|
| Ferrari 288GTO build (Page 47/61) |

|
Sage
|
MAY 07, 02:23 PM
|
|

HAGO! 
|
|
|
|
RCR
|
MAY 07, 08:00 PM
|
|

Bob
|
|
|
|
dobie1
|
MAY 16, 11:56 PM
|
|
Thanks for stopping by Ted and Bob always appreciated!!🤙
Lots of thinks going on in my life grandkids and the honey due list.... always seems to take time away from the build.
I had to build a permanent fence for the dogs and grand kids , also preparing for a roofer to put a new roof on my shop should be finished tomorrow Gutter installation week this should be the last distraction for awhile.
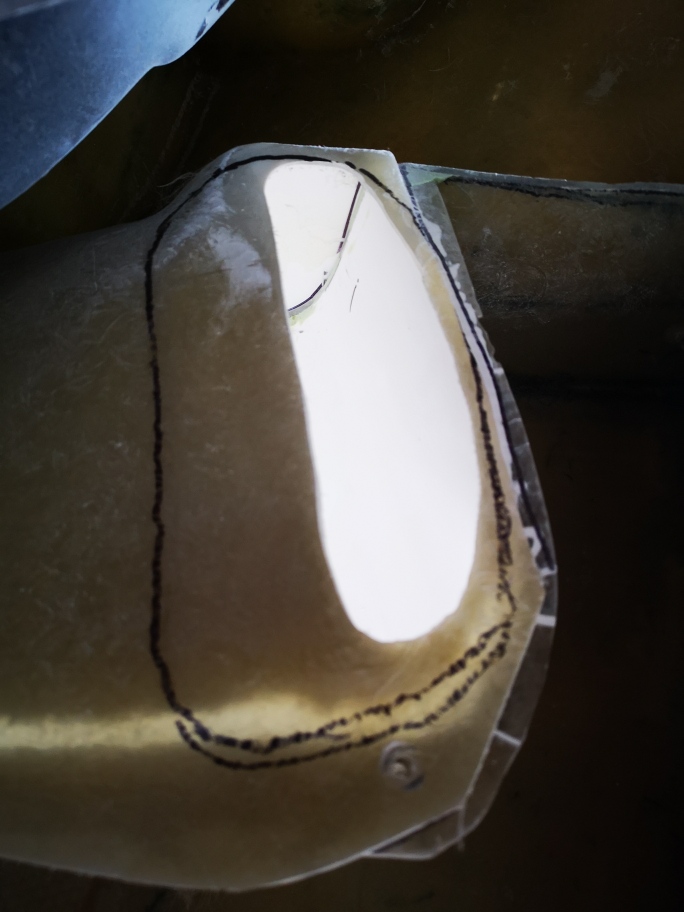
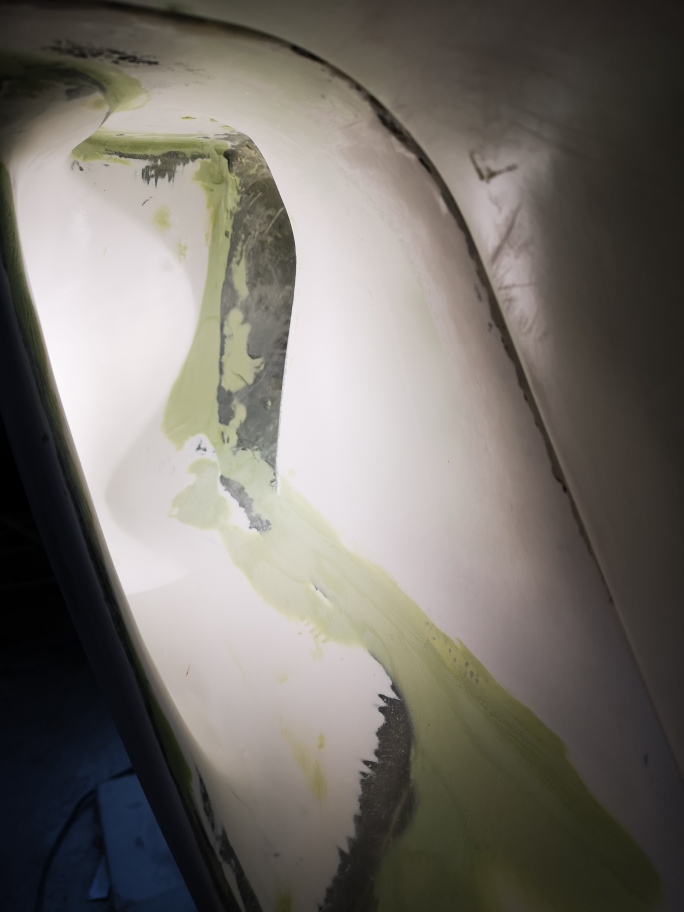
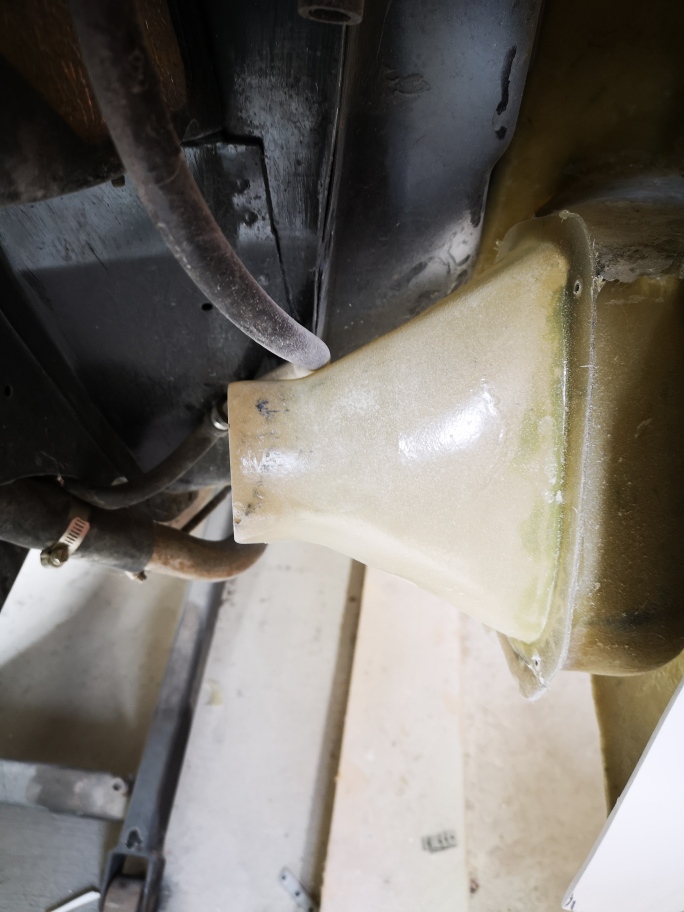
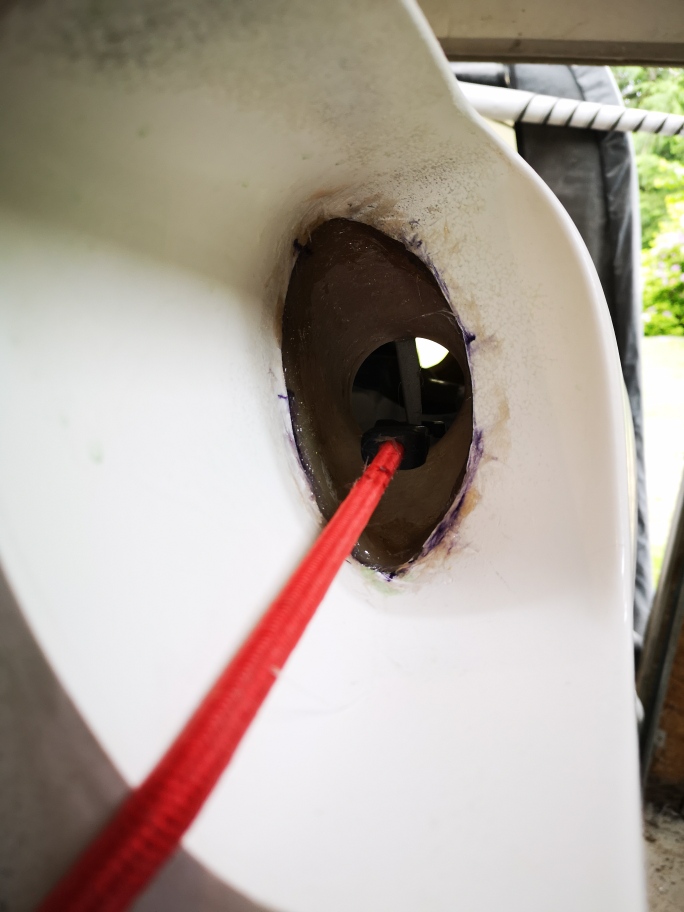
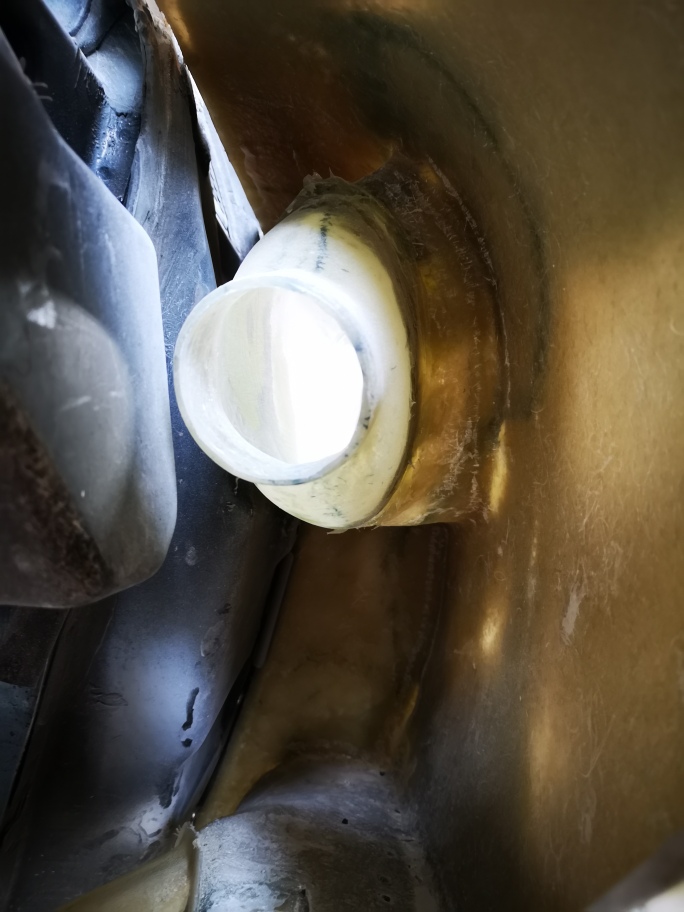
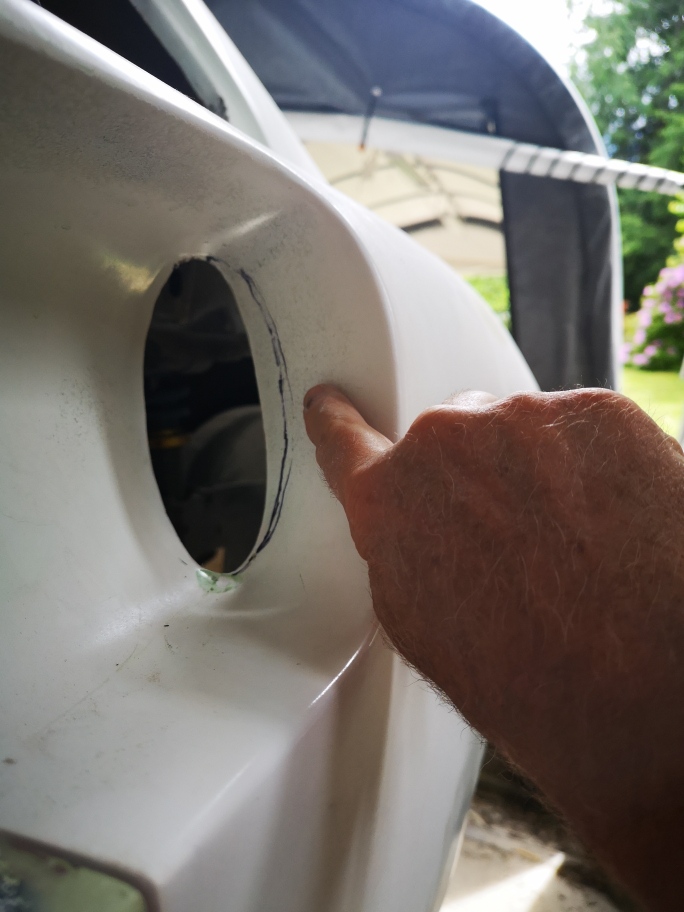
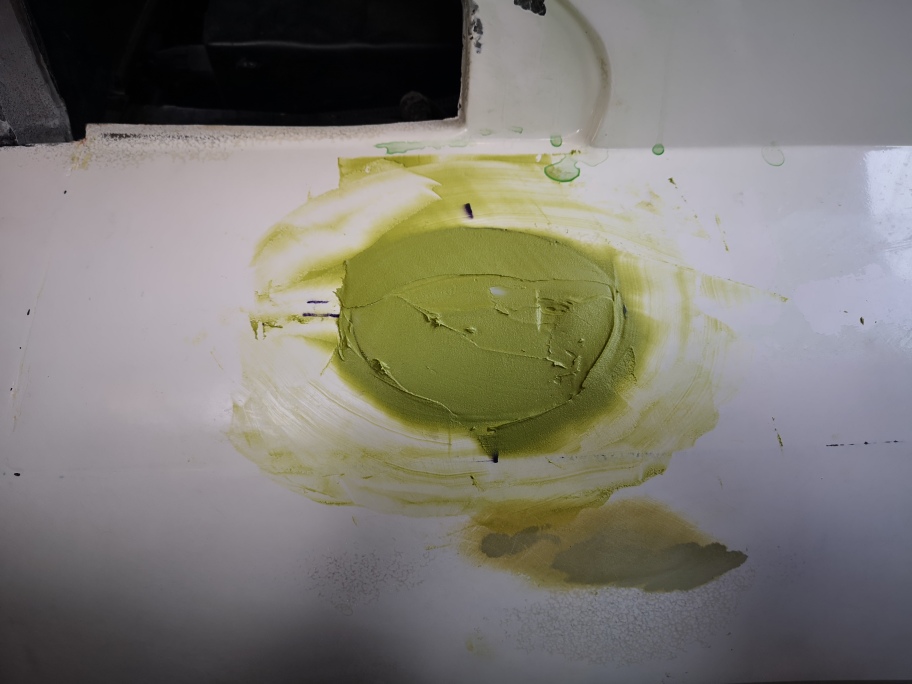
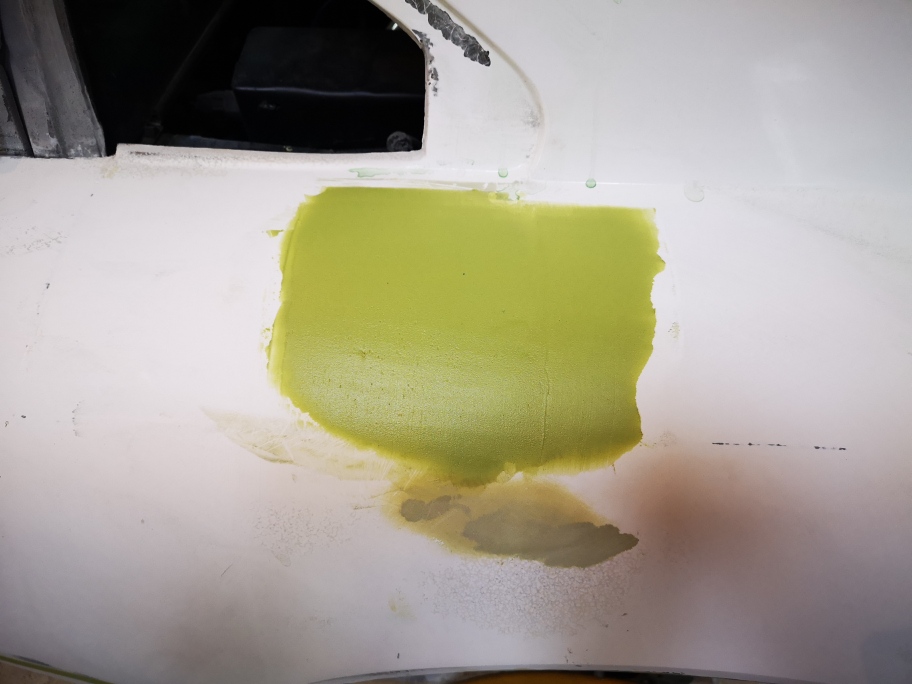
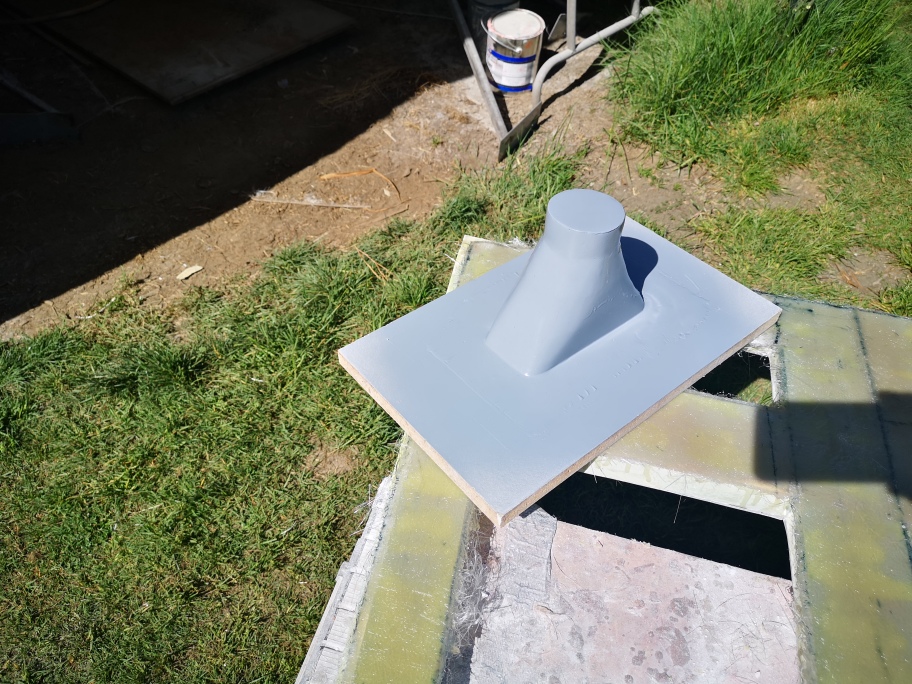
I was able to get a couple things done on the car. I needed to build a inner collector for the upper and lower scoops , the one I built will be able to be used on both left and right sides. I thought some of you might like to see the full process from start to finish on the mold. I tried something new in this mold adding a air valve to help in the demolding from the plug.
Starting with foam blocks
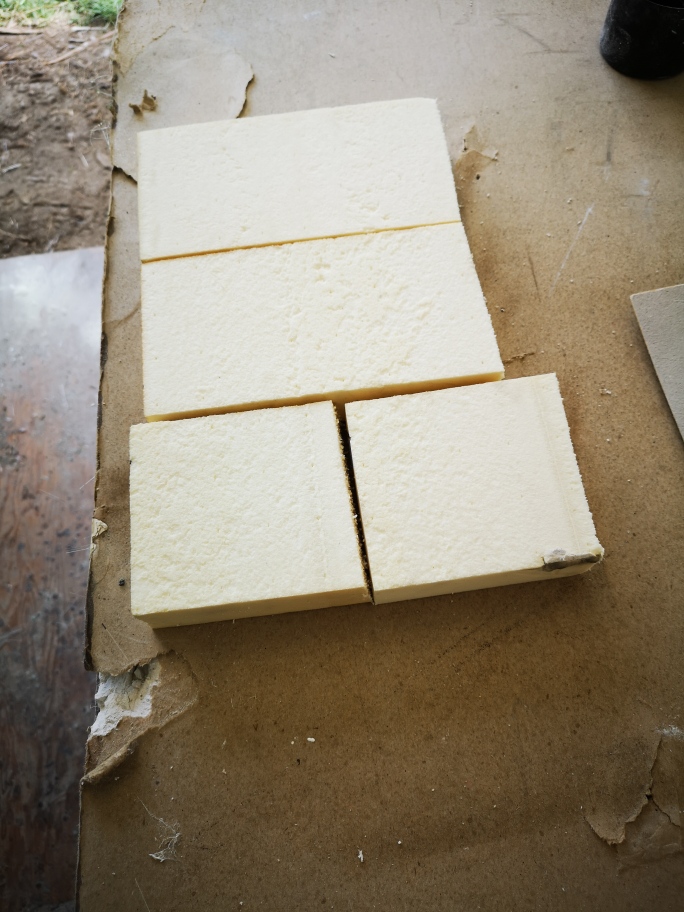
I attach them together using super77 spray glue
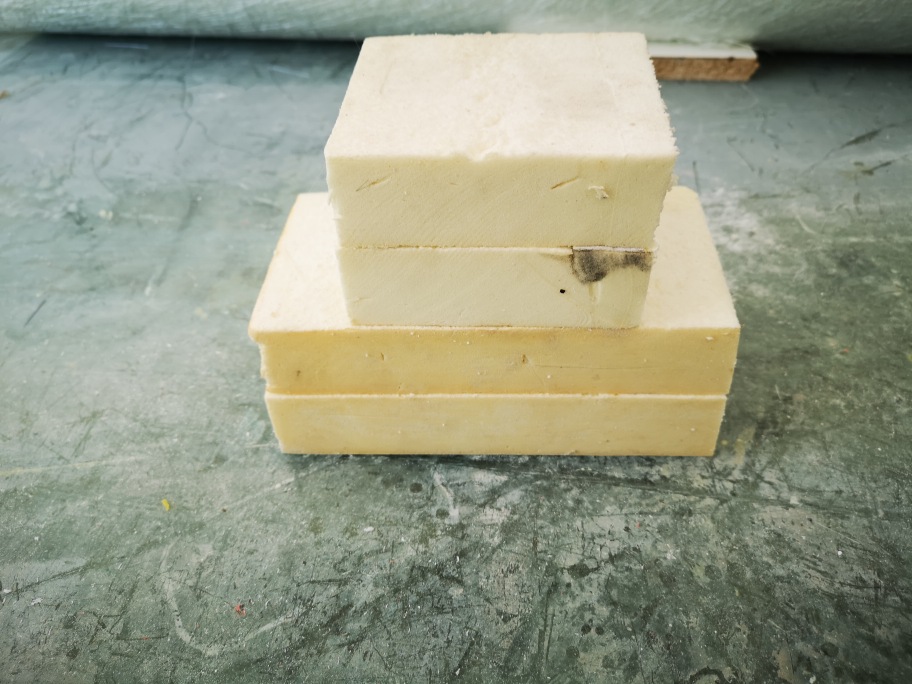
I carved and sanded the foam to the shape I wanted
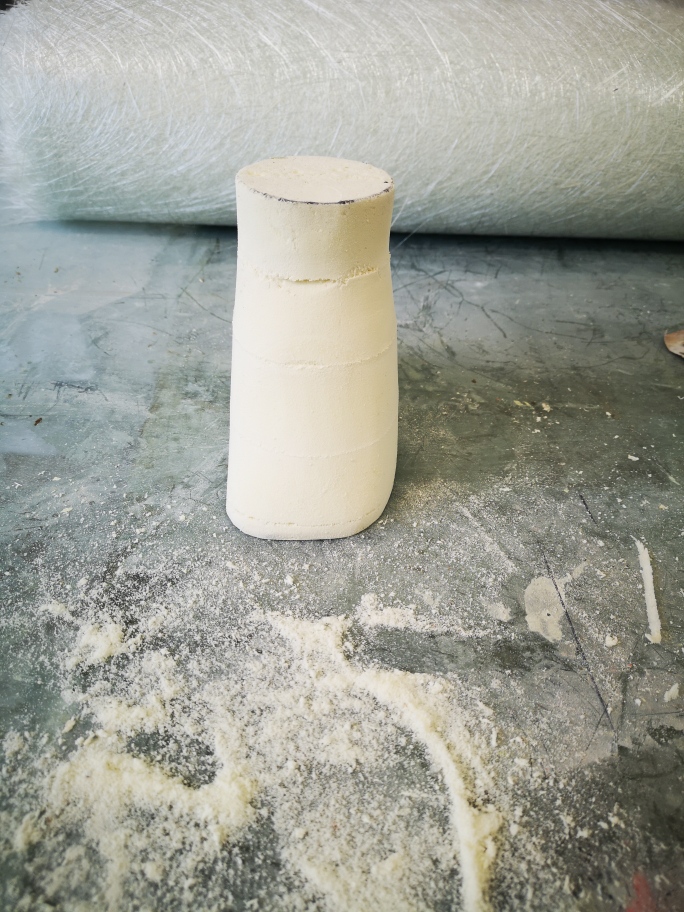 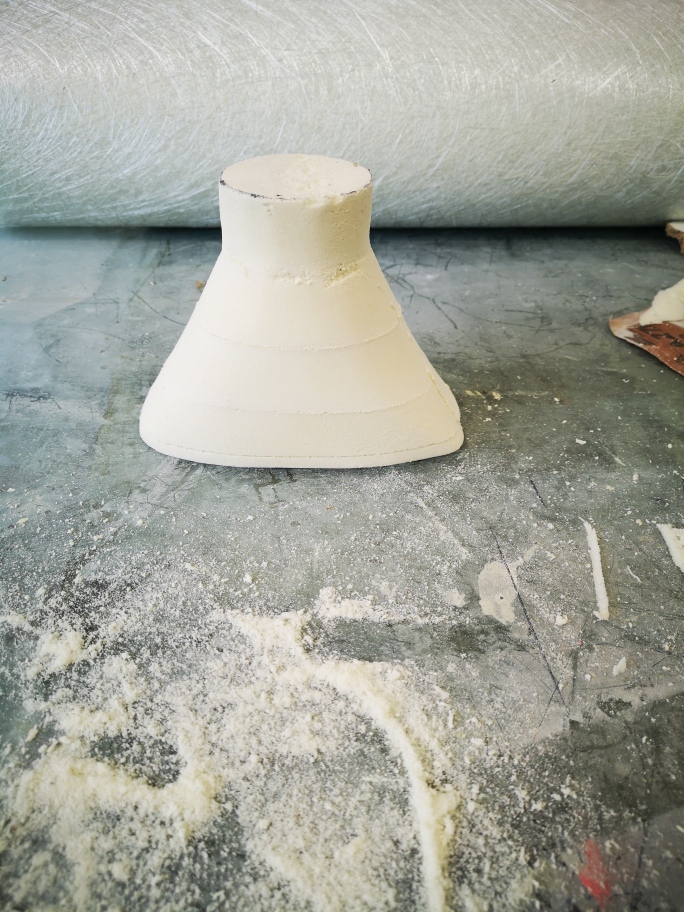
Then attaching to a piece of melamine board , I painted the foam with a coating of Rondo. I let it completely cure for a couple hours and sand to a 220
Grit finish.
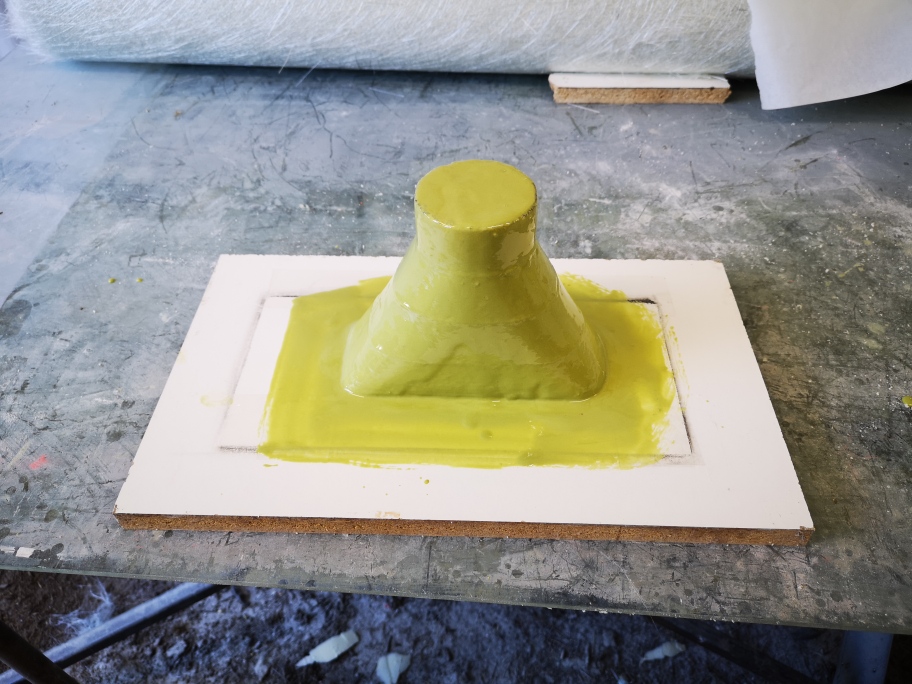 
Then sprayed with 2k primer
Then sprayed with with white single stage paint and using clay to seal and attach a air connector .
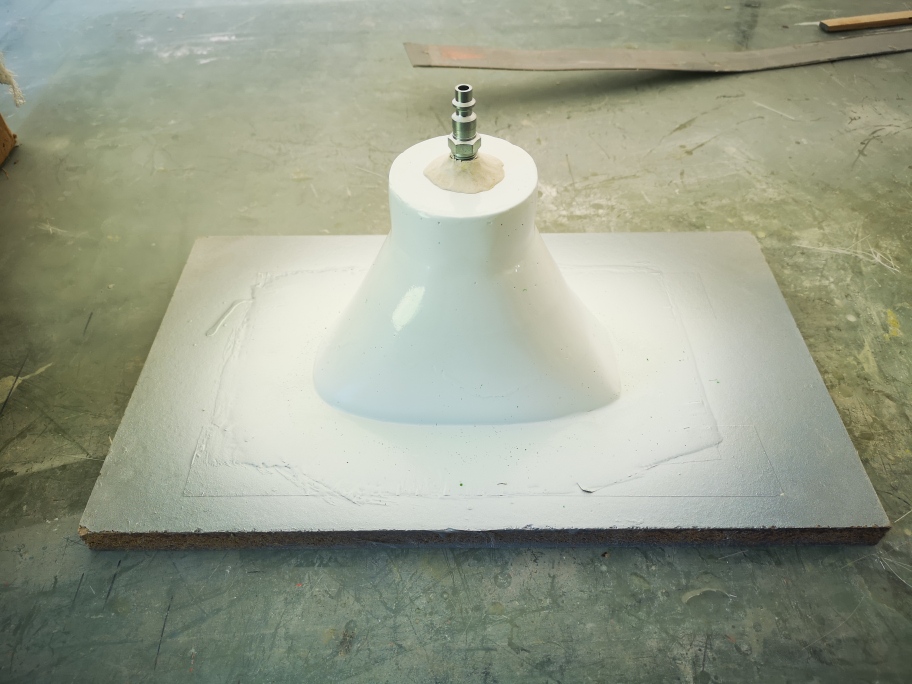
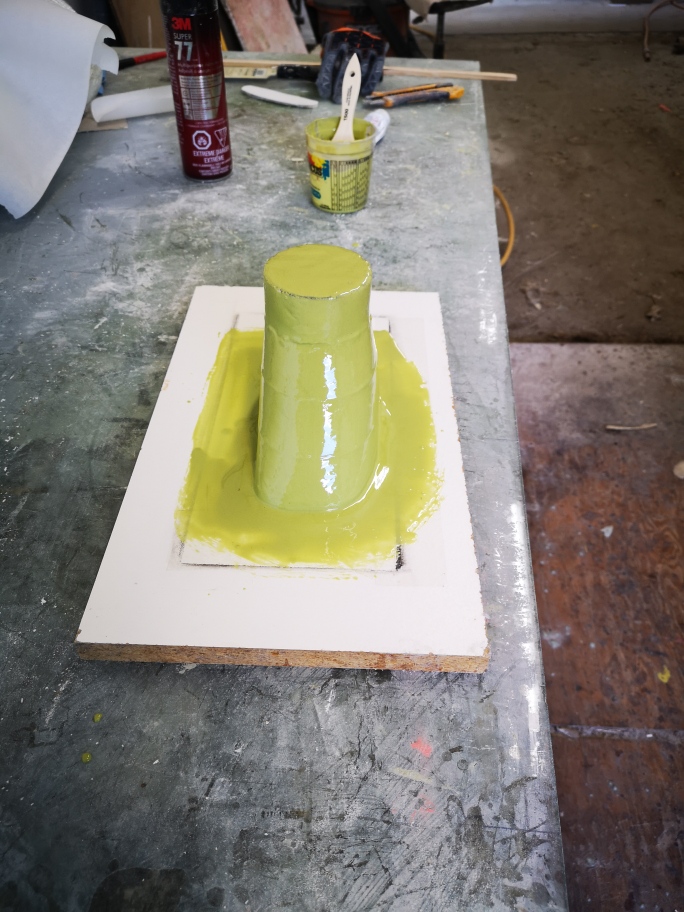
I then did a normal fiberglass layup on the part

A couple days later I attach a air hose to the connector and opened up the valve and the mold just floated up off the plug.
freaking cool🥳 I wish I had tried this earlier so much easier.
Stay safe everyone
Wayne
|
|
|
|
dobie1
|
JUN 13, 12:25 AM
|
|
|
|
|
Sage
|
JUN 14, 08:10 AM
|
|
As always, looking good Wayne.
The gas door treatment reminds me a little of how my "mentor" taught me to make Corvette doors fit right.
He said to put them in place, glass them solid, then with a very thin sawzall blade, cut them out the way they should've been in the first place! 
Glad to see you're still at it...and believe me, if anybody knows about "family distractions".....I do...so you have my empathy and respect for being able to get ANYTHING done on your "projects"......seems to be an impossibility for me thus far.
Keep up the great job, and don't stop with the updates.....and pics!

HAGO!
|
|
|
|
RCR
|
JUN 26, 09:57 AM
|
|
Hey Wayne... Looks great.
It's kind of hard to tell, but you're working on the lower scoops in the above pics? Really good stuff either way. I need to figure out what to do with my upper scoops, so this gives me some ideas.
I've been lurking more than working, so I guess I should get out there.
Take care...
Bob
|
|
|
|
dobie1
|
JUN 26, 09:53 PM
|
|
Thanks for stopping by Ted I know how busy you are always appreciated the encouragement.
Bob always good to hear from you I f you’d like I will happily layup 2 inner scoops for your build.
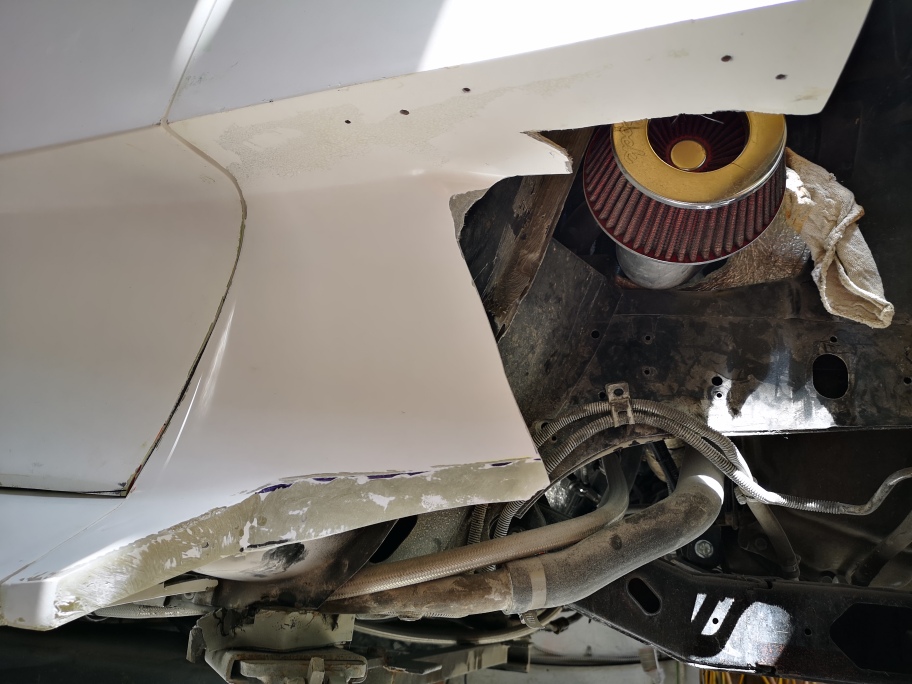
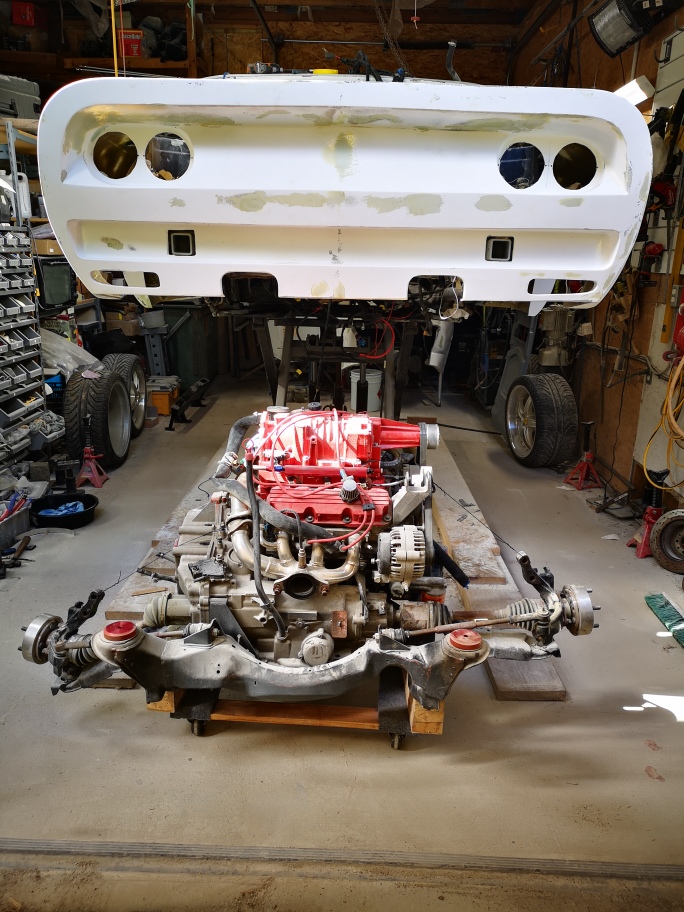
I dropped the engine and cradle the other day to do the final run of wiring and final cleanup for the engine bay. At the same time I removed the fuel tank. I’m replacing the expensive Holley High Performance external pump and going back to the stock location with a Walbro HP pump the only reason is that it was just too loud.
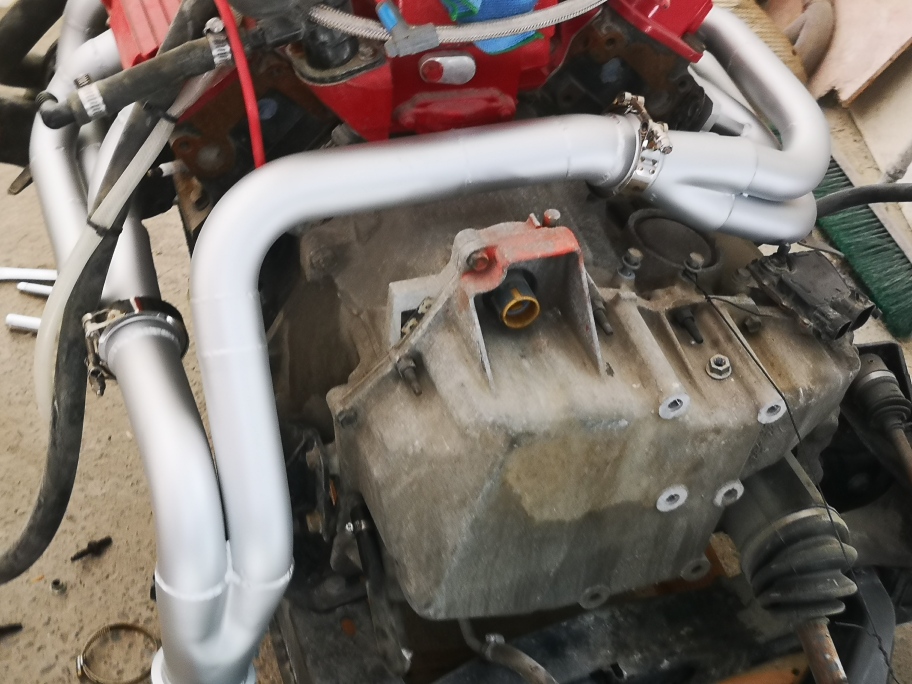
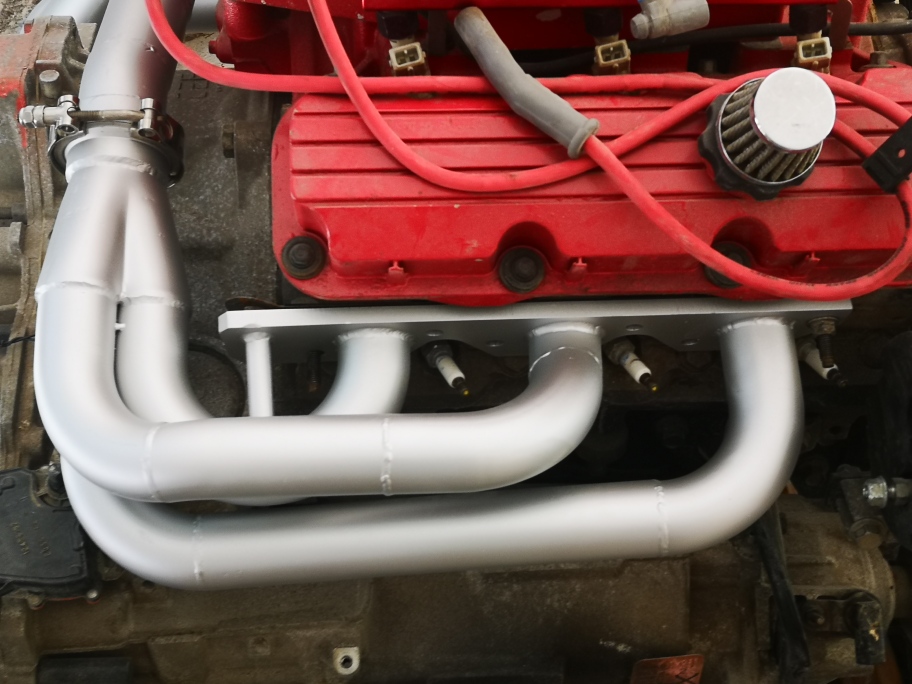
I also removed the stock 3800 exhaust that I Jet coated a few years back I was really happy with how much cooler it ran but the flow master muffler I was running which is the one used in most 3800 swaps was to loud for my wife to ever ride with me . Because the stock 3800 exhaust exits to the rear of the engine it limited muffler location.
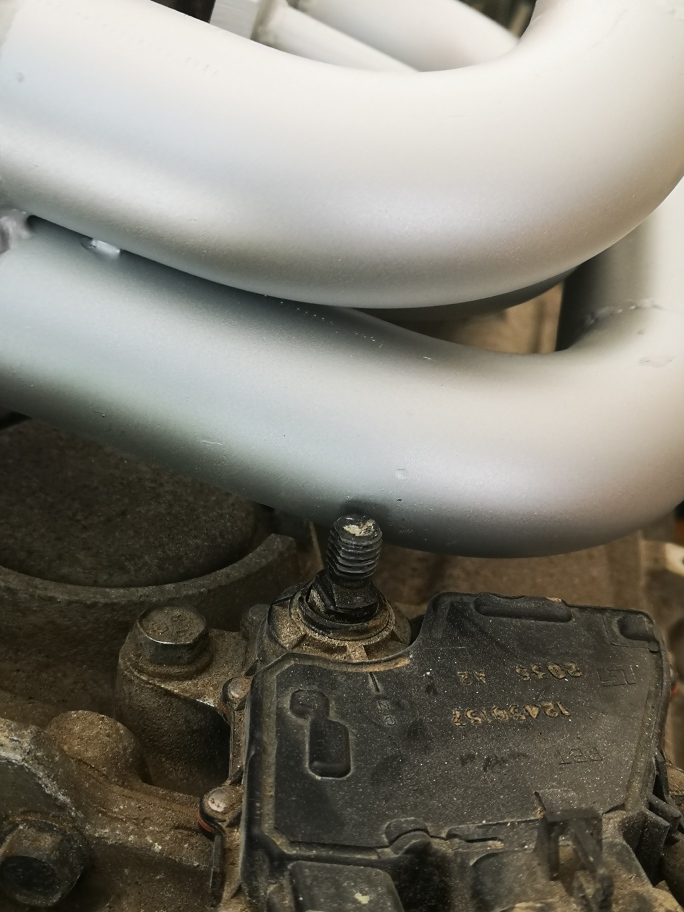
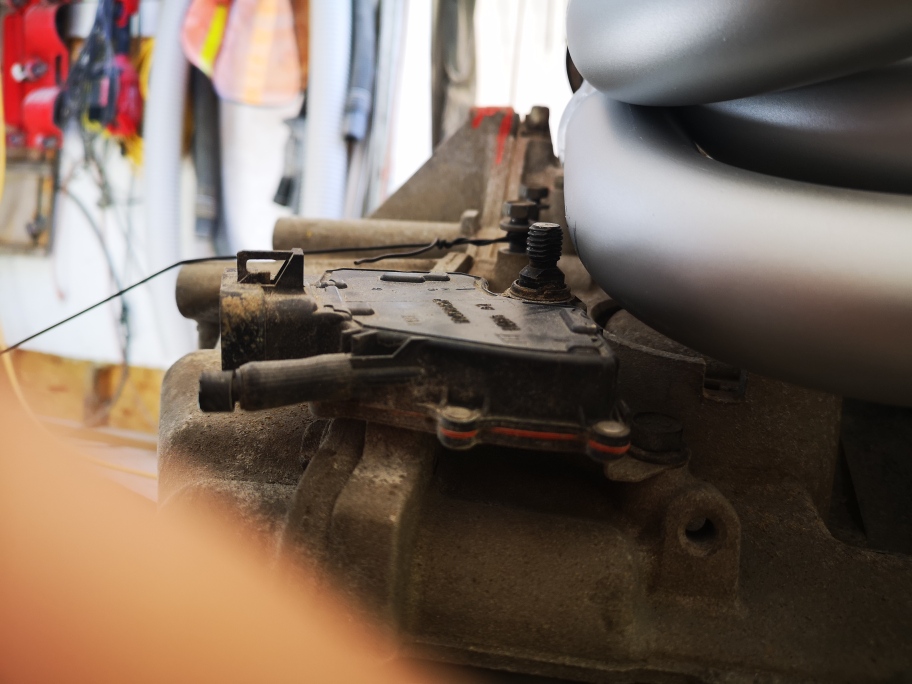
Don O gave me a set of SS headers he no longer needed I had them ceramic coated and luckily they dump in the Fiero OEM allocation and exhaust run. Everything mounted perfectly until I went to mount the transmission electronic shifter controller. It was just to close to the headers to safely leave . After speaking with Don I find out the headers we for a standard not auto , so I need to find a new location to make everything work safely.
The todo list just keeps getting longer not shorter, this is not the direction I want the project going but things need to be done right .

I’m still working on the rear deck lid just pushed aside for a little bit .
Stay safe everyone
Wayne
|
|
|
|
shemdogg
|
JUN 27, 11:37 PM
|
|
Its always something with these builds, they just never end lol! Everything looks great, love the exhaust!
Shem
|
|
|
|
RCR
|
JUN 28, 06:58 AM
|
|
Ugh, got hate that. Will you be keeping the exhaust and rigging up something for the shift select, or something else?
Bob
|
|
|
|
dobie1
|
AUG 10, 11:02 PM
|
|
Hi Bob sorry for the really late reply to your question.
Yes I’m planning on relocating the Park neutral safety switch to the right and fabricating a new set of parallel shift levers that will shift the trans as well as positioning the switch sensor ring.
I’ll be out of commission for a couple months though, I injured my leg and am on crutches for at least two months with a torn Achilles/cafe muscle.
Talk to everyone in a few months. Just one delay after another.
Wayne
|
|
|
|