
 
     |
| Trinten's SBC/F23 build - The work has begun! (Page 56/69) |

|
Trinten
|
AUG 09, 11:13 PM
|
|
I was at Mike's on the 31st, I won't be out there again until the 28th of August. I thought I took some more pictures of this little update, but I guess I didn't like them? I couldn't find them on my phone. I'll have to scroll through the pics slower next time, beside the one I am posting that was from under the car, there was another I took through the wheel well.
Anyway, Mike spent time fabricating the mount for the remote oil filter. He wanted to make sure it was going to be mounted 'level', so he took out this magnetic-mount angle gauge thing, measuring the angle of the tubing he was going to mount it to, then the angle of the cradle since it was jacked up in the air. He then fabricated up the bracket, and had me tack it in place with his welder through the wheel well while he held it from under the car. I didn't do a great job, but third time it stuck well enough for him to finish it up after he made a line and checked to make sure the routing for the oil to everything was going to work, and there would be no interference.
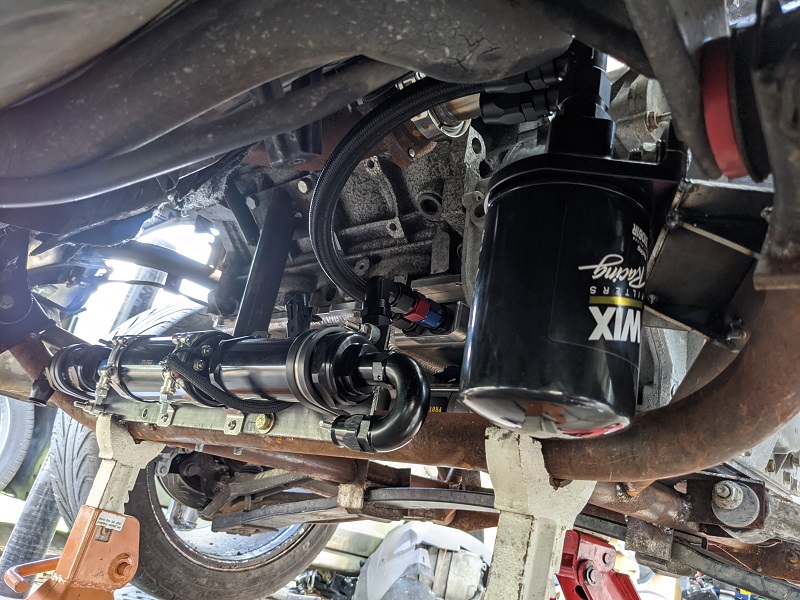
The filter doesn't come down below the cradle.And that wix filter is a chunky, so not worried about any future filters if I ever have to stop using that one.
When Cowspatoot was up here last, he left his Fiero over at Mike's to fabricate a few things. I asked Mike if he could turn his attention to that since I wouldn't be up a few weeks, assuming his own plans and other jobs allowed it. So I'm not expecting much to get done on my car while I'm not there, but Mike has definitely surprised me in the past!
Look for my next update near the end of the month/start of September. 
[This message has been edited by Trinten (edited 03-26-2023).]
|
|
|
|
La fiera
|
AUG 19, 02:45 PM
|
|
|
That looks awesome Vince!
|
|
|
|
RCR
|
SEP 05, 11:18 AM
|
|

Bob
|
|
|
|
Trinten
|
SEP 07, 11:01 PM
|
|
I know, I know, no real update!
Injector Upgrade and misc.
I was there on August 28th. Mike was busy with the exhaust system. I had bought two segments of oval stainless with 90 degree bends, one piece had the bend 'the easy way', and the other was bent 'the hard way'. (basically bent along the wider part of the oval or the narrower part of the oval).
I had also bought a bunch of oval stainless pie-cuts. Mike was spending a lot of time with the pie cuts, working on making a collector for the exhaust manifolds to get it buckled up to the turbo. There were a lot of pieces but I figured it'd look a lot better when it's a little more assembled.
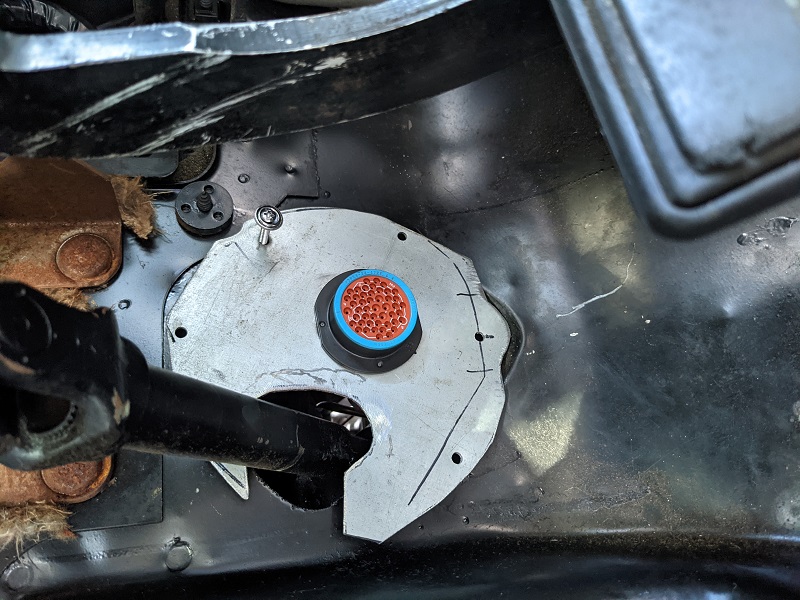
Mike also made the first fitting of the cover plate that will cover the steering column opening where we had to modify it a little to accommodate the connection to the C5 steering rack. This is also where we're going to have the wiring from all the FAST components coming in. Not sure what Mike has in mind for routing the wiring to the rear bulkhead where we will have another connector there as well. I suspect it's going to move from the steering column area and and snaking through the armrest area with all that other wiring.
I'm going to look into some rubber sheet or something to make a 'cone' from the metal plate to the steering shaft, to help keep water from getting in.
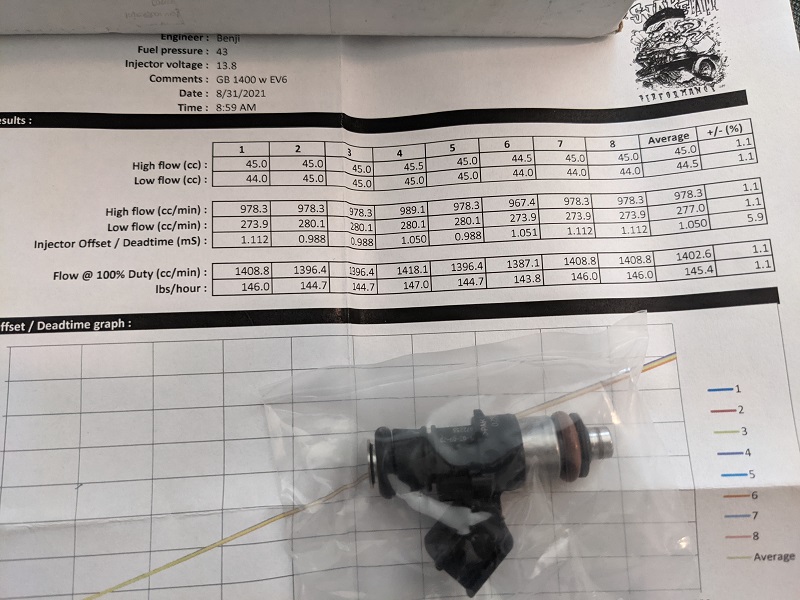
Now here is a cool thing -- I had bought my 1500cc injectors from Snake Eater Performance about a year ago. A few months ago, they publish a big update that they contracted with BOSCH to produce two more injector lines for them!! The Bosch 1400cc are made in the German plant, the 210/hr injectors are made at one of Bosch's other plants.
A few weeks ago, they sent an email to all their customers asking for product feedback. I admitted I couldn't give product feedback, but gave feedback on the pre-and-post sales support, and admitted I was kicking myself for jumping on the 1500cc injectors so early (they usually sold out fast).
The owner of the company emailed me back, thanking me for the feedback, and said if no fuel had passed through the injectors, they would offer me FULL CREDIT to exchange them towards the Bosch's!! I let them know that I had installed them so we knew what size adapters to get for the fuel rails... they said that was fine!
So I put in the order and shipped them back. They were so cool about it that when I sent them the USPS tracking number and thanked them again, they even sent out my Bosch's before my return got there.
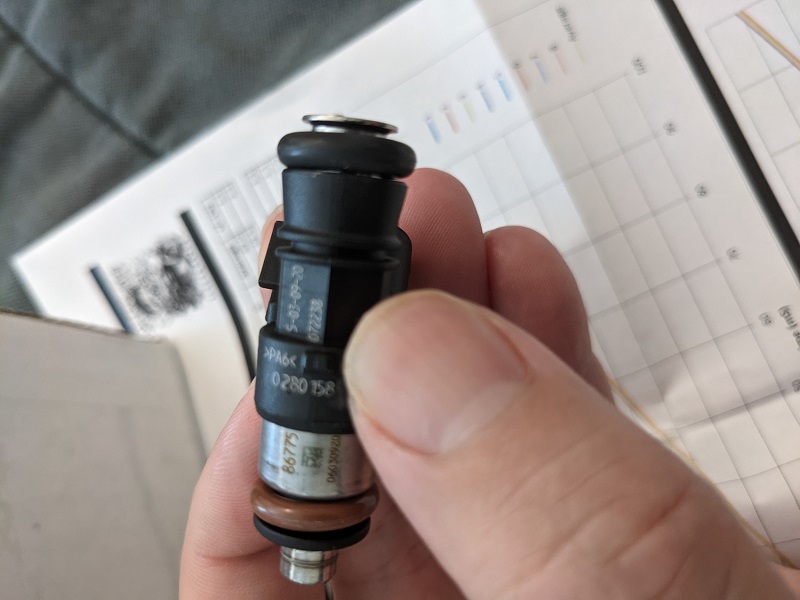
So that's my big news for right now, and these are the higher end ones made with stainless steel components, not the (almost) all plastic ones that are floating around out there! And just like their other injectors, SEP does flow testing to make sure everything has a tight tolerance, marks the numbers on each injector, and sends you the flow sheets.
[This message has been edited by Trinten (edited 03-26-2023).]
|
|
|
|
Trinten
|
SEP 13, 08:19 PM
|
|
Enhanced lift point. September 2021
Saturday was an productive, with one facepalm moment.
Facepalm first. Mike wanted to start working on the extension of wiring that would run through the cabin, from all the FAST stuff up front, to the engine compartment. Cool.
So we get our length of 'measurement wire', he gets out the FAST wiring diagram for the colors, and he starts rattling them off, I cut them, he puts on the terminators, and starts putting them into the Deutsch connectors...
He gets about 6 wires in.. and I go "oh hell." and he stops.
"What? Cut something the wrong length?"
"No... we forgot about the sleeve I bought for the interior."
"Oh no."
So I get the sleeving, he gets out his Deutsch connector pin disconnect tool. Unfortunately, here's where my desire to get high-quality stuff causes an issue. All the wiring I bought is SXL, so it has a slightly thicker insulation to make it more resistant to abrasion and what not. It also prevents it from slipping into the channel on his disconnect tool. Sigh.
He pointed out that inside the cabin it's not going to run into a lot of stressors, I just wanted something a little cleaner looking then using zip ties or reusable "christmas tree" ties.
He's going to talk to his tool guy at work and see if they have something with slightly bigger channels.
Onto other things where I have some pictures! So when dropping the cradle, we've been using two car-dollies (the ones you put under the tire and can push the car around, sideways and whatnot). It's a little wobbly, and usually an a-arm winds up dragging, but it functions. We are going to work on building a 'sled' for the cradle with caster wheels. I took measurements for that.
The next issue is lifting the car up. We didn't like doing lifting the car up by the trunk latch, which is common but always makes me cringe. Without strut towers, we couldn't do it some of the other cool ways people like FieroGuru have come up with. The secondary problem with this method is the legs of the cherry picker get in the way of the cradle, requiring a lot more wibbly-wobbly to slide the cradle/drivetrain out.
Mike had a solution for that, which we did this Saturday. Testing is planned for next Saturday (though that might change. He's doing a little work for CowsPatoot, and CP will be down here in early October, so I'm going to ask Mike to put my car on the backburner so he has plenty of time to finish up CP's stuff).
"So what did Mike think of?!" I know you're all excitedly asking....
Well, it required me taking the bumper cover and bumper off... and started off with...
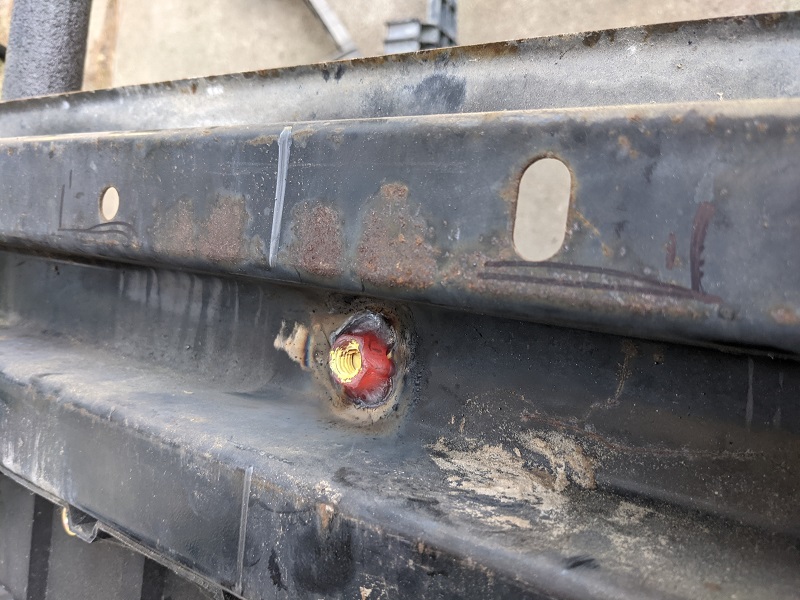
I didn't get my phone out fast enough to take a picture when it was glowing red hot, and the zinc coating that was in the threads was glowing gold-green.
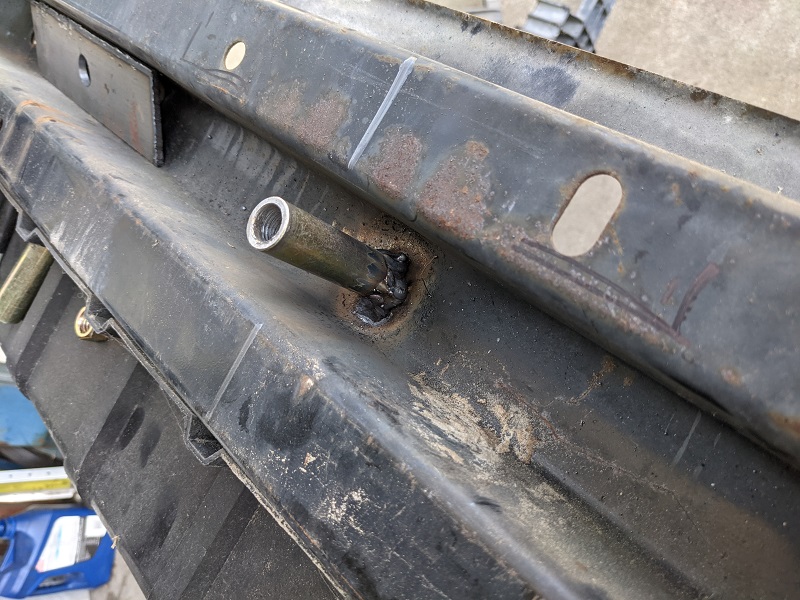
Next up is this nifty thick-walled heavy duty tube, welded to the nut. Yes, it's a little 'bubble-gummy', but welding in a recess doesn't give you much options.
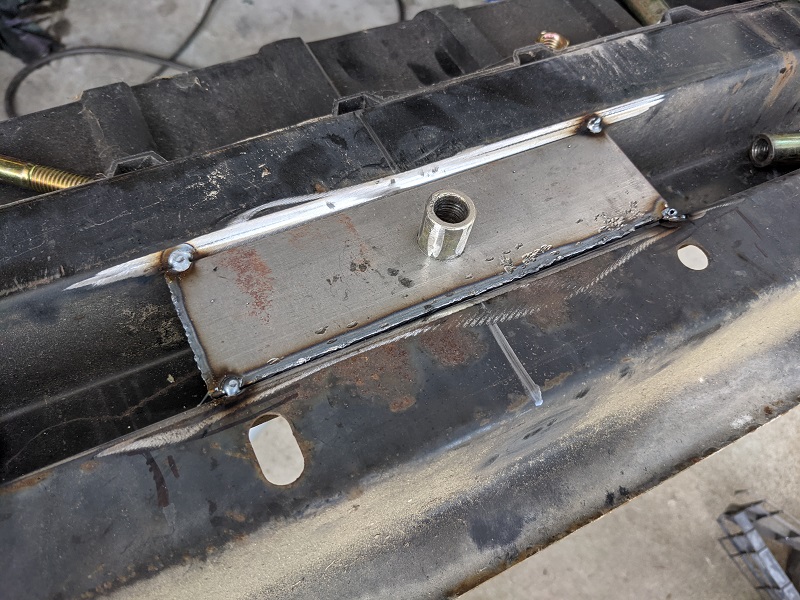
Next, boxing it in to add some strength and spread out the load....
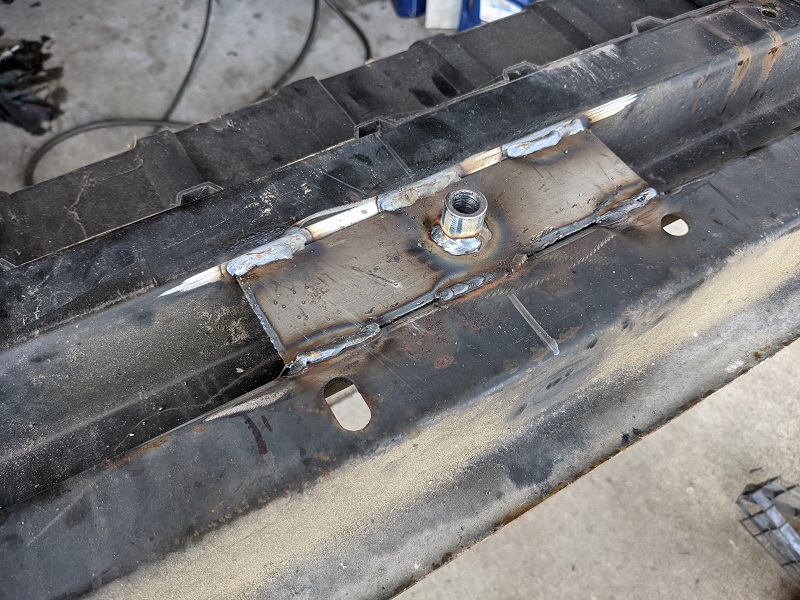
Finished up with that boxing in.
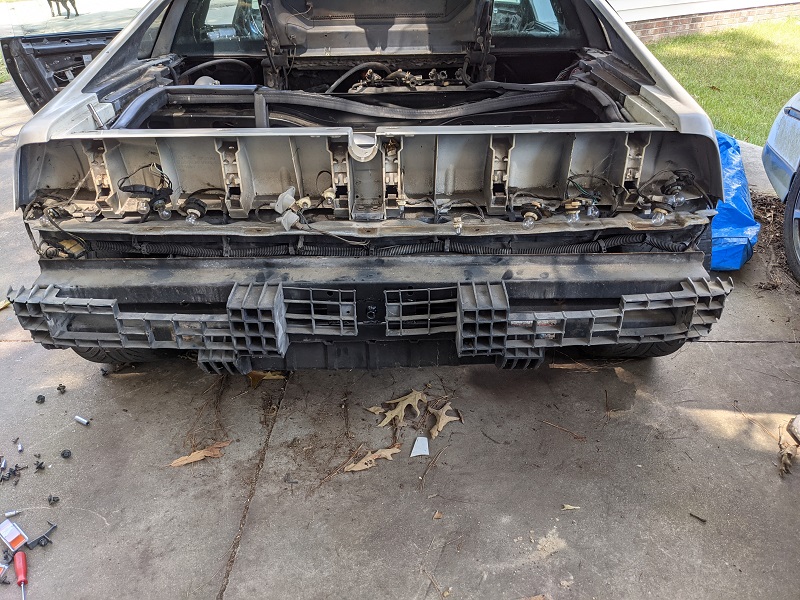
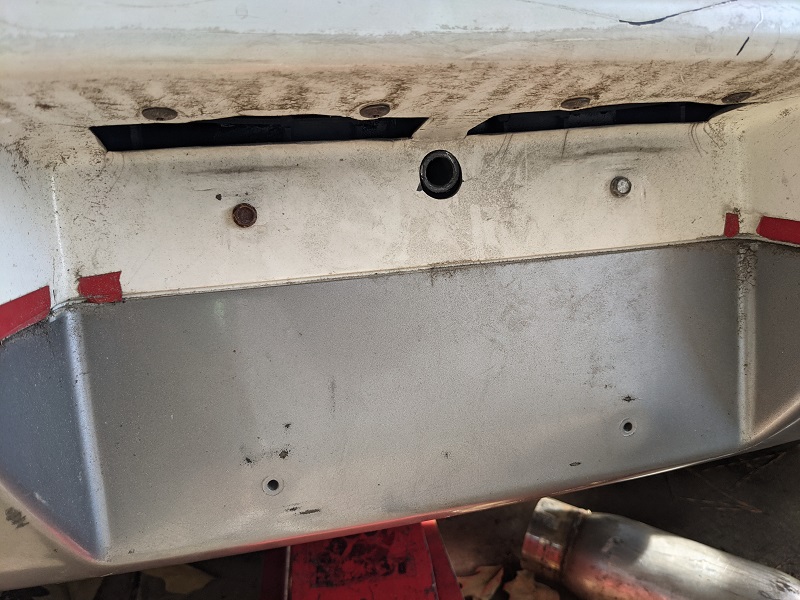
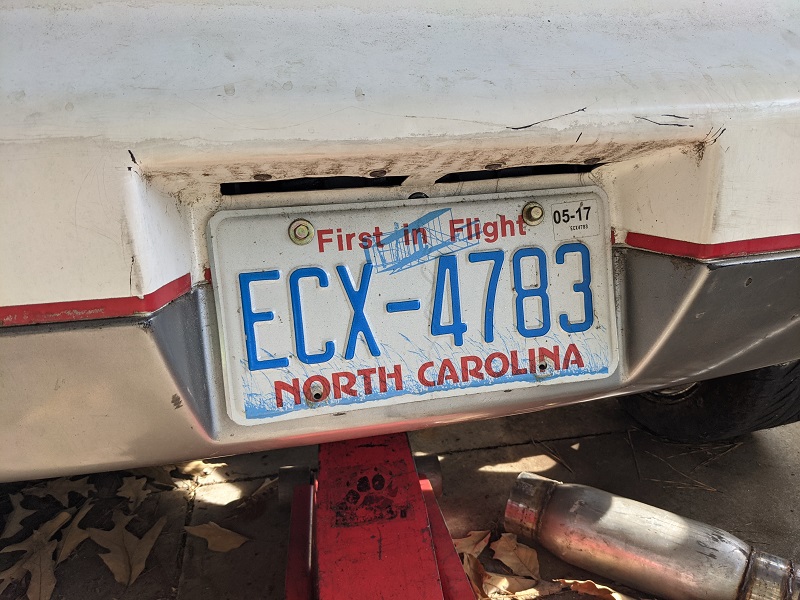
Bumper is back on the car! Now here is where I goofed and forgot to take a picture. After Mike modified the bumper cover (don't worry, it was a repop, and so the actual bumper. Apparently the car had gotten into a rear-end collision, but not bad enough to damage the frame). So the bumper cover now has this quarter-sized hole in it, that'll be hidden by the license plate. And for what??
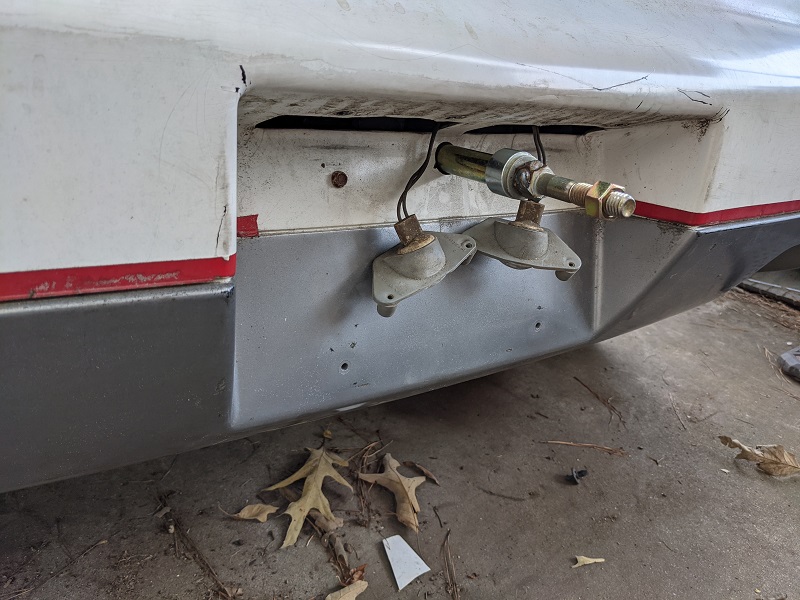
For this! This is the first draft (for length measurement) of the anchor that will screw into the nut in the first picture, and the cherry picker (or a come-along hook) can be connected to. So now we can lift the car up higher without using the trunk latch and not have the legs of it get in the way. And if the car slides off the track at VIR, or needs to be pulled up onto a trailer, that's where the hook will connect.
It's not designed to lift up the car with the drive-train in it. It is for towing and drive-train-dropped lifting only.
[This message has been edited by Trinten (edited 03-26-2023).]
|
|
|
|
Trinten
|
SEP 20, 09:31 PM
|
|
Waterpump, water manifold and engine cradle sled
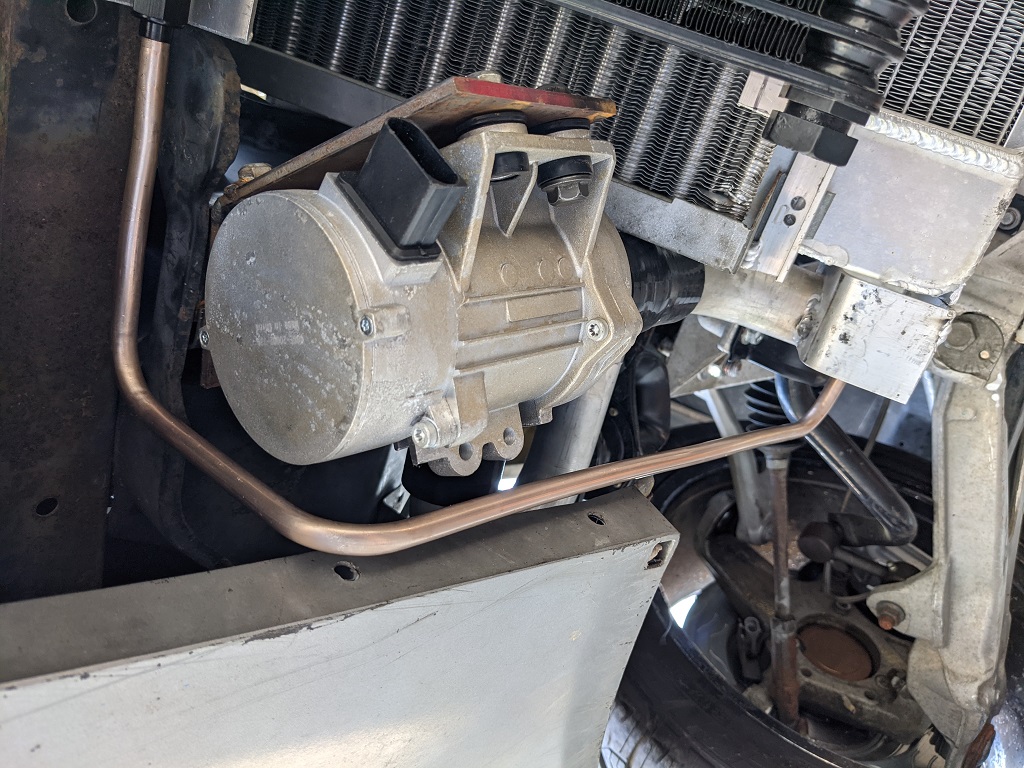
Another productive day at Mike's. FieroGuru had posted up some stuff in his thread on water pumps, including the cool stuff that Davies Craig makes. It was on my list, and then I ran across a thread where La Fiera posted up about the BMW pump he uses (CWA200, with an aftermarket controller). That pump has been used on BMW engines (v6 and v8), included mounted in some places where they take a lot of thermal abuse.
La Fiera has been running this pump without any issues. So I figured, hey, this is an off the shelf pump I can get (somewhat) easily if I had to replace it on the side of the road. And we are mounting it up front (though not the same way La Fiera did), so it'd be away from all the engine heat. A phone call later, and viola, we went to a local store and picked up the pump. Mike isn't sure if XFI will be able to do a PWM to control this pump, so I'm going to get the controller for now -- and yes, I'll pick up a backup at some point to throw in the trunk on long trips, just in case.
So let's start with some pics of that!
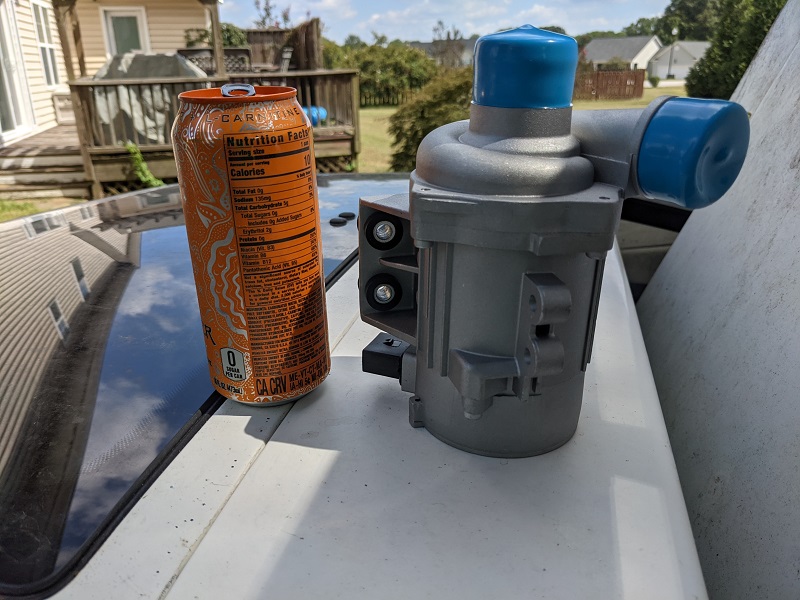
Here is the pump next to an energy drink for reference. When the guy at the parts store pulled up the image of it on his computer to see if they had one, he commented it was the strangest water pump he'd ever seen. The top of it looks like a little turbocharger.
Mike made a bracket after figuring out a good place to mount it up front where it wouldn't be in the way of things. Plus with the fuse block he put up front, we'll have power for it and the controller up there already too, so this works out well.
I went with the LS Simple water manifold. It fit on very well, we just had to rotate the cam sensor 180 degrees, so the plug cleared the lower tube. It's very close to the block, so maximizes space! Mike penned out how to hook in the steam ports for the heads, so he's going to make a radiator overflow tank that will mount in the engine bay, so air will bleed out of the steam vents and into the tank at the top, and we'll have a return hose at the bottom. He'll be fabbing up that tank.
This was one of the few times I came up with an idea he liked. Originally he wanted to make a surge tank, but didn't like that the routing could have trapped air in the steam vents.
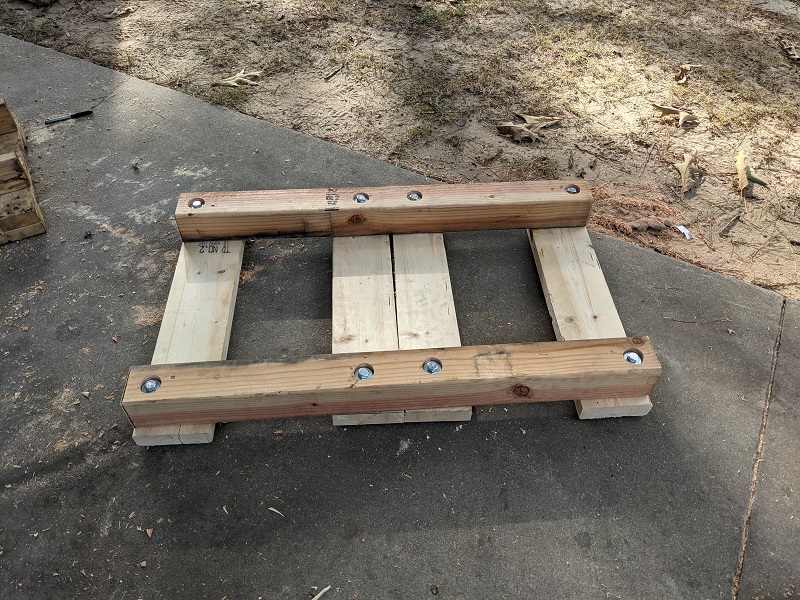
While we ran out to get the water pump, we also stopped by the local big box hardware store and picked up the lumber and hardware for my engine cradle sled. The casters I had ordered last week didn't show up (fast refund from Amazon) but I could still make the rest of the sled. Replacement casters will be here this week and go on this weekend.
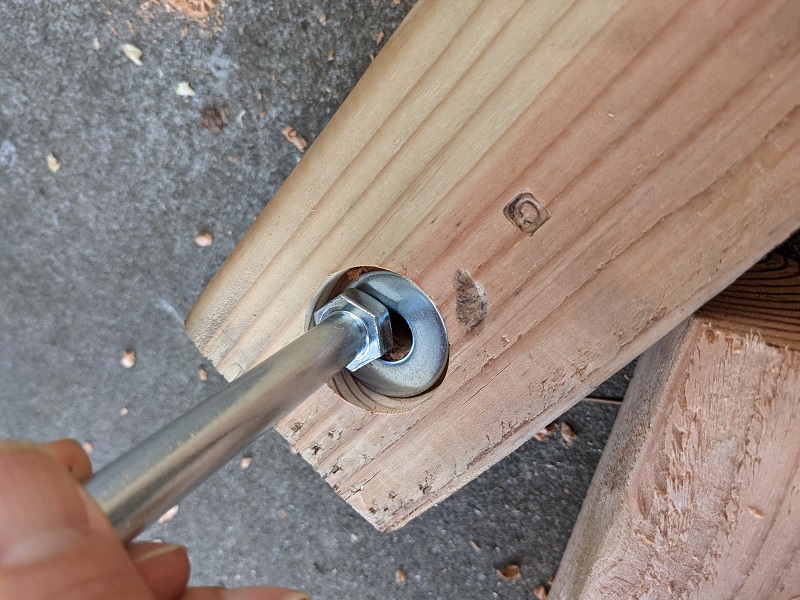
I used a routing bit (I think that's what it's called) to make sure the head of the bolts would be sunk to just below the surface of the wood. I didn't want to risk them scratching up the cradle after it's powdercoated.
I know it looks like an upside down skid, and it sort of is. It will be orientated that way, so main weight bearing parts of the cradle will be supported evenly on those 4x4s, and it will sit at the right width so the smaller 'cross arms' in the A-arms will be supported on the back 4x4, lifting the suspension up a little bit closer to 'neutral' like when the car is sitting on the wheels.
The casters will in the wide space between the 2x6s. I'll probably take the skid to go get powdercoated before I put the wheels on.
Lastly, two pictures I forgot to take last weekend of the car-lift mod without the test 'hook' in, and with a plate on.
(okay, how many of you actually caught that I said I was going to take wood to get powdercoated, and of those that noticed, how many of you were getting ready to say something before you read this? )
[This message has been edited by Trinten (edited 03-26-2023).]
|
|
|
|
HTXtremes
|
SEP 21, 12:20 PM
|
|
|
|
|
La fiera
|
SEP 22, 12:14 AM
|
|
|
That looks very clean Vince! The pump controller will do an awesome job that can't be matched by any programing from any ECU manufactures unless they are willing to spend the lots of time on the R&D. The Ecomotive guys are not garage mechanics, they are engineers that took their time to make a product perform 200%. I've seen many shade tree tuners tryng to tune with their AEMs at no avail! You won't be dissapointed.
|
|
|
|
Trinten
|
OCT 11, 09:58 PM
|
|
Yes I am behind in posting updates.
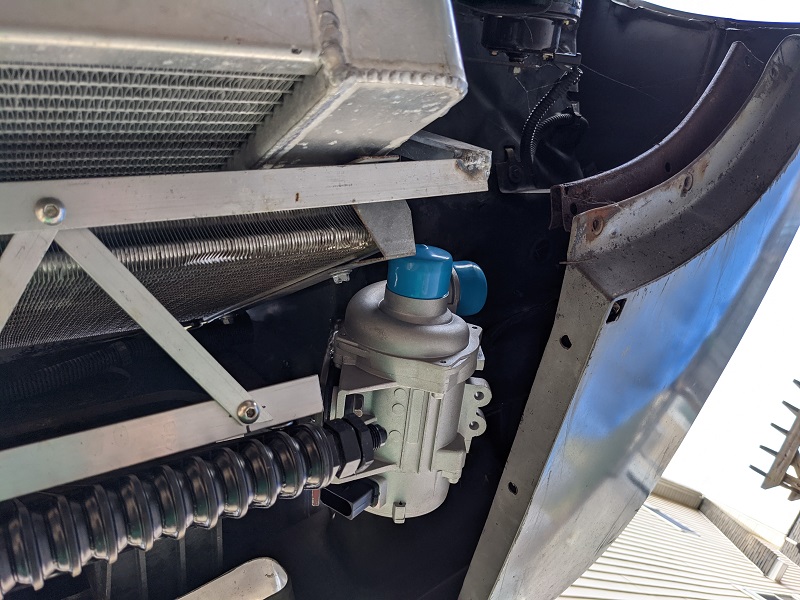
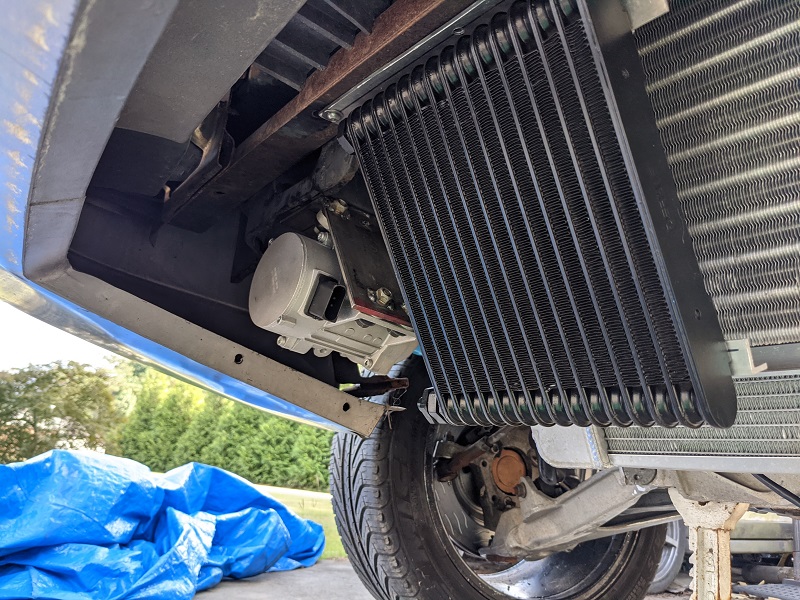
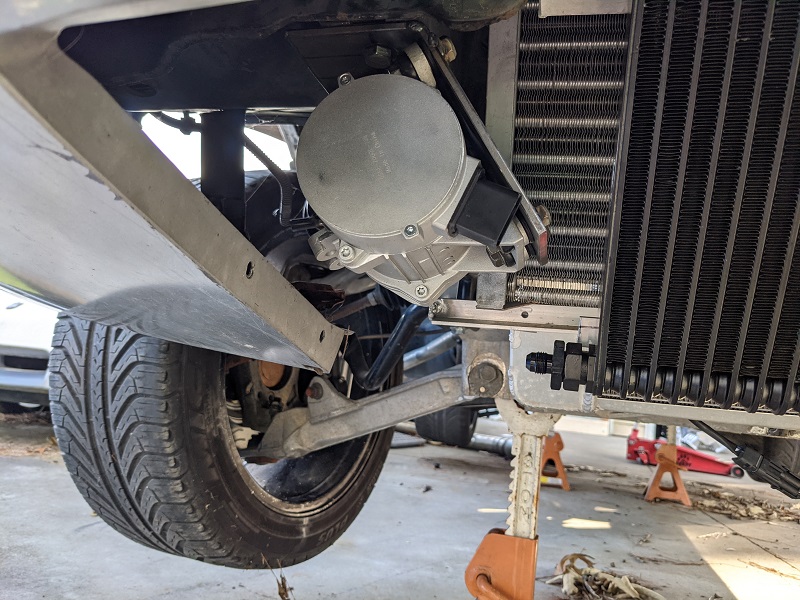
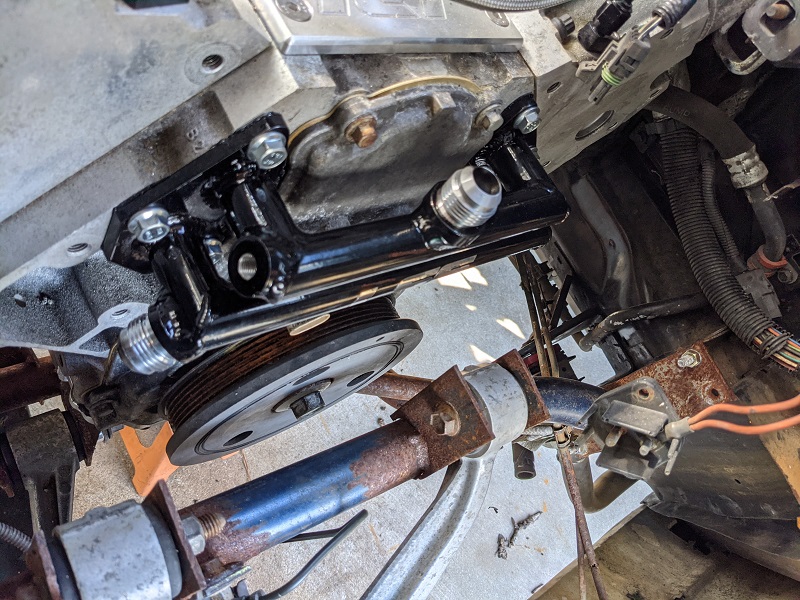
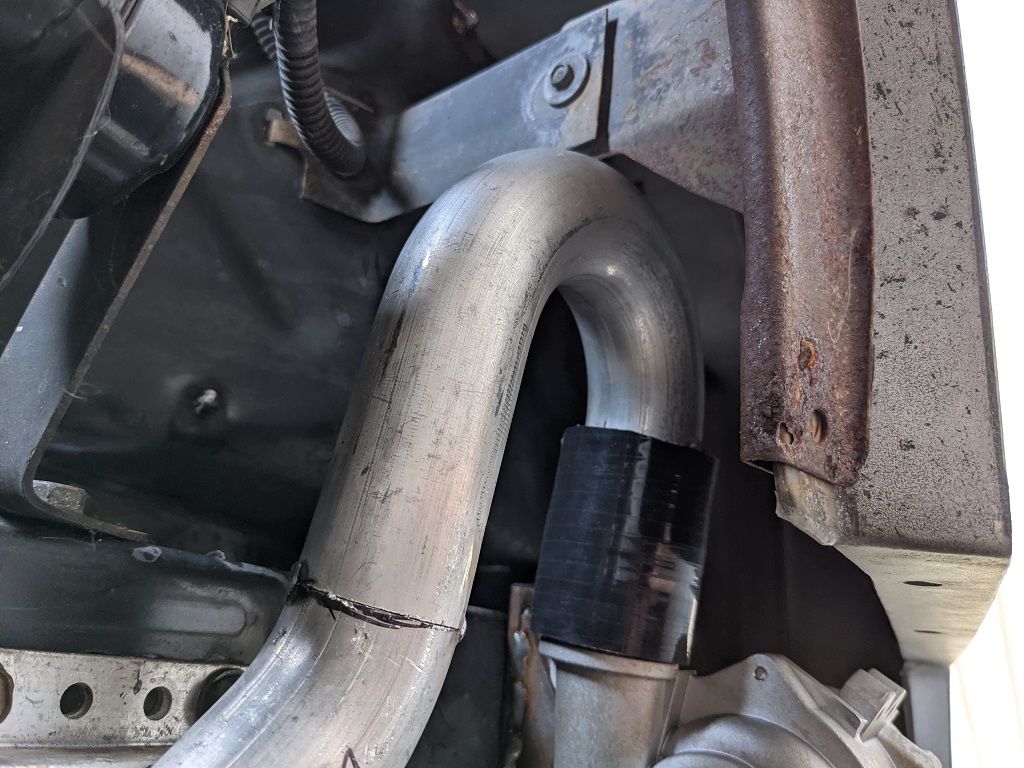
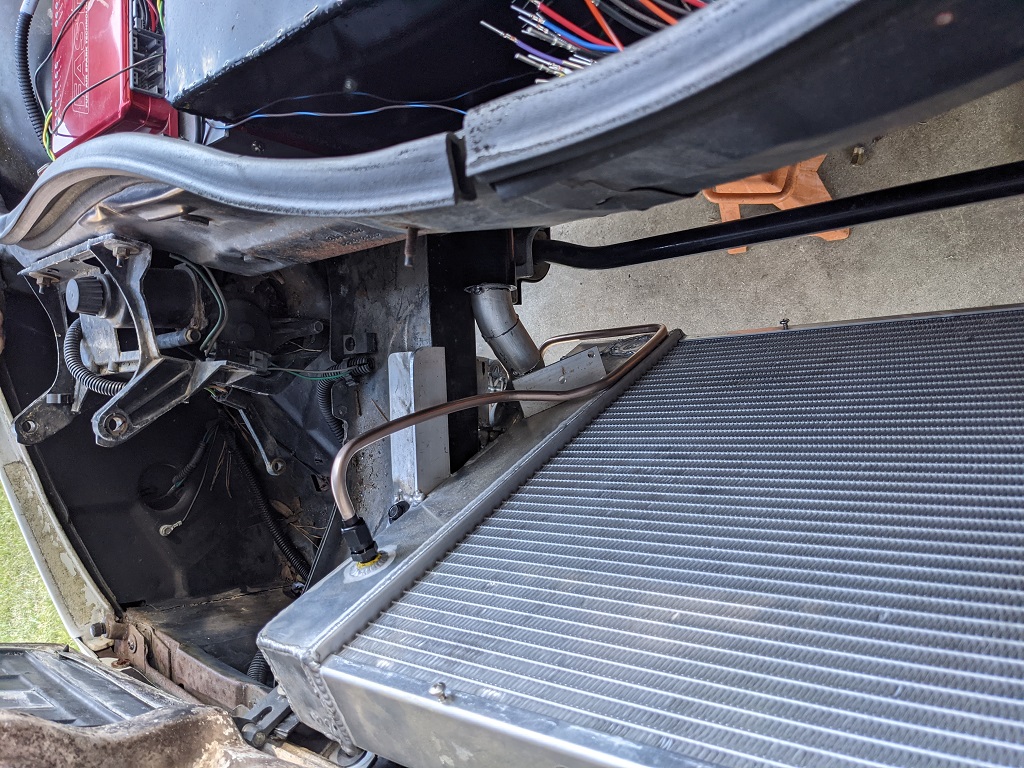
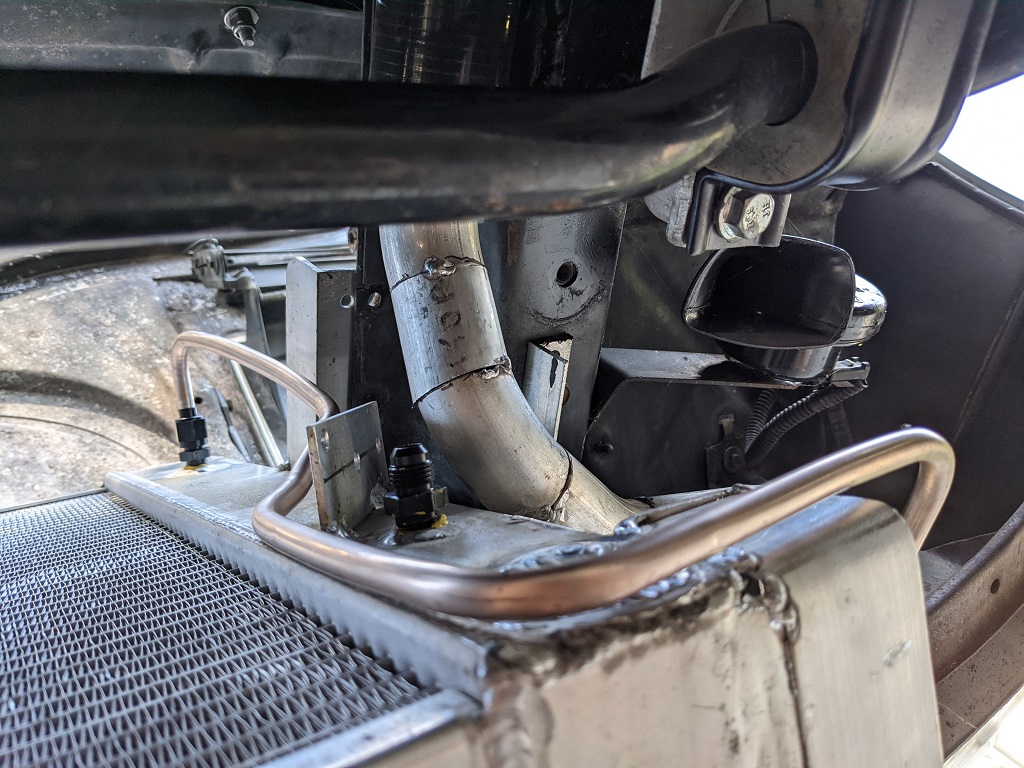
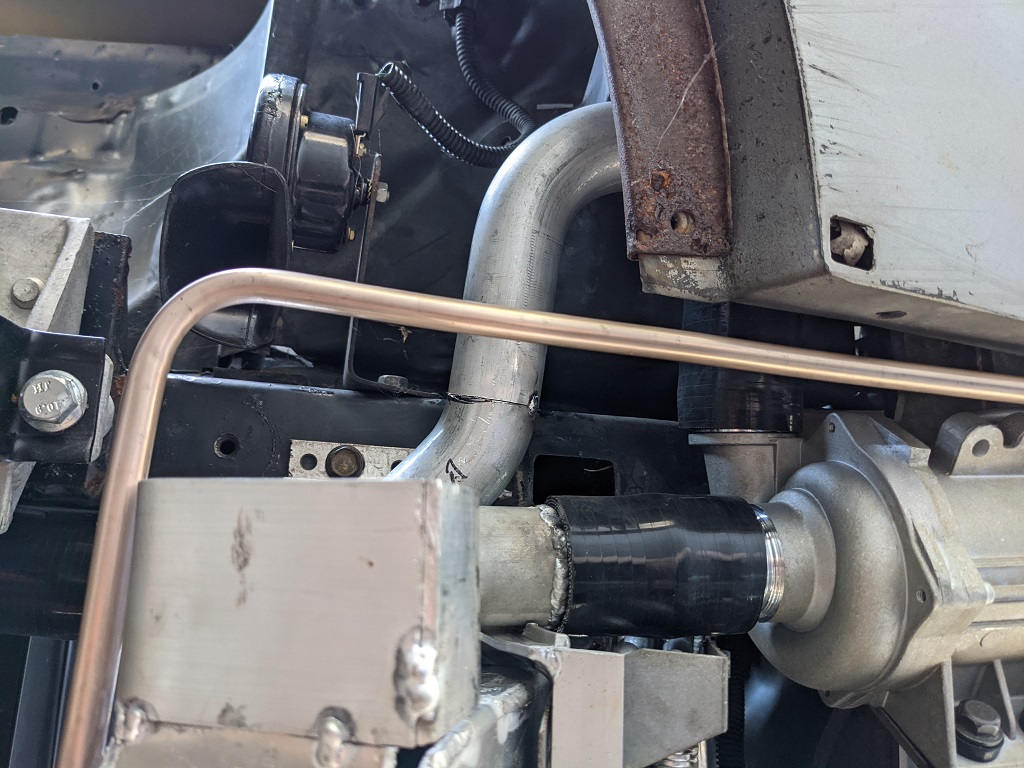
Mike has had to redo a lot in the radiator area to accommodate my new water pump, including some additional modification of the radiator itself. In the end, the connections from the pump and radiator to the radiator pipes going to the back of the car are going to be closed off with short heavy duty silicone hoses, and all-stainless t-clamps.
Mike also started running the lines for the transmission cooler. Here's some pictures of all that stuff!

And also here is a picture of my drivetrain skid with teh wheels on there. Just enough clearance. Haven't had a chance to test it yet. Thankfully it was cheap to make, so easy to build another one and improve it if necessary.

Lastly, does anyone have any good "long shots" of how the transmission cooler lines are run a stock automatic Fiero? This car was manual, so nothing to go by. I've found a website where they are selling new transmission cooling lines, but they are so "twisty" it's tough to figure out where they're going. I know Mike would like to route them as close to 'stock' as possible.
When we drop the drivetrain we'll be working on accessory setup. Mike said the OEM alternator is not going to play nice with where he wants to put things, he's looking to use one that GM used very widely, including in pretty much every G-Body.
We also have pushrod measuring tool on standby, so I can make sure we get the exact-right length pushrods. So that'll be happening when we drop the drivetrain, too.
[This message has been edited by Trinten (edited 03-26-2023).]
|
|
|
|
Will
|
OCT 12, 10:24 AM
|
|
| quote | Originally posted by Trinten:
Lastly, does anyone have any good "long shots" of how the transmission cooler lines are run a stock automatic Fiero? This car was manual, so nothing to go by. I've found a website where they are selling new transmission cooling lines, but they are so "twisty" it's tough to figure out where they're going. I know Mike would like to route them as close to 'stock' as possible.
When we drop the drivetrain we'll be working on accessory setup. Mike said the OEM alternator is not going to play nice with where he wants to put things, he's looking to use one that GM used very widely, including in pretty much every G-Body.
We also have pushrod measuring tool on standby, so I can make sure we get the exact-right length pushrods. So that'll be happening when we drop the drivetrain, too.
|
|
No photos, but IIRC, the auto trans cooler lines follow essentially the same path as the clutch line in a manual trans car.
|
|
|
|