
 
     |
| Rebuild of Indy Fiero #163 Super Duty 4 (Page 4/29) |

|
Lilchief
|
NOV 12, 08:06 PM
|
|
|
Fierosound: Very impressive rebuild. Just a few questions. How does the SD 3.3L compare to the 2.8 or even a 3.4 ? Or is it closer to a SC 3.8 ? Have you ran any 1/4 mile times? And what kind of gas mileage does it get? You said something in the lines of engine work, what are your plans? Do you have any specs on the present engine,hp, tq, internal components? Just curious cause I'm working on a 3.0L SD/Merc for my 88 coupe. Well a big 2 thumbs up on your project. I like it. ------------------
85 GT 3.4
14.9 @ 90 1.9 60' Old TH125/3.06
Unknown New 4T60/3.42
|
|
|
|
fierosound
|
NOV 13, 09:05 AM
|
|
Lilchief - see your PM
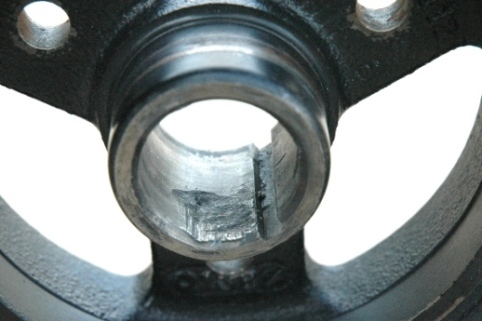
The real "meat" of the project was the 3.3L SD4 engine.
After all, that was the BIG selling point "Dirty Rat" Chester was bragging about and supposedly made this Indy
such a bargain for whoever "bought in" (suckered by) what he was saying. http://www.fiero.nl/forum/A...070315-4-032634.html
Unfortunately, contrary to everything that was said, the engine did need a complete rebuild and many $$$.
The cylinders had some wear and we determined that the pistons had .008" piston-to-wall clearance - way too much!!
That explained in part the low compression test readings of 92psi.
JE pistons specify a .0045" piston-to-wall clearance for their pistons (these were JE's).
The engine block went through all the usual rebuild procedures.
The block was hot-tanked, align honed, decked, cylinders bored and honed for 4.020" diameter pistons, and new freeze plugs installed.


The new Stainless Steel intake valves are 2.055" diameter and the exhaust valves are 1.600" in diameter.
Here's a comparison of what came out and the new SS valves that would be installed.

The bare head was cleaned up, milled, and new bronze guides installed, along with the new SS valves, dual valve springs, keepers and locks.
According to the SD4 engine guide, the Paul Vanderley designed SD4 heads out of the box (before any porting) flow 88% more than a stock Duke head!


I had the crank and rods magnafluxed to make sure they were OK. They passed inspection and were then prepped for the engine.
The crank bearing surfaces were ground/polished and the connecting rods had their ends resized.

The head cc'd at 58cc in the combustion chambers. It was calculated that a 4.020" zero deck piston with a
20cc dish would give us a 10.5 to 1 compression ratio - should be workable with premium pump gas.


Here's the "goods" waiting to go into the readied block after coming back from balancing - pistons, reground crank, and resized rods.

...and a couple of shots of the reassembled short block.

You can see some minor grinding in the block walls required to clear the connecting rod throws.


Once they had the head installed, I would be bringing it home!
The installed billet Crane roller camshaft PN 298011 was designed for solid roller lifters and a 1.55 ratio.
It had been sent to Geoff at Colt Cams Inc (Langley, B.C.) and was reground to a suitable single-pattern hydraulic roller
street/strip profile compatible with the new CR of 10.5, and the Crane Gold 1.71 ratio roller rockers that were on the engine.
Colt Cams camshaft (ref# C822IH) specs:
Duration: intake/exhaust 224 degrees @ .050"
Lift @ cam: intake/exhaust .310"
Lift @ valve: intake/exhaust .530"
LDA (Lobe Displacement Angle): 110 degrees
Rocker arm ratio: 1.71
Operating RPM range of the cam with matching springs is 2000-6500rpm.
New hydraulic roller lifters and hardened pushrods will complete the valvetrain.
A steel camshaft gear set was used to drive the camshaft off the crank.
Here's how the specs of the reground camshaft compare to the Ultradyne hydraulic roller cams made for the SD4.
.jpg)
Part numbers
SD4 Engine block GM PN 10027634
SD4 aluminium cylinder head (Brodix?) GM PN 10038433
SD4 GM head gasket PN 10038952
Forged connecting rods (6") GM PN 14011091
Forged crankshaft (3.9375" stroke) GM PN 10041860
There were several SD4 cranks available for displacements from 2.0 to 3.3L
(with 4.000" bore) so engine could be used in many racing classes.
PN 10042835 2.600" stroke - 2.0L
PN 10027778 3.000" stroke - 2.5L
PN 10027779 3.250" stroke - 2.7L
PN 10093312 3.625" stroke - 3.0L
PN 10041860 3.9375" stroke - 3.3L[This message has been edited by fierosound (edited 03-29-2022).]
|
|
|
|
Hudini
|
NOV 13, 09:36 AM
|
|
|
|
|
stinky817
|
NOV 13, 10:14 AM
|
|
yes yes, very very nice 
I've always had a soft spot for the 84's as well. i actually own 2 84's
|
|
|
|
The_Stickman2
|
NOV 13, 02:13 PM
|
|
|
|
|
82-T/A [At Work]
|
NOV 13, 03:20 PM
|
|
Wow, that really, REALLY looks nice.
I've got a quick question. Do you have other projects you're working on at the same time, or are you JUST focusing all your attention and time to this one vehicle? Only reason I ask is because the attention to detail is amazing... I've done work of that quality as well, but now that I'm stupidly juggling 3 projects, I find that I just don't have the time to sand down every part and repaint it.
Also, that sound deadening material, is that dynomat type stuff? I typically install stuff like that in cars that I fix up, but I'm hesitant to do it on my 87 Fiero since I don't want to line the floorpans with stuff I won't be able to remove. Is the stuffy tacky, or does it just lay in there?
Thanks!!!------------------
Todd,
2006 Pontiac Solstice
2004 Volkswagen Beetle Convt. (Wife's)
2002 Ford Crown Victoria LX
1987 Pontiac Fiero SE / V6
1981 EZ-GO Xi875-A "Miami Dolphins" Medical Cart
1973 Volkswagen Type-2 Transporter
1973 Oldsmobile Cutlass Supreme 350
|
|
|
|
fierosound
|
NOV 13, 03:49 PM
|
|
| quote | Originally posted by 82-T/A [At Work]:
...but now that I'm stupidly juggling 3 projects, I find that I just don't have the time to sand down every part and repaint it.
Is the stuffy tacky, or does it just lay in there?
|
|
Thanks everyone, been working on it since Sept 2006. You'll find that working on more than one project at the same time means none ever get finished. 
The soundproofing I used is a peel & stick roofing material that seems to made of a similar material to Dynamat. Thought I’d try it. Covered it here in the stereo thread: http://www.fiero.nl/forum/Forum2/HTML/081643.html
The “other car” - 87 GT - is kinda done. Just maintaining it so it keeps winning awards. It's been jealous of the attention on the Indy.  [This message has been edited by fierosound (edited 04-01-2012).]
|
|
|
|
fierosound
|
NOV 15, 12:01 PM
|
|
| quote | Originally posted by Dennis LaGrua:
I saw this car a few years back at Carlisle when the previous owner showed it and it looked nothing like you have it looking now. For the money that you paid it should have looked like this when you received it. Not trying to rub it in but just wanted to complement your fine work.
|
|
I'd have to agree with you. What really shocked me was how "beat up" the car was for something with ONLY 19,000 miles... 
I've seen cars with 50,000 miles or more that still look BRAND NEW so I don't think I was out of line expecting this to be better than it was.[This message has been edited by fierosound (edited 11-17-2008).]
|
|
|
|
fierosound
|
NOV 17, 08:36 AM
|
|
Wo-hoo!!  The assembled long-block engine is painted and on the cradle. The assembled long-block engine is painted and on the cradle.
My machine shop matched the old ruined harmonic balancer with one from a Chevy truck 6-cylinder engine.
All that was required was a slight sizing to fit the crank and cutting of a new timing mark.
https://www.fiero.nl/forum/...HTML/146575.html#p35
Here it is with the timing cover, harmonic balancer and water pump installed.

We did a test fit of the cradle and that's when we confirmed that something was not sitting right with the way the engine/transmission was mounted.
We had "pushed" the engine to get the dogbone bolted up, but the Edelbrock 4-bbl manifold did not fit between the head and trunk firewall.
There was LOTS of head scratching trying to figure this one out. 

Only after checking things over and over again, we discovered that mounting the 4-speed automatic transmission on stock Fiero mounts tilted the powertrain back,
because the front transmission mount is too high and needed modification. I'd never seen this mentioned anywhere before, but then the V6
engines aren't as close to the trunk firewall so people likely haven't noticed.
It's covered in earlier posts above and in a thread here:
http://www.fiero.nl/forum/A...110502-2-082950.html
When I bought this car, Chester said it "only needed" a custom mounting block for a hi-torque starter because nobody made one to fit the SD4.
Actually, Tilton has a high-torque starter to fit the SD4 and has it listed on their website. I had it in my hands before the car arrived!!
But it was immediately obvious that the car needed more than a new starter, battery, oil change, coolant and fresh fuel to get the thing running.

I then found a Tilton starter with a butchered mounting block that they'd been trying to fit, in the Indy's trunk!
The problem wasn't lack of a suitable starter, but the way the solenoid is "clocked" when the Tilton starter is installed.
The starter only fits this way because the offset gearing doesn't permit clocking it to get the solenoid on top - the motor hits the block.
The solenoid clashes with the header's primary pipe from cylinder #4 because of the way the it is tilted outward.

Rather than try to modify the way the starter mounted to the engine (as Chester had tried), it was necessary to change the header
- either to a different one, or modify the one we have. Finding new headers of any type for the Fiero Duke was impossible, so I decided to modify the old header.

The old exhaust is shown in detail here: http://www.fiero.nl/forum/Forum2/HTML/095615.html
You can see that the while header's primary pipe from cylinder #4 would clear the stock starter with solenoid directly on top, it would now clash with the Tilton starter's solenoid.

The "Competition" Hooker header was a 4-into1 long primary tube design.
It wasn't especially suited to the street because of the way it ran under the cradle and reduced road clearance
- a liability if the car is lowered. You also can't install a rear sway bar because of it.

I decided on a compromise and modify it into a 4-into1 "shorty" design header.
We cut back the tubes to change the location of the collector, and changed the routing of the primary pipe from
cylinder #4 to clear the starter. After modification and the final welding, the entire header was ceramic coated.

A ceramic coated exhaust heat shield was also installed. It shields the water pump and A/C compressor from exhaust heat at the front of the engine,
and protects the wiring and starter to some degree on the transmission end. The 3" exhaust runs under the cradle and just clears the rear sway bar below it.

On the other side of the engine I installed an Paul Vanderley designed Edelbrock Victor Jr 4-bbl aluminum manifold.
The SD4 head had already been ported, so both the intake gasket and intake manifold were ported to match the head.
Prior to installation, the manifold was clear powder coated to protect it and keep it looking good. It is topped with a polished Edelbrock AVS 4-bbl carburetor.
An ATI polished aluminum carb bonnet will be directing air into the carburetor.
This item is originally intended for use in supercharged or turbocharged blow-through carburetor applications.
As it happens, it matches the new polished Edelbrock valve cover topping the engine perfectly. 

The ONLY valve cover gasket you want to use on the Duke is Felpro PN FEL-VS50179T - especially with this Edelbrock valve cover.
Don't use the cork or cork/rubber ones as they always tend to leak.
This rubber/steel gasket has raised edges to seal properly and comes with all the hardware needed for installation.


Part numbers
SD4 PONTIAC valve cover (Edelbrock) GM PN 10031327
Edelbrock/GM 4-bbl manifold GM PN 10038470
Fel-Pro intake gasket (cut to fit) PN FPP-12381
Edelbrock Thunder AVS carb PN 1803
Fel-Pro valve cover gasket PN FEL-VS50179T
Fel-Pro oil pan gasket PN FEL-1813
Tilton starter PN 54-10011
Stant 180* thermostat PN 13818, PN 45818 (Premium)
OR MotoRad PN 211-180, PN 7211-180 (Fail safe)
The distributor I decided to use was a coil-in-cap HEI design with centrifugal and adjustable vacuum advance
as this would be the best and simplest solution and because of the great number of performance items available.
I'm using an MSD distributor module and MSD coil with it. Has a Crower bronze drive gear.
The distributor's centrifugal advance was tailored to bring in 38* by 2800rpm and limited to 52* total with vacuum advance.
Magnecor plug wires send the charge to Autolite spark plugs. DEI boots protect the plugs and boots from the heat of the headers.

Part numbers
Crower bronze distributor drive gear PN 76063 (.500" shaft)
Magnecor wire kit PN 49143 (universal cut-to-fit)
DEI Protect-A-Boots (heat protection) PN 010522 (set/8)
Spark Plugs - Autolite 4062
At the front of the engine, it was now possible to use the proper dogbone/alternator bracket and dogbone.
The clunky old alternator was tossed in favor of the newer smaller CS design used on the 88 Fieros.
Braided lines drain oil from connections on the intake manifold to inlet ports in the Moroso PN 2035 oil pan.

This is now spotless and looking VERY different from the engine that came out of this Indy. 
Refresh your memory: http://www.fiero.nl/forum/Forum2/HTML/095615.html
A new exhaust was built, header to tips. I used a Flowtech Afterburner cross-flow muffler designed for the Camaro.
The dolly is pushing up on the exhaust pipe which is why it looks like the muffler is hanging crooked in this picture.

Part numbers
Fel-Pro SD4 header gasket PN FPP-1441
Flowtech Afterburner muffler PN 50363FLT
Hooker resonator tips PN 21430HKR

In the meantime, I also got the engine bay ready. The old ratty insulation was removed,
everything scrubbed down and paint touched up as needed, before new OEM looking insulation went in.

 [This message has been edited by fierosound (edited 09-01-2023).]
|
|
|
|
The_Stickman2
|
NOV 17, 02:49 PM
|
|
|
|
|