 
     |
| Aurora 4.0l / Izuzu 5 speed swap into 88 coupe (Page 64/102) |

|
cptsnoopy
|
AUG 11, 10:48 PM
|
|
I am going to do a little looking around. If I can find a 12" rotor with about 1/4" less offset then I will stick with 12" otherwise if WCF will sell me just the extra brackets needed and 2 13" viper rotors, I will just install the 13" rotors in front and leave the 12" rotors in the rear. As it is, WCF may just know which 12" rotors to get so I don't have to go to the 13" setup in front. If you look at the 13" setup, the offset is close to the same as the stock Fiero rotor offset. This will give another 3/8" clearance for the LCA and additional clearance from the upper spring perch than the 12" setup.
Charlie

|
|
|
|
Russ544
|
AUG 12, 12:14 AM
|
|
No clearance issues or hose problems with the bracket design I made. didn't need countersunk bolts either . I'm using 88 Vett std front rotors all around BTW.
Get your batterys recharged and get back to work. 
Russ
|
|
|
|
cptsnoopy
|
AUG 12, 01:19 AM
|
|
| quote | Originally posted by Russ544:
No clearance issues or hose problems with the bracket design I made. didn't need countersunk bolts either . I'm using 88 Vett std front rotors all around BTW.
Get your batterys recharged and get back to work.
Russ |
|
Hi Russ,
After looking at mine I am curious how you did not have issues with the caliper/brake hose hitting at full turn? My original Bobby brackets are very similar at where they place the caliper in relation to the knuckle. The ones I made that use countersunk bolts allow plenty of clearance for the caliper but the real question is why the rotors that Bobby found are dished in (offset) too much. I don't know if it is because we got the wrong year or if they all come close on the 88's. Do you remember how much clearance you have from inside face of your front rotors to the outer tip of the LCA? That is an issue I and others have with these rotors from Bobby.
You can't see it now, but I am about to crawl under the car and attempt to tack weld the exhaust pieces back together... 
Charlie
|
|
|
|
Russ544
|
AUG 12, 11:38 AM
|
|
It's been a wile, but I do seem to recall that I had to ding over the very tip of one side LCA lip just a scosh. other side was ok. it only amounted to maybe 1/8" interference as I recall however.
BTW. I used some header wrap on the ex cross-over section under the pan. seemed too close to me as well.
Russ
|
|
|
|
cptsnoopy
|
AUG 12, 03:42 PM
|
|
Thanks Russ,
I received similar info so the consensus is, even though it looks close, you can usually get enough clearance by grinding/pounding to drive it without rubbing. After checking the position of the caliper on the sliders, it is apparent that the rotor is correct as the caliper cannot move any further outward. A change in rotor would require a change in the brackets. So, I'll leave the passenger side alone and I will grind/pound the drivers side until I get at least as much clearance as the passenger side.
I got the exhaust welded and installed last night/this morning and I can actually move the car under its own power for the first time! 
(still a lot of work before it can be driven on the road though... )
Charlie
|
|
|
|
cptsnoopy
|
AUG 13, 12:39 AM
|
|
I drove the car out of the garage and onto the street so I could turn it around and back it in. It was getting difficult to squeeze between the wall of the garage and the car to do the grinding. The nice thing to report is that the clutch seemed ultra smooth and has light pedal force. Hopefully no slipping when driven for real. The brakes also seemed nice and firm but smooth. So far so good. Once I got it backed into the garage I went after the drivers side LCA again with the grinder. I hope I did not take too much off but now there is at least 1/4" or more clearance with the suspension decompressed all the way. This is a little more than the passenger side had so I hope it will all work out ok. Need to finish putting the power window motors and door locks in then I can think about getting going on the paint again.
Charlie
|
|
|
|
cptsnoopy
|
AUG 14, 03:45 PM
|
|
|
|
|
cptsnoopy
|
AUG 17, 06:06 AM
|
|
Thanks to JazzMan, Oliver Scholz and GSXRBobby for their helpful writeups on tightning the tilt-steering columns. Did that on the 86 last night and if it was not for the outer bearing retainer sticking on the steering shaft I would have had no troubles at all. It just took a leather mallet blow (or two) to the end of the steering shaft with everything else ready to come loose to free it up and get the tilt housing off.
Charlie
|
|
|
|
cptsnoopy
|
AUG 18, 04:35 AM
|
|
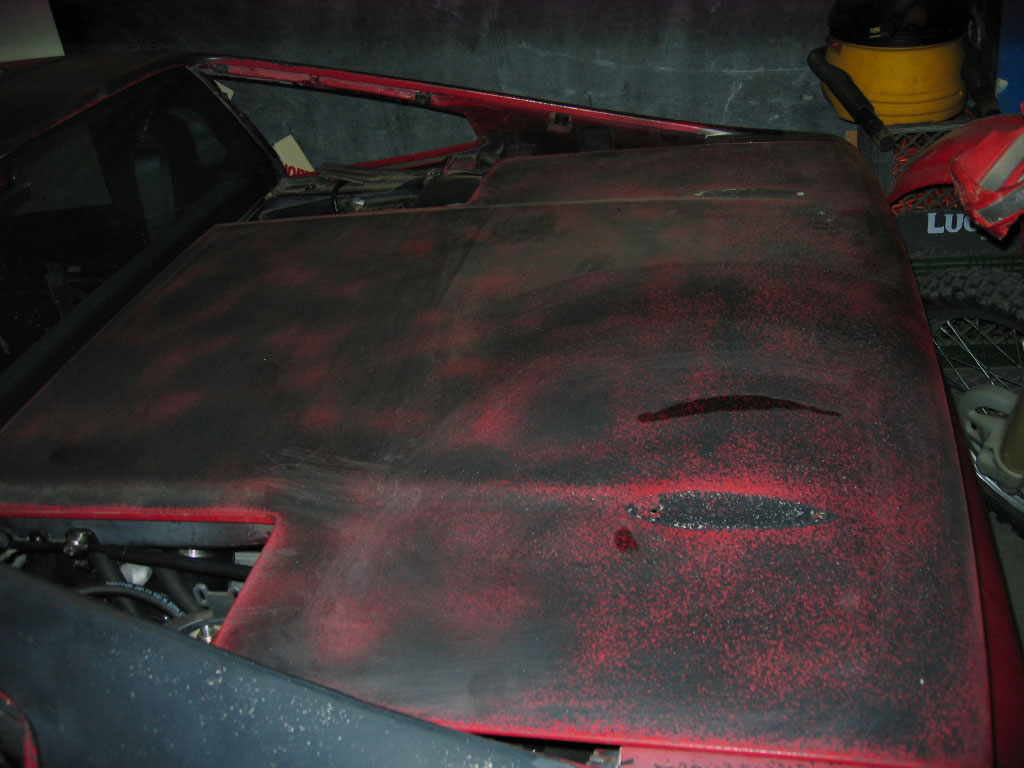
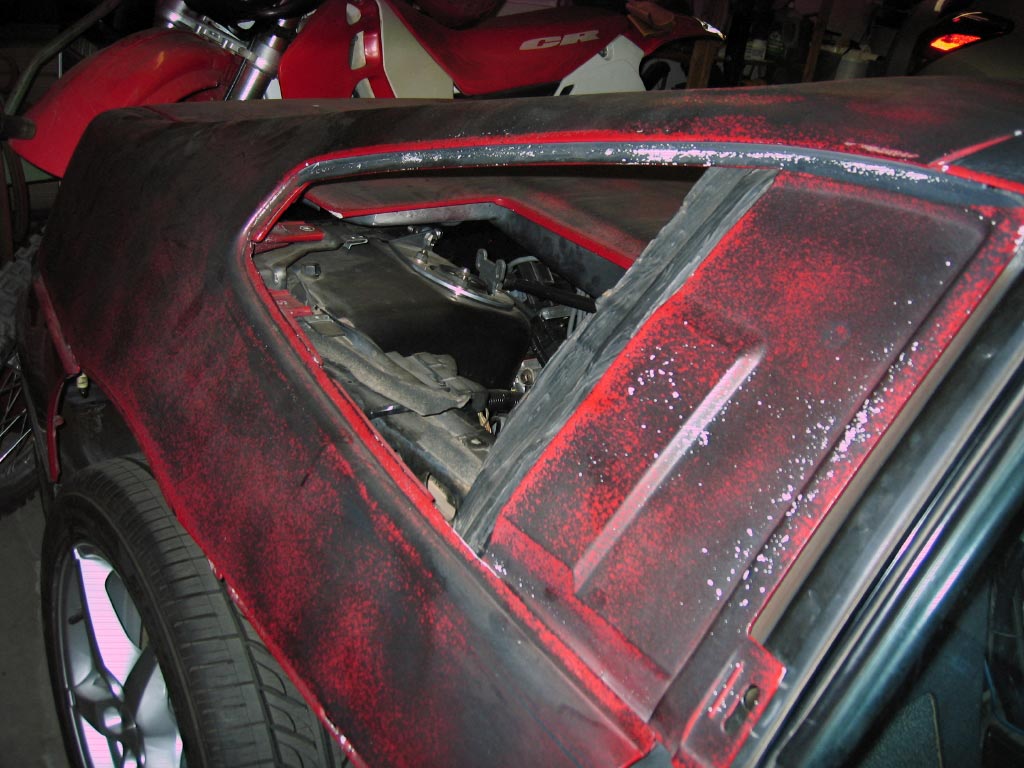
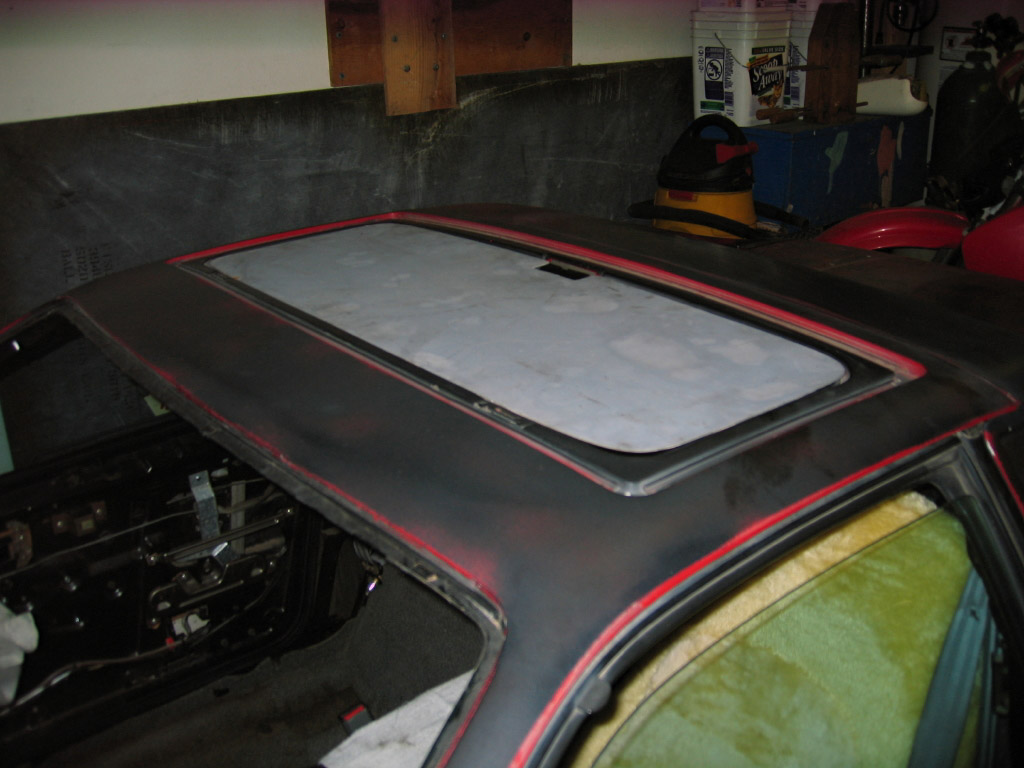
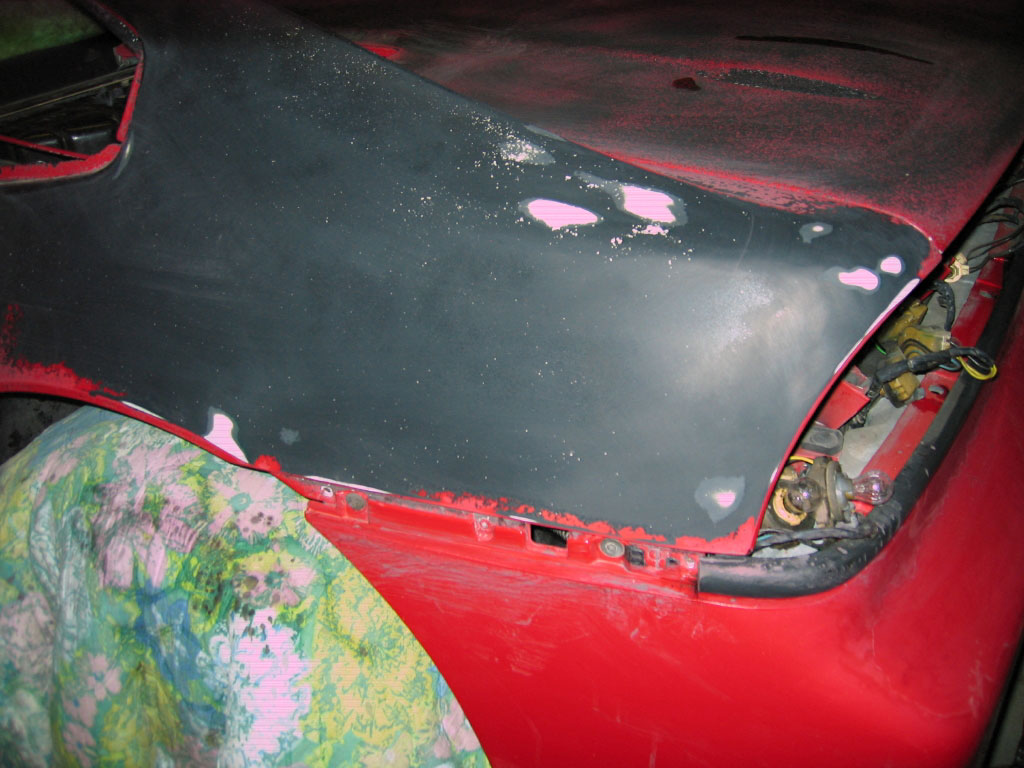
I have run out of excuses, it is time to start sanding. We had the roof panel, rear clip and decklid media blasted to see if it would be helpful. So far I think it is going to be ok. I am trying to knock down the bits of paint that did not come off with the media blast. This is the first time block sanding for me and it shows. I am burning through the black primer in various spots. Hopefully as I get more time doing this I will make less mistakes. The nice part is so far there is no fiber sticking out anywhere. The first three pics are of the panels that were media blasted and no sanding has yet been done. The last picture is the left rear of the car where I am trying to take off the rest of the red paint down the black primer.
On another paint related note. I am now leaning towards a Trans-Am style of white body and dual metallic blue stripes. I need to investigate a little more to see if that is really the look I want but it is a start in the right direction.
Charlie
|
|
|
|
Russ544
|
AUG 23, 03:13 PM
|
|
It will be up to you to carry the torch from here Charlie. mine went on E-bay this AM at no reserve (see mall for link).
who will paint your car?
Cheerio,
Russ544
|
|
|

