
 
     |
| Trinten's SBC/F23 build - The work has begun! (Page 51/76) |

|
Trinten
|
AUG 23, 06:24 PM
|
|
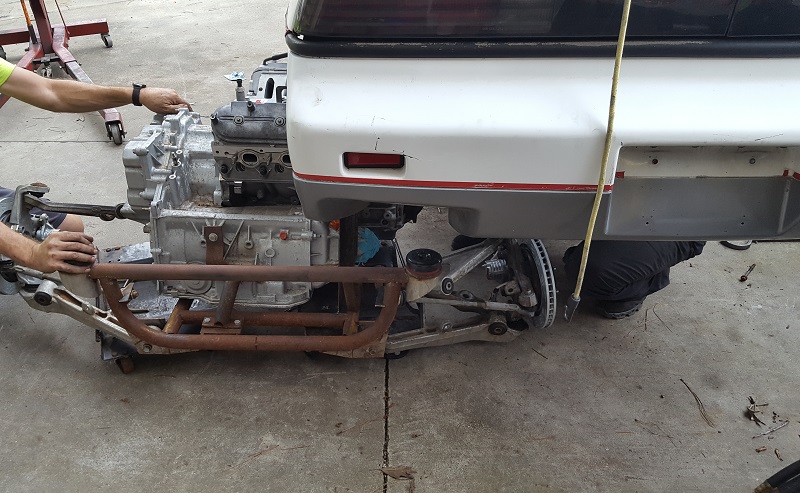
This weekend marked another milestone. The SBC came out, the LS4 was mocked up, some tentaive mounts on the new frame were made, and we made sure the engine and transmission would go together. Chug was also kind enough to come out to give Mike assistance. They worked much more effectively together thanks to Chug's experience with engine swaps. I'm sure we would not have accomplished all we had if it were not for his help!
We used a couple car dollies under the cradle to slide it out through the wheel well, which was pretty nice. Mad things much easier.
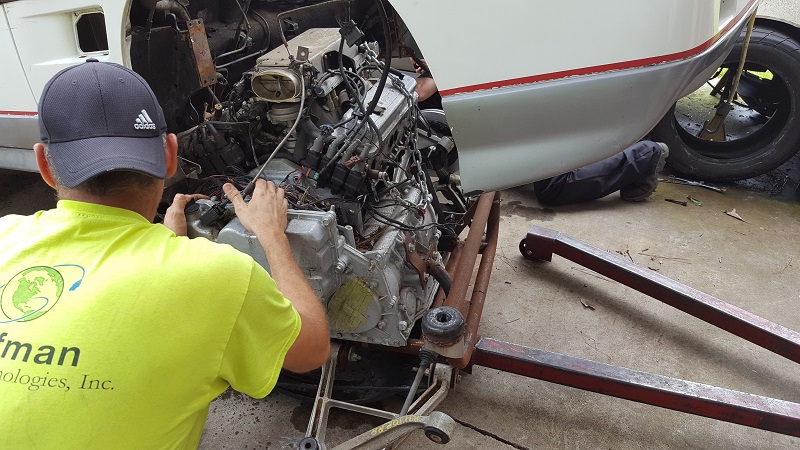
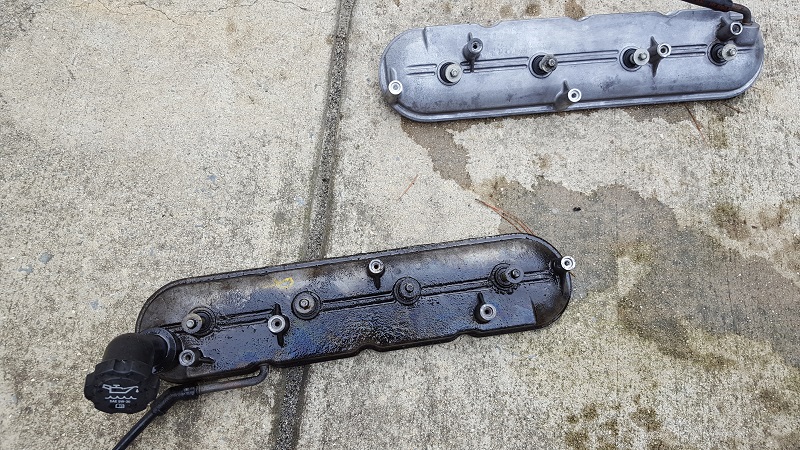
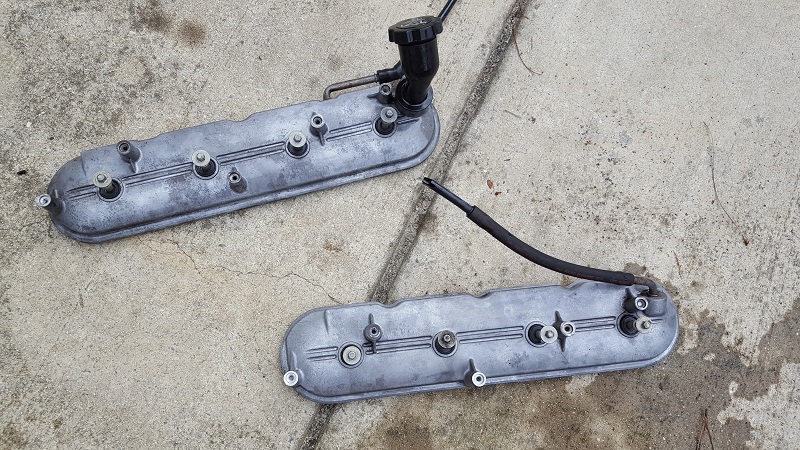
So besides taking pictures and (sometimes) being the tool go-fer, I had the very improtant job of cleaning all the gunk off the valve covers!
We did, sadly, discover that my flexplate will NOT work after all. The stock LS4 flex plate is 'dished' or 'stepped', to give clearance from the face of the crankshaft bolts and the face of the torque converter. My flexplate is flat. We considered using spacers between the torque converter and the flexplate, but the available space wouldn't allow it, that offset lead to other alignment/fitment issues.
So I've shot an email to Meziere with the pictures of the OEM flexplate, with some comments and explanations, and asked them if they could make me a billet one. They <b>do</b> have a billet flexplate on their site that has a small built in offset around the crankshaft, but I can't tell from the picture if it's "deep" enough.
So for now, things are mocked up with the OEM flexplate.
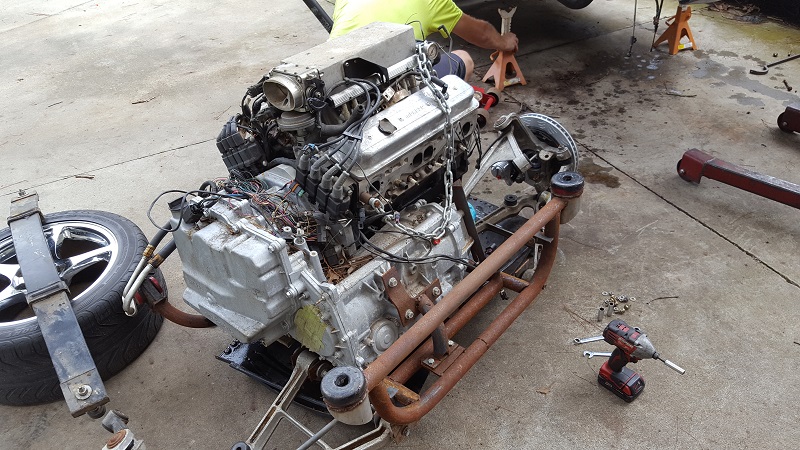
After that was done, and Mike had created the new mounts, in went the new setup! Again scooting along on the dollies.
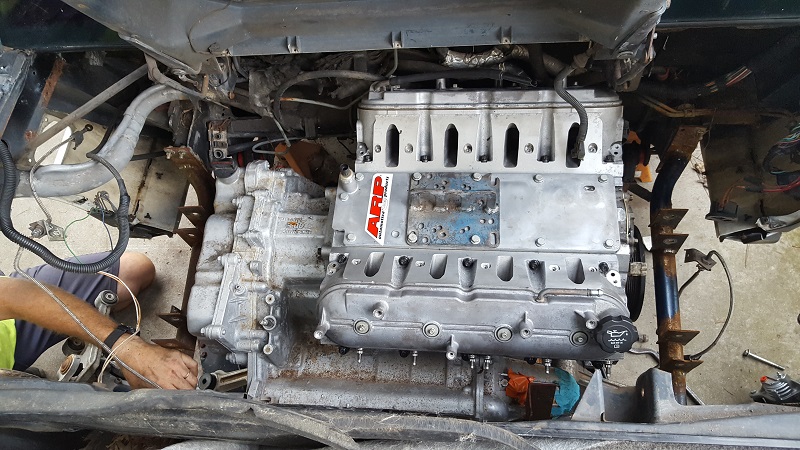
After the cradle was reconnected to the body, we put the OEM intake on to see how the fitment would be, and get an idea of spacing. It's pretty roomy! The decklid closes without any issues! There was around 2.5-3 inches of room between the intake and the 'beam' on the bottom of the decklid, and of course more room between the 'beams'.
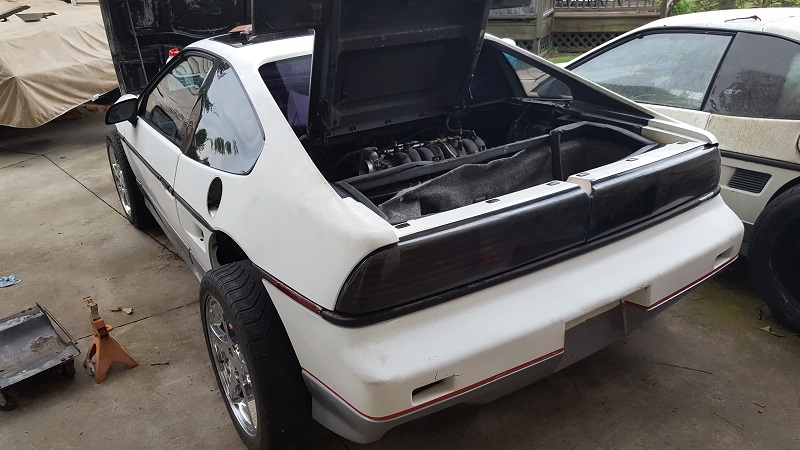
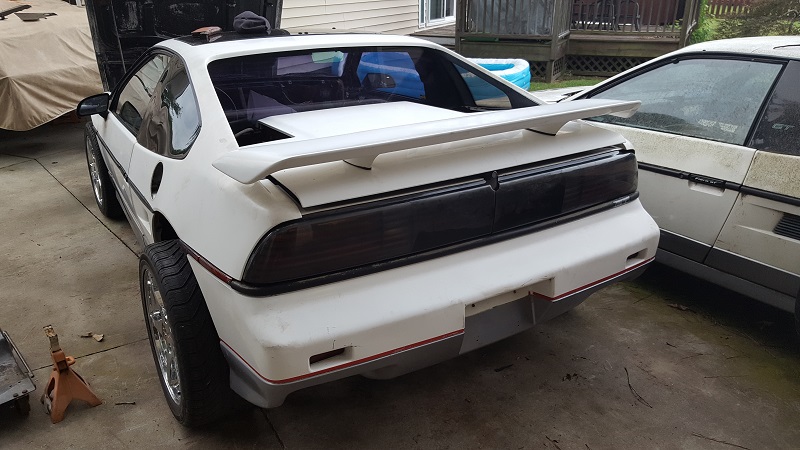
Now that I have some ideas on the room I have to work with, I can start shopping for my aftermarket intake. Though I think for now, we'll use the OEM since we won't be running any crazy boost until the engine has 500 or so miles on it.
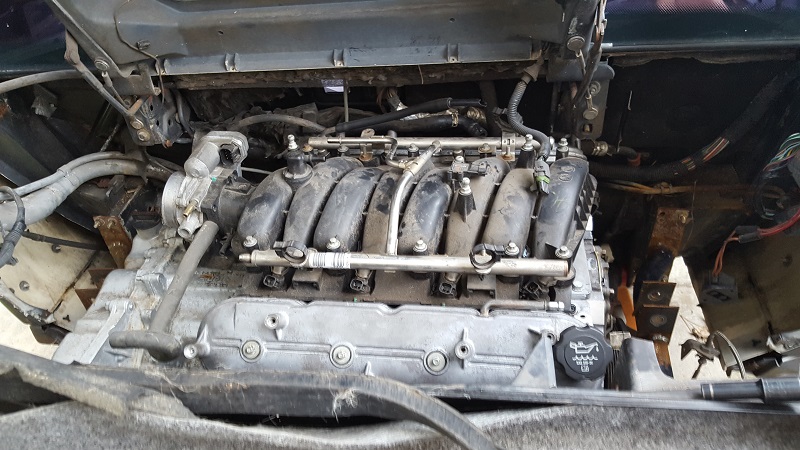
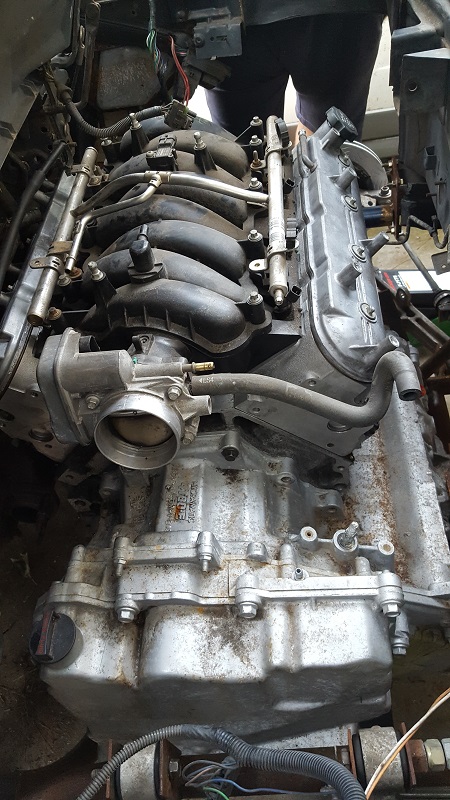
The last thing that's driving me nuts is this terrible water manifold/pulley setup the LS4 has. Look how ugly and convoluted this thing is!
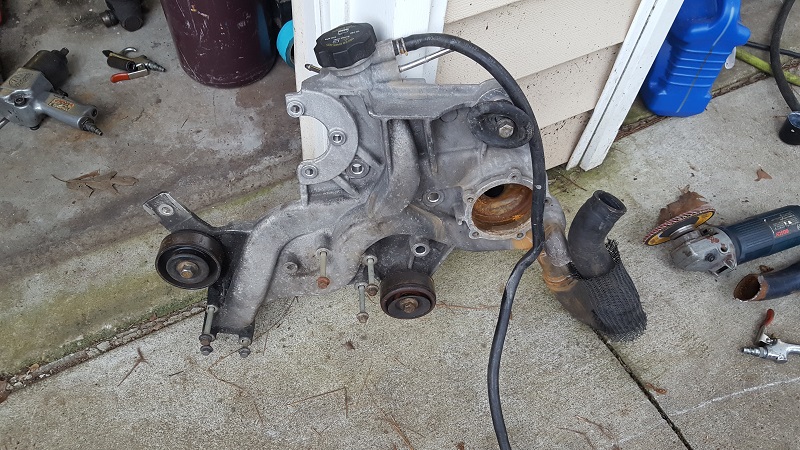
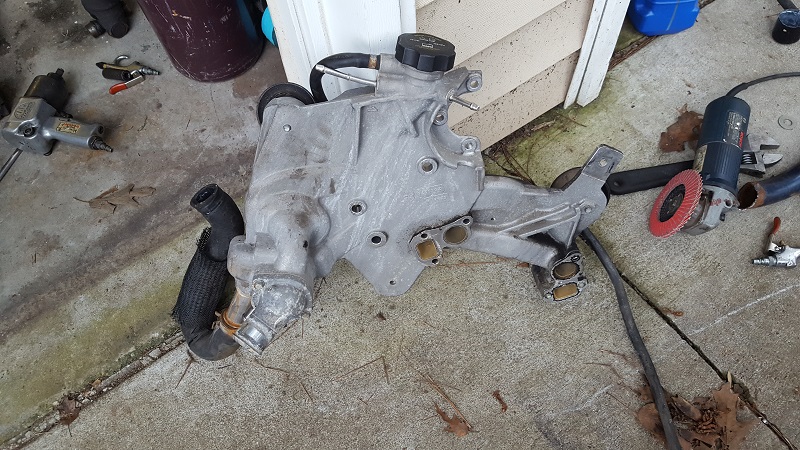
I really want to get something nicer or cleaner or more minimalist steup for this. Or something. That will need to wait until Mike figures out how he wants to mount the accessories first. There are about 3 or 4 different accessory configurations on the LS motors, I think the Corvette setup is the one that brings it all close to the engine, which he wants to keep, but might still be able to flip stuff around.
Also, the LS4 (maybe all LS engines??) had a provision for an oil cooler built into the blocks! So no need for an adapter under the oil filter, just hook it up to the connections that are there! How cool is that?
[This message has been edited by Trinten (edited 06-04-2024).]
|
|
|
|
fieroguru
|
AUG 23, 07:15 PM
|
|
Without the lower frame rails, trunk wall, and strut towers in the way, you will have a lot more options than normal for water pump and accessory setups.
Are you using the Morroso oil pan for the starter? If you are, then they likely are using the standard LS oil cover plate bolt pattern, so the off the shelf oil cooler plates would work. The stock LS4 oil pan is the lone wolf and uses different bolt spacing for that oil cover plate and all other LS engines.
|
|
|
|
Trinten
|
AUG 23, 07:43 PM
|
|
Yes! I did (Finally) get in touch with Brandon Furches via another party to order one of his specialized Moroso pans that come with the starter, setup specifically for the LS4 / 4T80E configuration.
It has not arrived yet. It had a ~5 week lead time. I think I ordered it 3 weeks ago? Maybe 4? So I'm expecting it soon.
Mike and I aren't concerned of that setup fitting... it's just... I don't know. 'Eh'.
If we do stick with that, I'll probably send it off to be powdercoated. Do I recall correctly that you came up with a cool bracket/pulley setup that goes where the LS4 power steering pump went? If I remember right... and we stick with that accessory setup... would you be interested in selling one to me?
|
|
|
|
NCTyphoonKid
|
SEP 08, 06:36 PM
|
|
|
Very nice progress ------------------
Korey "Plastic Makes It Possible"
86 Pontiac Fiero SE #70123, gold on black options incl luggage rack,power windows,power door locks,sunroof,4 spd,black GT lace wheels,restoring it back to stock check out my build thread!
84 Jeep CJ7 "Dixie"
86 Buick Grand National bone stock
93 GMC Typhoon #1710 black on black bone stock
|
|
|
|
Trinten
|
SEP 08, 07:05 PM
|
|
Thanks man!
CowsPatoot was down this way this past weekend. He kindly agreed to help me tear apart the doors to put in all the goodies I had bought for them:
A set of the Rodney Dickman faster window motors
New inner and outer dew wipes
New felt pads
With everything apart, I cleaned everything, I took the rust off the "x" of the regulator, covered the wheels, and hit them with a little paint. I cleaned all the tracks thoroughly, and of course re-greased them (and the little roller wheels on the aforementioned x part). Mike was kind enough to tack-weld the nuts on the back of the motor plate for us.
Fierobsessed and Rodney were not joking, the new motors FLY.
Only downside, the stock assist springs are a little rusty, and they are NOISY. Like, so noisy that when we first cycled the window (before all the work), we thought something was wrong. When we put everything back in, it was still scary noisy. Checked everything, it all looked good. Took the spring out... (near) silent.
So I do need to get a new set of those stupid springs at some point.
Once all of the MANY window adjustment bolts were adjusted ("with the window in the half-way up position"... quote from the TSB on adjusting the windows). we applied blue loctite one bolt at a time. All rivets that we removed were replaced with appropriate sized/length stainless steel hardware.
[This message has been edited by Trinten (edited 03-24-2023).]
|
|
|
|
NCTyphoonKid
|
SEP 09, 03:05 PM
|
|
|
Can’t wait to see it in person my car is tagged so hopefully it’ll be at the next meet
|
|
|
|
Will
|
SEP 10, 09:01 AM
|
|
I would think the LS4 accessory drive would be the one that fits the best, since it's designed for FWD mounting and a FWD transmission.
Yeah, the water manifold can have some issues relative to the firewall, but it looks like dealing with that is easier than mixing/matching accessory drive components all over the place.
|
|
|
|
Trinten
|
SEP 13, 01:30 AM
|
|
Thanks Will,
Today we started to mockup the accessory drive. I say "we". I mean "Mike". I put the DeLorean horns on the car today and just sorta hung out and asked Mike questions. Though I did give him a good idea while he was working on the brake lines! So, score.
Anyhow. Not much room from the valve cover and the cabin bulkhead. He also found that we will need to put FieroGuru's awesome decklid hinges on sooner than later. The accessory drive needs to come up about another 1.5", which puts the fill cap right into the bracket. Mike did say if he needs to shift the engine and transmission back on the cradle some, it can be done with minimum impact to anything. There is plenty of room between the trunk wall and the engine, so the slight shift back would just put an acceptable angle in the axles. Right now it's placed so they are directly in line with the hub opening.
There is also no cleanup yet on the bulkheads. Mike doesn't like to remove anything until he knows for sure he's not going to use it.
The rear brake lines are all done. He had to flip some brackets around. We picked up some brake line for the front, I forgot I had brought over some stainless steel line last year (left over from fixing the brakes on my last Town Car), and he's a fan of the nickle-copper stuff. He came up with some great uses of the existing bolt holes on the front cradle. He wanted to try to route it without having it bolt to the cradle, so the cradle could come out even easier (if needed). Now it'll take undoing a whole extra 4 screws. lol
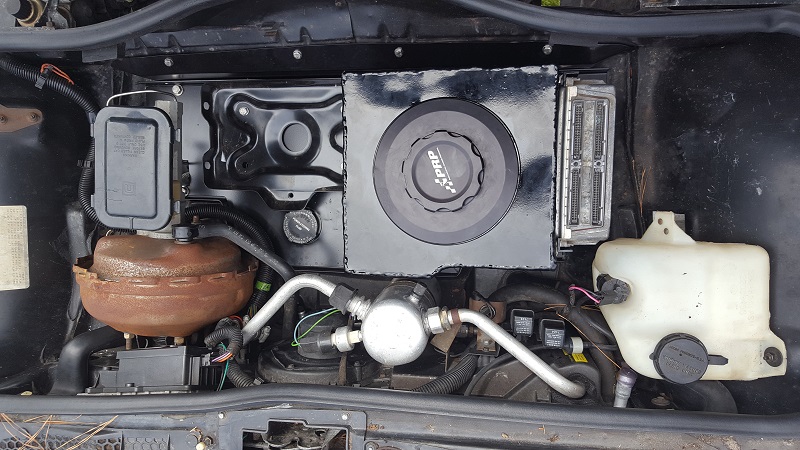
After some emails with Darth Fiero, who was kind enough to educate me on some things, and additional conversations with Mike, we realized the stock PCM was not going to do all he wants it to do. Thankfully, Mike is experienced at tuning multiple aftermarket units, so I've settled on the Holley Terminator Max unit for the LS1/4L80e. Selling my NIB HP Tuner unit if anyone is interested! Check the mall!
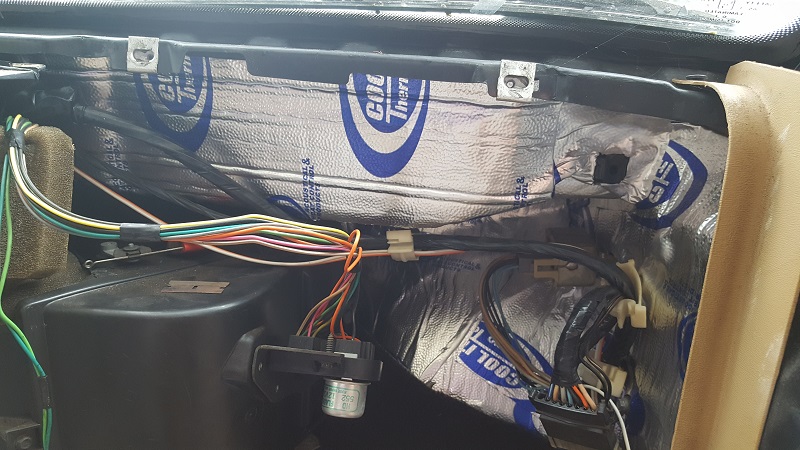
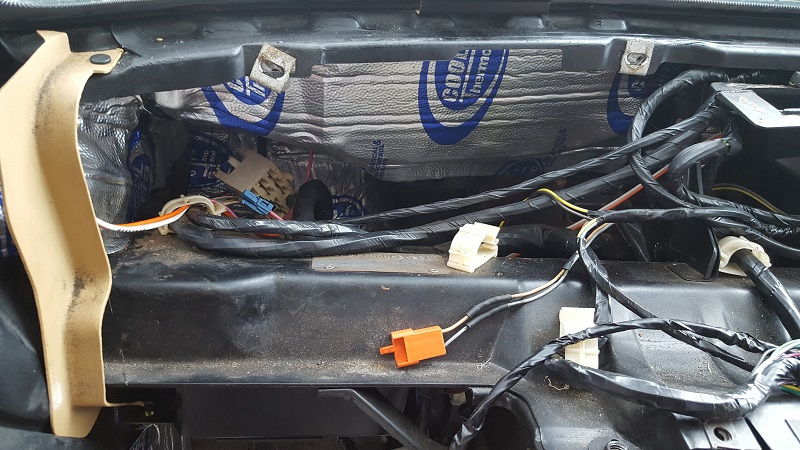
Also tossing up some pictures of the work that CowsPatoot and I (yes, I actually did some work this time!) did putting in the new Rodney Dickman motors, along with all the seals and the dew wipes. I cleaned all the tracks, cleaned rust off parts, helped remove rivets, used a self etching paint to protect things, and of course regreased things. CowsPatoot did the disassembly and reassembly. He also pulled all the crappy jute from the front area and put in the thermal/sound stuff I bought and used in the rest of the car. I am debating on if I went to put any of the fiber-padded stuff on top of it in places or not. Cow spent a CRAZY amount of time doing this for me, and I'm grateful.
For the doors, I will be using FieroGuru's images as a guide to put the sticky stuff on those, too. Again, not sure if I'll use the new jute, or use the fuzzy insulation which is thinner. The vapor barrier will go on too.
Okay, so first picture up....
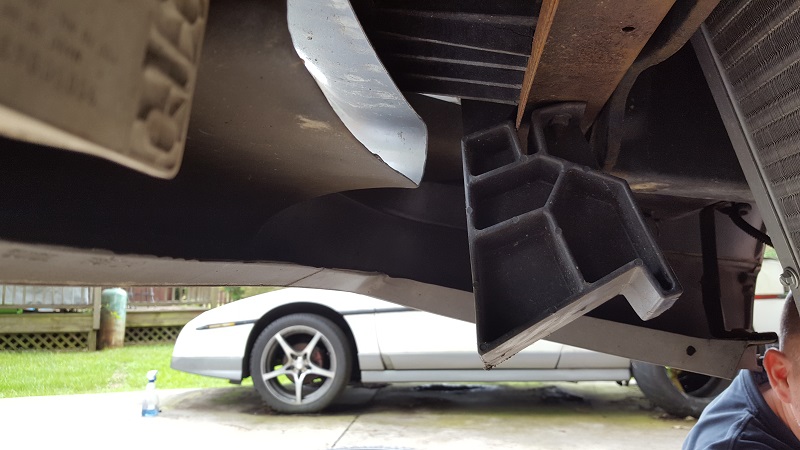
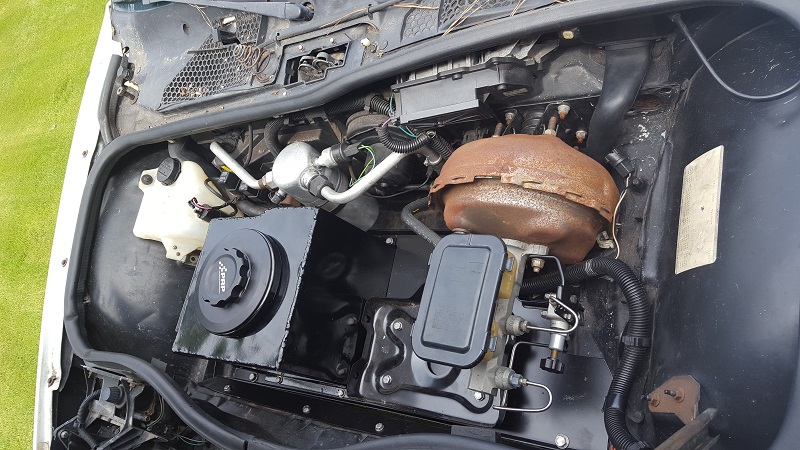
Above: What is that thing? What does it do? It's just sort of flopping around there. There's not one on the other side. What does it connect to? Thanks!
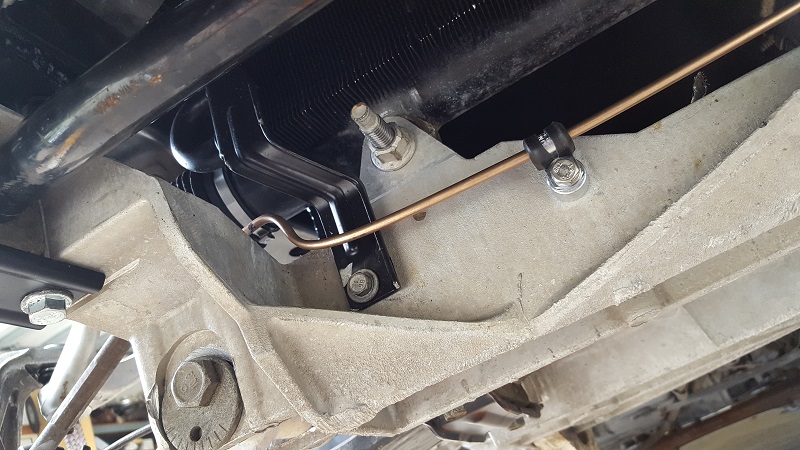
Slick brake line measuring and routing by Mike, and effective use of pre-existing mounting points!

Check out that nice work by CowsPatoot!! He made sure to get around all the push mounts, and screw mounts, and what not.
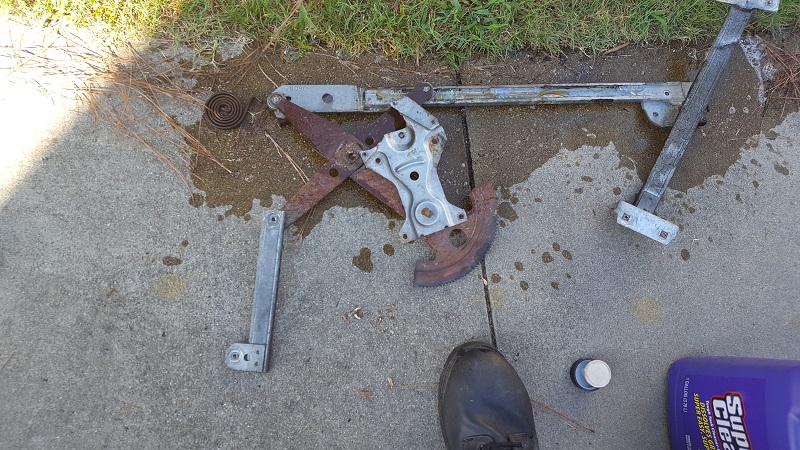
Rusty window regulator!
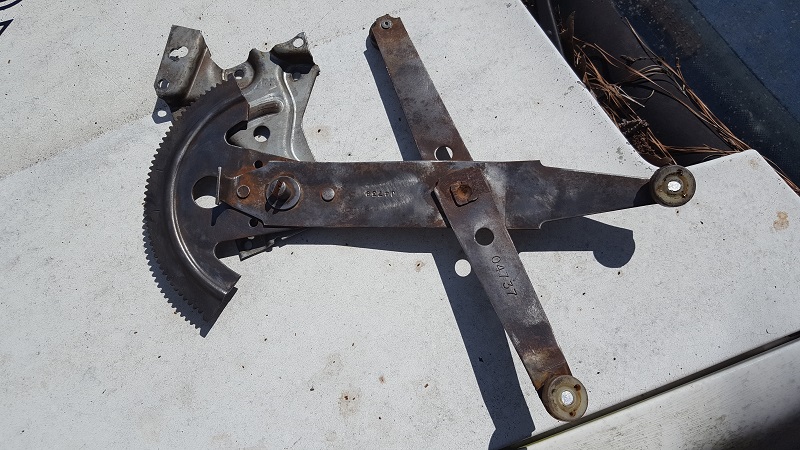
Starting to get it cleaned up. I did fully disassembly it and use a variety of brushes to clean it all.
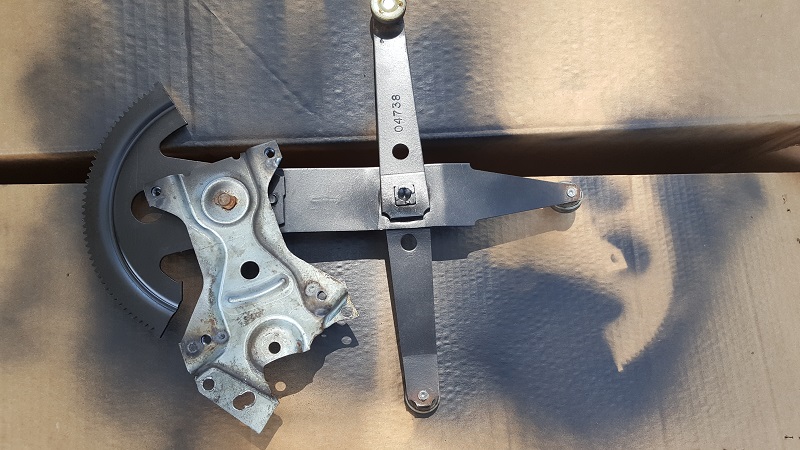
Covered up the wheels and hit it with self-etching paint in a light coat. Made sure the wheels were well greased.
Used the same paint to clean up the scratches and marks from when we were getting the rivets out. You can see some of the paint was running there.
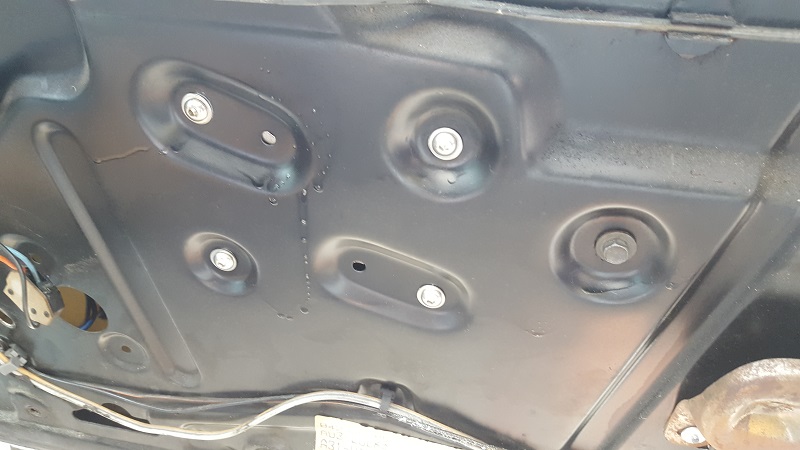
And lastly, the completed frunk... which will now need to be redone a bit, since the bracket that Mike made for the 0411 won't be used now.
[This message has been edited by Trinten (edited 06-04-2024).]
|
|
|
|
Trinten
|
NOV 20, 12:36 PM
|
|
Hi all,
Sorry for the lack of updates. There has been progress, just sometimes not enough to make a post about. Also, the FTP connection to my host doesn't seem to be working, so I can't upload pictures!
Here's the high level for now:
Brakes are DONE. The car had come with the SS braided Fiero brake lines, and for once, GM used the same kind of connections, so those hoses connected to the Vette calipers (via a fresh set of banjo bolts) without any issues. We bled the brakes out, which went pretty smoothly. Even with no vacuum, the pedal firms up quick. Far faster than it did before. And even with just light pressure applied to the pedal by Mike, I wasn't able to force the car to roll.
The body-length coolant lines have been repaired and modified. Mike didn't want to use a bunch of rubber couplings, so he had me buy some appropriately sized stainless steel, and he modified the driver side pipe. It was cool seeing how it went in and the thought he put into it. This is where I wish I had the pictures up. When they're up this will hopefully make more sense - the coolant tube front was arched and hooked, so it had to rotate into place as the part that ran under the car moved into position. It fit great. So now there is just the two small flexible lengths of hoses that go from the radiator to the body lines. Compared to what was on my old Fiero, where there was more than a few rubber hose couplers.
I also got my first intake from Summit. Sadly I ordered the wrong one, it was a little too tall. Thankfully it was within the return date, but the shorter one that came powdercoated was sold out, on back order until February 2021!!
So I asked for the non-powdercoated version. It shipped today. I'll take it to get powdercoated.
We also cut up the axles for the back, one of which I ordered from Rockauto. It was made by a company called FVP. It was inexpensive. What surprised Mike and I the most (given the cost was that this piece used a genuine GM shaft. The tripods are now bolted to the rear hubs, so Mike can get the alignment done. Then when the cradle comes out, he's going to shift the engine back about a half-inch and do the final welding. We'll use the axle parts to make the mock ups for the correct lengths I'll need to order from the Driveshaft Shop.
Still trying to find a good solution / reliable replacement clip for the lock mechanism rod. Not the plastic clip, but the metal one that holds the lock cylider rod to the lock cylinder arm. I've tried a variety of aftermarket "GM compatible" clips, all to no avail.
[This message has been edited by Trinten (edited 03-24-2023).]
|
|
|
|
La fiera
|
DEC 02, 07:24 PM
|
|
Your car looks like mine with the wheels sticking out!! Looking good! We should go cruising and then go to Burrito Loco once it's done!
Can't wait to hear that beast wailing!
|
|
|
|