
 
     |
| Trinten's SBC/F23 build - The work has begun! (Page 52/74) |

|
Trinten
|
DEC 02, 08:10 PM
|
|
Definitely!!
Man, I could go for some Burrito Loco....
Anyhow, another short (pictureless) update. The new intake showed up and we clear the decklid with plenty of room. The injectors I bought are the LS3 style though, so they were too short for the included fuel rail brackets to work. Instead of the shenanigans going into fabricating brackets, I saved Mike the time and bought the injector adapters to make them 'taller'.
He also modified the intake to be able to mouth an IAT sensor in the center of the intake. Eventually the intake will go off for powder coating.
ALSO! My spiffy Moroso LS4 oil pan showed up, courtesy of Brandon Furches. It's modified to support the starter on the bottom, it has baffles and a modfied pick-up tube to prevent oil starvation, and it's setup with a turbo return already.
The starter hasn't shown up yet, but we're still some ways away from needing it, and worst case, I can spend the few hundred bucks to buy it (I know which manufacturer and model), and when the one from him shows up, I'll shelve it as a spare.
This weekend the weather is supposed to be lousy, so not sure if we'll be working on it.
|
|
|
|
Trinten
|
JAN 21, 10:30 PM
|
|
Holy smokes it's been a while, right!?
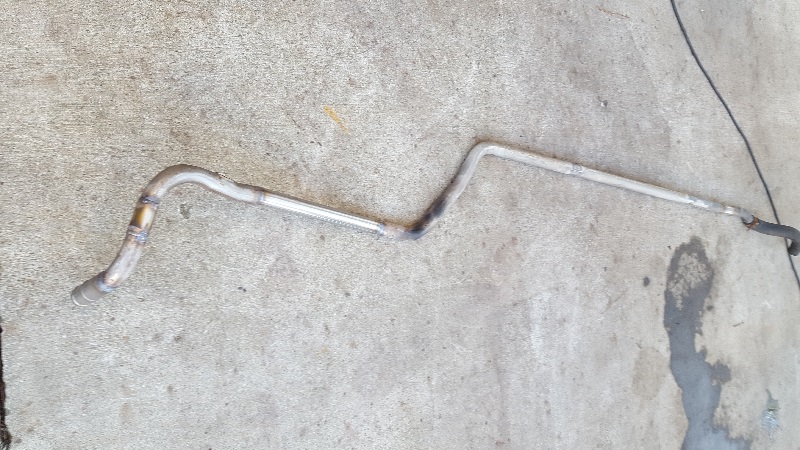
The upside is, there's been some progress. A lot of test fit and mock up stuff. Mike has been playing around with the exhaust stuff. We got a set of manifolds off of a Chevy Truck, which are apparently super well suited to be used as turbo headers on this swap (again thanks to Brandon Furches videos for the idea). Mike agreed, that these particular manifolds flow super well for being a cast piece. I wanted to have all of the exhaust stuff done in Stainless 321, and even found some good sources to buy it in larger pieces that Mike could whittle down, but I was only going to bother with that if I could get the whole thing done that way. Since we're using these cast headers for now, we're sticking with 304. Doing a combination of oval and round pipe to maximize our space.
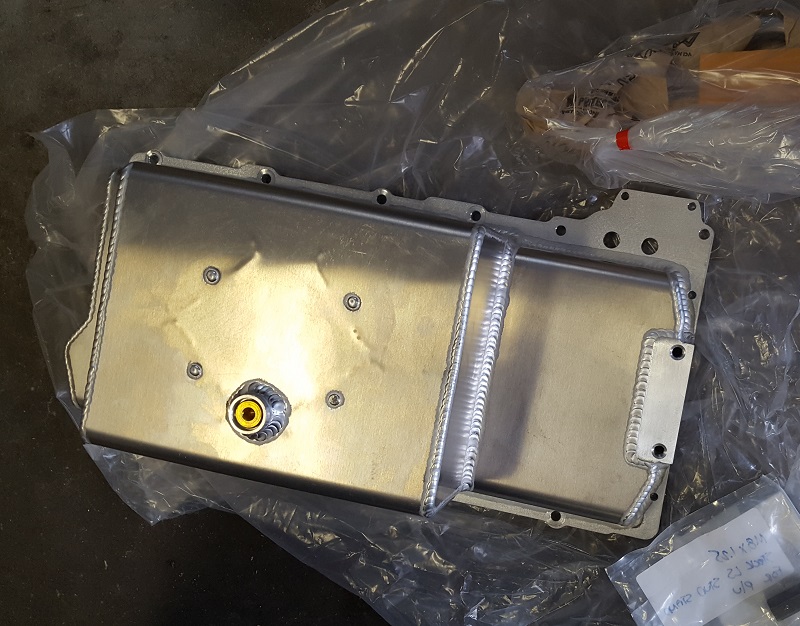
The nifty LS4 Moroso Oil pan with the starter provision! I thought I took more pictures... but apparently I did not. It is a quality piece, but Moroso tends to make good stuff. It comes with a modified oil pickup tube, does not sacrifice oil capacity, and the starter will mount to it. When it originally showed up, it was missing the starter and oil filter plate (the pan is setup to have a plate for a screw on type or remote type filter). Brandon has always been quick to reply when I shoot him an email. While it all took some time, I have the pan, starter, and I THINK the plate for the remote oil filter showed up. I need to check that last one the next time I'm at Mikes.
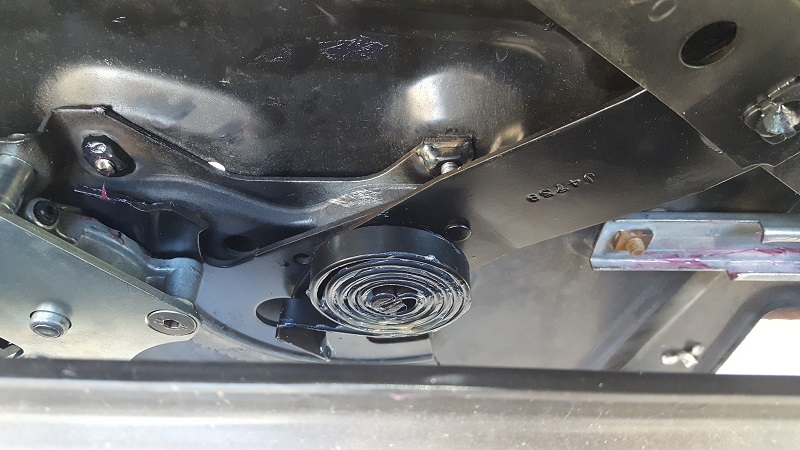
I also have a picture of the new window assist spring installed. Now if only I could get my hands on some pristine door glass! Still kicking myself for not seeing the posts about that company in the northeast that was making the glass for a while!!! I did get ahold of the guy, but he actually had to close his doors entirely, which was sad to hear.
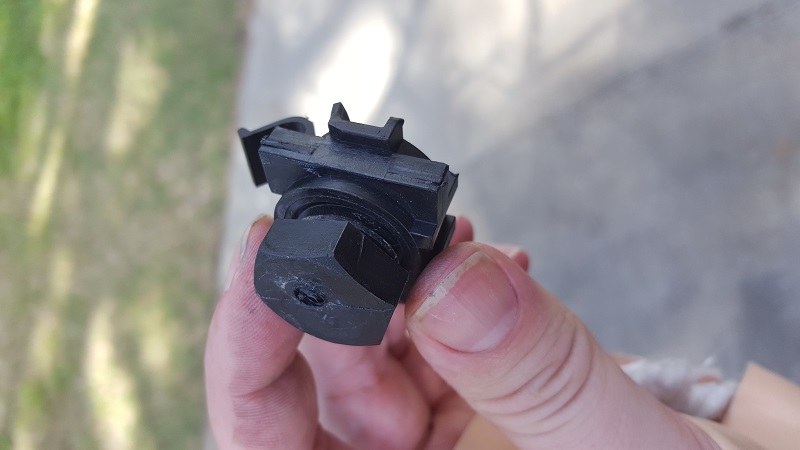
Among the door parts, this body panel pusher piece has some broken ears, I managed to get another one thanks to Chug, who had some extra doors laying around (one seems to have a really nice piece of glass in it...).
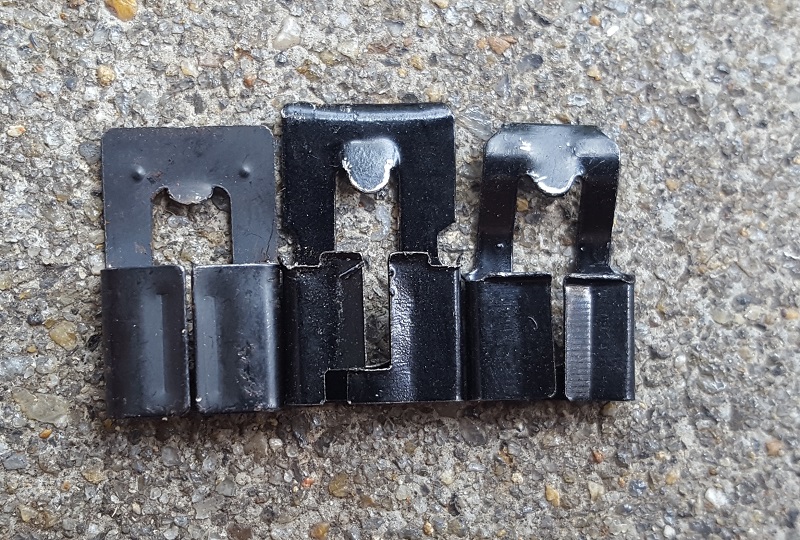
These clips! I hate them! Why did GM make so many different versions! These are the clips for attaching the rod to the lock cylinder arm. Again, thanks to Chug for letting me pillage his doors for a couple. I've tried Dorman and a few others, none fit properly.
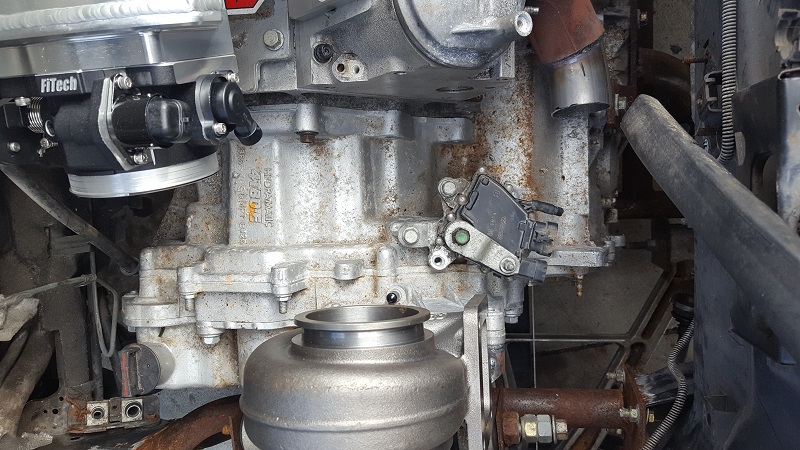
Mike used some stainless tube of the appropriate OD and ID to modify the coolant tubes, it slid into place really smoothly given the bends! It sort of 'corkscrews' into position.
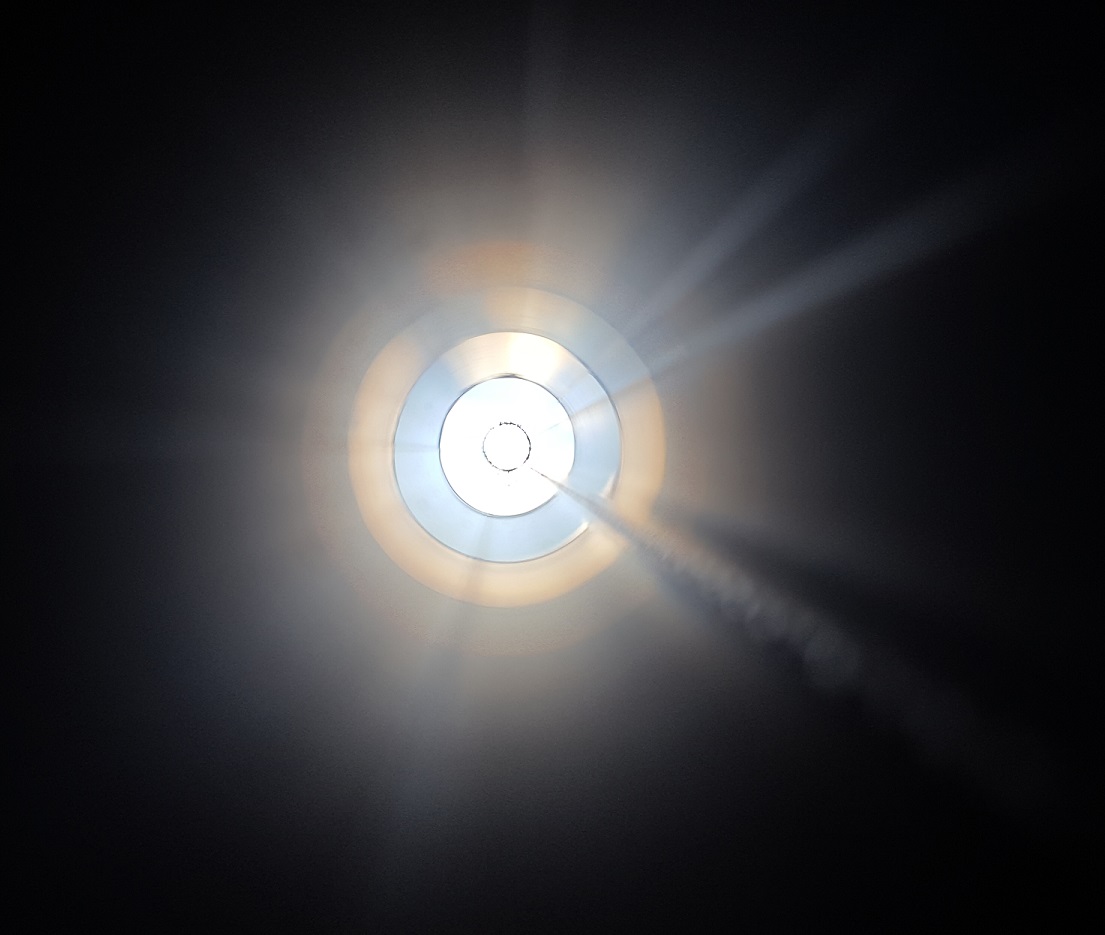
Speaking of that piece of pipe, check out the crazy optical illussion when I looked in that bit of stainless. I wish my camera was able to capture the image better. Do you see the innermost "concentric ring"? That's the actual opening of the tube. The rest is a stepped reflection! When looking through it with your eyes (instead of a camera) at the sky, you could see the sky reflected in the tube, it was a little trippy.

Here is my new intake.He's already modified the bottom of it for a sensor that he wanted to be more central instead of near the back where the factor stuff is, in addition to the other sensor ports it'll be using. Once we know it's all good, it'll be going off for powder coating (probably).
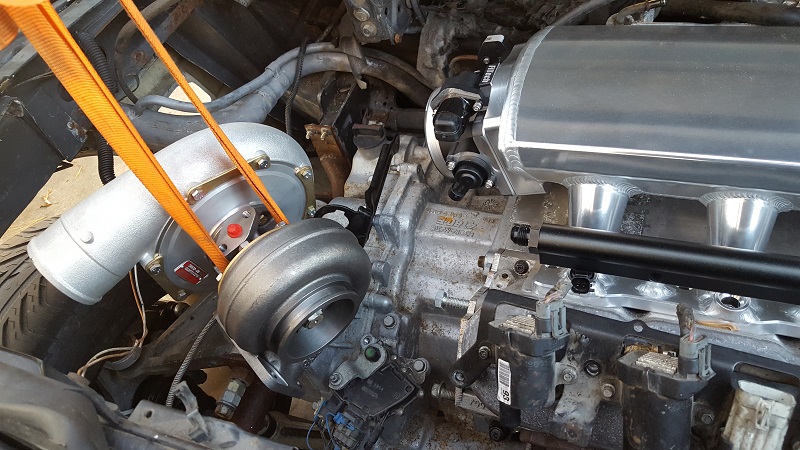
Above is a bunch of pictures on Mike working on the mount for the turbo. That tiny cut in the one is no longer there. We were using some scraps he had laying around to work on this, the tubing is all chrome moly.

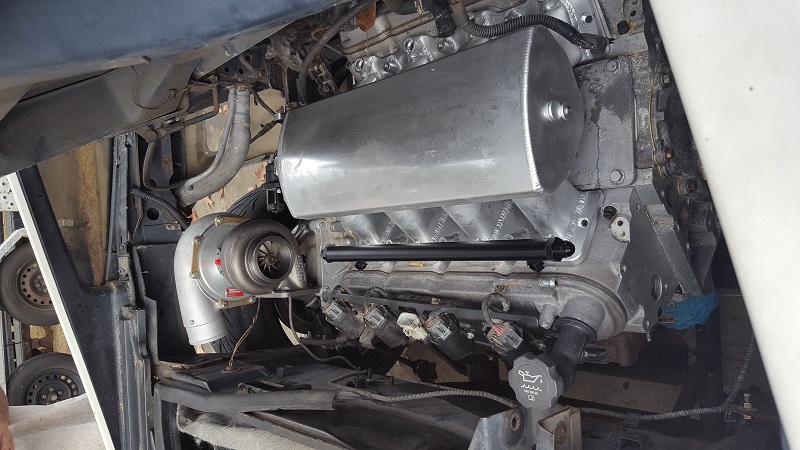
He originally made that cool plate to bolt to the side of the head, and was going to have an arm coming off from there as well as the supports coming up from under the turbo that you see above, but I think he's abandoned that part. We hung the turbo from his cherry picker so it would stay in the same relative position while he took measurements. The primary mount and drain tube is done.
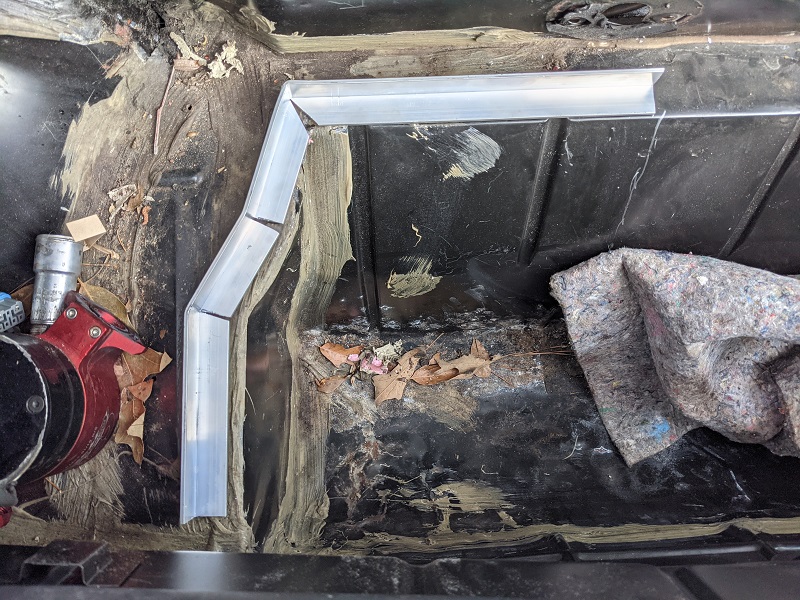
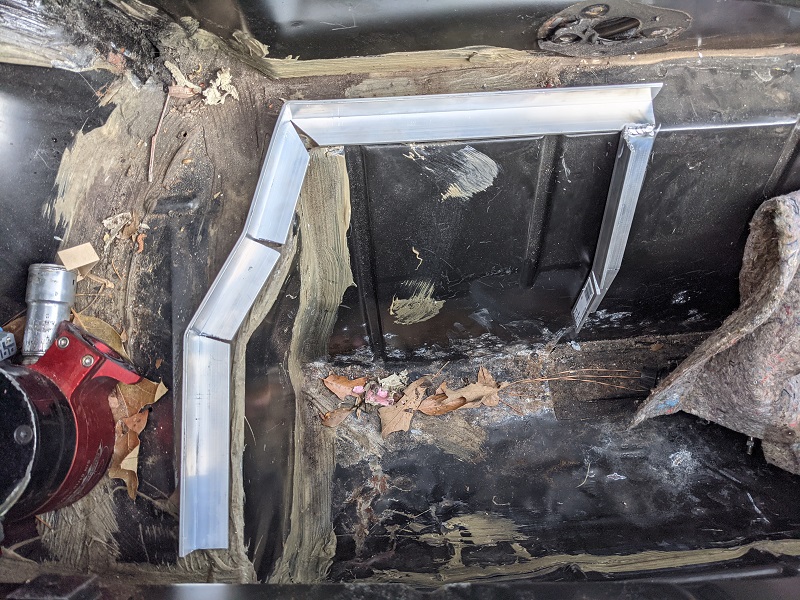
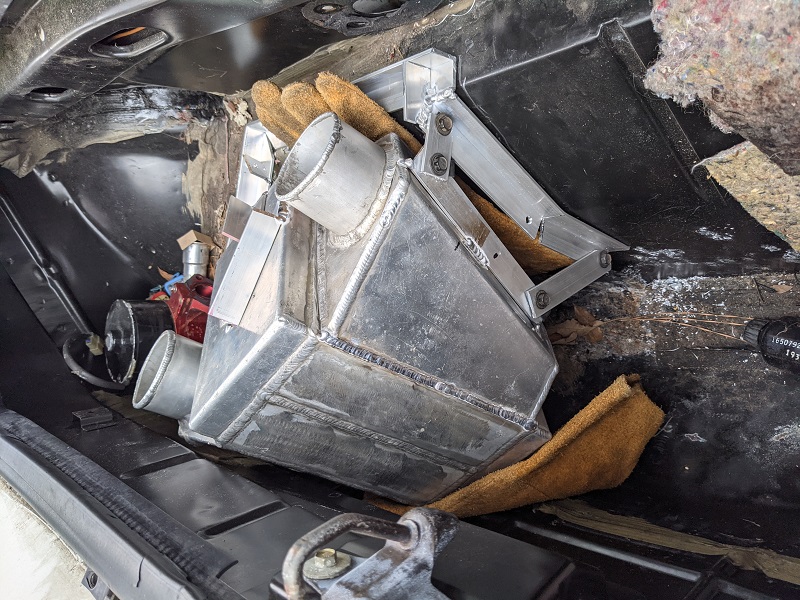
Then we have our test fit for the intercooler! It actually fits in the 'luggage' section of the trunk pretty nicely. He started mocking up brackets to hold it, the gloves are there to mimic (roughly) the space needed for the carpet and such. We want to try to install the carpet around it, and powdercoat the bracket as close in color to the carpet as possible, to give it a vague "floating" appearance. The pipes leading to/from the intercooler will go through yet-to-be-drilled holes in the trunk bulkhead. The water pump isn't going to go there, I don't think. That's just where it was sitting at the time.
Currently waiting on more stainless exhaust tube to show up. And yes, a lot of stuff looks "rough", this is because we know some changes are likely to happen, and it's easier to undo tack welds than cut full welds. It's worked out, as things went into place, we've noted where other things will need to move. The whole drivetrain needs to move back 0.25-.5" on the cradle. When everything is tacked in and fits, then powder coating and final assembly with correct hardware will take place!
[This message has been edited by Trinten (edited 06-04-2024).]
|
|
|
|
Larryinkc
|
JAN 23, 10:20 AM
|
|
|
New door glass may be available at Pilkington Classics, ask for Randy, 800-848-1351. The Glass Part #s are DD6717 & DD6718.
|
|
|
|
Trinten
|
JAN 23, 07:12 PM
|
|
Hey Larry!
Thank you so much for the pointer! That will be awesome if they have it! Since CowsPatoot had already done some work on my doors/windows, the glass already just has the screws in the plastic follower things, so I don't think it would be too tough to pop the outer door skin back off and get the old glass out. I will definitely reach out to Randy ASAP!
|
|
|
|
Trinten
|
JAN 26, 10:30 PM
|
|
So an idea that FieroGuru gave me was around getting an OAD (or "decoupler") alternator pulley. They're pretty neat. Here's some info on them, but in summary, they have something along the lines of a one-way clutch so when you lay into the gas and drop off, the belt isn't fighting the inertia of the alternator. I know I way oversimplified that. I'm tired and going to bed right after this post.
https://aviondemand.com/pro...-vs-overrunning-adp/
Anyhow! I found out you cannot just pop a decoupler pulley onto an alternator not designed for them, and vice versa (talked to a few alternator shops). I did ask one if they could bump up the amperage on mine to 200 (from the stock 135) as well as put on a decoupler pulley. They said none of their suppliers have the parts to kick up the amperage on that alternator, but they can probably swap out the parts to put on a decoupler.
It was only the first place I talked to, so probably going to check with some others. I haven't researched what's involved in bumping up the output of an alternator.
Alternatively, I'll pick up a C5 Vette alternator (they apparently all came with decouplers to start with), and see if Mike can fabricate a bracket for it, putting it in the stock location with the proper plane for the belt.
|
|
|
|
Trinten
|
JAN 30, 08:55 PM
|
|
Hey guys!
Lock motor upgrade! January 2021
It was a chilly morning (well, whole day) here in North Carolina today. Mid-30s this morning when I got to Mikes. His garage is not (well) heated, so no welding today. Instead, we tackled a few of the smaller things.
This one, I'm going to turn into a write-up!
That's right, I'm actually going to contribute something besides commentary! 
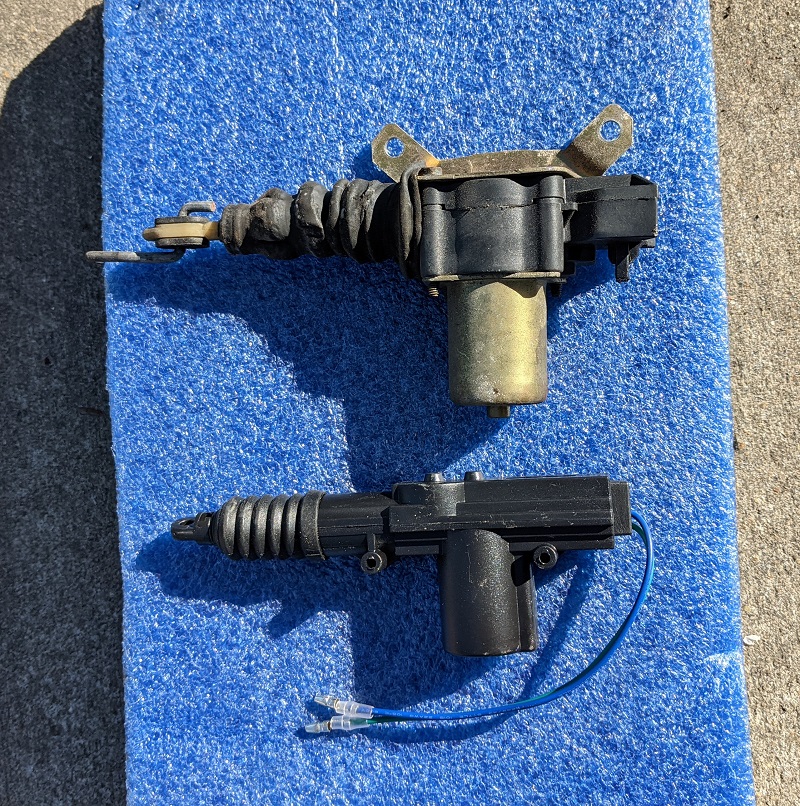
The first is, I feel we found an easy fix (your opinion may vary) for the anemic door lock actuators, especially as things get gunked up. One again, Mike cursed my good luck at random stuff working out! At least with this. The other thing we did today did not work out, more on that later.
Things you will need!
A set of these!
Zone Tech Car Universal High Power Door Lock Actuators
These are good for 13lbs of push/pull force. They come with a mounting kit and screws, you won't need it. The screws are also wood screws, so we opted to use other hardware that wouldn't "bite" into the plastic of the housing and eventually crack it with stress over time.
Various* sized stainless steel screws, nylon lock nuts, and washers. The size we used to mount the linear actuators is 6-32 metric, 1 5/8th in length (we bought 2 inch ones and cut them down). This size slid snugly through the aforementioned mounting points on the actuators.
Tools of your choice to remove rivets!
Now, I should have taken more pictures. So apologies if this isn't quite a super great write-up. I figure the majority of people here are more comfortable with doing stuff on their cars themselves than I am.
This also can be done WITHOUT removing the outer door skin. We removed it on the first door just so we can really look everything over, but Mike installed it on the second door without taking the outer door skin off. However, he now had measurements he could just copy from door 1 to door 2, so not sure how easy this will be without taking the outer skin off at least ONE of the doors.
Here's a comparison of the two:
1. Remove your inner door panel! Also the door handle/lock assembly fascia, so you just have a rod there.
2. Remove the rivets so you can take out the old actuator and that metal thing that mostly covers it. It should look like this when you're done:

3. Slide off the little linkage bar from the stock actuator. Use a screwdriver and carefully pry out the gasket at the end of the actuator (the one the bar you just took out was going through). KEEP THEM BOTH.
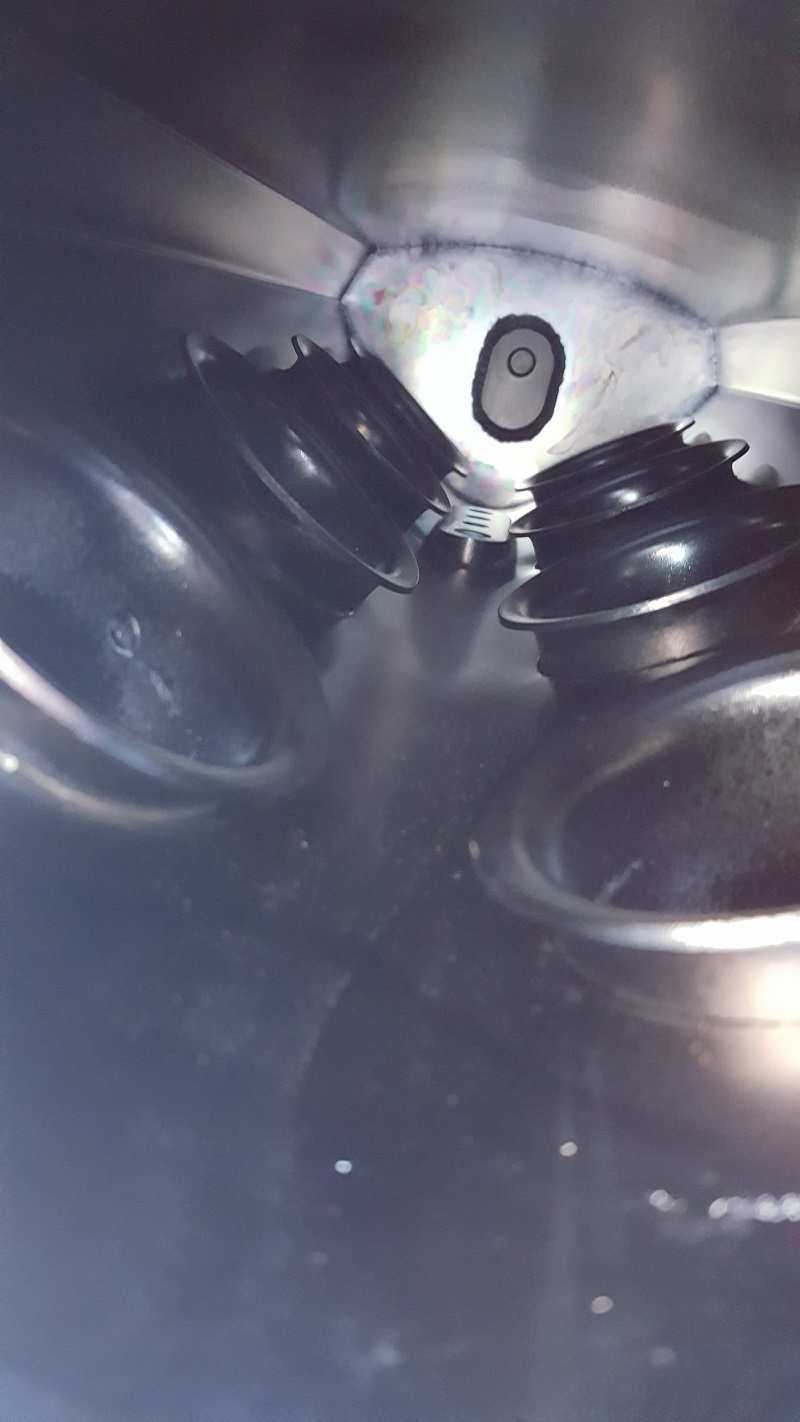
4. Slide said gasket onto the door handle rod, the one that runs to the fascia where you physically pull the inner handle to open the door. Pop the rod off the little slide clip thing. Keep sliding that gasket along to the "Z" bend by the power lock "swing arm" (I have no idea what it's called). Use screwdriver and carefully work the gasket into that oval space. It should look like this:
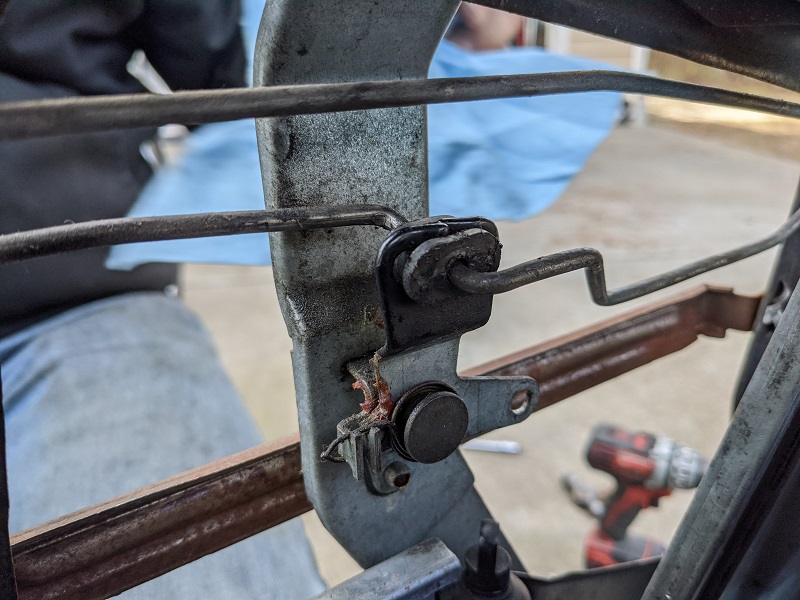
4A. You are now probably asking WHY?! WHY DO I NEED TO DO STEP 4?! Here's where it gets a little tricky. The "throw" on this linear actuator, when it's set nuetral/center, is about 1/8" too short in each direction to fully 'snap' the lock open and closed. As you all know though, that's because the "oval thing" around the "z bend" needs to travel a lot of unnecessary distance before it can "snap" the rod to the right position. Using this gasket eliminates that issue. And yes, we tested the door, and the key, many, many times. No issues.
5. This part requires some patience. You need to find the points to mount the actuator as close to 'center' as of it's throw as possible. There's a bunch of ways I'm sure this can be done. Mike didn't completely explain how he was doing it. Here's what I think was going on. Connect the rod to the actuator, then to the lever. With the oval thing center/neutral, move the actuator all the way down (extending it), so you can get a mark. Then move it fully the other way, again don't let the oval shift. Now you know the travel distance and can mark it.
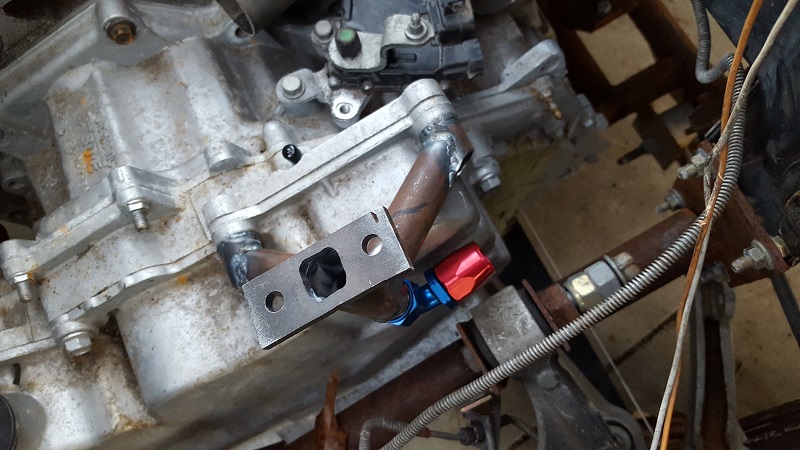
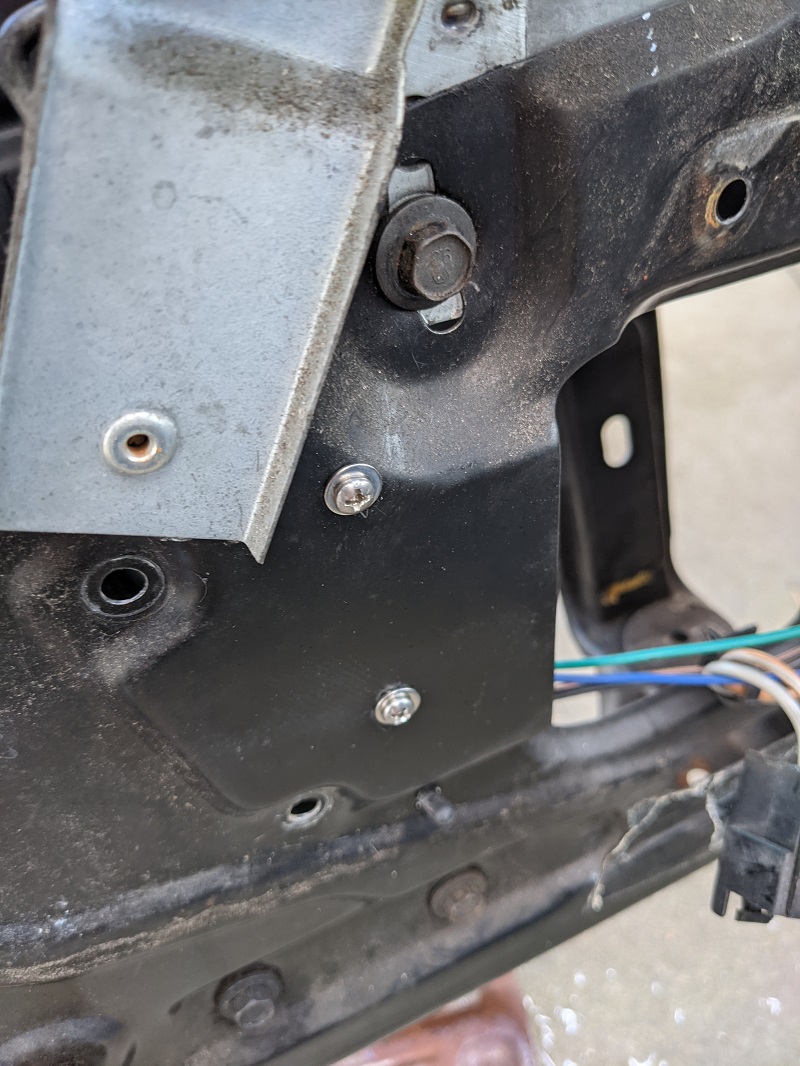
6. using measurements of spacing from the mounting holes, roughly mark your bottom hole. Mike made this hole a "slider" (so adjustable). The top one is not as 'oblong' as the picture makes it, not sure what's going on there. The point is, with some adjustment room in the bottom one, you can set the actuator and make adjustments for measurements on the top hole, checking things twice, etc, before you drill for it.
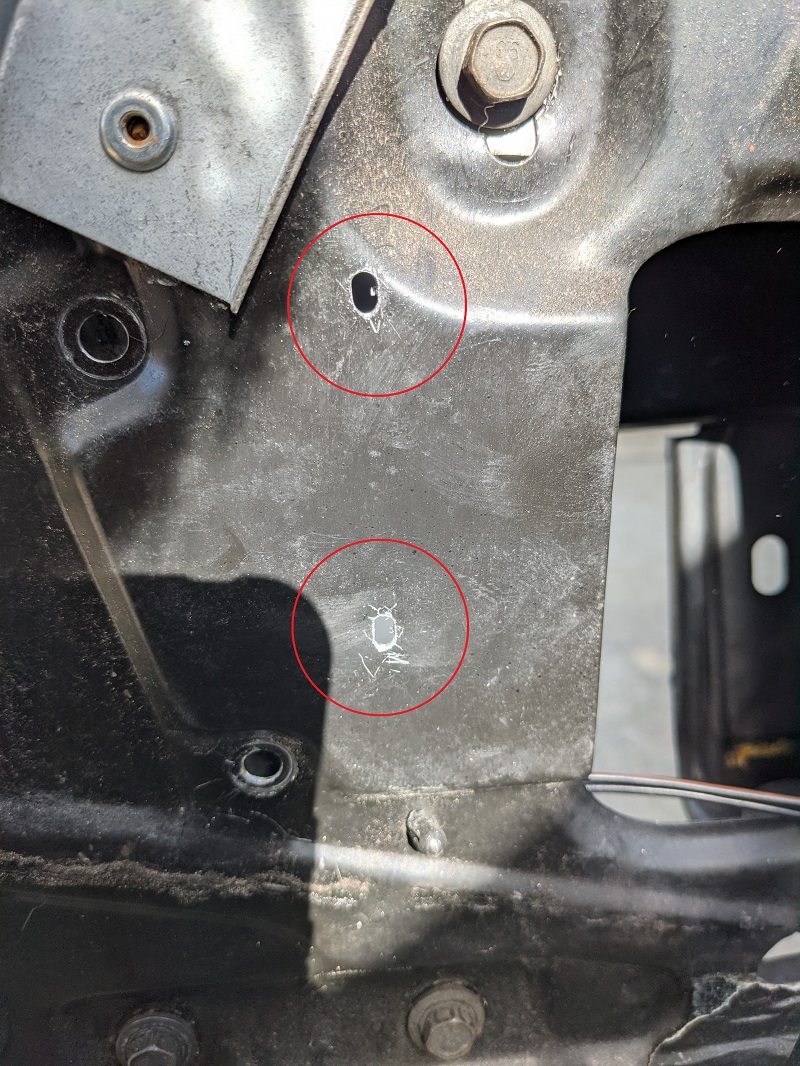
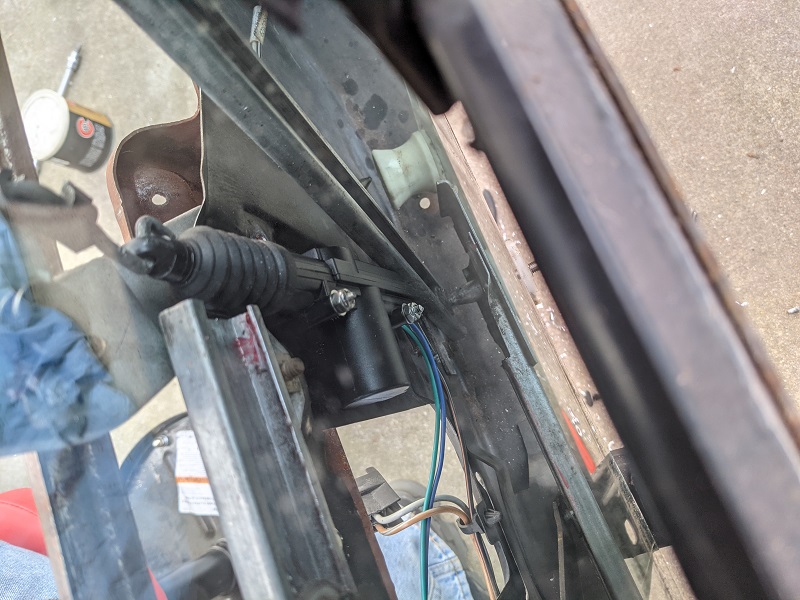
7. Mount said actuator! Use the aforementioned 6-32 screws, two washers (one on each side) and a nylon lock washer. Because I was paranoid, we rolled the glass down afterwards to make sure everything cleared. It does with room to spare. 3rd pic is through the rolled down glass.
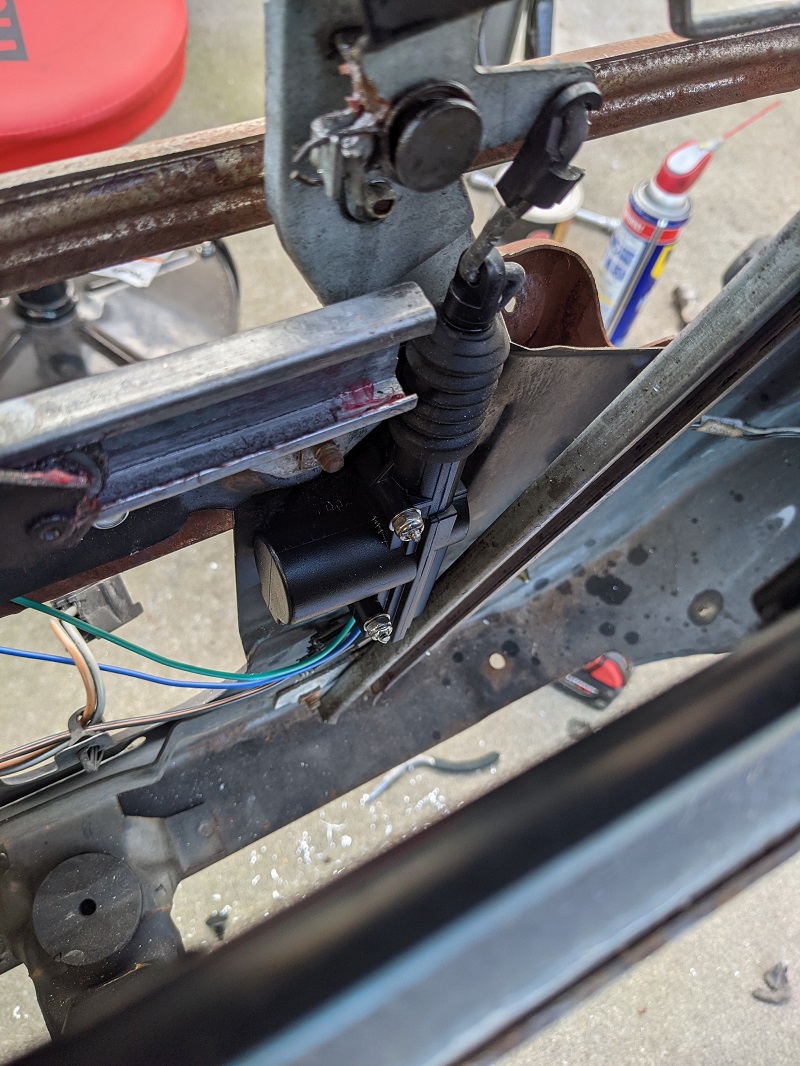
8. Weatherpack! Unfortunately the wiring ends that came on these is obviously not compatible with the OEM stuff. Get some weatherpack connectors of your choice, cut and assemble. TEST to make sure the pin orientation is right (and not "unlock button" = lock).
9. Get in the car and do more tests, do tests outside the car. Make sure you do not lock your keys in the car.
10. Put the door panel(s) back on! DONE!
I'll put this in it's own thread if folks want me to.
***************
Mike also messed around with the Ford Fusion side mirrors I bought. I really want the mirror-mounted turn signal indicators, since our cars are so low. And since we have an aftermarket blind-spot indicator system, we could wire that to the blind spot lights in the mirrors.
Sadly, the base of these mirrors has an obtrusion that could not be worked around, and the mounting angle was wrong. Mike said he could work out a solution, but it would take a bunch of time and reworking the mounting point on the door, and I'd still have a funny gap between the base of the mirror (in places) and the door. I decided to scrap the idea. There are other cars out there with mirrors that have those features and mount 'to the door' versus 'the window triangle'. I just wish I could find technical drawings of them. It would make my life so much easier!
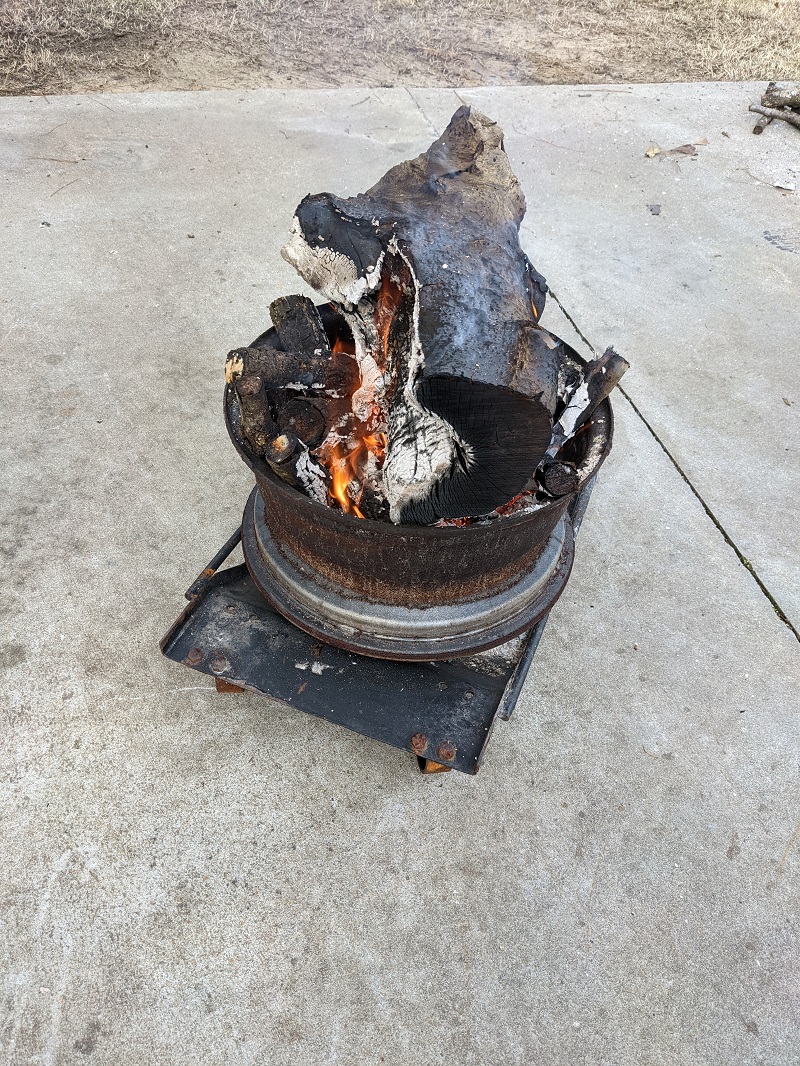
And because it was so damn cold today, and Mike has a lot of firewood on his property, he rigged up a portable firepit, using an old wheel and a car dolly!
 [This message has been edited by Trinten (edited 06-05-2024).]
|
|
|
|
Trinten
|
MAR 04, 12:30 PM
|
|
| quote | Originally posted by Larryinkc:
New door glass may be available at Pilkington Classics, ask for Randy, 800-848-1351. The Glass Part #s are DD6717 & DD6718. |
|
I called them, they DO have the glass, both with the green tint and grey tint. Unfortunately Randy is no longer in their "Classics division". I spoke with Rick, who said they have moved to wholesale only, and don't do drop shipping (so they would send out a truck to the resellers warehouse and deliver to them).
I asked him if I could get setup, as I still have a federal tax ID from some consulting work years ago, and he said something about licensing and needing a commercial address to ship to.
So I'm going to reach out to some of our vendors and hope they are willing to stock this glass!!
|
|
|
|
Trinten
|
MAR 08, 11:09 PM
|
|
Just a quick update.
Mike got a plasma cutter. Not the nifty table-sized parts maker like FieroGuru, though it could be used like that. This thing looks more like a welding unit. Timing was pretty good. Mike started to make the holes in the trunk wall for the plumbing to go to/from the intercooler. This is a "arc-coil", so can cut through 'contaminated metal' easier (might have some terms wrong there), and should make it far easier than with the air saw he was using.
I did bring out one of the rear Z06 wheels just to pop it on. The C5 Z06 and C5 standard wheel have a different offset. Again to Mike's credit, the geometry mimics the C5 so well that the fitment of the Z06 was just as guys on the Vette forums described (as far as spacing between control arms and the wheel at full extension of the suspension). This also means that if the 10.5" wide wheel doesn't give us enough wheel in the back to reliably get power to the ground, I will be fairly confident that any forged wider racing wheel that says fits on the C5 will pop on there without any issues.
There is 12" wide OEM vette wheel out there that has an offset that works with the suspension on the C5, but strangely... it's not forged!! I was kind of shocked at that. Plus it was an inch bigger in diameter, and if I'm going to get a wider wheel, I want to get it in a 17", which will clear the brakes and let me put on a taller DOT slick. But... that's only some precautionary thinking I've been researching. Gives me something (else) to do during the week. 
The rest of my FueLabs fuel system and filters is on the way, along with the FAST TCU 2.0. Yes, we wound up changing which ECU I was going to go with again. One of Mike's other clients was moving from his FAST 2.0 and XIM system to some system that is pretty much race-car only (don't recall the name right now), so I got his FAST system at a nice discount.
Plus, Mike can tune this in his sleep.
Because we're going with FAST, he also had me order a MAC Boost Solenoid BCS 4 port, it's the same thing he has on his grand national,and it'll work with my wastegate, so now he can use the FAST system to 'ramp up' my boost.
Oh! And I got another 4T80! This one is just a core. I figured I could learn more about transmissions and rebuild this one when I'm just standing around at Mike's. On that topic, I spoke with Brandon Furches today. I found an old thread of his where one of his earlier 4T80Es had blown up. He was really great about sharing information. The blow up was because he had made his own bracket on the transmission, so the detents weren't exactly lining up. It was enough that the electronics knew what to do, but the mechanical solenoid wasn't quite in the right position... so pressures were not going where they were supposed to go.
He also told me the only other thing he changed was flipping around the 2-3 accumulator piston and spring, otherwise it's a LAGGGY 2-3 shift. Which I imagine is not good for the clutches. Mike knew about this trick, and said it's something he normally does. Plus this is accessible from the side cover of the transmission, so easy to do on the one that's already in the car. All other parts internally are stock. Not even milling the cup/piston for more clutch packs!
Given the great luck and low failure rate Brandon has had, I don't expect mine to blow up, but it's better to have a spare and not need it...
Speaking spares I might not need... I picked up another EHPS pump, same model as the one I have. Just in case.
On the door glass front, I emailed the information to the Fiero Store, they did reply, it sounds like they might at least consider it. Fingers crossed!
I also got a hold of a local company that comes out to you to replace windshield or rear glass, and asked them to do the Fiero. We first talked in the late fall, and they could source it. Hopefully that hasn't changed. Now that the weather is getting a little nicer, I'd like them to get that taken care of.
At this point, minus some coolers, the billet flexplate, improved gas tank, and axles, I think I have bought all other major components! Getting closer to turning that key!
[This message has been edited by Trinten (edited 03-24-2023).]
|
|
|
|
Trinten
|
MAR 23, 05:24 PM
|
|
There has been some movement, I've admittedly just been a little lazy on getting pictures off my phone, resizing, uploading, etc.
Mike finished coming up with a really cool new bracket setup for the XFI components, so they are all being packaged in the same place as the originally planned 0411pcm.
Some bad news, I did hear back from the Fiero Store again today. They did follow through to talk with the glass company to see if they could work something out. Unfortunately they could not. Matt (FieroStore) had pointed out some difficulty in shipping the glass, and the last time they did such thing, it was an unfavorable outcome.
So going to see what other avenues there are. There is a small glass and body shop here in town that does some oddball stuff (they have an old MG B out there). They might be up for it. I'll have to email them next and ask.
Mike is interested in possibly trailing the Fiero up to Carlisle in June. Still not close to done, but at least it'll be there for any other Fiero folks to check out!
|
|
|
|
La fiera
|
MAR 26, 08:19 PM
|
|
| quote | Originally posted by Trinten:
A couple candy shot ofa piston and rod


|
|
Wow Vince, how long are your rods!!??
|
|
|
|