 
     |
| The Rottin Resurrection (Page 35/70) |

|
Marine1981
|
OCT 11, 04:42 PM
|
|
|
|
|
fierogtlt1
|
OCT 11, 04:50 PM
|
|
| quote | Originally posted by JimmyS:
 |
|
Does the original sail panel windows fit or do you have to go aftermarket "Fiero Fiberglass"?
|
|
|
|
LornesGT
|
OCT 11, 05:49 PM
|
|
|
Can I come see the car when you get it back?
|
|
|
|
johnyrottin
|
OCT 11, 06:43 PM
|
|
|
|
|
jetsnvettes2000
|
OCT 11, 08:38 PM
|
|
| quote | Originally posted by johnyrottin:
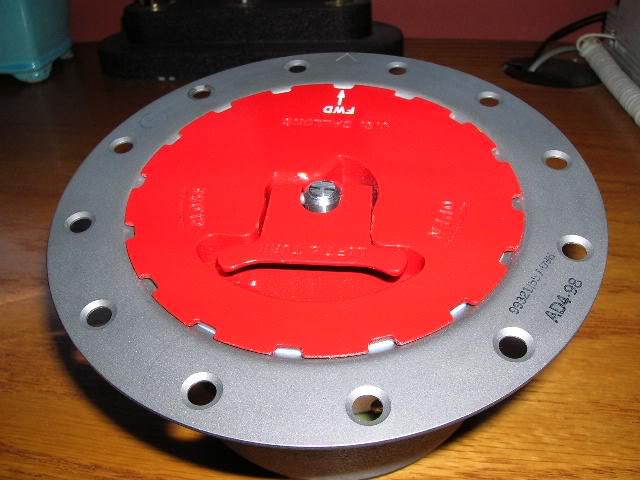
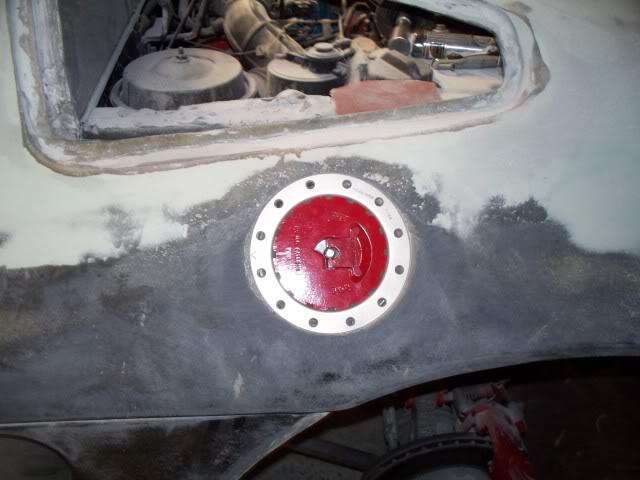
Of course! Here are a couple pics of fuel doors I saw:
[

|
|
John the round one was what I was thinking
|
|
|
|
JohnWPB
|
OCT 12, 12:39 AM
|
|
Here is a fuel door from an F-16 Fighter. I do not remember who's car it was, sorry....
.
.
Here it is being molded into a Fiero:
 [This message has been edited by JohnWPB (edited 10-12-2013).]
|
|
|
|
jetsnvettes2000
|
OCT 12, 02:11 AM
|
|
|
|
|
infinitewill
|
OCT 12, 08:04 AM
|
|
| quote | Originally posted by JohnWPB:
Here is a fuel door from an F-16 Fighter. I do not remember who's car it was, sorry....
|
|
I believe that was Whodeanie's old choptop.
Rob, would the standard cable release for the fuel door still work with the Chevy replacement you noted directly above?
Dr. W.
------------------
Is your Fastback GT's trunk seal shot? My Gen IV replacement GT trunk seals with miter double bonded corners are now in production. $95 + $15 flat rate shipping to the US (contact me for international shipping rates) or buy two and pay only a single shipping rate! More info can be found here GT Trunk Seal Project [This message has been edited by infinitewill (edited 10-12-2013).]
|
|
|
|
johnyrottin
|
OCT 12, 01:05 PM
|
|
|
I like the design. Do we want chrome or more of a brushed aluminum finish? I can't remember what finish the rims are...
|
|
|
|
jetsnvettes2000
|
OCT 12, 11:44 PM
|
|
Well, Today I got working on stuff again between the rain drops and decided to work on the door skin parts for the tops of the hips.
After thinking about how I was going to do this for a week or so I decided to change things up a bit from how we discussed how bonding them would go. Originally we had decided that the lower door skin would sit over the new wider top within the door molding channel. But, After mocking things up I found a problem with doing that and that is the effective lip at the front of the door for the molding channel is too shallow and would look awful with the door trim on.
Solution: put the lower skin on the bottom. Second issue is the new wide body hips for the doors do not have the two mounts for those pain in the ass holder screw thingys so I added them too. After playing with it all day I have it were I like it and things look good. Tomorrow I will finish up getting ready the other door skin and then bond the two halves together and fiberglass the back side for added strength. Here are some pics of whats going on.
Now at this stage it is just rough and that's ok everything gets filled in with bonding agents and fiberglass and then sanded.
Ok here is the back mount screw tab I added

The back side needs to be prepped and sanded also the tabs need to be cut out to fit the door. some fiddling will be needed later on as well.

here is the front tab mount added to new hip.

I had to cut out htis whole area for the door handle to do it the way I wanted it to fit, plus doing it this way makes life simpler when mounting the door handle now I have stock holes to work with.

Here is the hip and you can see how cutting out the door handle area makes sense.

Here you can see the door trim in place and now how it sits down into the hip channel I am glad I decided o do it this way so much easier.

Here on the lower skin you can see I had to do a few modifications to the channel area as well as thinning it a bit so I can achieve the depth I wanted with the trim so it matches the rest of the trim.

Tomorrow I will finish fitting it up a final time and then bonding time!!
|
|
|


