
 
     |
| Blooze Own: An F355 Six Speed N* Build Thread (Page 23/126) |

|
88GTS
|
OCT 06, 02:51 PM
|
|
Charlie,
I think your proposal will work. What you want is maximum belt contact on the traction pulley surfaces (crank & alternator) and minimum traction on the idler and tensioner pulleys and you have almost 180 degrees on the alternator.
A slightly modification to your layout is what Russ did on his (see 1/2 way down) - http://www.fiero.nl/forum/F.../HTML/000025-8.html
André[This message has been edited by 88GTS (edited 10-06-2010).]
|
|
|
|
Bloozberry
|
OCT 10, 07:21 PM
|
|
Well, I’m pretty sure I’m going to route the serpentine belt in accordance with Charlie's (cptsnoopy’s) suggestion, but I’m only going to commit to it once I get all the parts polished and can test it out. So that means only one thing… more painting and polishing!
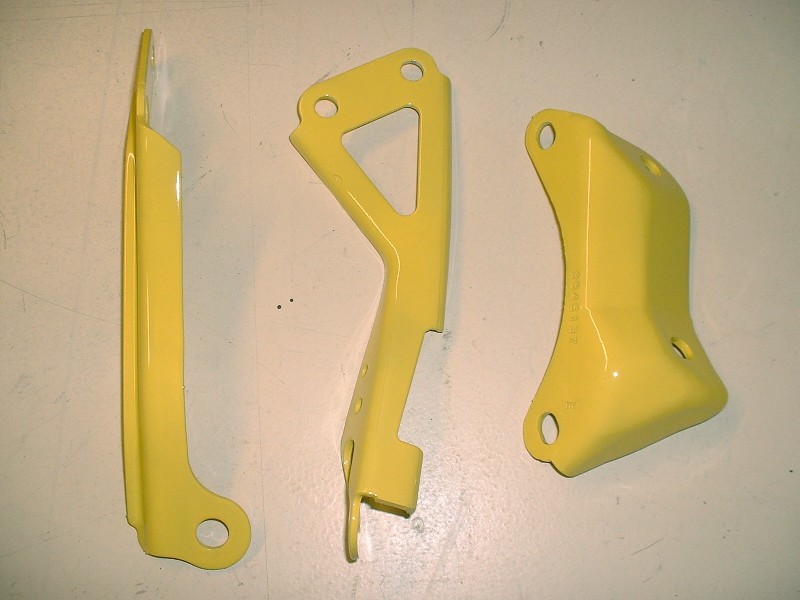
On the painting side of things, here are a few engine brackets that needed refinishing… some I know I need, others, not so sure but I was on a roll with the sandblaster. I just hope I don’t change my mind on the color of the car over the next year or so (although some of you probably do!)
Next up was the serpentine belt tensioner since I knew I’d be using it regardless of the belt routing. So off came the pulley, where it got treated to a varsol bath, and the rest of the tensioner got thrown into the sandblaster. Once good and clean, the tensioner got the rough-medium-fine flapper wheel treatment, some extra fine hand sanding, and finally a good buffing on the wheel. While that was going on, the pulley got undercoated white, then sprayed with some color. Here’s the finished product… better than new!

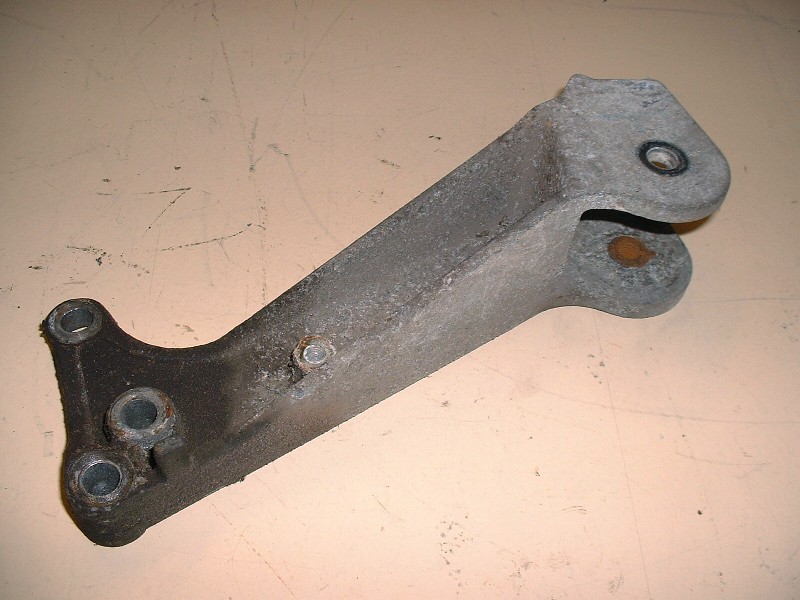
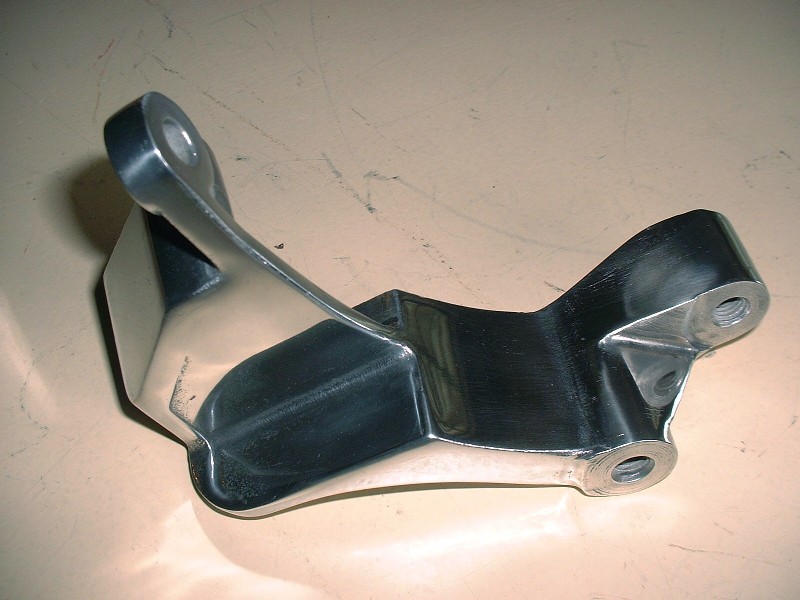
Again, I’m unsure whether I’ll be able to make use of the stock dogbone mounts on the engine itself, but my plan is to use them if at all possible. I’d rather have the dog bone(s) on the forward firewall where they’re less obvious than on the trunk wall like most people have them. I won’t know if I’ll have the space or not for another week or so when I test fit the engine but in the meantime I figured I’d schnazz up the RH one to help motivate me to use it no matter what the obstacles. Here’s the “before” picture:
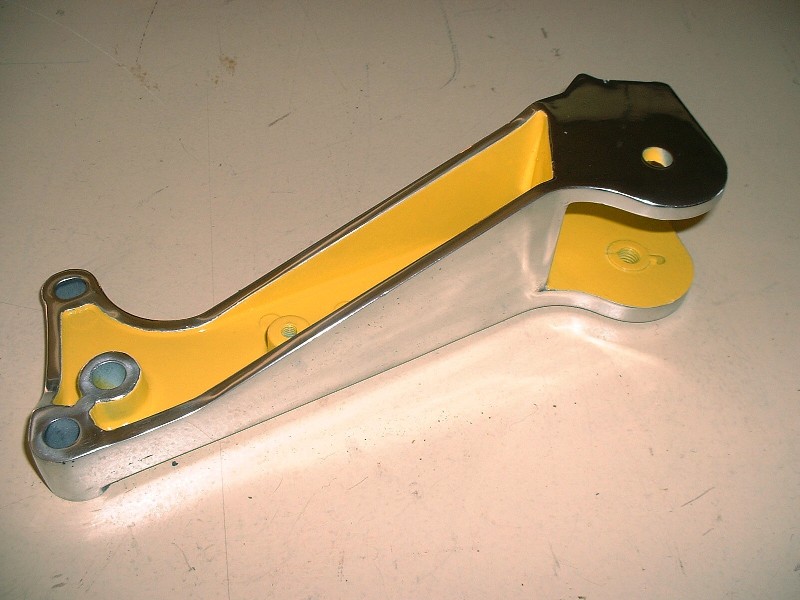
And here’s that “after” picture. Since my engine bay is deeper by 3” due to the chassis stretch, I have good reason to believe that I’ll be able to adopt my front dogbone idea into my car. On this bracket, it simply wasn’t possible for me to get the pebble finish of the sand casting off the recessed areas. I couldn’t figure out how to polish in those areas either so I left them rough, and painted them instead. I think it adds a finishing touch to an otherwise difficult piece to polish.
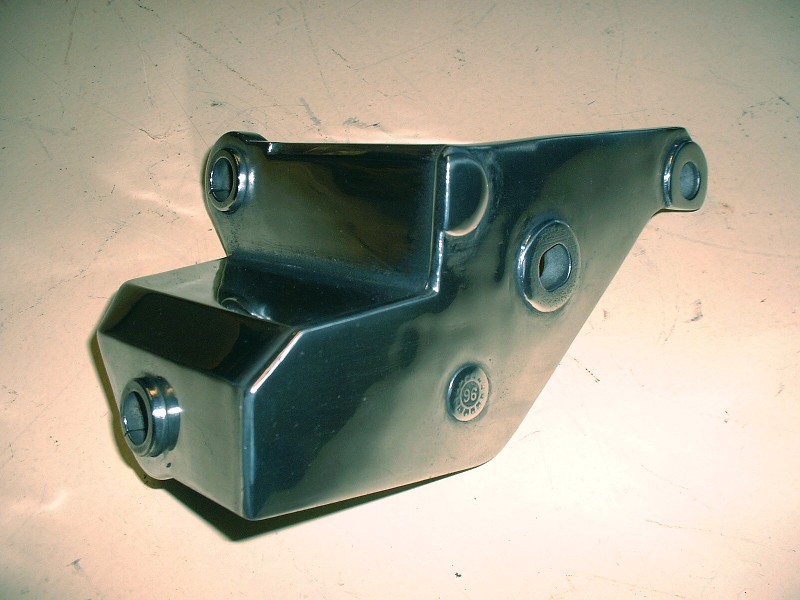
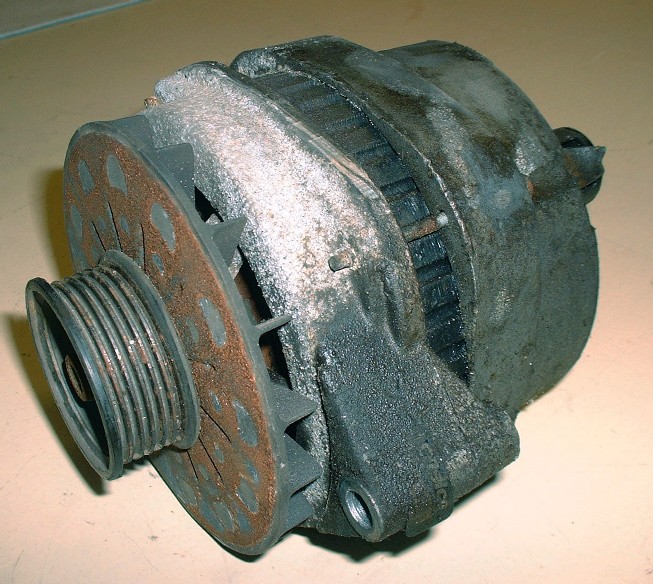
My heart kind of sank as I reached into the tickle trunk to see what my next task would be and pulled out two more aluminum brackets. Arghhhh… will the polishing ever end? It turns out that the Northstar alternator is held in place with not one, but two brackets. Here’s what one of them looked like in a typical crusty finish.

A bunch of elbow grease, a lot of patience, some buffing compound up my nose, a couple hours, and here’s what the two brackets came out looking like... this is the rear one:
And this is the front one:
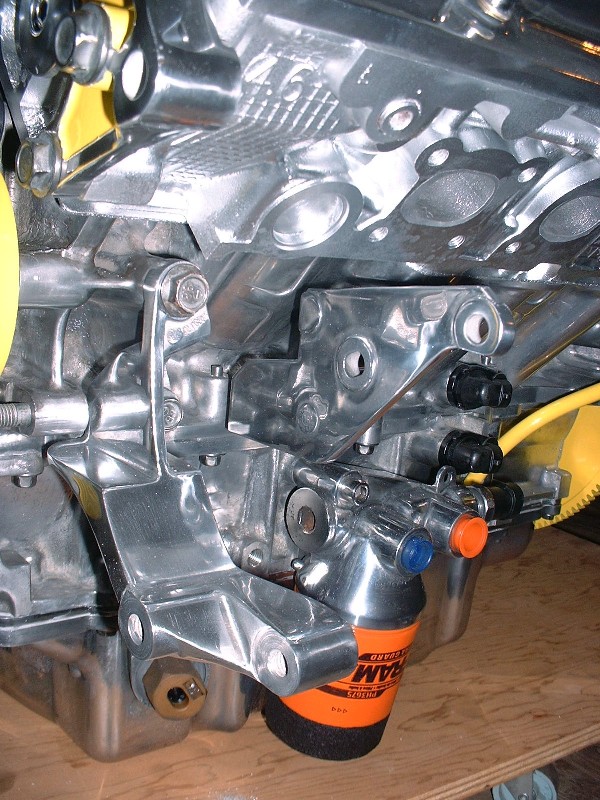
With those done, I could finally install them…
…and move onto the last piece needed to complete the front serpentine belt system… the 140A alternator. That should be easy right? Except good ol’ Murphy (from the Law society) has taken up residence at my place for some time now and made his presence felt again. I figured I would just be able to take the alternator apart, polish the case, and stick it back together again. That was wishful thinking...
|
|
|
|
cptsnoopy
|
OCT 10, 09:10 PM
|
|
WOW! (again...  ) )
Those before and after pics are amazing...! I can see why it took a couple of days to post again, you had your work cut out for you.
Charlie

|
|
|
|
doublec4
|
OCT 11, 02:57 AM
|
|
polishing OCD! 
|
|
|
|
Tony Kania
|
OCT 11, 10:42 AM
|
|
|
Exactly DoubleC4! The guys in my area think that I have issues? Blooz is full blown looney. But I love it! [This message has been edited by Tony Kania (edited 10-11-2010).]
|
|
|
|
Bloozberry
|
OCT 11, 12:00 PM
|
|
|
LOL. You guys crack me up. I think you guys are suffering from "polish-envy". [This message has been edited by Bloozberry (edited 10-11-2010).]
|
|
|
|
cptsnoopy
|
OCT 11, 04:23 PM
|
|
| quote | Originally posted by Bloozberry:
LOL. You guys crack me up. I think you guys are suffering from "polish-envy".
|
|
yep, I won't be able to open my trunk now...
Charlie
|
|
|
|
Gokart Mozart
|
OCT 12, 11:40 AM
|
|
|
. [This message has been edited by Gokart Mozart (edited 10-15-2010).]
|
|
|
|
Fierobsessed
|
OCT 13, 03:24 AM
|
|
| quote | Originally posted by Bloozberry:
Anyone recognize the symbol? It sure looks like the Briggs and Stratton logo to me. |
|
Most GM harmonic balancers are Briggs and Stratton. You can also find the same logo on the 3800's balance shaft.
From the early days of GM till... I think '67 GM's Keys were Briggs and Stratton as well. If you see the Hexagonal head on a classic cars keys, thats a B&S ignition key.
Now, on with the show. The engine is looking absolutely beautiful. I am very impressed with your workmanship. Doin' us proud.
|
|
|
|
Bloozberry
|
OCT 14, 04:30 PM
|
|
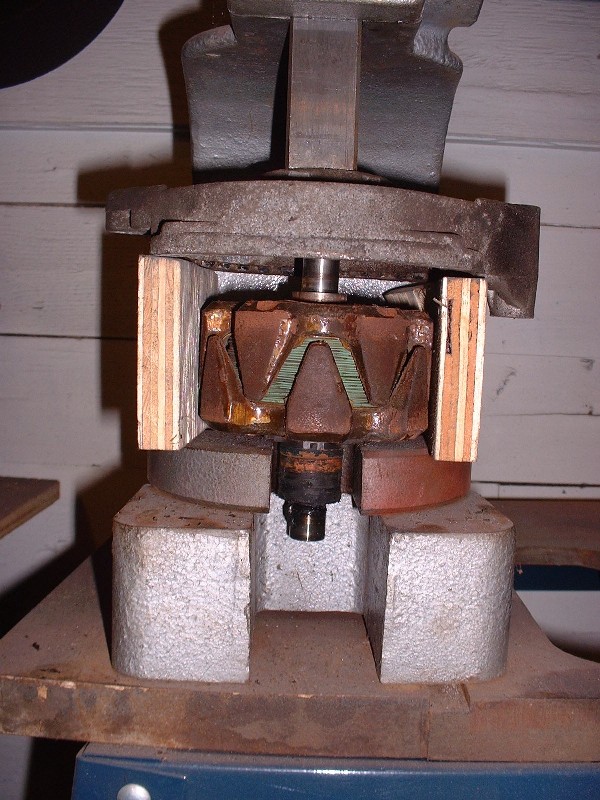
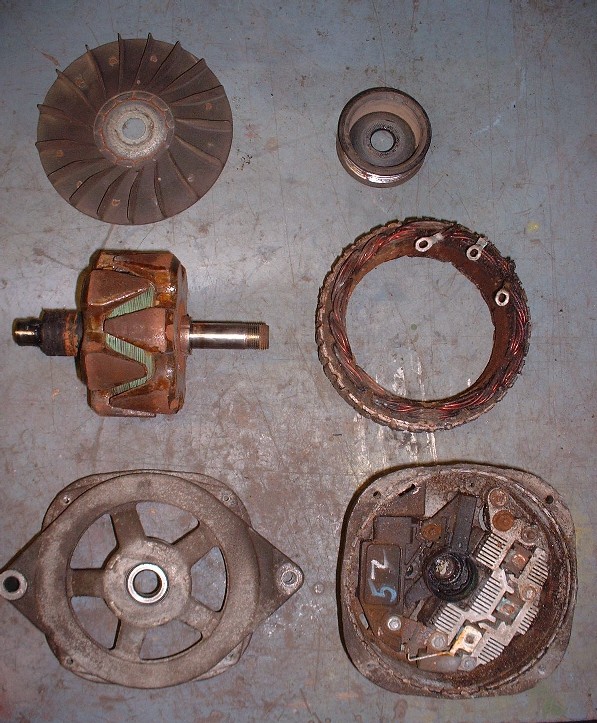
I wanted to polish the alternator case so that meant taking it apart. (I know for many of you rebuilding an alternator may be uninteresting, but if this helps one person in the future, then it was worth it. The rest of you can scroll on by!) There are only four screws that hold the case halves together, and once they’re out, the alternator literally comes apart in four major sections excluding the fan and pulley. To get the armature/rotor to let go of the bearing in the front case halve, I had to press it off with my arbor press.
Here are the major parts clockwise from the top left: fan, pulley, field windings, rear case half, front case half, and rotor/armature:
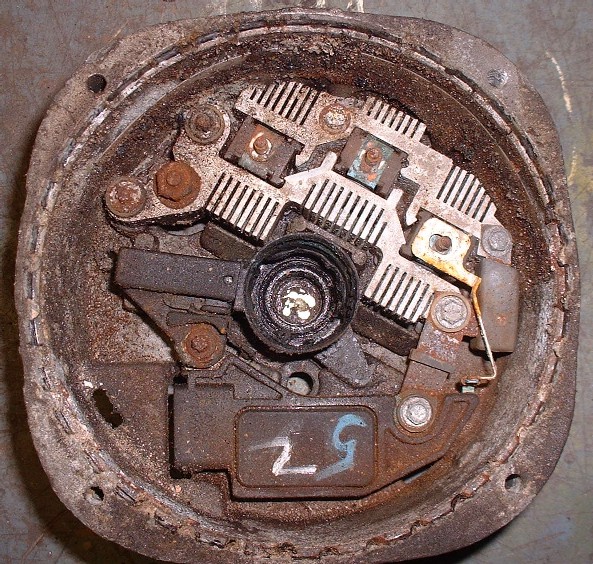
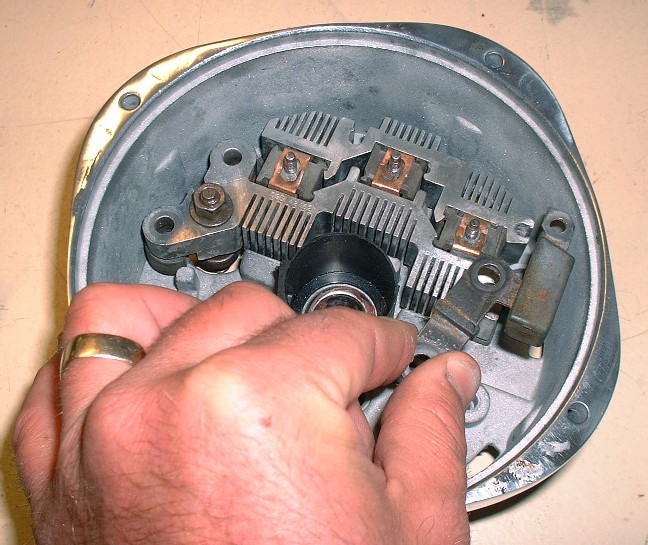
Because I don’t have a rebuild manual for this specific alternator, I took a close up picture of the layout of the electronics in the rear case half to make putting it back together a little easier. Good thing I did too because I needed to refer to it several times.
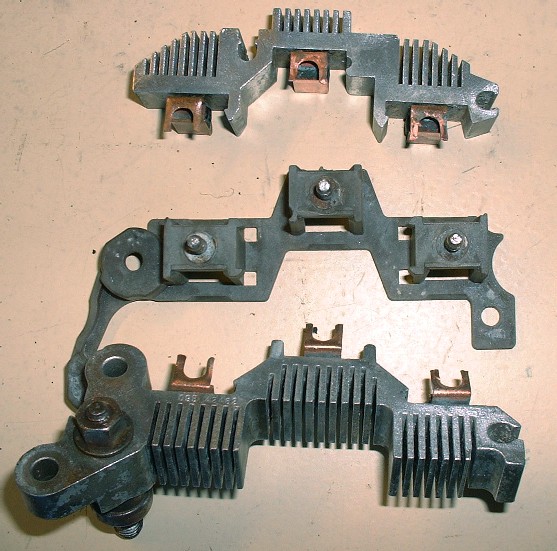
I removed all the components so I could clean, sandblast, sand and polish the rear case without worrying about ruining something. Once the case was polished, I cleaned the individual parts of the voltage regulator, rectifier, and heat sinks and reinstalled them. To be honest, I haven’t a clue which part is which so I won’t even pretend. Here’s the part with the heat sinks. There are two sets and they snap onto a plastic insulator mount of sorts:
Once they’re back together, they can be set back into the rear case.
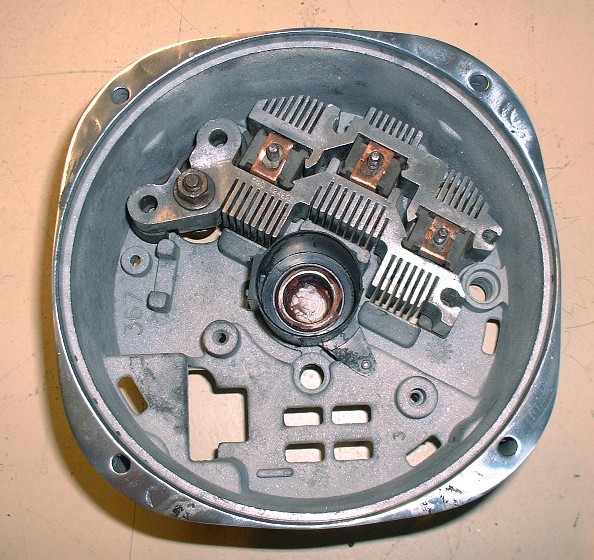
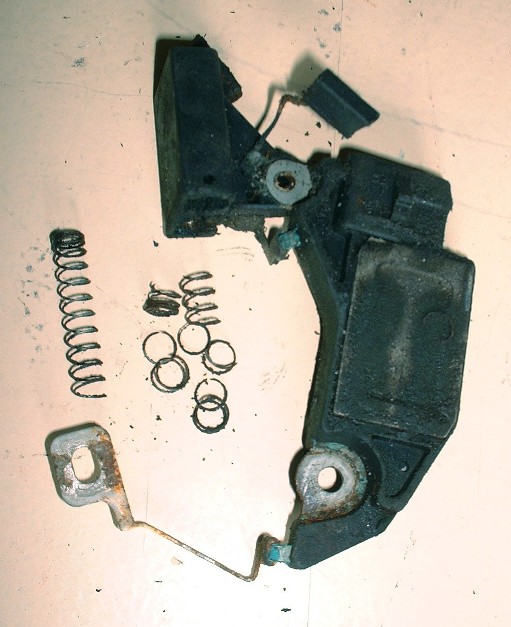
Next in the order of reassembly comes this doo-hickey… again, for now it just gets set into place:
And here’s where my problem started. As I was taking apart the alternator and inspecting the various pieces, I noticed that the armature where the brushes ride was worn asymmetrically. When I removed the brush assembly, this is what I found:
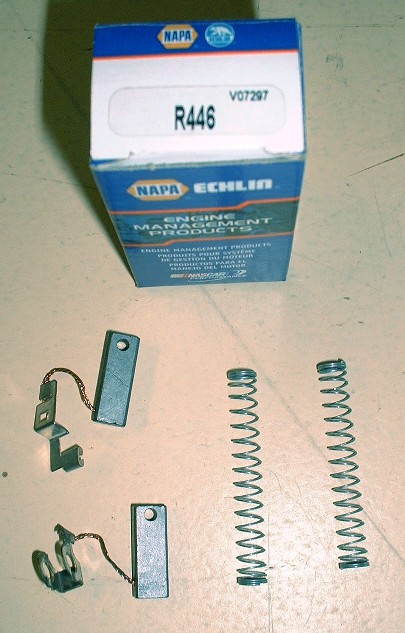
That’s when I almost cried because I wasn’t aware that you could buy the brushes separately, and a rebuilt alternator is $230! After a few calls to the dealership (I don’t know why I bother) and some local parts stores, I learned that for $5.77 I could have new brushes the next day! Yay! I got these from NAPA:
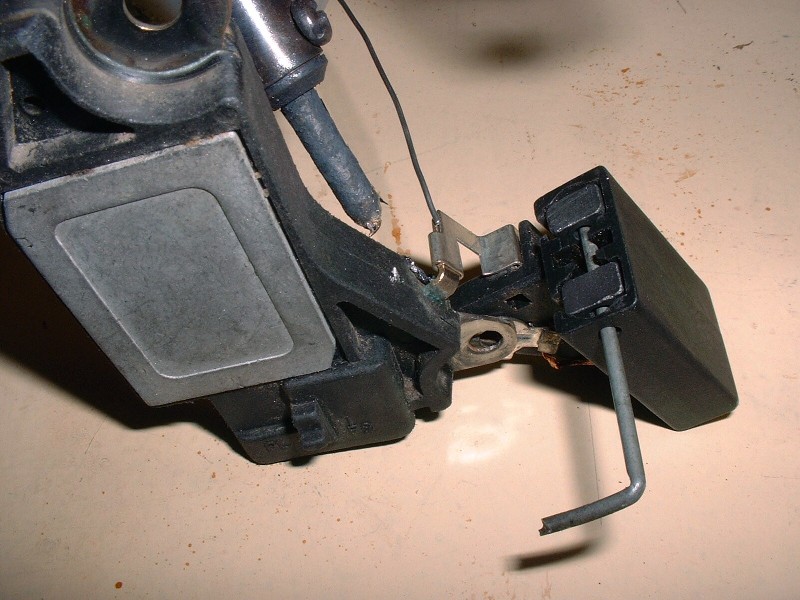
Installing the new brushes was pretty straight-forward, but for anyone who hasn’t done this sort of thing before, you basically insert the brushes into a holder, then slip a small diameter pin (I used part of a bicycle spoke) through a couple holes in the holder and the brushes to keep them from springing out. Here’s one side that’s done and the other just waiting to be pinned in place:
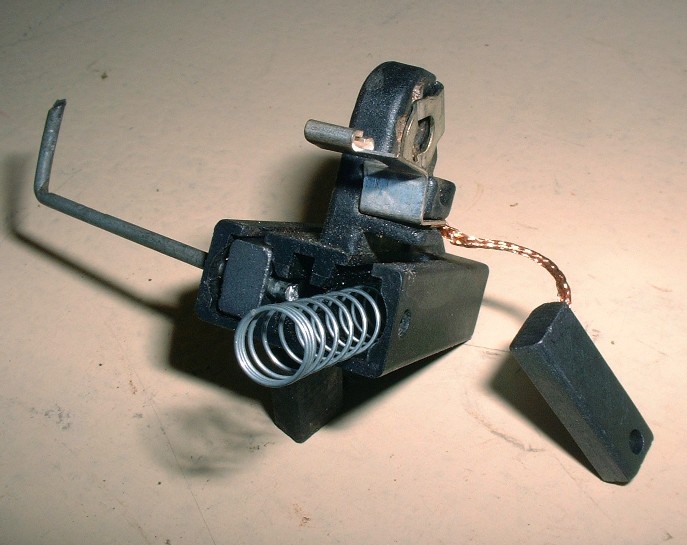
One of the brushes was originally soldered onto a tang that protrudes out of the solid state box, so I did the same with the new brush too. Here you can also see how the pin keeps both brushes tucked inside the holder until you’re ready to release them.
And with that, I’m off for the weekend flying to Ottawa to catch Roger Waters perform Pink Floyd’s The Wall. Yes… this should be awesome.
|
|
|
|