|
| Blooze Own: An F355 Six Speed N* Build Thread (Page 21/126) |

|
Gokart Mozart
|
SEP 25, 08:18 AM
|
|

I've always liked the look of polished metal over chrome.
| quote | Originally posted by Bloozberry:
It’s a messy job requiring safety glasses and a mask because the aluminum dust will end up in every one of your bodily orifices if they’re not covered… (yet another reason not to use a grinding wheel in the buff!) |
|
I won't ask if you've tried that... 
|
|
|
|
topcat
|
SEP 25, 09:08 AM
|
|
|
This by far ranks in the top 5 of my favorite threads of all time. The level of detail you put into the project is inspiring and makes me want to tear my engine apart to detail it. Have you given any thought on how to keep the polished aluminim clean and shiney? I had aluminum wheels that were a bear to keep polished and took a lot of work.
|
|
|
|
Fiero Thomas
|
SEP 25, 10:40 AM
|
|
|
|
|
Bloozberry
|
SEP 25, 10:09 PM
|
|
Thanks Gokart for stealing page 6... so far, I only own page 1 and I'm the one doing all the work!
Thanks for the compliments there too Topcat and Thomas. For Topcat, there's no magic formula to keeping the aluminum nice and shiny that I've found so far. The corrosion forms in the pits, so sanding and polishing takes care of a good deal of the problem. The quality of the aluminum also makes a big difference though. I've polished the intake plenum on my TPI small block only once and over 14 years it's never oxidized. On the other hand, I polished my 2.8L plenum on my '86 and had a tough time keeping it looking good. Last year before storing it for the winter, I repolished it and tried spraying it down with WD40 to get a protective film on it. It worked great but it left me with a different mess to clean up in the spring, though it's far easier to wipe off the WD40 than to try to clean off oxidation. I may try using car polish (carnuba wax) in an attempt to keep the pieces from tarnishing on the N*. The polish should fill in any voids preventing moisture from getting into the tiny surface imperfections. I'm keeping my fingers crossed that the engine block is made of the same alloy as my TPI plenum, but so far it looks like it's not.
Fiero Thomas: I think Caddy service manuals would be a great addition to your site. AJxtcman has already scanned in a lot of the engine inspection procedure in this thread here: www.fiero.nl/forum/Archives...090219-2-082157.html and much of the rebuild manual in this thread here: www.fiero.nl/forum/Archives...100421-2-080614.html Both are archived now so they're not as easily found as when they were active threads. They may save you some time if you're serious about adding Northstar info on your site.
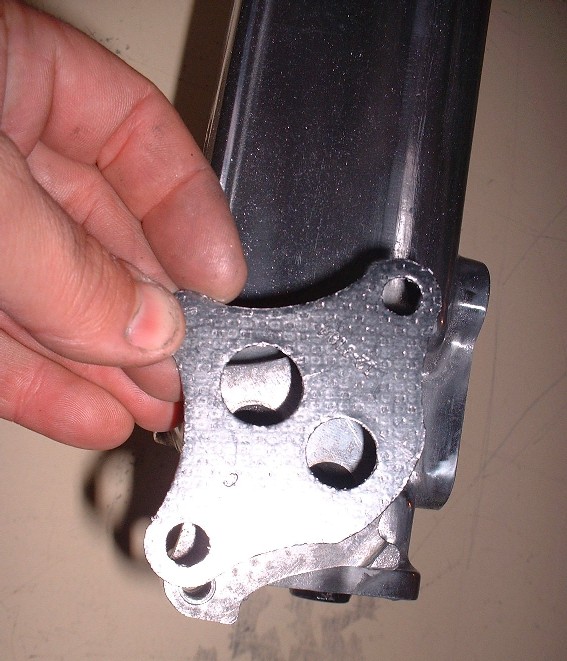
Anyhow, to finish up the water log I still needed to install the EGR valve since I plan (at least at the moment) to run OBD2. I figure emissions testing isn't going to get any slacker in the future so I may as well keep the pollution provisions intact. The first thing is to install a new gasket.
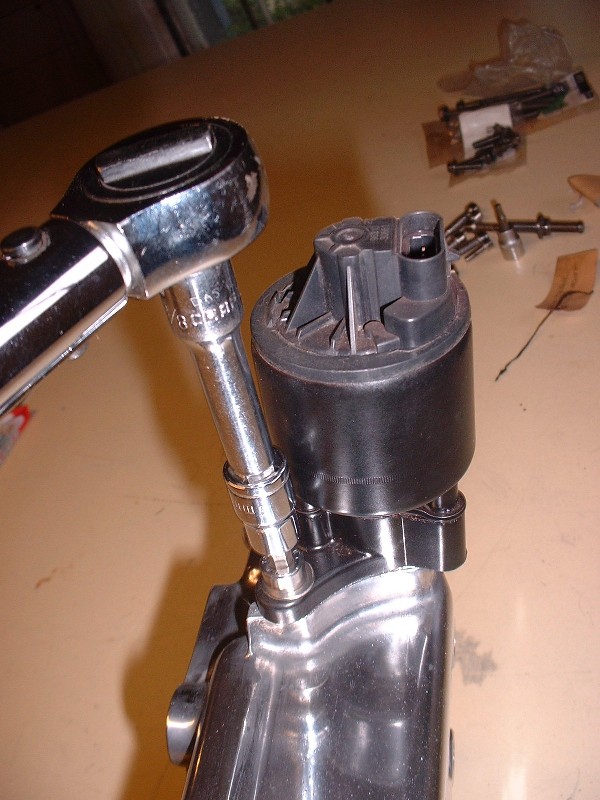
Next, the EGR valve itself. It's strictly an electrically controlled valve as opposed to the electro-pneumatic valve on the Fiero. It's a straight forward two bolter, torqued to 89 lb-in. No vacuum lines to contend with, just a single four pin connector. The water log has an integral channel drilled through completely separate from the water circuit to route the exhaust gases from one side of the engine to the other. Flex lines similar to the Fiero V6's EGR tube connect the exhaust system and the throttle body to the water log.
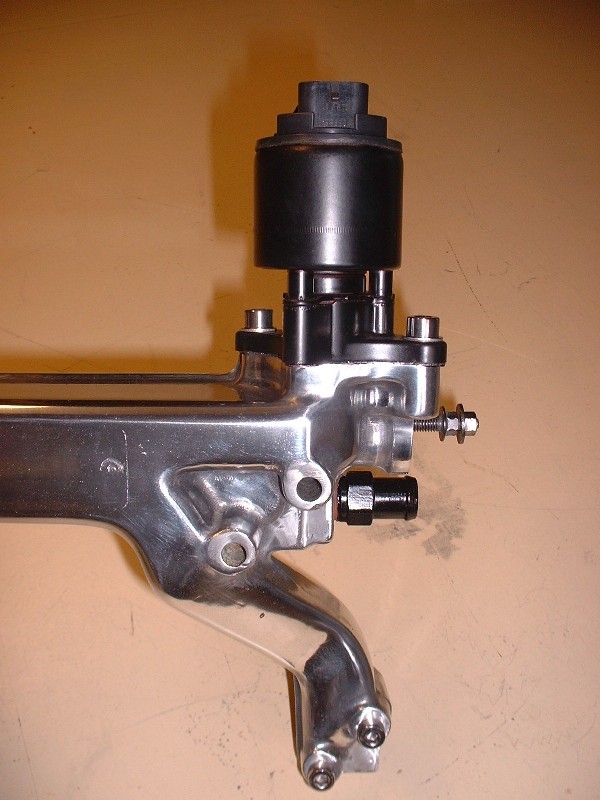
Here's what the EGR valve installed on the water log looks like:
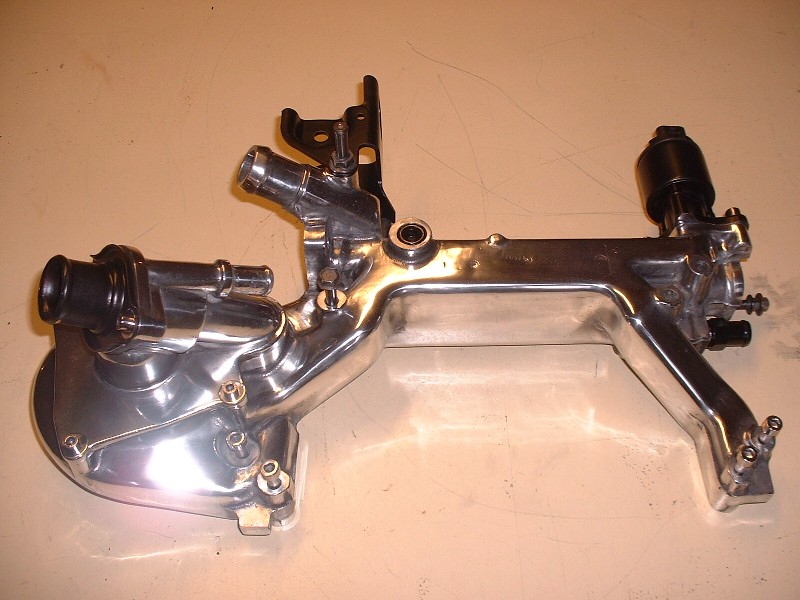
And finally, the completed polished water log with everything on it... well, it's missing the water pump belt tensioner, but I'm still working on polishing that little piece.
|
|
|
|
Icelander
|
SEP 26, 01:55 AM
|
|
No prob! I'll give you the chance to steal my thread when I start working on mine. 
|
|
|
|
Fiero38SC
|
SEP 27, 11:59 AM
|
|
| quote | Originally posted by topcat:
Have you given any thought on how to keep the polished aluminim clean and shiney? I had aluminum wheels that were a bear to keep polished and took a lot of work. |
|
Someone told me WD-40. Spray it and wipe off the excess.
And that person is OCD also, so it must be true. 
|
|
|
|
Bloozberry
|
SEP 30, 09:48 PM
|
|
A few odds and sods for this post: I bead blasted the harmonic damper to get it nice and clean for paint when I noticed something interesting:

Anyone recognize the symbol? It sure looks like the Briggs and Stratton logo to me. I wonder why that would be stamped into the damper. Hmmmm… are there any 32 valve lawn mowers out there that I’m not aware of? Anyways, once it was nice and clean I sprayed it with some Tremclad red oxide primer, then a coat of gloss white, and finished with a coat of John Deere yellow. I use the white undercoat to really make the yellow pop out. I plan on painting all of the pulleys and idlers yellow to match the current plan for the exterior of the car. And no… before anyone asks, it’s not going to be John Deere yellow, but it’s not far from it. The John Deere paint is just a great inexpensive way to get a nice bright yellow on the accessories. I find that the Tremclad yellow is very orangy.
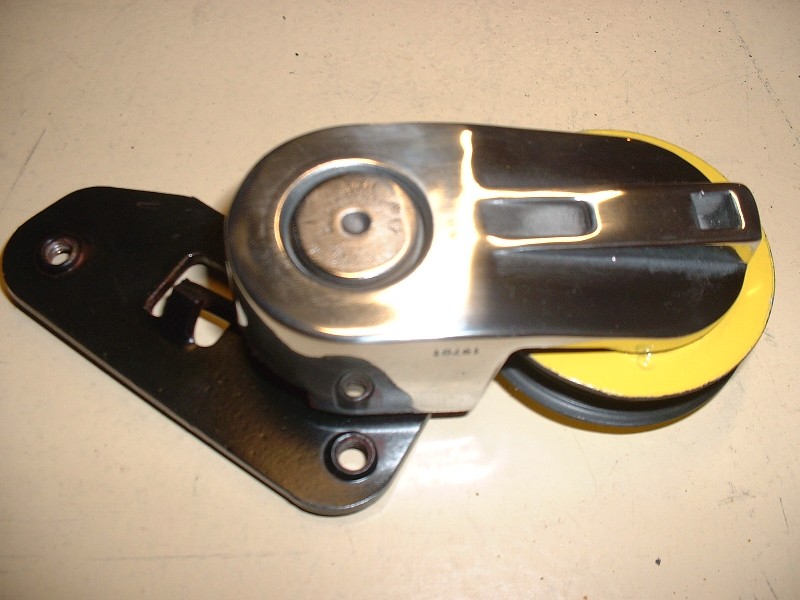
While working on the water pump pulleys I found yet another reason to go over your junkyard engine with a fine tooth comb before just plopping it into your car and hoping for the best. This is the water pump belt tensioner:
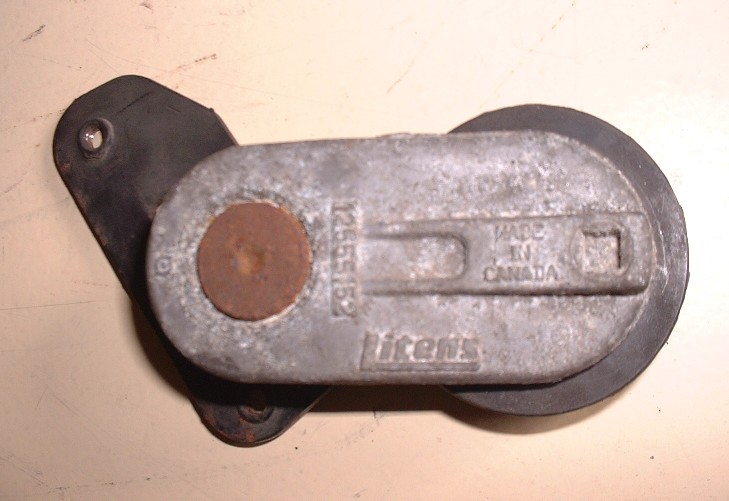
Apart from a little corrosion, it doesn’t look all that bad, except that the tensioning pivot point was seized and the pulley was coming apart. I’m pretty sure in no time it would have ate up the little water pump belt. And since it’s not in an easy place to inspect once it’s installed in the Fiero, it could easily lead to an overheated engine. It’s up against the front wall and is hidden with a small sheet metal belt guard to protect probing fingers:
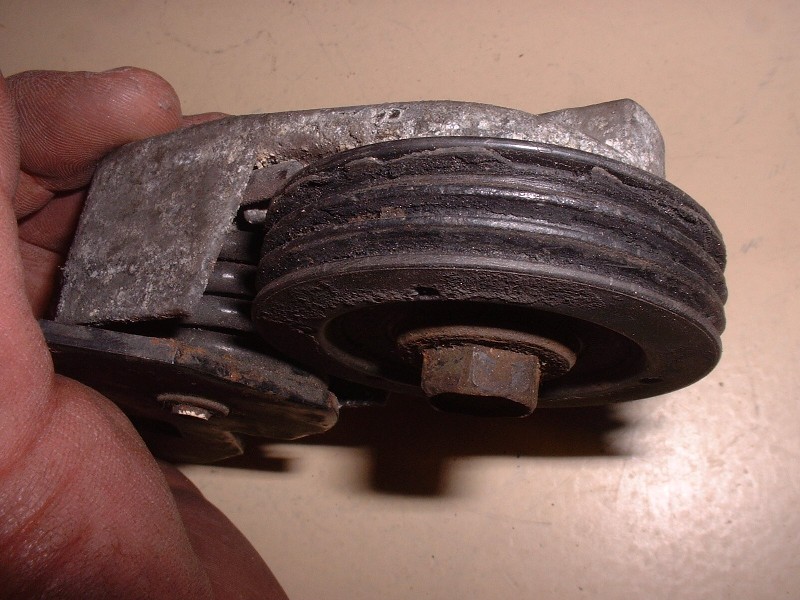
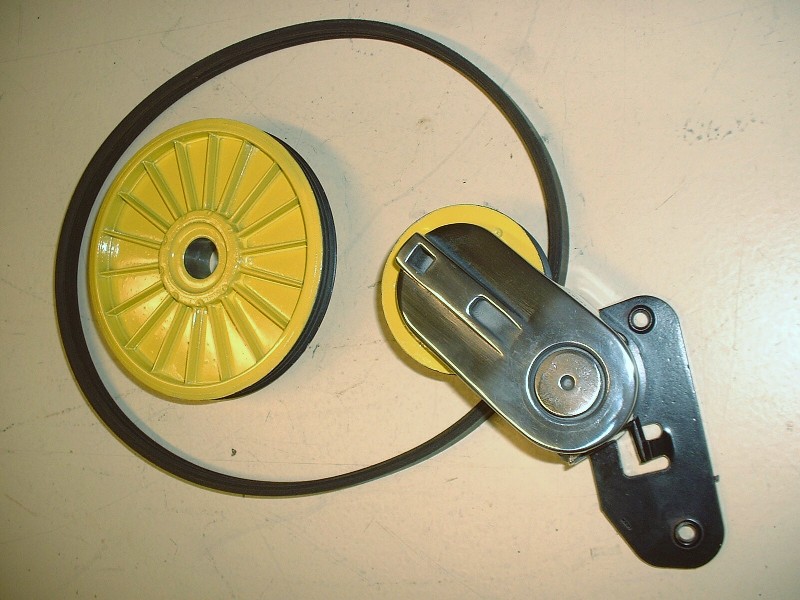
The pulley core and outer ridges are made of steel with a plastic coating. The two middle ridges on the pulley are entirely plastic. No biggie right? Just remove the pulley and order up a new one. Except that GM doesn’t sell the pulley and the tensioner separately… of course not! And the cost… are you holding onto your socks? A whopping $197. Unbelievable. Good thing I have my second engine to rob parts like this off of. If you need one and can afford it, it’s part number 12555153.
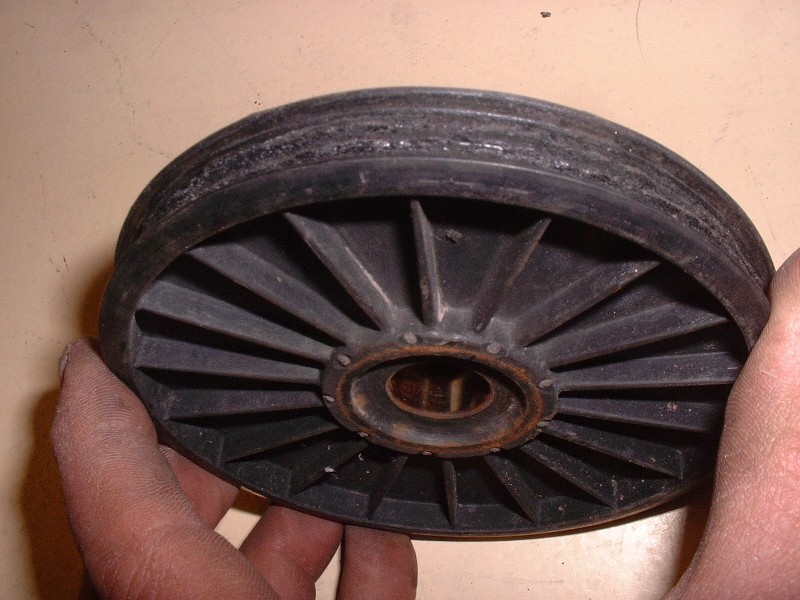
Surely I would have better luck with the cam-mounted pulley right. Strike two! The middle ridges looked like a mouse had munched on them for breakfast, lunch, supper, and a bedtime snack. Aside from that explanation, I have a hard time understanding how this would happen. Again, the dealership wanted five times more money than the part could possibly be worth… $69.25. It’s GM part number 03535846. Spare engine, to the rescue!
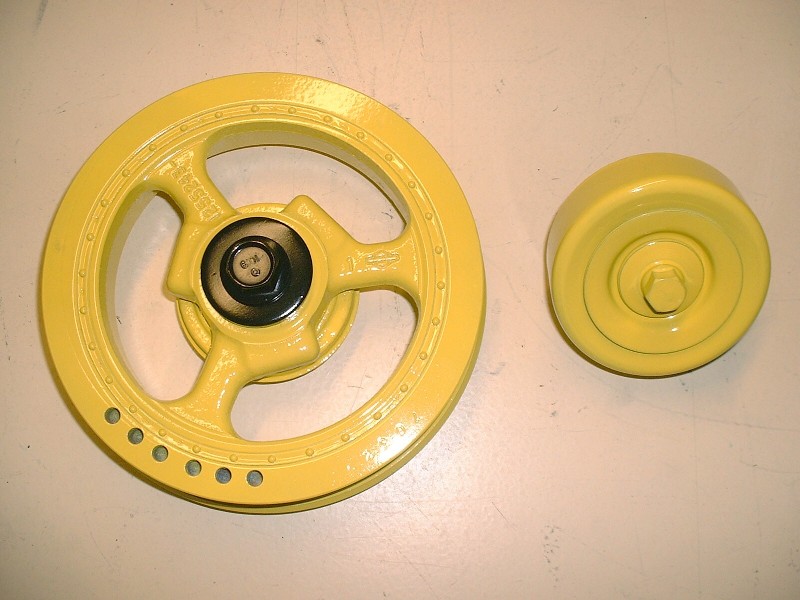
After spending a couple hours bead-blasting, sanding, polishing and painting various parts of the water pump tensioner, here’s how it turned out… like a little jewel.
And here’s the cam pulley along with a shot of the mini serpentine belt (GM p/n 12588412 for a mere $19.97)
|
|

|
Erik
|
OCT 01, 01:26 AM
|
|
|
going to have to wear sunglasses to look at your engine
|
|
|
|