
 
     |
| Ecotec, Fastback, T-Top Build. (Page 18/22) |

|
Lunatic
|
NOV 19, 12:02 PM
|
|
The original fuel lines were old, deteriorated and needed to be replaced. I decided it best to install nylon fuel lines. I had several feet here and, of course, I had to drop the fuel tank. Ugh.
As you can see, this is the original pressure, return and vent lines on the 88 tank.
I will have to modify two of these. I'll leave the vent line as is.

I removed these 90° fittings from the donor car but you can get these at your local auto parts place.

The item on the left is the pressure line that I cut off the tank.
I used a 3/8" compression fitting and adapted the newer line as seen.

The same procedure was used for the return line with the exception of using a 5/16" compression fitting. Voila!

Here, the fuel tank was reinstalled and the new nylon lines were clicked into place.
I'll secure and tidy the wiring up later in the day.

I decided to use a fuel filter from a 95 Cadillac DeVille with the Northstar engine.
I liked the fact that it had both ends made for the quick release nylon lines.

A view showing the filter and line routing. I still need to make brackets to hold the filter and lines.

Here's a view showing the fuel lines where they connect to the engine.
Note: These will get wrapped in a heat-resistant sleeve.
In time, I might relocate them to the other side of the engine for a cleaner look. Until then, this is where they'll stay.

I kept the original stainless lines because of the schrader valve. This way, I can verify and relieve the fuel pressure.

After putting in $20 worth of fuel and cycling the ignition a few times, I can verify the following:
-The Walbro fuel pump works as intended.
-The Frankenstein fuel sending unit works perfectly.
-All fuel line connections are leak-free.
As an added benefit, there are no 90° fittings in this fuel system.
|
|
|
|
Lunatic
|
NOV 20, 07:07 PM
|
|
On a cold Sunday afternoon in November, I installed four new spark plugs, plugged in the PCM and turned the ignition key.
Gimme fuel, gimme fire, gimme that which I desire.....
[This message has been edited by Lunatic (edited 11-20-2016).]
|
|
|
|
Quad Raider
|
NOV 20, 07:20 PM
|
|
|
Congratulations! Been a while since a checked your thread so it's cool to see such a significant update.
|
|
|
|
Lunatic
|
NOV 21, 07:13 AM
|
|
I'd like to add this little bit of electrical information to those interested/following this L61 Ecotec swap.
My engine runs on the stock PCM. At this point, the only thing done to the PCM was VATS (Vehicle Anti Theft System), was turned off using HP Tuners software.
While I chose to install the BCM (Body Control Module), I only wired up the interior light control circuit.
The stock 12576162 PCM can run the Ecotec with the following subsystems removed.
-EBCM (Electronic Brake Control Module)
-Instrument panel cluster
-Inflatable restraint sensing and diagnostic module
-Passlock lock cylinder
-Radio
-Vehicle communication interface module[This message has been edited by Lunatic (edited 11-24-2016).]
|
|
|
|
wftb
|
NOV 21, 06:43 PM
|
|
|
Awesome to hear it run . Congrats on making it in the Construction Zone .Long overdue ....
|
|
|
|
Lunatic
|
JAN 14, 02:07 PM
|
|
Despite having a throttle body that is both tilted, and in close proximity to the rear window, making a cold air intake was surprisingly simple.
I started with a silicone transition elbow from Vibrant Performance. It had one end 2.75" and the other at 3".

After a little trimming, here is what it looked like.

I had to remove the throttle cable holder and clearance it as well. You can see the original versus the one that I cut down.

Then, I placed some loom to prevent chafing.

After seeing the elbow cleared, I took the old antenna and formed it into a pattern for the intake tube.

I went into my local Midas Muffler, bought a piece of 3" aluminized tubing and used their bender.
This is the result.

As you can see, it fits well. I then drilled two holes. One for the IAT sensor and one for the fuel pressure regulator vacuum.

From this photo, you can see the air filter.
Note: I still need to add a bracket to hold the intake tube secure.

Then came time for some exhaust work.
Using these components, I made a system. It's tucked up tight and fits well.
Note: Yes it's loud! Too loud. I'll have to find some short mufflers.

A view of the shortest catalytic converter that I had.

Underside view.

Cadillac STS tailpipes loosely installed.


Since the car starts and runs, it's now time to make it shift.
Here is the issue that I encountered. The shift arm is placed at an angle that doesn't work for me.

While others have had custom cables made, I chose a different approach.
I wanted to utilize the stock 84 four speed shift and select cables.
I removed the shift assembly from the F23.

Then disassembled.

Here is the stock shifter base.

I made a CAD drawing and cut it on the laser.

Then I cut off the boss for the select shift lever.

Here are the new and old pieces side-by-side.

As you can see, I also made two new arms for the select lever operation.

Since my base plate is steel, I can weld my arms wherever I feel they're best suited.

After some measuring, I filled the original dowel hole with weld. I then drilled a new hole in order to clock my shift arm into a better suited position.

Of course the F23 ball stud didn't fit the 84 shift cable.

Here, I removed the original F23 ball stud.

Drilled and tapped the hole to the pitch of the original 84 Muncie ball stud.

Here is the 84 ball stud on the F23 shift arm.
Note: I removed some material from the weight for clearance.

While I did install a nut, it might have to be replaced with a thinner one for clearance.
New base is installed.
I've used the original base, since it has the seal, and installed my new steel plate over top.
There is a small gap that will be filled prior to final installation.

Followed by the re-clocked shift arm.
While it looks close, the weight on the left actually clears the frame rail.

The shift cable has to fit in this vicinity.

That lead me into a way to mount the cables. Back to the drawing board, I ended up with this revised design.

I now have room to secure the shift and select cables.

Simple angle iron turned into the cable holders. Easy peasy.

It looks like this will work for the shift cable.

In the last photo, the cable was mounted too high.
This is far better as it allows full range of motion from the shifter.
Note: I'll mill slots into the angle iron thus allowing adjustability and fine tuning of both shift and select cables.


The stock 84 cables clear everything just fine.


|
|

|
motoracer838
|
JAN 21, 09:57 AM
|
|
Nice work on your swap, that's a great find on the clutch hose, I assume it's a metric bubble flare on the other end...
Joe
|
|
|
|
Lunatic
|
JAN 22, 07:59 AM
|
|
| quote | Originally posted by motoracer838:
Nice work on your swap, that's a great find on the clutch hose, I assume it's a metric bubble flare on the other end...
Joe |
|
Hey Joe.
Thanks for the compliment.
I work on Porsche, BMW, Audi and VW vehicles on a daily basis. Finding the clutch hose wasn't too difficult. If I recall, it came off a fourth generation E46 chassis. I then seen an X3 that had a similar looking hose.
To answer your question, yes, it required a bubble flare on the hard line.
Here's a few cars that I work on in any given day.


|
|
|
|
Stubby79
|
JAN 24, 11:15 AM
|
|
|
Those are some nice cars. You must really like Fieros!
|
|
|
|
Lunatic
|
JUL 02, 07:13 AM
|
|
Today, I had one mission in mind; finish the cooling system.
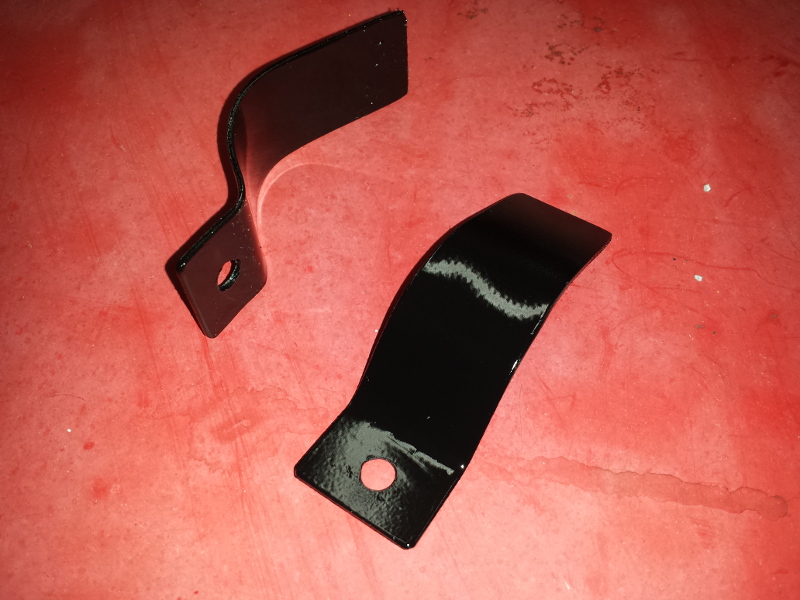
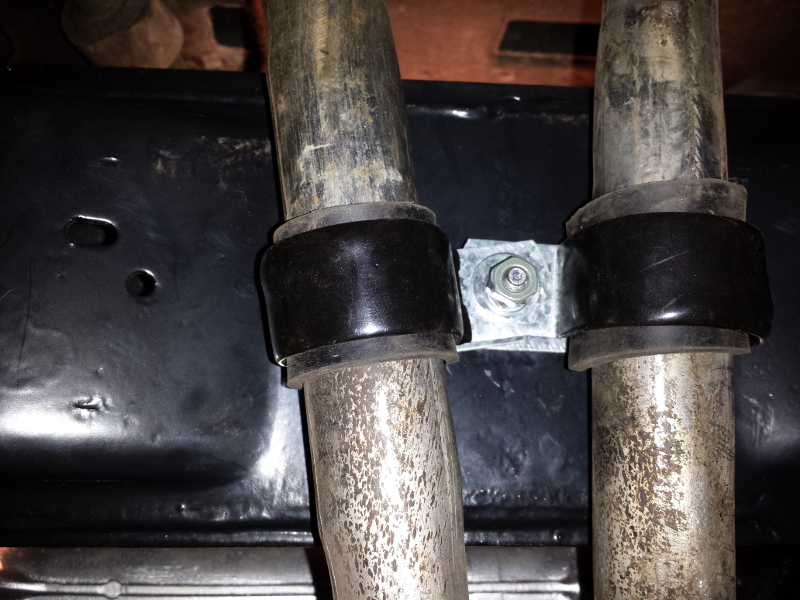
This started by installing the coolant tubes. Since my original clamps were rusted and I didn't trust using them, I made my own.
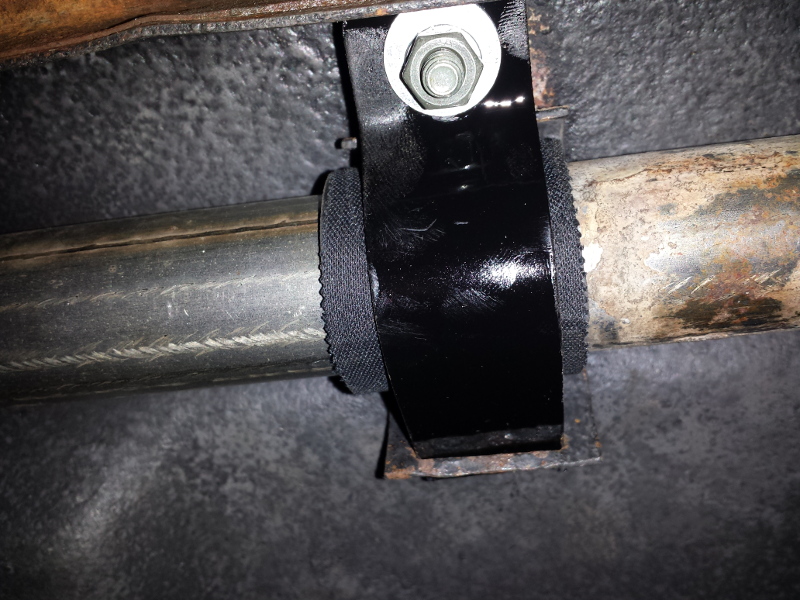
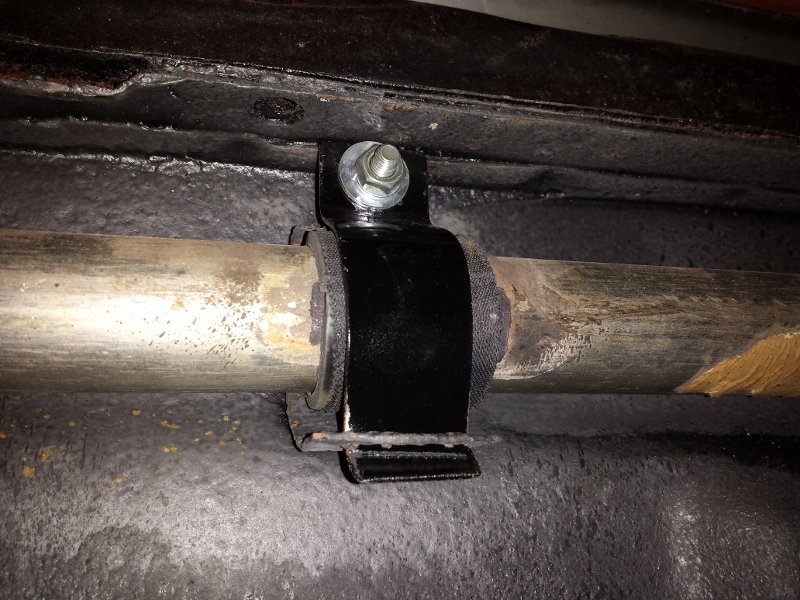
For the middle, I used these. Simple 16 gauge made at home and painted.
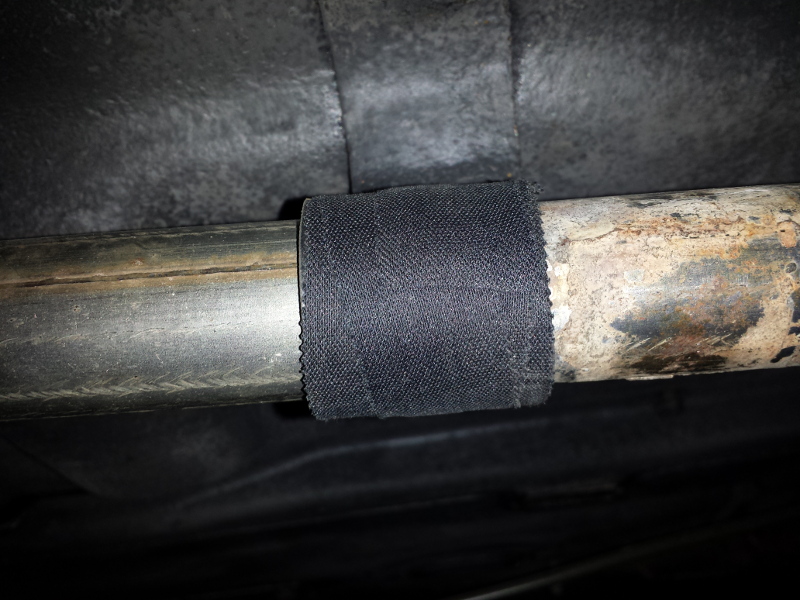
I wrapped the coolant tubes with a piece of rubber hose followed by a little hockey tape to keep in together while I clamped it into place.
For the front, I merely used some "P" clamps and a little rubber to keep things snug. Perfect.
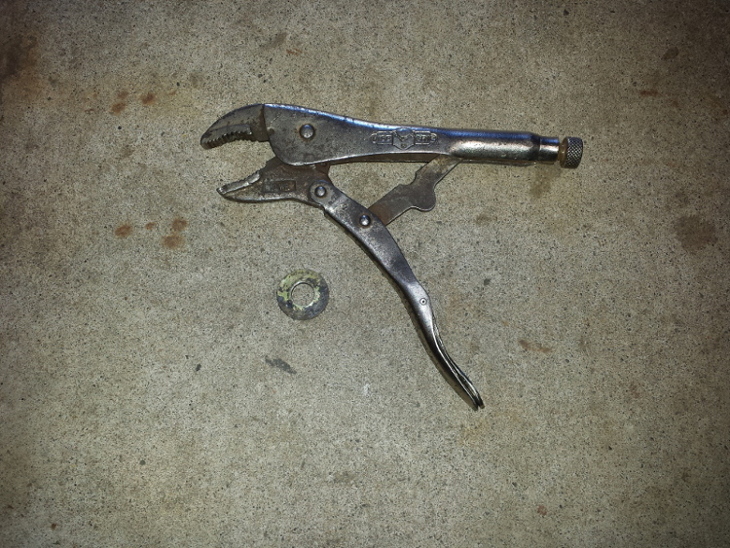
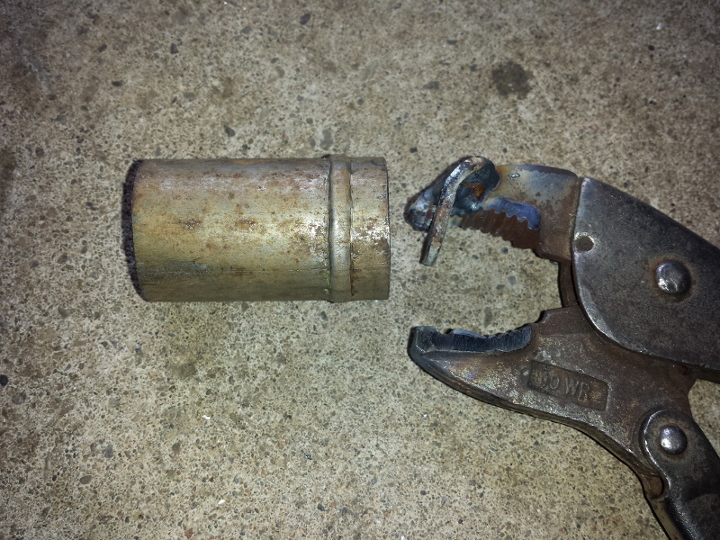
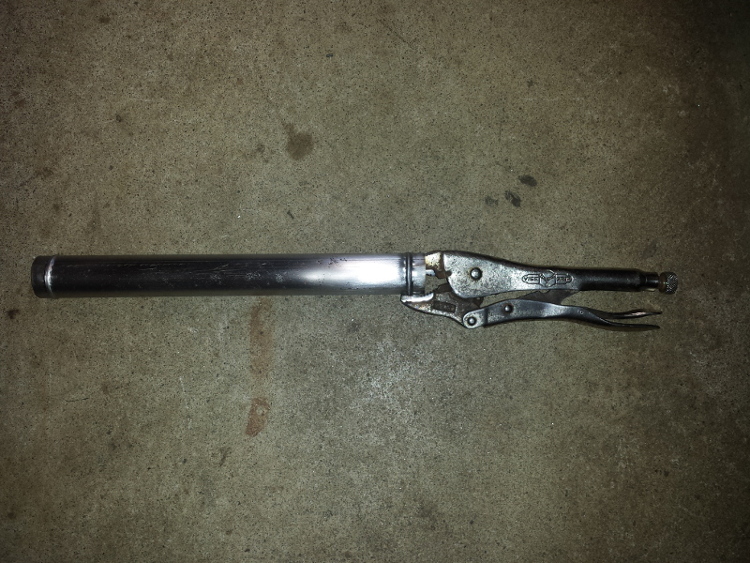
To keep hoses from slipping off, I had to replicate the beads that hold them in place. This was as easy as re-purposing an old set of Vicegrip pliers.
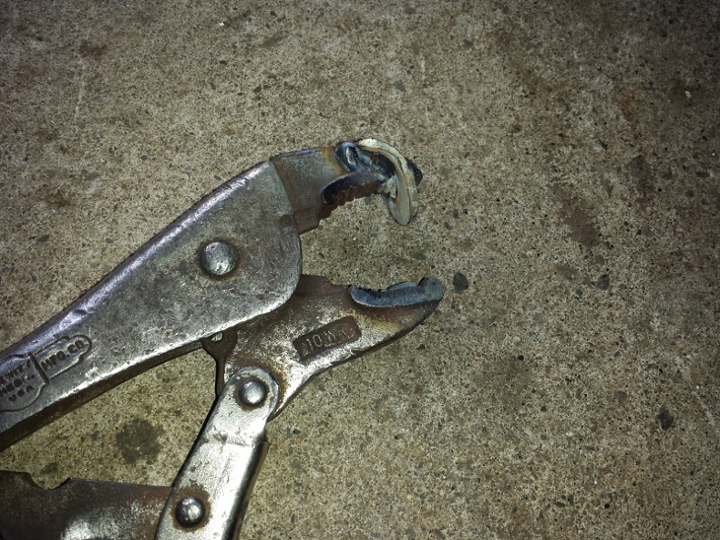
I used a washer and welded it to the Vicegrips as shown.
I also created a relief in the opposing jaw. This gives the metal somewhere to go when forming the bead.

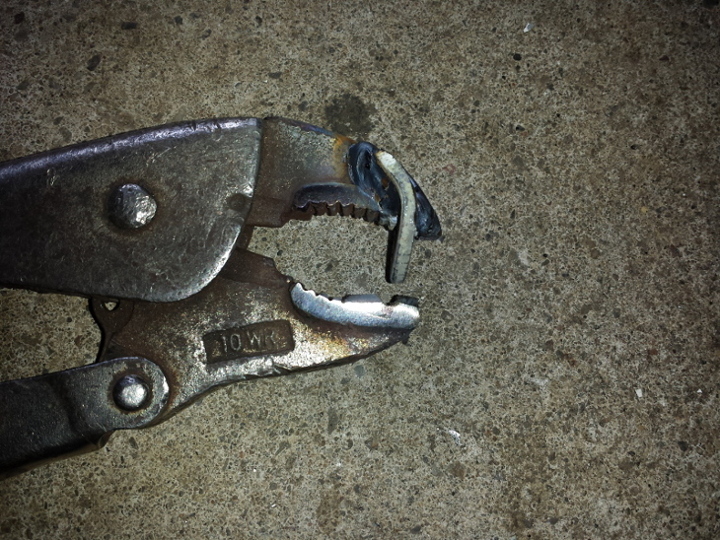
I sacrificed a spare 84 coolant tube. I've since installed the 88 ones on my car.
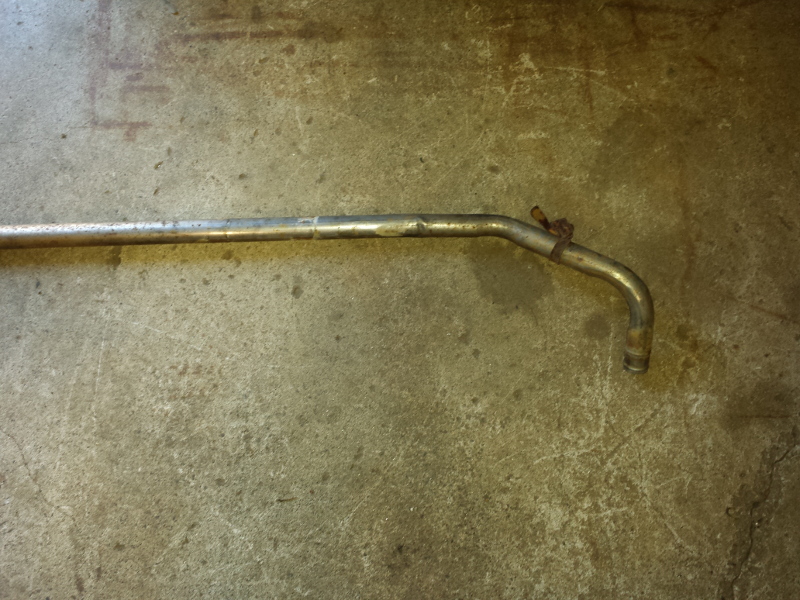
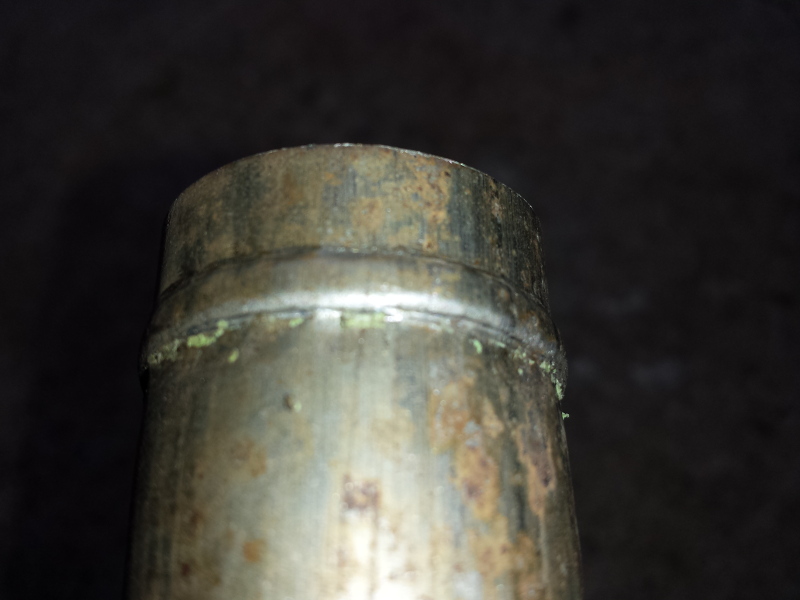
Here I cut off a piece to test with.

As you can see, the end result turned out rather well. I can now rest assured knowing my coolant hoses will not slip off.
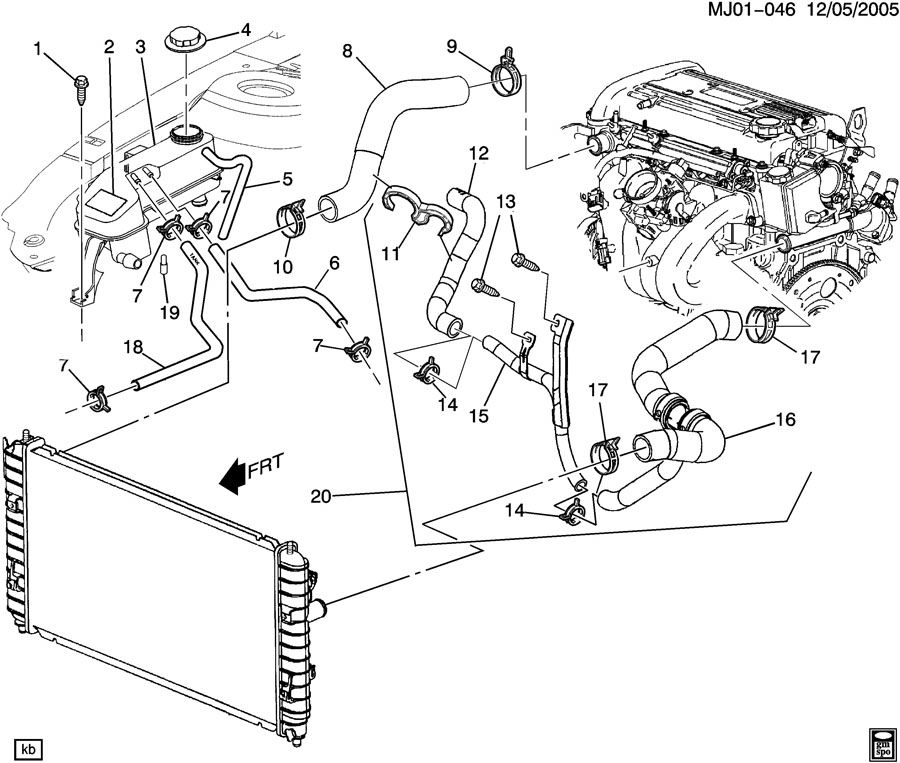
Moving on, I used this exploded view and decided to copy the setup on my swap.
Despite both cars using crossflow rads, the inlets and outlets were not identical.
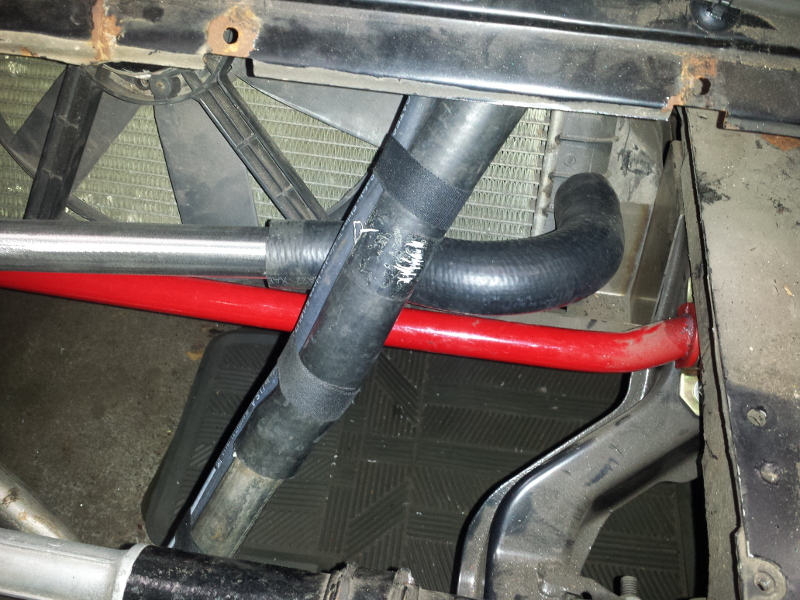
I solved this by crossing over the coolant lines and following the Ecotec design.
Here is the stock setup.
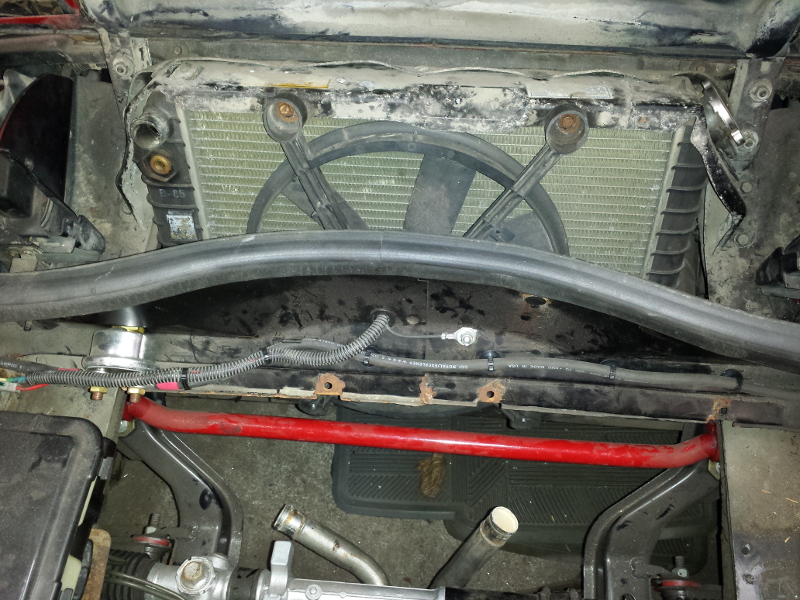
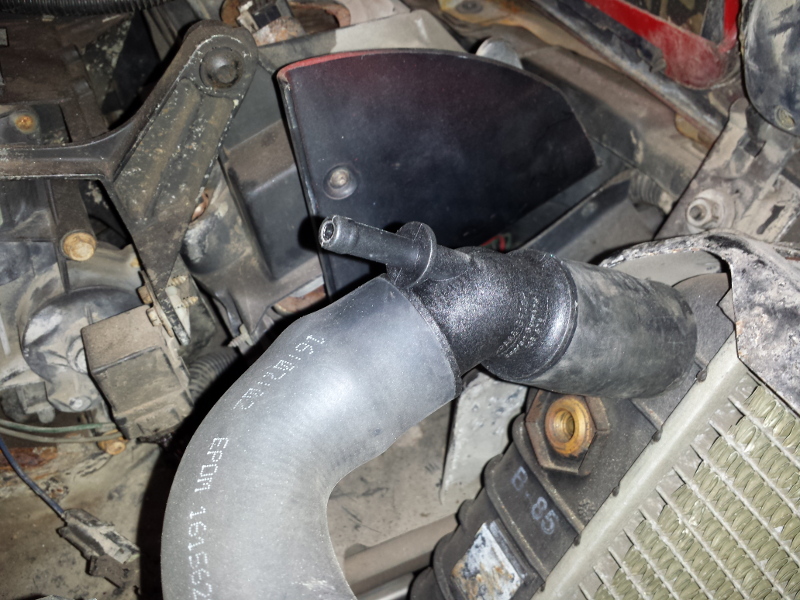
A few hoses and fittings.
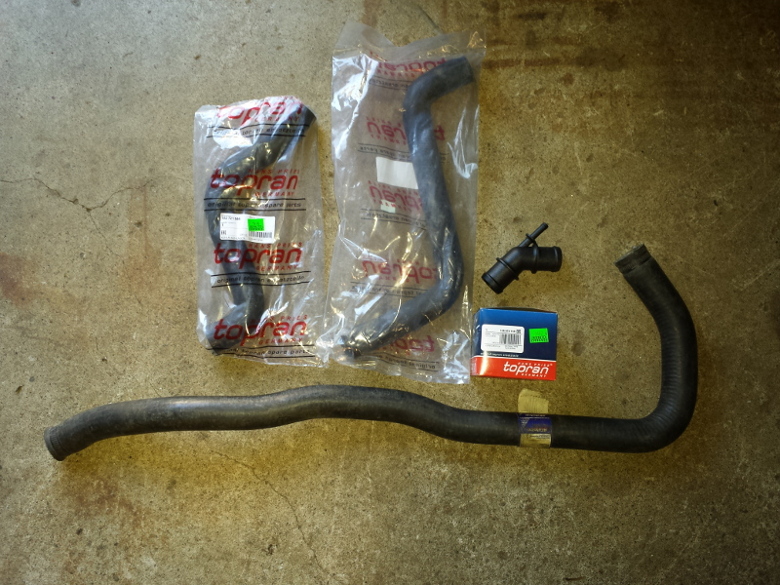
After forming a bead on both ends, this tube was used as shown.
The left upper rad hose is just a 90° bearing the Topran part number: 102 721 586
The other end in a Northstar hose that I cut to fit. AC Delco part number: 26252X.
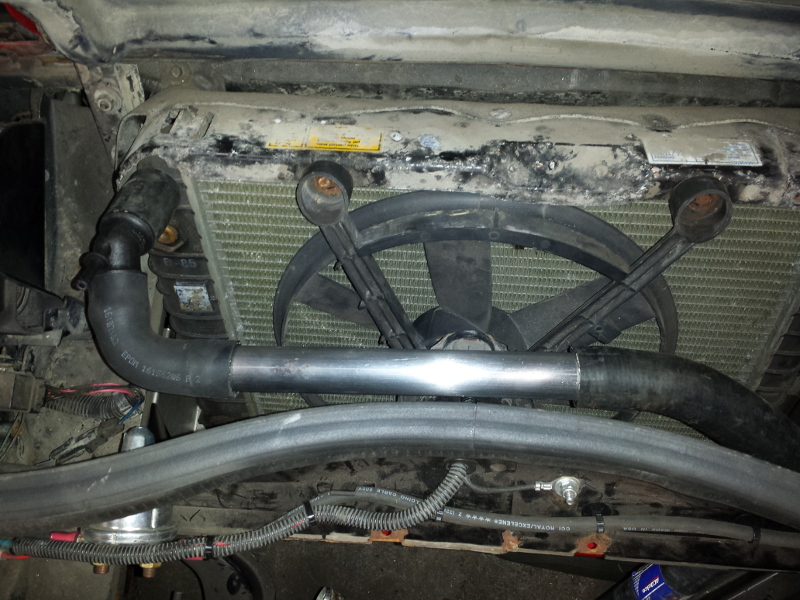
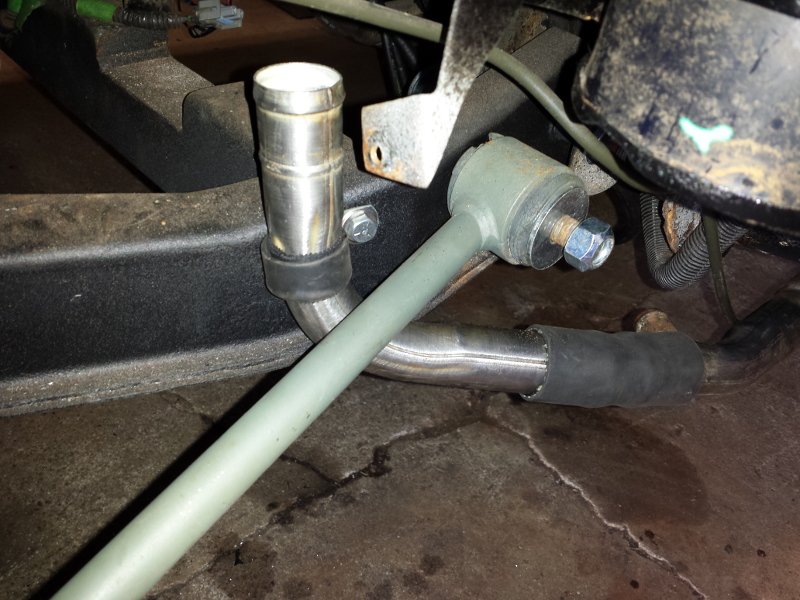
I needed a way to get coolant from the expansion tank at the back of the car to the front. Here, a simple VW Tee fitting was used.
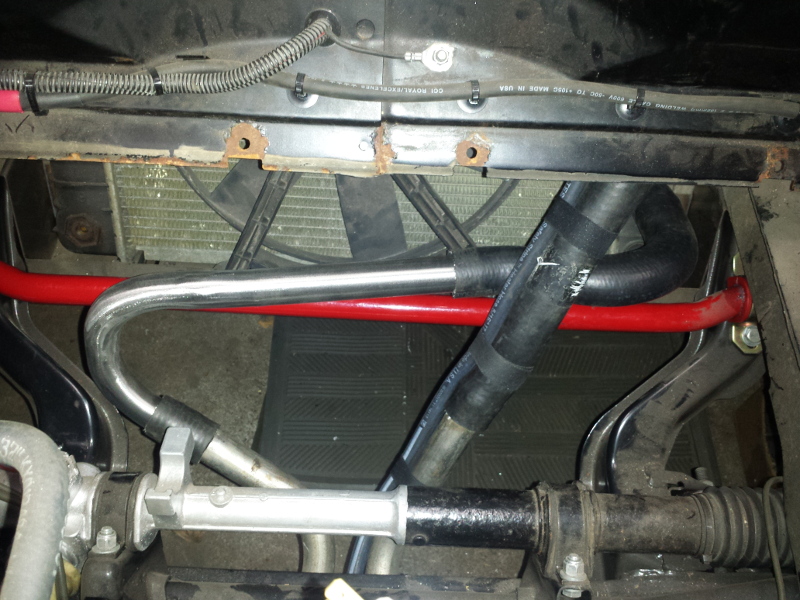
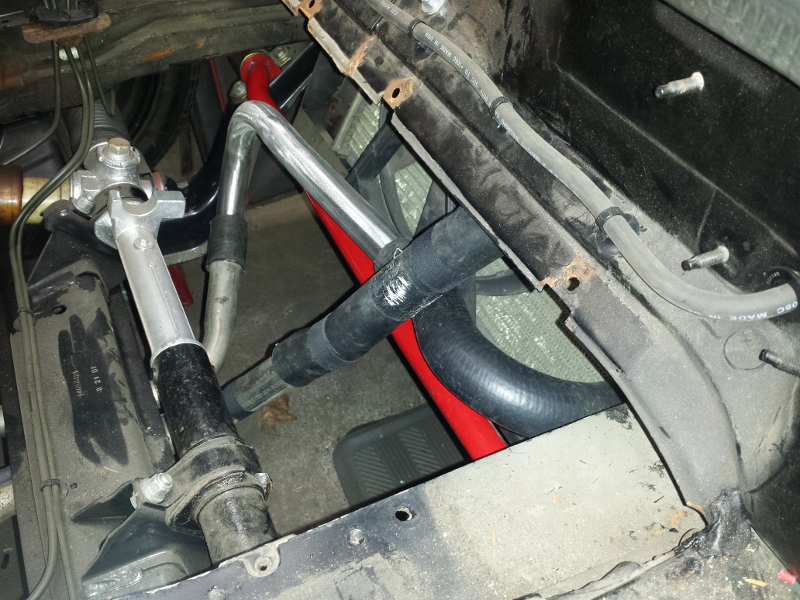
The bottom crossover was kind of the same. I used a few sections from the old coolant tube and created this.
I know, it looks like a plumbing fitting for a sink. It clears the swaybar and it fits well.
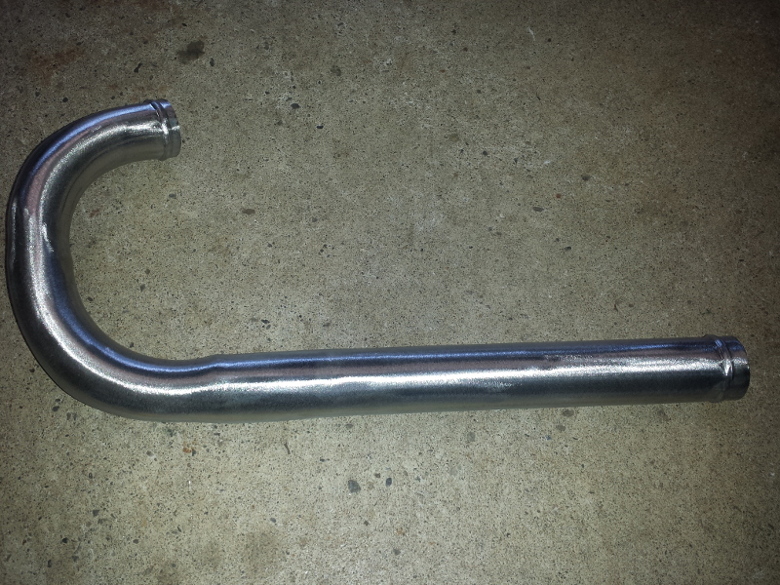
The lower rad hose is part number: 8754.
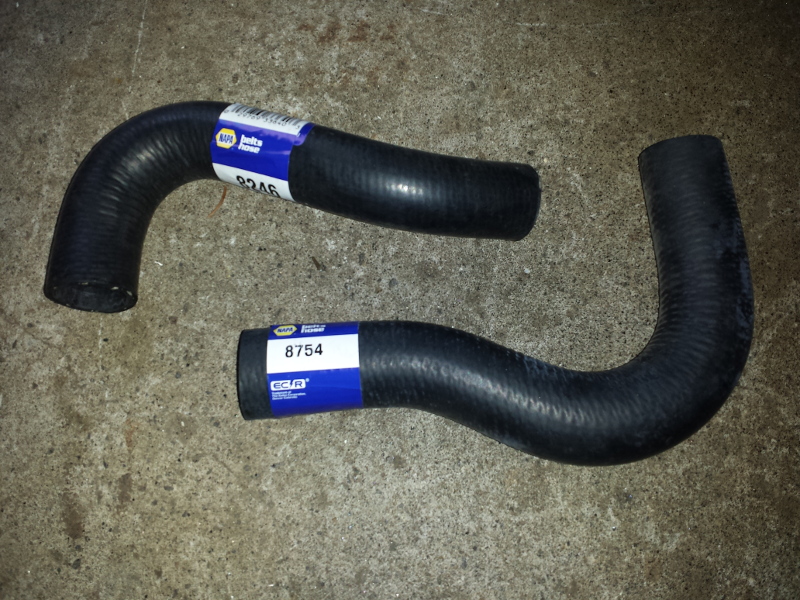
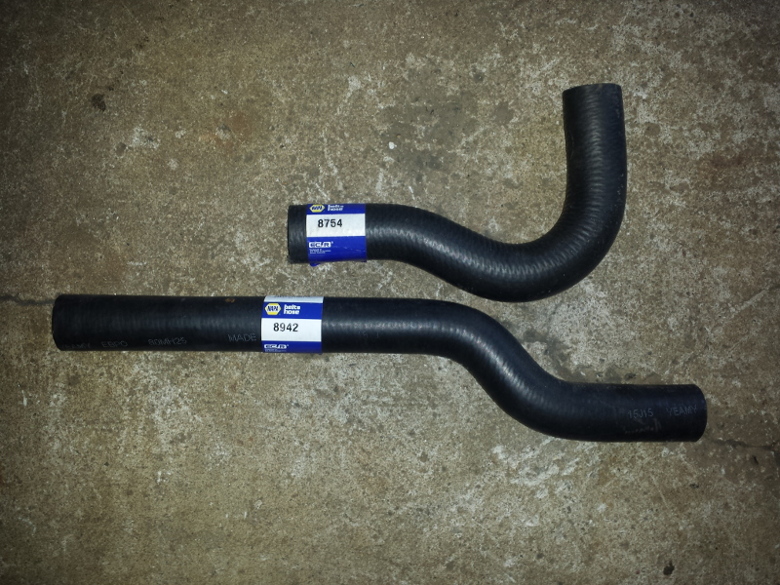
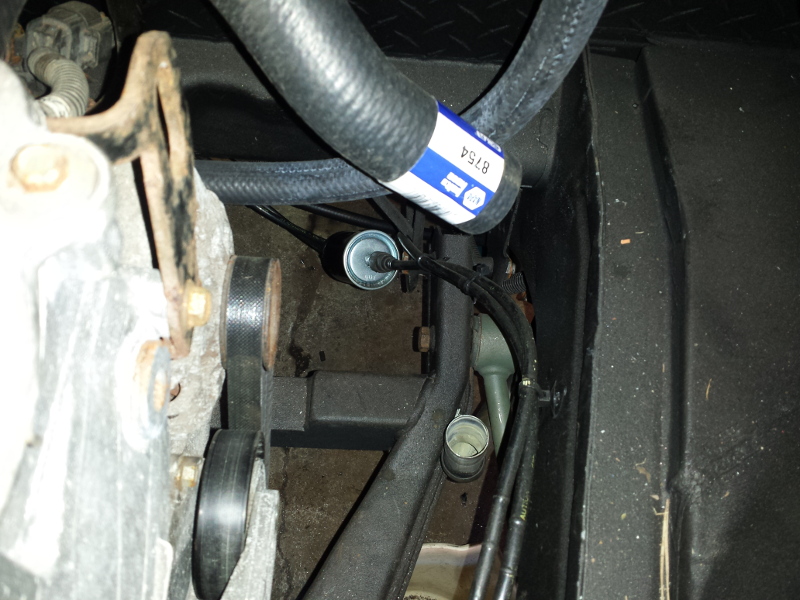
Now that the front was taken care of, I moved on to the rear of the car. My local Napa auto parts allowed me to look through their hose selection.
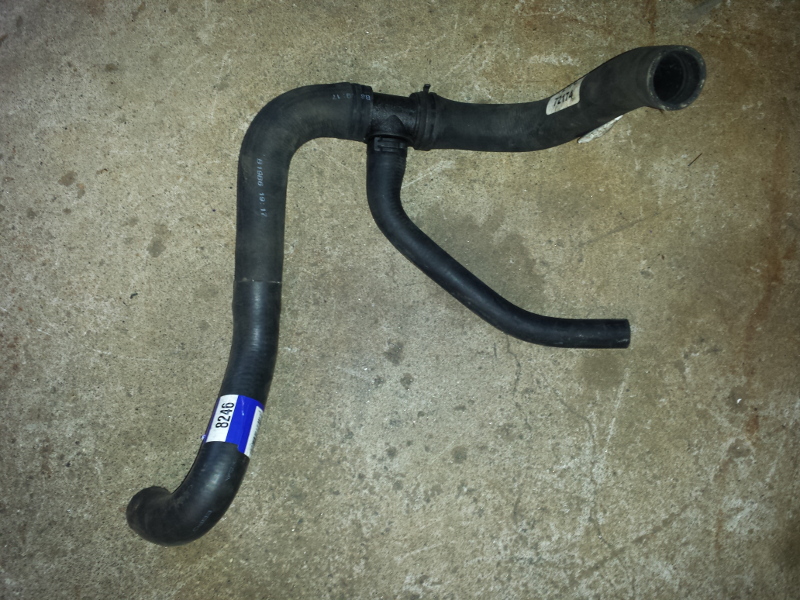
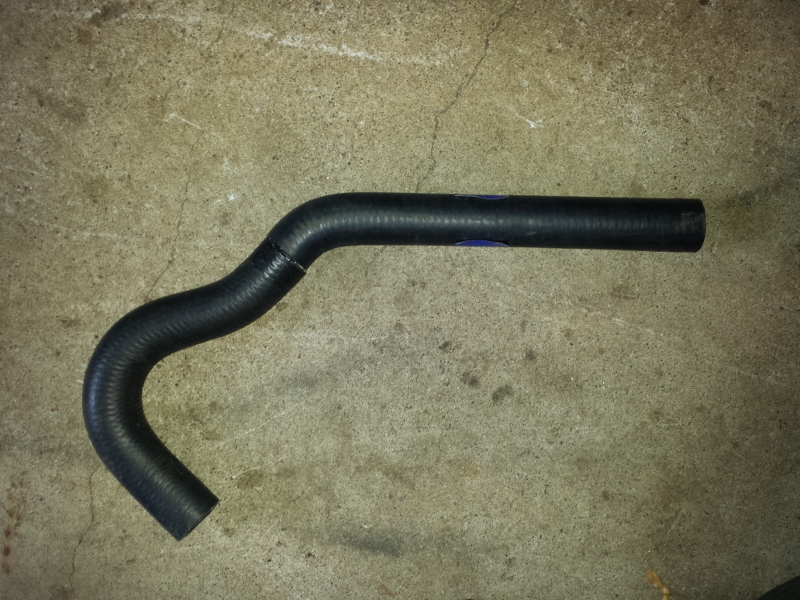
I found hoses that looked like they would work with minimal modification. Here's what I ended up with.
The left side of the engine consisted of these two part numbers: 72174 and 8246.
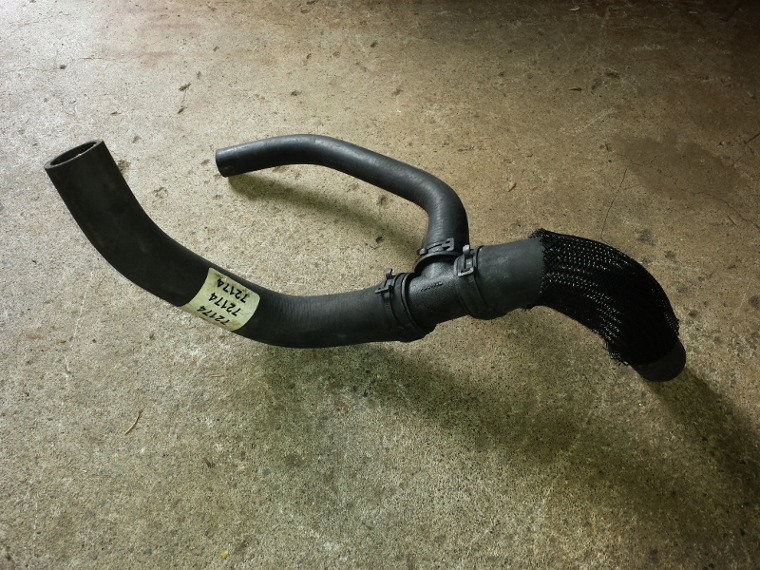
They then created this monstrosity.
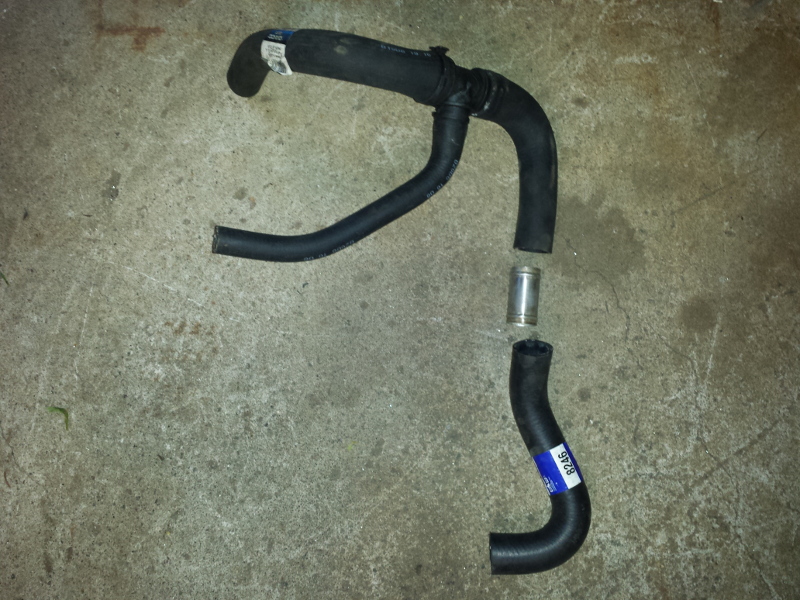
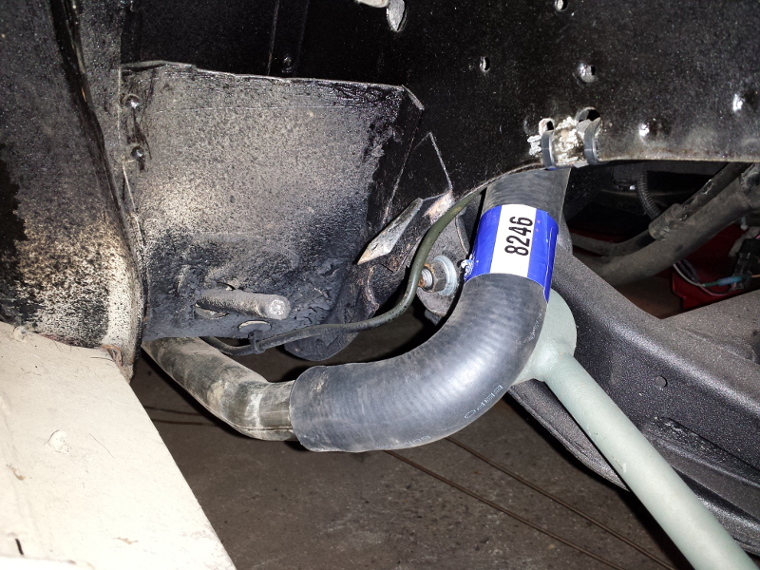

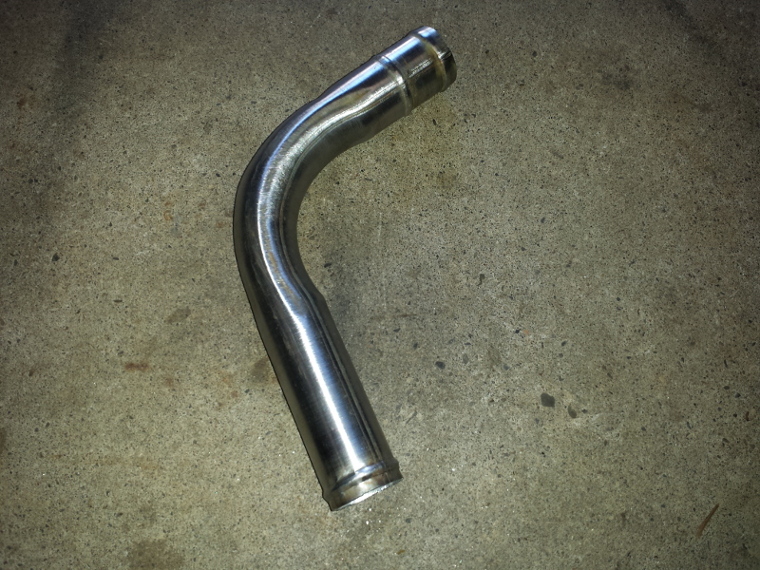
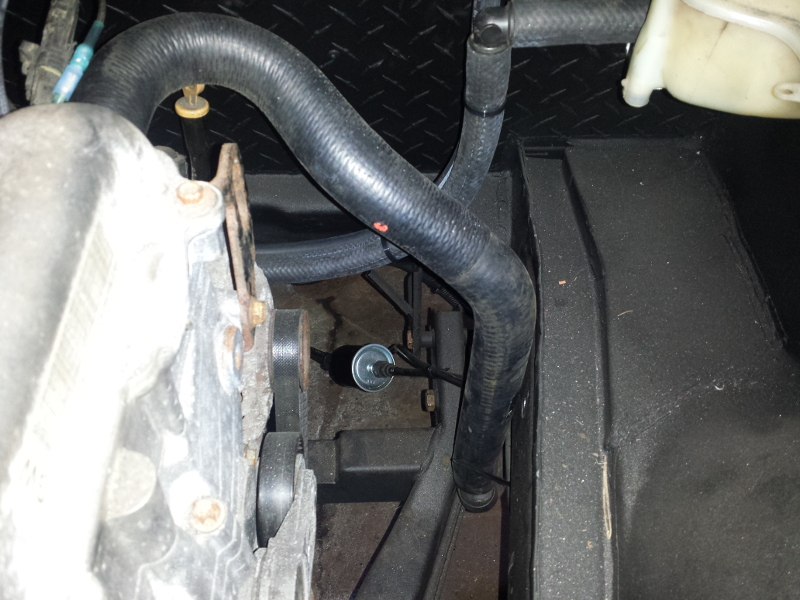
I took part of the 84 coolant tube and used it on the passenger's side. It clears the trailing arm well.
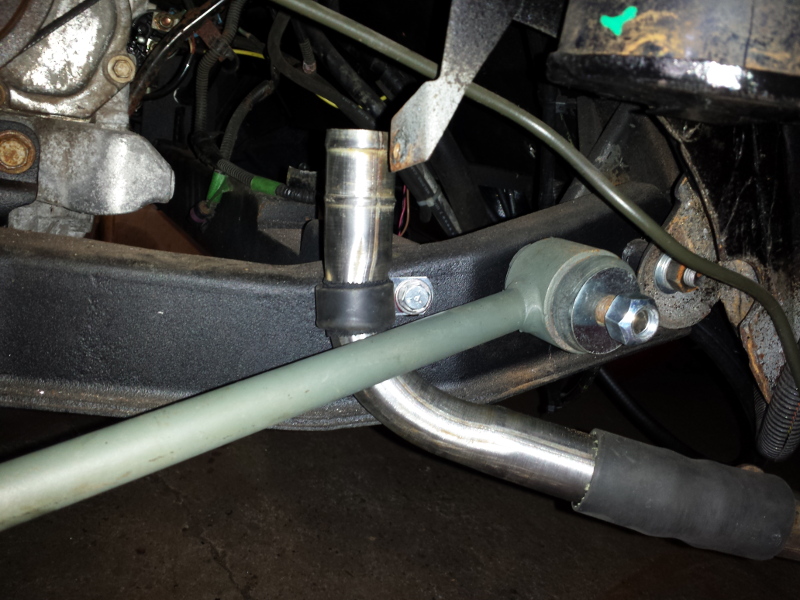
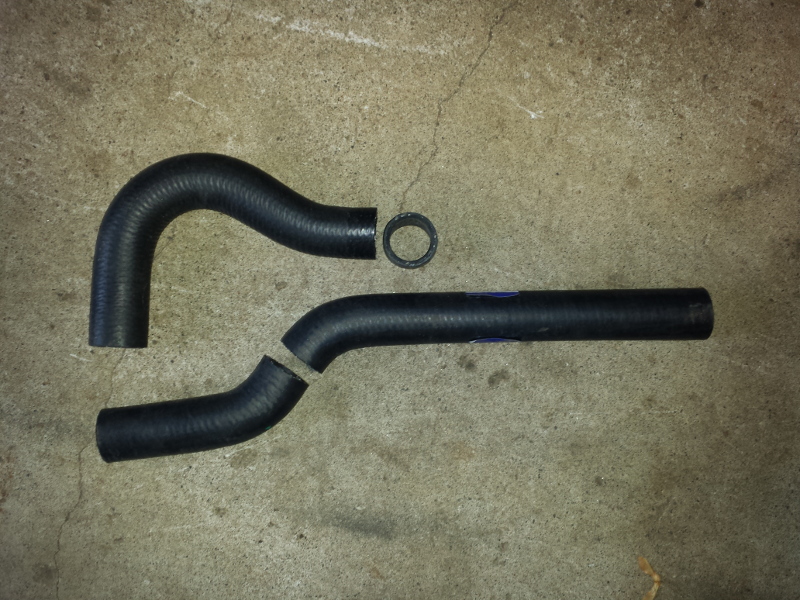
The right side looked like this by joining these two hoses together. Part numbers: 8942 and 8754.
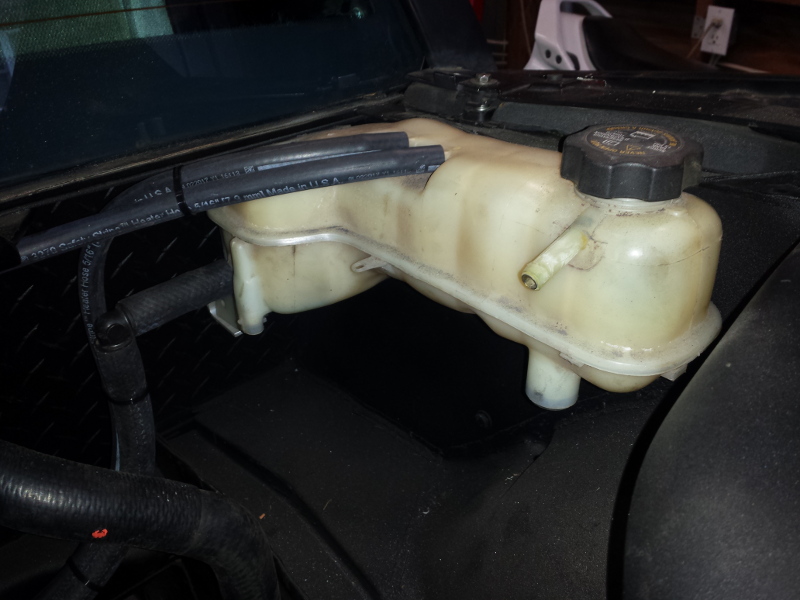
This is the Cavalier expansion tank. It fits well in this unused space and is the highest point in the system. I now will fill the coolant and bleed the air from the system.
I also picked up a damaged Honda VFR800 for free. I'm not sure if I'll repair it or part it out.
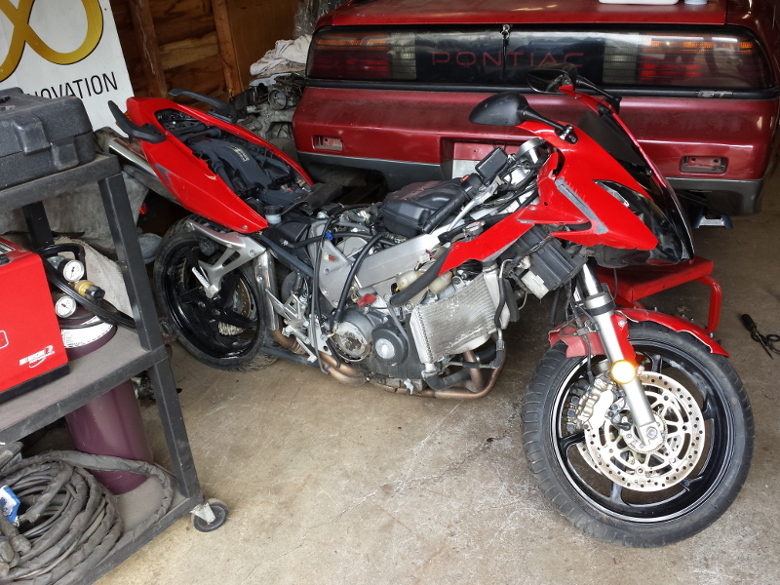 [This message has been edited by Lunatic (edited 07-02-2017).]
|
|
|
|