
 
     |
| Blooze Own: An F355 Six Speed N* Build Thread (Page 11/126) |

|
Bloozberry
|
MAY 18, 08:26 AM
|
|
|
|
|
Bloozberry
|
MAY 19, 07:44 PM
|
|
One thing I forgot to mention in my last post is that it’s a good idea to measure the side clearance of the top two piston rings too. You just slip a feeler gauge between the piston ring and the ring land on the piston itself. The clearances are pretty tight for this measurement: 0.0016” to 0.0037”. It’s hard to find feeler gauges less than 0.0020” thick although a more expensive set I bought for this engine had a 0.0015” feeler. I could fit the 0.0020” in all of mine but not the next size up 0.0025”, so all was good.
So I turned the block upside down again, removed the lower case-half, and began installing the pistons and connecting rods to measure connecting rod bearing clearances. The first thing to do is to make sure the rings are well lubricated. I get an old margarine container, put an inch or two of oil in the bottom, and dip the whole piston top in it. It’s messy, but effective. Now's the time to lube them up since there’s no need to take the pistons out again after checking the bearing measurements.
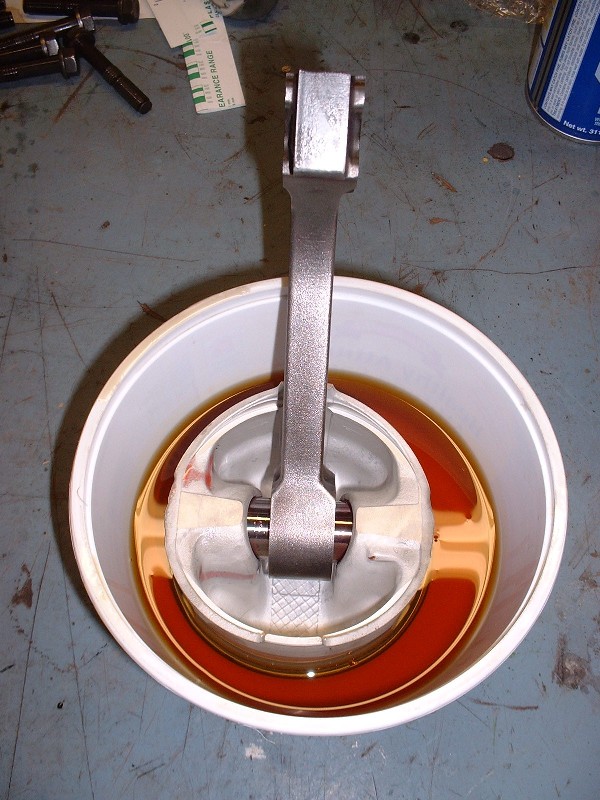
To compress the piston rings so the pistons will slide into the cylinders, I use a locking band-style ring-compressor instead of the pliers-style. I couldn’t take any pictures at this stage because it took too many hands to install the pistons with the block upside down, and besides, I was full of engine oil! For those who’ve never done it, here’s a picture of me installing a Fiero 2.8L piston in a block that’s right side up. The ring compressor just squeezes the rings flush with the piston OD so that they don't hang up on the deck when pushing the pistons in. The compressor has to be held up tight against the block deck or else the super thin oil scraper rings slip out of the crack and expand prematurely preventing you from going deeper. It's not bad right side up, but rather frustrating to do up side down on the N*.
Of course the Northstar pistons and connecting rods are uni-directional so they must go on in a particular orientation. Here’s a picture of some virgin Plastigauge on the rod journal prior to bolting on the caps.
Before sticking the connecting rod cap on, there’s an important thing to remember when rebuilding a Northstar. The connecting rod bolts are Torque to Yield (TTY), meaning that they get torqued so much that they are irreversibly stretched the first time you torque them, and then if you remove them, they’re no good anymore. They’re also $17.14 each times 16 of them equals $300 after taxes, so you don’t want to use up your new ones to check your bearing clearances or it’ll be a costly mistake. I reused the old bolts to check the bearing clearances. Once again, you install the rod bolts, torque them to a nominal 18 lbft, click on the angle gauge, set it to zero…
… and torque the crap out of it until you reach a whopping 110* more twist on the bolts. It not only sounds like a lot, it feels like a lot. You can only do two at a time since you can’t turn the crank without smearing the Plastigauge, and you’d never get the other caps on without turning the crank.
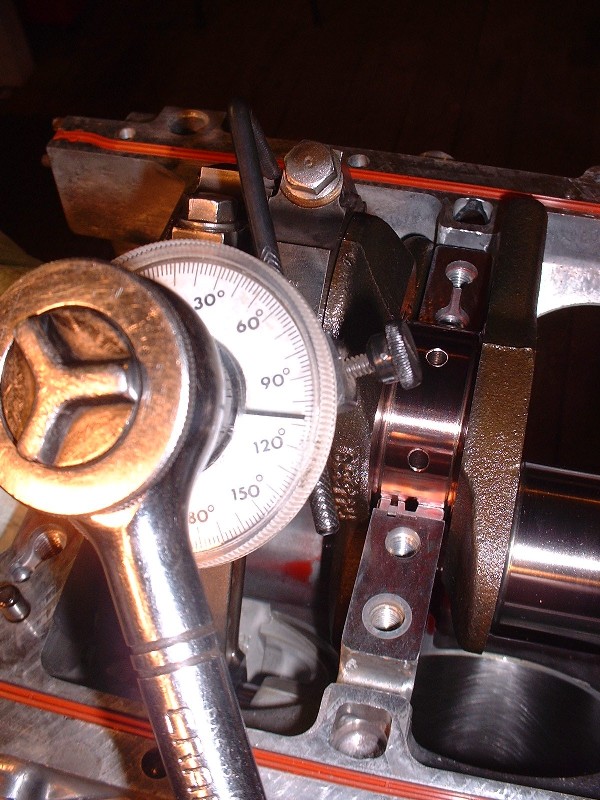
So two by two you torque the caps, remove the caps, check the rod bearing clearances, clean off the Plastigauge, reinstall the caps using your new rod bolts, and torque them up a final time. Then you move onto the next pair of rods. Here's more squished Plastigauge.

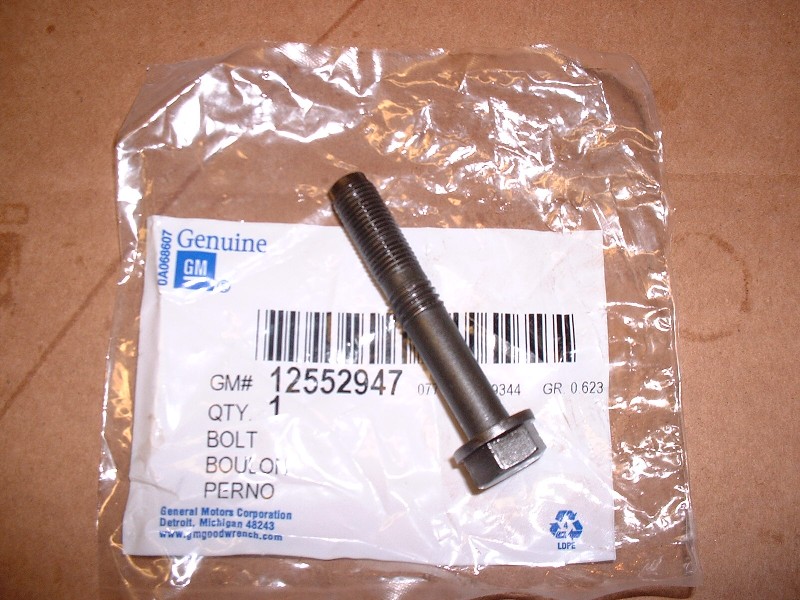
Here’s a pic of the rod bolts (GM p/n 12552947). I thought I’d include it because of the strange threads. It’s only the fine threads at the end of the bolt that engage the connecting rod, so I’m not exactly sure of the reasoning for the coarser threads halfway down. Just bizarre enough to make you think long and hard about going to the hardware store and buying some generic rod bolts at a quarter of the cost.
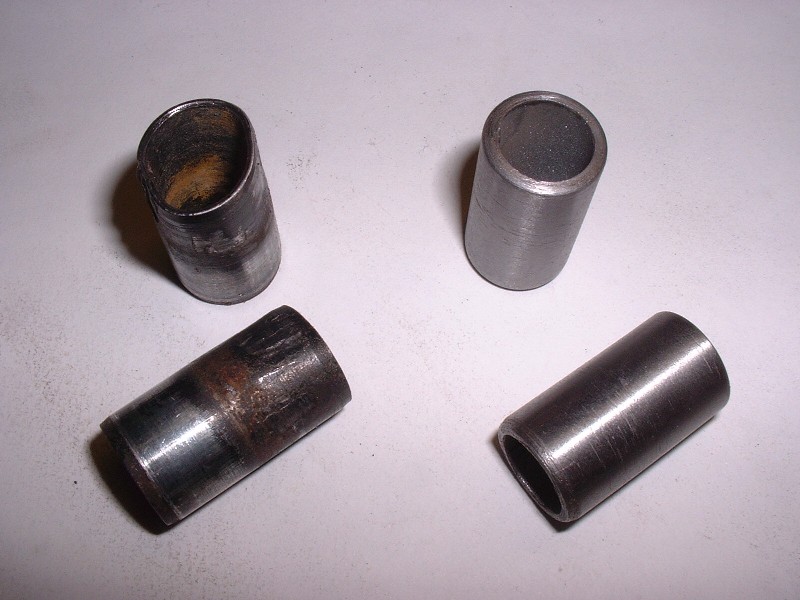
With the pistons installed, the next step was to retrieve the heads from the machine shop! Yay! In preparation for this, I knew I needed new cylinder head alignment dowels as previously mentioned, so I took a trip to a buddy of mine’s who has a lathe. Within an hour or so, he had a new set of four nicely turned for me for $25 instead of $75 from the dealership.
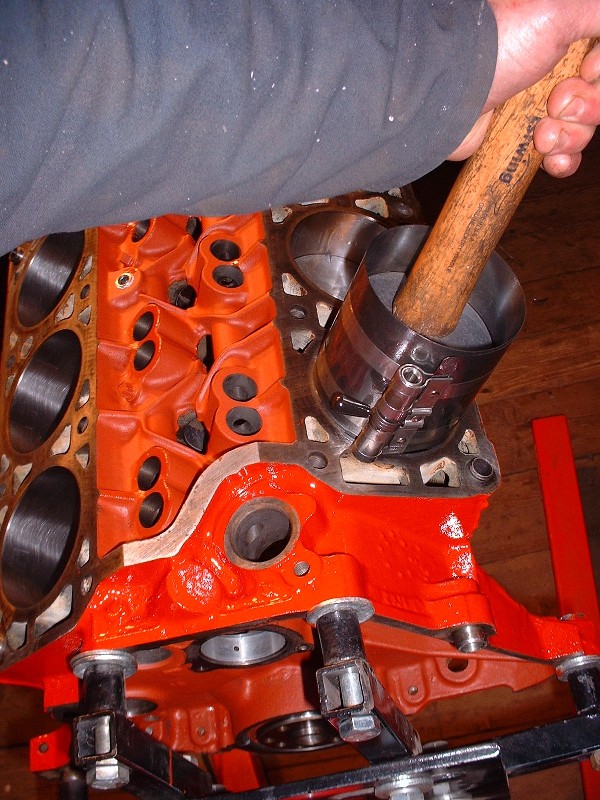
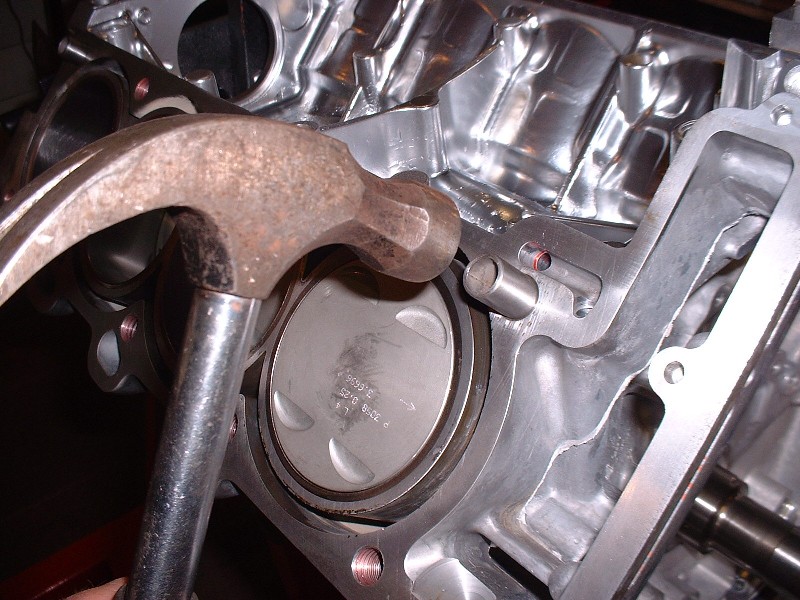
A few quick hammer taps and I was ready for the heads.
|
|
|
|
pmbrunelle
|
MAY 19, 10:09 PM
|
|
| quote | Originally posted by Bloozberry:
I reused the old bolts to check the bearing clearances. Once again, you install the rod bolts, torque them to a nominal 18 lbft, click on the angle gauge, set it to zero…
… and torque the crap out of it until you reach a whopping 110* more twist on the bolts. It not only sounds like a lot, it feels like a lot. You can only do two at a time since you can’t turn the crank without smearing the Plastigauge, and you’d never get the other caps on without turning the crank. |
|
Sounds like the rod bolts really were torqued to yield.
|
|
|
|
Erik
|
MAY 20, 03:02 AM
|
|
|
I wonder if the strange threads are part of the TTY feature ..
|
|
|
|
Bloozberry
|
MAY 20, 07:29 AM
|
|
|
You're probably right there Erik. The bolt would be at it's smallest cross section in the bottom of the coarse threads, so that would be the weakest point.
|
|
|
|
Bloozberry
|
MAY 21, 09:01 PM
|
|
Hmmmm… I keep getting ahead of myself. Before I could turn the engine upright and install the alignment dowels, I had to bolt the lower case-half on again. This time, luckily, I had done a little more reading here on PFF about sealing the case halves properly. I mentioned before that the original way was just using the orange neoprene seals. I guess GM found that they didn’t work very well so at some point a few years back they recommended following up with some anaerobic sealant in the seal grooves, then installing the seal, and then more anaerobic sealant before joining the two halves together. Most Northstar rebuilds on PFF to date have used this method with good success.
I, on the other hand, had downloaded and was following AJxtcman’s instructions for reassembling my engine. In it, GM calls for a particular sealant which I tried to buy but was told that the part number had been superseded to AC Delco p/n 88901148. The instructions make no mention of the neoprene seals at all, instead, they say to fill the machined grooves that the seal sat in with this new engine sealer. So I did.
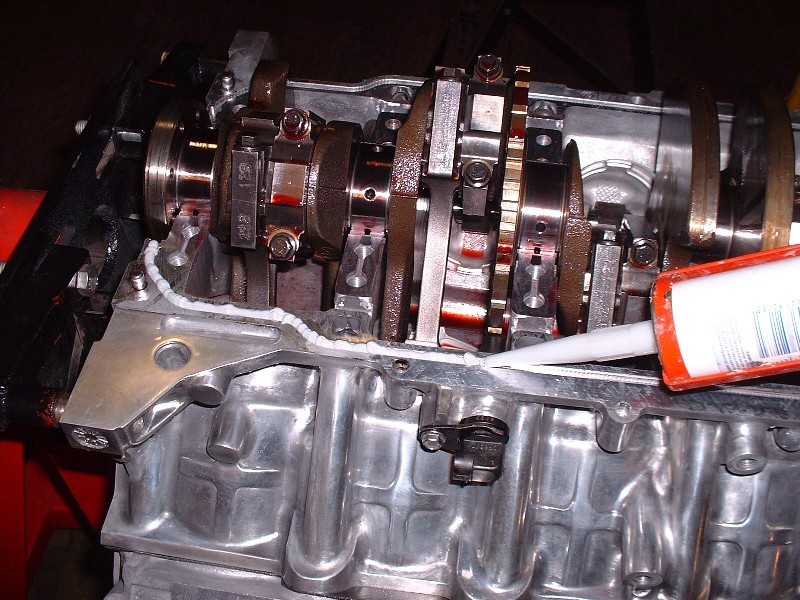
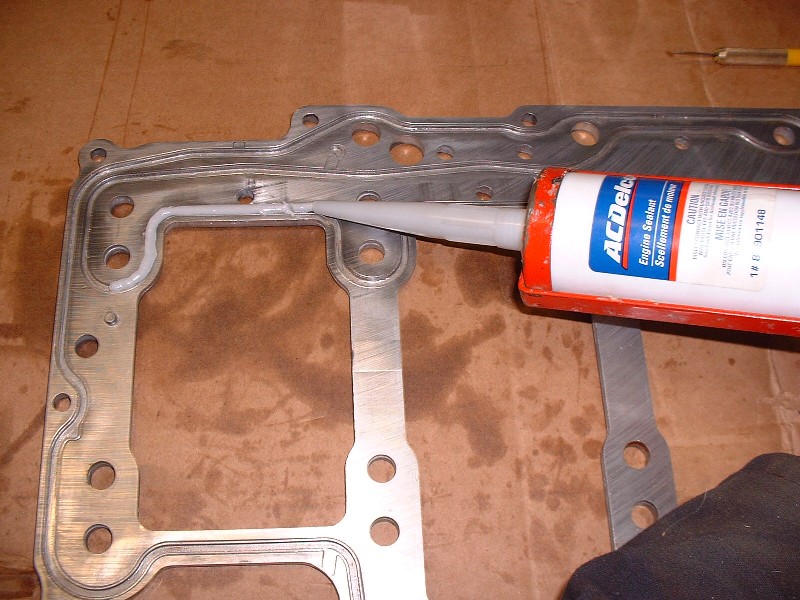
The sealant costs $17 and comes in a 1/3 length caulking-gun tube and has enough sealant to do about 90% of what you need… it’s like they know and they do it on purpose. It’s kind of a grayish putty-like silicone and blends in reasonably well with the color of the aluminum. Once you fill the grooves you have a maximum of 20 mins before it skins over and becomes useless. It’s plenty of time. So once the lower case-half was gooped up, I flipped it over and onto the block. Next came the oil manifold plate.
GM recommends replacing the oil manifold plate and I now know why. It takes more time than it’s worth to clean the OEM silicone out of the serpentine grooves. Once it was done though, it got the same treatment as the lower case-half… AC Delco engine sealant in all the grooves with enough to stick up about 3mm above the surface of the plate.
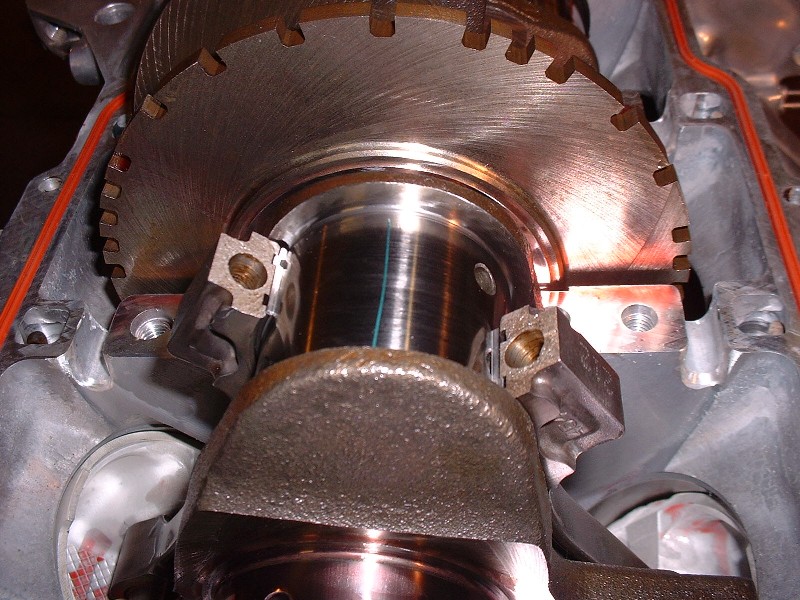
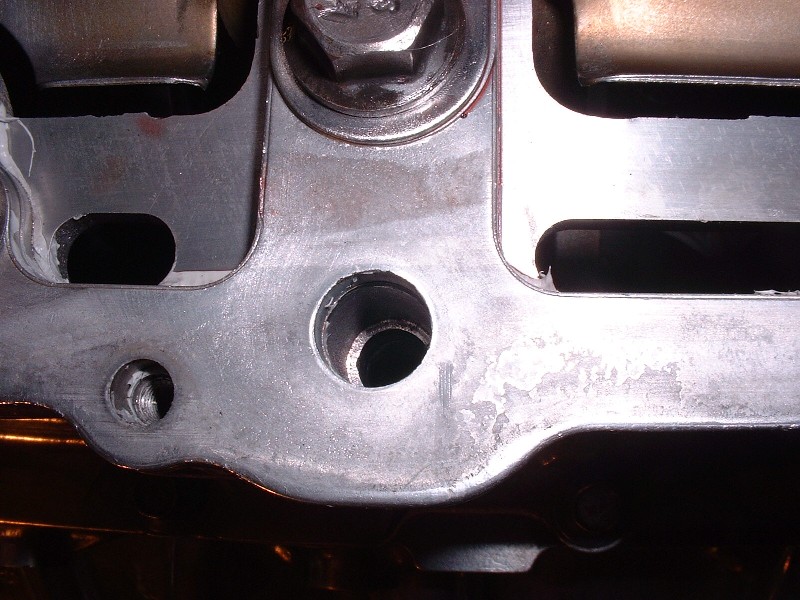
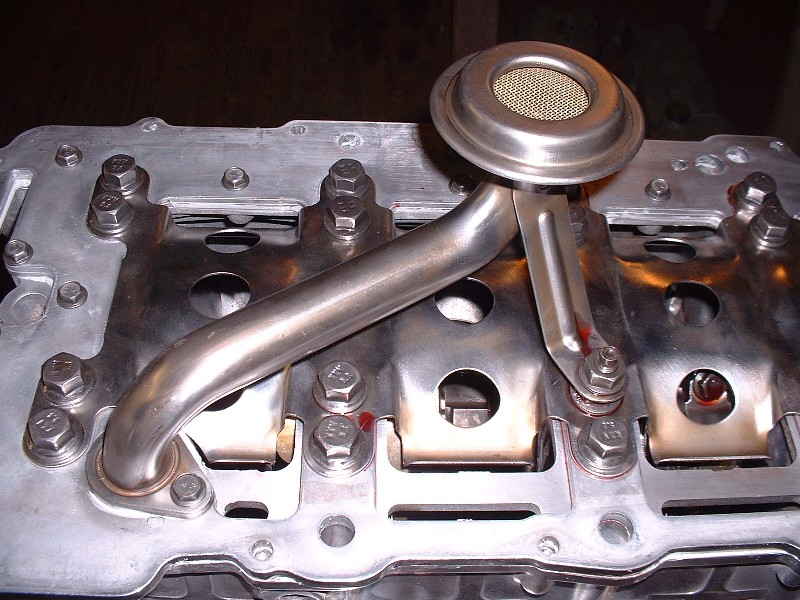
With the oil manifold plate installed, next came the windage tray (again), and finally all the main bearing bolts for the last time (**crosses fingers**). One thing to be watchful of once everything is torqued back into spec is that the engine sealant doesn’t ooze into the oil drain-back tubes on the side of the block and plug or restrict them. The oil drain-back tubes carry oil from the heads down through the upper case-half, lower case-half, oil manifold plate and finally into the oil pan. All of these mating surfaces except the heads have engine sealant applied to them so you’ve got to reach down with a thin bladed screwdriver or dentist’s tool into each tube after every step and clean up any sealant that squeezes in them. Here’s one of the tube holes I’m talking about. I had to clean sealant out of about three tubes.
Another frustrating thing about the ’97 block is that the oil manifold plate doesn’t come with a replaceable oil pick-up tube seal. Some earlier-year blocks do, but GM probably decided that since you should replace the manifold plate, then there was no purpose to making a replaceable pick-up tube seal. Before I ruined mine digging it out, I read the list of contents of my master rebuild kit and it included the seal, so I went ahead and tore the old one out of the plate. Only after I had done that did I actually look for the seal only to find an O-ring that didn’t fit. The later blocks use a molded-in-place neoprene-like seal. To make a long story short, I ended up using more engine sealant around the pick-up tube and sticking it in place. This is an area where you can’t afford to have leaks because the oil pump would much rather suck air in through that leaky joint than try to suck that thick oil up from the pan.
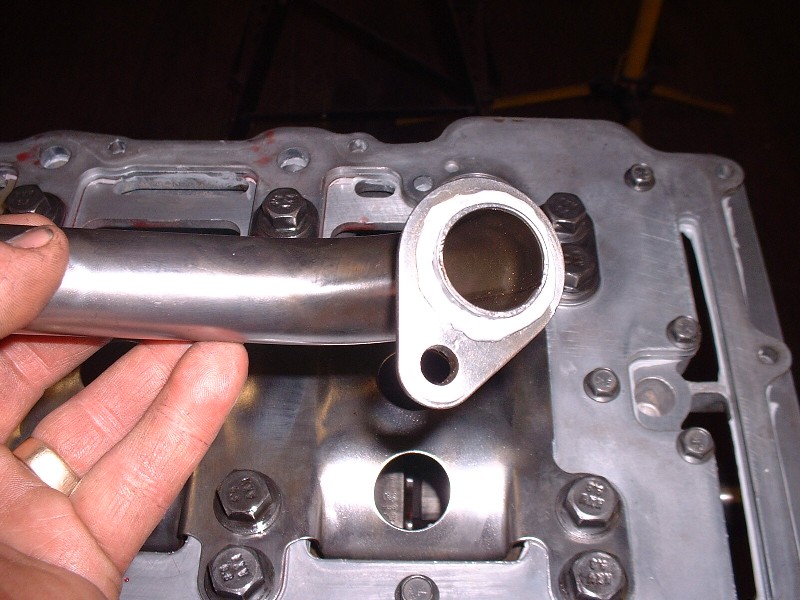
Here’s the pick-up tube bolted in place. Notice too if you’re building your own Northstar that one of the main bearing bolts is actually a stud… that one goes on one of the #3 bearing caps so you can bolt the oil tube to it later. Finally I treated the oil pan with the same engine sealant and tossed out the orange neoprene seal. The oil pan bolts get torqued on is a particular sequence just like everything else. OK, now I was ready for the heads.
|
|

|
Fierofreak00
|
MAY 26, 07:34 AM
|
|
|
I'm going thru withdrawls....and need an update, this is a great thread! -Jason
|
|
|
|
AJxtcman
|
MAY 26, 08:58 PM
|
|
I gave Westers the information that got him started in the Northstar Tuning world. It is kind of funny after all of the arguing with some members and now some of them recommend Westers
|
|
|
|
Bloozberry
|
MAY 26, 10:52 PM
|
|
I’m baaaack (and this post should put me on page four! Edit: but it didn't!) Life has a habit of catching up to you when you start a build thread. I’ve been busy piecing a ’67 Pontiac GTO convertible back together after the owner had it totally stripped of every part you can imagine for painting (interior, wiring, glass, trim, bumpers, ...the works) then brought it here for reassembling.
Thanks for the feedback Fierofreak, this hit is for you. AJ, glad to see you chime in too. I’d love to use your LS1 tune on my Northstar but I’ve been on the fence about it for the same reasons as many others… I’m just not sure if the development was ever completed. It would be great if you could post an update. It would be nice to see some testimonials from people who are running your tune too.
Anyways, to continue my story… once I saw the condition of the cams, the cam followers and the valves, I knew the heads would have to be completely rebuilt to satisfy my obsessive need for things to be just right. Normally I would farm out the machining and reassemble the heads myself, but the machinist at this specialty-heads shop around the corner convinced me he would machine them as though they were his own, and only charge a nominal fee to reassemble them. So I entrusted him.
He started saving me money from the get-go. After he measured up the cam wear, he decided that the intake cams were perfectly good with almost no measurable wear. The exhaust cams were a different story though, but I already knew that. I can’t recall the exact pricing for new exhaust cams, but it was enough to make my eyes nearly pop out of my head. Something like $600 each. Luckily there’s a place in Moncton, New Brunswick that can weld up, regrind, and re-harden the cams using a process called Parkerizing. (It’s a trade-name for a method of protecting a steel surface from corrosion and increasing its resistance to wear by immersing it in a solution of manganese or zinc acid with phosphate.)… and all this for the lowly sum of $210 for each cam. Needless to say I didn’t need much convincing.
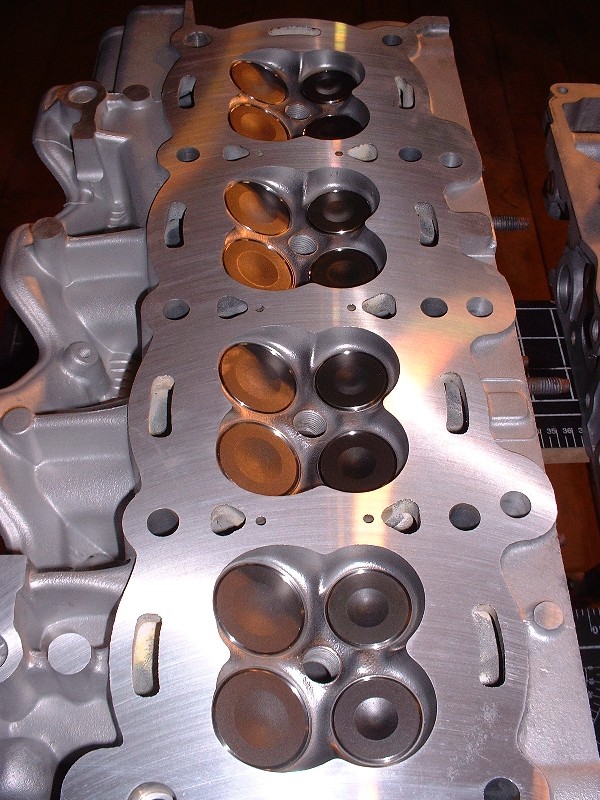
He cleaned the bare heads, bead-blasted them, planed them, re-cut the valve seats, and put in all new intake and exhaust valve guides, new valves, new cam followers, and reconditioned cams for about $1400. Not cheap by any stretch, but not bad for a N*. I think you’ll agree they look like new too. God I love the look of those 32 valves! (insert Tim-the-Toolman grunt here)
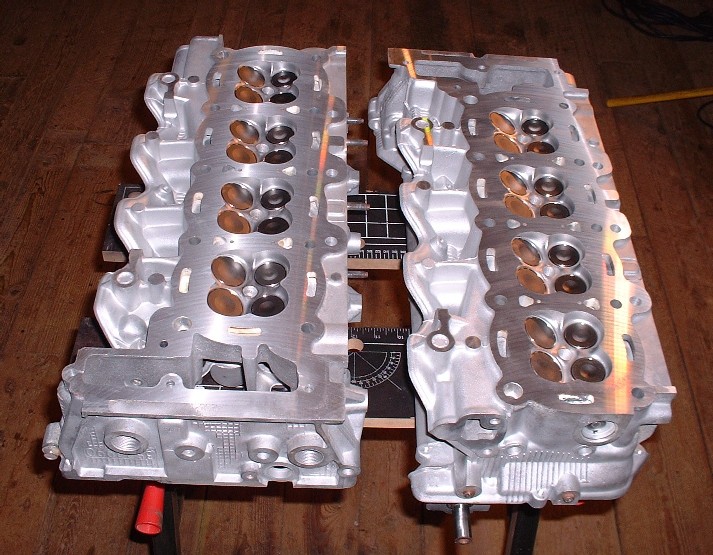
A thing of automotive beauty... I'm restraining myself from posting the twenty-something photos I took of just the heads from different angles.
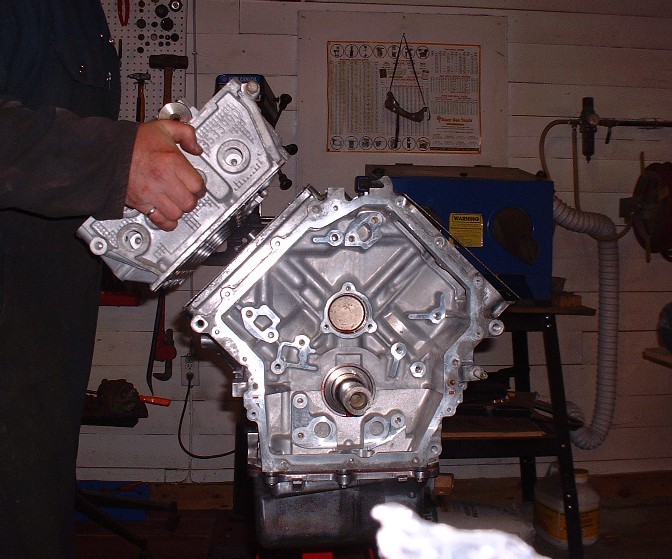
I almost didn’t want to put the heads on the engine and hide all those shiny mechanical parts, but my wife didn’t agree they’d make great coffee table conversation pieces. I kept them tightly wrapped up in clear plastic bags for months showing anyone and everyone who walked through my shop, but the time finally came to install them. Despite all the recommendations from everyone to use cometic gaskets, I bought the Fel-Pro Permadry head gasket set (part number HS26150PT-1) at $250 for the set. I can’t offer any other explanation than cost for my choice. At some point the piggy bank just says “No”. Here they are installed on the deck surfaces just waiting to be sandwiched by the heads.
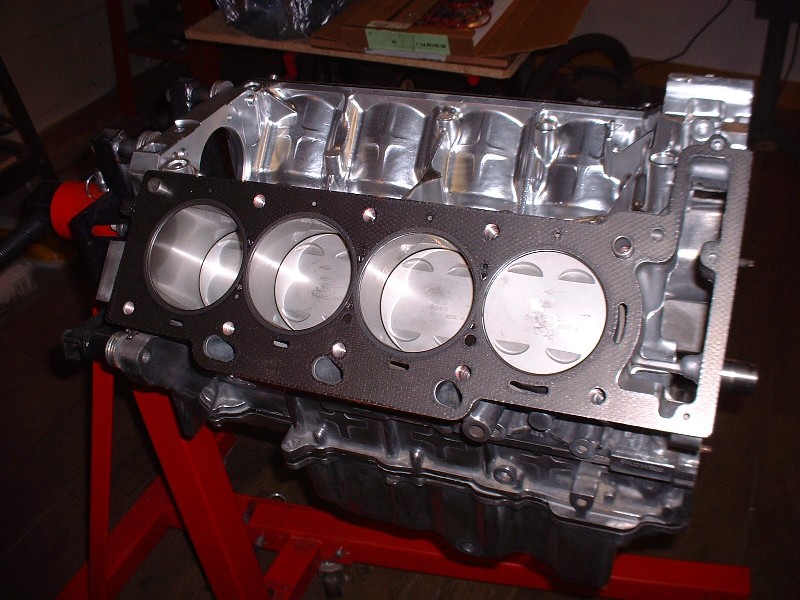
And this is the crowning moment when the first head was finally put in place… Yay! Not surprisingly, the heads are actually quite light and easily handled by one person despite their size.
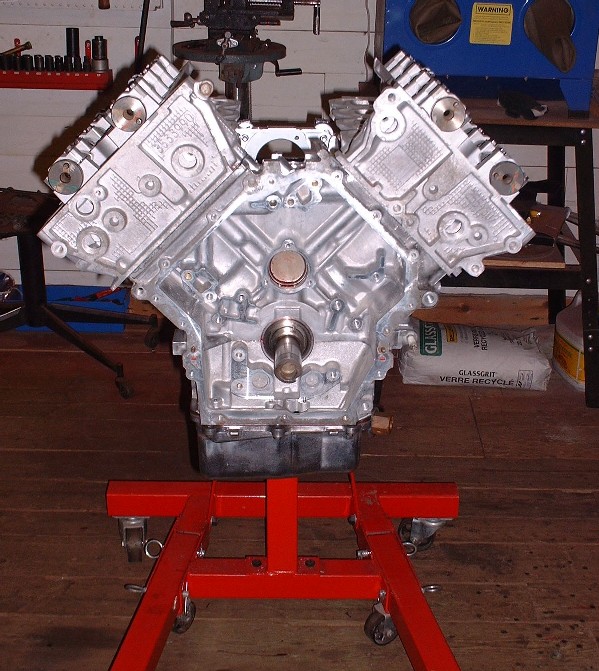
And here’s the double-crown look. From this point of view, without the intake, it’s clear how the double overhead cam heads make the engine so much wider than say, a SBC. I know the Northstars fit in a stock Fiero engine bay, but it’s kind of nice knowing that I’ll have an extra three inches of depth due to the frame stretch on mine.
In my next post I’ll go over torquing the heads down and what to look for to prevent foreign object damage from the by-products of the headbolts.[This message has been edited by Bloozberry (edited 05-26-2010).]
|
|
|
|
dratts
|
MAY 26, 11:32 PM
|
|
|
I'll never be able to afford what you are doing to your engine, but I would like to make an album of all your great pictures and I'm learning a lot from your build. Much appreciation!
|
|
|
|