
 
     |
| Ecotec, Fastback, T-Top Build. (Page 10/22) |

|
Will
|
DEC 22, 08:37 AM
|
|
| quote | Originally posted by Lunatic:
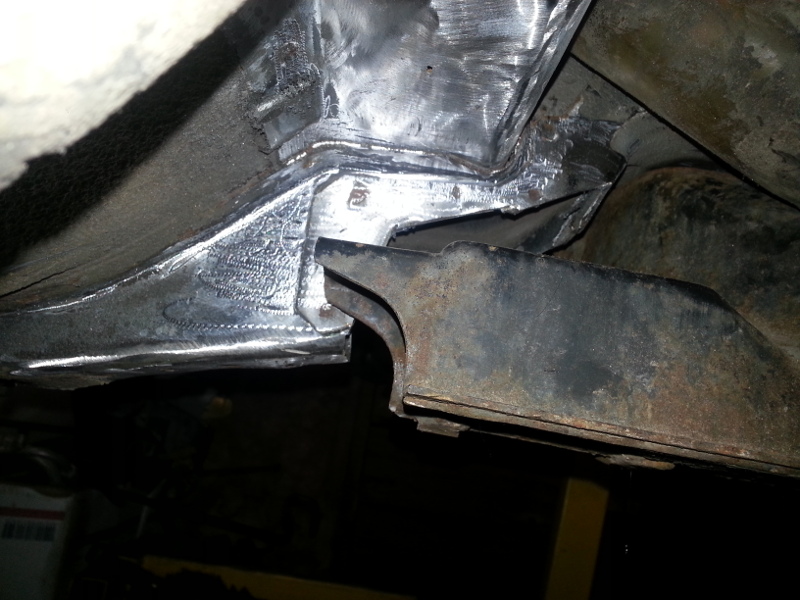
There are a few more area's that must be addressed. After removing the factory bracketry, you can clearly see the back two mounting locations are floating in the air.
|
|
The bracket that's already been removed from here already has the bolt hole in the right location fore/aft and left/right... it's just at the wrong height. It's easier to section the stock bracket to raise the mounting pad to the right location then weld it back together. That way you also retain the stock captured nut and don't have to deal with loose hardware.
|
|
|
|
Will
|
DEC 22, 08:40 AM
|
|
| quote | Originally posted by Lunatic:
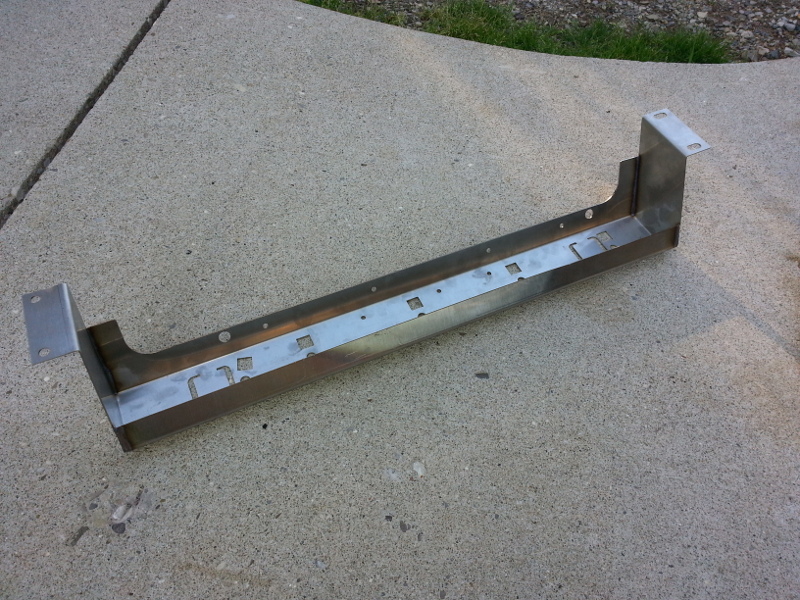
In hopes of finding a "nice" rad saddle, and not finding one, I decided to just make one.
I whipped this up, cut on the laser and formed on the brake. Just for something to do of course. Lol.
Ooh, aah, stainless too! No crusty crap here any more.
|
|
That's a really swift product.
I think you could sell a few of those... especially if they bolt in and work with stock radiator and mounts, while also allowing room for a specific larger aftermarket radiator. Obviously, you can't design for all aftermarket radiators...
|
|
|
|
Will
|
DEC 22, 09:12 AM
|
|
| quote | Originally posted by Lunatic:
Thanks for the reply. Indeed, I could replicate and modify the parts that you've shown and come up with an equally nice component for the Fiero. I've also posted another option. The below items can be bought fairly inexpensively and they provide adjustability which is nice as it can compensate for different offset wheels and such. I like both options and I'll keep you informed as to what route I go with.
 |
|
Did you make those solid rod ends yourself? I've been looking for similar parts to meet some specific dimensions.
My personal opinion is nothing but spherical bearings for the '88 lateral links.
Also, are you going to raise the inner pivots relative to stock?
|
|
|
|
Will
|
DEC 22, 09:14 AM
|
|
| quote | Originally posted by Lunatic:
A few 1/4" holes rosette welded and the right side is coming along.


|
|
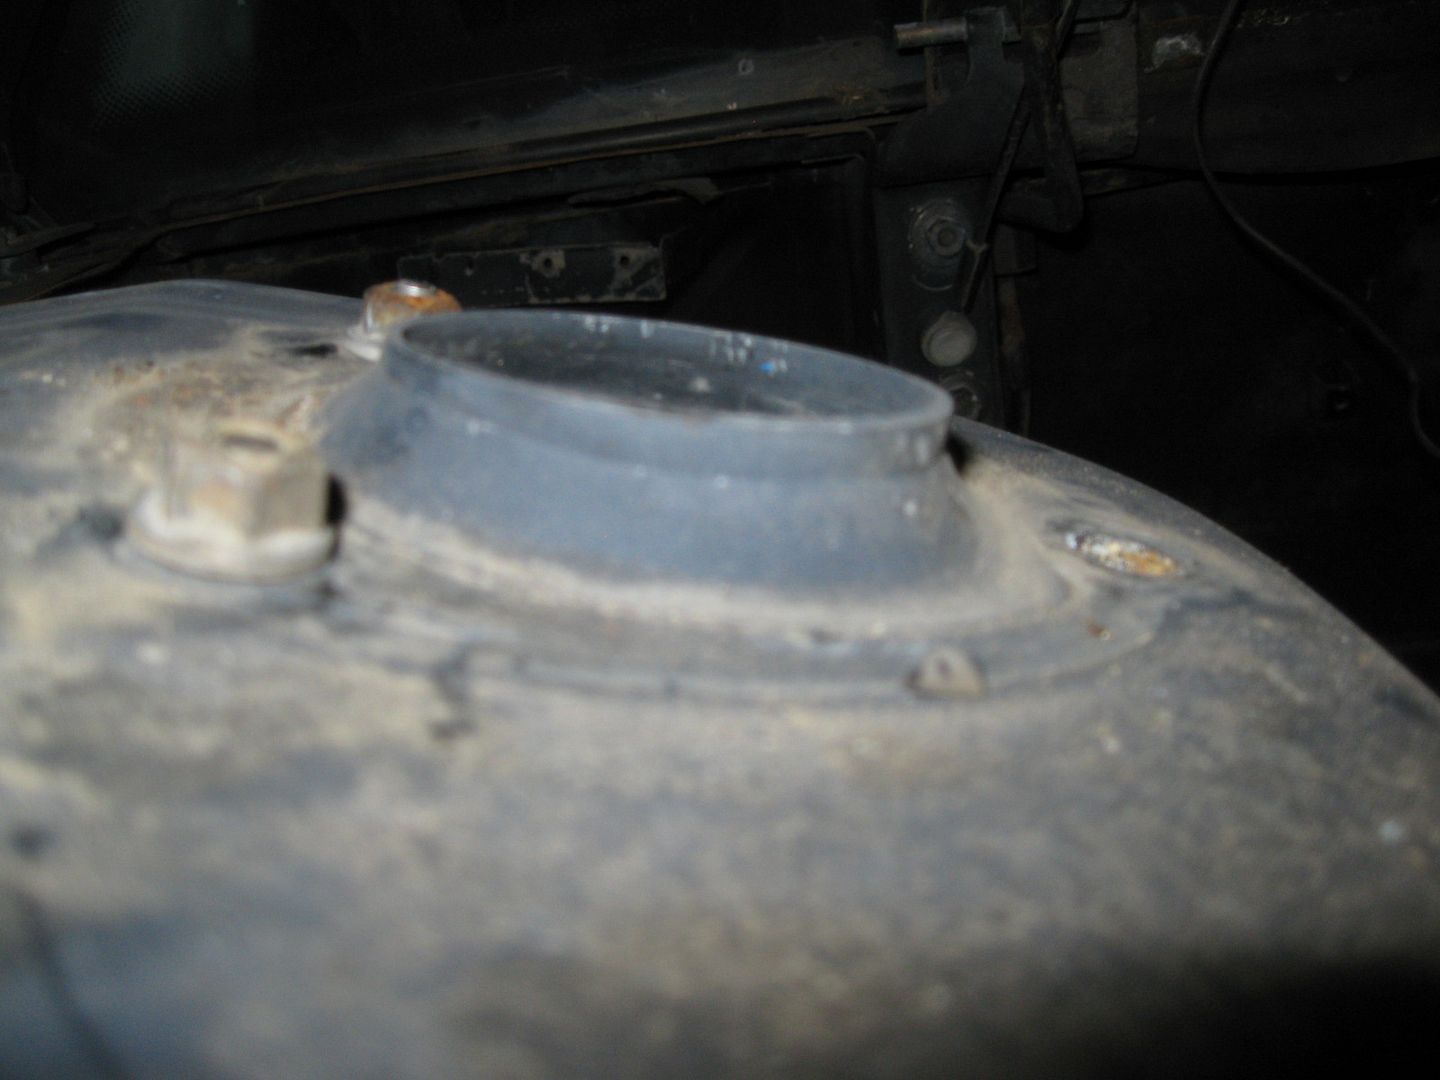
Are those the '84-'87 strut towers or the '88 ones?
|
|
|
|
fieroguru
|
DEC 22, 05:00 PM
|
|
| quote | Originally posted by Will:
Are those the '84-'87 strut towers or the '88 ones? |
|
Those are the 84-87 strut towers. You can see where the three separate oval wahsers were, plus the geometry of the center hole isn't the same as the 88's. Here is an 88:
|
|
|
|
Lunatic
|
DEC 22, 08:28 PM
|
|
| quote | Originally posted by Lunatic:
There are a few more area's that must be addressed. After removing the factory bracketry, you can clearly see the back two mounting locations are floating in the air.
|
|
The bracket that's already been removed from here already has the bolt hole in the right location fore/aft and left/right... it's just at the wrong height. It's easier to section the stock bracket to raise the mounting pad to the right location then weld it back together. That way you also retain the stock captured nut and don't have to deal with loose hardware.
I knew it was close but I never took the time to see how close. There you go folks, great information for all those that are looking to do the 88 crossmember swap. Thanks Will for pointing out this alternative.[This message has been edited by Lunatic (edited 12-23-2014).]
|
|
|
|
Lunatic
|
DEC 23, 05:28 AM
|
|
| quote | Originally posted by Lunatic:
In hopes of finding a "nice" rad saddle, and not finding one, I decided to just make one.
I whipped this up, cut on the laser and formed on the brake. Just for something to do of course. Lol.
Ooh, aah, stainless too! No crusty crap here any more.
|
|
That's a really swift product.
I think you could sell a few of those... especially if they bolt in and work with stock radiator and mounts, while also allowing room for a specific larger aftermarket radiator. Obviously, you can't design for all aftermarket radiators...
I've had a several PM's about this rad saddle that I made. So it appears as though there's interest in this product. It was fairly close to the original that I used to measure from with a few minor variations. With having said that, it fits the stock rad. I did make mine as wide as possible to accommodate a larger rad if needed. I was thinking of making one more and offering it to a member on here that could install, evaluate and see how well it works. Once I receive reply from said member, I'd make any changes to the final product and then offer them in the mall.
|
|
|
|
Lunatic
|
DEC 23, 05:30 AM
|
|
| quote | Originally posted by Lunatic:
Thanks for the reply. Indeed, I could replicate and modify the parts that you've shown and come up with an equally nice component for the Fiero. I've also posted another option. The below items can be bought fairly inexpensively and they provide adjustability which is nice as it can compensate for different offset wheels and such. I like both options and I'll keep you informed as to what route I go with.
|
|
Did you make those solid rod ends yourself? I've been looking for similar parts to meet some specific dimensions.
My personal opinion is nothing but spherical bearings for the '88 lateral links.
Also, are you going to raise the inner pivots relative to stock?
When I started my build, I only had 84 parts to use. Soon after, I found the 88 specific uprights locally. I then had to find stock lateral links and radius rods since I never had them to measure from. A guy I know is also building a Fiero. These are the links from his car. They're made by Bicknell Racing in St. Catherines Ontario, Canada and I'm not sure if he bought the ends like that or made them.
Their part numbers: 13170 for the long bar, 13090 for the rear lateral bar, 13080 for the front lateral bar.
I was going to get a set but since I already bought stock 88 pieces, I'll probably just use them. I also have spherical joints, swage tubes and the special seals. I think I'll save them for now.
I did not raise the inner pivots and they are still in the stock location. I now see the benefit of raising the mounting points and I will probably do this as my cradle hasn't yet been powder coated.[This message has been edited by Lunatic (edited 12-23-2014).]
|
|
|
|
Lunatic
|
DEC 23, 05:32 AM
|
|
| quote | Originally posted by Lunatic:
A few 1/4" holes rosette welded and the right side is coming along.
|
|
Are those the '84-'87 strut towers or the '88 ones?
Yes, these are the 84-87 strut towers. I did have the back half of an 88 but it was hit in the side. I couldn't get it to line up with any of my measurements as it wasn't square any more. I went back to the 84-87 style. I'll be making coil overs for the rear and move the top of the strut to where the 88's are. I'll also make a nice cover for it so it looks factory.
Note: To those swapping in an 88 cradle into an 84-87 chassis. Here are the proper 88 strut mounting point locations.
When looking "DOWN" from the top of the 84-87 engine bay, and standing behind the rear of the car facing forward, the new 88 strut shaft centreline location will be:
INWARD (47.625mm) or 1.875" (1 7/8")
FORWARD (30.1625mm) or 1.1875" (1 3/16")
These measurements are "per strut". You'll have to move both struts!
|
|
|
|
Lunatic
|
DEC 26, 10:55 AM
|
|
|
|
|


