|
| World's slowest Fiero/Quad 4 Swap (Page 4/50) |

|
Quad Raider
|
NOV 25, 09:47 AM
|
|
|
|
|
Quad Raider
|
NOV 26, 05:46 PM
|
|
|
|
|
Quad Raider
|
JAN 14, 06:45 PM
|
|
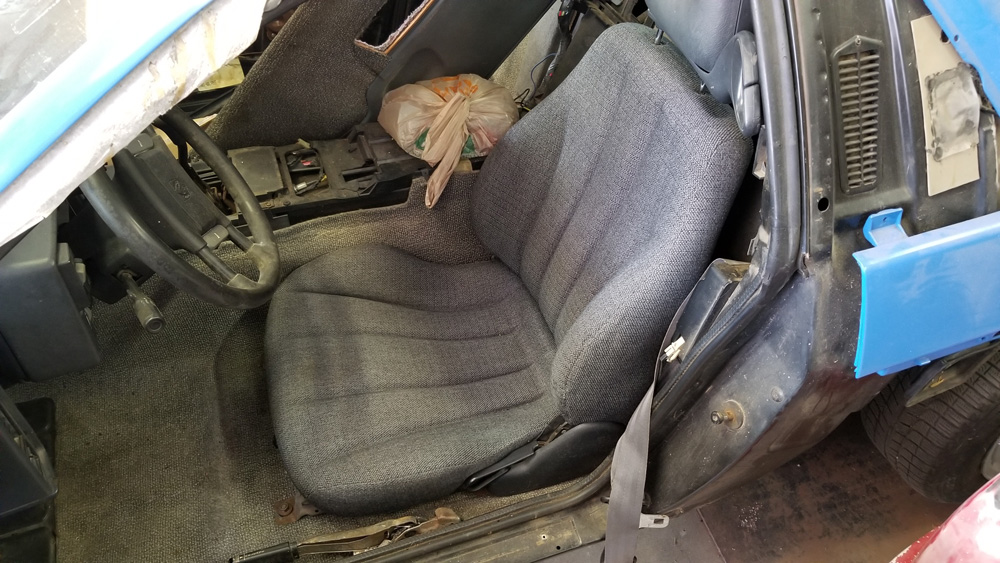
Here's a photo of the Camaro seats installed in the car. I think they look great and may just keep these covers instead of trying to find the gray/dark gray version. The only downside is that they look so good they make my original carpets look pretty worn. Once I get the car on the road I may spring for new black carpets.
 [This message has been edited by Quad Raider (edited 01-17-2018).]
|
|
|
|
Quad Raider
|
JAN 14, 07:06 PM
|
|
|
|
|
Quad Raider
|
JAN 14, 07:20 PM
|
|
I had a week's vacation over Christmas, so my son and I made the 3-hour drive to Wichita to look at a couple Fieros in a salvage yard up there. On the way we stopped in Winfield, Kansas which is home to a guy who owns all kinds of exotic cars. He keeps them in an old storefront right on the main drag, and periodically trades them out.
Last time we were there, which was a couple years ago, it was full of Pontiac muscle: an early 70s TA, a couple '69 GTOs including a Judge, etc. This time there was something just as cool:
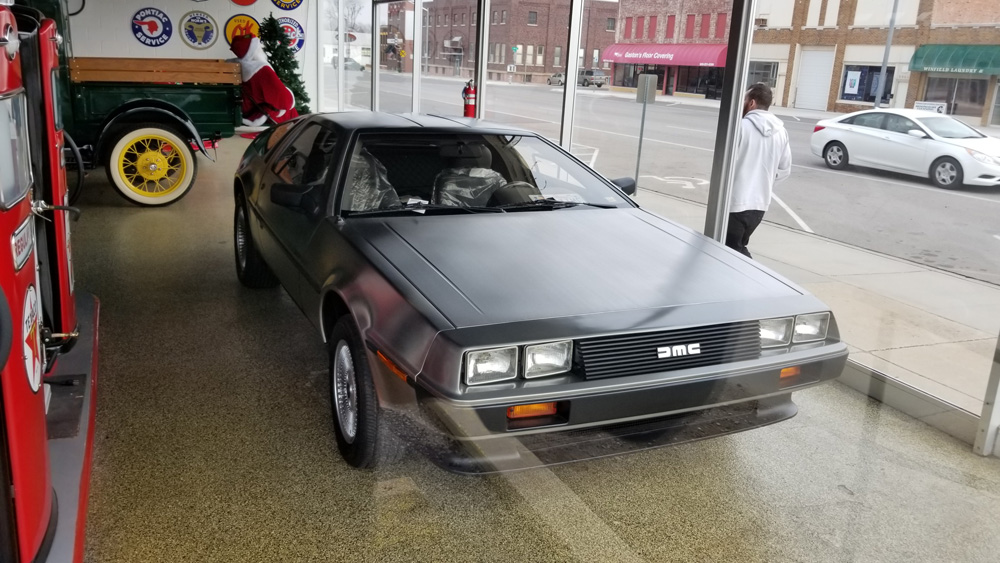
It looked brand new, like it had just come from the dealer.
|
|
|
|
Quad Raider
|
JAN 27, 10:55 PM
|
|
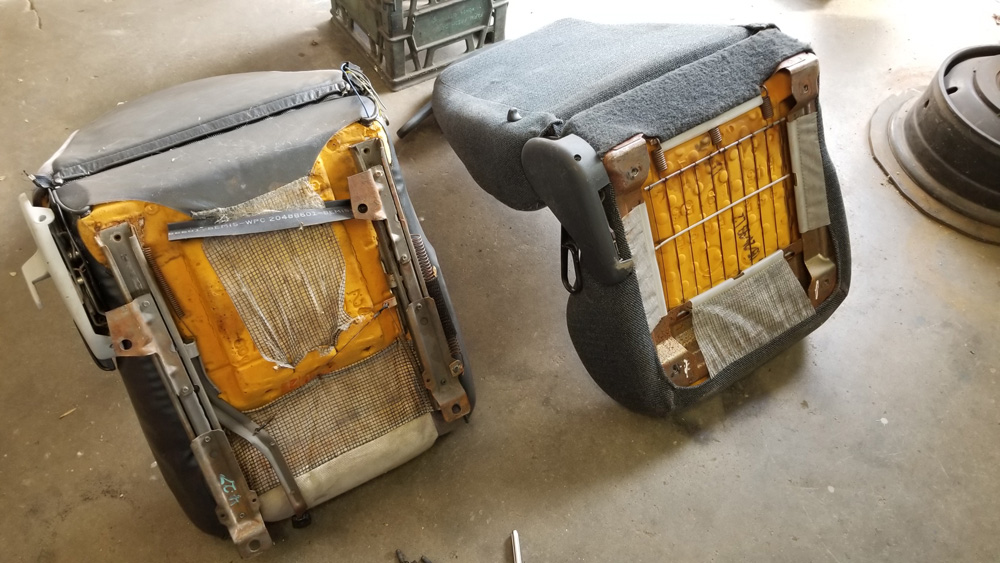
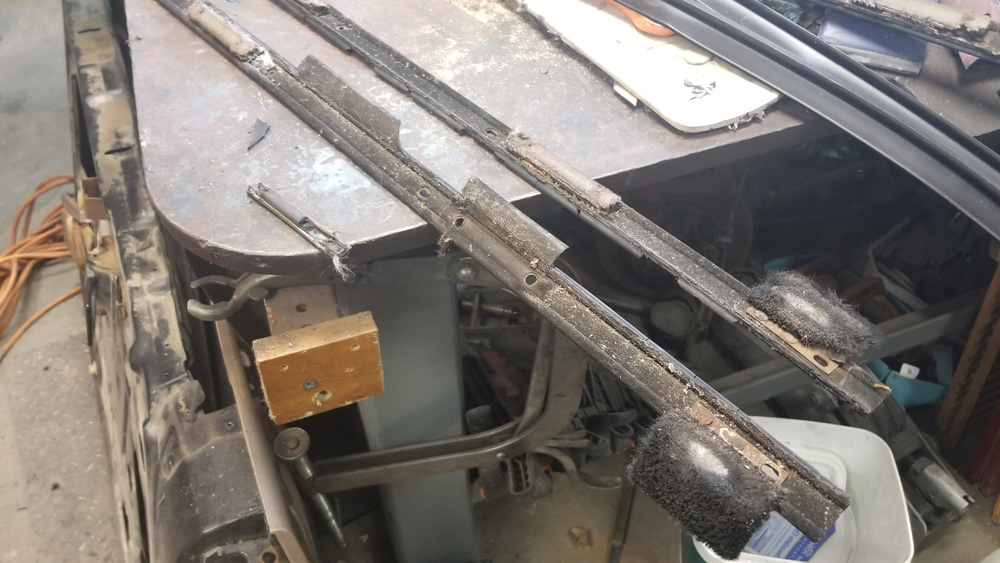
Spent most of the day working on the car today. I wet sanded several body panels, but also started working on my DIY dew wipes. I used the tips in this thread to order the parts:
http://www.fiero.nl/forum/Forum2/HTML/129107.html
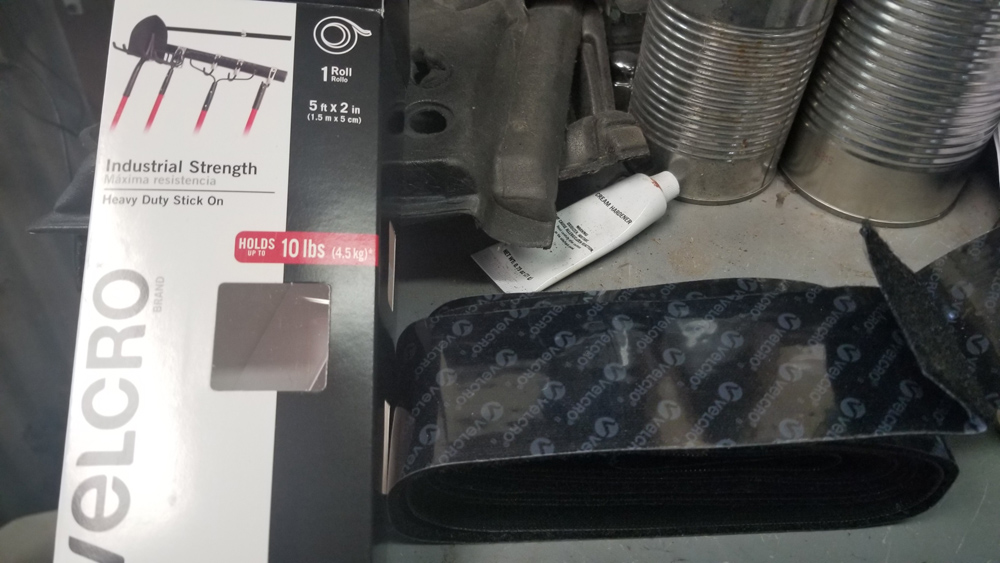
A couple years passed before I removed my old dew wipes and I was surprised at how worn out they were, so then I figured I'd just order all new wipes. After a couple of days I changed my mind again (a common theme in this project), and decided to go ahead and use the parts I'd already bought to make my own. Velcro works great for the felt material, and it has adhesive on one side, making installation simple.
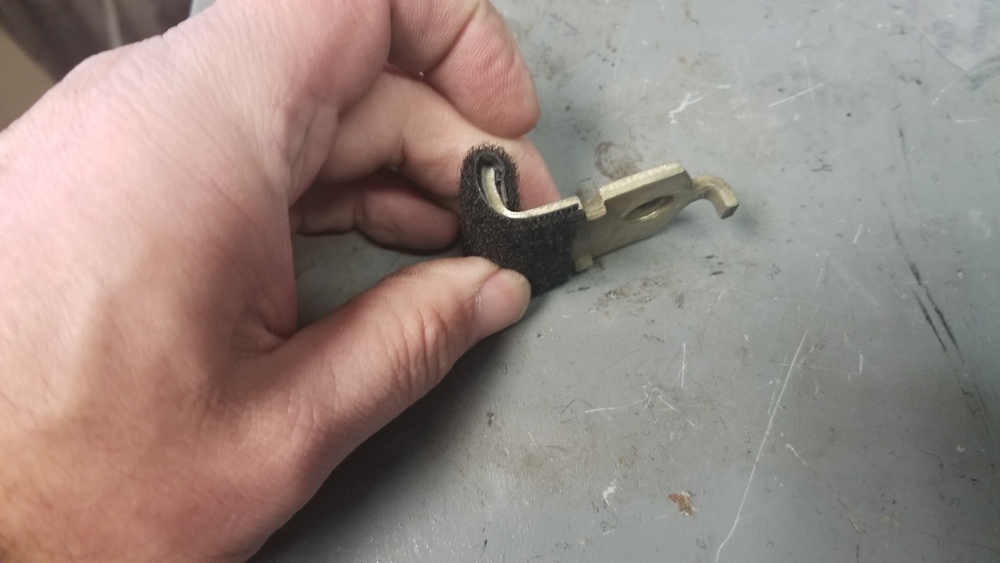
The one part I'm struggling with is the small guides. The felt is so stiff it crumbles off but the rubber underneath has turned to stone and will not come off the bracket.
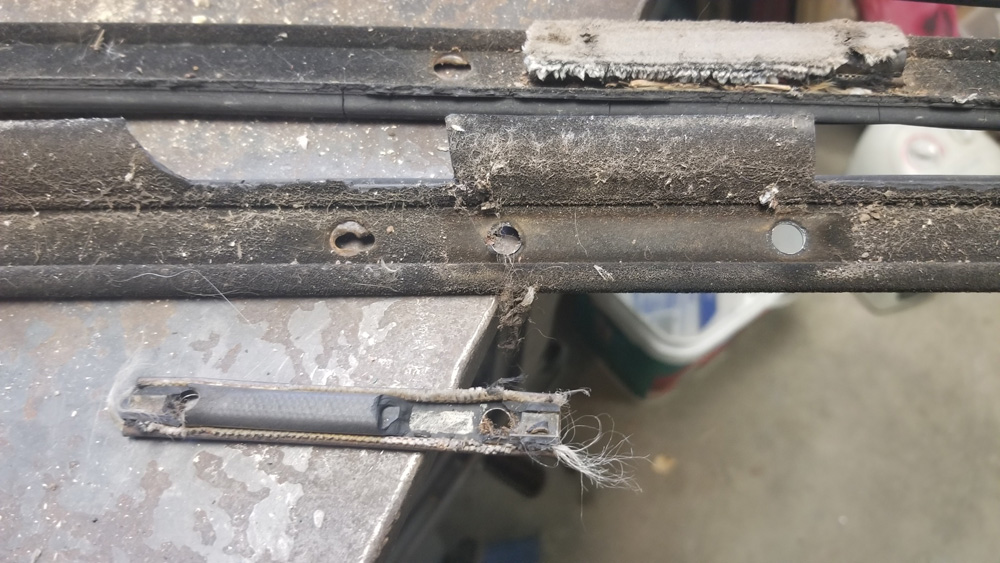
At first I considered using vacuum hose to replace the rubber, but then found some weatherstripping at Home Depot that's shaped exactly the same, flat on one side and rounded on the other. It even has adhesive.
I may try burning the old stuff off.
I hope to finish painting and installing all the body panels in the next few weeks. I know that that will give me a huge emotional boost and help inspire me to finish.
|
|
|
|
Quad Raider
|
FEB 03, 10:12 PM
|
|
I was cleaning out my computer yesterday and I found hundreds of photos I thought were lost. As I've mentioned, I accidentally deleted all the photos on my phone a few years ago, including most of the ones I took of my Fiero project. I must have saved them to my computer and forgotten all about it. Oh well.
Here's the first batch. They show how I set a Quad on the Fiero engine cradle to figure out how to mount it.
This Quad is out of a Grand Am, but I don't remember which one. If you're going to mate a Quad to a Fiero cradle, I highly recommend using a welding table. This table was a gift from my brother and it made the process much easier.
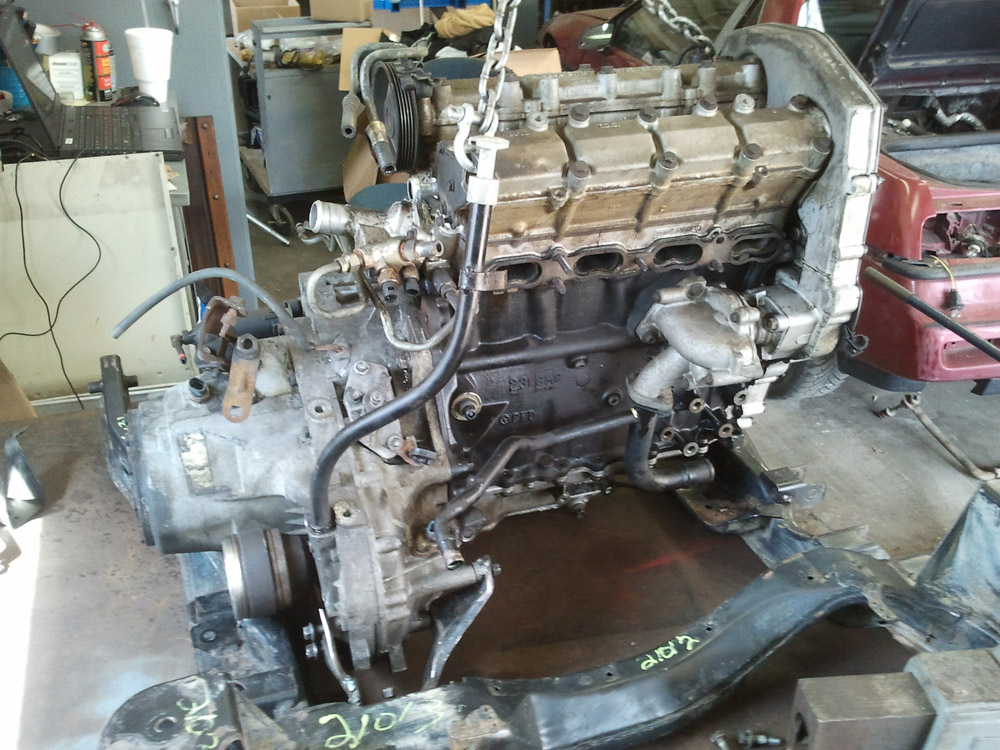
As you can see, the exhaust hump is very close to the AC compressor on the Quad, so most people cut it out and weld in a straight piece. I showed that process earlier in this thread.
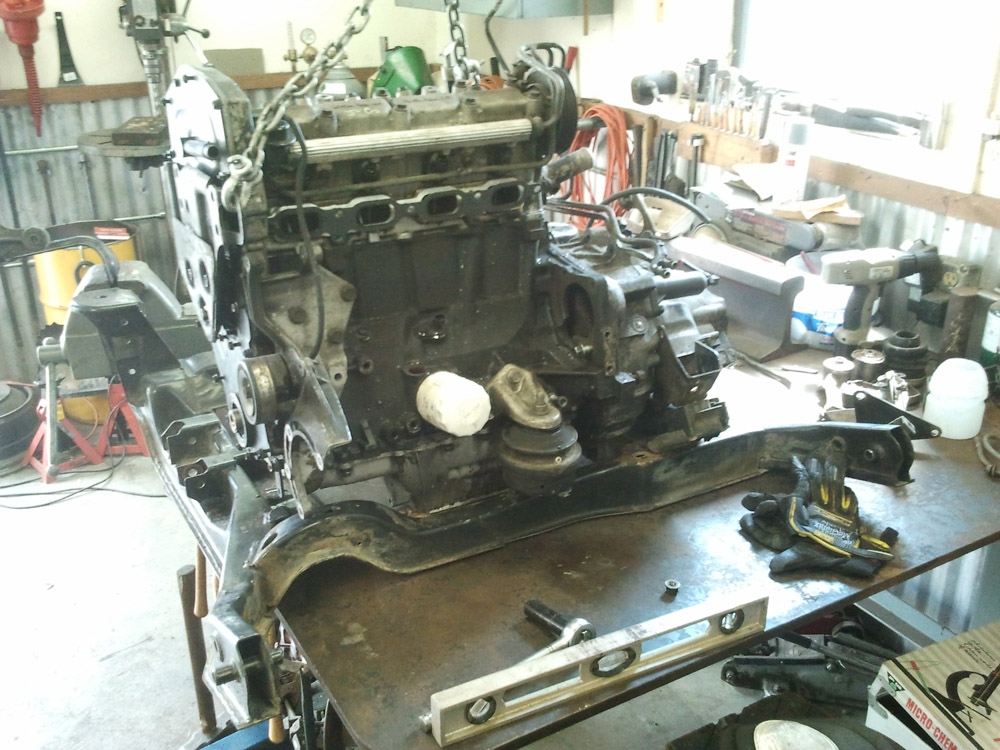
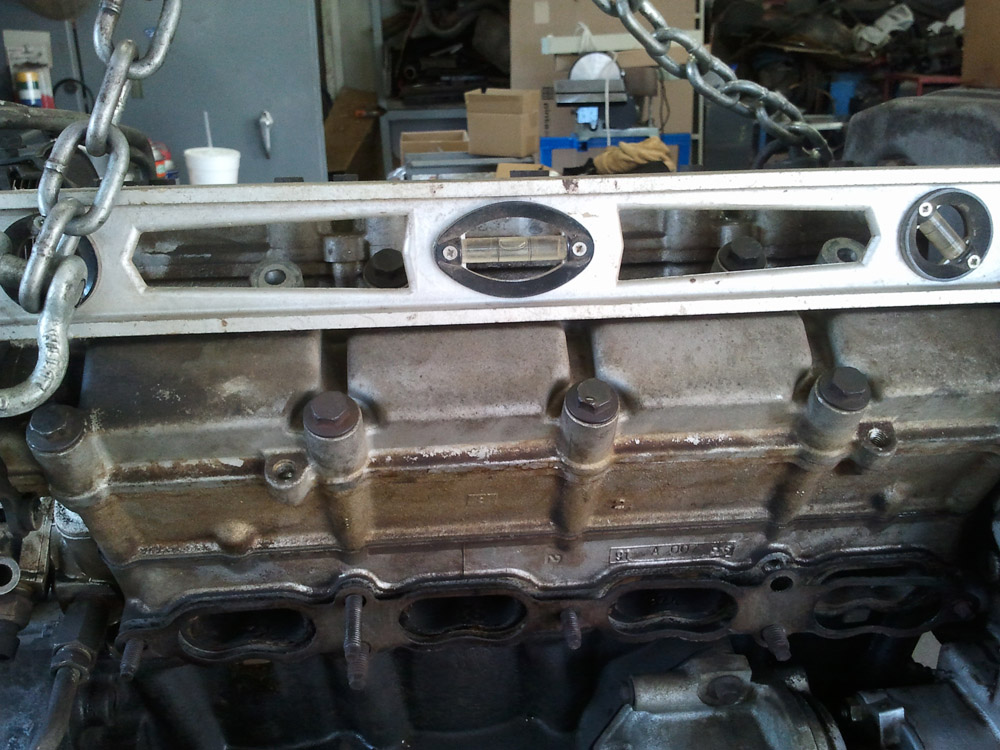
I used a level on the Quad's cam towers to make sure the engine was sitting level from side to side. It took some jockeying, but there's a sweet spot where both ends clear the cradle yet the top of the engine fits under the deck lid with NO modifications. It's difficult to describe but it does exist.
I used pieces of wood of varying thicknesses to get the engine level. It's been 7 years since I did this, but I think the bottom of the oil pan does not sit level, it's angled, with the drain plug at the bottom of the incline. The Quad is such a weird looking engine, I figured it made sense to have it sitting crooked in this way.

In previewing this post, I realized the cradle pictured in these photos is an '88 that I bought at the salvage. At some point I decided not to switch to the '88, because of all the other modifications it would require. It's obviously different from my '87, but the process is still similar.
|
|
|
|
Quad Raider
|
FEB 03, 10:19 PM
|
|
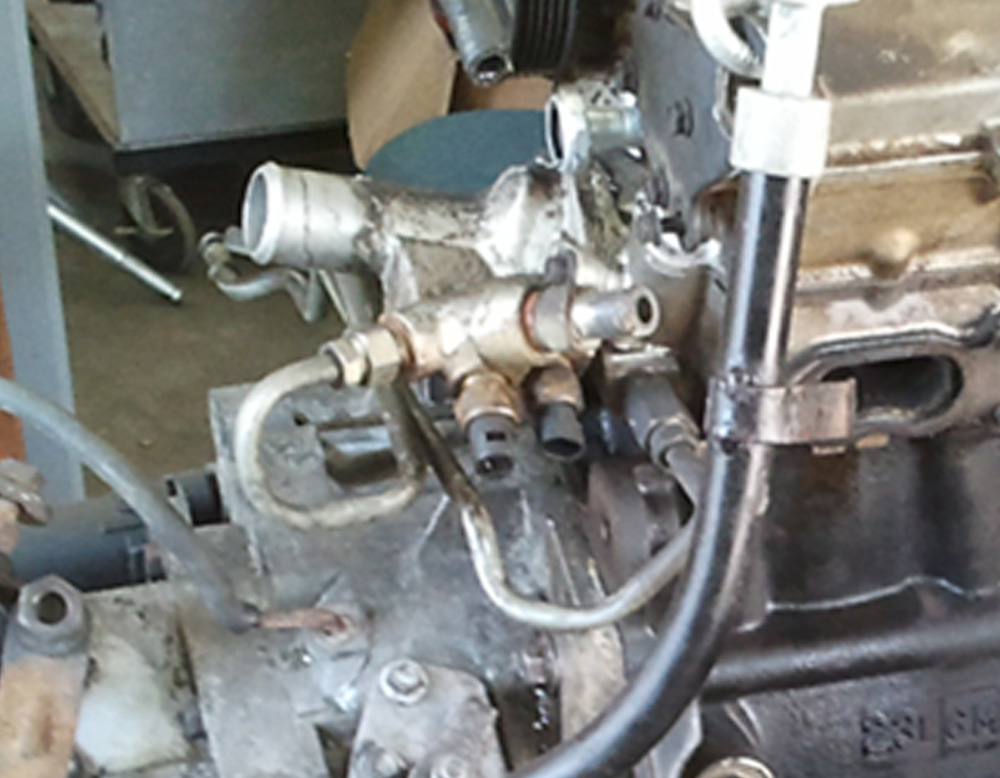
A quick note about one of the odd features of the Quad 4. They came from the factory with a coolant line that runs from the thermostat housing to the throttle body and then back to the head. The system was probably designed to warm the throttle body in cold climates, but it's not needed. It's common to remove the lines and plug the coolant fittings on the t-stat housing and head, and just leave the openings on the throttle body.
 [This message has been edited by Quad Raider (edited 03-11-2018).]
|
|
|
|
Quad Raider
|
FEB 03, 10:36 PM
|
|
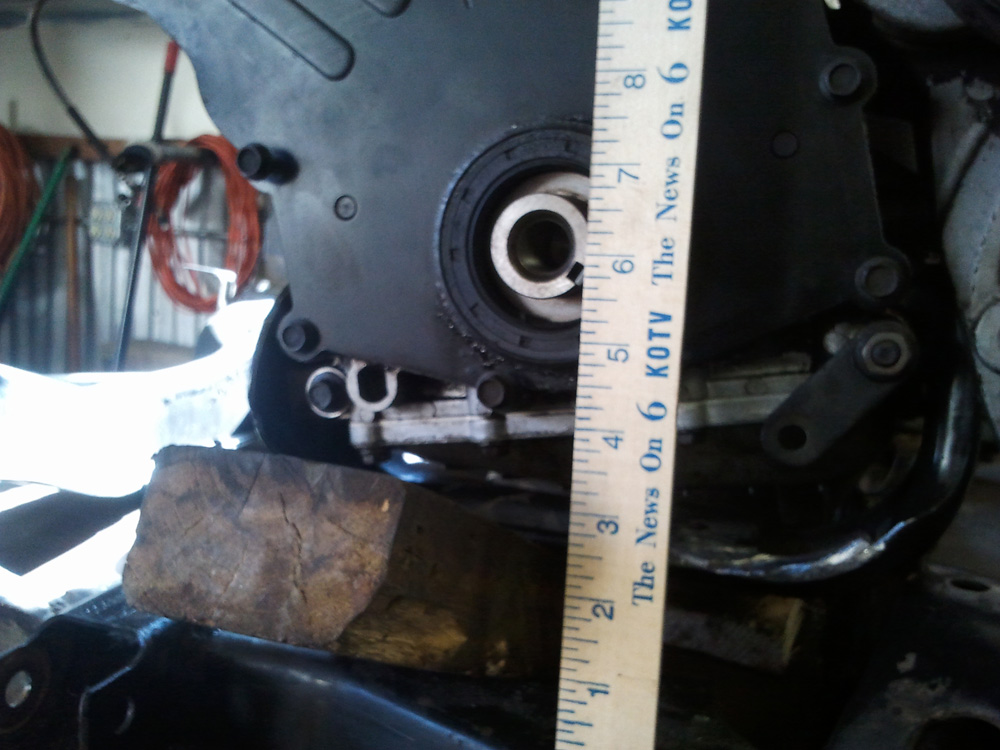
After wrestling the engine for a while, I finally decided to roll it out of the garage and power wash it.

Here are a couple more photos showing how I used wood blocks to get the engine where I wanted before working on the mounts.
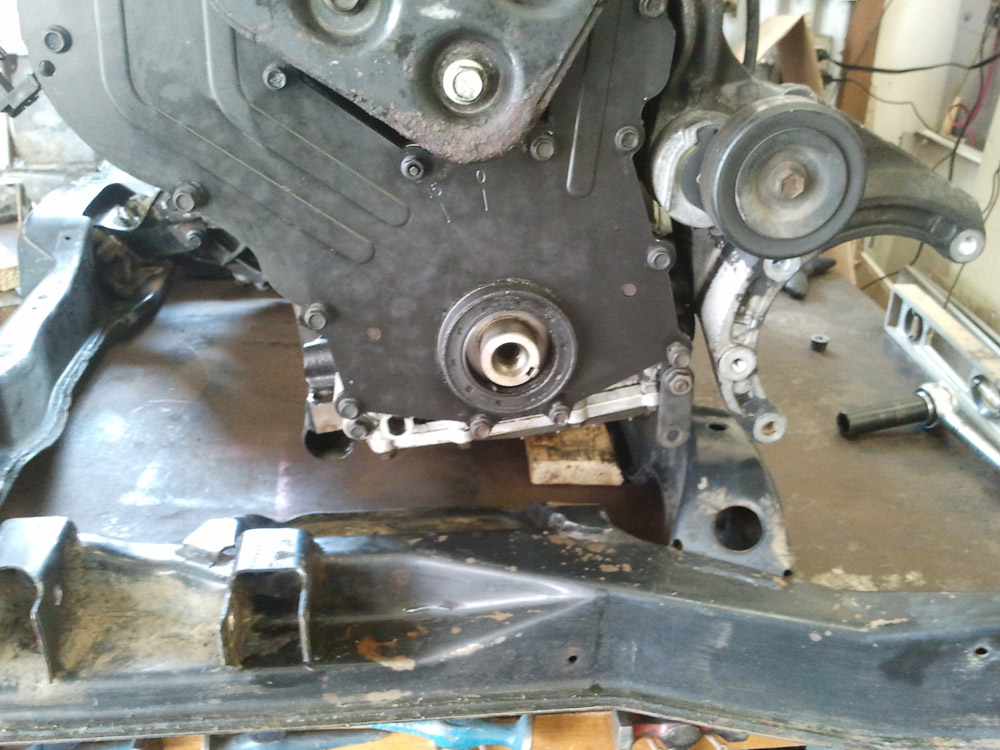
I don't remember what I measuring for, but here it is for posterity.
|
|
|
|
Quad Raider
|
FEB 03, 10:54 PM
|
|
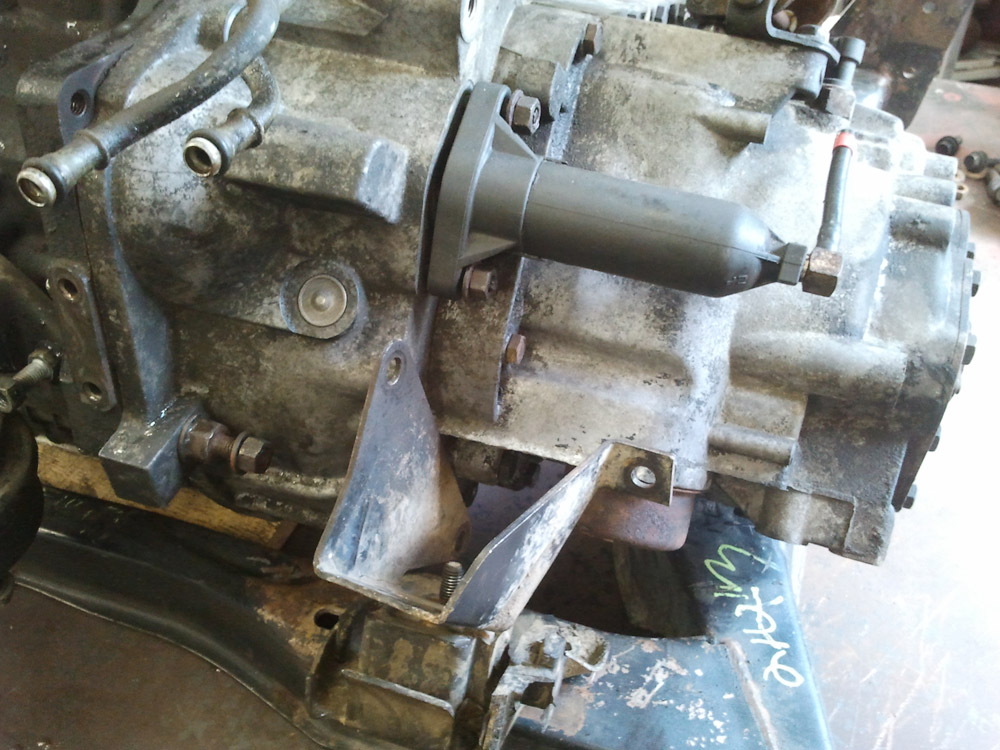
I found the whole series of photos I took when I modified the Fiero's transaxle mounts to fit the Quad's Getrag. I could've fabbed new mounts, as I've seen some other guys do, but I knew using the Fiero mounts as a starting point would be faster.
The Fiero's front transaxle mount won't fit around the Getrag's housing.
I used a piece of cardboard to make a pattern, then cut the Fiero mount.
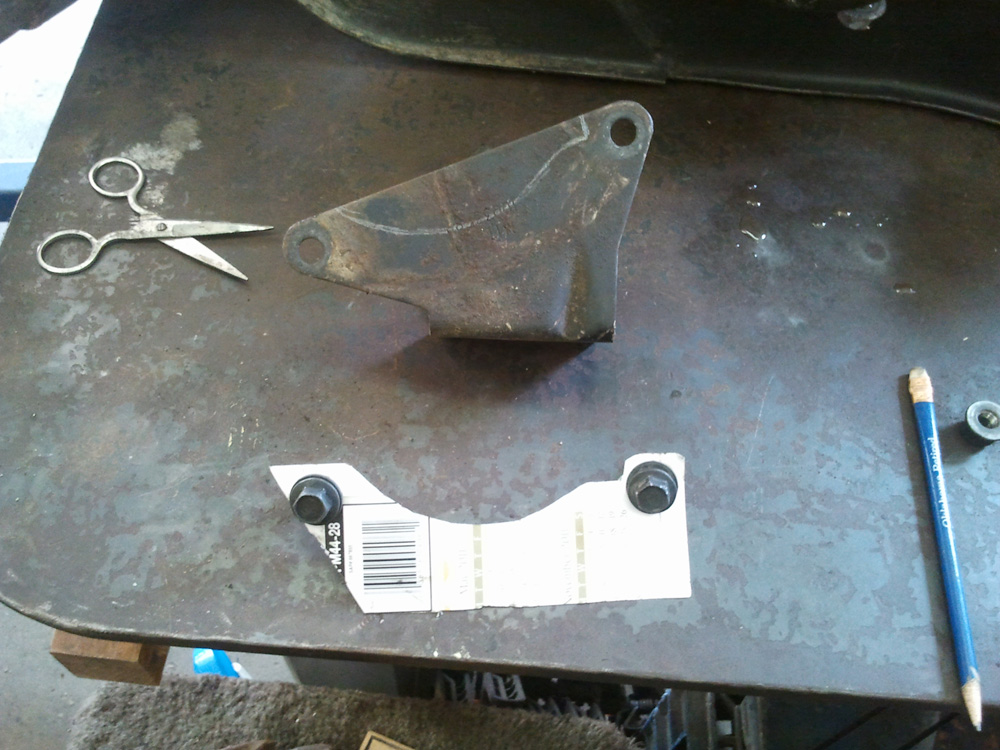
After cutting down the Fiero mount and attaching it to the Getrag, I decided what was left was too flimsy. You can see why.
Somewhere I have a photo of the angle iron I used, instead. Maybe I already posted it here. I'm too tired to check.
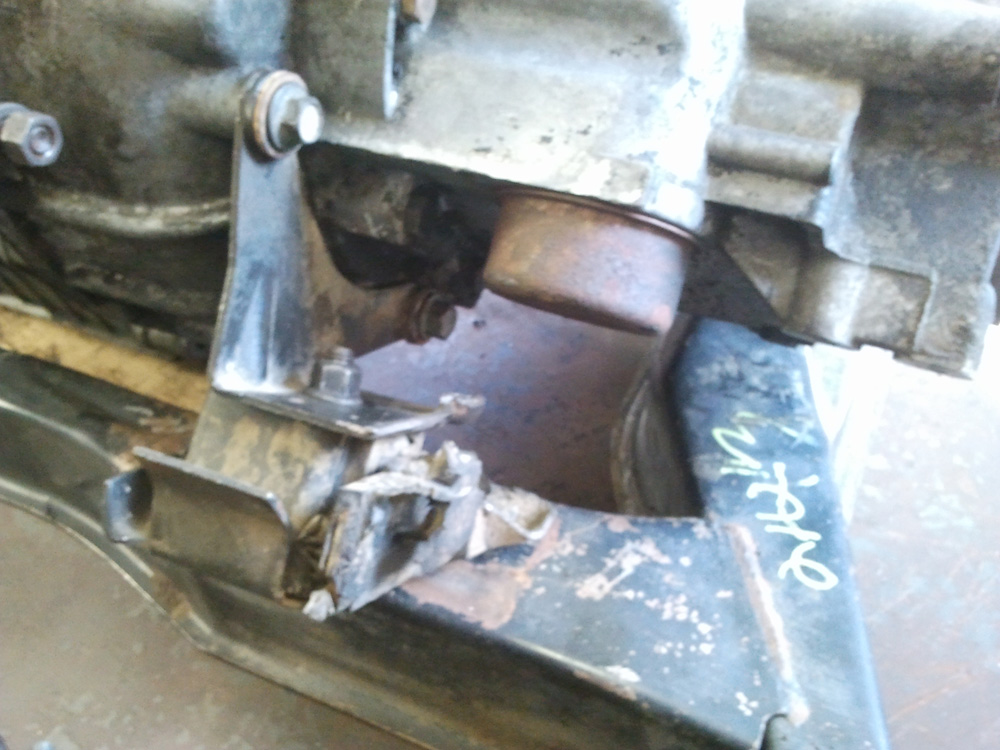
The rear mount would almost fit, but the holes were just a little off. I cut one side and welded in a small piece of angle iron to move the bolt hole about a half an inch toward the transaxle. I welded a spacer onto the other hole so it would fit tightly to the case.

I did all this work this way just to get the engine and transaxle mounted securely enough to put the cradle in the car to make sure everything fit without needing to modify the deck lid. It worked.
My plan has always been to pull the cradle out and go over these mounts again, either beefing up and beautifying what I've already done, or starting over to make something better.
|
|
|
|