|
| RCR's body mods... (Page 65/67) |

|
RCR
|
JUN 30, 07:21 PM
|
|
| quote | Originally posted by Awalker W02:
Awesome work
|
|
THank you... 
|
|
|
|
RCR
|
JUL 02, 12:39 PM
|
|
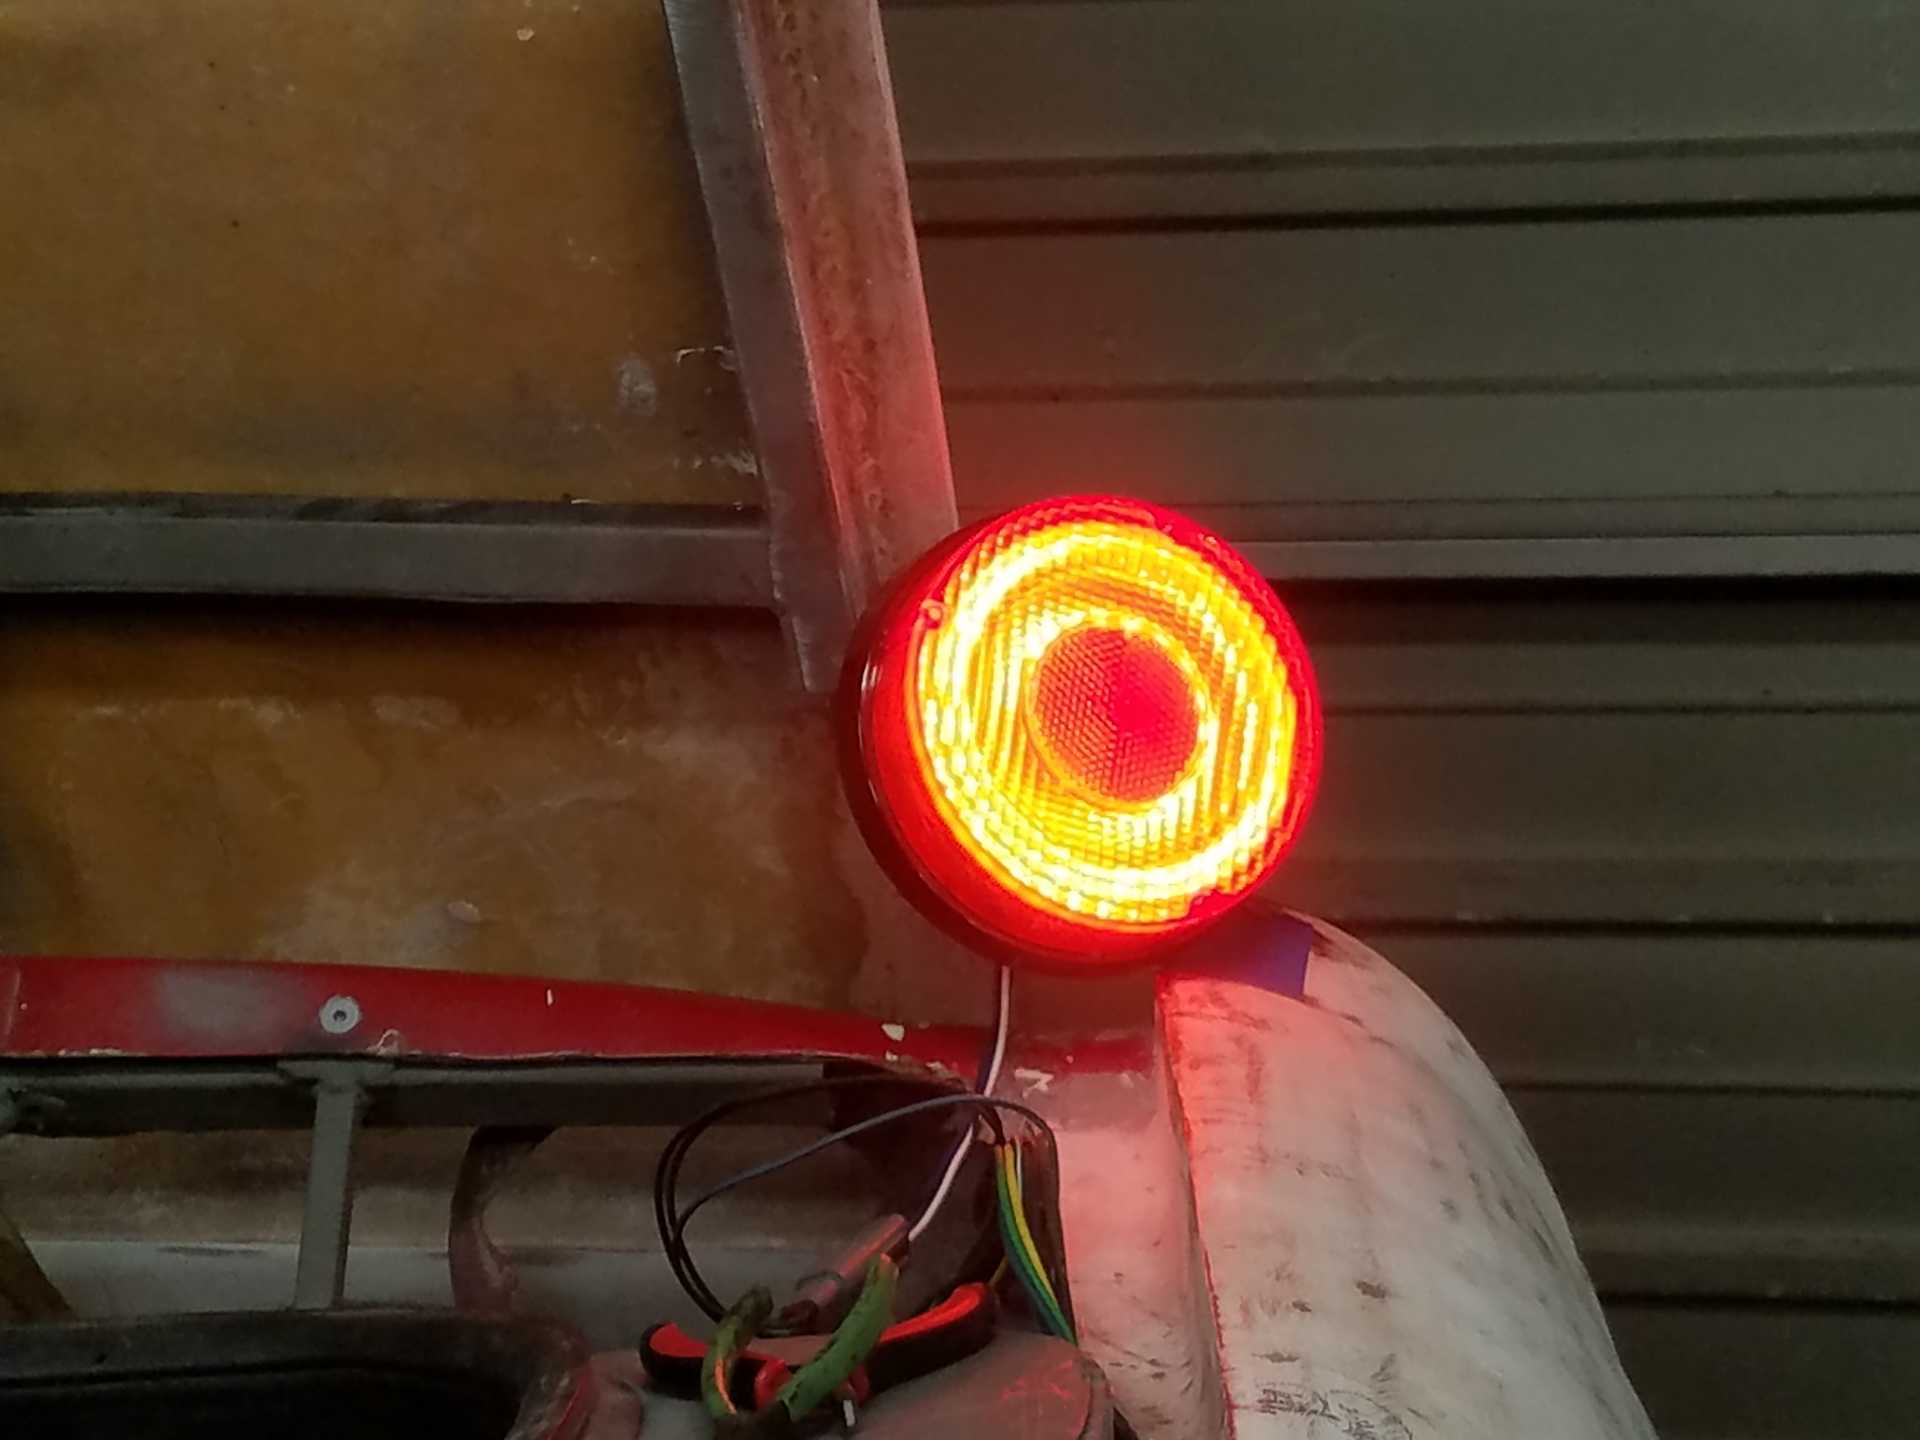
Back in late April, I started tinkering with the taillights. As shown, I made a mold to replace the vacuum formed backs. Since then, I've gone in a different direction (as usual). Here's some of the tale...
I wanted to update the lights from bulbs to LEDs. I also wanted to update the look. So, after a lot of research and some false starts, I ended up with halo rings from Superbrightleds.com.
I tried a couple sizes and ended up with the 120mm and 80mm rings. I also purchased the halos to go along.
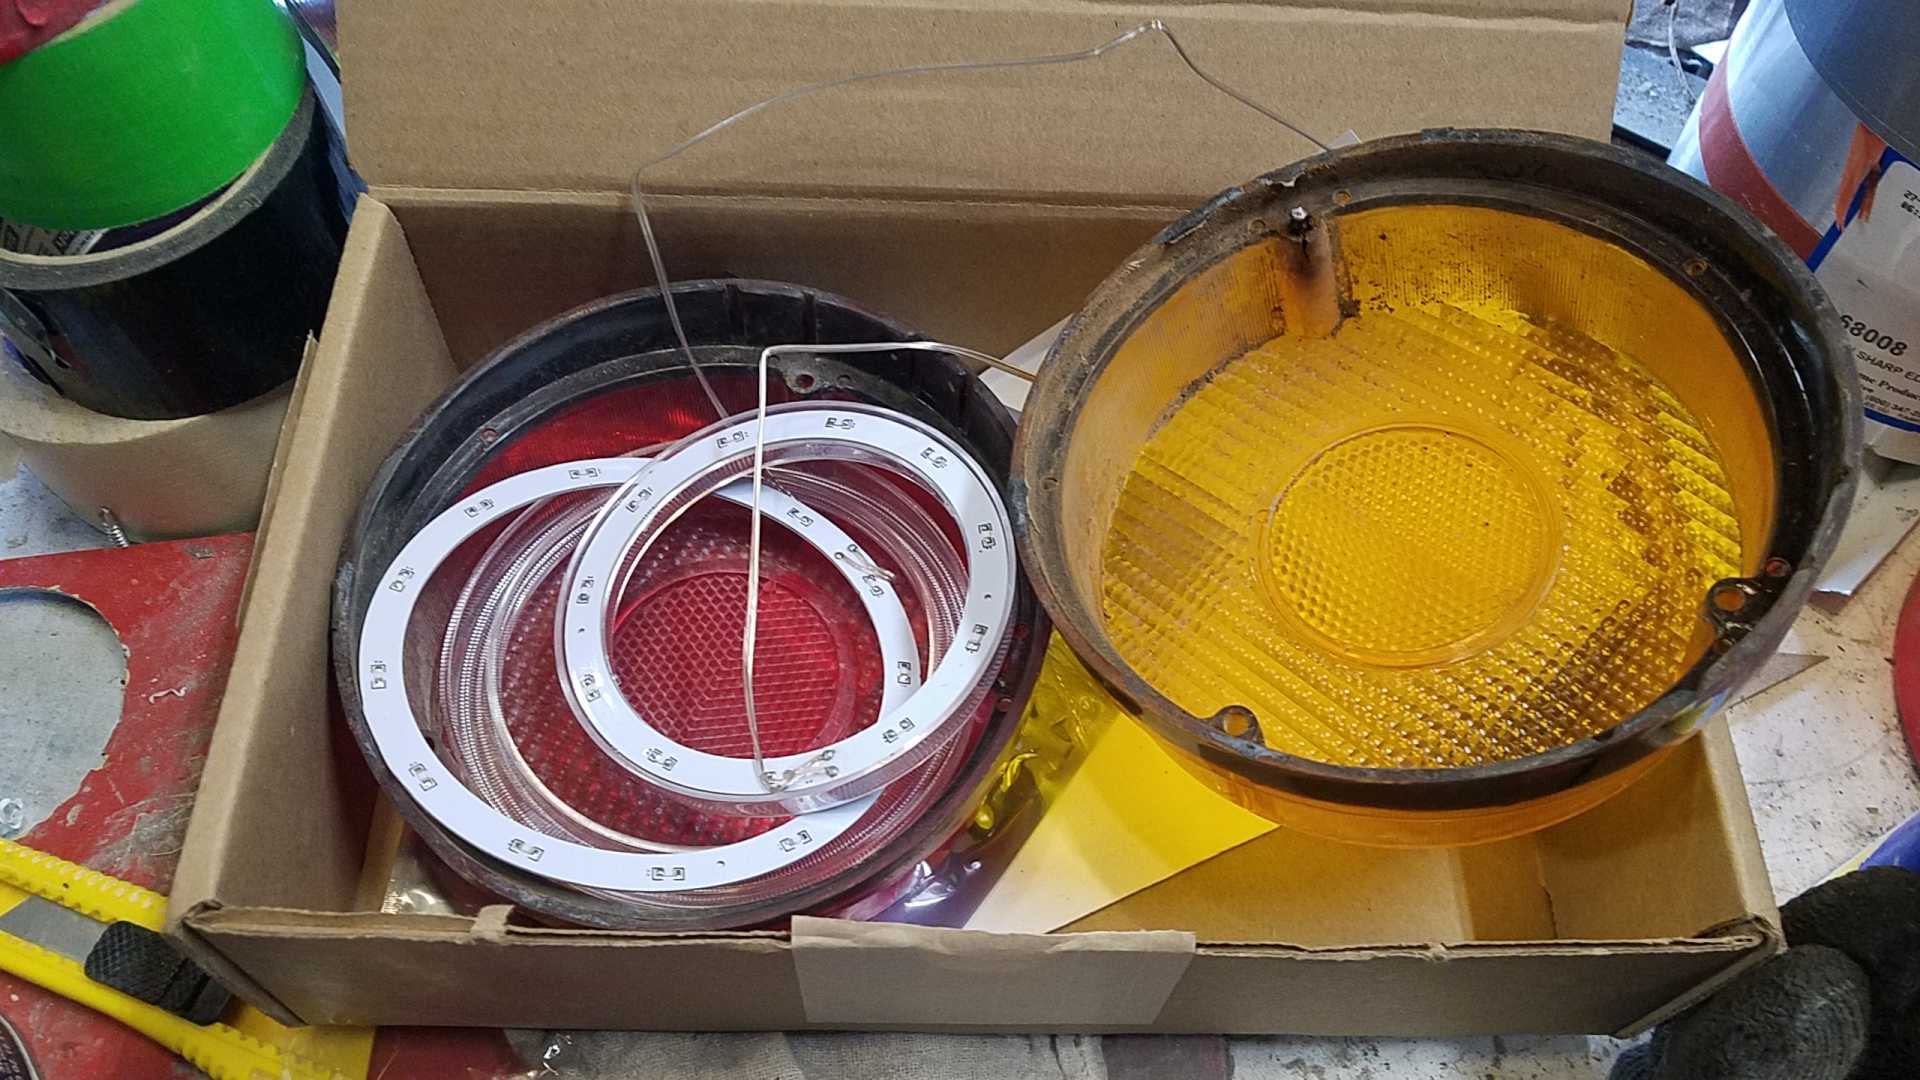
This image shows the 120mm and a 100mm ring on a turn signal lens.
The 120mm ring and halo nearly fit perfectly into the lens. Only a slight mod to the screw bosses was required. I then used clear J-B Weld epoxy to glue the halo to the lens, and the LED ring to the halo.
I gooped enough epoxy on to seal the LED board from moisture.
Instead of using the fiberglass backing I started to make, I ordered some 1/16" ABS stock and cut out flat plates that fit right into the lens covers. To this, I mounted the inner 80mm LED ring. I was trying to provide some depth to the look.
After epoxying the LEDs to the halos, I epoxied them to the plates (I also painted the inner surface silver). I found that the back plate needed a good scuffing for the paint and epoxy to stick.
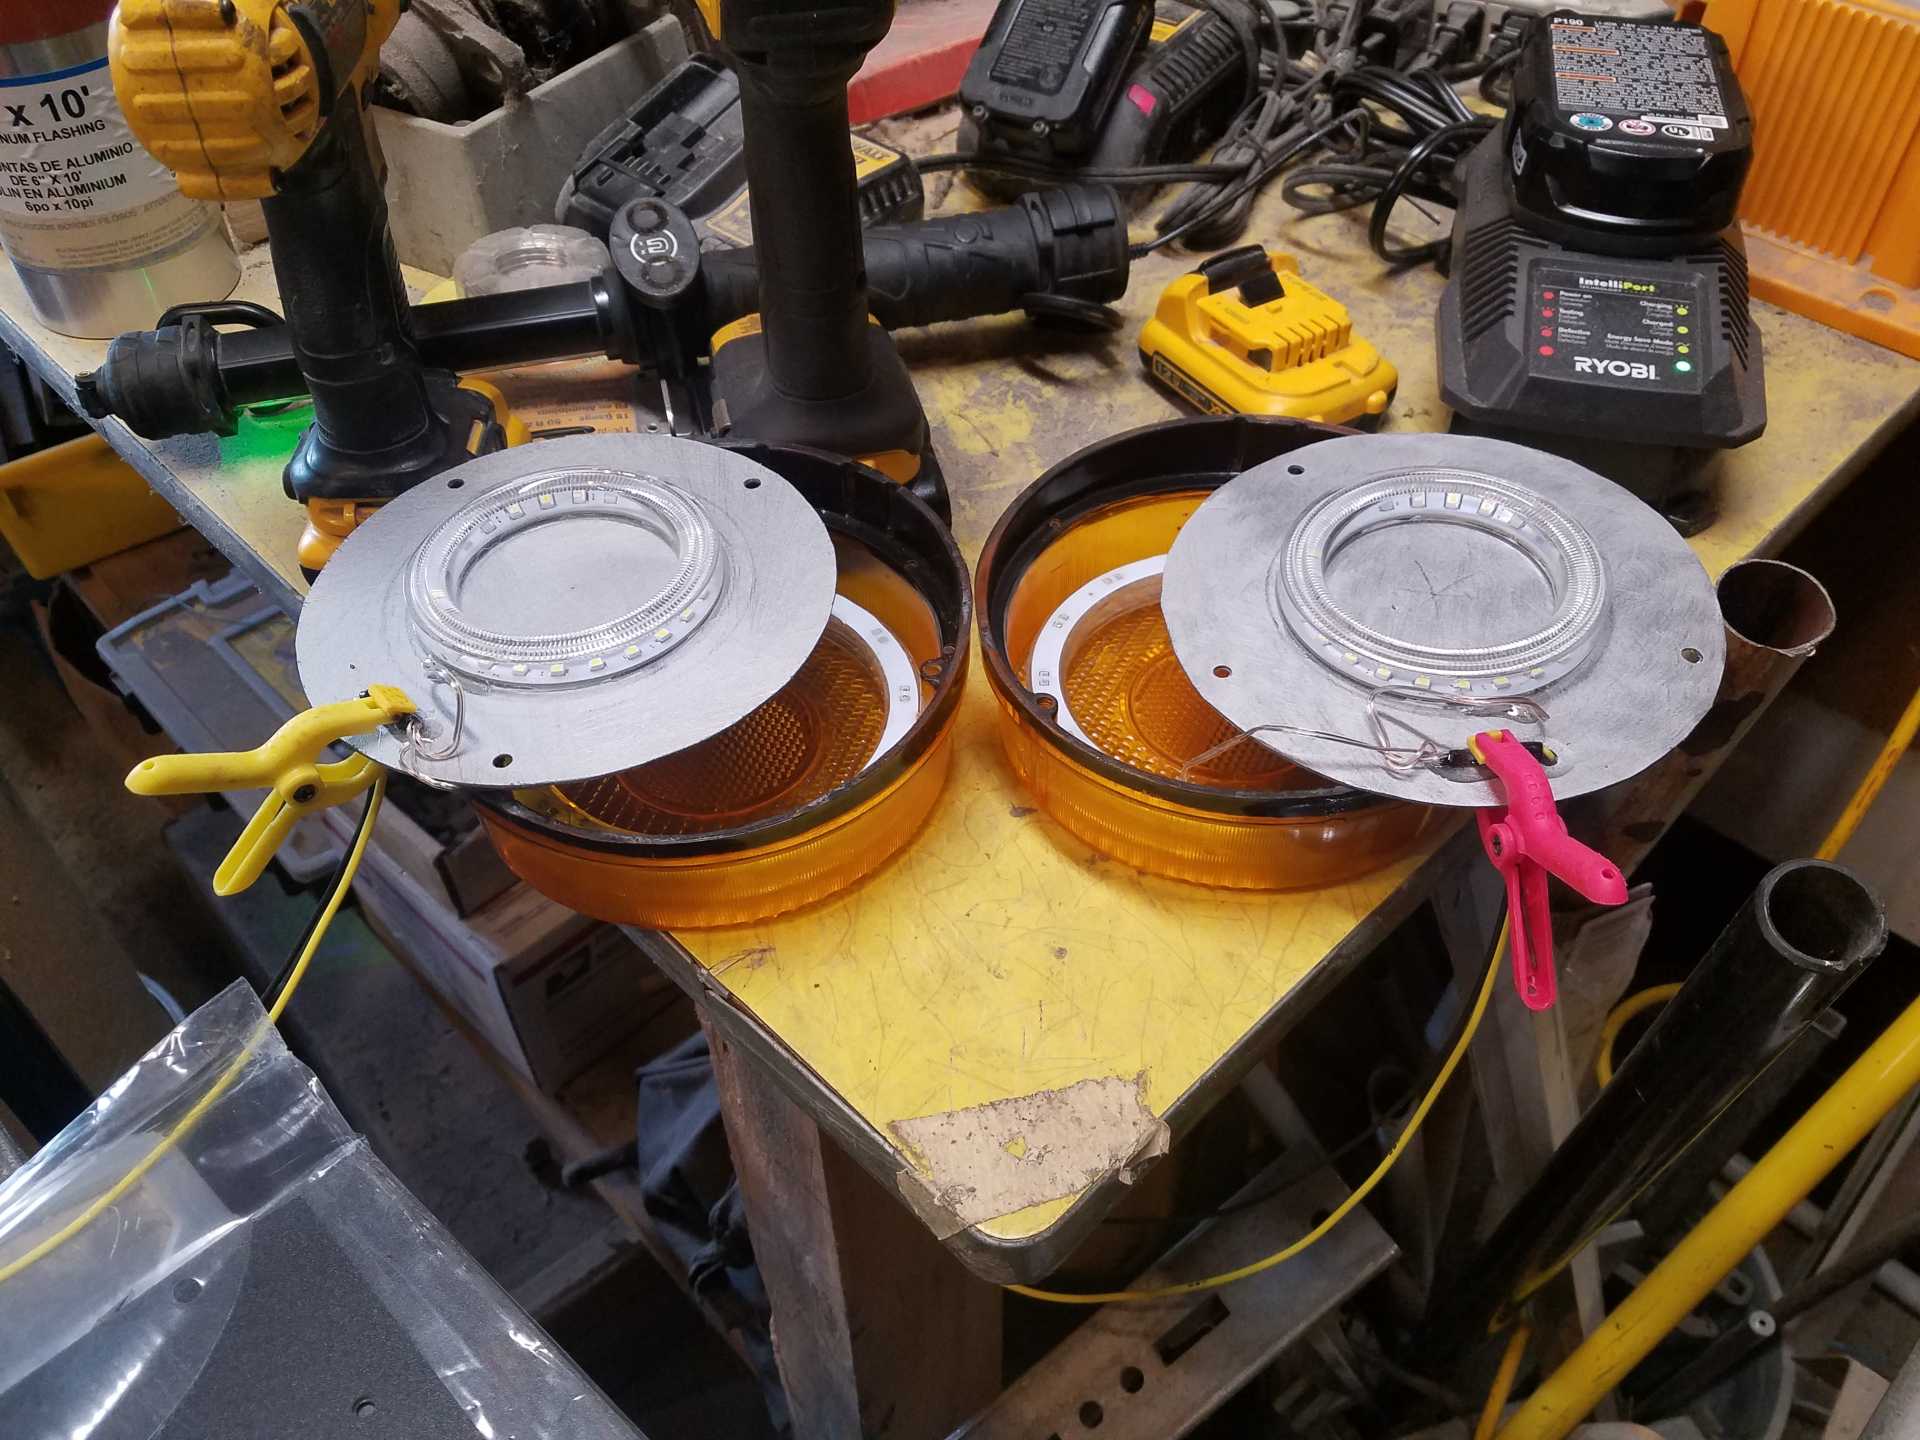
Here, you can see the outer ring mounted to the lens, and the inner ring mounted to the back plate.
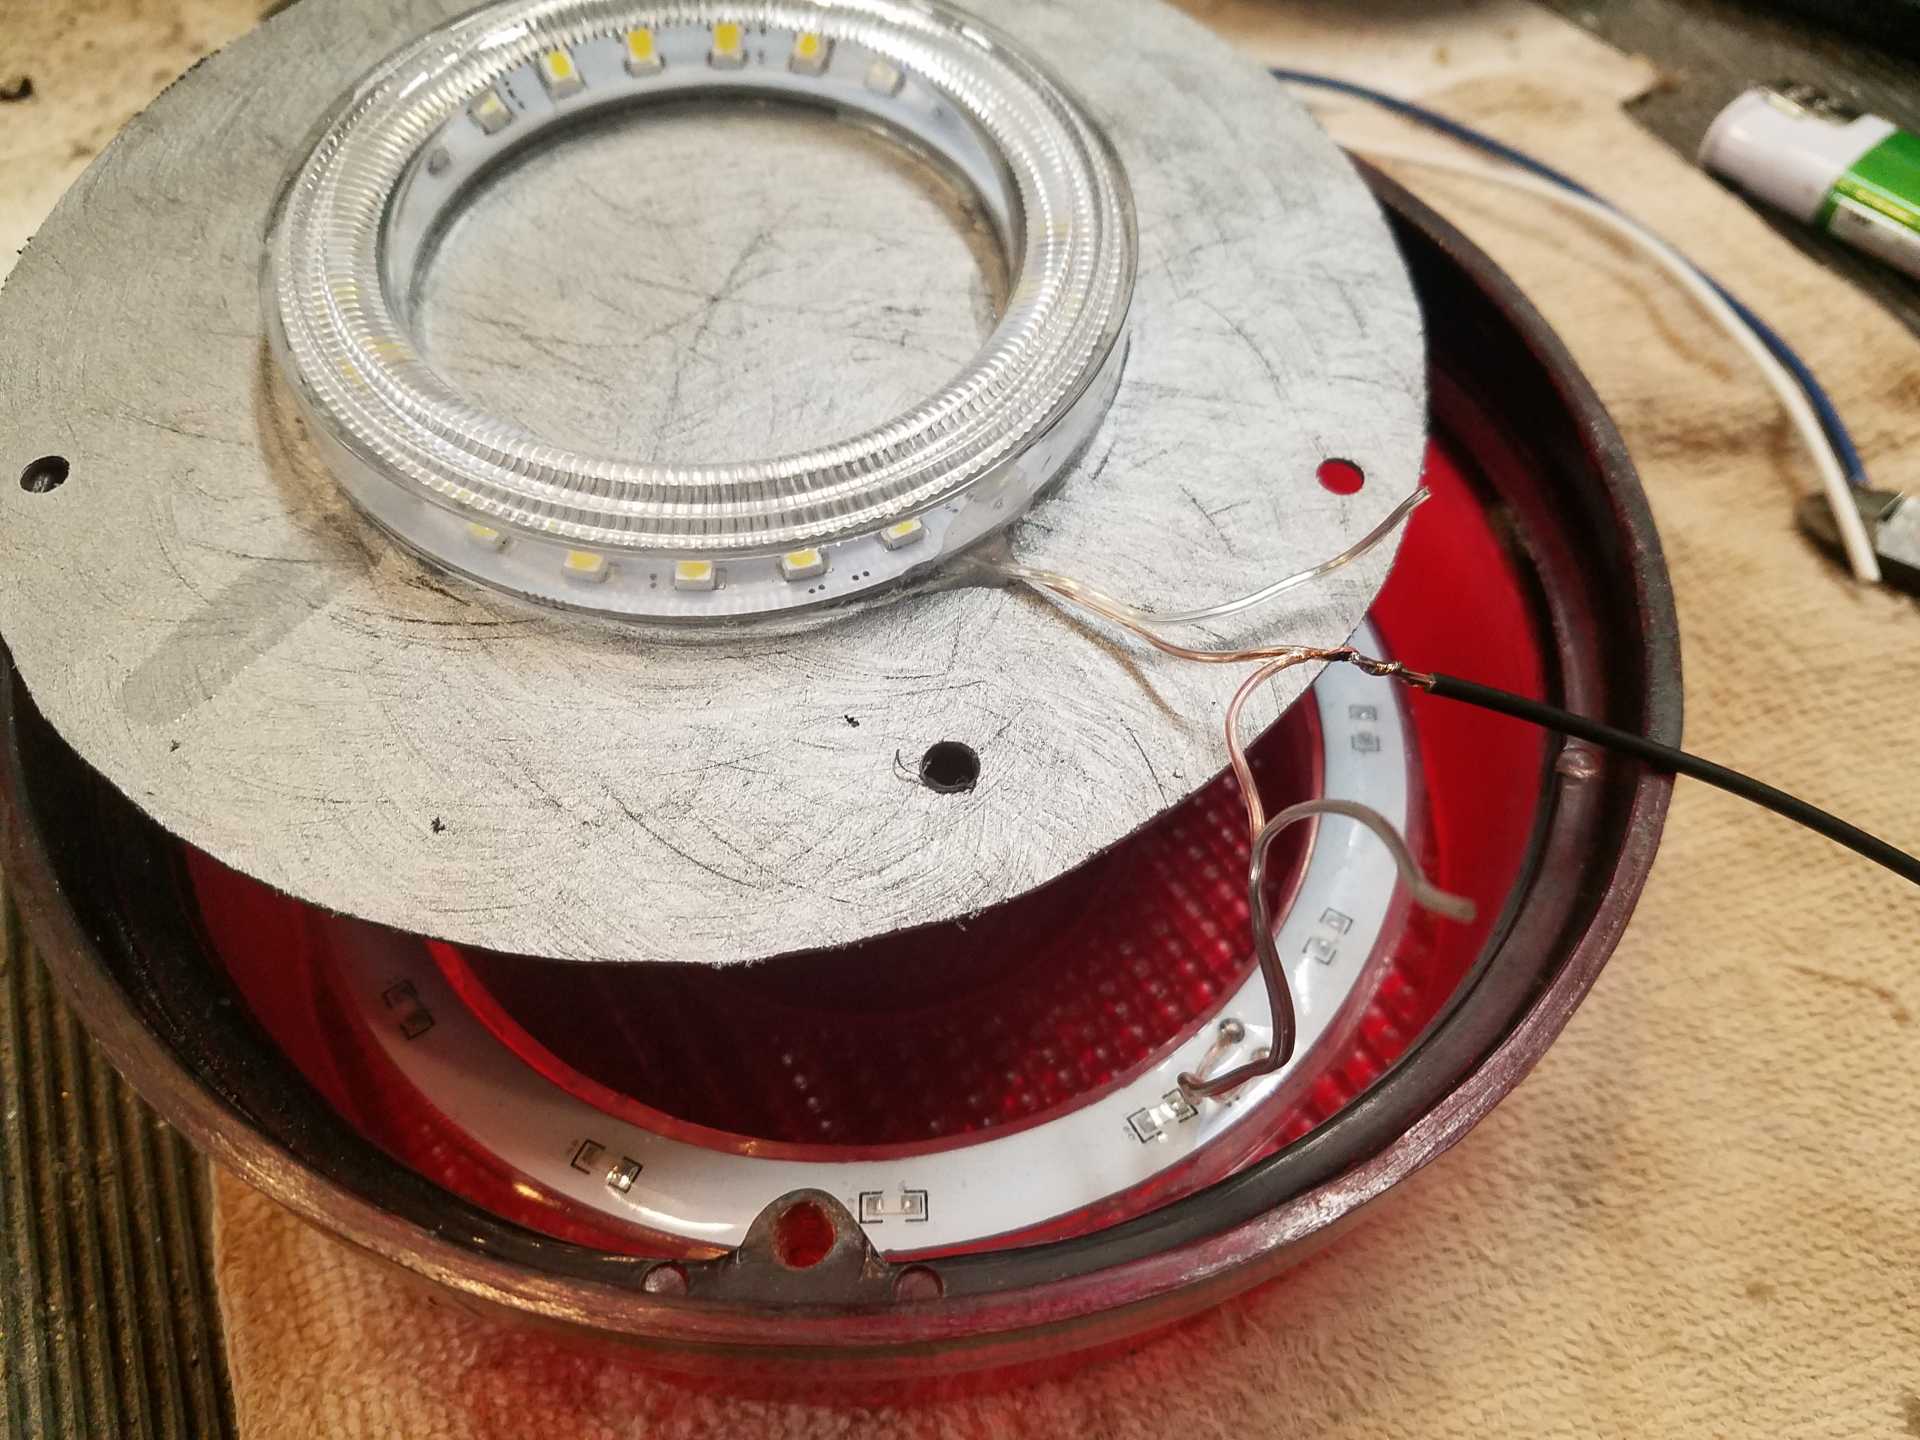
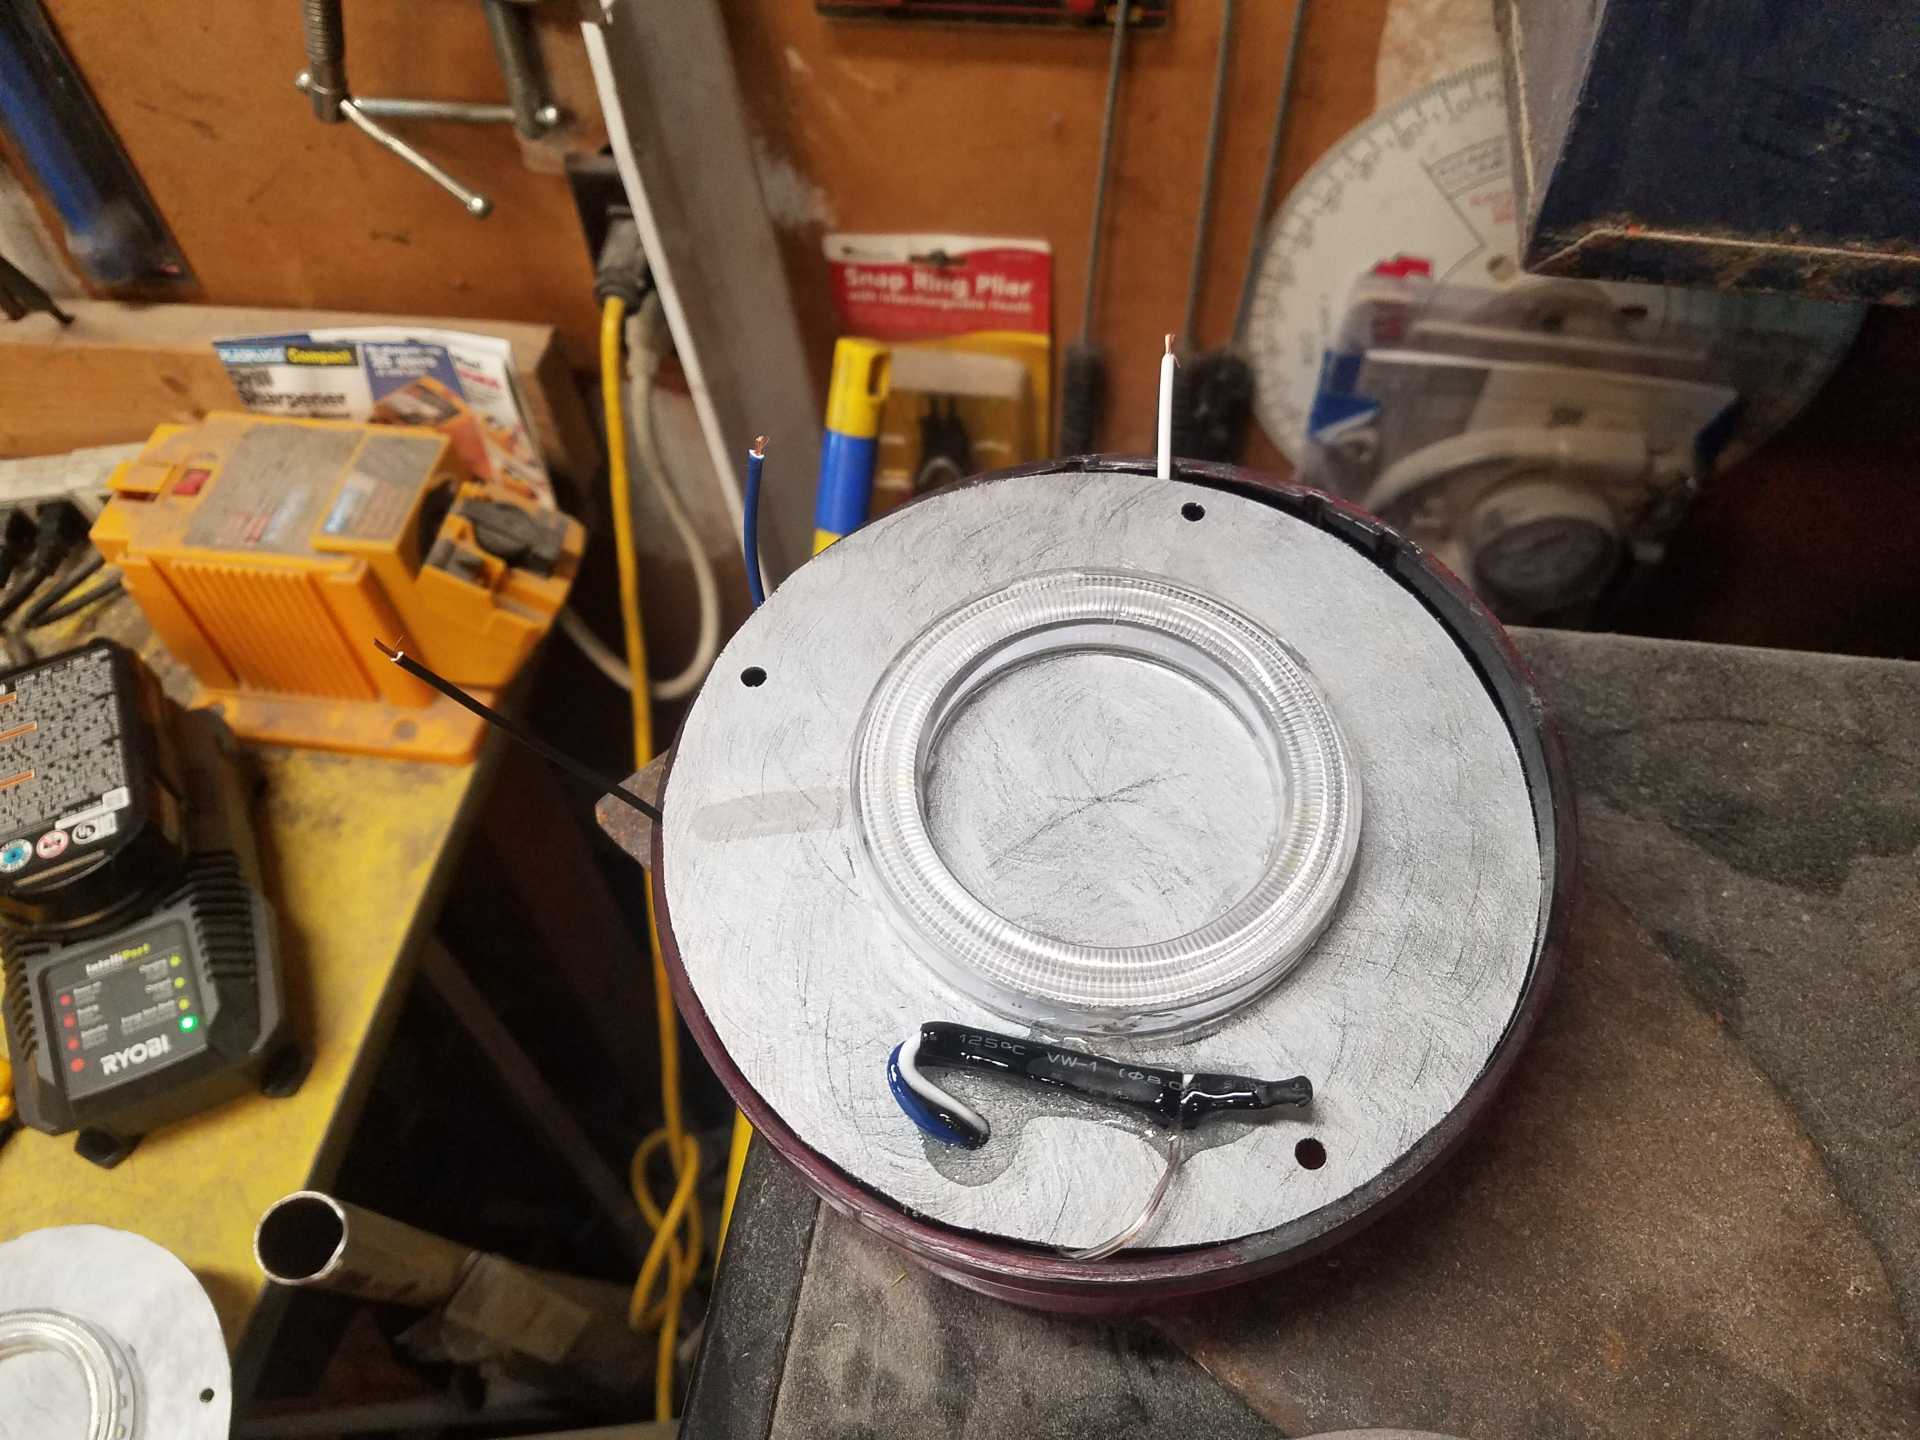
The wiring on the LED boards is pretty light, so I spliced everything into some 20 awg wires. The turn signals are pretty straight forward, tie the LED wires together and bring them out the back. The brake lights were only slightly more difficult. To maintain the brake and running lamp features, I placed a diode in between the outer ring and inner ring. The brake line can now drive both rings, and the running light is the inner ring.
More epoxy was used to glue down the wiring in the housing and to seal the wires coming out. A little more epoxy was then used to glue the backs to the lens, but not so much I can't get them apart. A bead of silicone caulk was used to seal everything together. I bought some Deutch connectors to connect to the car.
Only thing left to do is to mount some studs for installation.


Bob[This message has been edited by RCR (edited 07-02-2021).]
|
|
|
|
RCR
|
JUL 02, 12:50 PM
|
|
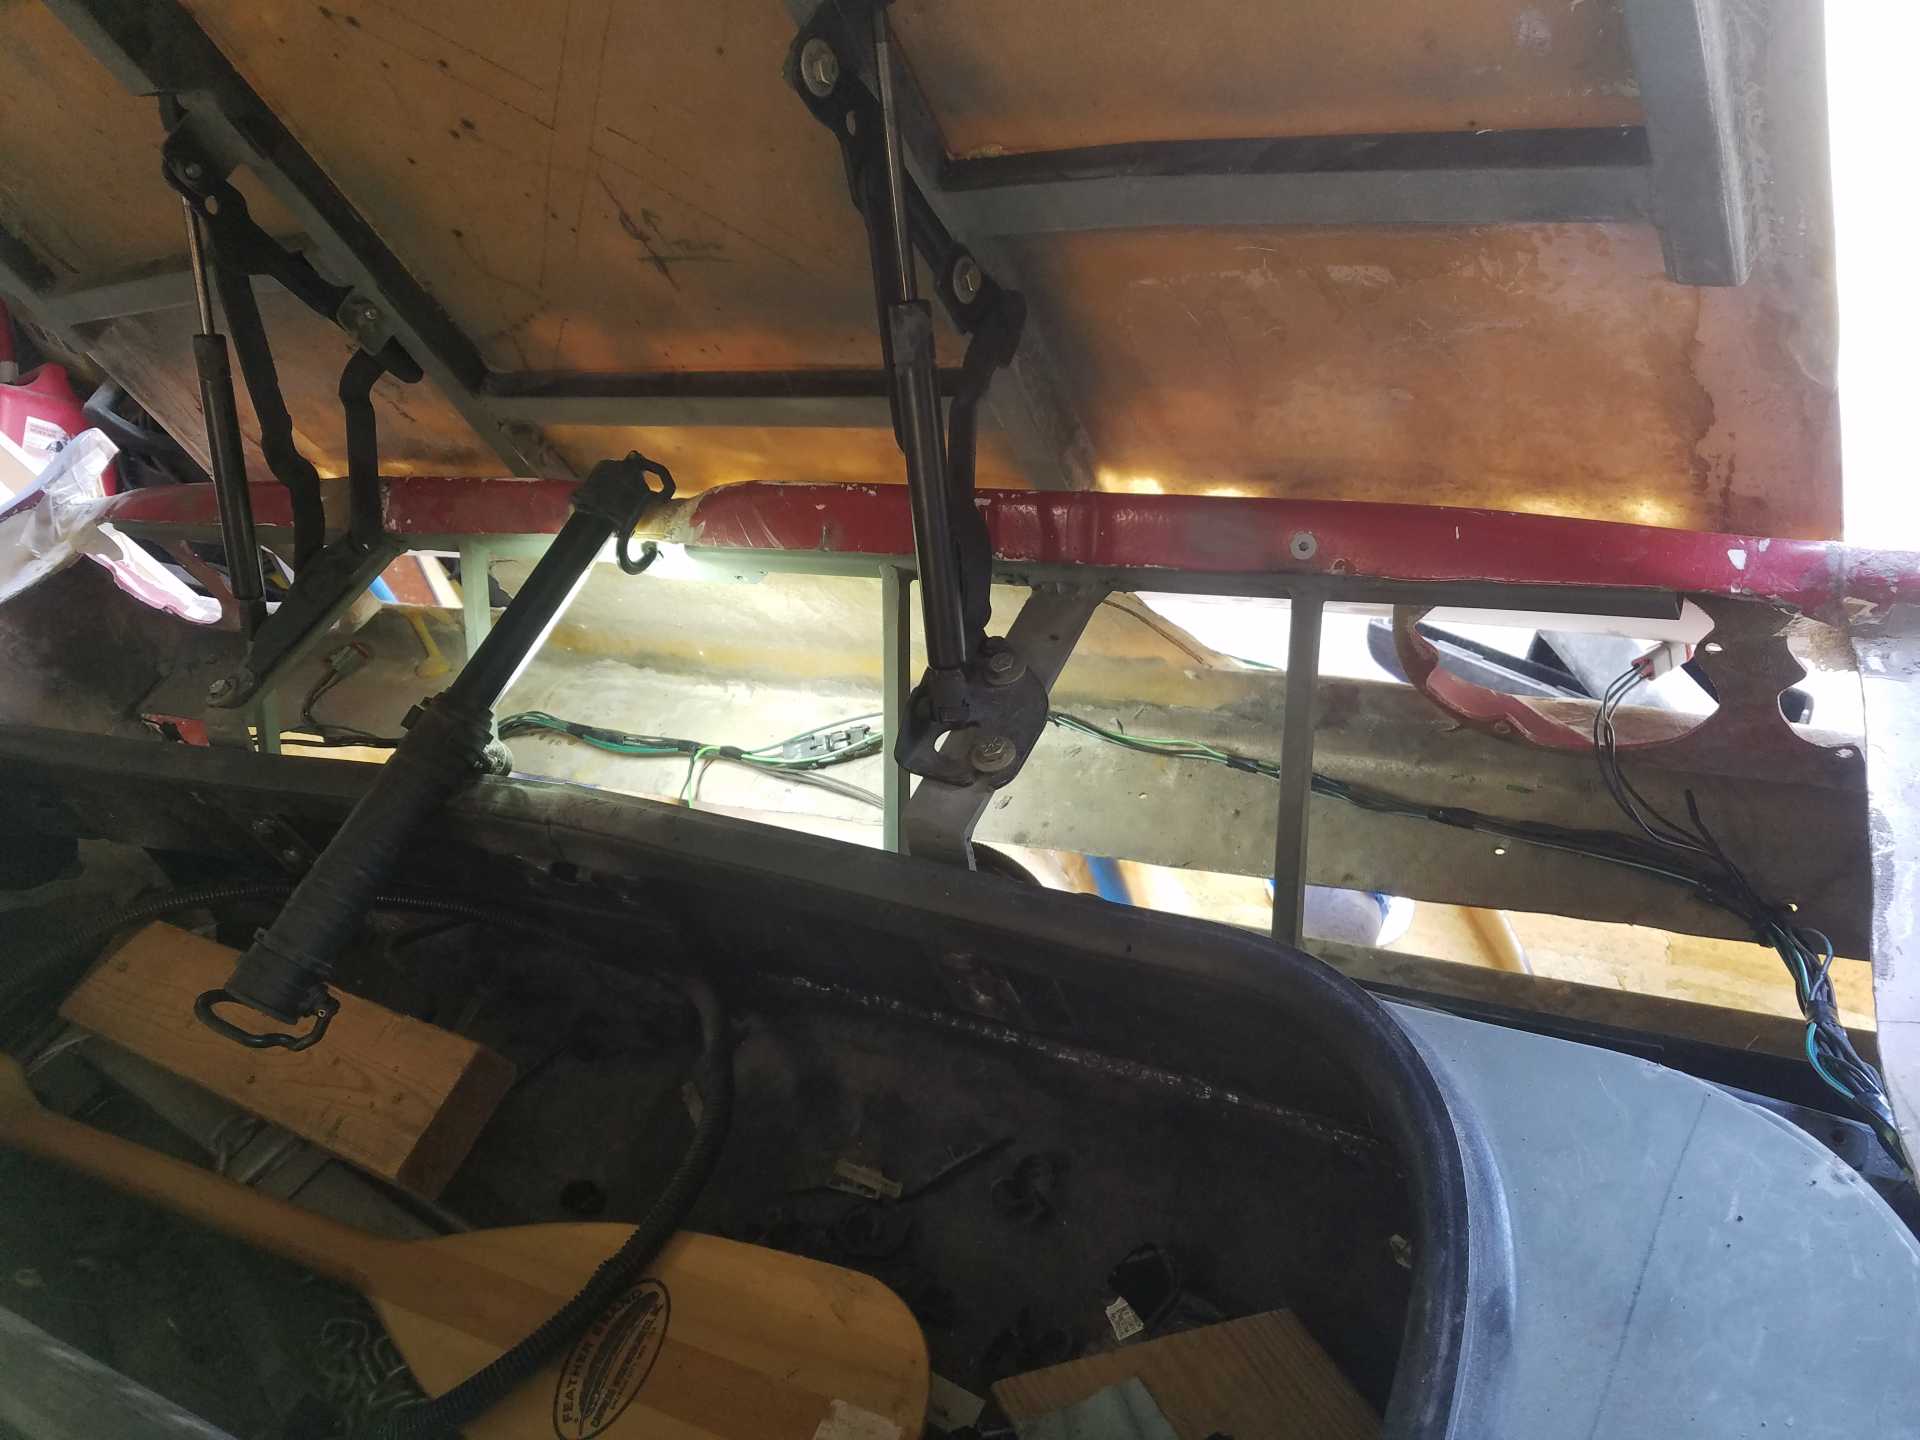
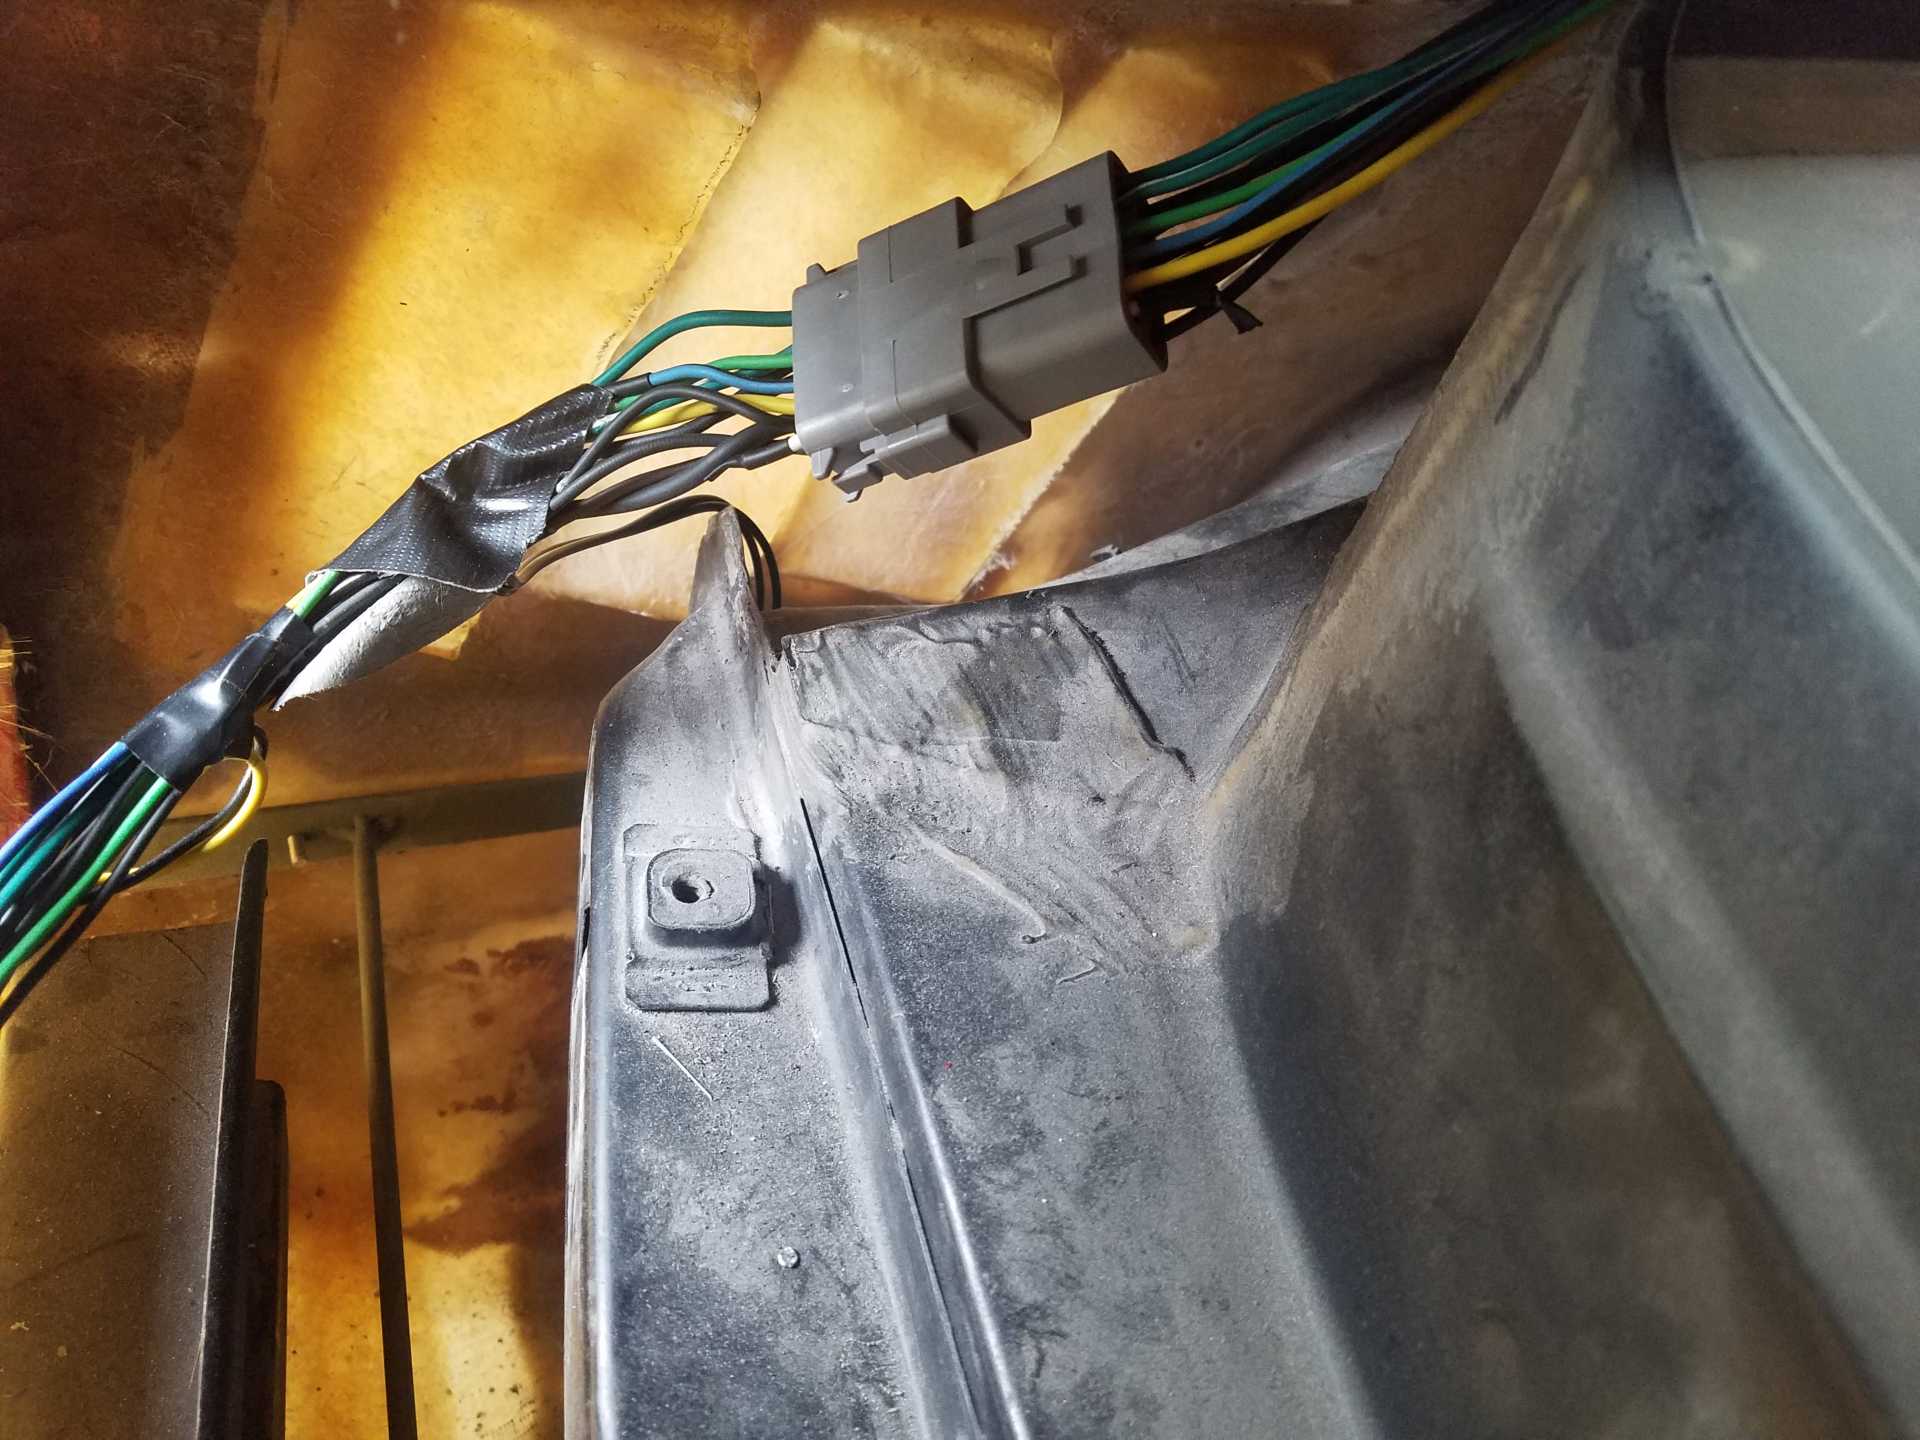
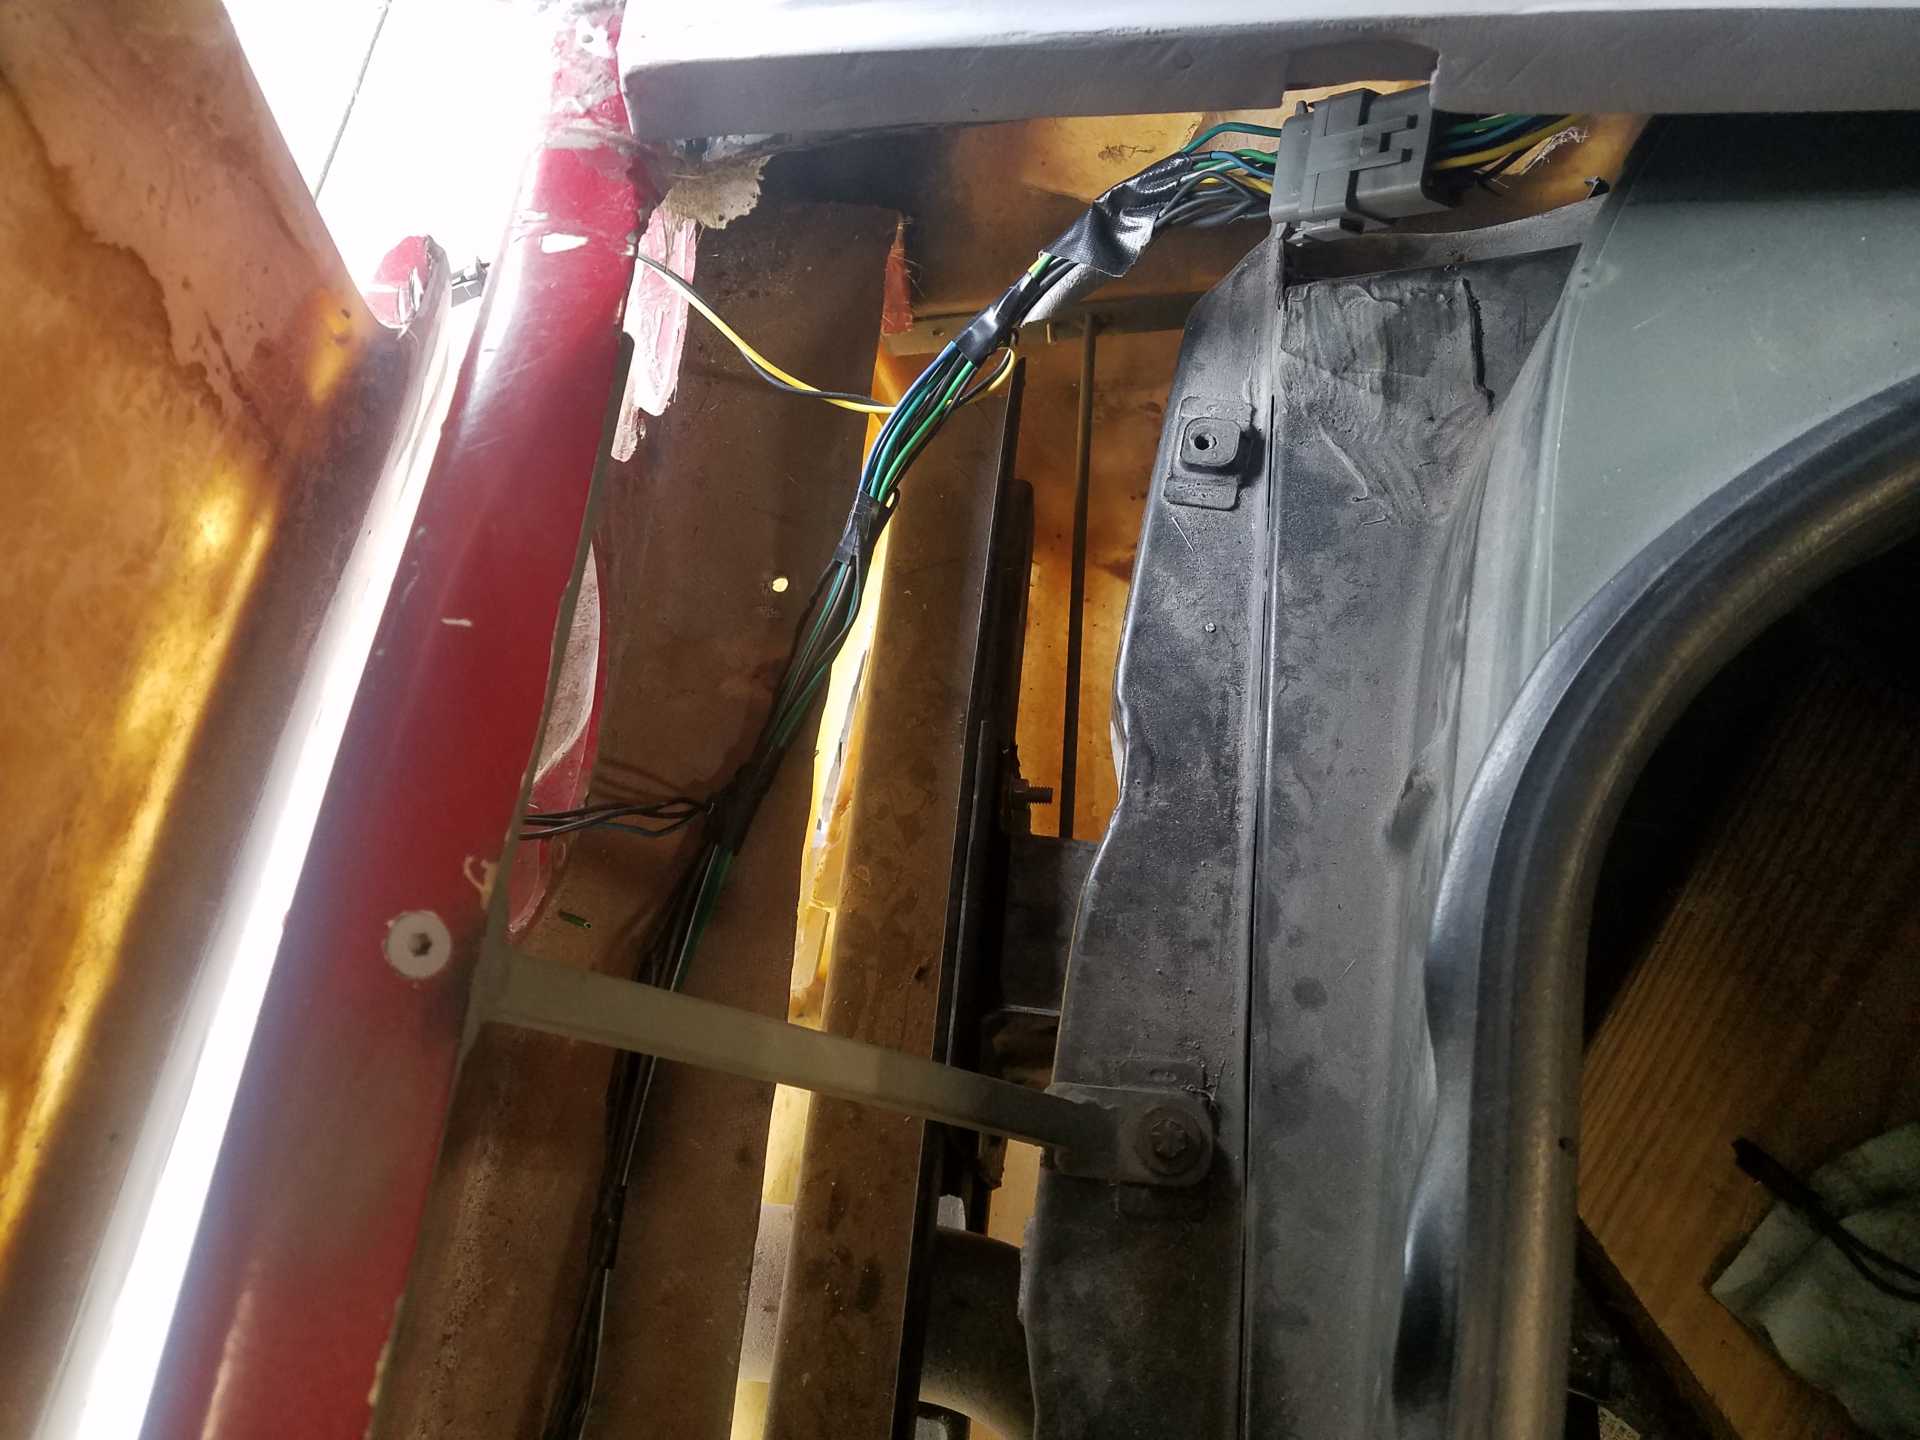
I also rewired all of the rear harness (as mentioned). I pretty much finished cleaning it up and terminated the ends for the new lights. I'm moving the harness from the chassis to the rear clip. There will be a single connector to ease removal of the clip.
I'm also adding in a single reverse lamp. Started modifying it to fit (and not look like it belongs on a Jeep.)...
That's it for now... Almost time to go fishing... 
Take care.
Bob
|
|
|
|
shemdogg
|
JUL 03, 01:00 AM
|
|
Was just catching up on this thread and going to comment on how well the bodys turning out when I saw the new lights. Thats friggin awesome man, what a cool idea! Im debating getting a new set for my build, or start molding my own lenses. The innards of my lights are pretty beat as well and ill have to come up w something soon. Love the body work, the rear end is looking good. Just keep throwing time at it when you can, getting closer and closer. But they never seem to finish lol
shem
|
|

|
MinnGreenGT
|
JUL 06, 03:10 PM
|
|
|
Wow - loving what you did with the LEDs in the Taillight Lenses!
|
|
|
|
RCR
|
JUL 10, 08:56 PM
|
|
Thanx, Minn...
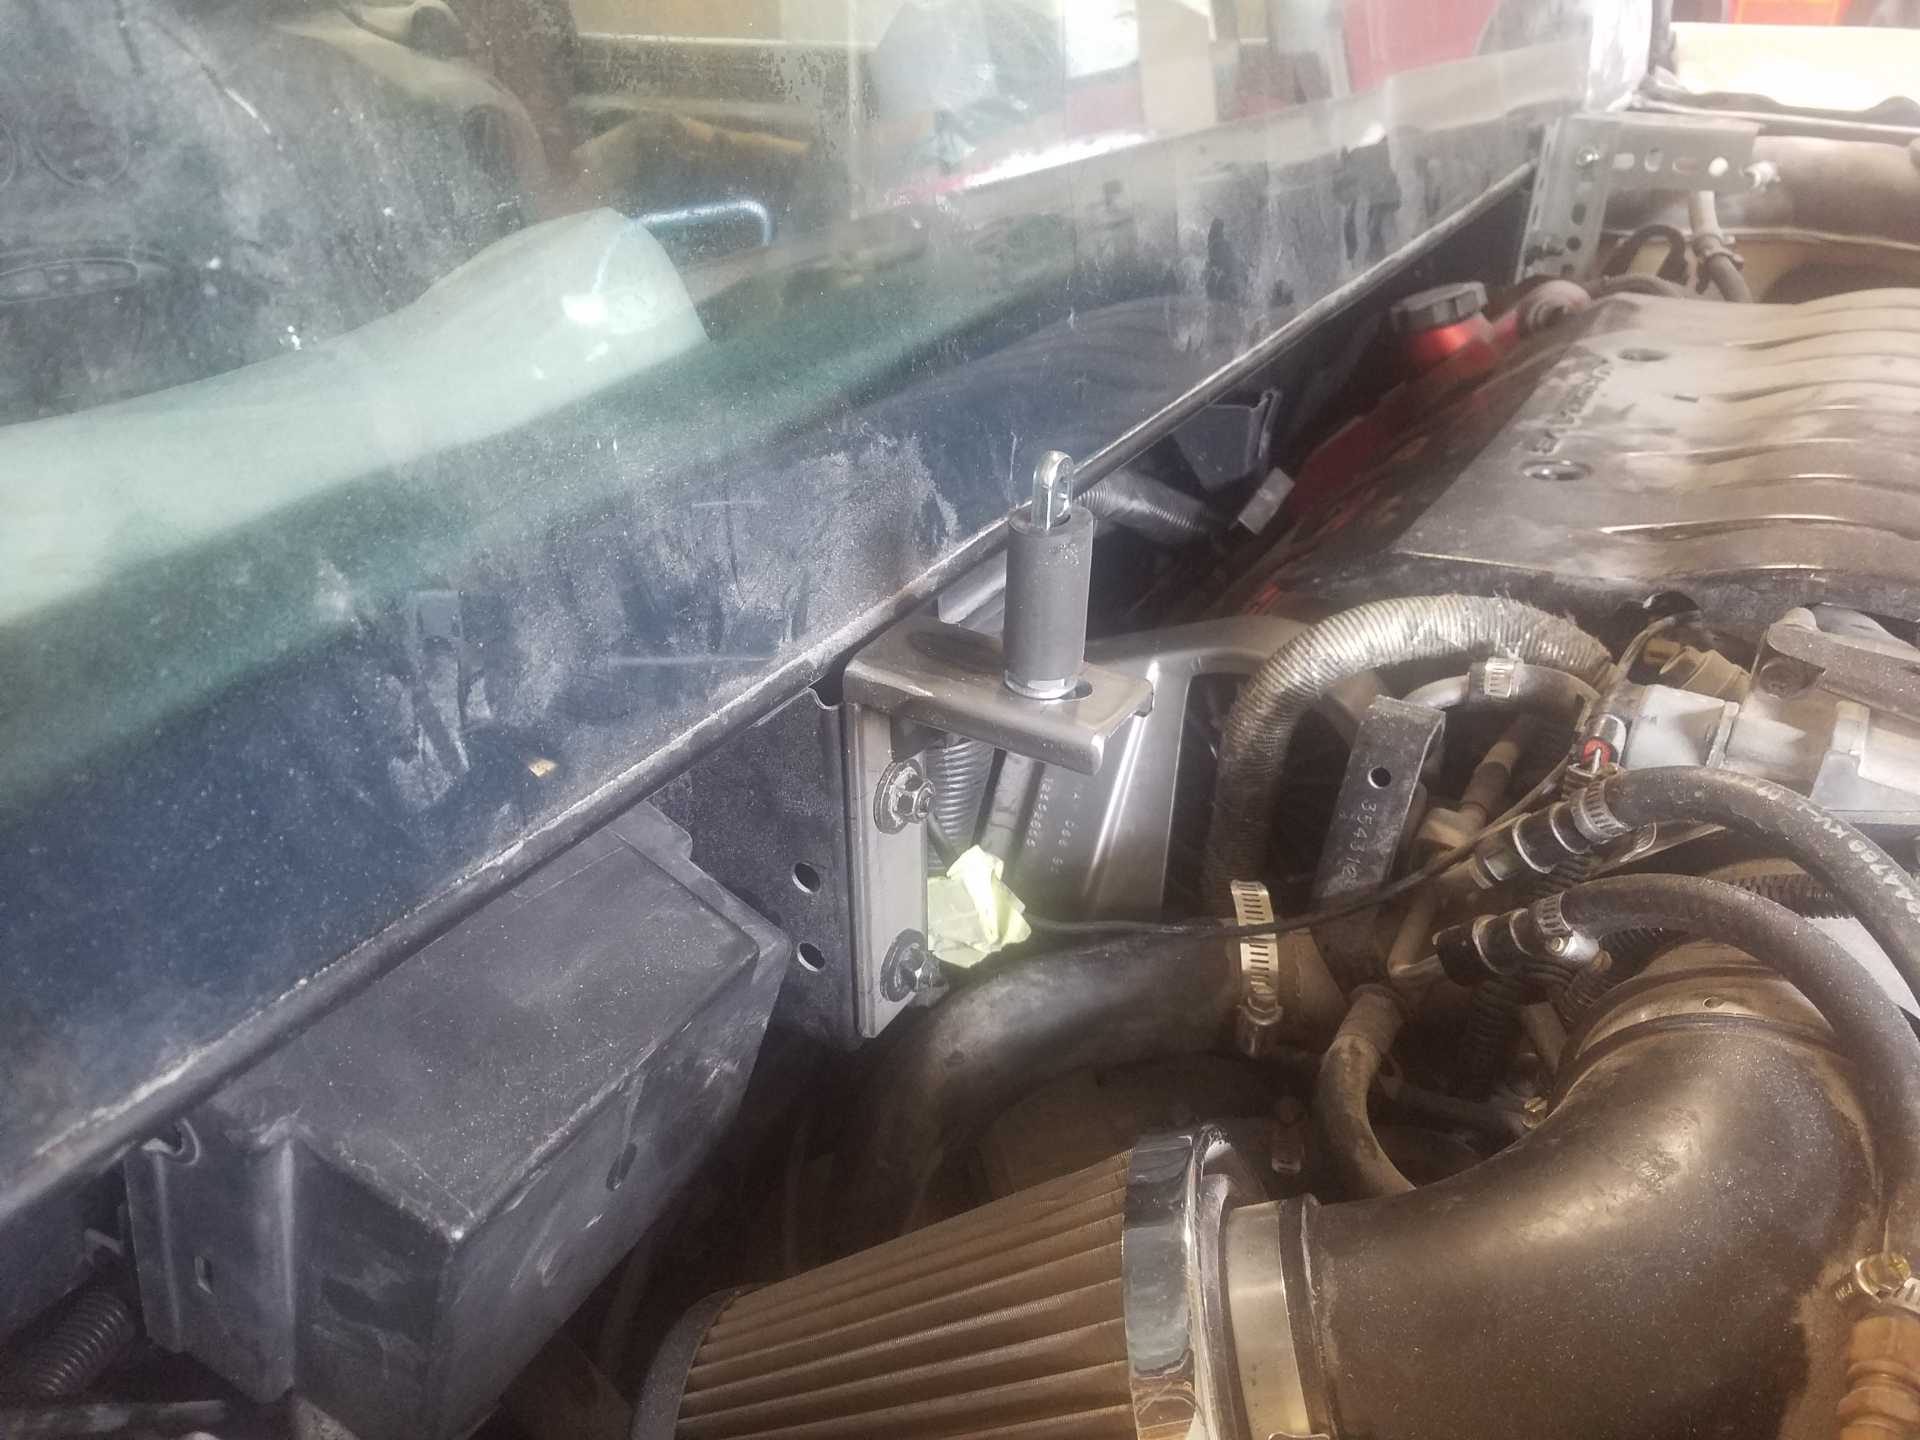
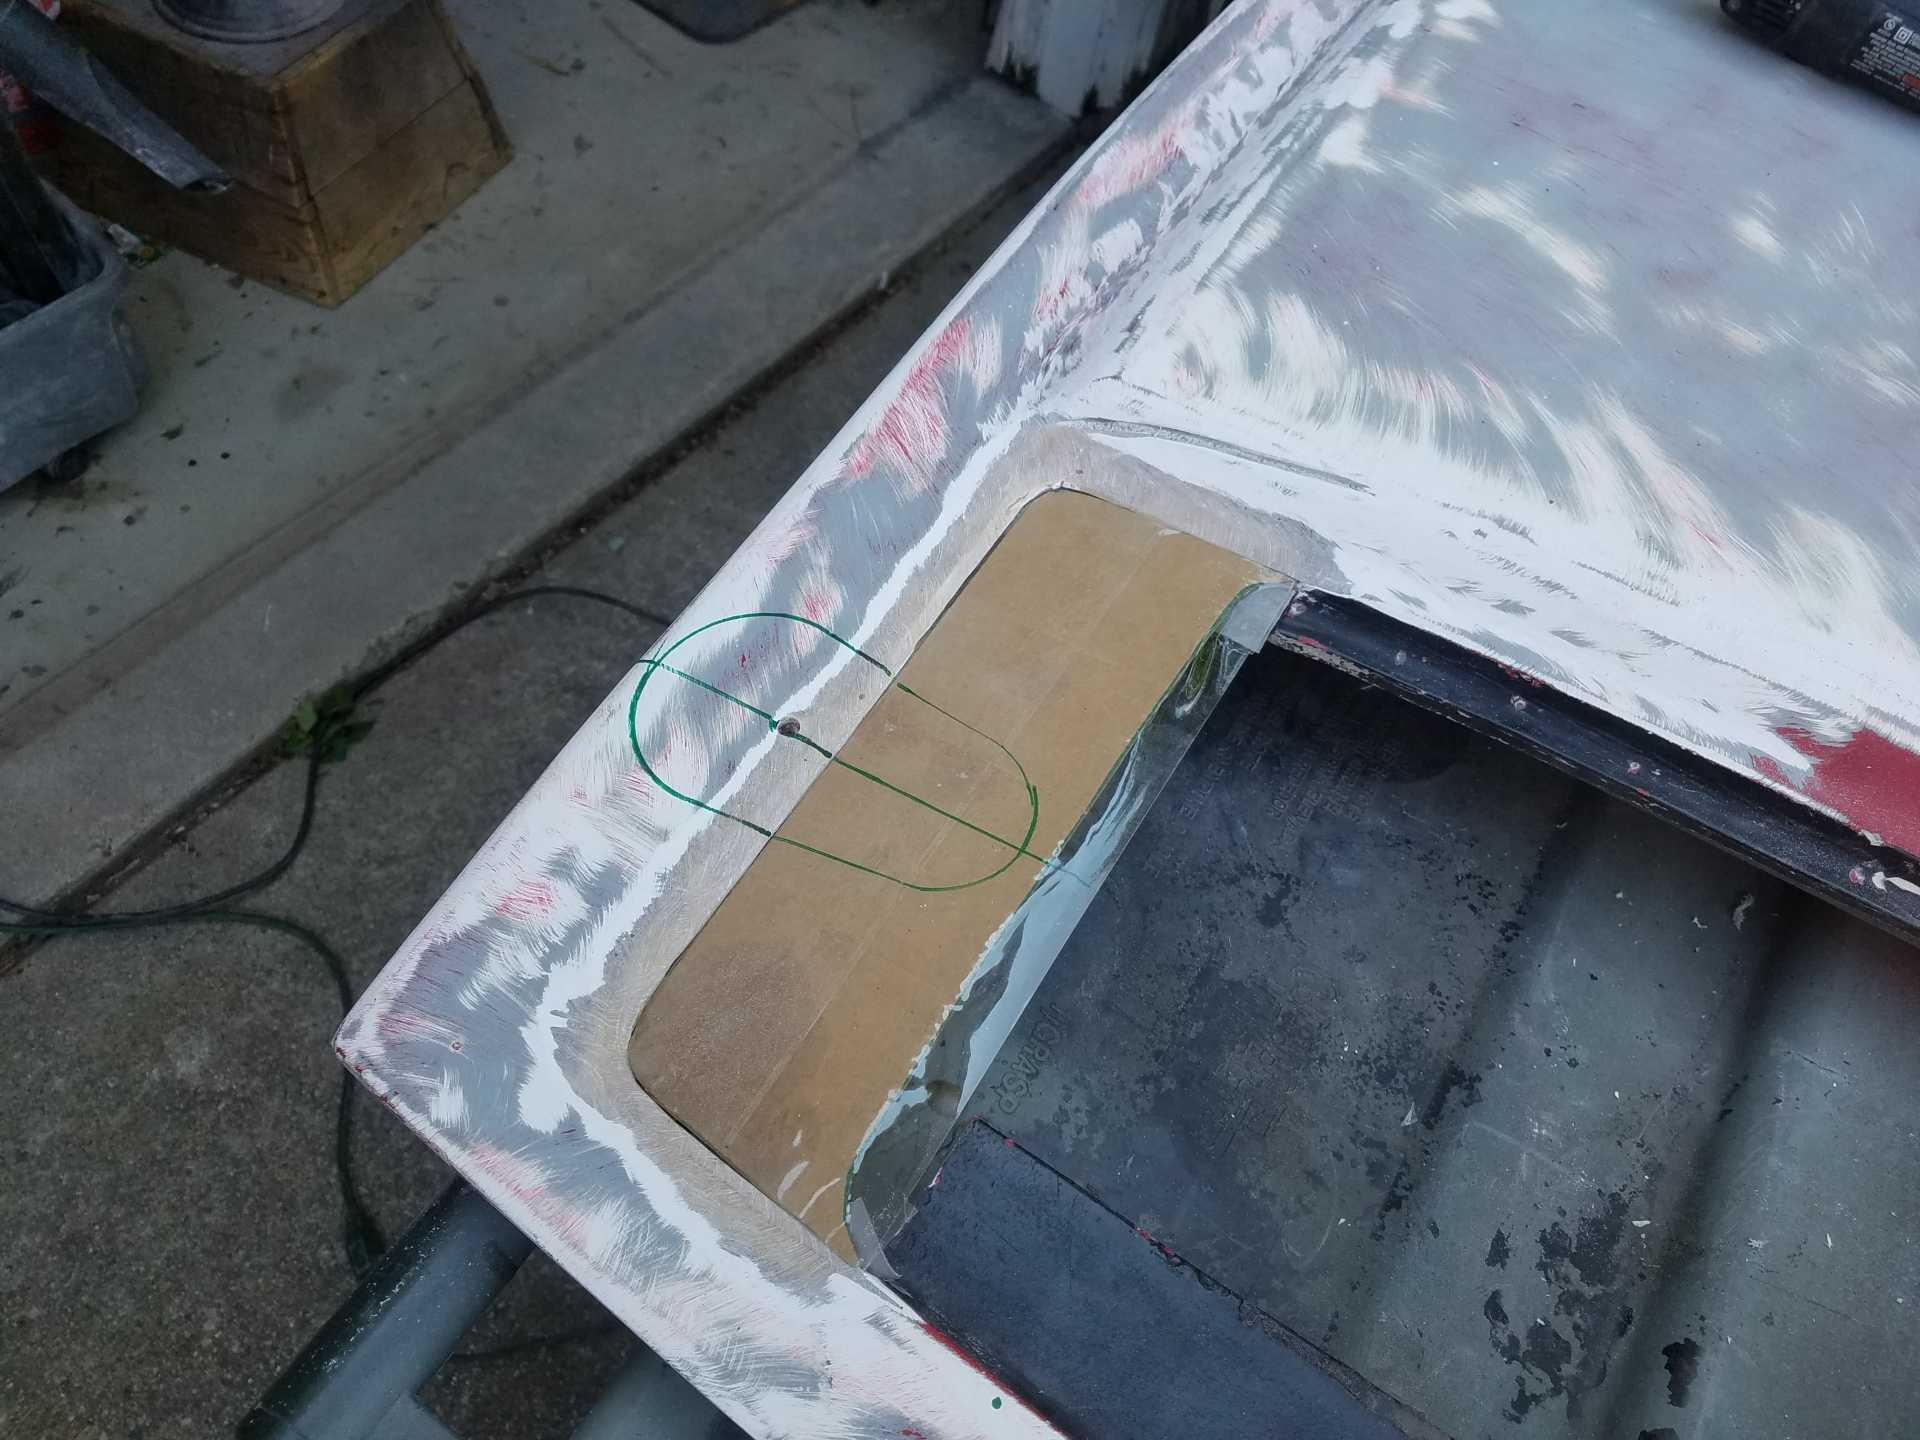
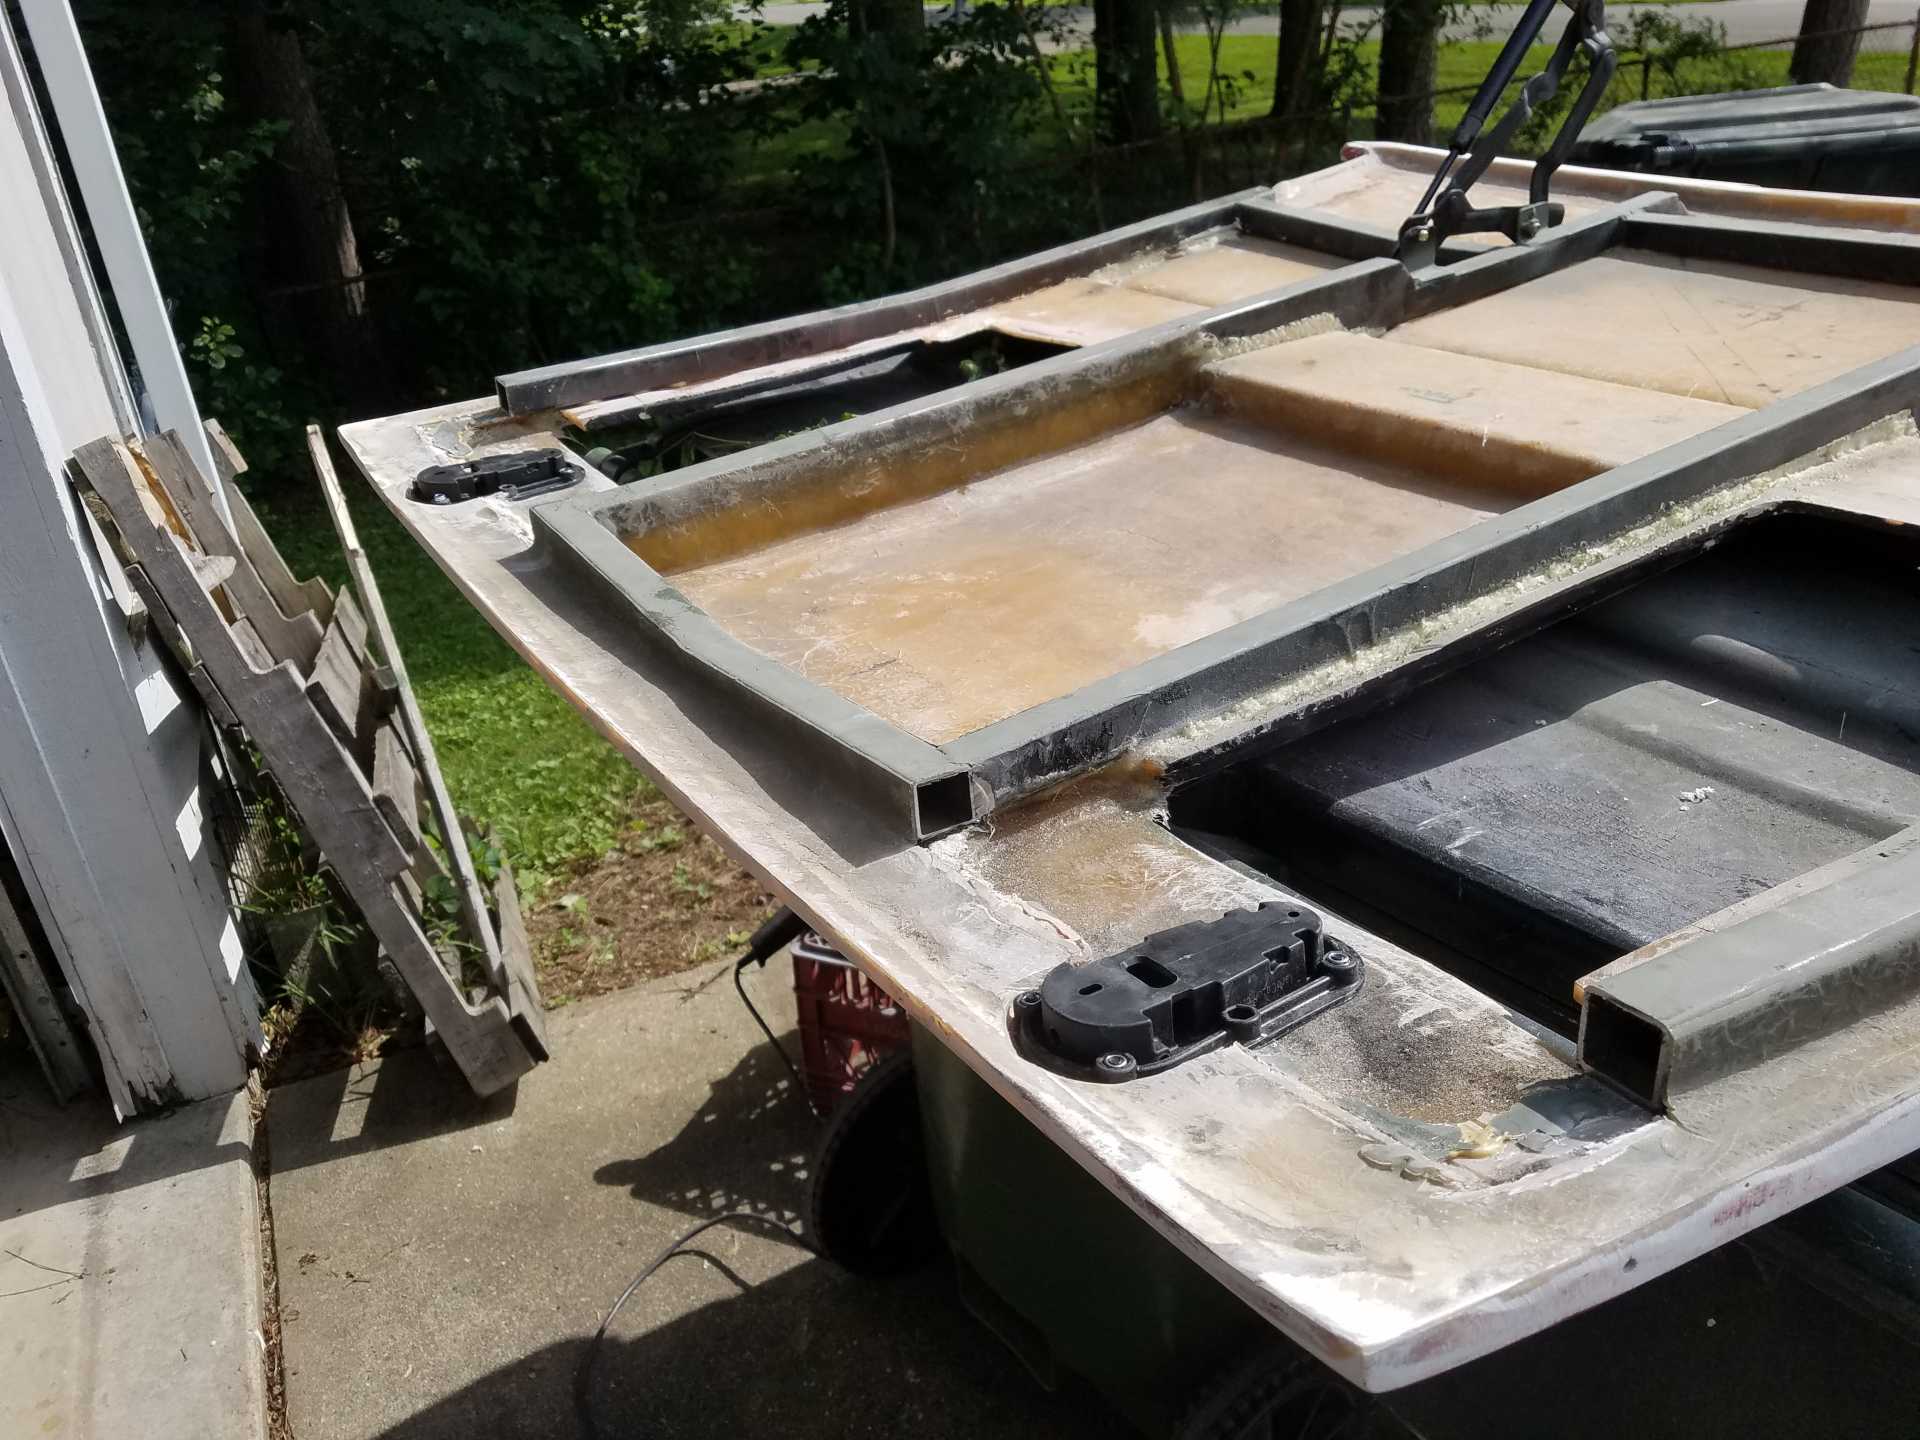
Today I played with something else a bit different. Picked up a pair of Aerocatches for the rear deck. These will match the ones on the front. Let the hacking begin.
One of the challenges was locating a spot to put them. I was going to place them near the strut towers, but I had concerns with the amount of custom work required for the deck, but anywhere was going to require custom work.
I ended up picking near the window. Unfortunately, the deck support tubes just hit where the catch post needs to go. More on that...
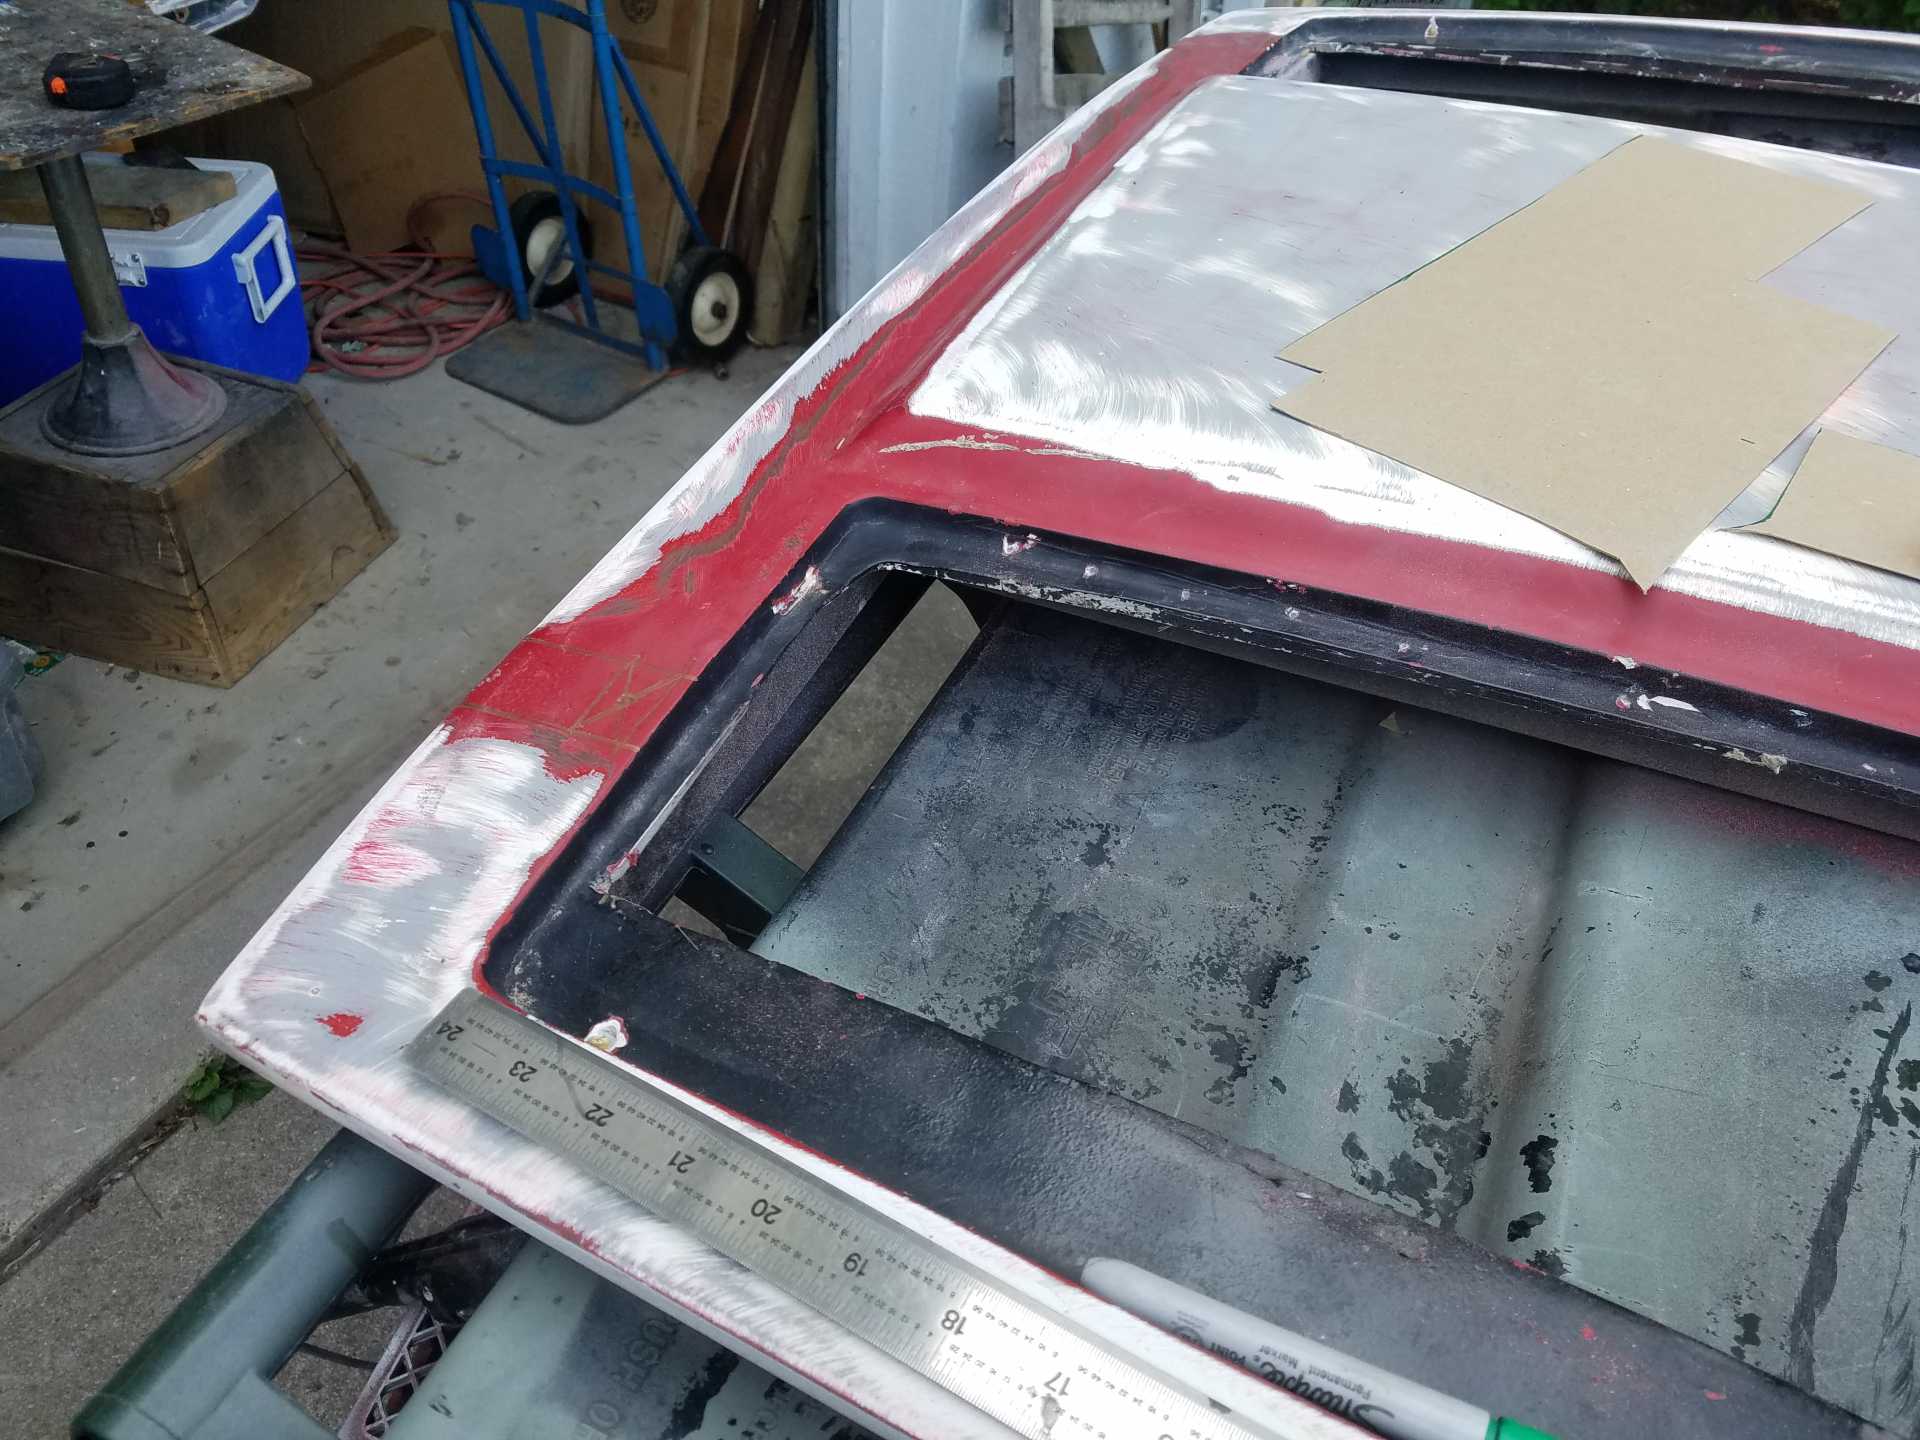
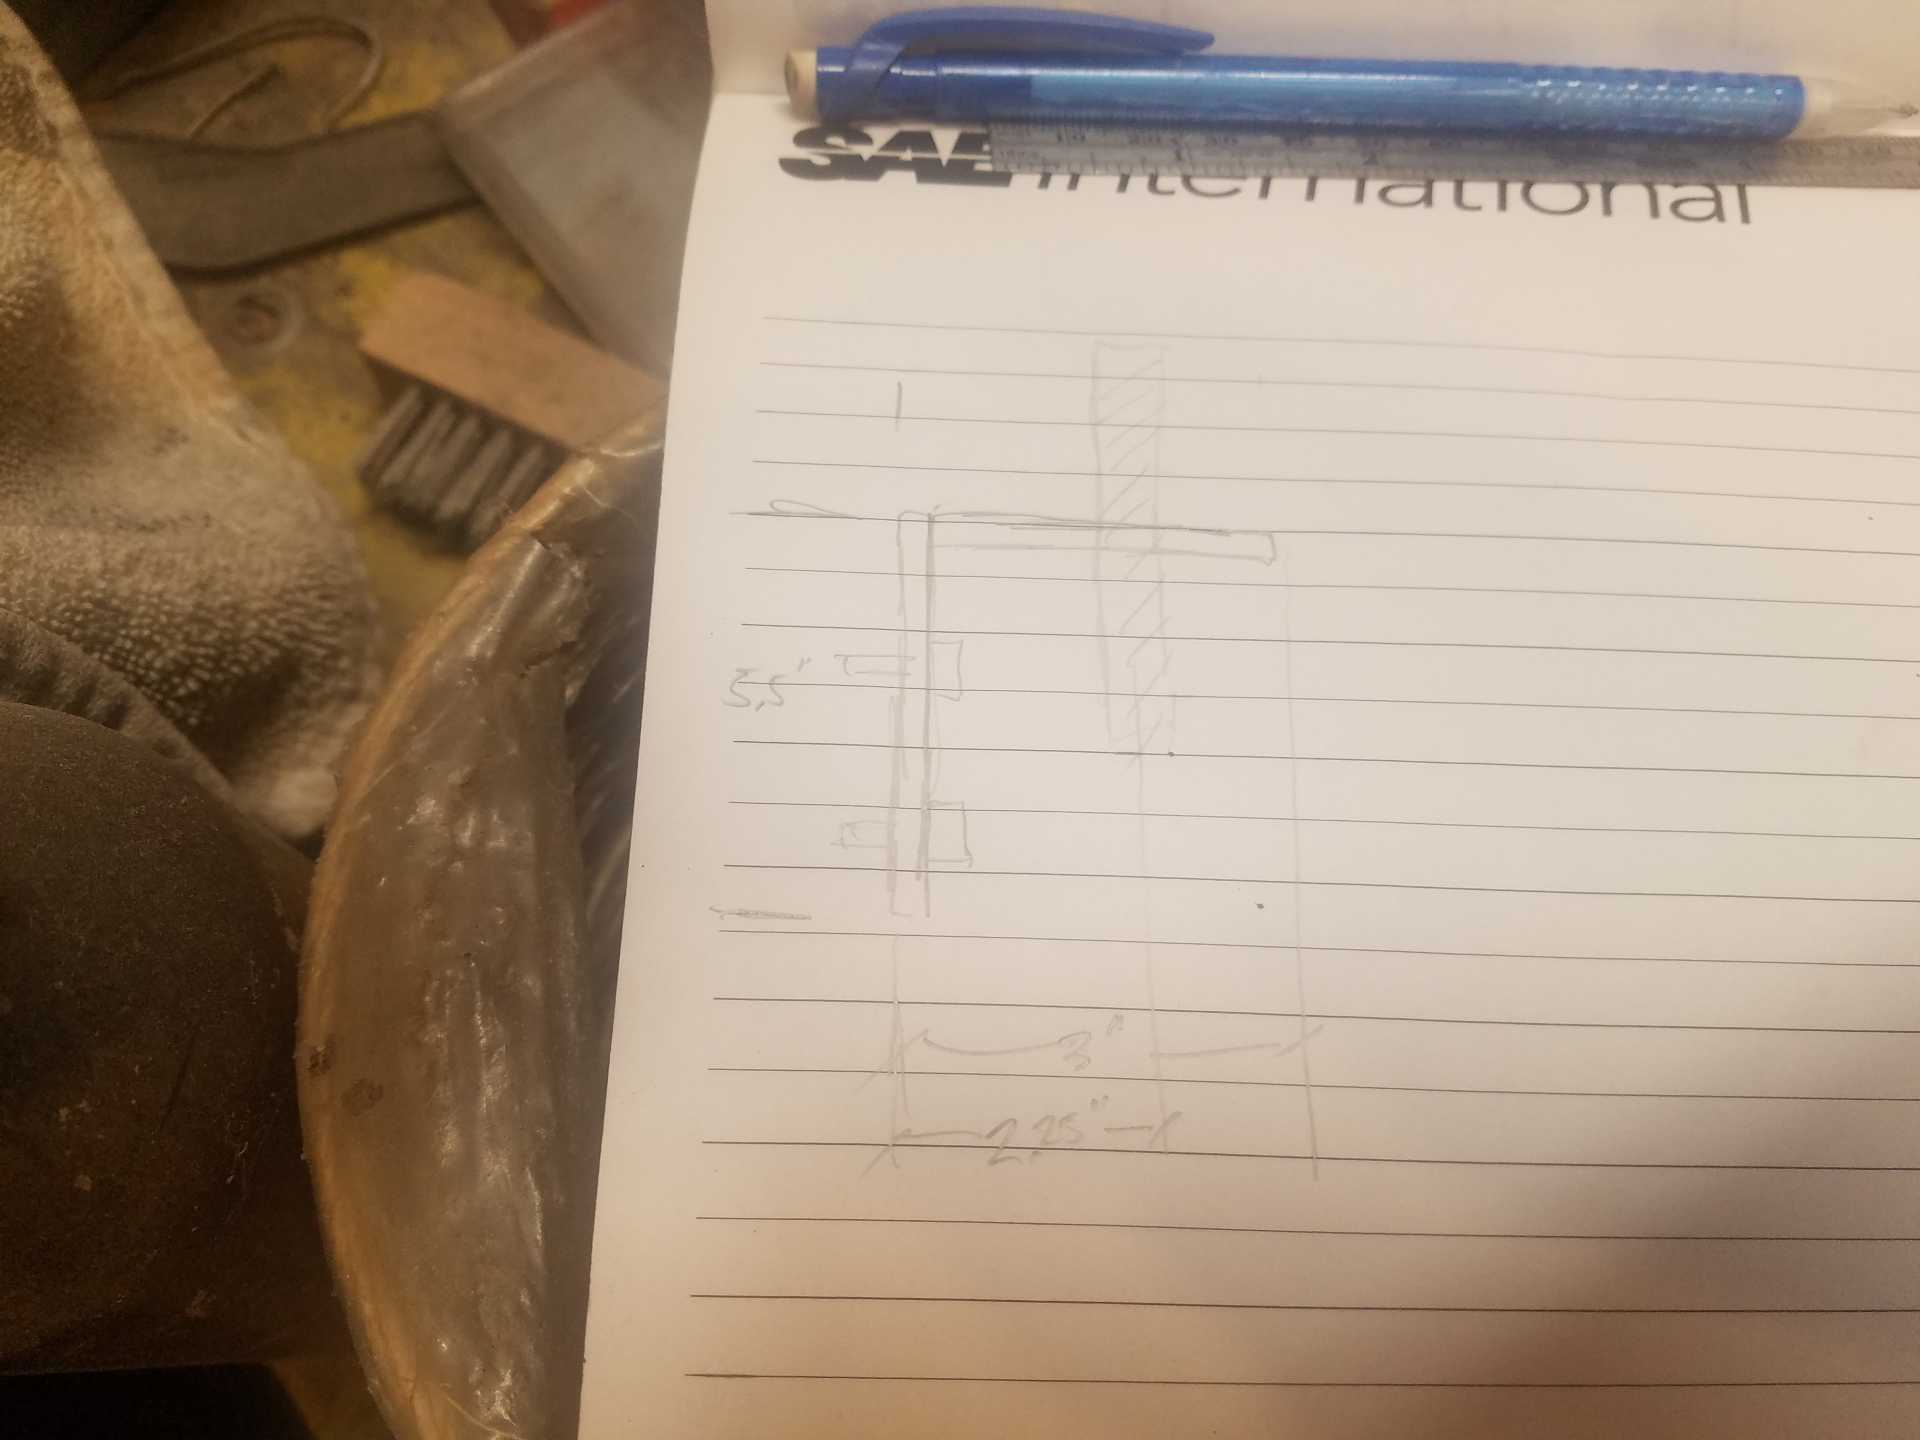
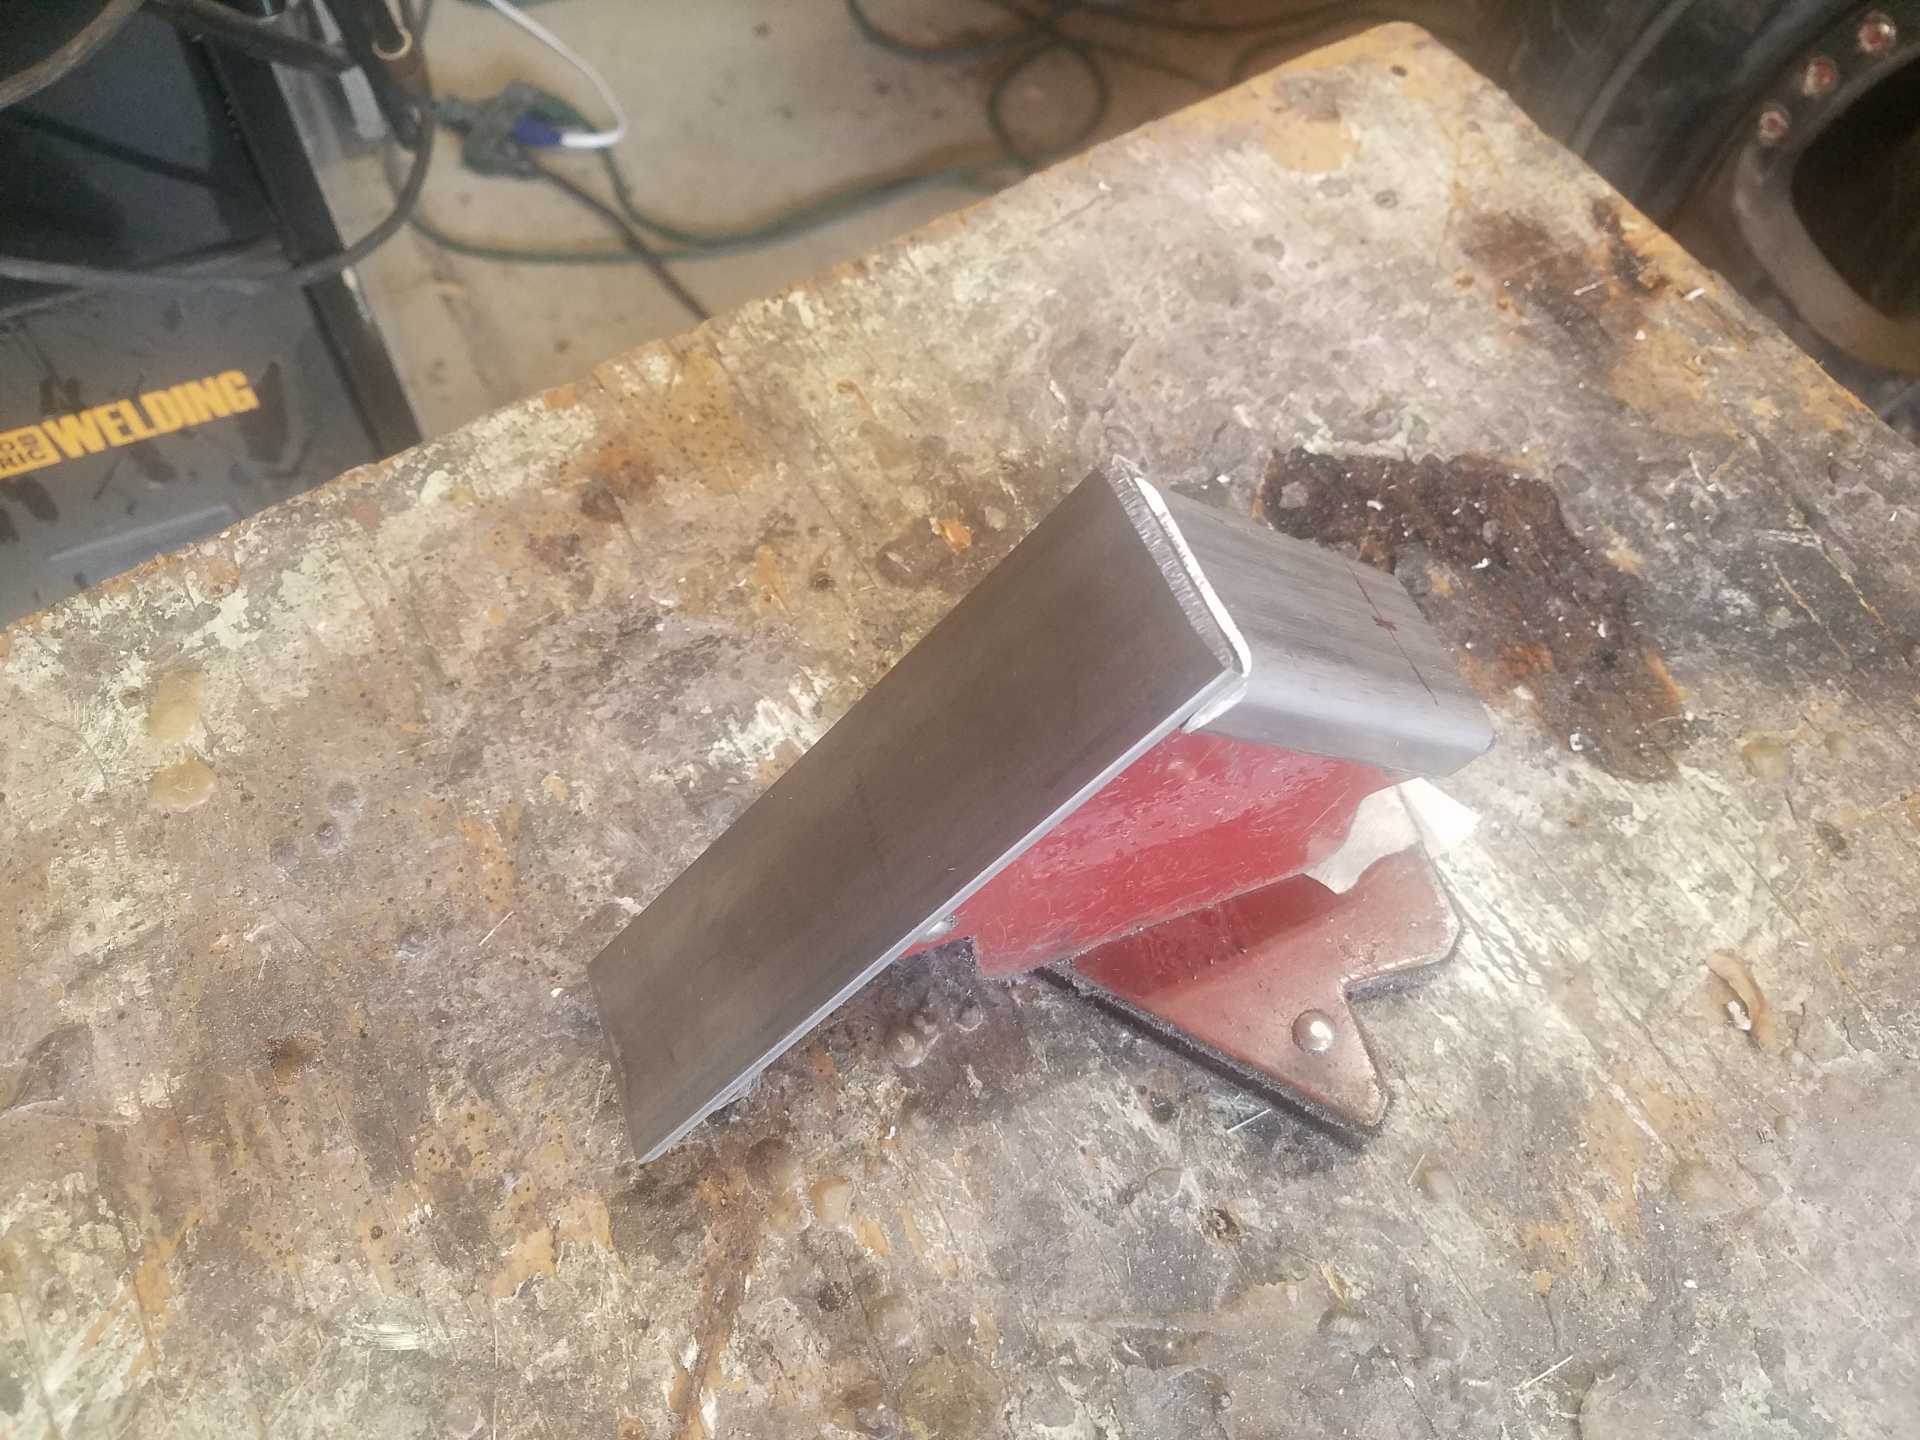
As can be seen in the pic, I'm going to need to add some real-estate to the deck lid to make this work.
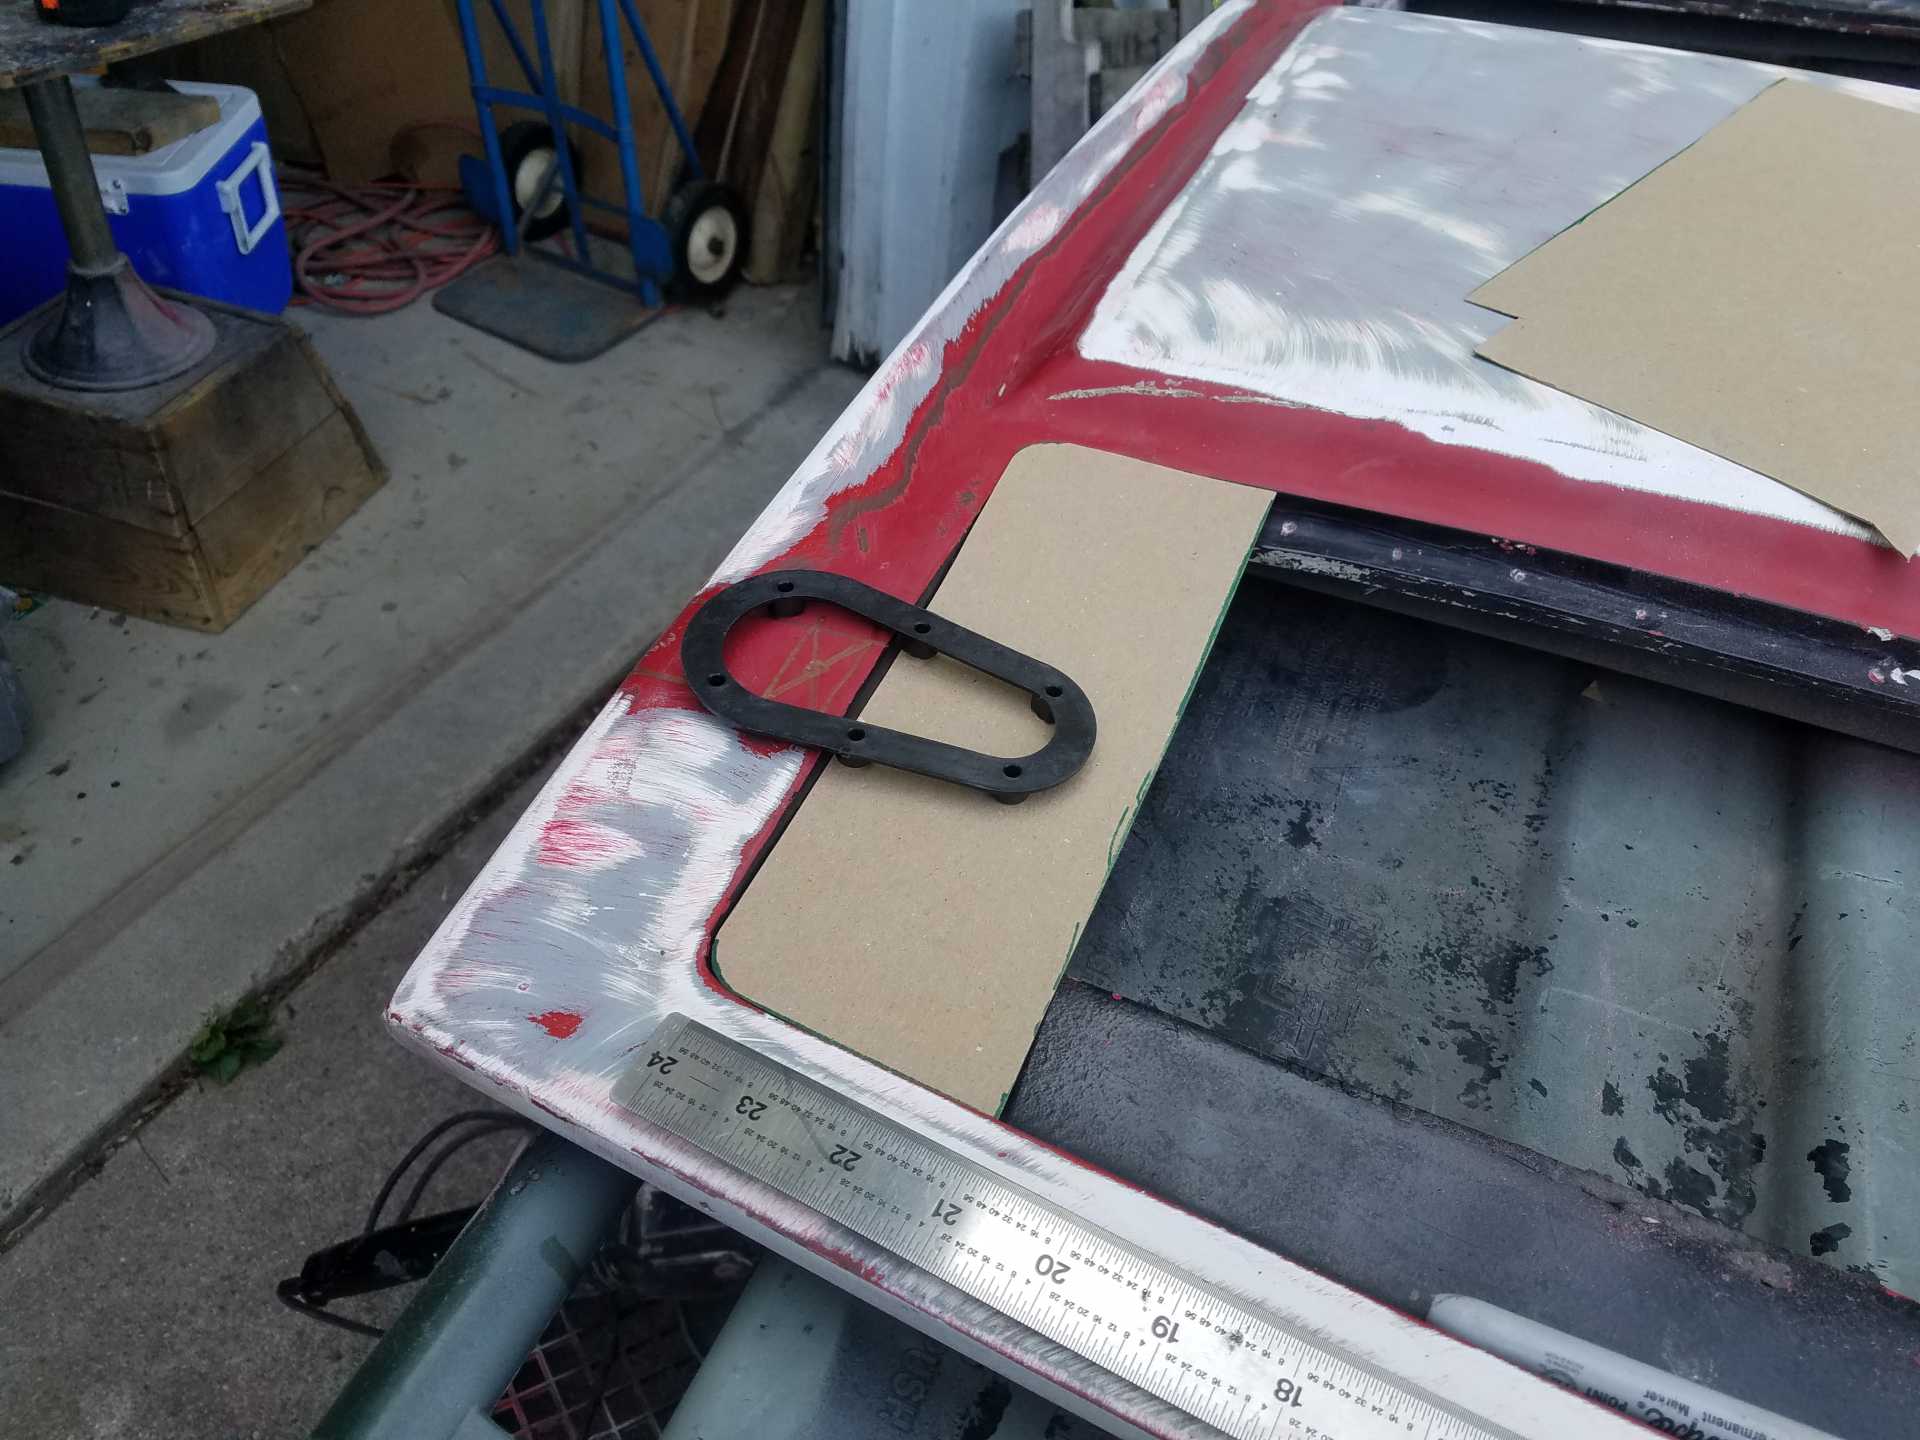
Made template and glassed it in.
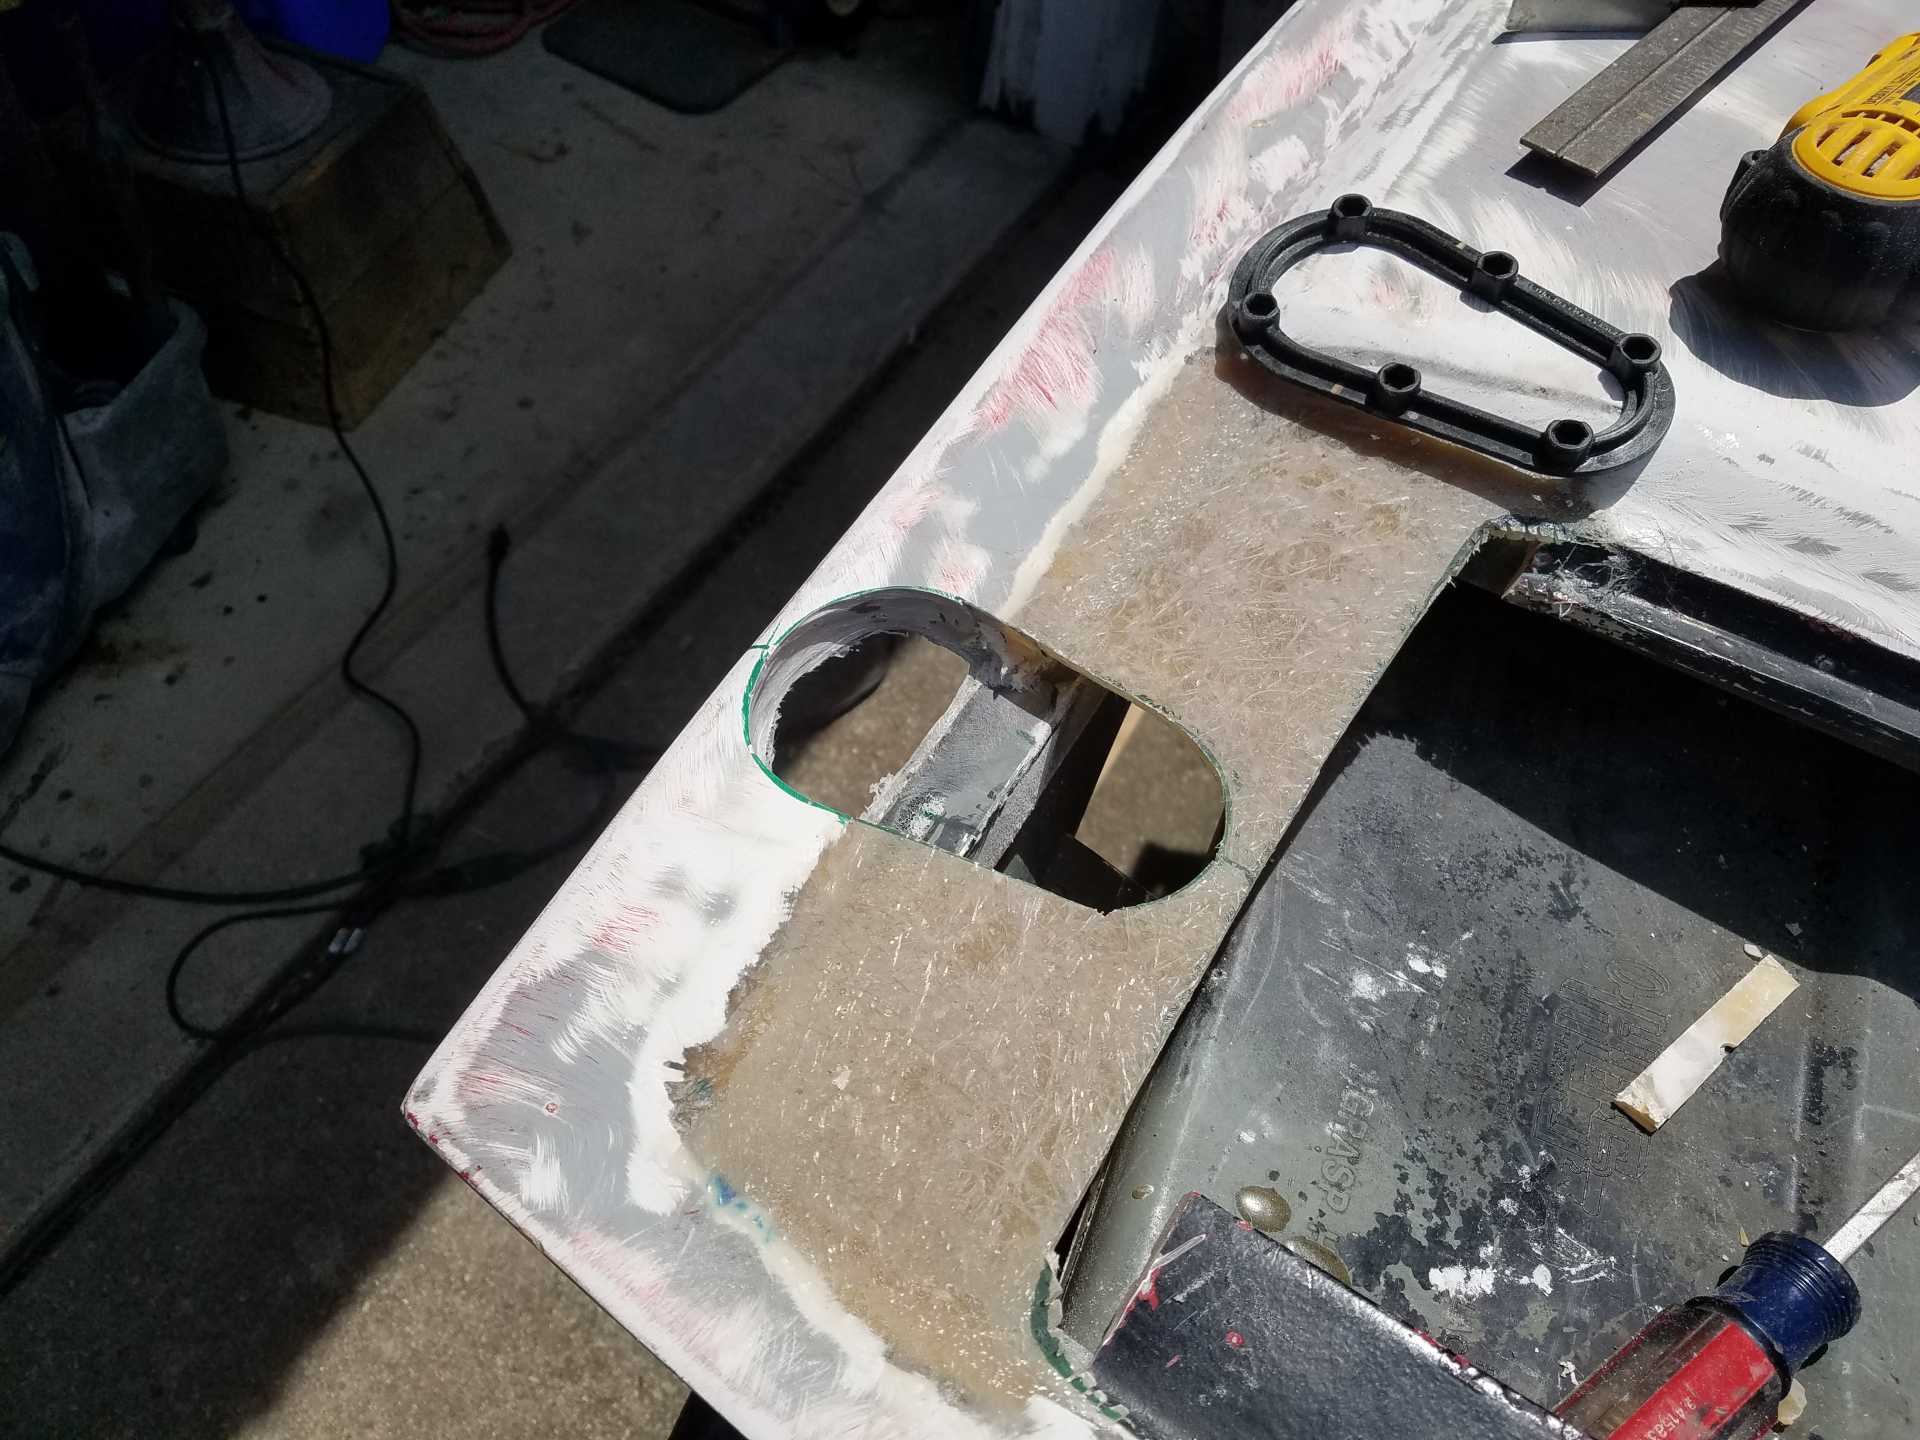
Copy paste for other side.
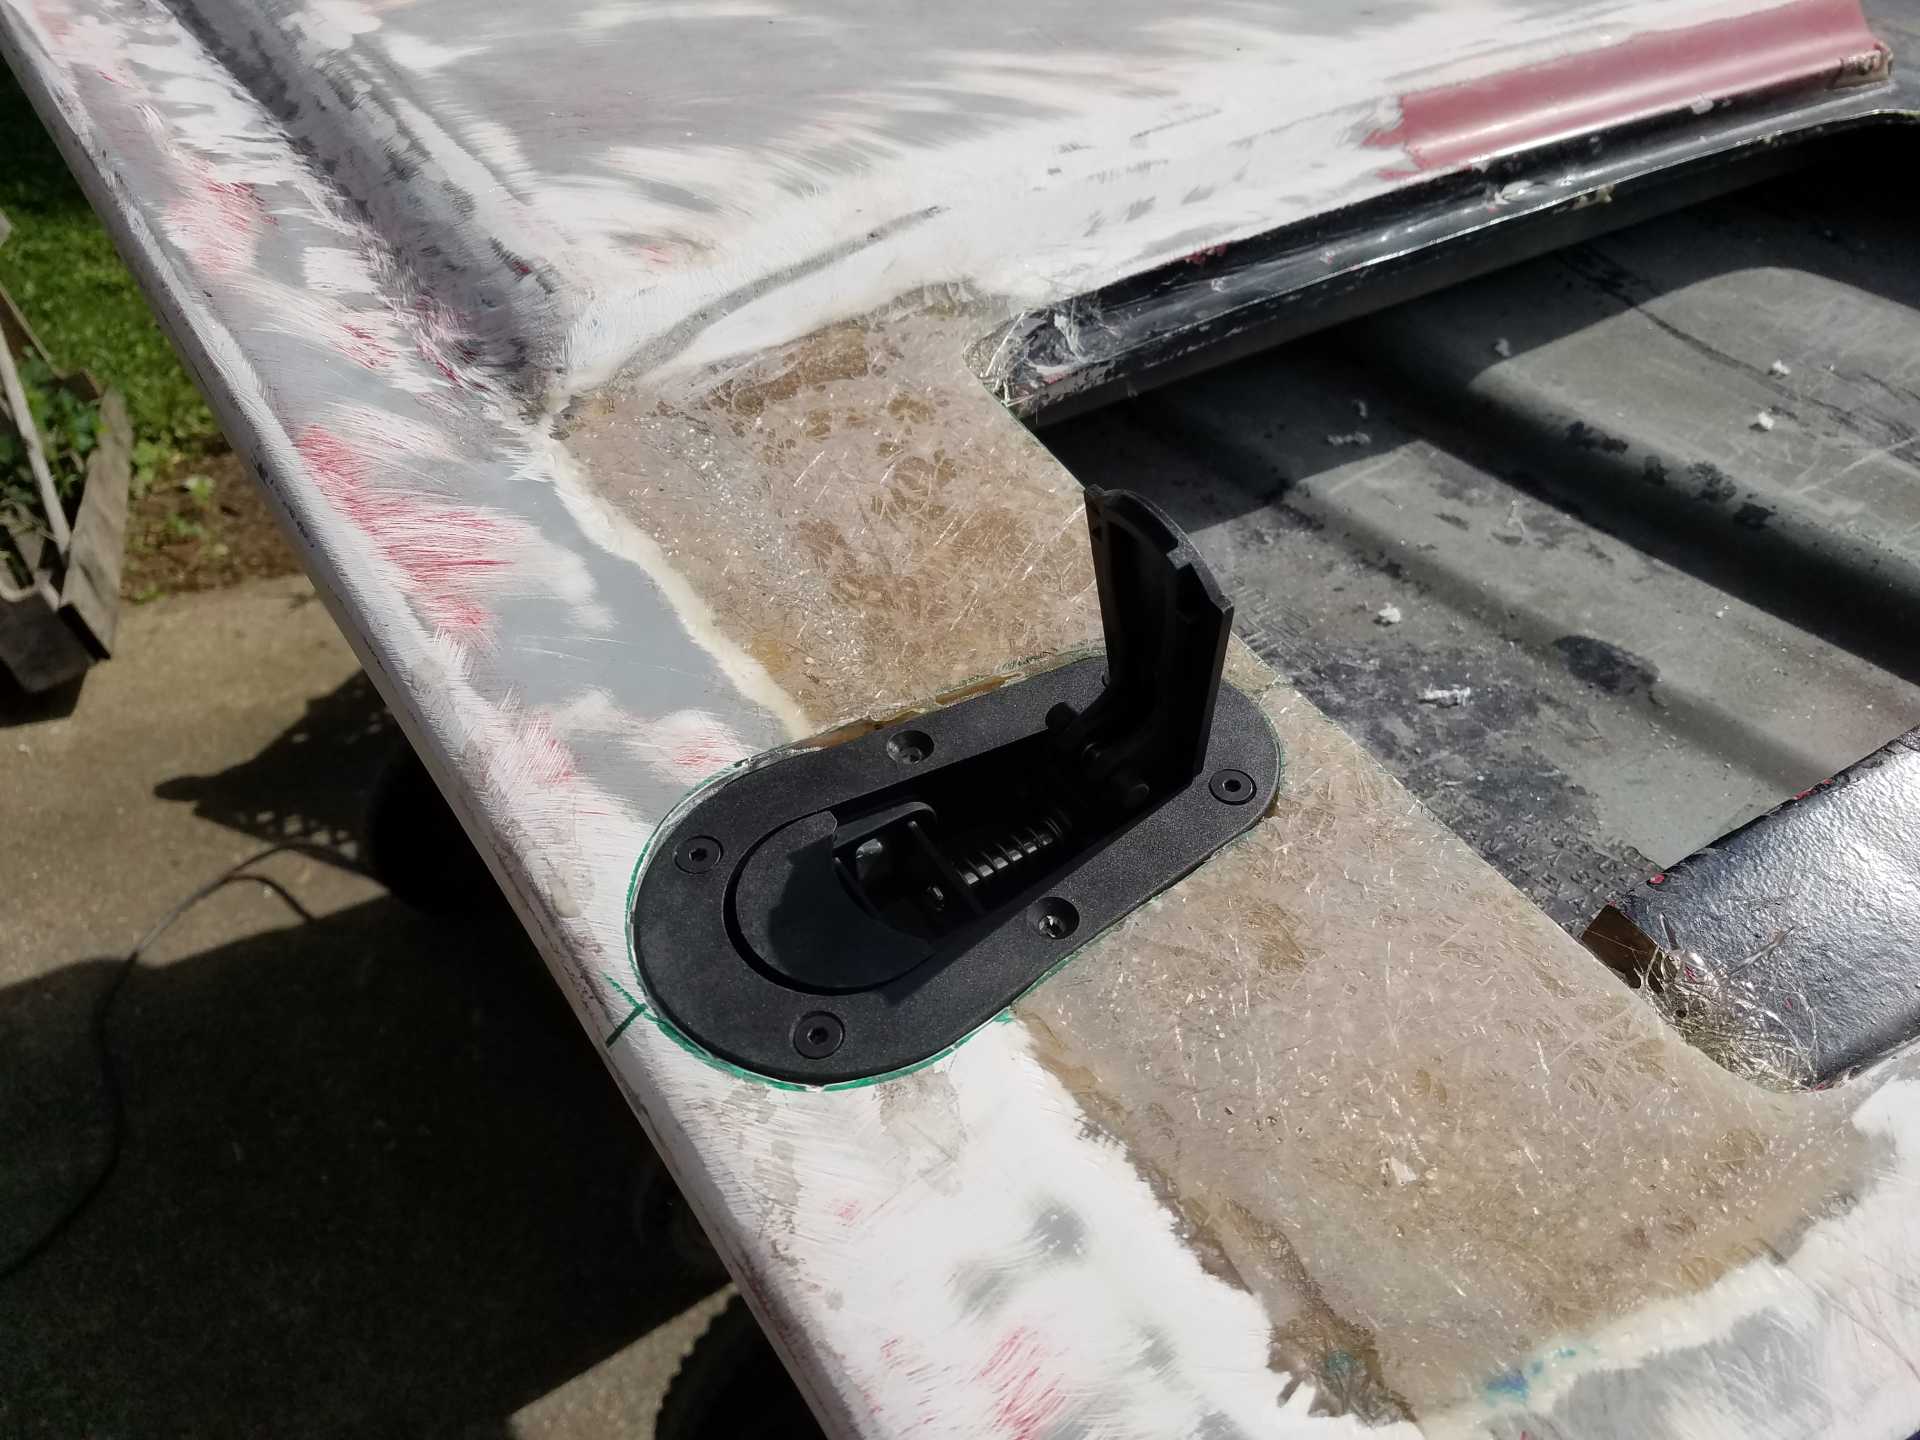
Now. I need to flush mount these, so I needed to make a flange underneath. I used the bottom rings as a mold to get the height right. Then glassed them in.
Notice the tube in the way. Inspiration hit, so I cut the tubes out.
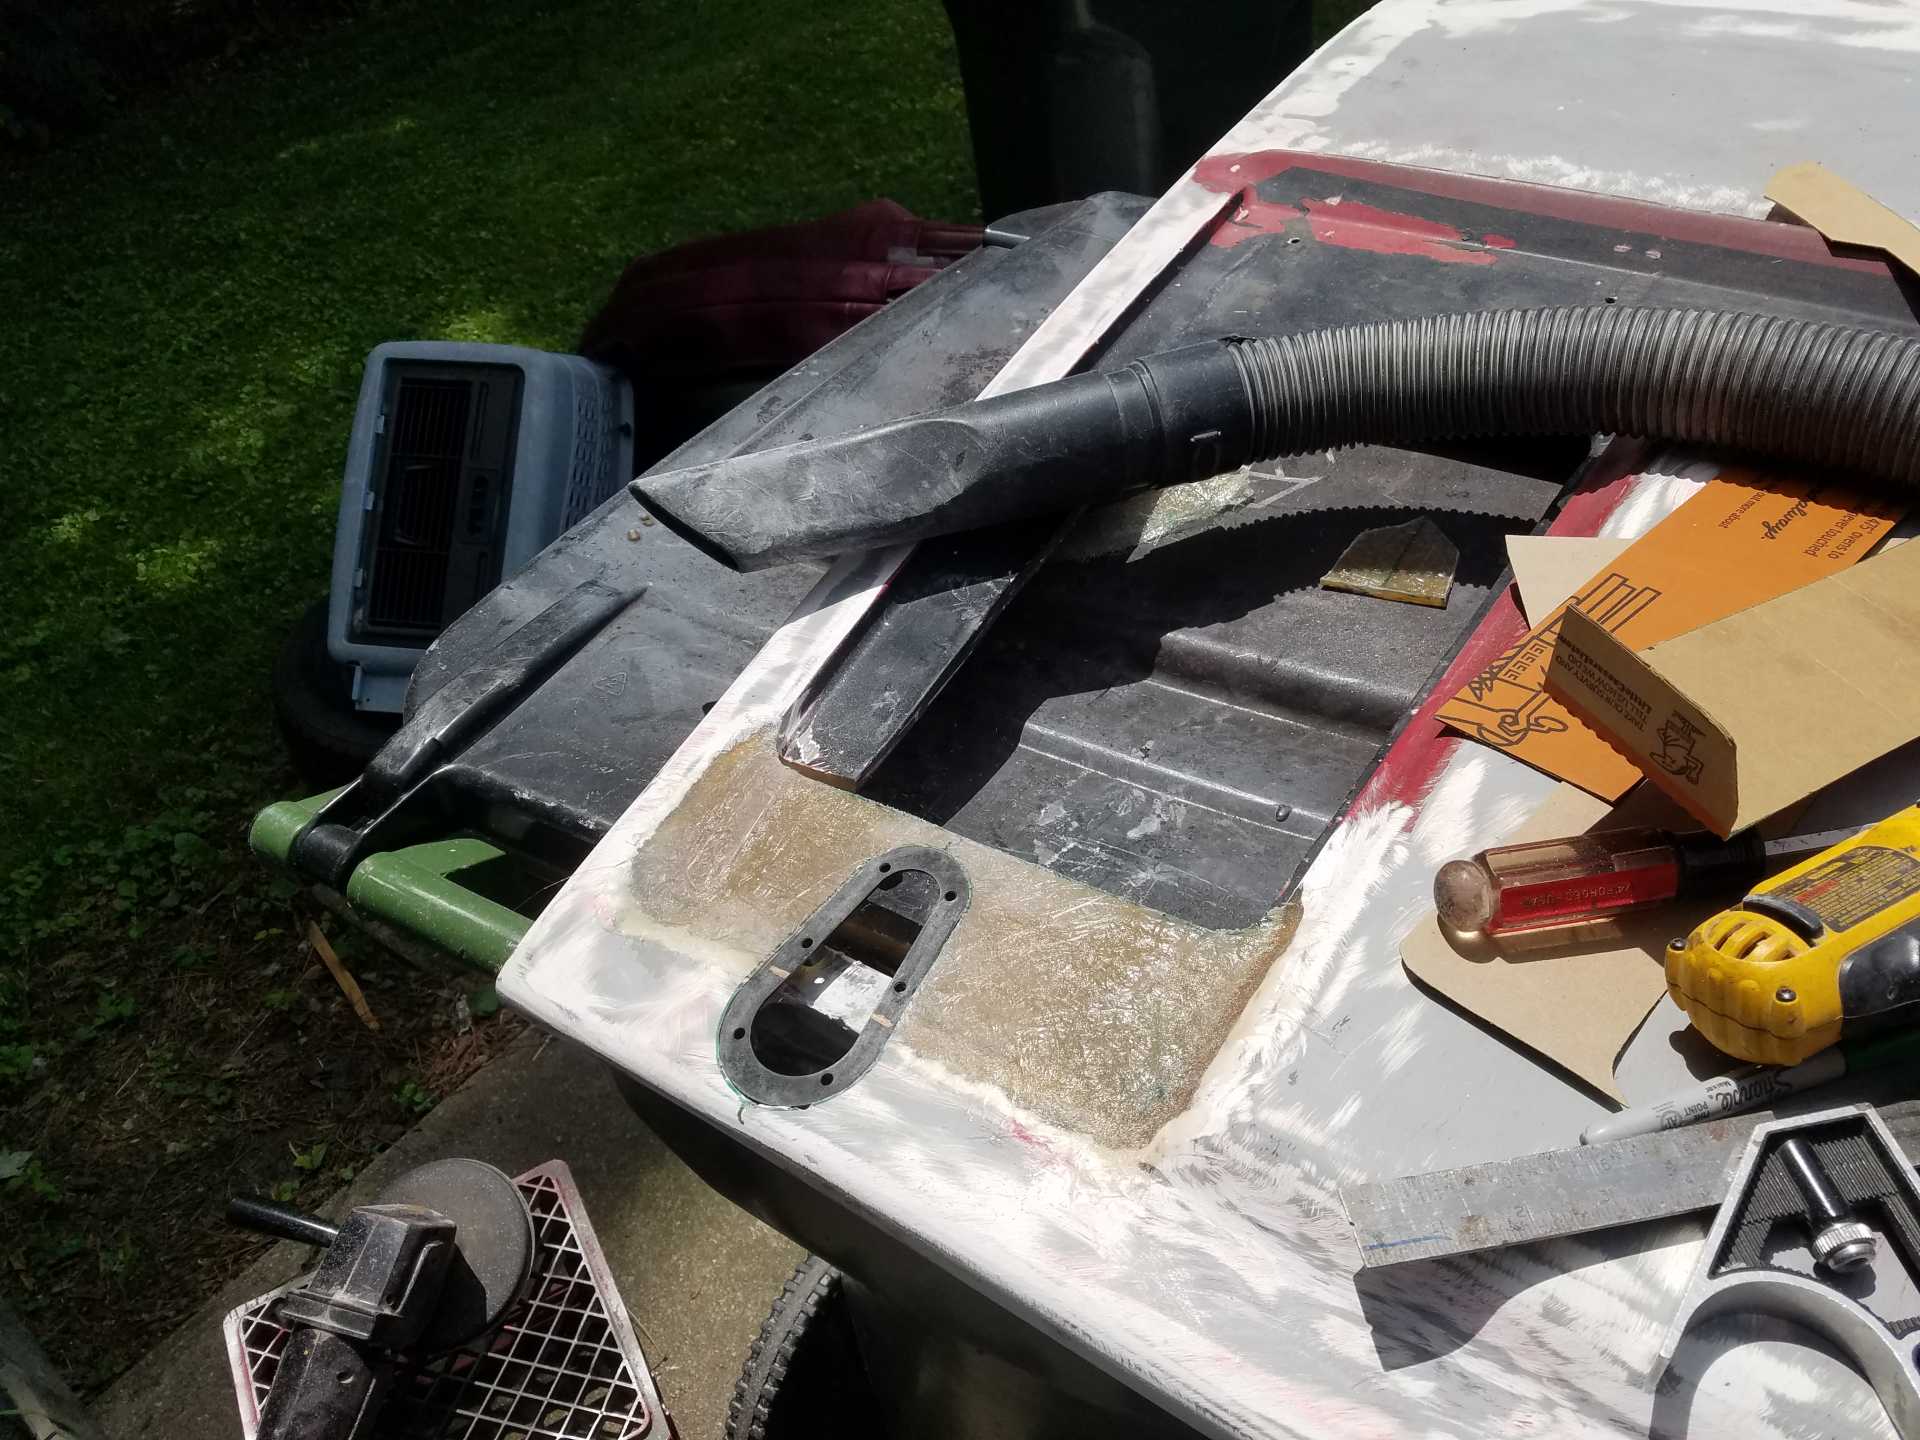
And Voila, flush mounted latches.

To bring it all together, I welded in new tubing.
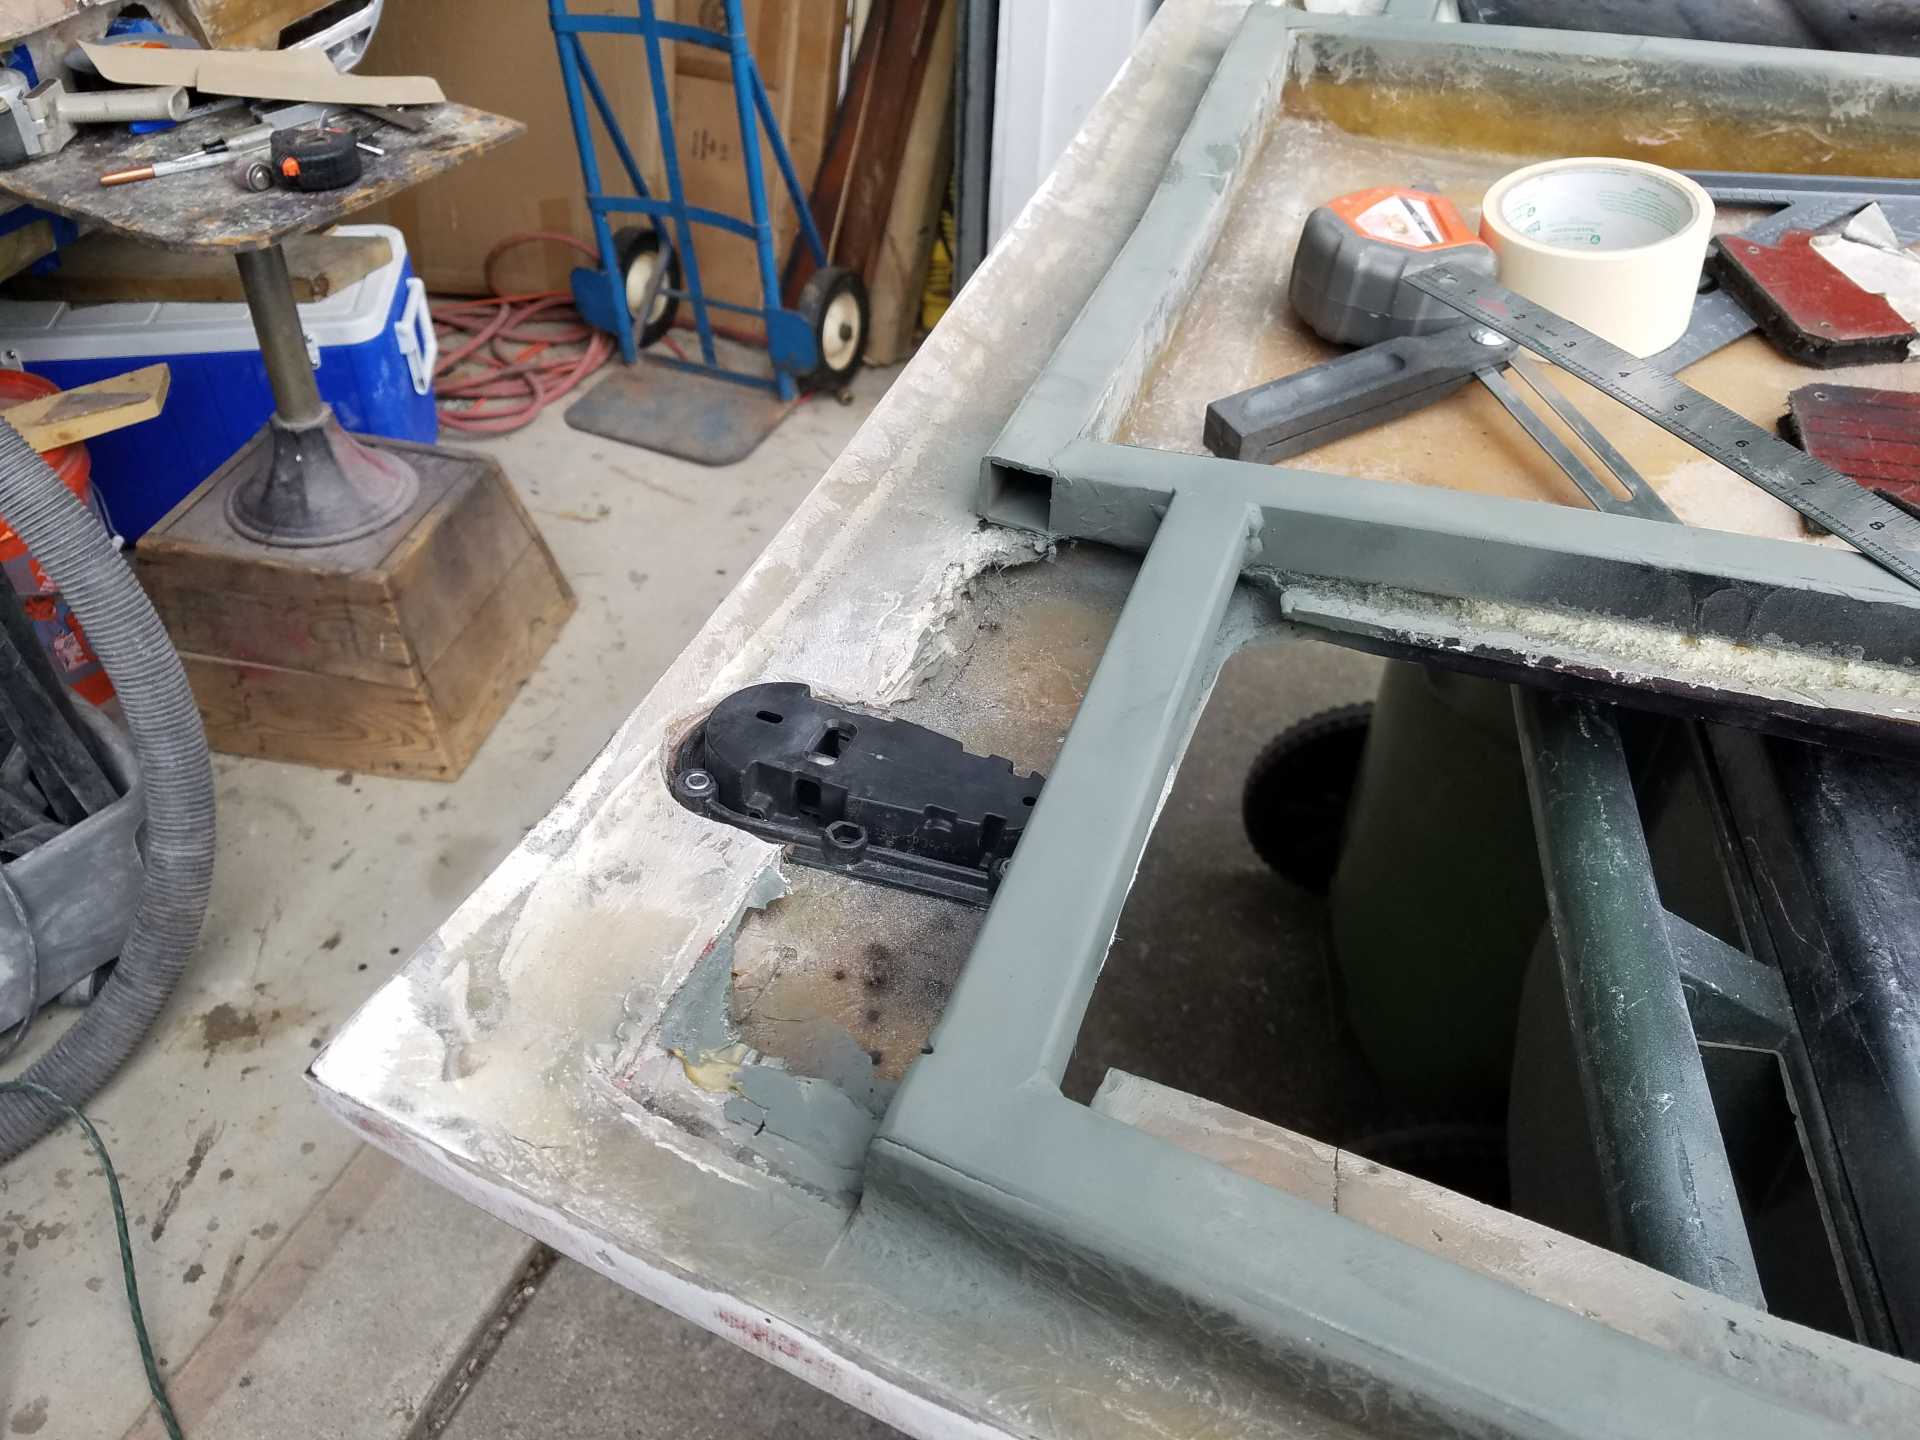
I'm going to have to clean up the glass and make a new return flange for the vent, but that's another day.
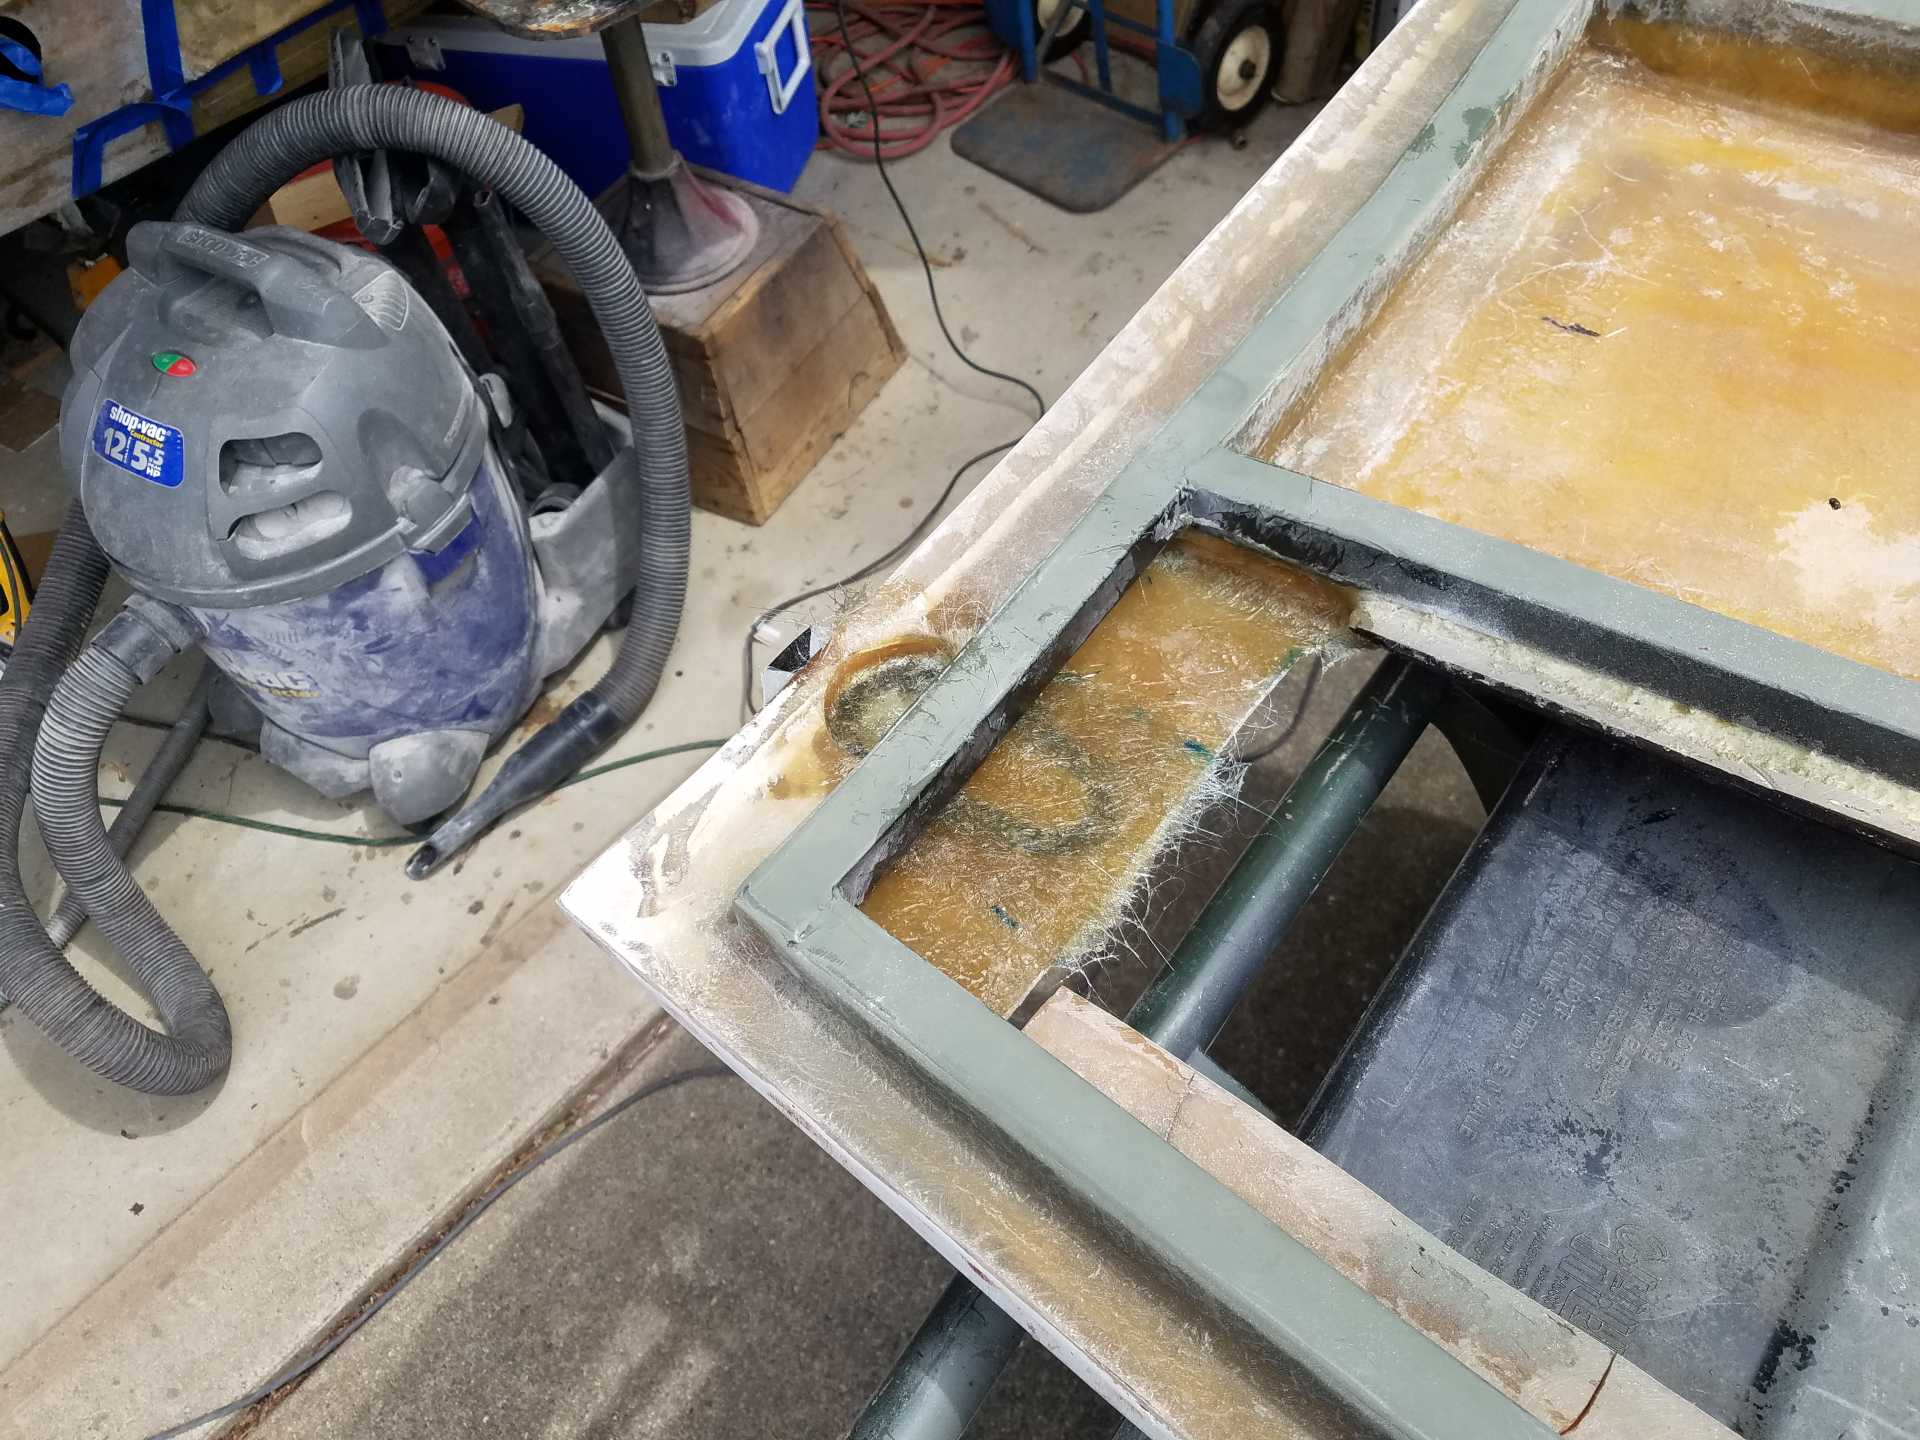
Here they are, back on the car. .
I will also have to make the post mounts. These will attach to the hinge supports.
Til next time... Stay safe.
Bob[This message has been edited by RCR (edited 07-11-2021).]
|
|
|
|
RCR
|
JUL 12, 08:49 PM
|
|
|
|
|
RCR
|
JUL 15, 08:22 PM
|
|
A tiny update:
I wired in the 12 position connector so I can separate the taillight harness from the body harness. I used another sealed Deutch connector for the job. I also fixed my blinker issue, bad relay. And, if anyone asks, and as I recently learned, it's on the steering column, not by the blue dingy thingy (that's for hazards).
Peace out ...
Bob
|
|
|
|
Trinten
|
JUL 16, 06:17 AM
|
|
That is a great idea! If you don't mind me asking, how did you mount the connector so it wouldn't 'rattle' against the frame or the panels?
A picture of location where you did it would be greatly appreciated, most of the Deutch connectors I've seen are pretty large (for understandable reasons).
|
|
|
|
RCR
|
JUL 16, 07:05 AM
|
|
| quote | Originally posted by Trinten:
That is a great idea! If you don't mind me asking, how did you mount the connector so it wouldn't 'rattle' against the frame or the panels?
A picture of location where you did it would be greatly appreciated, most of the Deutch connectors I've seen are pretty large (for understandable reasons). |
|
Hi Trinten,
The connectors are not permanently mounted yet. I will either do something factory with the christmas tree style clip, or just tie wrap it.
I will do that next time I have the rear clip off (hopefully soon). I will get some pics this weekend.
Bob
 [This message has been edited by RCR (edited 07-16-2021).]
|
|
|
|