
 
     |
| FieroGT/4E introduction (Page 12/13) |

|
ericjon262
|
MAY 01, 11:29 PM
|
|
| quote | Originally posted by fierogt4e:
ericjon262
Nice to see you here again. The info and pics of your manifold is why I decided to cut the bottom away to get to the tube inside.
I am also watching your MS3X install as I think this is the way I will be going. The 6 coils, sequential injection, knock censer, flex fuel, and so on, will be needed to help the big cam, long rod, motor run smother at lower RPMs.
|
|
Lol... I should have re-read the thread... I didn't realize I had already posted that info here. the megasquirt install has been pretty straightforward. knowing what I know now though, I think I would have thrown down the extra $400ish for the MS3 pro instead of the MS3x, mainly because it's a weather resistant case that can be installed anywhere instead of the MS3x which has to be installed in the cabin. my install has been on hold for a bit though, as I'm installing an 88 cradle, and C5 brakes on the car, and have the engine and trans out. I'm pretty excited about all the little stupid things I've fixed so far. it should transform my car and make it much more pleasurable to drive.
I always like seeing progress here, you're clearly not afraid to go all in and build the car the way you want like lots of folks on here. and you have the tools and expertise to do it right. one thing I will recommend, be very careful welding the intake, the shop that welded mine warped the crap out of it and it was a PITA to get flat again. ------------------
"I am not what you so glibly call to be a civilized man. I have broken with society for reasons which I alone am able to appreciate. I am therefore not subject to it's stupid laws, and I ask you to never allude to them in my presence again."
"The day I tried to live, I stole a thousand beggars' change and gave it to the rich."
http://www.fiero.nl/forum/Forum2/HTML/119122.html
|
|

|
shemdogg
|
MAY 02, 12:24 AM
|
|
Very cool thread and mods!
shem
|
|
|
|
fierogt4e
|
MAY 17, 11:54 PM
|
|
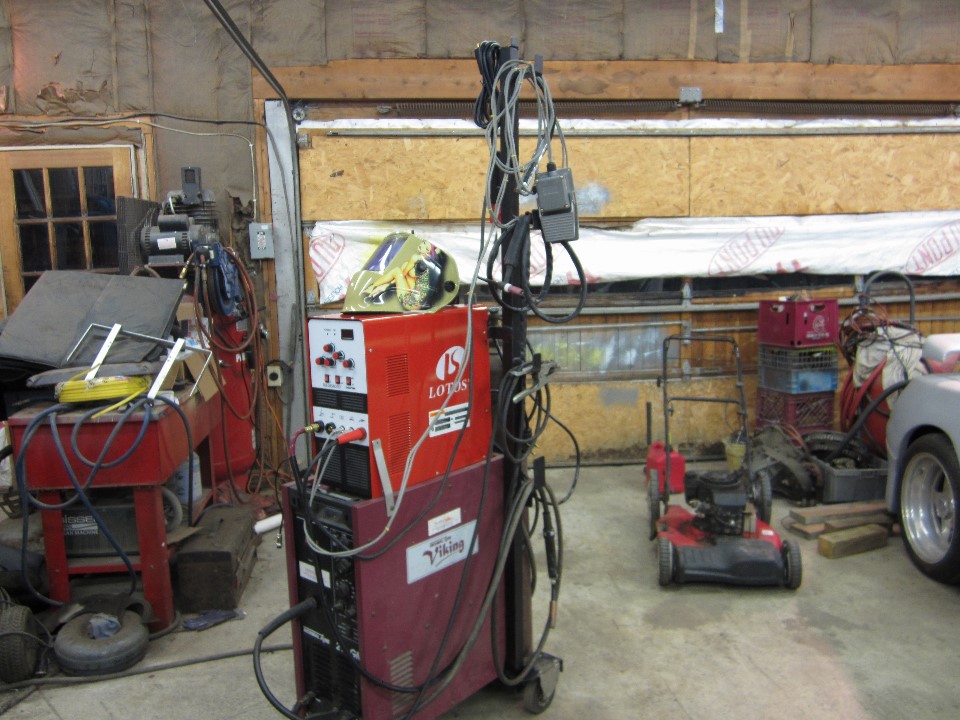
I have my tig setup for the most part. It said not to stack it do to a chance of it falling. I stacked it. I need the floor space. But you can see one of the little clips in the lower right hand corner to support it. I made the rings to build the rack the tank is in. It's back far enough to open the wire spool door on my old mig, to more than 90deg. to change spools easily.
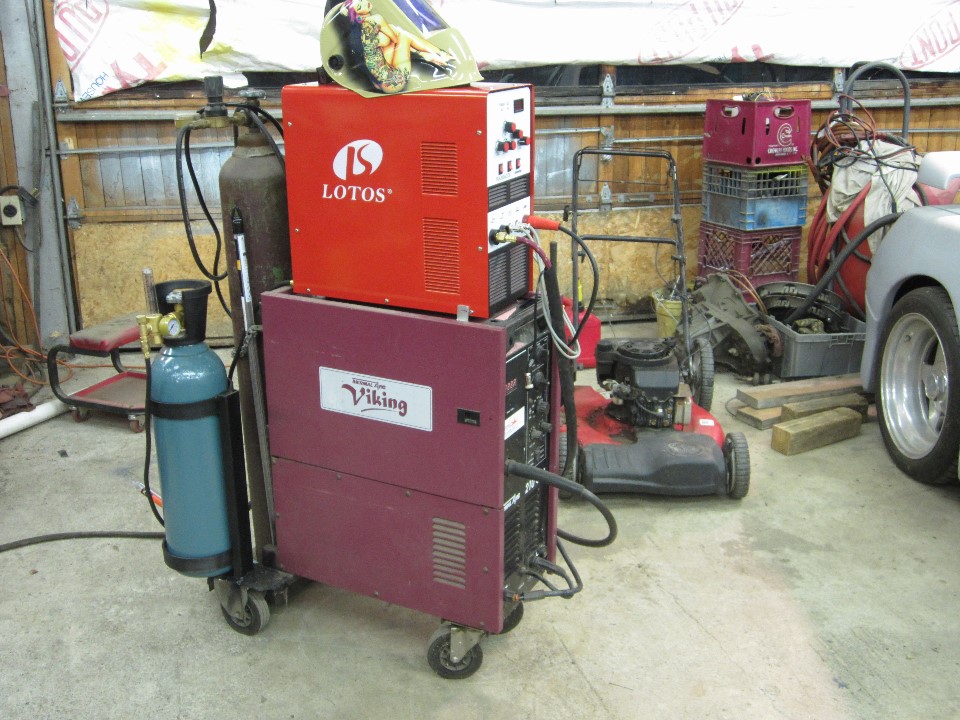
I added this cable-tree so I could get to all the different cables, keep them neat, and off the floor when not in use. It also has a clip to brace the tig in the upper rear. And one is in the lower front that keeps it in place.
I'm all set to start building. THEN... it sh_t the bed!!! completely dead, nothing, junk. So back it goes. I guess I need to go a step or two up in tigs. What are you using???
------------------
Sincerely
George
https://www.youtube.com/cha...oJ3CMtWvgEok8R-n3XRg
|
|
|
|
ericjon262
|
MAY 18, 03:09 PM
|
|
|
I really like my Miller Diversion 180, but I'm also a TIG novice.
|
|
|
|
fierogt4e
|
AUG 22, 12:45 AM
|
|
lately I've been working on the crank. Knife edging the counter weights leading edge, radius the trailing end, drilling the rod journals, milling of excess materiel, and polishing. When I'm done with this I can finely get the journals ground down from 2.250 to 2.000 for the new rods. The pistons must be notched, polished and balanced before I can have the crank balanced, and the heads must be done before I can do the pistons.
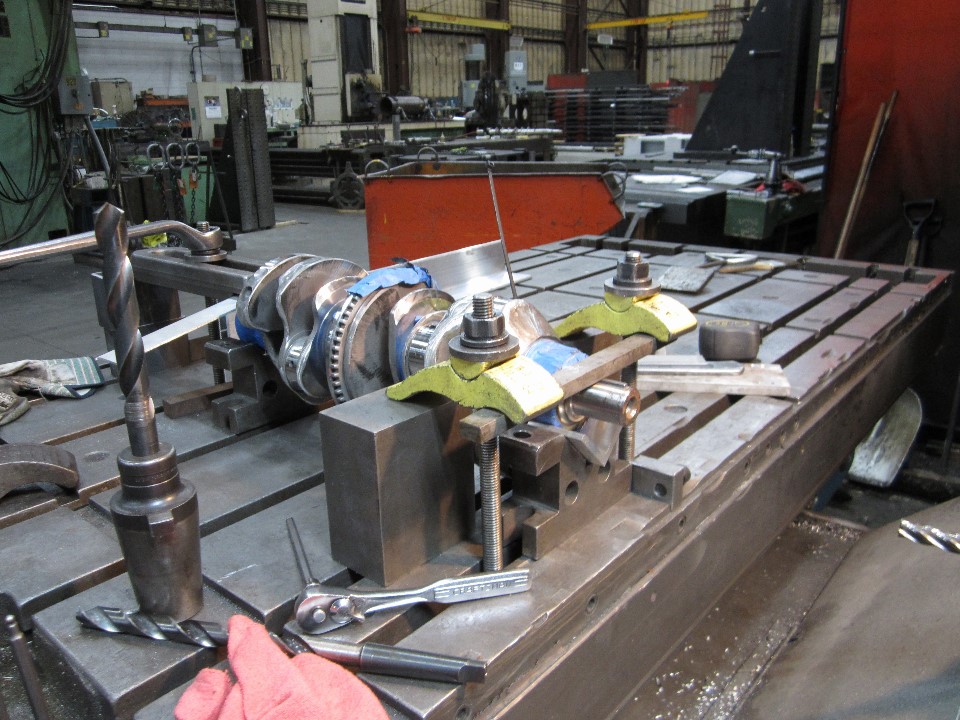
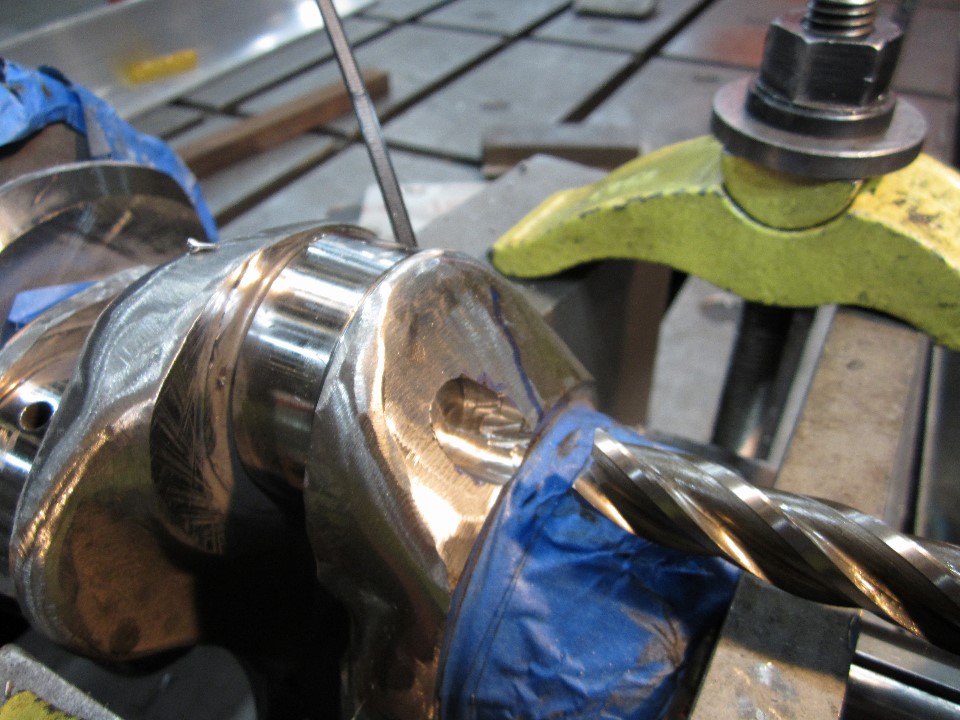
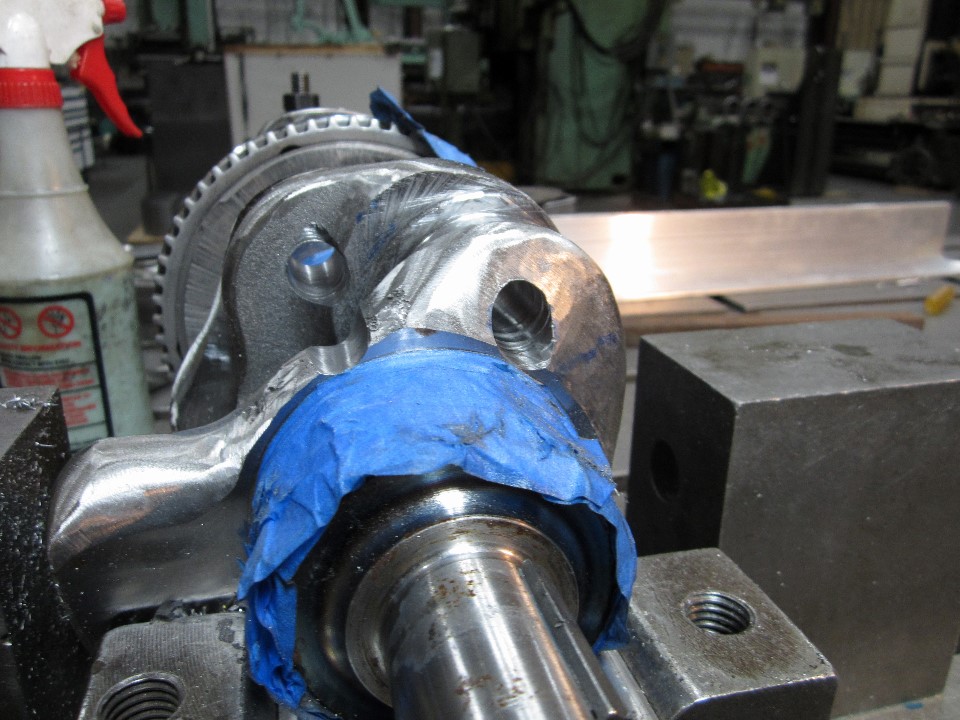
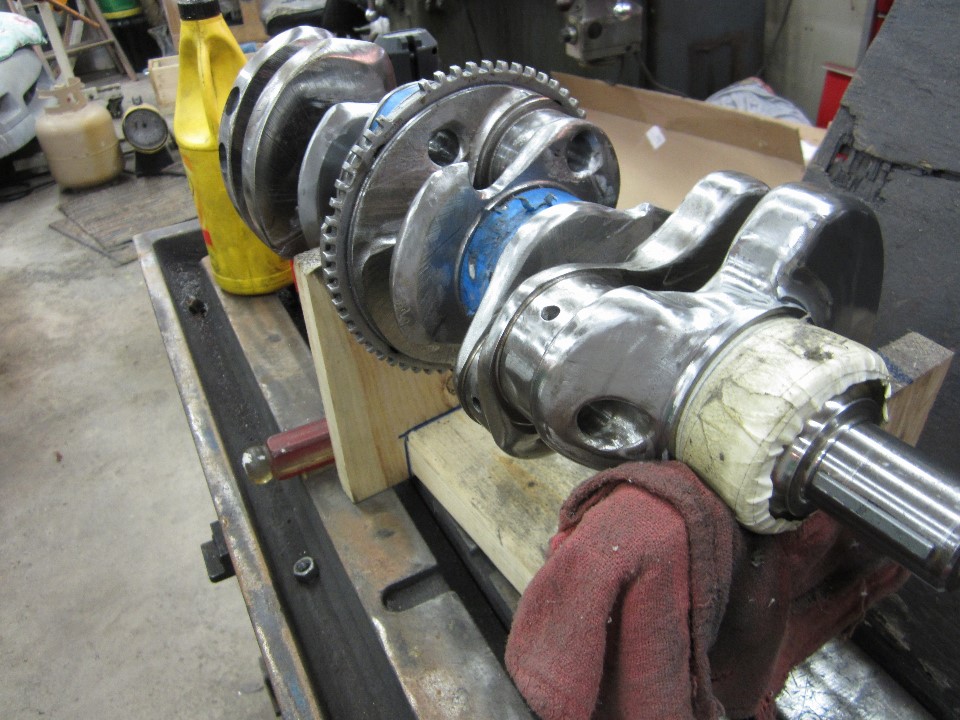
Well I've thought I was done the the lightening and polishing of the crank a few time. But after studying it for awhile, I did a little more, then studying it for awhile I did a little more, then...
Now it may be time to get the journals ground down at the crank grinder.
I tend to jump around on the different parts depending on machines I can get on at work. What I can get metal for. Or boredom. And the hard one, money enough for.
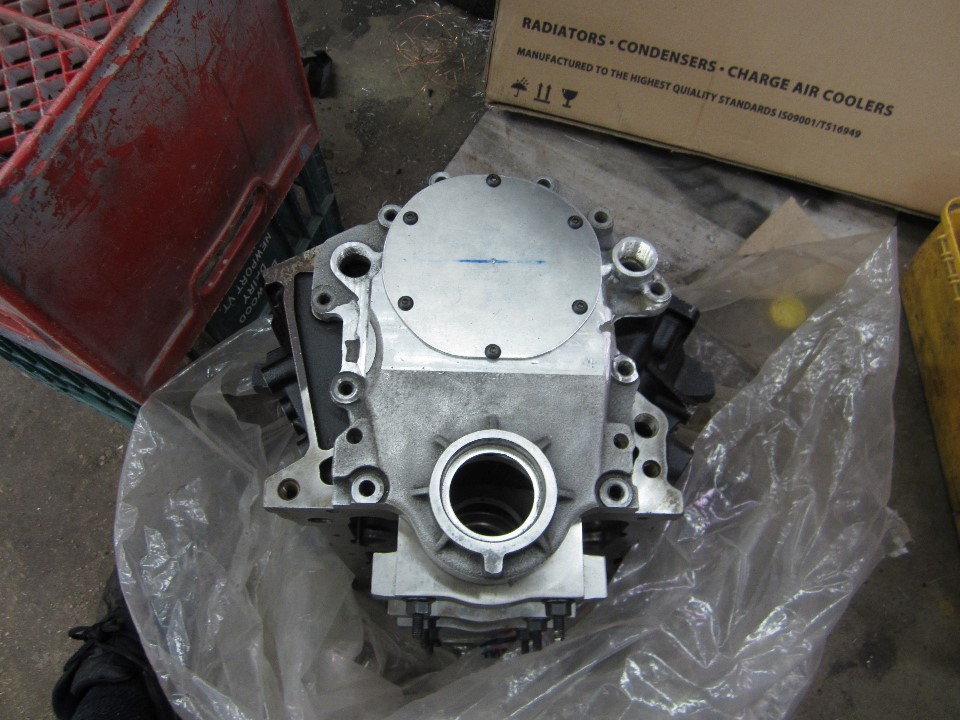
This is a timing cover for remote water pump I have been working on. I will most likely get stainless button head to re place the black oxide ones in this fit-up.
It's the stock cover with all the extra stuff milled off and bungs welded on for ¾ pipe tap. An 1/8 inch thick plate covers the opening.
------------------
Sincerely
George
https://www.youtube.com/cha...oJ3CMtWvgEok8R-n3XRg[This message has been edited by fierogt4e (edited 08-22-2017).]
|
|
|
|
ericjon262
|
AUG 22, 11:26 AM
|
|
|
I'm loving this build, you're going all in all over, I'm excited to see how the crank will look once you're done with it! ------------------
"I am not what you so glibly call to be a civilized man. I have broken with society for reasons which I alone am able to appreciate. I am therefore not subject to it's stupid laws, and I ask you to never allude to them in my presence again."
"The day I tried to live, I stole a thousand beggars' change and gave it to the rich."
http://www.fiero.nl/forum/Forum2/HTML/119122.html
|
|
|
|
solotwo
|
AUG 26, 11:14 PM
|
|
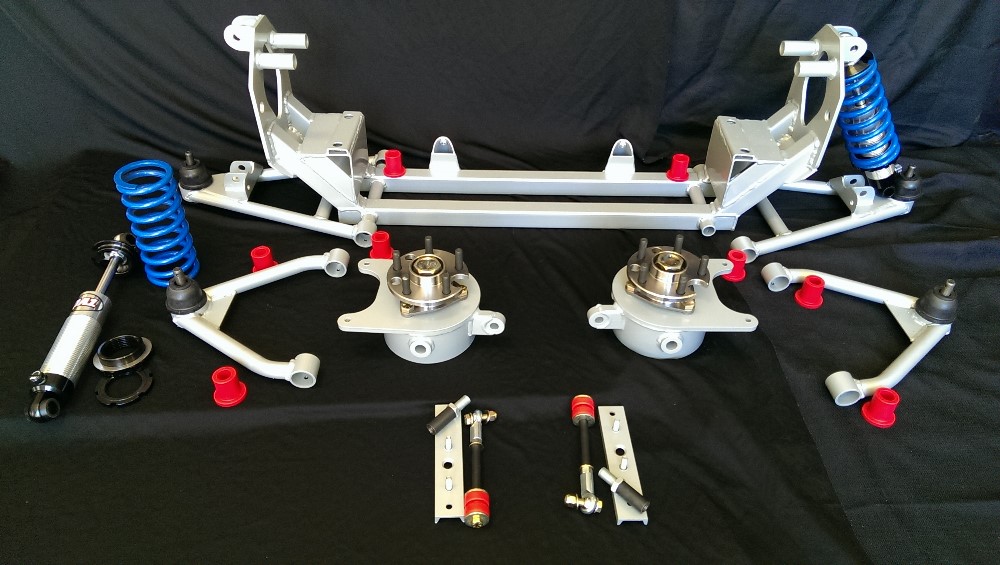
Hello enjoy your mods to your car. I have a question about the arraut front suspension. Have they addressed the weak point in the 84-87 front suspension? The tube the upper long bolt goes thru. That part is softer than the hardened bolts and the holes "egg out". I have had to replace the front cross member twice now on my 87.
Keep posting your doing a great job!
|
|
|
|
fierogt4e
|
AUG 27, 02:17 AM
|
|
solotwo
Are you using a stock stamped steel cross member?
I run the complete solo kit with the fabricated cross member. Adjustments are made with a pair of rod ends the bolt passes through for the upper “A” arm inner mounts not tubes..
------------------
Sincerely
George
https://www.youtube.com/cha...oJ3CMtWvgEok8R-n3XRg[This message has been edited by fierogt4e (edited 08-27-2017).]
|
|
|
|
fierogt4e
|
OCT 03, 12:19 AM
|
|
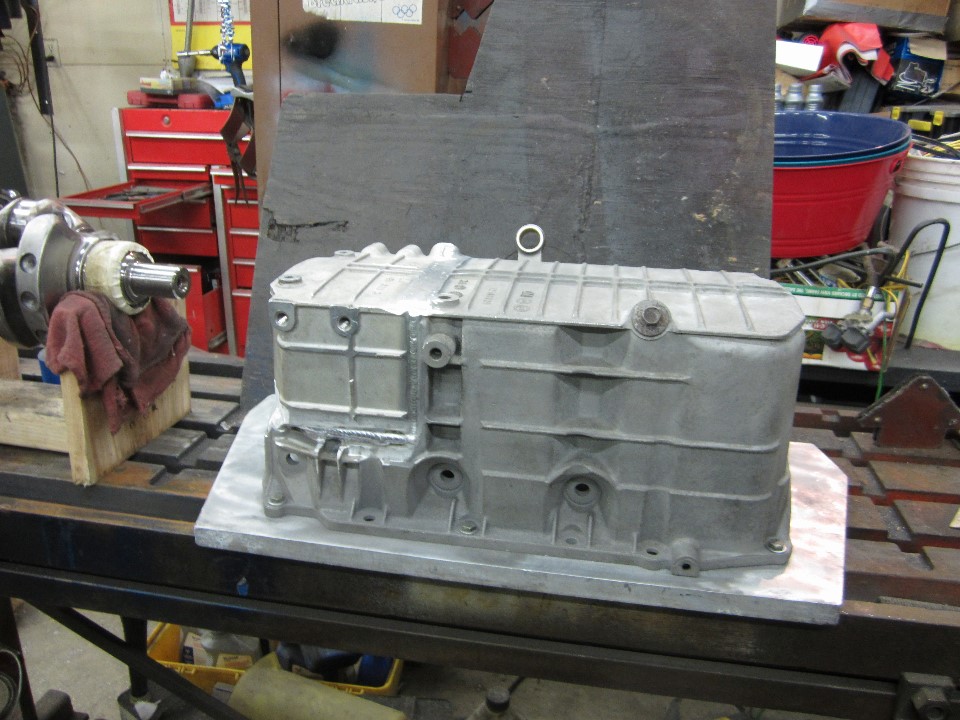
I changed direction on the oil pan, as can be seen here. I cut a section out of a different oil pan to graft onto the pan to create one that is is full depth for the entire length.
There is more work to do on it, but I like how it's coming out.
However should I need to make another one I will use two pans that are exactly the same for construction.
 ------------------
Sincerely
George
https://www.youtube.com/cha...oJ3CMtWvgEok8R-n3XRg
|
|
|
|
fierogt4e
|
OCT 04, 10:52 PM
|
|
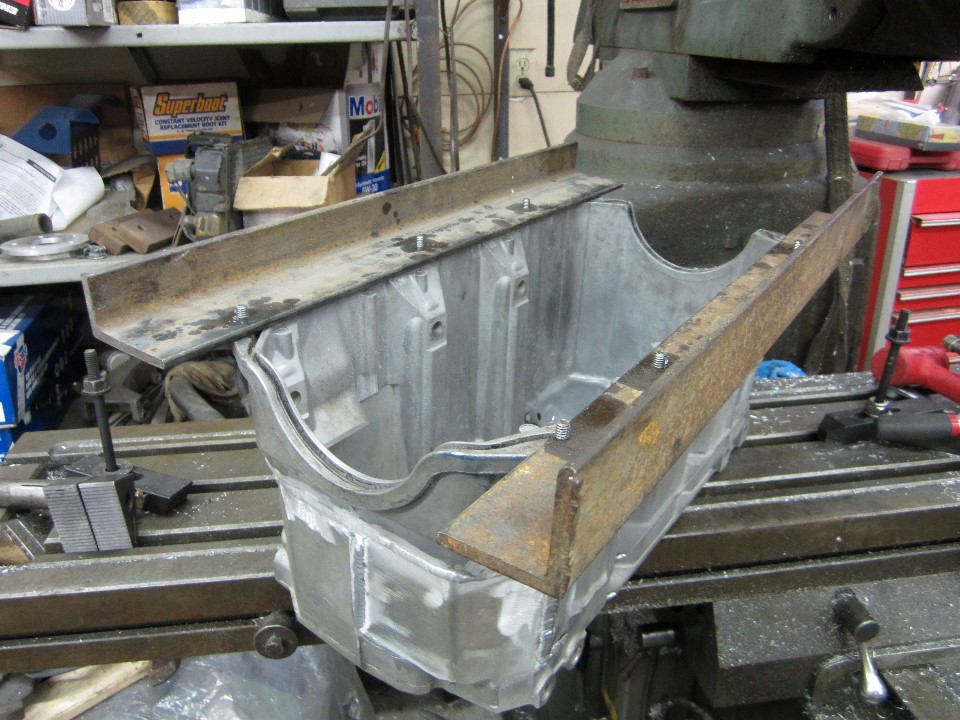
The friend I have helping me hot glue (weld) the pan together asked me to open a big hole in the large aluminum plate I had it mounted to so he could weld the inside also. However I use it for many things. So I tapped these angles to try and keep it flat during the inside welding.
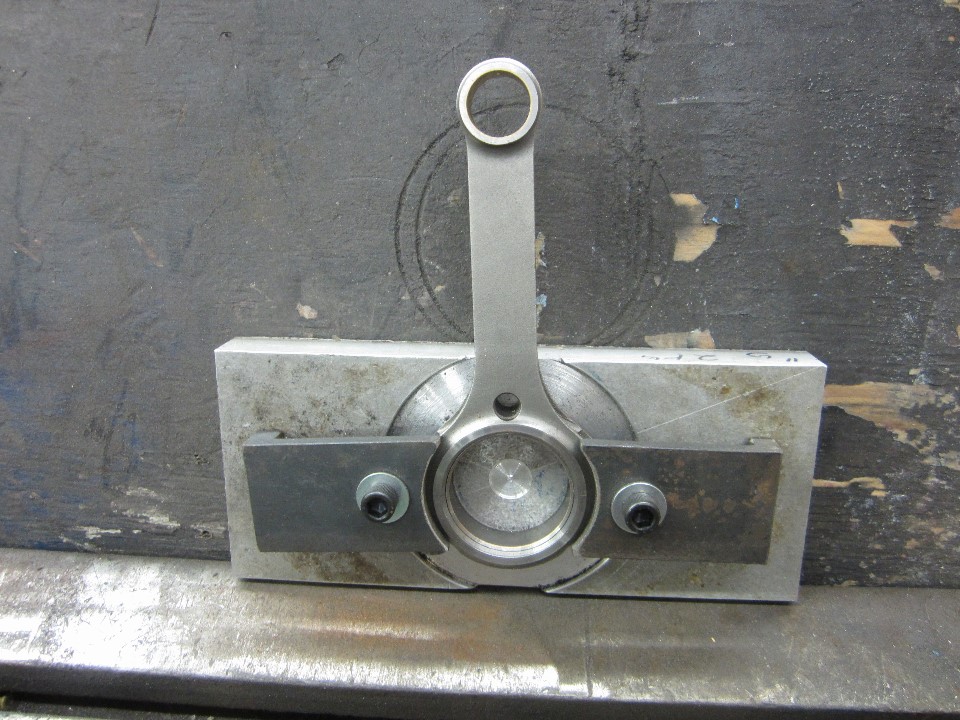
I did not like the way I thinned and chamfered the first rods big end as it had two different setups for each side. This is the fixture I made in the hope I can do both steps on one side at once. That needs to wait for the crank to be done to get side clearance right.
 ------------------
Sincerely
George
https://www.youtube.com/cha...oJ3CMtWvgEok8R-n3XRg
|
|
|
|