If you have a good induction timing light, hook it up to your coil wire and you will be timing for both your #1 cylinder and your #4 cylinder at the same time. I just tried it myself and it worked like a charm. For years I've taken the difference between #1 and #4 as I set the timing, this is so much simpler.
I wish that I could remember the forum member that had suggested this idea, I really wanted to give credit where credit is due for this teriffic idea.
I was about to suggest that as well. I was shown the coil wire trick when I first started in mechanical work in the mid 70's. Sure does make it easier to average out when you can see both at once!!
Great write up BTW.
Max
Edit: WoHooooo Page 2 is MINE!!!
[This message has been edited by Max The Chainsaw (edited 06-22-2007).]
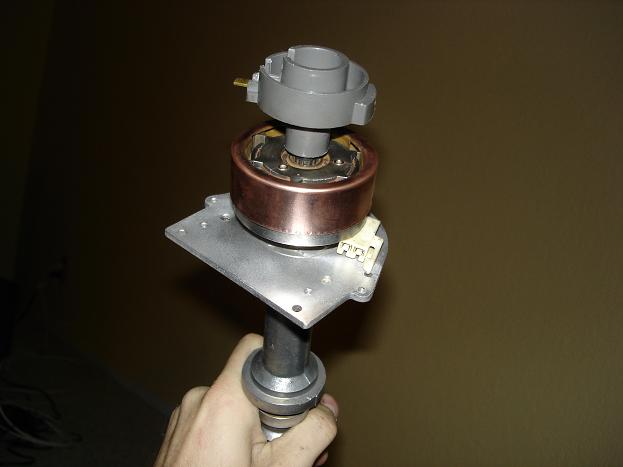
One thing I never liked about the Fiero's distributor, is the style of the pickup coil. The rusted/bent steel fingers on the pickup coil and on the magnet do not promote any kind of consistancy on the firing across all 6 cylenders. I was always a big fan of the star shaped pointed pickup and magnet. I just got finished rebuilding a 2.8 distributor using parts from a used 4.3 (blazer/S10) distributor. Far superior parts, much like the ones you installed. I'm hoping that this will eliminate some of the roughness that the Fiero has always had at an idle. You can REALLY feel the pointers when they line up now.
One thing I never liked about the Fiero's distributor, is the style of the pickup coil. The rusted/bent steel fingers on the pickup coil and on the magnet do not promote any kind of consistancy on the firing across all 6 cylenders. I was always a big fan of the star shaped pointed pickup and magnet. I just got finished rebuilding a 2.8 distributor using parts from a used 4.3 (blazer/S10) distributor. Far superior parts, much like the ones you installed. I'm hoping that this will eliminate some of the roughness that the Fiero has always had at an idle. You can REALLY feel the pointers when they line up now.
Guess I am kicking myself for not taking pictures as I rebuilt this distributor
Before I do any sort of writeup, I am going to send the distributor to my father so he can use it in his car, mostly to verify that this mod does what I think it will do, or for that matter work at all. One thing I can say, is the plastic housed pickup coil itself, from the S10/Blazer, is of far better quality then the one from the Fiero. The Fiero one was wrapped up in paper and fell apart when I was removing it.
I'm guessing that it was a 90+/- Blazer/S10 Something of that vintage. Possibly all chevy 4.3's.
And you are exactly right. I used the Fiero's shaft, gear, and base (with the plate).
It was a REALLY easy build, Just had to be very careful not to break the magnetic star from the 4.3 while pressing it off then onto the Fiero's shaft. All the parts from the 4.3 pickup assembly fit flawlessly into the 2.8's distributor. Who knows, there may even be a distributor available that has the good parts, (camaro 3.1 maybe? I don't know) I might go back to the U-pull it for more research, maybe pick up another fiero dizzy and do the conversion, and take pics this time
Rotate your distributor until you have the timing set to 10 * then hook up to #4 plug wire, you want to set the timing at the average of these two readings. I'm a little chicken, I wear a glove while rotating the distributor. Tighten the hold down bolt and button everything up.
Okay, I understand the "set to 10*" part, and I get the "hook up to #4 plug wire", but when you say "you want to set the timing at the average" how exactly do you do that?
How do you adjust the timing? Maybe I'd have to actually try doing this to get a better idea, but I'm still at a loss. Sorry for the dumb question, just trying to learn.
Due to the normal wear in the system, there is a little slop in the cam shaft, timing gears and crank shaft. Set the timing so that the average timing of both #1 and #4 is 10*. You may have the timing of #1 at 11* and the timing of #4 at 9* which is perfectly fine.
I did mention that if you have a good induction light, just hook up to the coil wire, you'll just set the timing once and be done with it as you're getting both #1 and #4 at the same time.
Yep, there are actually three timing grooves on the harmonic dampener. The wide one is for cylinders #1 and #4, the other two are for the other two pairs of cylinders. If you use the coil wire to trigger the timing light you'll get a flash for every cylinder and each should like up with one of the timing marks.
To clarify what averaging means, say you check the timing for #1 and it's at 11°, then without making any adjustments you check the timing for #4 and it shows 13°. By adjusting the timing to 9° on #1 and therefor 11° on #4 the average timing of the two is 10°.
The reason for this is to compensate for production tolerances in the machining of the crank. Though it's possible for the three crank planes to be out of tolerance by a degree or two, in practice I haven't seen a crank that was more than half a degree out. Also, timing isn't all that critical, you could be off a degree or two and not even notice a significant difference in driveability.
Bravo excellent post a green rate I was just informed about this distributor by Black Tree,, this is a performance distributor . a needed improvement over the stock stonehenge druid unit .. this is the kind of post we all can benefit from a big + for a post that will increase fiero owners satisfation level(and make the car run better ) If you use the coil wire ,,use a thin timing mark and thier will be no need to double check the 1 and 4.. this forum is a constant source of fiero improvement, thanks to members like Jetman
Any time you are going to replace a distributor , you should be on the #1 firing point..piston fire position.. When the timing is known to be exact The distributor should be marked with a small slim white paint mark ,scribe mark or a pin punch mark at the join surfaces,that will center the distributor any time you move it..When the new distributor is installed ,once timing is verified,,use the lower old mark and place the new mark on the distributor to match the old mark,,If you carefully eyeball the position of the distributor before you remove it ,and the finish position as it clears the lower drive gear,, this makes install and future removal easier..
A paper match or tooth pick can be used to apply the paint,a dry wall screw will scribe most excellently when the distributor clears mark the exact place where the rotor (or moving part) is in relation to the distributor For the generous souls who assist others on thier fieros a distributor cap with the top partialy cut out can be of assistance in distributor trouble shooting.. some body rate jetman green for me
I posted a build up with the s10 / blazer write up some time ago if you look in the search it shows how to do it. and what the differences are between the fiero one and the blazer one!
Any time you are going to replace a distributor , you should be on the #1 firing point..piston fire position.. When the timing is known to be exact The distributor should be marked with a small slim white paint mark ,scribe mark or a pin punch mark at the join surfaces,that will center the distributor any time you move it..When the new distributor is installed ,once timing is verified,,use the lower old mark and place the new mark on the distributor to match the old mark,,If you carefully eyeball the position of the distributor before you remove it ,and the finish position as it clears the lower drive gear,, this makes install and future removal easier..
A paper match or tooth pick can be used to apply the paint,a dry wall screw will scribe most excellently when the distributor clears mark the exact place where the rotor (or moving part) is in relation to the distributor For the generous souls who assist others on thier fieros a distributor cap with the top partialy cut out can be of assistance in distributor trouble shooting.. some body rate jetman green for me
Can you guys confirm I did this right? I have my engine out. Before pulling the distributor I put got the engine to TDC of cylinder #1 . I saw a punch mark in the block at the base of the distributor. I made a mating punch in the distibutor base for lineup later. I also took a sharpie and marked the relationship of the rotor to the distributor housing just to be sure I was not off a tooth. I then pulled the distributor.
Should this at least get the thing started when I get the engine back in the car?
Also- I HATE oil leaks. Any comments on Rodneys high temp distributor O-ring? I have a new one with my gasket set, but should I consider using his instead?
If engine was running O K when you pulled the engine you should be fine ,,the purpose of the marks is to KEEP time when working on the engine distributor and save time ,, The mark is made when you know timing is correct,so you do not have to retime from "not known" If the distributor was not moved from the last time the engine was run you are fine I always bring engine to top dead center or #1 fire position when I reinstall a distributor A properly done punch mark will FEEL into place,, The paint mark with a center scribe is more precise when parts are changed the timing change is small but timing should be check for best running engine try for as close to 10 and 10 as possible,but 9 and 11 are O K One mark is permanent,block to distributor, the 2nd mark should be lighter more easily erased ,,but it is the more important mark..it is the position of the distributor gear driven shaft and what it turns that is most important..always use #1 for time purpose to simplify The piston must be at the same position as it was at removal when you remount distributor... top dead center firing stroke do not alter distributor firing points to attain perfect time The stock o ring should be fine, this has been a problem on older o rings,use a small amount of lube to assist in smooth slide entry.if edges are sharp ,smooth with sand paper just place oily rag or oily soft paper in hole to prevent grit from falling in new engine I ve found that lube aids quick entry into a tight hole
[This message has been edited by uhlanstan (edited 04-06-2008).]
If you have a good induction timing light, hook it up to your coil wire and you will be timing for both your #1 cylinder and your #4 cylinder at the same time. I just tried it myself and it worked like a charm. For years I've taken the difference between #1 and #4 as I set the timing, this is so much simpler.
quote
Originally posted by jetman:
I did mention that if you have a good induction light, just hook up to the coil wire, you'll just set the timing once and be done with it as you're getting both #1 and #4 at the same time.
Perhaps I'm not following exactly what you're saying, but why would an induction timing light be necessary? Couldn't a regular timing light be attached to the coil (or the center terminal of the distributor) in much the same fashion as a regular timing light is normally attached to the #1 spark plug?
[This message has been edited by Patrick (edited 04-02-2008).]
Perhaps I'm not following exactly what you're saying, but why would an induction timing light be necessary? Couldn't a regular timing light be attached to the coil (or the center terminal of the distributor) in much the same fashion as a regular timing light is normally attached to the #1 spark plug?
An induction timing light is a regular timing light. In the bad old days timing lights had to be connected in line with the spark plug wire or even (heaven forbid) used a wire that pierced the insulation. Modern induction timing lights use a clamp with an induction coil to clamp to the wire.
An induction timing light is a regular timing light. In the bad old days timing lights had to be connected in line with the spark plug wire or even (heaven forbid) used a wire that pierced the insulation. Modern induction timing lights use a clamp with an induction coil to clamp to the wire.
JazzMan, thanks, but I'm aware how an induction timing light works.
My question was in regards to using a timing light from "the bad old days" (the type I have) connected in line from the coil to the distributor to monitor timing for both the #1 and #4 cylinders.
In other words, I don't understand why an induction timing light was originally mentioned specifically. Just looking for some clarification, is all.
Well, it doesn't matter what triggers the flash in the light, the result is the same. There is a timing mark on the harmonic dampener for every cylinder pair besides #1 & 4, so you'll get results with the coil wire as well.
Perhaps I'm not following exactly what you're saying, but why would an induction timing light be necessary? Couldn't a regular timing light be attached to the coil (or the center terminal of the distributor) in much the same fashion as a regular timing light is normally attached to the #1 spark plug?
Induction or regular makes no difference. You can connect to the center (coil) terminal, but it fires for all cylinders, so using it for timing purposes is useless. For a regular, inline, timing light it should be connected to cylinder #1 distributor terminal or spark plug.
You can connect to the center (coil) terminal, but it fires for all cylinders, so using it for timing purposes is useless.
So you don't agree with Jetman?
quote
Originally posted by jetman:
If you have a good induction timing light, hook it up to your coil wire and you will be timing for both your #1 cylinder and your #4 cylinder at the same time. I just tried it myself and it worked like a charm. For years I've taken the difference between #1 and #4 as I set the timing, this is so much simpler.
[This message has been edited by Patrick (edited 04-03-2008).]
Originally posted by sjmaye: You can connect to the center (coil) terminal, but it fires for all cylinders, so using it for timing purposes is useless. For a regular, inline, timing light it should be connected to cylinder #1 distributor terminal or spark plug.
Not useless at all. In fact it is a neat trick for setting the average for #1 and #4. How? Because you mark the harmonic balancer with white chalk or paint on the fat mark and that is the mark you see even though the timing light flashes for all cylinders. The net effect your eyes see is the white chalk mark. You move the dist so the chalk mark bounces around as close to the 10* mark as you can get.
Induction or regular makes no difference. You can connect to the center (coil) terminal, but it fires for all cylinders, so using it for timing purposes is useless.
Not quite. The harmonic dampener has marks corresponding to TDC of every cylinder, so you can use the coil wire and see a timing mark that's relatively accurately located for every cylinder firing event.
Not quite. The harmonic dampener has marks corresponding to TDC of every cylinder, so you can use the coil wire and see a timing mark that's relatively accurately located for every cylinder firing event.
JazzMan
If you are connected to the coil wire won't it be firing and blinking for all 6 plugs firing? How would you know which one it is firing for? I thought I was pretty sure about this, but I am beginning to wonder
If you are connected to the coil wire won't it be firing and blinking for all 6 plugs firing? How would you know which one it is firing for? I thought I was pretty sure about this, but I am beginning to wonder
Because all 6 cylinders will fire at 10* BTDC. So even if you can see the 2 skinny timing marks for cylinders 2,5 and 3,6 as well as the fat mark for 1,4 the timing mark(s) will appear mostly stationary. You then adjust the dist until the marks are as close to 10* as possible. This would be even more accurate than 1/4 as you get the average for all 6 cylinders.
Because all 6 cylinders will fire at 10* BTDC. So even if you can see the 2 skinny timing marks for cylinders 2,5 and 3,6 as well as the fat mark for 1,4 the timing mark(s) will appear mostly stationary. You then adjust the dist until the marks are as close to 10* as possible. This would be even more accurate than 1/4 as you get the average for all 6 cylinders.
Wow! I stand corrected. All my work with distributors prior to this was with my old 1969 350. I was always told to reference #1 cylinder only.
It should be number 5 in your first picture. You can actually make it any one you want but it will confuse you and the next owner of the car as it is shown differently in the manuals. Here is a picture from one of the manuals.
Man, you do not know how hard I looked for this picture when I put a new distributer in the car, sent it to a shop to get timing done, and the mechanic changed the plug wires and distributer all around to the wrong firing order.
Just a tip, I wired a toggle switch with a safety cover to the dia mode plug. I can now easily put it in dia mode to set timming, IAC, check a code or whatever without taking apart the console.
You can also install a mini headphone jack to the cover for the ALDL connector area that stays plugged into the connector. My ALDL cable plugs right into the jack for data logging, and I have a seperate dummy plug that plugs in and shorts the A&B terminals for setting timing.
OK, kick me for reading the directions, but I just read the sticker on my car for setting the timing and it said to put the car in "drive". WTF??? I DON"T think I'll do it that way and I bet it will be just fine.......... What were those engineers thinking??