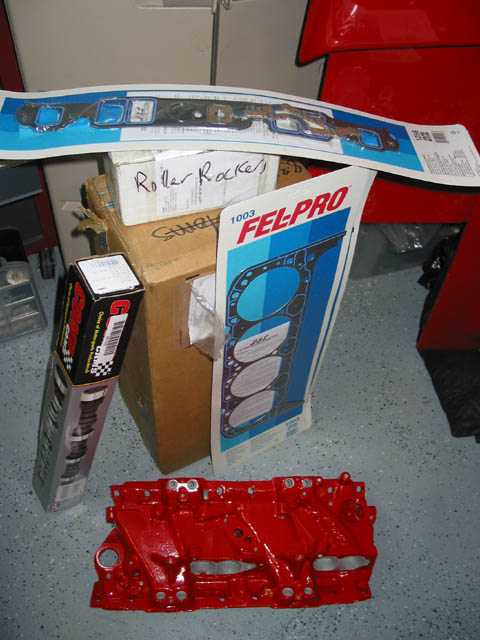
Thanks Jake. Here is the bumpstick and part ready to take to machine shop. Later I found out that I orderd the wrong cam and wrong valve cover gaskets. Oh well... Summit is making profit of my mistakes Soon I'll post pics of the known clearance issues with the trany and cradle.
looks good so far. Will you dyno the car when you're done?
Thanks. Oh yeah. It will take a while because I will need to tune it. Depending how far is the current one will tell how much time. Hopefully by December. I was expecting my engine back this weekend but because of some mishaps with wrong ordered parts (all my fault) and me traveling I won't get it back until next Friday. I hope to clean up what is left (little things here and there) and have it on the ground no later than by end of November. Will see...
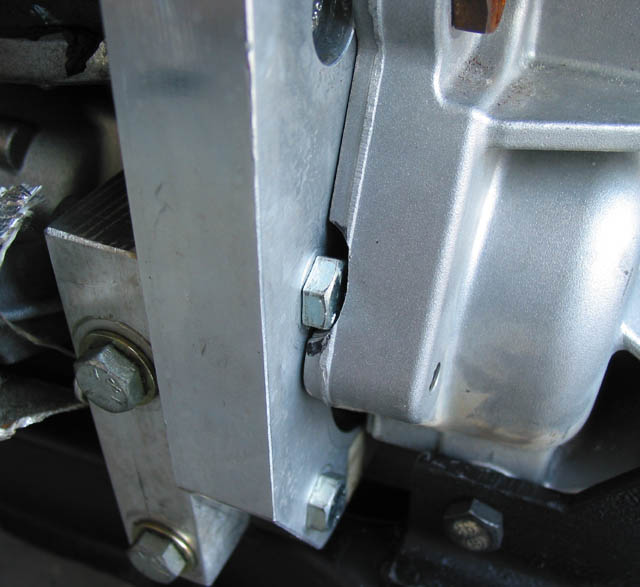
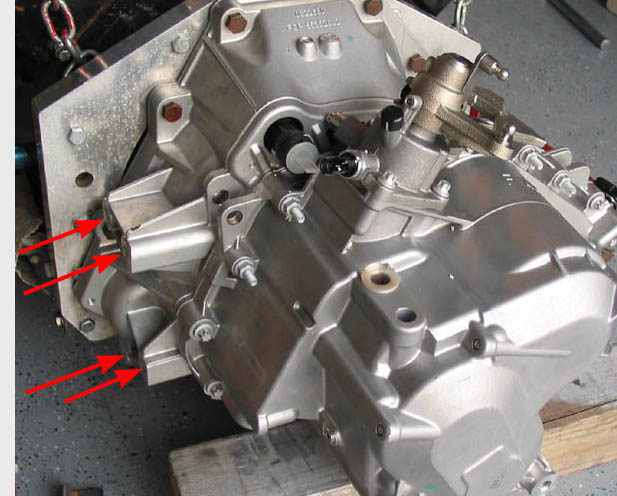
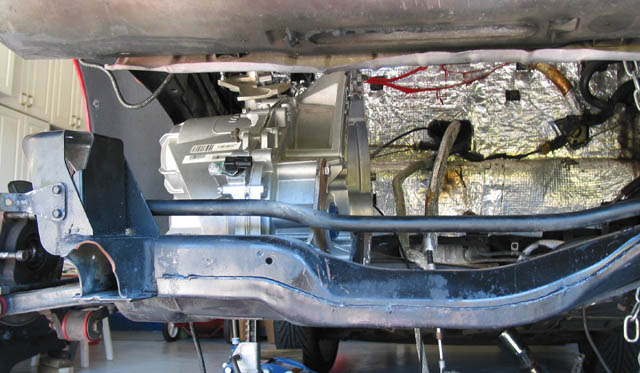
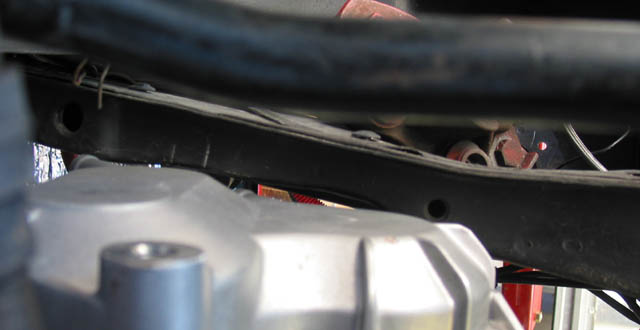
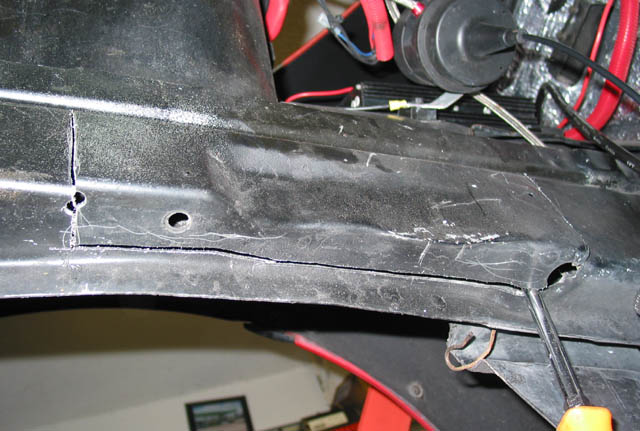
So here was the trany mockup o check clearance. Much easier with the trany alone on the cradle. You can clearly see the problem area towards the rear of the cradle;
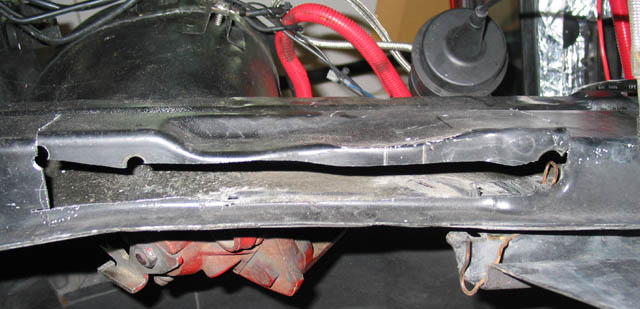
Here is the solution. Cut and move crosmember in;
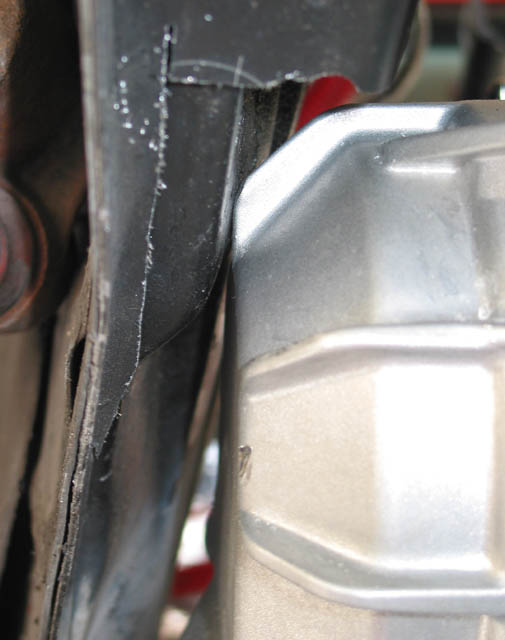
Still after that it was slightly touching so I had to cut a slit in the area to push it inward. No problem after that. More later
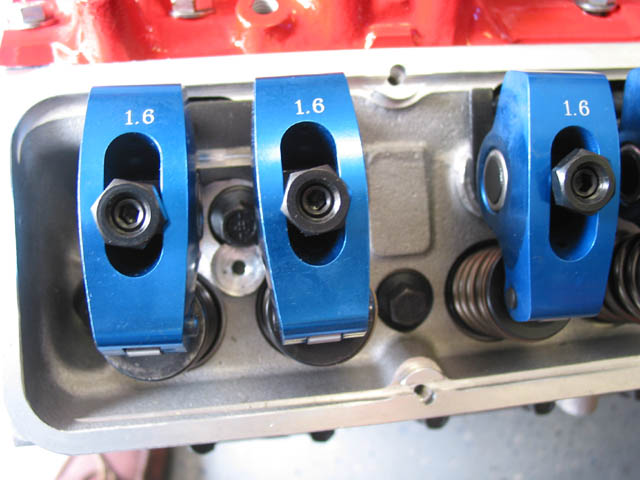
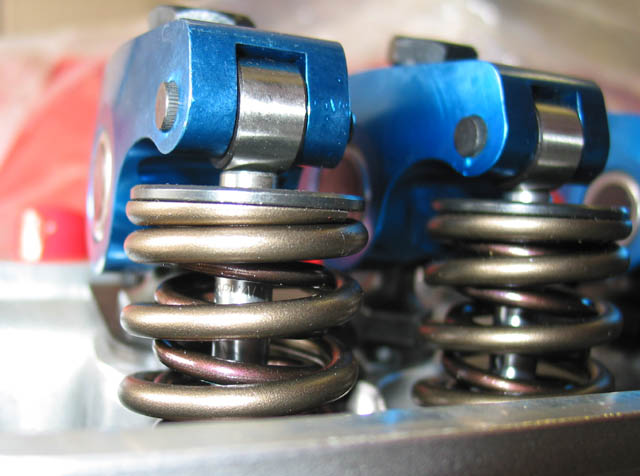
Back again but progress is slow. I always forget what a pain all this is. If it wasn't for that very bright light and feeling at the end of the tunnel I would sell this thing as is and go to the beach instead.... Oh well. When you change parts the things that worked before has a probability to not work with the new parts. Well it is happening on and on. A bolt too long here, one too short there, a bad thread to tap, etc. etc. all is happening Even at the machine shop I found out that I ordered the wrong cam (pre-87) and that the nice GMPP rockers would not work. All delays. At the end I went with some Summit narrow body rockers to ensure no issues with my center bolt valve covers.. I hope they do fine.
Here the new heads holes are shorter so the alt bracket bolts didn't work. No big issue, just time consuming. Now I have to go back to the HW store to get new ones. Also the bracket holes didn't align well so it had to be modifeid. more time..
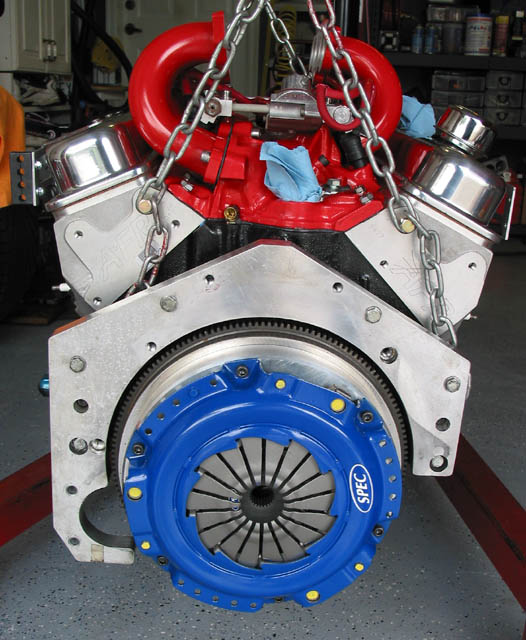
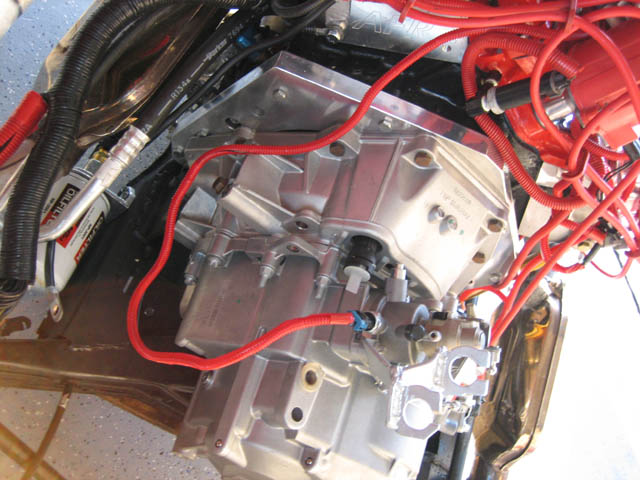
Here is the clutch assembly finally installed and ready to receive the trany. No issues here.
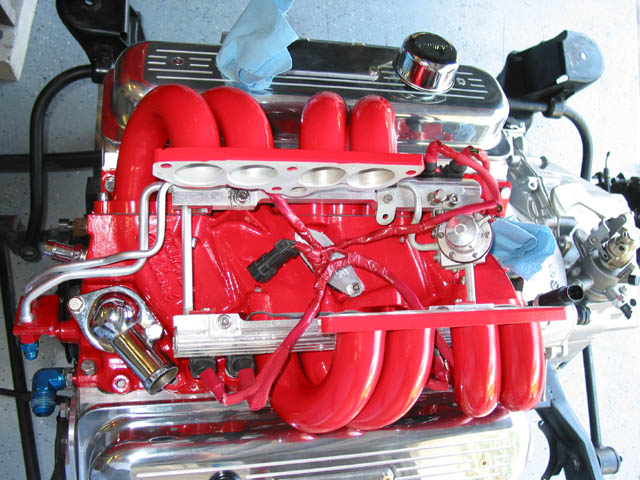
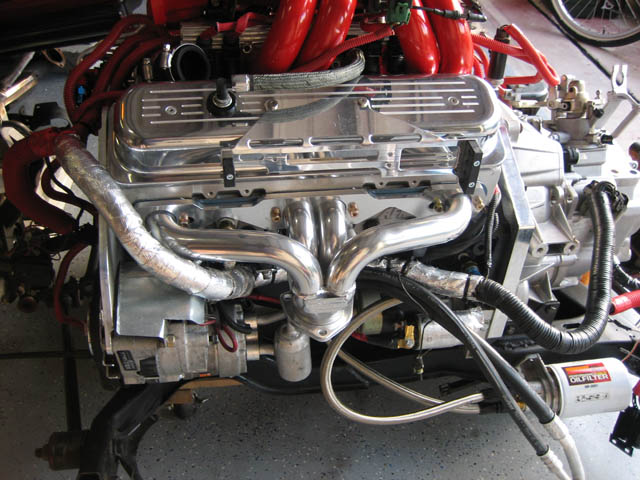
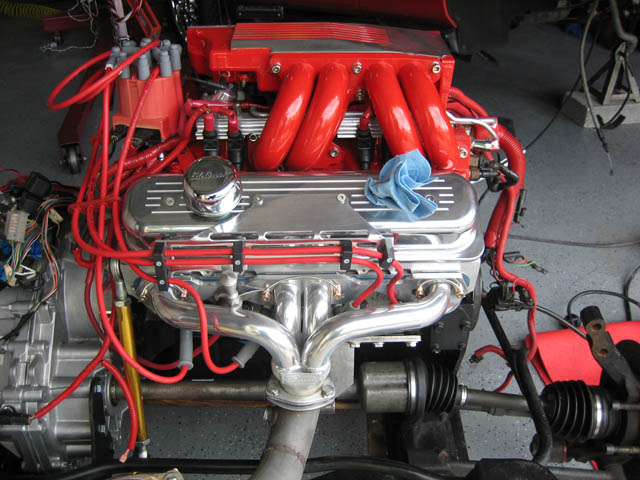
In this area I spent about 4hrs alone and only the top runner is bolted on and lower intake was already installed. Several bolts too long, 9 threads needed tap, the EGR cover needed to be grinded, and then the valve covers to be taken out because otherwise you can't tighten the lower runner bolts. Two things caused that, runners are thicker and the valve covers are about 1/4" taller. What a pain would that be if any service is needed in the engine bay
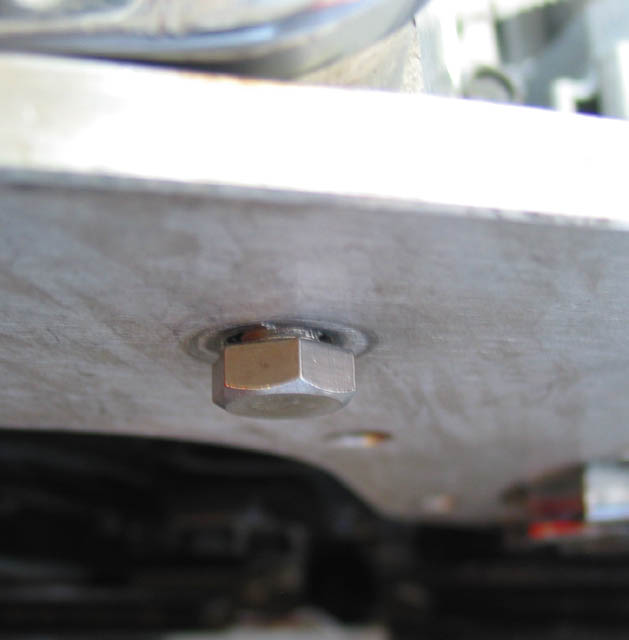
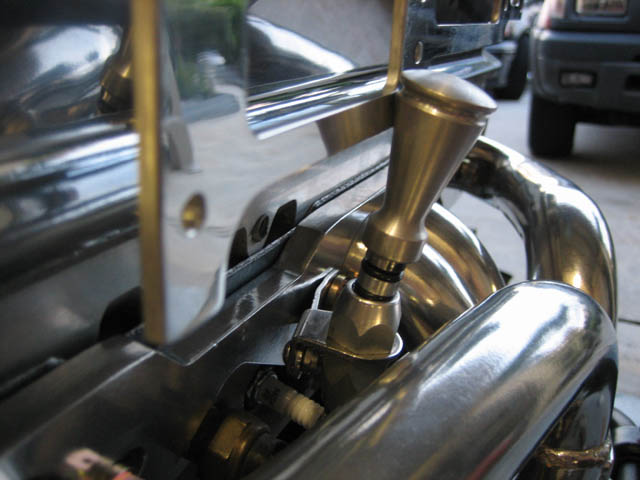
How the hell you put a bolt in there!!
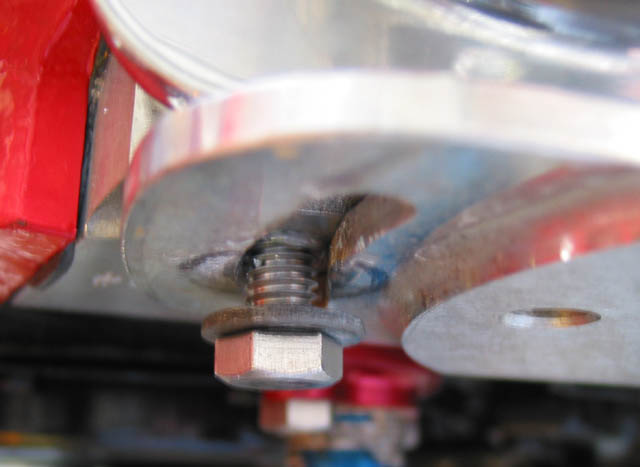
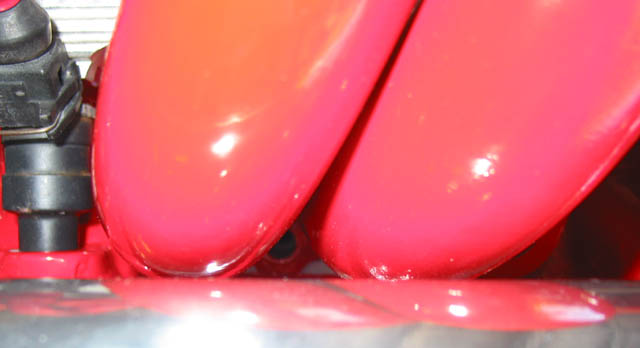
Then a mistake that I hope I won't have to pay later. I grinded this area too small and a wrench won't fit. I hope I got that starter alignment right...
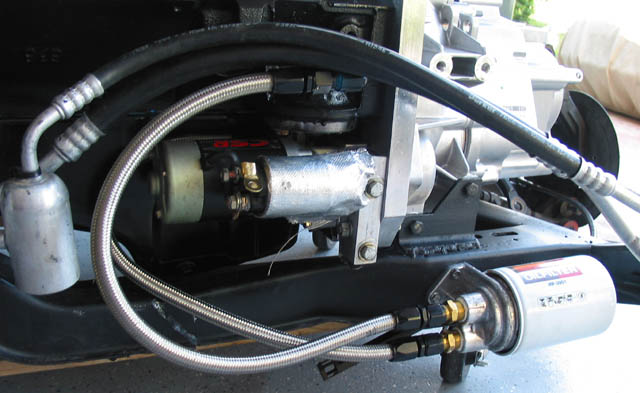
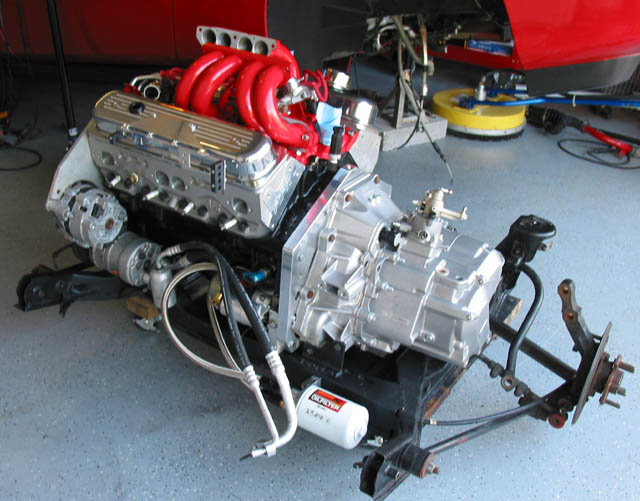
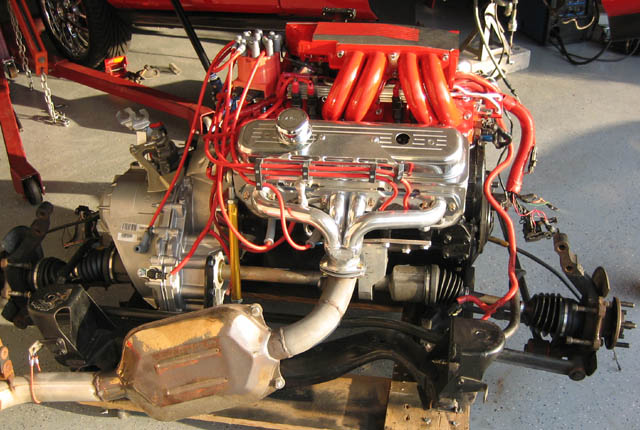
Good thing is at the end today I was able to put the whole thing on the cradle with no issues. Mounts aligned nicely as expected. Also I finished the new braided hoses for the relocator kit. I put oil in and exercised the oil pump to see if there was any major leak. everything was fine. All I need are the headers to finalize the install and wiring and hope no new issues come up. Also I need to finish welding the cradle mod. Goal is to be done by end of November but every day that goal moves. I will need one of those corporate posters "Patience", "Perseverance" in my garage to keep finding motivation. More later
It's usually at about the point that the engine and transmission are on the cradle, that most Fiero owners start doing impressions of driving.
You know what I'm talking about; When you sit on the floor infront of the cradle in the same relation as if you and the engine were actually in the car, and pretend slamming through gears making obnoxious engine and tire sounds.
This is the first time since 1988 that I have been more than one month without driving a Fiero. In this case it is going to be 4 months now It is killing me. Hurts more when I have to see two cars down instead of one. It is so boring driving SUVs and truck....
Hey, Alex, how different is the G6 flywheel setup than the Getrag? I know the G6 has a dual mass flywheel from GM, so I was wondering how much had to be changed.
Hey, Alex, how different is the G6 flywheel setup than the Getrag? I know the G6 has a dual mass flywheel from GM, so I was wondering how much had to be changed.
The F40 shaft is much farther away than the Getrag so there is a big "spacer" between the stock flywheel and the clutch assembly to move it to the right place.
Since you are at this point, can you tell me what the width of the built small block and 6 speed is from pulley to the drivers outside case on the tranny? also what is the measurement from the left to right hub flanges where the wheels mount?
The F40 shaft is much farther away than the Getrag so there is a big "spacer" between the stock flywheel and the clutch assembly to move it to the right place.
So how much does the whole assembly weigh? Is the combined flywheel weight up to 40#?
Also how fast can 1st gear get up to? I guess with all that torque all you will really have is a better geared 5 speed tranny (from second through six)
Since you are at this point, can you tell me what the width of the built small block and 6 speed is from pulley to the drivers outside case on the tranny? also what is the measurement from the left to right hub flanges where the wheels mount?
Thanks, Jim
39" balancer to rear trany, +/- 58.5" hub to hub.
Will; I have no idea but the aluminum spacer is not too light. I should have weighted it.
JG; I hope to find that out before year end
My plan is to have it on the ground next week. Still trying to get small pieces here and there for the changes. It is so time consuming... I need some connectors for the trany backup switch and speedo. Archie still owes me the Dakota adapter to correct the speedo. Headers will arrive Friday. I'm changing the top water hose setup to flexible chrome and those arrive Thursday. Etc. etc.. Coolant, trany fluid, dip stick (didn't come with one), and so and so. Oh well. Hang in there
Where the bolts were too long....you could've just cut to fit. I've done it from time to time. Looks like you're going to have a lot of fun when you're finished! Very nice.
Thanks guys. v8fiero400; I have a Canon G2 and an SD450 with great macro
I have had great progress lately. I took the week off so I could try to finish this thing but still all the little things still kills me. Like they say, the devil is in the details! I installed the intake and headers and started wiring.
Here is my new fan
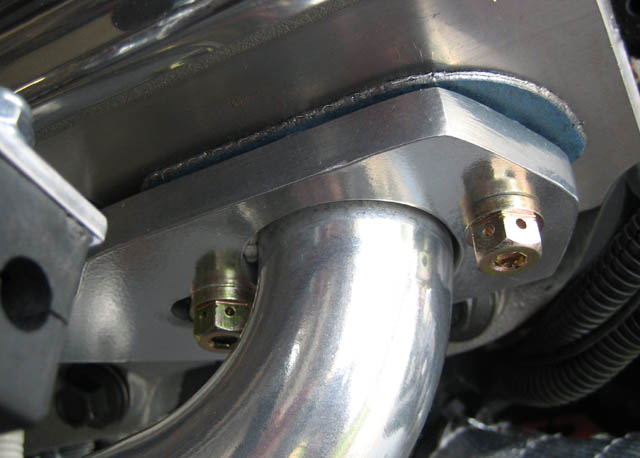
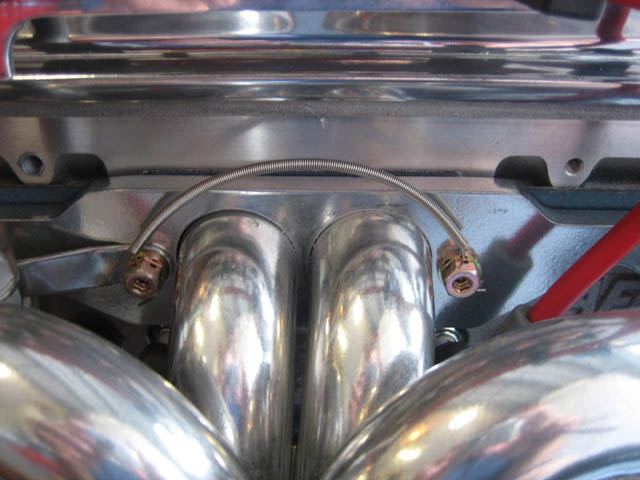
Has anyone used these header bolts? They come with a wire to hold them tight. Not sure if I should use them. Any experience with these/
And new problems. The oil dip stick doesn't ilke the new wire looms...
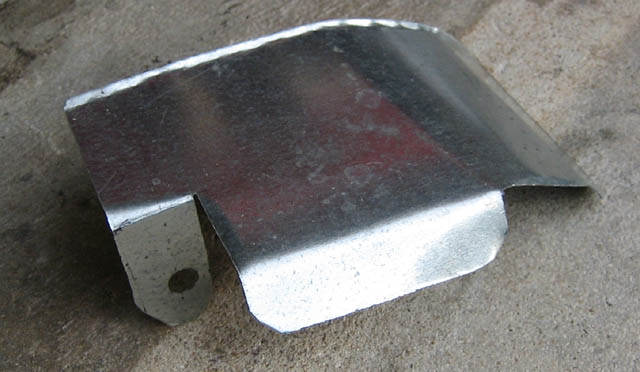
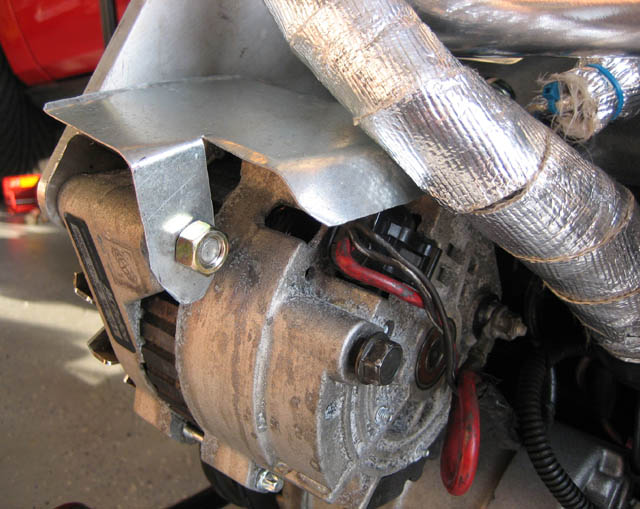
Here is my new alternator water shiled;
[This message has been edited by Alex4mula (edited 11-23-2006).]
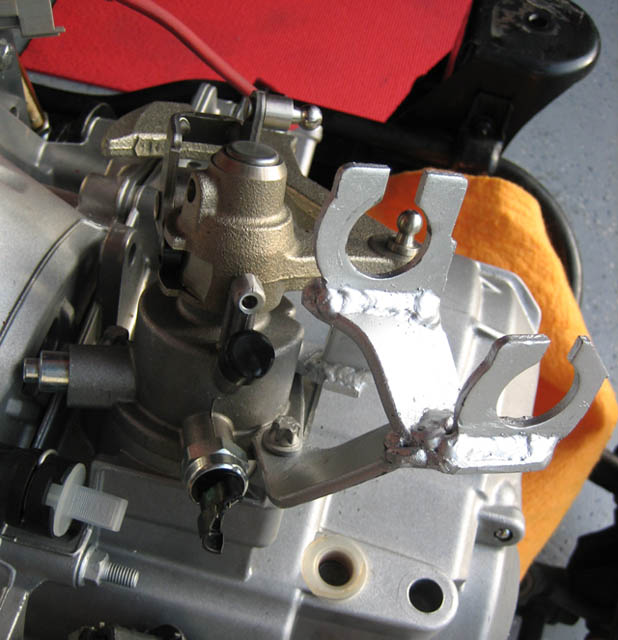
Here are some more trany details. This is the cable bracket installed;
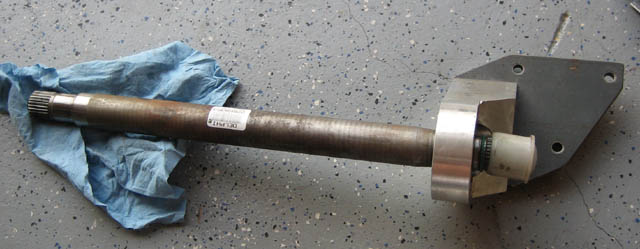
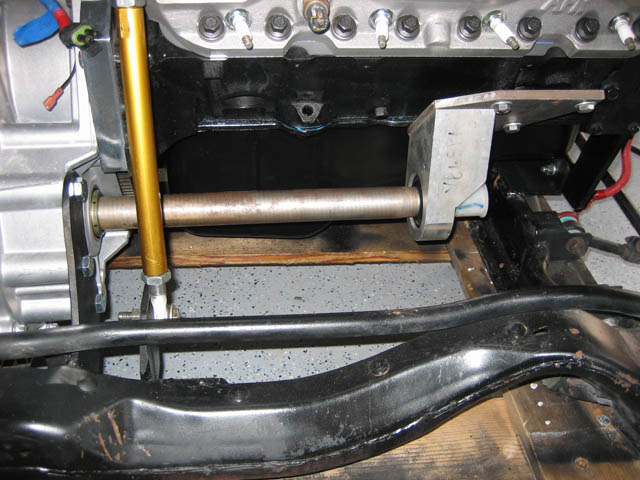
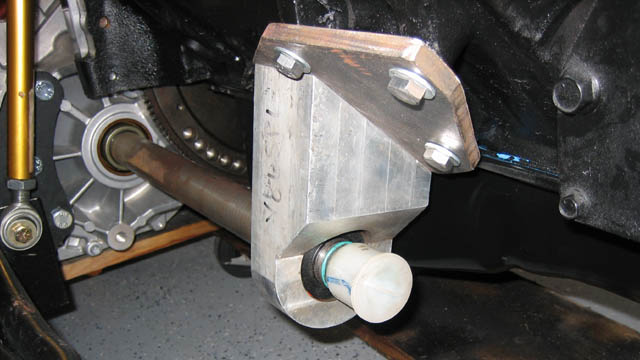
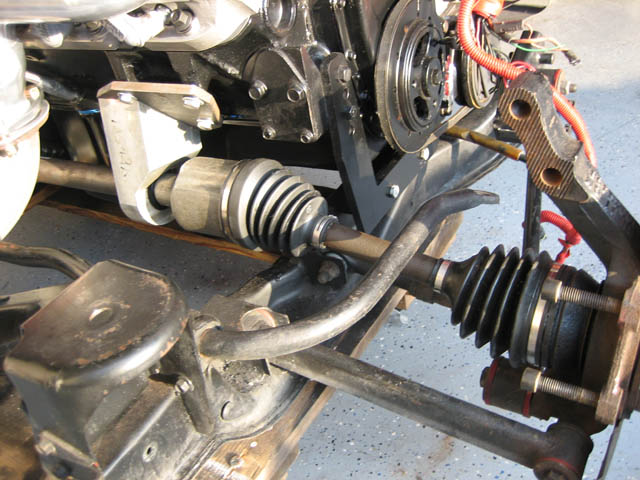
And here is the intermediate shaft and install. This went very smooth. Alignment was perfect. No shims nor nothing as mentioned as possibility in the video. I guess the newer blocks has better tolerances This piece is nice. I would say the best part of the kit together with the adapter plat.
I use the old fashioned cast iron rams horn manifolds on my V8. If I was doing a new one I'd use These.
They're about $350 but they'll never crack welds or warp like headers will. You can also get them in a bare metal finish if you want them ceramic coated or whatever for about $50 less.
John Stricker
quote
Originally posted by Alex4mula:
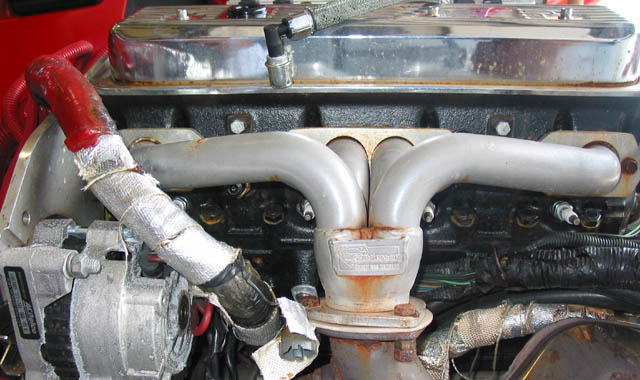
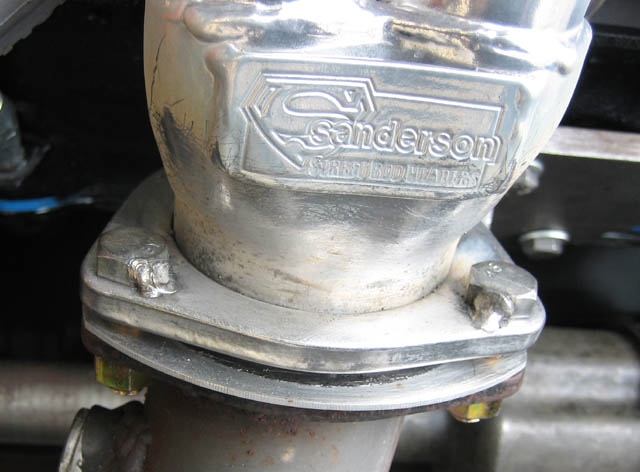
Another annoying problem to correct. Common to daily driver SBCs I guess. These headers fit great but the quality is not so good. Rusted ceramic coated? Isn't that supposed to avoid that? Oh well. I need to try to design soemthing to catch rain water in the front. It gets on top of the alternator, valve covers and headers and all failed due to that. I sent this set to Sanderson for repair. Main issue was the rich condition it caused as the crack was on top of the O2 sensor. Not a problem in carbed engines. More to come soon.
Originally posted by Alex4mula: Has anyone used these header bolts? They come with a wire to hold them tight. Not sure if I should use them. Any experience with these/
I've never used them, but I'm curious about where you got them.
I use the old fashioned cast iron rams horn manifolds on my V8. If I was doing a new one I'd use These.
They're about $350 but they'll never crack welds or warp like headers will. You can also get them in a bare metal finish if you want them ceramic coated or whatever for about $50 less.
John Stricker
John; Those look great. Not sure how they will fit at the top but will need to redesign the whole exhaust as they seem to go lower than the CC90s.
Will; I got those at Autozone. They got them recently as I have never seen them before there. They come with cable ties to put between every two bolts.
Originally posted by Alex4mula: Will; I got those at Autozone. They got them recently as I have never seen them before there. They come with cable ties to put between every two bolts.
I've heard of "safety wired" header bolts, but I didn't know that Autozone had them, already drilled. I'm actually impressed. Wonder if they have them in metric sizes to fit Fiero heads.
[This message has been edited by Raydar (edited 11-24-2006).]
Here they are with the wires. They only have this type (for SBC).
Ok, now that's slick. I was thinking traditional safety wire on each bolt. That looks much easier to work with.
Another option I've seen are locking nuts that have an allen key in the center of the bolt. You tighten the hex bolt down to the proper torque, then use the allen key to lock it.
Here they are with the wires. They only have this type (for SBC).
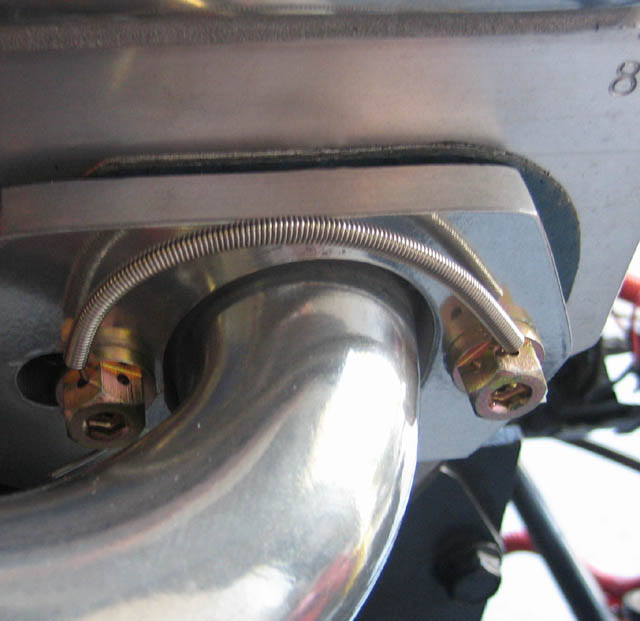
I don't see how the springs installed in that manner prevent the bolts from becoming loose. It seem like each bolt could be loosened half a turn before there is even tension on the springs. Am I missing something here?
I don't see how the springs installed in that manner prevent the bolts from becoming loose. It seem like each bolt could be loosened half a turn before there is even tension on the springs. Am I missing something here?
The springs I think are more for looks. It is a very hard wire with the spring over it. The may move a little but no way anything close to half a turn.
Fiero1Fan; I am using the modified shifter from Archie's kit
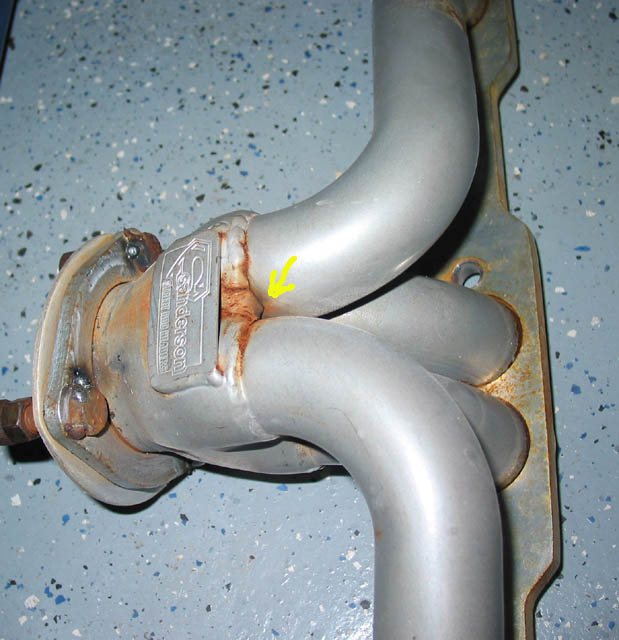
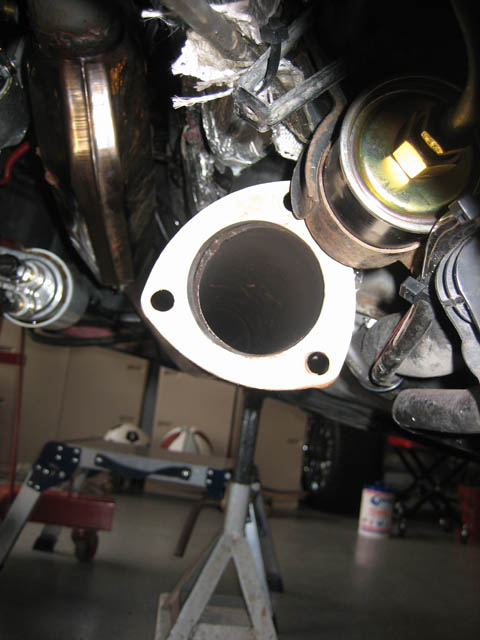
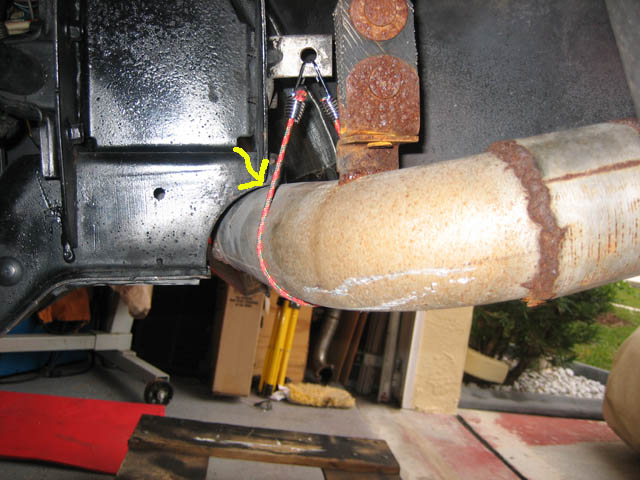
So I installed the cradle back and new problems surface. My exhaust uses two mufflers with 2.5" mandrel bent pipes and all clearances were very tight. Changing the mounts, new heads and using gaskets for the headers screwed up big time all those clearances in all critical areas To begin with the rear (trunk) headers didn't clear the trunk when rocking up the engine. I had to use the BFH to create about 1/4" more clearance. The new rear valve cover (1/4" taller) was hitting the shock tower so I had to trim the area. The TPI TB is now too close (again) to the shock tower so I can't put the TB bolt close to it nor the rubber elbow. I'm working on that one today. Finally the exhaust is all crooked. The biggest problem is the front which moved about 1/2"! (pic below). The rear one doesn't seem that bad and should require only some cradle trimming in the arrow area. So learning for all of you changing to nicer hardware in your SBCs may bring some unknown grief. Be ready for it. Right now 1st engine firing up is looking more like a December goal and who knows maybe later. I think not even Santa would help me get this finished this year. Oh well.... To be a good hotroder you need to have a lot of patience.
Fuel filter now in the way.
[This message has been edited by Alex4mula (edited 11-28-2006).]
That does look slick, however that safety wire has too large of a loop in it to prevent the bolt from loosening. We used safety wire working on helicopters in the military, and I have seen bolts work their way all the way out with less slack than that. They have to be guitar string tight or they will loosen. Just thought you might want to know. But I would have to agree those are more for looks than function.
That does look slick, however that safety wire has too large of a loop in it to prevent the bolt from loosening. We used safety wire working on helicopters in the military, and I have seen bolts work their way all the way out with less slack than that. They have to be guitar string tight or they will loosen. Just thought you might want to know. But I would have to agree those are more for looks than function.
I'm gonna tell you that if I see one of these come loose without the wire braking I will give you $50. The wire is extremely stiff. And I bet the heli sees much more vibration than these.
sspeedstreet: Yes they are all available and threaded. The top ones use thicker bolts.
lol, that's not necessary. You are quite right that helicopters have a lot more vibrations than an engine will ever see. But header bolts on SBC are notorious for falling out. My point was just that without them being banjo tight with that much slack the loop can just keep flopping over the bolt and loosen the bolt.
We actually had to get certified in using safety wire bolts. In order to do our jobs. And they have shown us real world live videos of bolts working themselves loose while being safety wired.


 LOL They dont have to look good just make sure you get enough on there


 Soon I'll post pics of the known clearance issues with the trany and cradle.
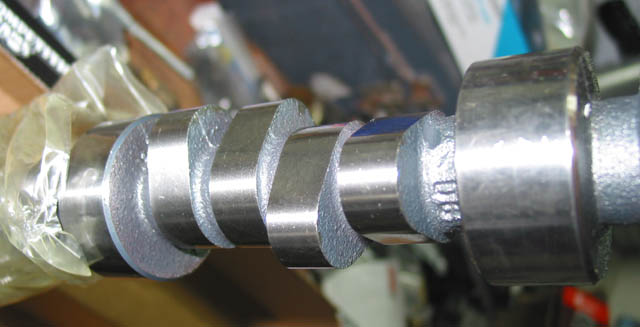


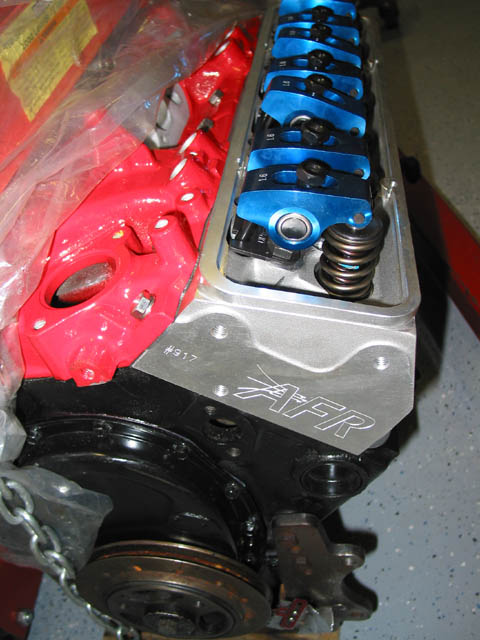
 Even at the machine shop I found out that I ordered the wrong cam (pre-87) and that the nice GMPP rockers would not work. All delays. At the end I went with some Summit narrow body rockers to ensure no issues with my center bolt valve covers.. I hope they do fine.