Pennock's Fiero Forum
  The Construction Zone
  "ABT" Steel Lady (56k warning) (Page 6)

Post New Topic  Post A Reply
Email This Page to Someone! | Printable Version

This topic is 7 pages long:  1   2   3   4   5   6   7 
Previous Page | Next Page
next newest topic | next oldest topic
"ABT" Steel Lady (56k warning) by Fiero1Fan
Started on: 12-27-2005 03:20 PM
Replies: 279 (18538 views)
Last post by: F355spider on 09-07-2011 04:21 PM
Fiero1Fan
Member
Posts: 4364
From: Brachttal, Germany
Registered: Sep 2005


Feedback score:    (19)
Leave feedback


Total ratings: 100
Rate this member

Report this Post05-29-2006 04:55 PM Click Here to See the Profile for Fiero1FanClick Here to visit Fiero1Fan's HomePageSend a Private Message to Fiero1FanEdit/Delete MessageReply w/QuoteDirect Link to This Post
The temp sensor I located forward of the radiator so as not to be near the generated heat that the rad gives off.


I then run the cable under the light and into the spare tire area by going between the plastic tire pan and the chassis.


Here is a pic of how I laid the wiring.
IP: Logged
Fiero1Fan
Member
Posts: 4364
From: Brachttal, Germany
Registered: Sep 2005


Feedback score:    (19)
Leave feedback


Total ratings: 100
Rate this member

Report this Post05-29-2006 05:11 PM Click Here to See the Profile for Fiero1FanClick Here to visit Fiero1Fan's HomePageSend a Private Message to Fiero1FanEdit/Delete MessageReply w/QuoteDirect Link to This Post

Fiero1Fan

4364 posts
Member since Sep 2005
I then used the second rubber gromet around the hood release cable to enter the cabin.


The cables together in the left hand corner of the cabin.


Up the A-Pillar in the cable retainers.


Joined with the mirror connector and zip-tied up.


Finished.

[This message has been edited by Fiero1Fan (edited 05-29-2006).]

IP: Logged
Fiero1Fan
Member
Posts: 4364
From: Brachttal, Germany
Registered: Sep 2005


Feedback score:    (19)
Leave feedback


Total ratings: 100
Rate this member

Report this Post05-30-2006 05:26 PM Click Here to See the Profile for Fiero1FanClick Here to visit Fiero1Fan's HomePageSend a Private Message to Fiero1FanEdit/Delete MessageReply w/QuoteDirect Link to This Post
The Old Man at work.... lol.

[This message has been edited by Fiero1Fan (edited 05-30-2006).]

IP: Logged
Fiero1Fan
Member
Posts: 4364
From: Brachttal, Germany
Registered: Sep 2005


Feedback score:    (19)
Leave feedback


Total ratings: 100
Rate this member

Report this Post06-01-2006 02:21 PM Click Here to See the Profile for Fiero1FanClick Here to visit Fiero1Fan's HomePageSend a Private Message to Fiero1FanEdit/Delete MessageReply w/QuoteDirect Link to This Post
Installed my Battery Relocations Box (from Norms) and routed the cable to the rear.
Front of Box.


Back of Box.


Started routing the Cable from the engine compartment. I went through the rubber gromet here.


Entered the drivers cabin here under the ECM.


Routed the cable forward in the Console.


IP: Logged
Fiero1Fan
Member
Posts: 4364
From: Brachttal, Germany
Registered: Sep 2005


Feedback score:    (19)
Leave feedback


Total ratings: 100
Rate this member

Report this Post06-01-2006 02:22 PM Click Here to See the Profile for Fiero1FanClick Here to visit Fiero1Fan's HomePageSend a Private Message to Fiero1FanEdit/Delete MessageReply w/QuoteDirect Link to This Post

Fiero1Fan

4364 posts
Member since Sep 2005
Here the cable disappears down under the heating duct.


Then comes back up and out here. Here you can see the hole I drilled for the cable to pass into the front compartment.


Here in the front compartment the cable comes out between the two hoses.
Perfect!!!
IP: Logged
Fiero1Fan
Member
Posts: 4364
From: Brachttal, Germany
Registered: Sep 2005


Feedback score:    (19)
Leave feedback


Total ratings: 100
Rate this member

Report this Post06-01-2006 02:38 PM Click Here to See the Profile for Fiero1FanClick Here to visit Fiero1Fan's HomePageSend a Private Message to Fiero1FanEdit/Delete MessageReply w/QuoteDirect Link to This Post

Fiero1Fan

4364 posts
Member since Sep 2005
Now incase you might be wondering how I was able to get the cable to disappear under the heating duct and then comeback up behind the duct. I can show you a really good little tool to have.
I call it rubber arms..........


My son Orson!!!
IP: Logged
Sourmug
Member
Posts: 4538
From: Calgary, Alberta, Canada
Registered: Sep 2002


Feedback score:    (29)
Leave feedback


Total ratings: 144
Rate this member

Report this Post06-01-2006 05:11 PM Click Here to See the Profile for SourmugSend a Private Message to SourmugEdit/Delete MessageReply w/QuoteDirect Link to This Post
I like the idea of running the cables through the cabin below the console. My concern has always been running the cables under the car and the possibility of having them damaged. I think that I will do it your way. Looks good!

Nolan

[This message has been edited by Sourmug (edited 06-01-2006).]

IP: Logged
whadeduck
Member
Posts: 8907
From: Aventura, FL
Registered: Jul 2004


Feedback score:    (7)
Leave feedback


Total ratings: 103
Rate this member

Report this Post06-01-2006 05:59 PM Click Here to See the Profile for whadeduckSend a Private Message to whadeduckEdit/Delete MessageReply w/QuoteDirect Link to This Post
Orson WILL get to drive the car when he's old enough right? lol

------------------
Whade' "The Duck Formerly Known As Wade" Duck
'87 GT Auto
'88 Ferrario

IP: Logged
Fiero1Fan
Member
Posts: 4364
From: Brachttal, Germany
Registered: Sep 2005


Feedback score:    (19)
Leave feedback


Total ratings: 100
Rate this member

Report this Post06-01-2006 07:35 PM Click Here to See the Profile for Fiero1FanClick Here to visit Fiero1Fan's HomePageSend a Private Message to Fiero1FanEdit/Delete MessageReply w/QuoteDirect Link to This Post
 
quote
Originally posted by whadeduck:

Orson WILL get to drive the car when he's old enough right? lol


Wait and see if he even wants to.
IP: Logged
Fiero1Fan
Member
Posts: 4364
From: Brachttal, Germany
Registered: Sep 2005


Feedback score:    (19)
Leave feedback


Total ratings: 100
Rate this member

Report this Post06-08-2006 12:26 PM Click Here to See the Profile for Fiero1FanClick Here to visit Fiero1Fan's HomePageSend a Private Message to Fiero1FanEdit/Delete MessageReply w/QuoteDirect Link to This Post
Started painting and reinstalling the interior today.
Started with the Gauges. See anything different?


Then painted the dash and vents.


I had real problems with the defroster vent. I couldn't get it to go on evenly without bubbles. I HATE DUPLI-Color paints. Pure crap IMHO. I'll buy some good base paint and color paint tomorrow (the dupli is in the trash).

IP: Logged
Fiero1Fan
Member
Posts: 4364
From: Brachttal, Germany
Registered: Sep 2005


Feedback score:    (19)
Leave feedback


Total ratings: 100
Rate this member

Report this Post06-08-2006 12:40 PM Click Here to See the Profile for Fiero1FanClick Here to visit Fiero1Fan's HomePageSend a Private Message to Fiero1FanEdit/Delete MessageReply w/QuoteDirect Link to This Post

Fiero1Fan

4364 posts
Member since Sep 2005
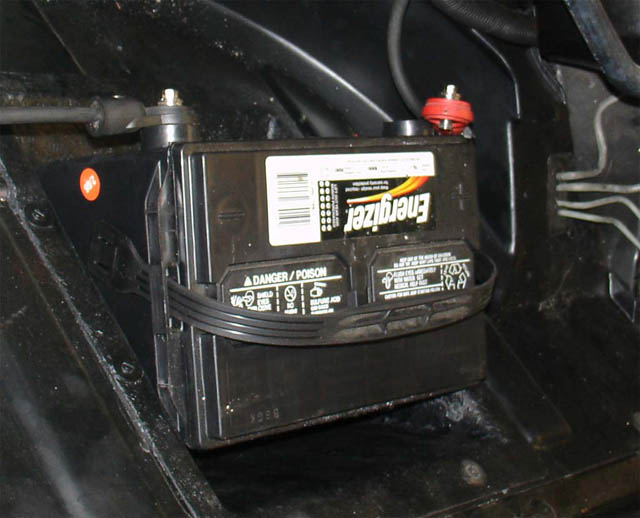
I will be taking the car to a mechanic on Monday to get the 3.1l, trany, clutch, clutch pedal assy and shifter assy. installed so I have to have at least the basic gauges and dash in it. Plus it gives me a chance to get a preview how it will look someday. So I put the basic stuff back in.


So what do you think?

By the way what is this connector for?
IP: Logged
PFF
System Bot
Fiero1Fan
Member
Posts: 4364
From: Brachttal, Germany
Registered: Sep 2005


Feedback score:    (19)
Leave feedback


Total ratings: 100
Rate this member

Report this Post06-30-2006 03:48 PM Click Here to See the Profile for Fiero1FanClick Here to visit Fiero1Fan's HomePageSend a Private Message to Fiero1FanEdit/Delete MessageReply w/QuoteDirect Link to This Post
It's been awhile since I updated this thread but tomorrow is the big day The Lady gets her new 3.1l engine, 5 sp getrag, new clutch, new flywheel and cradle installed!! A friend of mine is coming over to help get everything in.


I am all excited!!
IP: Logged
Sourmug
Member
Posts: 4538
From: Calgary, Alberta, Canada
Registered: Sep 2002


Feedback score:    (29)
Leave feedback


Total ratings: 144
Rate this member

Report this Post06-30-2006 07:13 PM Click Here to See the Profile for SourmugSend a Private Message to SourmugEdit/Delete MessageReply w/QuoteDirect Link to This Post
Aren't you done Yet!!!

I know I'd be all excited to if I was dropping in the new engine into mine. Congrats!

Nolan
IP: Logged
Sourmug
Member
Posts: 4538
From: Calgary, Alberta, Canada
Registered: Sep 2002


Feedback score:    (29)
Leave feedback


Total ratings: 144
Rate this member

Report this Post07-01-2006 08:46 PM Click Here to See the Profile for SourmugSend a Private Message to SourmugEdit/Delete MessageReply w/QuoteDirect Link to This Post
Well?? How did it go?

Nolan
IP: Logged
shawnkfl
Member
Posts: 2457
From: Largo, Florida
Registered: Oct 2004


Feedback score:    (7)
Leave feedback


Total ratings: 72
Rate this member

Report this Post07-01-2006 10:49 PM Click Here to See the Profile for shawnkflSend a Private Message to shawnkflEdit/Delete MessageReply w/QuoteDirect Link to This Post
 
quote
Originally posted by Fiero1Fan:

Started painting and reinstalling the interior today.
Started with the Gauges. See anything different?

QUOTE]

you really modified that gauge! it doesn't look digital to me....

[This message has been edited by shawnkfl (edited 07-01-2006).]

IP: Logged
Fiero1Fan
Member
Posts: 4364
From: Brachttal, Germany
Registered: Sep 2005


Feedback score:    (19)
Leave feedback


Total ratings: 100
Rate this member

Report this Post07-02-2006 12:37 PM Click Here to See the Profile for Fiero1FanClick Here to visit Fiero1Fan's HomePageSend a Private Message to Fiero1FanEdit/Delete MessageReply w/QuoteDirect Link to This Post
Well we didn't get started as early as we wanted (1 pm). Went pretty good once we did.
First the OEM clutch. I got this from GM here in Germany for $0.00 several years ago so why not use it? The clutch didn't come with a guide pin. So we improvised with a long socket that fit just right into the clutch plate and it worked great.


Here is a pic of the guys that helped. Helmar on the left and Michael on the right.


Then we got the Trany hooked up.

[This message has been edited by Fiero1Fan (edited 07-02-2006).]

IP: Logged
Fiero1Fan
Member
Posts: 4364
From: Brachttal, Germany
Registered: Sep 2005


Feedback score:    (19)
Leave feedback


Total ratings: 100
Rate this member

Report this Post07-02-2006 12:55 PM Click Here to See the Profile for Fiero1FanClick Here to visit Fiero1Fan's HomePageSend a Private Message to Fiero1FanEdit/Delete MessageReply w/QuoteDirect Link to This Post

Fiero1Fan

4364 posts
Member since Sep 2005
Next came getting the engine assembly onto the cradle. Went great with 3 people to help lower and guide everything together.


Then we got most of the rest of the cradle back together and ready for the installation into the car.


IP: Logged
Sourmug
Member
Posts: 4538
From: Calgary, Alberta, Canada
Registered: Sep 2002


Feedback score:    (29)
Leave feedback


Total ratings: 144
Rate this member

Report this Post07-04-2006 02:05 AM Click Here to See the Profile for SourmugSend a Private Message to SourmugEdit/Delete MessageReply w/QuoteDirect Link to This Post
She's looking great Timo!
IP: Logged
Fiero1Fan
Member
Posts: 4364
From: Brachttal, Germany
Registered: Sep 2005


Feedback score:    (19)
Leave feedback


Total ratings: 100
Rate this member

Report this Post07-10-2006 01:15 PM Click Here to See the Profile for Fiero1FanClick Here to visit Fiero1Fan's HomePageSend a Private Message to Fiero1FanEdit/Delete MessageReply w/QuoteDirect Link to This Post
While installing the manual trans cable tree my help decided to take a break!!


Out Cold!! BTW the cable tree is almost finished even while he slept.
IP: Logged
whadeduck
Member
Posts: 8907
From: Aventura, FL
Registered: Jul 2004


Feedback score:    (7)
Leave feedback


Total ratings: 103
Rate this member

Report this Post07-10-2006 01:49 PM Click Here to See the Profile for whadeduckSend a Private Message to whadeduckEdit/Delete MessageReply w/QuoteDirect Link to This Post
Looks like he's just the right size to sleep there. Is he getting excited about riding in it?

------------------
Whade' "The Duck Formerly Known As Wade" Duck
'87 GT Auto
'88 Ferrario

IP: Logged
Fiero1Fan
Member
Posts: 4364
From: Brachttal, Germany
Registered: Sep 2005


Feedback score:    (19)
Leave feedback


Total ratings: 100
Rate this member

Report this Post07-10-2006 02:30 PM Click Here to See the Profile for Fiero1FanClick Here to visit Fiero1Fan's HomePageSend a Private Message to Fiero1FanEdit/Delete MessageReply w/QuoteDirect Link to This Post
Not really. It's still not real for him yet. Wait until the motor is running then I bet he lights up.
IP: Logged
PFF
System Bot
Fiero1Fan
Member
Posts: 4364
From: Brachttal, Germany
Registered: Sep 2005


Feedback score:    (19)
Leave feedback


Total ratings: 100
Rate this member

Report this Post07-21-2006 04:09 PM Click Here to See the Profile for Fiero1FanClick Here to visit Fiero1Fan's HomePageSend a Private Message to Fiero1FanEdit/Delete MessageReply w/QuoteDirect Link to This Post
Well I finished the interior wiring harness today and installed the Steering column with the Cruise Control. The wiring harness for the engine I finished earlier in the week.
I put Mobile1 full synthetic oil in the engine and the Syncromesh in the trany. I am almost finished with painting everything around the engine. Tomorrow is the big day!! The engine is going to be installed!! I've got real butterflies about this though. I believe I have got everything right and have checked everything twice (at least ) but never having done it before I am very nervous about it.
Wish me luck and keep your fingers crossed.

[This message has been edited by Fiero1Fan (edited 07-21-2006).]

IP: Logged
Fiero1Fan
Member
Posts: 4364
From: Brachttal, Germany
Registered: Sep 2005


Feedback score:    (19)
Leave feedback


Total ratings: 100
Rate this member

Report this Post08-02-2006 01:35 PM Click Here to See the Profile for Fiero1FanClick Here to visit Fiero1Fan's HomePageSend a Private Message to Fiero1FanEdit/Delete MessageReply w/QuoteDirect Link to This Post
I finally got to the point that I wanted to connect the battery and test the wiring swap I did.

I installed the 87 front compartment light and switch into the 88. 8) Still needs some cleaning.


I adapted the original Fiero battery terminals to fit on my front battery relocation mod.


I then tested the head lights and low and behold they work!! :shock:


So do the PW's, the new mirror and all the interior courtesy lights. The front compartment light doesn't light up but it will!!

Tomorrow will be the first test of the Stereo system.

[This message has been edited by Fiero1Fan (edited 08-02-2006).]

IP: Logged
Fiero1Fan
Member
Posts: 4364
From: Brachttal, Germany
Registered: Sep 2005


Feedback score:    (19)
Leave feedback


Total ratings: 100
Rate this member

Report this Post08-03-2006 01:38 PM Click Here to See the Profile for Fiero1FanClick Here to visit Fiero1Fan's HomePageSend a Private Message to Fiero1FanEdit/Delete MessageReply w/QuoteDirect Link to This Post
Now that I have the wiring in and the battery connected I just couldn't resist testing the Stereo.......

I hooked up the 6x9's. Then modified the console skeleton for the 2 DIN Pyle Stereo.


The 4x6 were already installed.


WOW what a sound!! Sounds real good. Just not enough bass.

Good thing I have these.

[This message has been edited by Fiero1Fan (edited 08-03-2006).]

IP: Logged
ambfiero
Member
Posts: 384
From: In here its like living in goonville
Registered: Jan 2003


Feedback score: N/A
Leave feedback


Total ratings: 103
Rate this member

Report this Post08-04-2006 03:31 PM Click Here to See the Profile for ambfieroSend a Private Message to ambfieroEdit/Delete MessageReply w/QuoteDirect Link to This Post
Your car is coming along nicely, I cant wait to see the photos for the sub install.
+ for you!!!!

------------------
In loving memory of Harold Hummel (PFF 4WHEEL)
1936-2004

IP: Logged
yellowstone
Member
Posts: 9299
From: Düsseldorf/Germany
Registered: Jun 2003


Feedback score: N/A
Leave feedback


Total ratings: 250
Rate this member

Report this Post08-04-2006 07:12 PM Click Here to See the Profile for yellowstoneSend a Private Message to yellowstoneEdit/Delete MessageReply w/QuoteDirect Link to This Post
Great! Think you will be ready for the NL meeting?
IP: Logged
Fiero1Fan
Member
Posts: 4364
From: Brachttal, Germany
Registered: Sep 2005


Feedback score:    (19)
Leave feedback


Total ratings: 100
Rate this member

Report this Post08-20-2006 02:00 PM Click Here to See the Profile for Fiero1FanClick Here to visit Fiero1Fan's HomePageSend a Private Message to Fiero1FanEdit/Delete MessageReply w/QuoteDirect Link to This Post
You're not going to believe what happened yesterday!! We finally got the engine in!!!!

Here it is with only the cradle bolted up:
Left side:


Rear:


Right side:


Here is a pic of the idiots that put it in.


Here is the engine after connecting most everything.

Left:


Right:


Then we put the wheels on to see how it looks.


Startin to look like a car again, what?
IP: Logged
AutoTech
Member
Posts: 2385
From: St. Charles, Illinois
Registered: Aug 2004


Feedback score:    (7)
Leave feedback


Total ratings: 109
Rate this member

Report this Post08-20-2006 02:20 PM Click Here to See the Profile for AutoTechSend a Private Message to AutoTechEdit/Delete MessageReply w/QuoteDirect Link to This Post
[QUOTE]Originally posted by Fiero1Fan:


Looks like Norm made his molds bass-ackwards! The smooth side should be on the top, not bottom! I would swap that with Archies, they are correct.
IP: Logged
Fiero1Fan
Member
Posts: 4364
From: Brachttal, Germany
Registered: Sep 2005


Feedback score:    (19)
Leave feedback


Total ratings: 100
Rate this member

Report this Post09-12-2006 04:01 PM Click Here to See the Profile for Fiero1FanClick Here to visit Fiero1Fan's HomePageSend a Private Message to Fiero1FanEdit/Delete MessageReply w/QuoteDirect Link to This Post
I made some good progress on the intrerior the last week.


IP: Logged
FieroWannaBe
Member
Posts: 2289
From: USA
Registered: Oct 2004


Feedback score: N/A
Leave feedback

Rate this member

Report this Post09-12-2006 07:16 PM Click Here to See the Profile for FieroWannaBeSend a Private Message to FieroWannaBeEdit/Delete MessageReply w/QuoteDirect Link to This Post
 
quote
Originally posted by AutoTech:


Looks like Norm made his molds bass-ackwards! The smooth side should be on the top, not bottom! I would swap that with Archies, they are correct.


I'm prety sure if it was to be turned 180 it will be right
IP: Logged
Fiero1Fan
Member
Posts: 4364
From: Brachttal, Germany
Registered: Sep 2005


Feedback score:    (19)
Leave feedback


Total ratings: 100
Rate this member

Report this Post10-02-2006 12:40 PM Click Here to See the Profile for Fiero1FanClick Here to visit Fiero1Fan's HomePageSend a Private Message to Fiero1FanEdit/Delete MessageReply w/QuoteDirect Link to This Post
Time to post a bit of an update.

The final stages of the stereo amps and woofers install.


The woofer boxes will be covered in suede leather.

[This message has been edited by Fiero1Fan (edited 10-02-2006).]

IP: Logged
PFF
System Bot
Fiero1Fan
Member
Posts: 4364
From: Brachttal, Germany
Registered: Sep 2005


Feedback score:    (19)
Leave feedback


Total ratings: 100
Rate this member

Report this Post10-02-2006 02:31 PM Click Here to See the Profile for Fiero1FanClick Here to visit Fiero1Fan's HomePageSend a Private Message to Fiero1FanEdit/Delete MessageReply w/QuoteDirect Link to This Post

Fiero1Fan

4364 posts
Member since Sep 2005
Here is another little project that I have running right now.
This is a prototype and more R&D is needed but when they are finished then I'll have them for sale to anyone that is interested.


IP: Logged
Fiero1Fan
Member
Posts: 4364
From: Brachttal, Germany
Registered: Sep 2005


Feedback score:    (19)
Leave feedback


Total ratings: 100
Rate this member

Report this Post10-03-2006 04:17 PM Click Here to See the Profile for Fiero1FanClick Here to visit Fiero1Fan's HomePageSend a Private Message to Fiero1FanEdit/Delete MessageReply w/QuoteDirect Link to This Post
Here are a couple of pix of what I am doing with the brackets.

The Rectangular: (Thanks to Electrathon)


The Twin Rounds: (Thanks to Yellowstone)
This images is larger than 100K. Click to view.
IP: Logged
fierov8
Member
Posts: 513
From: Fort Worth, TX USA
Registered: Feb 2000


Feedback score: N/A
Leave feedback

Rate this member

Report this Post10-03-2006 06:02 PM Click Here to See the Profile for fierov8Click Here to visit fierov8's HomePageSend a Private Message to fierov8Edit/Delete MessageReply w/QuoteDirect Link to This Post
Fiero1Fan.........

Is your quad headlight kit being set up to use the Hella 90mm headlights? If so -- I'm VERY interested in being in line for when you start making them available. I already have the lights, just need the brackets.

PM me pics/details.......thx in advance,

-jeff d
Fort Worth, TX
IP: Logged
Fiero1Fan
Member
Posts: 4364
From: Brachttal, Germany
Registered: Sep 2005


Feedback score:    (19)
Leave feedback


Total ratings: 100
Rate this member

Report this Post10-04-2006 03:49 PM Click Here to See the Profile for Fiero1FanClick Here to visit Fiero1Fan's HomePageSend a Private Message to Fiero1FanEdit/Delete MessageReply w/QuoteDirect Link to This Post
The progress for today.
Passenger side finished.


The mounting of the 2nd amp.


Now a problem.


I had thought that as low as I was placing the subs the fuel fill pipe wouild not be in the way. I thought WRONG!!
Anyone have an idea what I can do to move the pipe up about 2 inches?
IP: Logged
Fiero1Fan
Member
Posts: 4364
From: Brachttal, Germany
Registered: Sep 2005


Feedback score:    (19)
Leave feedback


Total ratings: 100
Rate this member

Report this Post10-07-2006 09:41 AM Click Here to See the Profile for Fiero1FanClick Here to visit Fiero1Fan's HomePageSend a Private Message to Fiero1FanEdit/Delete MessageReply w/QuoteDirect Link to This Post
Well today I droped the tank and swaped in the new fuel pump. It works now when I turn the key!!!

As most of you know and can see in the pix I had removed and painted my coolant pipes not too long ago (yellow of course). Welllllll........as I was looking at that FUGLY grey gas tank I got an idea!! I have decided to clean up and paint the tank YELLOW!!

I have also fonud the gas / acid resistant rubber hoses I need to relocate the fuel fill lines. Thinks are coming along nicely.

[This message has been edited by Fiero1Fan (edited 10-07-2006).]

IP: Logged
Fiero1Fan
Member
Posts: 4364
From: Brachttal, Germany
Registered: Sep 2005


Feedback score:    (19)
Leave feedback


Total ratings: 100
Rate this member

Report this Post10-10-2006 03:06 PM Click Here to See the Profile for Fiero1FanClick Here to visit Fiero1Fan's HomePageSend a Private Message to Fiero1FanEdit/Delete MessageReply w/QuoteDirect Link to This Post
I covered my liner today with the cloth I had already bought for it. I'll do it in leather some other time.

I want to add a small reminder (warning) here. If you purchase and use one of the after market fiberglass liners, remember to cut the 3rd brake light, visor and clothes hanger holes BEFORE you glue on the cloth or leather!! DO NOT ask me why I mention this here!! ops: :shock: They're marked on the front side but not on the back side. I had to use the old liner pieces to mark the places that needed to be drilled and cut. What a pita!! :P

Visor holes:


3rd Brake light and hanger holes:


It should look something like this when you are finished. Yours will differ slightly........ because my son won't be holding it up!! :lol: :lol:


Here is a mock-up of what mine will look like.
IP: Logged
Sharkman
Member
Posts: 804
From: Sweden
Registered: May 2004


Feedback score: N/A
Leave feedback

Rate this member

Report this Post10-10-2006 04:45 PM Click Here to See the Profile for SharkmanSend a Private Message to SharkmanEdit/Delete MessageReply w/QuoteDirect Link to This Post
Looking good.

------------------
Regards SHARKMAN
86 GT, 3.4 Camaro engine,
choptop # 1 in Europe/Sweden

IP: Logged
whadeduck
Member
Posts: 8907
From: Aventura, FL
Registered: Jul 2004


Feedback score:    (7)
Leave feedback


Total ratings: 103
Rate this member

Report this Post10-10-2006 05:03 PM Click Here to See the Profile for whadeduckSend a Private Message to whadeduckEdit/Delete MessageReply w/QuoteDirect Link to This Post
Looks like you'll be finished in no time. After that, you'll probably have some time on your hands. How 'bout hoppin' over the puddle and give me a hand with mine? lol

------------------
Whade' "The Duck Formerly Known As Wade" Duck
'87 GT Auto
'88 Ferrario
'84 Indy (8/26/06)

IP: Logged
Fiero1Fan
Member
Posts: 4364
From: Brachttal, Germany
Registered: Sep 2005


Feedback score:    (19)
Leave feedback


Total ratings: 100
Rate this member

Report this Post10-11-2006 02:28 PM Click Here to See the Profile for Fiero1FanClick Here to visit Fiero1Fan's HomePageSend a Private Message to Fiero1FanEdit/Delete MessageReply w/QuoteDirect Link to This Post
Here it is more or less finished. The drivers side sub is only sitting in there for the moment until I get the rubber hose for the fuel fill line.

From left:


From right:


From the center:


I sure like the balanced look!!
IP: Logged
Previous Page | Next Page

This topic is 7 pages long:  1   2   3   4   5   6   7 
next newest topic | next oldest topic

All times are ET (US)

Post New Topic  Post A Reply
Hop to:

Contact Us | Back To Main Page

Advertizing on PFF | Fiero Parts Vendors
PFF Merchandise | Fiero Gallery | Ogre's Cave
Real-Time Chat | Fiero Related Auctions on eBay


Copyright (c) 1999, C. Pennock