Pennock's Fiero Forum
  Technical Discussion & Questions
  First Time Builder Attempts Totally Custom Modded Build (Page 3)

Post New Topic  Post A Reply
Email This Page to Someone! | Printable Version

This topic is 5 pages long:  1   2   3   4   5 
Previous Page | Next Page
next newest topic | next oldest topic
First Time Builder Attempts Totally Custom Modded Build by Corpsmen Ed
Started on: 10-11-2012 01:29 AM
Replies: 191 (11791 views)
Last post by: Dennis LaGrua on 06-16-2019 09:47 AM
Corpsmen Ed
Member
Posts: 161
From: Jonesboro, Indiana,USA
Registered: Oct 2012


Feedback score: (1)
Leave feedback

Rate this member

Report this Post01-05-2013 06:26 PM Click Here to See the Profile for Corpsmen EdClick Here to visit Corpsmen Ed's HomePageSend a Private Message to Corpsmen EdEdit/Delete MessageReply w/QuoteDirect Link to This Post
Got a lot done on the 88 today. And I remembered my camera!!!

Here's some random shots:
Caliper, knuckles & hubs, and some tools


Control arms drying on makeshift rack


After running to Fastenal this morning only to find out they were closed, I made a trip to Autozone and Napa. I was looking for some new bolts that hold on the lower control arm (that go through the bushings) to replace the one I cut off with the Metabo. No luck.

I also was hoping to find someone to re-thread the ends of the shaft that goes through the upper A arm (that attaches it to the subframe and holds the bushings) so I wouldn't have to replace them. I buggered up the threads pretty bad with the sledge getting them out. Unfortunately, all I got were referrals for various machine shops.

Undeterred, I fixed them myself by grinding down the buggered tips and cutting new starter threads with the rotary tool, then used Dad's Tap & Die set to rethread them. Worked great!
See?


It occurred to me today that I haven't been in any of the pics on this site, so here's my ugly mug.


Here is my latest project. Cleaning and priming the dust shields.
Uncleaned on the left, cleaned on the right

My friend Metabo shows off his handy work

And my choice of covering for this job

[This message has been edited by Corpsmen Ed (edited 01-06-2013).]

IP: Logged
Corpsmen Ed
Member
Posts: 161
From: Jonesboro, Indiana,USA
Registered: Oct 2012


Feedback score: (1)
Leave feedback

Rate this member

Report this Post01-07-2013 01:49 AM Click Here to See the Profile for Corpsmen EdClick Here to visit Corpsmen Ed's HomePageSend a Private Message to Corpsmen EdEdit/Delete MessageReply w/QuoteDirect Link to This Post
I cut down my coil springs 1 1/2 coils


Then I primed and painted them


Then I spent what was left of the day (after watching my Colts lose in the playoffs) cleaning rust off what hardware I will be reusing and painting some other pieces.


I also ordered a whole bunch of new parts this weekend. Here's a breakdown of what I got, from where, and how much.
From Rock Auto
Moog K6170 Control Arm Bushings $10.95
Moog K6163 Control Arm Bushings $13.17
shipping $8.82 = Total $32.94

From Amazon
KYB KG4513 Gas-A-Just Shocks $63.20
shipping $0 = Total $63.20

From Rodney Dickman
1 x 1988 Front Paddle Bolts () = $14.98 Quantity Two pair
2 x 1988 Upper Ball Joints () = $46.00
2 x 1988 Outer Tie Rod Ends () = $42.00
1 x Fiero - Zero Lash End Links () = $43.95 model year 88 front
2 x 1988 Lower Ball Joints () = $56.00
shipping $14.50 **But Rodney discounted my order $14.40, so shipping only ended up costing me $.10!!!**
Total = $203.03

And From The Fiero Store
Part #68617 1988 FRONT UPPER SPRING PADS = $14.95
Part #57015 LOWER CONTROL ARM BOLTS & NUTS (2 sets) = $15.90
shipping $6.41
Total = $37.26

Grand total for New Goodies ordered = $336.43


So far, this project has cost me the following
1988 Fiero = $700
Misc (pant, tools, wd40, etc ) $100 (?)
New Parts = $336.43
Total = $1136.43
DON'T TELL MY WIFE!!!
IP: Logged
css9450
Member
Posts: 5423
From: Glen Ellyn, Illinois, USA
Registered: Nov 2002


Feedback score: (2)
Leave feedback


Total ratings: 85
Rate this member

Report this Post01-07-2013 12:19 PM Click Here to See the Profile for css9450Send a Private Message to css9450Edit/Delete MessageReply w/QuoteDirect Link to This Post
 
quote
Originally posted by Corpsmen Ed:


From Rodney Dickman
1 x 1988 Front Paddle Bolts () = $14.98 Quantity Two pair


While you're on Rodney's site, I highly recommend ordering a pair of his Paddle Nuts also. If I recall, the FSM calls for replacement of both nuts and bolts any time the control arm is removed. But even so, why not buy new nuts to go along with the new bolts? The ones Rodney supplies are thread-deformed and are not going to work themselves loose which could happen if you re-use the originals.

You DID get lucky, however, when you removed the old paddles. Mine got all twisted like pretzels! Which if you can imagine was really fun trying to remove...

[This message has been edited by css9450 (edited 01-07-2013).]

IP: Logged
Corpsmen Ed
Member
Posts: 161
From: Jonesboro, Indiana,USA
Registered: Oct 2012


Feedback score: (1)
Leave feedback

Rate this member

Report this Post01-07-2013 05:43 PM Click Here to See the Profile for Corpsmen EdClick Here to visit Corpsmen Ed's HomePageSend a Private Message to Corpsmen EdEdit/Delete MessageReply w/QuoteDirect Link to This Post
css9450,

I considered that, but since mine were in really good shape (minus some rust) I decided to clean off the rust, clean the threads, paint, and reuse them.


My first box of goodies came in today!!!


Guess what? I only ordered enough bushings for ONE SIDE!!!

I can't believe none of you caught that.
IP: Logged
Corpsmen Ed
Member
Posts: 161
From: Jonesboro, Indiana,USA
Registered: Oct 2012


Feedback score: (1)
Leave feedback

Rate this member

Report this Post01-08-2013 09:15 PM Click Here to See the Profile for Corpsmen EdClick Here to visit Corpsmen Ed's HomePageSend a Private Message to Corpsmen EdEdit/Delete MessageReply w/QuoteDirect Link to This Post
More goodies arrived today.

Look!
IP: Logged
fierogt28
Member
Posts: 2937
From: New-Brunswick, Canada.
Registered: Feb 2005


Feedback score:    (14)
Leave feedback

Rate this member

Report this Post01-09-2013 12:00 AM Click Here to See the Profile for fierogt28Send a Private Message to fierogt28Edit/Delete MessageReply w/QuoteDirect Link to This Post
Hi Ed, thanks for the help.

BTW, could you tell me where those Moog bushings are made??

It should be indicated on the box. I'm curious to see if they are made in Spain.

Thanks,

------------------
fierogt28

88 GT, Loaded, 5-speed.
88 GT, 5-speed. All original.

IP: Logged
Corpsmen Ed
Member
Posts: 161
From: Jonesboro, Indiana,USA
Registered: Oct 2012


Feedback score: (1)
Leave feedback

Rate this member

Report this Post01-09-2013 11:08 PM Click Here to See the Profile for Corpsmen EdClick Here to visit Corpsmen Ed's HomePageSend a Private Message to Corpsmen EdEdit/Delete MessageReply w/QuoteDirect Link to This Post
fierogt28,

The box says "Made in Mexico".


My stuff from The Fiero Store came today!

Coil spring cushions and Bushing bolts.


I have some dilemmas I need the Forums help with.
- First, I removed the 3 bolts holding the hub to the knuckle. Now, how the heck do I get them apart?

Are they pressed in? Or just rust-welded?
I have tried soaking in tons of WD-40, a rubber mallet, brute strength. NADA!
Any tips????

- Second, my calipers seemed in pretty good shape when I first removed them. Upon closer inspection...


What do you recommend?
Do I buy a seal kit and rebuild them? I had a heck of a time getting the 2 tension pins, that hold in the pads, out of one of them. Not sure I could even get them apart.
Do I buy some Reman ones? I have read that they are mostly junk.
Do I bite the bullet and buy the NOS ones?
What are your opinions?

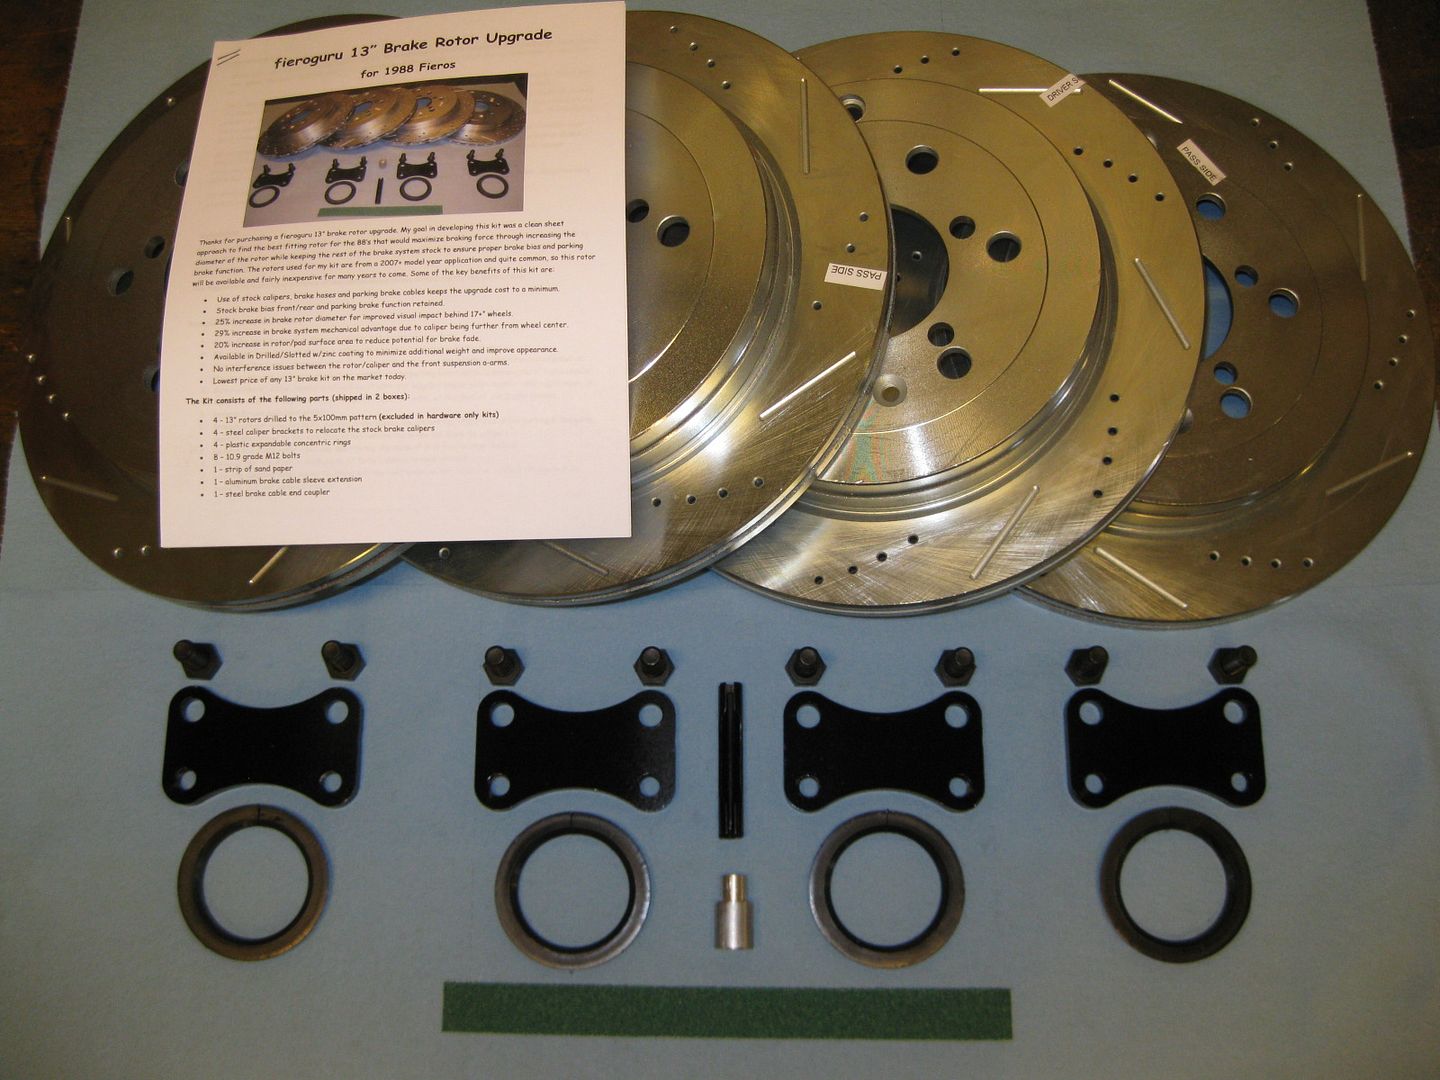
I plan to do the Corvette rotor upgrade. Does anybody know if there are still any forum members still making and selling the offset brackets?

Ed
IP: Logged
fierogt28
Member
Posts: 2937
From: New-Brunswick, Canada.
Registered: Feb 2005


Feedback score:    (14)
Leave feedback

Rate this member

Report this Post01-10-2013 12:12 AM Click Here to See the Profile for fierogt28Send a Private Message to fierogt28Edit/Delete MessageReply w/QuoteDirect Link to This Post
Ed, I bought 1 pair of 88 front calipers from CalipersOnline. The price is pretty good for factory fully loaded calipers.

The rears, you'll need to get re-mans for sure. Or rebuild them yourself.

I rather get rebuilt re-mans so there is to guess work or issue from you rebuilding them. Just return you old
rear calipers. *Make sure you keep all the brackets, spring pins and pad retainers. Those aren't available anymore.*

The fiero store calipers are priced at 110$ each. Its way cheaper to get the 88 calipers from CaliperOnline for 125$ / pair.
They sell the same exact thing, all loaded, bolt on ready to go.

------------------
fierogt28

88 GT, Loaded, 5-speed.
88 GT, 5-speed. All original.

IP: Logged
Corpsmen Ed
Member
Posts: 161
From: Jonesboro, Indiana,USA
Registered: Oct 2012


Feedback score: (1)
Leave feedback

Rate this member

Report this Post01-10-2013 08:33 AM Click Here to See the Profile for Corpsmen EdClick Here to visit Corpsmen Ed's HomePageSend a Private Message to Corpsmen EdEdit/Delete MessageReply w/QuoteDirect Link to This Post
fierogt28,

THANKS! That was the way I was leaning, I just wasn't ready to pull the trigger yet. Thanks again.

Any ideas on the Hub/Knuckle issue?
IP: Logged
css9450
Member
Posts: 5423
From: Glen Ellyn, Illinois, USA
Registered: Nov 2002


Feedback score: (2)
Leave feedback


Total ratings: 85
Rate this member

Report this Post01-10-2013 10:27 AM Click Here to See the Profile for css9450Send a Private Message to css9450Edit/Delete MessageReply w/QuoteDirect Link to This Post
 
quote
Originally posted by Corpsmen Ed:

Any ideas on the Hub/Knuckle issue?


You could take them to any auto parts store that offers machine shop services; they'll press them out. That's what I did with mine; it was something like $10 for the pair.

Alternatively, there is an old thread on here where the author started the bolts onto the back side of the knuckle, and ahead of them the bolts pushed some spacers that served as a little ram to press on the bearing's flange surface. With three bolts and spacers, he just tightened them a little at a time until they eventually popped the bearing out of the knuckle. He used cutoff lengths of an old pushrod for spacers if I remember right.

IP: Logged
Corpsmen Ed
Member
Posts: 161
From: Jonesboro, Indiana,USA
Registered: Oct 2012


Feedback score: (1)
Leave feedback

Rate this member

Report this Post01-10-2013 09:11 PM Click Here to See the Profile for Corpsmen EdClick Here to visit Corpsmen Ed's HomePageSend a Private Message to Corpsmen EdEdit/Delete MessageReply w/QuoteDirect Link to This Post
css9450,

Thanks for the tip. I'm going to try and run them by Auto Tech tomorrow. They supposedly have an arrangement with a local machine shop.


Well, no new packages today. Kinda sucked.

[This message has been edited by Corpsmen Ed (edited 01-10-2013).]

IP: Logged
PFF
System Bot
RCR
Member
Posts: 4397
From: Shelby Twp Mi
Registered: Sep 2002


Feedback score:    (7)
Leave feedback


Total ratings: 102
Rate this member

Report this Post01-11-2013 06:27 PM Click Here to See the Profile for RCRSend a Private Message to RCREdit/Delete MessageReply w/QuoteDirect Link to This Post
 
quote
Originally posted by Corpsmen Ed:
I have some dilemmas I need the Forums help with.
- First, I removed the 3 bolts holding the hub to the knuckle. Now, how the heck do I get them apart?

Are they pressed in? Or just rust-welded?
I have tried soaking in tons of WD-40, a rubber mallet, brute strength. NADA!
Any tips????
Ed


Mine were rust welded too. I had to beat the @#$ out of them, using a cold chisel to split them. My hubs were bad and needed to be replaced anyway. If yours are good, you may want to leave them (not my best suggestion).

Fieroguru is still selling the kits (13"). I did have a thread on a DIY system using 4'th gen F-body calipers and 13" Cobra rotors.

Bob
IP: Logged
Corpsmen Ed
Member
Posts: 161
From: Jonesboro, Indiana,USA
Registered: Oct 2012


Feedback score: (1)
Leave feedback

Rate this member

Report this Post01-12-2013 01:40 AM Click Here to See the Profile for Corpsmen EdClick Here to visit Corpsmen Ed's HomePageSend a Private Message to Corpsmen EdEdit/Delete MessageReply w/QuoteDirect Link to This Post
RCR,

Yeah, I'm kind of scared to keep messing with them. The guy at Auto Tech told me he would press them out for me for $20, if I removed the caps on back. He said he didn't want to be responsible for crushing them in the press. I got the caps off really easily. The bearings looked clean. The grease in one was red and new looking, the other was kind of black and not as packed. What scares me the most is that I can't tell if they are still good or not. Hubs are expensive, but I definitely don't want to tear the front end apart again. They spin somewhat easily by hand, but seem rougher than I would expect they should be and stop spinning on their own as soon as you pull your hand away. I wasn't as gentle as I probably should have been getting the rotors off either, and worry maybe I messed something up. I did notice they spun better with the caps removed, but they are kind of dinged up a bit. I mainly wanted them out so I could clean and paint the knuckles, repack the bearing grease, and replace the wheel studs. Maybe I can do all that without having the hubs pressed out of the knuckles.

Oh, and thanks for the tip on the brake adapters. I'll do some more checking. Fierofan25 also replied to a PM I sent him about the ones he used to make. Thanks to him as well.

[This message has been edited by Corpsmen Ed (edited 01-12-2013).]

IP: Logged
Raydar
Member
Posts: 40727
From: Carrollton GA. Out in the... country.
Registered: Oct 1999


Feedback score:    (13)
Leave feedback


Total ratings: 460
Rate this member

Report this Post01-12-2013 08:11 AM Click Here to See the Profile for RaydarSend a Private Message to RaydarEdit/Delete MessageReply w/QuoteDirect Link to This Post
The person who did the write up on hub removal was, I believe, Formula88.
Edit - Here...
https://www.fiero.nl/forum/A...050410-2-056279.html

I might be inclined to just replace them. This is especially true if you feel roughness when you turn them, although that may be caused by the grease being displaced when you hammered the rotors off. If they smooth out, they may be okay. I'm sure others will chime in.

Having said that...
Rodney Dickman is now selling roller bearing replacements. They should be at least as sturdy, if not more so, than original equipment. Others have purchased the "ebearings" replacements and have not had good luck with them. (You definitely don't want to use the cheap replacements if you are going to drive "spiritedly", or on any kind of road course, or with wder/sticker tires. Rodney all the way.)

------------------
Raydar
88 Formula IMSA Fastback. 4.9, NVG T550

Praise the Lowered!

[This message has been edited by Raydar (edited 01-12-2013).]

IP: Logged
Custom2M4
Member
Posts: 4414
From: Winnipeg, Manitoba Canada
Registered: Sep 2004


Feedback score: (3)
Leave feedback


Total ratings: 114
Rate this member

Report this Post01-12-2013 06:25 PM Click Here to See the Profile for Custom2M4Send a Private Message to Custom2M4Edit/Delete MessageReply w/QuoteDirect Link to This Post
I had to torch my OEM bearings, and get a couple screwdrivers on each side and pound them under it.

------------------

IP: Logged
Corpsmen Ed
Member
Posts: 161
From: Jonesboro, Indiana,USA
Registered: Oct 2012


Feedback score: (1)
Leave feedback

Rate this member

Report this Post01-12-2013 08:27 PM Click Here to See the Profile for Corpsmen EdClick Here to visit Corpsmen Ed's HomePageSend a Private Message to Corpsmen EdEdit/Delete MessageReply w/QuoteDirect Link to This Post
Raydar,

Thanks for the link. I had read that thread a long time ago and forgot about it. I tried it and it totally worked! See below...


Custom2M4,

I may end up resorting to that.


So, after re-reading the link Raydar shared, I spent the day attempting to separate the hubs from the knuckles. My hope was to get them separated so that I might clean and paint the badly rusted knuckles, and then I could at least start re-assembling the front suspension with my new parts while deciding what to do about my hubs (re-grease/reuse or replace).

Since I didn't have an old push-rod lying around that I could cut up, like recommended in the link above, I had to find an alternative. I happened to have an 18" extended 1/2" wood boring drill bit that I bought when I built the kids wood swingset 5 years ago, and haven't used since. I cut the 18" smooth shaft into several pieces about 2" long. (Determining the correct length turned out to be one of the hardest parts about this project, and resulted in several smaller cut pieces).

The write-up in the link above also recommends buying or obtaining several 12 x 1.75 threaded bolts about 1/4" longer or more than the bolts used to hold the hub to the knuckles. It just so happens, the brake caliper bolts fit this requirement perfectly.

(Hub bolt on left, caliper bolt on right).

After sliding the cut pieces of drill bit through the back of the knuckle bolt holes until they rest on the wheel flange (this was the HARDEST part of this project. Getting all 3 to hit solid flange and not have one line up with a hole. Sure seemed like mine had extra holes. lol)


...and following them with the caliper bolts


...the hub separated fairly easy.


MAN, those things were nasty!

But I think they cleaned up nice.


And all primed and painted.
IP: Logged
Corpsmen Ed
Member
Posts: 161
From: Jonesboro, Indiana,USA
Registered: Oct 2012


Feedback score: (1)
Leave feedback

Rate this member

Report this Post01-14-2013 10:00 AM Click Here to See the Profile for Corpsmen EdClick Here to visit Corpsmen Ed's HomePageSend a Private Message to Corpsmen EdEdit/Delete MessageReply w/QuoteDirect Link to This Post
Waiting on the parts I ordered from Rodney so I can start putting the front end back together. I have everything else I ordered.

Next on my list:
New NOS calipers from Calipersonline.com (to be painted yellow and hand lettered "Fiero")
Big brake kit from fellow Pennock member
Possibly new hubs from Rodney

These may have to wait for my tax check.

I've been reading up on the rear suspension stuff in the meanwhile.
So far, my plan is coil-overs, reman calipers with big brake kit, new bushings.

Any recommendations???
IP: Logged
deloreanant
Member
Posts: 216
From: Missouri
Registered: Mar 2010


Feedback score: (3)
Leave feedback

Rate this member

Report this Post01-15-2013 04:43 PM Click Here to See the Profile for deloreanantSend a Private Message to deloreanantEdit/Delete MessageReply w/QuoteDirect Link to This Post
Looking good
IP: Logged
fieroguru
Member
Posts: 12128
From: Champaign, IL
Registered: Aug 2003


Feedback score:    (45)
Leave feedback


Total ratings: 258
Rate this member

Report this Post01-15-2013 05:03 PM Click Here to See the Profile for fieroguruSend a Private Message to fieroguruEdit/Delete MessageReply w/QuoteDirect Link to This Post
 
quote
Originally posted by Corpsmen Ed:

Big brake kit from fellow Pennock member

Any recommendations???


[shameless plug]
If you have 17" or larger wheels, then I think this is a very good brake kit for the 88's...

https://www.fiero.nl/forum/Forum4/HTML/060122.html


[/shameless plug]
IP: Logged
Corpsmen Ed
Member
Posts: 161
From: Jonesboro, Indiana,USA
Registered: Oct 2012


Feedback score: (1)
Leave feedback

Rate this member

Report this Post01-15-2013 05:05 PM Click Here to See the Profile for Corpsmen EdClick Here to visit Corpsmen Ed's HomePageSend a Private Message to Corpsmen EdEdit/Delete MessageReply w/QuoteDirect Link to This Post
My stuff from Rodney actually arrived yesterday, but since we missed the mailman, I had to pick them up from the Post Office today.


I could not be more impressed with the quality of the parts. He even did an excellent job packing them for shipment.


It's like Christmas morning all over again!

(zero-lash endlinks, 88 upper & lower ball joints, 88 outer tie rods, 4 paddle bolts for upper A arm)

I'm already planning my next order from Rodney. Its great that we have quality vendors like him.
IP: Logged
Corpsmen Ed
Member
Posts: 161
From: Jonesboro, Indiana,USA
Registered: Oct 2012


Feedback score: (1)
Leave feedback

Rate this member

Report this Post01-15-2013 05:07 PM Click Here to See the Profile for Corpsmen EdClick Here to visit Corpsmen Ed's HomePageSend a Private Message to Corpsmen EdEdit/Delete MessageReply w/QuoteDirect Link to This Post

Corpsmen Ed

161 posts
Member since Oct 2012
deloreant,

Thanks.


Fieroguru,

I actually had your kit in mind for my brakes. Thanks though.
IP: Logged
PFF
System Bot
Raydar
Member
Posts: 40727
From: Carrollton GA. Out in the... country.
Registered: Oct 1999


Feedback score:    (13)
Leave feedback


Total ratings: 460
Rate this member

Report this Post01-15-2013 09:45 PM Click Here to See the Profile for RaydarSend a Private Message to RaydarEdit/Delete MessageReply w/QuoteDirect Link to This Post
 
quote
Originally posted by Corpsmen Ed:
...
Fieroguru,

I actually had your kit in mind for my brakes. Thanks though.


I've got one. It's quite nice. Highly recommended.


IP: Logged
Corpsmen Ed
Member
Posts: 161
From: Jonesboro, Indiana,USA
Registered: Oct 2012


Feedback score: (1)
Leave feedback

Rate this member

Report this Post01-17-2013 08:16 AM Click Here to See the Profile for Corpsmen EdClick Here to visit Corpsmen Ed's HomePageSend a Private Message to Corpsmen EdEdit/Delete MessageReply w/QuoteDirect Link to This Post
Thanks for the recommendation, Raydar.


Well, I have all my parts that I've ordered so far. Just waiting on some free time to work on the car. Probably will be Saturday. Pics and updates to follow.
IP: Logged
Corpsmen Ed
Member
Posts: 161
From: Jonesboro, Indiana,USA
Registered: Oct 2012


Feedback score: (1)
Leave feedback

Rate this member

Report this Post01-19-2013 02:14 AM Click Here to See the Profile for Corpsmen EdClick Here to visit Corpsmen Ed's HomePageSend a Private Message to Corpsmen EdEdit/Delete MessageReply w/QuoteDirect Link to This Post
Made a little trip to Autozone to pick up some stuff for this weekend.


Some Red RTV, Synthetic grease, Anti-seize, Lock Tight, and brake/parts cleaner.


Also rented/borrowed a Torque wrench & Ball Joint/bushing press.

$272 LATER!!! (At least I'll get $214 of that back when I return the torque wrench and press.)

I went ahead and pressed the bushings and ball joints in.


Got a little carried away with the Anti-seize


These SUCKED!!!


These were EASY!


I have a 3 day weekend this weekend. God I love working for the Fed!

My plan is to get the front suspension reassembled before I go back to work on Tuesday. Hopefully, I can get the boys to help me.

Wish us luck!
IP: Logged
Corpsmen Ed
Member
Posts: 161
From: Jonesboro, Indiana,USA
Registered: Oct 2012


Feedback score: (1)
Leave feedback

Rate this member

Report this Post01-19-2013 08:26 PM Click Here to See the Profile for Corpsmen EdClick Here to visit Corpsmen Ed's HomePageSend a Private Message to Corpsmen EdEdit/Delete MessageReply w/QuoteDirect Link to This Post

Corpsmen Ed

161 posts
Member since Oct 2012
Today I installed the upper ball joints I got from Rodney. Again, awesome quality parts from Rodney.

I also decided to try and salvage the original front wheel hubs. Originally, I was going to bite the bullet and spend the $320 for new ones from Rodney.

But, my dad (who has a lot more car mechanic experience than me) said my old hubs were still good. He spent several minutes spinning and listening to them, and said they still had plenty of life left, as they still freely spun and didn't bind up or make noise, like they would if a bearing was pitted. He recommended I regrease and reuse them.

Most of the stuff I read said this was impossible, because they are sealed bearings and can't be taken apart to repack with grease.

Eventually, I did find a write-up by someone who said YES, you can repack sealed bearings, and told how.

So, I figured it was worth a shot.

First, I used brake/parts cleaner to remove all the 25 year old grease from the bearings.


Then, I used a combination of things to repack the grease into the bearing and the hub until no more would fit.

These included straight-edge razors, my fingers, an air compressor, and finally (and MOST USEFUL) a folded McDonald's straw.


You just keep packing and packing until no more will fit and everything keeps squishing out. (That's What She Said)


And then, after cleaning up all the excess grease, I put a small bead of RTV under the lip of the cap prior to putting it back on.

IP: Logged
ericjon262
Member
Posts: 3082
From: everywhere.
Registered: Jan 2010


Feedback score:    (10)
Leave feedback


Total ratings: 66
Rate this member

Report this Post01-20-2013 11:36 AM Click Here to See the Profile for ericjon262Send a Private Message to ericjon262Edit/Delete MessageReply w/QuoteDirect Link to This Post
looking good! be sure to pot some anti seize on the bearing before you press it back into the knuckle, that'll help with removal later if the go bad.

------------------
#1 hater! also the aluminum head 60V6 troll.

I know these lines Look crooked on paper, but I swear I've got them straight in my head.

IP: Logged
Corpsmen Ed
Member
Posts: 161
From: Jonesboro, Indiana,USA
Registered: Oct 2012


Feedback score: (1)
Leave feedback

Rate this member

Report this Post01-22-2013 02:02 AM Click Here to See the Profile for Corpsmen EdClick Here to visit Corpsmen Ed's HomePageSend a Private Message to Corpsmen EdEdit/Delete MessageReply w/QuoteDirect Link to This Post
Done!!! (kind of)

New Moog bushings and Hardware (from Rodney & TFS) all around


New upper & lower Ball joints (Rodney)


New Zero-lash sway bar end links (Rodney)


New outer Tierods (Rodney)


New KYB Shocks


Also, I cut my bump stops down an inch


Passenger side


And some of the drivers side just so you know its done too


As soon as I get some new wheel studs, I'll reinstall the hubs.
IP: Logged
fierofan25
Member
Posts: 994
From: ohio
Registered: Apr 2007


Feedback score:    (8)
Leave feedback

Rate this member

Report this Post01-22-2013 11:55 AM Click Here to See the Profile for fierofan25Send a Private Message to fierofan25Edit/Delete MessageReply w/QuoteDirect Link to This Post
Doing a great job. Keep up the good work!!
IP: Logged
Corpsmen Ed
Member
Posts: 161
From: Jonesboro, Indiana,USA
Registered: Oct 2012


Feedback score: (1)
Leave feedback

Rate this member

Report this Post01-22-2013 10:25 PM Click Here to See the Profile for Corpsmen EdClick Here to visit Corpsmen Ed's HomePageSend a Private Message to Corpsmen EdEdit/Delete MessageReply w/QuoteDirect Link to This Post
Thanks FieroFan!

Now I just need to find a good deal on some wheel studs. Autozone wanted 2.49 a piece! That's $25 for the front ones!!

Rock auto has them for about $1 a piece, but then charges about $10 shipping.

Any suggestions?
IP: Logged
fierofan25
Member
Posts: 994
From: ohio
Registered: Apr 2007


Feedback score:    (8)
Leave feedback

Rate this member

Report this Post01-22-2013 11:51 PM Click Here to See the Profile for fierofan25Send a Private Message to fierofan25Edit/Delete MessageReply w/QuoteDirect Link to This Post
try advanced auto
put a124 in the coupon space
IP: Logged
Corpsmen Ed
Member
Posts: 161
From: Jonesboro, Indiana,USA
Registered: Oct 2012


Feedback score: (1)
Leave feedback

Rate this member

Report this Post01-23-2013 12:43 AM Click Here to See the Profile for Corpsmen EdClick Here to visit Corpsmen Ed's HomePageSend a Private Message to Corpsmen EdEdit/Delete MessageReply w/QuoteDirect Link to This Post
I just ordered 10 new wheel lug studs from RockAuto for $13. INCLUDING shipping!!
IP: Logged
PFF
System Bot
BV MotorSports
Member
Posts: 4821
From: Oak Hill, WV
Registered: May 2001


Feedback score:    (7)
Leave feedback


Total ratings: 189
Rate this member

Report this Post01-23-2013 09:21 AM Click Here to See the Profile for BV MotorSportsSend a Private Message to BV MotorSportsEdit/Delete MessageReply w/QuoteDirect Link to This Post
Man, you arent messing around! I hate the clean up stage... nothing worse than getting all that grime off! I bought a steam cleaner recently and cant wait to use it on my '88!

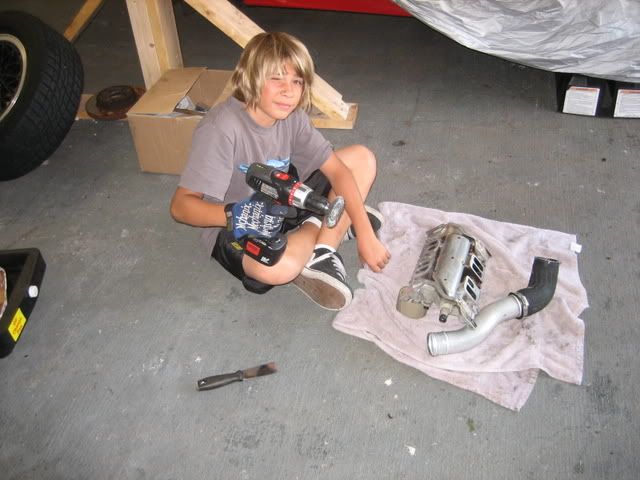
Having the kids help is awesome. My son, Chase (6) is the one that usually helps me. Its very handy having a "tool monkey"! I have very fond memories of helping my dad, in the garage, before he died when I was 13. Miss you dad! Anyway, I hope my kids can someday look back and talk about how much they enjoyed helping me work on cars as well.

------------------
1988 Fiero GT, loaded, 14k original miles, F23, built L67, ST2 cam, PT67 bb turbo, w2a charge-cooled, HT tubular suspension w/ coil overs front & rear, interior, paint & body mods. Ruined by Whodeanies Customs, repaired by myself & Charlie Stump.

1987 Fiero GT Road Racer. 1st documented 3.4TDC swap- built in 1994. 5MT Isuzu, Quaife prototype LSD, HT Tubular A-arms, Fully poly & Heim jointed suspension, Custom 3 way adjustable sway bars, HT Bump Steer kit, Koin's, 320# springs, MegaSquirt III MS3, and more! Under full restoration.

ƒ13r0'$ rµ£3

IP: Logged
Corpsmen Ed
Member
Posts: 161
From: Jonesboro, Indiana,USA
Registered: Oct 2012


Feedback score: (1)
Leave feedback

Rate this member

Report this Post01-23-2013 11:14 PM Click Here to See the Profile for Corpsmen EdClick Here to visit Corpsmen Ed's HomePageSend a Private Message to Corpsmen EdEdit/Delete MessageReply w/QuoteDirect Link to This Post
BV Motorsports,

Thanks! Yeah, my boys were my biggest motivation in starting this. Specifically my oldest. While they both love cars, Max (my 13 y/o) has been more consumed by them the closer he gets to driving age. I remember fondly being out in the garage with my dad, being HIS shop monkey, when I was growing up. My dad was always working on cars out there. We had several drag cars and muscle cars while I was growing up. The ones I most remember "helping" dad on were a '65 Plymouth Belvedere (drag car: 426 Max Wedge, 22" wrinkle walls, 4.88 gears, etc), a '73 Corvette Stingray, and a '69 Chevelle 396 SS. Mostly I just handed him tools, held the light, or sat inside and pretended to drive. The only times I usually got to "turn wrenches" were when we went to the junkyard to get parts for the 4-wheel drive business my parents ran.
I wanted my boys to get more hands on experience with this project, in hopes that they would not only learn more about how cars work, but so they would feel comfortable working on their own someday. The title of this build thread is a little far-reaching and cracks me up now when I read it. Our original idea was to build a kit car, because my 13 y/o is in love with Italian sports cars. Partly due to funds and sheer work load, but MAINLY due to the fact that I wanted him to see that American cars could be cool too, we decided to do a custom Fiero.
Although, lately, I'm having trouble getting ANY help. Bunch of lazy bums.
IP: Logged
BV MotorSports
Member
Posts: 4821
From: Oak Hill, WV
Registered: May 2001


Feedback score:    (7)
Leave feedback


Total ratings: 189
Rate this member

Report this Post01-23-2013 11:35 PM Click Here to See the Profile for BV MotorSportsSend a Private Message to BV MotorSportsEdit/Delete MessageReply w/QuoteDirect Link to This Post
I can tell you one of my most proud moments. My oldest son, Bryan, at the time was 6. We were working on my 4.9 87GT, aka "the Blur", and I was rebuilding the suspension. I needed to separate the lower ball joint. I said out loud to Bryan, "What tool do you think I need here"? I swear on a stack of bibles, the kid walks over to my tool box and comes back with a freakin' pickle fork! I kid you not! That kid used to have quite a racket back in the day. I cant tell you how many Fiero (members from the Va Fiero club) & Starion engine bays he cleaned with a bottle of Simple Green and a toothbrush. He hustled everyone of my friends to let him clean thier engine bay. He'd climb in there and go to work. Now, I cant get him to clean anything! LOL

Here Bryan is helping me get the 2.8L turbocharged 88GT fixed up back in 2008


Isnt it funny how much more they want a "father & son project" the closer they get to getting their drivers license? Bryan is hounding me to pick up another Fiero for "us". LOL Yeah, us... RIGHT.......
IP: Logged
Corpsmen Ed
Member
Posts: 161
From: Jonesboro, Indiana,USA
Registered: Oct 2012


Feedback score: (1)
Leave feedback

Rate this member

Report this Post01-24-2013 01:40 AM Click Here to See the Profile for Corpsmen EdClick Here to visit Corpsmen Ed's HomePageSend a Private Message to Corpsmen EdEdit/Delete MessageReply w/QuoteDirect Link to This Post
Ha! That's awesome.

I keep asking Max, and he says, "Call me when you get to the fun stuff."
IP: Logged
lambo2013
Member
Posts: 15
From: Sylvania, Ohio
Registered: Jan 2013


Feedback score: N/A
Leave feedback

Rate this member

Report this Post01-24-2013 11:12 AM Click Here to See the Profile for lambo2013Send a Private Message to lambo2013Edit/Delete MessageReply w/QuoteDirect Link to This Post
Your doing a great job and lots of great pics. Whenever I'm working in the garage it seems I get everything all back together then think to myself, "Dang I should have taken some pictures" Too late!

Something to keep in mind. With cutting your rubber stops by an inch your tires will travel up into the fender more and may rub, (even more with larger tires) if your body kit is close to the stock inner wheel liner. Just a thought.
IP: Logged
Corpsmen Ed
Member
Posts: 161
From: Jonesboro, Indiana,USA
Registered: Oct 2012


Feedback score: (1)
Leave feedback

Rate this member

Report this Post01-24-2013 09:31 PM Click Here to See the Profile for Corpsmen EdClick Here to visit Corpsmen Ed's HomePageSend a Private Message to Corpsmen EdEdit/Delete MessageReply w/QuoteDirect Link to This Post
lambo2013,

Holy crap, thanks for the tip! I'll keep an eye on that.
IP: Logged
Corpsmen Ed
Member
Posts: 161
From: Jonesboro, Indiana,USA
Registered: Oct 2012


Feedback score: (1)
Leave feedback

Rate this member

Report this Post01-27-2013 01:11 PM Click Here to See the Profile for Corpsmen EdClick Here to visit Corpsmen Ed's HomePageSend a Private Message to Corpsmen EdEdit/Delete MessageReply w/QuoteDirect Link to This Post
My new wheel lug studs came from Rock Auto came in.


I figured installing these would be fairly simple.

After applying liberal amounts of Anti-seize to the knuckle....


I spent about 3 hours trying different techniques to get them to seat properly. This turned out to be way harder than I planned.

First, I tried pressing them in with a vise. No luck. Then hammering them in with a sledge. Bad idea.

I even tried using the lug nuts to torque them in. This kind of worked, but only to a point.

They still wouldn't fully seat. I tried putting a rim on and torquing it down, but that didn't help.

Finally, I put an old washer from the LCA bushing bolts on between the wheel flange and the lug nut, then torqued them down.


SHAZAAM!


They seated so easily I almost felt like crying. Like a proud new father looking at his newborn son. Or something.
IP: Logged
Corpsmen Ed
Member
Posts: 161
From: Jonesboro, Indiana,USA
Registered: Oct 2012


Feedback score: (1)
Leave feedback

Rate this member

Report this Post01-28-2013 11:11 PM Click Here to See the Profile for Corpsmen EdClick Here to visit Corpsmen Ed's HomePageSend a Private Message to Corpsmen EdEdit/Delete MessageReply w/QuoteDirect Link to This Post
I need some opinions on what I should tackle next. I originally planned to move to the rear suspension, but I figure that will be easier when I drop the cradle to do the swap. That will have to wait on warmer weather. I could do brakes, but I don't see that being a very lengthy process.

Speaking of, do I need to re-install the original dust shields if I am doing the 13" brake upgrade? And should I upgrade the MC? I plan to use the NOS front caliper and Reman rears from Calipersonline.

Any thoughts on what comes next?
IP: Logged
fieroguru
Member
Posts: 12128
From: Champaign, IL
Registered: Aug 2003


Feedback score:    (45)
Leave feedback


Total ratings: 258
Rate this member

Report this Post01-29-2013 08:25 AM Click Here to See the Profile for fieroguruSend a Private Message to fieroguruEdit/Delete MessageReply w/QuoteDirect Link to This Post
 
quote
Originally posted by Corpsmen Ed:

Speaking of, do I need to re-install the original dust shields if I am doing the 13" brake upgrade? And should I upgrade the MC? I plan to use the NOS front caliper and Reman rears from Calipersonline.


The dust shields are removed for most brake upgrades on the 88's, including my 13" brake kit. The common rotors used are deeper than the stock 88 rotors, so the new rotors would rub the dust shields if they remained in place.
The master cylinder should only be upgraded to match a caliper piston diameter change. If you are keeping the stock calipers, keep the stock master cylinder.
IP: Logged
Previous Page | Next Page

This topic is 5 pages long:  1   2   3   4   5 
next newest topic | next oldest topic

All times are ET (US)

Post New Topic  Post A Reply
Hop to:

Contact Us | Back To Main Page

Advertizing on PFF | Fiero Parts Vendors
PFF Merchandise | Fiero Gallery | Ogre's Cave
Real-Time Chat | Fiero Related Auctions on eBay


Copyright (c) 1999, C. Pennock