Hello all. Here's the backstory here: I have a 1986 SE V6 that started developing a lower-end knock at 149,900 miles. I set out to find a cheap way to build up some more power while replacing the failing 2.8. Luckily, my good friend Damian (thedrue on PFF) had a 3.4L longblock on an engine stand that he was willing to let me use. It came out of a wrecked Camaro, and supposedly had something like 160,000 miles on it. I set out to rebuild this engine, build it up a little bit more powerful than stock, and install it in place of my 2.8. He and I tore it down to a shortblock, and I took all the parts back to my garage to start in on the endeavor.
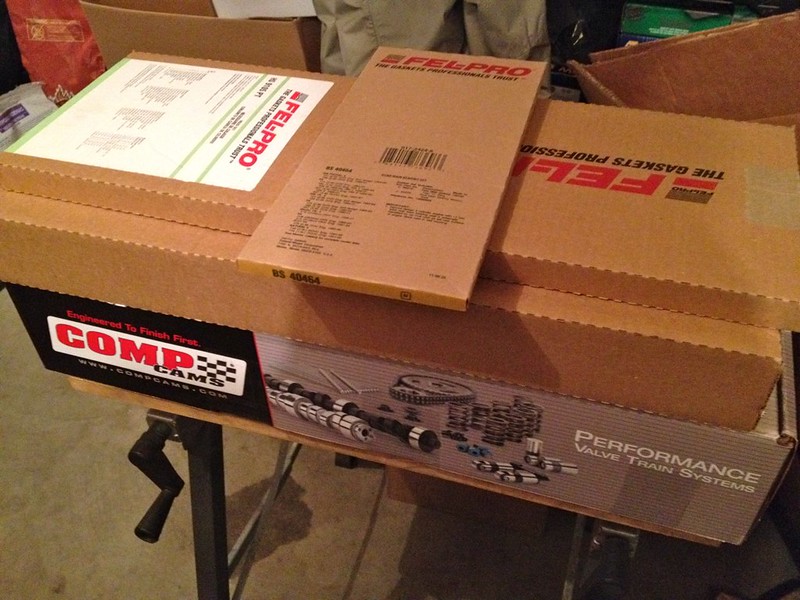
Fel-Pro gaskets, Comp Cams valve train and timing kit. A good way to start in on some fun. :-)
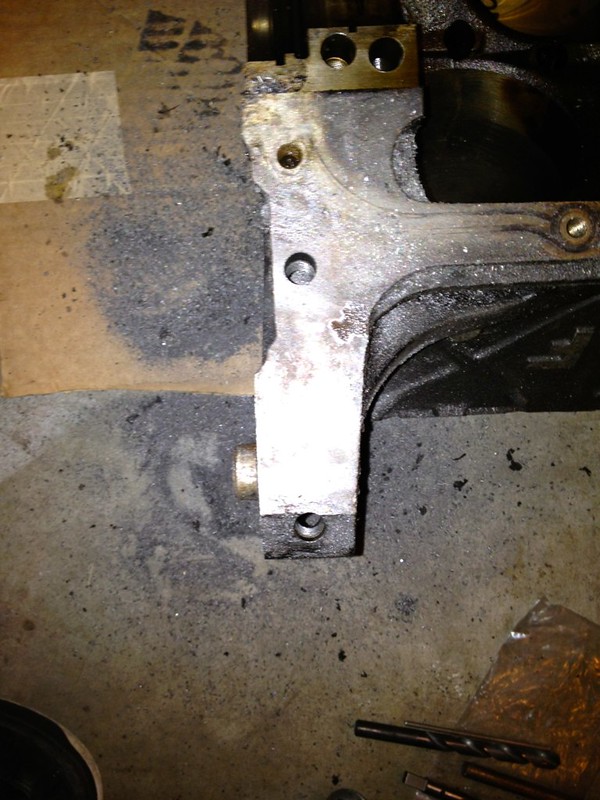
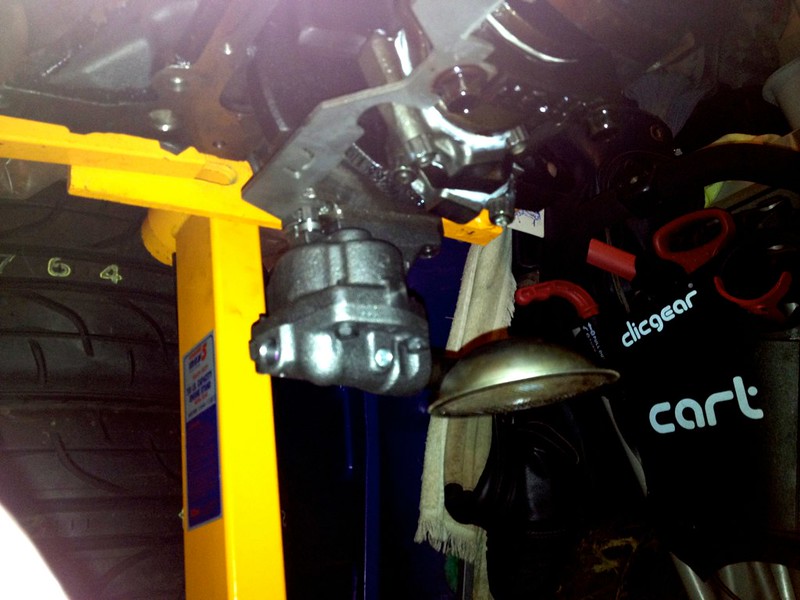
Rodney Dickman 3.4L starter relocation jig. Duplicates the starter location to the other side of the block for transverse applications, like the Fiero.
Drilled, counterbored, tapped and tested. This jig is seriously worth the money. Lines it up flawlessly, and drills and taps the holes perfect. I'm very glad I chose to buy it.
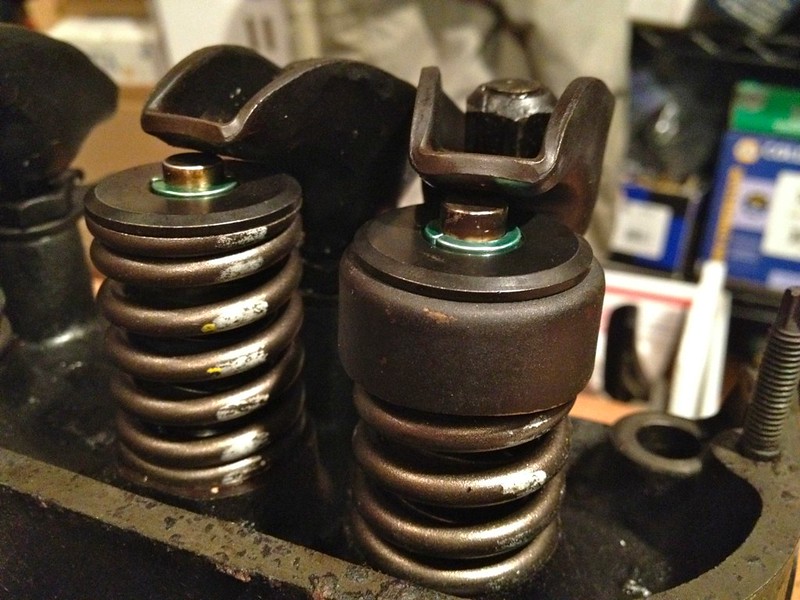
Replacing the valve seals, retainers, spring buckets, and adding double valve springs.
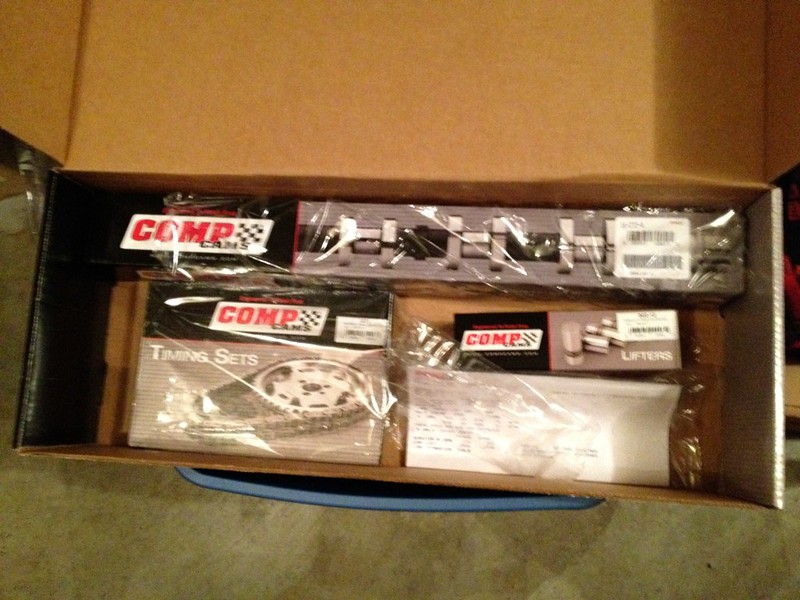
New CompCams 260H camshaft, lifters and timing chain/sprocket.
[This message has been edited by ManMadeChickens (edited 03-18-2014).]
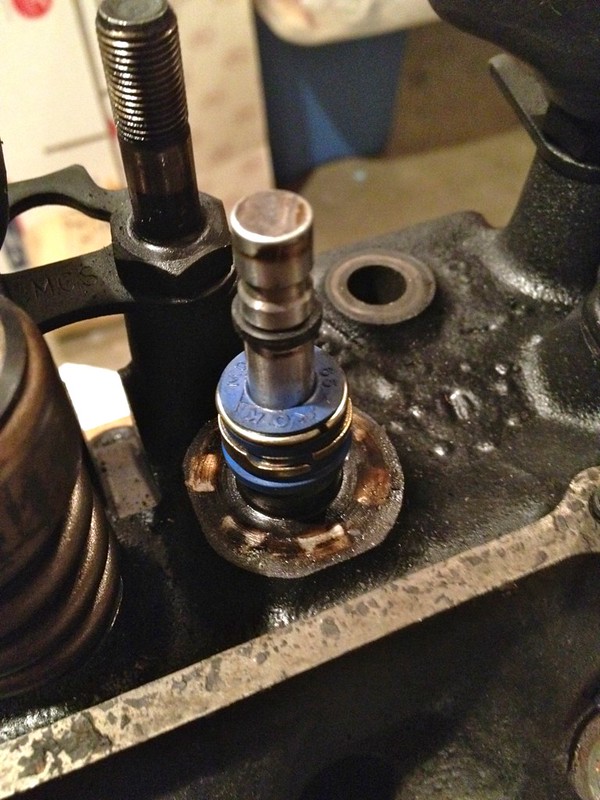
Intake valves get these new bright blue valve guide seals. All valves get the plain-Jane black o-ring.
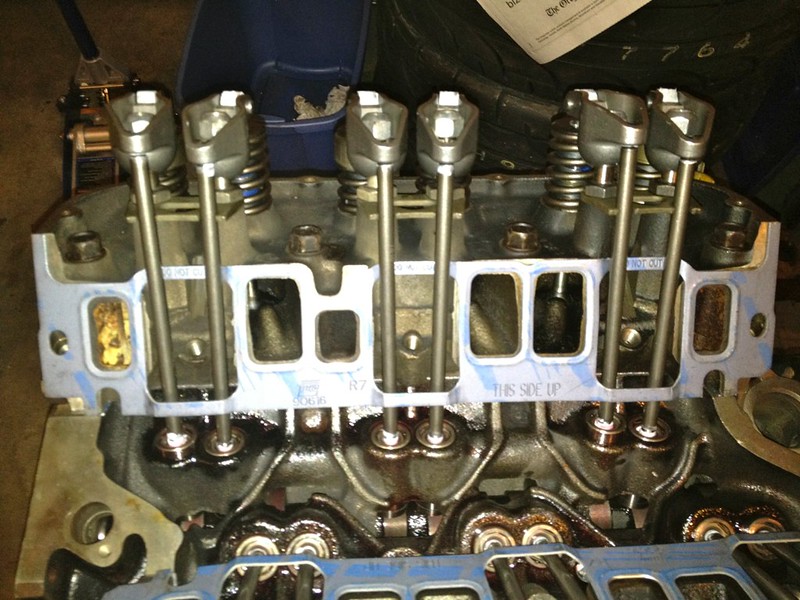
Head one of two "complete" as far as hardware goes. New double valve springs, valve guide seals, valve stem o-rings, retainers, locks, and a thorough cleaning. The other head got the same treatment.
Up-close shot of the valve springs, and new bits. You can see though the main coils to the additional inner spring, which significantly increases the tension against the valve to close it. All the exhaust valve springs have those funny buckets on the top of them (right). For some reason, my new retainers were too big to fit in the standard opening. GM put the buckets there for a reason, so I had to bore out the opening to get the new retainers to fit the stock buckets. Not a big deal, just an extra step I didn't anticipate.
One of three broken studs stuck in the head. The machine shop handling my work was able to drill these out and put inserts in their place.
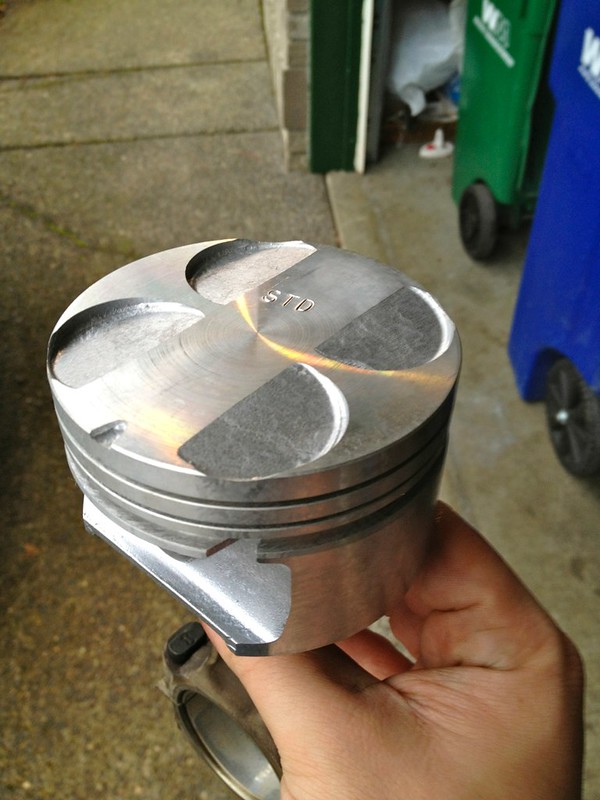
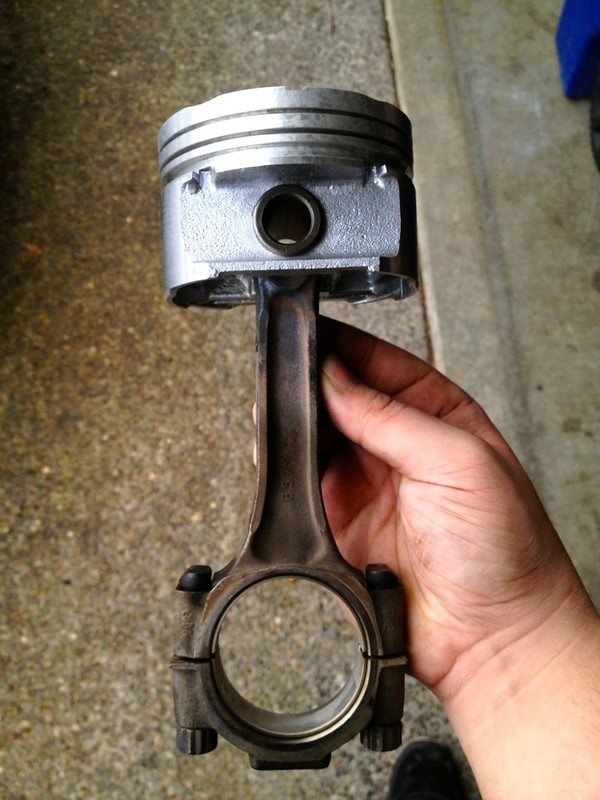
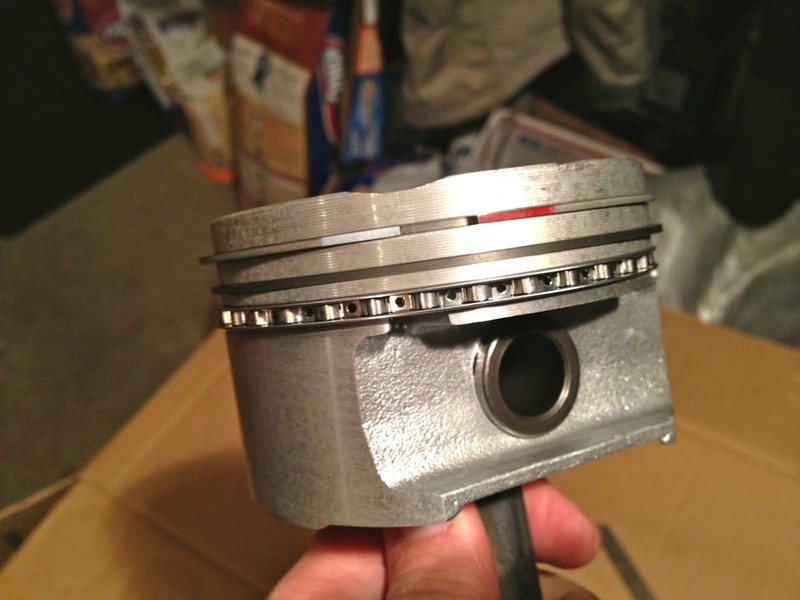
"Flat Top" 3.4 DOHC pistons attached to the 3.4 Pushrod connecting rods. Should be right about 10:1 compression. This was one of the upgrades I talked about earlier. These pistons share all the important dimensions with the 3.4PR pistons, but don't have the dish, so it raises the compression. These cost about 1/4 as much as a custom set of truely flat topped 3.4L bore pistons.
[This message has been edited by ManMadeChickens (edited 03-18-2014).]
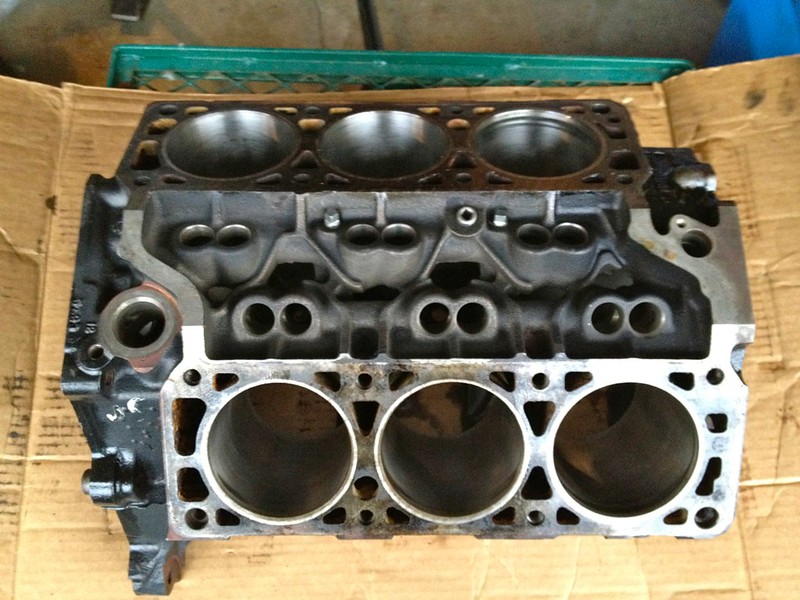
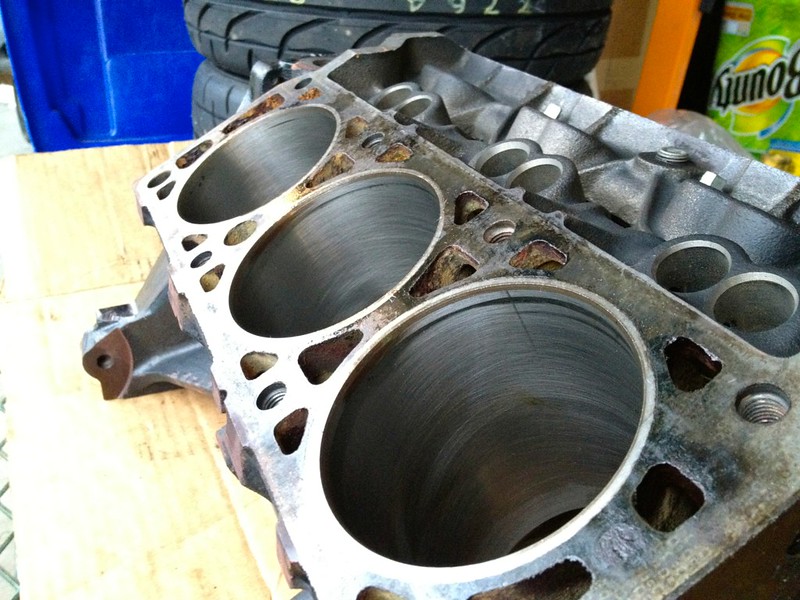
The valley of my freshly honed and hot tanked engine. Soooo clean! The machine shop wasn't sure if they could get away with just honing it until they measured the wear. They called me back later in the day and told me that the "worst" cylinder had only 0.002" wear, and that they all measured well within spec for roundness. A hone and tanking later, and it's set to get built from here.
One bank of bores, all clean and honed. The dark marks at the top of each bore are purely visual, it's supposedly a side effect of the machine hone.
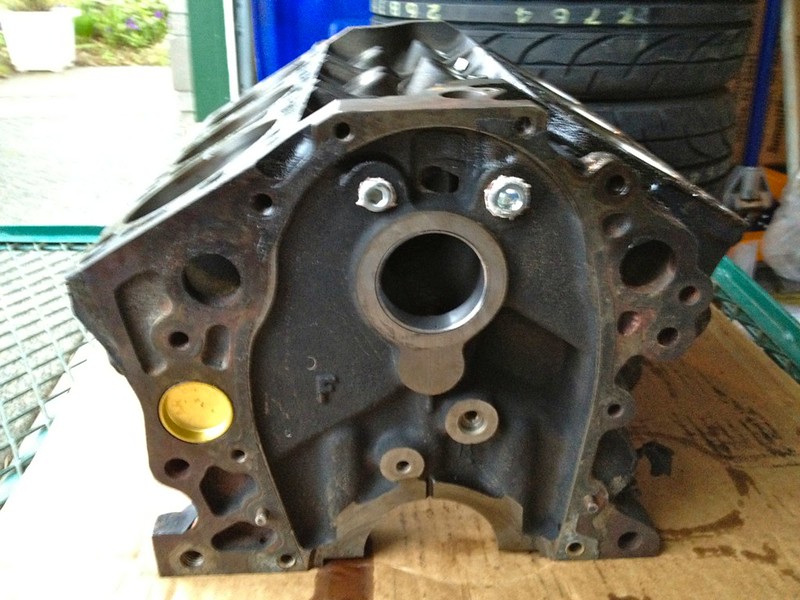
Front end. The machine shop put new plugs in, and replaced the cam bearings for me.
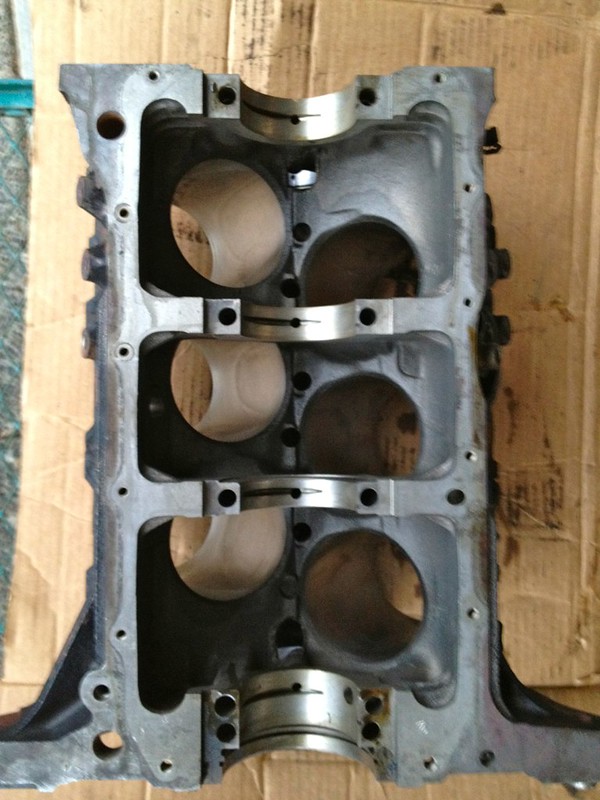
Bottom side. Just waiting for a crank, some pistons and such to fill it up!
[This message has been edited by ManMadeChickens (edited 03-18-2014).]
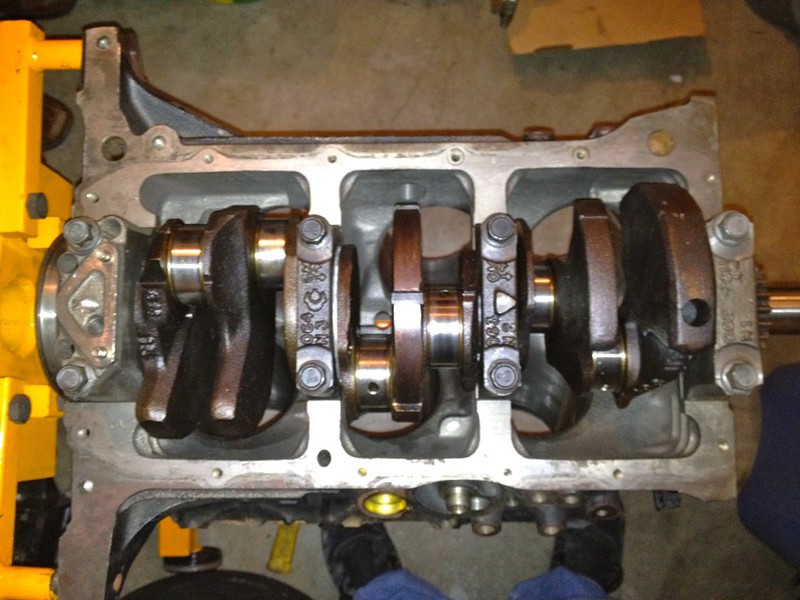
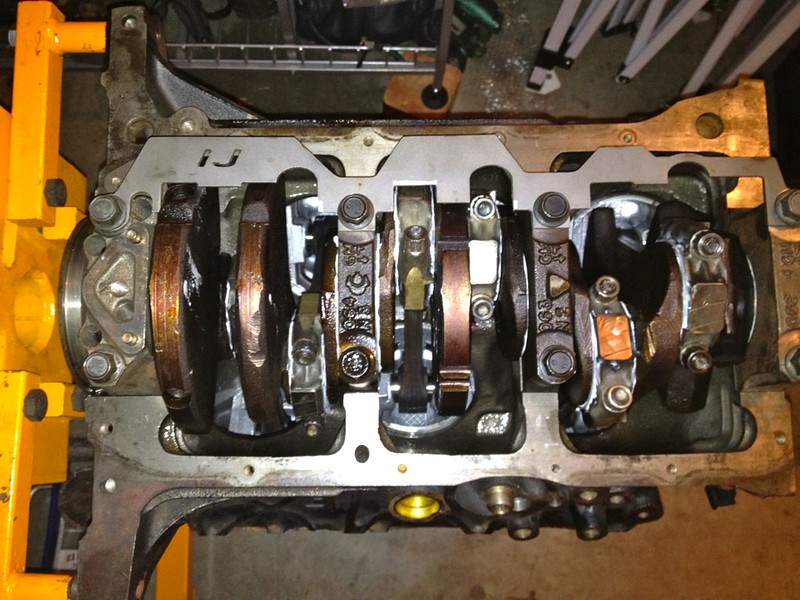
Up on the stand, crank installed, as viewed through the cylinders.
Crank main bearings replaced. I then Plastigage verified the oil clearance, which was within spec on all bearings. Assembly lubed everything, and torqued the caps to spec. I didn't machine the crank, I used it as-is, because there was no measurable wear on any of the journals. They all were smooth and free from visible issues.
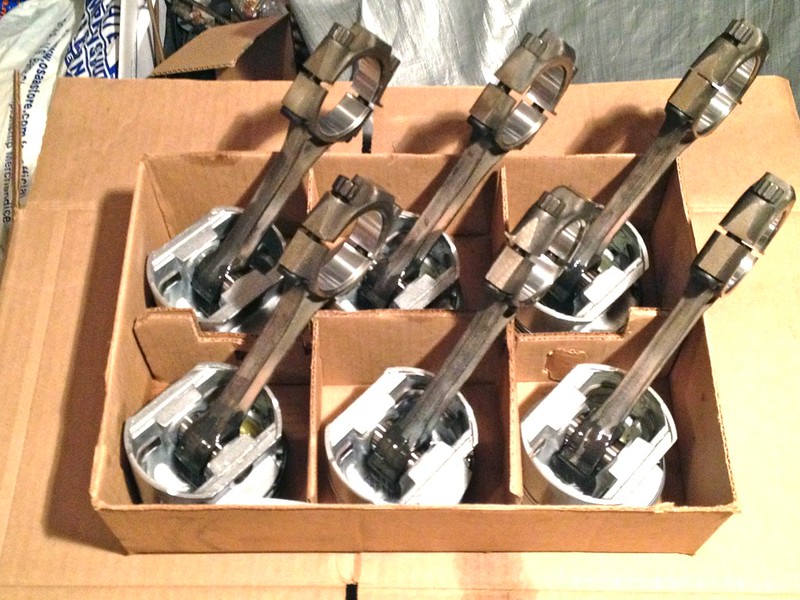
All ringed up and ready to be stuffed into the cylinders.
Six new pistons, each with three new rings, and two new bearing halves in each connecting rod. These pistons should take the stock 8.9:1 compression ratio up to 10:1. I reused the "old" 3.4 rods.
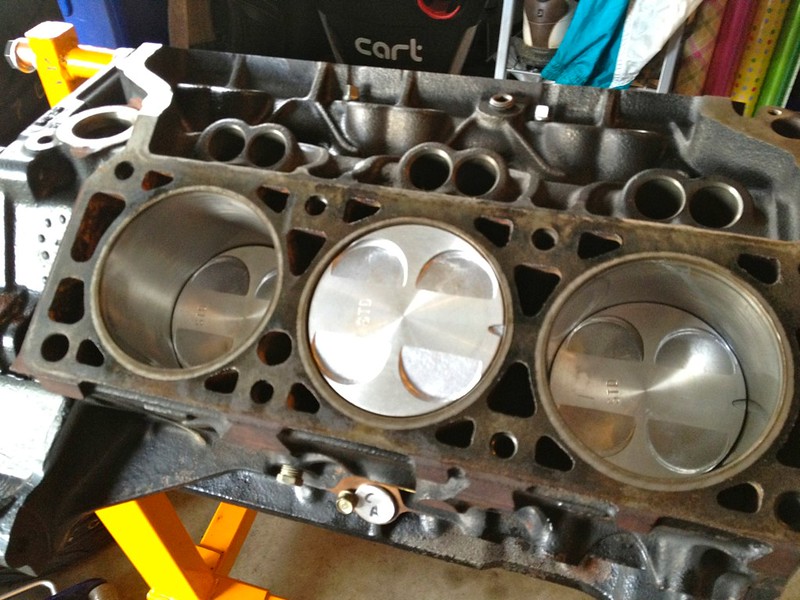
Pistons installed in the block, and rod caps torqued. The "STD" stamped into each piston indicates it's "standard size" for bore.
[This message has been edited by ManMadeChickens (edited 03-18-2014).]
Bottom end all together. Note the new crank scraper installed under the main cap bolts. WOT Tech sells these. I like the idea of keeping the crank from flinging the oil places it doesn't need to be.
This is all the clearance there is between parts of the rotating assembly, and the crank scraper. By design, there is only 1mm in places. The instructions state you need to verify this clearance when installing the scraper, and that some filing/grinding may be necessary. Mine did require some clearance here.
A new CompCams 260H camshaft installed. This cam is higher lift, slightly more duration, and a bit different in lobe separation angle than stock. Should keep the torque down low, but help the 3.4 breathe a bit more at the top end. A stock profile 3.4 camshaft is advertised as having a 900-4500 RPM useable power band. This cam is 1000-5500. I figured the "extra 1000 RPM" would be nice. The CompCams assembly lube is bright red, and very sticky. That's what's visible on the camshaft through the lifter bores and valley opening.
Lifters installed in their bores. Again, the Comp Cams cam and lifter assembly lube is bright red and very visible here.
One head installed, one to go.
[This message has been edited by ManMadeChickens (edited 03-18-2014).]
Both heads installed. The 60 bank-angle design is clearly visible here. Rather than mess with trying to remove the odd-sized plug to put the temperature sender in, I simply swapped heads side to side. They're symmetrical, so no harm no foul if you already have them off.
Lower intake manifold gasket installed, pushrods installed, and new CompCams Magnum 1.52 roller-tipped rockers installed. I contemplated going with 1.6 ratio, but I wasn't sure if I was going to have valve clearance issues with my 3.4 DOHC pistons. This cam has bigger lift than a stock cam already anyhow.
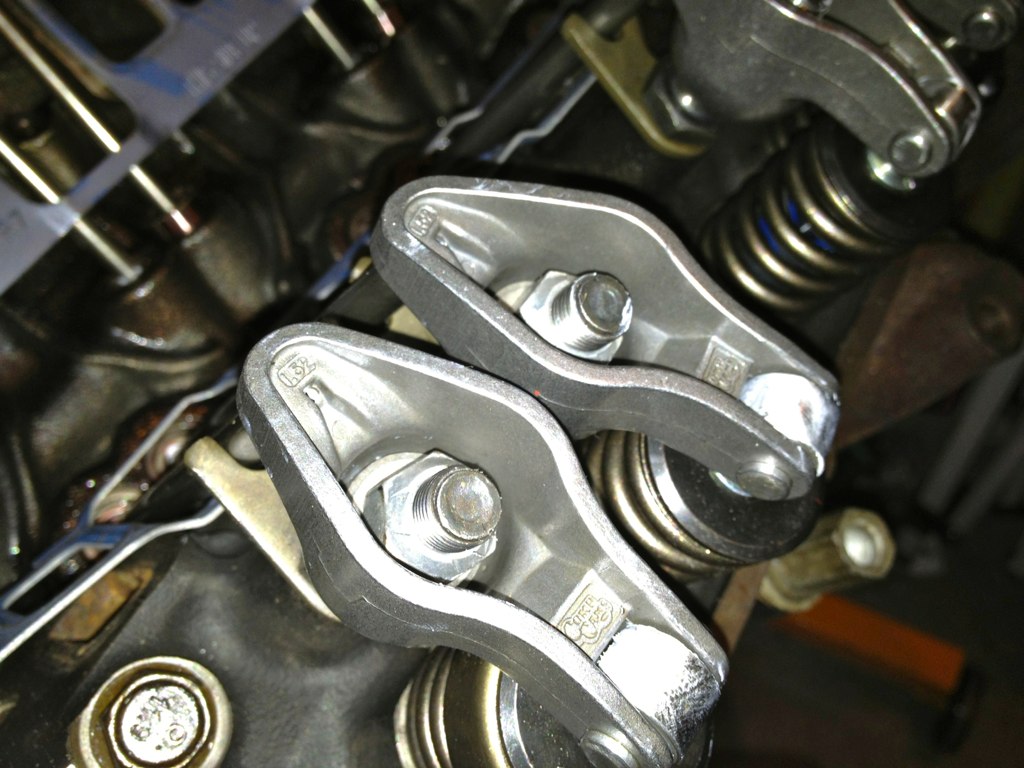
A good view of the lifters, pushrods, and roller-tipped rockers. All these parts are new. The pushrods are reinforced, which helps get all the camshaft's lift to the valve. Solid rockers rather than stamped, again to reduce flex and loss of lift. Roller tips reduce friction and wear. They do produce a bit more valvetrain noise however.
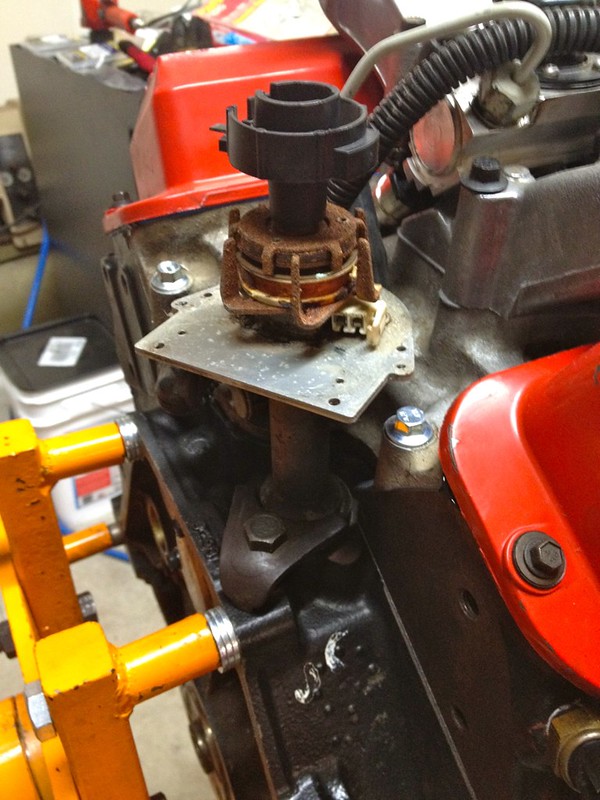
A West Coast Fieros cam position sensor delete plug. The Camaro that this engine came from uses a cam position sensor for an input to the engine computer. The Fiero engine computer does not need this sensor, so a plug is installed in it's place. It probably would have stayed put alright, but I threw in a bolt over it in the mounting hole just in case.
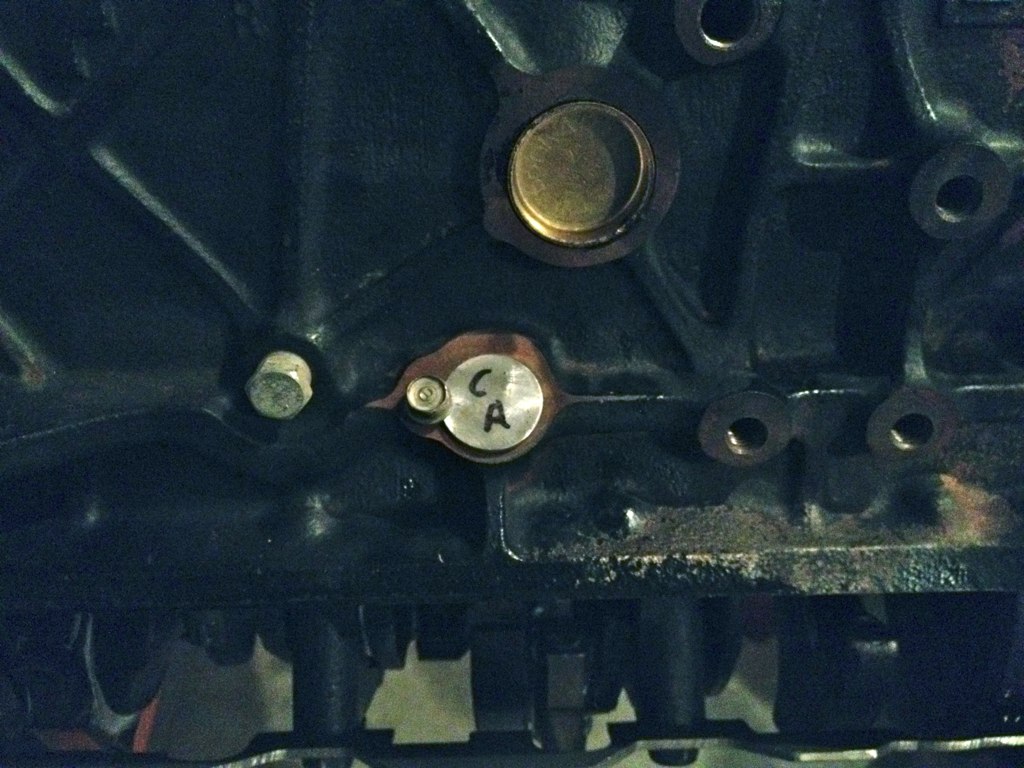
Similar situation on the side of the block- this is a WCF crank position sensor delete plug.
[This message has been edited by ManMadeChickens (edited 03-18-2014).]
When it's 2am, and you don't have a "crank sprocket installation tool," you improvise. In this case, I was able to get the crank sprocket pressed on using the harmonic balancer bolt and a pair of deep sockets to take up the depth. It worked flawlessly. I rock.
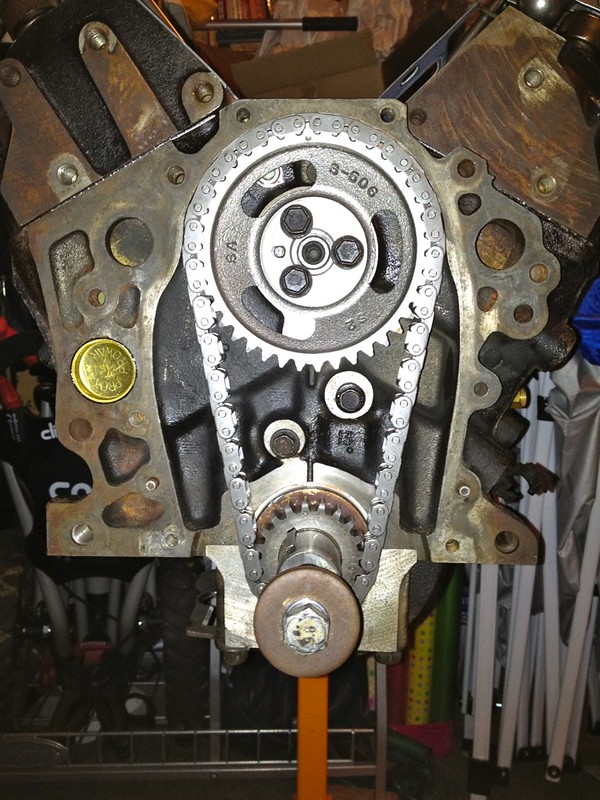
Crank sprocket installed, cam sprocket installed, and timing chain in place. The old chain damper was so gouged and chipped that I ordered a replacement. It didn't go on until later.
Valve lash adjusted. The roller-tipped rockers are a stock 1.52:1 ratio. However, they're cast instead of stamped, which makes them much stronger. Keeps them from deforming with my high lift cam, and stiff double valve springs. There was a lot of discrepancy about how much to crank down the nut after zero lash. Each CompCams pamphlet that came with parts (cam, lifters, rockers) had a different value ranging from 1/2 turn to 1.5 turn after zero lash. The factory service manual procedure says 1.5, and a Fiero club website I found detailed the process and mathematically showed that 1.5 is ideal, based on the thread pitch of the stud, the lifter height, and nominal preload amount. So I decided that 1.5 was what I wanted. Seems to work just fine.
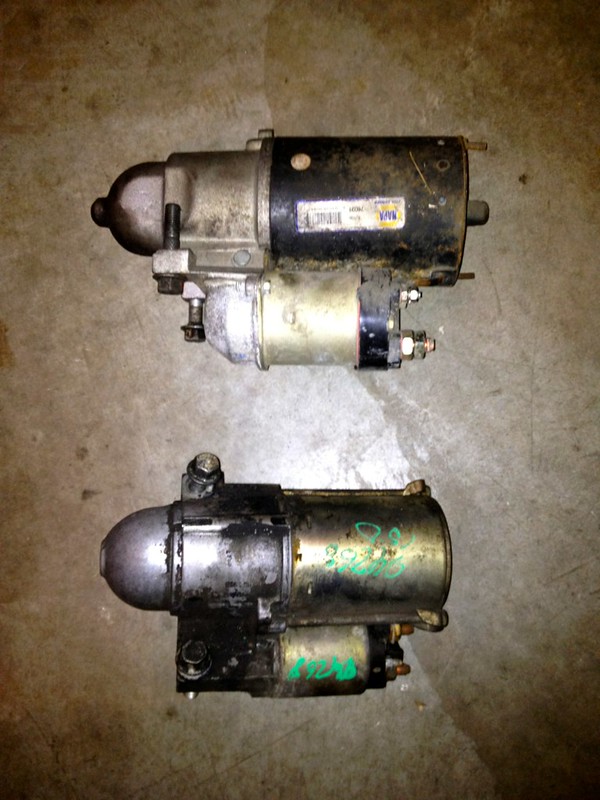
Bought a junkyard gear reduction starter. Cleaned it up so it could make it's way onto this engine. The gear reduction starter is physically smaller in most dimensions, weighs less, takes less energy to crank, and cranks faster. Overall just a much better part! Check out the photo below for comparison to a stock unit.
As mentioned above, the gear reduction starter is smaller diameter, shorter, lighter, and better in pretty much every way. With my new engine being fresh and tight, and the new 10:1 compression, I felt it would be a good idea to put this on.
[This message has been edited by ManMadeChickens (edited 03-18-2014).]
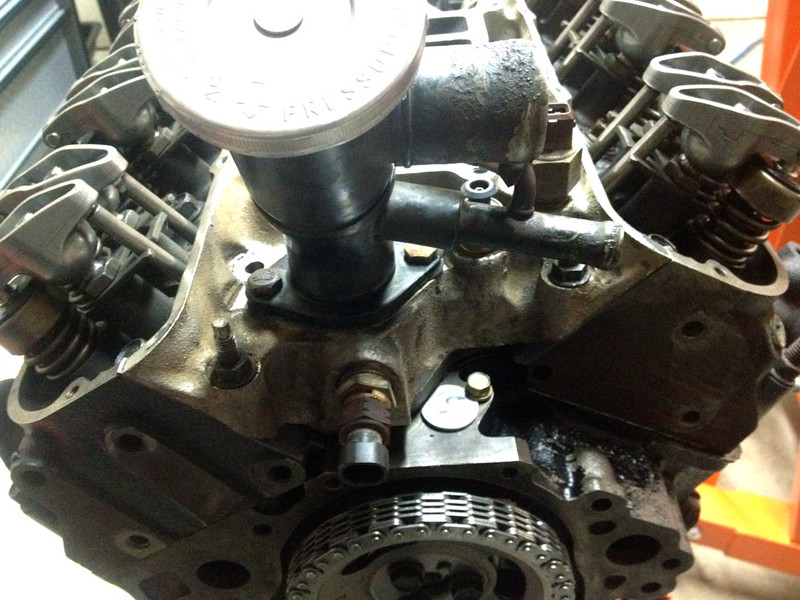
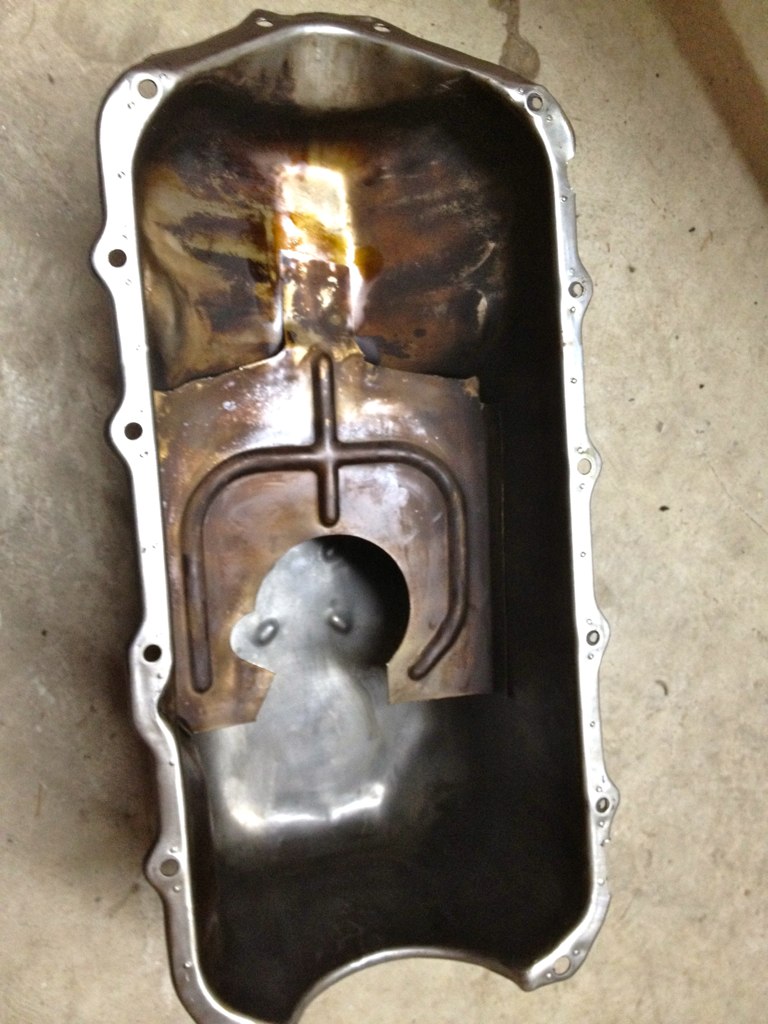
This is a terrible photo, but the point is that the oil pump, and pickup are on. I found an extra oil pump drive amongst my random Fiero parts, and threw it in. This is a Melling stock replacement pump, with the standard 3.4 pickup tube. I tack welded the pickup to the pump, so there's no chance of it falling out.
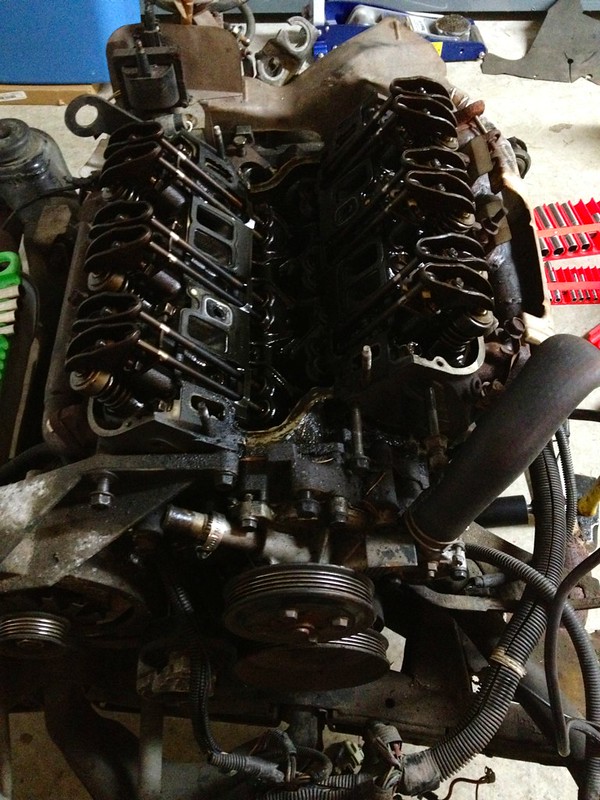
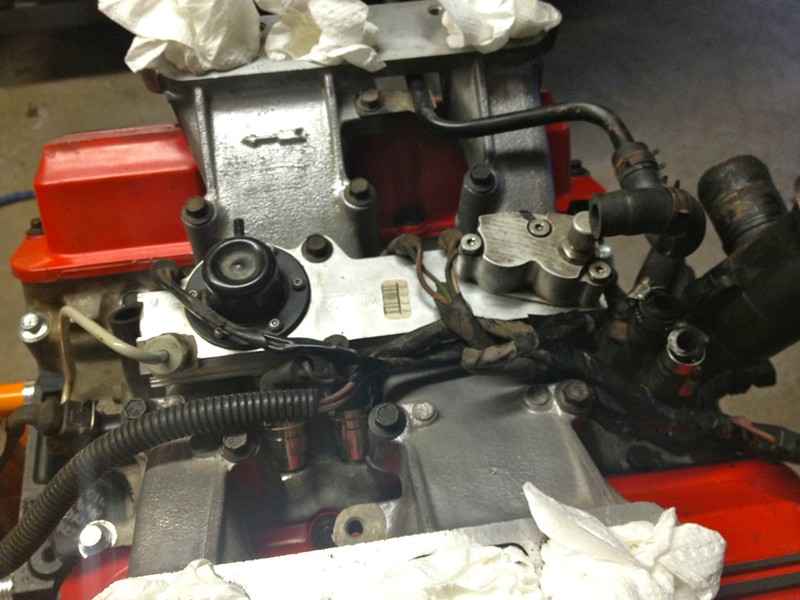
Starting to tear down the top end of my original engine. In this shot, I've already undone the air intake hose, the clutch slave, shift cables, taken out the distributor, and undid a great many vacuum hoses. Bolts for the upper intake manifold are just sitting in place.
Upper intake manifold removed. Not exactly sure how oil got into the dummy port positions on the middle intake manifold, when the gasket covers them... but it's there, and doesn't appear to have hurt anything. Next I removed the fuel rail, and injectors. Taking out the Lower Intake Manifold requires removing the valve covers, which is kind of hard to do with the engine dogbone bracket in place. I waited to do it when it's more accessable with the engine out of the car.
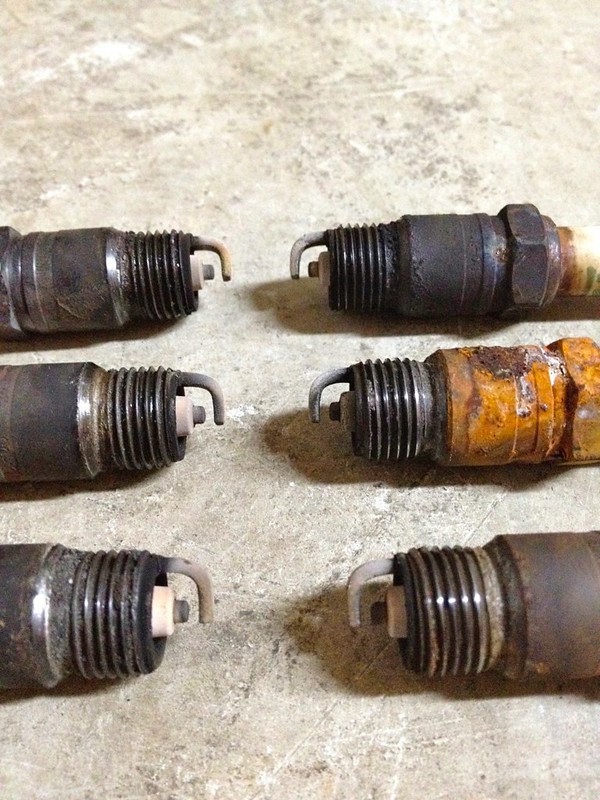
The old plugs were just right. Only car people will understand how cool it is to pull 30,000 mile plugs out, and see they're all perfect tan color, no oil contamination, and see them all wearing evenly and correctly. It's a shame how good this engine ran, it's knocking rod bearing excluded. The middle one on the right is the one that gets water dumped on it every time the deck lid is opened when it's raining. Pretty obvious, really.
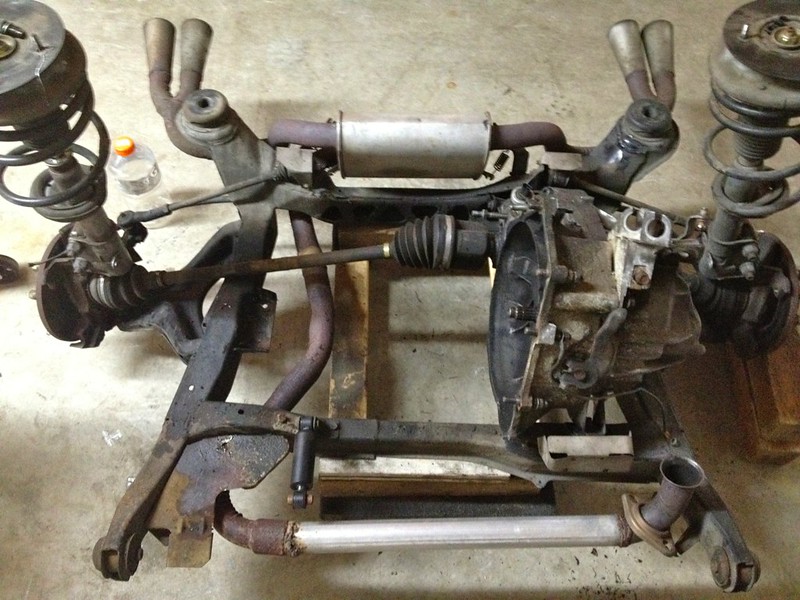
Success! It's always a good time when you get a cradle out in a couple hours, first try, no snags.
[This message has been edited by ManMadeChickens (edited 03-18-2014).]
Valve cover removed on the old engine. Everything is oil-stained, but otherwise normal. I'm very pleased that after 150,000 miles there's no sludge or grime. Makes my regular maintenance seem worth it that much more after getting to see the benefit first hand.
Pilfering the old engine for external pieces to go onto the new one. Already removed the lower intake manifold, dog bone bracket, A/C bracket, oil pressure gauge sender, valve covers, and more.
Cleaned up and installed the lower intake manifold. I RTV'd the gap between the heads and manifold, and torqued to spec.
LIM installed, I again used RTV along the exposed block edge. It's now pretty clear why there's a flat side cut into the cam position sensor plug.
Valve covers cleaned up and reinstalled, it's looking a lot like a Fiero engine now!
[This message has been edited by ManMadeChickens (edited 03-18-2014).]
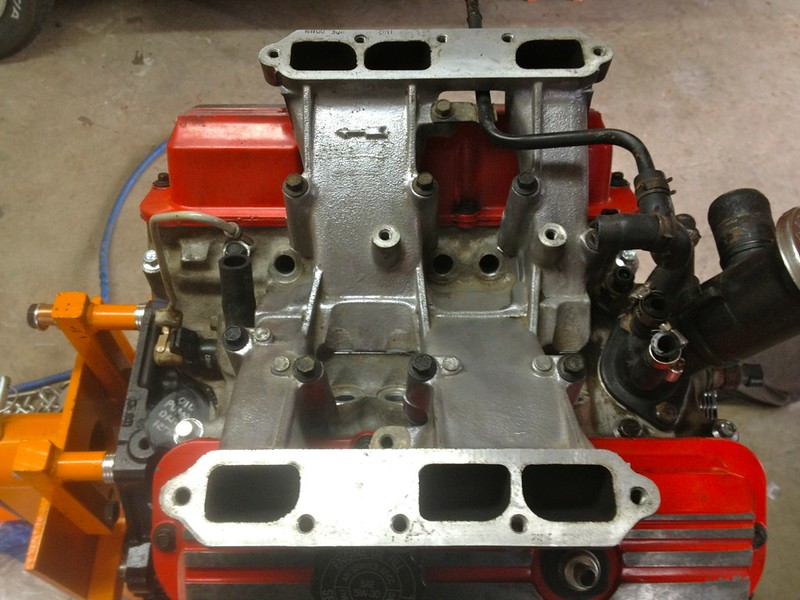
Intermediate intake manifold cleaned up, and reinstalled.
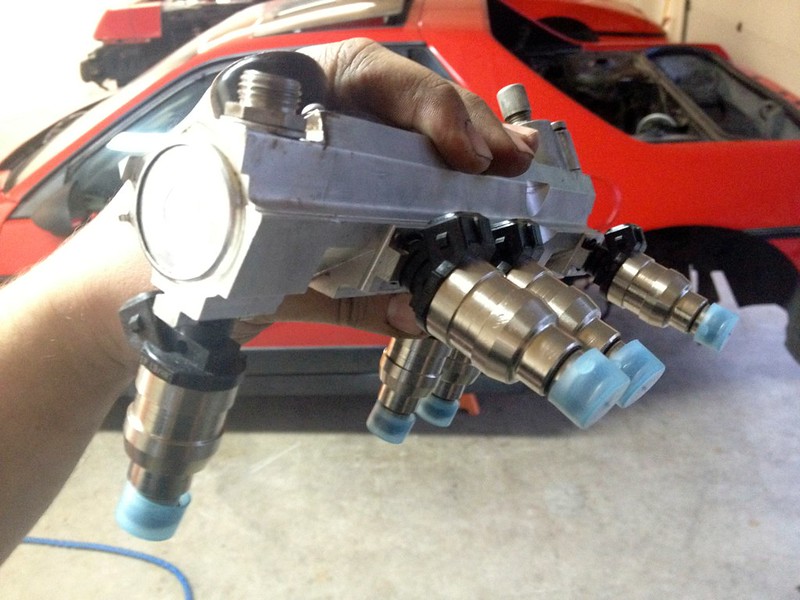
Fuel rail cleaned, and shiny new 19 lb./hr. Accel injectors installed. The 3.4 motor uses 17 lb/hr injectors stock, but with my mods and 10:1 compression, the 17 lb/hr injectors would be too small. So far, with the stock Fiero computer and 2.8 tune with 19 lb/hr injectors, everything is great. The block learn multiplier stays pretty close to ideal, in the 125-128 range.
Back on the engine, and the injector harness reconnected.
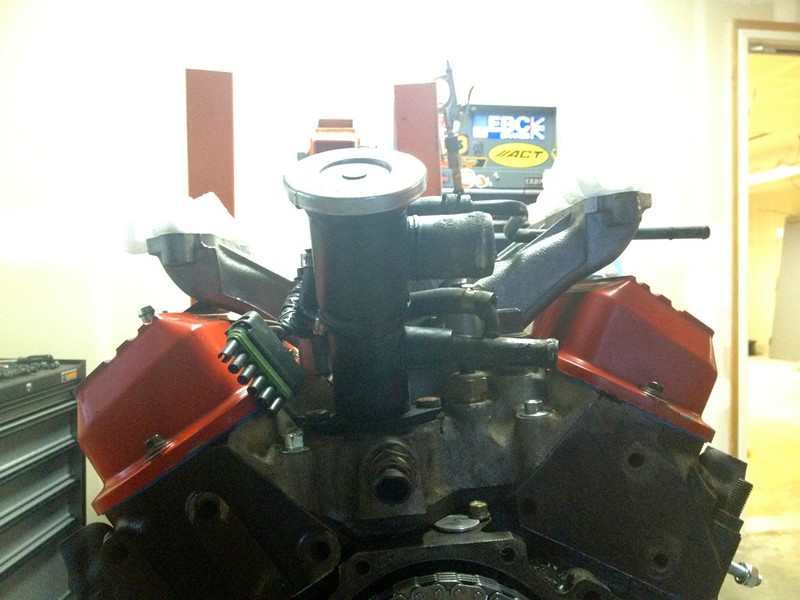
Here you can see how tight the clearance between the valve covers and the intake manifold is. That's why the engine harness has those really flat sections to fit in that gap.
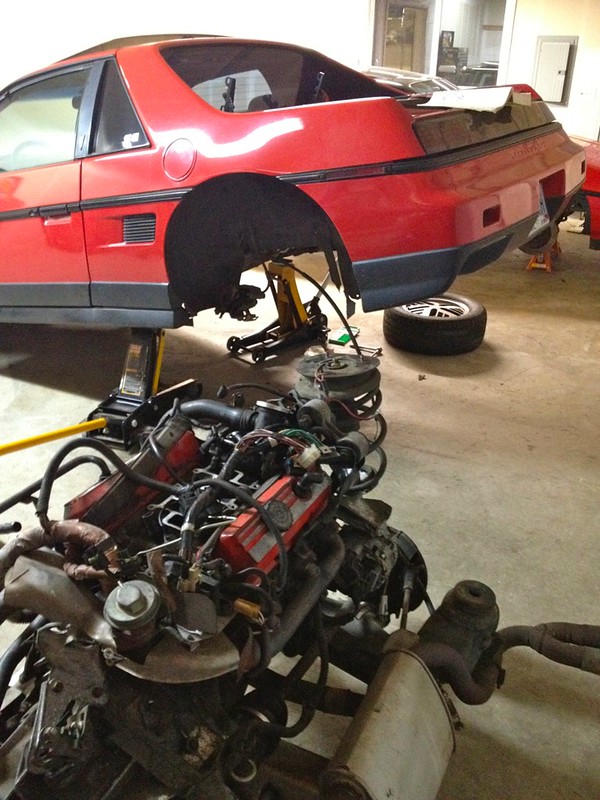
Old engine lifted off the cradle. [Insert 3.4L engine here.]
[This message has been edited by ManMadeChickens (edited 03-18-2014).]
Old timing set. This chain has stretched A LOT in 150,000 miles. Check out the deflection- a new chain stays taut against that plastic damper.
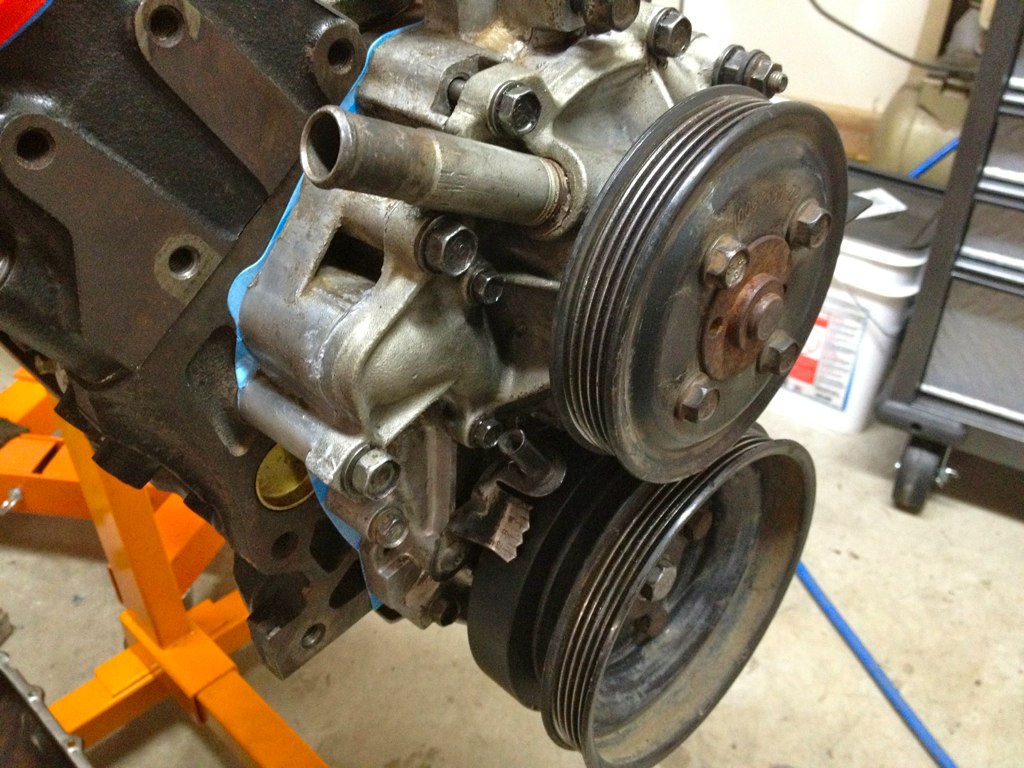
This little bastard took like 3 hours to clean and scrape old gaskets off of. It had a 26 year old original gasket on one side, and a 2 year old water pump gasket literally cemented onto the other. Either way, it's clean and ready for installation of the water pump.
Water pump RTV'd and torqued. Front timing cover torqued. Crank damper installed, crank pulley installed. That balancer is a new part for a 3.4. I transferred the timing mark, and went to install it. I learned that the crank trigger wheel on the back of the 3.4L balancer interferes with the Fiero front timing cover... so off it came. I just popped it out the back.
Oil pan cleaned out. I took a disturbing amount of small metallic flakes out of the bottom. Part of the reason why the old engine is dying.
I notched the starter opening in the lower flywheel cover, so this plate can be removed without taking off the starter. This is a pretty common "mod."
[This message has been edited by ManMadeChickens (edited 03-18-2014).]
Refitted the distributor, and got the timing set as close as I can without the engine running. I was really damn close on correct timing... only problem was it was 180 degrees off. A simple pull and half rotation of the shaft later it was correct.
Drive one Fiero to rebuild another... This is my Dad's 1985 SE V6 that he's had since new. At about 170,000 miles he replaced his 2.8 with a 3.1. Now 110,000 miles on that motor and going strong. It should hit 300,00 miles next year.
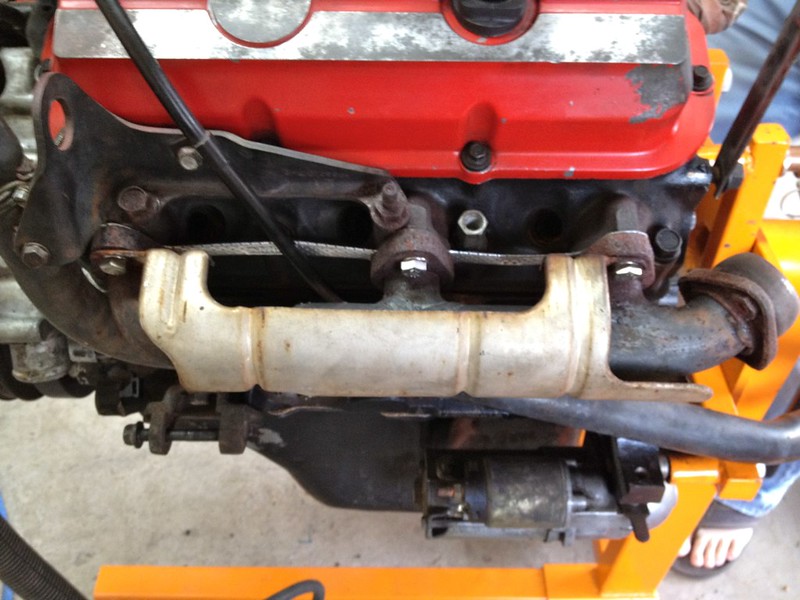
Front manifold and head shield reinstalled with new stainless steel fasteners. Dipstick, starter, lift loop, and brackets back on. I left the block shield off, as I don't like how it sandwiches between the head and manifold without a gasket on one side.
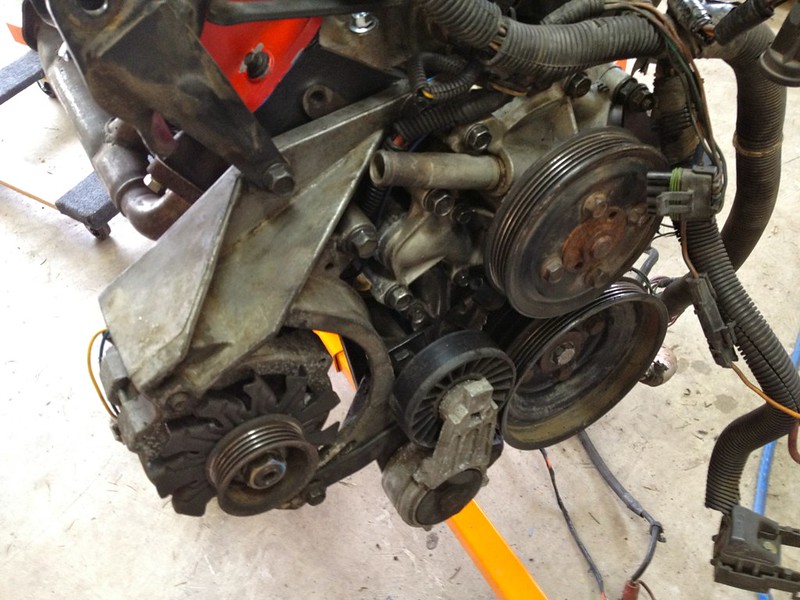
Installing front accessories back on. Shoutout to Dodgerunner for making that awesome belt tensioner kit. Makes getting a belt on and off so easy, keeps perfect tension on the belt all the time without needing adjustment. Looks like a factory part, too.
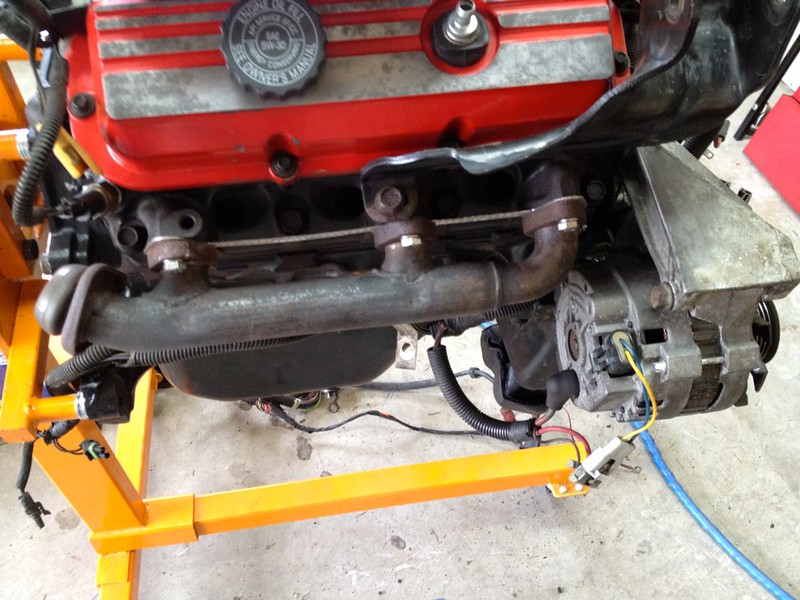
Rear manifold installed. Again, new stainless fasteners. CS-style alternator and wiring adapter visible. This is another upgrade I strongly encourage for the 1987 and earlier V6 Fiero. It gets you a smaller, lighter, more efficient alternator. Just order a 1988 Fiero V6 alternator, and get the wiring adapter. It's bolt-on and plug-n-play at that point. Lots of juice, never have a problem with voltage anymore. This alternator is 105 amp, whereas the best SI alternator that came in a Fiero was 94.
[This message has been edited by ManMadeChickens (edited 09-19-2012).]
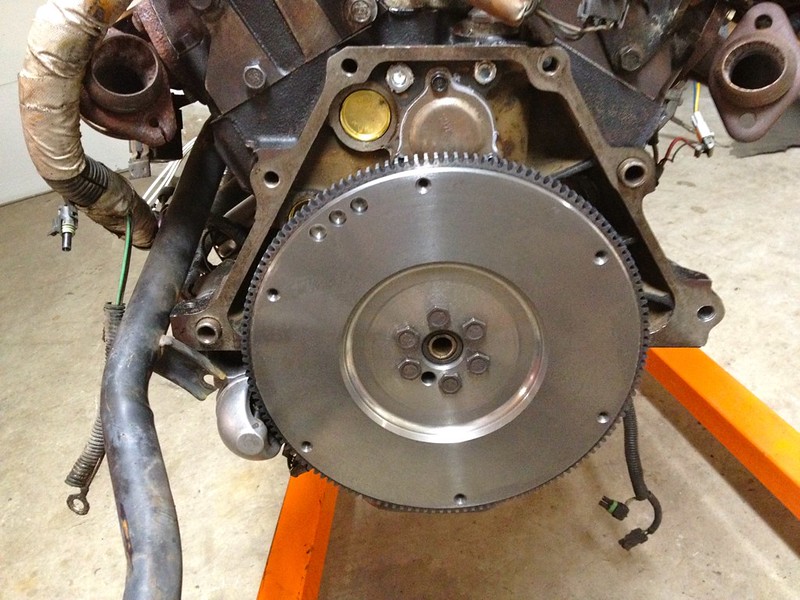
1988 Fiero V6 neutrally-balanced flywheel necessary with the internally balanced 3.4L crankshaft. Again, just order a 1988 Fiero V6 part, and it bolts right up. Does the trick. Note the old pilot bushing still stuck in the end of the crank. This would later prove to be a problem.
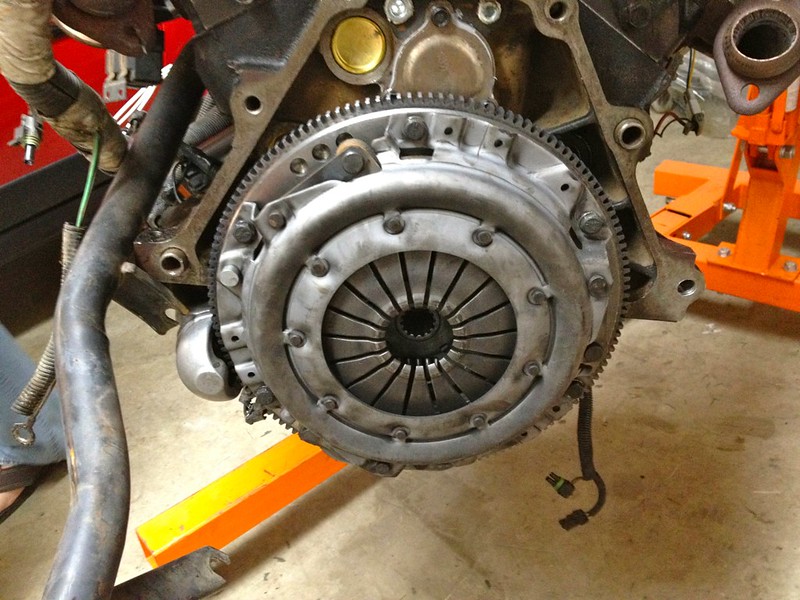
I installed this clutch assembly new only 1100 miles before the engine started knocking... so back in it goes!
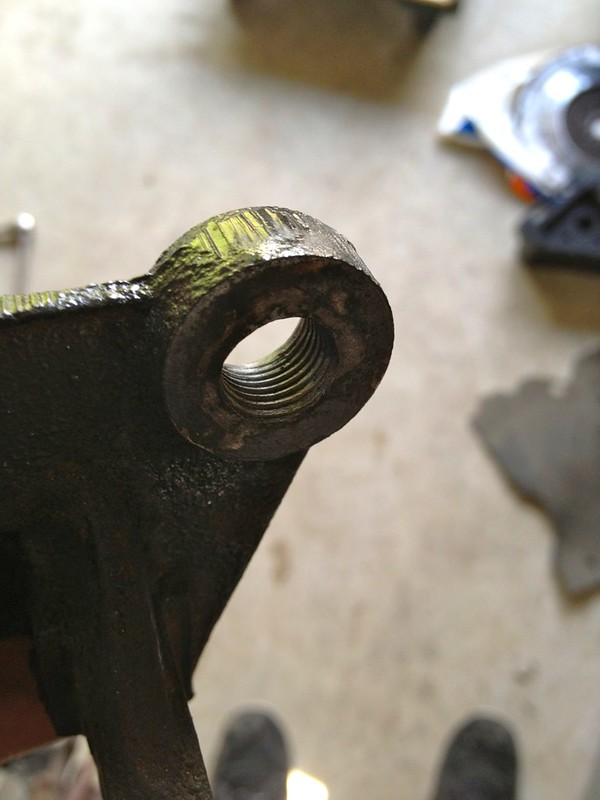
I opened up the hole and tapped some threads into the engine torque strut mount bracket, so that the A/C compressor bracket has somewhere to mount to. The stock 2.8 motor has a boss for the third bolt to share functionality as holding the bracket on, and mounting the AC compressor bracket. The new 3.4 motor has only the two bolt locations. I used a 27/64ths drill bit and M12x1.25 tap to properly thread the now bigger hole in the bracket. There's limited clearance behind the bracket, so I used a 30mm length 12x1.25 bolt which was enough to pass through both brackets and get a couple threads through on the back. You only have to do this if you have an '85, '86, or '87 Fiero with A/C. Check out the next picture to see the mounting points for this bracket.
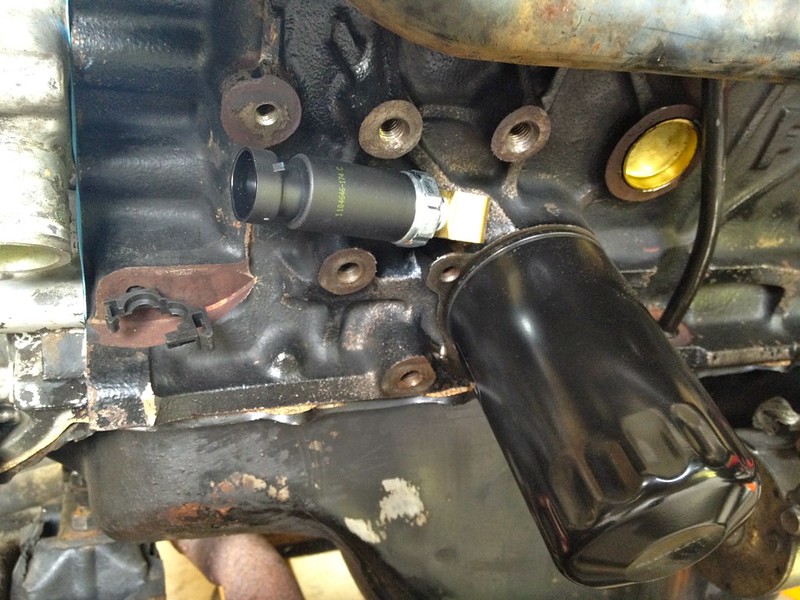
I installed an '88 Oil Pressure sender, instead of the earlier style with a tube up to a top-mount sender. This eliminates the degradation of the sensor from rain water damage, and is a cleanlier installation. I used a 45 degree angled fitting to get the sender to sit parallel to the side of the block, which allows clearance for the air conditioning compressor. This process is outlined in a 1988 Technical Service Bulletin. I bought the '88 oil pressure sender and new pigtail wiring from Autozone. I pulled the three wires back through the harness and out of the sheathing to get it down to this spot. Overall, another nice change. The two bosses between the sender and the oil filter are 2/3rds of the bosses on the 2.8. This is why you need to do something with the torque strut and A/C bracket. Also, note the larger than stock oil filter. You can get a filter for later 60 Degree V6's that is almost twice the capacity of the stock 2.8 part. Same diameter, same threads, just taller. Holds more oil, gives you longer filter life. Pair one of these with synthetic oil, and you can go 6000-7000 miles between changes and maintain an internally clean engine.
[This message has been edited by ManMadeChickens (edited 03-18-2014).]
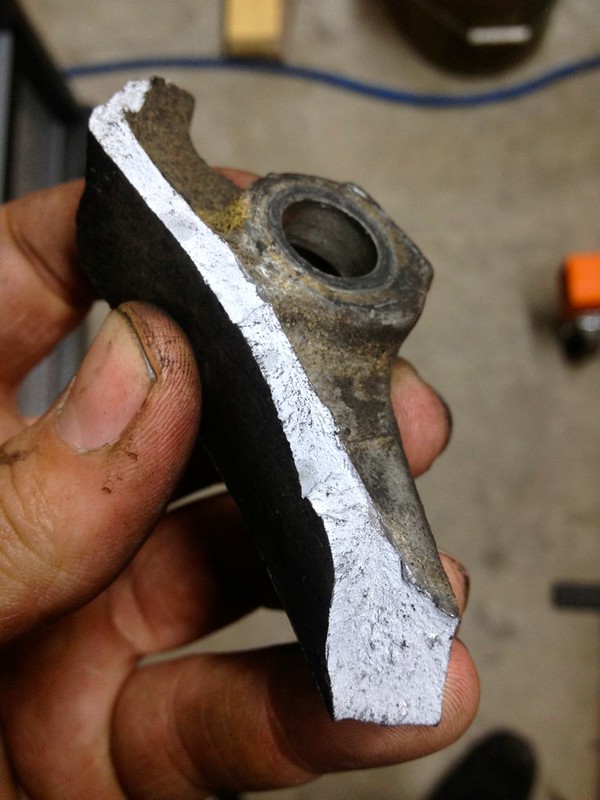
Here's a broken-off section of transmission bell housing. Cast aluminum is apparently very brittle. Damian and I were trying to install the transmission with the aforementioned unnecessary pilot bushing in the end of the crank, which apparently prevents the transmission input shaft from going all the way into the crank. We didn't realize this was why it didn't sit flush, and thought we'd try to cinch it up using the mounting bolts. We knew better, and had always heard that this is a no-no... but tried it anyway. Dumb. This stressed the case in an odd way, and cracked. Thankfully, I had a whole spare 4 speed Muncie just like the one I broke, so we swapped transaxles. Someday I'll either swap case halves on my old one, or have this welded back up so I have a spare again.
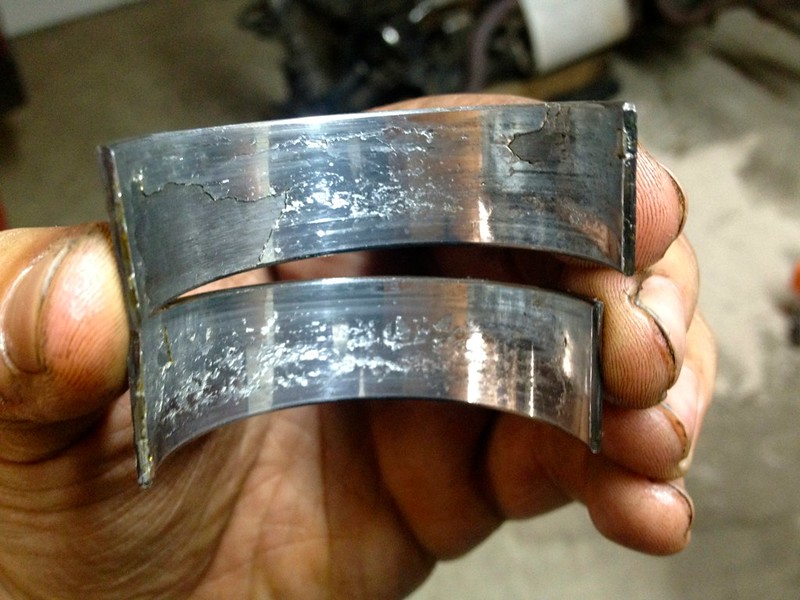
Once the trans case broke, I took a break from installing the new engine to do a Post-mortem on the 2.8. These are the #2 connecting rod bearings, with the two halves of rod bearing spun 90 degrees off normal. That's what was causing my engine noise. You can see how the bearings have grooves cut in their backs from spinning in their caps. Bad.
Inner surface of #2 rod bearings. WOW. These are totally mangled. Check out how the upper one is shedding layers of material, and how the bottom one is pitting. Totally crazy. This is as-pulled. The metallic flakes I was pulling out of the oil pan were the layers of that top bearing. Sad.
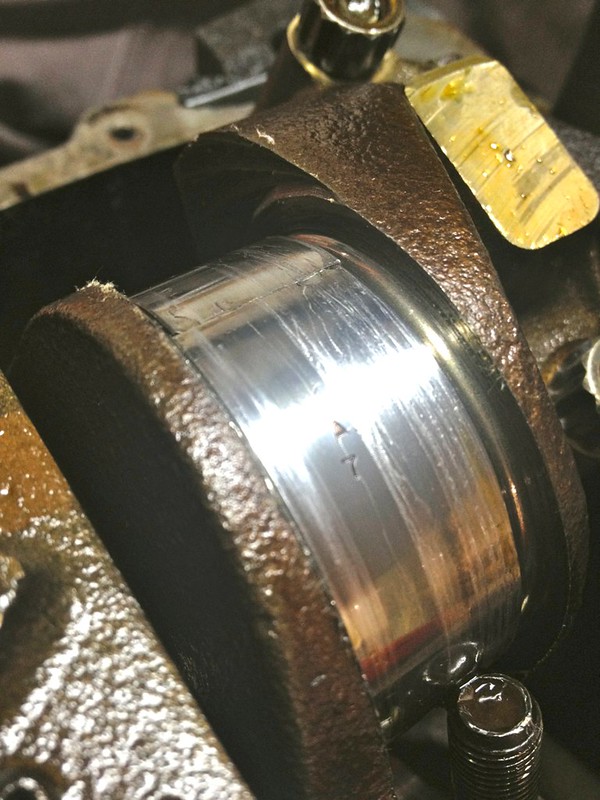
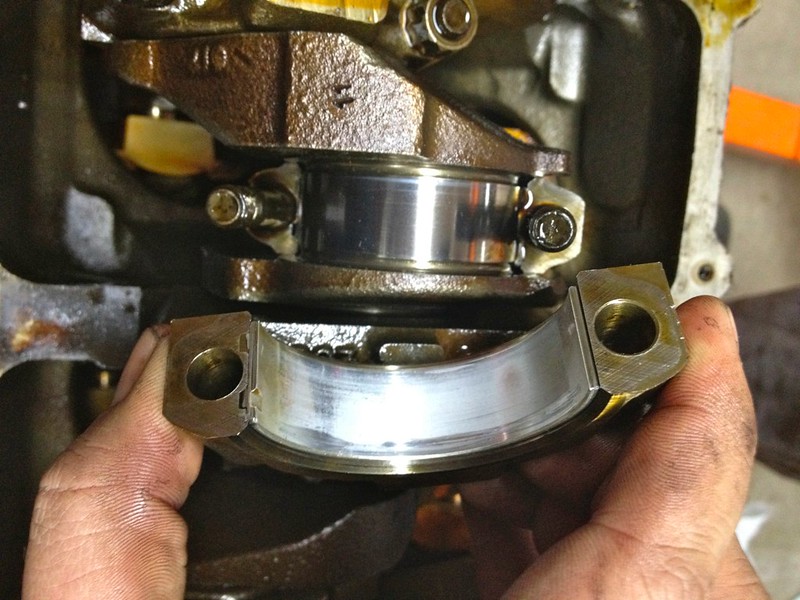
This is what a perfectly happy, normal, well-maintained rod bearing is supposed to look like. 5 of the 6 cylinder's bearings looked like this- minimal and normal wear after 150,000 miles. It's a shame one rod bearing had to go and ruin my motor.
Transmission replaced, everything set back in place. Next step, back in the car!
[This message has been edited by ManMadeChickens (edited 03-18-2014).]
DefEddie - Thanks for the praise. It's running on the 2.8 computer and tune for now, just because I need the car back. My plan is eventually get it on a 7730, so I can use my Dad's chip burner and make a much better tune for it. Even with the limitations of the stock management, it's a lot peppier, with a huge gain in low and mid torque. 4th gear pulls are completely possible now!
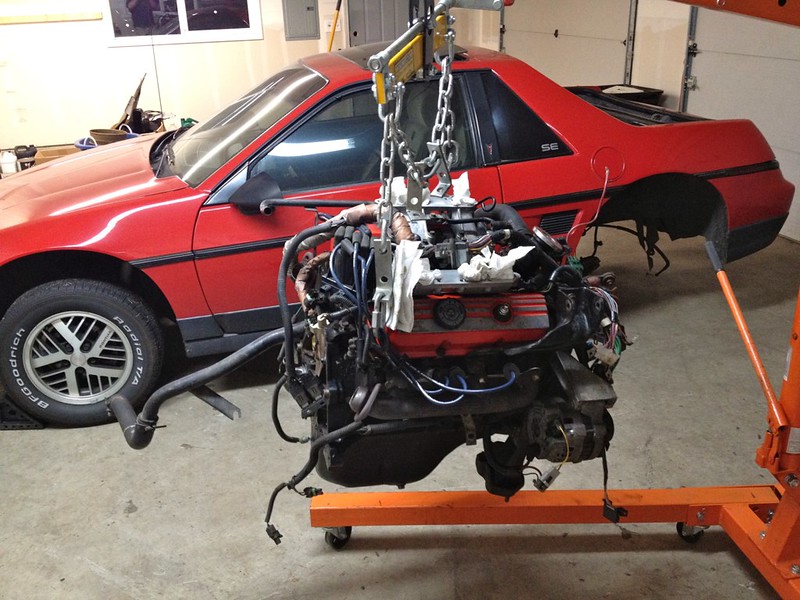
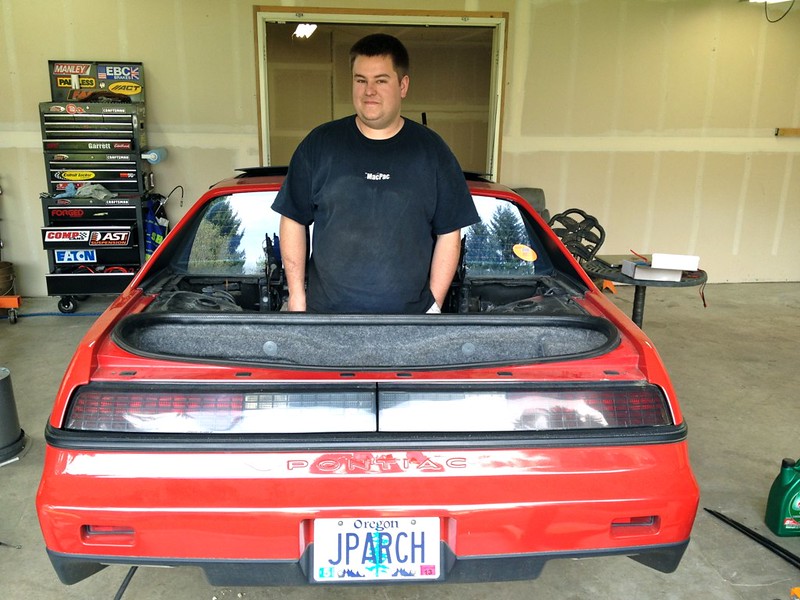
Obligatory "standing in the engine bay" shot. I was already in there installing Rodney's shift cable end link repair parts, so I had to get the photo.
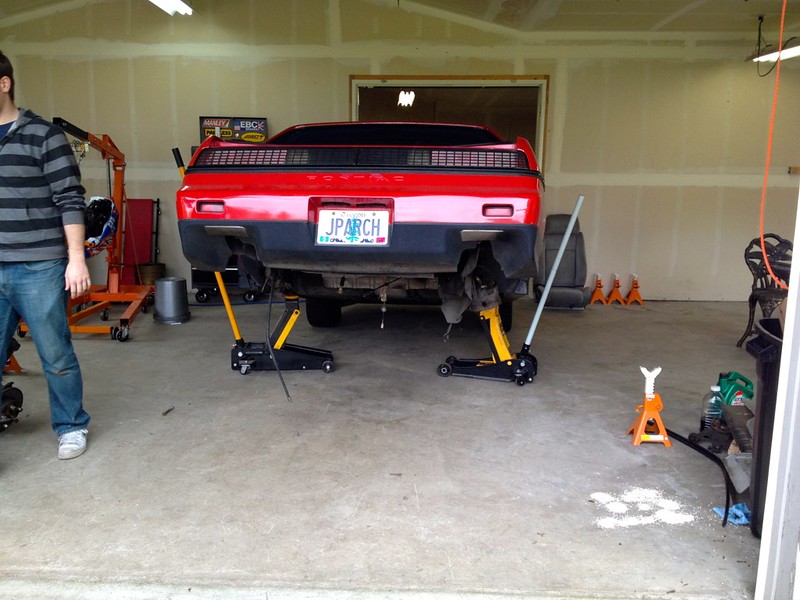
Going UP!
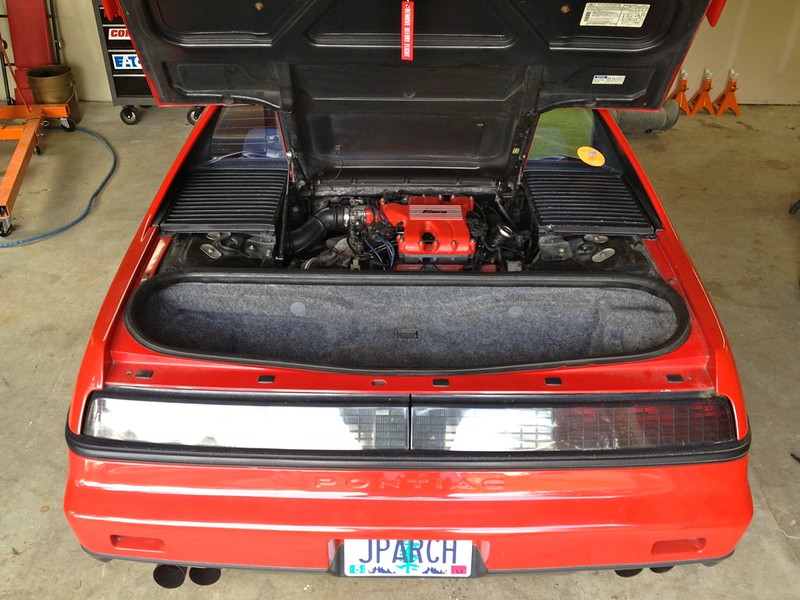
Everything back together, this is the result:
I pre-primed the oiling system when everything was apart, so it wouldn't starve at first-start. The timing was 180 degrees off, which I was able to change. After that, it started right up. Set the timing close, and got it going. Later on, I was able to crank the timing up to where I wanted it. It idles better after that. Has just the slightest hint of idle lope now. My friends say it's louder than it was before, although I can't tell.
And everything back together.
[This message has been edited by ManMadeChickens (edited 09-19-2012).]
Since then, I've already put 1200 miles on it in the two weeks I've had it back together. I broke it in on Shell Rotella, with a bottle of ZDDP additive. After 250 miles of getting the rings seated, I changed it over to Mobil 1 10W-30 with the ZDDP additive to help protect the flat tappet lifters. It's very noticeably better on the throttle than the 2.8, and has awesome torque. Mileage is about the same, perhaps 1 MPG less on average so far. Hard to tell if that's the bigger engine, or the fact that it's still pretty tight and "fresh."
Once it's fully broken in, I'm gonna take a baseline dyno, to see what it's making. Virtual Engine Dyno software says this build should be at about 195 crank. It was dead-on the stock 140HP figure for a 2.8, so it should be pretty close to that I think. We'll see if I'm making that much with the stock manifolds. After that, a 7730 is in the plan to get a bit better drivability and perhaps some more performance out of it.
[This message has been edited by ManMadeChickens (edited 05-01-2012).]
Any chance of getting some part numbers posted up for the engine parts you used?
------------------ "There is no more formidable adversary than one who perceives he has nothing to lose." - Gen. George S. Patton http://www.flowbenchtech.com
Sure, I'll do my best with the access to the receipts and such I have online. When I get back home to my parent's place, I can try to get anything remaining, as all the boxes and hard copy receipts are there.
As far as the Fel-Pro gaskets are concerned, I totally could have done that more efficiently. I mistakenly ordered an engine gasket set for the 3.4 Camaro motor, which has different manifolds, different oil pan and different front timing cover. For that, Get a Fiero engine Head gasket kit. Then, all you'll need is a front cover gasket set, which comes with an oil pan gasket, because of the shape of the Fiero oil pan. I bought so many unneeded gaskets, it's depressing.
As far as the pistons go, they're some no-name brand. The box at home has a bunch of industry part interchange numbers I can get for you later. The basic thing to know here is that they are 1991-1995 GM 3.4L DOHC (sometimes called Twin Dual Cam) pistons. They're an OEM design, so nothing too fancy. That's why I chose them- I thought that they're something that should be somewhat readily available. I did end up having a hard time finding anyone that could get me some.
The starter is supposedly a 1996 Pontiac Grand Prix 3.4L starter. I find them in the junkyard, so I don't have a part number for you.
My ChumpCar race car on the left, my Daily Driver behind it to the right, My friend Aaron's 1986 SE V6 in front and to the right of that, and then Damian's 1986 "GT" in the far right bay. Counting those four, and my Dad's that was over a couple times... we had 5 different Fieros at this place while working on mine.
[This message has been edited by ManMadeChickens (edited 03-18-2014).]
Nice writeup. Too bad you didn't have time to do any intake and head work. I might have missed if you removed the excess casting from the stock exhaust manifolds. Even with the higher compression pistons, I doubt you'll pass 145rwhp. That's what I made with that came using stock 3.4 pistons but had intake, head and exhaust work done. I also used 1.52 roller tipped rockers.
Next time, start with a 3400 roller cam block for a free cam upgrade. No holes to drill. Better oil pan. Less friction. I put down 187rwhp with the stock Fiero computer.
A nice project and an excellent post. You achieved good results and thanks for sharing them with everyone. The subject that repeatedly comes up with an engine build/replacement such as this among Fiero owners, is the cost for the horsepower, mileage and performance that it returns. If you spent $1000 -$1500 then you did well but if you spent $3000+ then the DIY engine swap starts to become a very attractive alternative. Enjoy the fruits of your labor as you've earned it!
------------------ " THE BLACK PARALYZER" -87GT 3800SC Series III engine, custom ZZP Intercooler setup, 3.4" Pulley, Northstar TB, LS1 MAF, 3" Flotech Afterburner Exhaust, Autolite 104's, MSD wires, Custom CAI, 4T65eHD w. custom axles, HP Tuners VCM Suite. "THE COLUSSUS" 87GT - ALL OUT 3.4L Turbocharged engine, Garrett Hybrid Turbo, MSD ign., modified TH125H " ON THE LOOSE WITHOUT THE JUICE "
Nice work Justin! It was a good project, just wish that darned 2.8 hadn't spun a bearing in the first place. Glad your rollin in the Fiero again and enjoying it. I am slightly embarrassed to be named as a member of the transmission breakage squad... We knew better and everything! Hopefully someone can learn from our stupidity.
When you coming back up so I can get that axle seal squared away?
Lou, I have not yet done anything about the manifolds. That's on the list of things to do now that it's running again. If I could make 150 at the wheels, I'd be very happy. From the sounds of it, that's gonna take some more work. If I had to choose, I would definitely start with a 3x00 bottom end. This 3.4 was a great deal I couldn't pass up. Saved me a lot of money doing it this way.
Dennis, I think I'm right about $1500 for this build. Maybe a bit more after the oil pressure sender parts and the multiple gaskets... but it can't be by much. Getting even a small bump in power over a stock 3.4 for a few hundred less than the cost of a stock 3.4 crate motor is totally worth it in my book. I'm certainly enjoying the result, I've put almost 600 miles a week on it since it's been back together.
Damian- fear not, brother. Like I said before, if I had reservations myself, I wouldn't have gone with that strategy. I'm to blame, as I went along with it, and I was actually the one wrenching it when it broke. You gave me that spare 4 speed originally anyhow, so I'm really not at all worried about it. This one drives as good or better than mine anyhow. I might be up this coming weekend Saturday evening through Sunday night. How's that looking for you? The axle seal is apparently only at it's worst at highway speed or more. Around town it doesn't seem to be such a problem.
The cam was kinda pointless without an intake upgrade, if that's the stock 2.8 intake system. It really chokes a 3.4 with a stock cam, let alone a bigger cam. You will see a large improvement with a better intake.
[This message has been edited by mattwa (edited 05-01-2012).]
The cam was kinda pointless without an intake upgrade, if that's the stock 2.8 intake system. It really chokes a 3.4 with a stock cam, let alone a bigger cam. You will see a large improvement with a better intake.
This will take this off-topic but I think this could be/has been highly debated. It's all going to depend on what your end goal of your engine build is. Not everyone wants or needs to run at max rpm's for peak HP. BUT, CFM and HP numbers do sell parts! This is a pretty hot topic for anyone who does cylinder heads for a living as they combat this "myth" the magazines tout as they sell advertising space in articles.
A big ole hole of an intake might move alot of CFM but it needs RPM to do that, it will be slow and lazy to move the air at lower rpm's. A cylinder sees open and close ramps twice as opposed to peak lift which happens once. So the faster you move the air on open and closing will make a difference in volumetric efficiency of your engine. Smaller ports & intake runners will aid in velocity and this will/can fill a cylinder with more mixture at lower rpm's and make more torque especially on a high compression motor. To some it's not always about peak HP
I doubt many here have actually studied the velocities within the intake runners and ports to maximize what can be done with stock parts? Not just grinding away and making it larger. As you are aware I have actually started showing those numbers in a past post and have already disproved some of the "wife's tales" about what is happening in the stock intake.
Just getting in an intake/port and making it bigger is not always the answer. Personally, I am not of the mind-set to bolt on something bigger until I know what I have now is not at it's max potential for some it works for others we want to know the how's and why's . . . it's about the journey along the way
At some point in the very near future I plan on flow-testing a stock 2.8 head and actually seeing what can be gained in cfm and velocity as well as some wet-flow testing.
------------------ "There is no more formidable adversary than one who perceives he has nothing to lose." - Gen. George S. Patton http://www.flowbenchtech.com
I highly doubt removing the restriction on the TB neck of the stock upper 2.8 intake will effect low RPM operation, yet it will very much improve CFM where this cam wants to go.
I agree that there would be power gained by going to a different intake, yes. However, the effects of this cam aren't entirely lost- this motor has more top end pull than any stock cammed 3.4 I've driven/rode in. Most 3.4's fall flat on their face at anything more than about 4800 RPM or so.
I have three spare upper intake manifolds, and I have been toying around with having some of my friends with the necessary skill and tools to open up the bottom of the TB neck, and get some more volume on the underside.
Awesome Rebuild. A quick tip for you now that it's done.
Run a Zinc additive all the time in your oil. you have stronger springs which will wear a flat tappet cam faster, you are putting a lot more pressure on the cam lobes so you NEED the added zinc. No matter what oil you run add some in every oil change to make sure you don't need to replace that cam.
Absolutely. I'm a firm believer in adding back the ZDDP that's been taken out of modern oil. About 4 years ago, my brother flattened a cam in a completely stock, relatively low miles 3.1 in a Grand Prix. Taught us that lesson!
So I had the privilege of driving this car last nIght! Let's just say it does not fail to put a smile on my face. It runs very well. Smooth acceleration but boy does it pull! Definitely more ballsy than any 2.8 I've driven.
It may not rev to the moon but the midrange torque sets you back and the car just goes. That's where almost all your driving happens anyway. Great engine for the car! Good work Justin!
Fixed all the broken links to the pics, after a hosting change.
I'll also take the time to note that I've put about 6000 miles on this motor so far, and everything is normal so far. Still puts a big grin on my face when I drop a gear and nail the gas.


 ...
...


