Well I searched alot to get all the information to do my do it yourself coil-over conversion to the rear of my 1984 Indy with KYB struts. Like many, my choice was two fold, both to lower the car & to be able to run a wider rear tire/wheel combo.
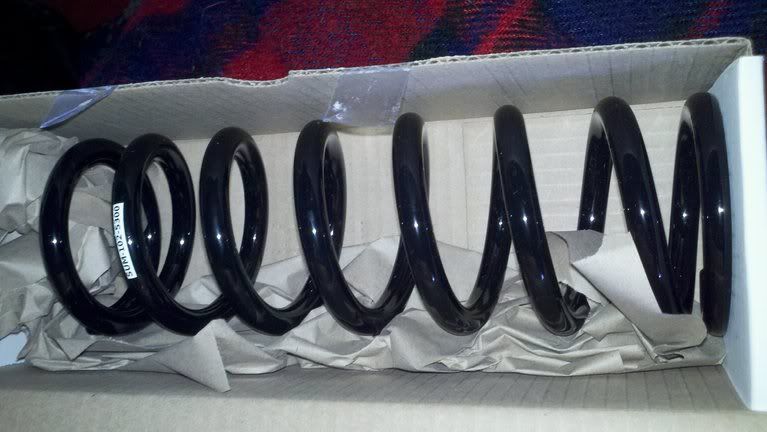
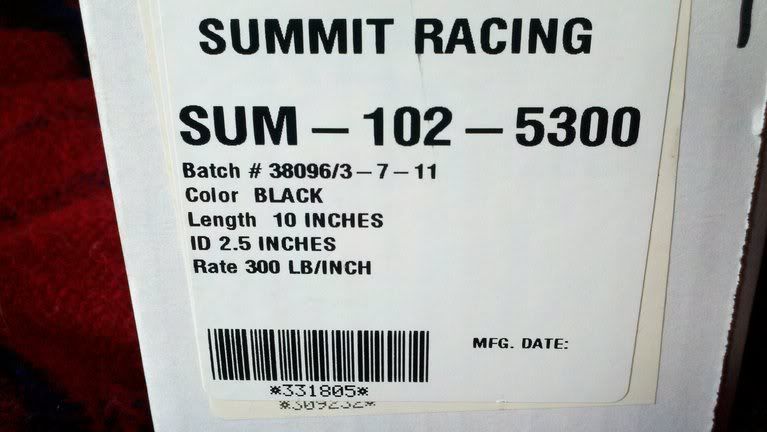
The first hurtle was to decide on the spring weight and length. I was debating b/w the 10 in and 12in as well as the 300Lb and 325Lb. Due to other members feedback and results in searching I learned to be able to run the wheel/tire option I wanted I needed to maximize my clearance. So I opted to go with a 10in spring to be sure the spring prech would remain as high as was possible and yet remain safe (coil bind and spring unseating while driving) Another member used wheels with a similar final offset placement in the wheel well and hit his perch with the tire when he used a 12inch spring. So 10in was the recommended fix for this. The spring weight... well that was a cost decision. I was able to get springs that were in stock and cheaper at my local summit by going with a summit 2.50 inside diameter spring in the 300LB. They were a nice black too! ($75 for the pair.) Figured I'm using the stock Duke and since its an INDY, I probably will not deviate much from this platform, motor wise, to worry about added weight in the rear to justify a heavier spring weight.
Next was the sleeve length and placement. I could go with a 5inch sleeve and keep a small part of the factory placed perch to seat the sleeve on, or I could remove the factory perch completely and let the sleeve rest on the bottom of the strut. After much deliberating I opted for the 7 inch sleeve resting on the bottom of the strut for strength and to cover more of the strut shaft for asthetics, as well as greater adjustability with my lowering pereferances. So I fought with Summit to try to get a sleeve from one of their vendors that I would NOT have to pay shipping on and was $10 cheaper then Coleman's, but for some reason they could not get the parts. So I went with Coleman Racing sleeves, the ID diameter was a clear 2.04 that would fit on my KYBs. Jegs was a bit cheaper on shipping , so I opted to buy from them. I thought about a 8inch sleeve for further asthetics, but time to get the part became a factor when Jegs said they had the 7in sleeve in stock, but the 8 in had a 6+ day wait. Ordered coleman part Number 420-701 (7in 2.04ID) FYI : Jegs part number is 193-420-701 ($101 shipped for the pair)
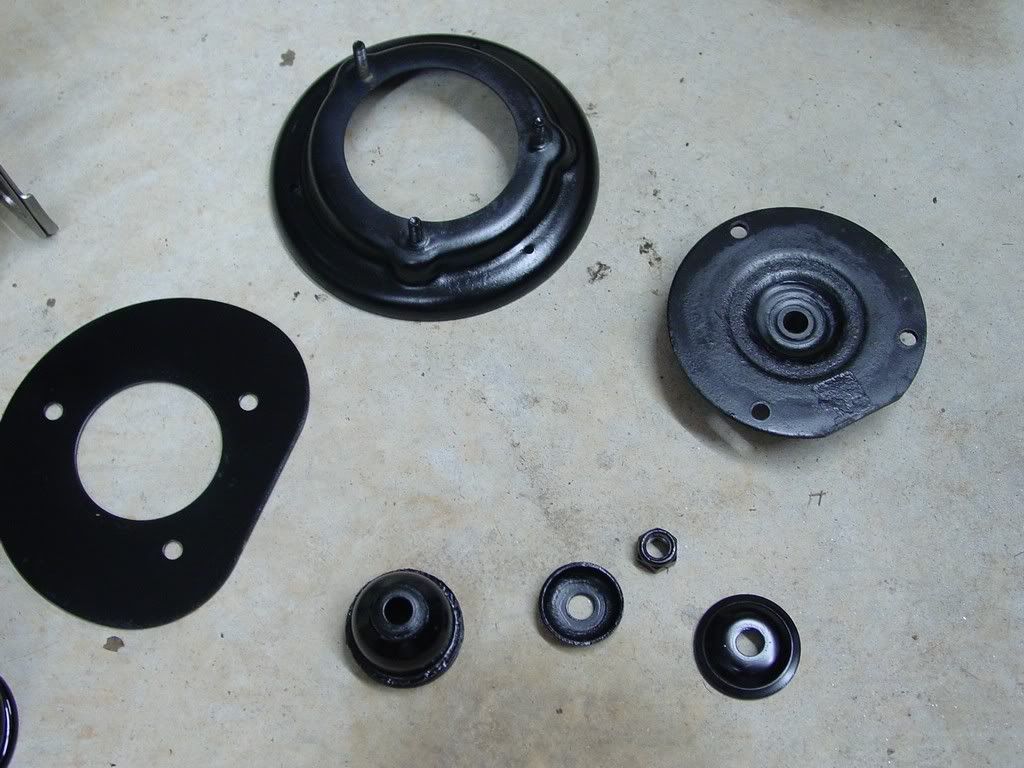
So I collected all the parts together and waited for time to begin.... I also noticed my factroy dust boots were missing, so up to the attic I went to locate them. My packrat side will never let something like this get tossed. Low and behold I found them!
Here they are with the rest of the parts
The sleeves came in Friday, but due to a dock and seawall renovation, things are slowed down. This renovation may interupt my process through this build, but I will be detailing my process through this as it might help someone down the line with their conversion. Many pics to come... this is how I learn... by seeing, so it might lend a hand.
Thank you to Fierohoho as my direction came from his DIY thread!
FYI: You will see some editing as I go along on this thread. I will be making corrections or clarifying things as I go for a better more informative thread
****UPDATE****
Darth Fiero did his own coil over mod and had this to add to my parts links on 08-04-2014 08:44 PM regarding what parts he used!
quote
Originally posted by Darth Fiero:
....The Coleman sleeve and adjuster kits mentioned in the OP aren't $101 for the pair anymore (they are now $137.98 for the pair) and they aren't always in stock at Jeg's. Instead, I found some Allstar ALL64143 sleeve kits from Amazon.com for $38.99 each (77.98 for the pair) which will fit over the KYB struts if you modify the sleeves themselves a bit (there are some raised portions inside the sleeve that need to be sanded down a bit - this can be done with a dremel and sandpaper roll).
I bought the 10" tall 325lb Summit springs for my Fiero ($83.94 for the pair).
I also bought some Energy Suspension 9.6118R upper spring pads (install between the spring and the upper strut plate) for $10.81 for the pair from Amazon.com as well.
You'll need to remove the stock jounce bumper (bump stop limiter) from your stock Fiero strut boots if you want to reuse them since the Fiero strut boots won't fit inside the 2.5" ID coil-over springs. If you want strut boots, the only thing I've found that will fit are the Bilstein "Service-7" blue strut boots sold here: http://www.maximummotorspor...over-strut-P975.aspx, but I don't think the OE Fiero jounce bumpers will fit inside these strut boots (but you can get some aftermarket ones if you want them).
My Fiero has a 3800 Series 2 Turbocharged V6 and 4T60-E automatic trans. The 325 lb rate springs seem to be a very good match for it offering much improved handling without hardly any loss of ride quality over a stock Fiero GT spring. I will admit the stock Fiero GT rear springs I was using seemed overloaded with the increased weight of my powertrain, which was producing an instability issue during hard cornering and evasive maneuvers at highway speeds.
-ryan
[This message has been edited by redraif (edited 09-15-2014).]
Disclaimer: I learned as I went along during this build, using the guidance of those that have gone before and the knowledge I have from other cars. I am not a mechanic and have no formal training. Do all work on your own car at your own risk. Don't point at me if you screw up or get hurt... LOL! Things may not go as simple as they were for me! I will note the good and the bad I come across it in my build.
The parts on my car have been apart before and my car lives in the South, so take that into account if your car is bone stock or lives up North. PB Blaster is your friend for sticky bolts and nuts!
Lets get started... Picture time... LOL!
Safety tip! Block the front wheels so the Fiero does not run away! A proper wheel chock is the way to go!
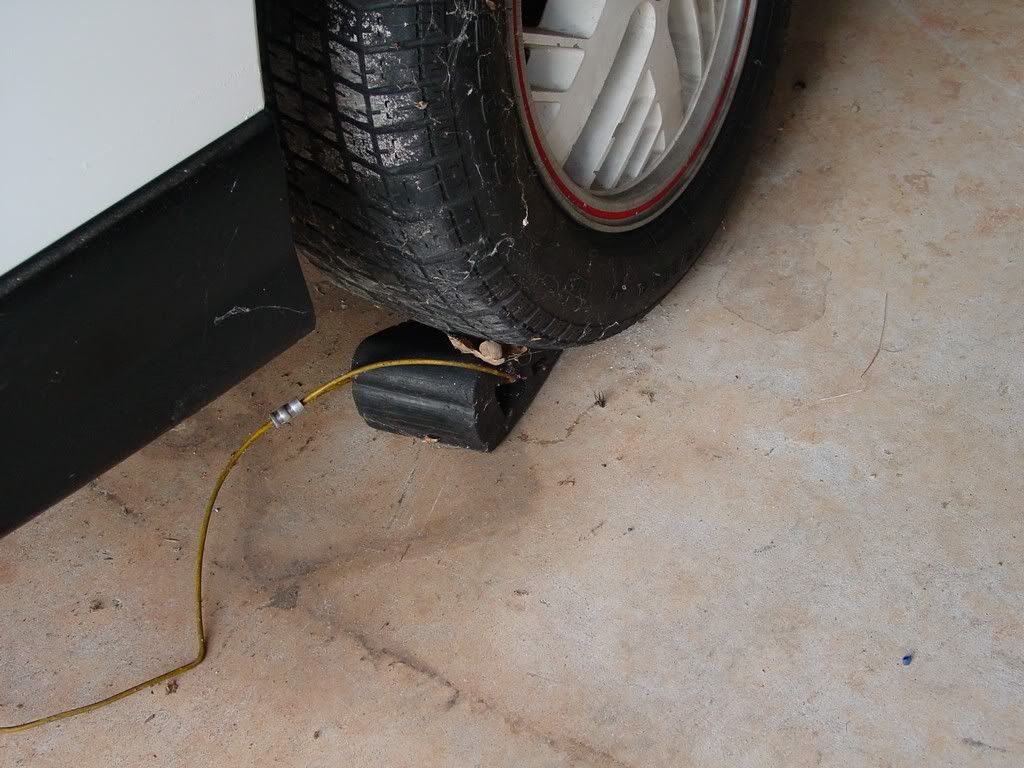
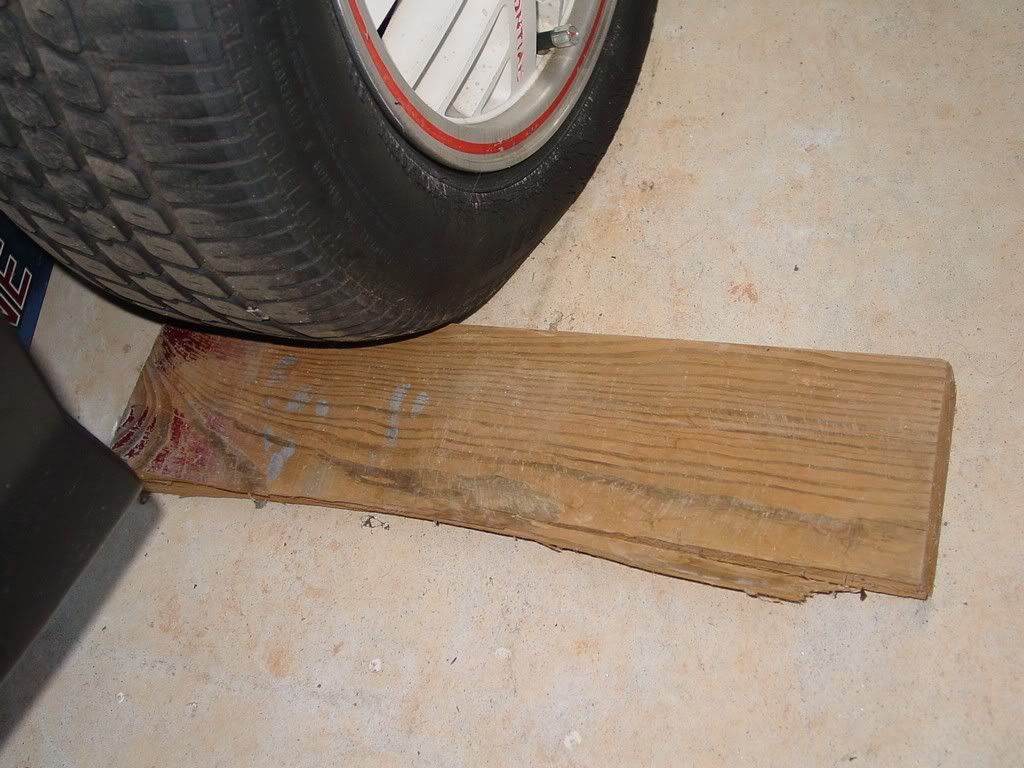
My car sits pretty low due to the small tires (takeoffs from my 87 Nissan Pulsar). So for extra clearance I use this little ramp my dad made years ago for the snapper mower. This gives me enough clearance to get under the car safely with the jack.
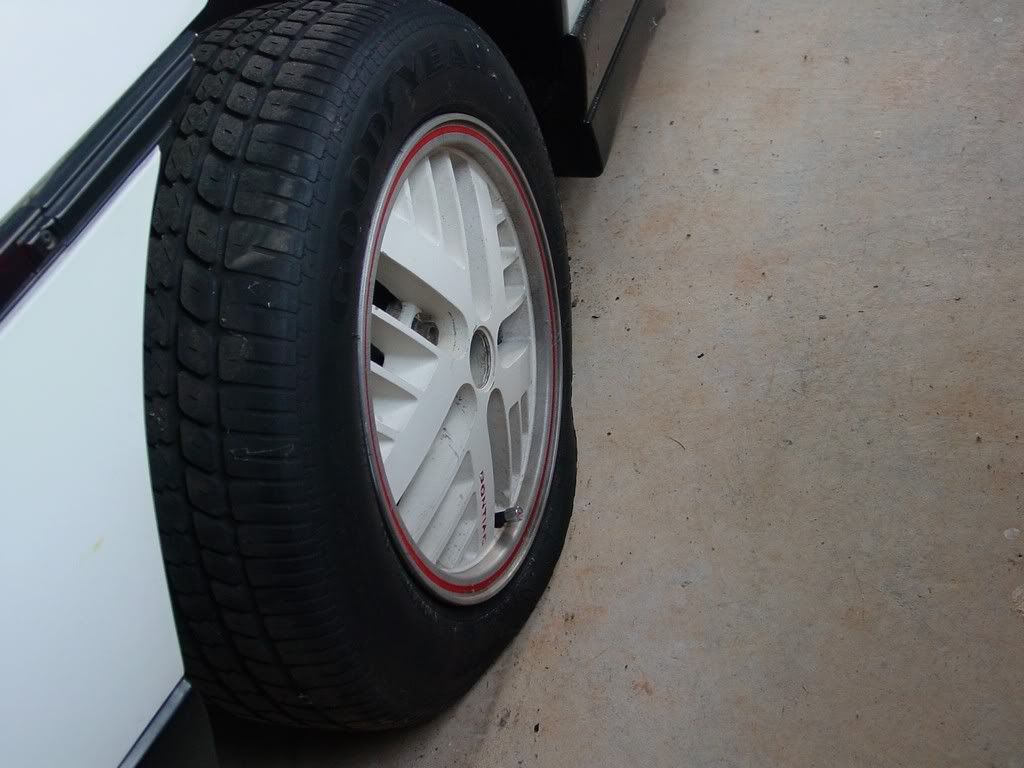
On a side note: Check out my dry rotted tire that refuses to hold air... UGH! This is the reason I used the wooden ramp on the other side. It did not help at all on this side with the tire so flat. The ramp on the other side gives me just enough body to ground clearance to get my low profile jack in on this side.
My poor car had been sitting so long the lugs were not wanting to budge without moving the whole car, so I blocked the back with a scrap of wood... It did the trick.
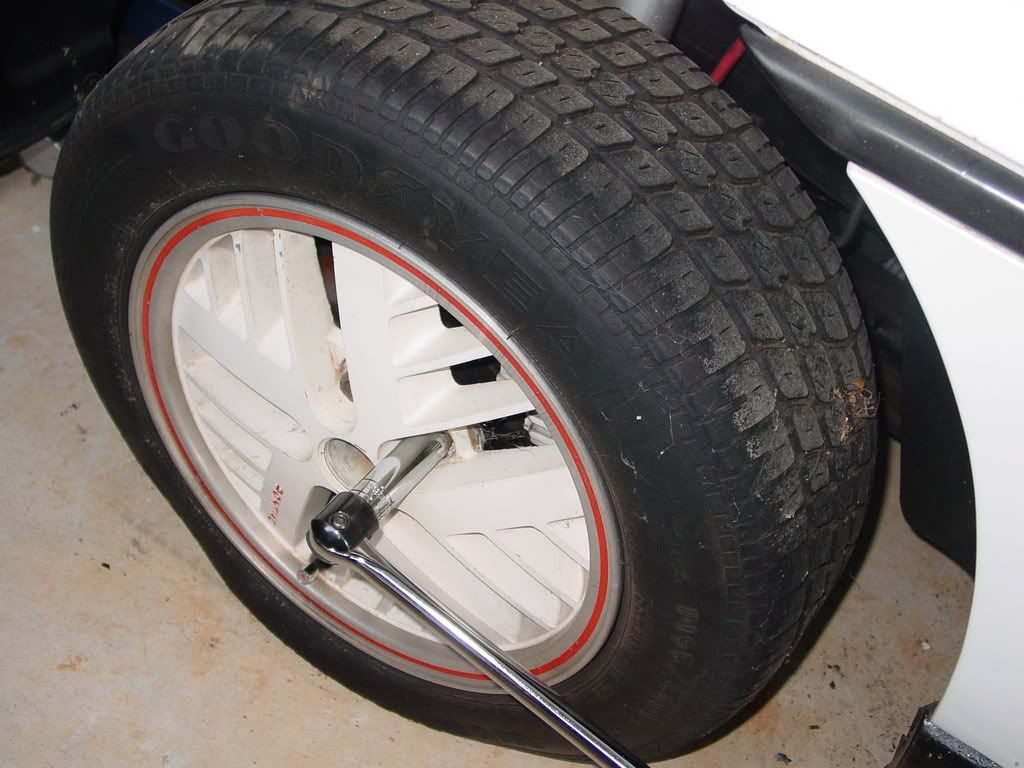
Breaking the lugs loose... yes I needed that huge breaker bar... LOL! You always want to do the intitial lug breaking loose while the car has it full weight on the ground. Once its up in the air the rim is too free to spin and breaking lugs loose can be a real PITA. If someone will get in and hold the brakes, but I'm not one to advise getting inside a car that is off the ground. But don't remove any of the lug nuts with car on the ground, you can damage the lug studs.
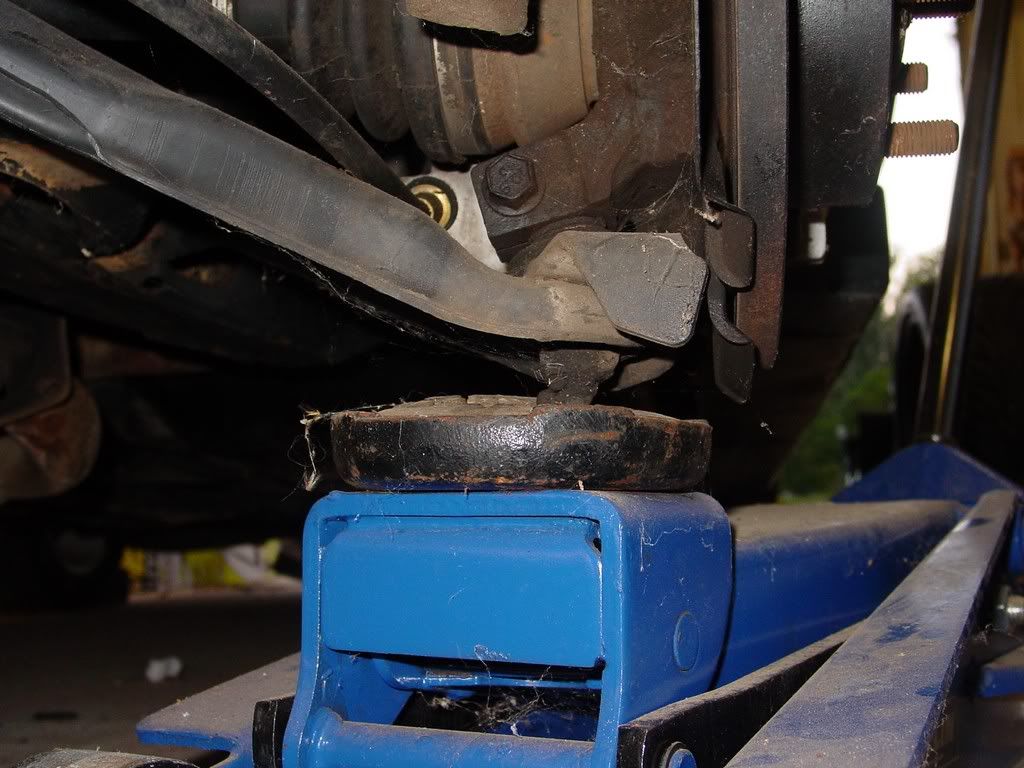
With the lugs broke loose, I slipped my jack in to lift the little one up! I used the cradle to lift the car. Just always make sure you are on square and aren't pinching anything like exhaust or brake cables. FYI: I don't trust jack points with real jacks. They don't have the recessed the factory jacks have. But I will not do any serious work under the car with a scissor jack! I ahve had these twist and collapse if the ground is not prefectly level. Instead, I always jack my cars up at the frame, front cross members, or rear chunk (front engine rwd cars). With really low cars that sometimes means using multiple jacks to get it done, but I have yet to mess a car up doing it this way.
Here we go
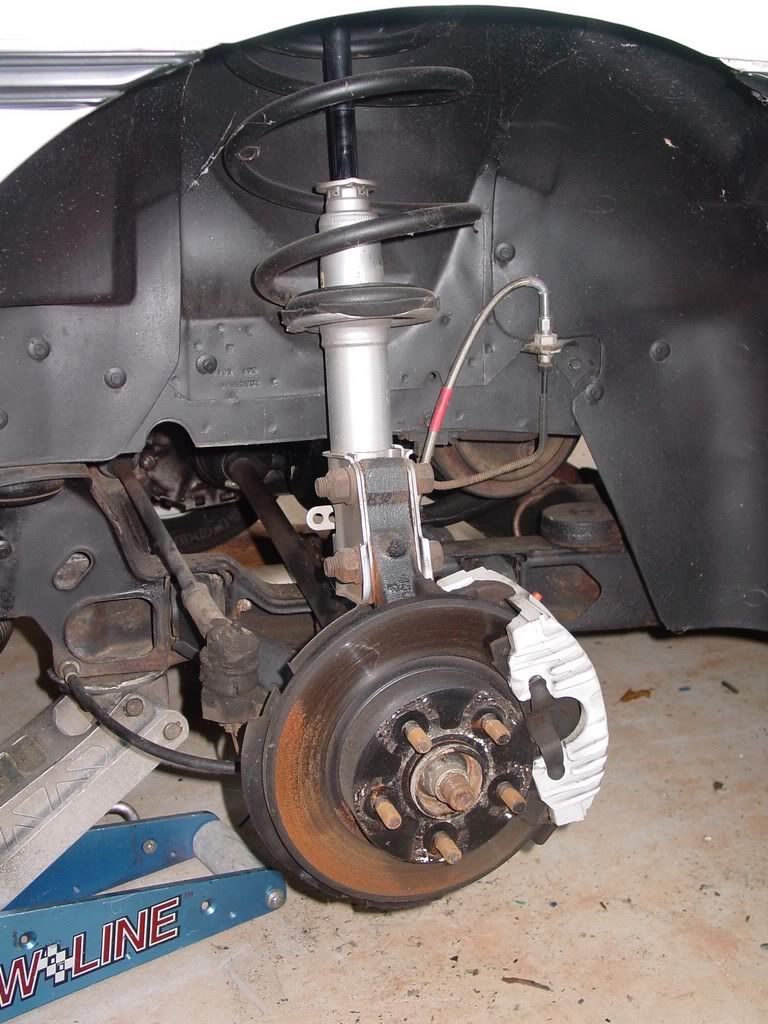
Wheel off... still needs some clean up too... ugh! And to think I cleaned this bad boy up once before. Guess I will be tackling it again as part of this build.
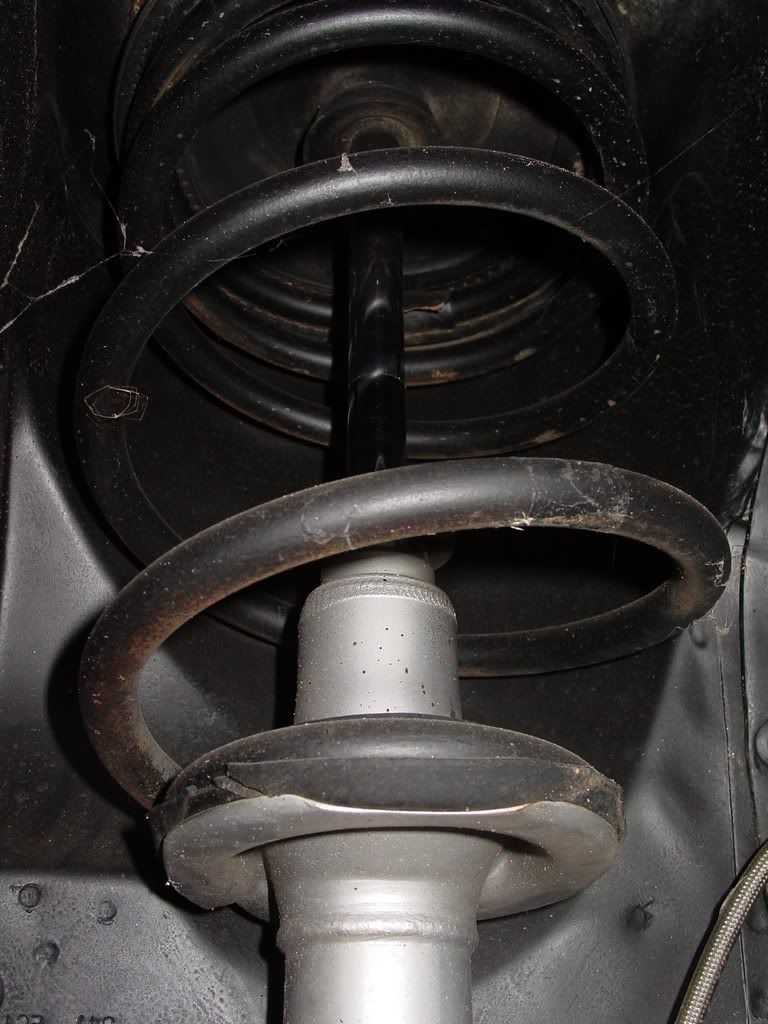
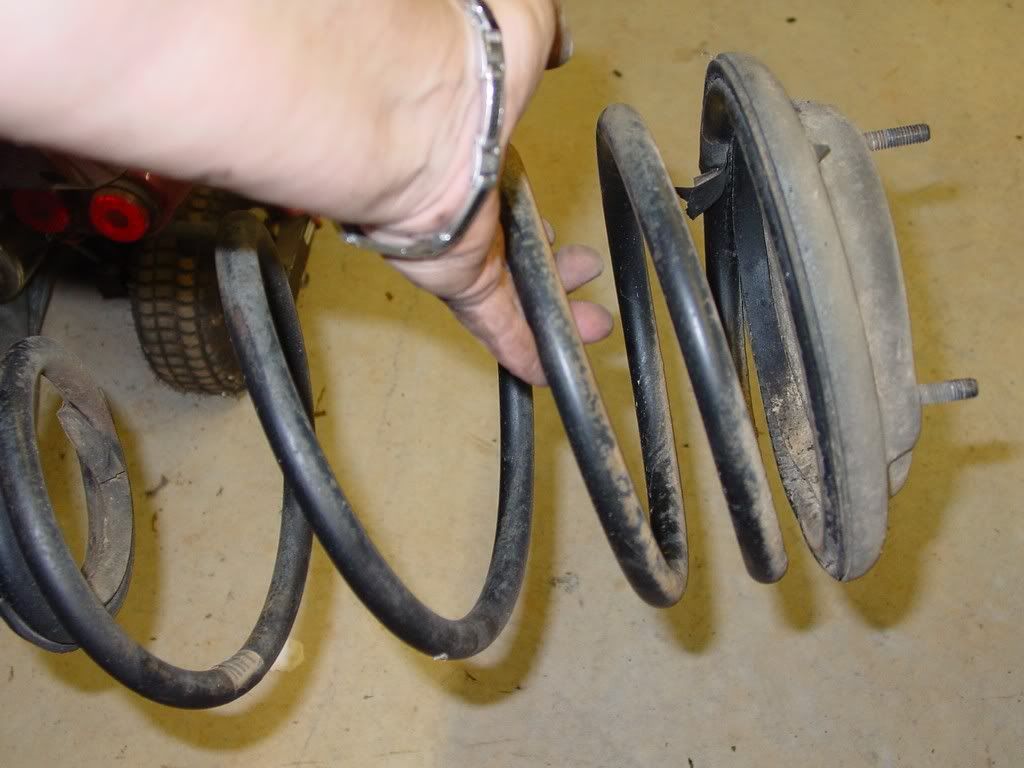
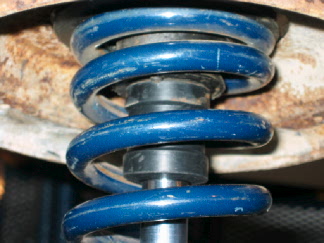
Shot of the stock coil spring... This thing is massive!
[This message has been edited by redraif (edited 09-15-2014).]
****FYI: The parts go back in the same orientation that they came off! So watch close as you take things apart and mark things if you need to to keep up with it!****
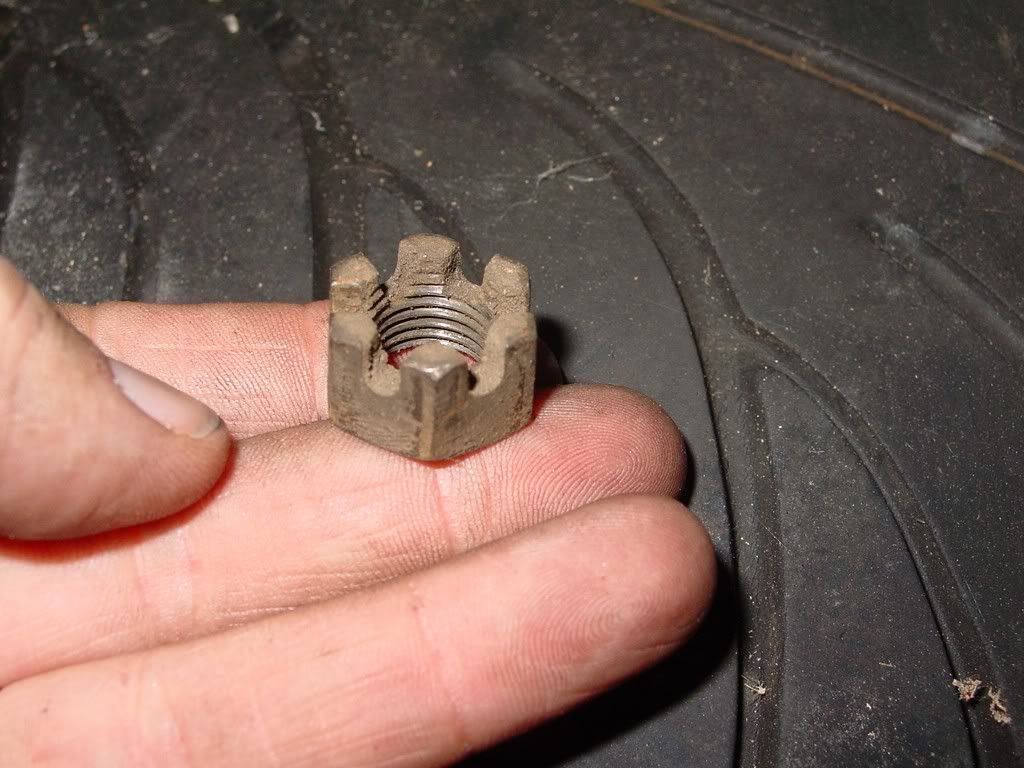
Just to be safe I removed the castle nut on the tierod end to avoid damaging it...just in case there was any stress put on it during the strut removal.
First straighten the cotter pin out and then pull the pin
The cotter pin is there to keep the castle nut from walking off.
The pin goes through this hole and slips b/w the gaps in the nut... keeping it locked in place.
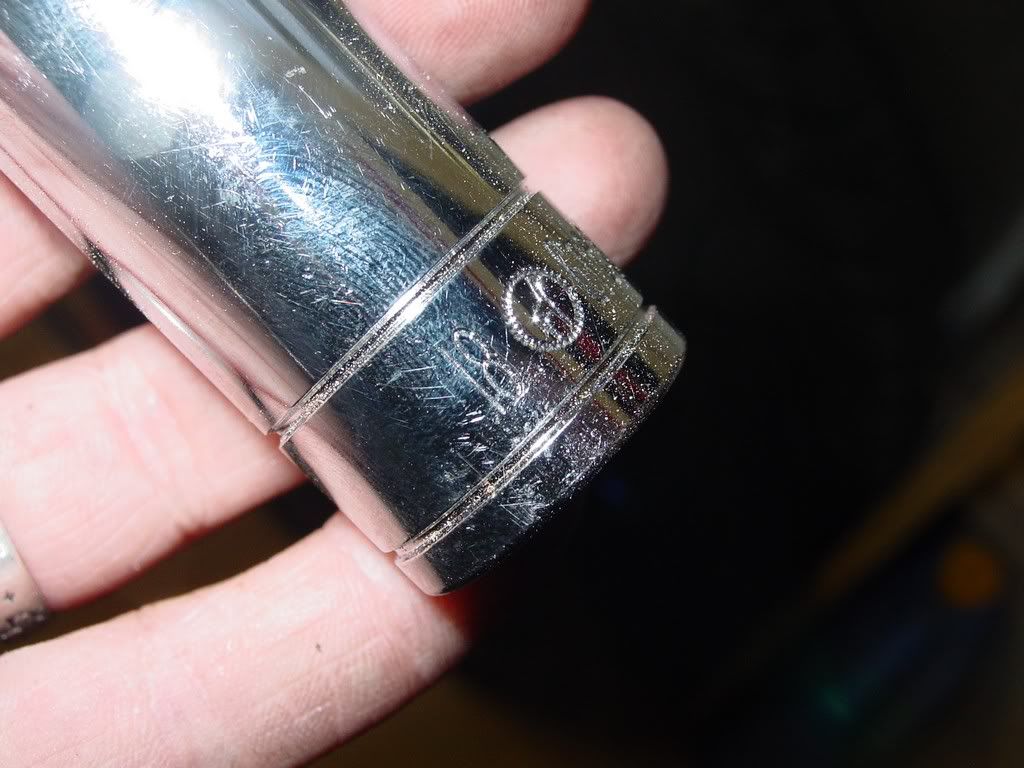
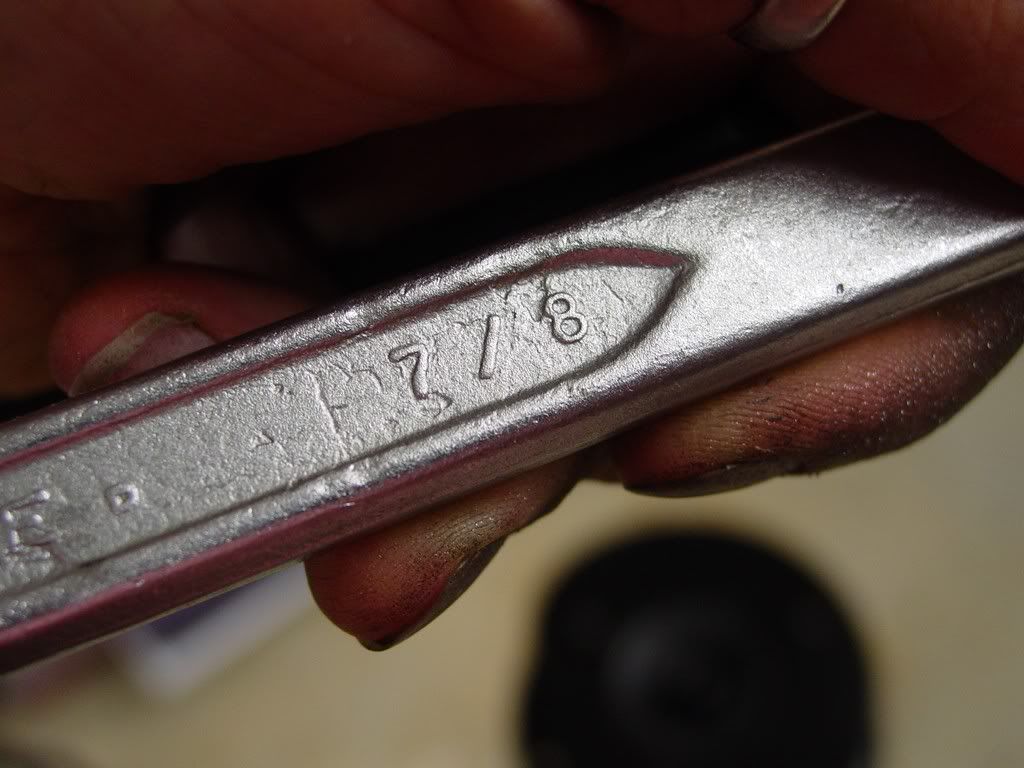
its an 18 btw
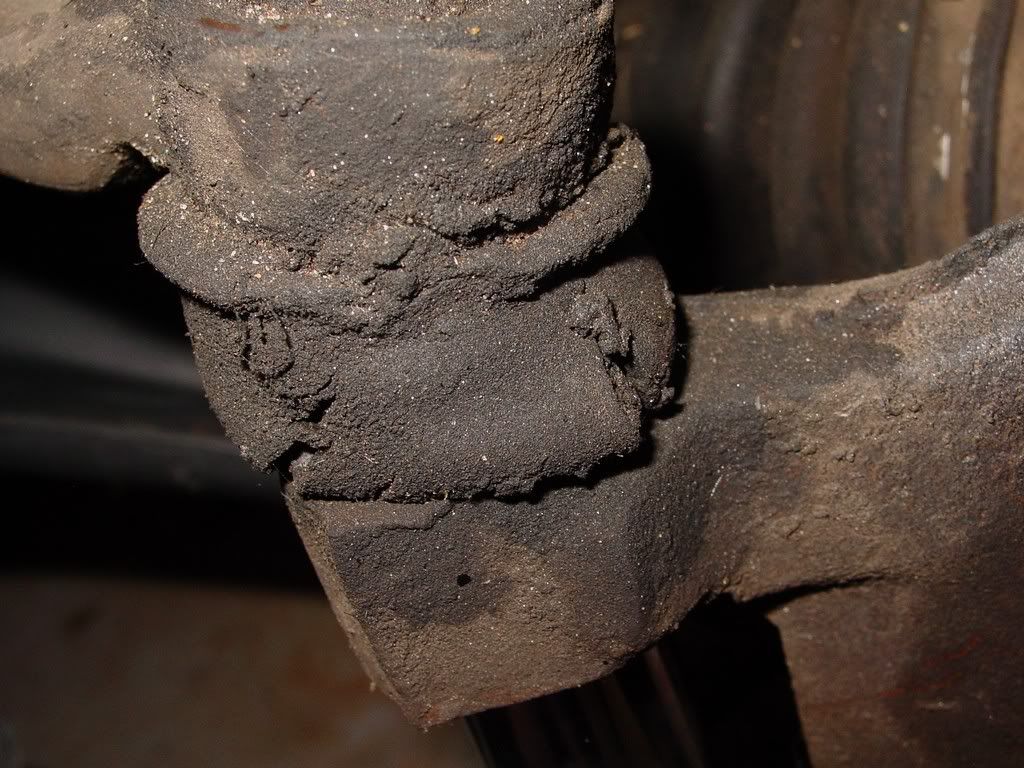
Geez the boot is a mess and needs replacing
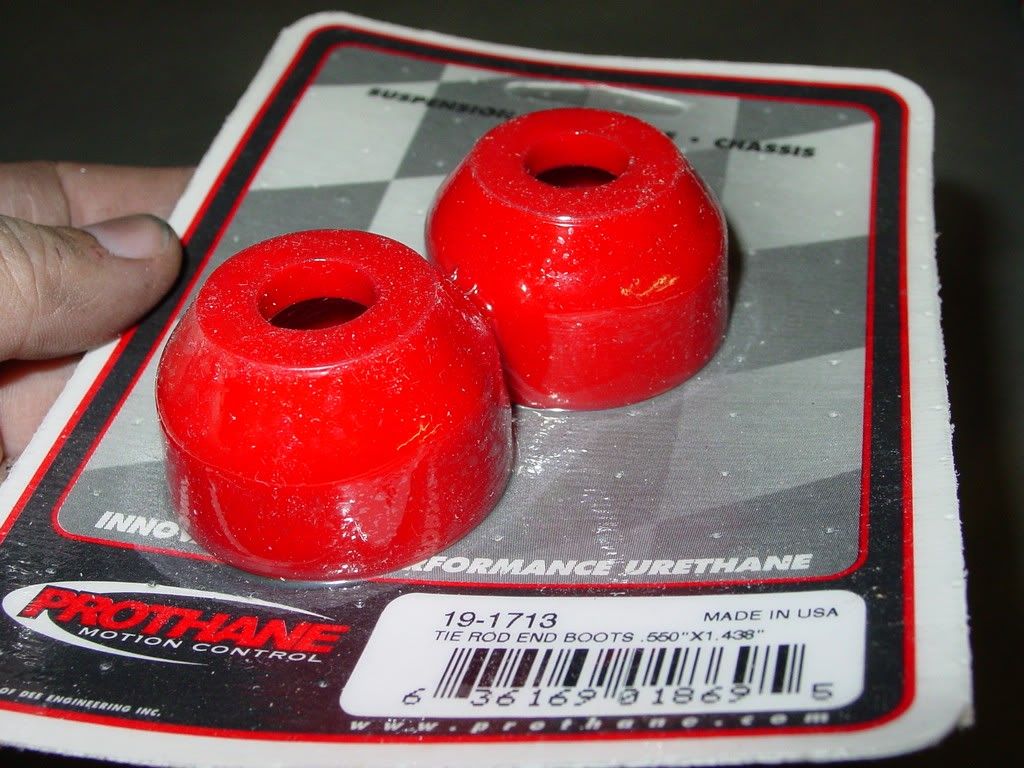
But I thought ahead... have a poly kit to fix er up! Now to get a tierod separator
[This message has been edited by redraif (edited 09-15-2014).]
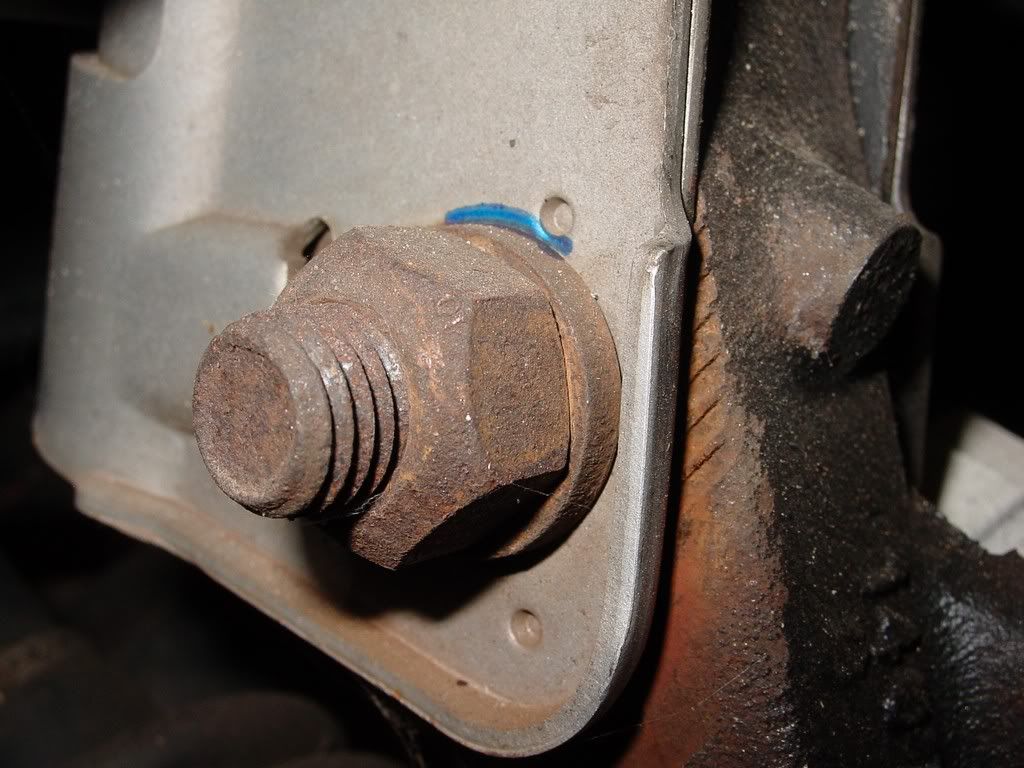
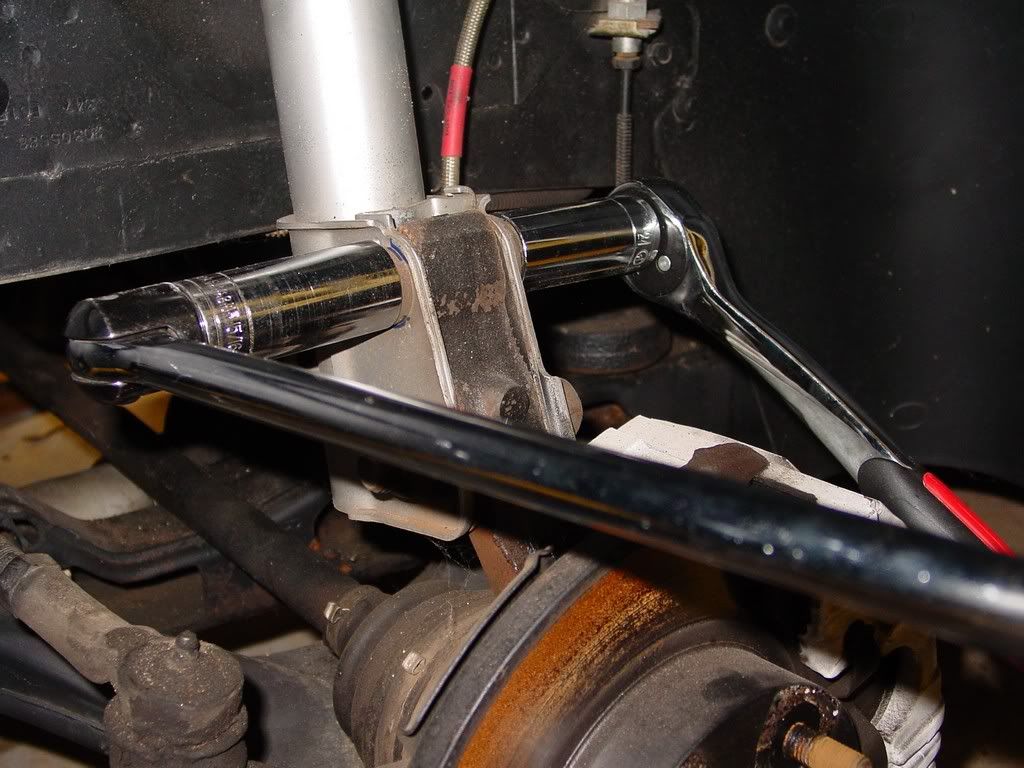
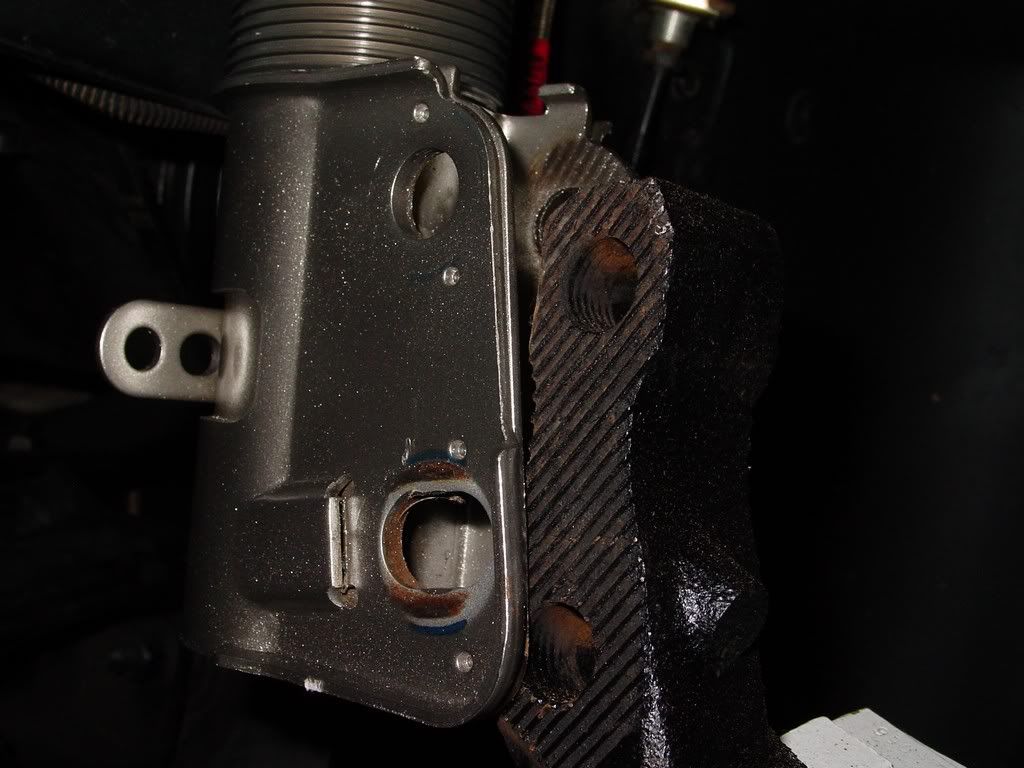
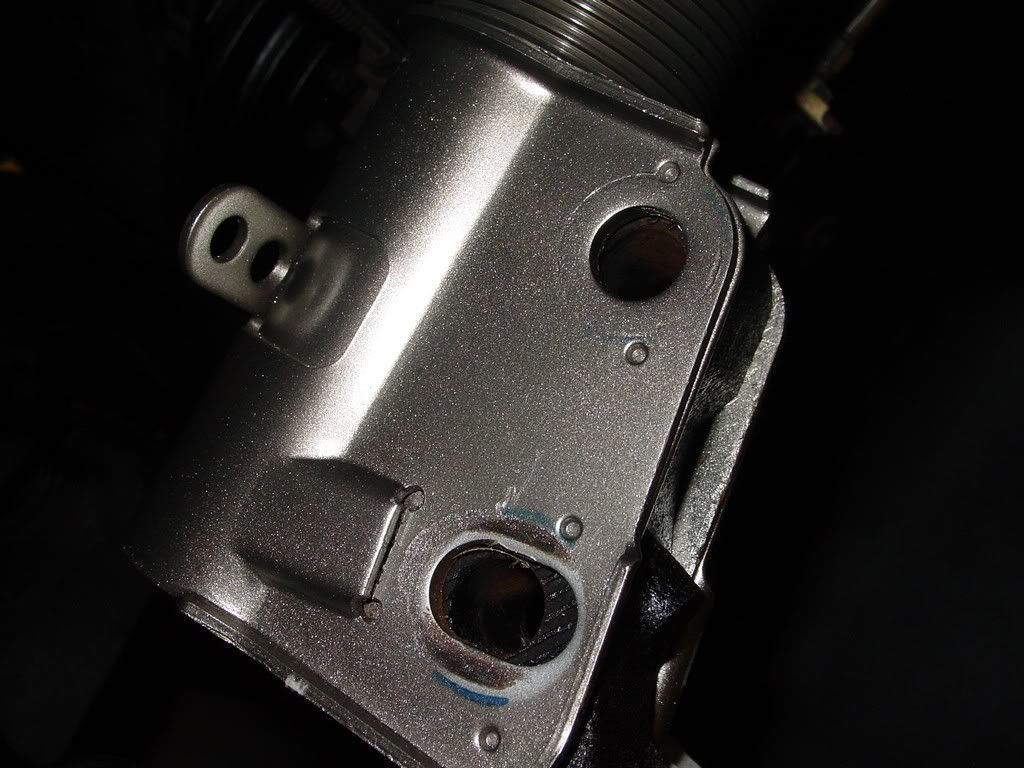
Now the massive bolts holding the strut to the spindle.
(FYI: I did this a bit wrong on the first one. I mention this so you don't do the same. I was doing things alone and was over thinking the job. I undid the strut tower nuts first and left the weight of the strut on the spindle while I removed the lower strut bolts. Don't do this! Again, I mention it only so you won't do it that way. This will put undue tension on the lower strut bolts and make them hard to remove. I wrote the DIY the way it should be done. I did it the correct way on the 2nd one and it was SUPER EASY!)
So a little trick to get the car at least back to the alignment is was at when I started... Maybe this will keep me from wrapping it around a tree on the way to get an alignment!
Just a bright colored sharpie to mark the washers spot on one side top and bottom. Also repeated it on the bolt side.
For safety, I threw a jack under the A-arm. It was only jacked up to lighly touch the a-arm. Only in case of a fluke slip on the a-arms part. Doing it alone I did not know how the car would respond... The spindle has enough parts holding it in place. Mine did not budge at all. But when leaving it diconnected over night the drivers side did sag down and needed a little lift to not strain the brake line.
Since my struts are relatively new KYBs, I did not need to use any PB Blaster, but folks with a stock set up, I advise it!
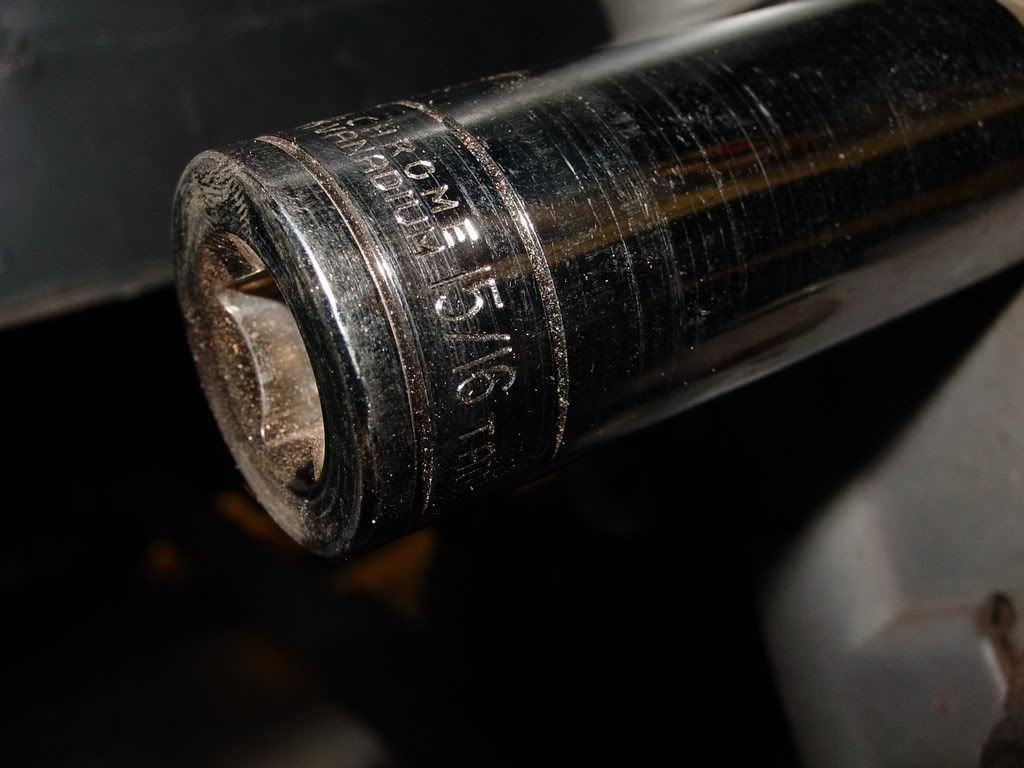
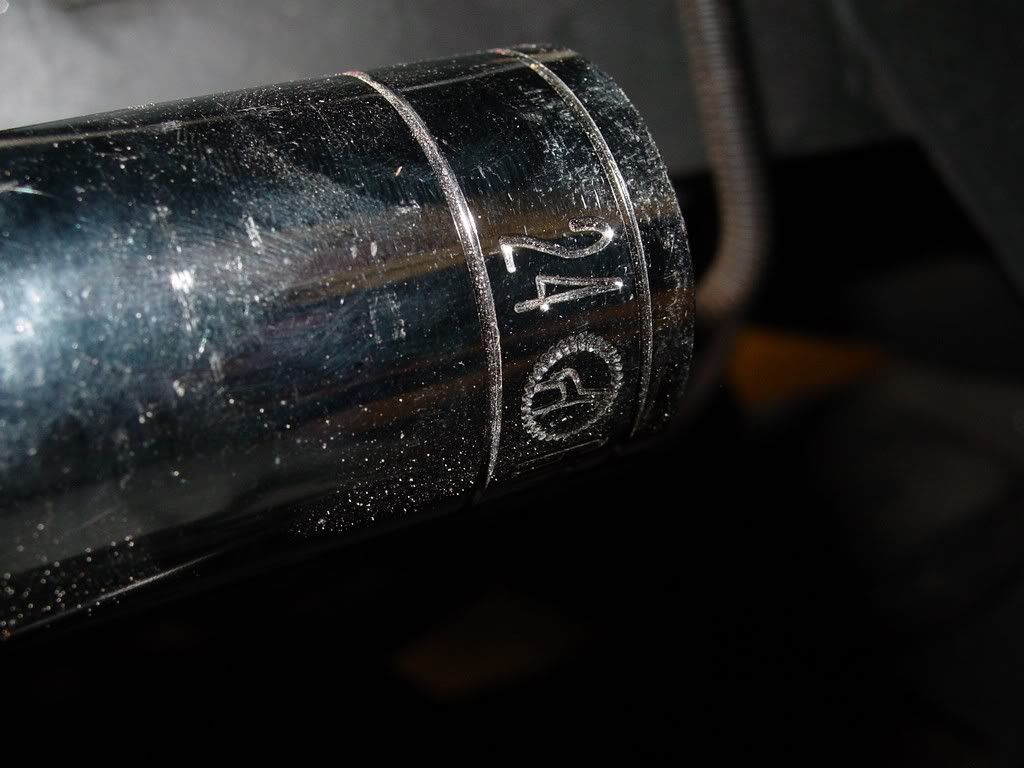
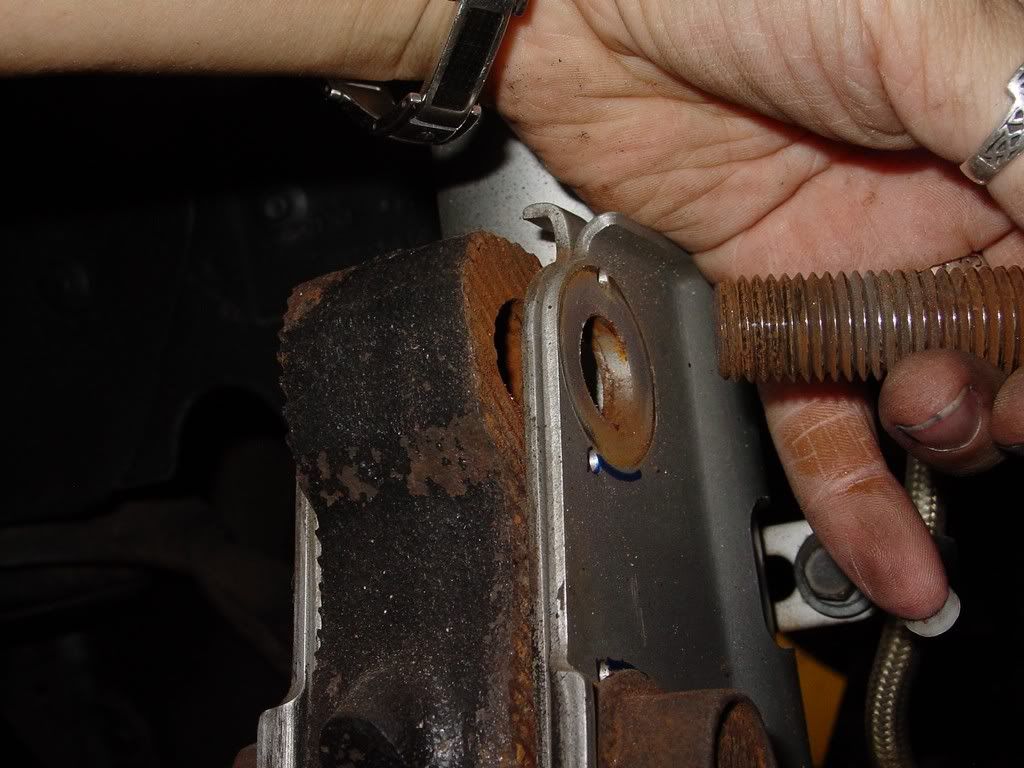
Ok time to find something big enough to get these suckers off... top bolt first, since it does not have an adjustment. Ok it turned out a 24mm or 15/16 was the magic size. Oddly both fit great. So your golden with either. I had one of each in sockets. I really need some more LARGE wrenches
Breaker bar on one side and ratchet on the other...
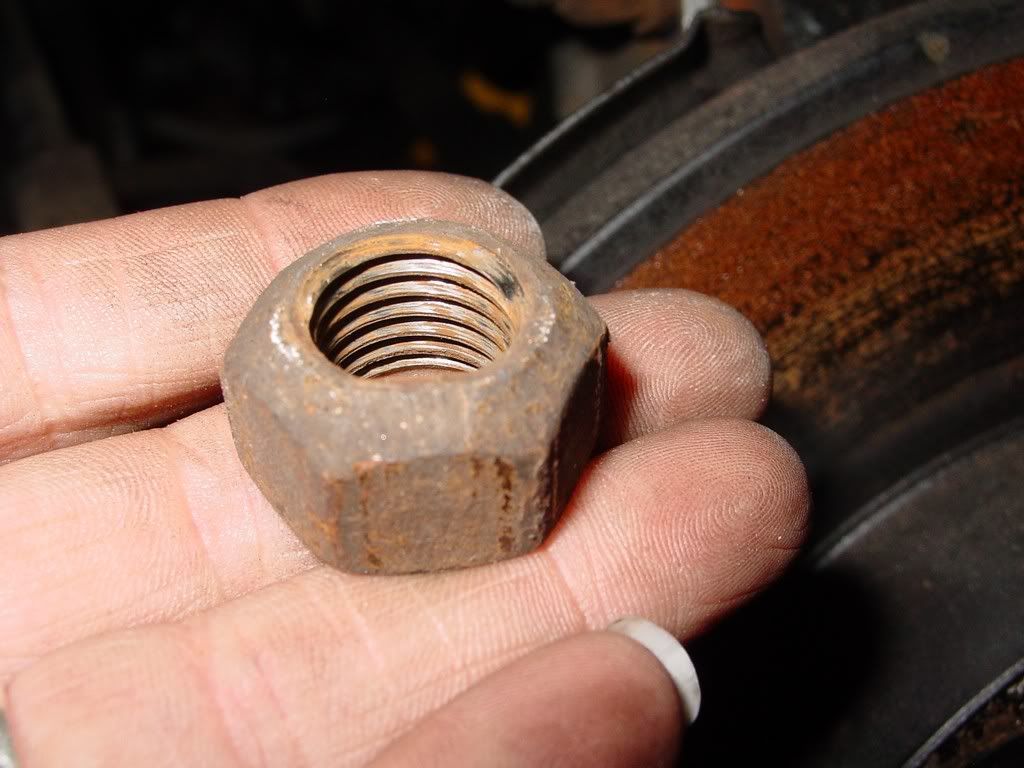
It took some muscle to get it going, but it was not bad. The breaker bar did the hard stuff for me. Nut broke loose and then you could turn it off with your fingers. Then washer came off It should come out super easy, but maybe stock has tighter tolerances then my KYBS.
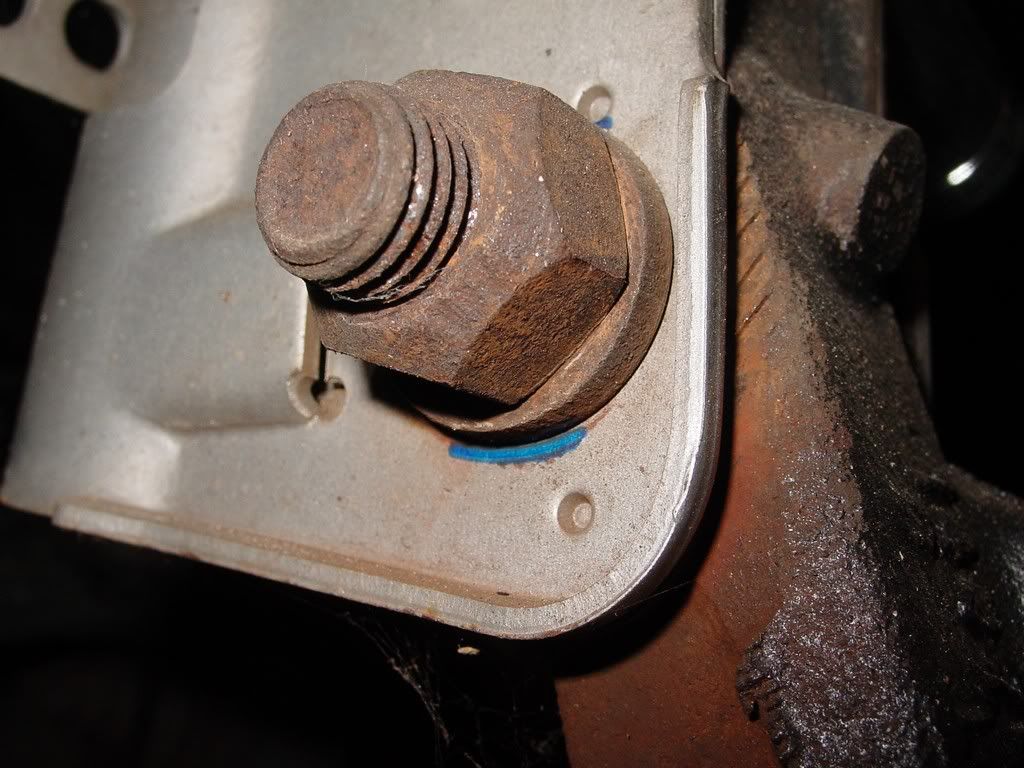
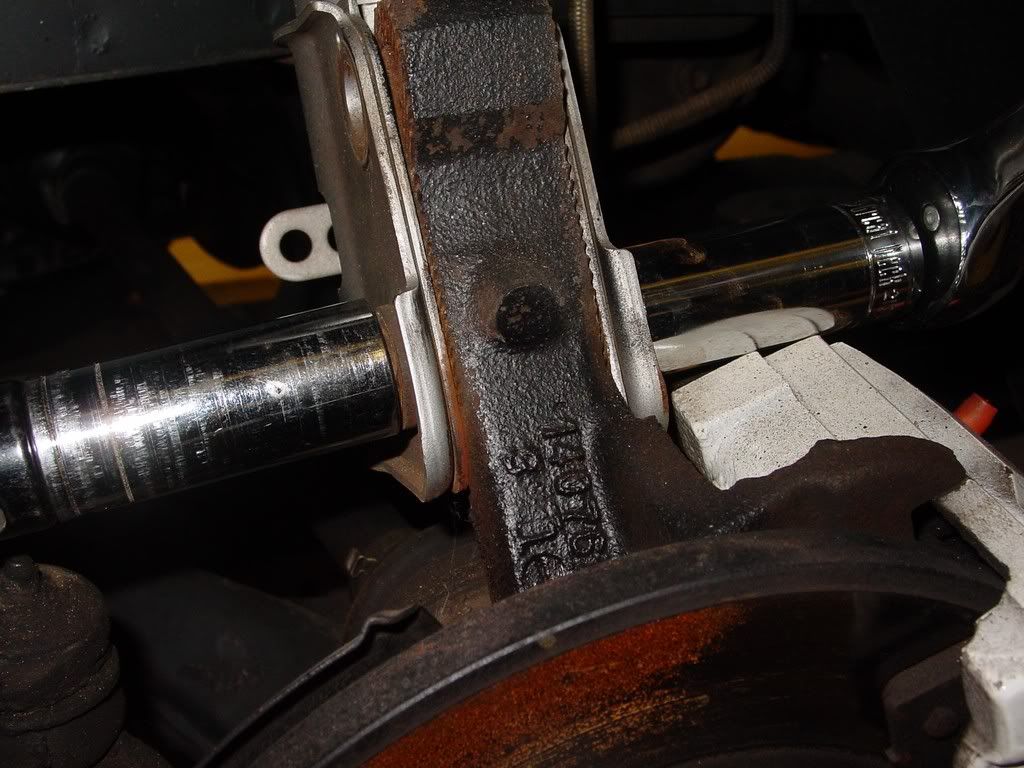
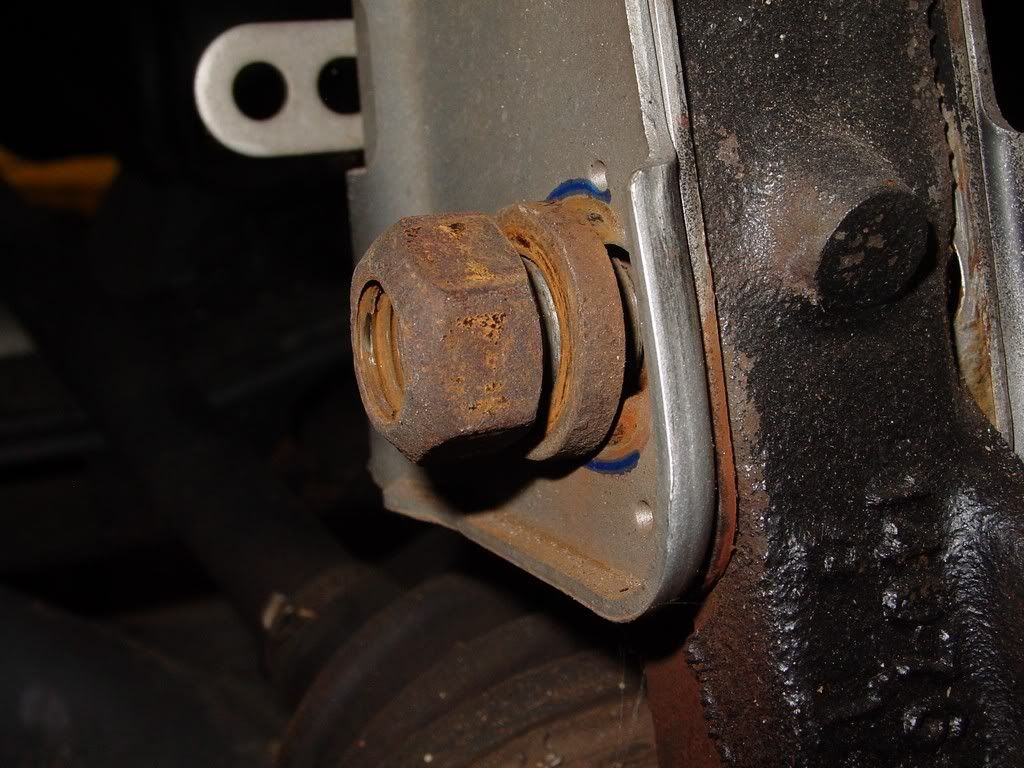
Now the lower one Loose Off
Wow close fit... I need wrenches! LOL!
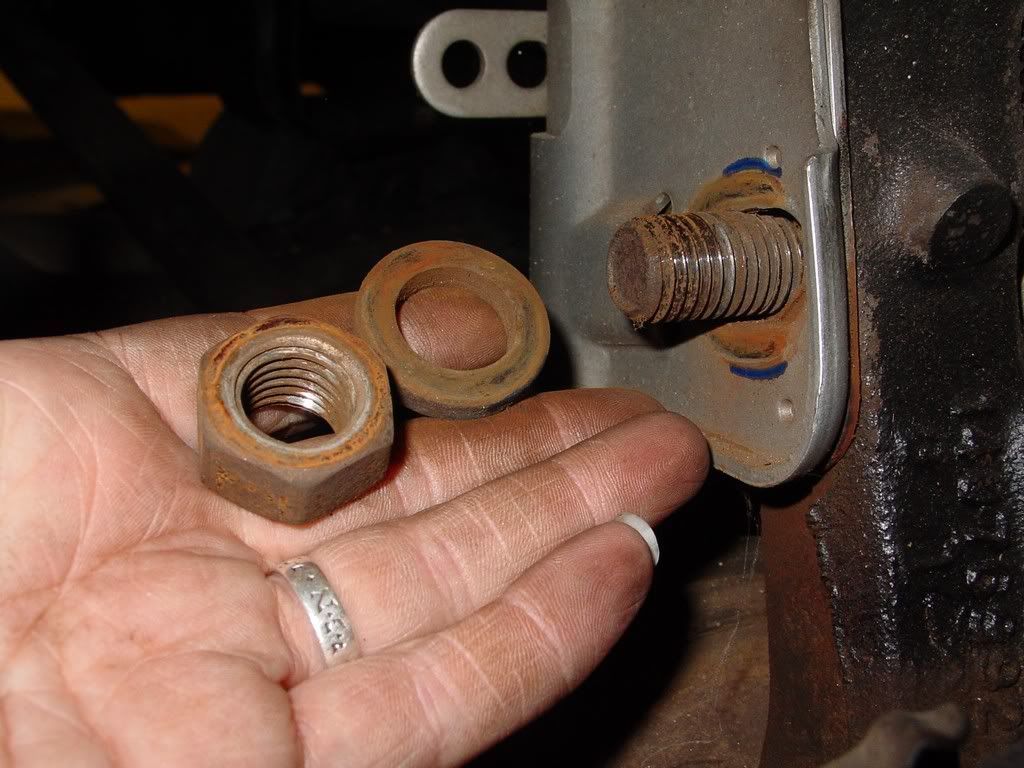
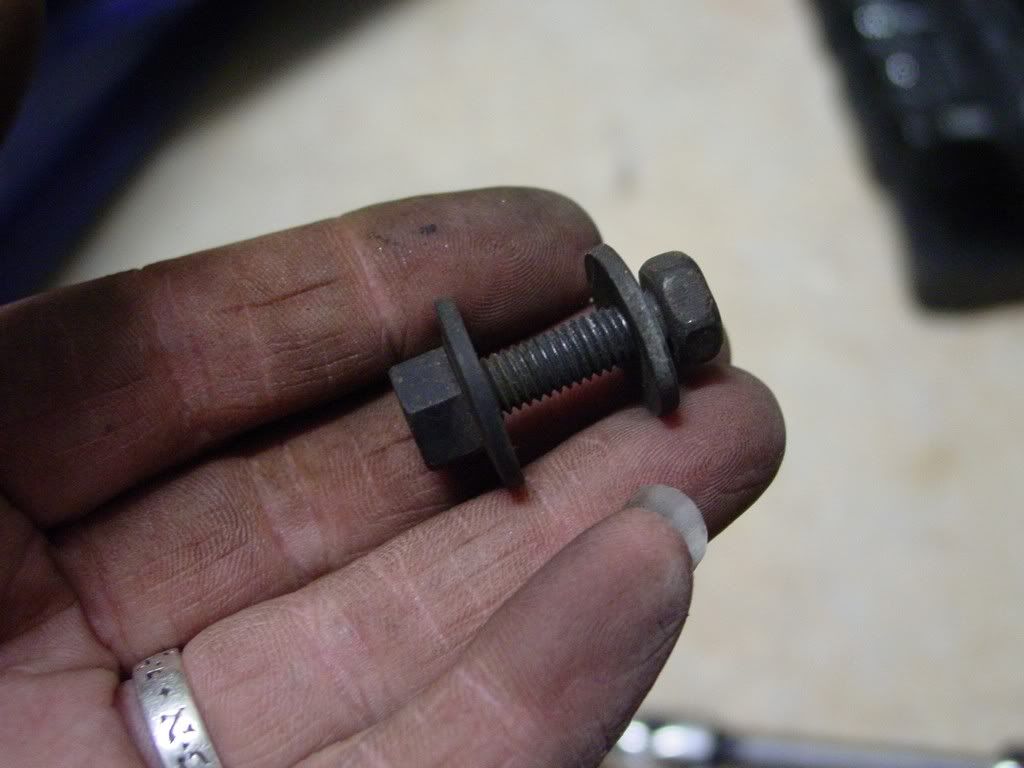
Ok once I removed the bolts, I placed the washer and nut back on its prespective bolt for safe keeping.
Sucess...
Now I gently moved the jack out of the way... Again it was not really necessary, but I did need it there overnight on the drivers side to keep the strain off the brake line.
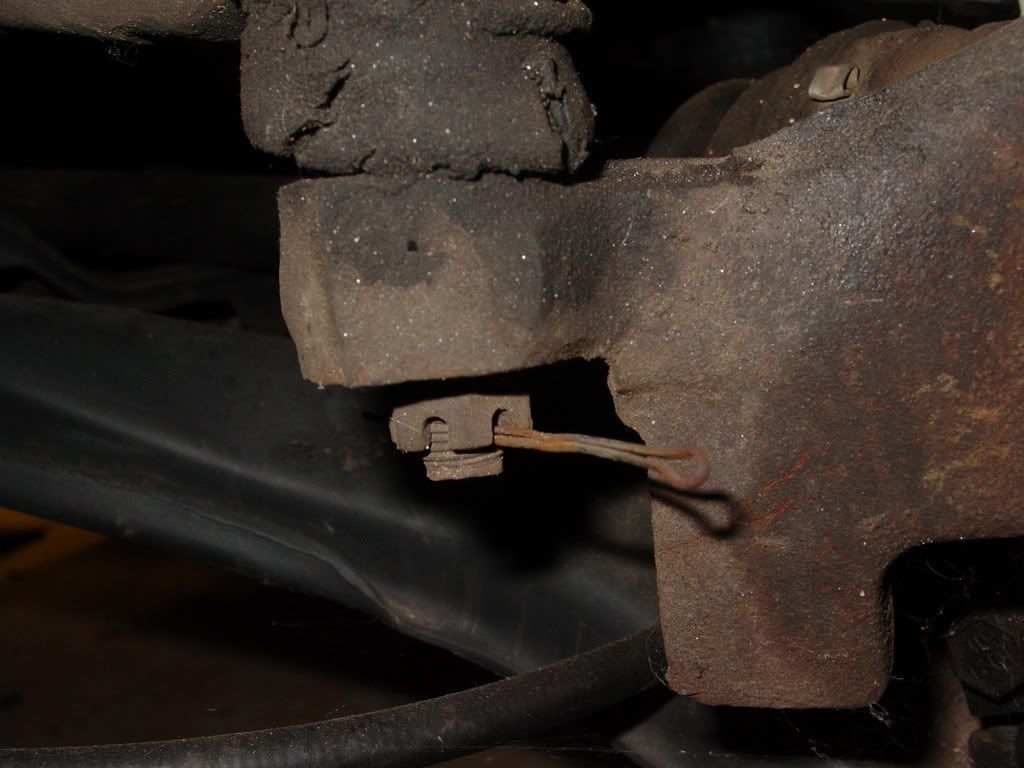
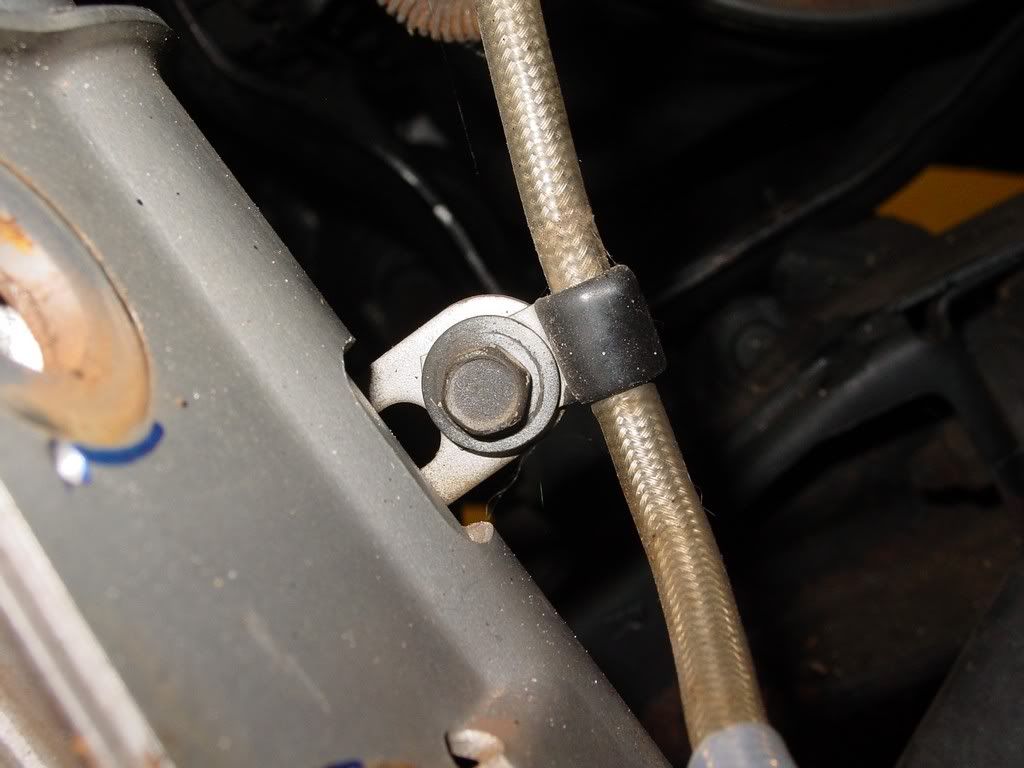
One more little thing to remove. The brake line is attached to the strut, you need to take him loose.
I think we altered mine from stock, but it was a 10mm nut and bolt to remove
[This message has been edited by redraif (edited 09-15-2014).]
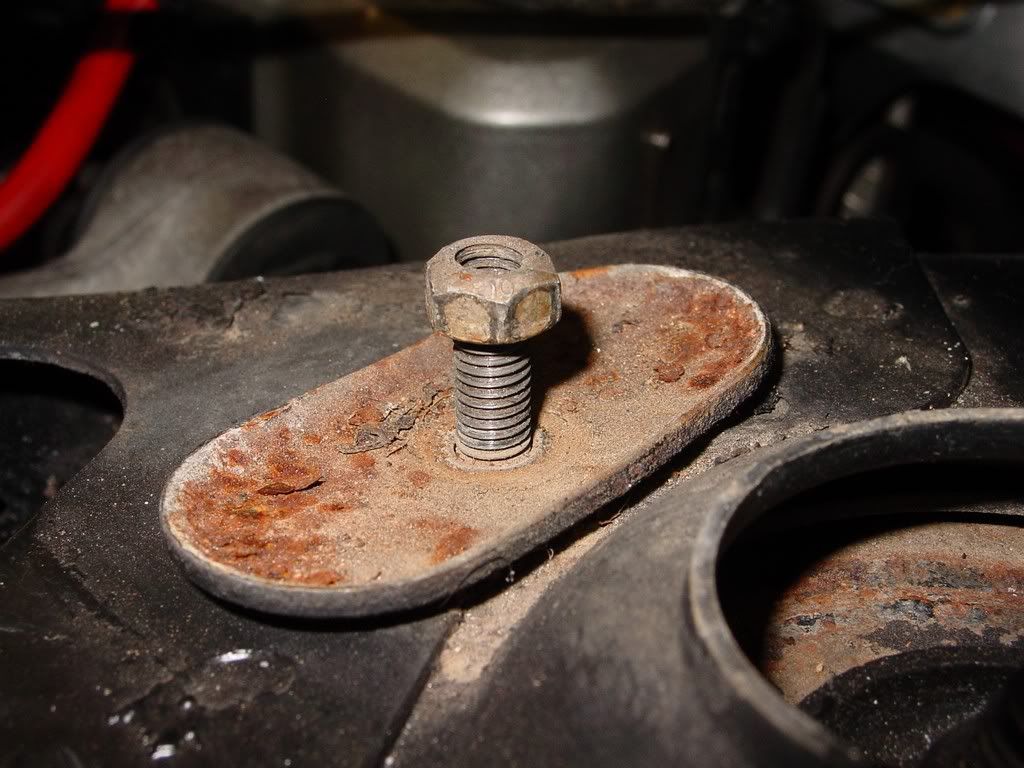
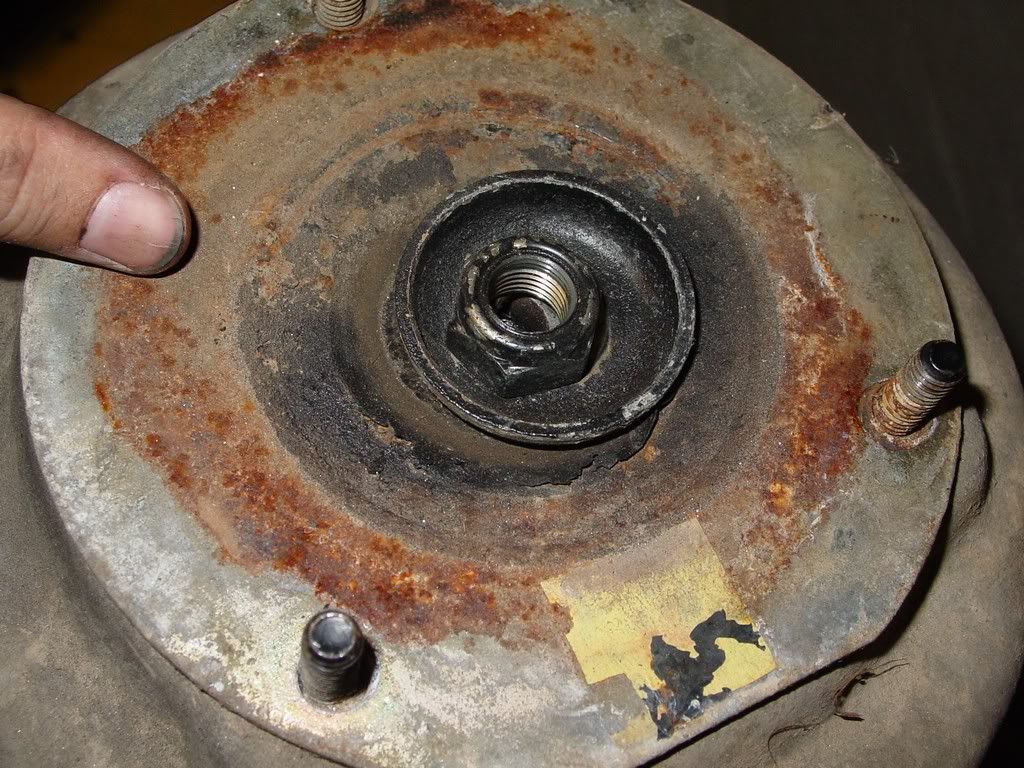
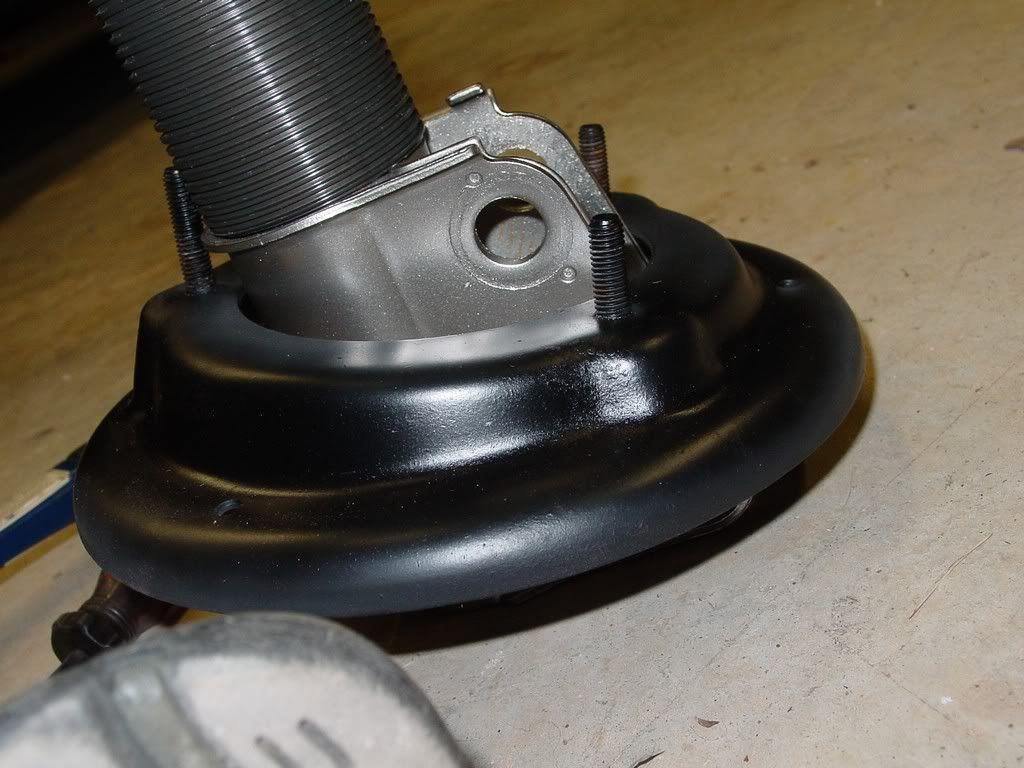
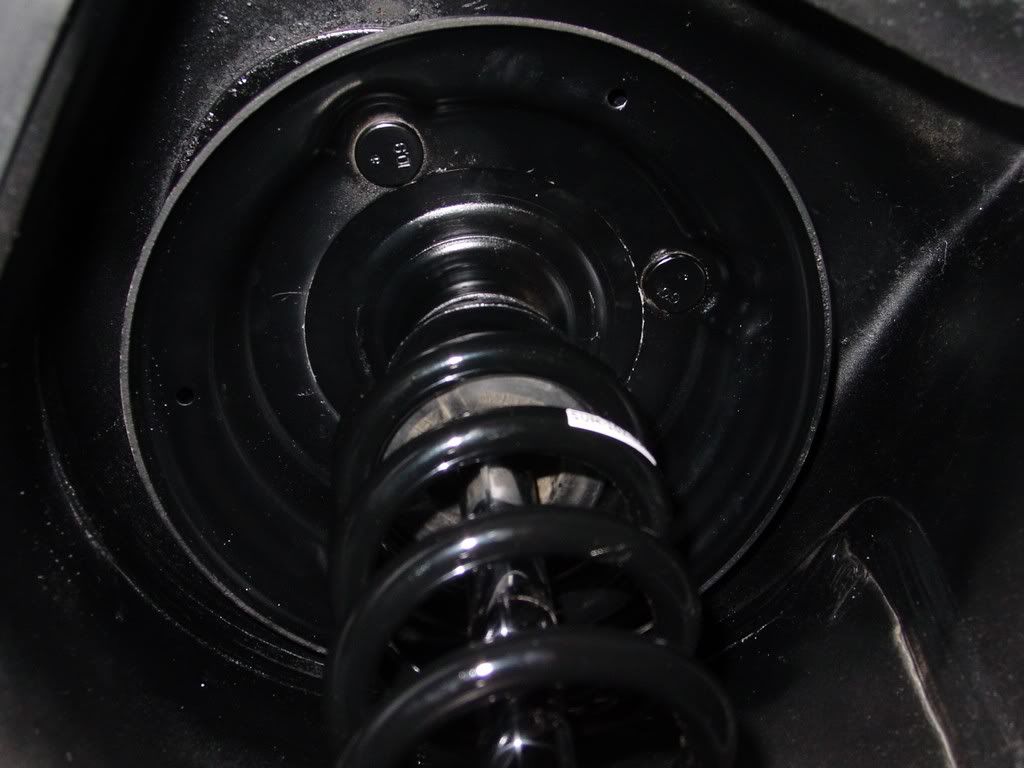
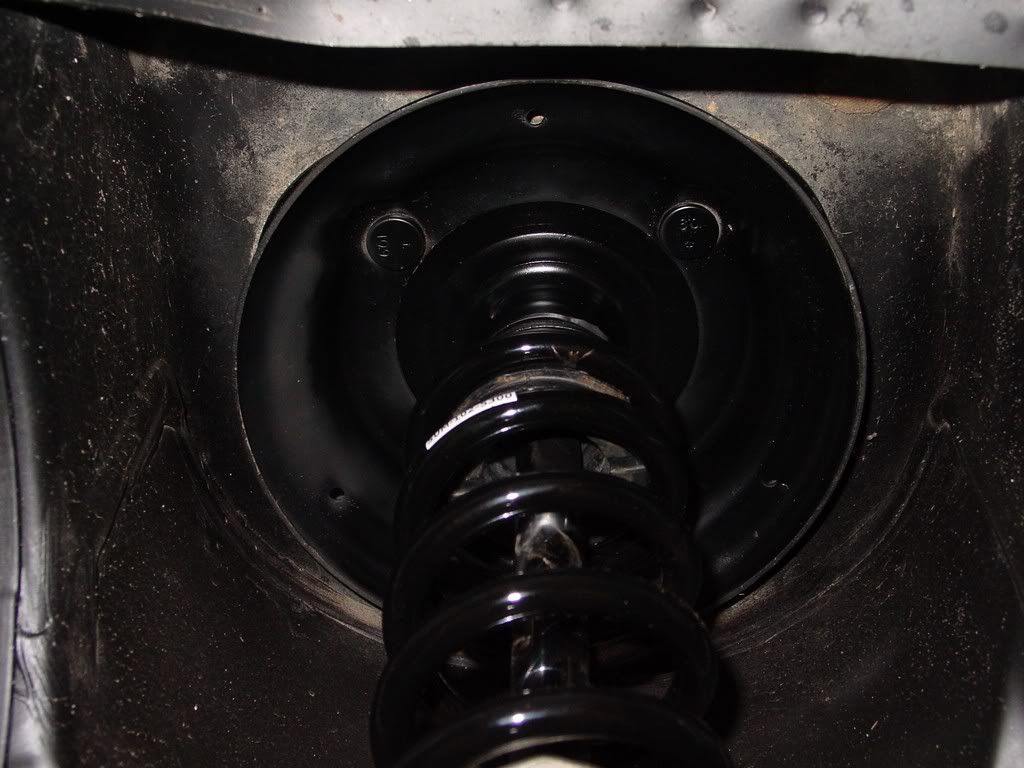
To remove the strut and coil spring assembly, its up to the strut tower we go...
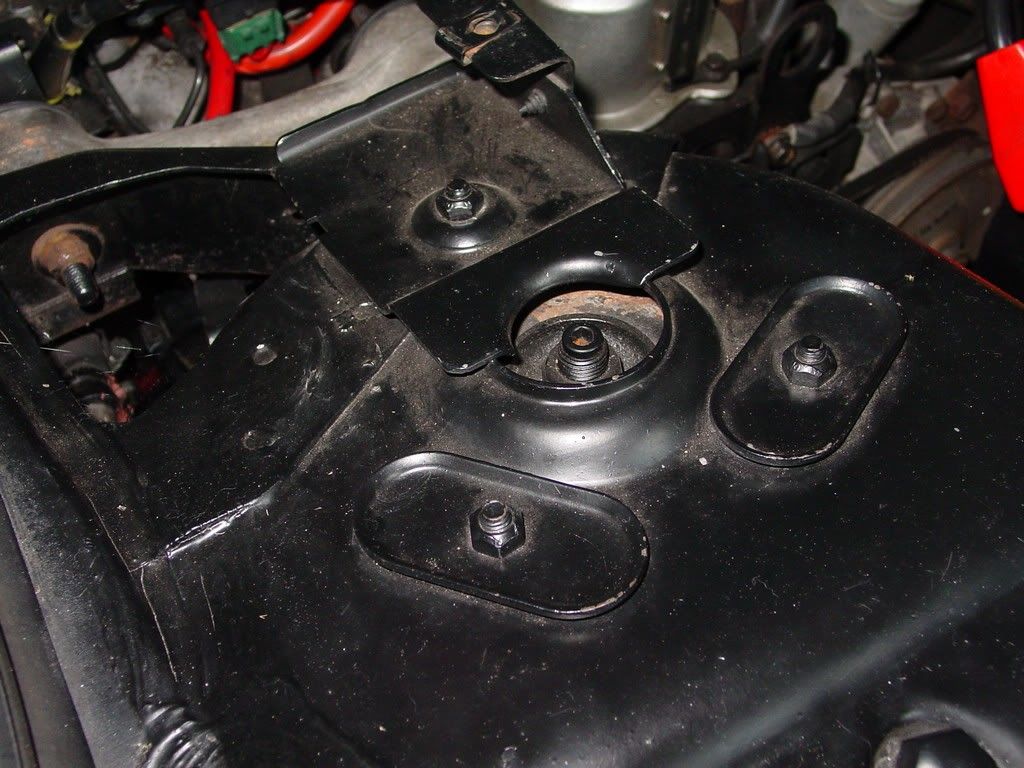
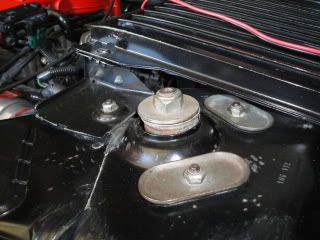
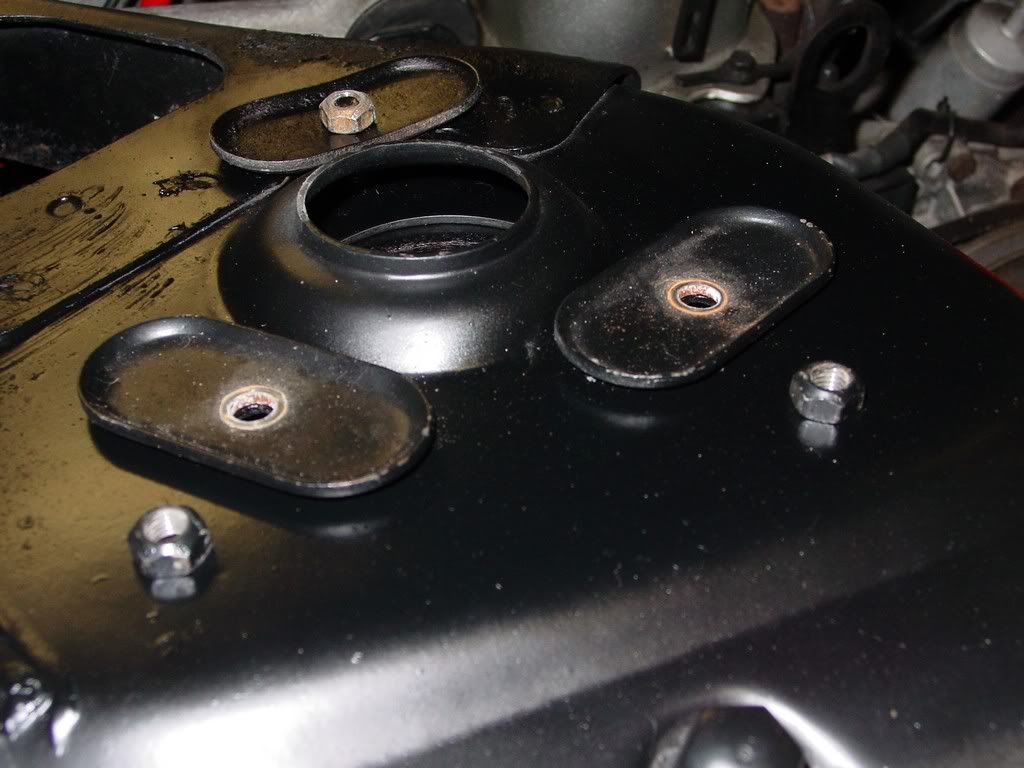
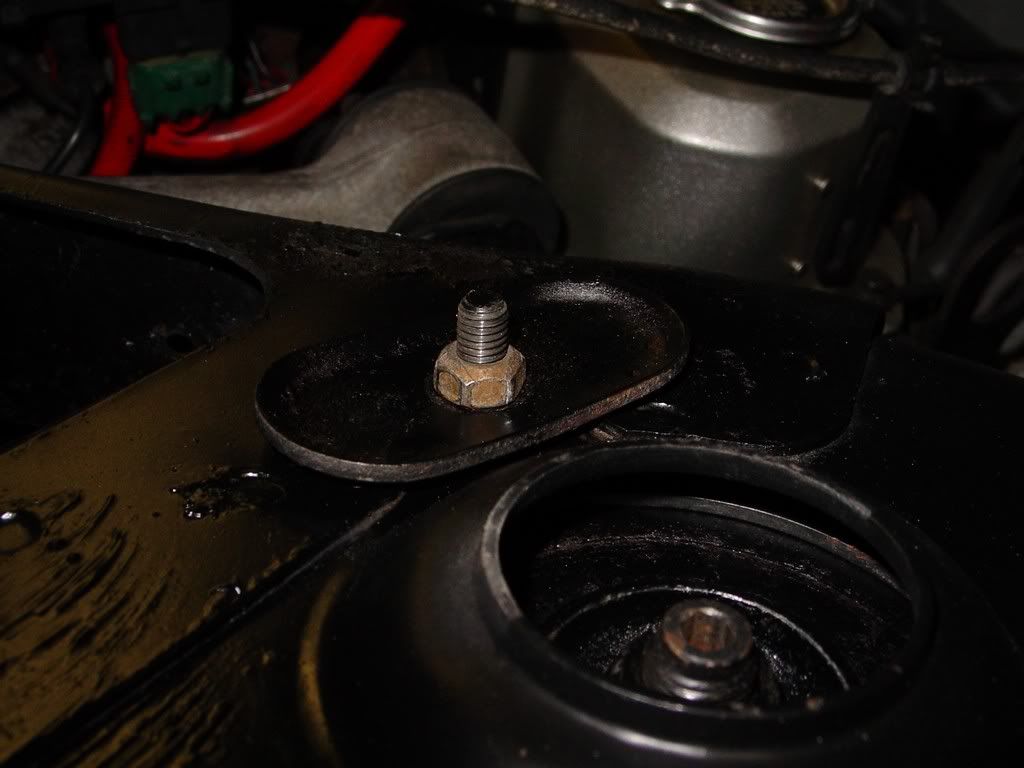
There are 4 13mm nuts holding the assembly to the strut tower. you will only see the 3 as the 4th is under the big bracket. That bracket is the mounting point for the rear deck lid access vents.
They are 13 mm
Remove the 3
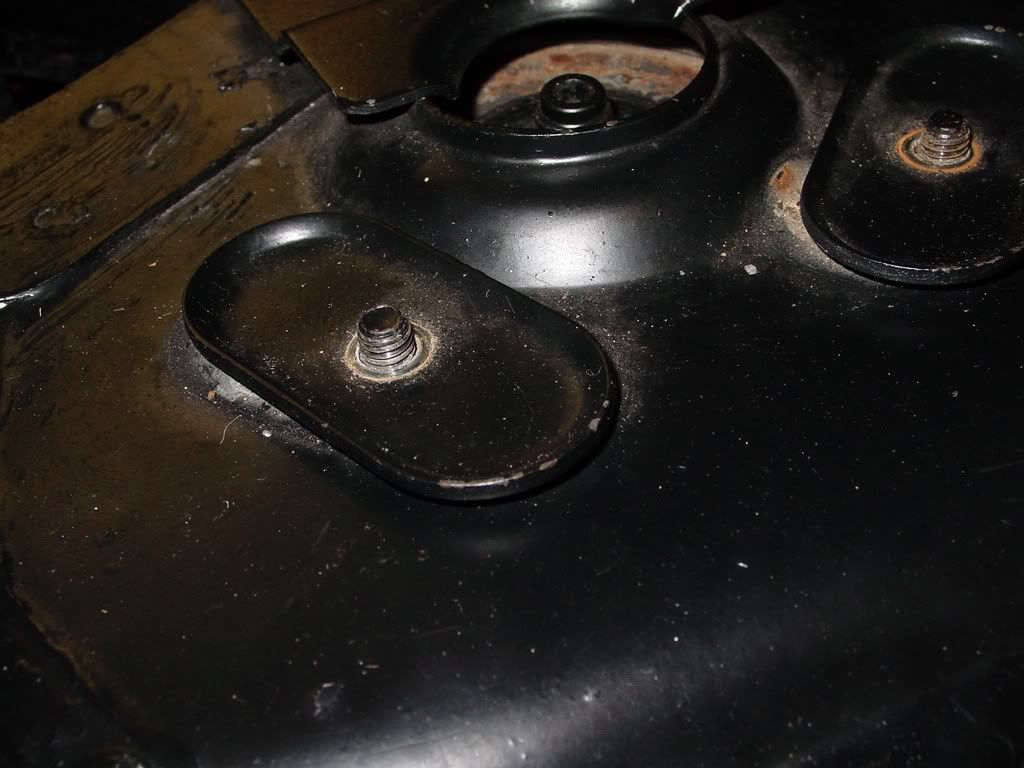
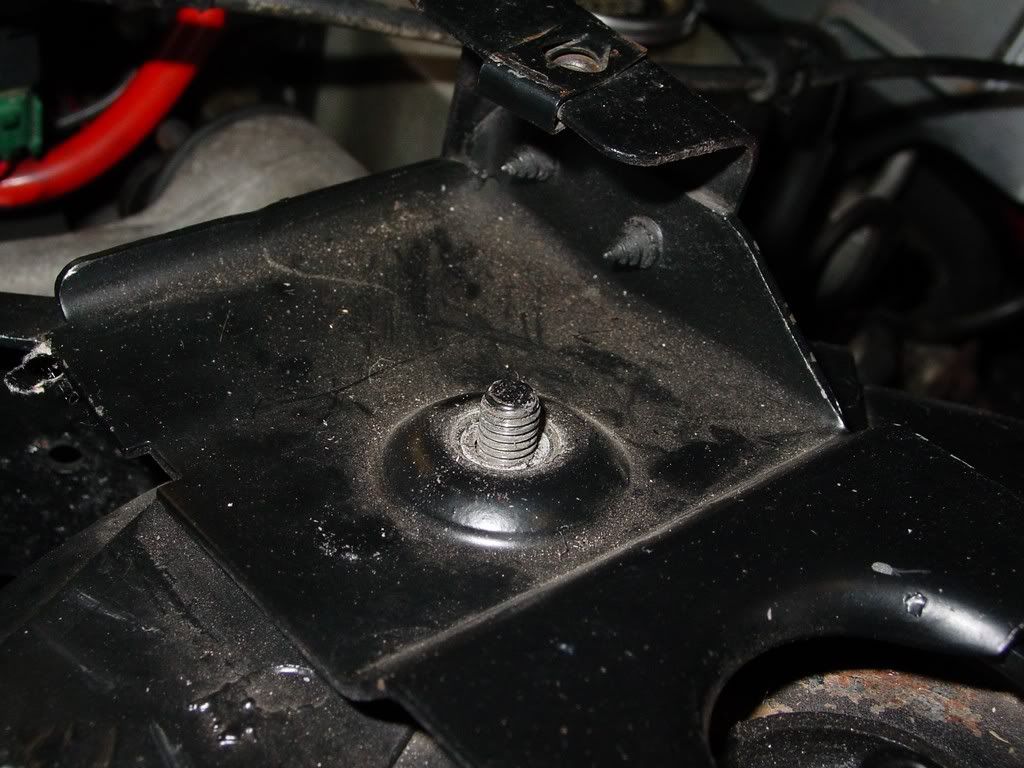
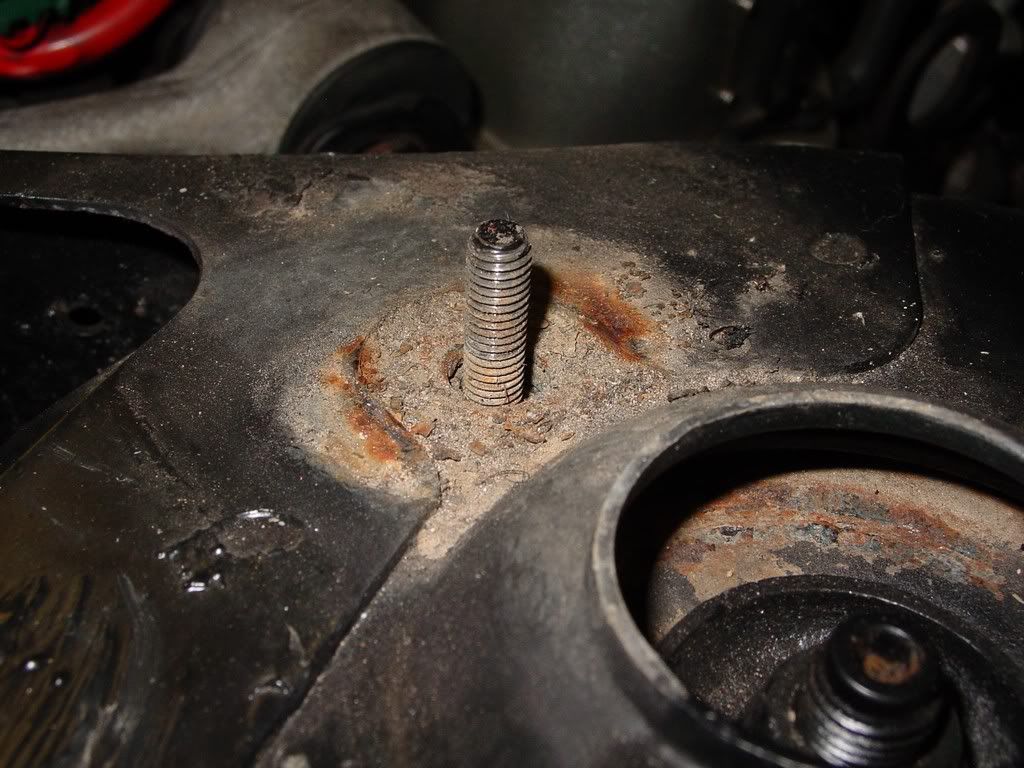
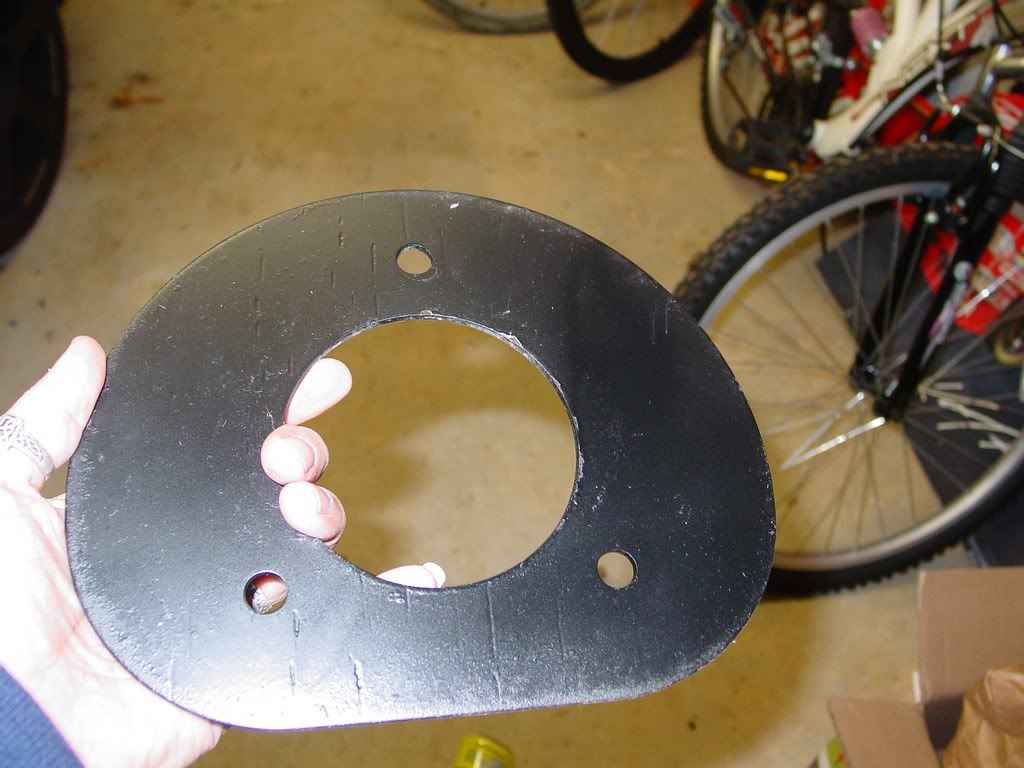
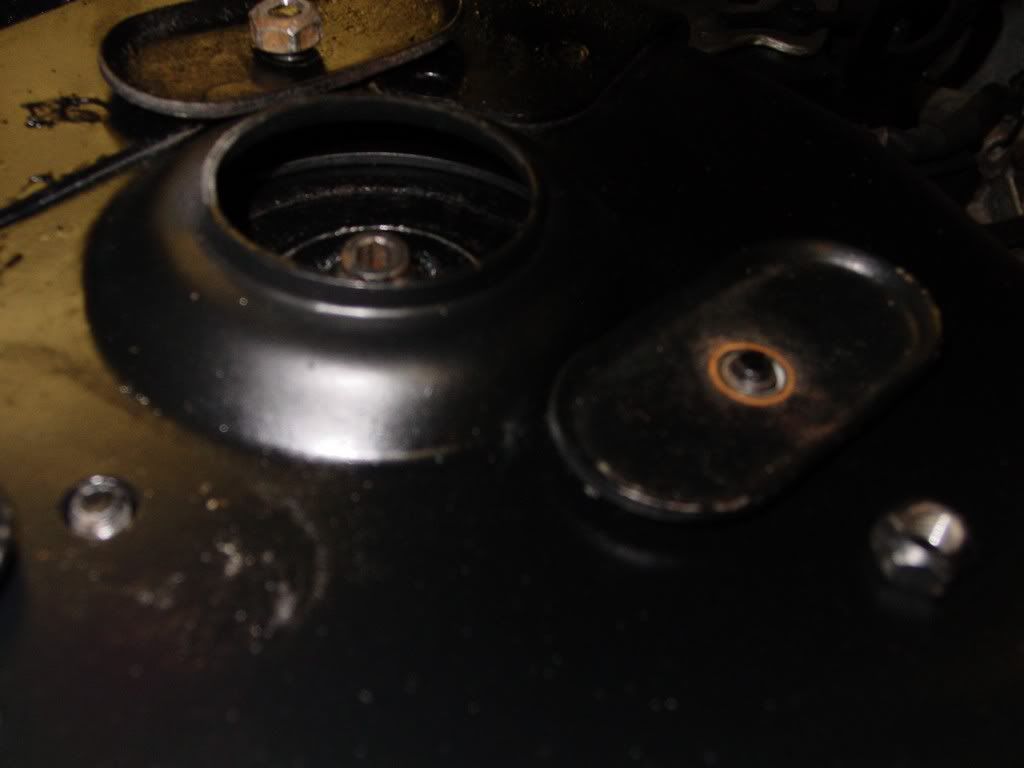
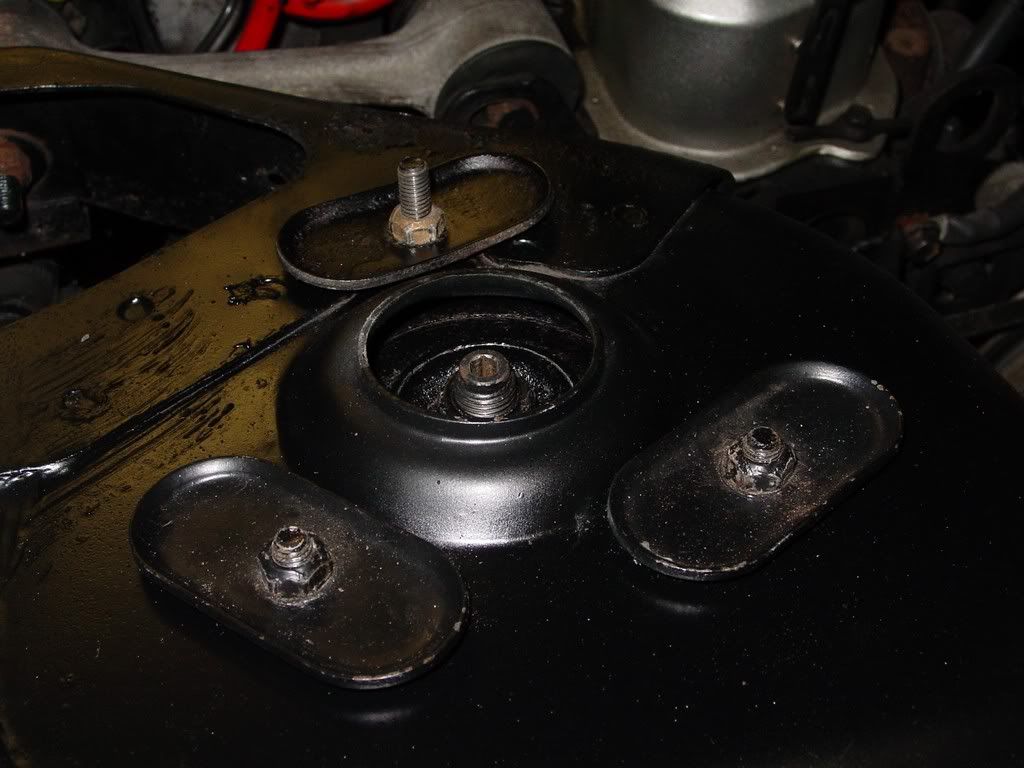
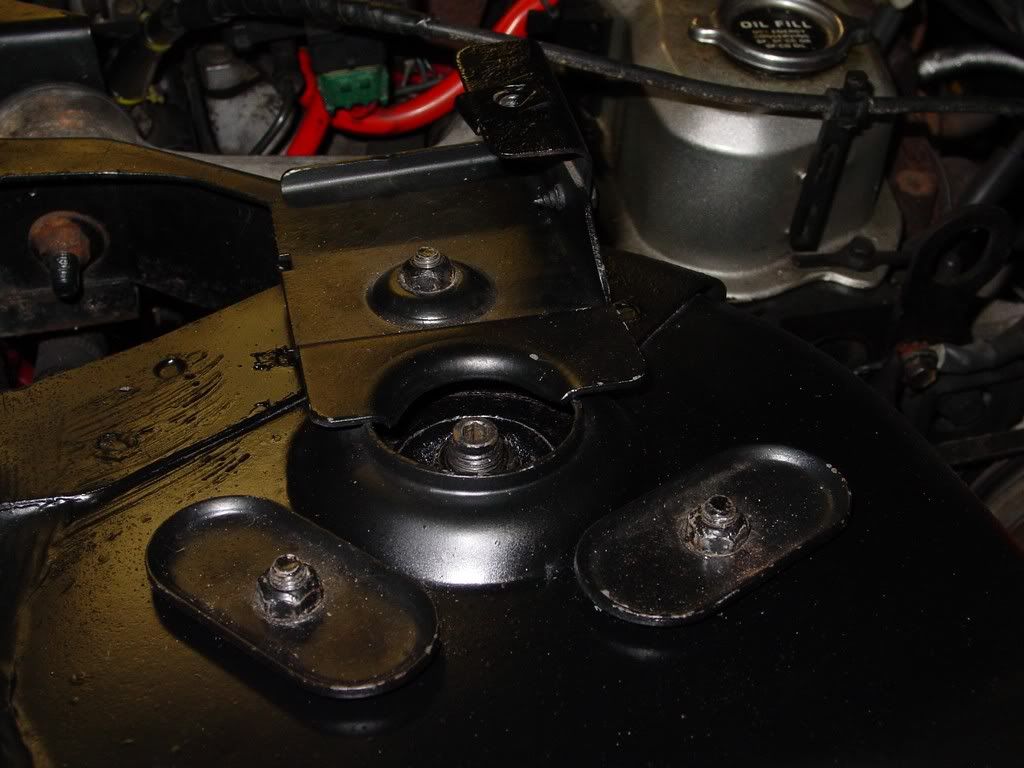
Now take off the weight dispersal plates and bracket and you will see #4. This inward most stud it longer then the others and its extra length a total help when you go to reinstall.
I advise you have a helper hold the assembly so it does not drop suddenly. Or if you are like me... Use one hand to hold onto/control the coil spring/strut assembly and the other to wrench on the nut till its loose and the whole thing tries to drop to the floor... LOL!
The 4th nut is a 13 as well
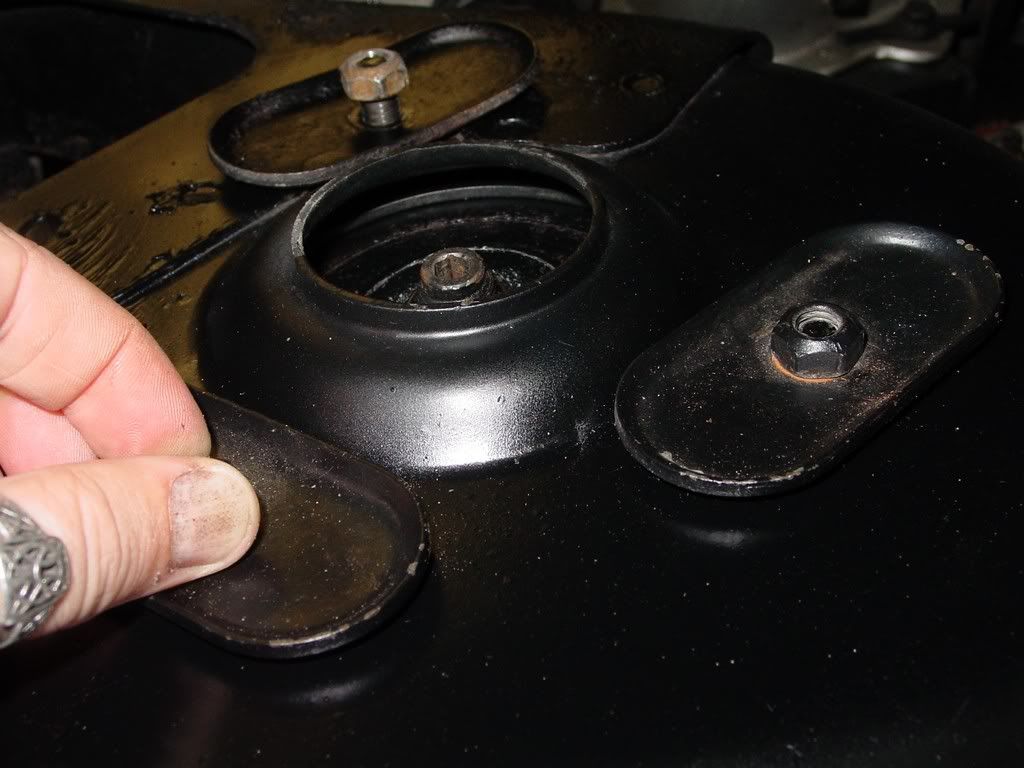
Dispersal plate & nut removed.
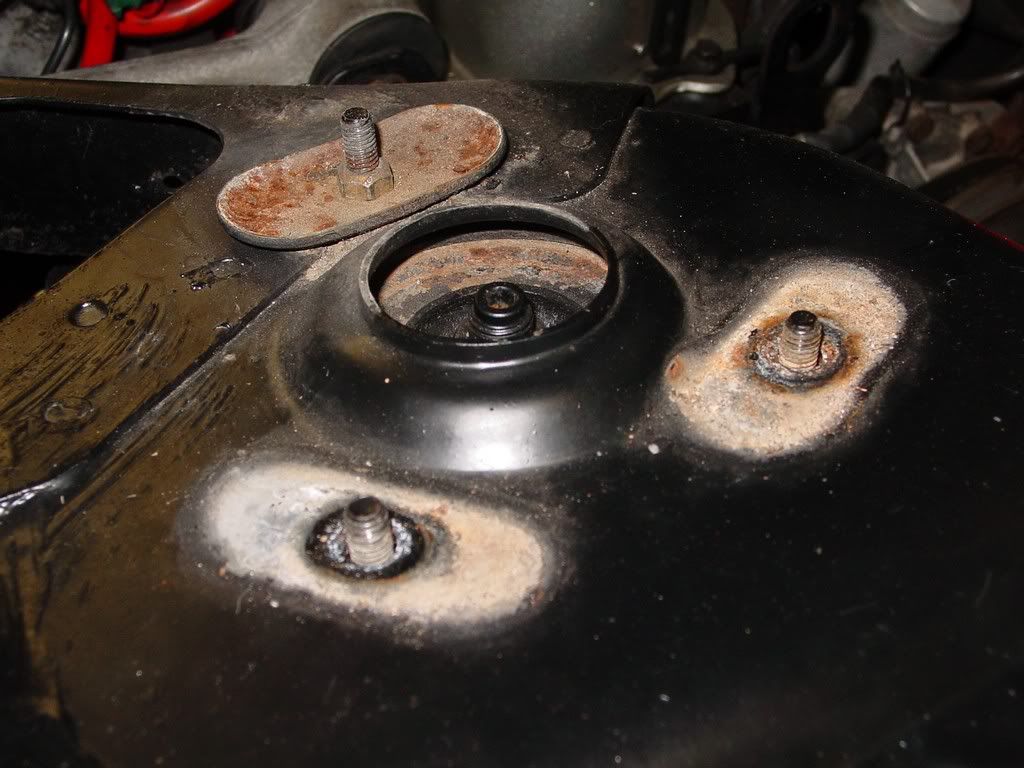
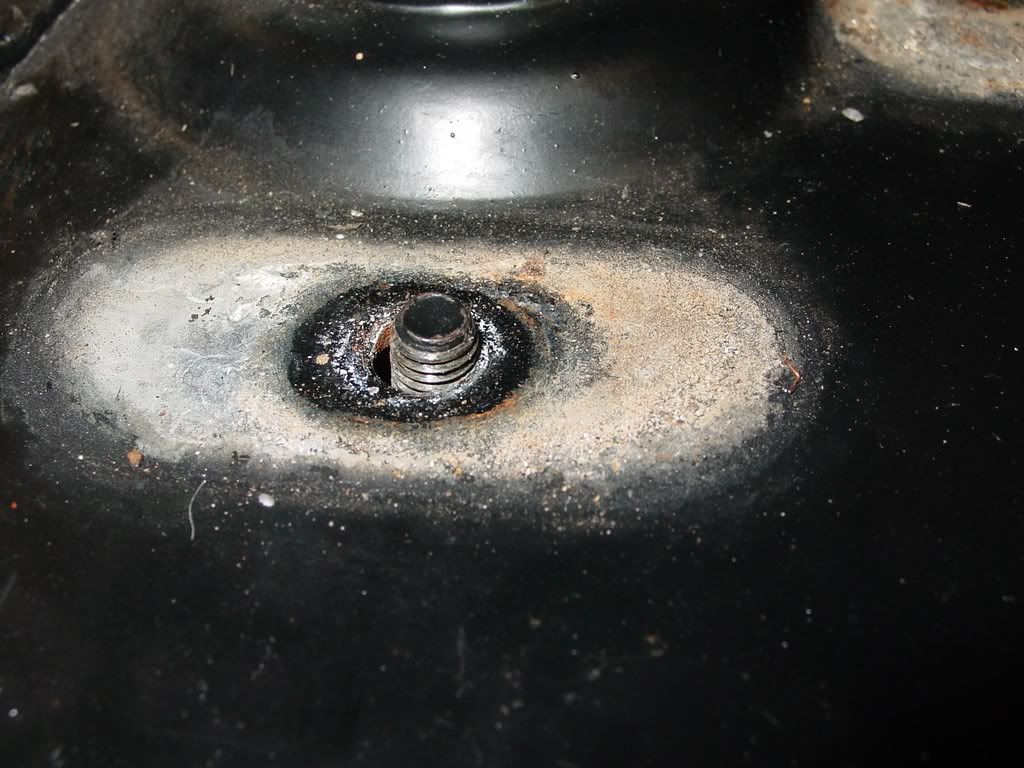
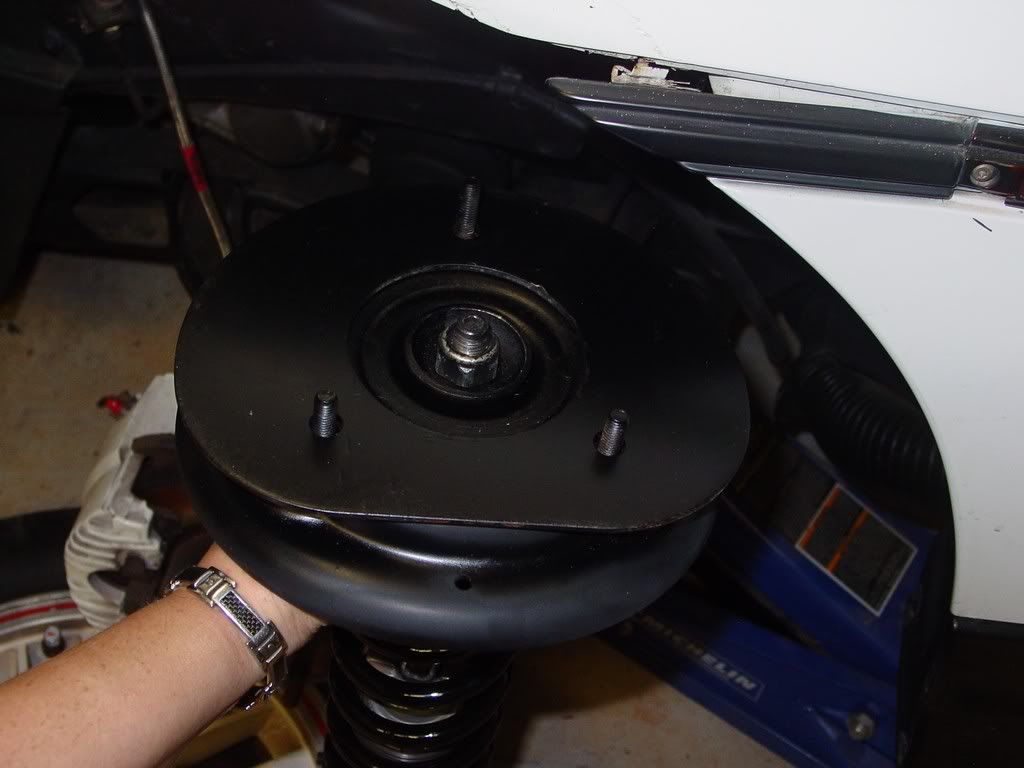
Now carefully lower the unit down & out
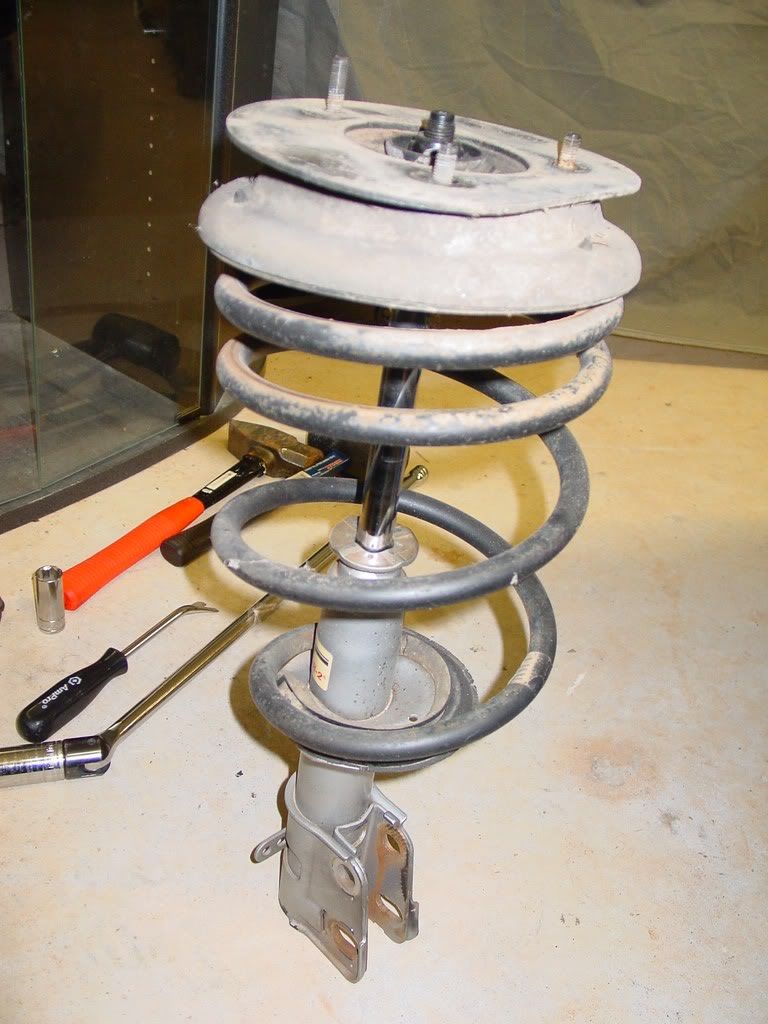
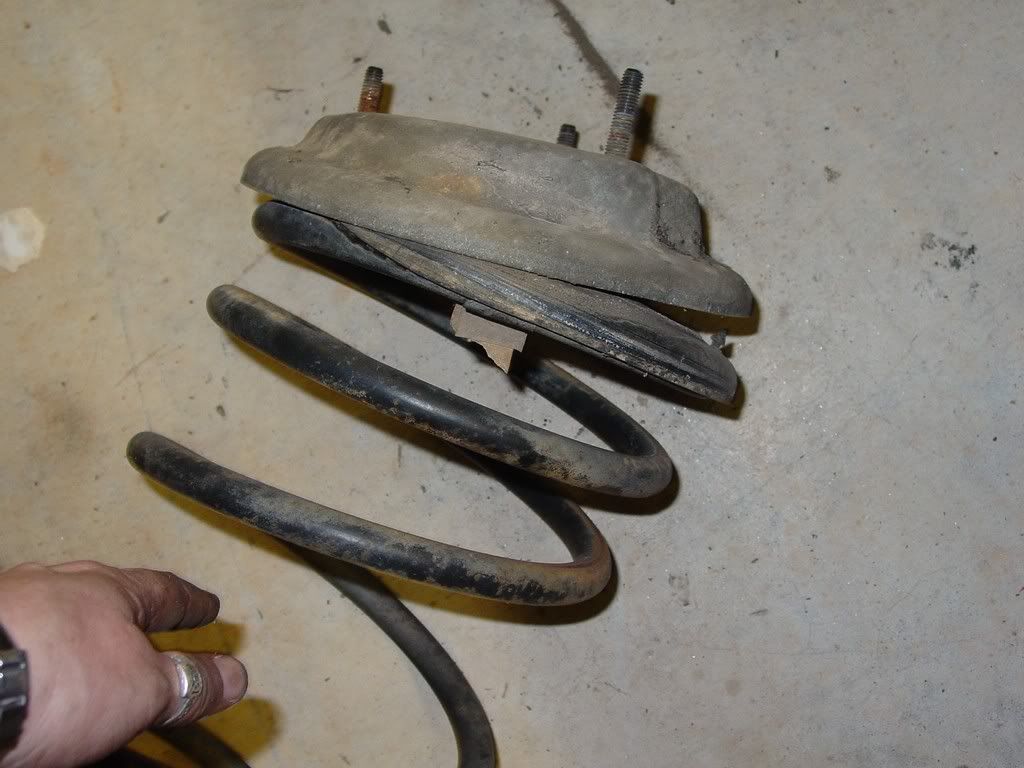
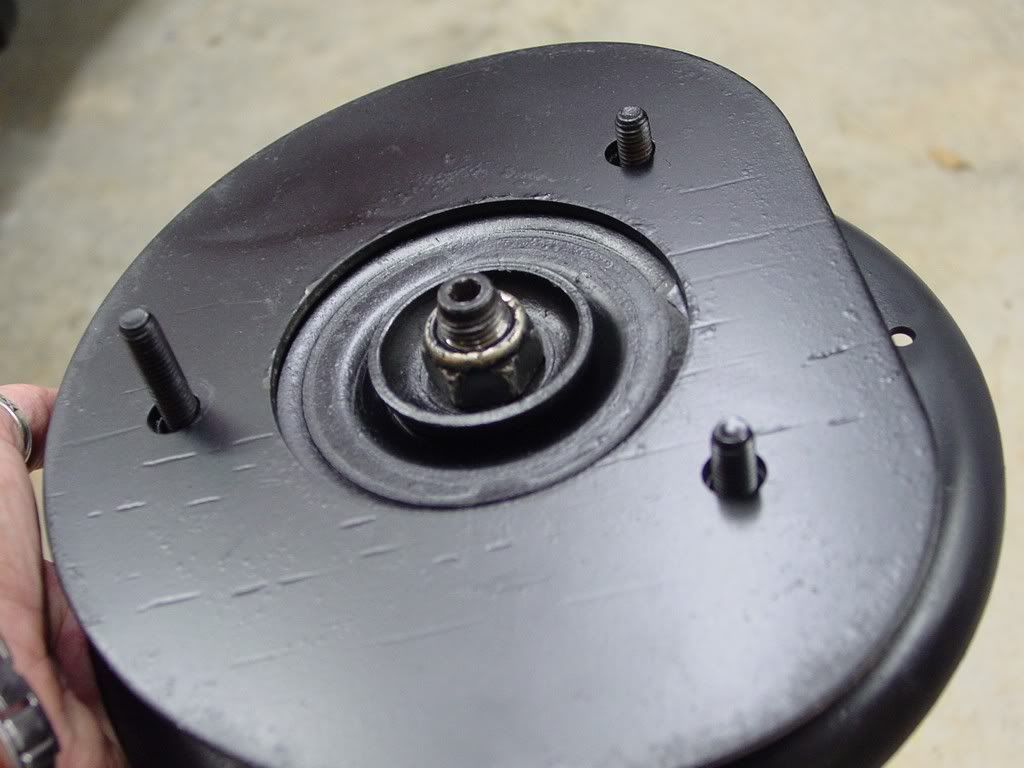
Here is the whole thing out of the car.
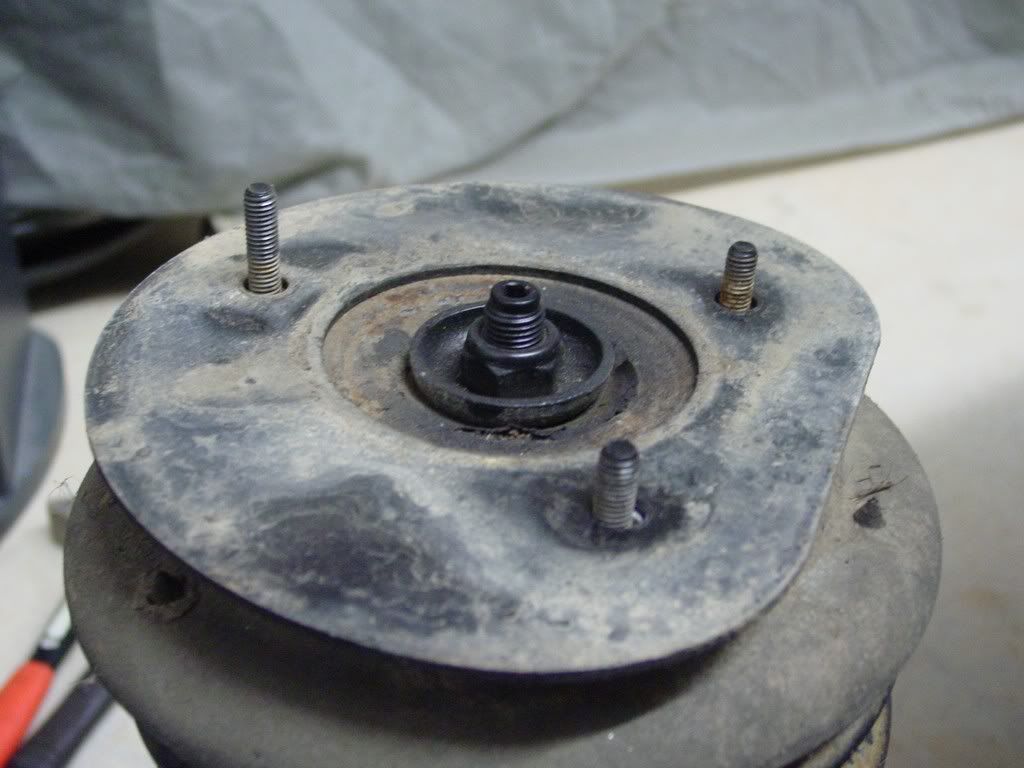
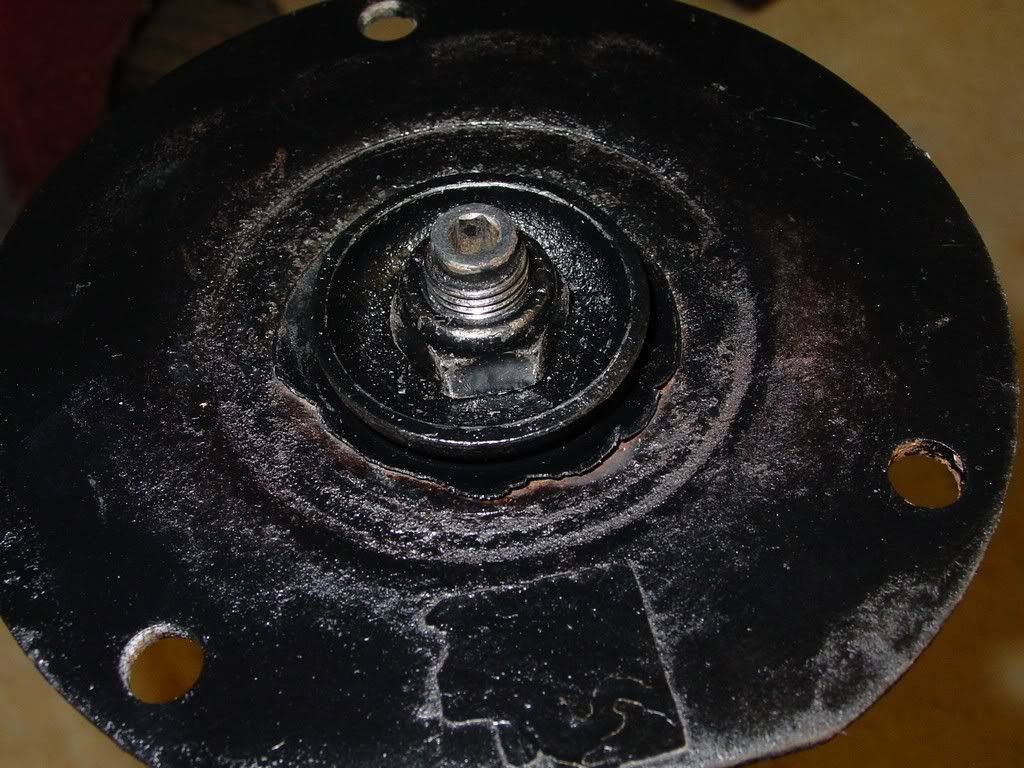
Note the orientation of this top plate to the strut for reinstall. It has one flat edge. It will match the top coil retainer plate below it, which also has a flat edge. The flat edge faces the outside of the car.
Now you can pull it off and set it aside. On mine the top was free of any markings, but the bottom had a sticker on it. I would use this a referance to tell top from bottom. You might write on yours or mark it somehow to tell top from bottom once you pull it off.
[This message has been edited by redraif (edited 09-15-2011).]
****FYI: The parts go back in the same orientation that they came off! So watch close as you take things apart and mark things if you need to to keep up with it!****
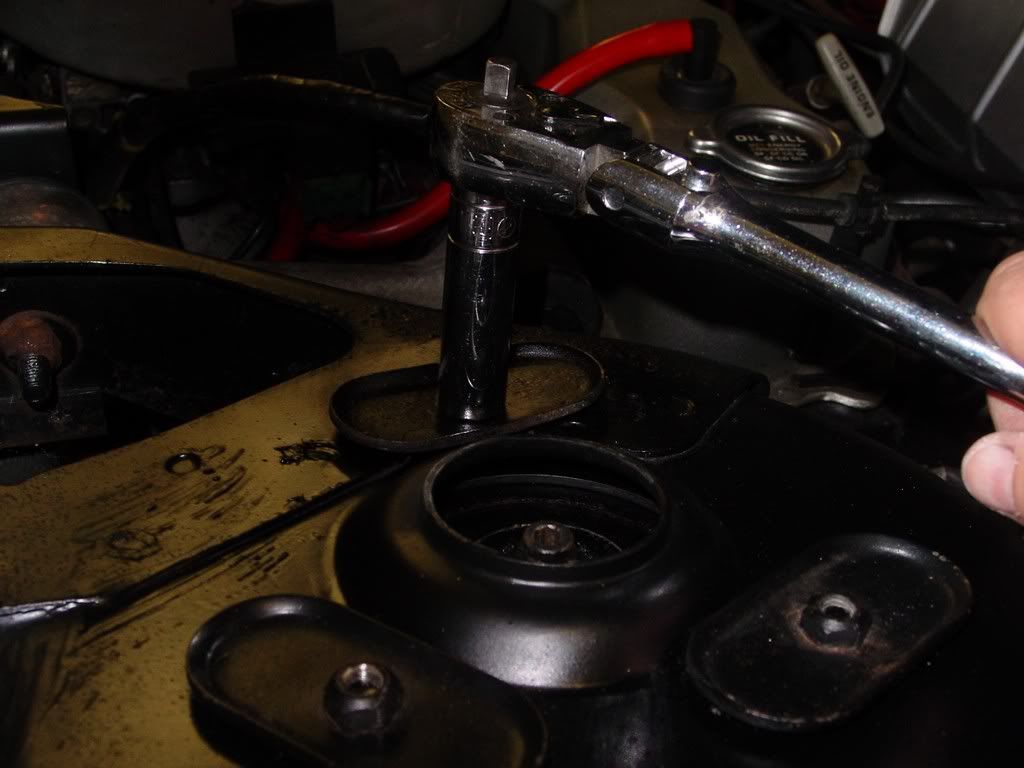
Time to take the spring loose. If you have a stock set up that has never been touched and no air tools, you might need a shop to help. Or at least some PB Blaster. Thank goodness I had previously tackled this thing when we installed the KYBs. So for me it was not horrible.
The struts are built so that you have another way to get them apart if you don't have airtools. The stock unit I believe has a squared part in the shaft of the strut so you can use a wrench to stop the shaft from turing. (Per fierohoho)
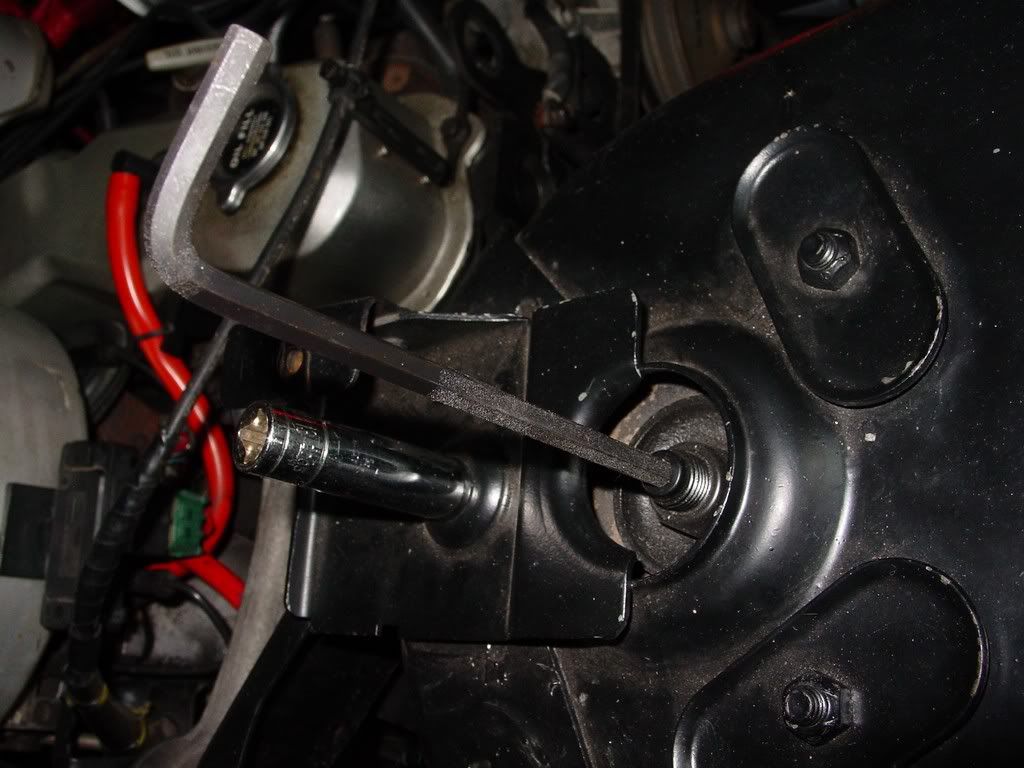
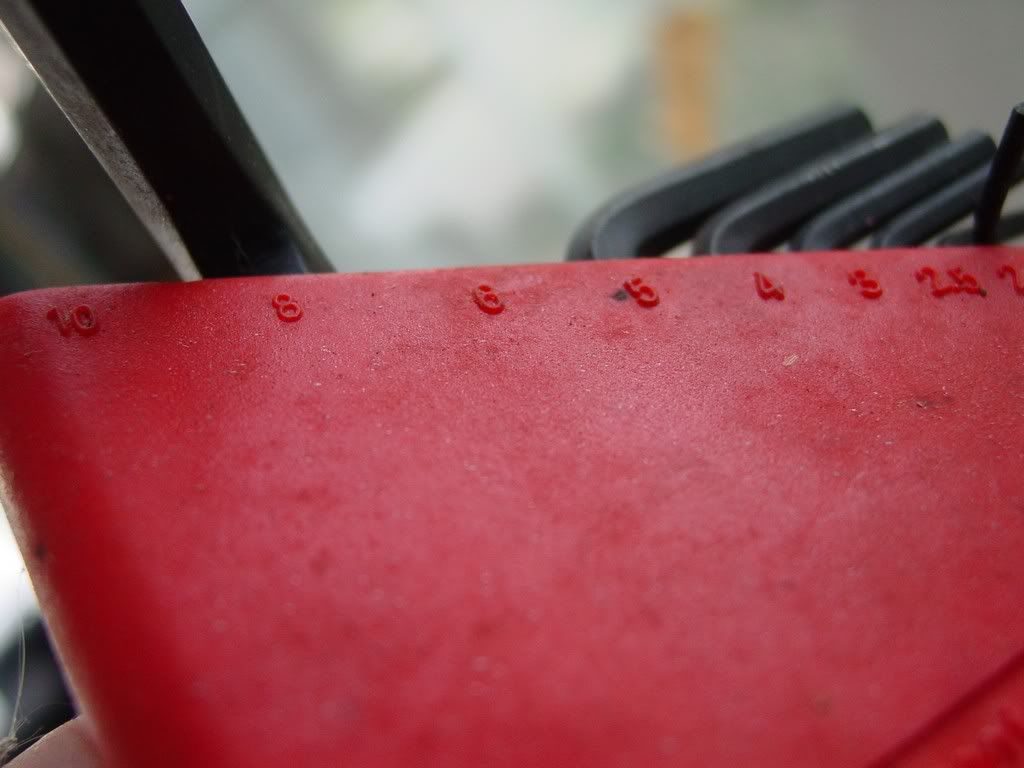
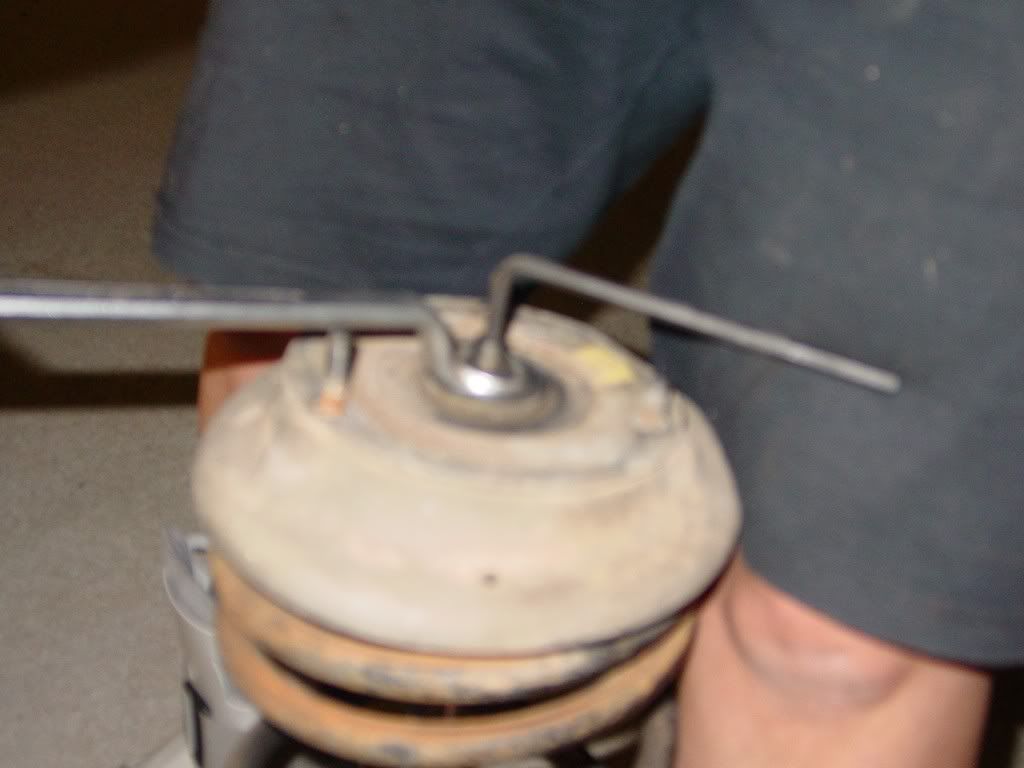
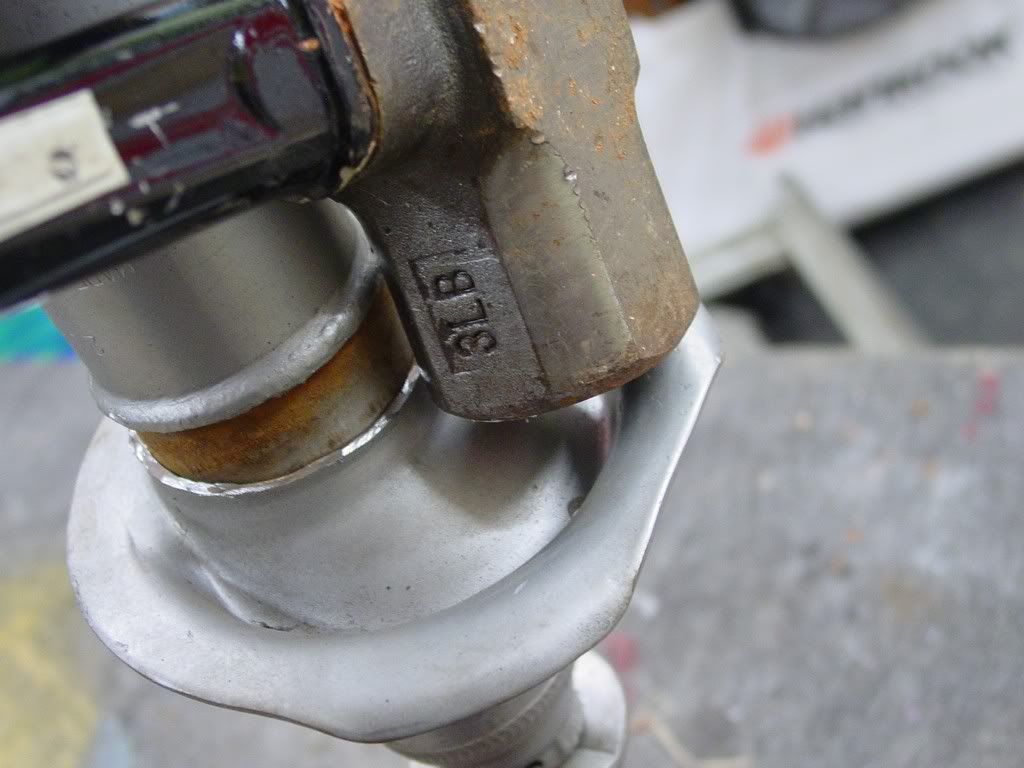
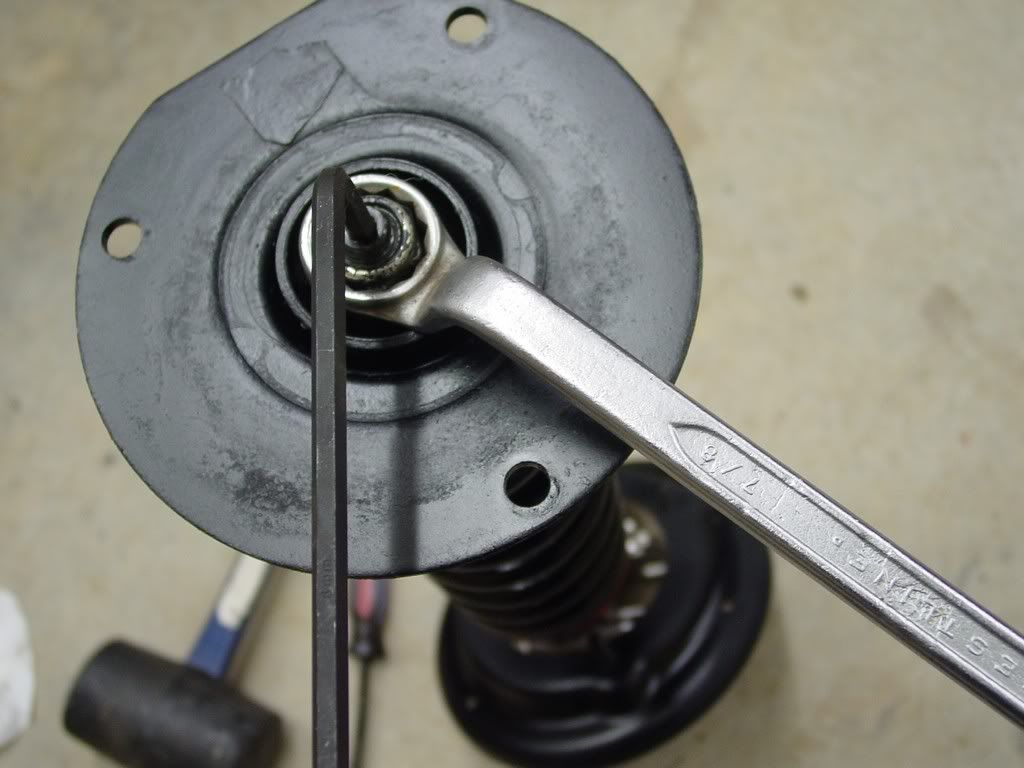
The kybs are different. There is a nut on top and a slot for a allen wrench at the top of the strut shaft. So the only way to do this without air is with an open end wrench on the nut and an allen key in the strut. I had previously measure the allen hole as a 6
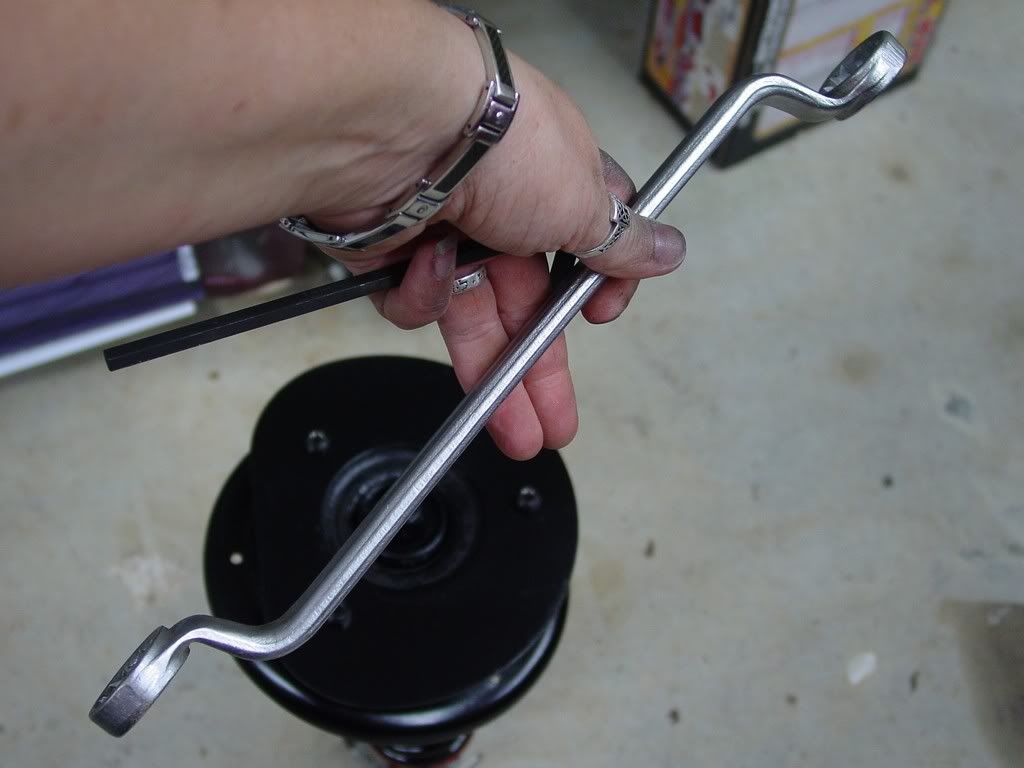
The nut was too larger for my box wrench collection so I pulled out the big adjustable,
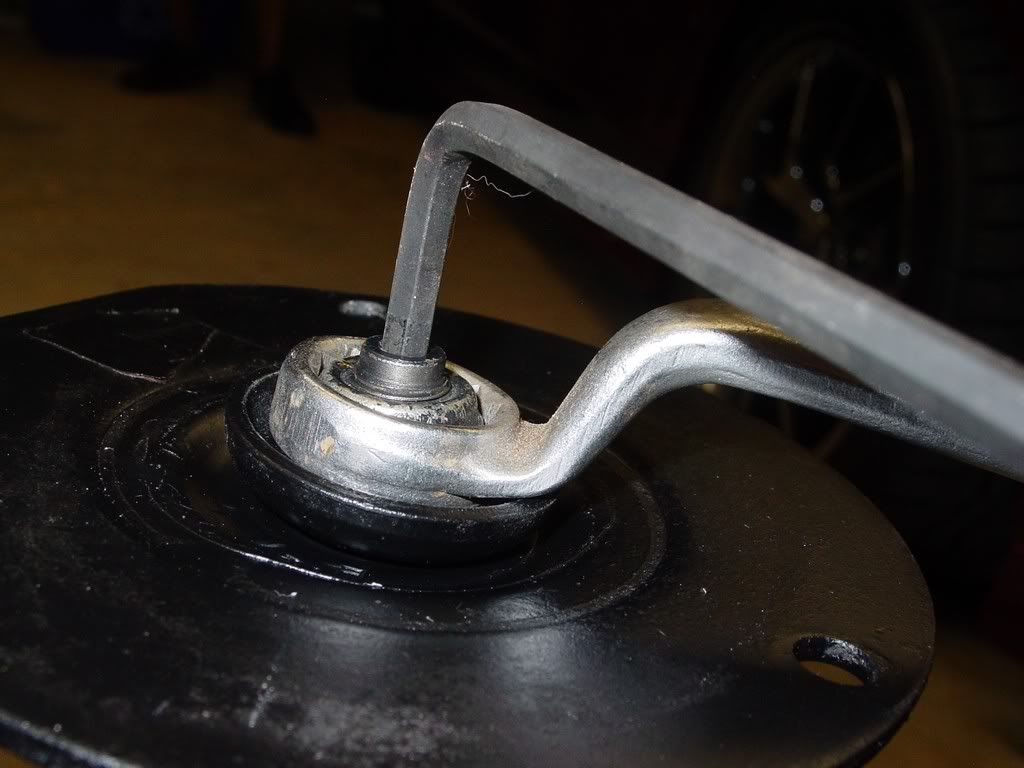
A forum member (Mike142) pointed out later in this thread that there was a better tool for the job! I had one used it at install and disassembly of the 2nd one. He was so right!
quote
Originally posted by Mike142:
BTW, a crow's foot wrench is the best way to hold that top nut when the allen is in there. Bought a set of those years ago when I did struts on another car. They make it so much easier to undo that nut.
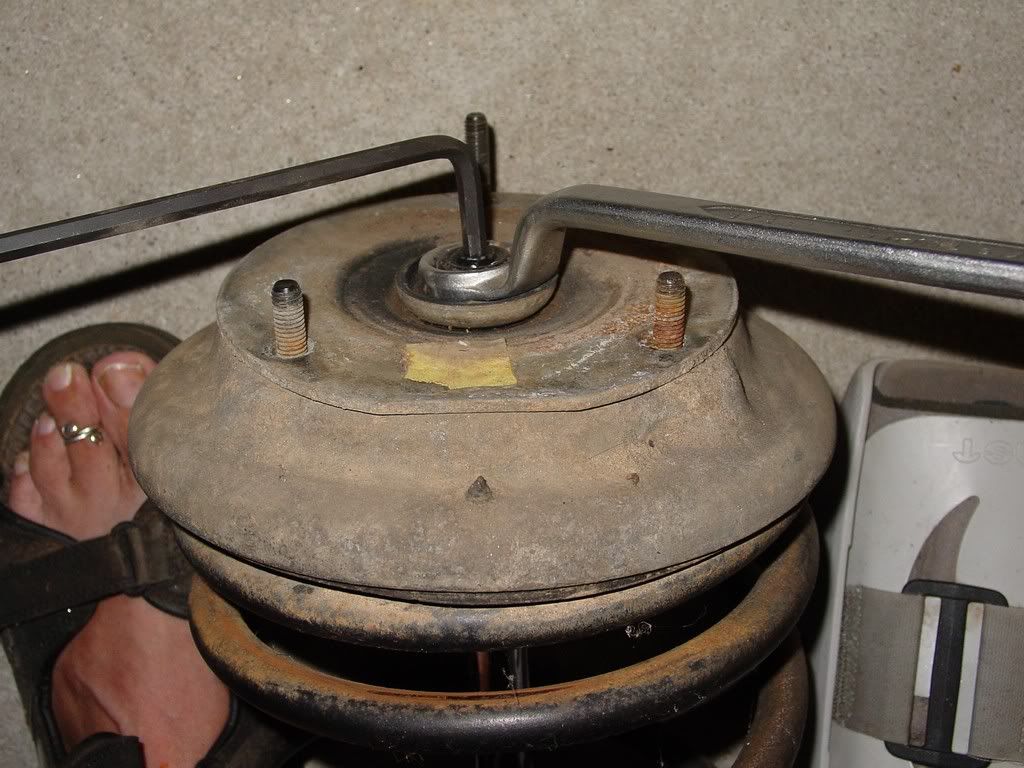
I had a helper hold the unit as I loosened things on the first assembly. Again I was lucky this was a recent install and the assembly cooperated. One the second, I did it alone. Gripped it with my legs and used my thigh to brace the allen wrench and turned the wrench.
It worked. Once I got close to the release point I took the unit outside and set it on its side and finished my last few turns with it pointing away from me, windows, cars, pets, bystanders...lol! That way any tension ejecting bolts or plates should not hit me or them.
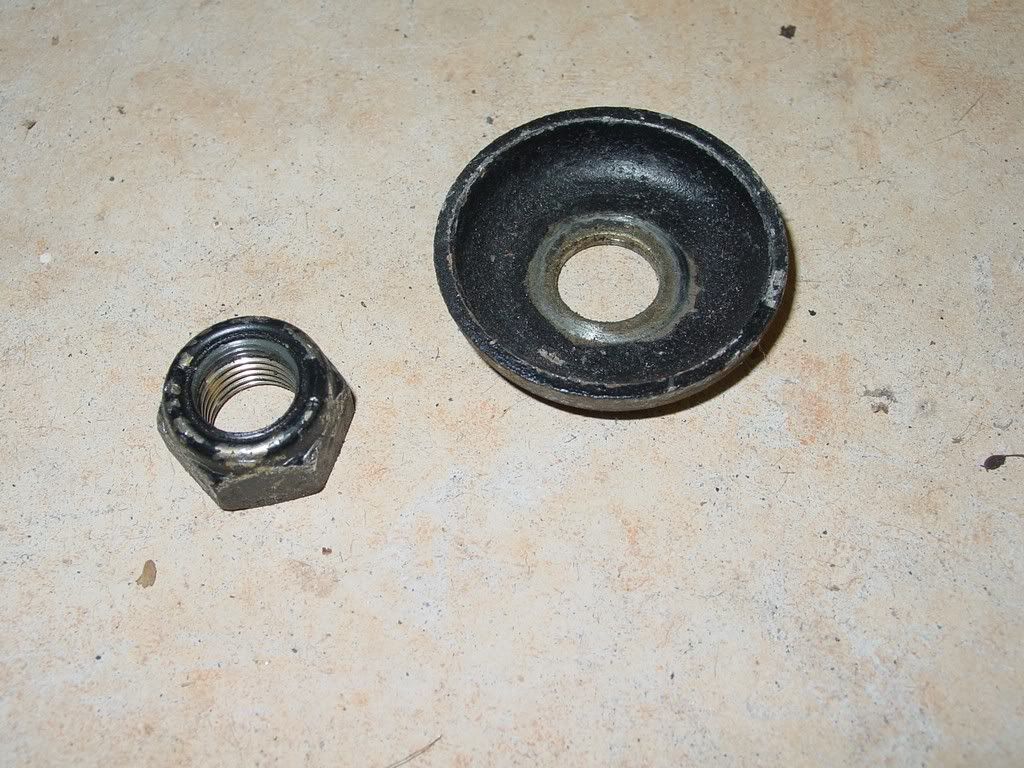
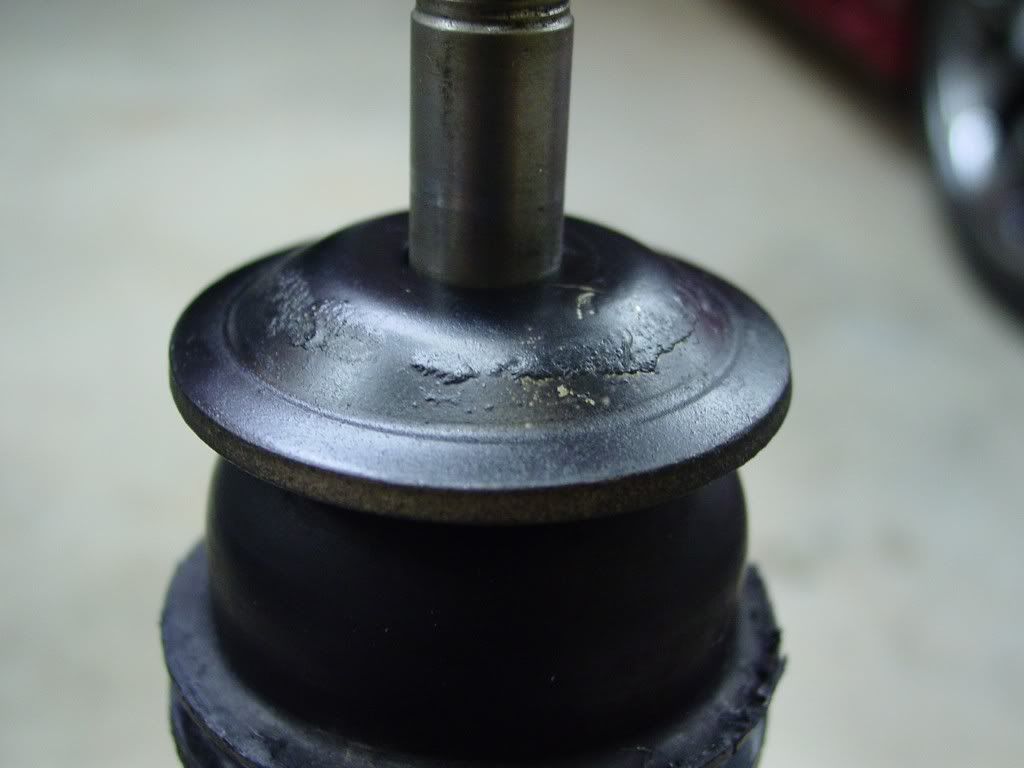
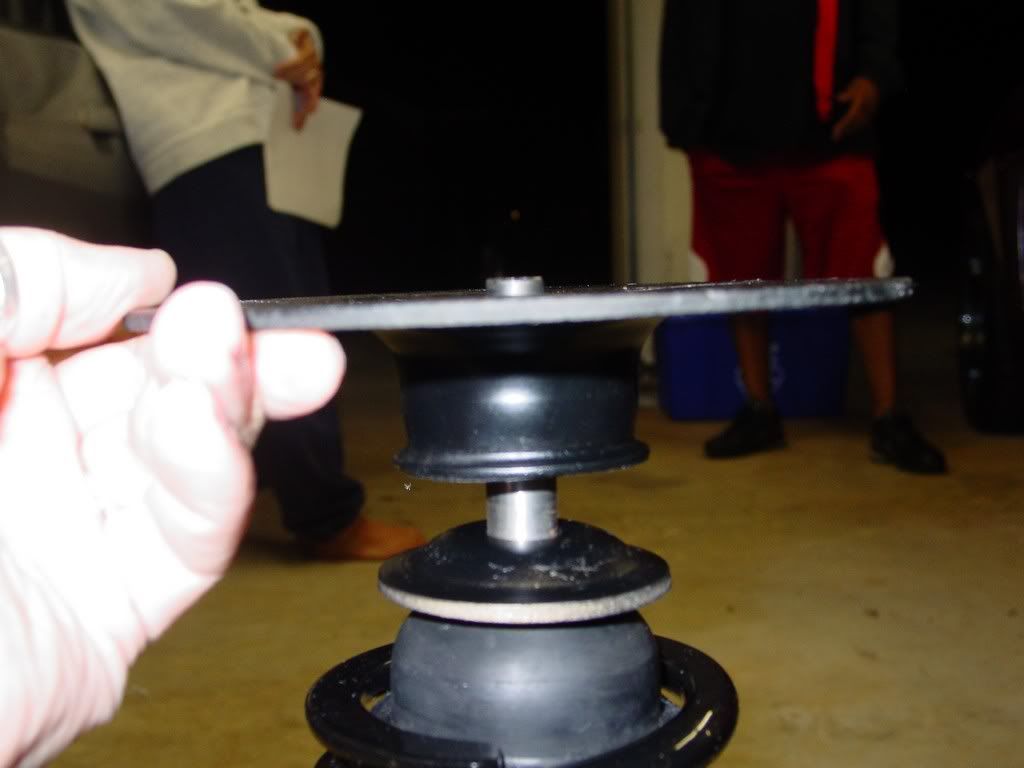
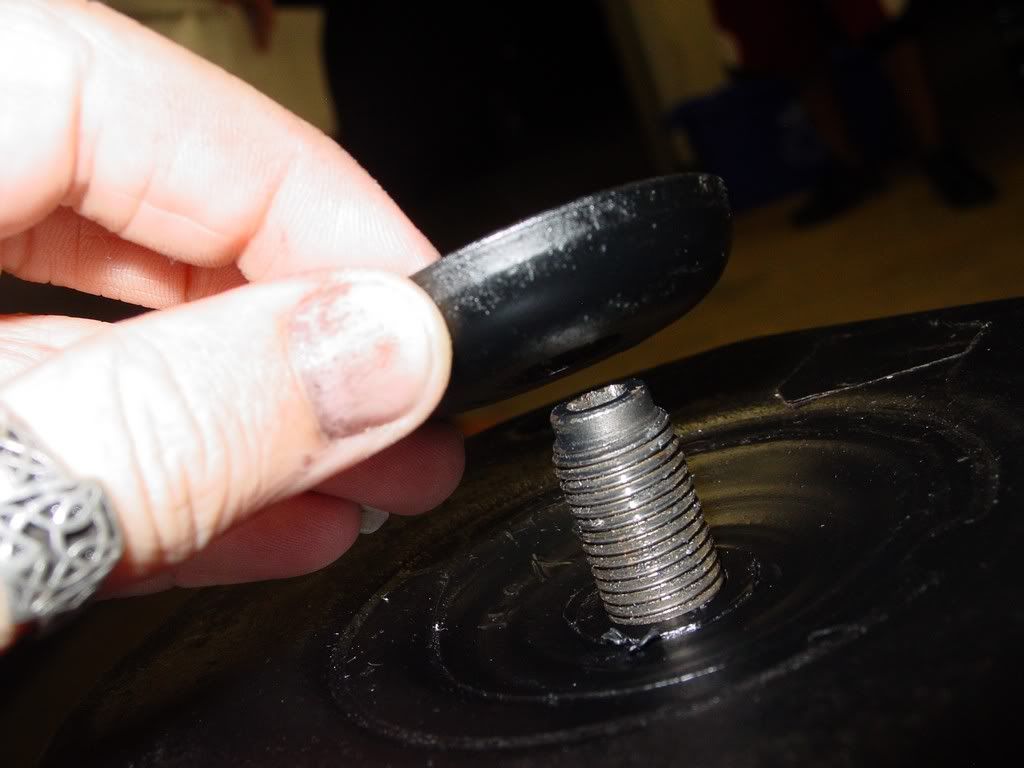
It was a bit of a let down, with just a small pop and the top nut and washer came off. The washer is sitting as it does on the unit. Cupped side up.
Here is how they sit on the unit
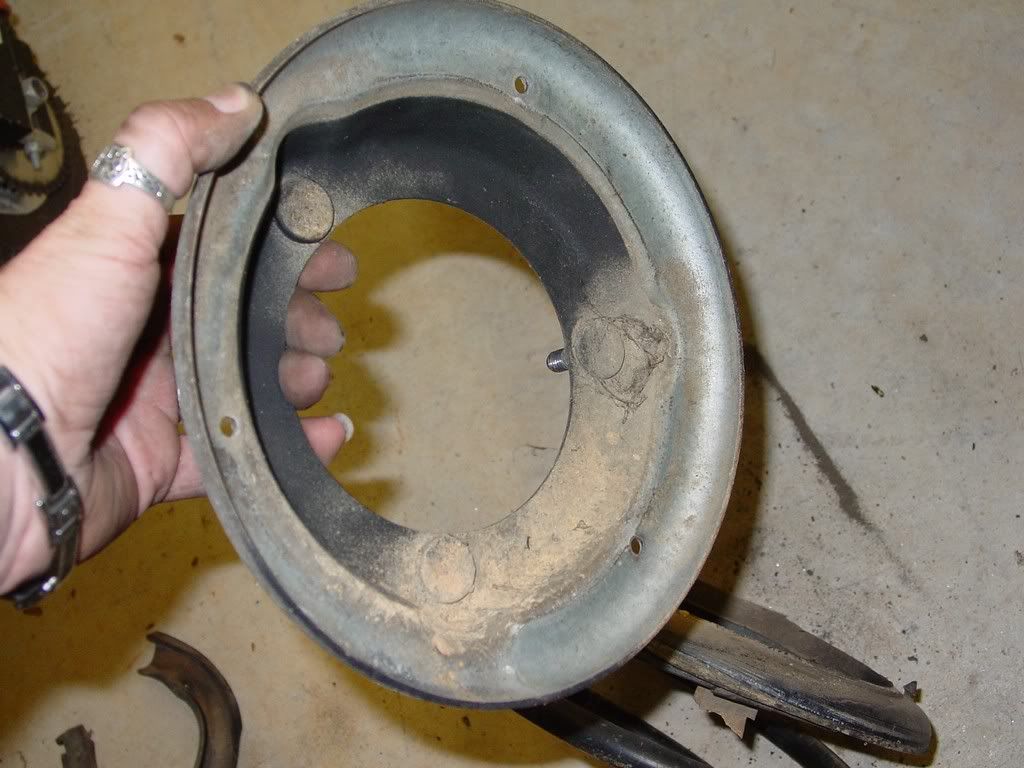
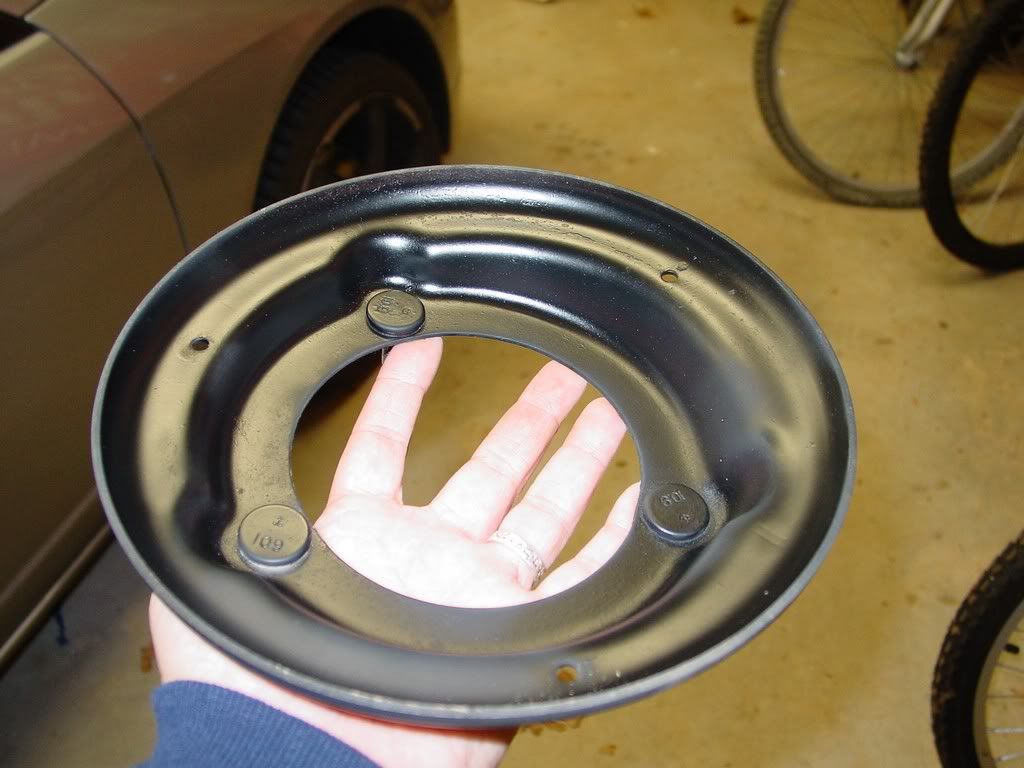
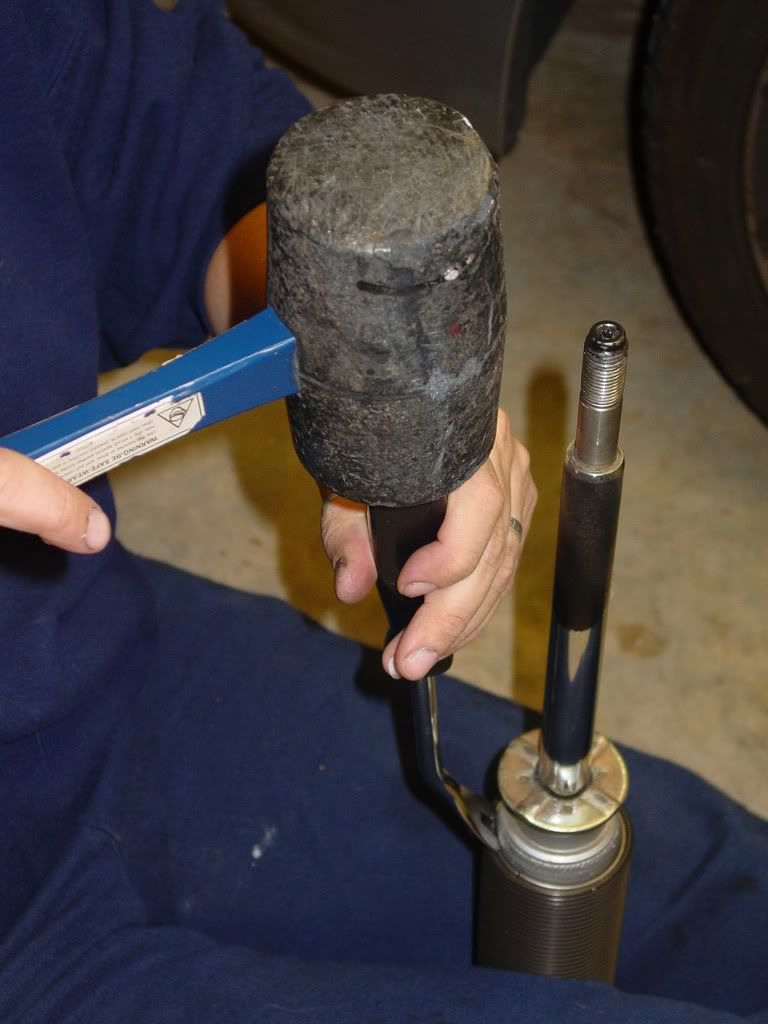
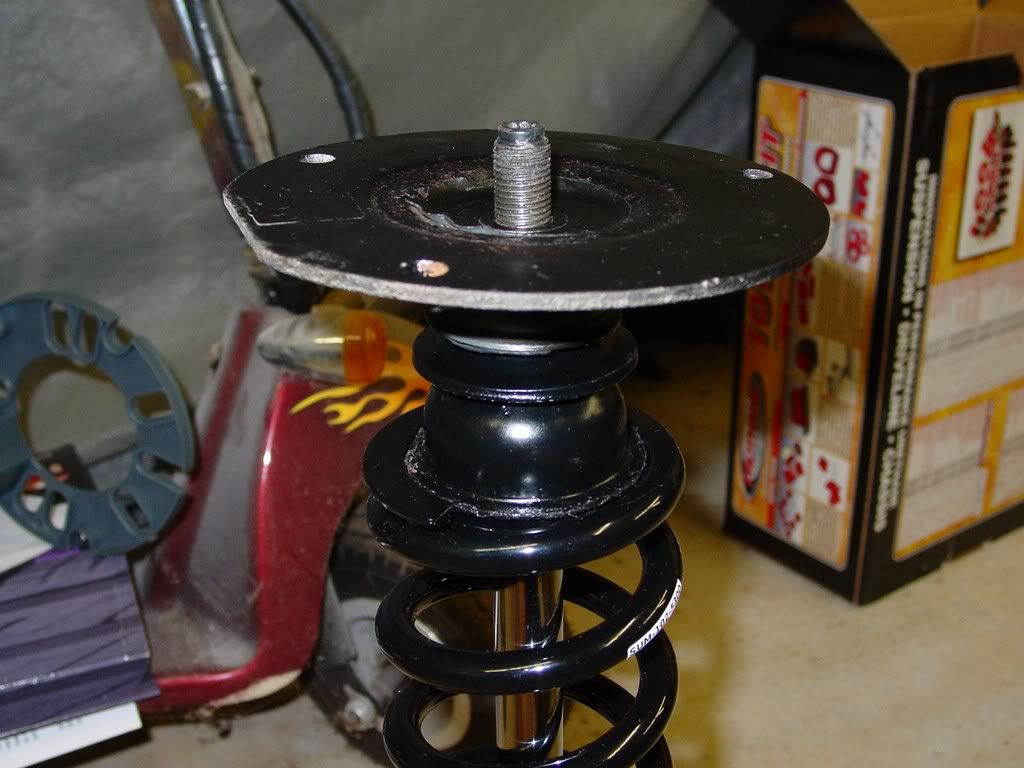
The spring retaining plate needed a bit of coaxing to come loose... a gentle wrap with a rubber mallet did the trick. Notice the flat side faces up when installed as an assembly
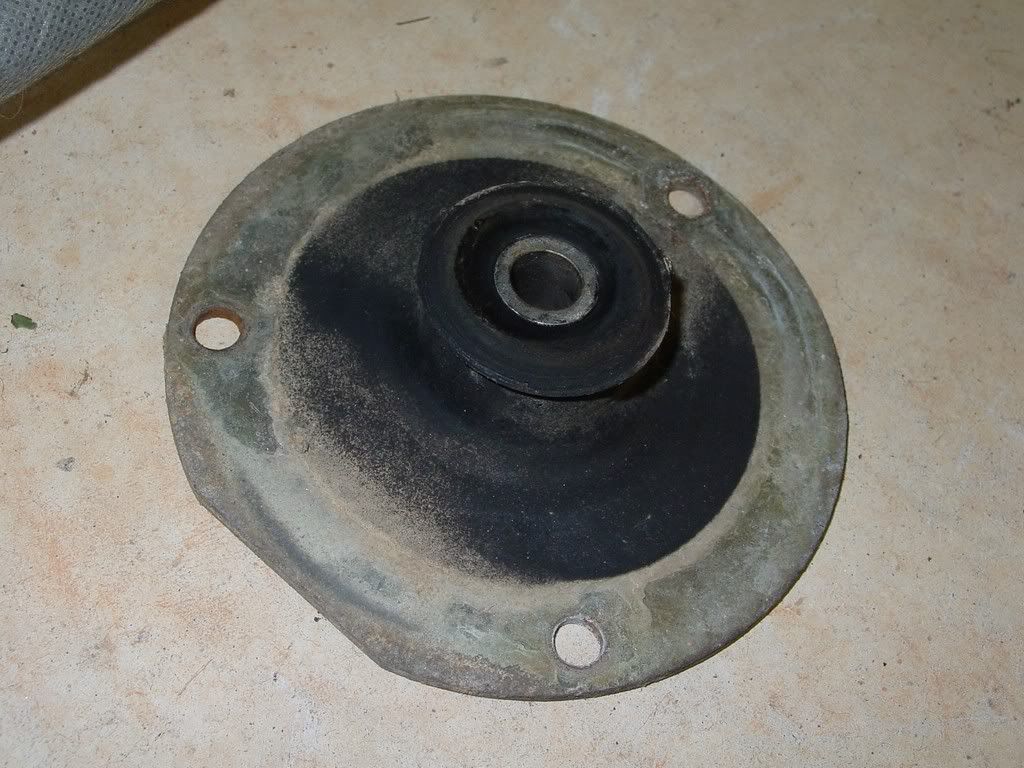
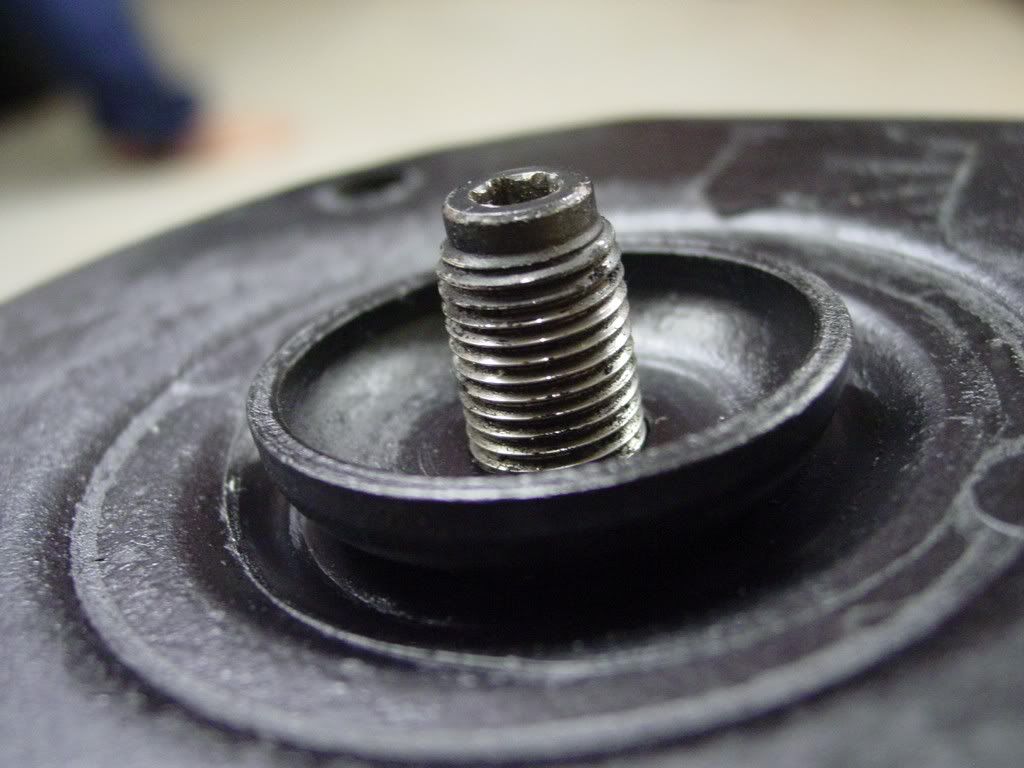
Here is the underside with the coil retainer jutting out. It helps keep things centered when you convert to the smaller diameter coli-over springs
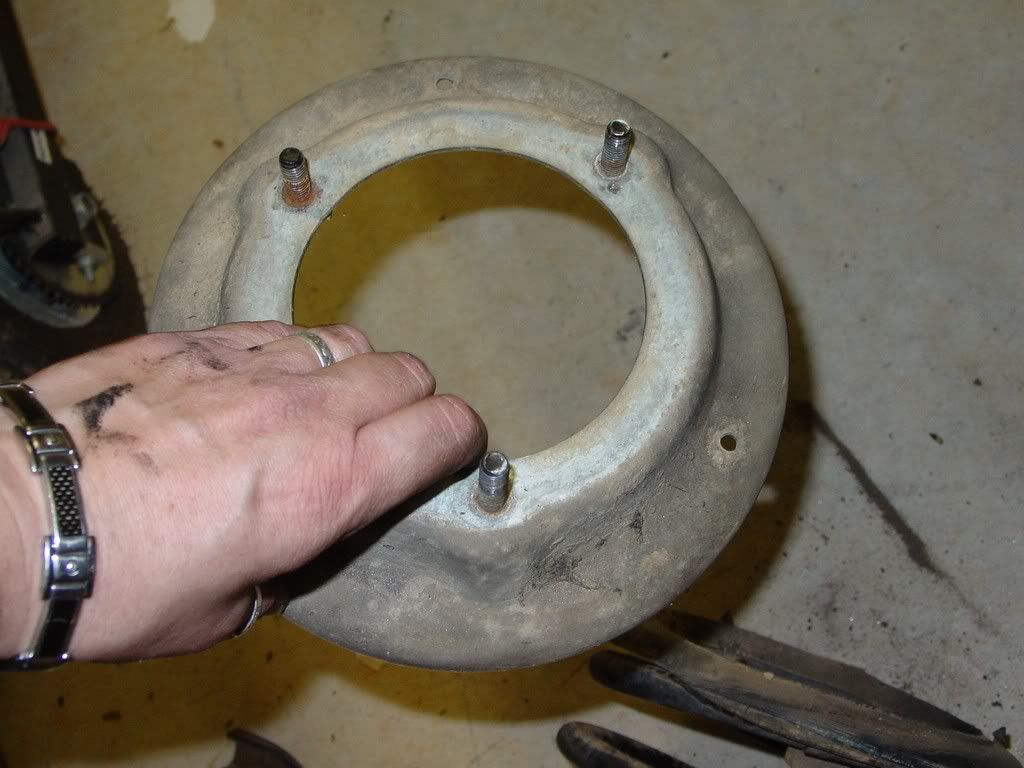
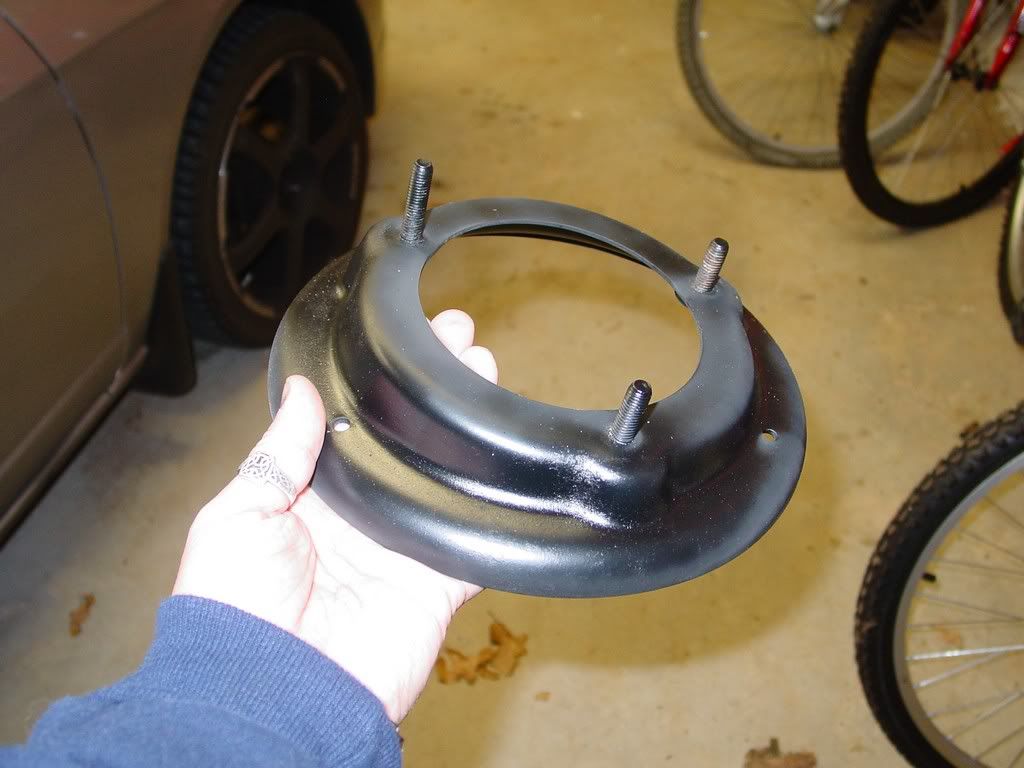
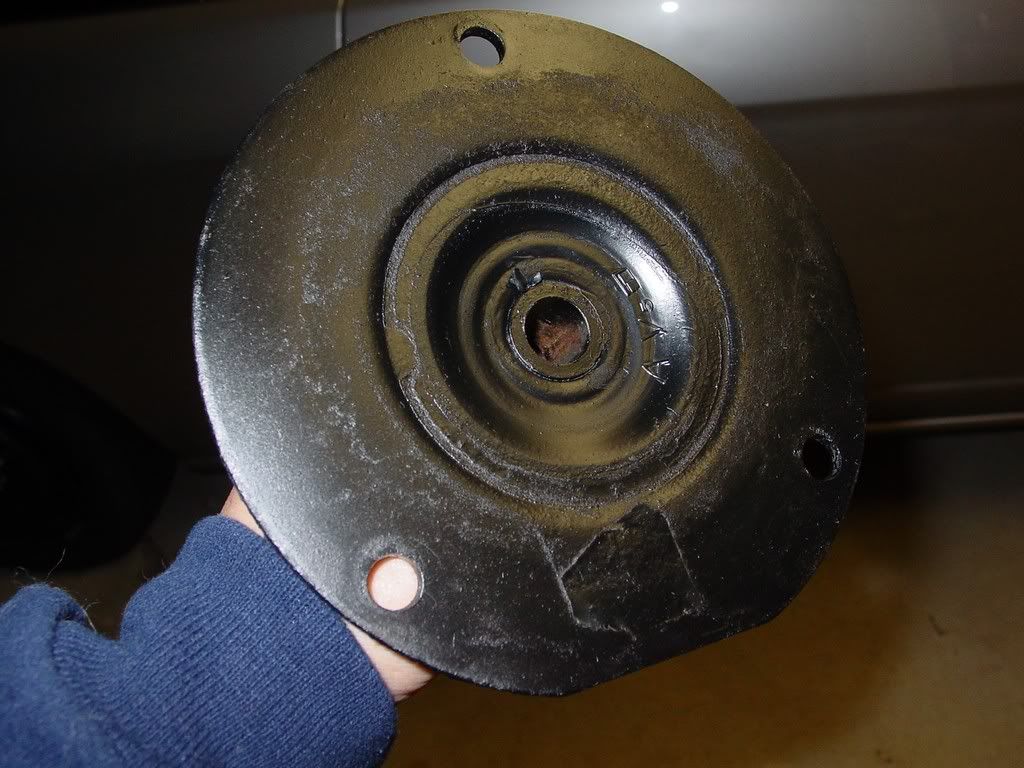
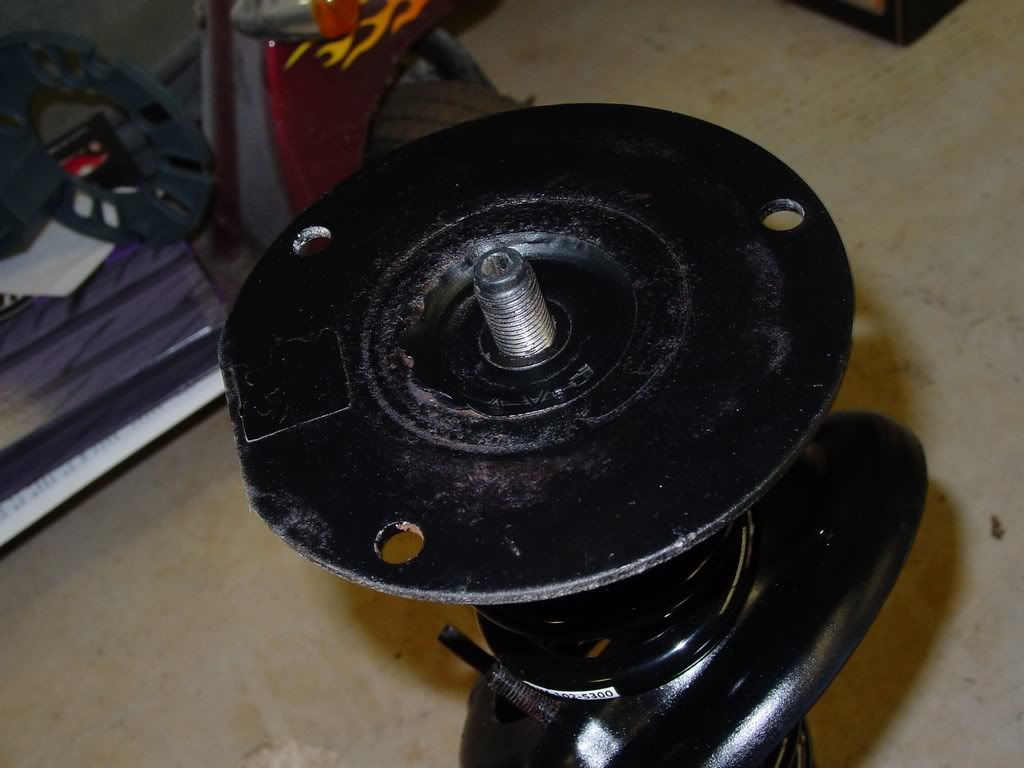
The upper spring perch plate, note the studs face up! (fyi for install)
It was stuck on there quite well and I had to drop him on the ground and then he let go
again...top
and bottom
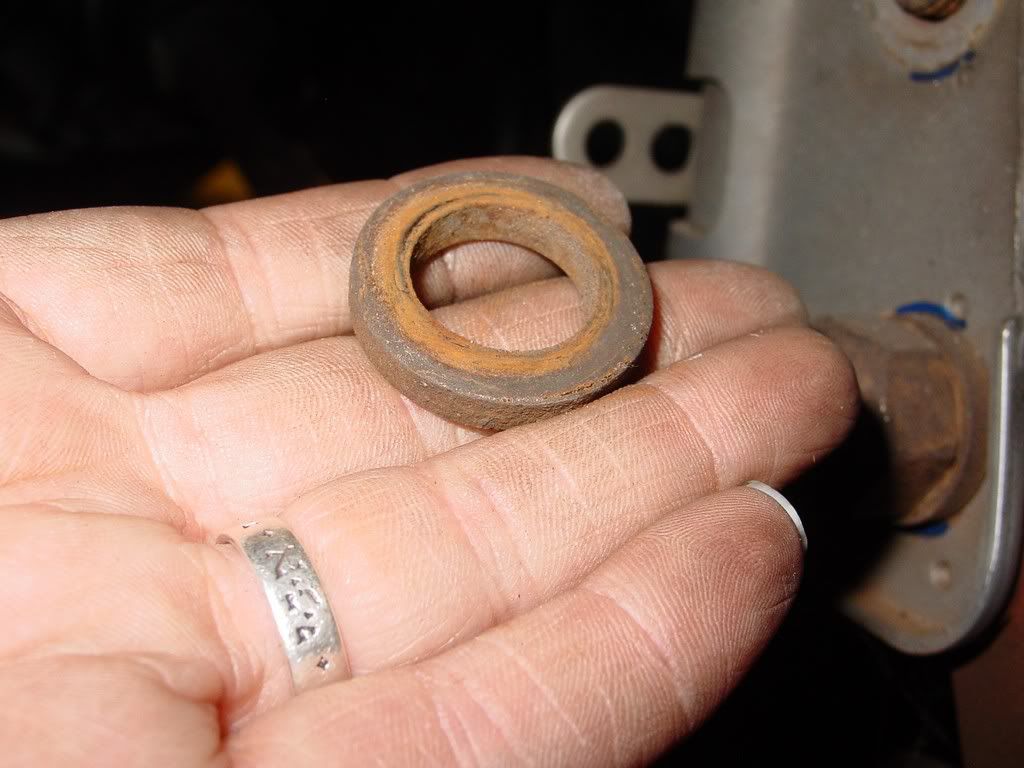
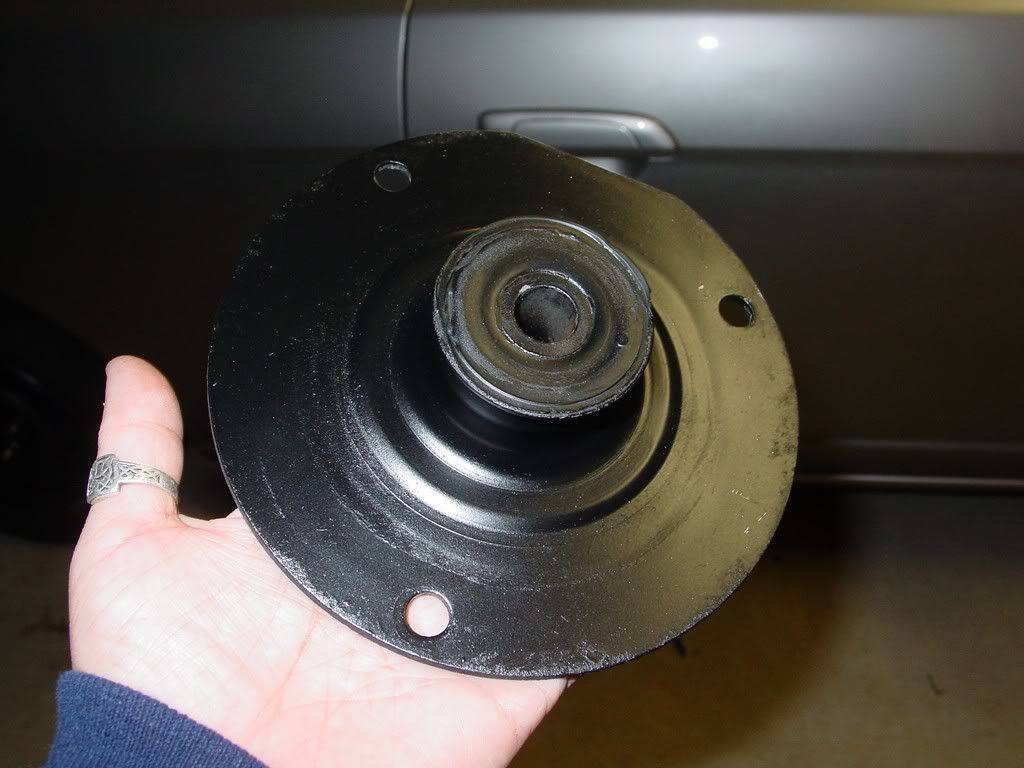
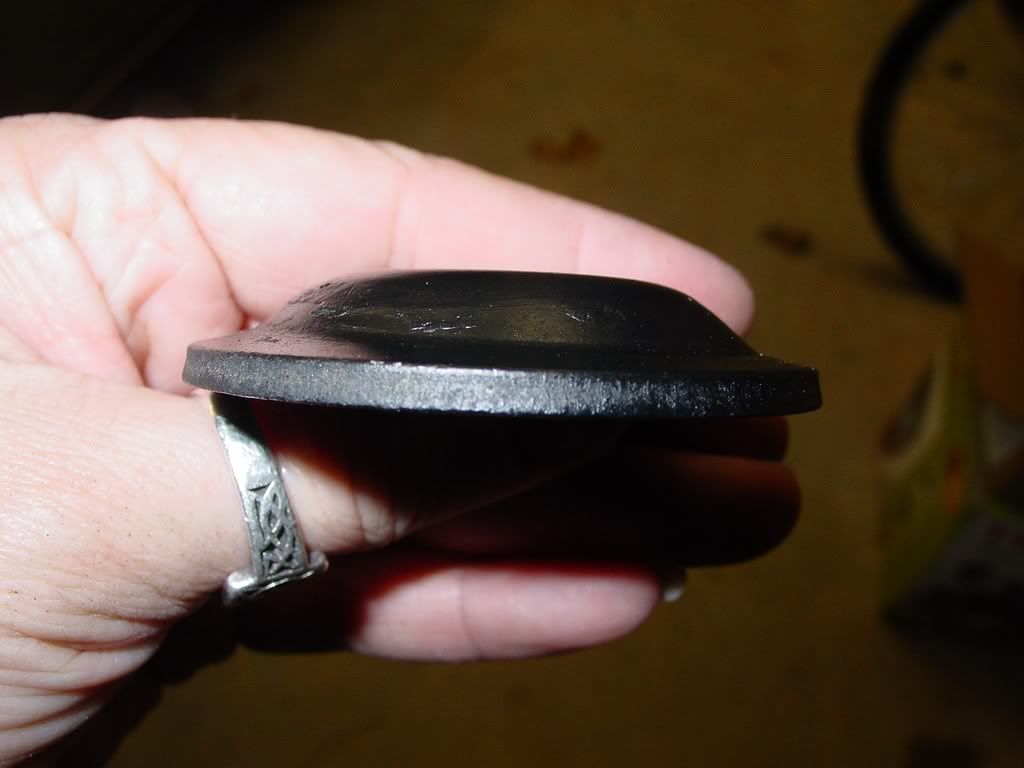
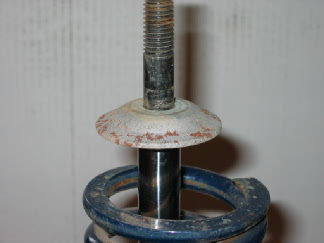
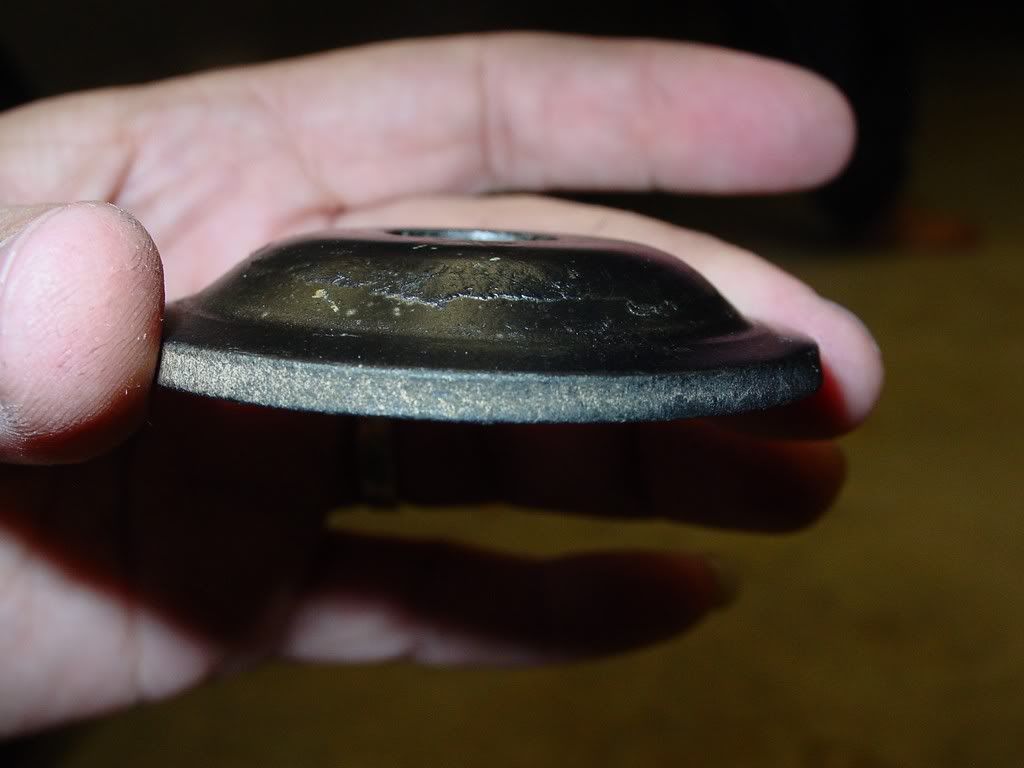
washer... note the domed side is up. it will be the same at install, however, the rubber bushing will seated below it.
Off in my hand. domed side up! Just like it will be installed.
Again, no dust boot... somehow it was removed when we installed the kybs. Not sure why. Had to dig them out of the attic.
[This message has been edited by redraif (edited 09-15-2014).]
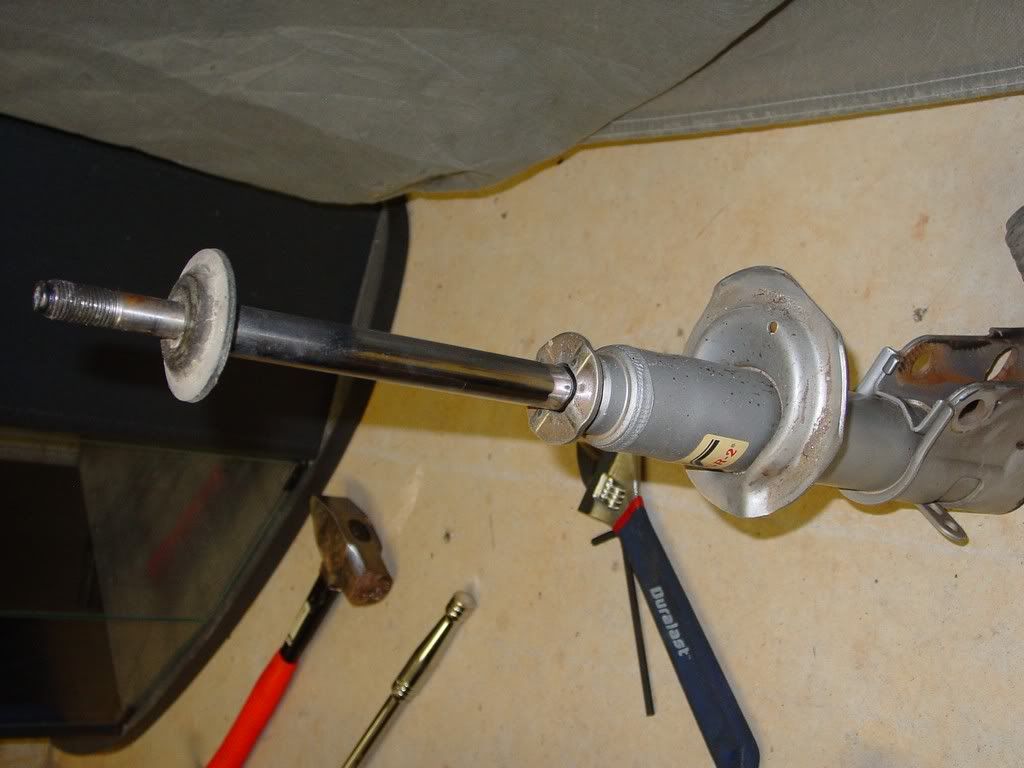
Ok now the strut is naked...Now on to the heart pumping part... DO not cut thru the strut tube when removing the perch... LOL
Now get your supplies
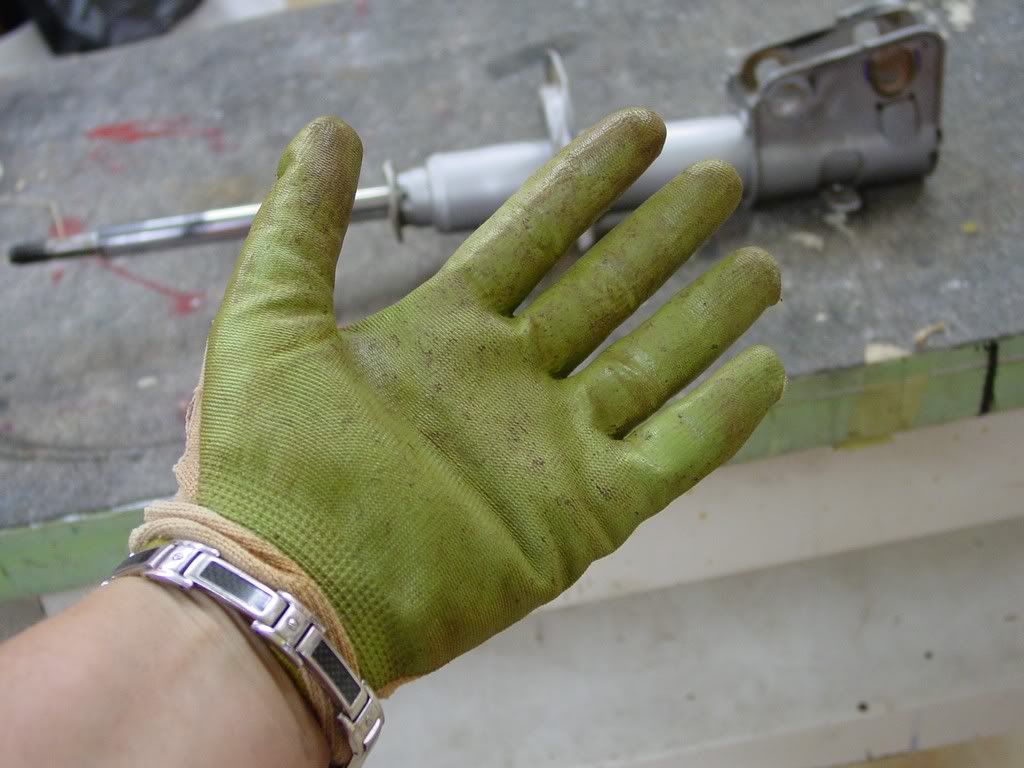
protect your hands
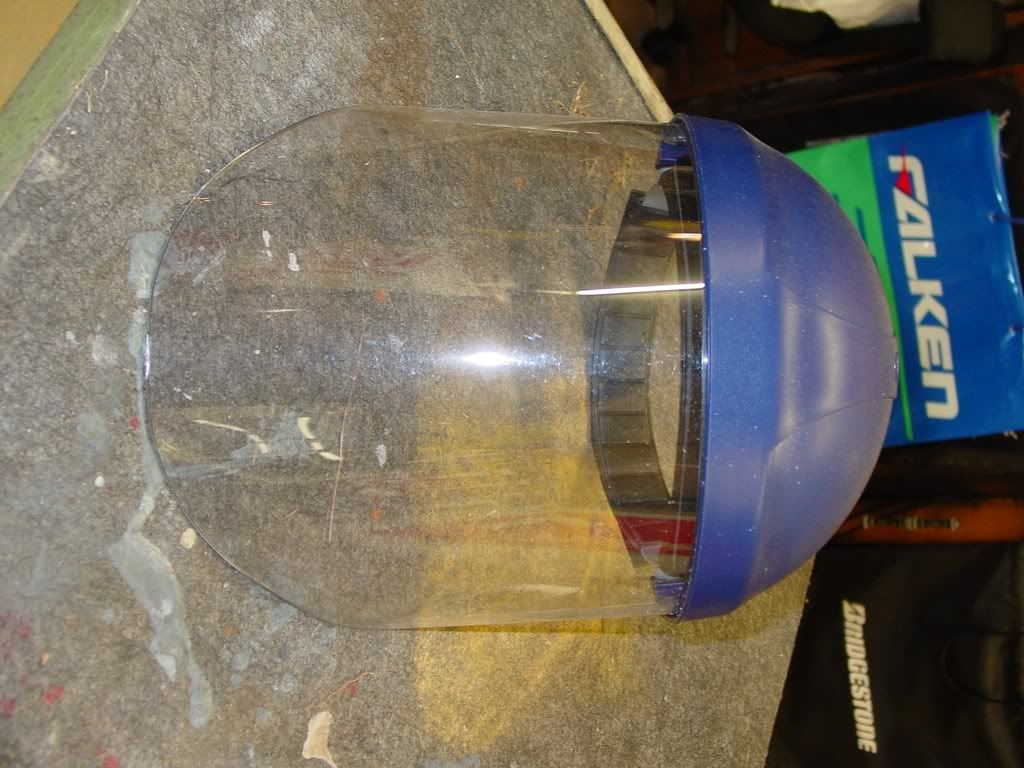
Your eyes...
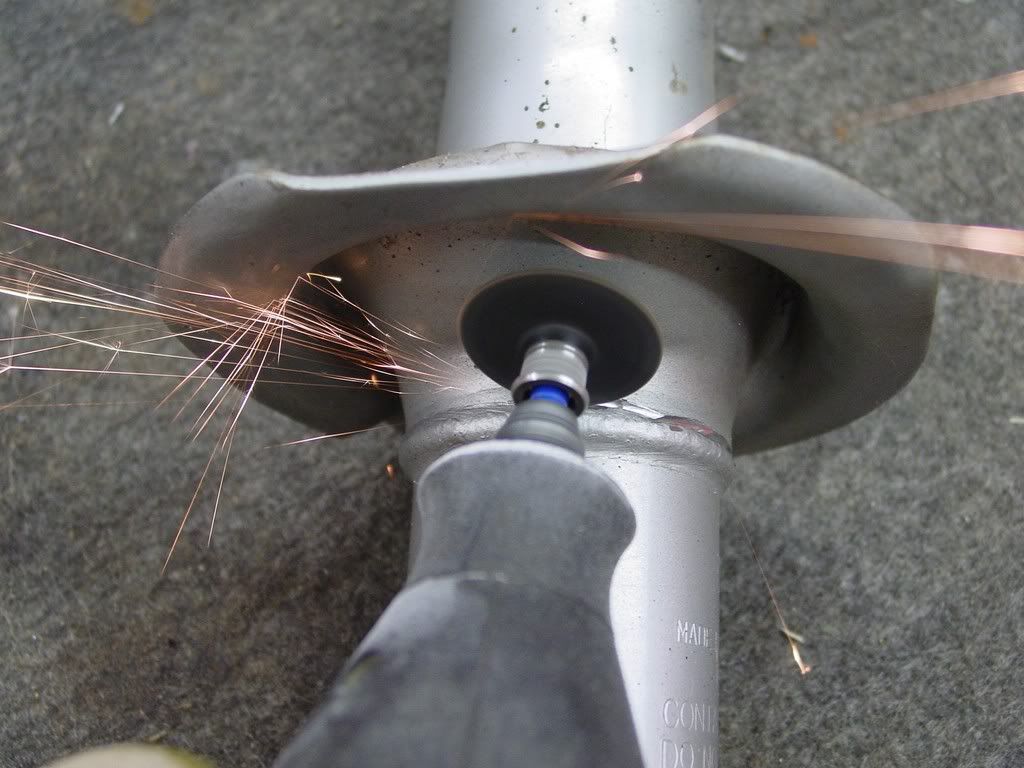
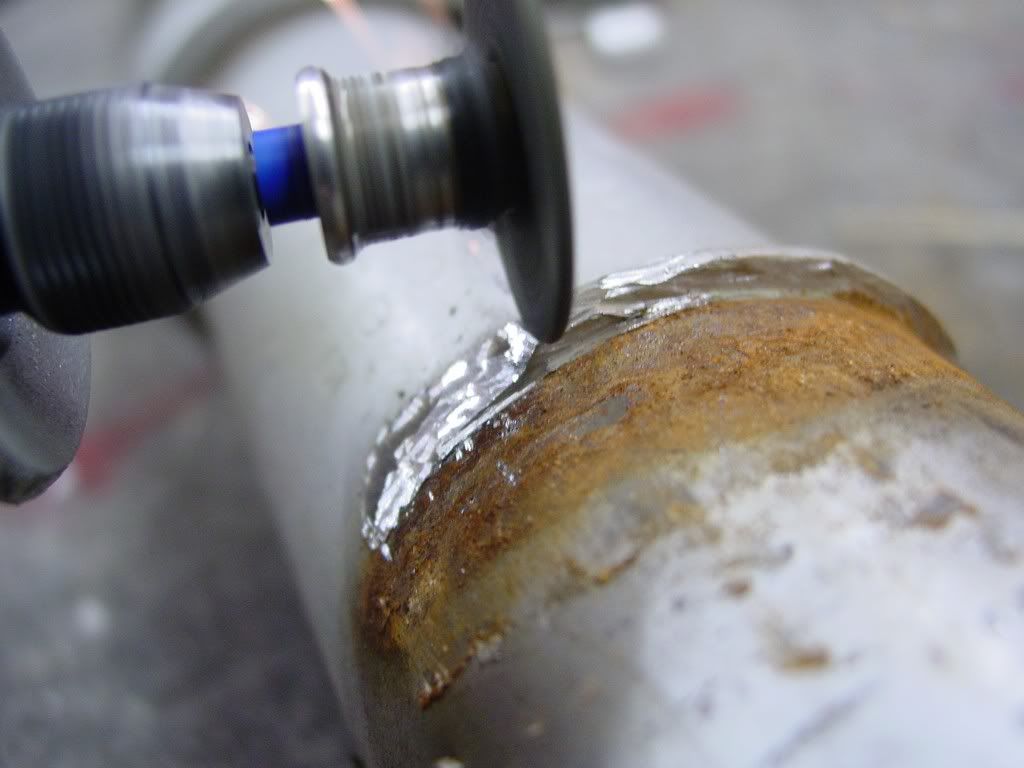
You weapon of choice. I use a dremel... I always use a dremel. slower then a airpowered ziz wheel, but safer due to the smaller and slower nature of the cutting. But errors can still happen if you are not CAREFUL
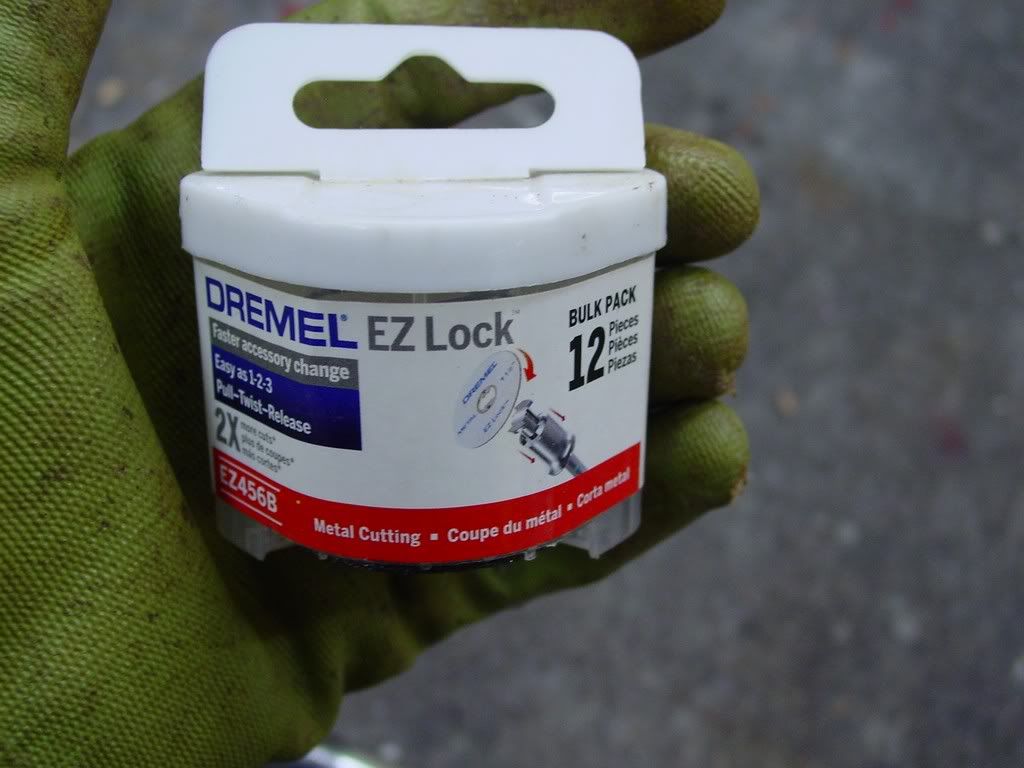
The cut off wheels I always use, for like everything. I LOVE them!
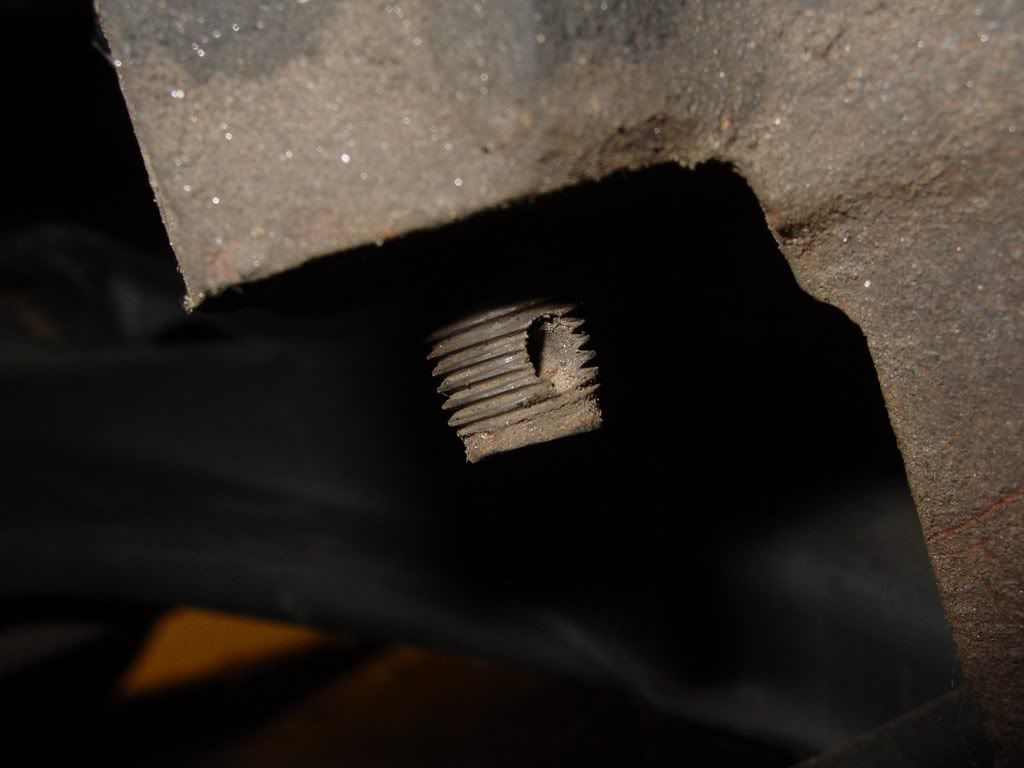
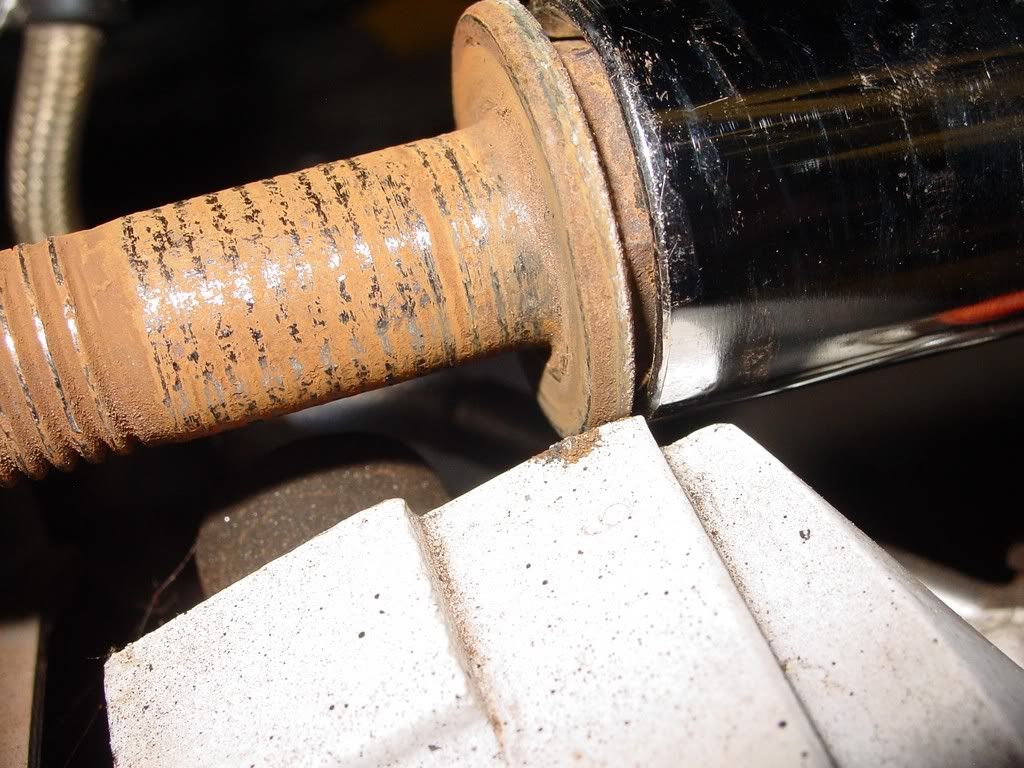
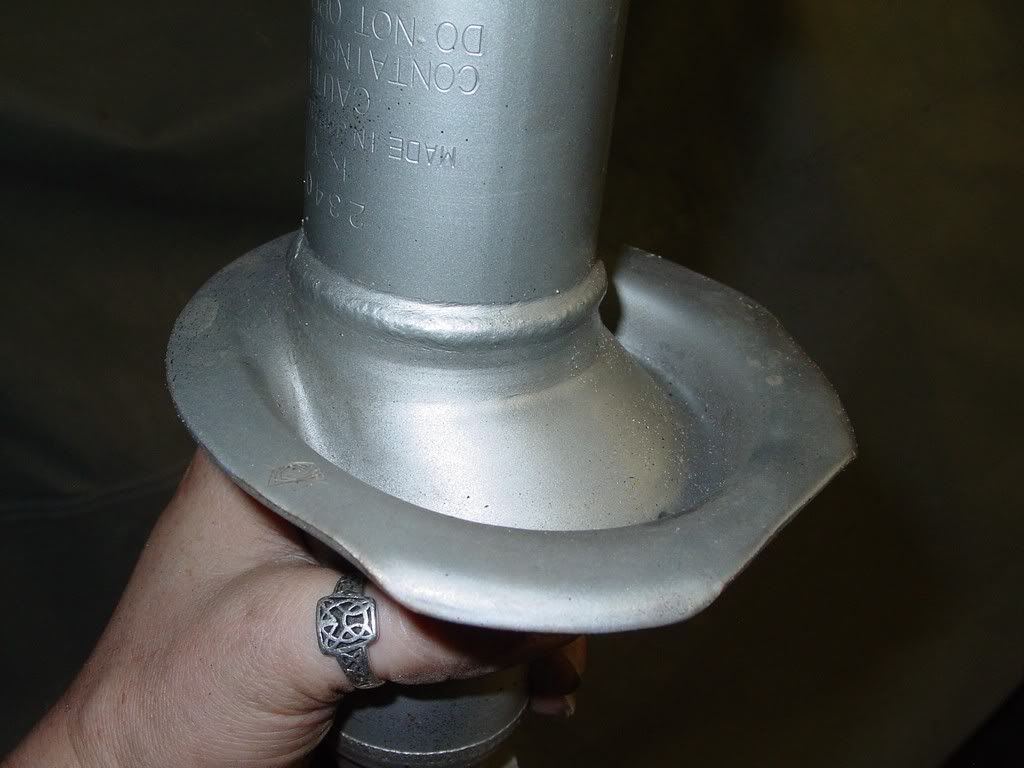
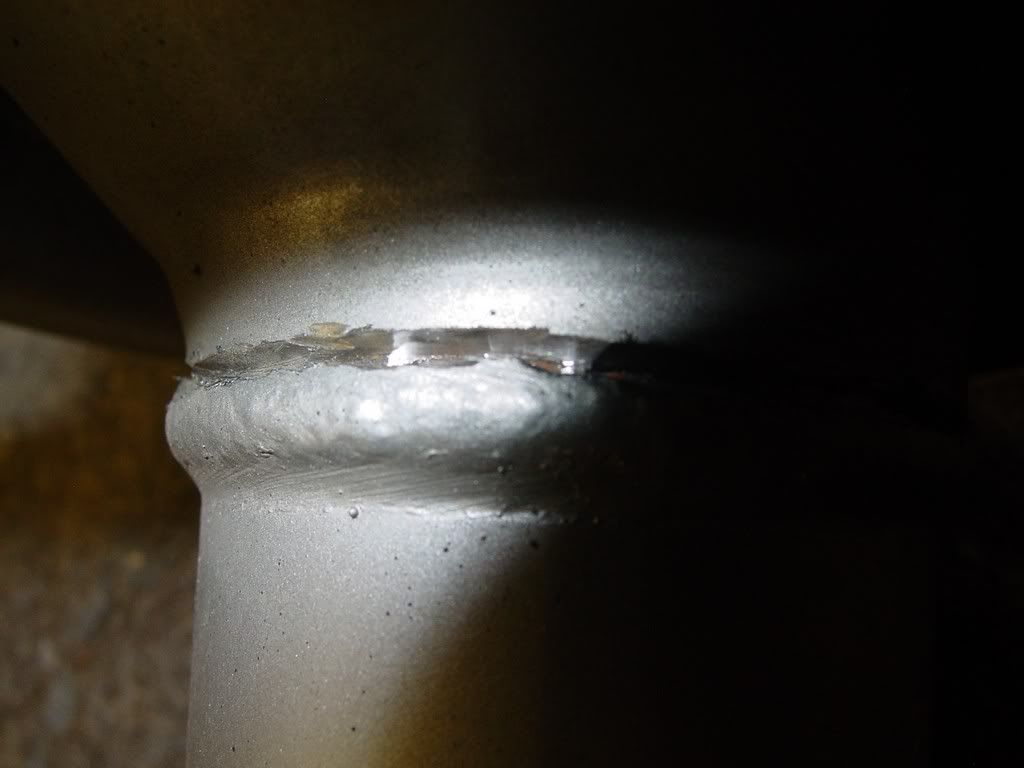
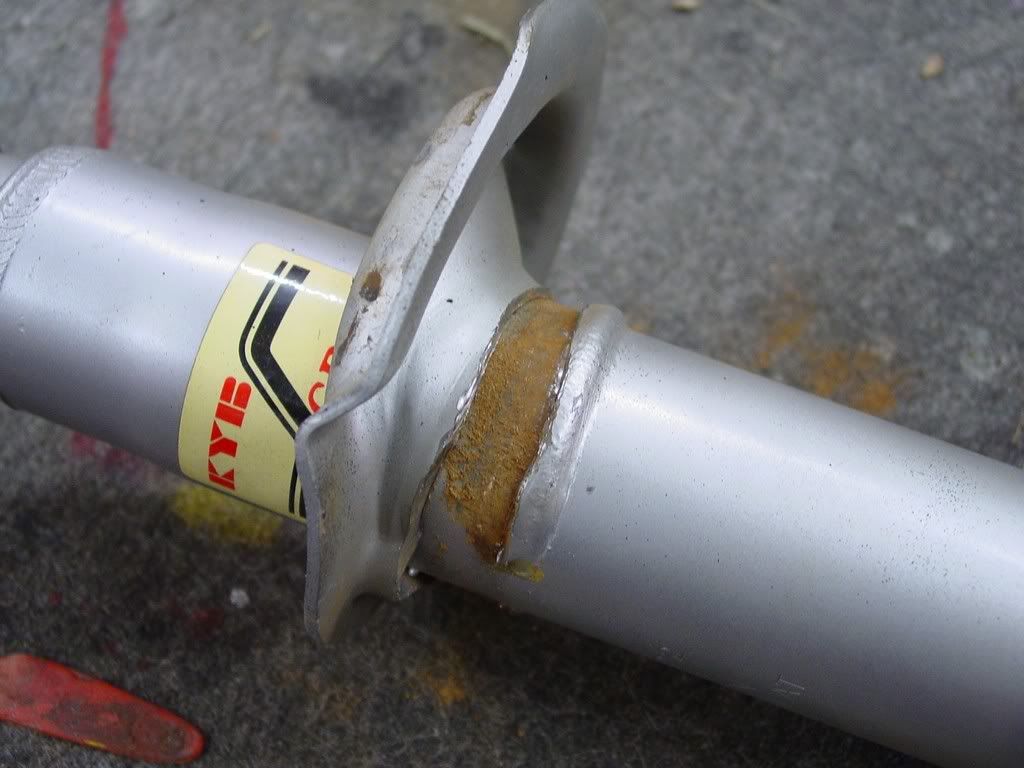
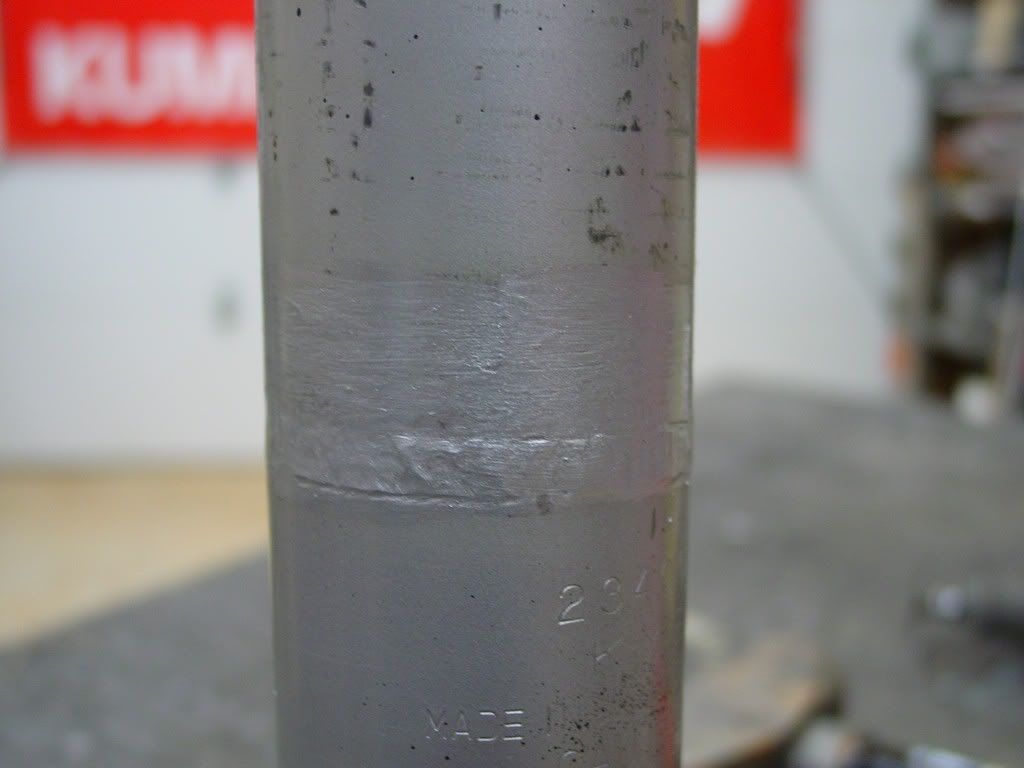
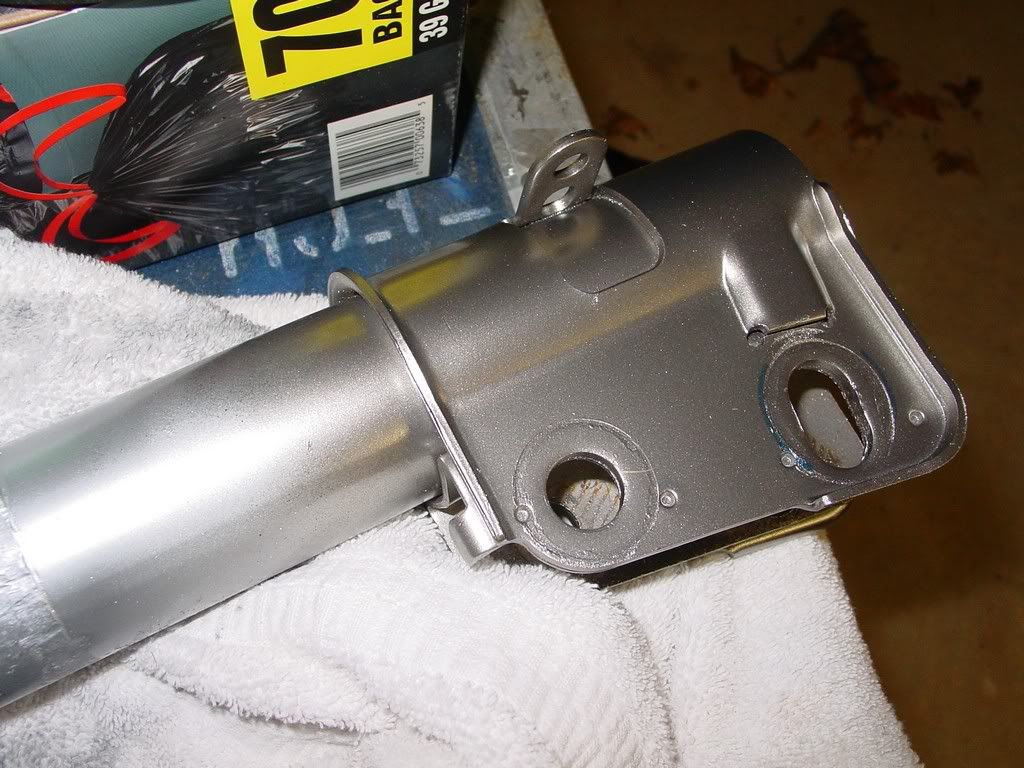
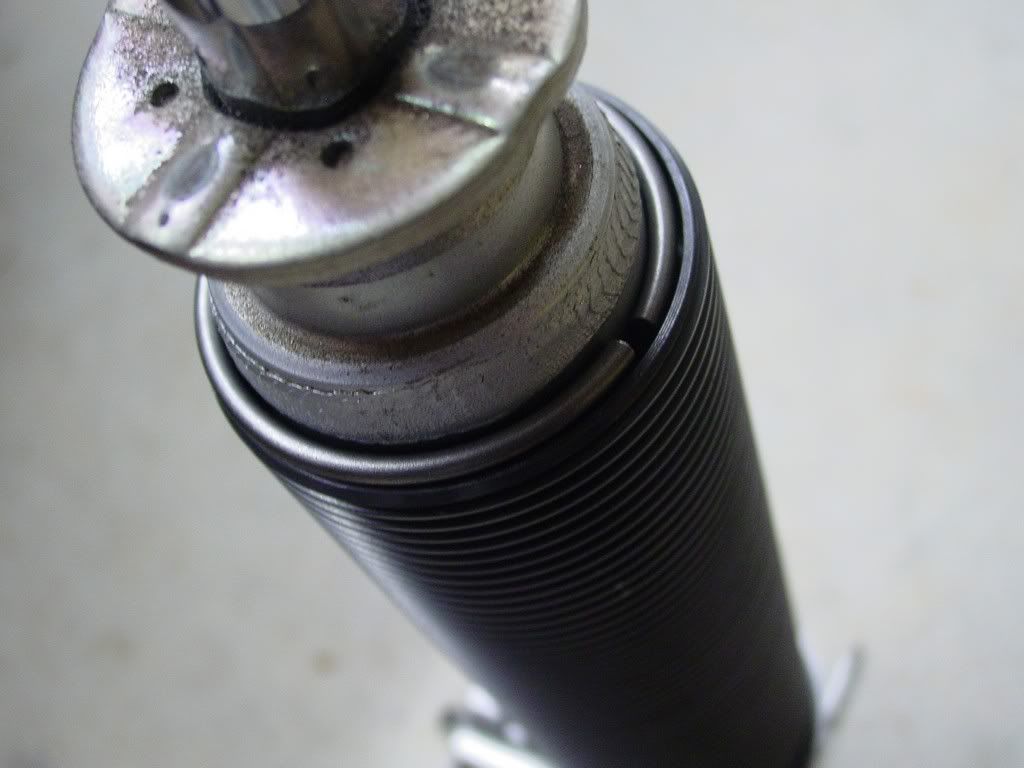
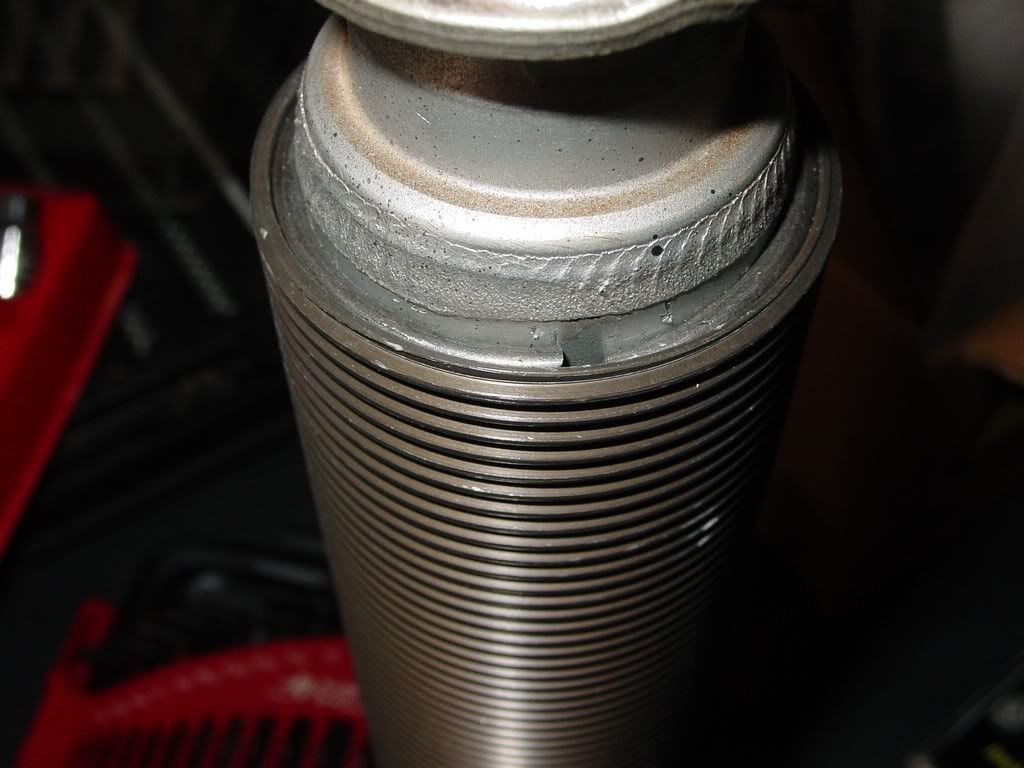
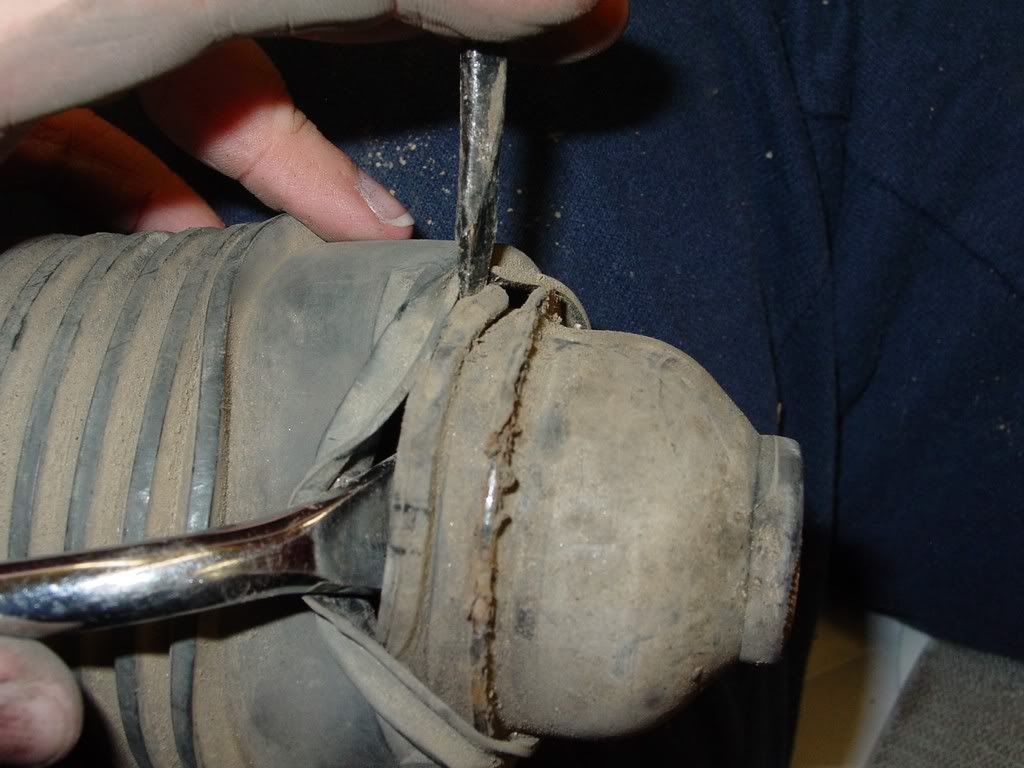
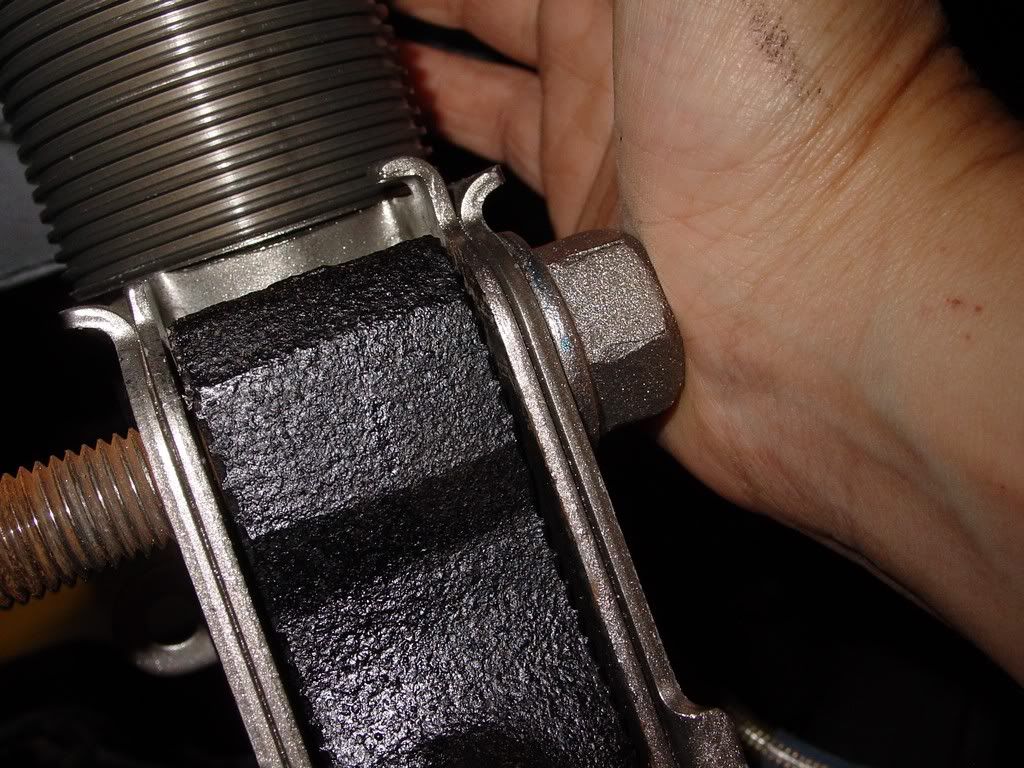
So I had to decide where to cut to remove the perch from the strut with the least chance of damage
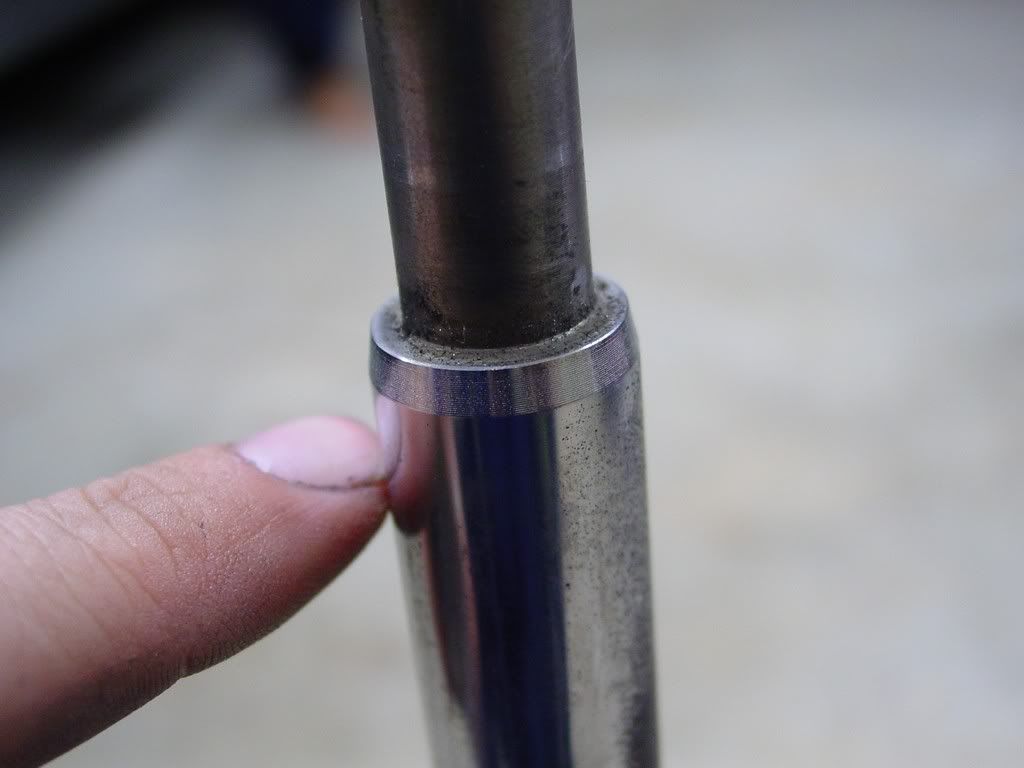
So i chose just above the weld line. I hoped to hit a slight visble pocket where the perch is close to the body, but not quite touching it
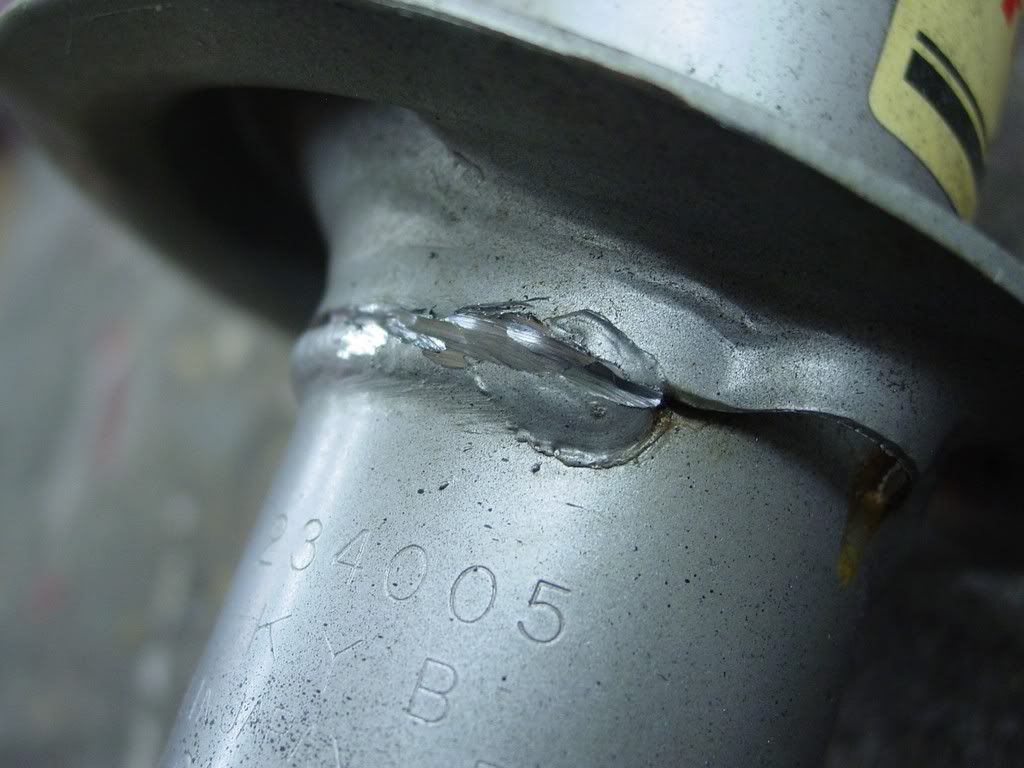
Slowly and carefully till the pocket revealed itself...
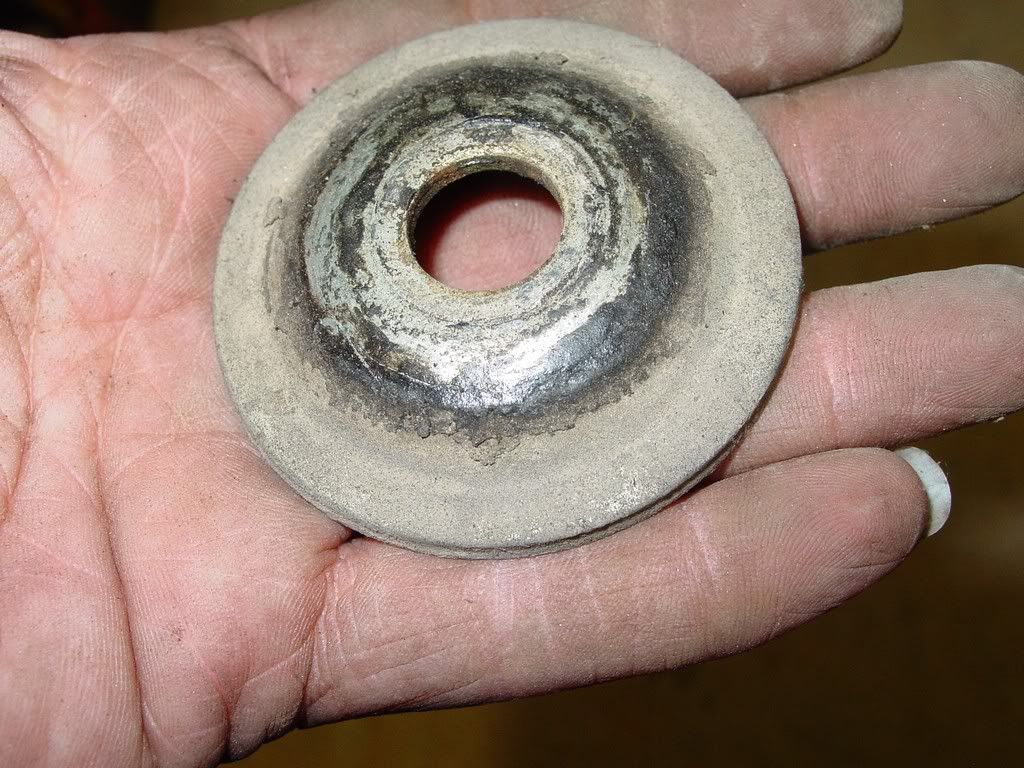
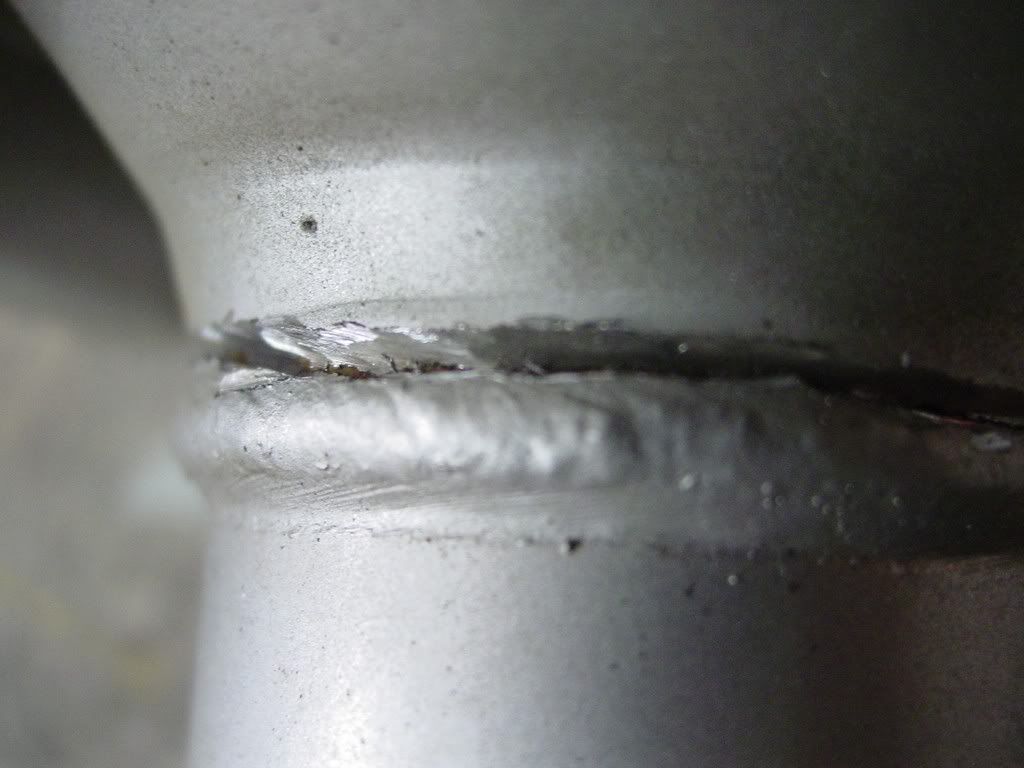
And it did. Finally I saw just a hint of rust... the last bit of space b/w the perch & body right above the weld revieled itself!
another shot
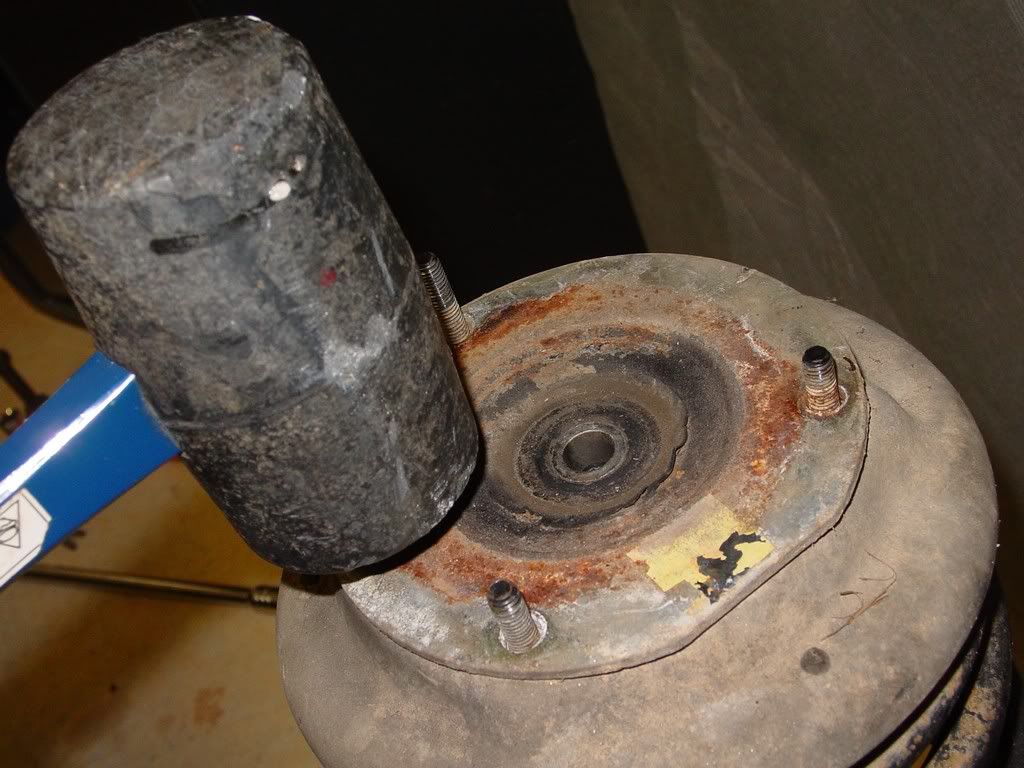
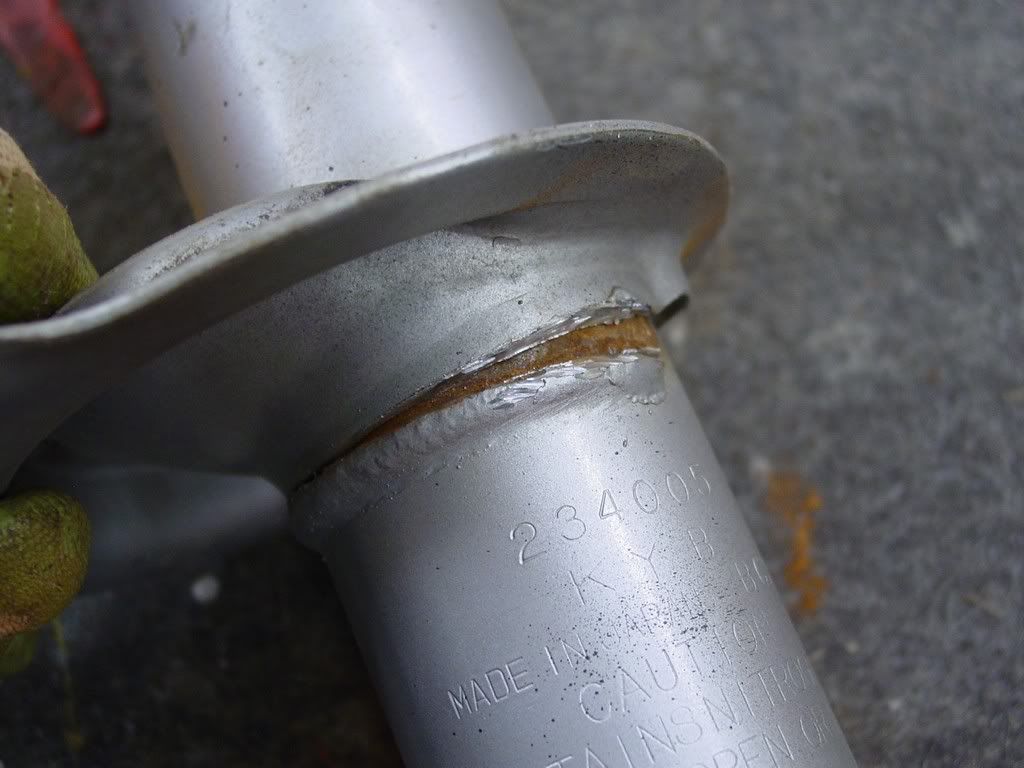
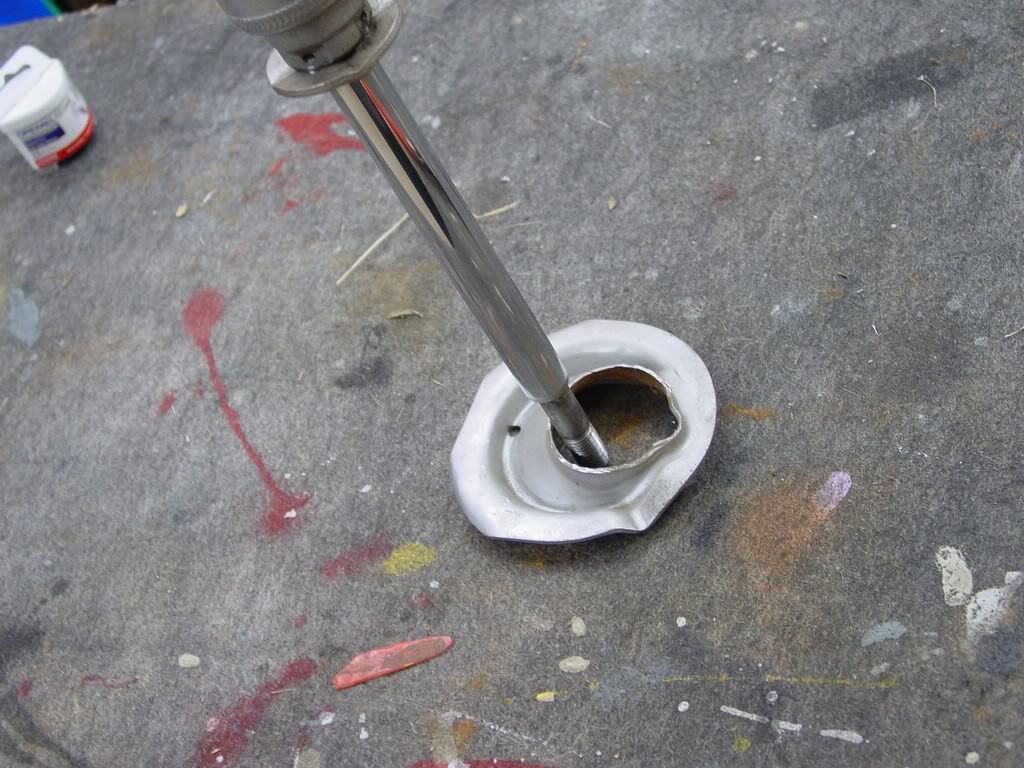
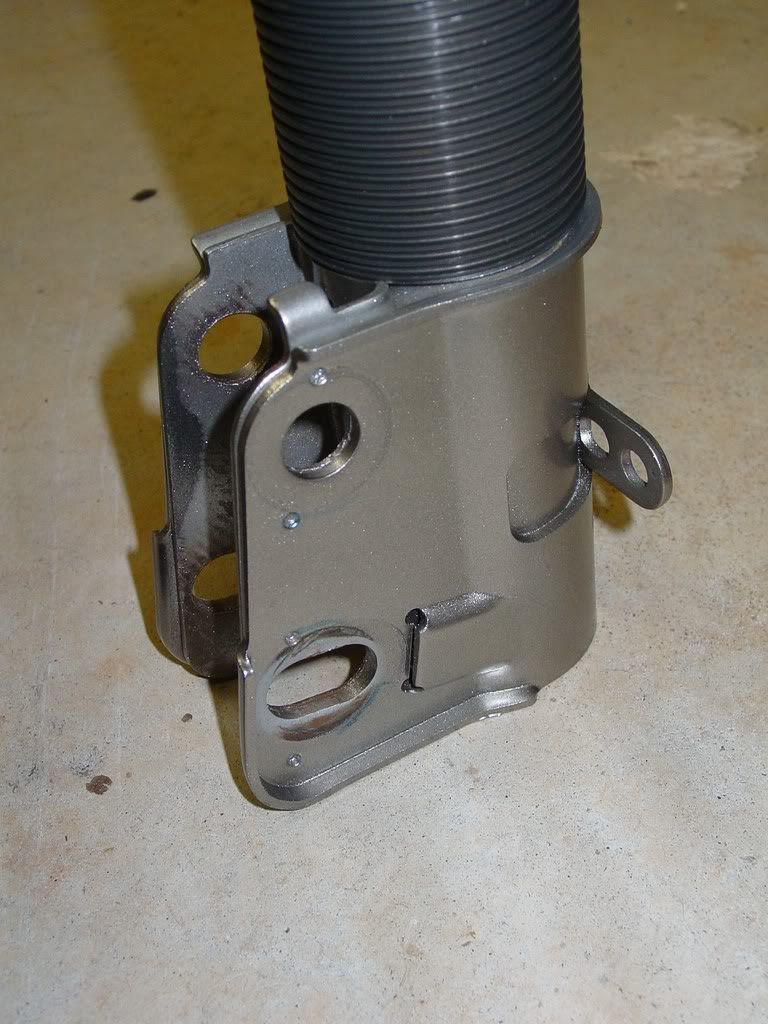
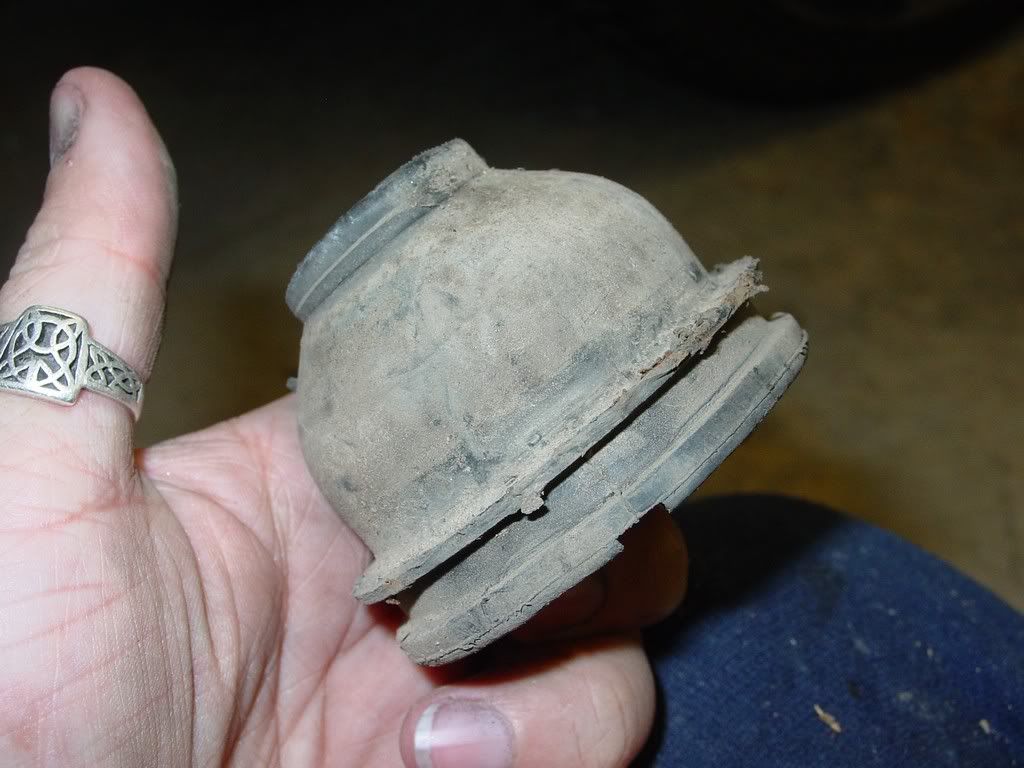
With the sweet spot now revealed I can work around to this depth looking for this tell all around the perch. once there a 3 lb hammer did the rest. Put the strut on the ground, base down, shaft up, and give it a wack.
Off finally... just tapped it down bit by bit and I could do the rest by hand
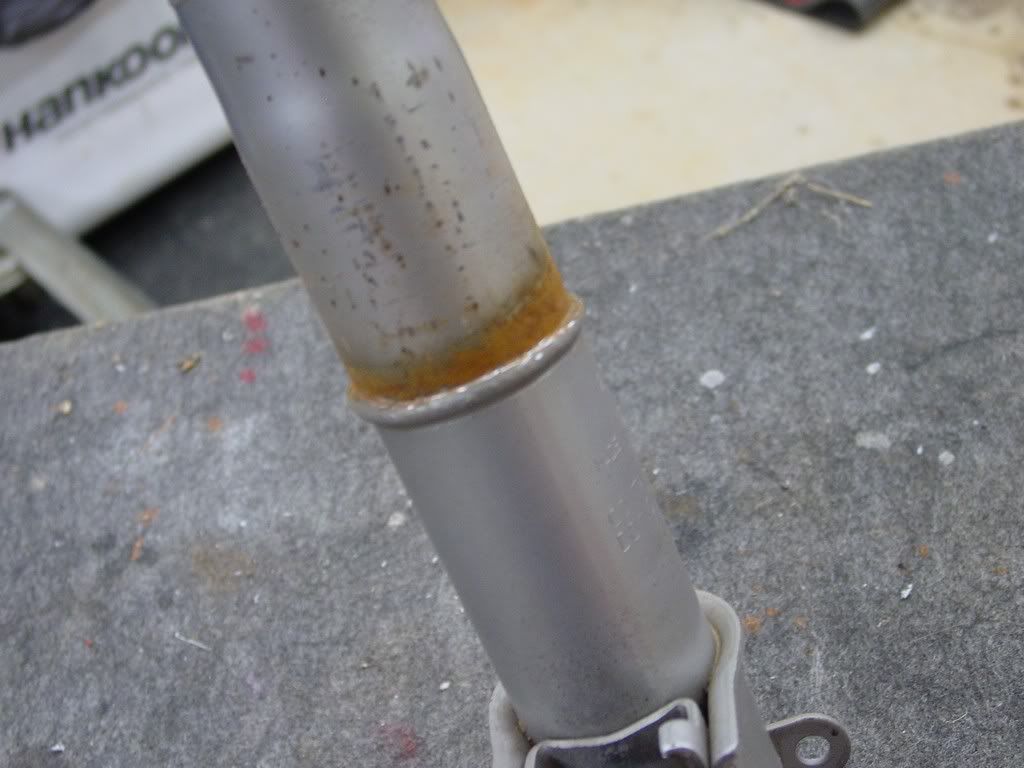
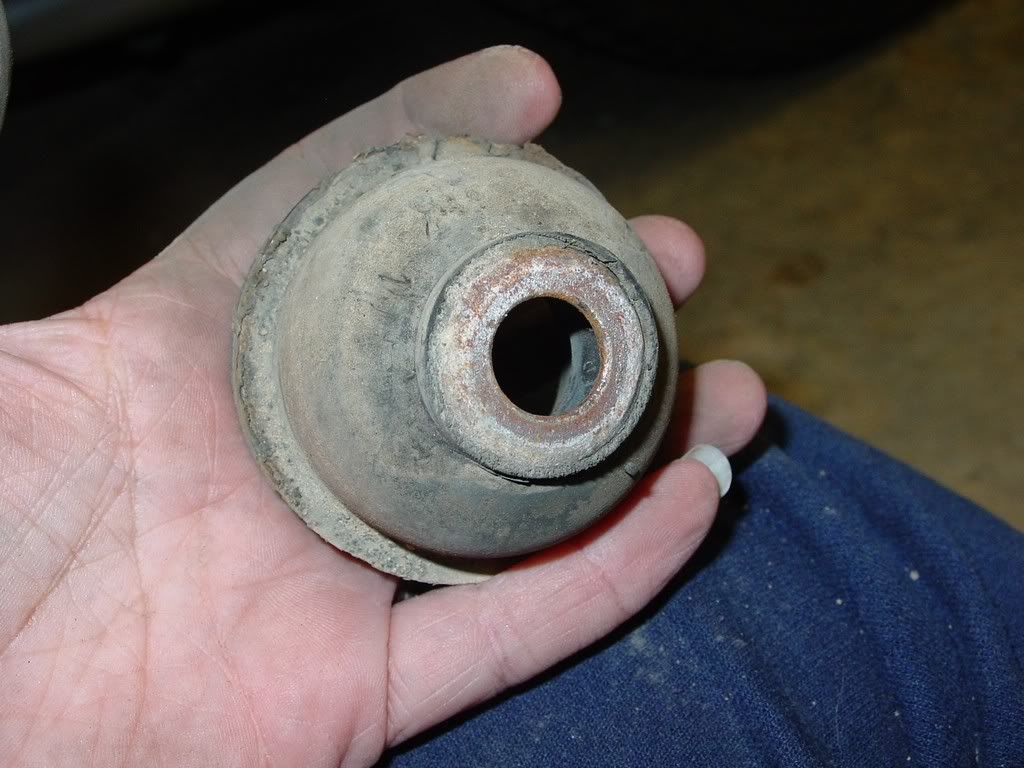
You can see the rust ring I used as my depth guide clear now...
[This message has been edited by redraif (edited 09-15-2011).]
BTW, a crow's foot wrench is the best way to hold that top nut when the allen is in there. Bought a set of those years ago when I did struts on another car. They make it so much easier to undo that nut.
nice thanks for the link. Yes that would make life easier. I actually have some of my grandfathers... I wonder if I have any large enough. His will be standard sizes.…
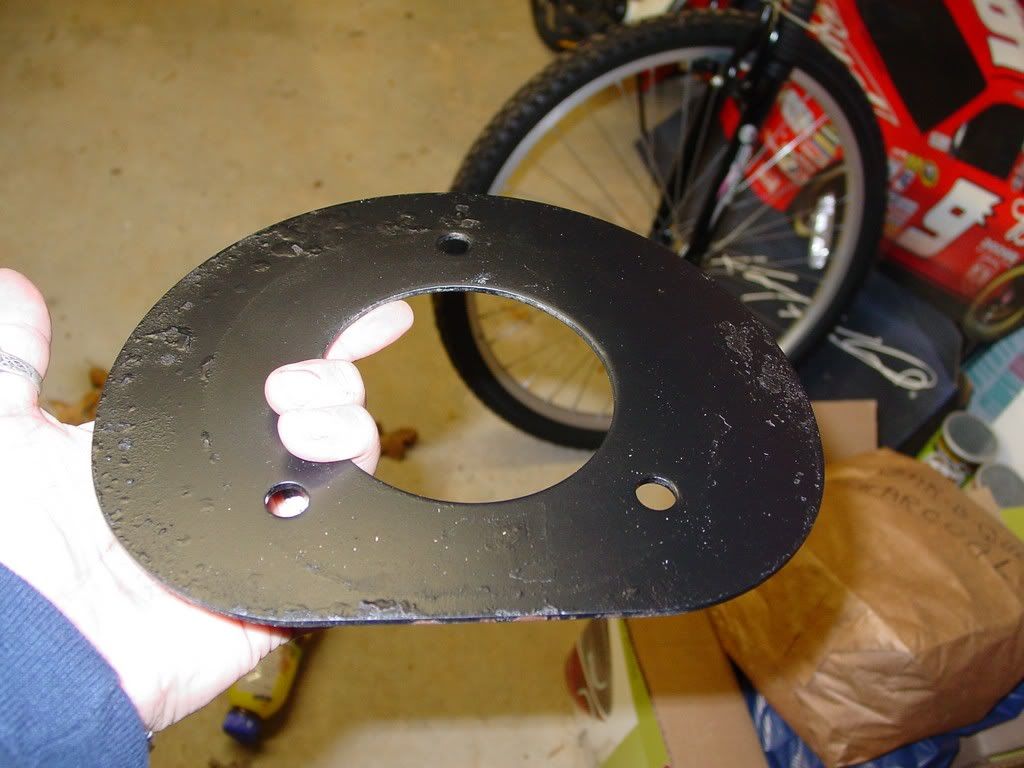
Painted the rest of the suspension parts for a freshen up! Everyone is sitting top up! (for assembly referance)
Here are the pics of the painted parts referanceing top and bottom as was not clear before... Top plate and this is the top side
Here is the bottom side... you can see the ring from it meeting the plate below it
Top of the factory spring perch
Bottom
Top of coil spring retainer plate
Bottom of it
Top of strut shaft washer:
Top is up here... notice the dome shape
Bottom of strut shaft washer
Here is the top strut washer that goes under the nut on top of the coil spring retaining plate... Here is the top side... notice the cupped shape being up!
bottom is facing us
I also threw some pewter paint on the lower part of my strut... I plan to hit the rest of the suspension with this color
Hopefully these edits, though it means more pics... will clear up some of the confusion that was mentioned later on in the thread
[This message has been edited by redraif (edited 09-15-2014).]
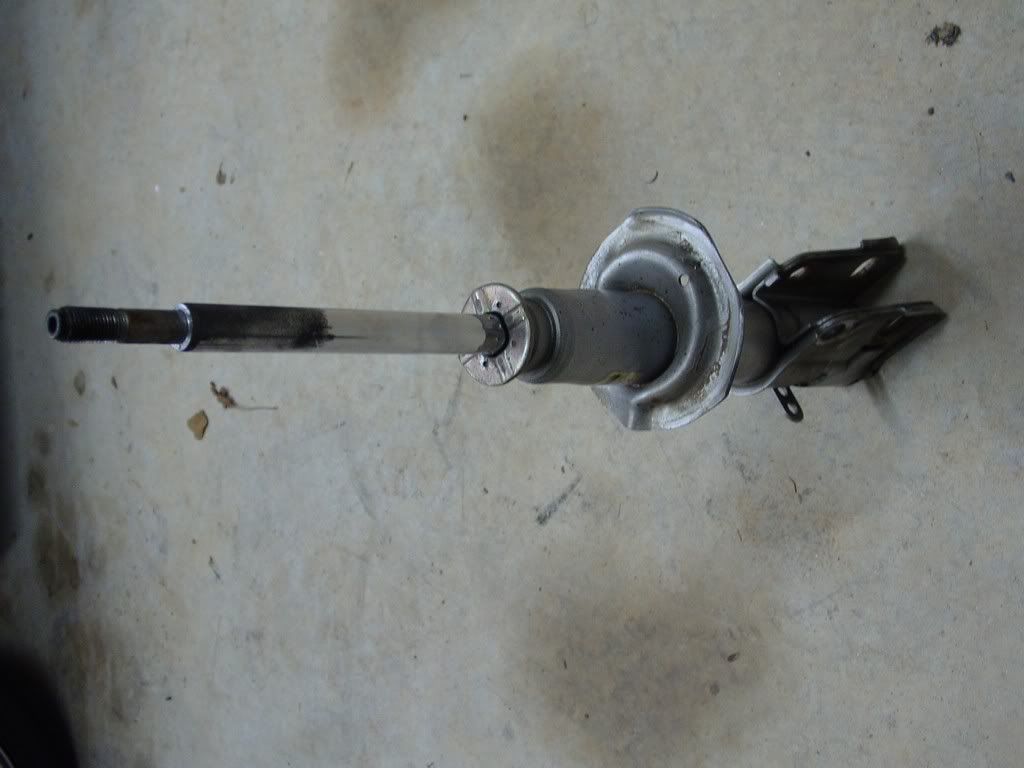
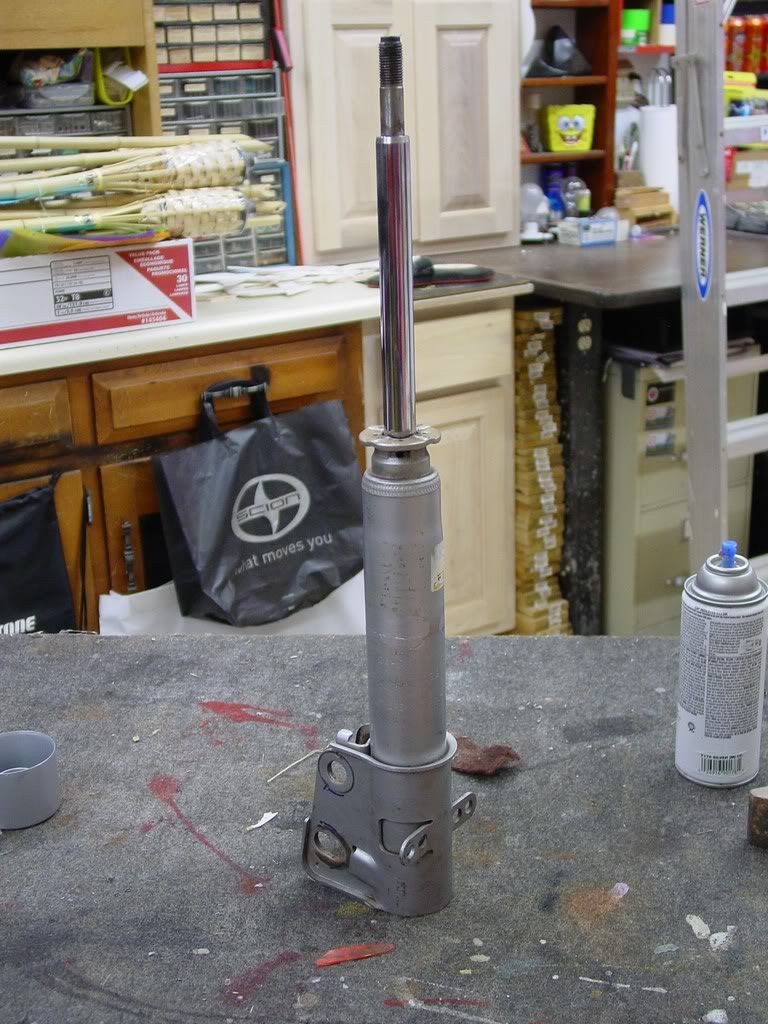
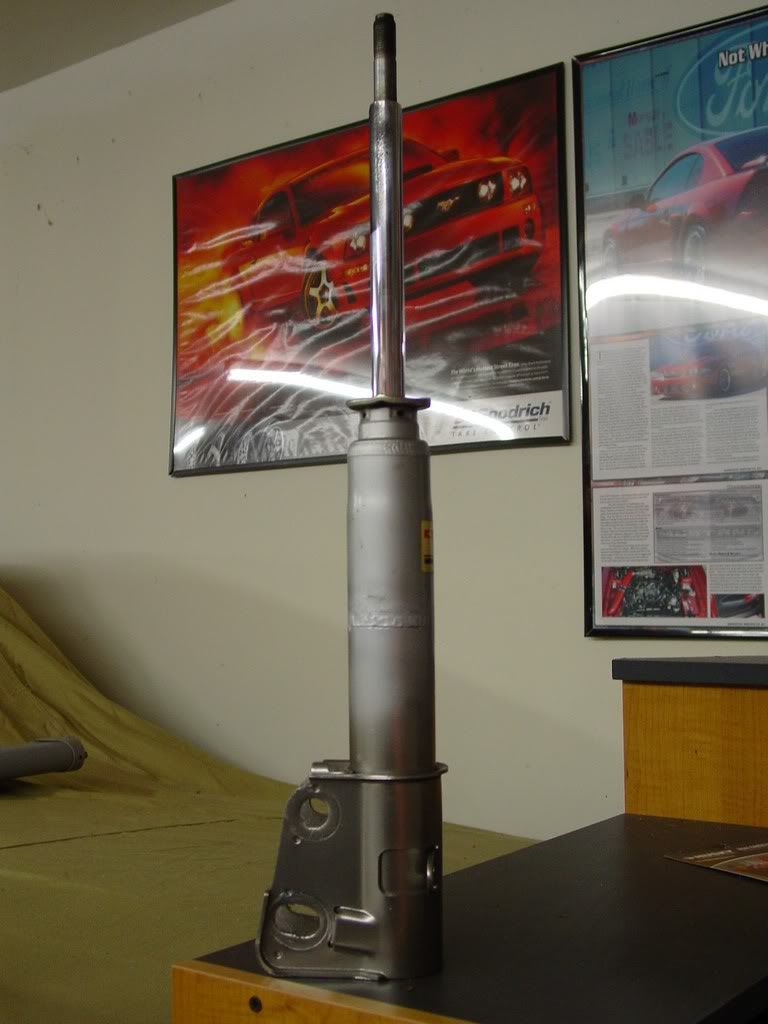
Naked cleaned up strut: NOTE: I only used the pewter paint on the part of the strut that will be visible... rest is covered by the new sleeve, so why waste the paint. Especially since I have discovered that Duplicolor is discontinuing the color... grrr...
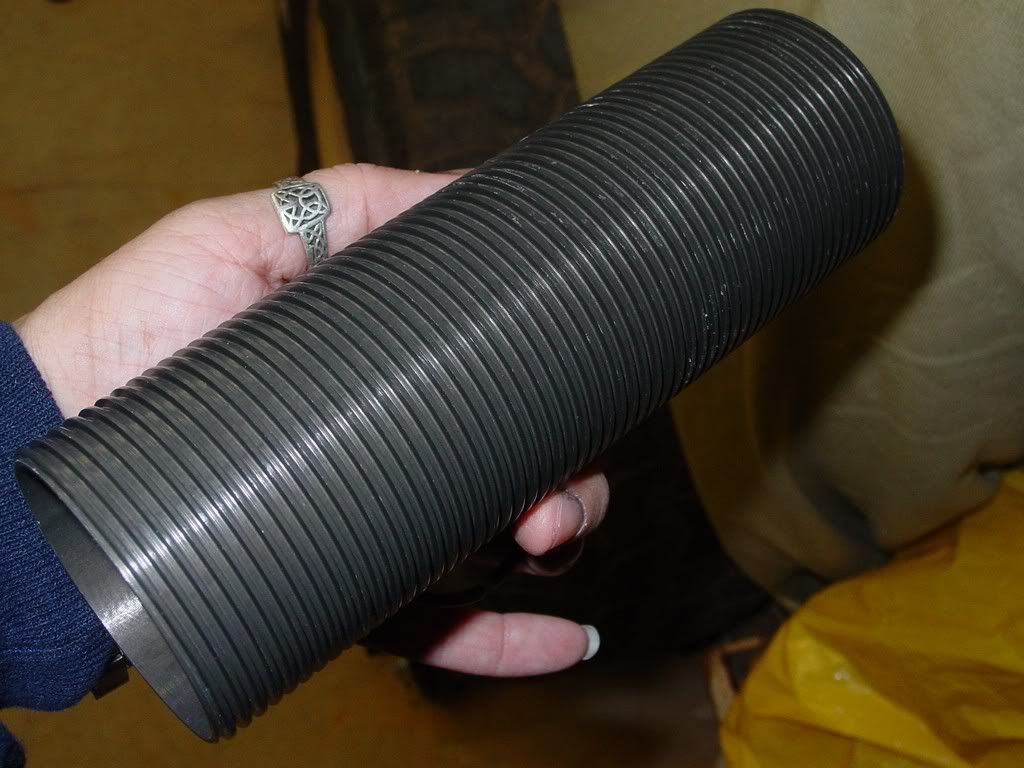
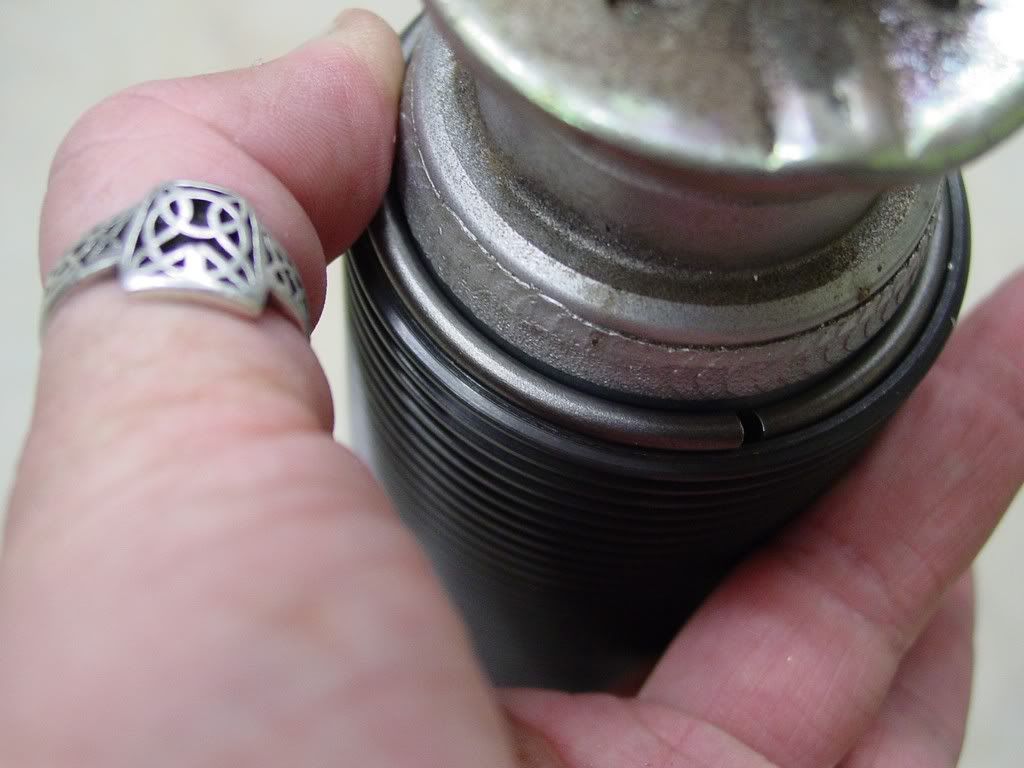
Sleeve:
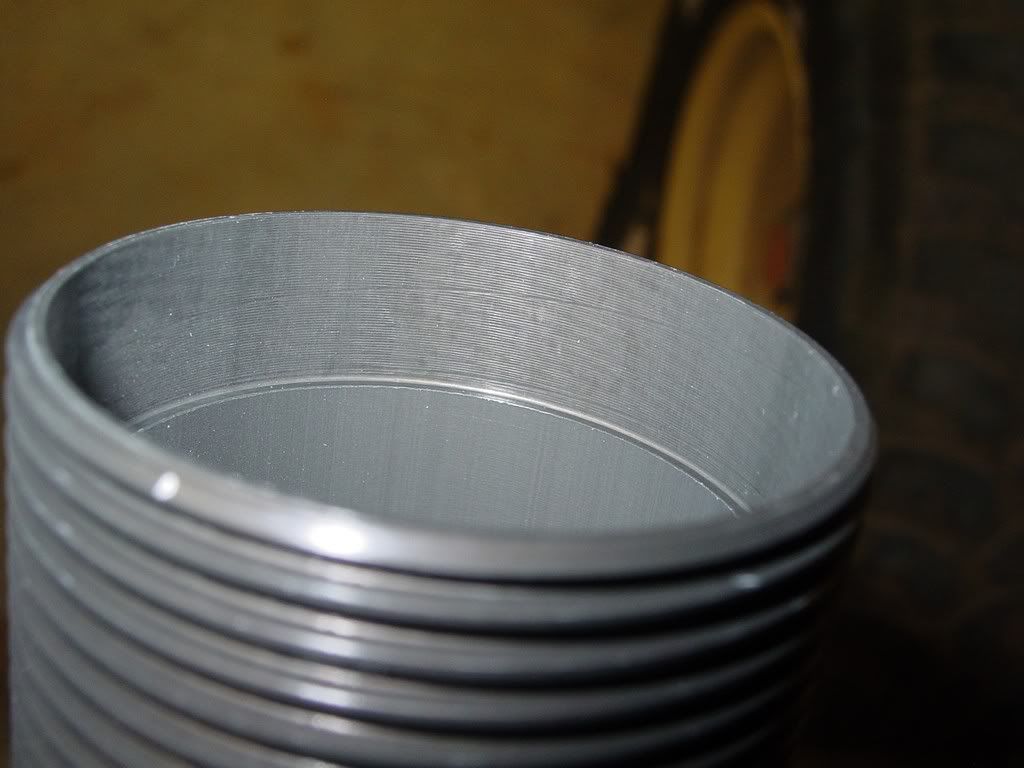
Machined area for snap ring to slip in. This side up.
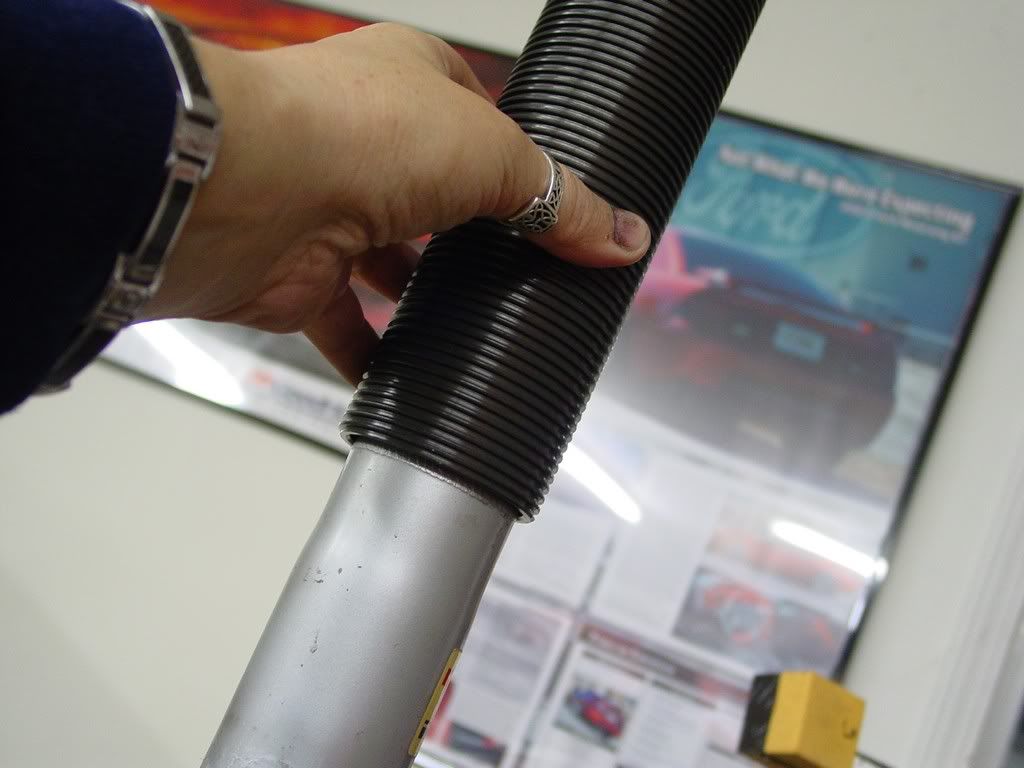
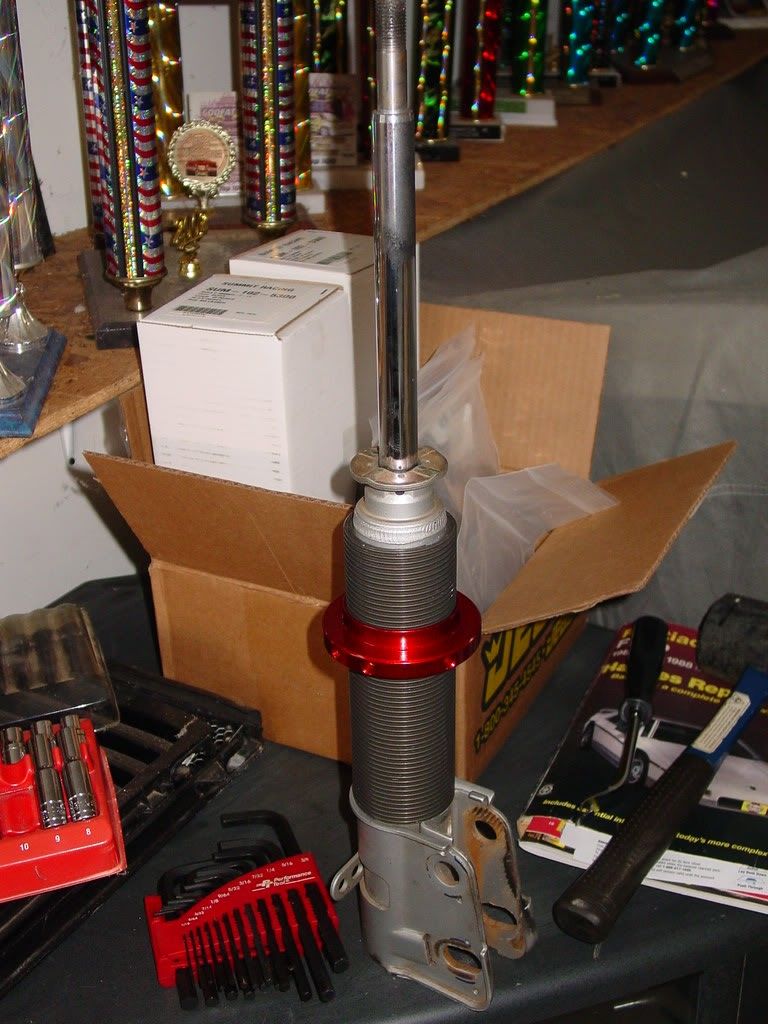
Slip on sleeve
As I said they just slipped right on!
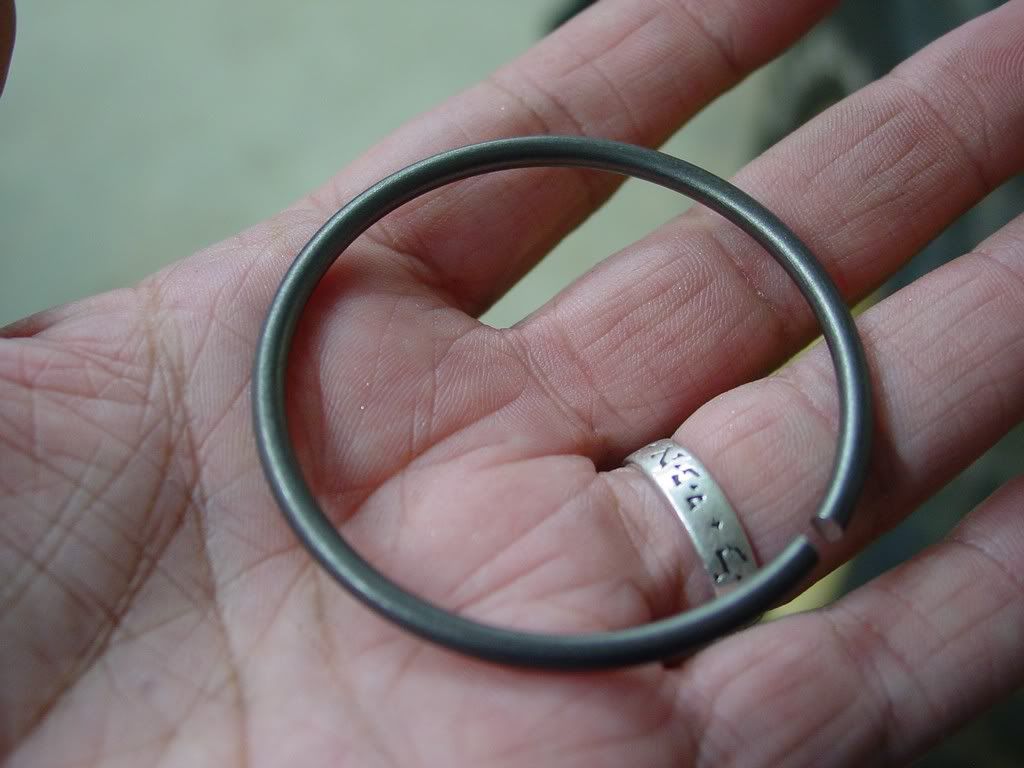
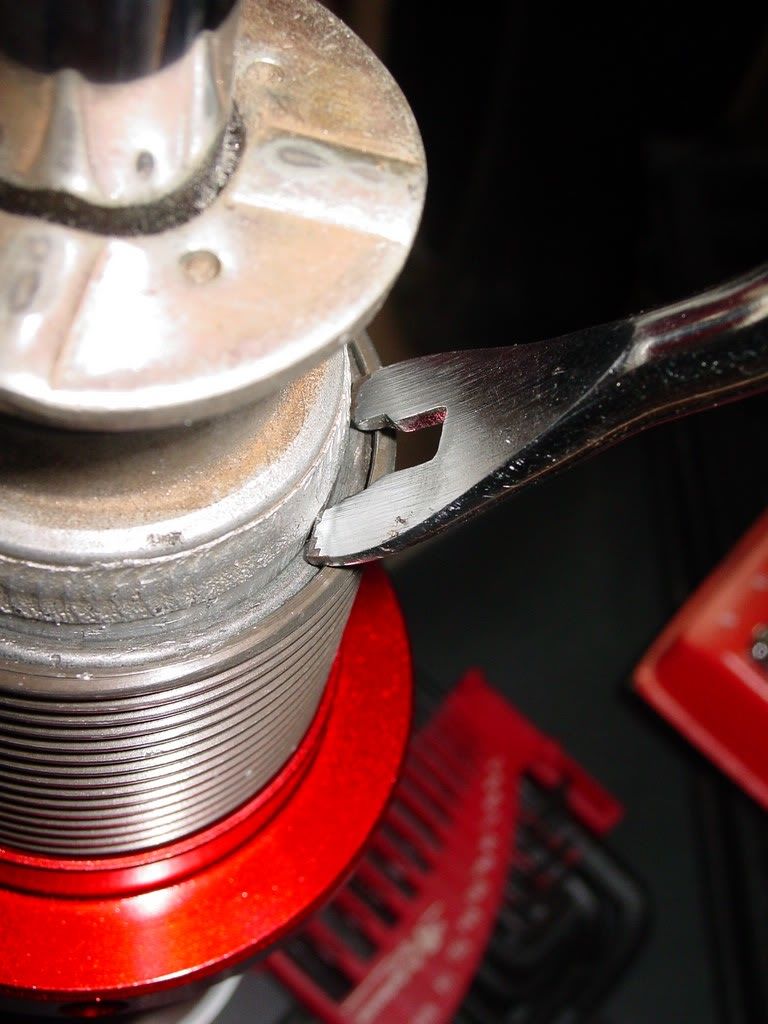
Get the snap ring
Slipped on
here is the snap ring going in... it slipped in pretty well on its own with just my fingers,
then i tapped it in with my panel pry tool. I just had it sitting there and figured it would work as well as a screwdriver!
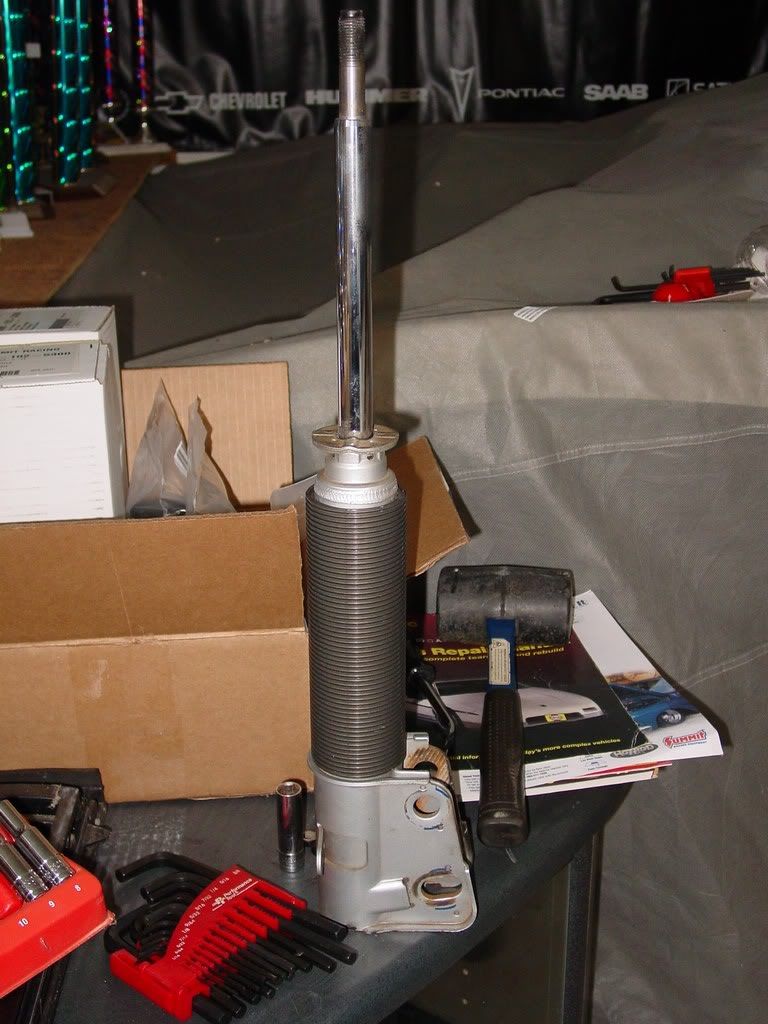
All in! Sleeve will not move at all!
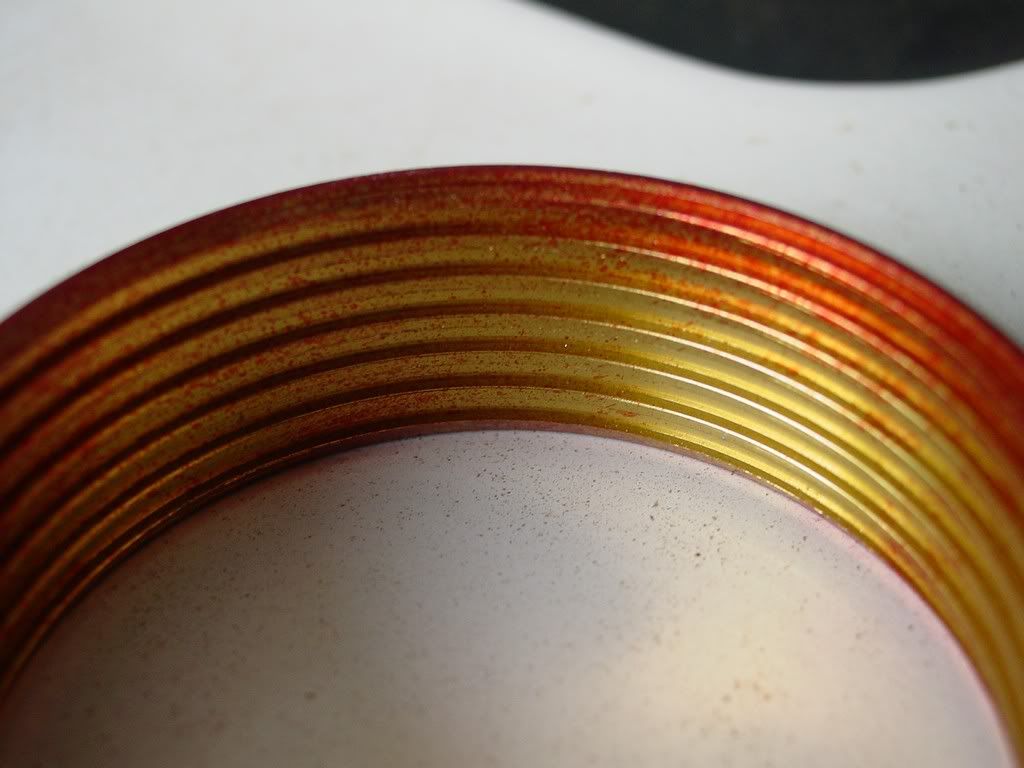
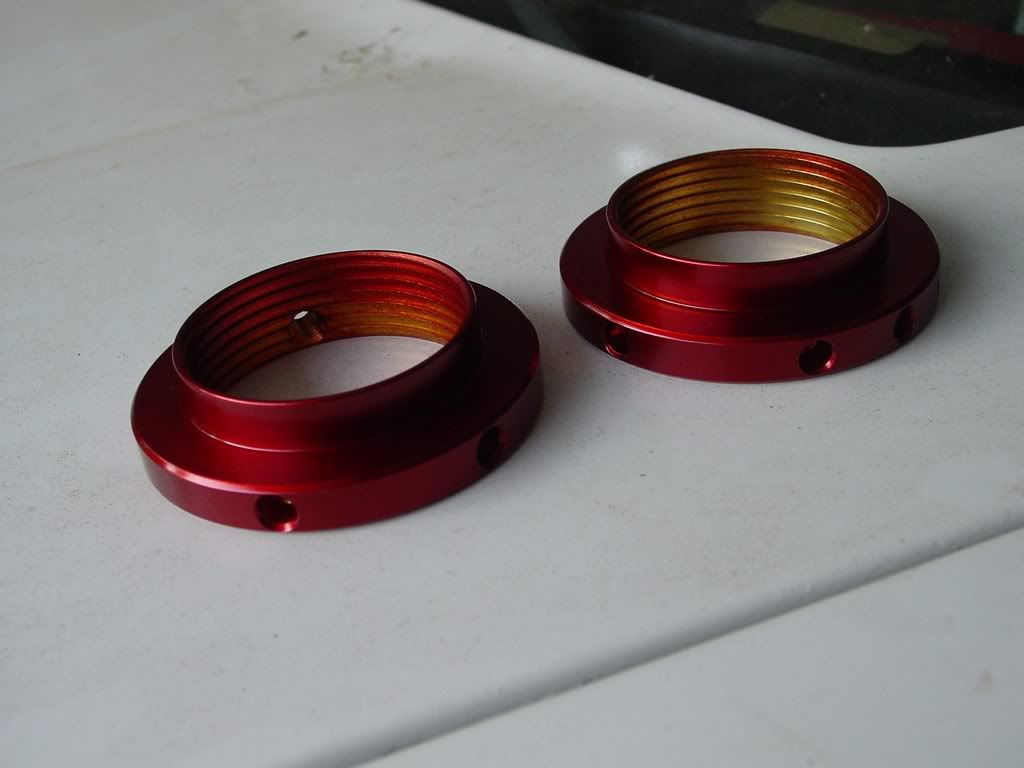
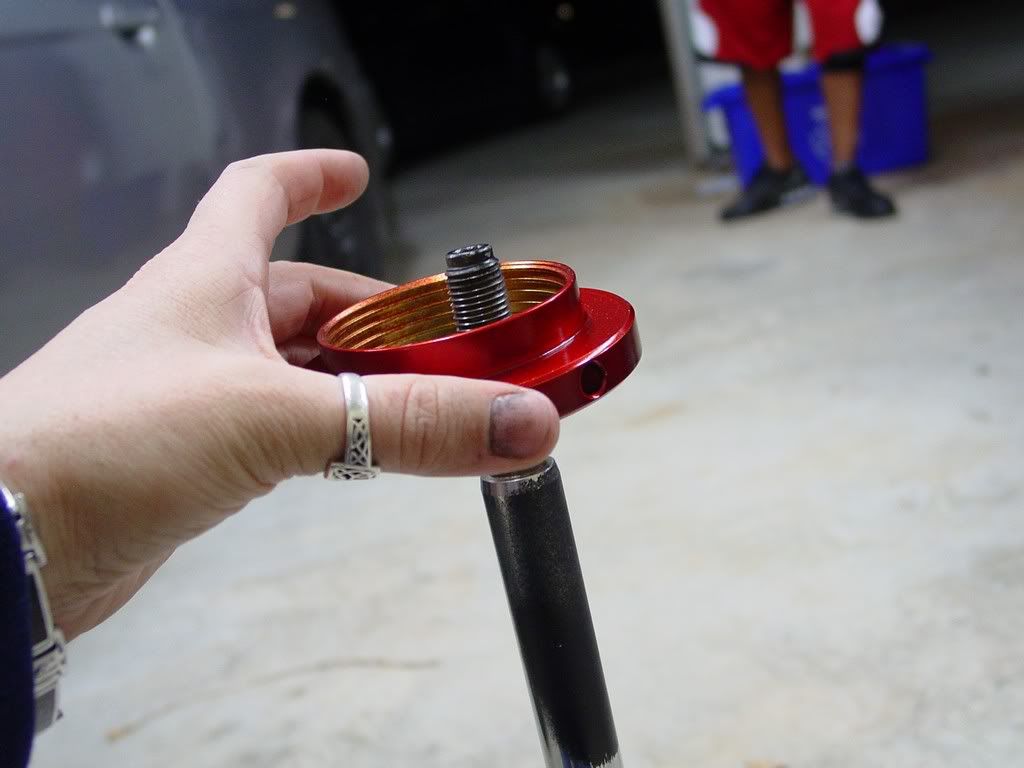
Now added on the perch...
All the way on
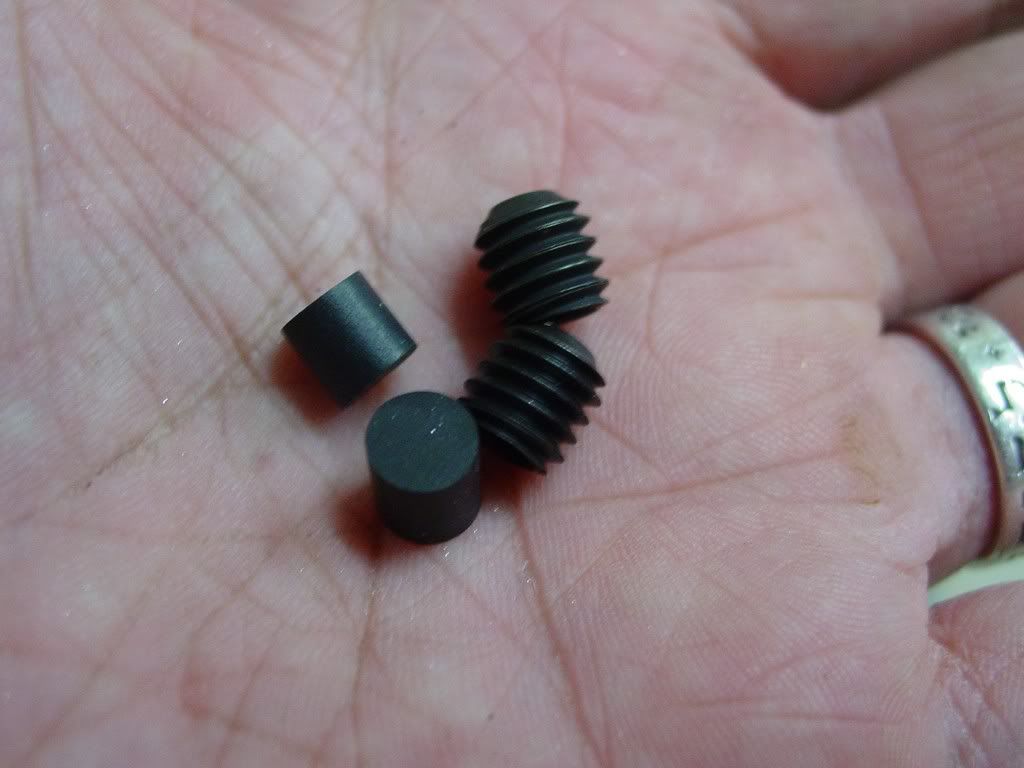
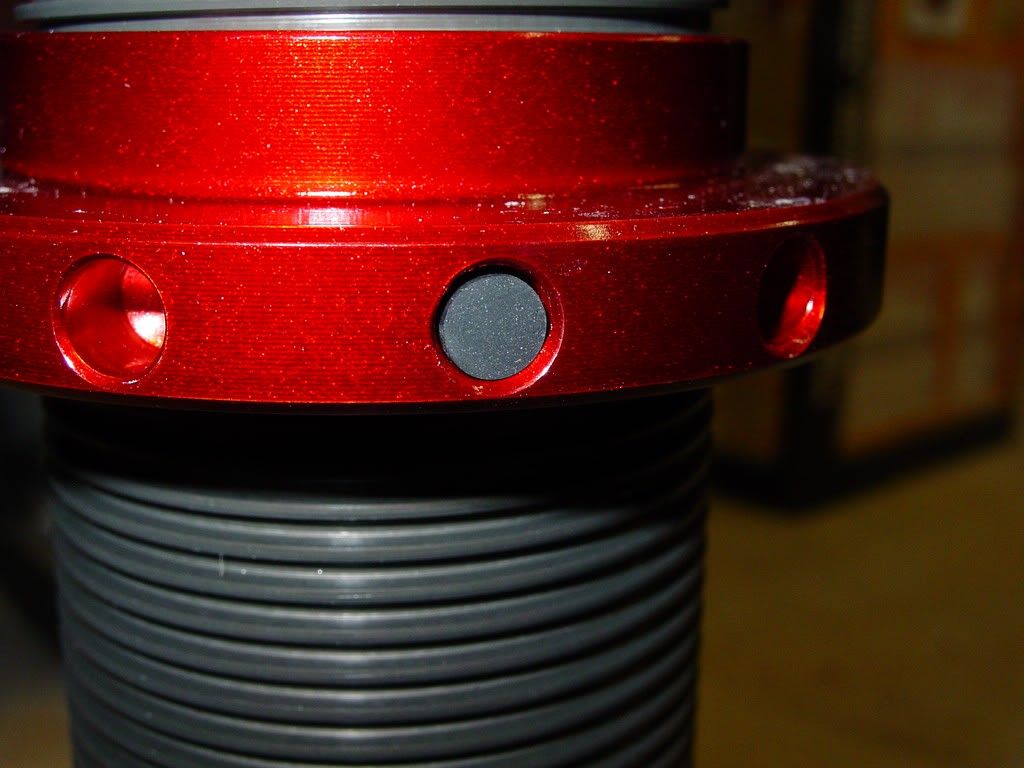
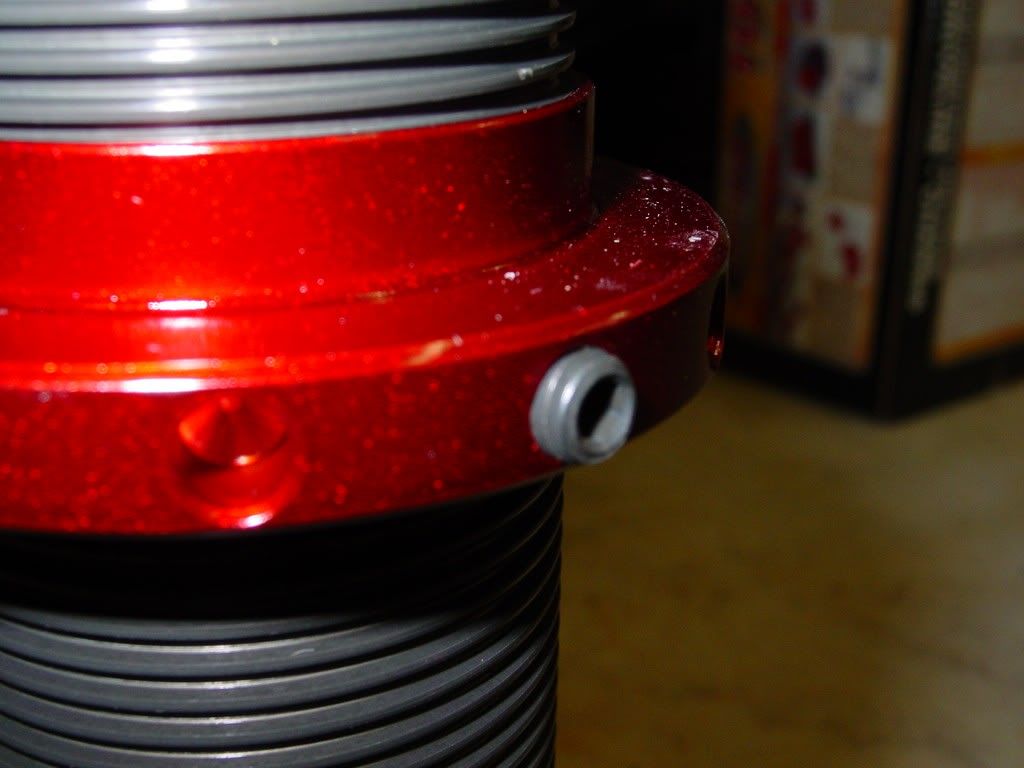
Check out the set screws... came with a piece of rubber to protect the threads!
rubber in
set screw...
[This message has been edited by redraif (edited 09-15-2014).]
**** THIS POST OF MINE SHOWS MY ERROR... THIS IS THE WRONG WAY TO INSTALL THE PARTS!*****
(I show my errors to help make it clear for you what the right way is and why it is the right way and what happens when you do it the wrong way!!!!)
***** The assembly (which went a bit wrong at first...) I was following the previous threads I had read and seen...
Quotes from the other threads I was following immediately follow below
quote
Originally posted by fierohoho:
First thing I did was bevel one inside edge so it would make it easier to slide the bushing onto the strut shaft.
A little oil inside the bushing and on the shaft and it slid on with a little pressure.
I decided to leave off the washer I had put on before, the next pic shows a view of the spring retainer plate and bushing without the spring in the way.
This last pic is an underside view of the re-assembled coilover strut, I think the bushing will work well to dampen the shock when/if the car bottoms out.
I'm very happy with this set-up, additional cost for two bushings, about $7.50, cool.
quote
Originally posted by fierohoho:
In the next pic you can see one of the washers I put back on the strut shaft
******
I went to work on my car with the above information and images in mind.... and I did it wrong.
TO REPEAT!
**** THIS POST OF MINE SHOWS MY ERROR... THIS IS THE WRONG WAY TO INSTALL THE PARTS!*****
I show this to help make it clear for you what the right way is and why it is the right way and what happens when you do it the wrong way!!!!
*****************
On with the oops...
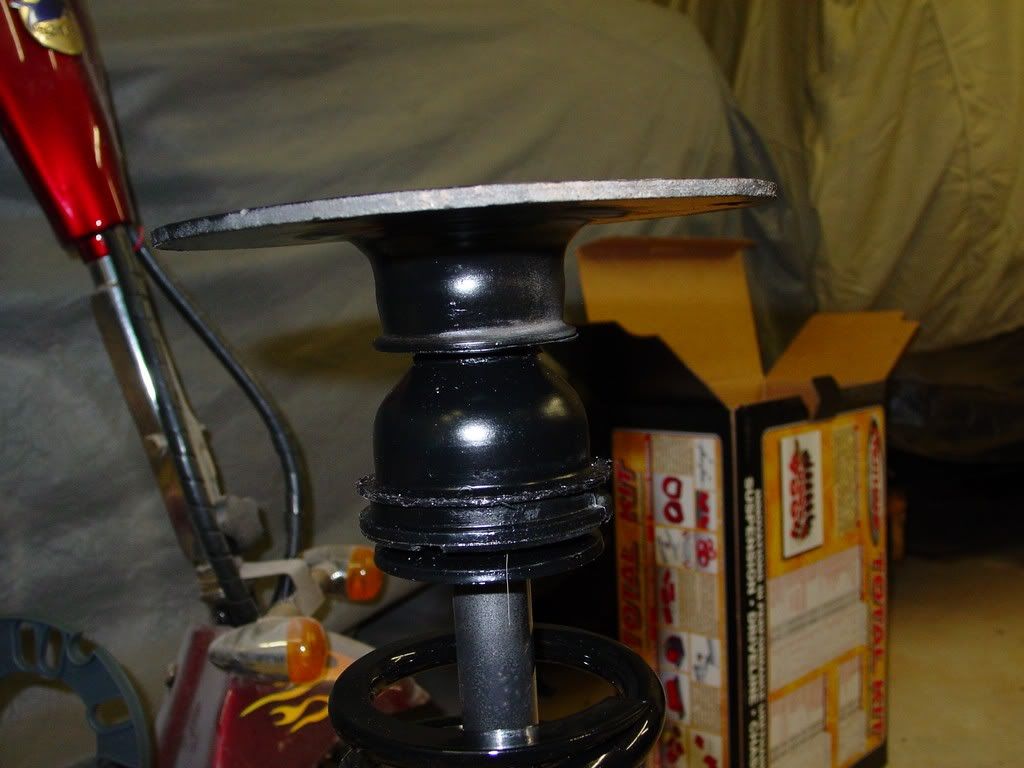
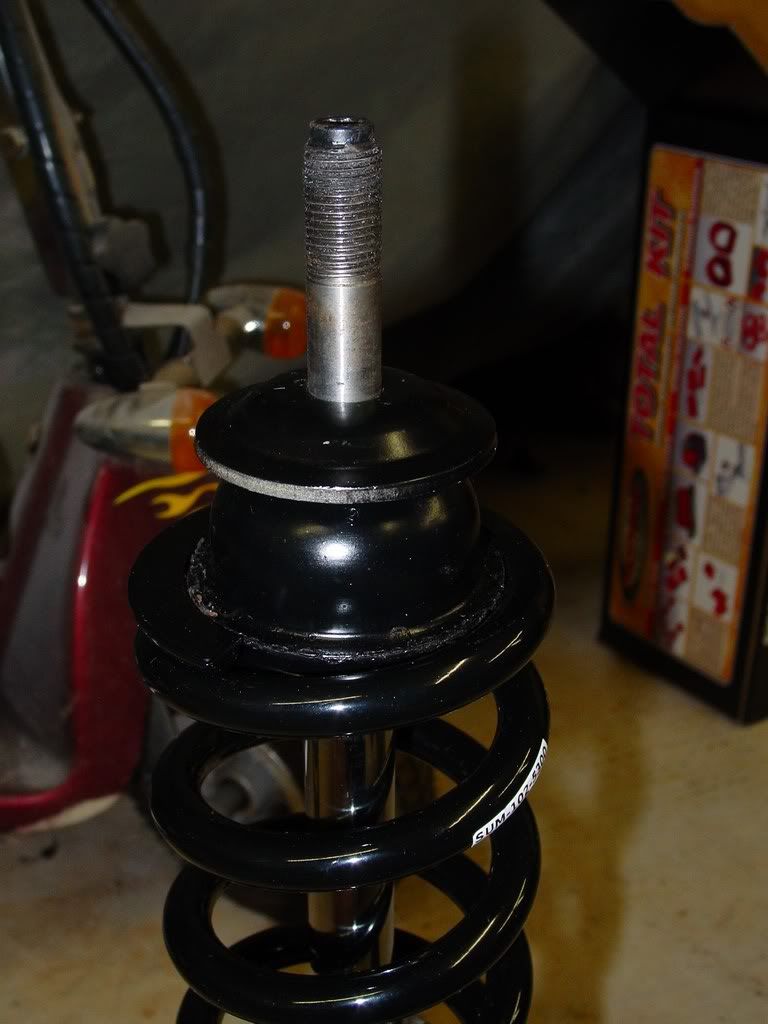
Spring on... & added the washer as I have seen in pictures... this is supposed to keep the strut shaft from pushing threw the spring top and into the strut tower. (wrong order) Orientation correct though!
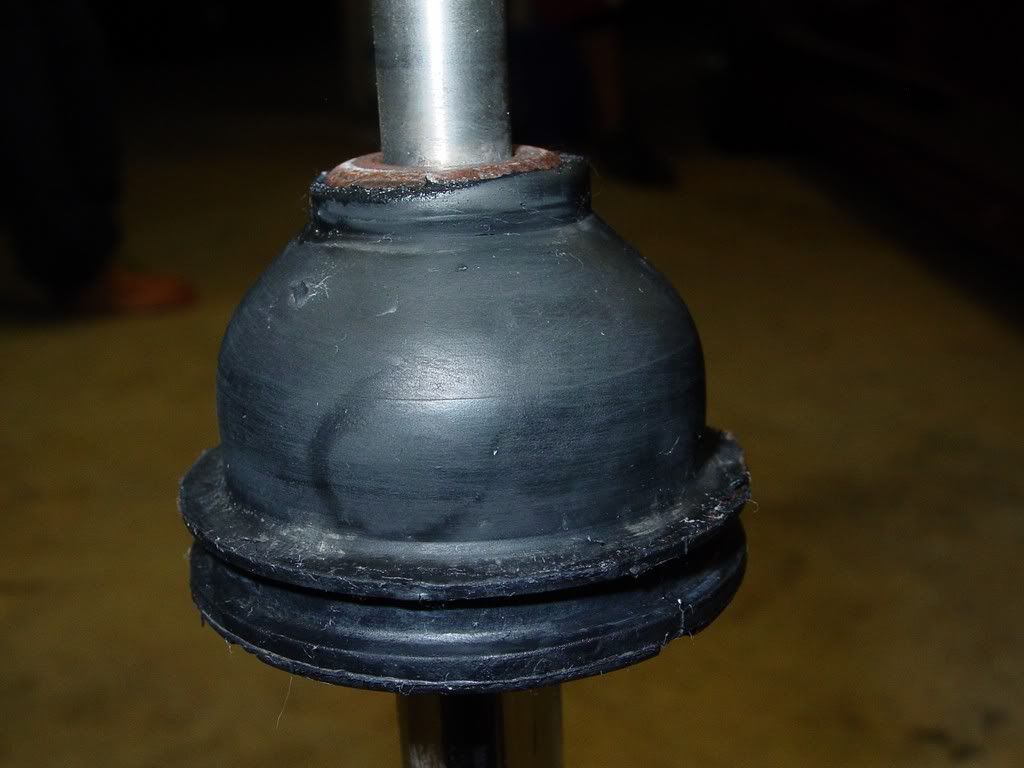
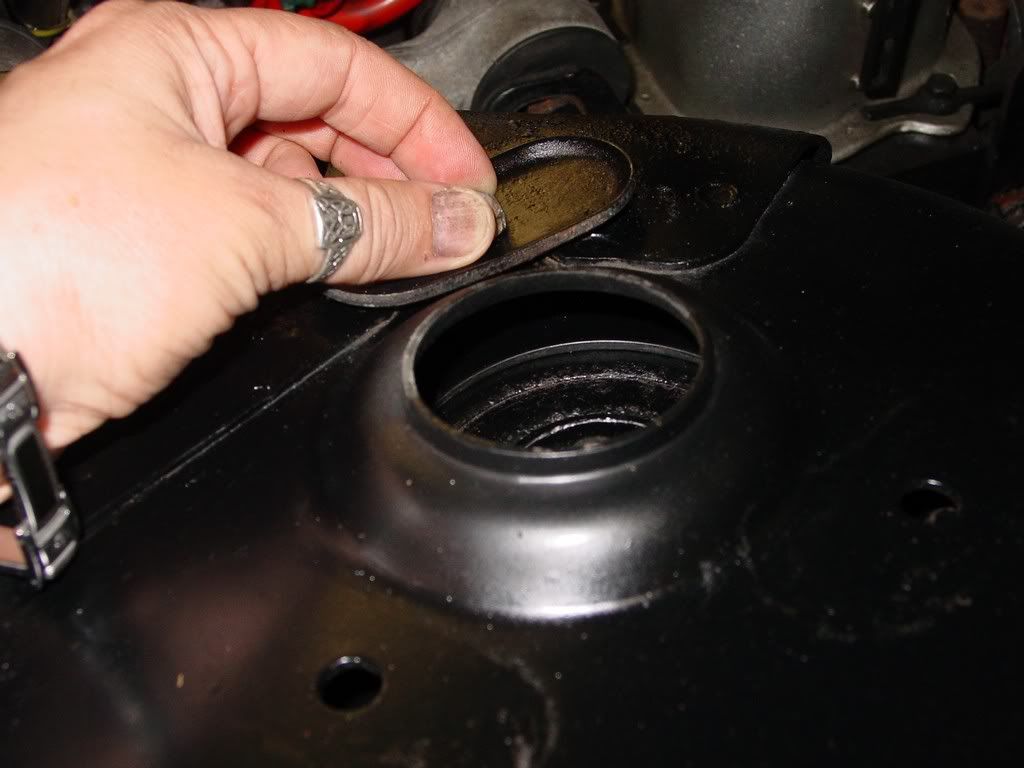
Now the dust boot as people said... fierohoho pictured his right up against the top spring plate... members mentioned its use being to protect the spring top center from metal impacts, so surely it had to be b/w the washer and coil retainer... (wrong again)
Now (finally) I'm starting to wonder how this is going to work... (the light bulb came on!) There were not enough threads left to make it through the spring top and bolt together...
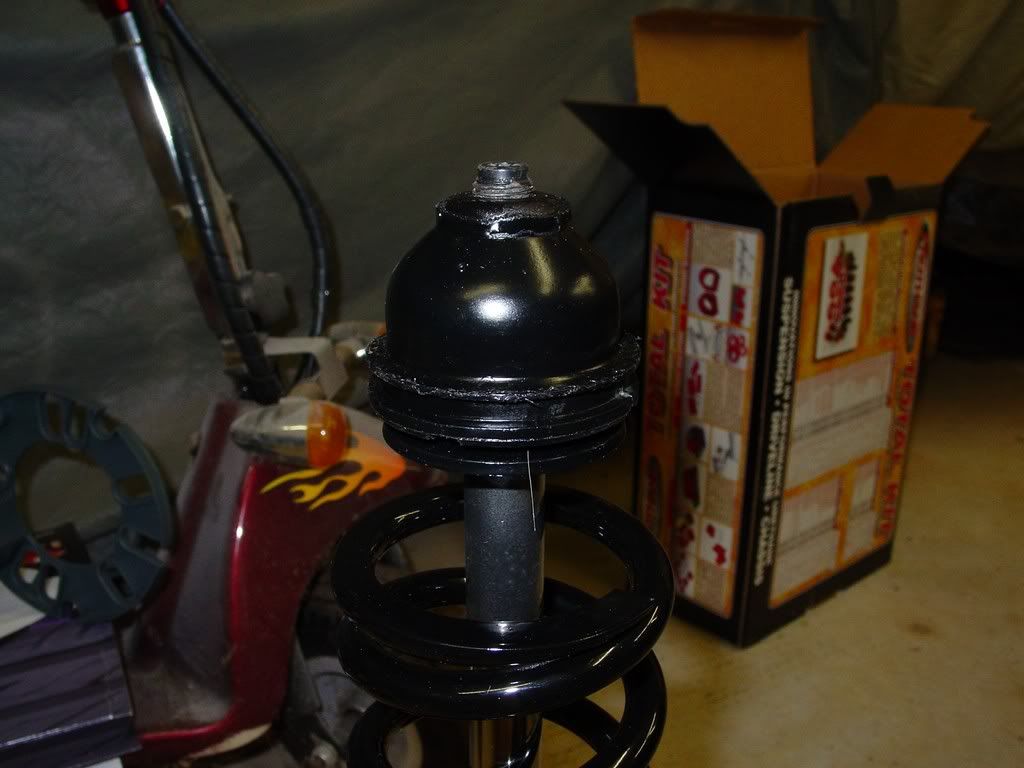
This is NOT going to work... (duh!!!)
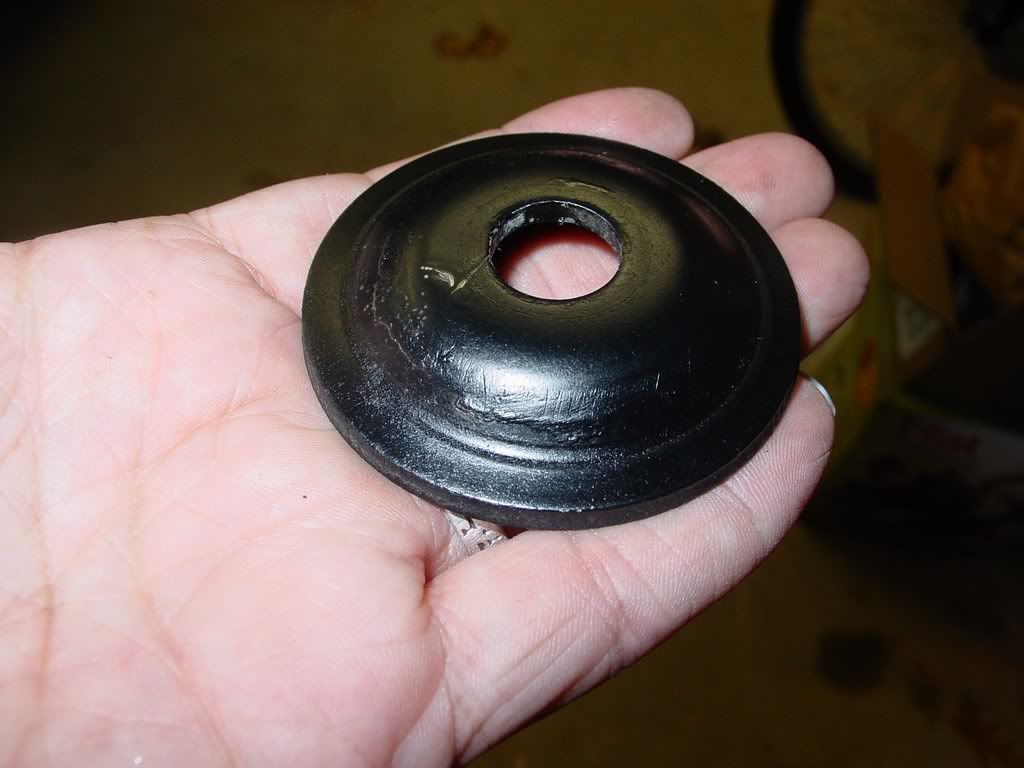
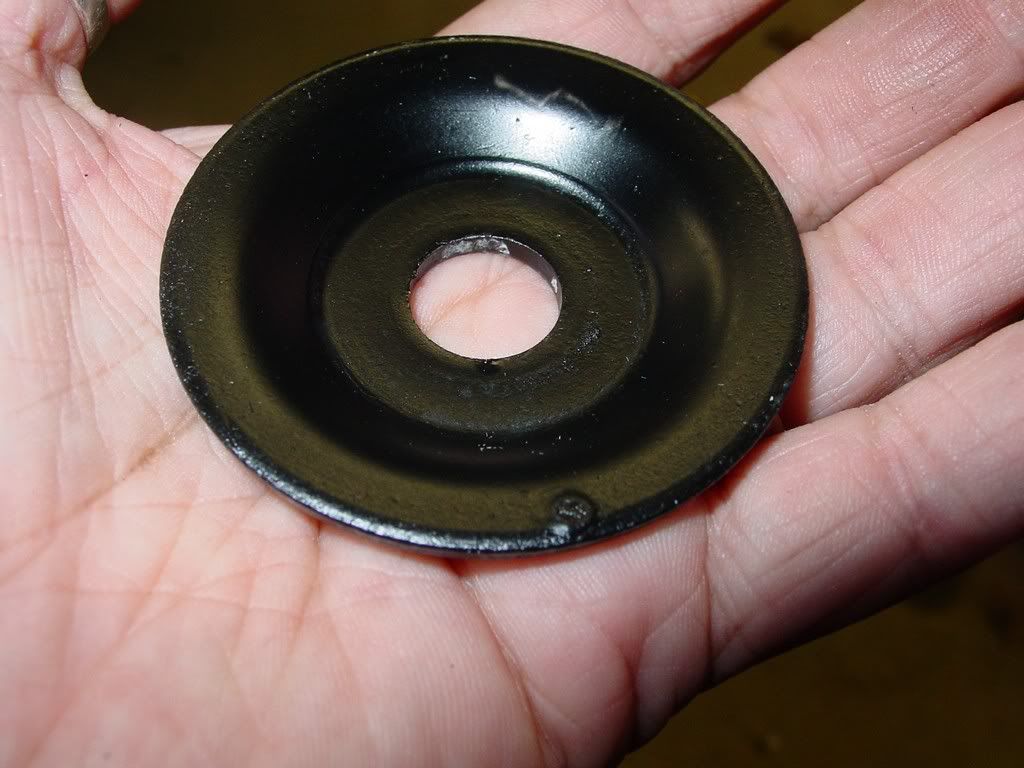
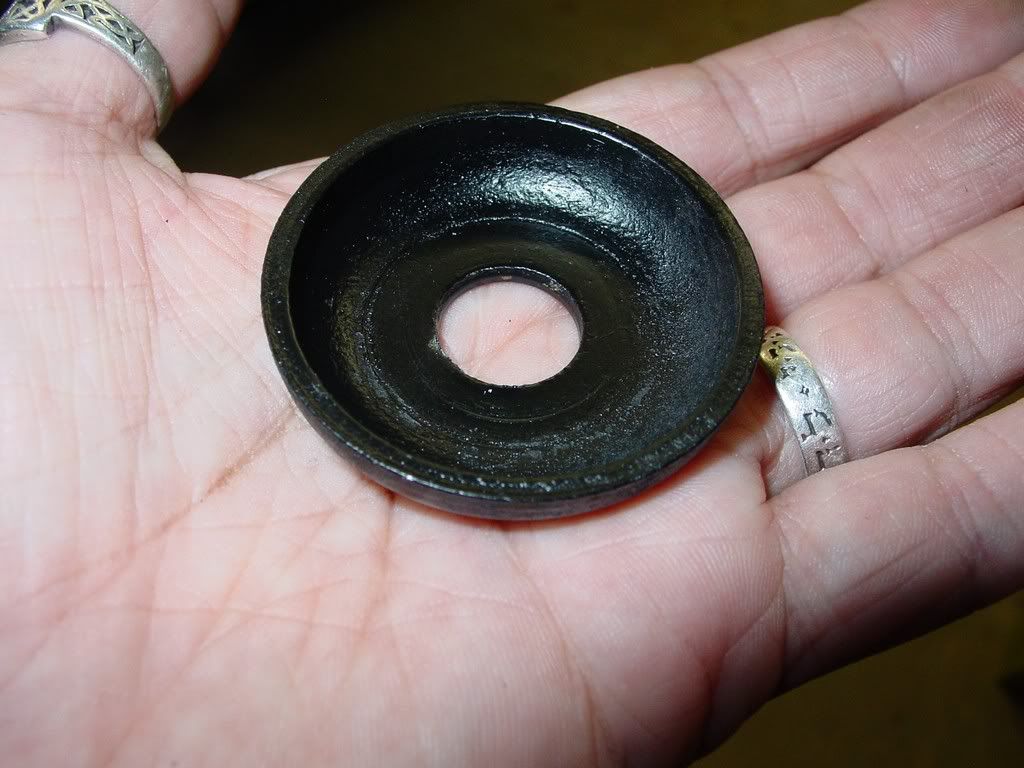
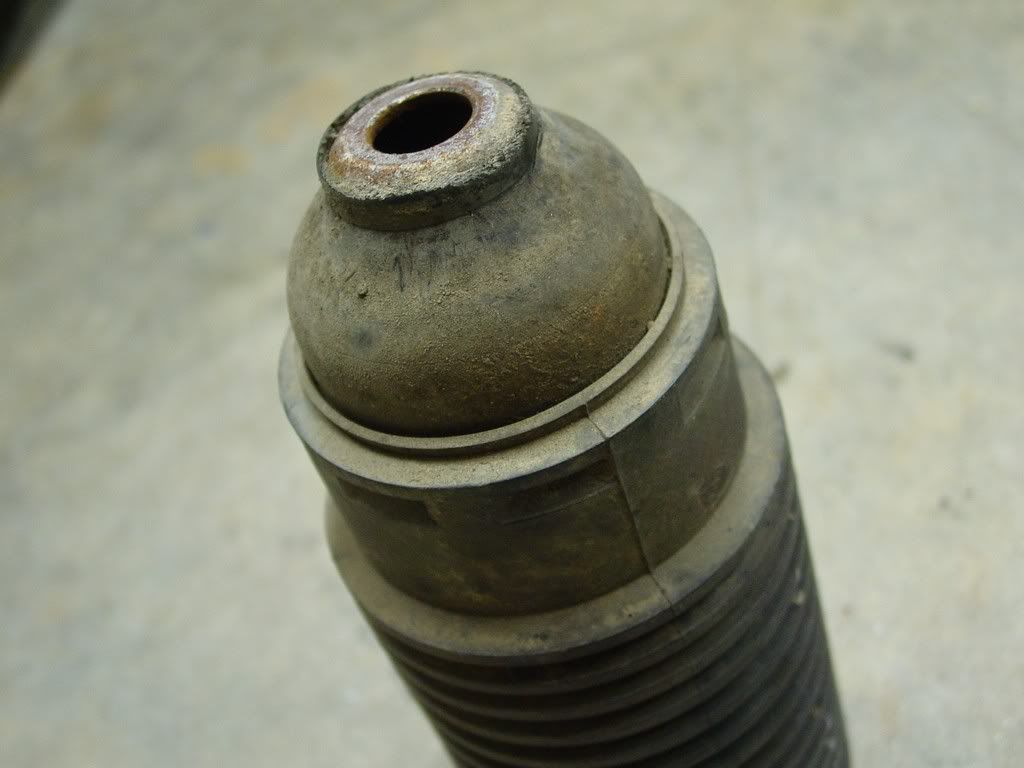
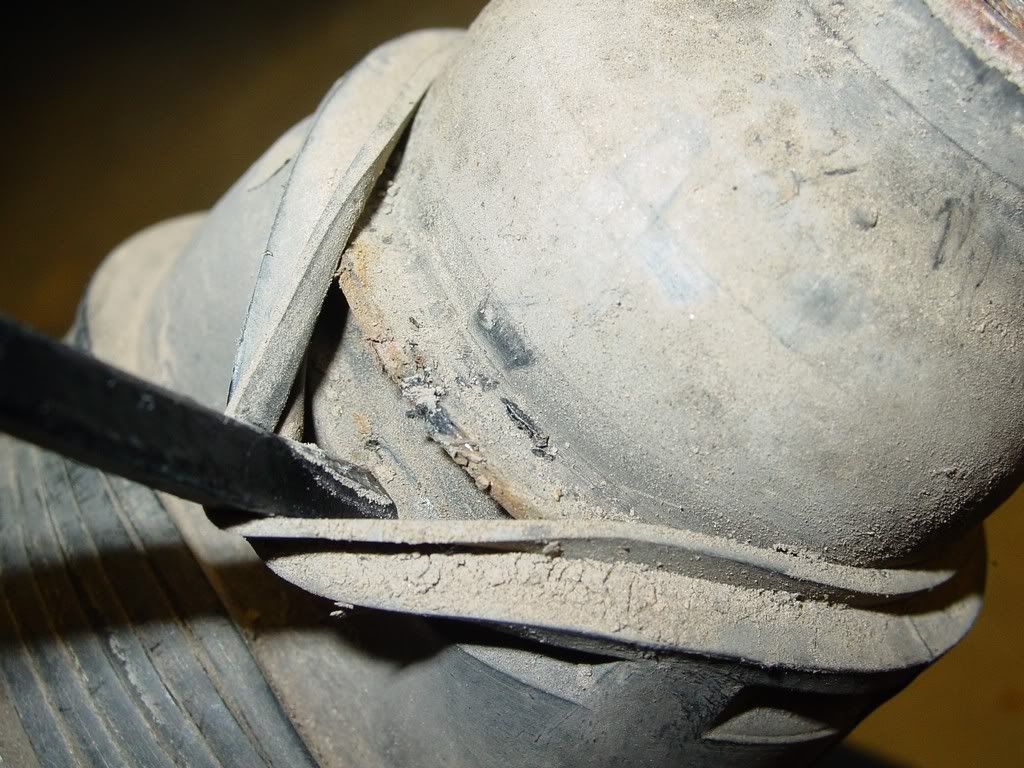
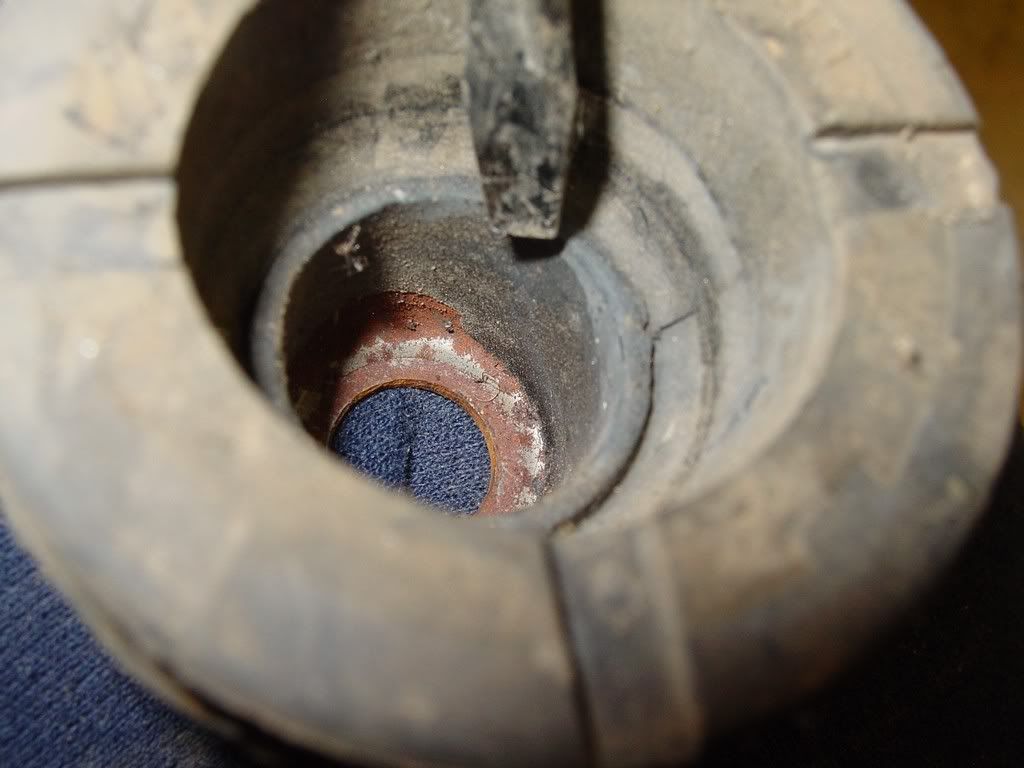
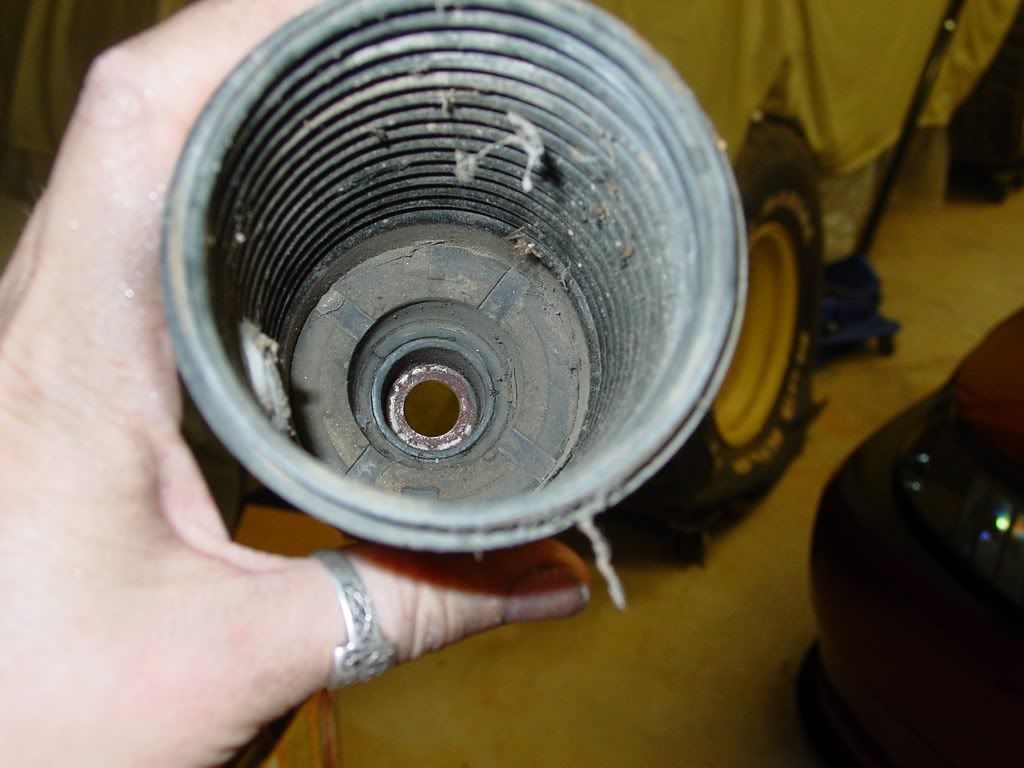
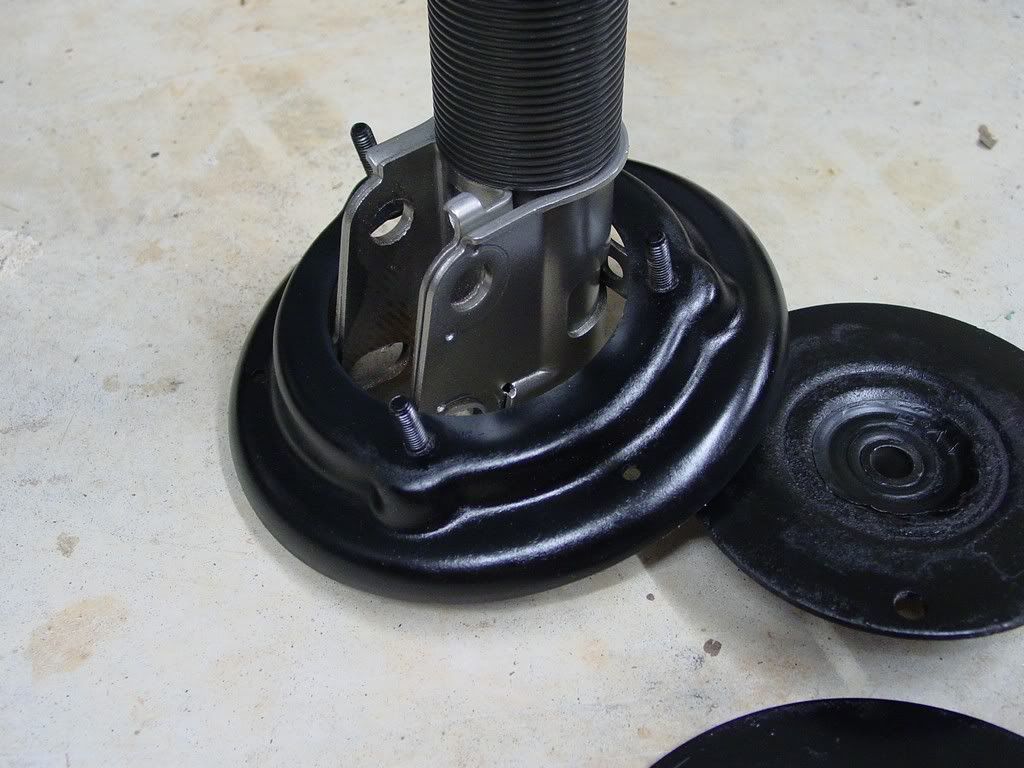
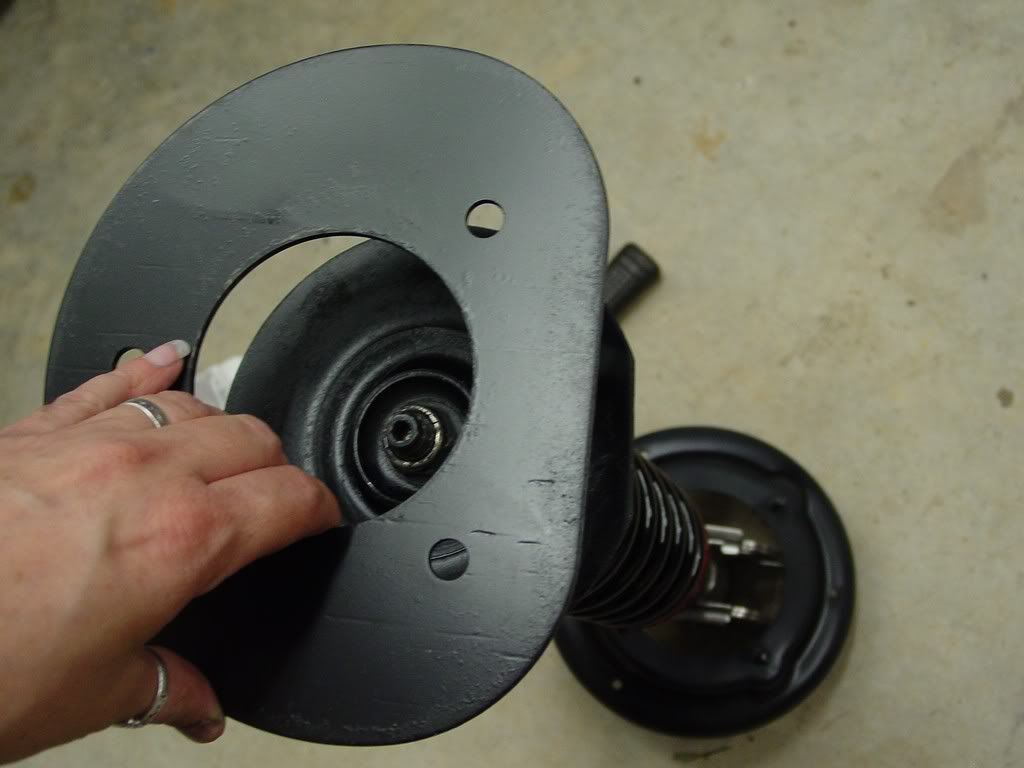
Here is why... look at the inside of the bump stop boot... The strut washer will not fit in here without creating a huge pocket of space. I notice the inside of the bumper is just big enough to slip over the strut shaft and catch on the collar of the shaft. The top of the dust boot also has a snubber made of a metal insert to keep it from pressing through the bushing and keeping the strut shaft collar from pushing through it...
Hmmm... time to reorder things the right way!... if only the darn dust boots had been installed so I would know exactly how it was placed stock sheesh!
[This message has been edited by redraif (edited 09-15-2014).]
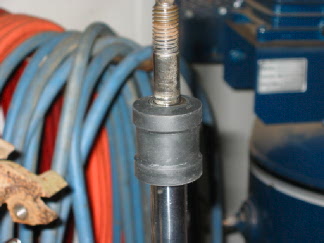
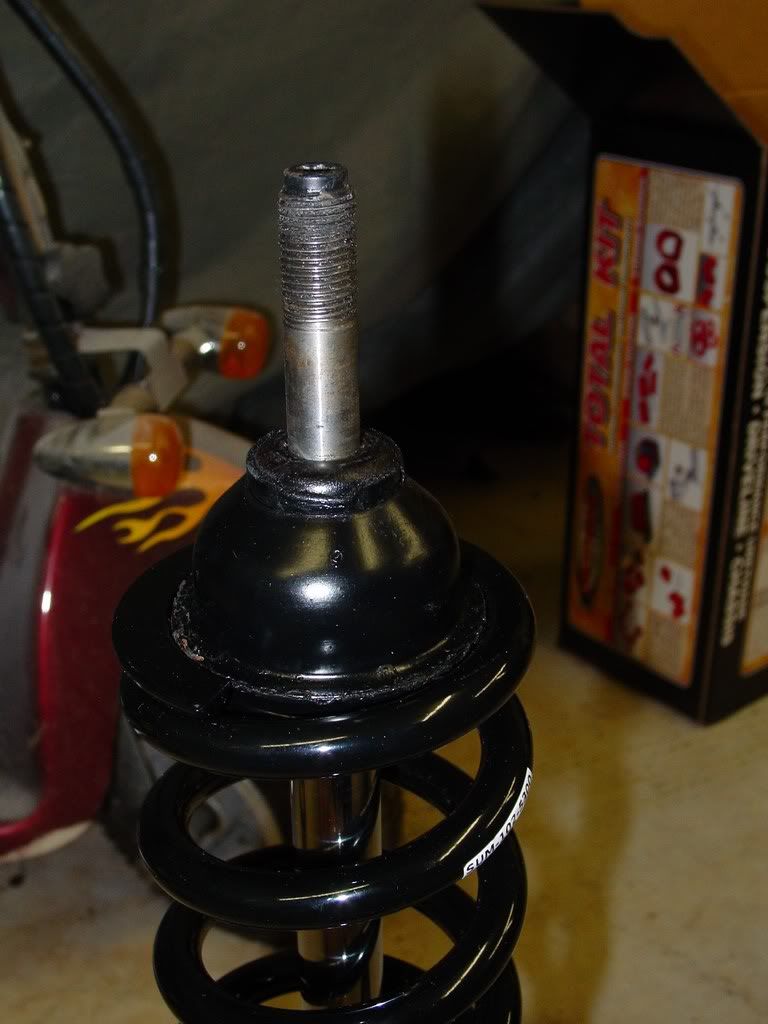
****THIS IS THE CORRECT WAY TO PUT THE PARTS ON THE STRUT*****
Spring on first as before....
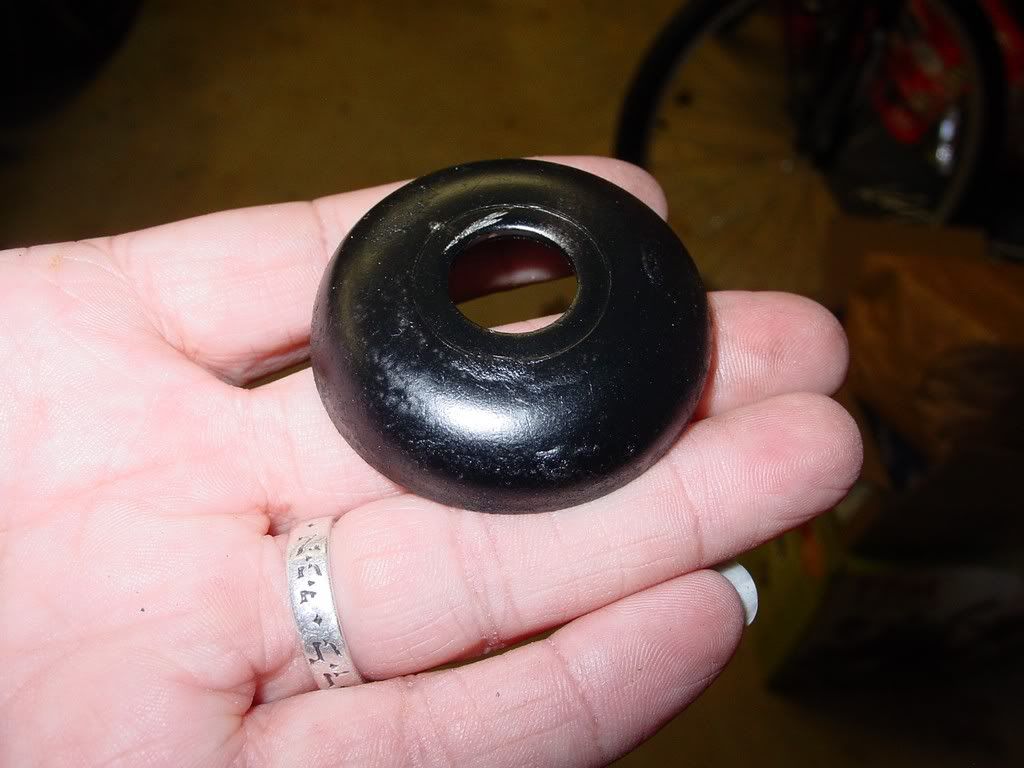
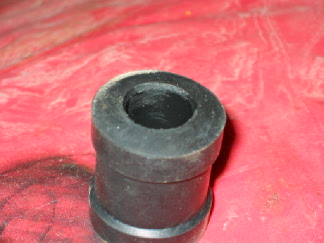
Dust boot... oriented with the dome side up
then washer oriented with the dome side up!
Add the upper spring perch with the 3 studs drapped on the strut bottom. Studs face up! It wont fit on after the top spring retainer plate is on and the hole is not large enough to slip over the bottom ot the strut...
There is a "correct" way to face this piece. longer stud goes to the back of the strut...
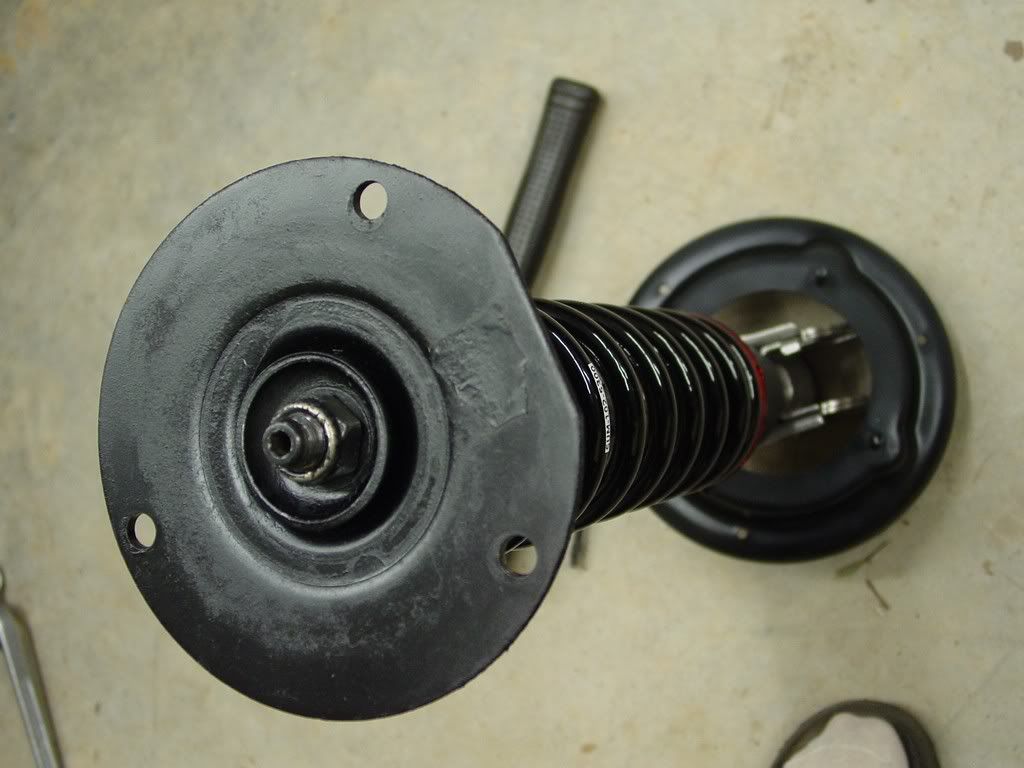
now the top spring retainer plate. Flat side up!
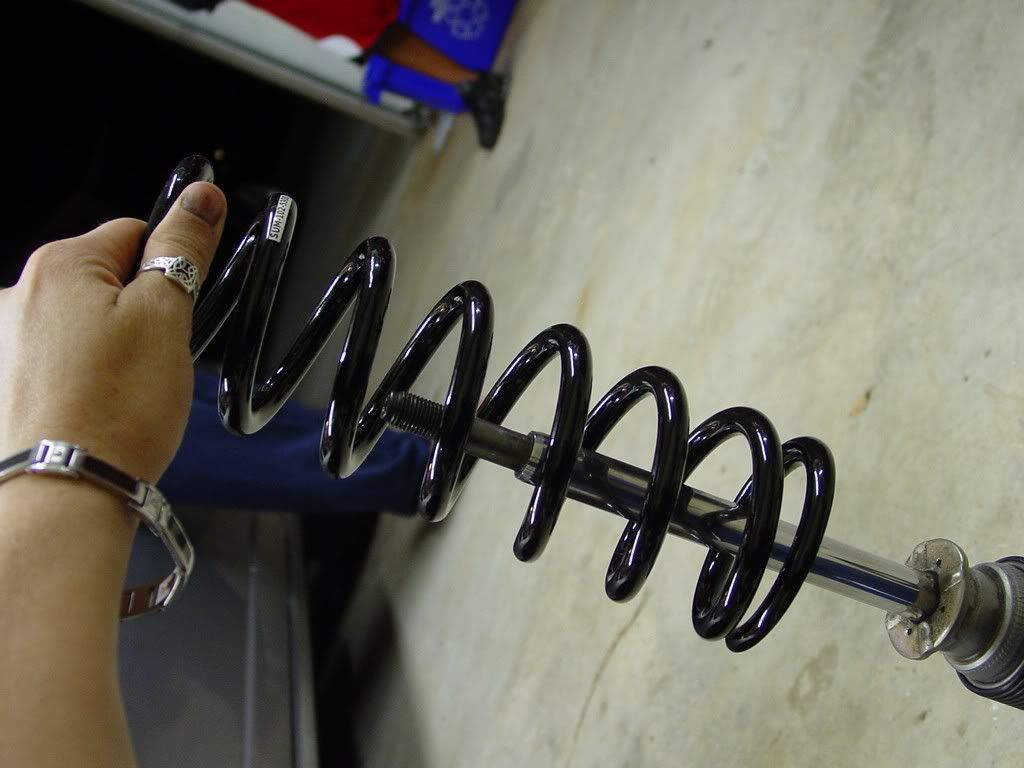
Ahhh now that is a usable amount of threads! Victory!
[This message has been edited by redraif (edited 09-16-2011).]
The allen 6mm and the 7/8 wrench.... worked AWESOME. Piece of cake.
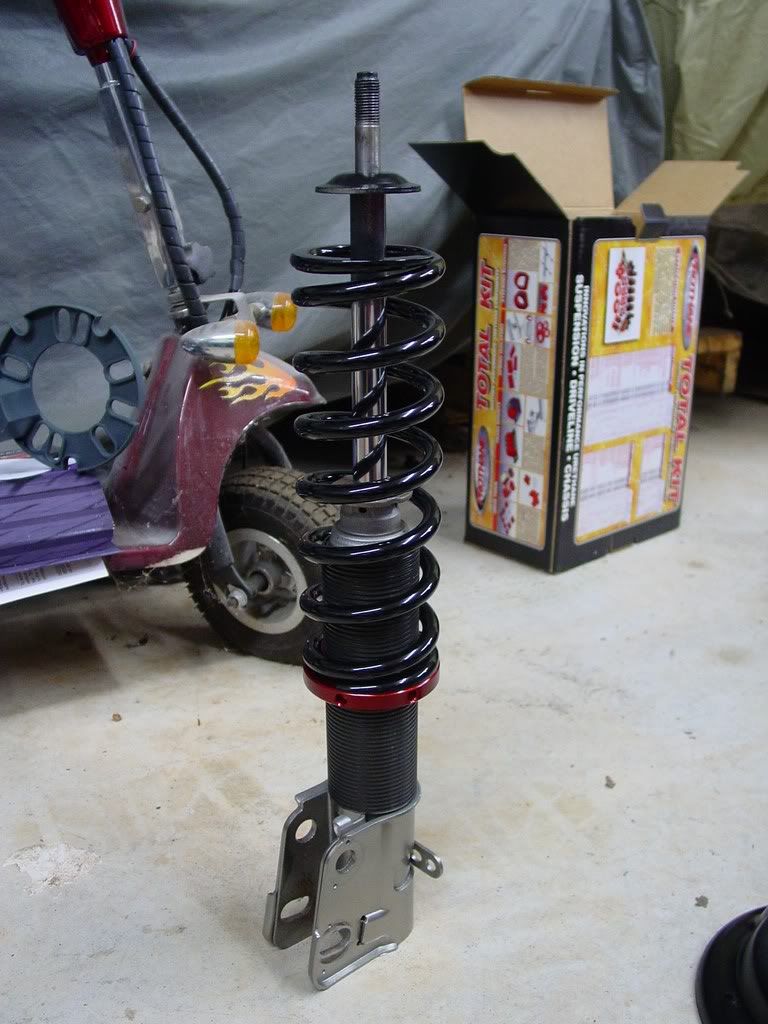
Finally things were looking right!
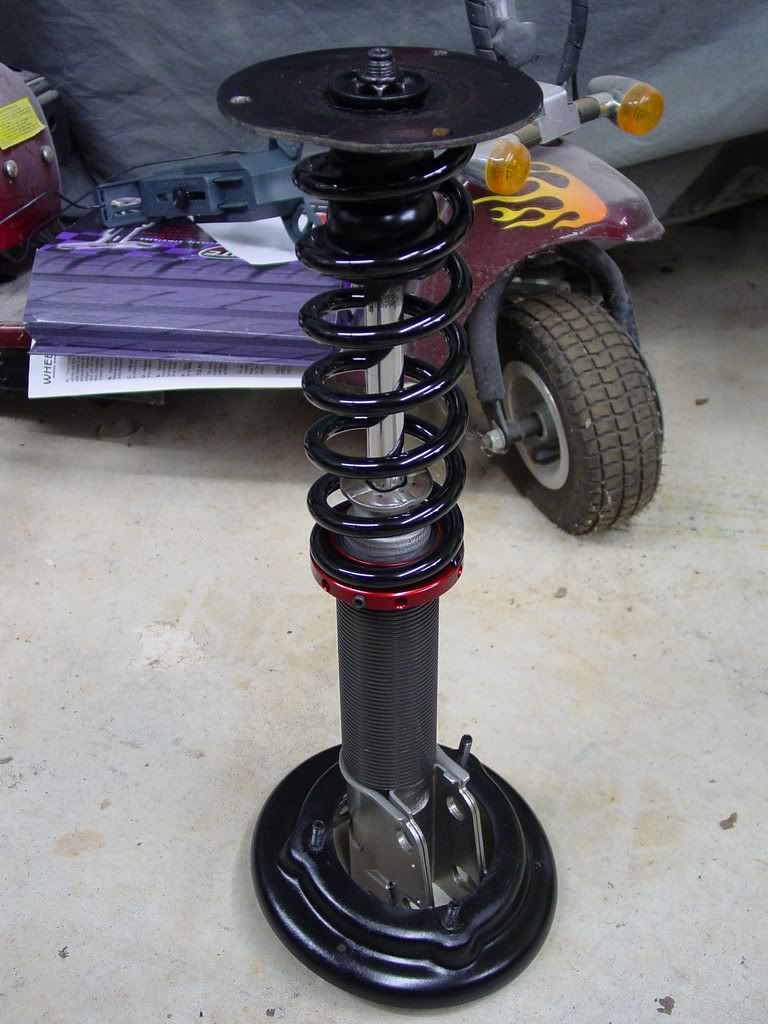
The whole assembly is now ready to reinstall. Leaving the spring perch down till go time
Notice how everything is lining up in the pic... flat side is to the outside of the... toward the side of the strut that bolts to the spindle.
But for referance...I will add the top most plate. Again... flat side is to the outside of the car... toward the side of the strut that bolts to the spindle.
here is the perch up and the nuts just barely on for the heck of it, so you can see how it all looks together before its on the car.
Time for bed... hopefully more tomorrow... depends on the seawall and dock replacement though!
[This message has been edited by redraif (edited 09-15-2014).]
I keep a towel nearby and use an old camera. Lol... my jobs would go faster though if I gave up the camera, but it has helped me many times over to go back and look later. Not to mention its habit now after writing tech articles for the Mustang forums
When I installed KYB struts on my 85GT more than ten years ago, the instructions that came with them indicated that the STRUT MOUNTS should be inverted, to provide an additional 1 inch of travel.
I did so, there was a mild interfernce between the decklid and the shafts, otherwise I've have never had a problem with them, except for some Fiero Experts saying "did you know your strut mounts are installed upside down?"
Here's a quick Pic
[This message has been edited by Tinkrr (edited 09-15-2011).]
When I installed KYB struts on my 85GT more than ten years ago, the instructions that came with them indicated that the STRUT MOUNTS should be inverted, to provide an additional 1 inch of travel.
I did so, there was a mild interfernce between the decklid and the shafts, otherwise I've have never had a problem with them, other than some Fiero Experts saying "did you know your strut mounts are installed upside down?"
hmmm... I wish I could remember if we even got instructions with mine. At the time the install was done it was my x- best friend and I doing various things at once. He tackled the strut install. The inverting would help with travel, but with it facing opposite I would have nothing to keep the spring centered. I have no welder to make my own retainer. But I had the kybs on there for this long with them facing like stock and have had no travel issues.... But then again I was at stock ride height... Time will tell I guess
Wow, thanks for the detail. Don't worry. There ain't a thing as "too many pics"
-Max
I know... I'm a mess when it comes to "over" pictures!
Last night went awesome! Side one is in... easy, easy....
Now I have all the parts together, like my last picture, as I'm ready to carry it over to the car...
Remember the straight sides line up with one another and line up with the outside of the car.
Stock pic to refresh you! Longer stud is on the engine side of the strut...
Put your weight dispersing plate over the engine side hole and get your nut ready by the hole.
With everything oriented (flat side of the plates to the outside and longer stud to the engine side of the strut). I now have to hold it together by hand and move it to the car. No easy feat alone... best picture I could get. Yes this is a one person show.
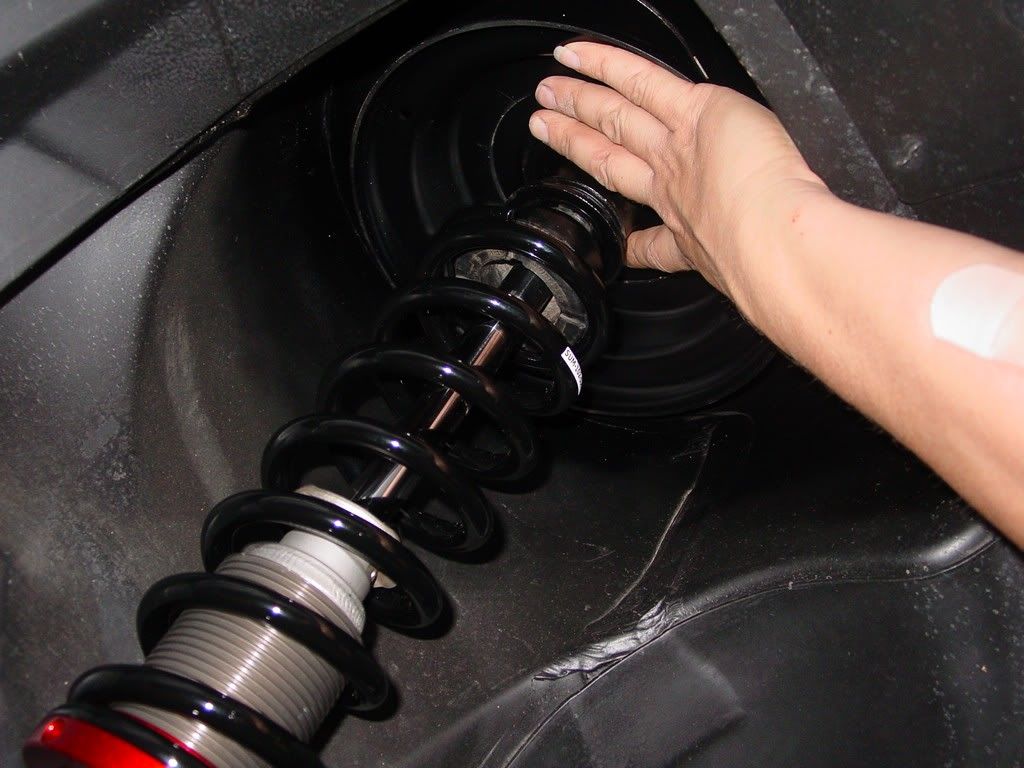
I let it rest here (axle boot) to eyeball where I needed to go & check my orientation.
I lift it up and slip it up into the underside of the strut tower. One more time...Flat side to the outside. Make sure to hold the upper perch studs through the holes in the plates as you lift it up. Get a helper if you can to eyeball from above and catch the stud with the nut when it emerges. However, it can be done solo while taking pics! Guide the engine side (longer) stud to its hole.
You just have to get a few threads through and catch them with the nut to help you hold the assembly.
It can carefully hang by the one stud while you regroup and get your other weight dispersal plates and nuts ready
Now you have make sure everything is oriented and lift the remaining studs through the other 2 holes and weight dispersing plates just enough to grab some threads with the nuts
This would be much easier without taking pics... LOL!
Run on the bolts
Now you can relax and switch to tools. To avoid any binds, I always make it a habit to wrench a little at a time on each bolt when doing on something like this. I work my way around to each bolt and tighten them little then move to the next and so forth. This brings the whole assembly up level and even. Otherwise by tightening one bolt all the way, you risk pulling the unit in crooked. This can cant the whole assembly in such a way that you can damage the thread or bend the other studs and risk not fully seat the plates. That will make for a bad trip down the road!
Some slack taken up on the engine side stud
Now on to the fronts a bit and work all the way around back & forth till all are tight. Give the assembly a shake to be sure its seated and bolted good up top. Check your nuts again! LOL!
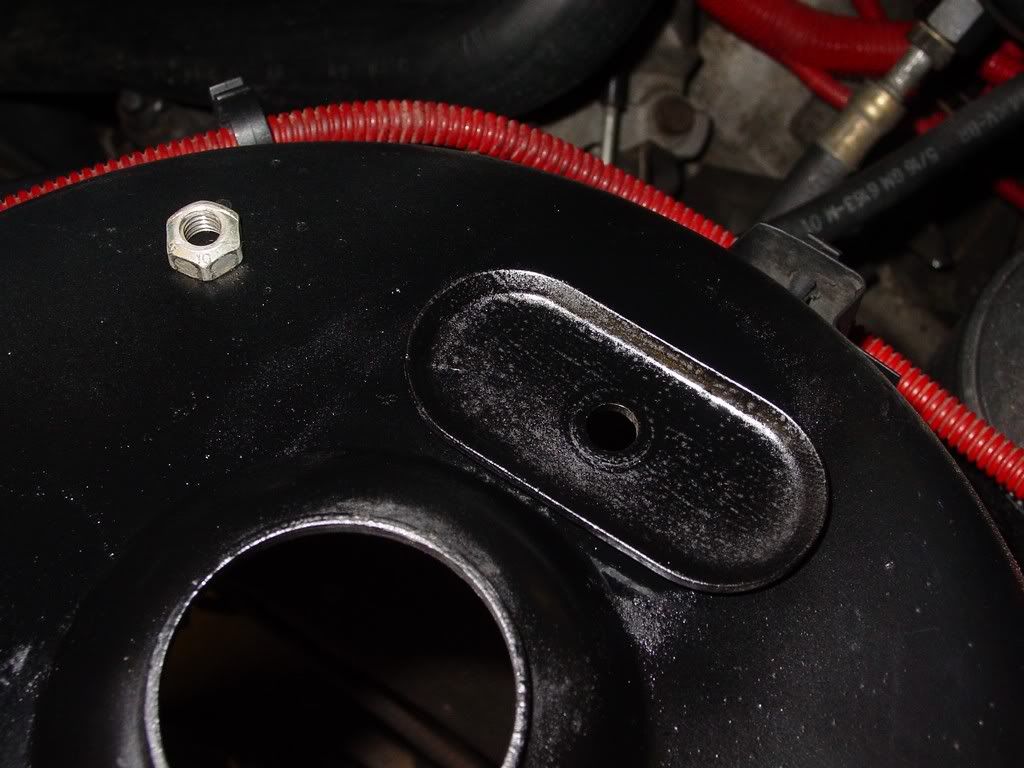
Add your bracket back on the engine side stud...
install the bracket's retaining nut
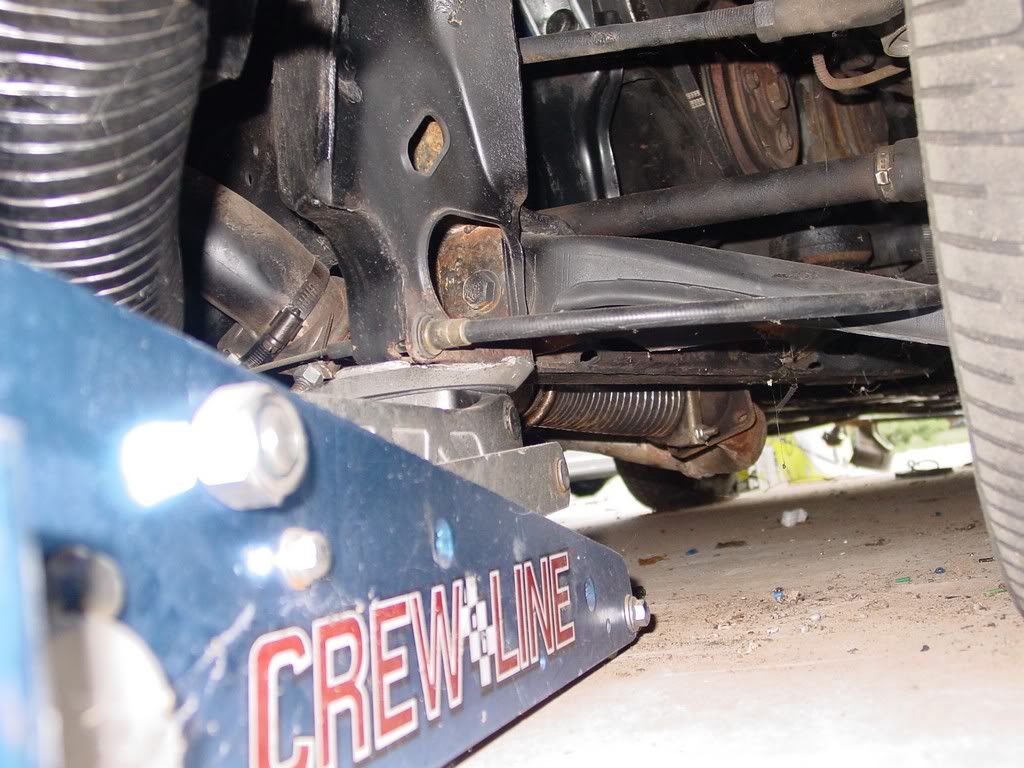
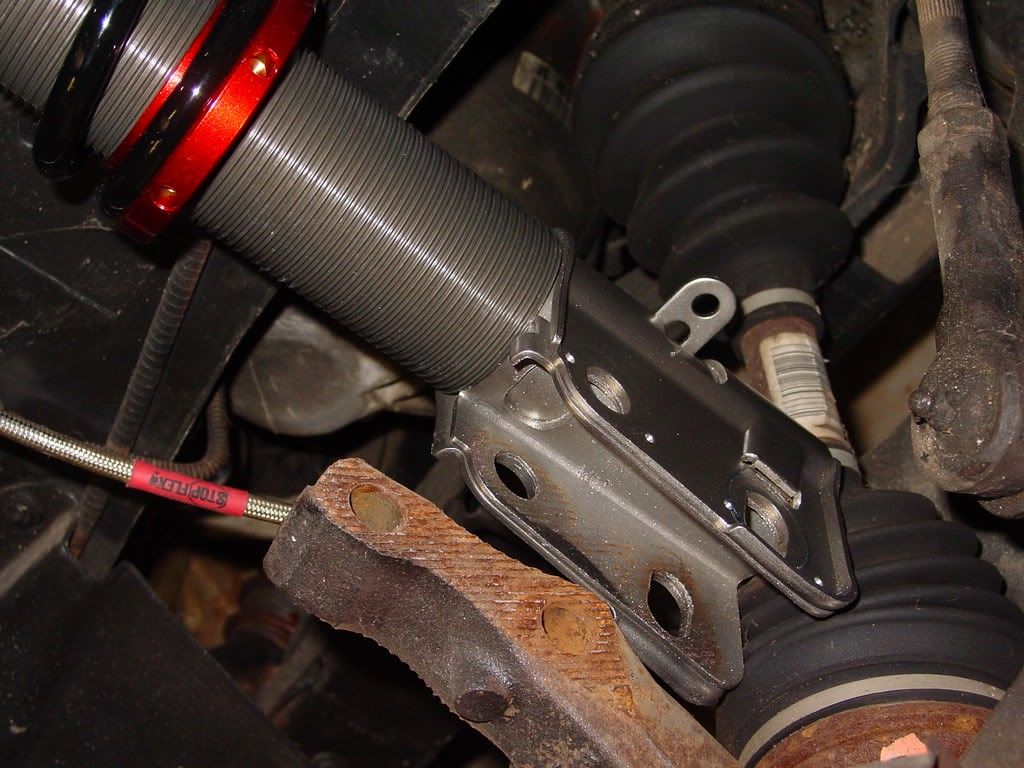
Now step back and enjoy!
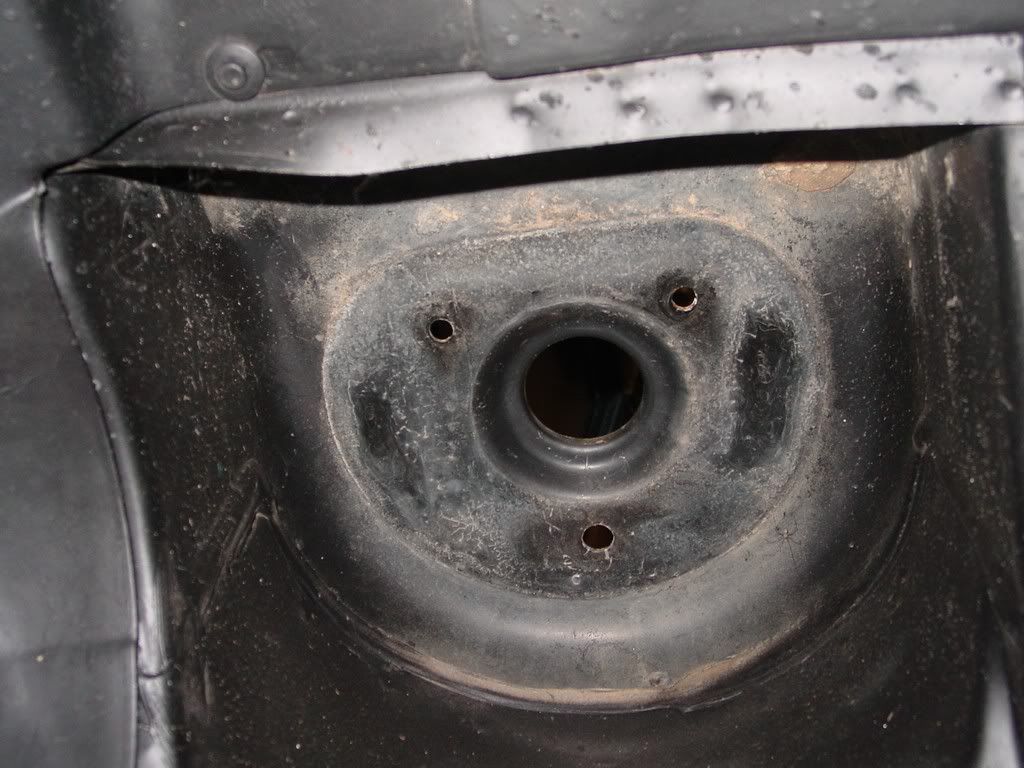
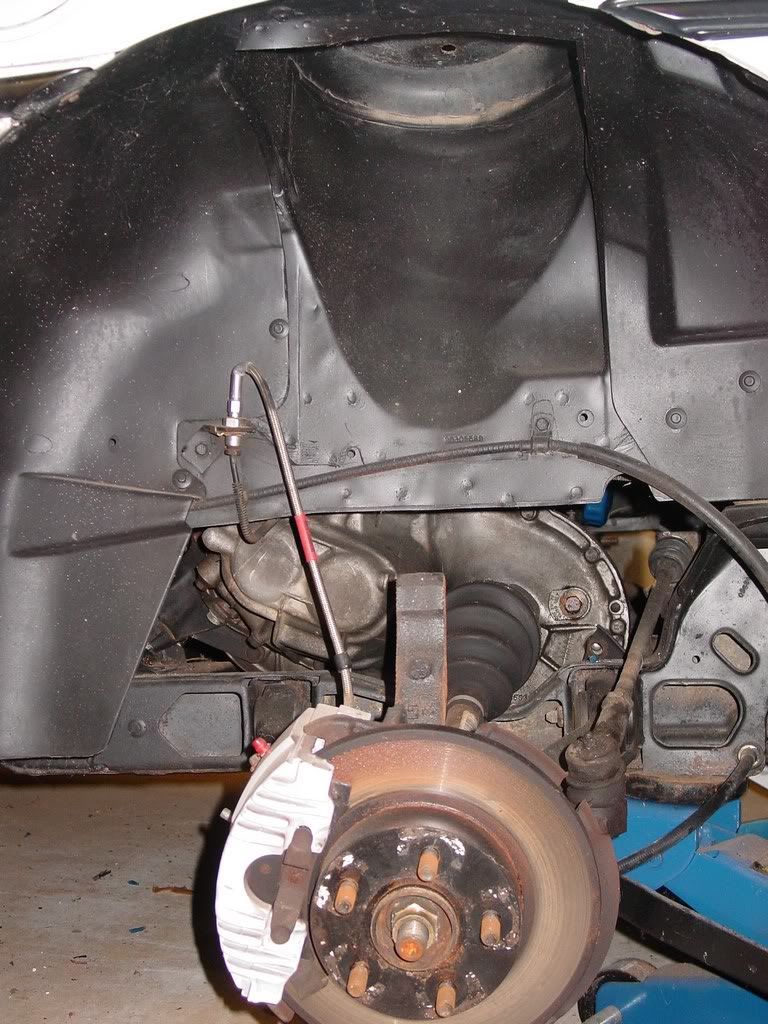
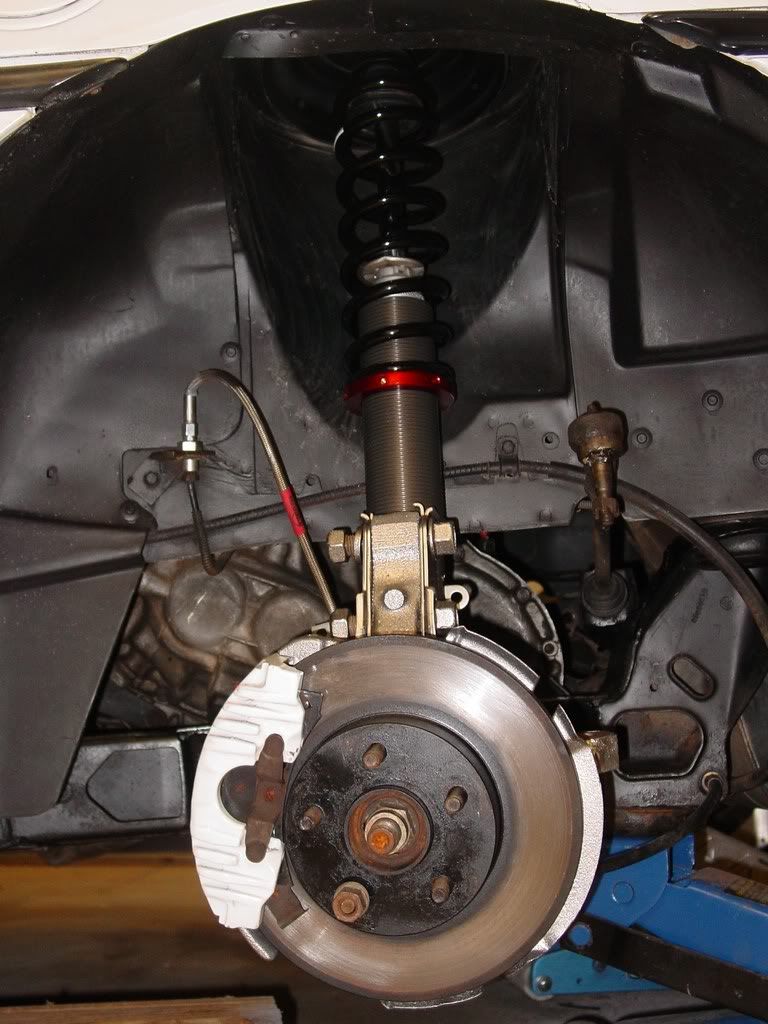
Much more room in there
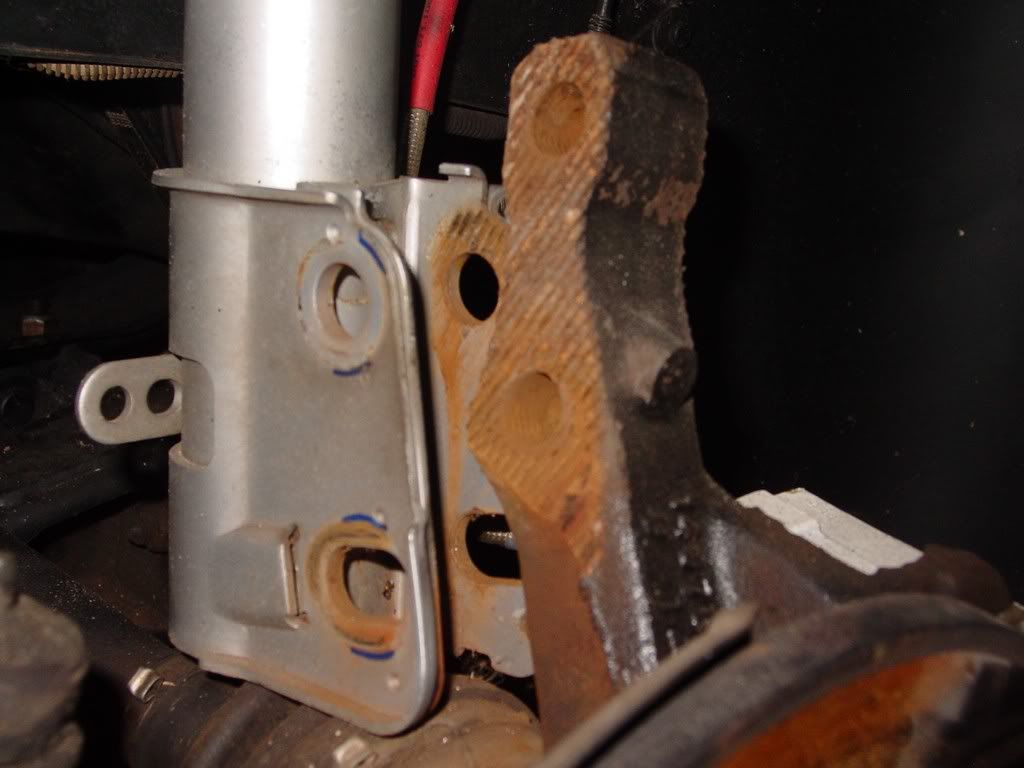
Now to line up the strut base and spindle
It moves into place with ease... not hard at all
I slipped in the top bolt... a few gentle bumps with my palm and in it goes
I'm leaving it there for now... I want to paint the spindle pewter to match the strut... But I need the tie rod separator first! I wanted to take the stress off the system till then.
Other side all tore apart to follow the same fate as the previous side!
[This message has been edited by redraif (edited 09-15-2014).]
When I installed KYB struts on my 85GT more than ten years ago, the instructions that came with them indicated that the STRUT MOUNTS should be inverted, to provide an additional 1 inch of travel.
I did so, there was a mild interfernce between the decklid and the shafts, otherwise I've have never had a problem with them, other than some Fiero Experts saying "did you know your strut mounts are installed upside down?"
That trick works on fastbacks.
The fastback decklid is higher than the notchback decklid.
All of your parts are black so I can tell what order you put it all back together and which side is up on them
I will take clearer pics tonight as I assemble # 2... Sorry about that. I will update the earlier pics with clearer how-to-details as well and insert clearer pics where needed. I will post when updates made.
FYI: The parts go back in the same orientation that they came off! So watch close as you take things apart and mark things if you need to to keep up with it!
for now
basic order I assembled the parts in strut sleeve snap ring perch spring top of strut boot dome side up(dust cover bottom portion removed retain metal inner snubbed if it has separated) larger washer dome side up big factory coil perch with studs facing up drapped around strut base now ad the coil retaining plate with the flat side up. The center helps keep the coil spring centered now and the smaller washer cupped side up now your strut bolt tighten..... once secure slide the upper factory coil perch up and slide studs through coil retainer plate then add flat plate over studs.
somehow lift balance and carry assembly to car and slide into tower and get the studs to surface thru their corresponding hole.... Lol. Not easy alone ;-)
[This message has been edited by redraif (edited 09-15-2014).]
Did some edits and added last night's install pics a few posts up! Hope things are explained clearer with my edits. Clearer more illustrative pics coming as well!
[This message has been edited by redraif (edited 09-15-2011).]
Just so everyone knows if you dont want to use a dremel. I used a hacksaw and cut both welds were the weld meets the plate. I went 90% thru and hammered until the weld cracked and it took me only 15 mins. Still have to cut off the actual weld with something tho
All of your parts are black so I can tell what order you put it all back together and which side is up on them
Ok I got everything edited and more pics to referance orrientation for "Greenmeansgo"! Hope that does the trick! Wheels should be mounted on tires Saturday and when I sort out all the control arm and tie rod bushings and painting I will have FINAL pics of the install!
Green... let me know if that has cleared everything up!
[This message has been edited by redraif (edited 09-16-2011).]
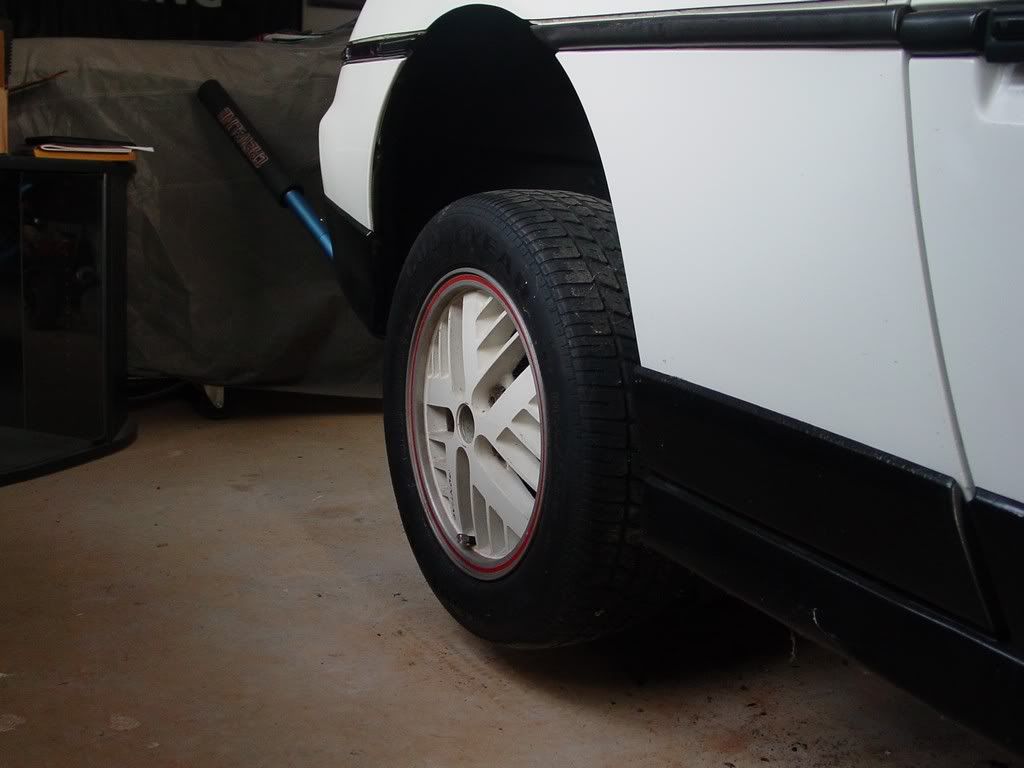
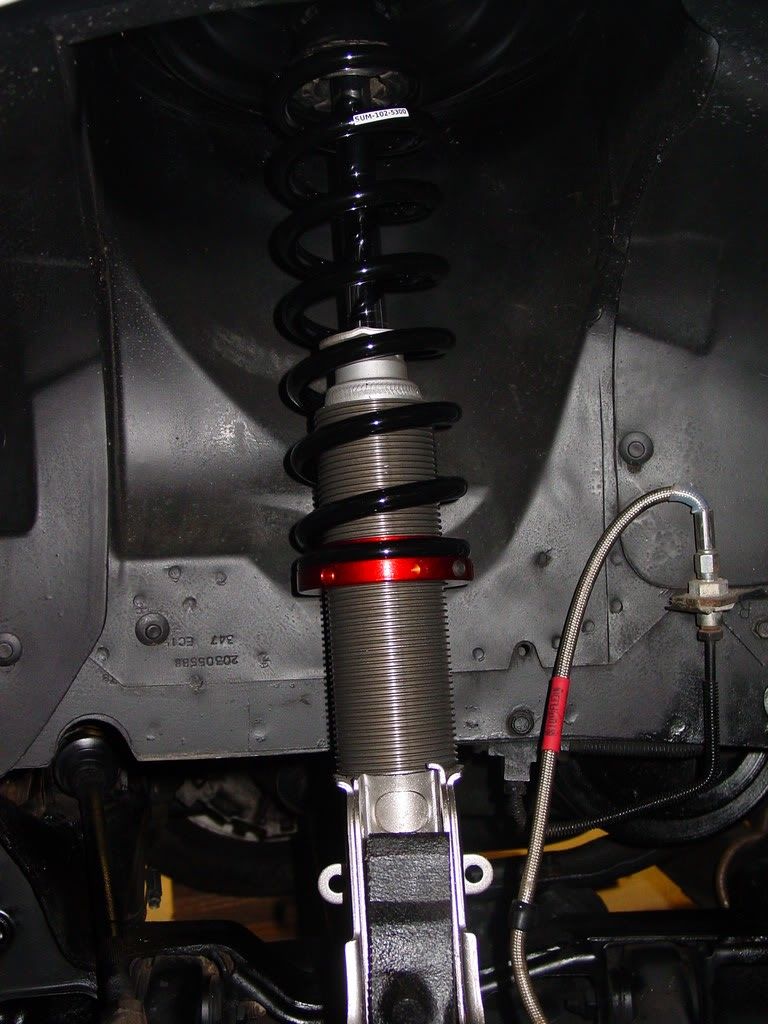
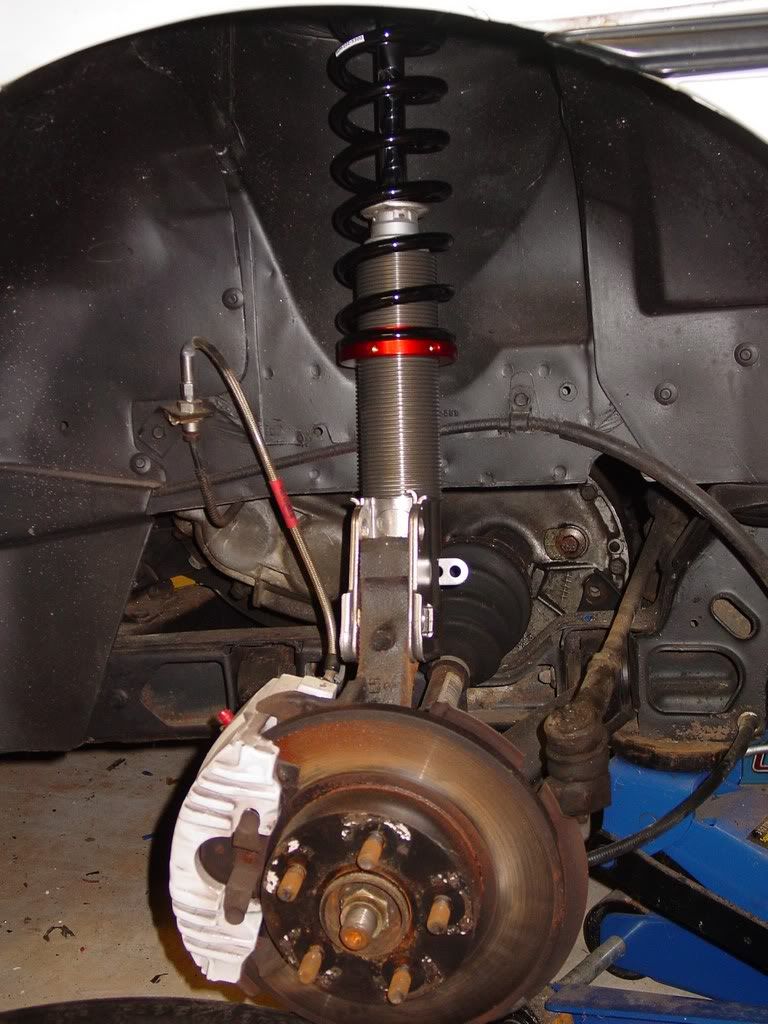
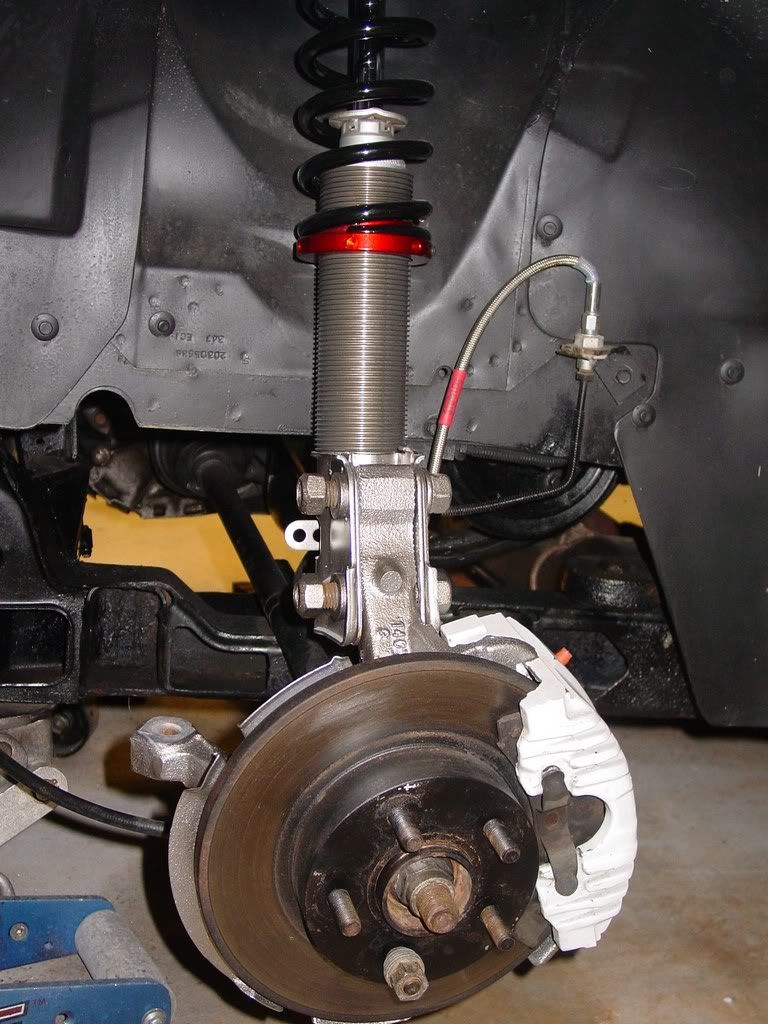
The almost final assembled shots I promised... Had to clean up all the rusty parts... Still have to finish up the poly parts on the a-arms, but the rest is in place and painted
Before the clean up of other parts:
After the clean up:
Passenger
Driver
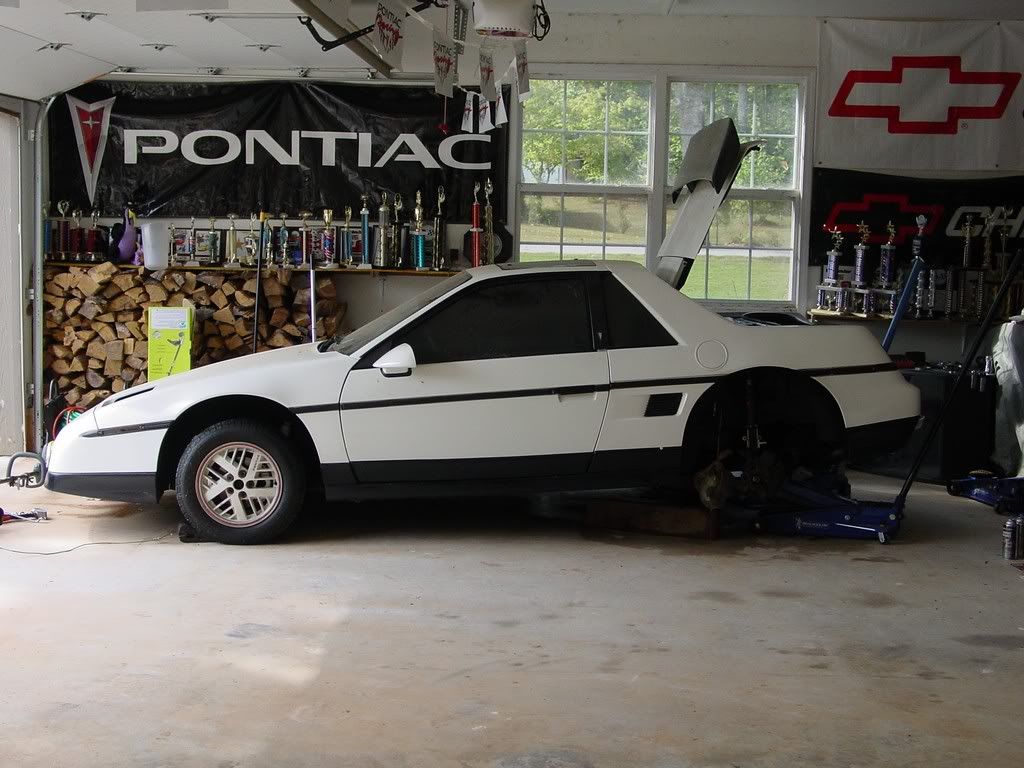
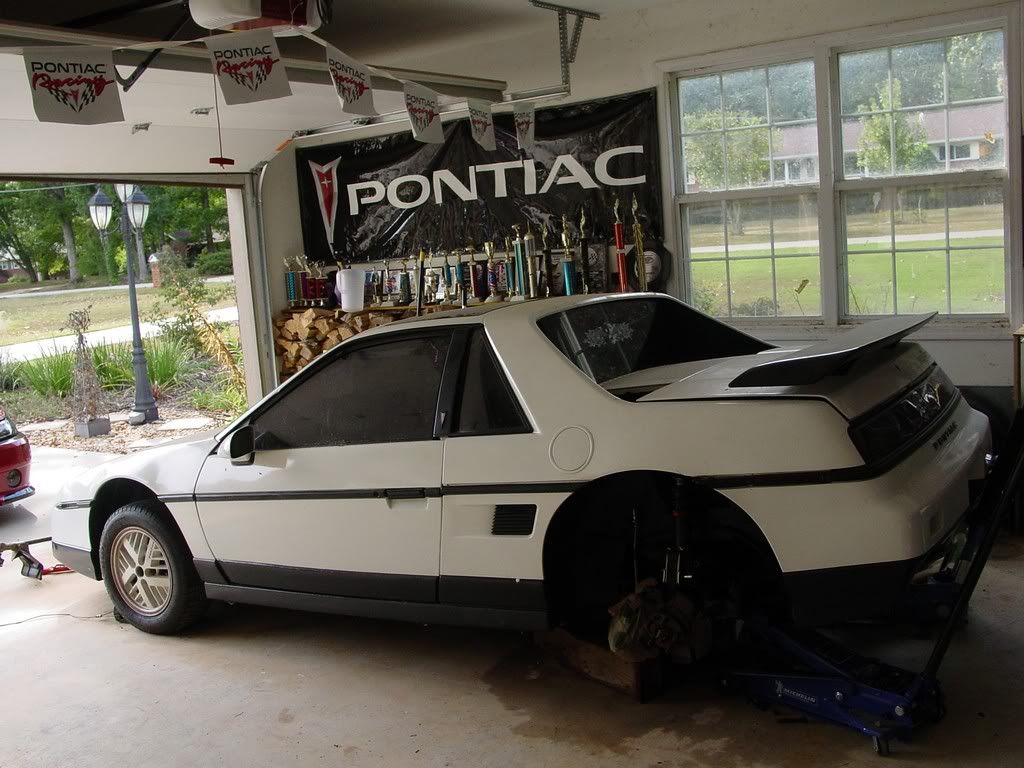
Oh and here is my little car while being operated on! Finally got the Mustang out of the way... LOL!
[This message has been edited by redraif (edited 10-05-2011).]
Ok finally got the front poly done and the frt 1.5 coil removal...
Much better all leveled out! I dropped the rear a few more turns and I'm near the 3 finger mark... in the front I'm at about 2.5 fingers...
Scarey thing is even with the alignment like this > < ... the darn car felt better then it ever did, nice and tight!... So that rear floaty feeling I have been plagued with since I got the car was a combo of: blown motor & tranny mounts, dead suspension bushings, and old soft springs. The poly, new solid rubber motor and tranny mounts, 300lb rear & 1.5 coils cut on the front WS6 (stiffest stock) made all the difference! I was SOOO happy when I was driving my little indy again! Dang, I have missed this car!
edit: Oh and before I drove it its 20 mile maiden voyage I dialed the toes in better in the rear. This weekend I will tackle the front. Darn car pulled straight as an arrow though!
[This message has been edited by redraif (edited 10-25-2011).]
Looks great! I only took out 1 coil from the front and can fit 3 fingers comfortably, I think I'll go back in and cut another half off next time I'm fiddling in there. Definitely a big difference with new bushings/ shocks and struts/ rear coilovers/ ball joints/ tie rods. My only complaint is that one of my bushings started squeaking in the front after only 500 miles on the poly install . I bought a whole tub of poly grease and they were coated with obscene amounts of grease and they still squeak!! Next year I'm going back in and doing a rubber bushing conversion, forget poly.
As far as the height... I need to measure what my new gap is now that the car has 20 miles on it. I wanted to go 2 coils, but I knew that right now I could not get the bump stops cut down. So the plan is, with all the hard stuff done, take things partially apart.... get a mobile welder, or take the car to someone's place. Take apart only what I have to to mod the stops and take another .5 off the front coils, or get lowering ball joints to go that extra little bit in front.
With all my control arms I added greasable fittings. I also added them to my swap bar. I hope they work as well as planned to prevent sqeaks and premature wear in the poly.
[This message has been edited by redraif (edited 10-25-2011).]


 \
\


 . I bought a whole tub of poly grease and they were coated with obscene amounts of grease and they still squeak!!


