Pennock's Fiero Forum
  General Fiero Chat
  Baby's First Engine Swap (Page 3)

Post New Topic  Post A Reply
Email This Page to Someone! | Printable Version

This topic is 4 pages long:  1   2   3   4 
Previous Page | Next Page
next newest topic | next oldest topic
Baby's First Engine Swap by BadNewsBrendan
Started on: 12-08-2018 01:35 AM
Replies: 155 (4502 views)
Last post by: BadNewsBrendan on 06-19-2022 10:27 PM
BadNewsBrendan
Member
Posts: 273
From: Michigan
Registered: Aug 2018


Feedback score: N/A
Leave feedback

Rate this member

Report this Post02-18-2020 08:05 PM Click Here to See the Profile for BadNewsBrendanSend a Private Message to BadNewsBrendanEdit/Delete MessageReply w/QuoteDirect Link to This Post


IP: Logged
BadNewsBrendan
Member
Posts: 273
From: Michigan
Registered: Aug 2018


Feedback score: N/A
Leave feedback

Rate this member

Report this Post02-18-2020 08:07 PM Click Here to See the Profile for BadNewsBrendanSend a Private Message to BadNewsBrendanEdit/Delete MessageReply w/QuoteDirect Link to This Post

BadNewsBrendan

273 posts
Member since Aug 2018
Probably won't be pulling the engine until next winter as there are a lot of other things I need to do on it to make it more practical and reliable for this summer and want to get some miles on the engine before tearing it apart again. Just getting them cleaned up and oiled for storage.
IP: Logged
pmbrunelle
Member
Posts: 4376
From: Grand-Mère, Québec
Registered: Sep 2008


Feedback score: N/A
Leave feedback


Total ratings: 62
Rate this member

Report this Post02-19-2020 12:01 AM Click Here to See the Profile for pmbrunelleSend a Private Message to pmbrunelleEdit/Delete MessageReply w/QuoteDirect Link to This Post
Did you use walnut shells or something?

If the blasting media is too nasty, you may want to strip the heads apart for a good cleaning, to keep from contaminating the oil with abrasive particles.
IP: Logged
BadNewsBrendan
Member
Posts: 273
From: Michigan
Registered: Aug 2018


Feedback score: N/A
Leave feedback

Rate this member

Report this Post02-19-2020 06:59 PM Click Here to See the Profile for BadNewsBrendanSend a Private Message to BadNewsBrendanEdit/Delete MessageReply w/QuoteDirect Link to This Post
I'm not entirely sure what it was the guy I bought it from used. Was planning on scrubbing it in a warm soapy water bath and then maybe running it through the dishwasher when the GF isn't here

Otherwise will probably get it cleaned at the engine shop down the road before swapping them on.
IP: Logged
BadNewsBrendan
Member
Posts: 273
From: Michigan
Registered: Aug 2018


Feedback score: N/A
Leave feedback

Rate this member

Report this Post04-03-2020 01:04 PM Click Here to See the Profile for BadNewsBrendanSend a Private Message to BadNewsBrendanEdit/Delete MessageReply w/QuoteDirect Link to This Post
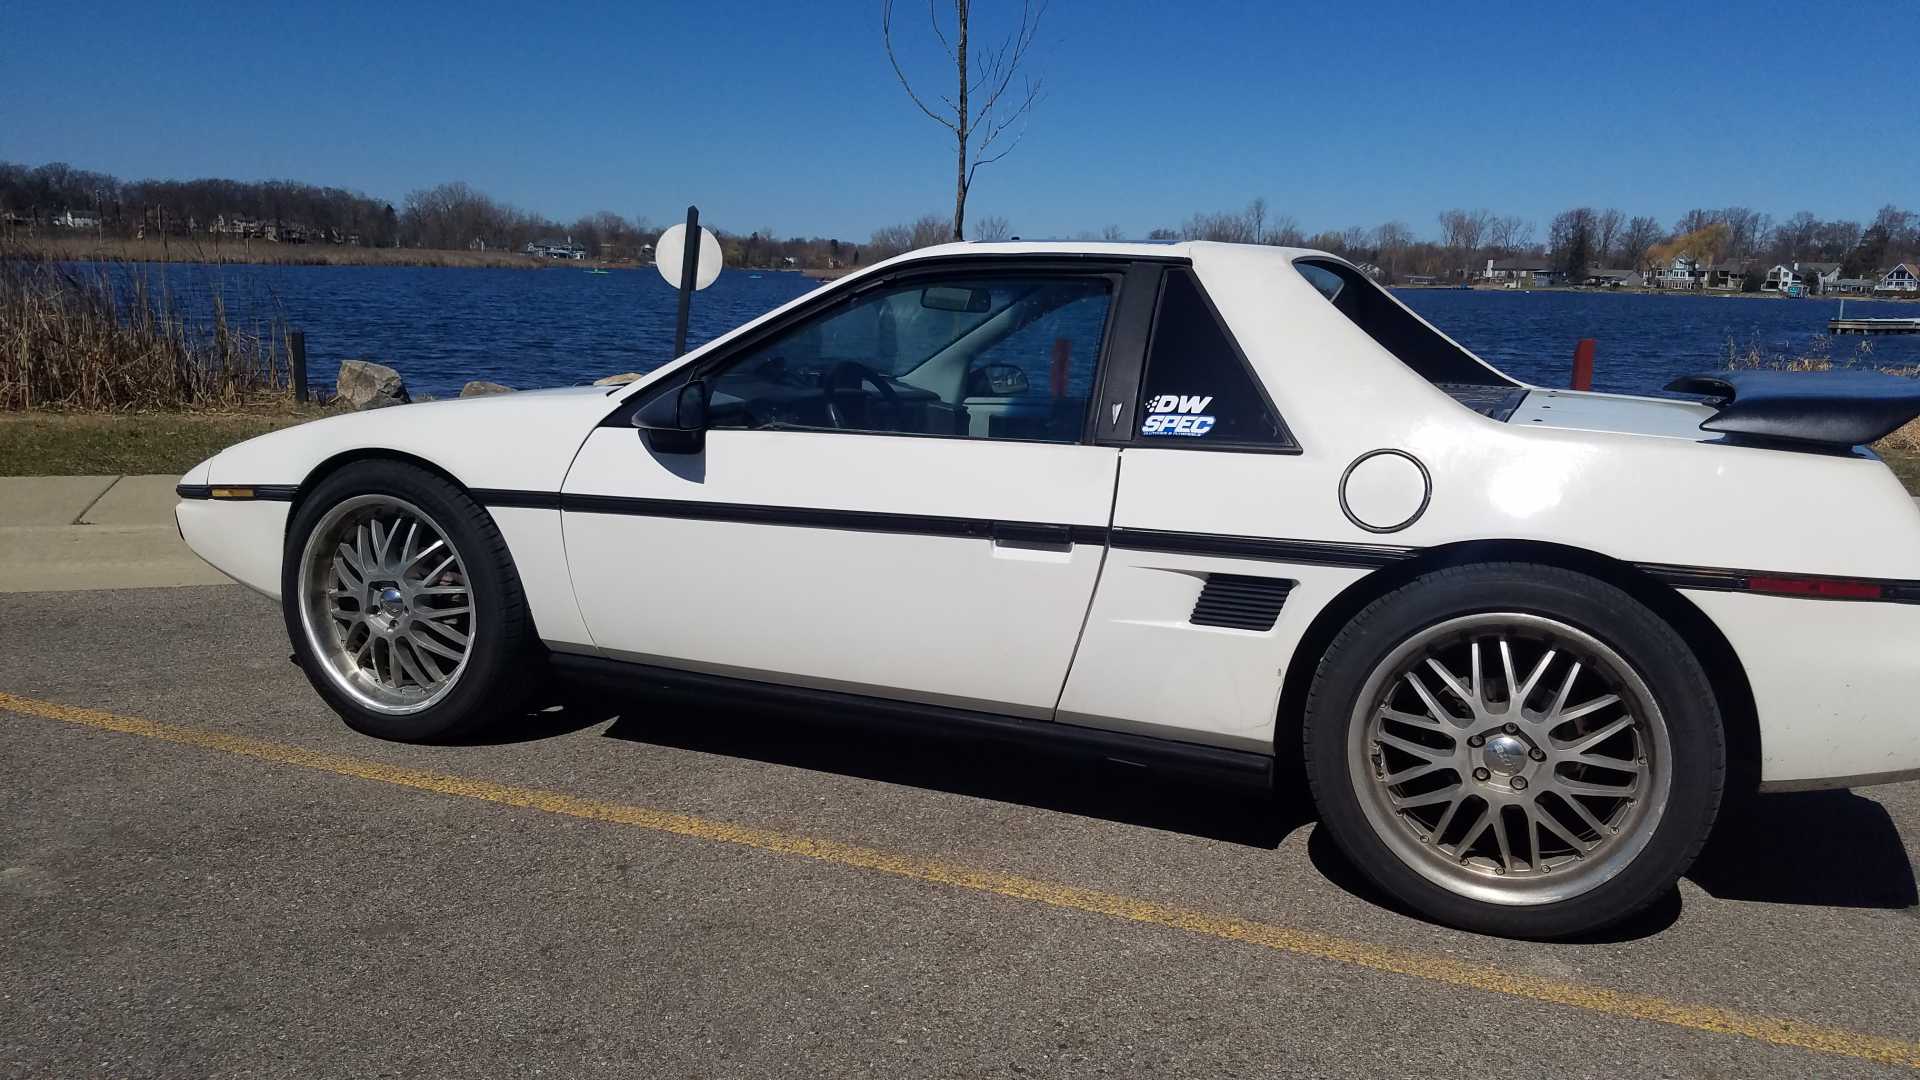
Went for a cruise to a state park over lunch. I'm liking wheel well gap a lot better since i lowered it a couple inches. Hopefully no more guys asking me if i lifted it at gas stations. May have cut the bump stops a bit too far cause its rubbed when hitting a few bumps but oh well.


IP: Logged
ignorant prodigy
Member
Posts: 621
From: taunton, ma, usa
Registered: Mar 2006


Feedback score: (3)
Leave feedback

Rate this member

Report this Post04-03-2020 07:16 PM Click Here to See the Profile for ignorant prodigySend a Private Message to ignorant prodigyEdit/Delete MessageReply w/QuoteDirect Link to This Post
i admire your persistence

nice job man! looking sharp
IP: Logged
BadNewsBrendan
Member
Posts: 273
From: Michigan
Registered: Aug 2018


Feedback score: N/A
Leave feedback

Rate this member

Report this Post06-19-2020 10:32 AM Click Here to See the Profile for BadNewsBrendanSend a Private Message to BadNewsBrendanEdit/Delete MessageReply w/QuoteDirect Link to This Post
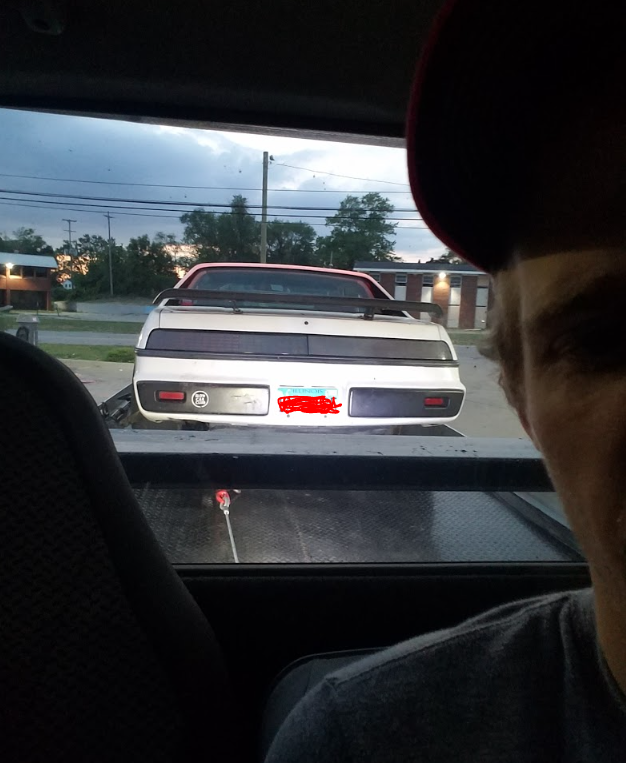
Was out for a cruise and hit the rev limiter once on an on ramp. Engine started popping very badly and died. Would not start and had to tow it home. First thought was the cam sensor connector popped out cause the clip is broken but it was still connected. Hopefully it didn't float a valve. Going to compression test it tonight. Maybe the cam or crank sensor went out? Hopefully i didn't just ruin a 3rd engine

If anyone has other thoughts on something else it could be I would appreciate it. Will update once compression tested.

IP: Logged
pmbrunelle
Member
Posts: 4376
From: Grand-Mère, Québec
Registered: Sep 2008


Feedback score: N/A
Leave feedback


Total ratings: 62
Rate this member

Report this Post06-19-2020 09:59 PM Click Here to See the Profile for pmbrunelleSend a Private Message to pmbrunelleEdit/Delete MessageReply w/QuoteDirect Link to This Post
 
quote
Originally posted by BadNewsBrendan:
hit the rev limiter once on an on ramp.


At what RPM was that?
IP: Logged
BadNewsBrendan
Member
Posts: 273
From: Michigan
Registered: Aug 2018


Feedback score: N/A
Leave feedback

Rate this member

Report this Post06-19-2020 11:16 PM Click Here to See the Profile for BadNewsBrendanSend a Private Message to BadNewsBrendanEdit/Delete MessageReply w/QuoteDirect Link to This Post
Whatever stock is (5600?) so wouldn't think it would hurt it. Did a compression test tonight and was fine, all over 165 psi
IP: Logged
Modesto
Member
Posts: 108
From: Utah
Registered: Apr 2020


Feedback score: N/A
Leave feedback

Rate this member

Report this Post06-20-2020 05:12 PM Click Here to See the Profile for ModestoSend a Private Message to ModestoEdit/Delete MessageReply w/QuoteDirect Link to This Post
Ohh my. You have much more patience than I do. I considered just using the 3.4 short block I pulled from the junk yard as is because it was relatively low miles and looked so good internally. I'll obviously never know if it would have been fine but the thought of completing a swap to only get a few hundred miles out of it makes my head spin. Way to go on not giving up!
IP: Logged
BadNewsBrendan
Member
Posts: 273
From: Michigan
Registered: Aug 2018


Feedback score: N/A
Leave feedback

Rate this member

Report this Post06-20-2020 06:53 PM Click Here to See the Profile for BadNewsBrendanSend a Private Message to BadNewsBrendanEdit/Delete MessageReply w/QuoteDirect Link to This Post
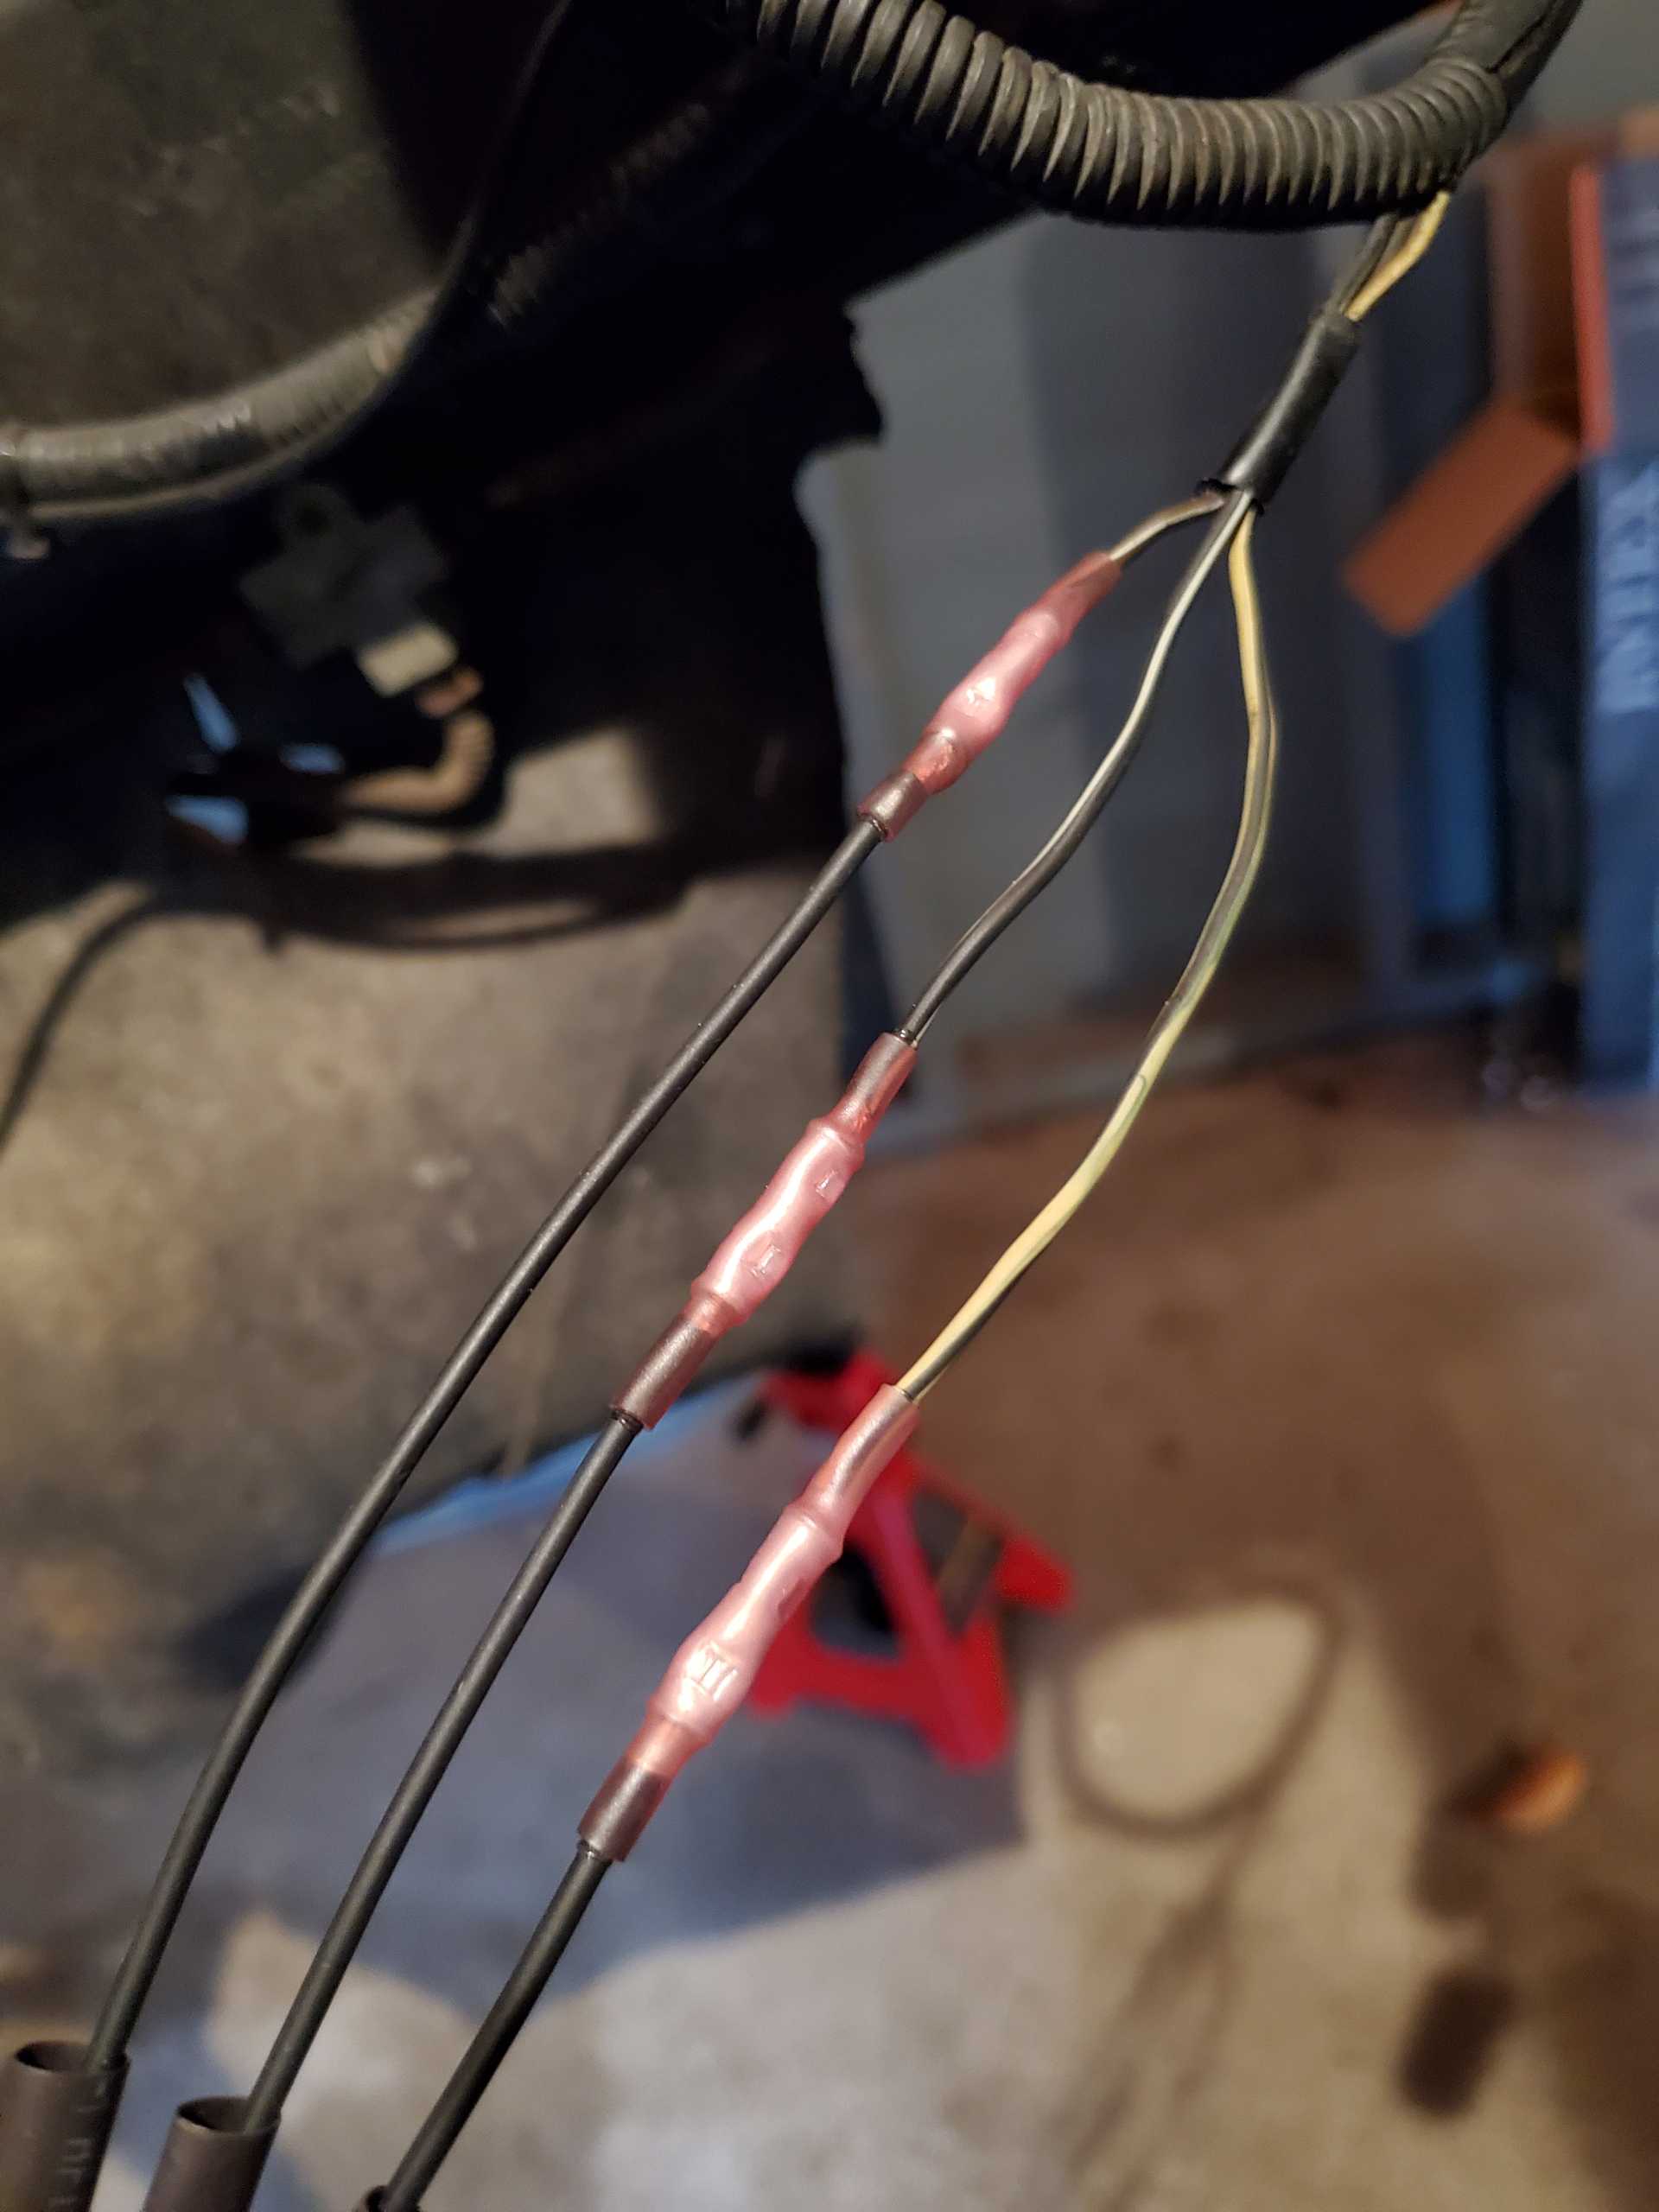
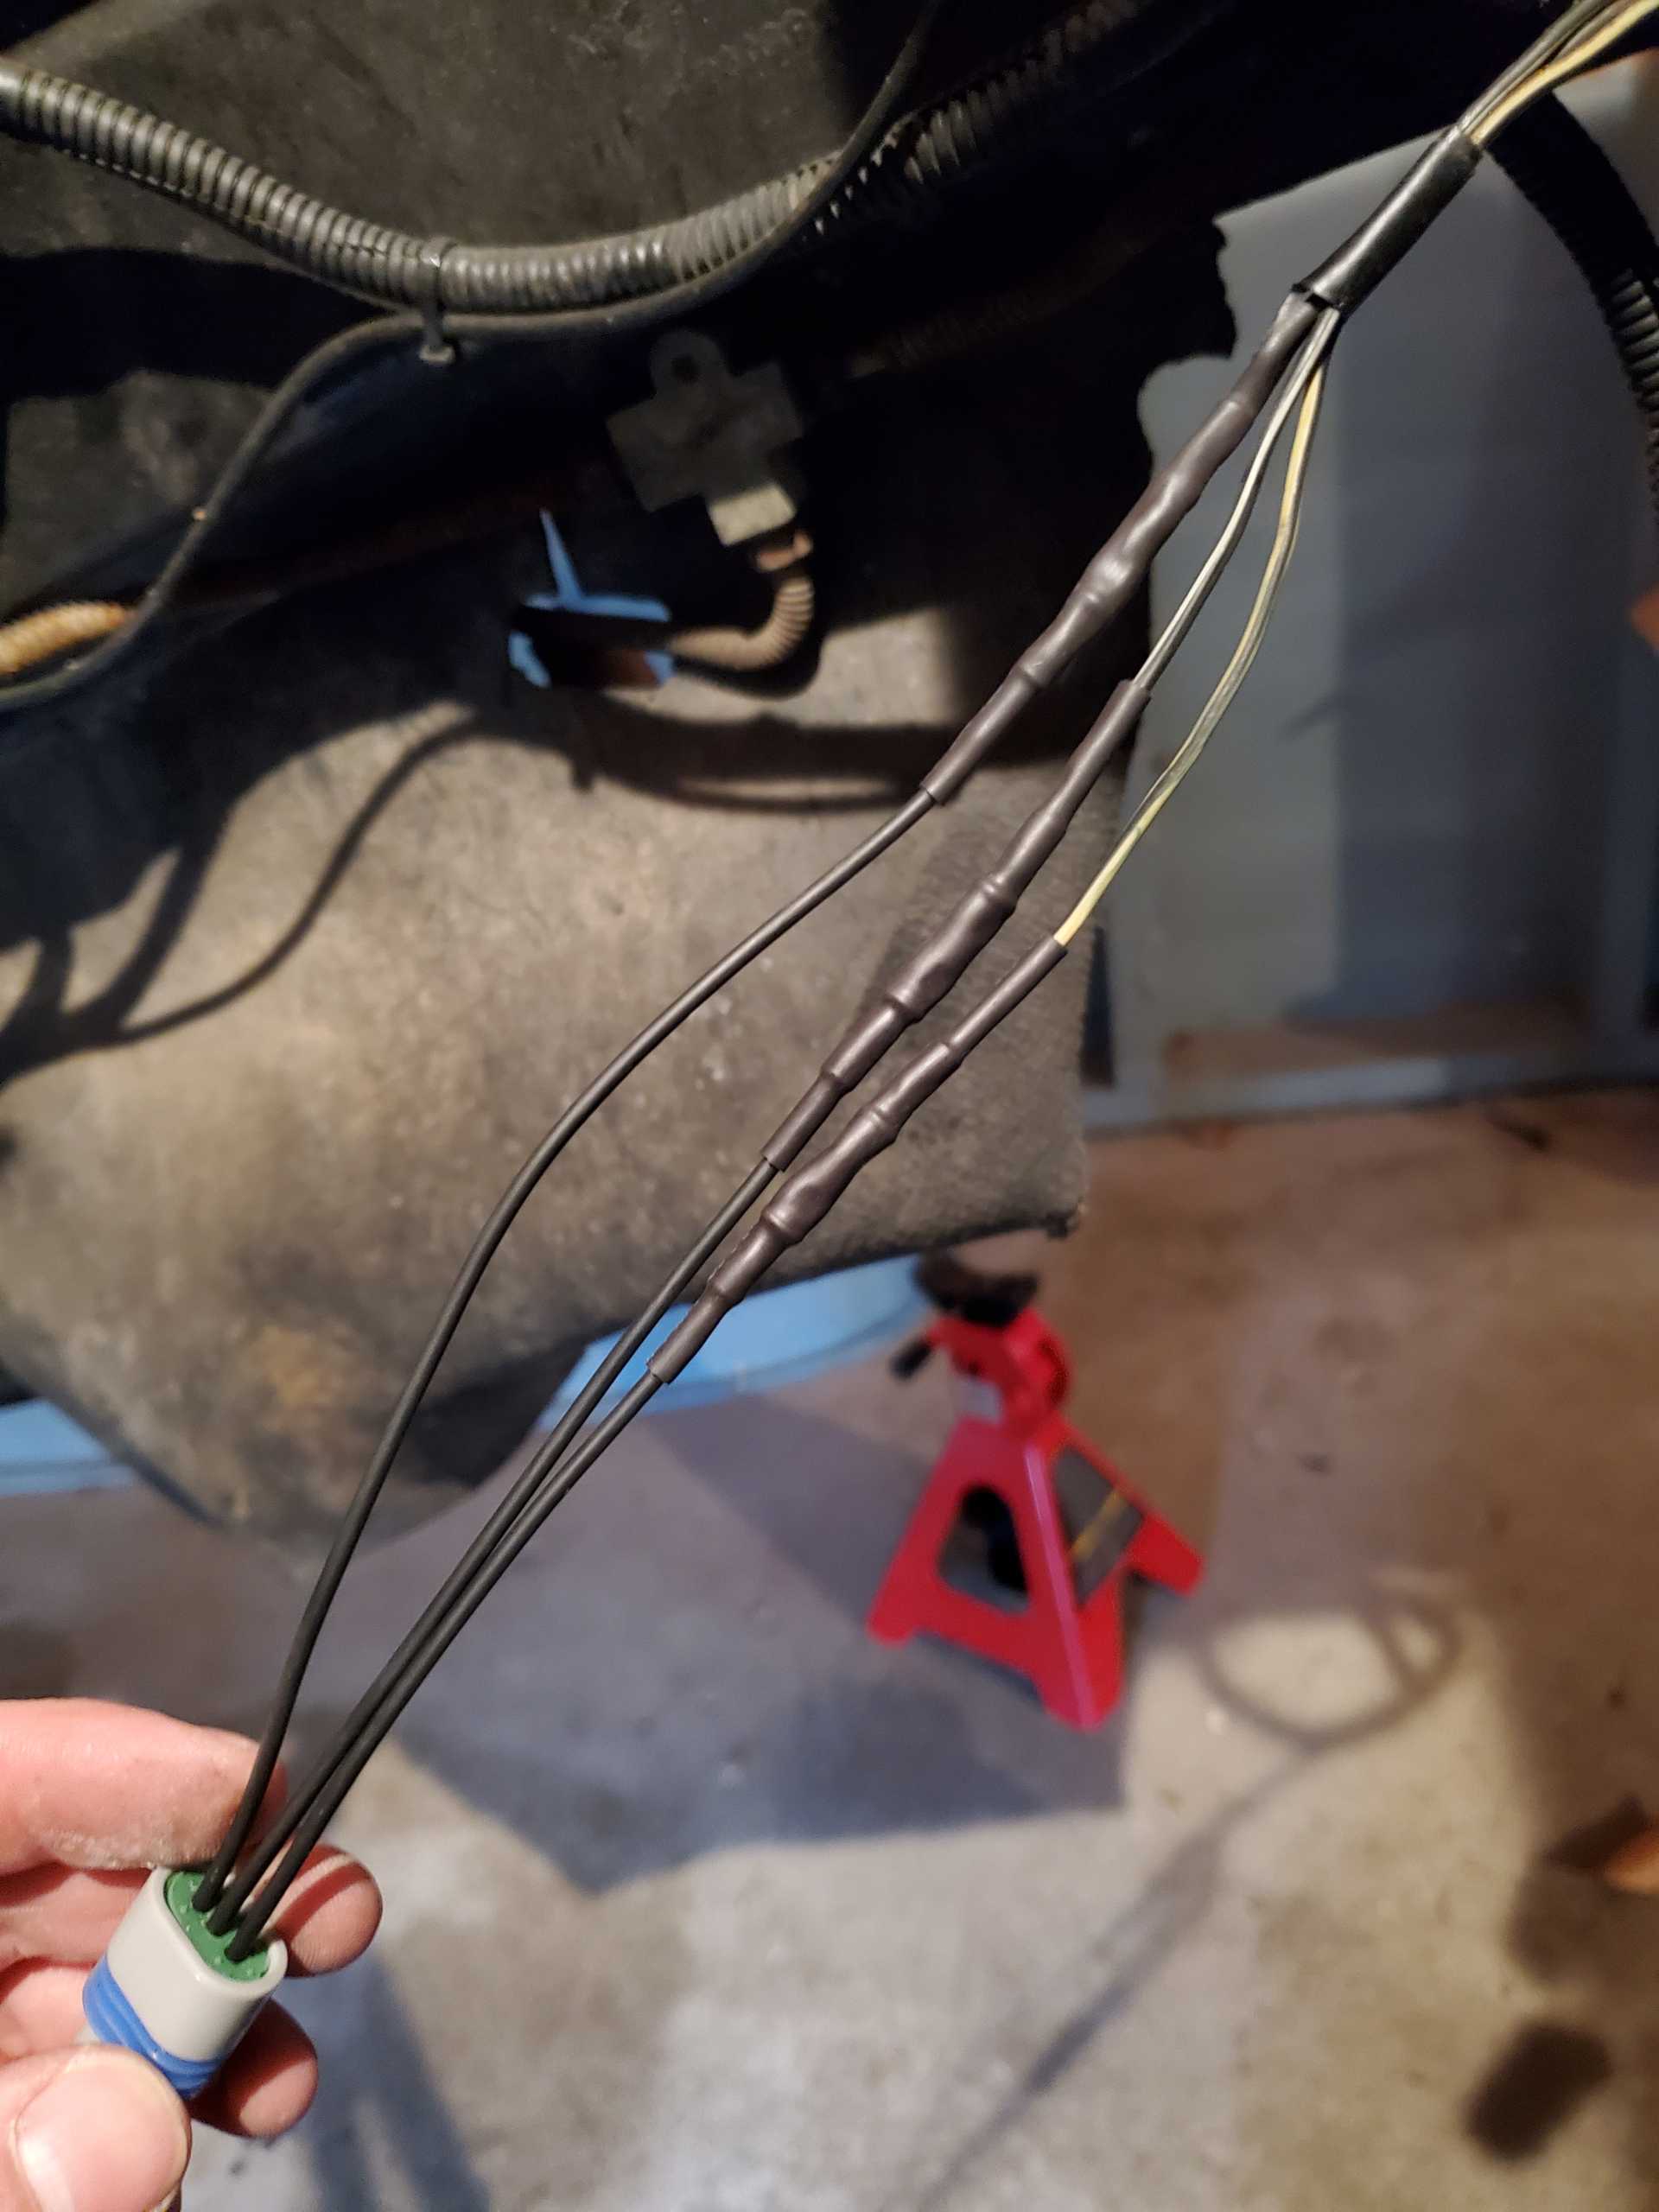
Thanks! It ended up just being a wiring issue. One of the belts rubbed through the crank position sensor wiring so i spliced in a longer wire with the connector from a spare harness i have and routed it around and it fired right up!!
IP: Logged
PFF
System Bot
BadNewsBrendan
Member
Posts: 273
From: Michigan
Registered: Aug 2018


Feedback score: N/A
Leave feedback

Rate this member

Report this Post06-21-2020 05:08 PM Click Here to See the Profile for BadNewsBrendanSend a Private Message to BadNewsBrendanEdit/Delete MessageReply w/QuoteDirect Link to This Post
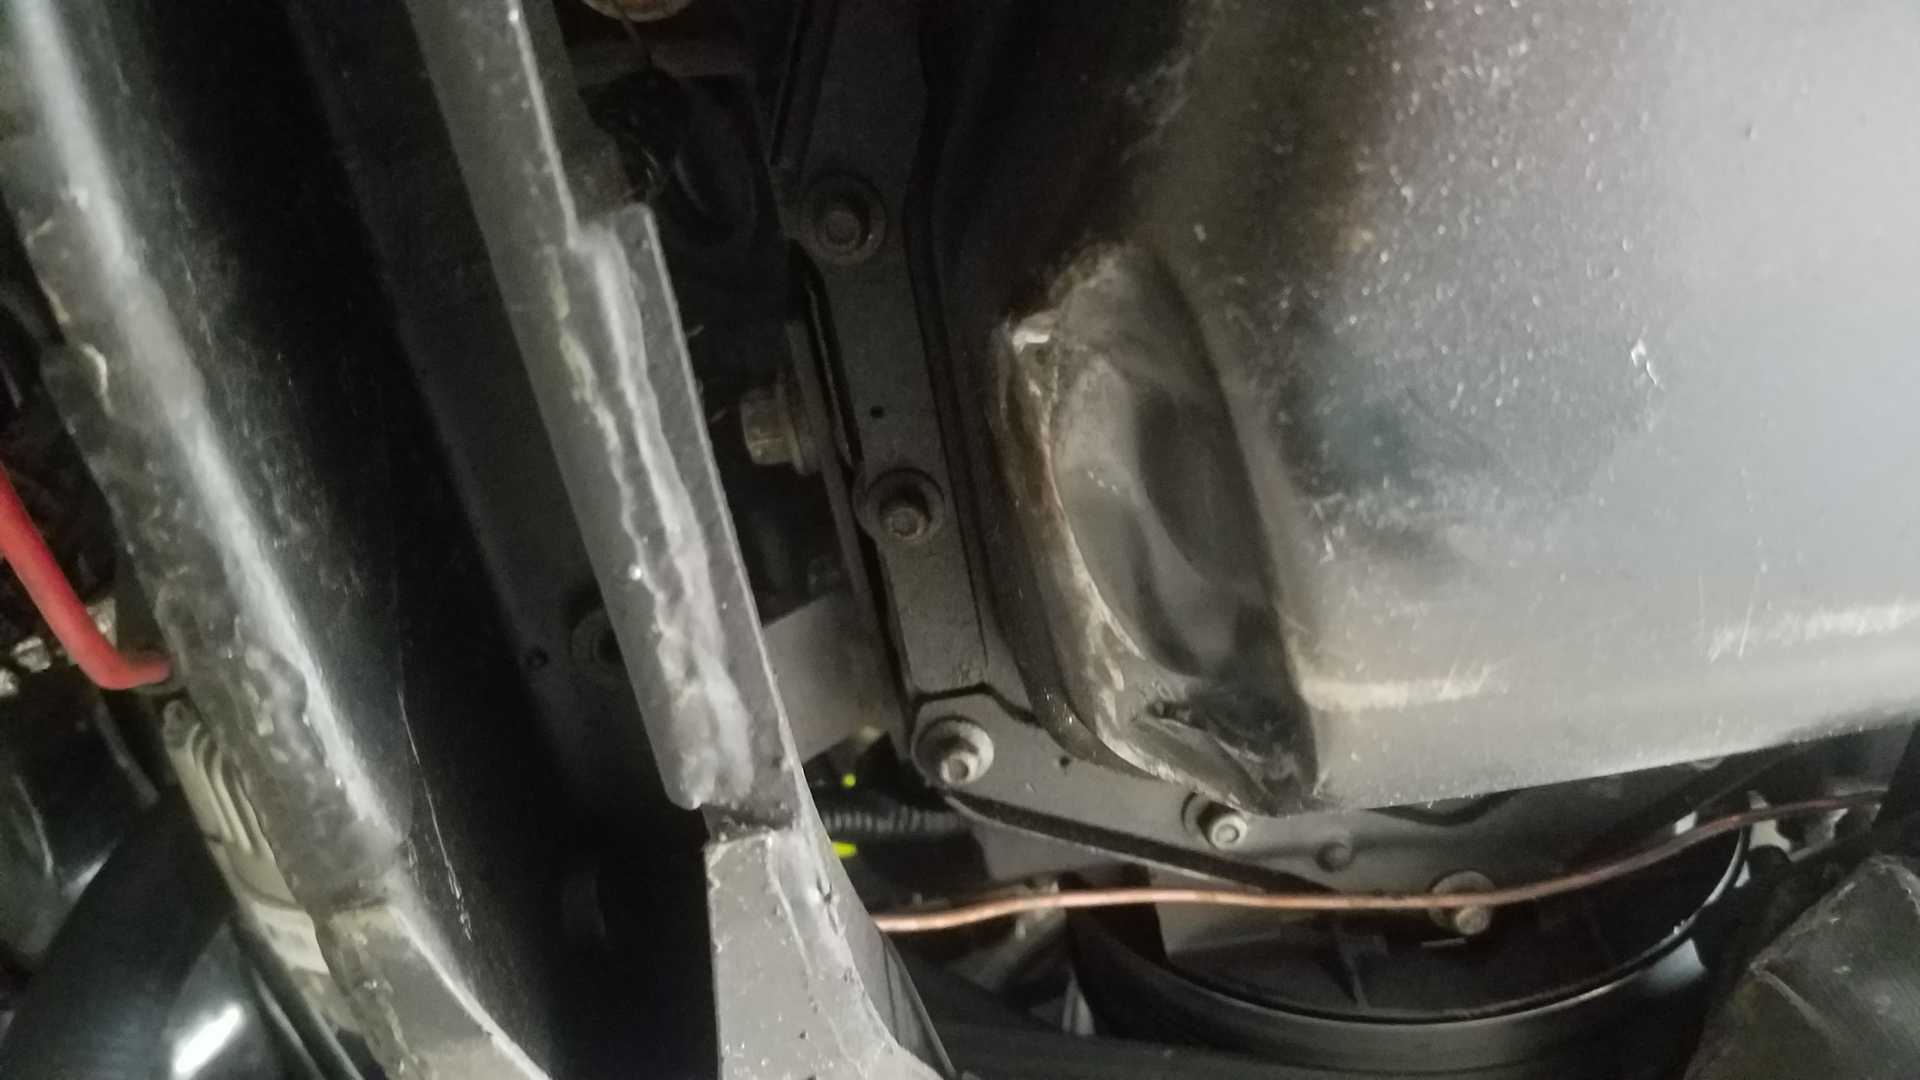
The plot thickens and can explain why the wire started rubbing on the belt. I hit a bump in the road a while back and it wasn't anything to crazy so i made sure i wasn't leaking oil and figured something hit the sub frame and didn't drive it since except last week cause the trans seal started leaking and took me a while to get that replaced. Not sure how I didn't notice this while replacing that but....

Guess i can count myself lucky it didn't dump the oil and destroy the engine.


[This message has been edited by BadNewsBrendan (edited 06-21-2020).]

IP: Logged
pmbrunelle
Member
Posts: 4376
From: Grand-Mère, Québec
Registered: Sep 2008


Feedback score: N/A
Leave feedback


Total ratings: 62
Rate this member

Report this Post06-21-2020 08:26 PM Click Here to See the Profile for pmbrunelleSend a Private Message to pmbrunelleEdit/Delete MessageReply w/QuoteDirect Link to This Post
Just a bump in the road, or the mother of all craters

I suggest Rodney Dickman polyurethane mounts, especially for the two transmission mounts.

The rubber transmission mounts I've tried tore apart even with a stock 2.8 L (and no big bumps that I can recall).
IP: Logged
BadNewsBrendan
Member
Posts: 273
From: Michigan
Registered: Aug 2018


Feedback score: N/A
Leave feedback

Rate this member

Report this Post06-22-2020 08:50 AM Click Here to See the Profile for BadNewsBrendanSend a Private Message to BadNewsBrendanEdit/Delete MessageReply w/QuoteDirect Link to This Post
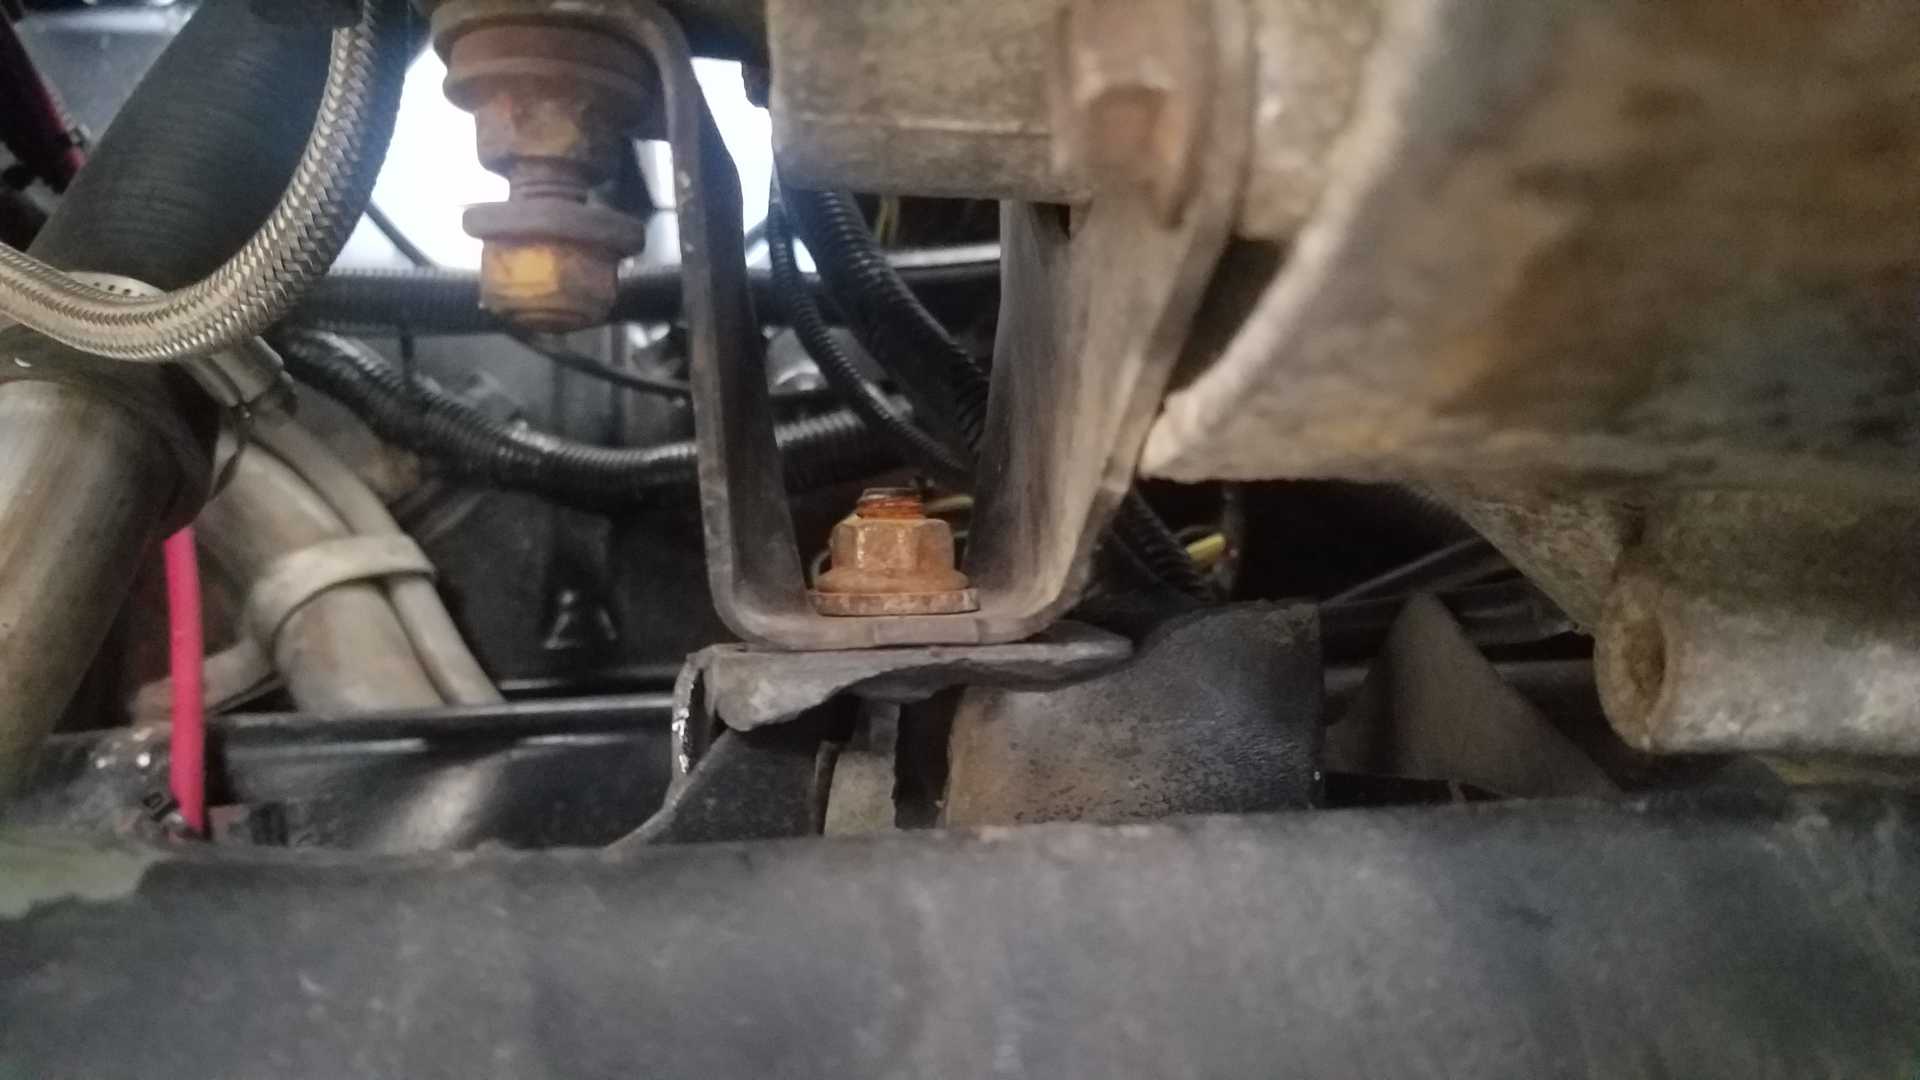
Yeah mother of all bumps i guess, just confused how it missed the subframe and hit the oil pan and confused how it didn't pierce the oil pan but broke the engine mount.

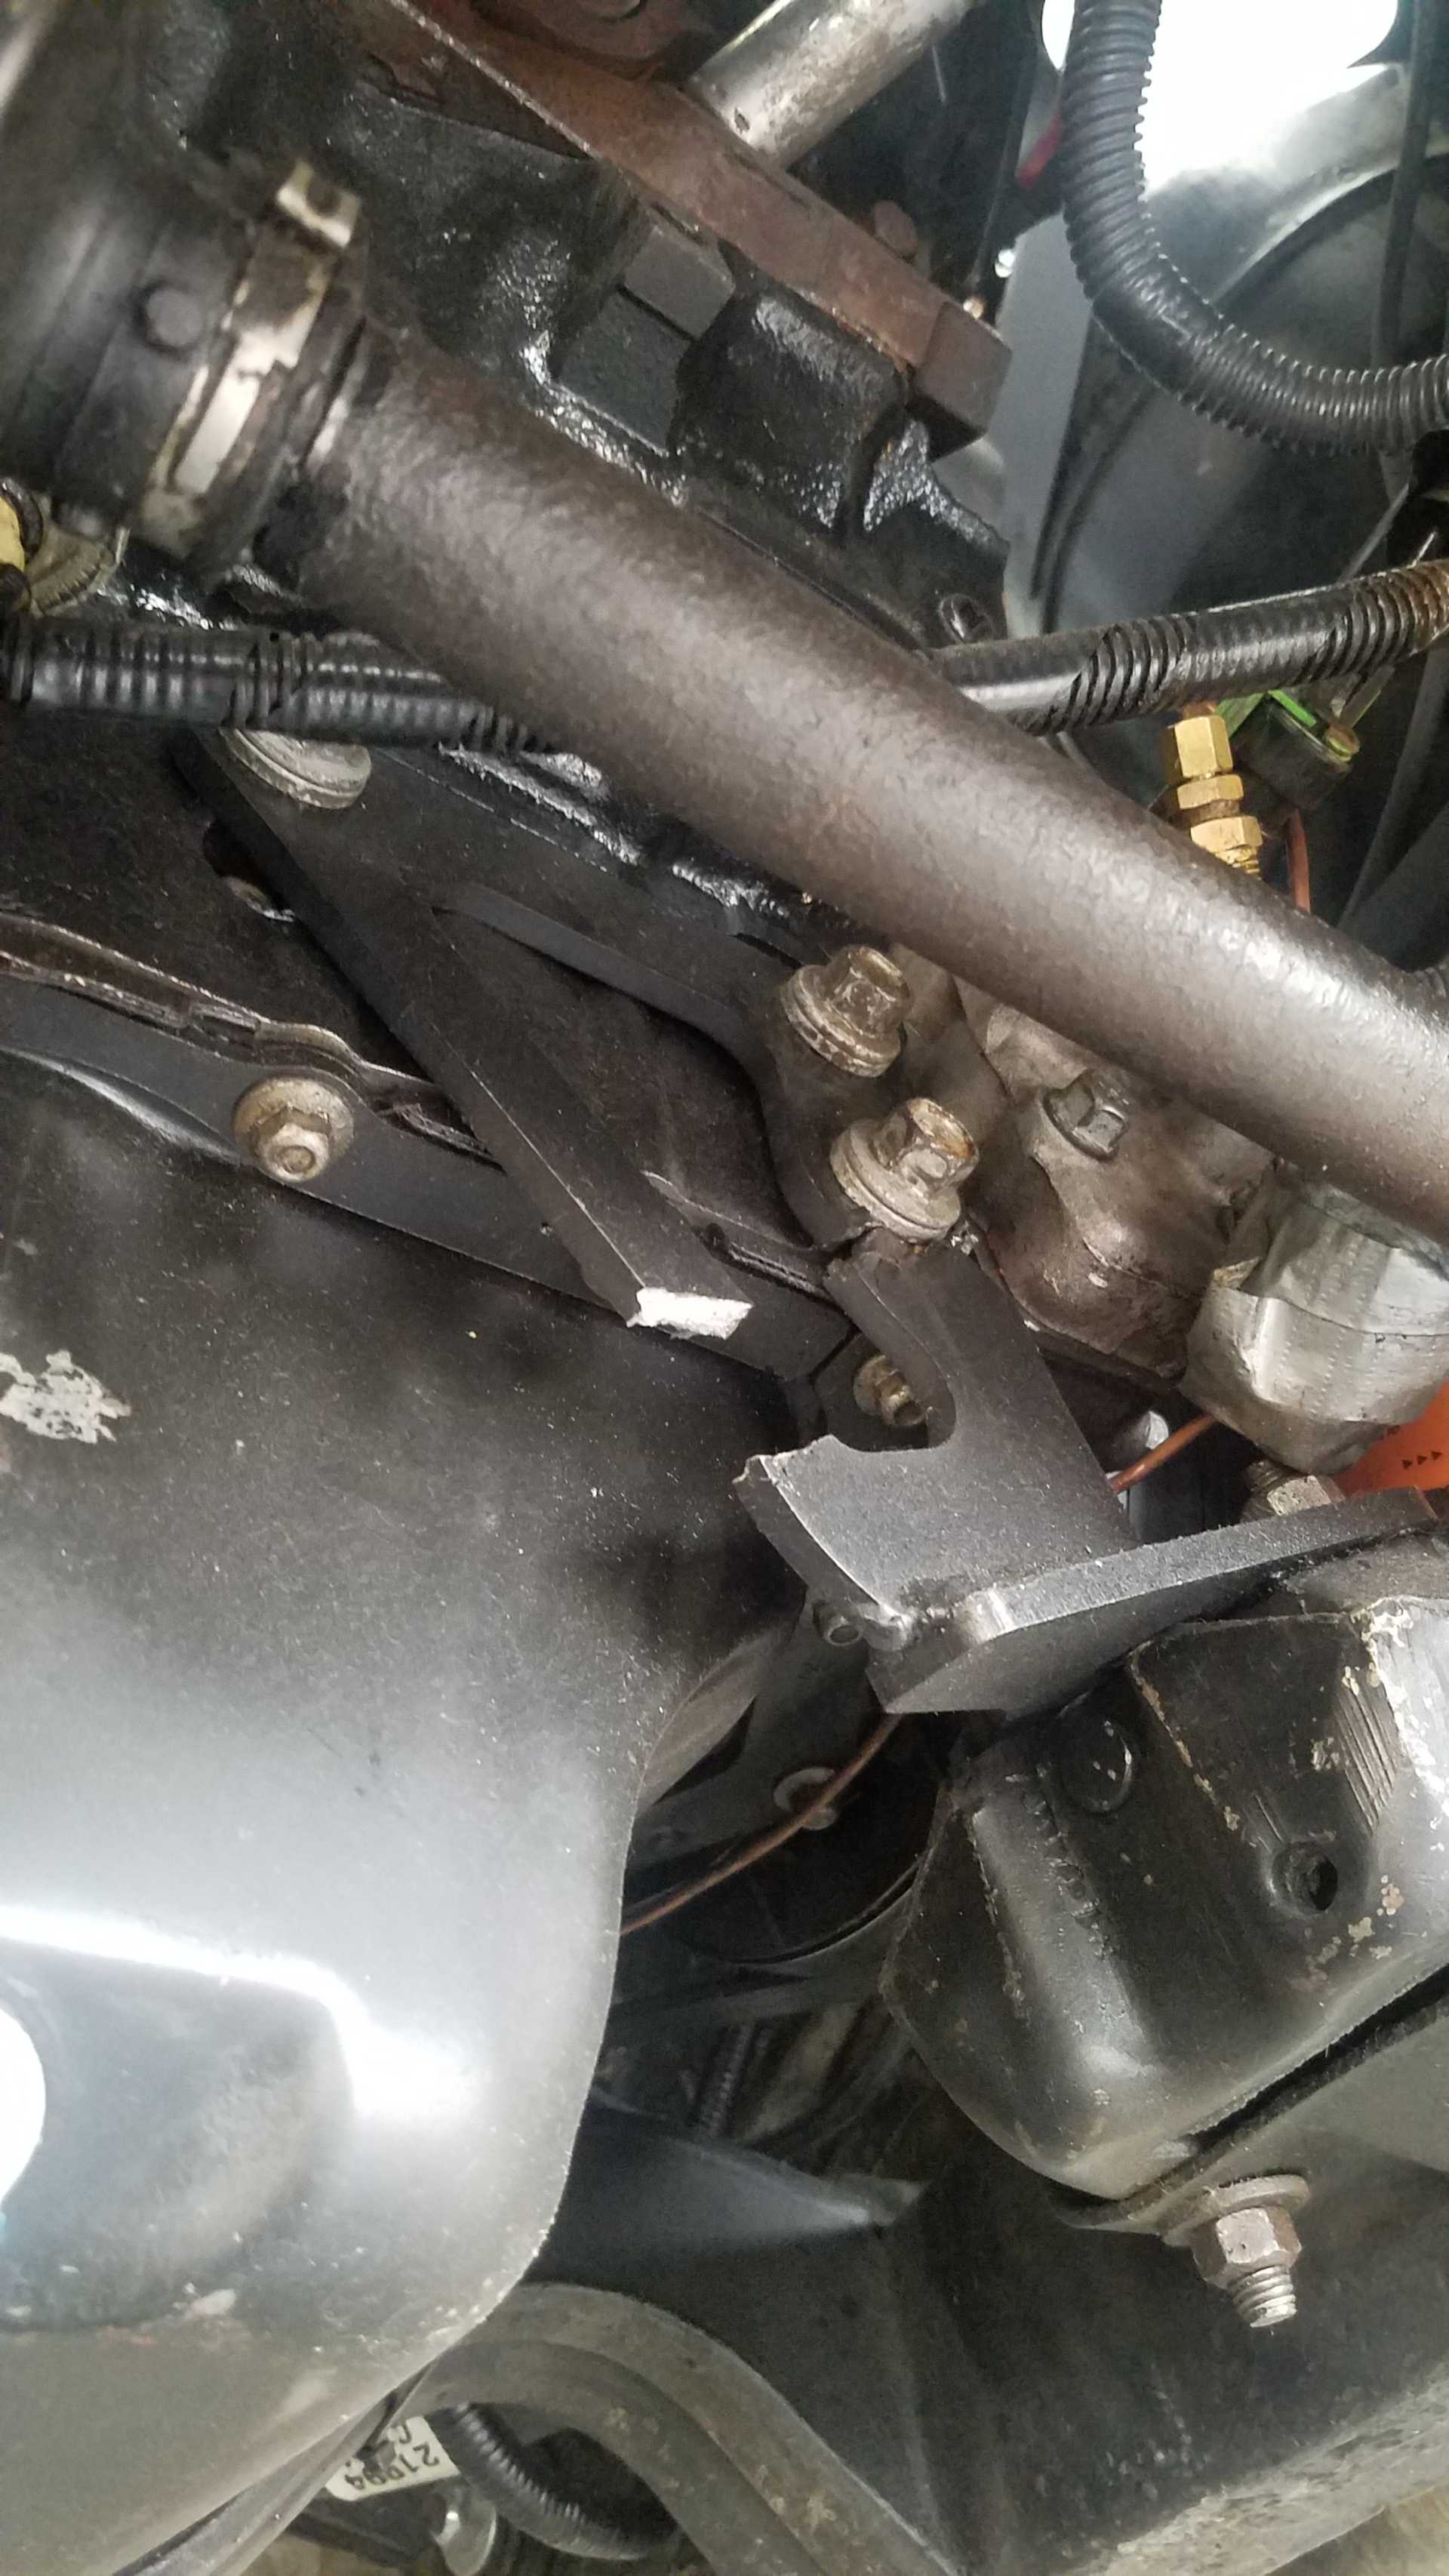
Thanks for the tip, will probably go that route with the poly mounts for the trans. Surprisingly the rubber on the stock fiero engine mount didn't break but the steel on the mount for the 3800 conversion did. Must be using a pretty low grade steel but I guess its not like it should be seeing that high of a force especially in that direction.
IP: Logged
BadNewsBrendan
Member
Posts: 273
From: Michigan
Registered: Aug 2018


Feedback score: N/A
Leave feedback

Rate this member

Report this Post07-29-2020 11:40 AM Click Here to See the Profile for BadNewsBrendanSend a Private Message to BadNewsBrendanEdit/Delete MessageReply w/QuoteDirect Link to This Post
Replaced the trans mounts with the poly ones from Rodney and they seem to be very well made and easy to install. Always happy with his products. It looks like the trans mounts had been broken for a while and were putting all of the force into bending the engine mount which cause it to eventually yield and snap. Welded it back together and added some bracing with my crappy harbor freight welder.

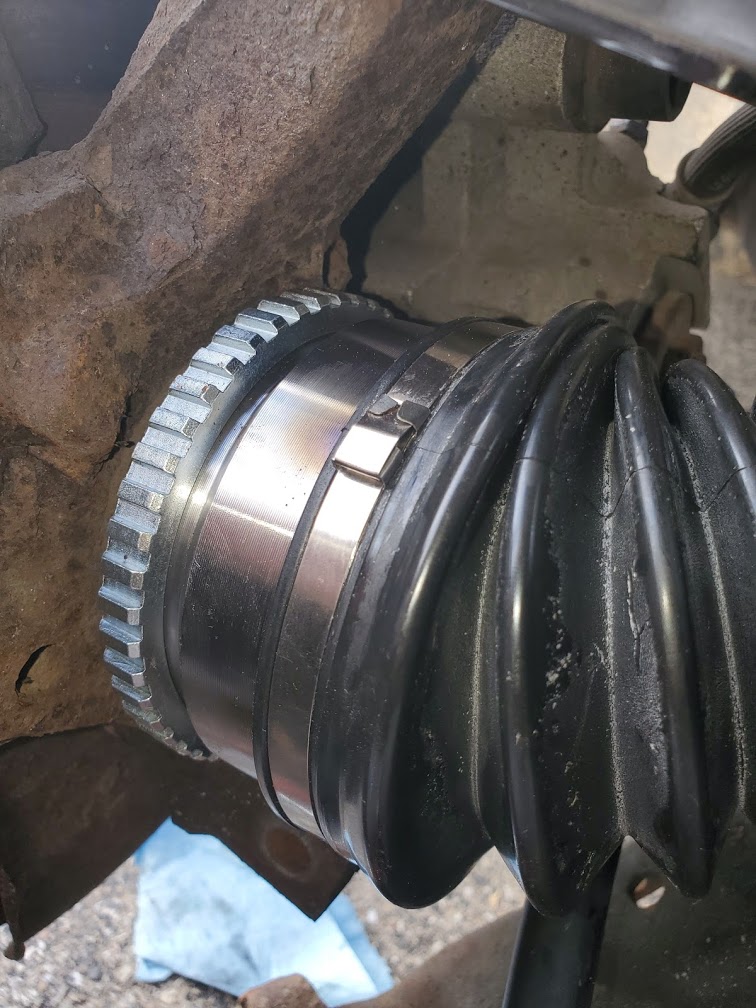
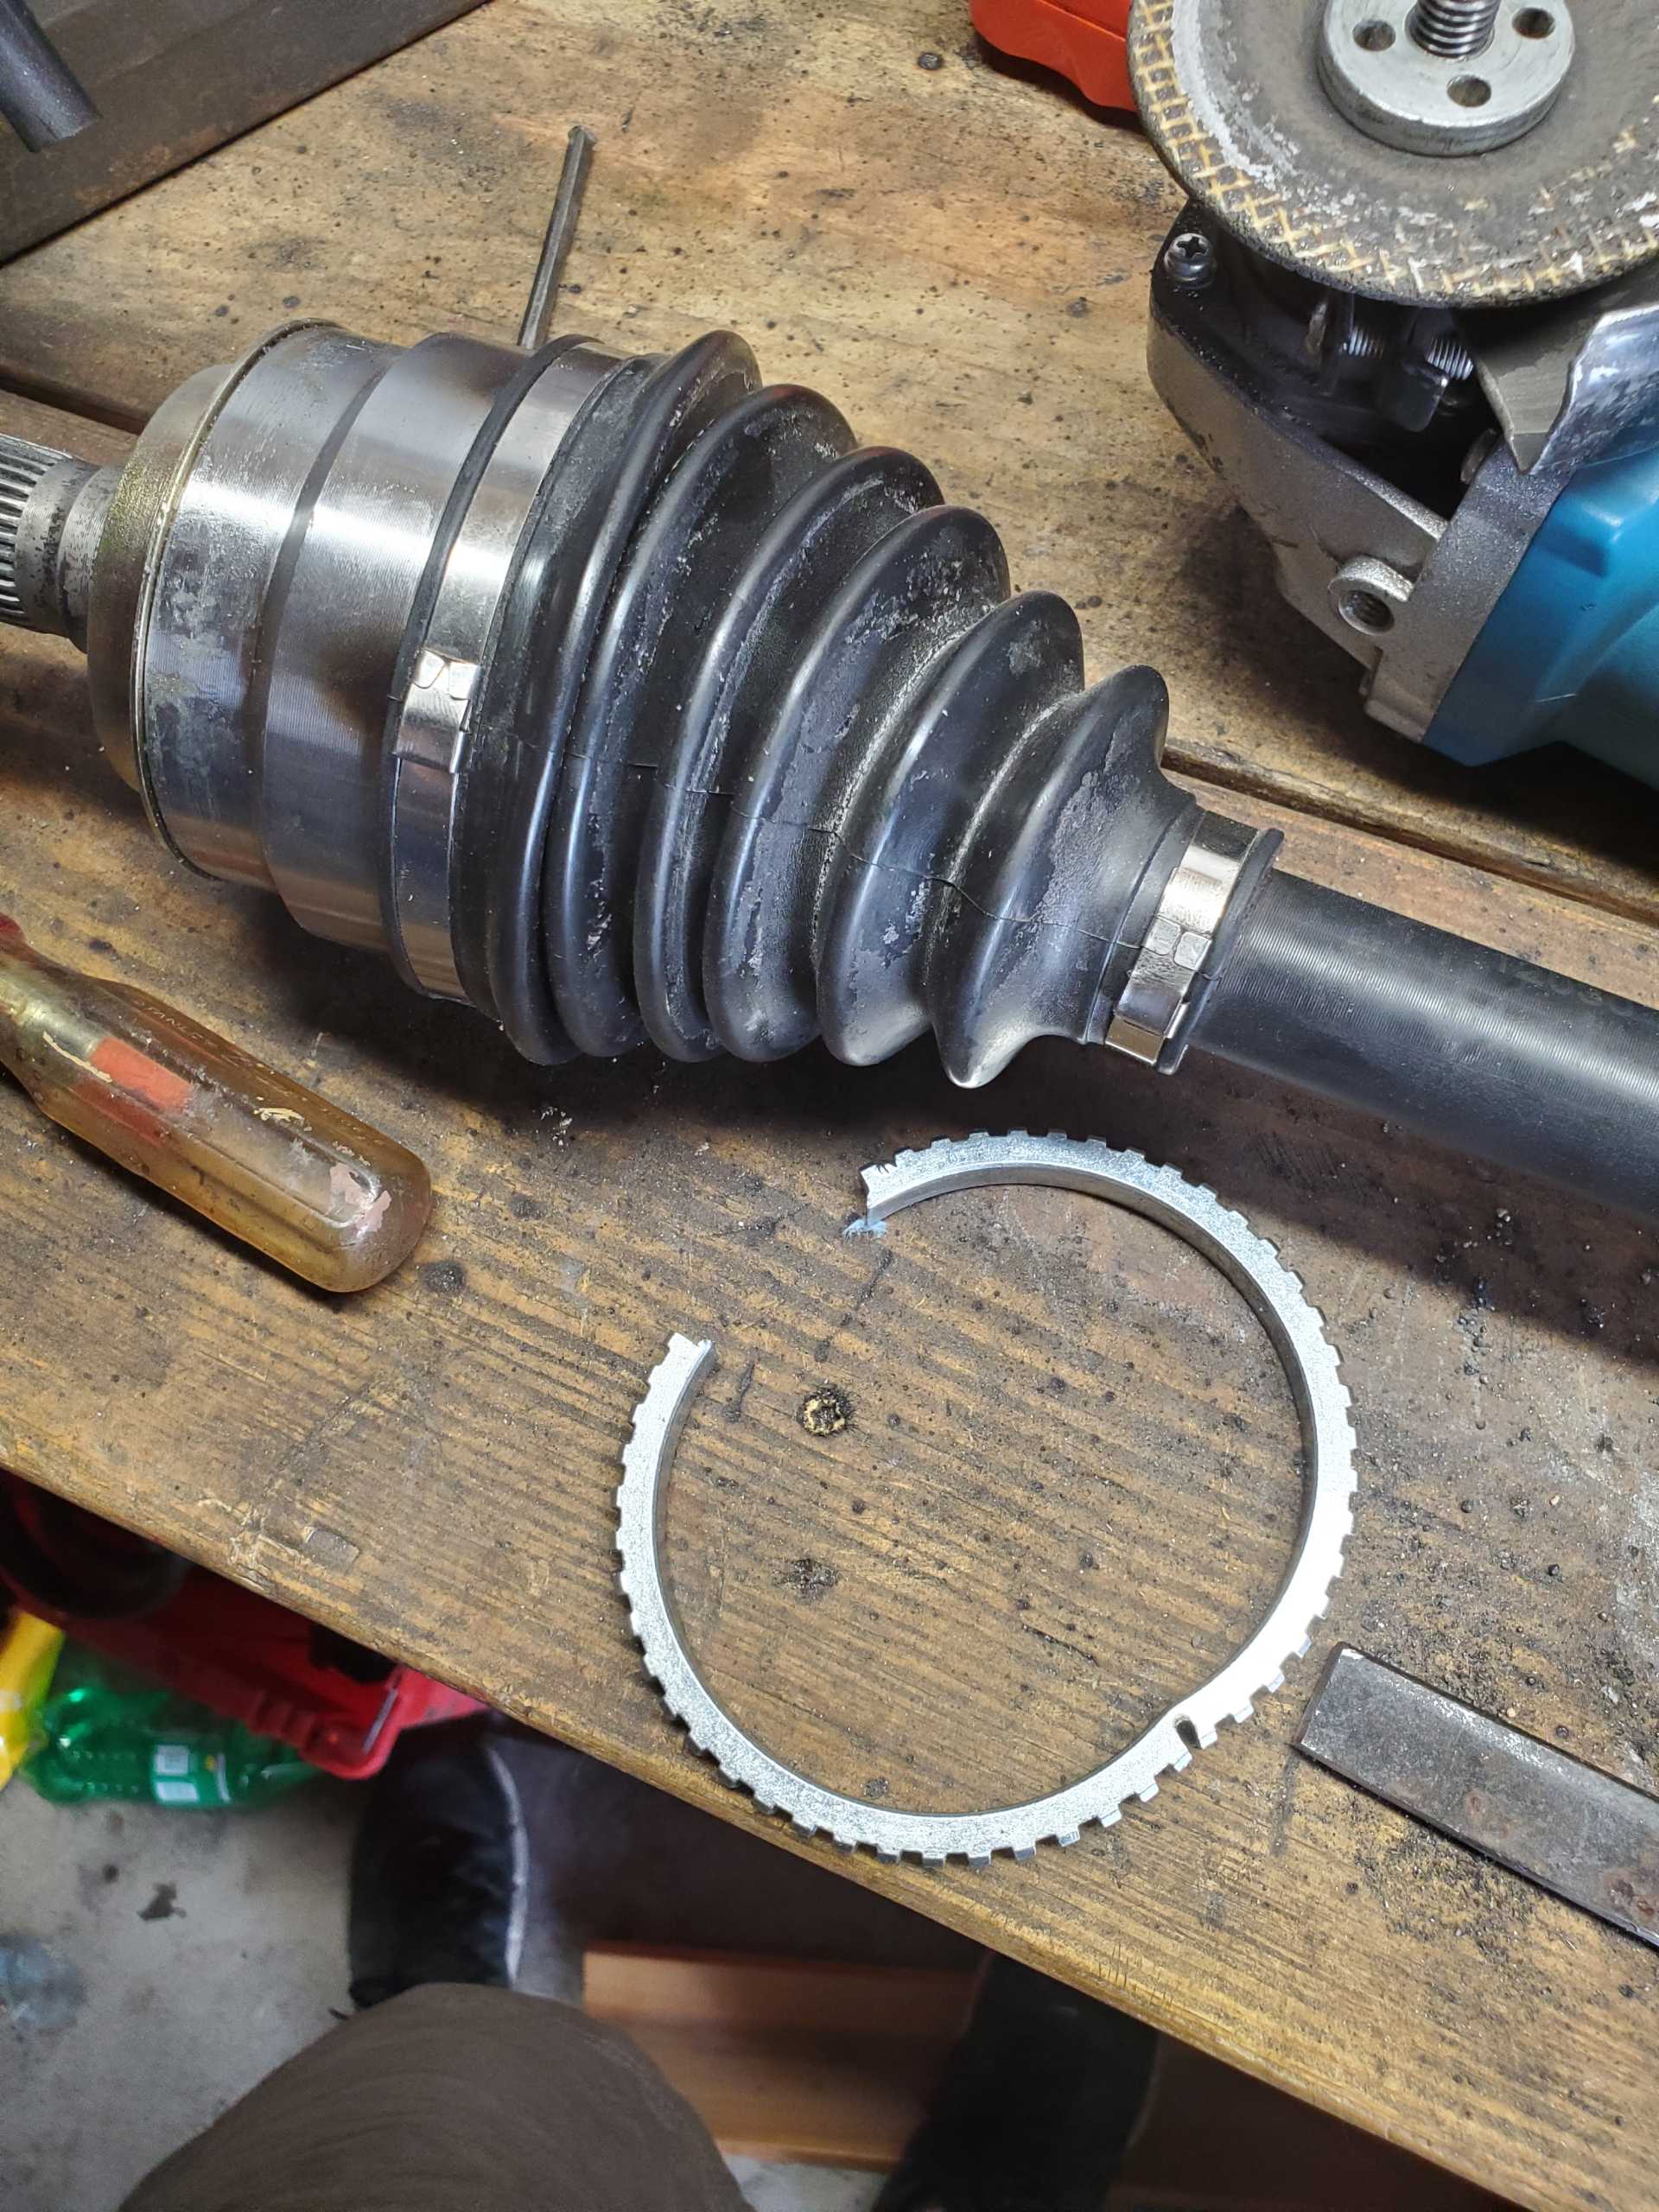
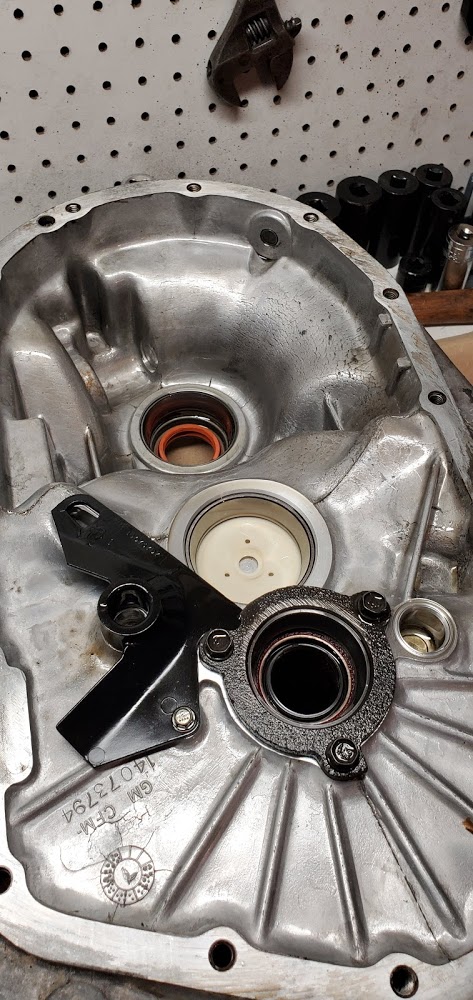
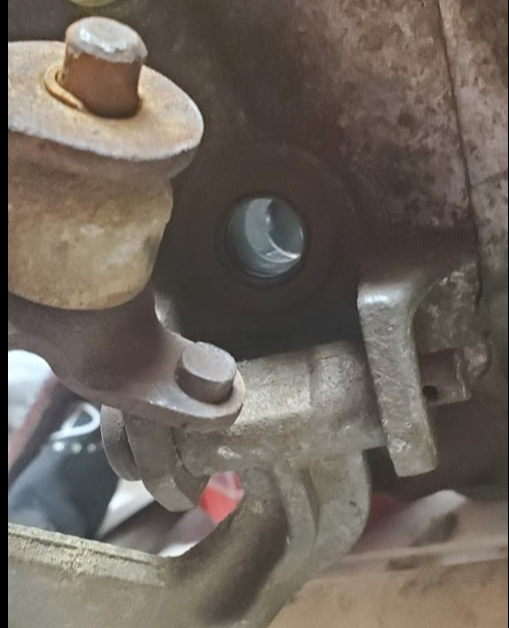
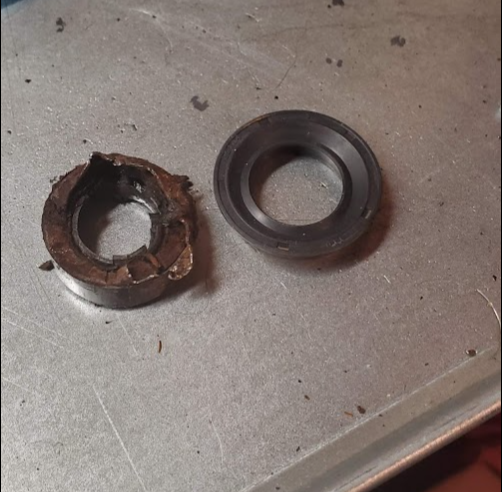
Passenger side axle seal on the trans started leaking and replaced the seal and still leaking. Where the axle rides on the seal it was pretty pitted and had some wear lines so I replaced that hoping it would fix the issue. Had to cut the ABS ring off because it was interfering with the knuckle.


After replacing the axle its still leaking and the bearing in the trans has a lot of play so I guess i will start sourcing another trans to swap in. I have seen the quick fix of using the support bearing and seal kit that presses in where the seal is but have seen mixed reviews and not sure i want to bandaid it.
IP: Logged
pmbrunelle
Member
Posts: 4376
From: Grand-Mère, Québec
Registered: Sep 2008


Feedback score: N/A
Leave feedback


Total ratings: 62
Rate this member

Report this Post07-29-2020 12:59 PM Click Here to See the Profile for pmbrunelleSend a Private Message to pmbrunelleEdit/Delete MessageReply w/QuoteDirect Link to This Post
Unless you have a brand-new transmission to replace yours, used is used, and is not necessarily better than what you have now.

Crack open your own transmission and replace its diff bearings. It will be less expensive and less trouble.
IP: Logged
BadNewsBrendan
Member
Posts: 273
From: Michigan
Registered: Aug 2018


Feedback score: N/A
Leave feedback

Rate this member

Report this Post07-29-2020 01:45 PM Click Here to See the Profile for BadNewsBrendanSend a Private Message to BadNewsBrendanEdit/Delete MessageReply w/QuoteDirect Link to This Post
Yeah good point, am a little scared to do that and haven't done any research on how difficult it is but will have to look into it. Thanks for the suggestion.
IP: Logged
kendell
Member
Posts: 93
From: Hinesville, GA
Registered: Aug 2017


Feedback score: N/A
Leave feedback

Rate this member

Report this Post07-29-2020 10:25 PM Click Here to See the Profile for kendellSend a Private Message to kendellEdit/Delete MessageReply w/QuoteDirect Link to This Post
 
quote
Originally posted by pmbrunelle:

Unless you have a brand-new transmission to replace yours, used is used, and is not necessarily better than what you have now.

Crack open your own transmission and replace its diff bearings. It will be less expensive and less trouble.


This should be a better route than getting a used one.
IP: Logged
pmbrunelle
Member
Posts: 4376
From: Grand-Mère, Québec
Registered: Sep 2008


Feedback score: N/A
Leave feedback


Total ratings: 62
Rate this member

Report this Post07-31-2020 02:22 PM Click Here to See the Profile for pmbrunelleSend a Private Message to pmbrunelleEdit/Delete MessageReply w/QuoteDirect Link to This Post
You've already taken apart an engine and put it back together, so a Muncie box shouldn't be any harder than that.

If you stick to servicing the differential bearings, the bearing replacement job is pretty simple.

You can knock out the old bearings from case halves with a drift punch from the outside. You can reinstall new bearing cups into the case with a drift punch as well. You'll need the J-26935 shim selector tool to check if your shim is still good with the new bearings; if not you'll have to address that.

For the bearings on the diff carrier, I couldn't get a good grip on them with a gear puller, so I welded bolts and used a steering wheel puller, like so:
https://www.fieromontreal.c...25.msg32733#msg32733

A hydraulic press and a socket as a driver work to reinstall new bearings on the diff carrier.

I'd strongly suggest removing and inspecting the spider gears, and cross-pin. You are likely to discover some horrors there.

[This message has been edited by pmbrunelle (edited 07-31-2020).]

IP: Logged
BadNewsBrendan
Member
Posts: 273
From: Michigan
Registered: Aug 2018


Feedback score: N/A
Leave feedback

Rate this member

Report this Post01-03-2021 01:45 PM Click Here to See the Profile for BadNewsBrendanSend a Private Message to BadNewsBrendanEdit/Delete MessageReply w/QuoteDirect Link to This Post
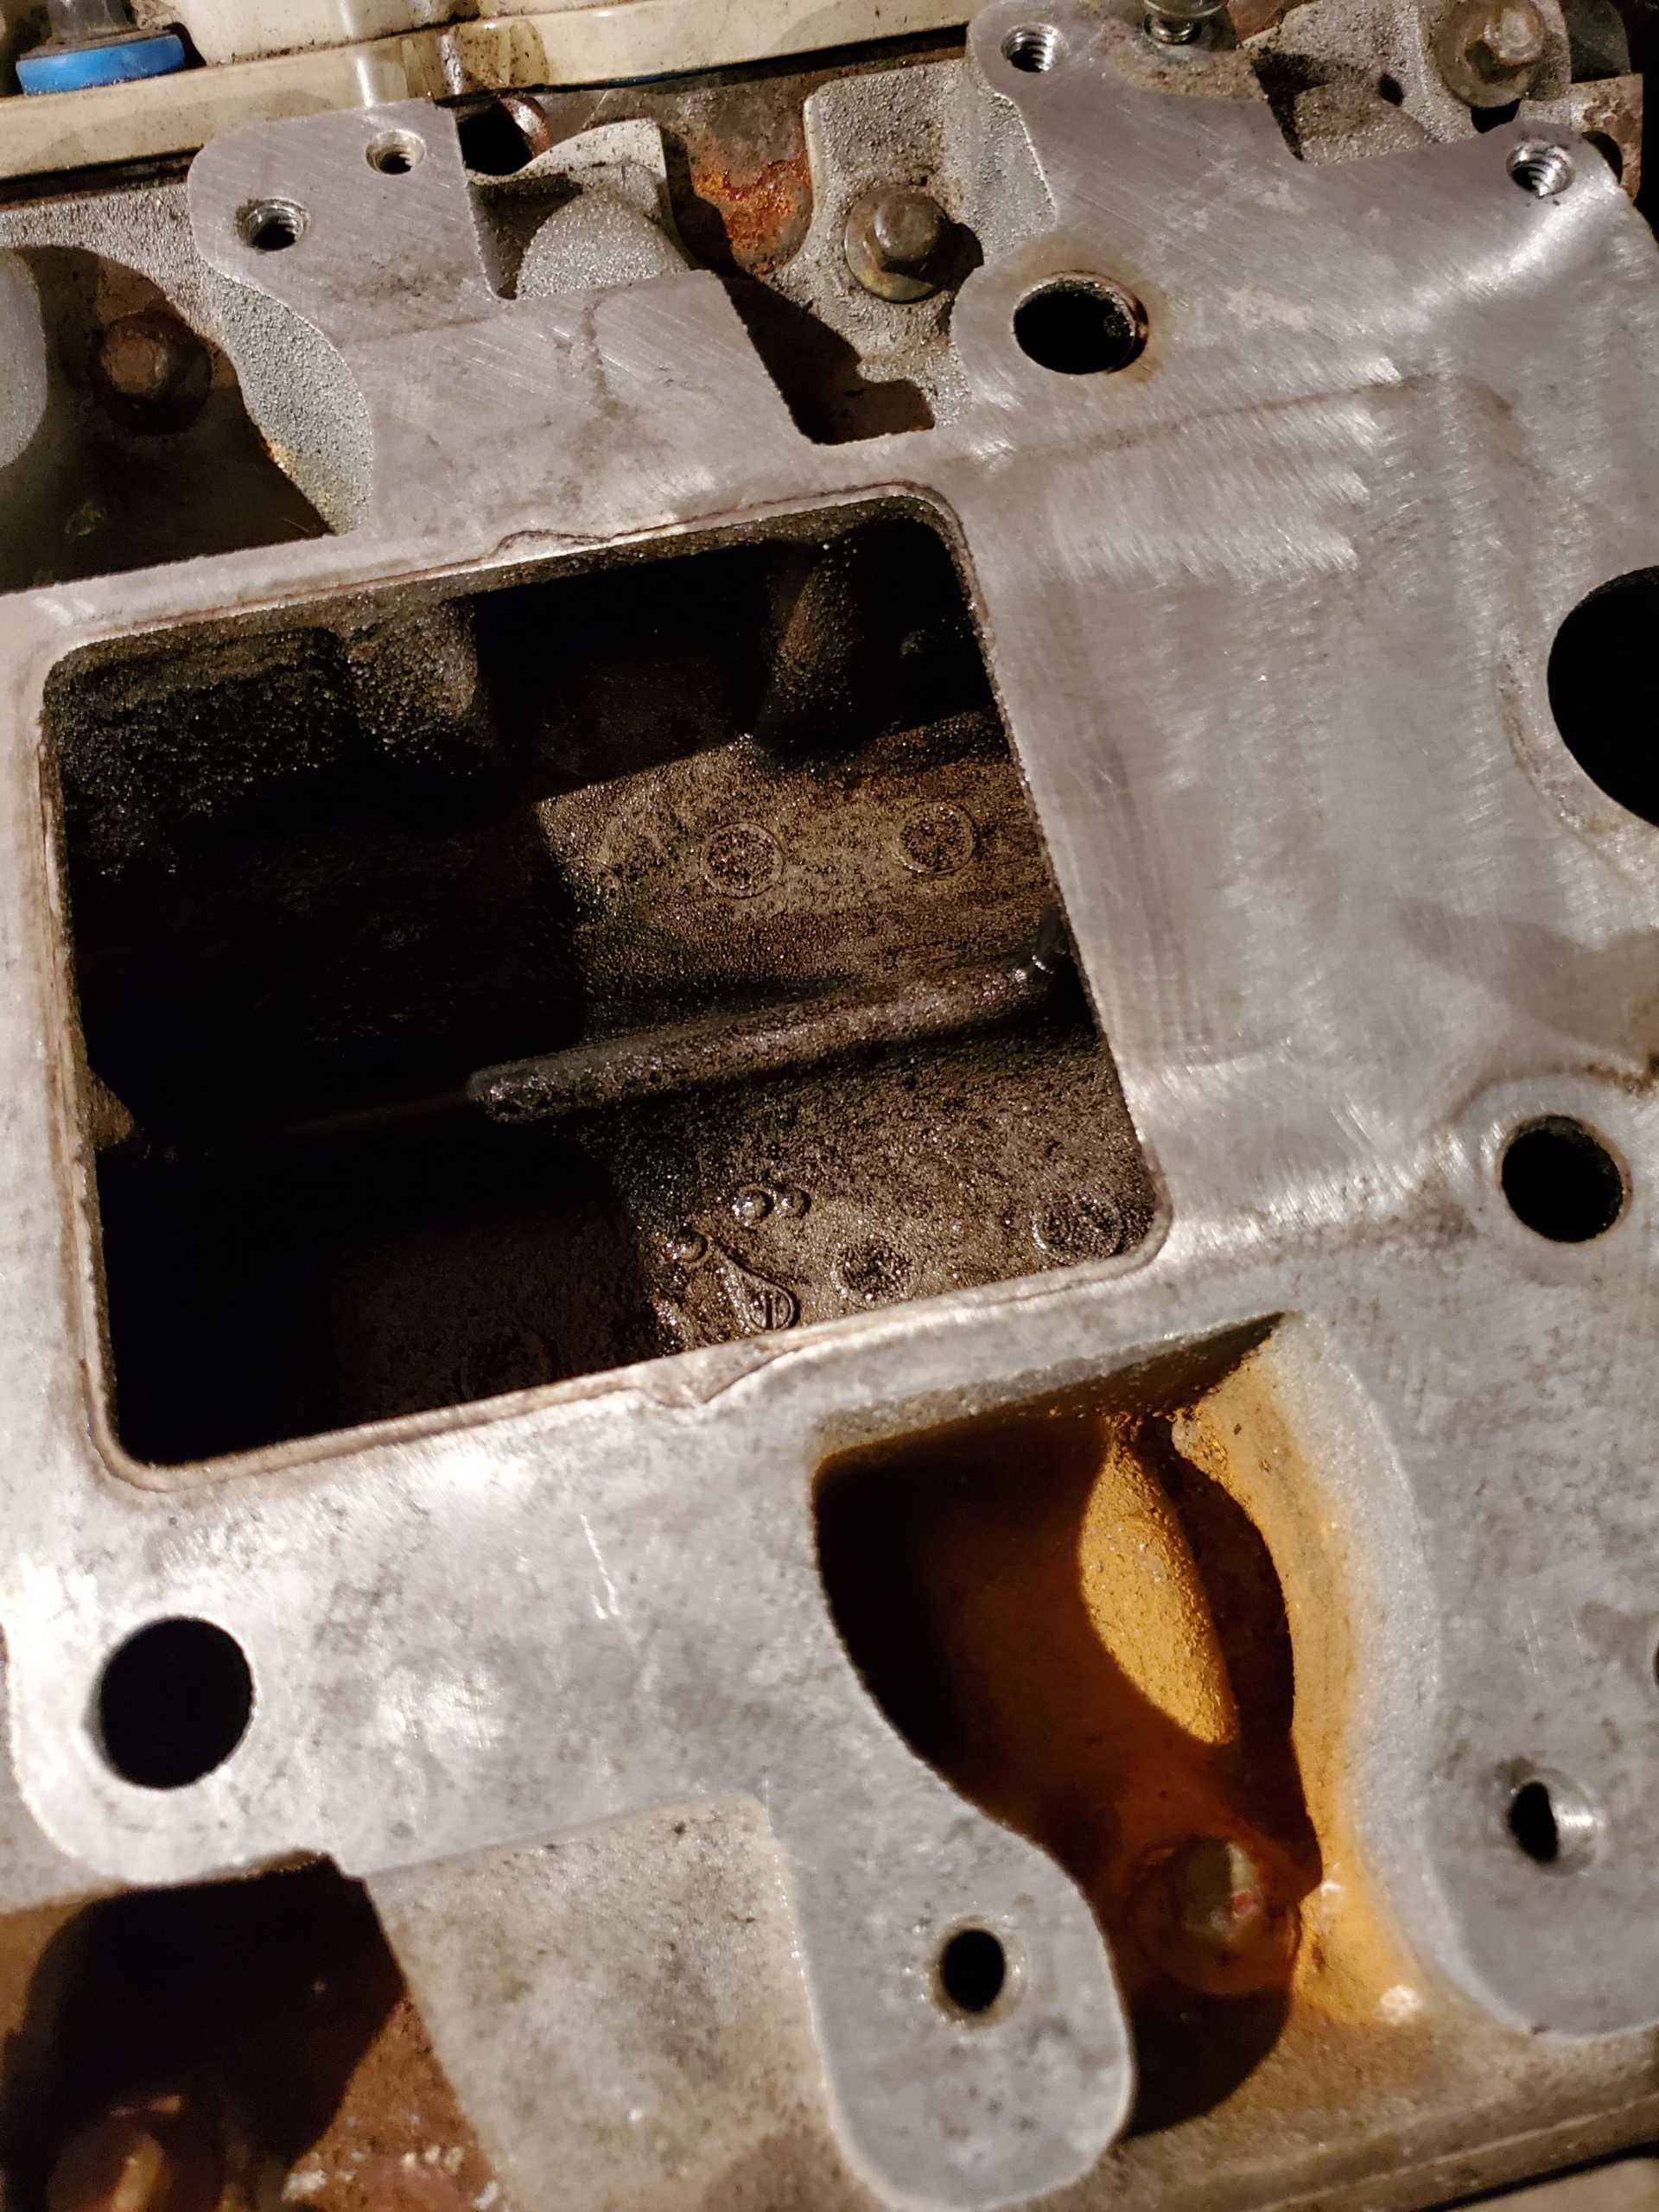
Thanks for the advice as always PMbrunelle. Pulled the engine out this week and started taking it apart. When I pulled the super charger off the inside of the lower intake manifold was very wet and smelled like gas and a little oily as shown below. Its been a few weeks since its ran. Does anyone know if this normal or is there something messed up? Can't think how gas would get in there since i don't have any EGR or vapor canister or anything.

[This message has been edited by BadNewsBrendan (edited 01-03-2021).]

IP: Logged
pmbrunelle
Member
Posts: 4376
From: Grand-Mère, Québec
Registered: Sep 2008


Feedback score: N/A
Leave feedback


Total ratings: 62
Rate this member

Report this Post01-03-2021 03:19 PM Click Here to See the Profile for pmbrunelleSend a Private Message to pmbrunelleEdit/Delete MessageReply w/QuoteDirect Link to This Post
When I remove the factory red plenum from my V6 Fiero, it's as how you describe, some oily junk (from the PCV), and fuel smell.

There are injectors just below, so you can imagine that not all the fuel goes directly into the cylinder; there is some cloud of fuel that is created.

My plenum can smell like fuel for days after engine shutdown; in the enclosed intake, I suppose that there's nowhere for the fuel to evaporate, so it can hang around for a while.

You do have PCV, right?
IP: Logged
PFF
System Bot
BadNewsBrendan
Member
Posts: 273
From: Michigan
Registered: Aug 2018


Feedback score: N/A
Leave feedback

Rate this member

Report this Post01-24-2021 09:06 PM Click Here to See the Profile for BadNewsBrendanSend a Private Message to BadNewsBrendanEdit/Delete MessageReply w/QuoteDirect Link to This Post
Ah that makes sense, just wanted some reassurance nothing was messed up. Yep I have a pcv. Figured thats where the oil was coming from.

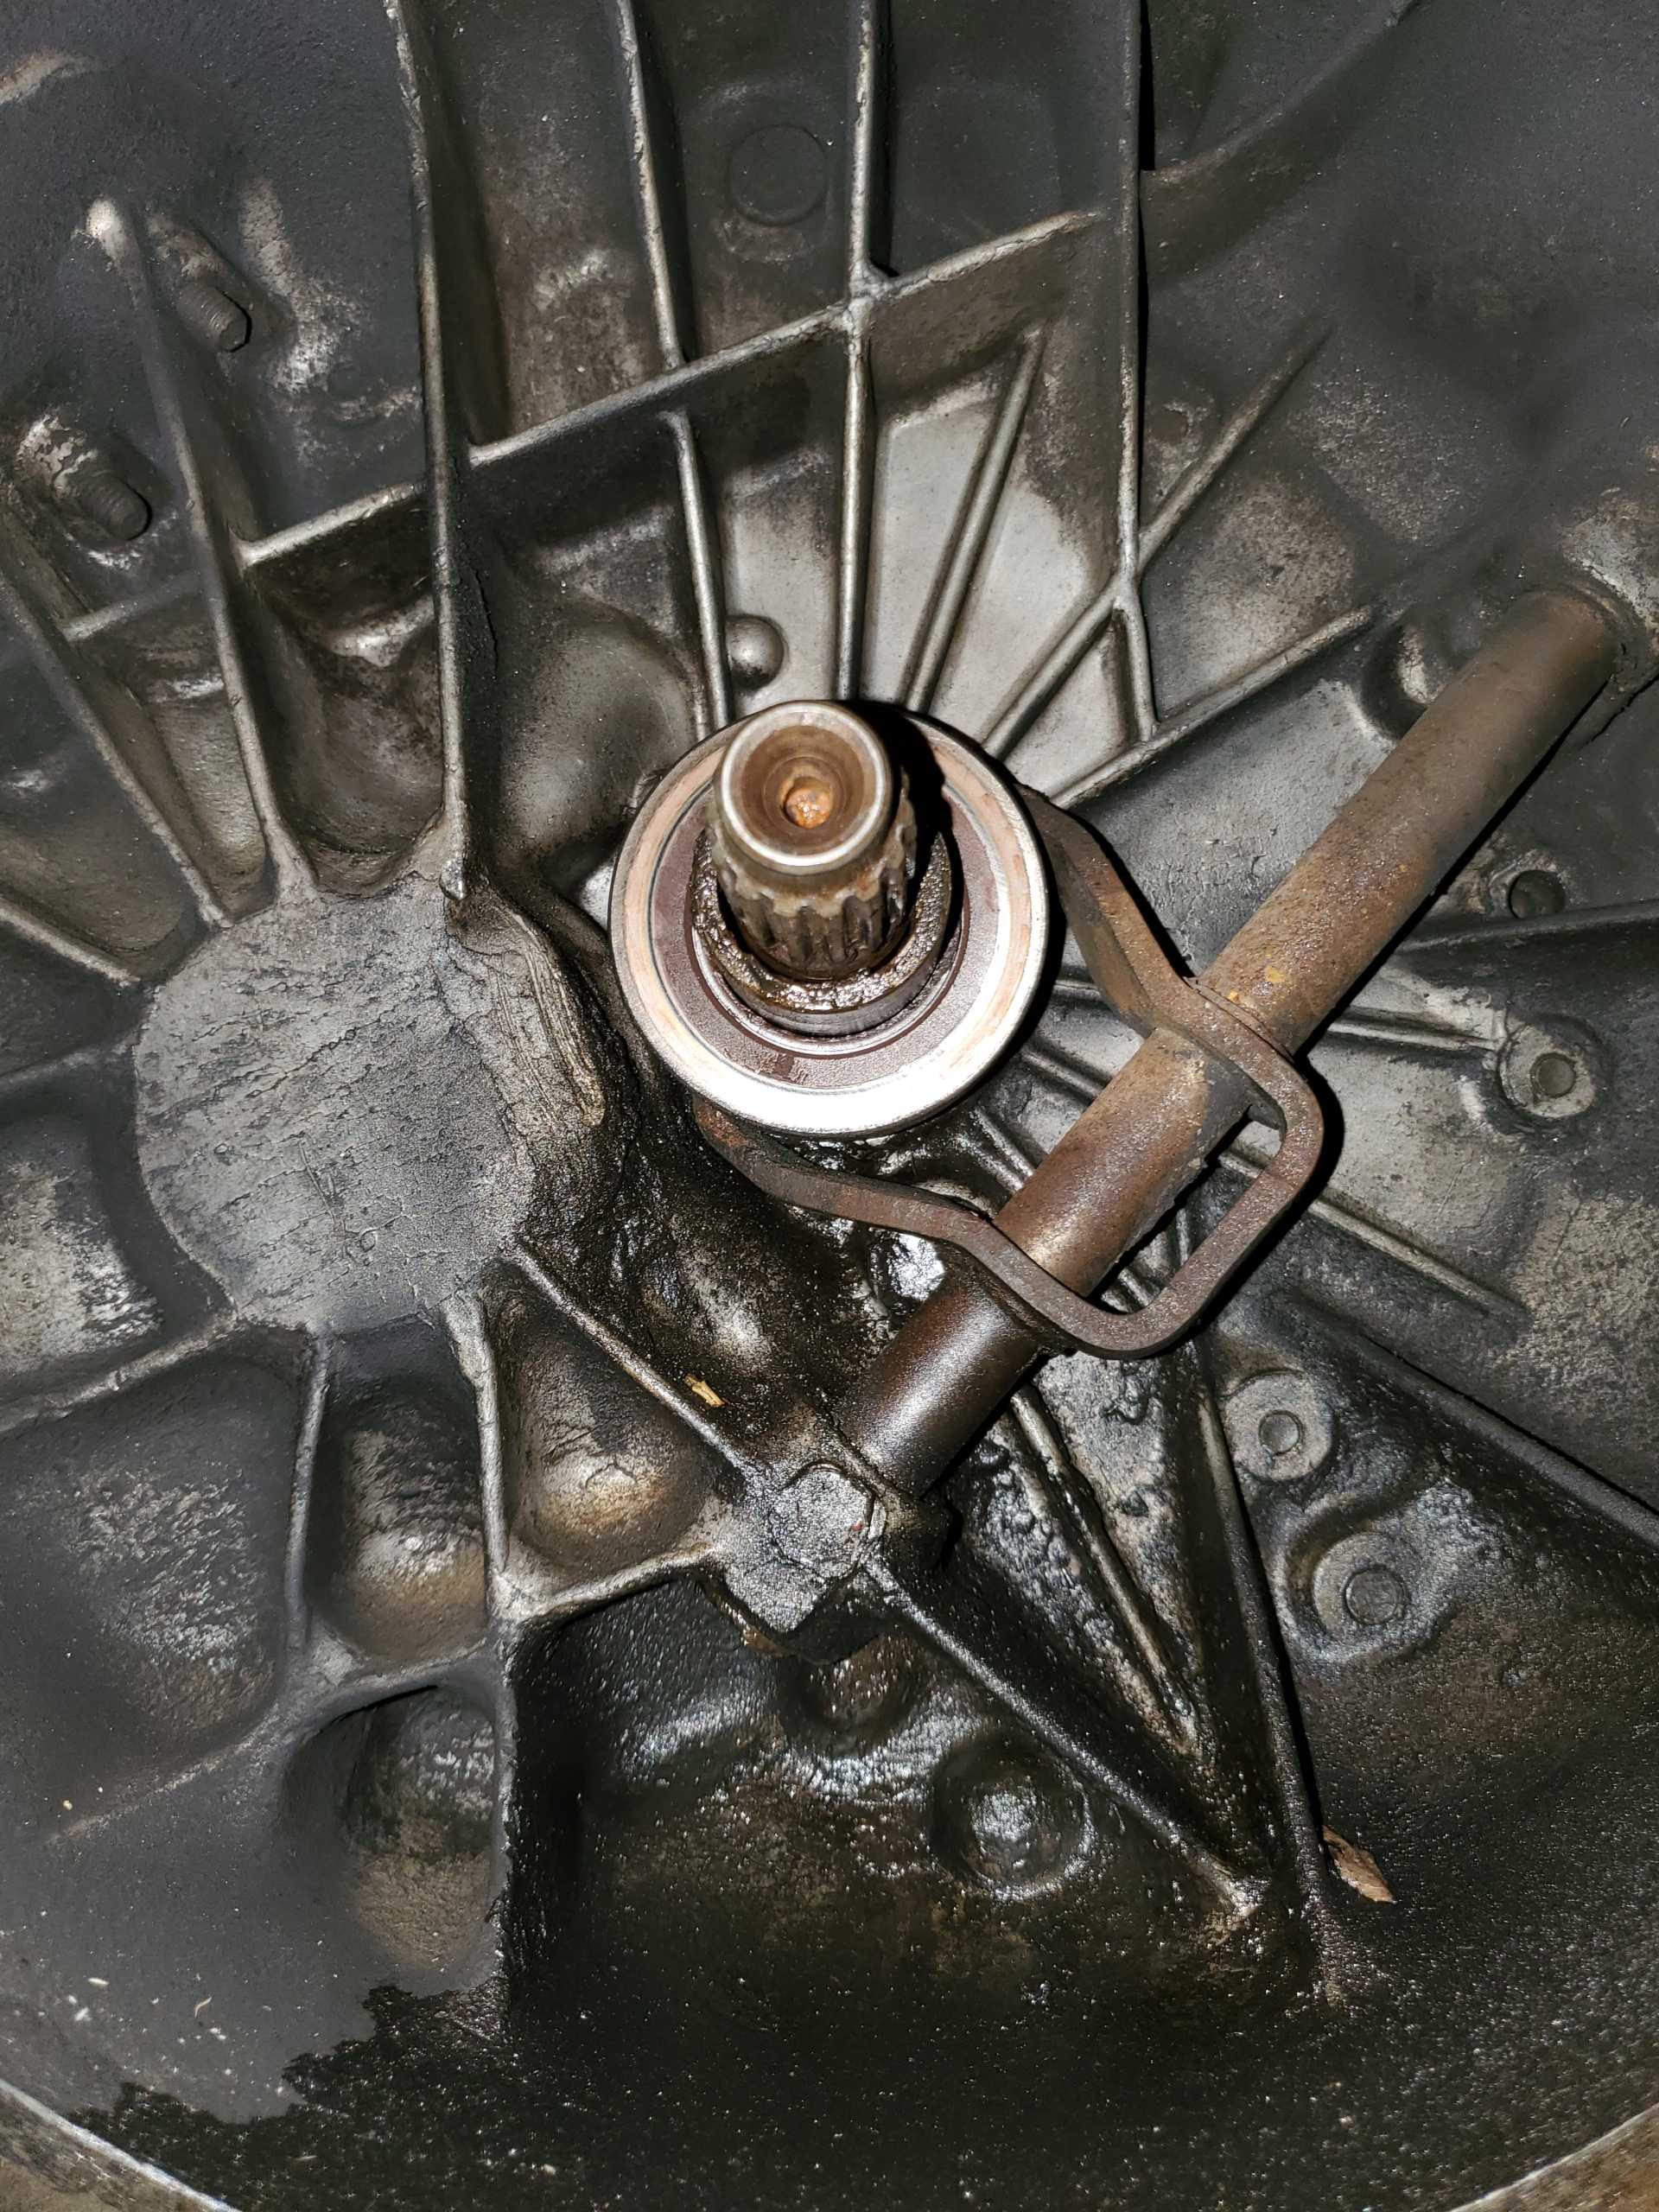
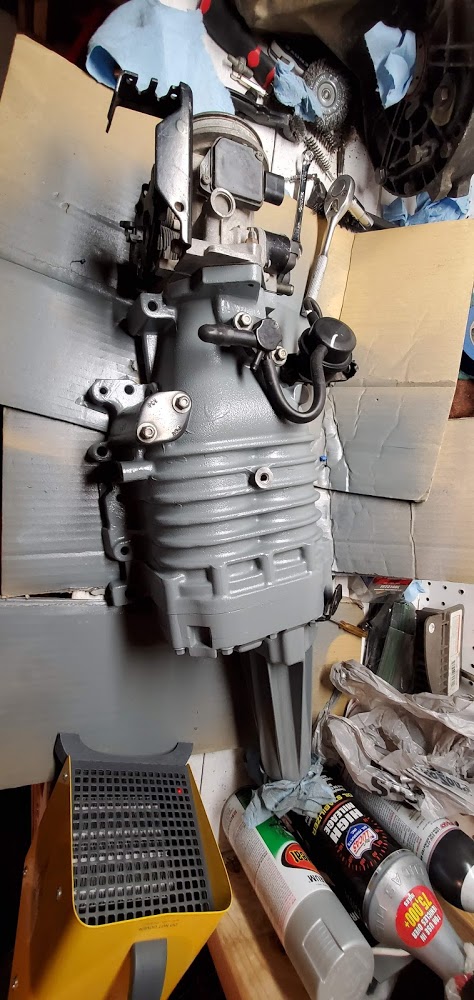
Put the trans on the work bench and noticed that the input shaft seal is also leaking so I guess it's a good time to rebuild it anyway.


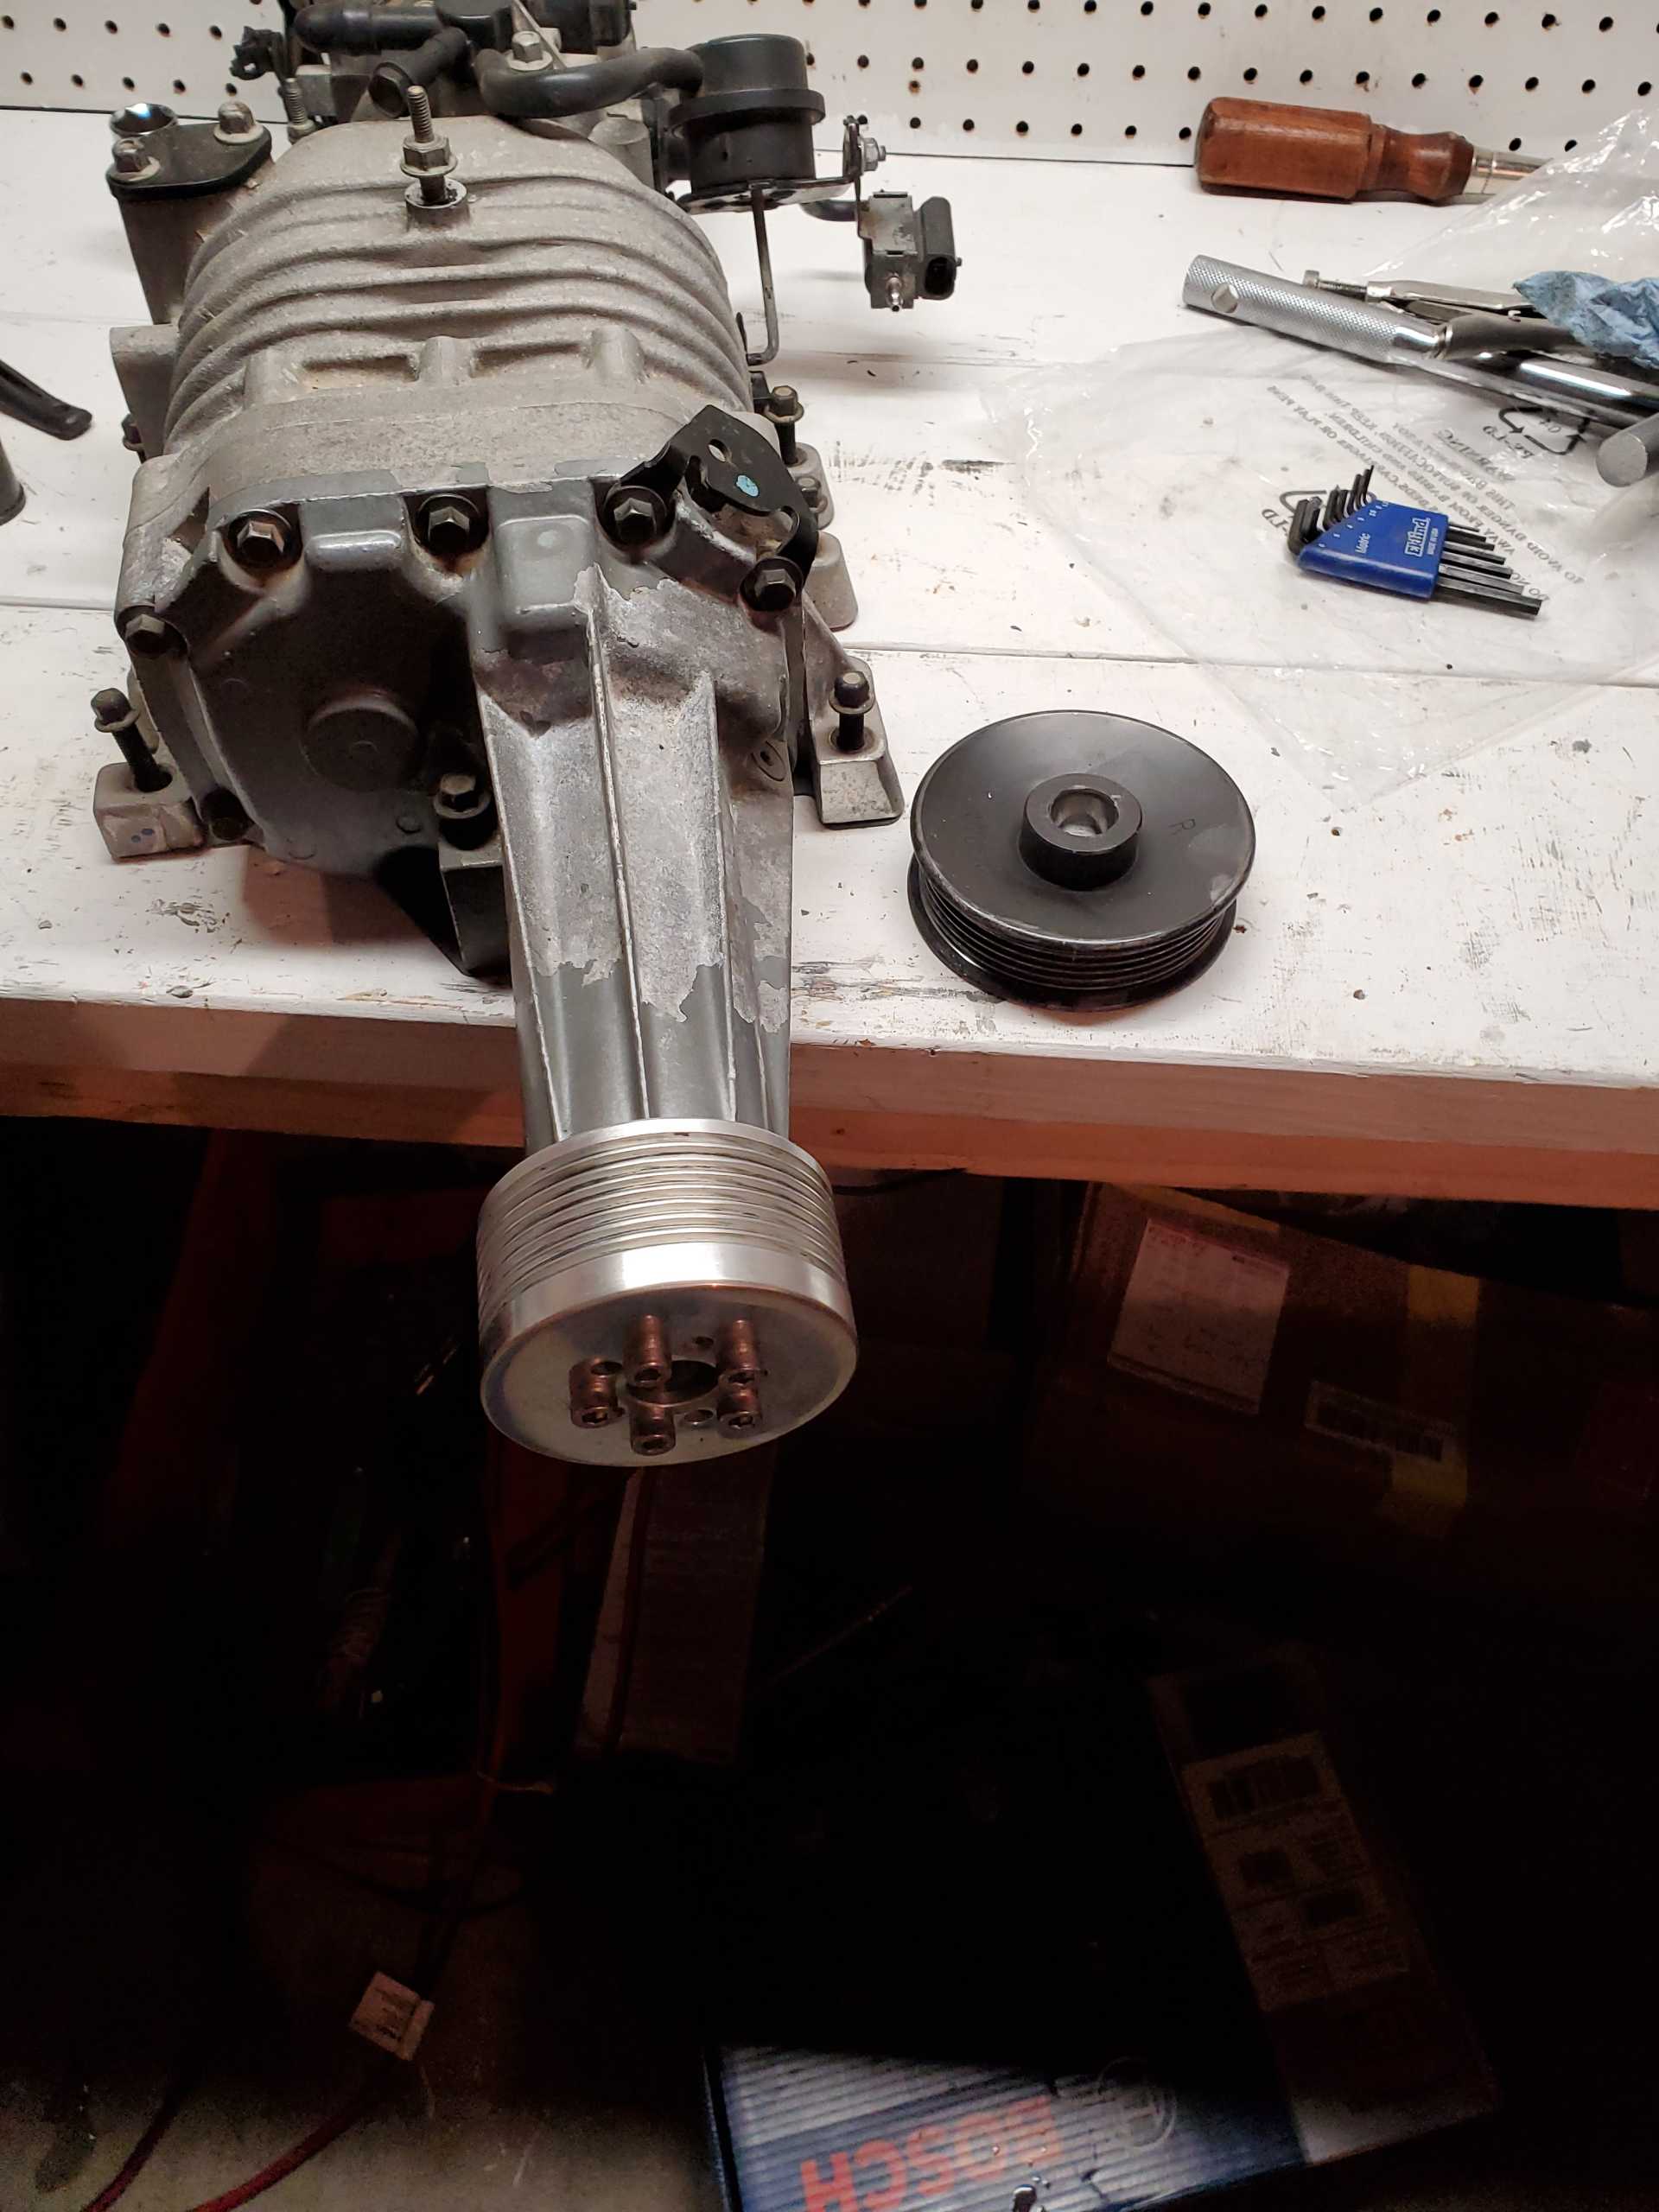
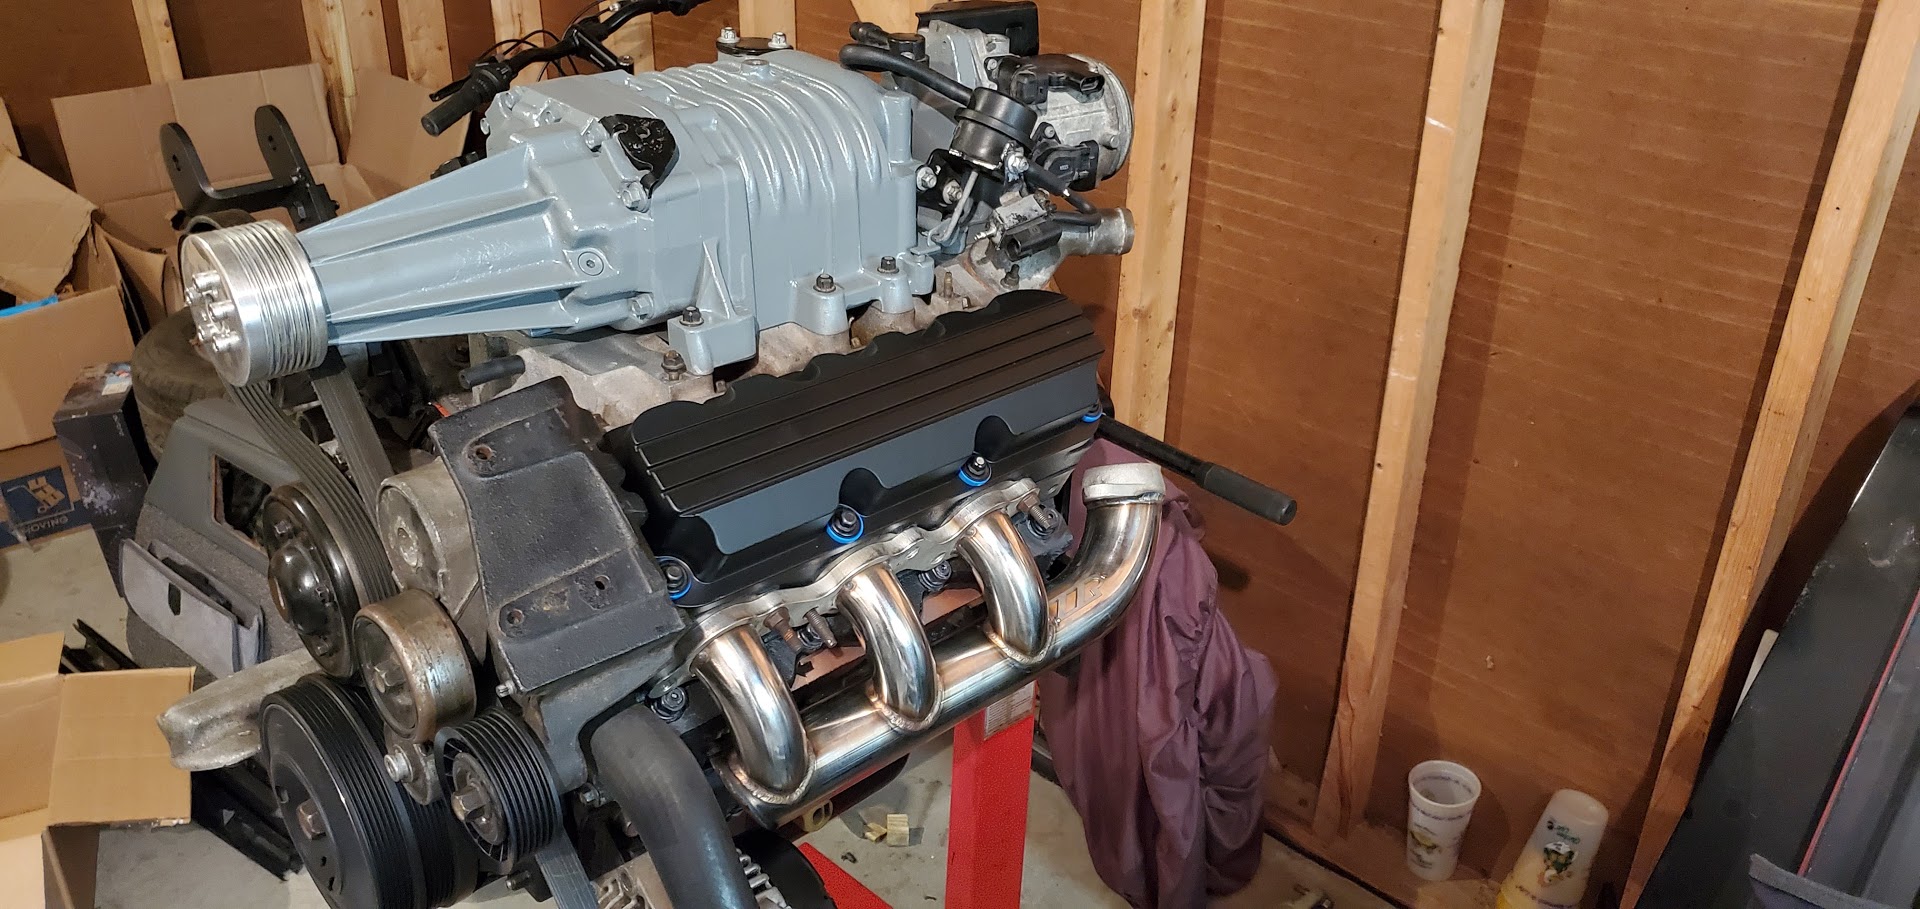
Also put a 3.2 pulley and modular pulley hub on the supercharger.


Wired in a new cam position sensor connector. The clip broke off the old one when I launched the car at the drag strip 2 summers ago with broken trans mounts. Its been zip tied on ever since. What are you guys' thoughts on solder vs but connectors? Know people that swear by one and hate the other. I use water proof butt connectors and heat shrink. Solder scares me with vibration and corrosion if I don't do it right.


IP: Logged
Spadesluck
Member
Posts: 2069
From: Georgia
Registered: Jul 2016


Feedback score:    (8)
Leave feedback

Rate this member

Report this Post01-25-2021 01:45 AM Click Here to See the Profile for SpadesluckSend a Private Message to SpadesluckEdit/Delete MessageReply w/QuoteDirect Link to This Post
Been a while since I checked in. You have come a long way and have stayed in it even with all the hits, congats! ha You have managed to go with 3 motors while I am still building 1!

[This message has been edited by Spadesluck (edited 01-25-2021).]

IP: Logged
pmbrunelle
Member
Posts: 4376
From: Grand-Mère, Québec
Registered: Sep 2008


Feedback score: N/A
Leave feedback


Total ratings: 62
Rate this member

Report this Post01-25-2021 05:12 PM Click Here to See the Profile for pmbrunelleSend a Private Message to pmbrunelleEdit/Delete MessageReply w/QuoteDirect Link to This Post
 
quote
Originally posted by BadNewsBrendan:
Wired in a new cam position sensor connector. The clip broke off the old one when I launched the car at the drag strip 2 summers ago with broken trans mounts. Its been zip tied on ever since. What are you guys' thoughts on solder vs but connectors? Know people that swear by one and hate the other. I use water proof butt connectors and heat shrink. Solder scares me with vibration and corrosion if I don't do it right.


I have a thread I started about my thoughts on splices and wiring:
http://realfierotech.com/vi...pic.php?f=3&p=159431

That reminds me, it's not complete, I need to add in some more details
IP: Logged
BadNewsBrendan
Member
Posts: 273
From: Michigan
Registered: Aug 2018


Feedback score: N/A
Leave feedback

Rate this member

Report this Post01-25-2021 09:16 PM Click Here to See the Profile for BadNewsBrendanSend a Private Message to BadNewsBrendanEdit/Delete MessageReply w/QuoteDirect Link to This Post
Thanks Spadesluck although I think one engine in a couple years might have been more efficient strategy than three engines quickly slapped together but I learned a lot. Its nice to finally be pulling an engine to do fun things and make it faster instead of because it blew up.

And damn pmbrunelle is there anything you don't have a thread for?

Also forgot to mention I picked up a front powerlog, a machined oil pump cover, a new oil pan to replace the dented one and zzp push rods.

Planning on making a cover/scoop to cover the 84 decklid vent so water won't be sitting on the front head when it rains. Going to clean up some of the wiring, re-plumb the oil pressure Guage and clean up some other things in the engine bay.

With the NIC cam I'm going to need to get it tuned so going to find an AFR Guage and sensor. Hoping to also find time to fab up a new exhaust and muffler to quiet it down and take away some rasp so i don't annoy the neighborhood so much.

A lot to do but hoping to get it ready in time to take it to some road tracks this summer. Going to try to take my time a little more this time though.
IP: Logged
BadNewsBrendan
Member
Posts: 273
From: Michigan
Registered: Aug 2018


Feedback score: N/A
Leave feedback

Rate this member

Report this Post01-30-2021 06:18 PM Click Here to See the Profile for BadNewsBrendanSend a Private Message to BadNewsBrendanEdit/Delete MessageReply w/QuoteDirect Link to This Post
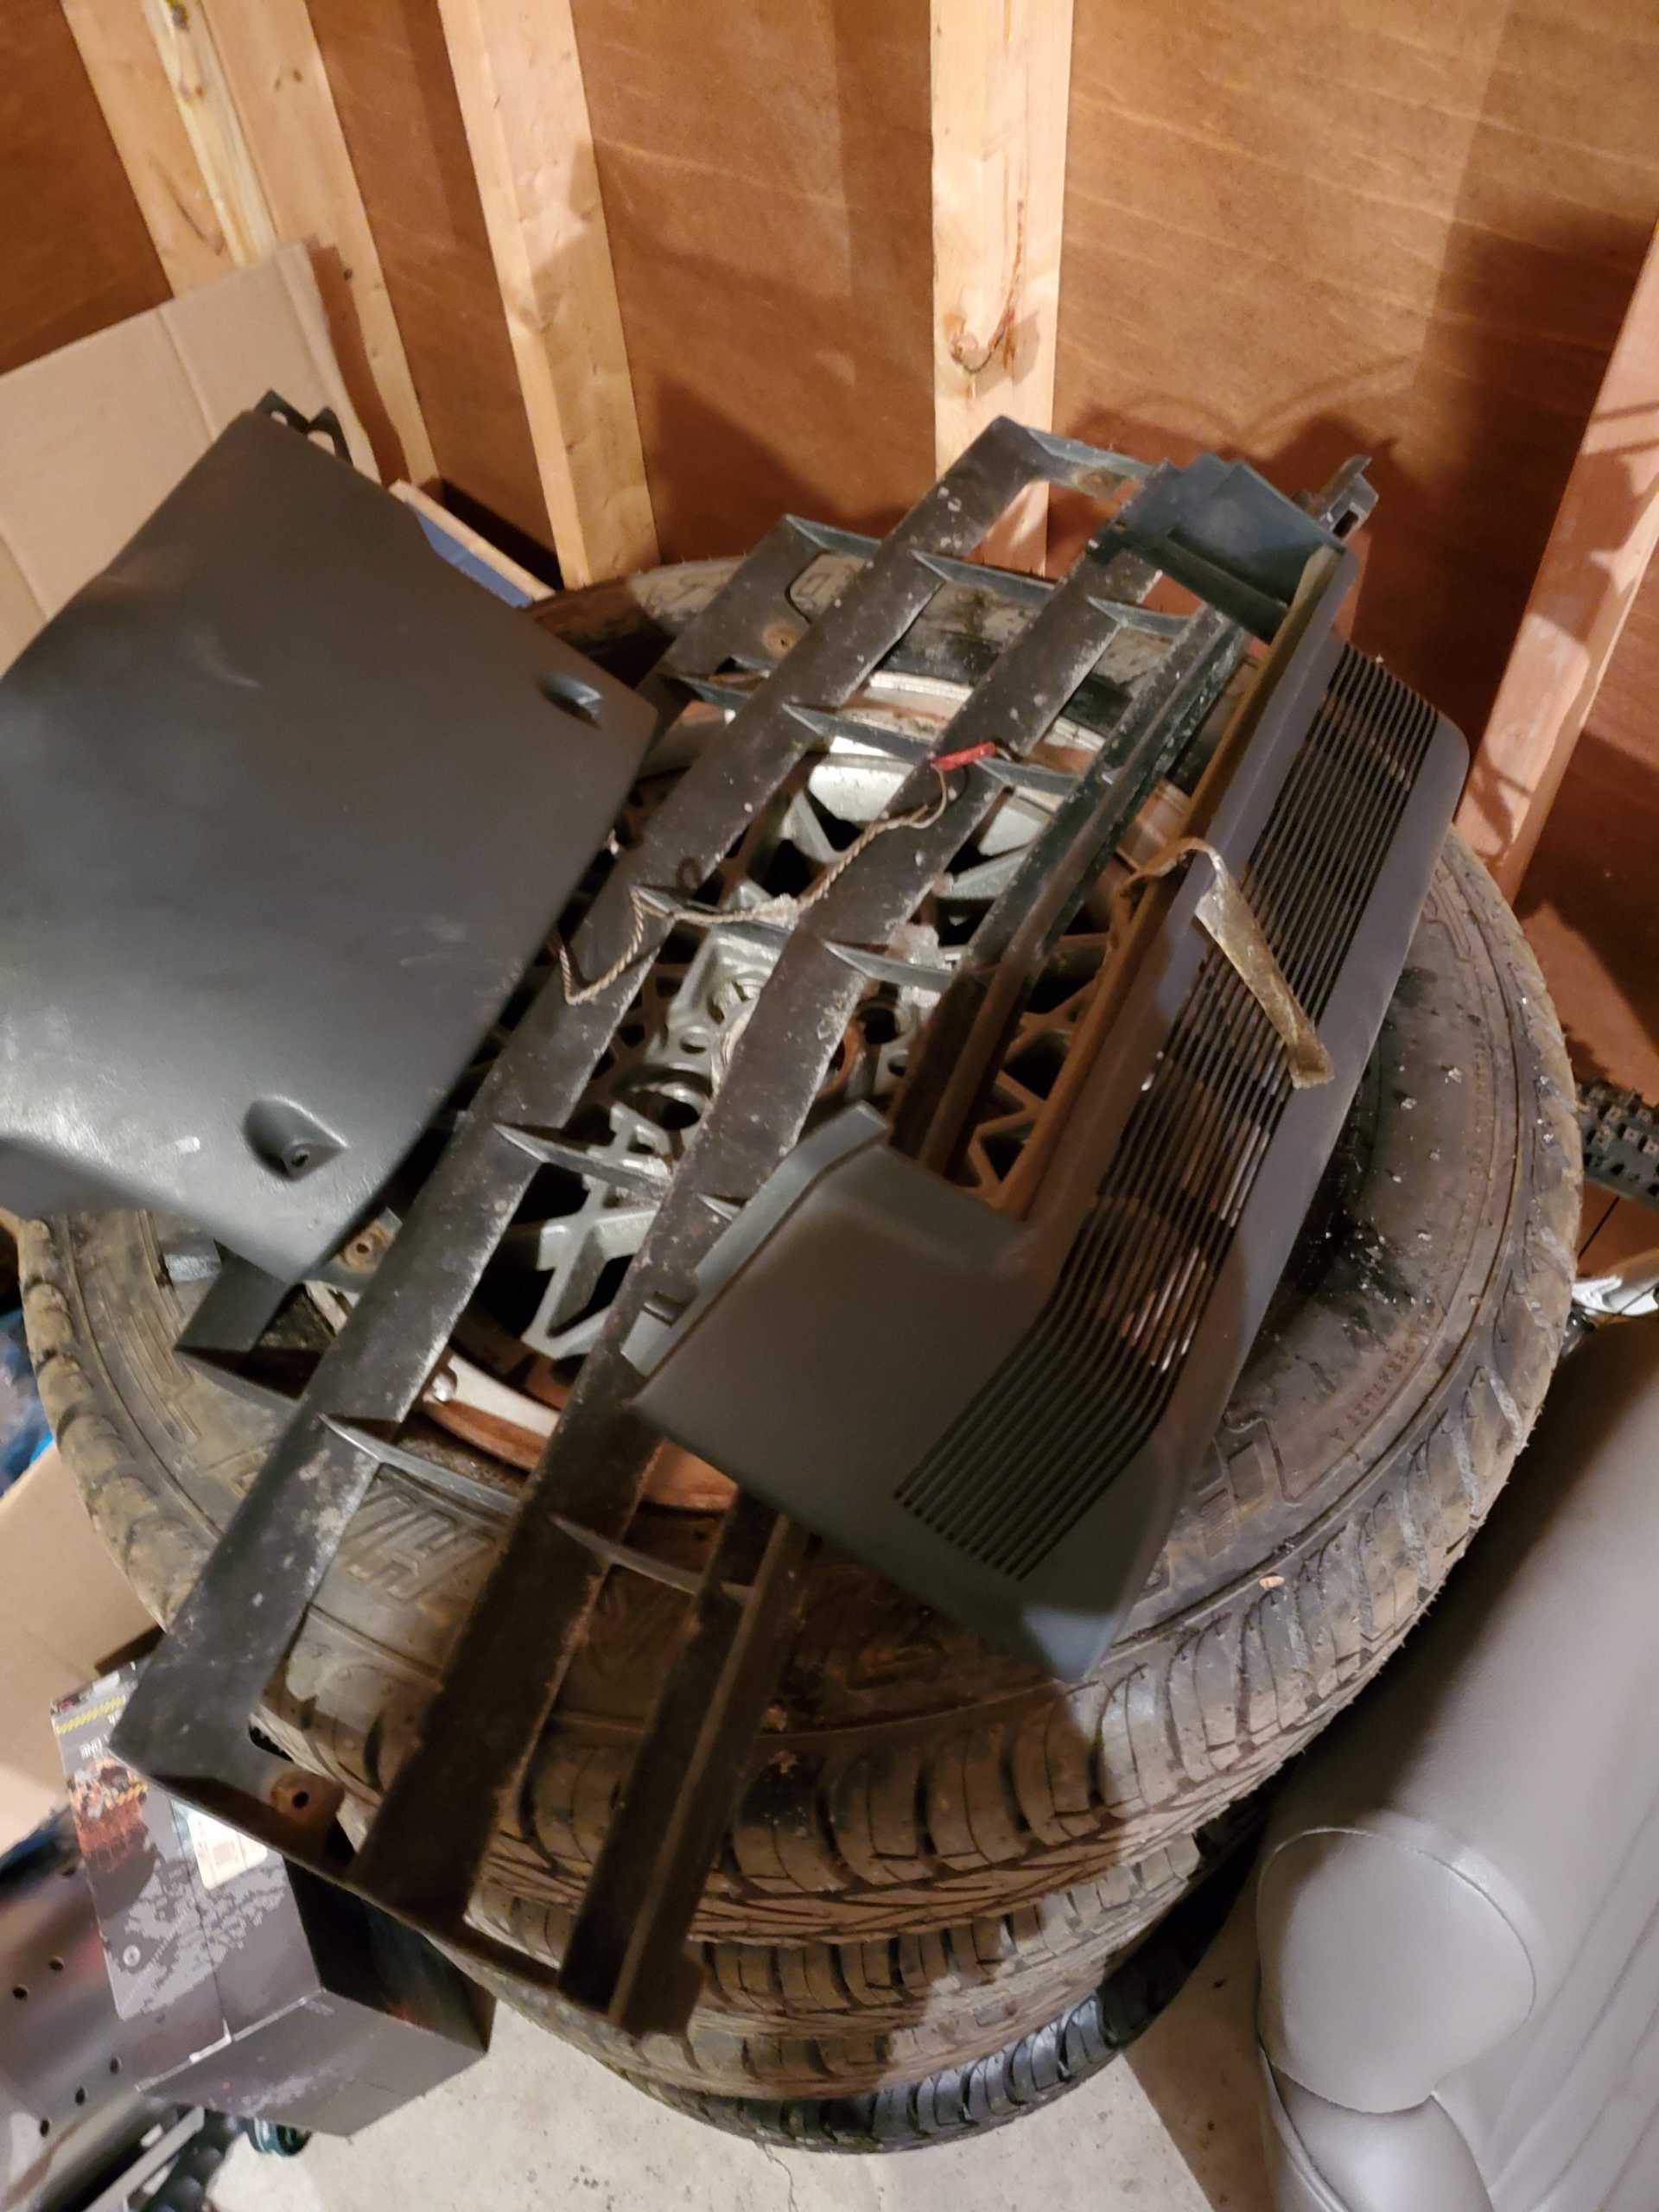
Went out to the nearest pick-n-pull to scope out the few fieros they had and came home with more than I bargained for.


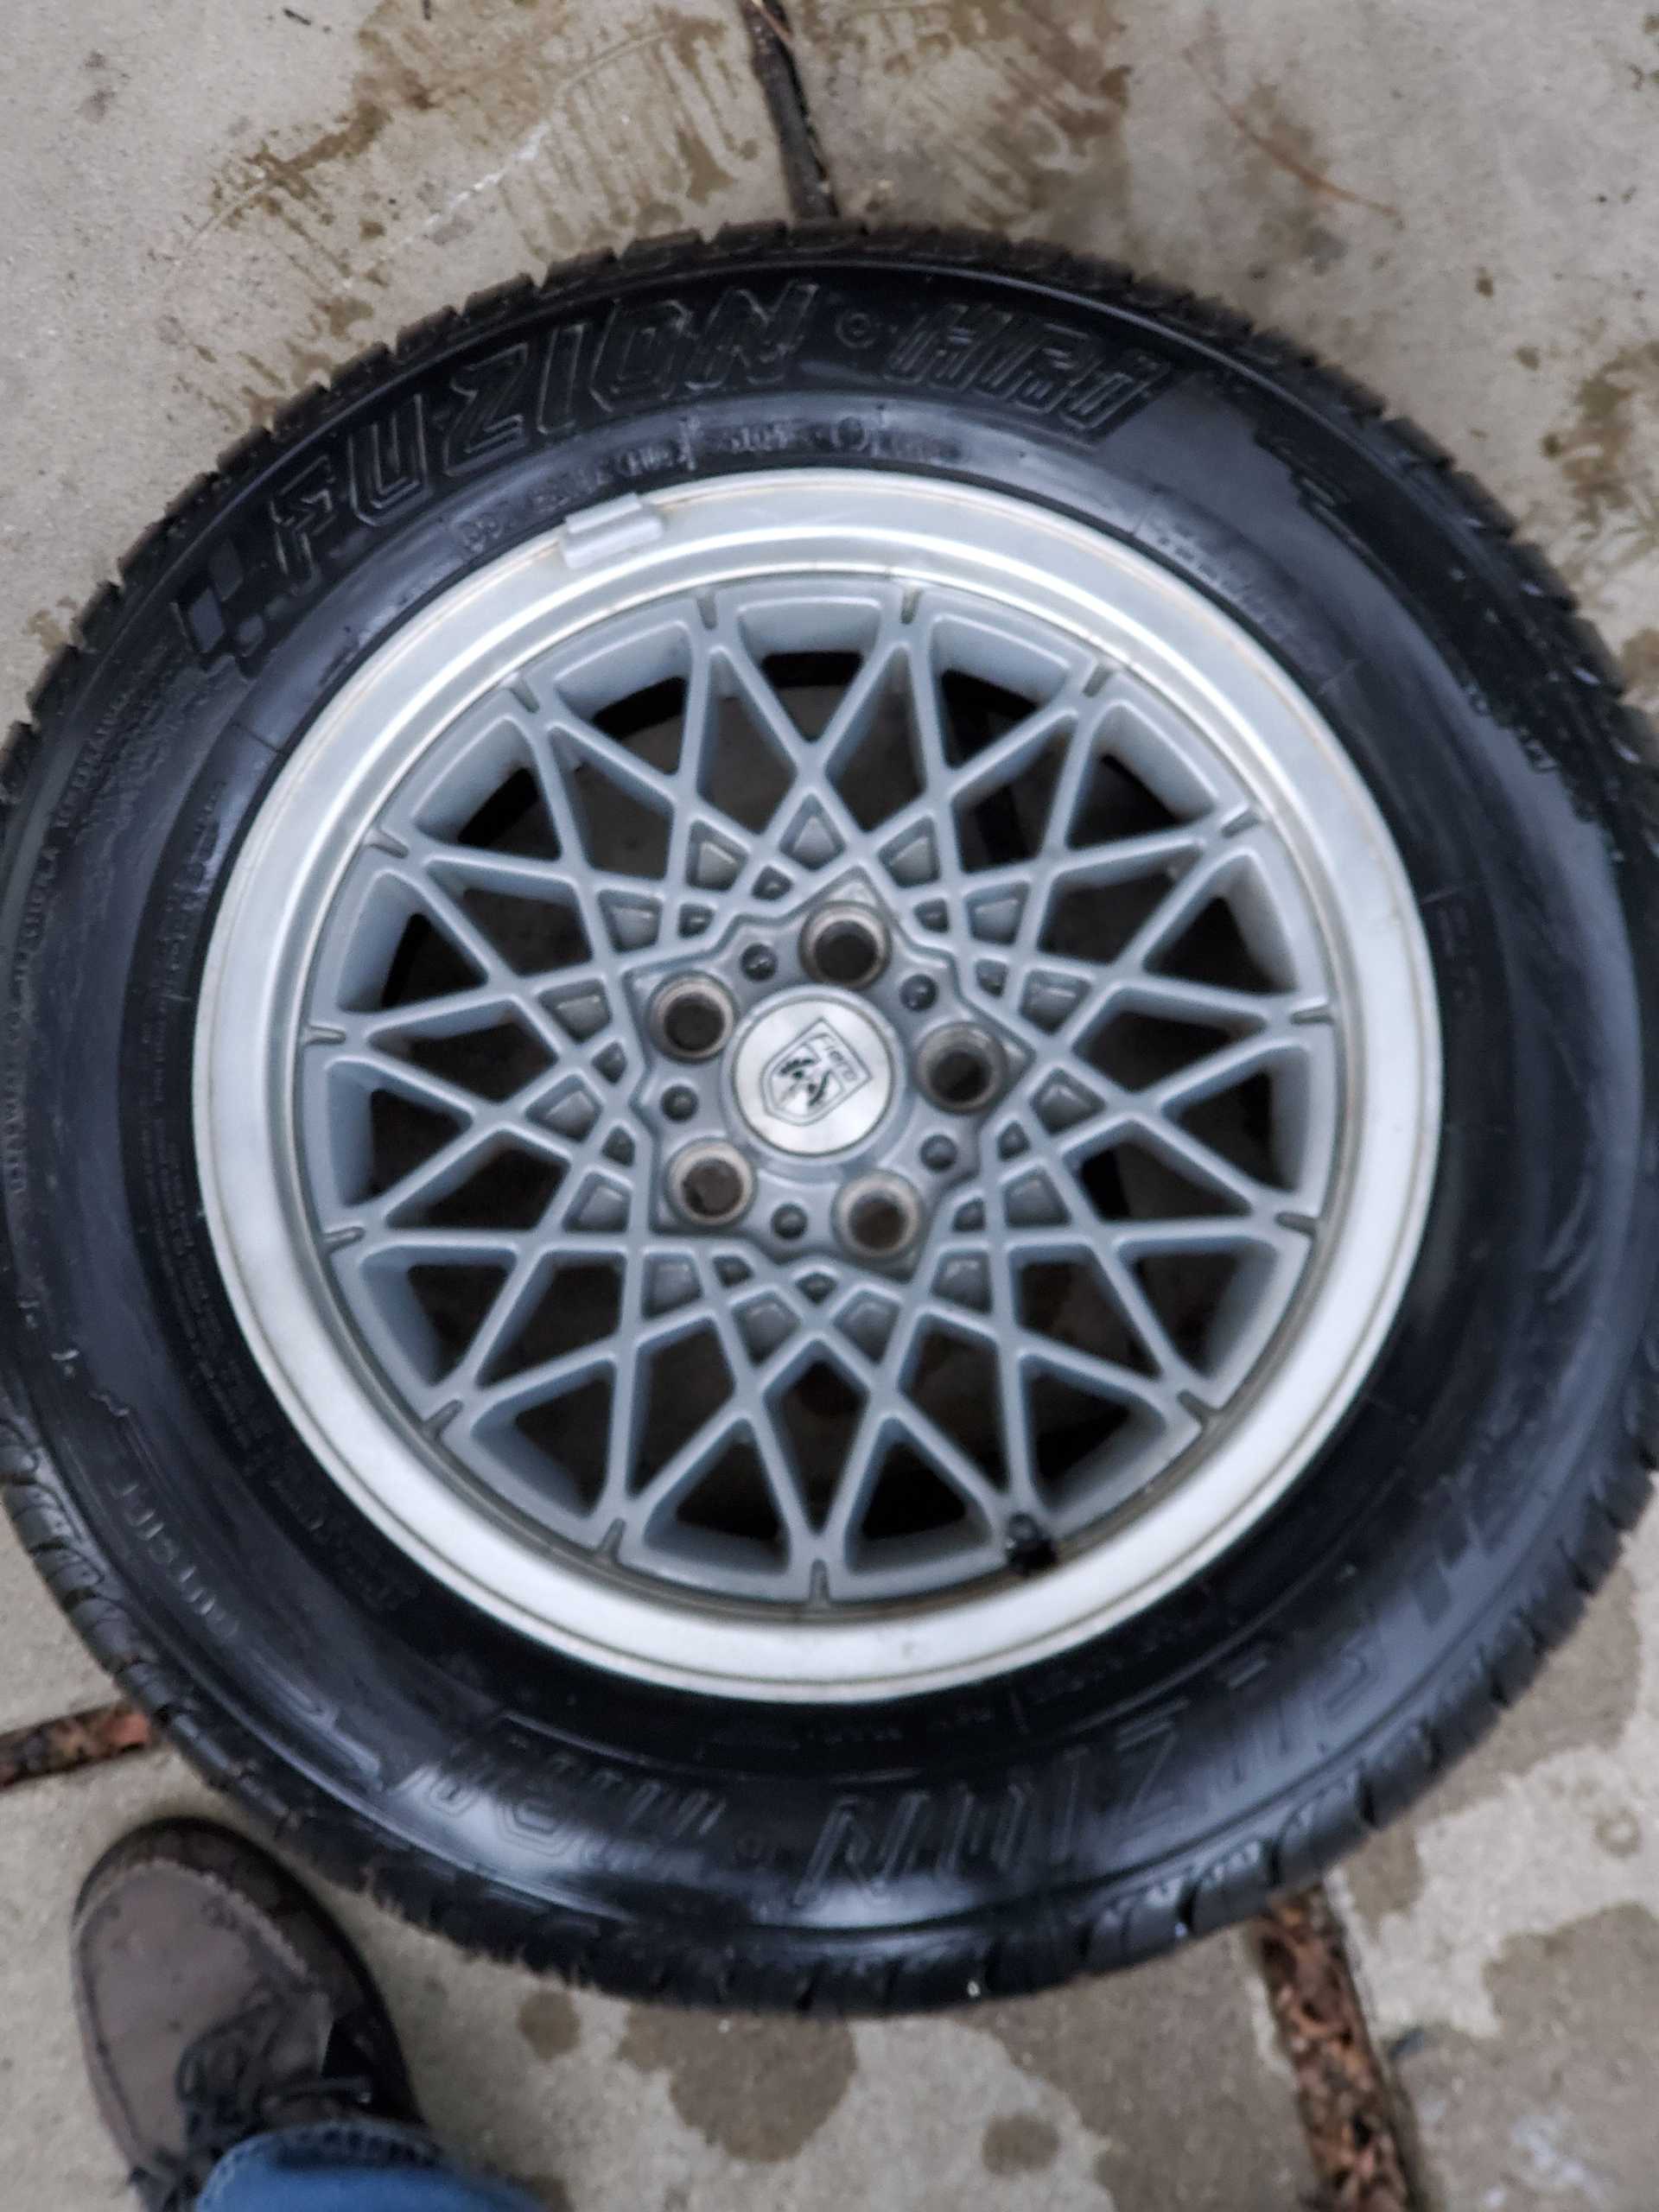
Pretty good condition set of gt lace wheels. A lot lighter than my current wheels and will probably use them for the track and autocross.


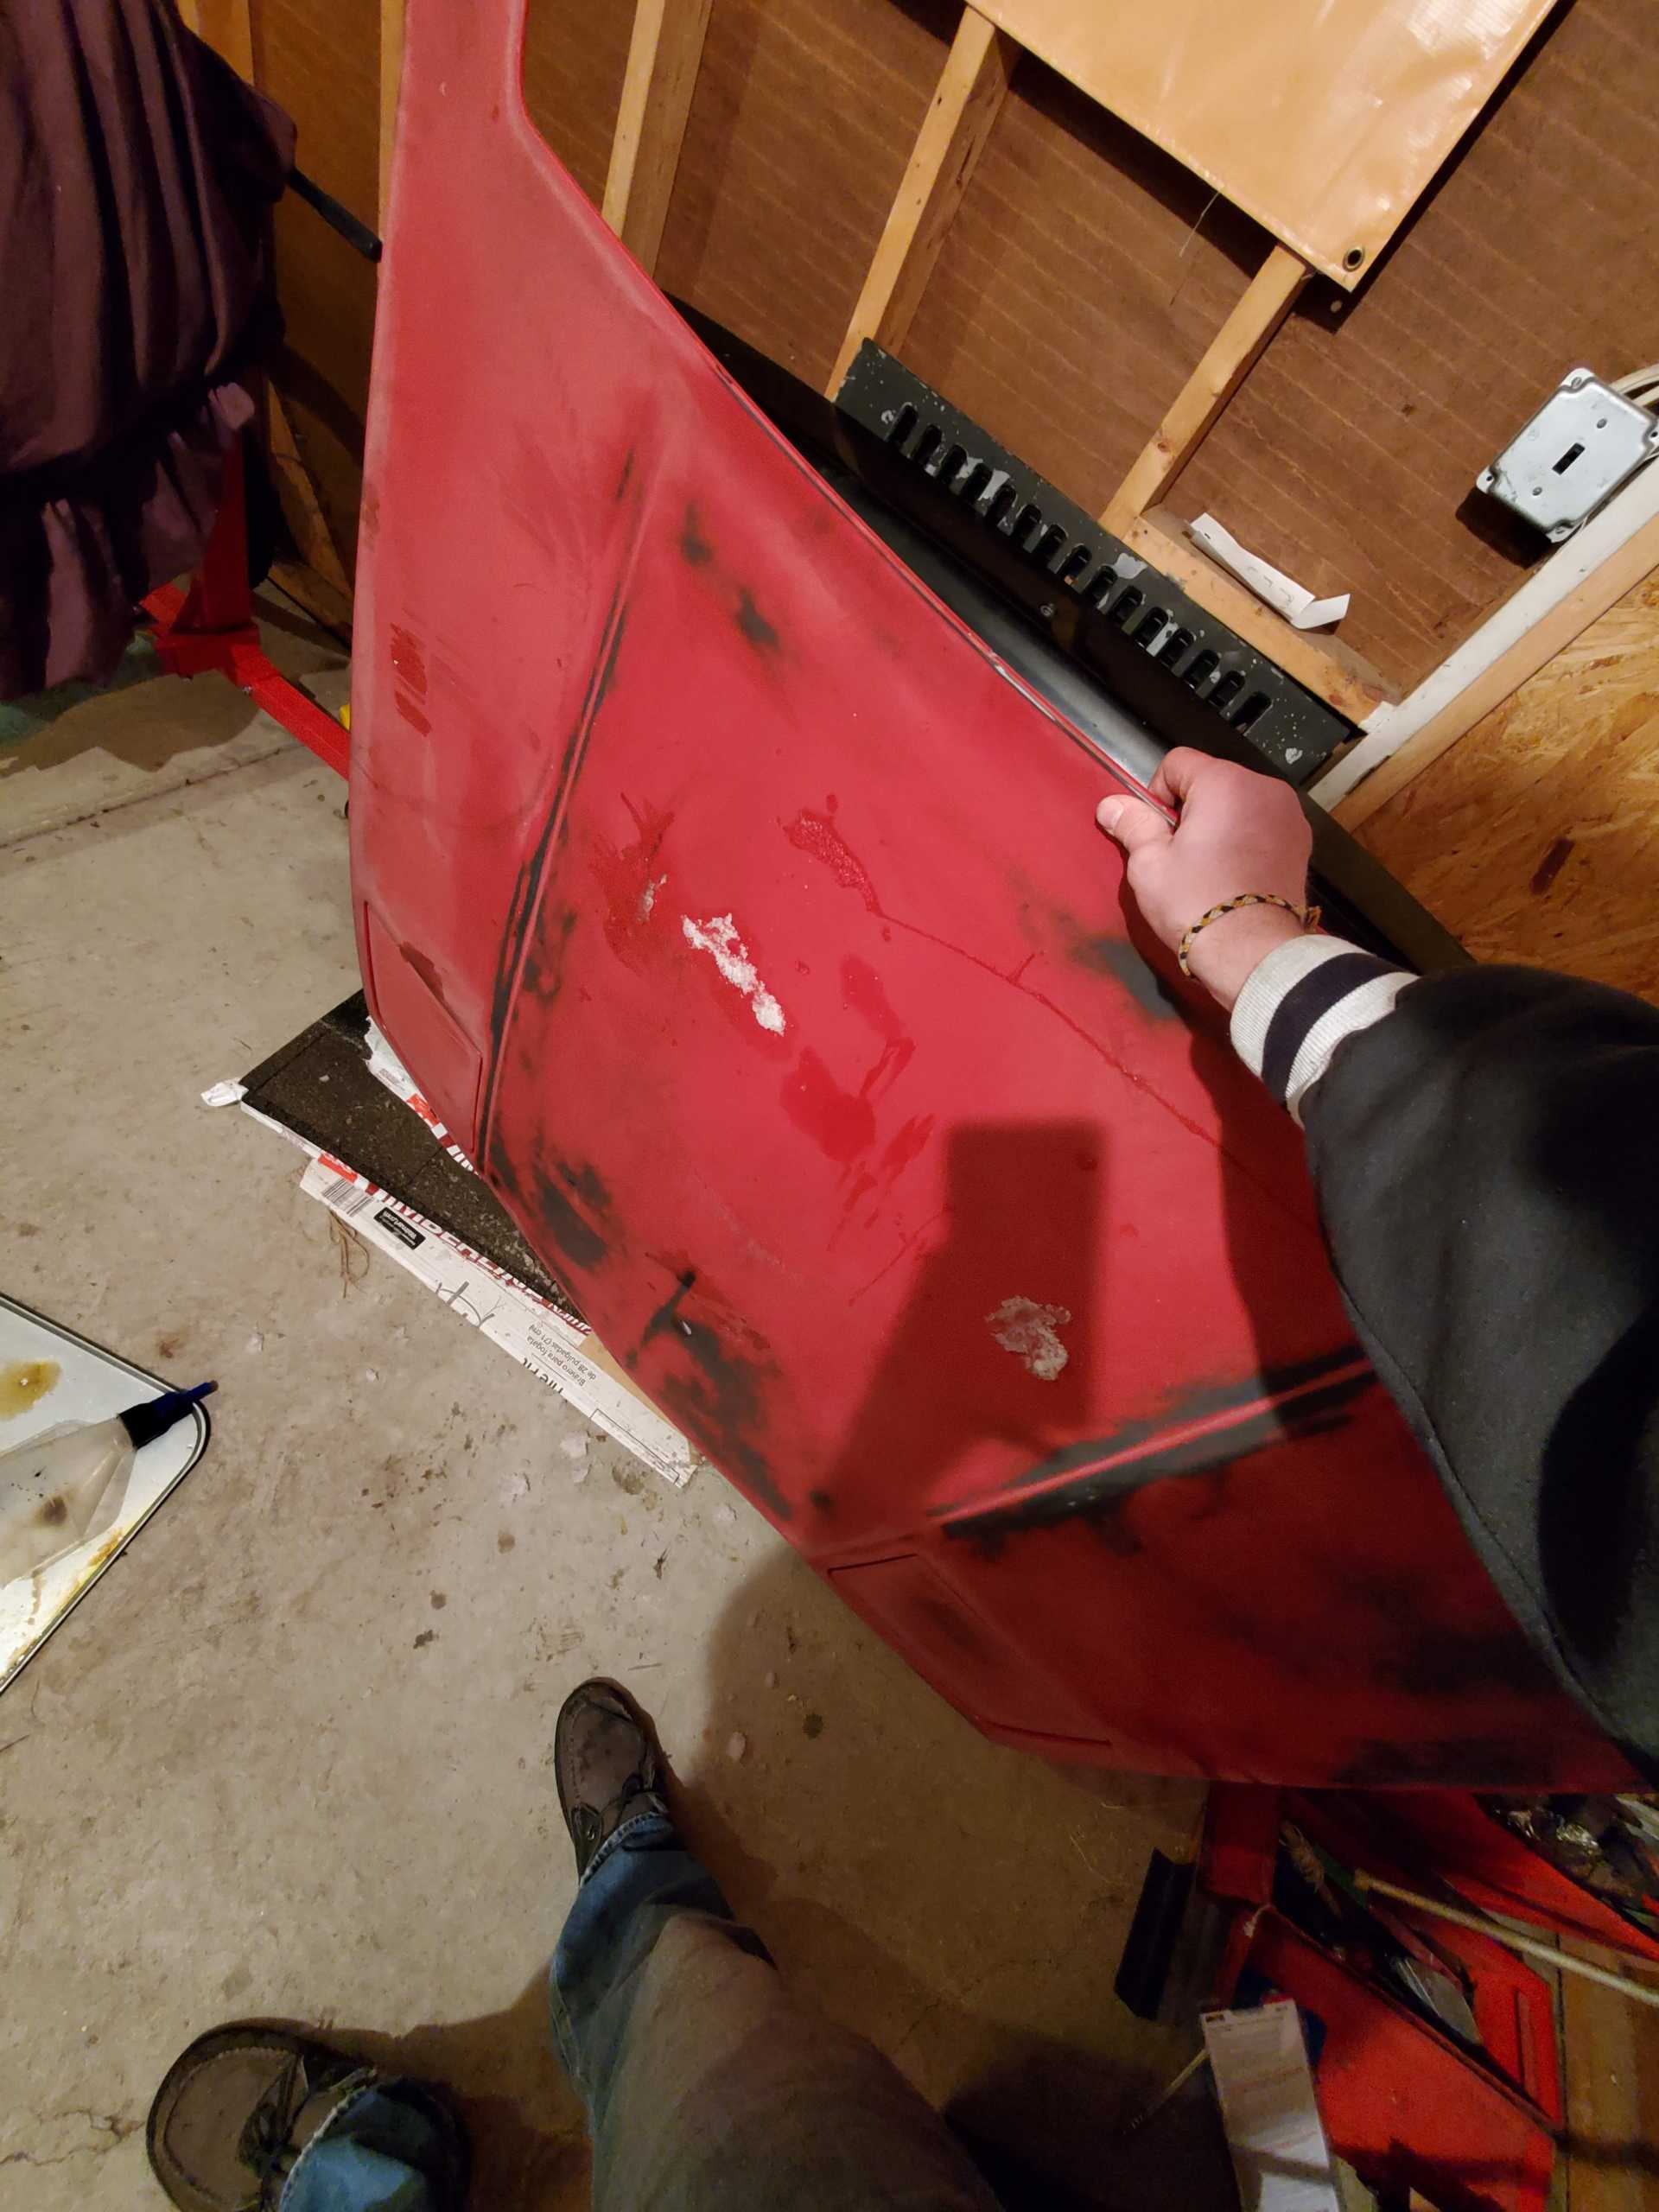
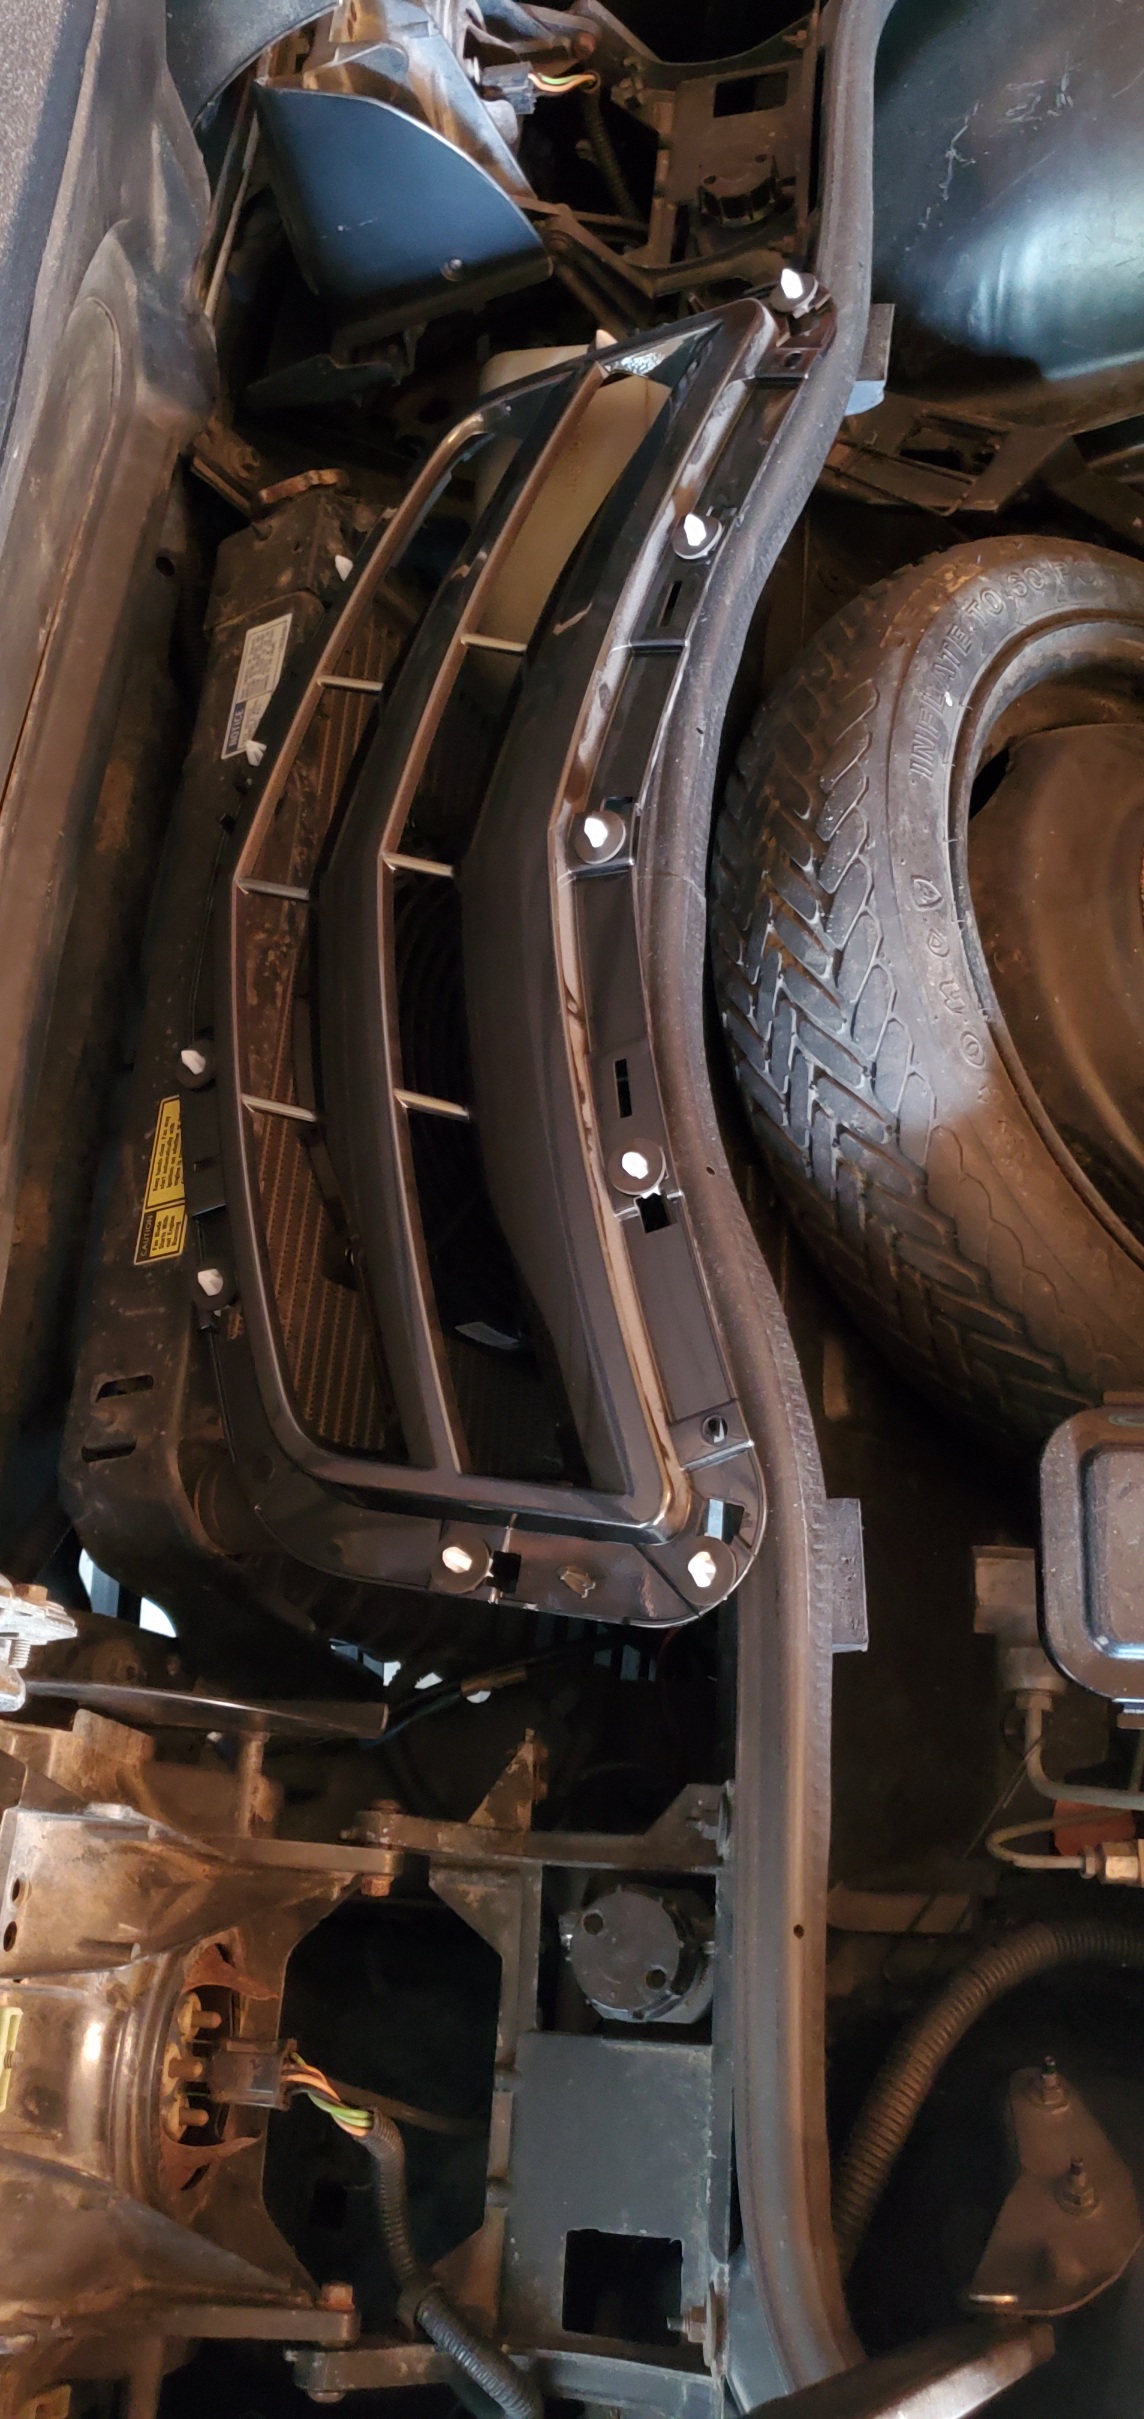
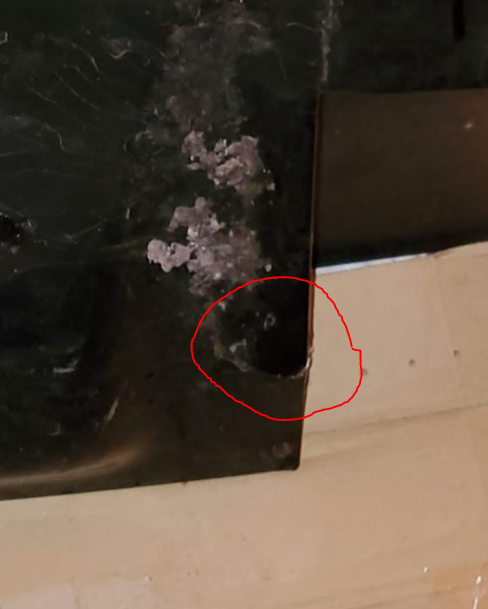
Rear deck lid, one banged up spot from where the spring rusted through and smashed up into it. Will solve the issue of water leaking in through the 84 center vent and sitting on the engine. also much lighter than my current deck lid with half inch thick steel braces holding it together haha.


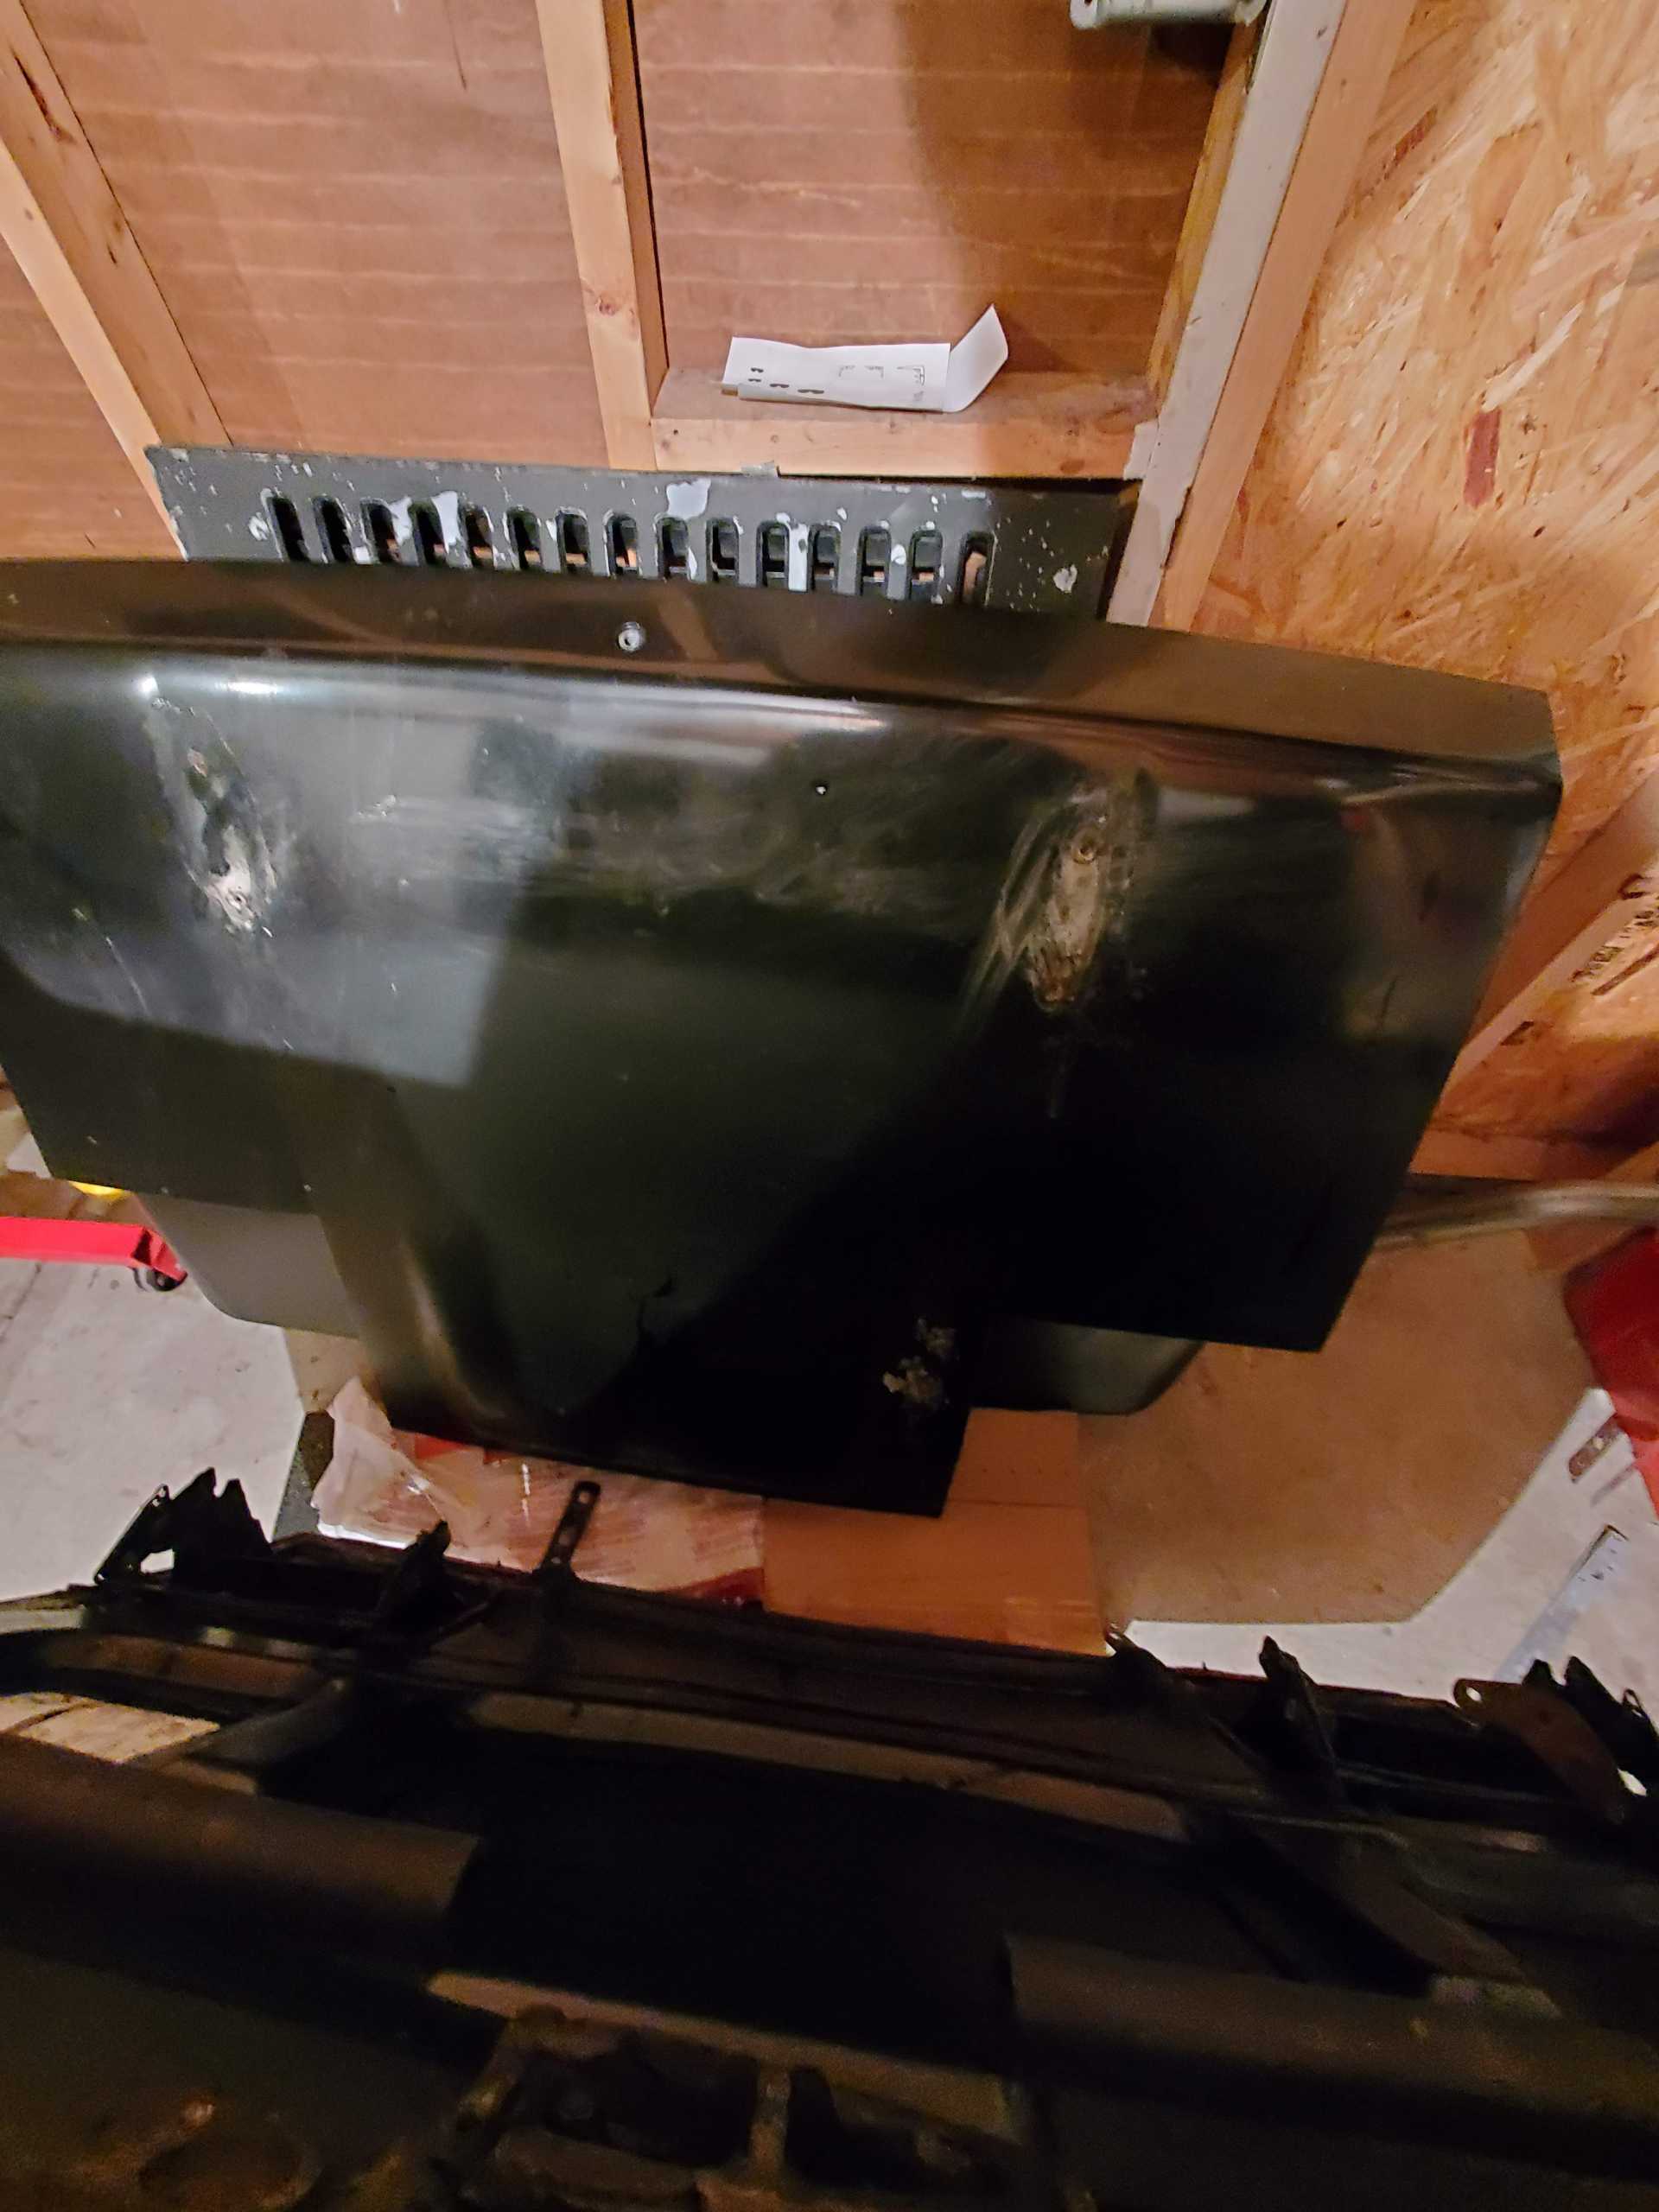
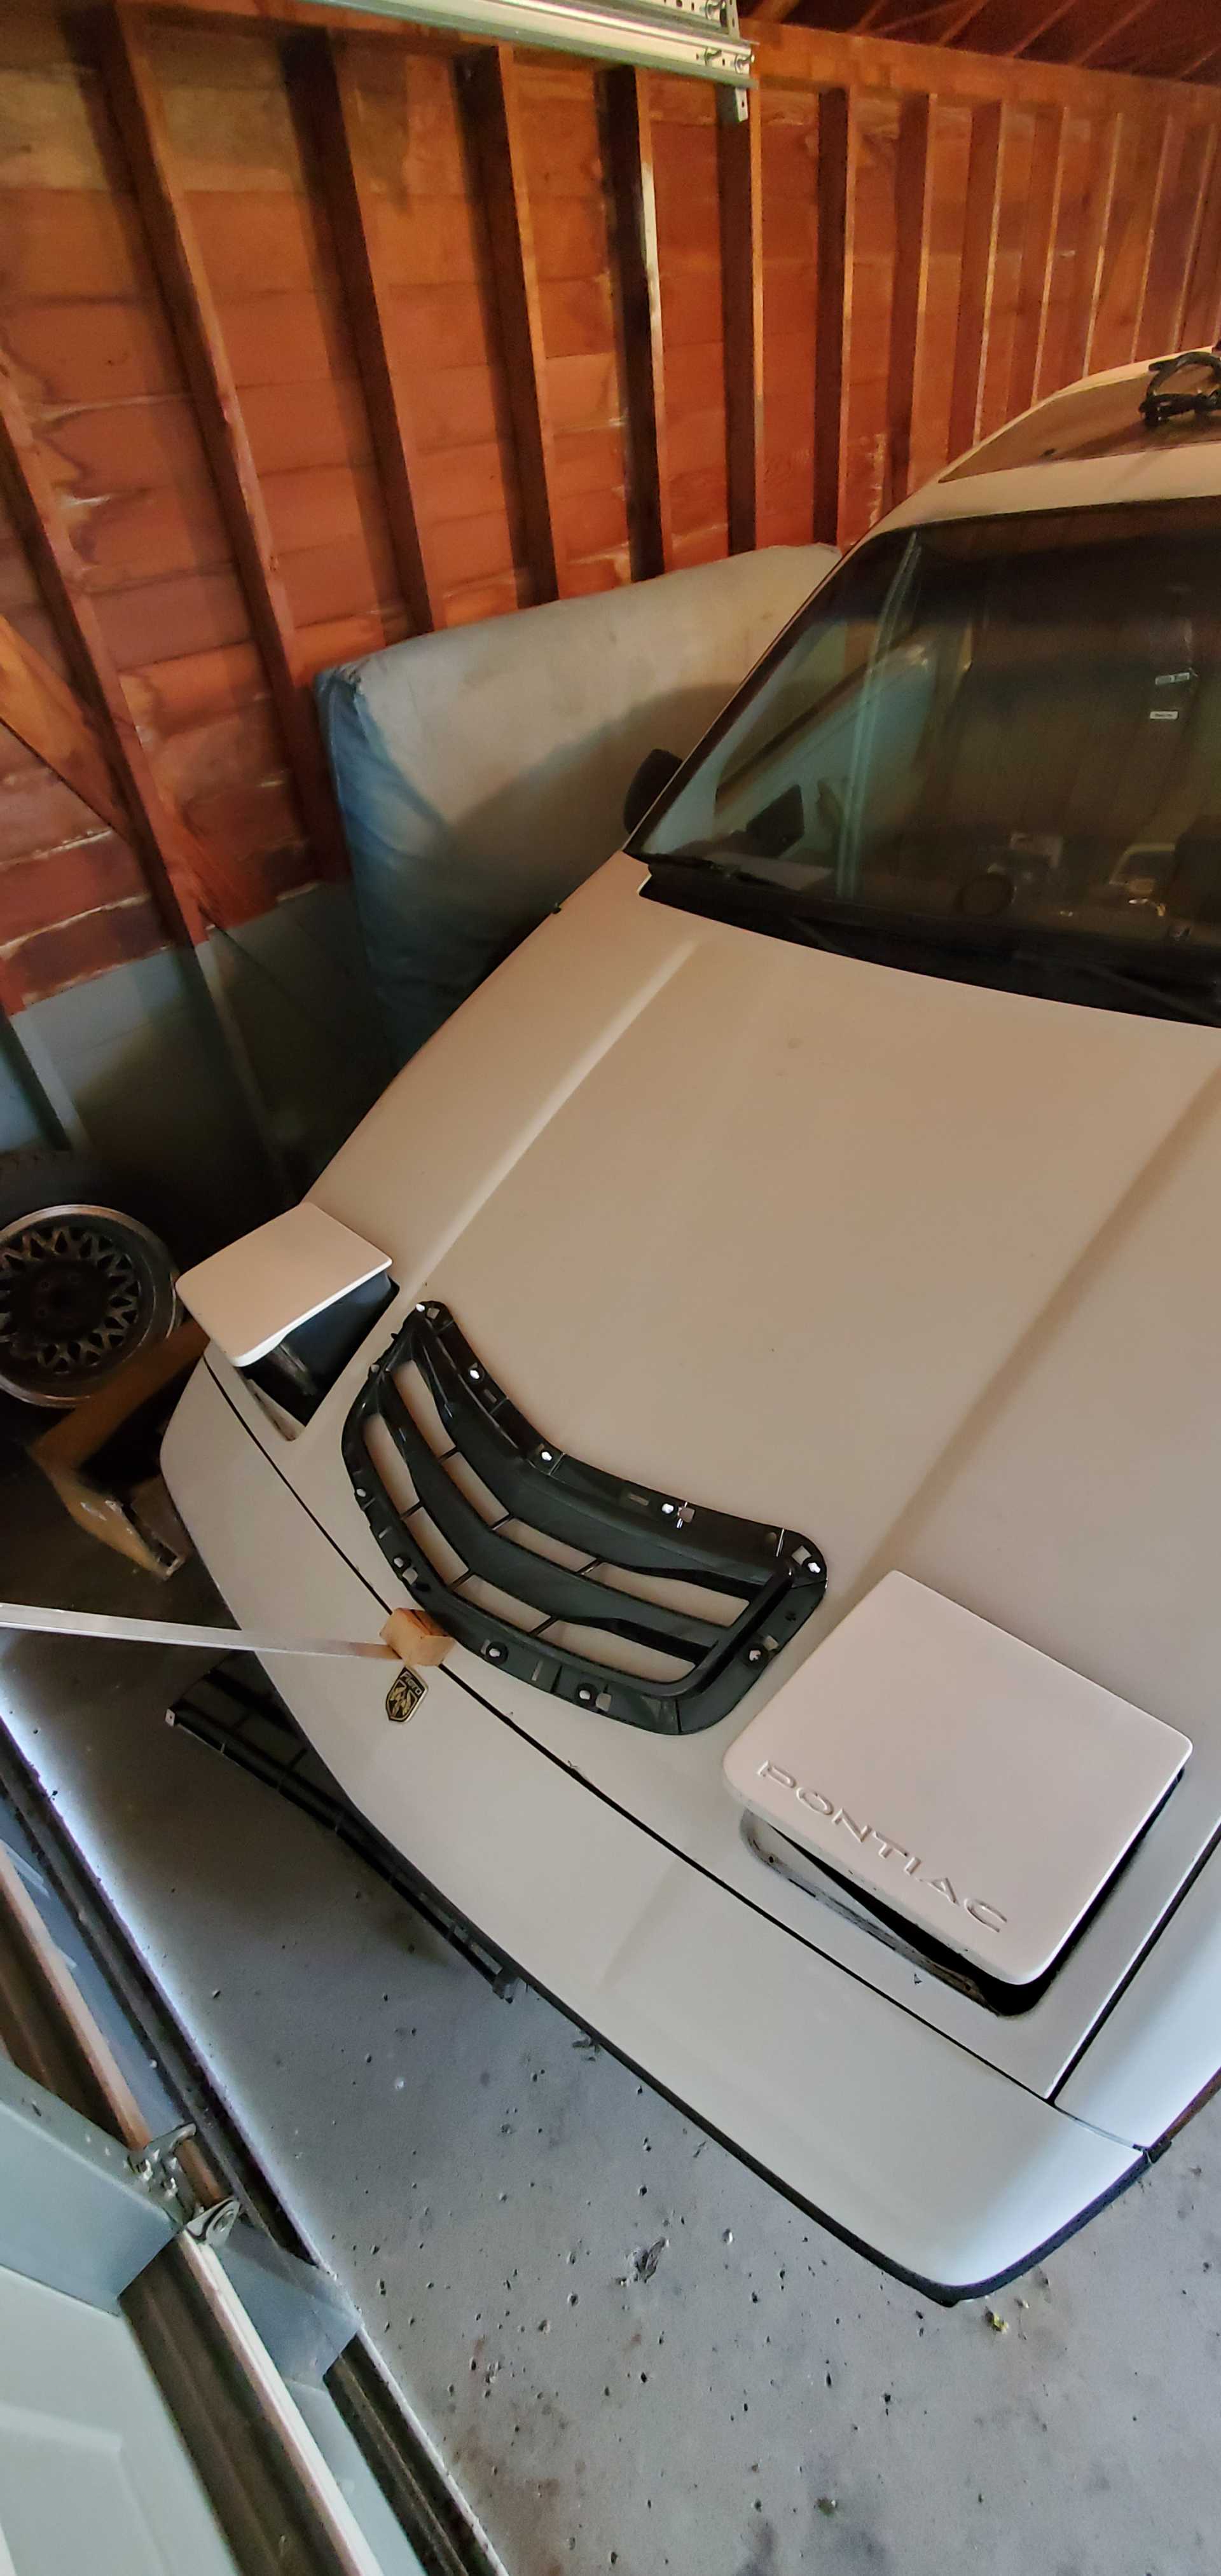
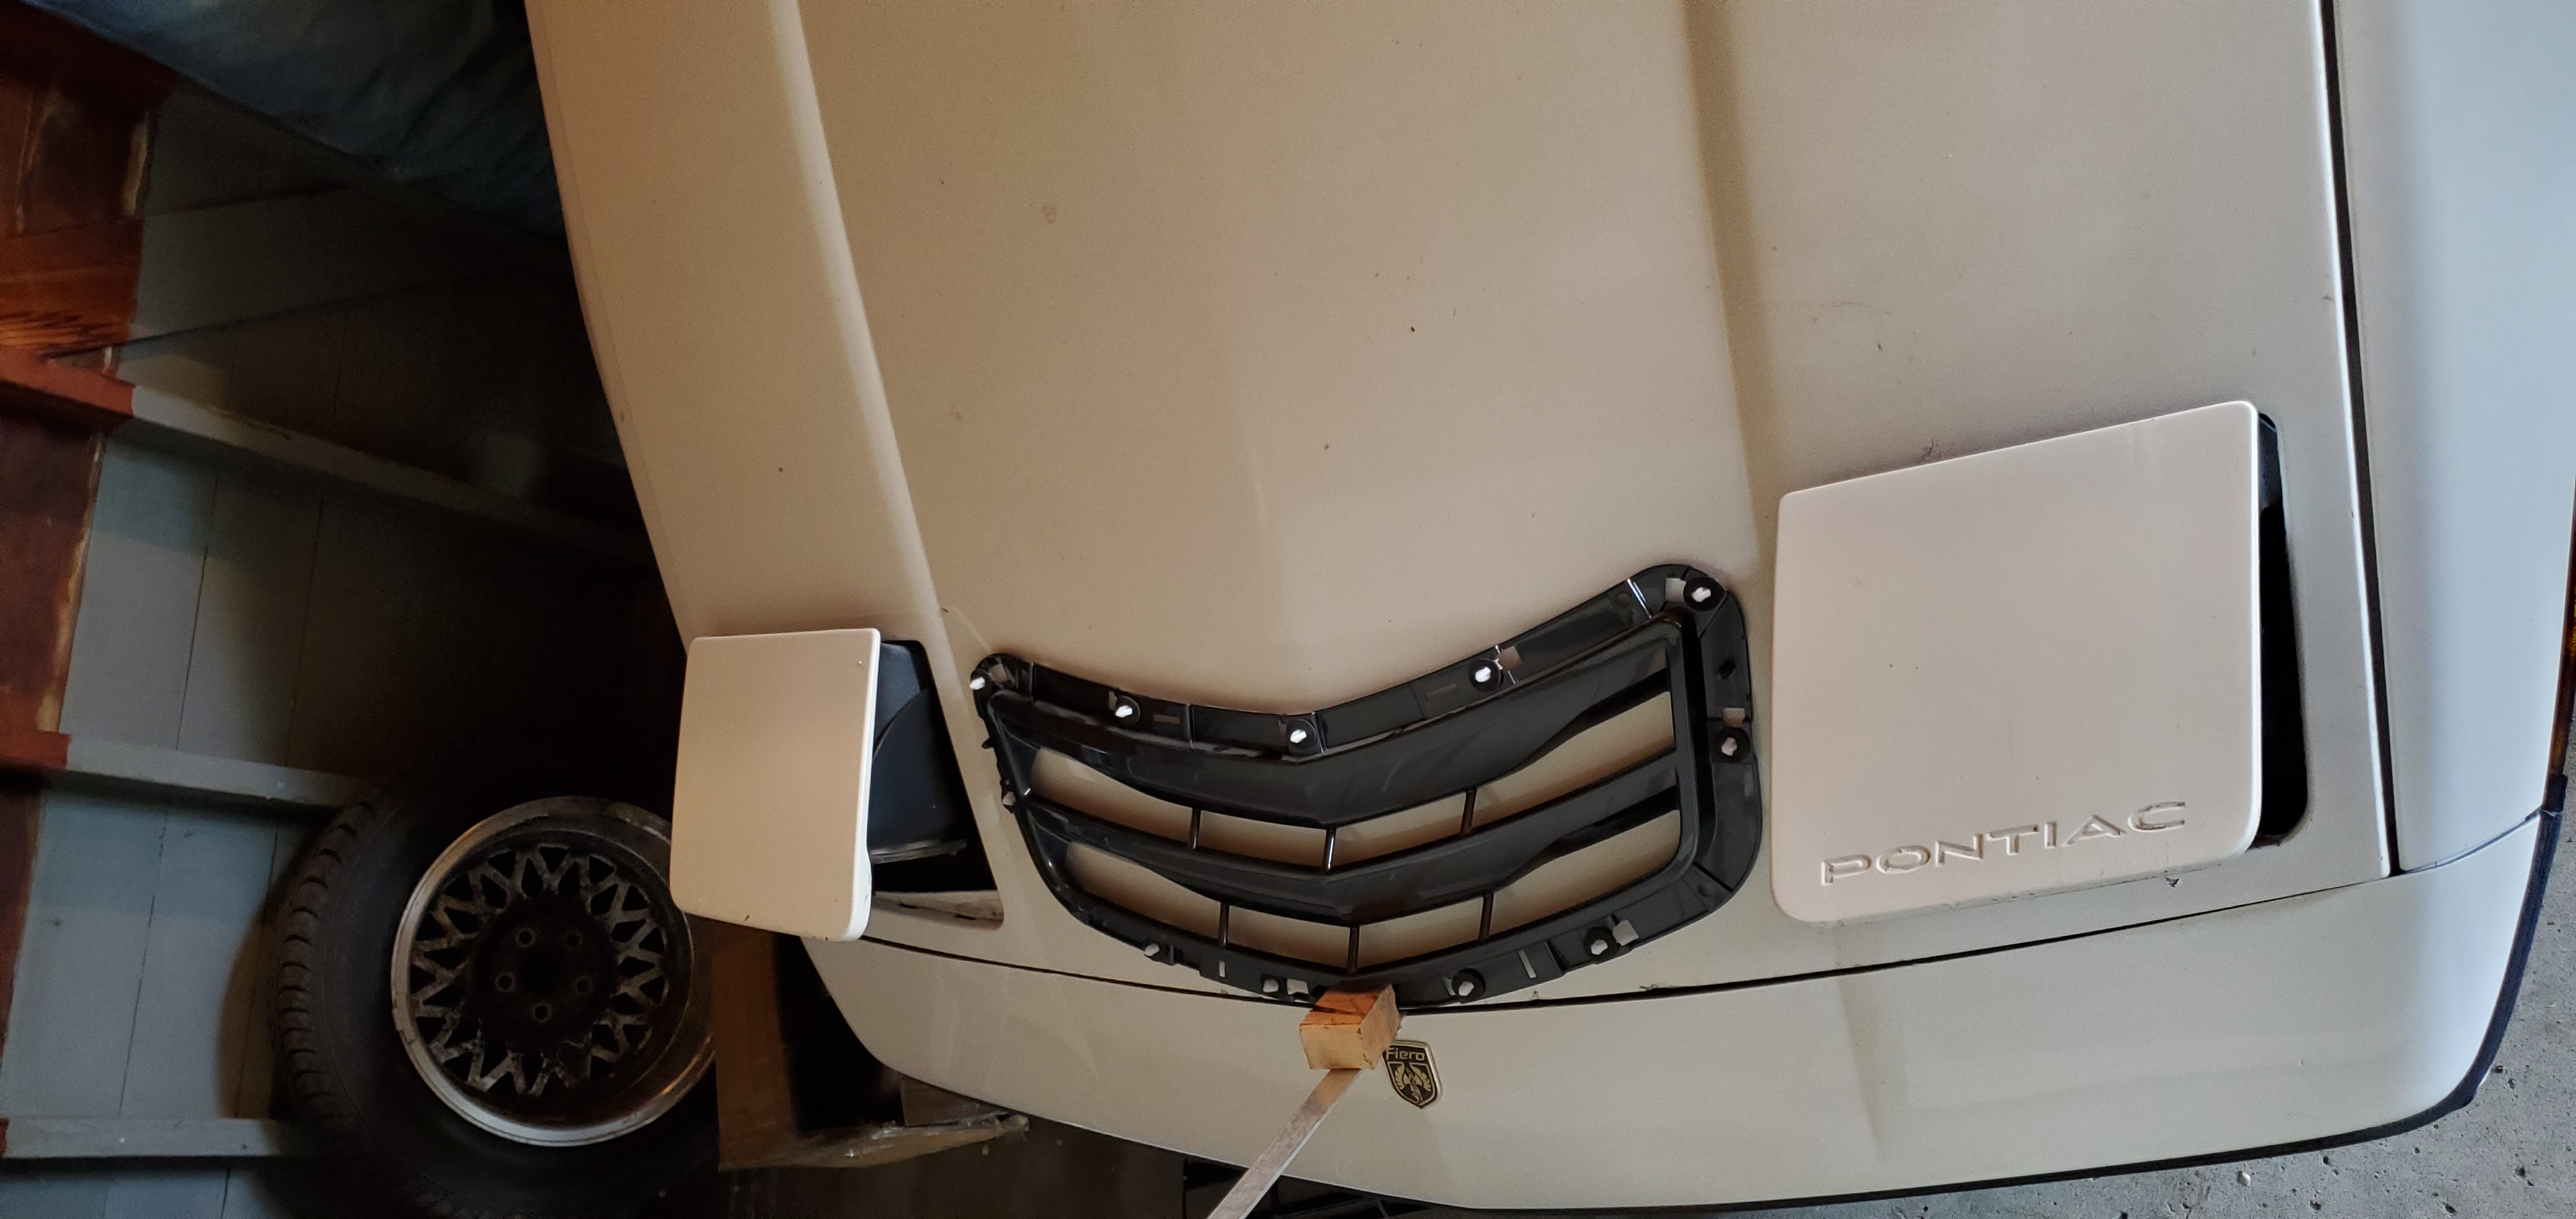
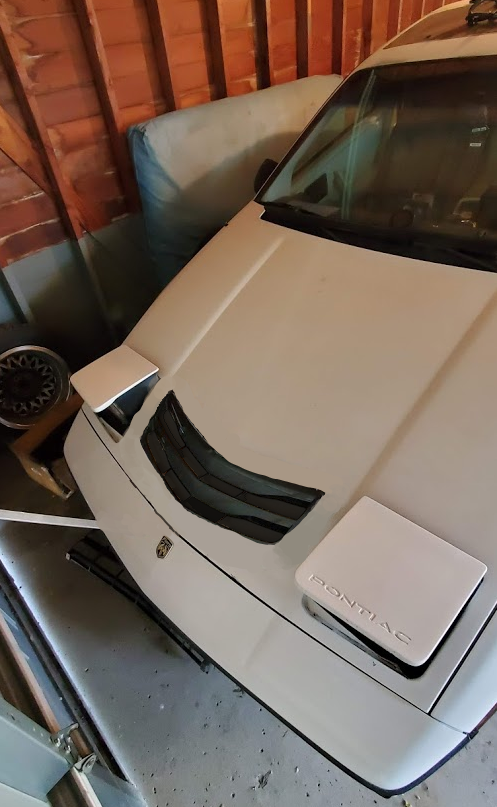
Hood for experimenting with some hood vents for improved air flow through the radiator and prevention of headlight doors popping up.


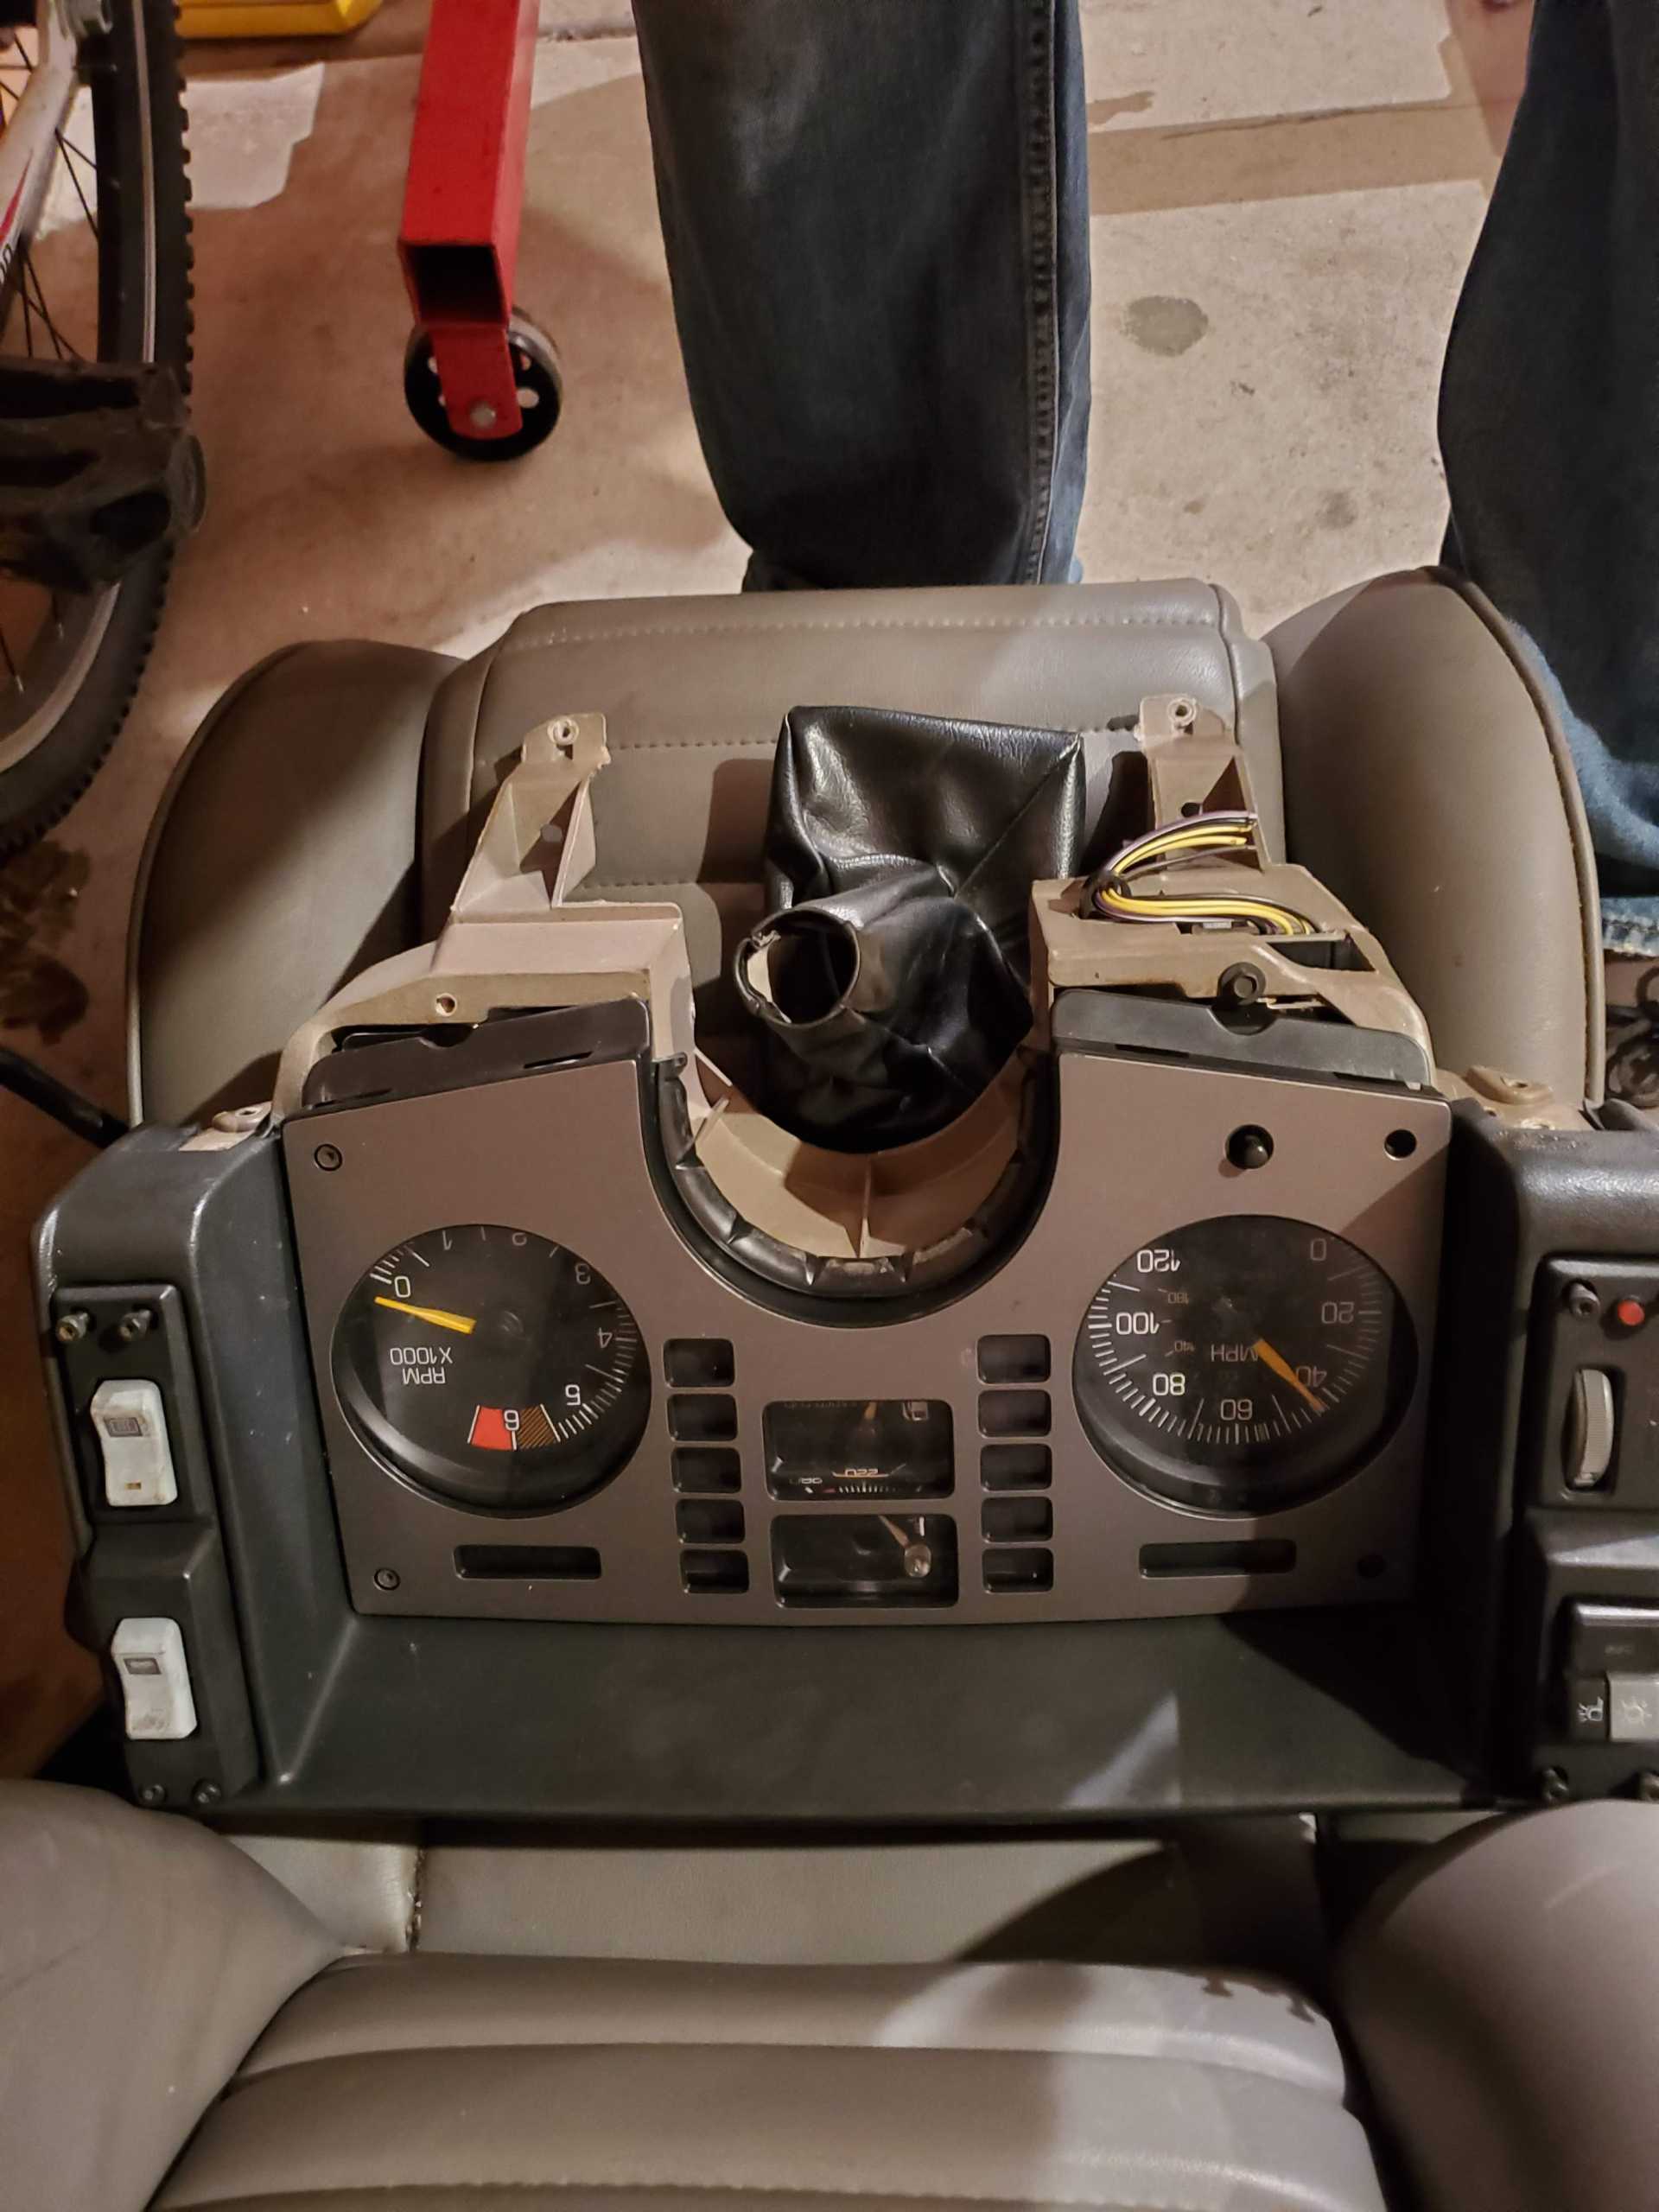
Gauge cluster with 120 speedo, mine is currently cracked around the mounting screws and only 85mph.


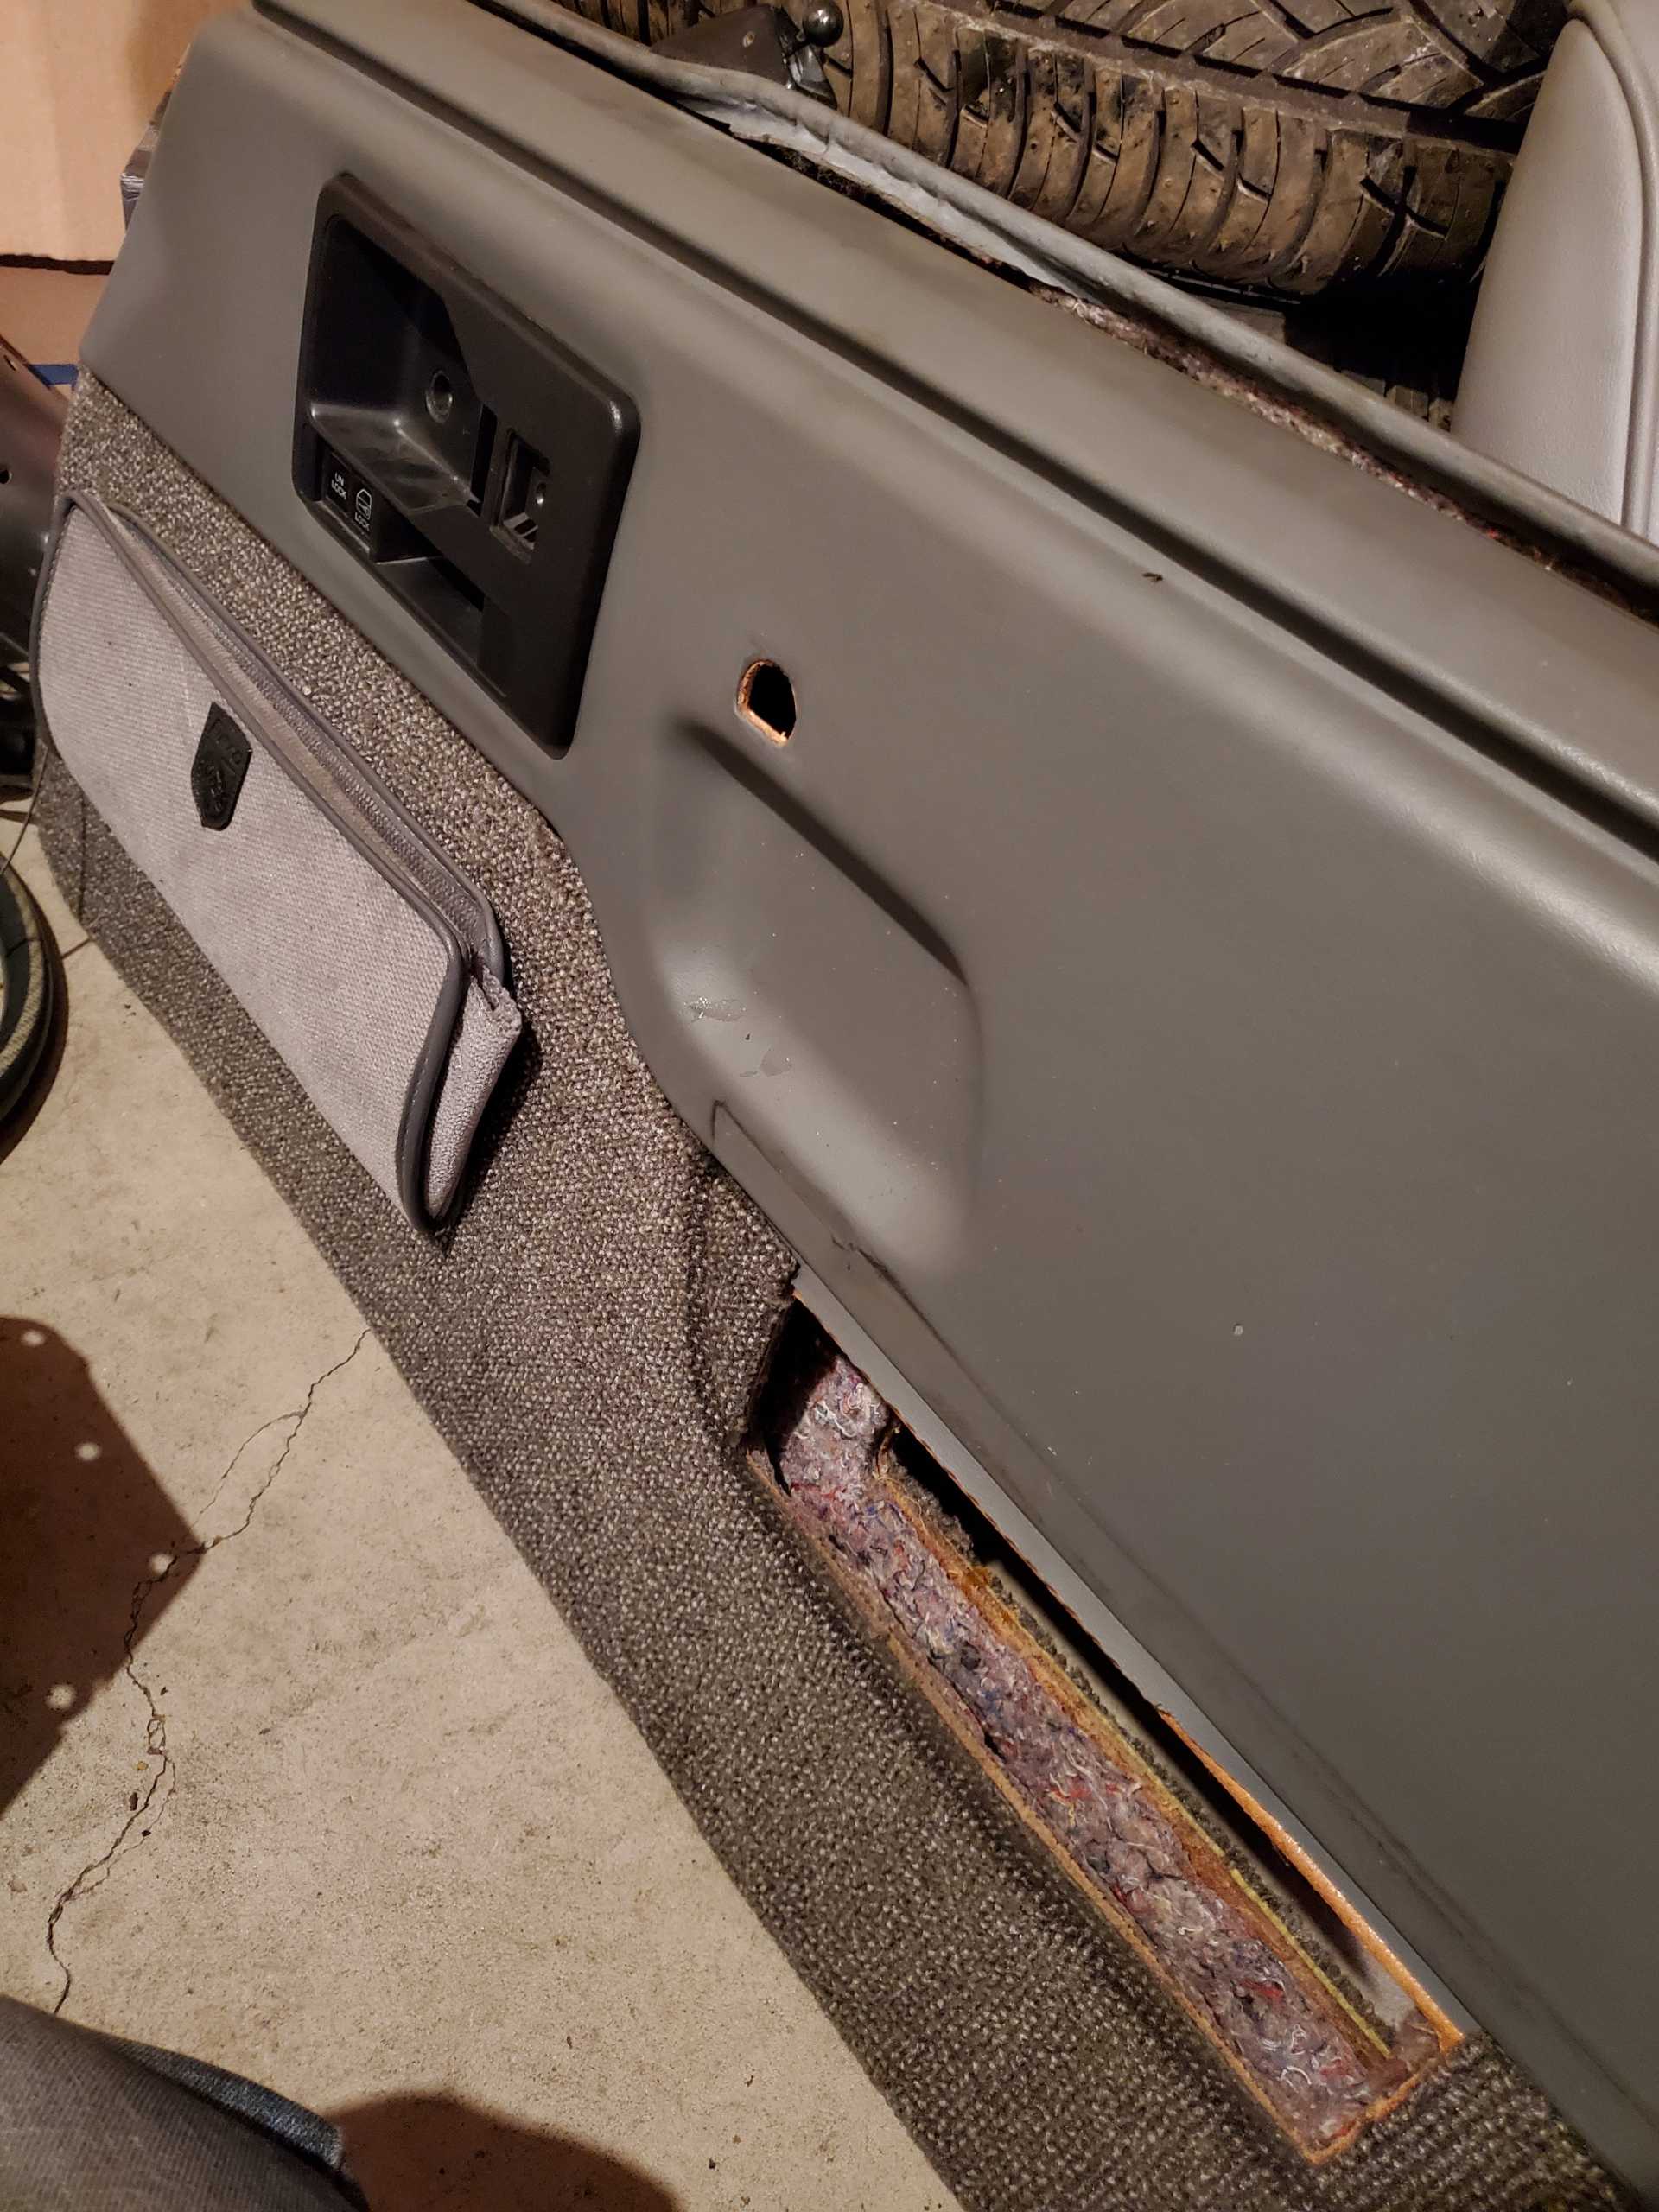
Some nice door panels, got them off before realizing the map pockets cover the spot where the manual window crank comes out so not sure what i am going to do with these.


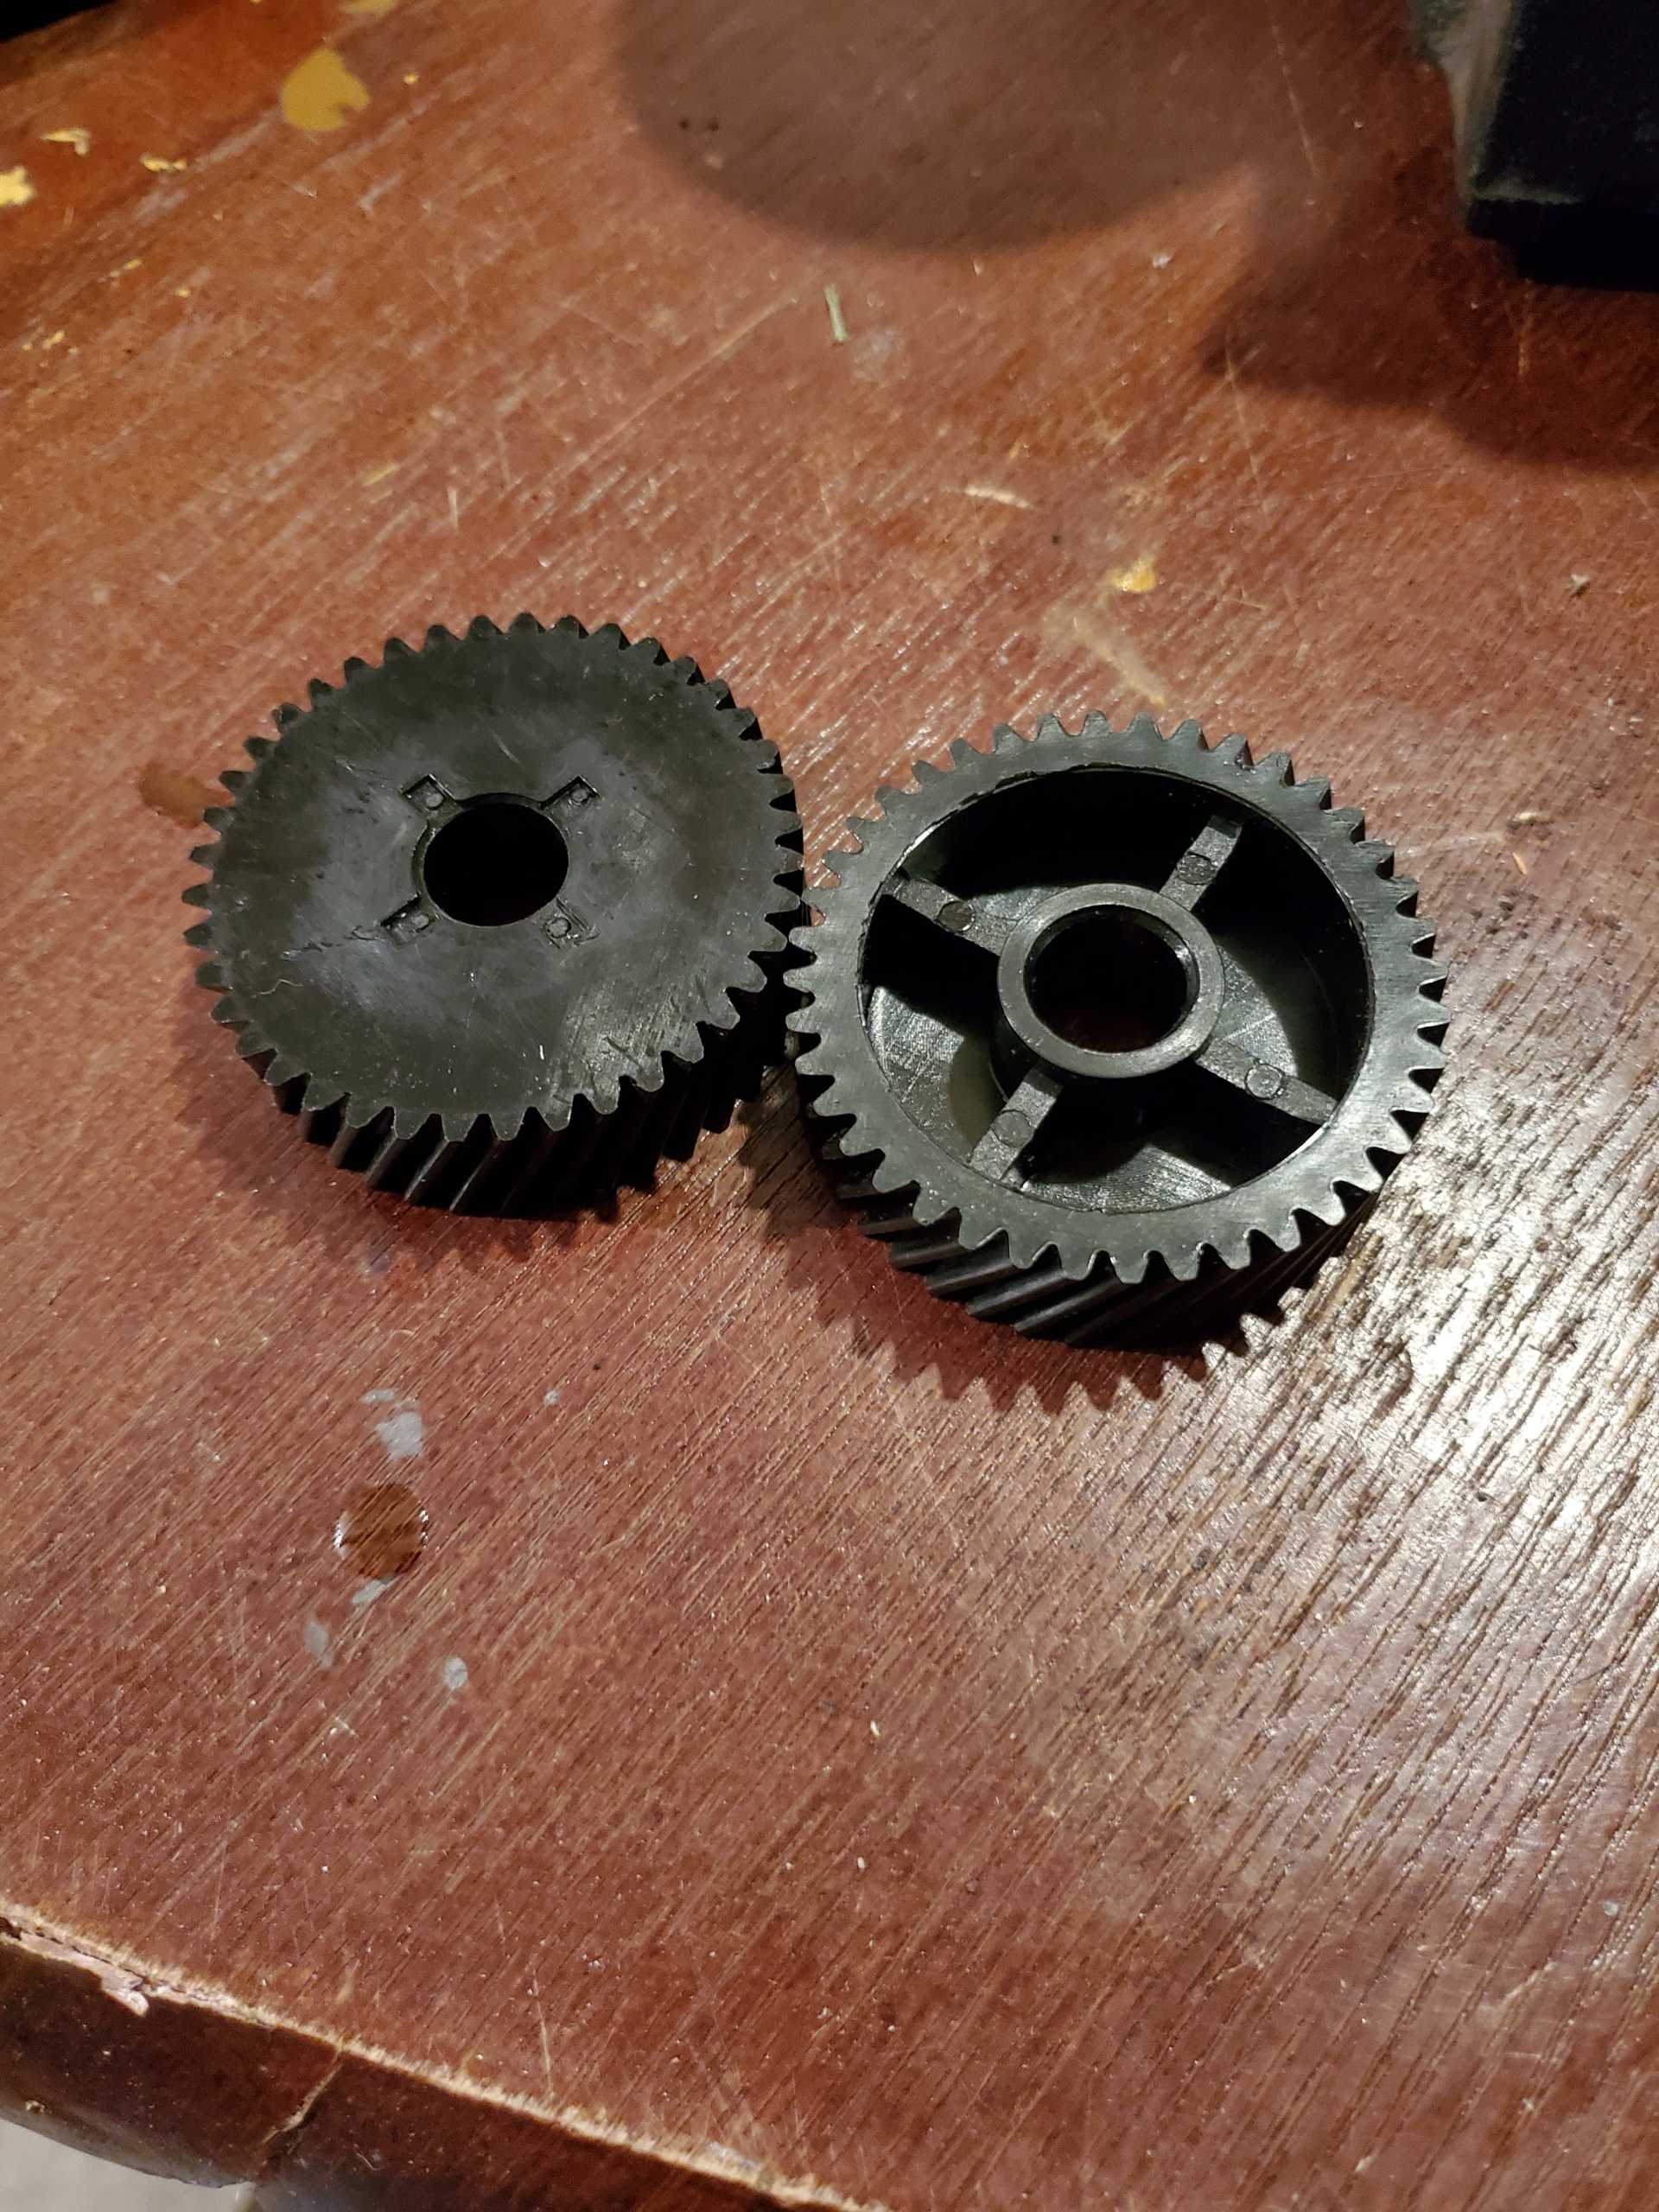
Some headlight motor gears? were just sitting on the floor.


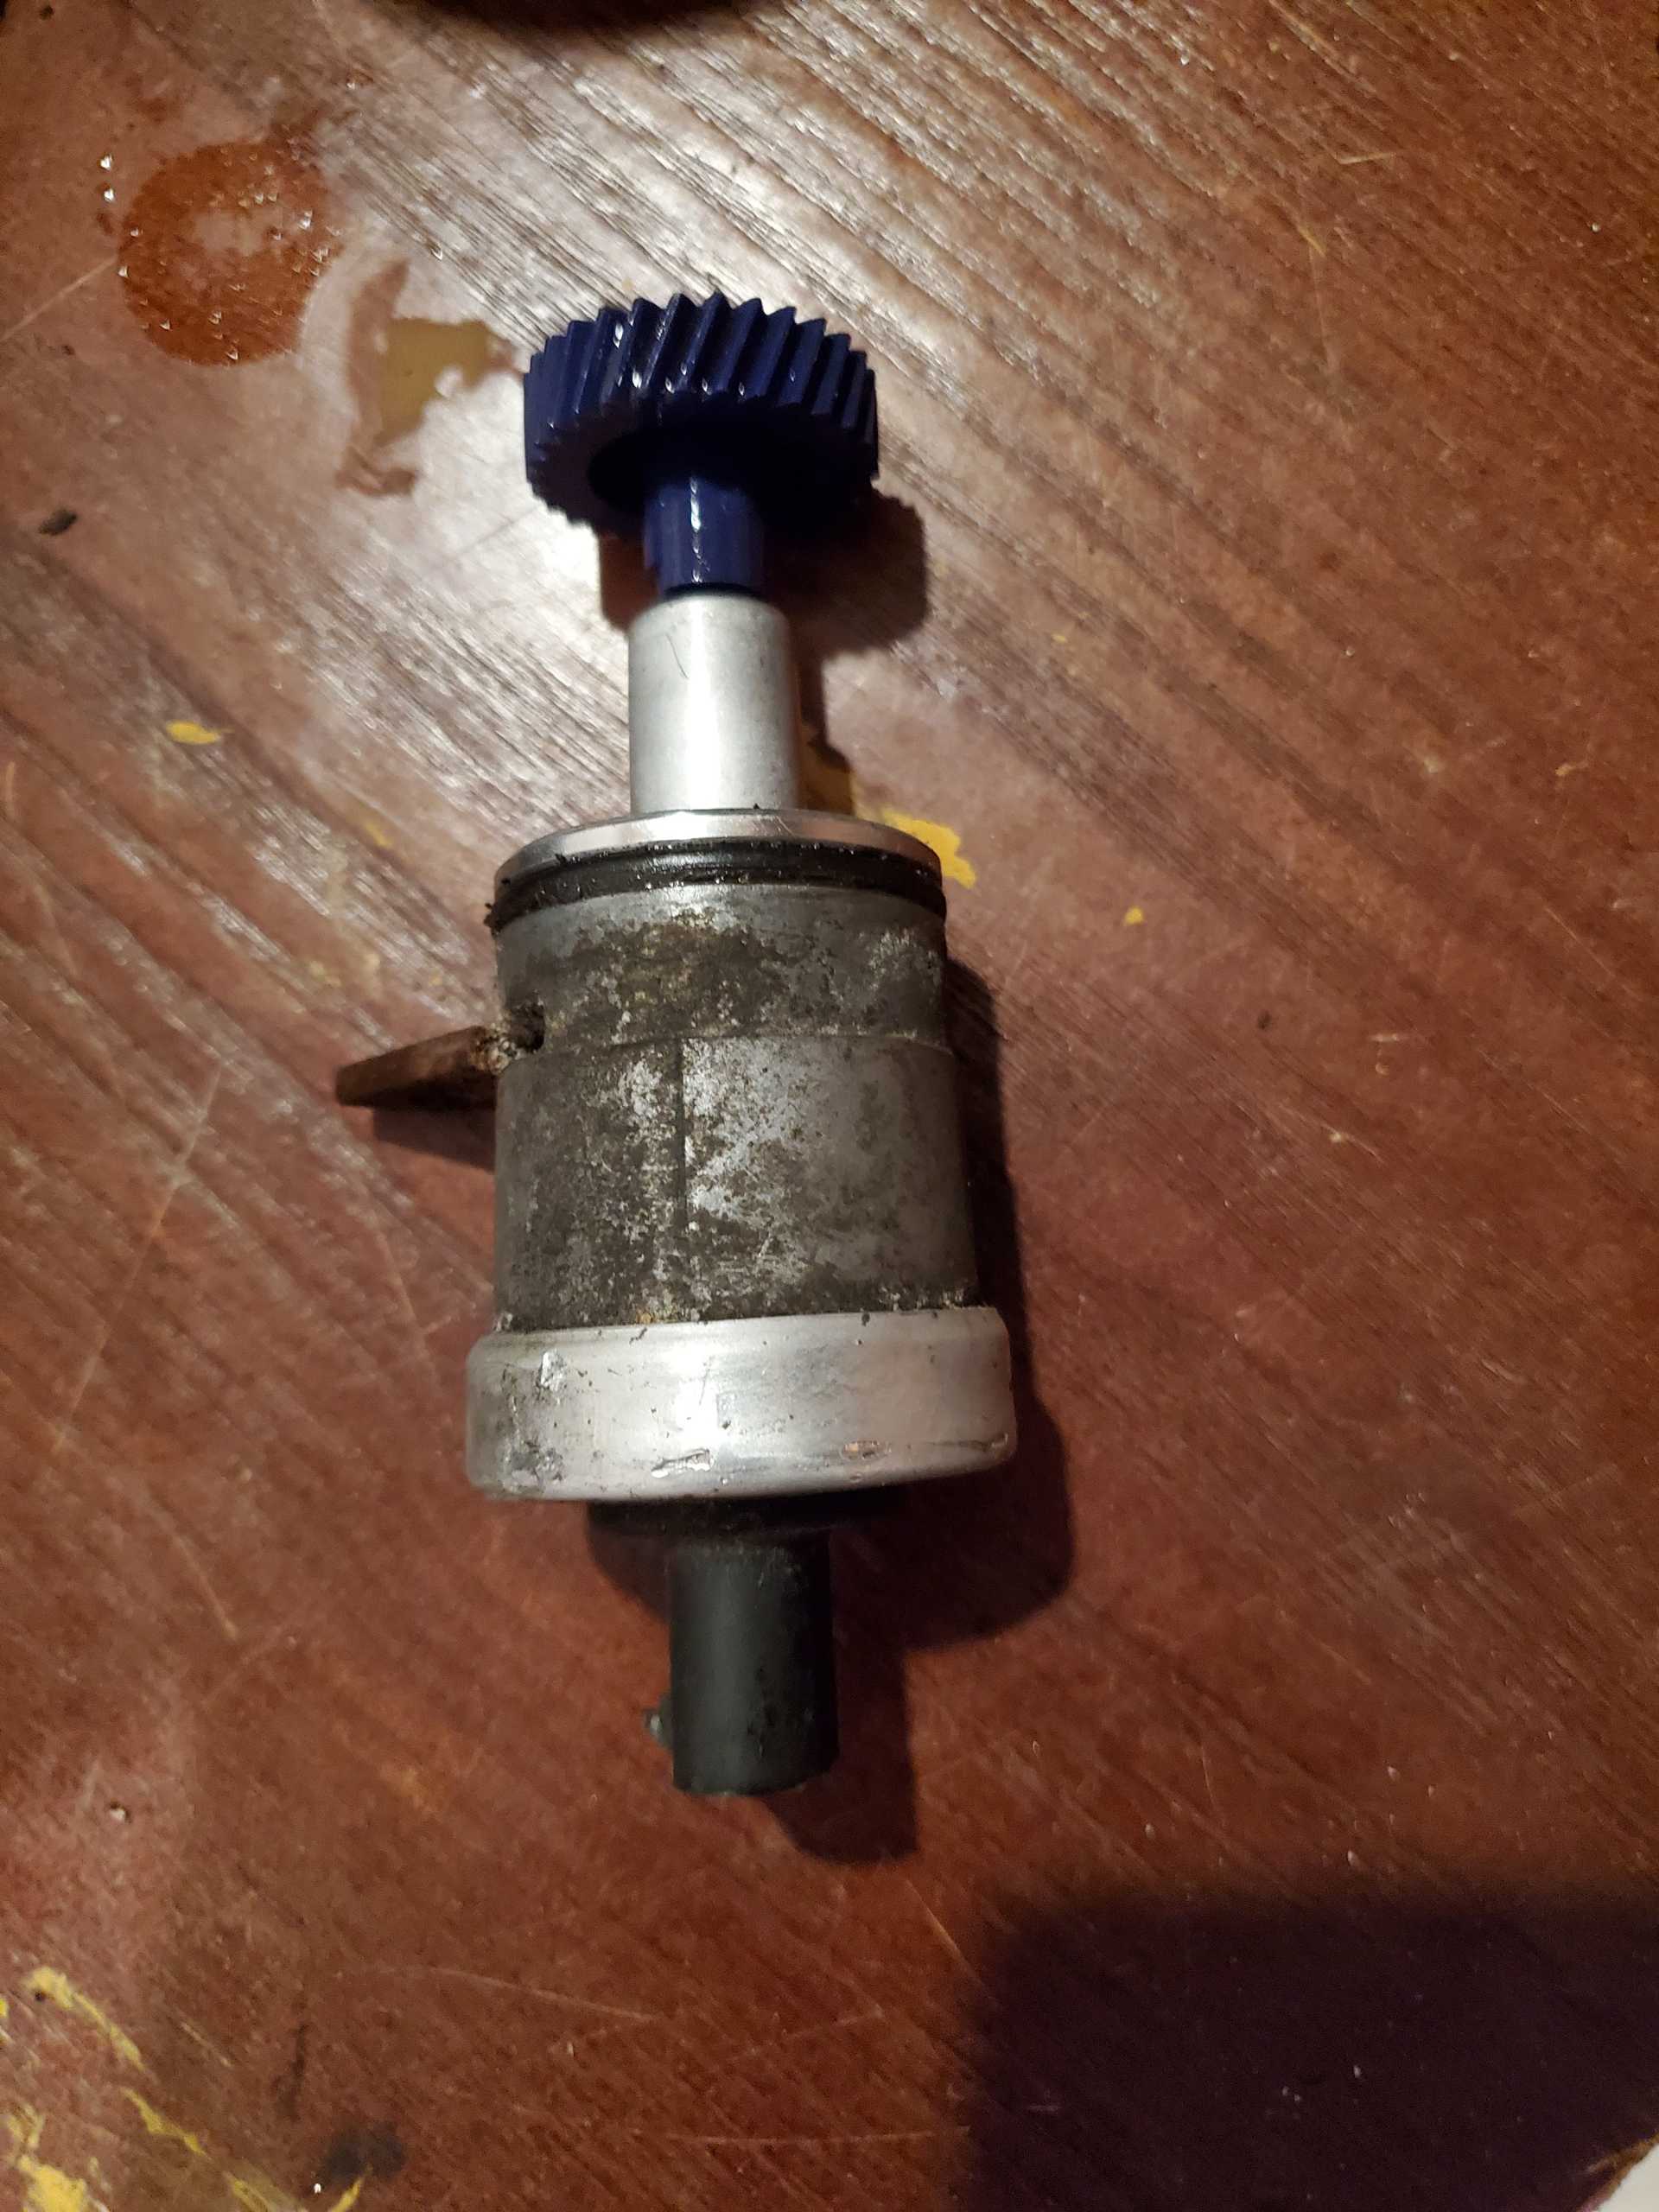
Vehicle speed sensor, mine isn't working.

[This message has been edited by BadNewsBrendan (edited 01-30-2021).]

IP: Logged
BadNewsBrendan
Member
Posts: 273
From: Michigan
Registered: Aug 2018


Feedback score: N/A
Leave feedback

Rate this member

Report this Post01-30-2021 06:27 PM Click Here to See the Profile for BadNewsBrendanSend a Private Message to BadNewsBrendanEdit/Delete MessageReply w/QuoteDirect Link to This Post

BadNewsBrendan

273 posts
Member since Aug 2018
Also anyone have ideas what that seat came out of? Saw it sitting on the ground and looked like it would be nice for a racing sim seat
IP: Logged
rbell2915
Member
Posts: 1437
From: Kenly, NC
Registered: Mar 2013


Feedback score:    (10)
Leave feedback

Rate this member

Report this Post02-14-2021 06:48 AM Click Here to See the Profile for rbell2915Send a Private Message to rbell2915Edit/Delete MessageReply w/QuoteDirect Link to This Post
Got a better pic of the seat?

I'm going to a yard next weekend to pick up some parts for my gauge cluster build. Hopefully I have as much luck as you did.
IP: Logged
BadNewsBrendan
Member
Posts: 273
From: Michigan
Registered: Aug 2018


Feedback score: N/A
Leave feedback

Rate this member

Report this Post02-20-2021 01:26 AM Click Here to See the Profile for BadNewsBrendanSend a Private Message to BadNewsBrendanEdit/Delete MessageReply w/QuoteDirect Link to This Post
Just checked out your cluster build thread rbell2915, looks sick! will have to get another pic of the seat this weekend.

Going to try and get the NIC cam and double roller chain installed this weekend, maybe more if i don't freeze first.


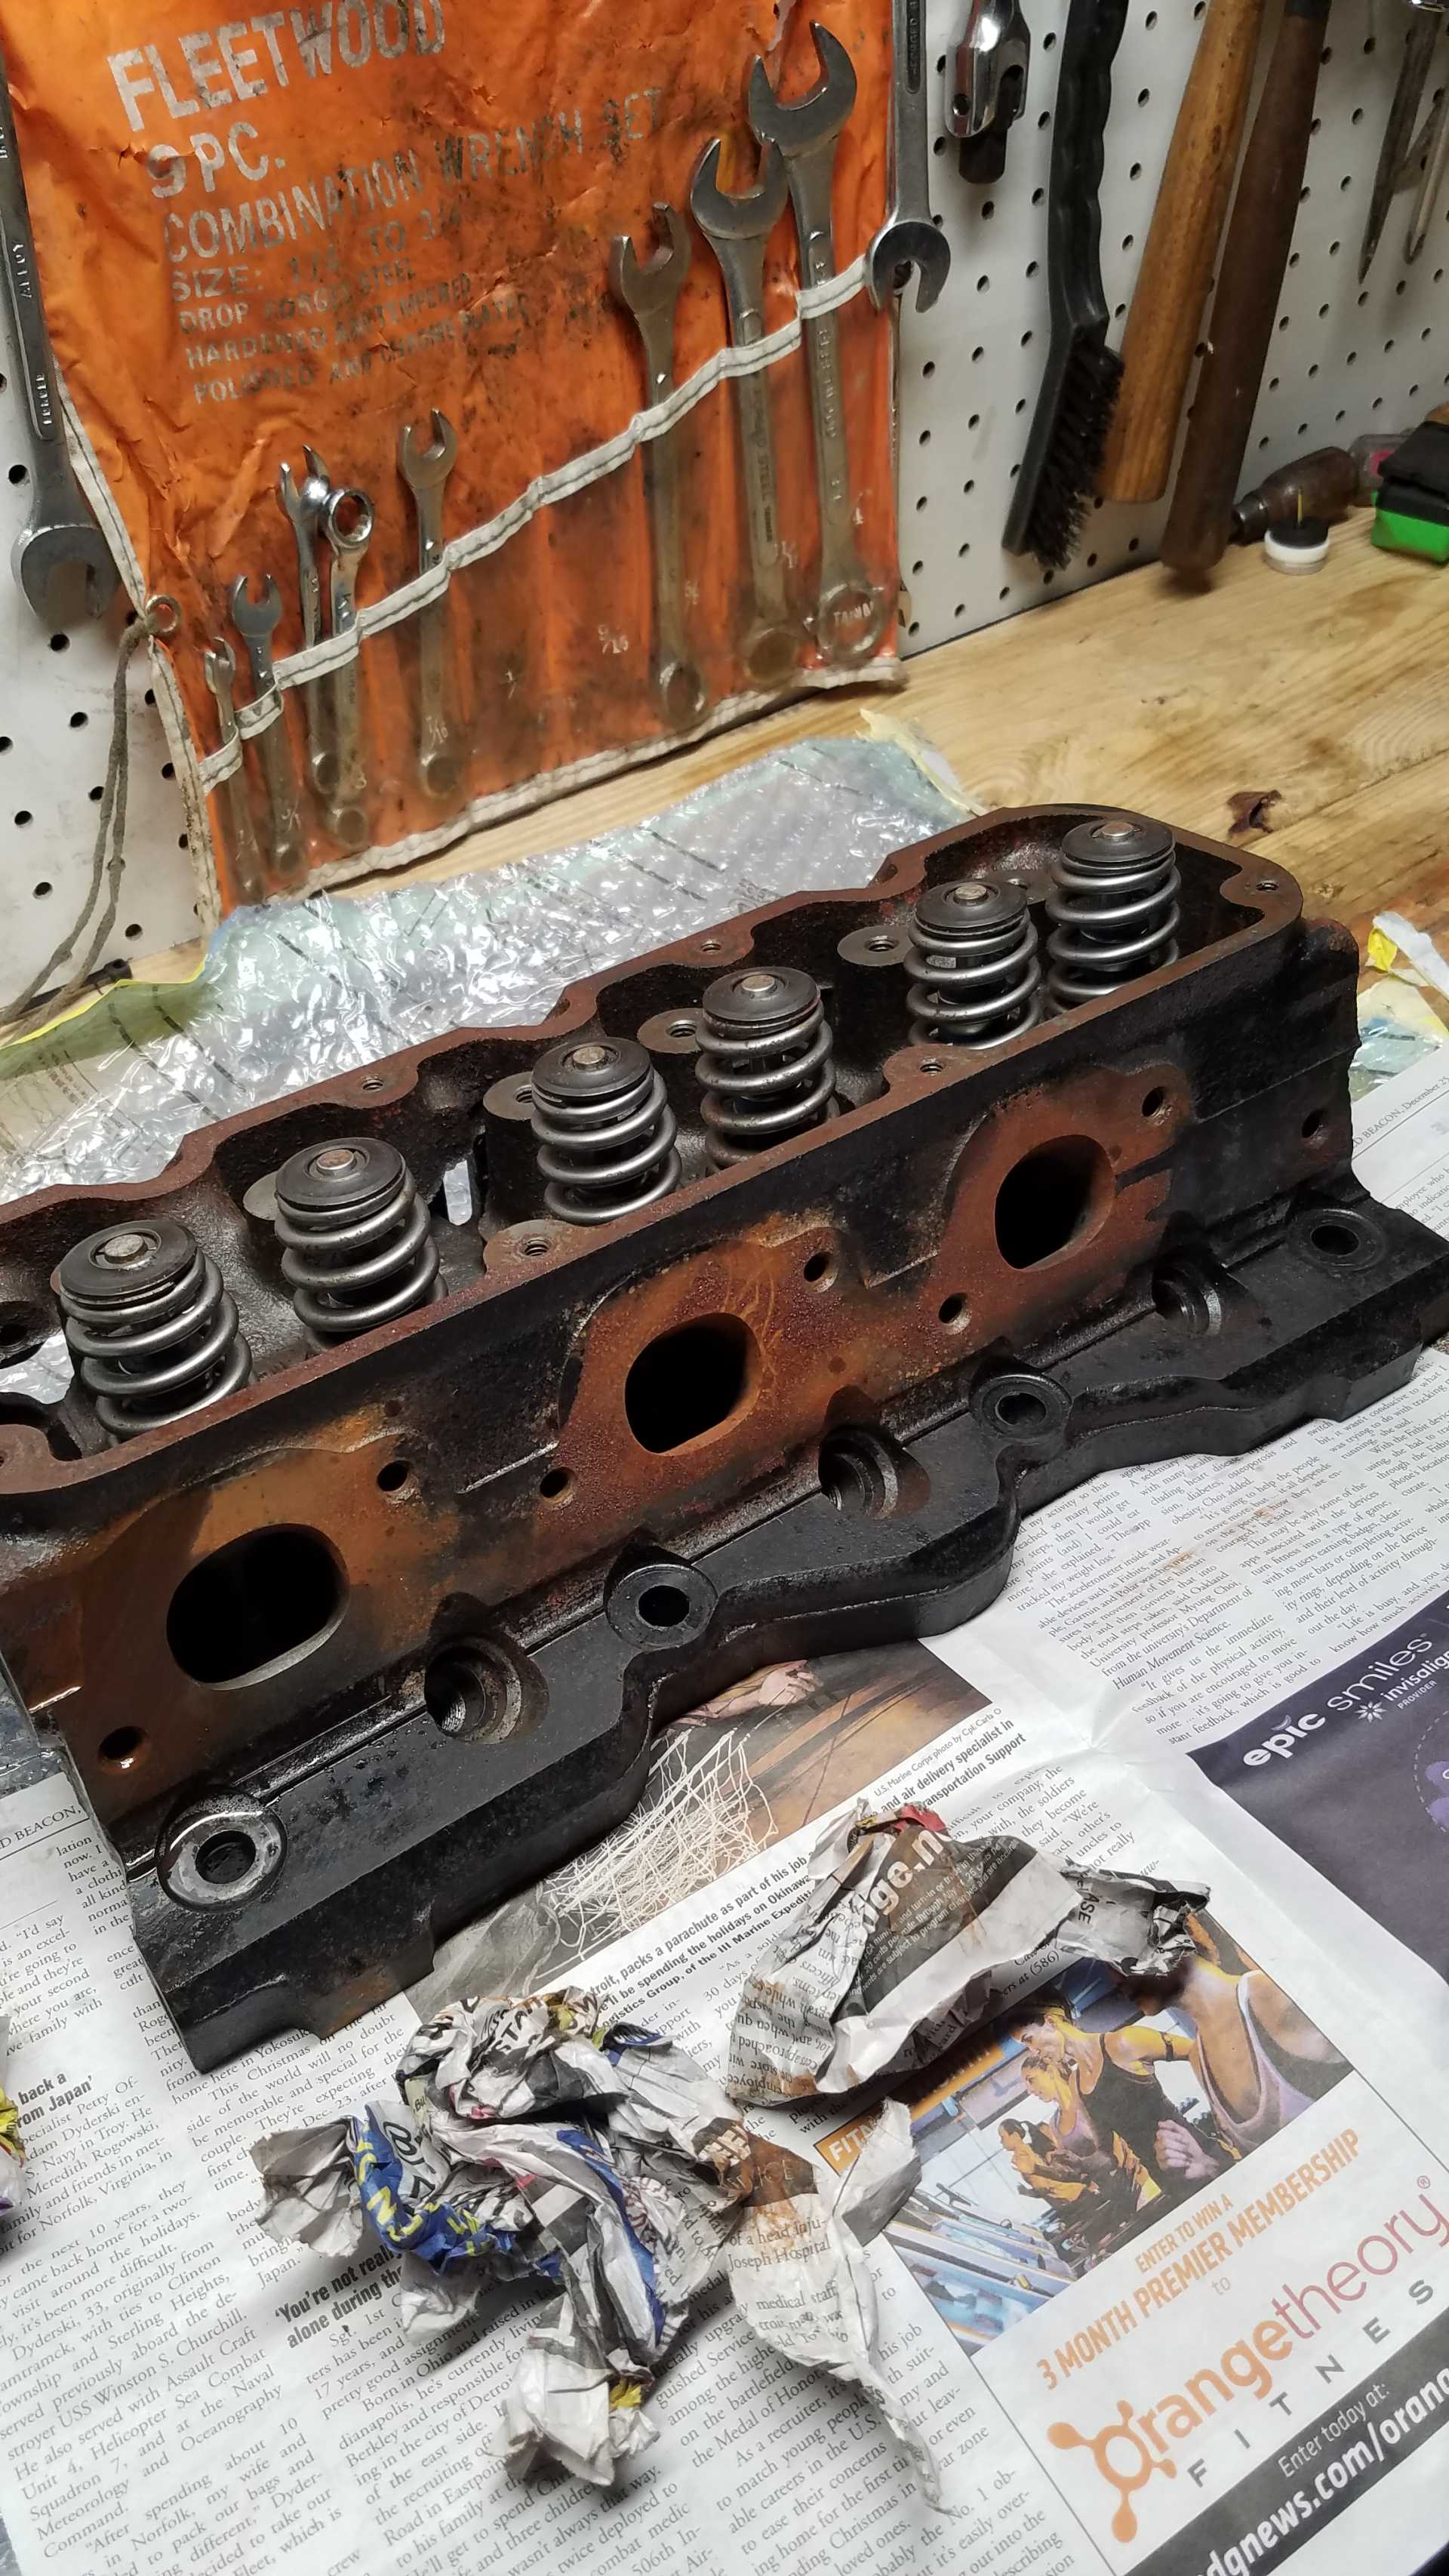
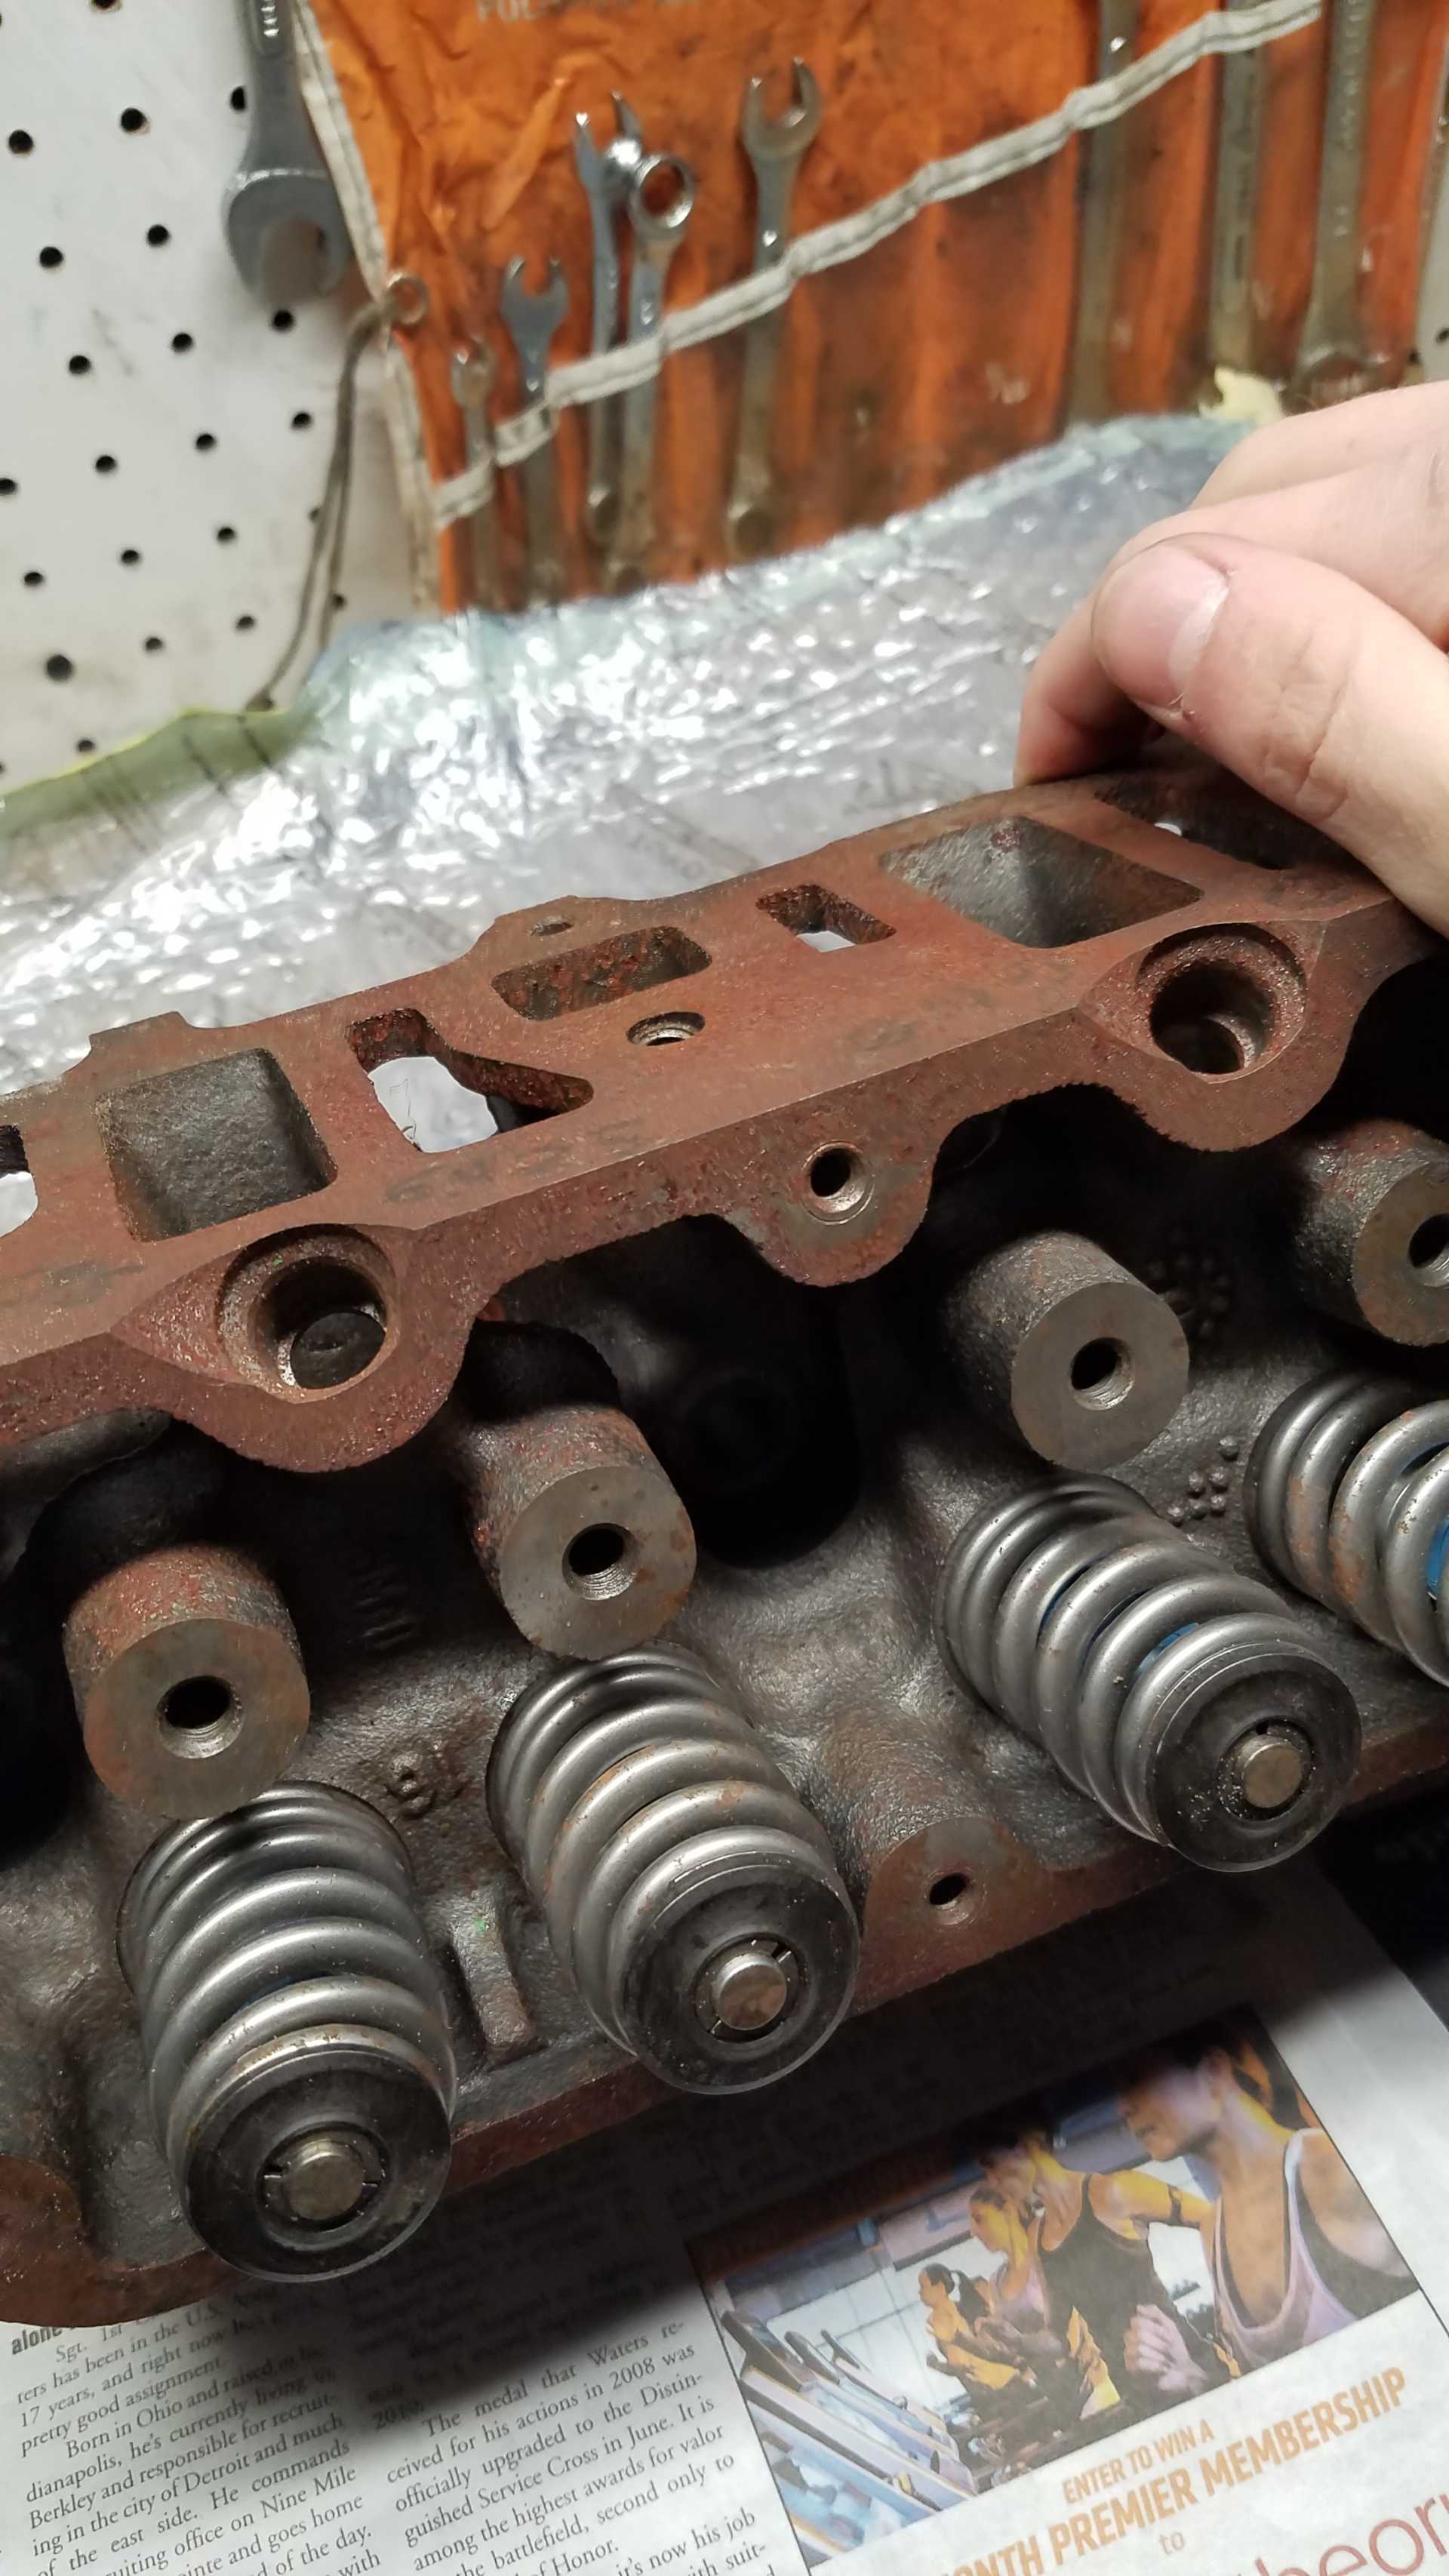
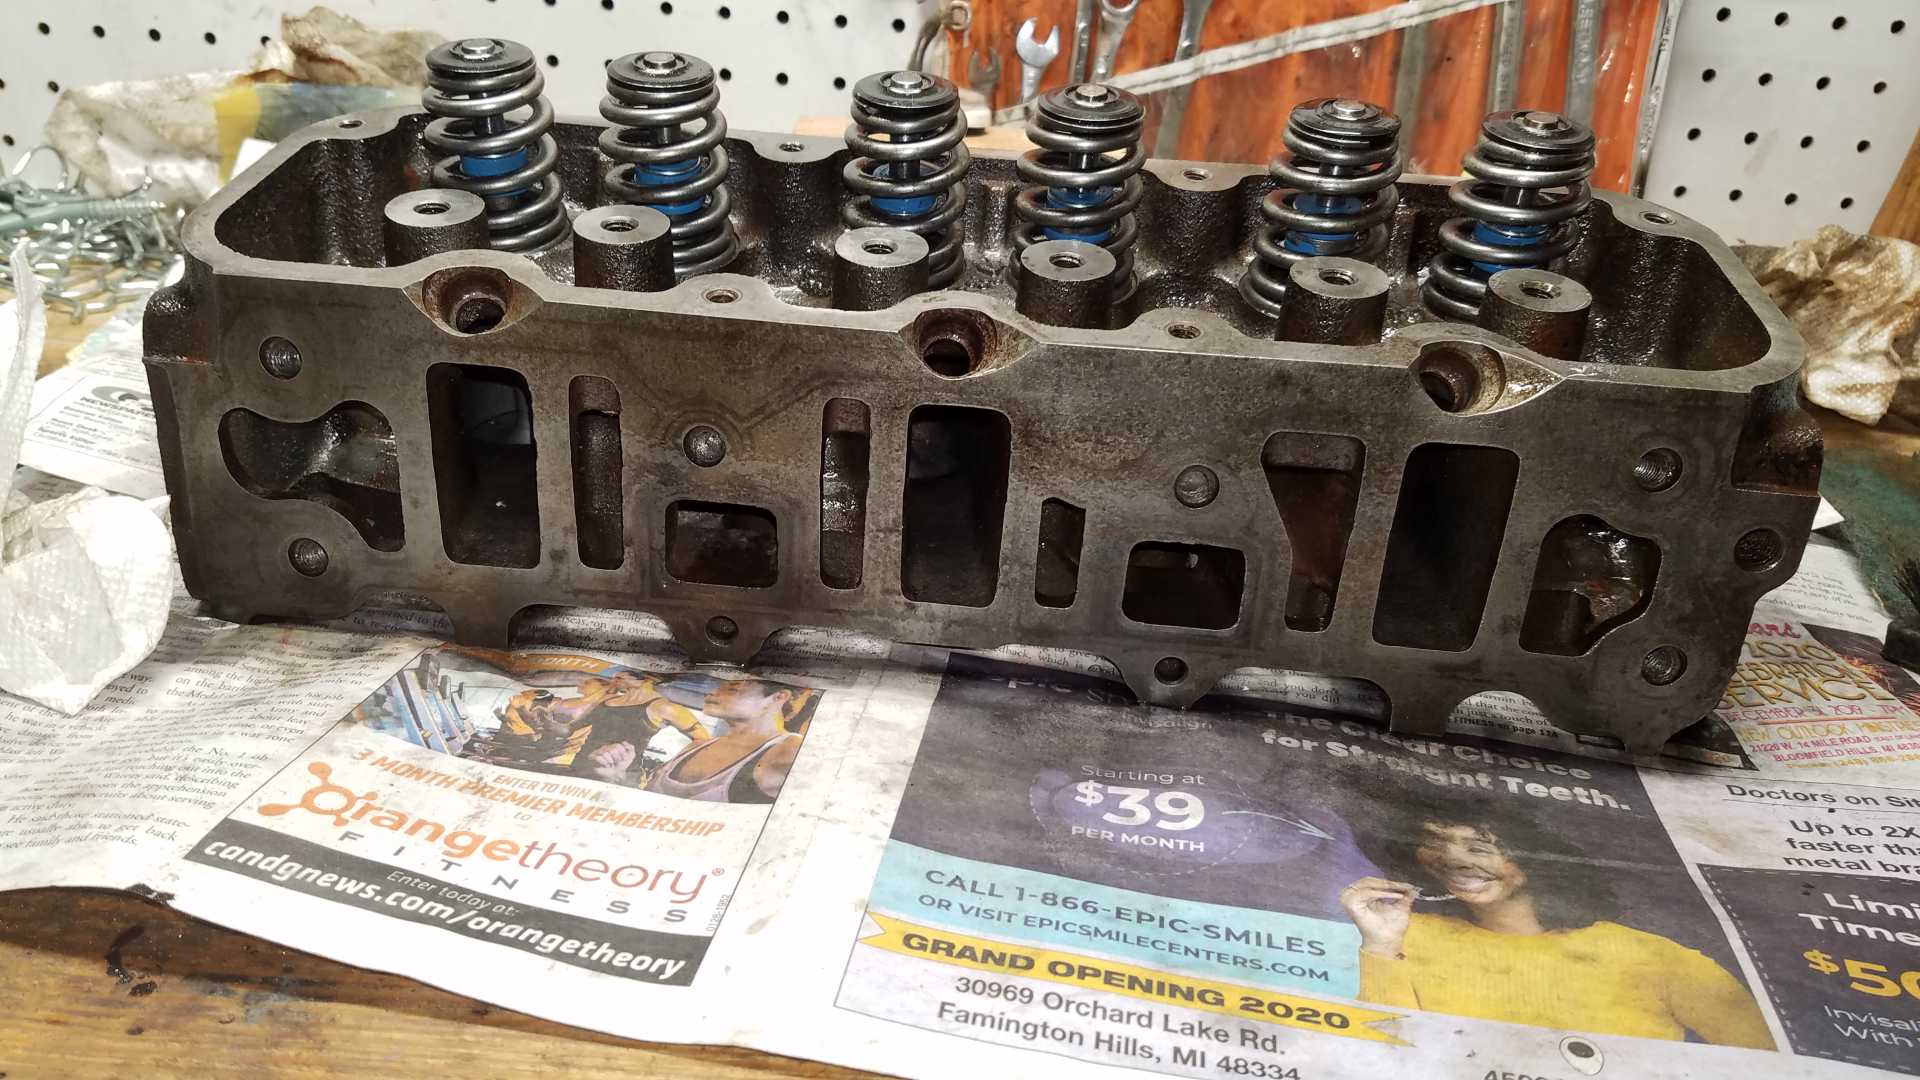
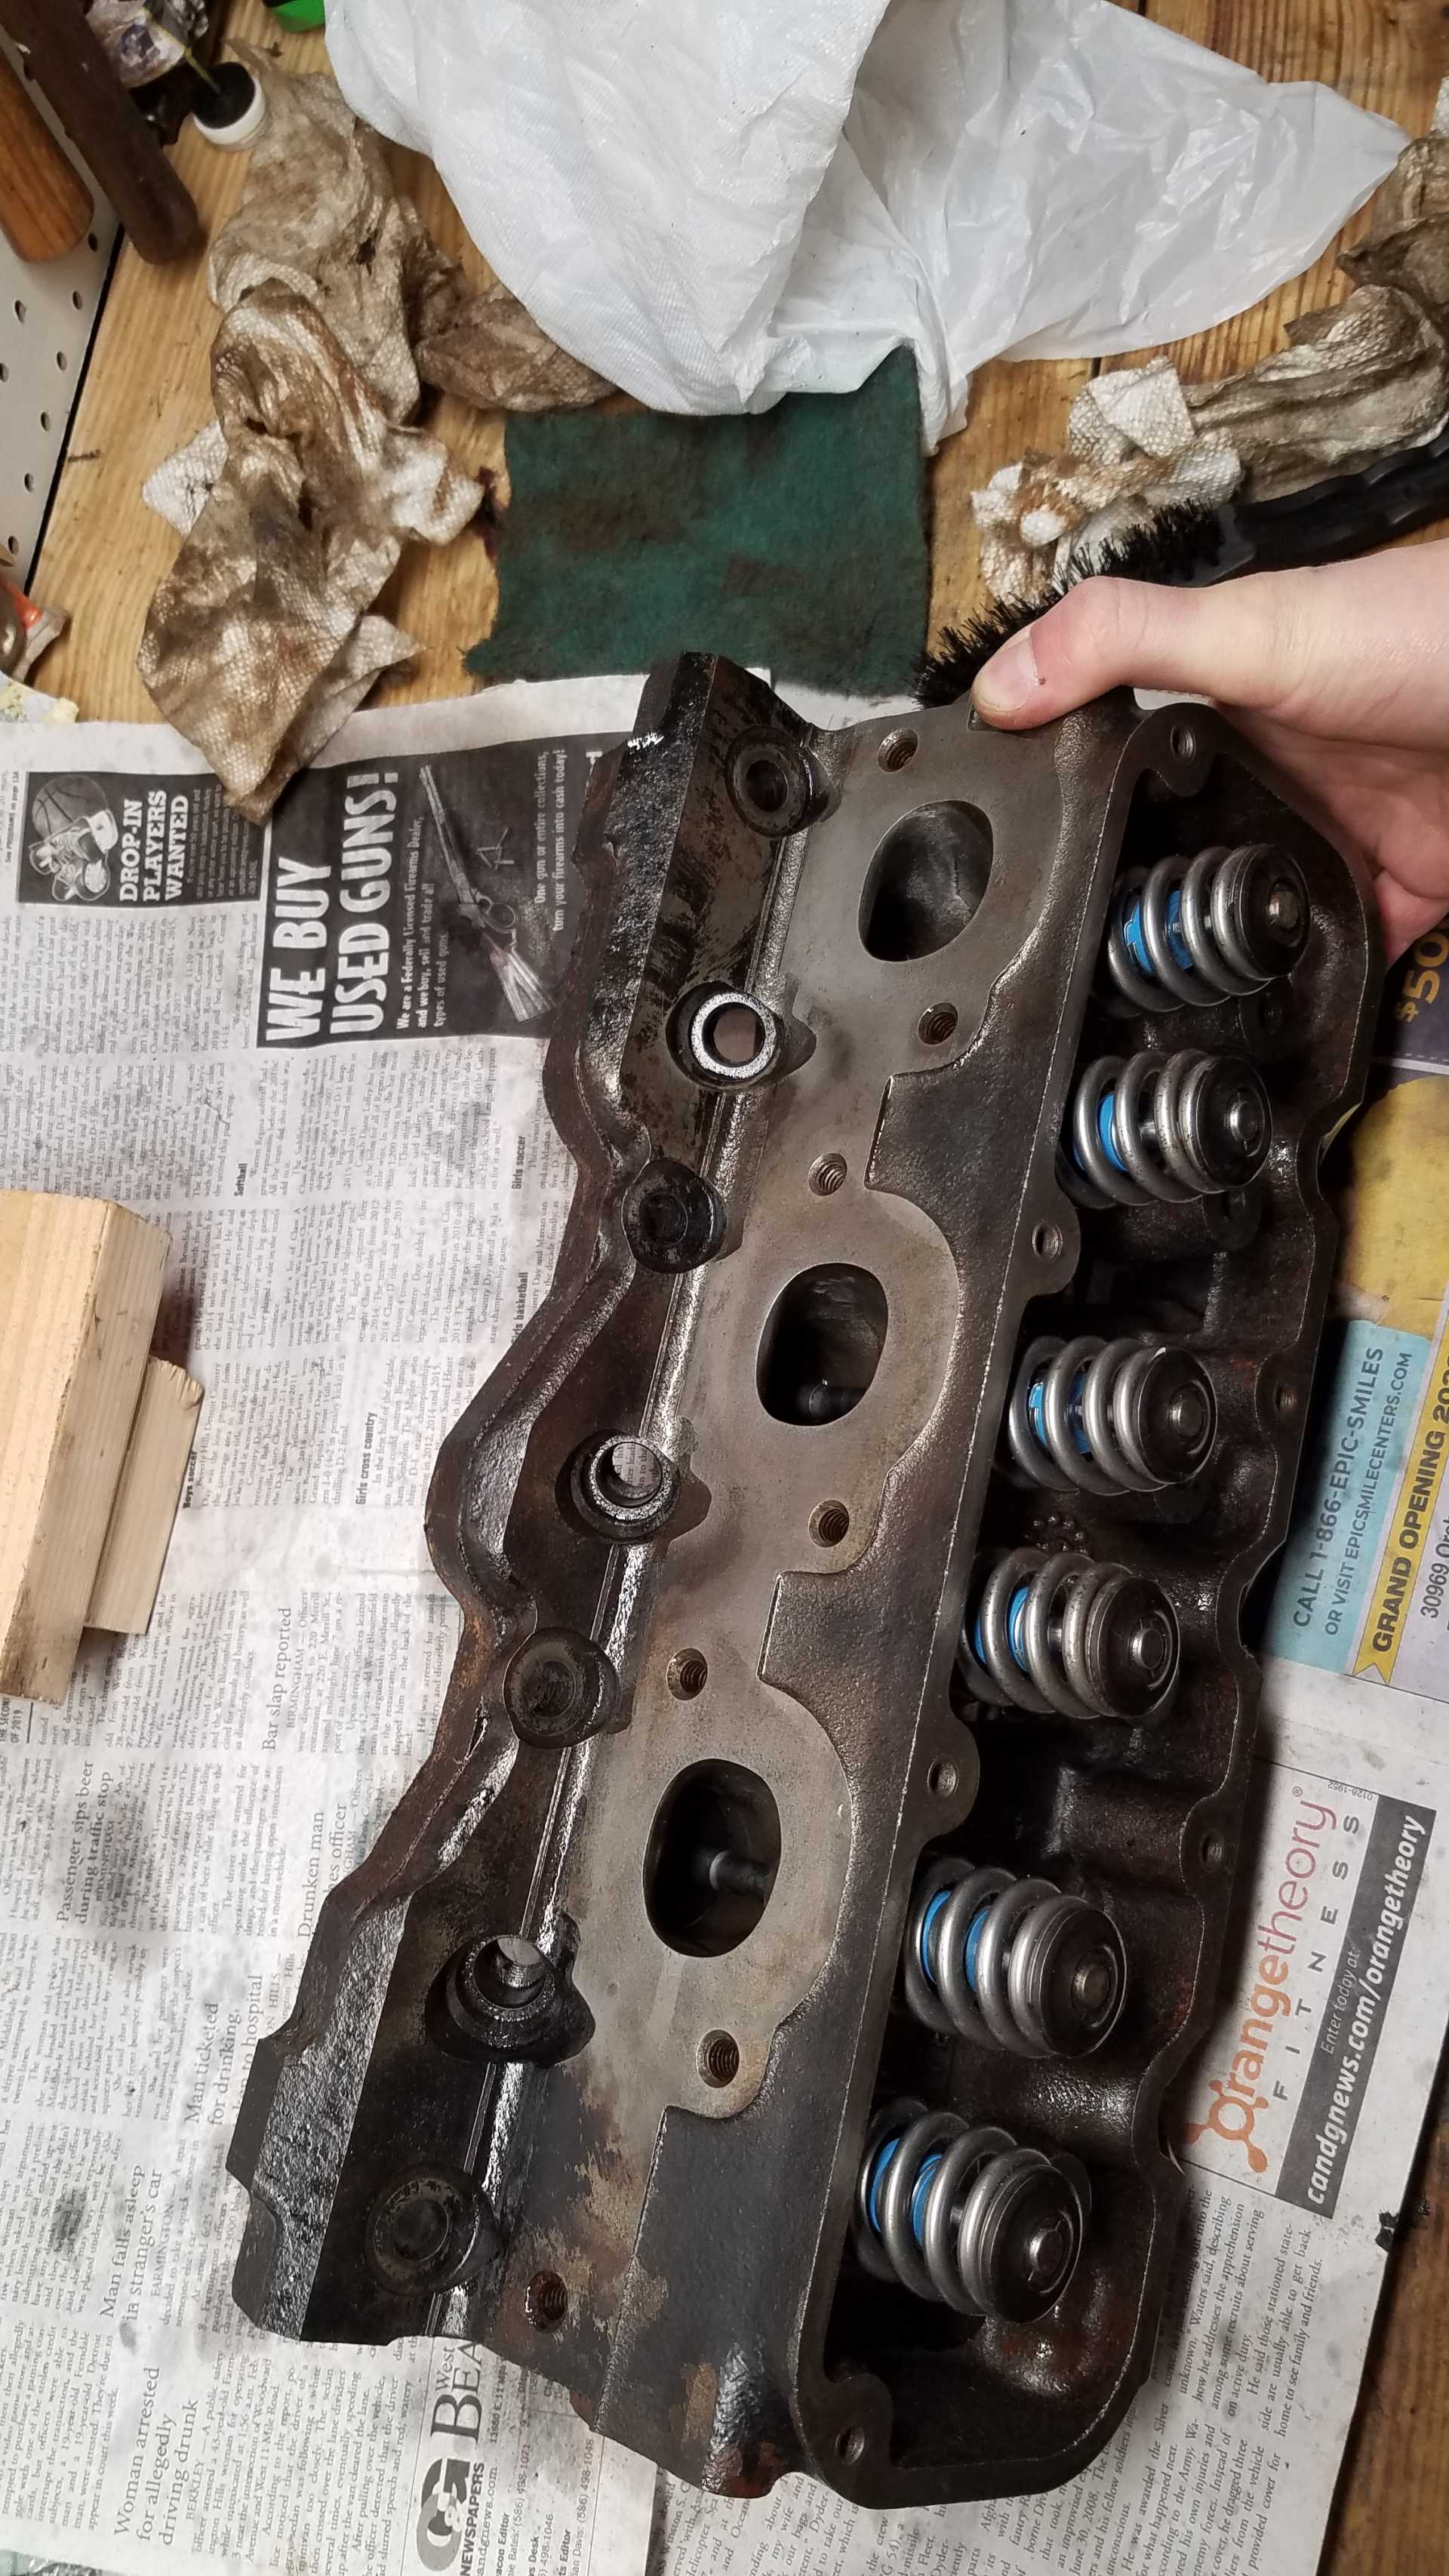
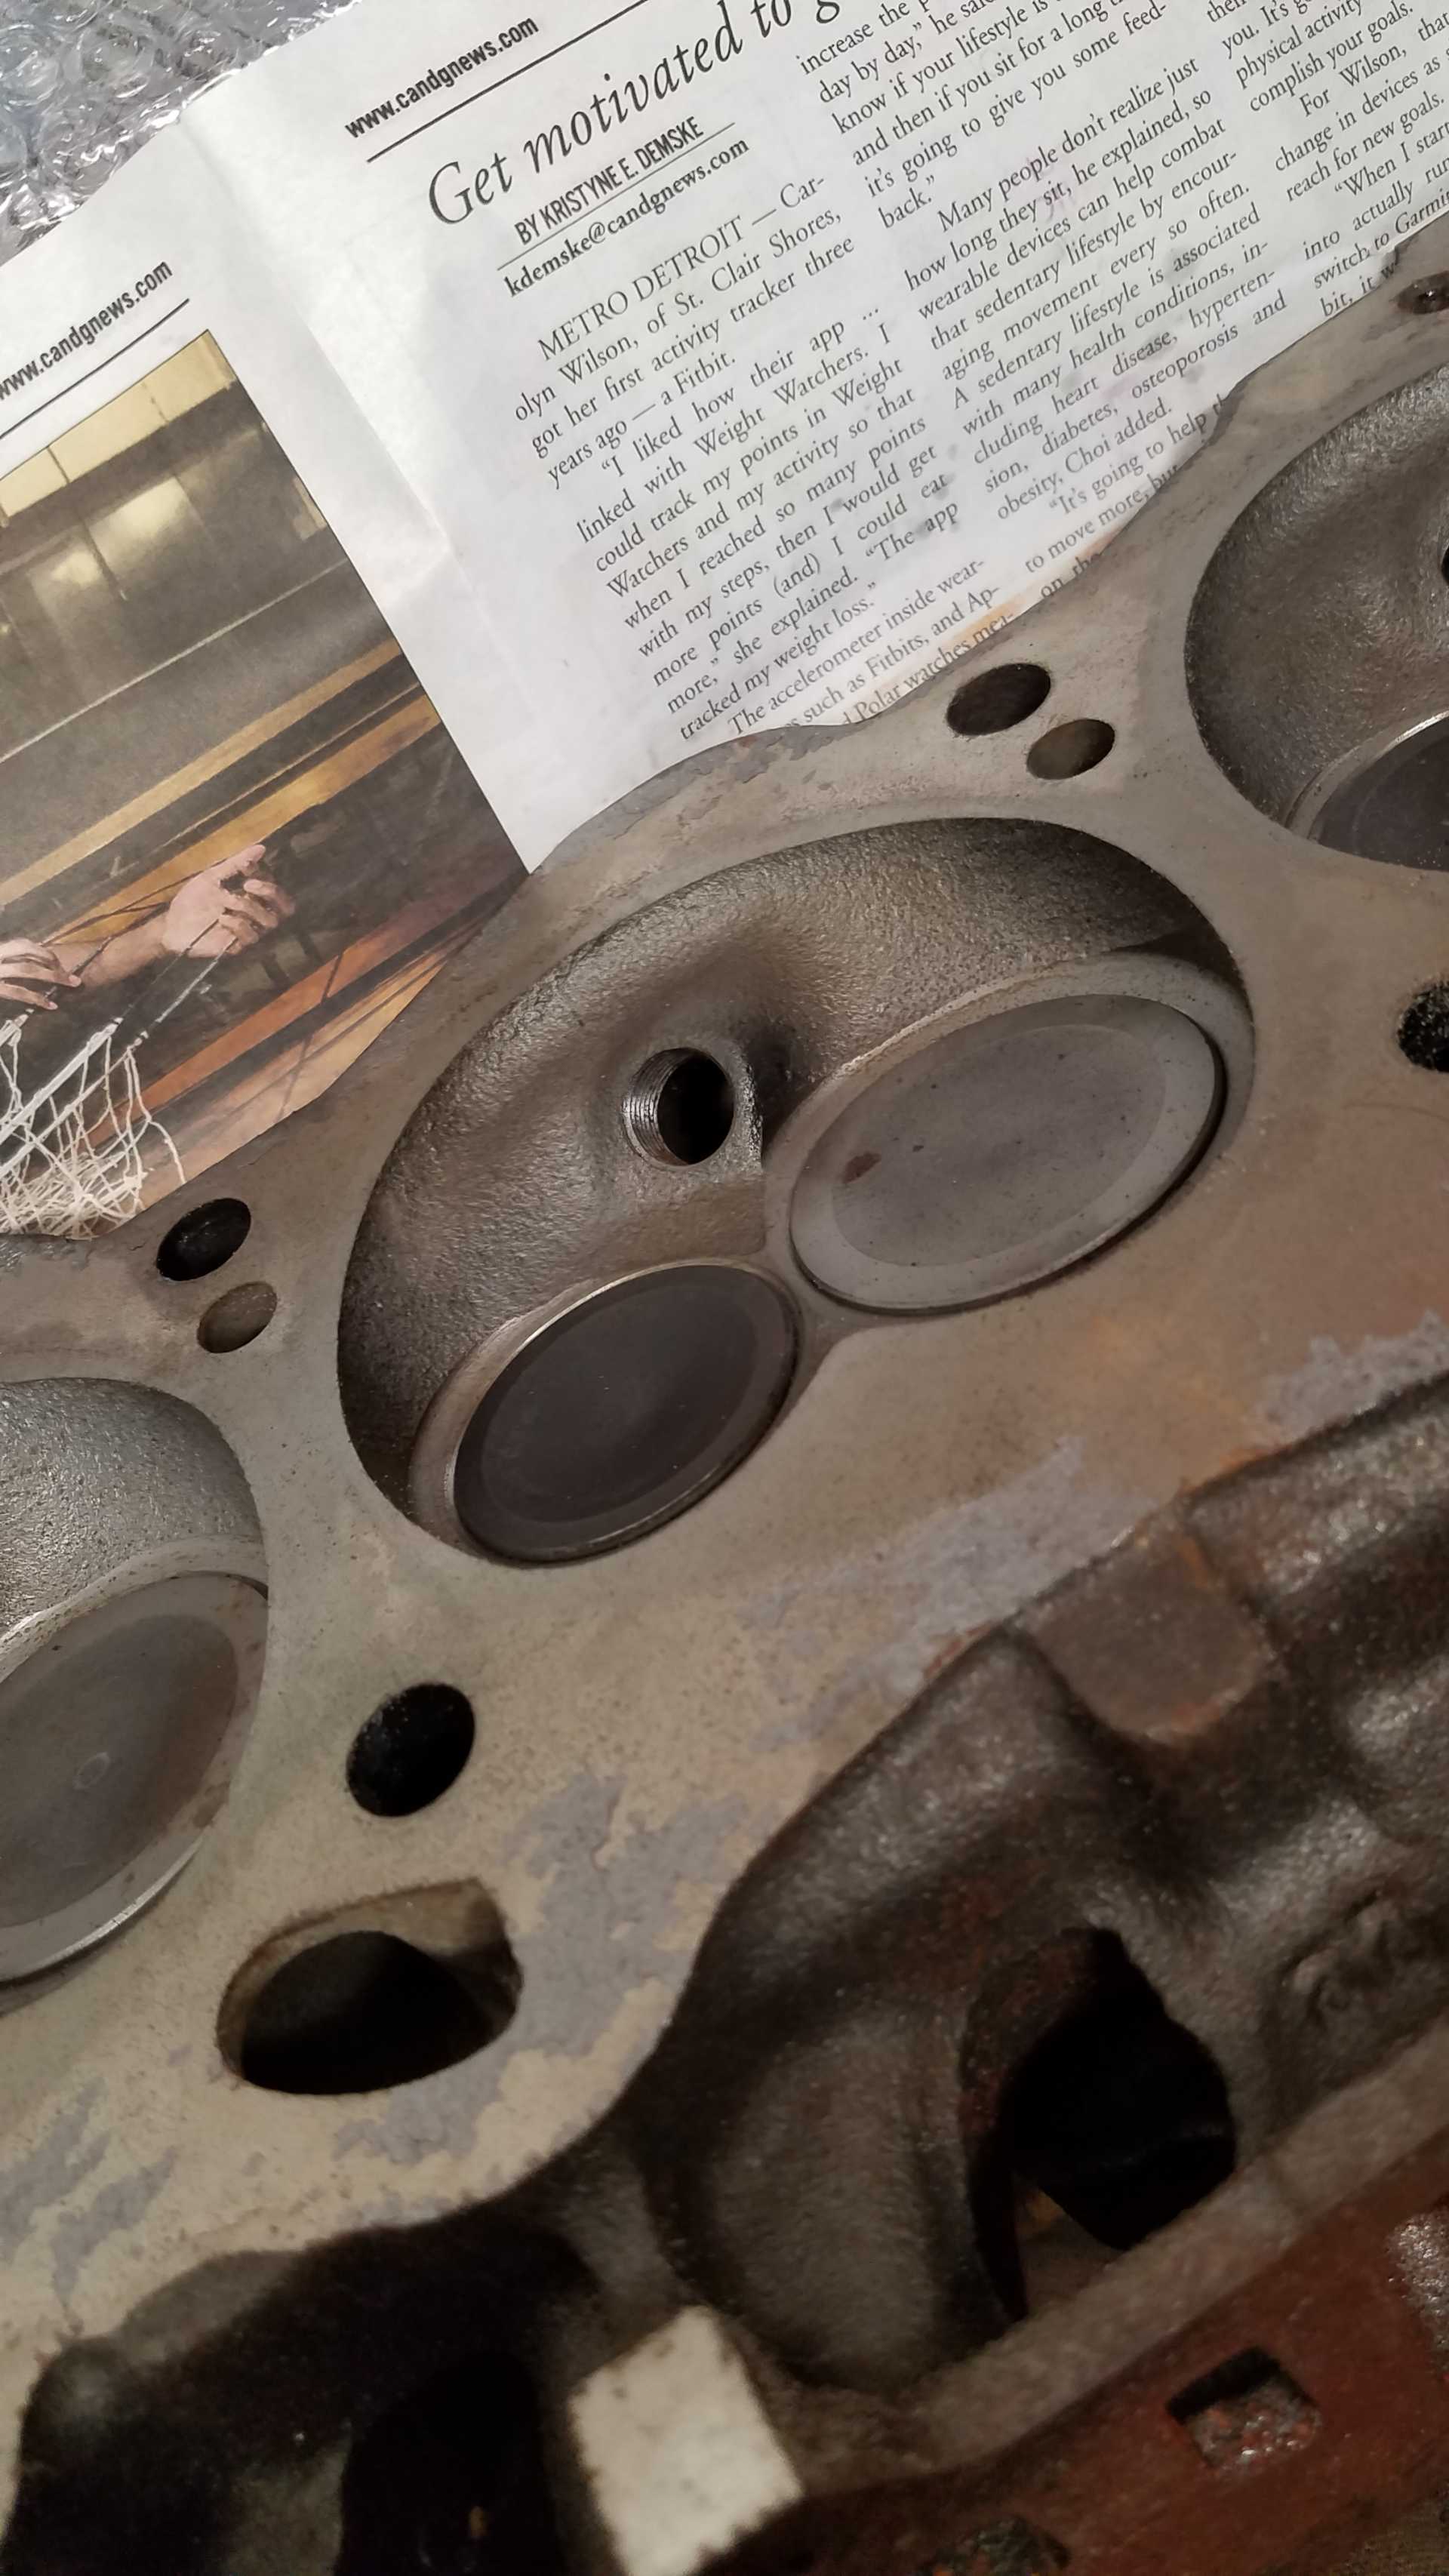
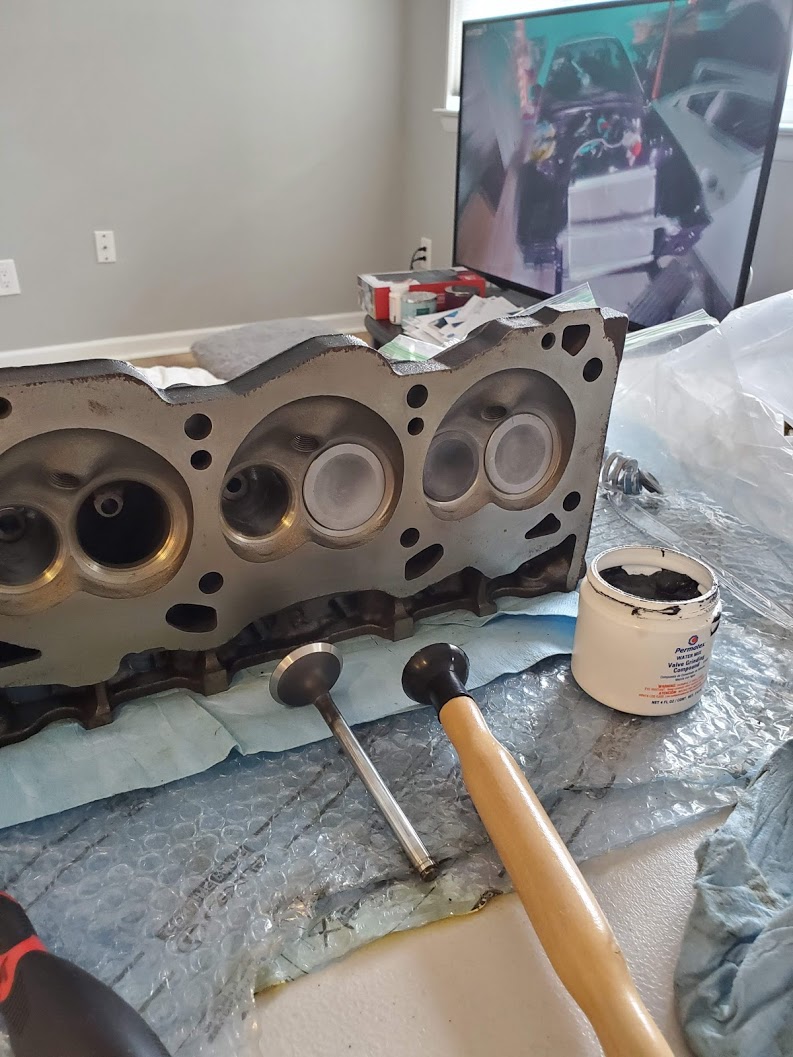
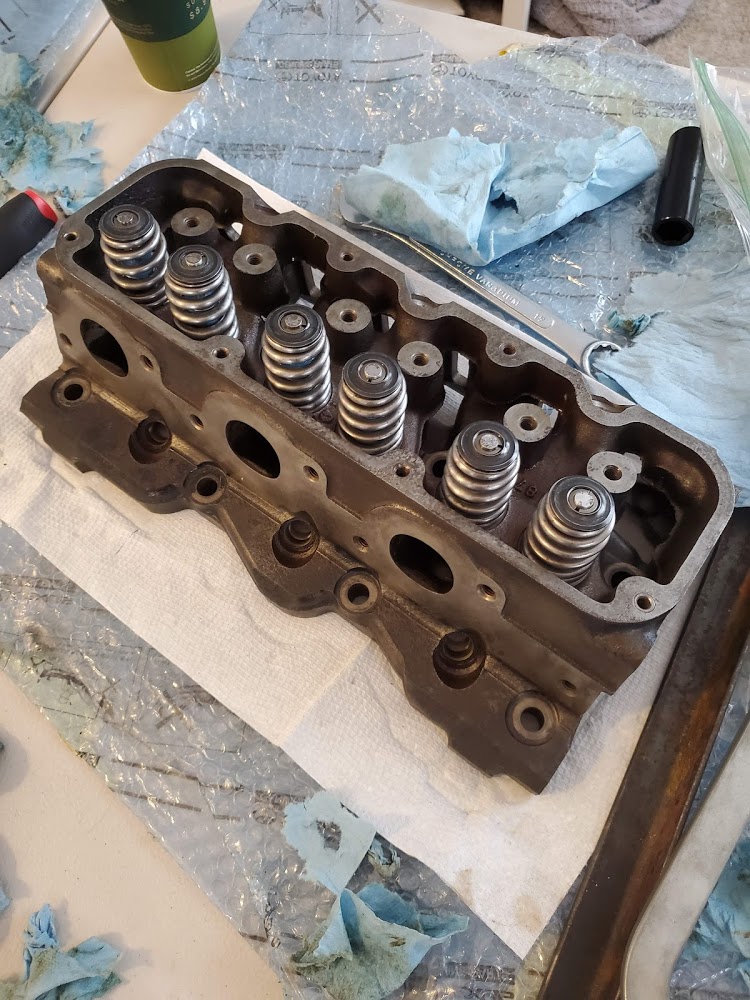
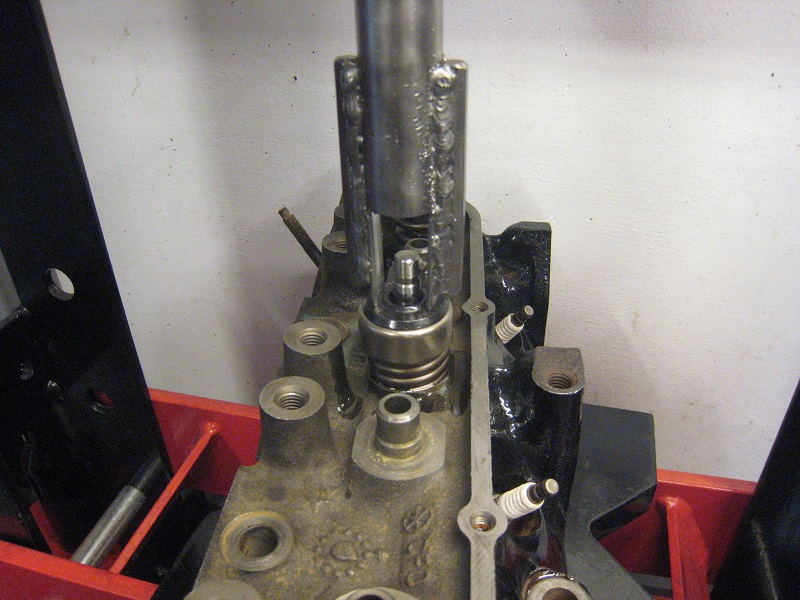
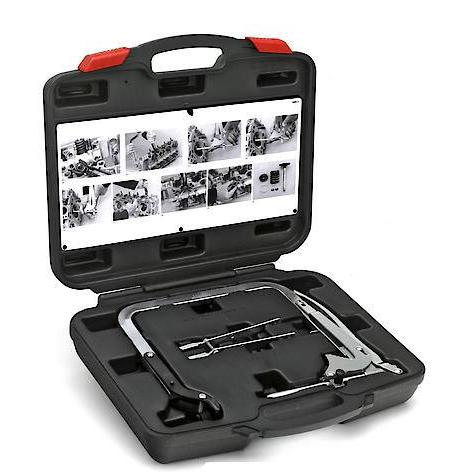
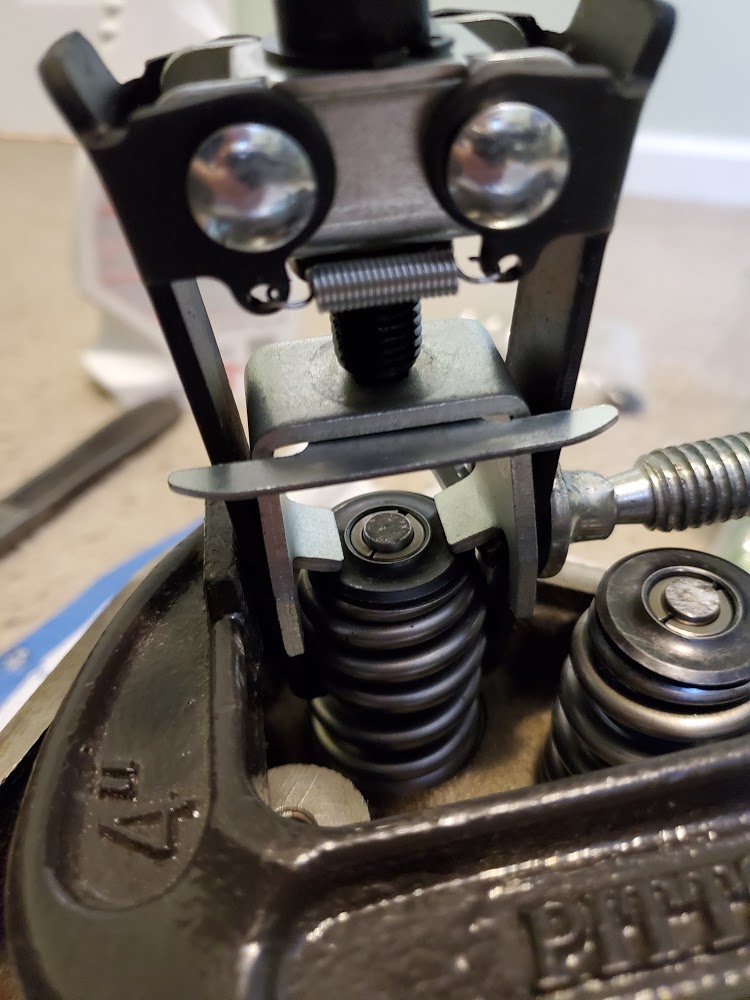
lapped valves last weekend. The advance auto valve spring compressor is straight garbage. Only other one i could find in town from napa couldn't even hook onto a spring without the 'claws' slipping off. With the advance auto spring compressor i was able to get valves and springs installed on one head but took almost 2 hours and launched a couple retainers into the wall and scratched the tops of a few valves. Going to try and figure something else out for the other head. It seems not many people do engine rebuilds at home and need to rent tools any more.

[This message has been edited by BadNewsBrendan (edited 02-20-2021).]

IP: Logged
pmbrunelle
Member
Posts: 4376
From: Grand-Mère, Québec
Registered: Sep 2008


Feedback score: N/A
Leave feedback


Total ratings: 62
Rate this member

Report this Post02-20-2021 11:12 AM Click Here to See the Profile for pmbrunelleSend a Private Message to pmbrunelleEdit/Delete MessageReply w/QuoteDirect Link to This Post
Hmmm, those valves appear to be perpendicular to the head gasket surface. Is that the case?

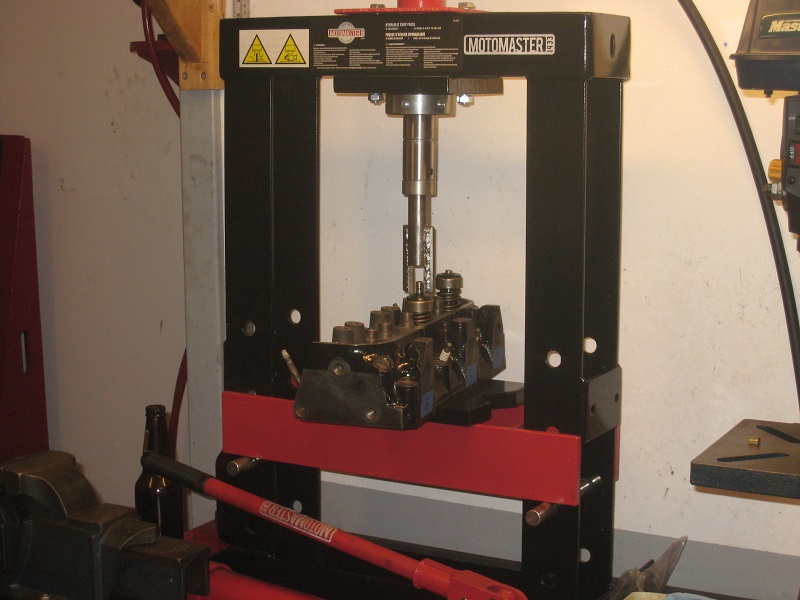
Do you have a hydraulic press?

This is the setup I used to compress valve springs on my Fiero heads:


The pressing tool was homemade from metal scrap.

There was also a small wood block under each valve (in the combustion chamber area) to prevent the valve from falling down, which would make it hard to install the keepers.

IP: Logged
BadNewsBrendan
Member
Posts: 273
From: Michigan
Registered: Aug 2018


Feedback score: N/A
Leave feedback

Rate this member

Report this Post02-20-2021 06:27 PM Click Here to See the Profile for BadNewsBrendanSend a Private Message to BadNewsBrendanEdit/Delete MessageReply w/QuoteDirect Link to This Post
I wish i had a hydraulic press because that looks much easier than what i did.

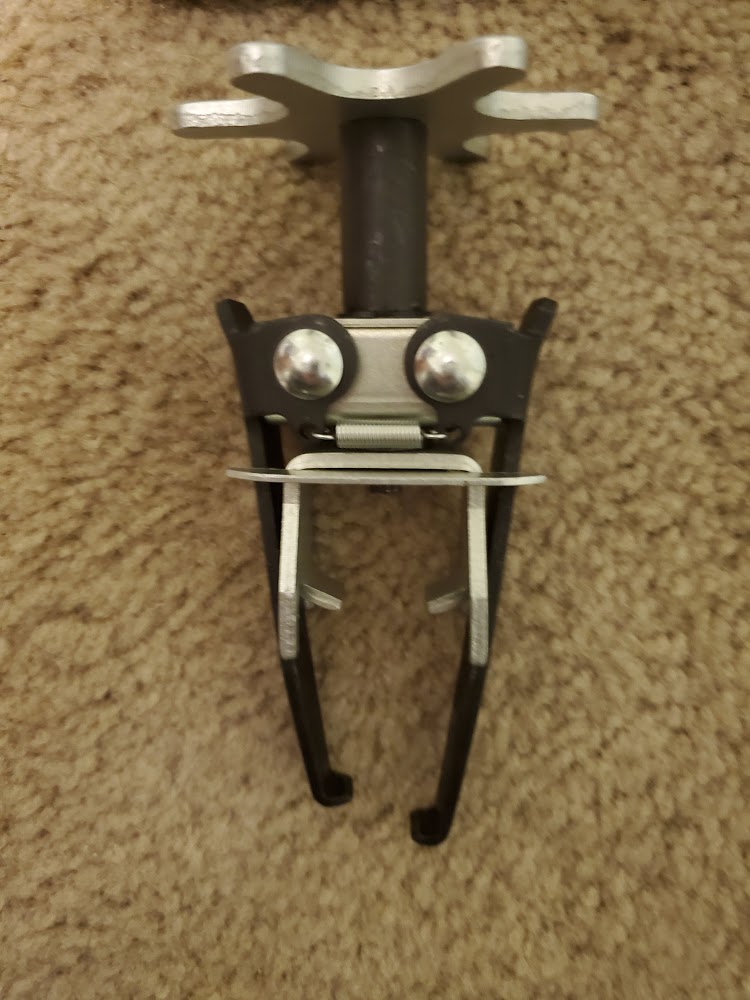
This is the POS that i rented from advance auto and would not recommend. Maybe it would work better on springs that don't have to compress as far and have a lower spring rate. For these though it couldn't even compress the spring enough to get the keepers on and i had to put one keeper on so it would catch and then pull it off and adjust it. I ended up gouging up the valve stems using this. I also had to use all the strength i had to compress it.


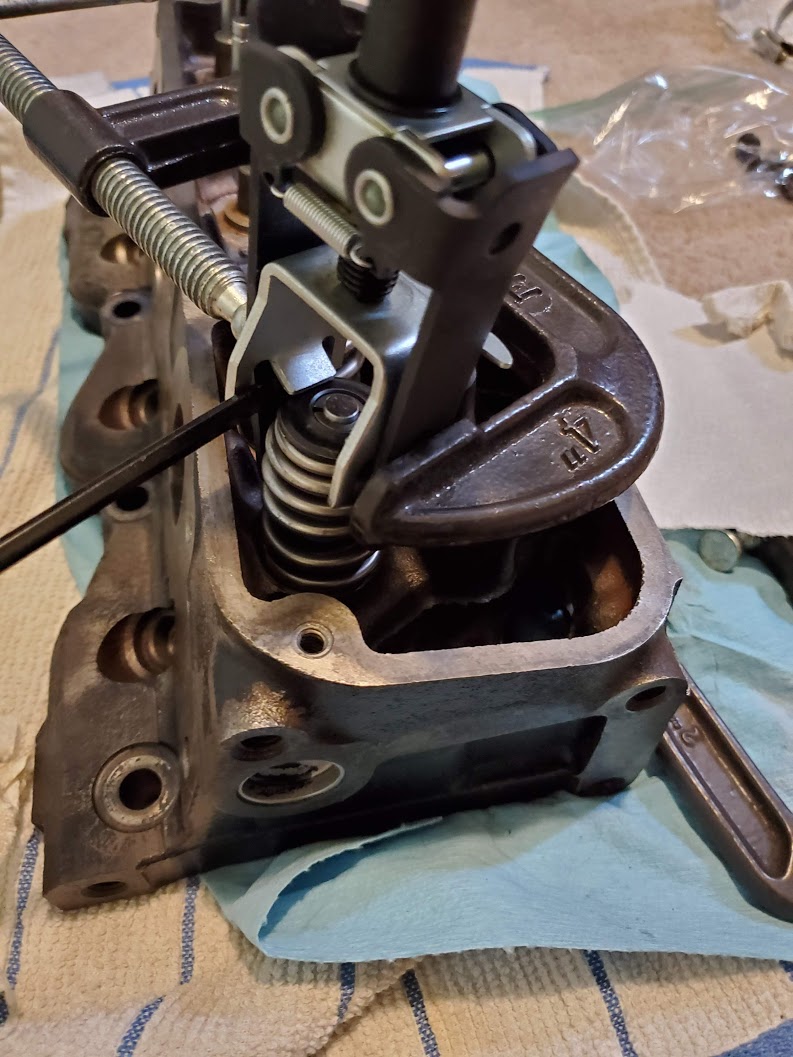
This is the garbage napa spring compressor i ended up rigging to work but the jaws slip off the spring as soon as you start tightening it. Used a C-clamp to hold it on and wedged an allen wrench to keep the top of the spring from slipping to the side. It was not fun but got it done without gouging any valves.


IP: Logged
PFF
System Bot
BadNewsBrendan
Member
Posts: 273
From: Michigan
Registered: Aug 2018


Feedback score: N/A
Leave feedback

Rate this member

Report this Post03-07-2021 09:39 PM Click Here to See the Profile for BadNewsBrendanSend a Private Message to BadNewsBrendanEdit/Delete MessageReply w/QuoteDirect Link to This Post
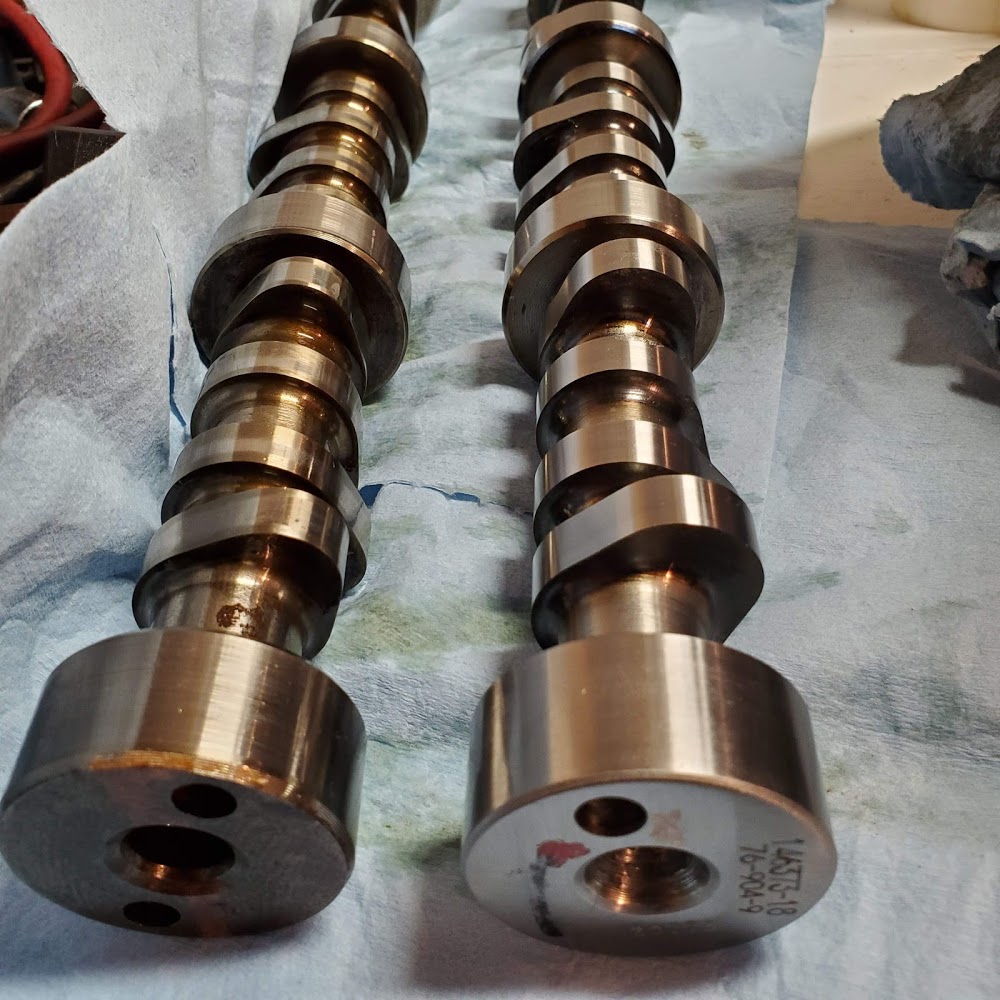
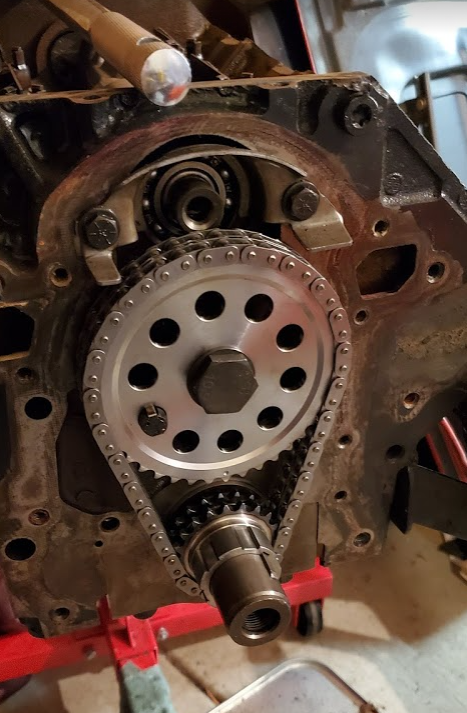
Double roller timing chain i got used with the cam appears to have stretched so not risking it and bought a new one.

while i wait for that to get here i decided to paint the heads and supercharger, not a fan of everyone painting the SC and valve covers bright colors like all the red ones i see out there so i went with something a little more subtle just to stop the corrosion.


Heres a pic of the stock vs new cam

[This message has been edited by BadNewsBrendan (edited 03-07-2021).]

IP: Logged
BadNewsBrendan
Member
Posts: 273
From: Michigan
Registered: Aug 2018


Feedback score: N/A
Leave feedback

Rate this member

Report this Post04-12-2021 11:05 PM Click Here to See the Profile for BadNewsBrendanSend a Private Message to BadNewsBrendanEdit/Delete MessageReply w/QuoteDirect Link to This Post
Went on a date with my girlfriend to the Detroit Art Institute and saw this in the Auto Design section that was temporarily on display.

[This message has been edited by BadNewsBrendan (edited 04-12-2021).]

IP: Logged
BadNewsBrendan
Member
Posts: 273
From: Michigan
Registered: Aug 2018


Feedback score: N/A
Leave feedback

Rate this member

Report this Post04-12-2021 11:19 PM Click Here to See the Profile for BadNewsBrendanSend a Private Message to BadNewsBrendanEdit/Delete MessageReply w/QuoteDirect Link to This Post

BadNewsBrendan

273 posts
Member since Aug 2018
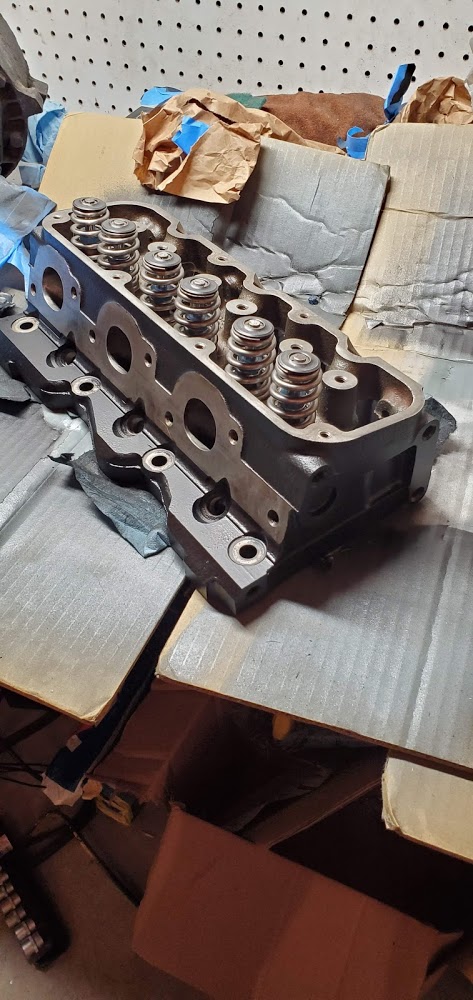
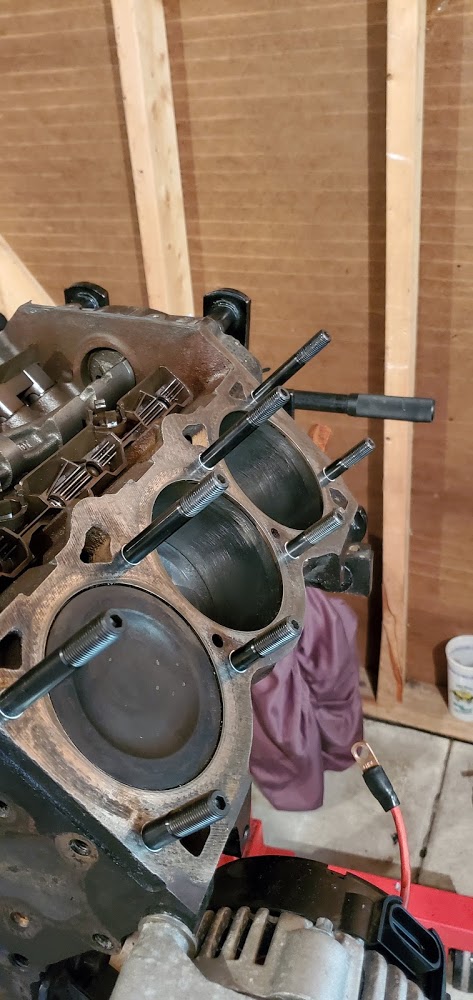
I got the head studs installed and installed heads. I think the ZZP pushrods might be one size too big according to their preload checking method by using the number of turns of the rocker bolt and I have LS7 lifters. Planning on compression testing once i get the engine back in the car and oil pump primed.


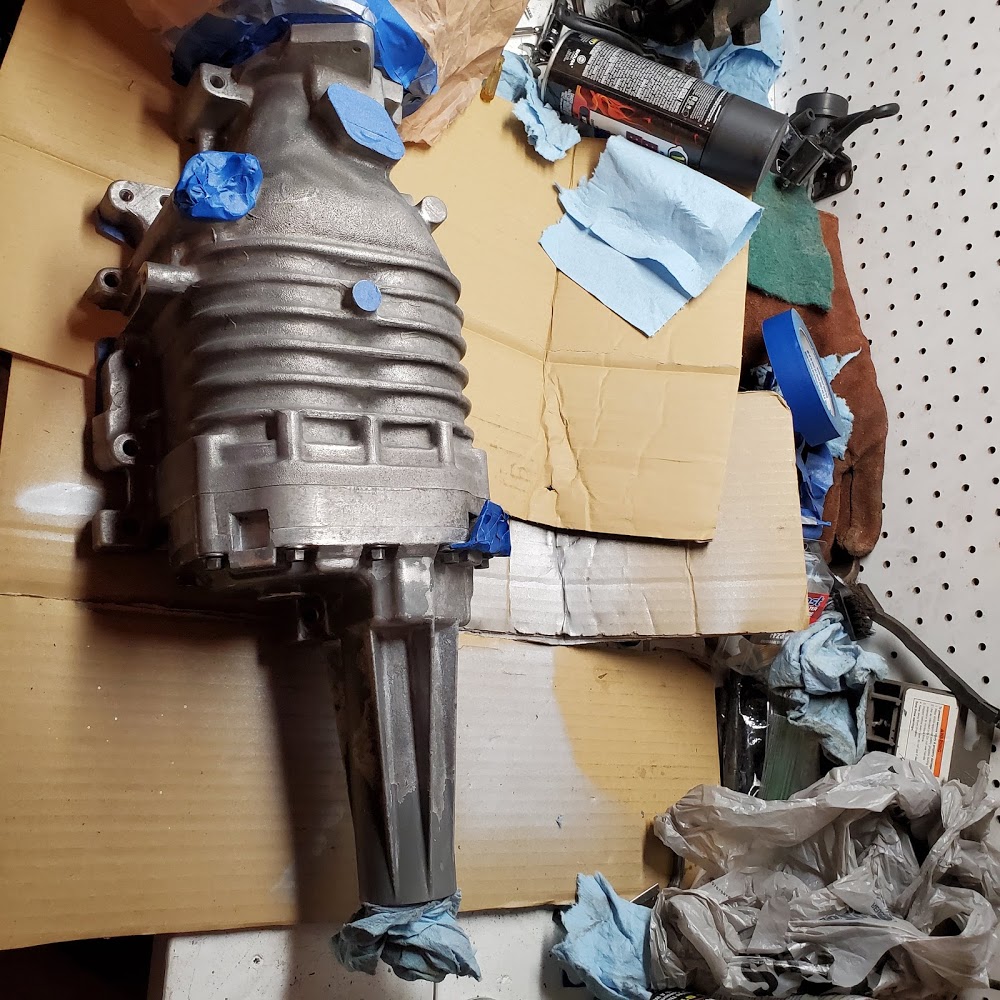
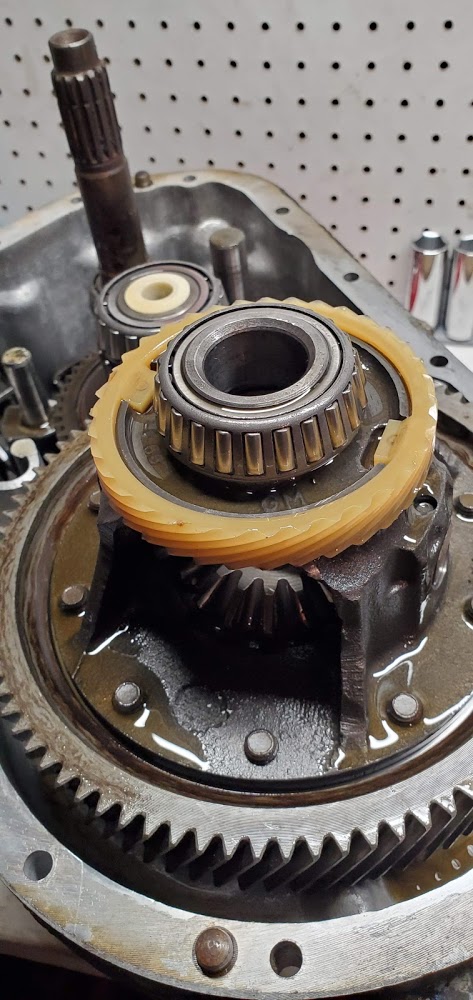
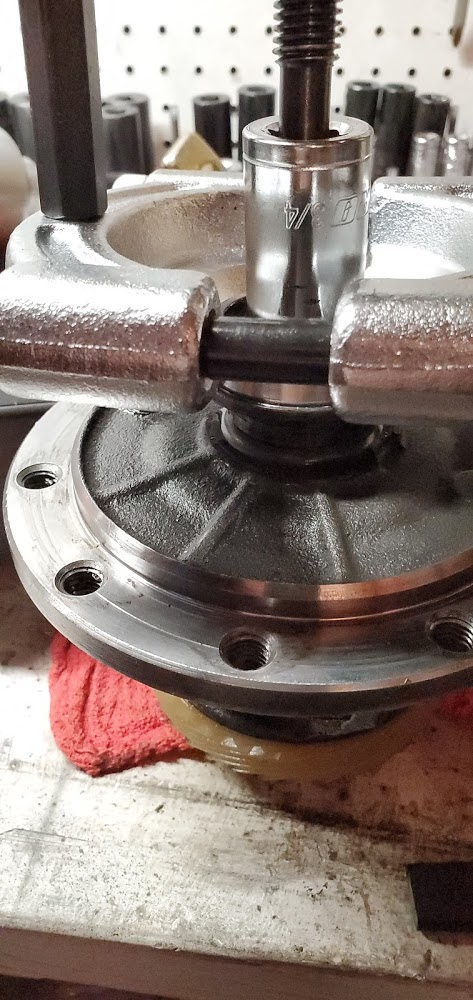
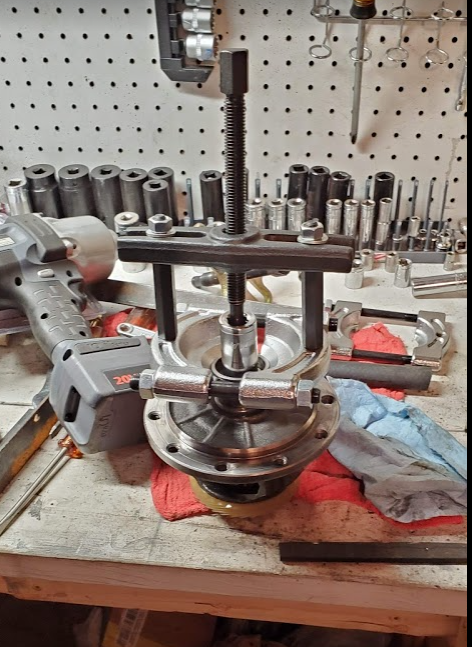
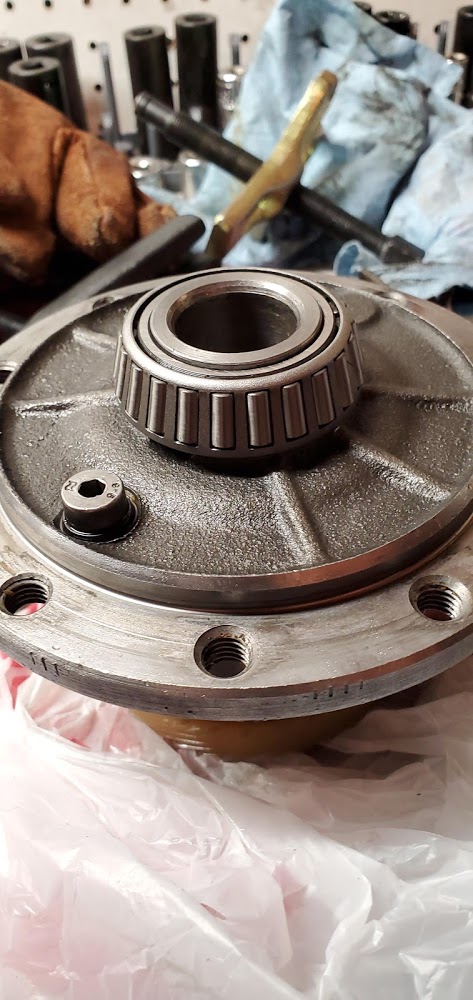
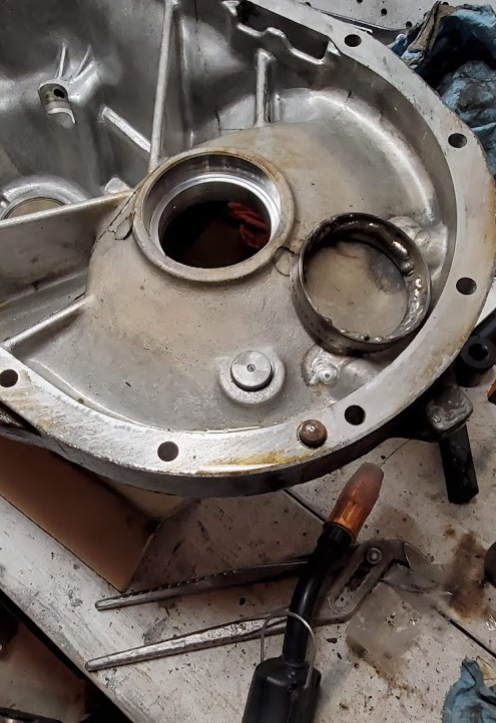
I took apart the trans to replace bearings. The first two machine shops i called said they couldn't press bearings and the harbor freight near by was out of shop presses so i bought a bearing puller kit and made it work by cutting the cage off and clamping it on the races. Installed the new bearings by putting the diff in the freezer and lightly heating the bearing race up and tapping them on with a socket. This is probably not the best method but it worked and I didn't damage the bearings. I have a few more bearings to go and need to remove and reinstall the races.


[This message has been edited by BadNewsBrendan (edited 04-12-2021).]

IP: Logged
BadNewsBrendan
Member
Posts: 273
From: Michigan
Registered: Aug 2018


Feedback score: N/A
Leave feedback

Rate this member

Report this Post05-07-2021 10:28 AM Click Here to See the Profile for BadNewsBrendanSend a Private Message to BadNewsBrendanEdit/Delete MessageReply w/QuoteDirect Link to This Post
Might just be on to something here....


Lines up better than I could have hoped for, will need to do some more checking and planning.


[This message has been edited by BadNewsBrendan (edited 05-07-2021).]

IP: Logged
BadNewsBrendan
Member
Posts: 273
From: Michigan
Registered: Aug 2018


Feedback score: N/A
Leave feedback

Rate this member

Report this Post05-14-2021 12:42 PM Click Here to See the Profile for BadNewsBrendanSend a Private Message to BadNewsBrendanEdit/Delete MessageReply w/QuoteDirect Link to This Post
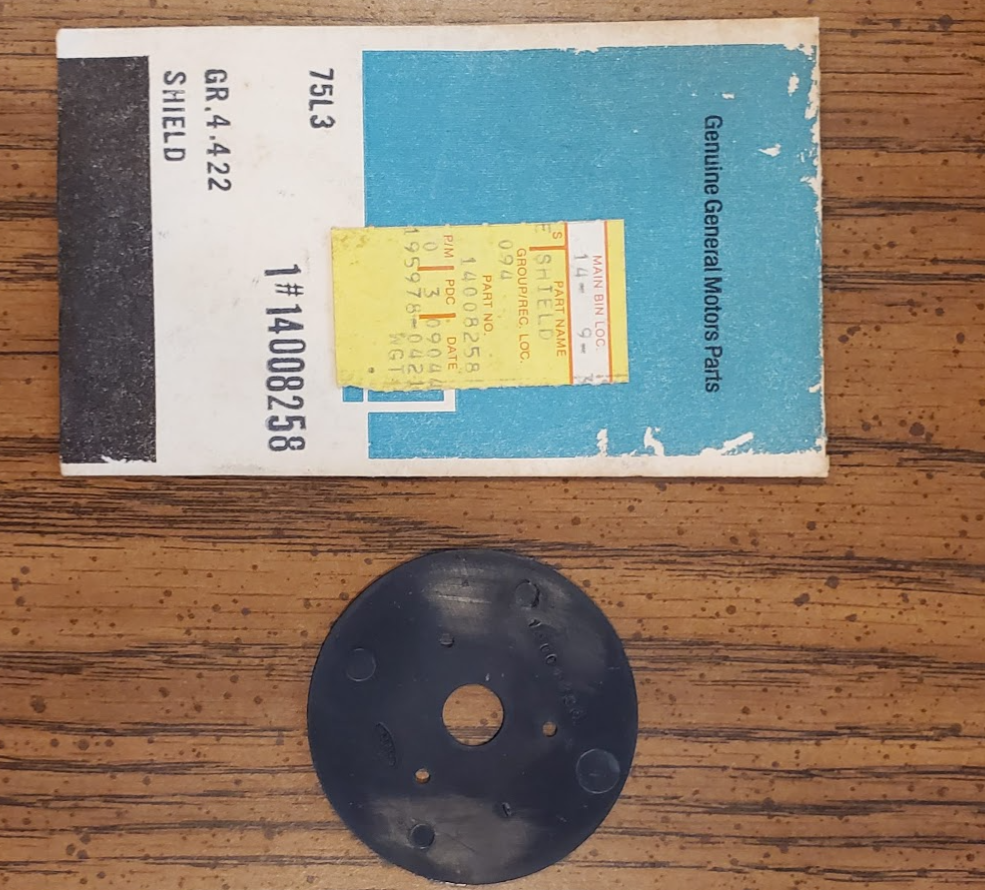
Trans is ready to go back together, just waiting on the shim I ordered. Other two shims seem to be the correct size when checking with the shim measuring tool.
Struggled on getting some of the bearing races out and melted a shield but was able to track one down through some phone calls to a NOS part warehouse.


The old 80s GM packaging is pretty cool.


IP: Logged
BadNewsBrendan
Member
Posts: 273
From: Michigan
Registered: Aug 2018


Feedback score: N/A
Leave feedback

Rate this member

Report this Post05-14-2021 12:53 PM Click Here to See the Profile for BadNewsBrendanSend a Private Message to BadNewsBrendanEdit/Delete MessageReply w/QuoteDirect Link to This Post

BadNewsBrendan

273 posts
Member since Aug 2018
Even went as far as replacing the shift(?) shaft seal. Thought i wasn't going to be able to get it out for a second.


IP: Logged
BadNewsBrendan
Member
Posts: 273
From: Michigan
Registered: Aug 2018


Feedback score: N/A
Leave feedback

Rate this member

Report this Post05-16-2021 09:16 PM Click Here to See the Profile for BadNewsBrendanSend a Private Message to BadNewsBrendanEdit/Delete MessageReply w/QuoteDirect Link to This Post
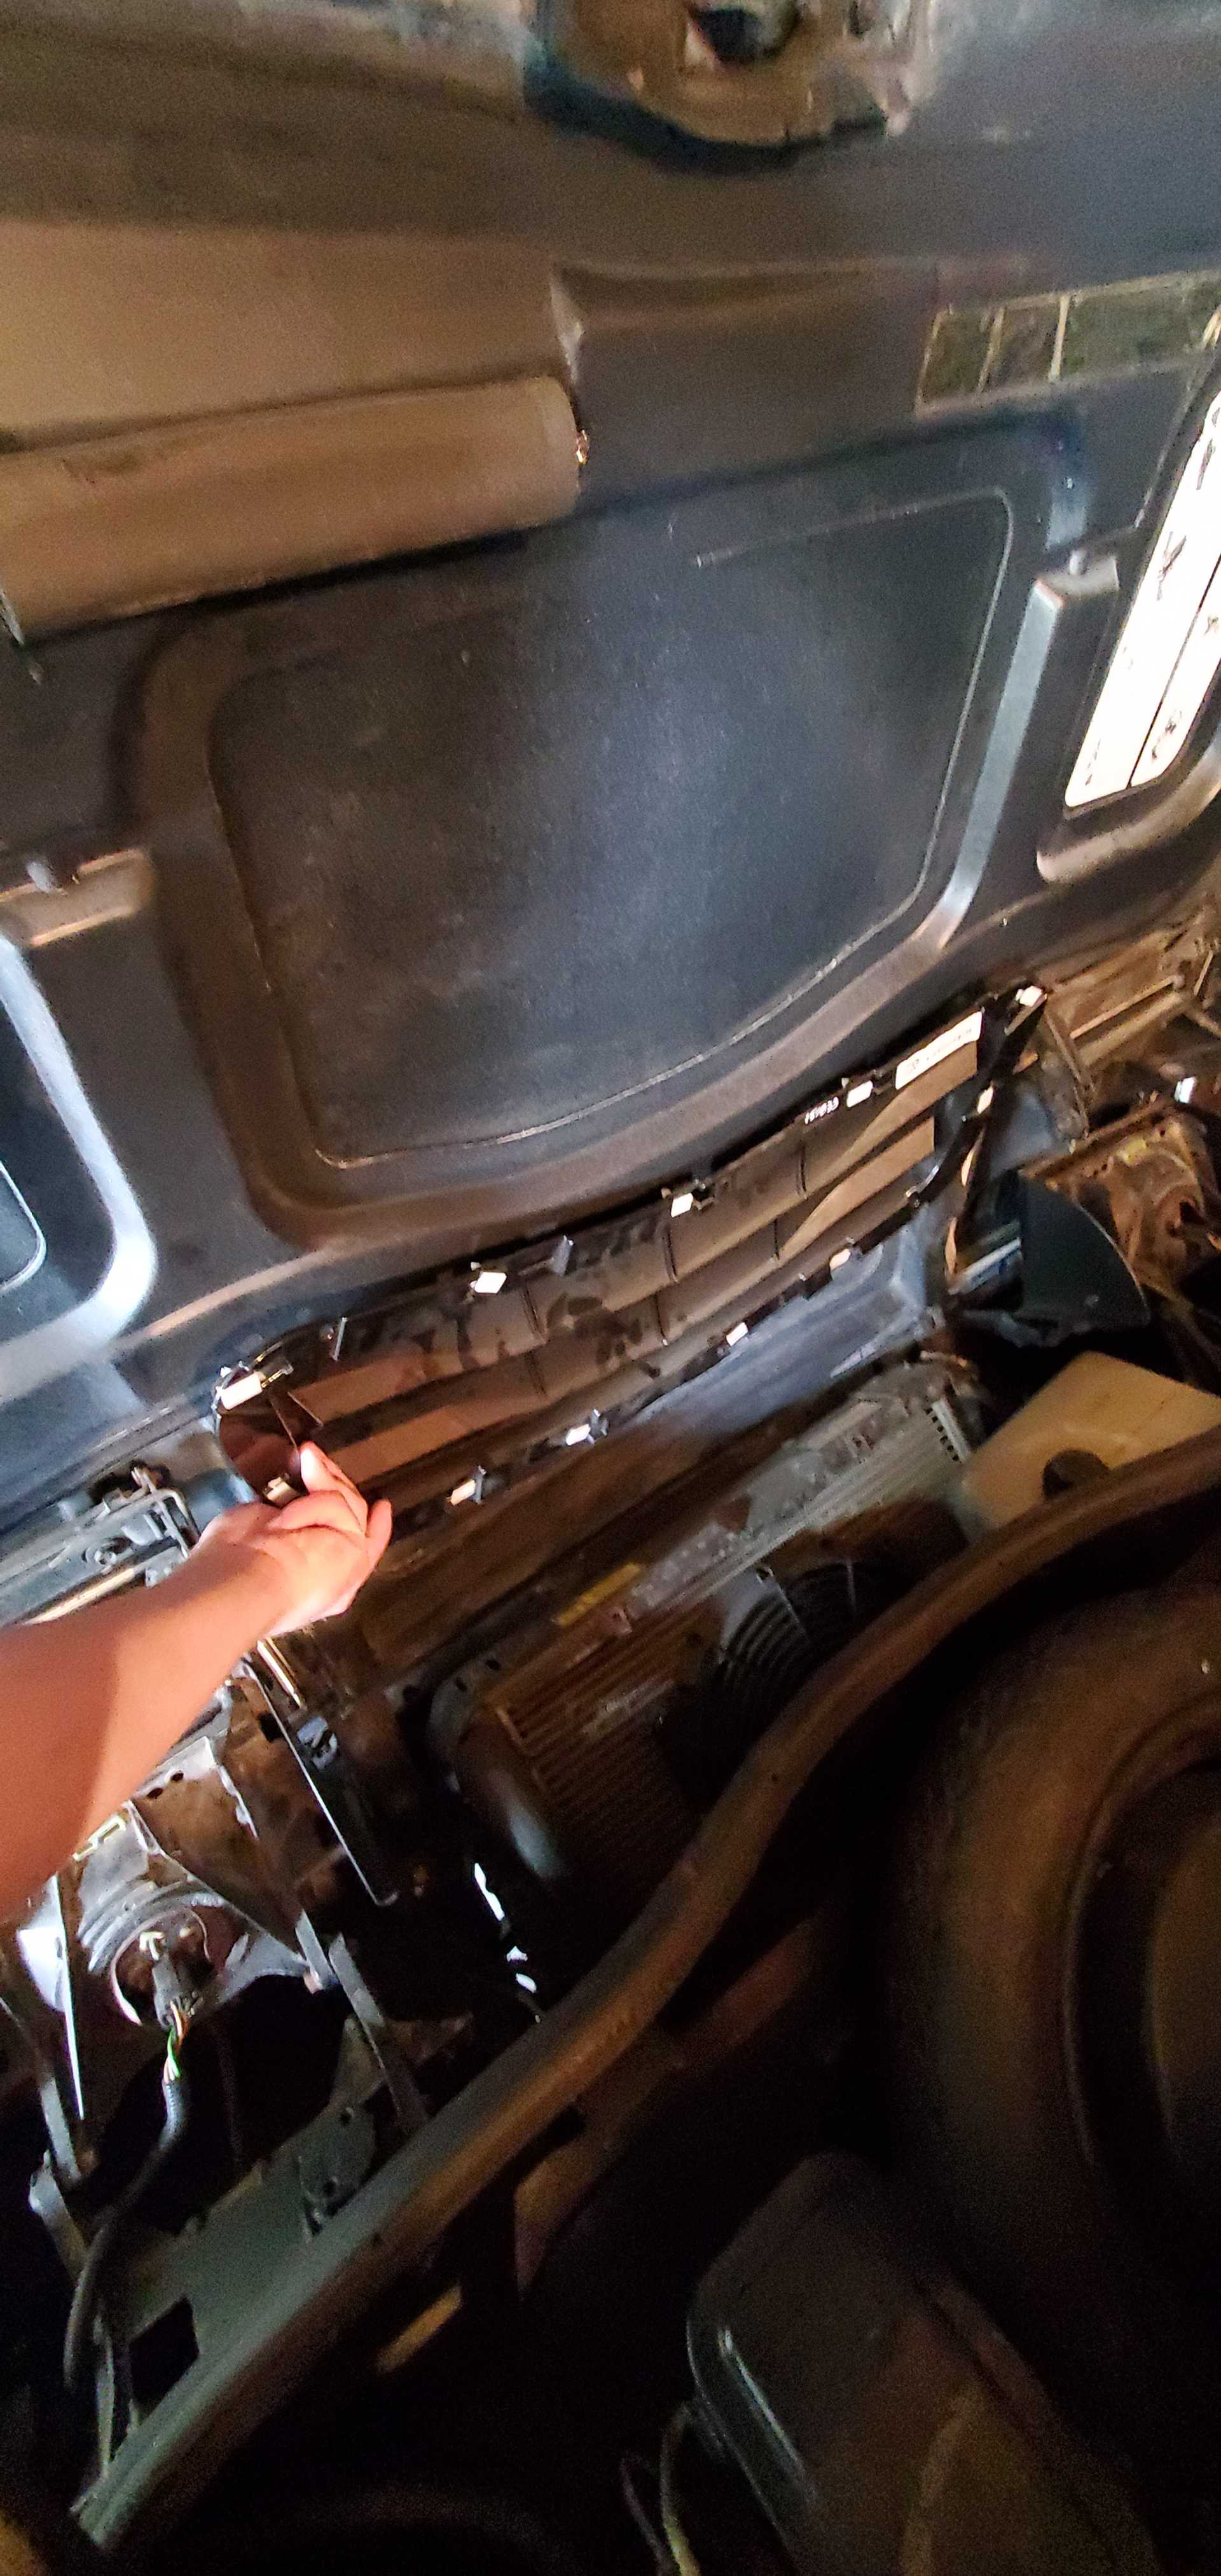
With my awful photoshop skills (actually microsoft paint 3D) I edited the hood vent louver to look like closer to what it should installed. I think it looks better than most hood vents ive seen on fieros.

[This message has been edited by BadNewsBrendan (edited 05-16-2021).]

IP: Logged
BadNewsBrendan
Member
Posts: 273
From: Michigan
Registered: Aug 2018


Feedback score: N/A
Leave feedback

Rate this member

Report this Post05-20-2021 08:41 AM Click Here to See the Profile for BadNewsBrendanSend a Private Message to BadNewsBrendanEdit/Delete MessageReply w/QuoteDirect Link to This Post
So i was cleaning things up in the garage this morning and realized that this seal i replaced was for the clutch fork shaft and not the shift shaft. Glad i found it before putting the whole trans back together and finding it leaking. Going to blame my poor lighting in the garage for not noticing this right away. Luckily you can buy this seal new from Timken. PN 463024 (Timken 473546)

IP: Logged
BadNewsBrendan
Member
Posts: 273
From: Michigan
Registered: Aug 2018


Feedback score: N/A
Leave feedback

Rate this member

Report this Post05-20-2021 08:52 AM Click Here to See the Profile for BadNewsBrendanSend a Private Message to BadNewsBrendanEdit/Delete MessageReply w/QuoteDirect Link to This Post

BadNewsBrendan

273 posts
Member since Aug 2018
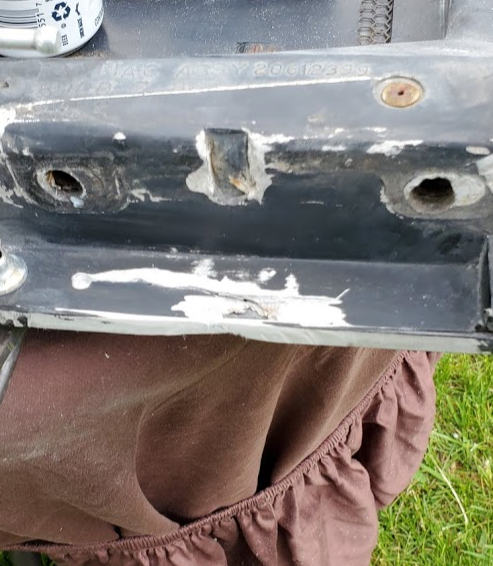
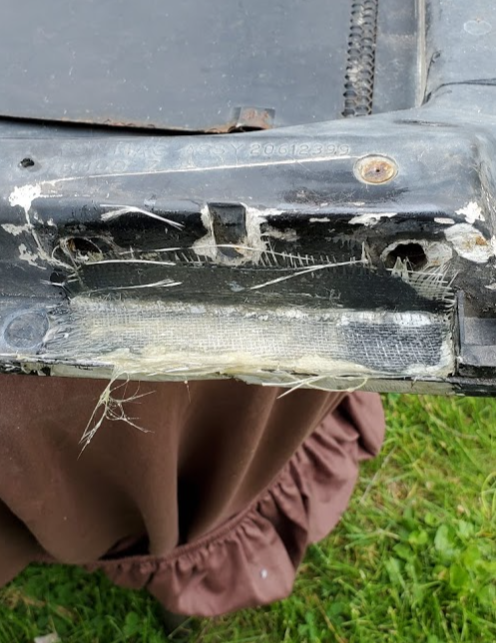
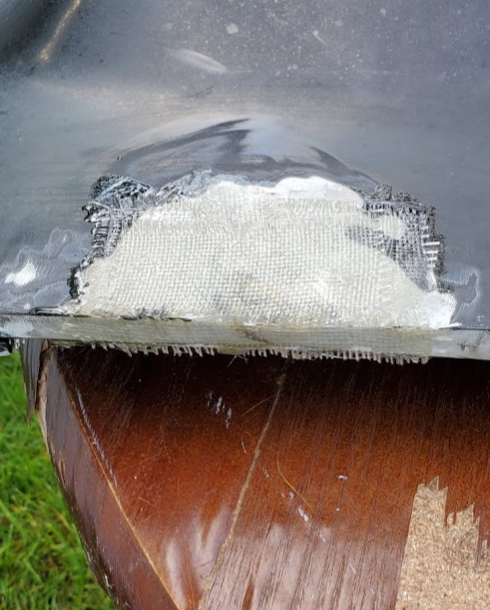
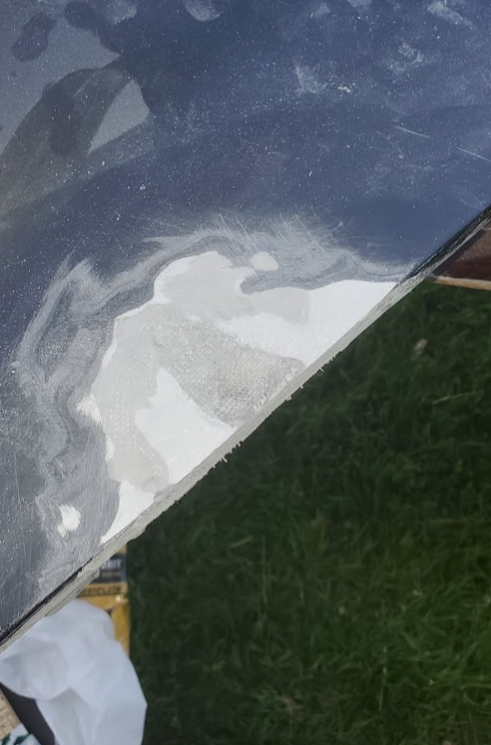
I did some fiberglass repair on the junkyard deck lid i got where the assist springs punched a hole. My first fiberglass work ever but should be strong enough. Had to cut some material out, drill the end of the crack and clamp a piece of metal to hold it straight. Now gonna try doing some bondo for the fist time. Don't need it to look great, just wanted a hood that wasn't broken and didn't have the center vent to keep leaking water on to the front head and injectors.


IP: Logged
Previous Page | Next Page

This topic is 4 pages long:  1   2   3   4 
next newest topic | next oldest topic

All times are ET (US)

Post New Topic  Post A Reply
Hop to:

Contact Us | Back To Main Page

Advertizing on PFF | Fiero Parts Vendors
PFF Merchandise | Fiero Gallery | Ogre's Cave
Real-Time Chat | Fiero Related Auctions on eBay


Copyright (c) 1999, C. Pennock