Did you guys find that "high heat" paint was necessary, or would a regular temperature primer/paint (higher quality like Krylon) be okay?
It didn't even dawn on me that "high heat" paint might be necessary till I happen to lay my hand on one of the vents today after idling for 20 minutes. They get fairly toasty.
Asking cause I'd rather get it right the first time . . . .
I have used Marhyde, I believe that's how you spell it, anyways, looks great and stays on good, actually has a picture of a fiero on the can. it works well for any trim that is painted black on our cars
When refinishing aluminum, like intakes and valve covers, this is my 8 Step process. Very resiliant.
1. Strip the old finish. 2. Degrease well and rinse thoroughly. 3. Wash with white vinegar, rinse and dry thoroughly. 4. Spray with Zinc Phosphate primer (used on aircraft) and sun dry for 1 day. Will still be a little soft. 5. Spray with high temp engine paint and sun dry for 1 day. 6. Send the spouse shopping. 7. Preheat oven to 250 and bake on center rack for 30 minutes. 8. Deny the house smells strange.
High Heat paint should not be necessary. You mentioned they were "toasty" after idling..... Check how hot regular dark car paint gets, say on a hood, when it's left in the full sun. Talking about a metal car here, with standard factory paint.
I think that doing it right would consist of using urethane paint.
That said, I rattle-canned my grilles with cheap spray-bomb clear, and nothing happened during the six months or so the grilles were in daily driver service.
However, I first sandblasted the grilles, so the clear had a good tooth to bite on; it gave a unique look.
John, I've painted others by just cleaning and spraying with regular exterior enamel. Patrick and I graduaded from the same 'done that' class. I don't think it was the heat that made them fade as much as from the sun. The high temp and baking hardens the paint against the elements of nature. Originally, I think they were powder coated. Grills are no easy task to clean and repaint.
I did this with a quart of black lacquer Rustoleum Gloss Black paint from the Home Depot. I mixed a tiny bit of lacquer thinner into it so it would spray easier through my paint gun. I laid it on pretty heavy. I did not use a top coat of clear. This is the way it dried. I was quite happy with just how glossy it is!
[This message has been edited by JohnWPB (edited 05-02-2017).]
Patrick and I graduated from the same 'done that' class.
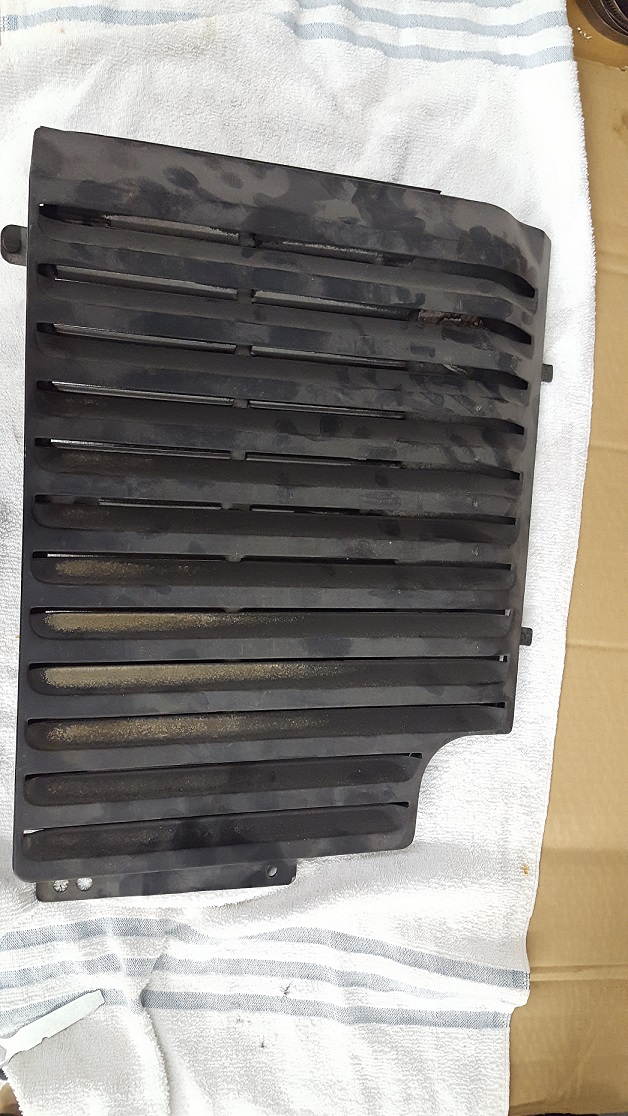
When I tried to spray the black satin paint I used on the bare aluminum, the paint just bubbled up. I had to use primer. Should've "done that" the first time!
The paint on the whole car is terrible (so I wasn't trying to do a perfecto job), but I was happy enough with the way the vents eventually turned out.
[This message has been edited by Patrick (edited 05-03-2017).]
When refinishing aluminum, like intakes and valve covers, this is my 8 Step process. Very resiliant.
1. Strip the old finish. 2. Degrease well and rinse thoroughly. 3. Wash with white vinegar, rinse and dry thoroughly. 4. Spray with Zinc Phosphate primer (used on aircraft) and sun dry for 1 day. Will still be a little soft. 5. Spray with high temp engine paint and sun dry for 1 day. 6. Send the spouse shopping. 7. Preheat oven to 250 and bake on center rack for 30 minutes. 8. Deny the house smells strange.
I have read some funny things, but this did make me chuckle to myself.
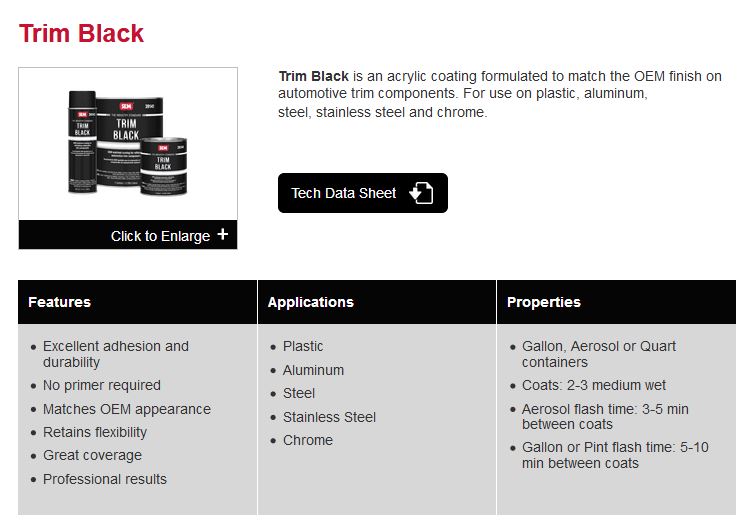
SEM black satin trim paint works well. Has the stock look and blends well with the rest of the cars trim. Done with Dow pad (fine) prep and mineral spirits wash.
[This message has been edited by Kevin87FieroGT (edited 05-03-2017).]
SEM black satin trim paint works well. Has the stock look and blends well with the rest of the cars trim. Done with Dow pad (fine) prep and mineral spirits wash.
I think the SEM paint is also self-priming (no separate primer coat needed)
Zinc Chromate primer is recommended. I just paint them with Krylon or Rustoleum Satin Black spray can.
I never tried the chromate. I use Seymour zinc phosphate green primer for bare metal and wood. Personally I would powdercoat grills. Let someone else do the hard work of stripping the nooks and crannies. I don't have the patience.
I never tried the chromate. I use Seymour zinc phosphate green primer for bare metal and wood. Personally I would powdercoat grills. Let someone else do the hard work of stripping the nooks and crannies. I don't have the patience.
Its more or less the same thing. Used for priming aircraft parts, can be green or yellow. On airplane surfaces I also anodize them after stripping and primering. I dont see that being necessary on car parts. Not much work to stripper them. Blasting makes a better surface to stick to. I paint chrome and glass after sandblasting and never had any peel.
Originally posted by USMUCL: It didn't even dawn on me that "high heat" paint might be necessary till I happen to lay my hand on one of the vents today after idling for 20 minutes. They get fairly toasty.
About a decade ago I took a temp gun to the engine vent on my SBC Fiero after a drive on a 80+ degree day. The passenger vent was about 170 degrees. Hot enough to burn, but not hot enough to require high temp paint.
I am getting ready to paint my vents in a few weeks and will be using the SEM 39673 Black Self Etching Primer and SEM 39143 trim paint for the top coat.
I did high heat for underside and regular rustoleum gloss black for the top.. Reg sprays can withstand 220 degrees-most paints... So I felt for the underside to go with a little better higher tolerance to heat
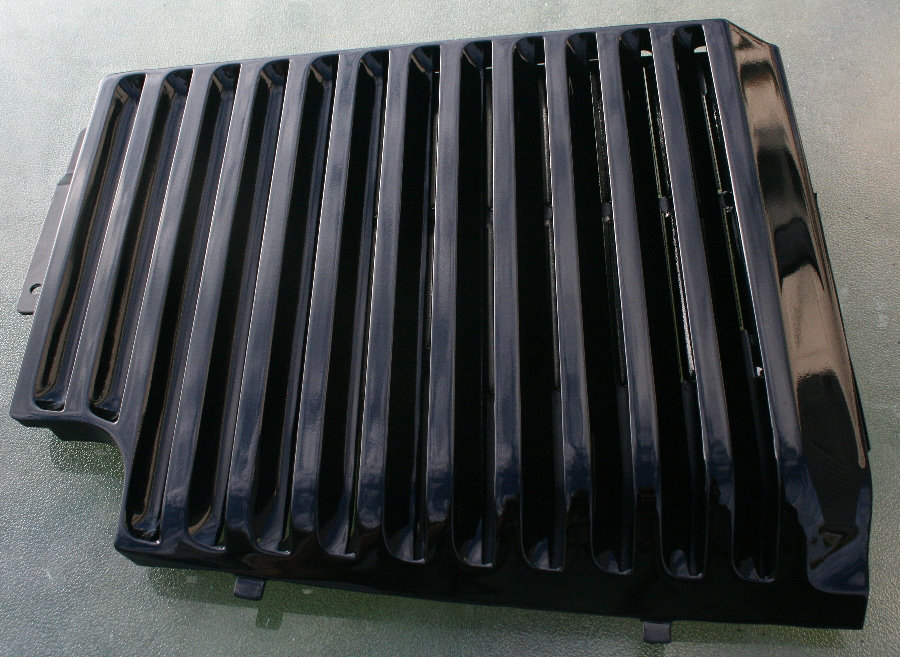
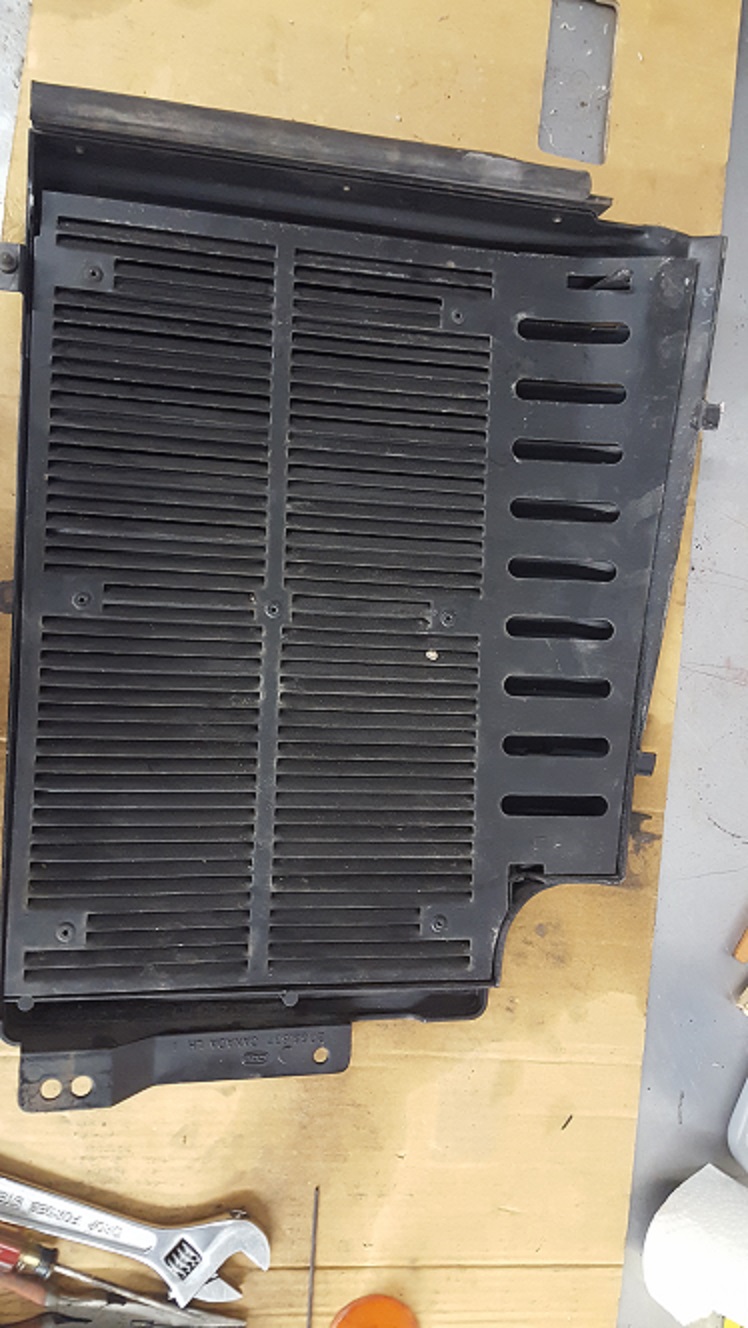
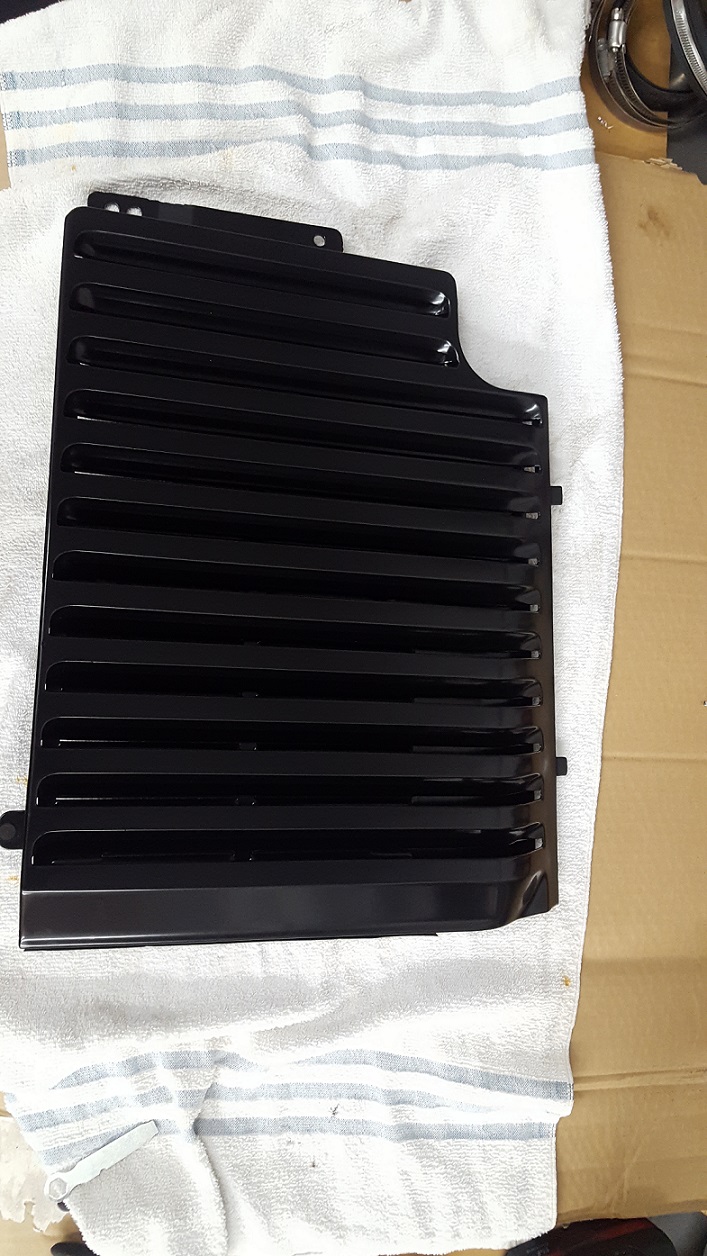
Thanks for the inspiration here guys I've been meaning to work on these and since i have a home powder coating and blasting setup its just time. Got the 1 side completely redone in about 3 hrs which included cooling off time while i went out to buy rivets. The OEM finish on the top part is definately powdercoat and the under tray I think is possibly just a spray paint as it comes off much easier. Did both on mine in semi gloss black not sure what the new OEM part would have been after looking at the finished product i wonder if the undertray was more of a flat finish to make it less visible. Before
Have you all found that the rivets can just be drilled out to separate the two pieces? Afterward, can they be screwed back together, or must they be riveted?
Have you all found that the rivets can just be drilled out to separate the two pieces?
It was easy enough to drill the top part of the rivet off (which allowed for separation of the two panels), but I found it next to impossible to drill out the rest of the rivet without accidentally drilling into the body of the aluminum. I ended up just using tiny screws to hold the panels together again afterwards.
[This message has been edited by Patrick (edited 03-24-2018).]
Originally posted by fierofool: ... this is my 8 Step process.
1. Strip the old finish. 2. Degrease well and rinse thoroughly. 3. Wash with white vinegar, rinse and dry thoroughly. 4. Spray with Zinc Phosphate primer (used on aircraft) and sun dry for 1 day. Will still be a little soft. 5. Spray with high temp engine paint and sun dry for 1 day. 6. Send the spouse shopping. 7. Preheat oven to 250 and bake on center rack for 30 minutes. [/b]8. Deny the house smells strange.[/b]
Heh heh. Send the wife shopping ? Are you crazy ? I will just wait for her to go shopping again.
I will blame the house smell on my dog.
quote
Originally posted by Patrick:
Those did turn out very nice Patrick. I had never thought of two toned. Do you have a further away picture, perhaps of both ?
What the heck is laying on top of that vent ?
[This message has been edited by cliffw (edited 03-23-2018).]
It's one end of the spoiler from a '92 Chevy Lumina which now resides on my '88 Formula. This picture isn't the best, but does show both grills.
And this is the same spoiler/rear decklid combination when I originally had it installed on my '84.
quote
Originally posted by Patrick:
Having the wing is a matter of personal taste. I don't like it. I've removed the decklid (with wing) from my '88 Formula and swapped onto it the decklid I had on another notchie on which I had custom fit a spoiler from a '92 Chevy Lumina. I like it a lot better.
This is the decklid (with spoiler) that I've now got on my Formula...
[This message has been edited by Patrick (edited 03-24-2018).]
Have you all found that the rivets can just be drilled out to separate the two pieces? Afterward, can they be screwed back together, or must they be riveted?
Thanks,
Troy
I was able to drill out both parts, the one set in the body just requires small bit and patience, then you can just rivet it back together for the correct look... Can believe anyone wants to go through all the prep work on these ( I think i spent 3-4 hours on mine?) and just spray bomb them after all that. Do the prep work and then find a local powdercoat place, or send me yours all ready to go and I'll do it!
Thanks for the inspiration here guys I've been meaning to work on these and since i have a home powder coating and blasting setup its just time. Got the 1 side completely redone in about 3 hrs which included cooling off time while i went out to buy rivets. The OEM finish on the top part is definately powdercoat and the under tray I think is possibly just a spray paint as it comes off much easier. Did both on mine in semi gloss black not sure what the new OEM part would have been after looking at the finished product i wonder if the undertray was more of a flat finish to make it less visible. Before
The factory finish is definitely not powder coat, it is a painted surface. That is why it wears off and gets weather beat.
I must say that with the exception of the rivets not being black, your finished pieces look NOS.
Where's that "LIKE" button.
[This message has been edited by Thunderstruck GT (edited 03-24-2018).]
Originally posted by Patrick: It's one end of the spoiler from a '92 Chevy Lumina which now resides my '88 Formula.
Ah, it looks weird from that top angle but does look good from the side profile
Hmm, I wonder what it would look like on wingstands.
quote
Originally posted by Patrick: Having the wing is a matter of personal taste. I don't like it. I've removed the decklid (with wing) from my '88 Formula and swapped onto it the decklid I had on another notchie on which I had custom fit a spoiler from a '92 Chevy Lumina. I like it a lot better.
Smart move. Even smarter would be if you saved the original deck lid. Just in case you sell. As you say, personal preference.
Years ago I got some advice from a professional painter, he said "primer sticks to metal, and paint sticks to primer". seems pretty basic but i've always lived by these words, and for the most part, my painted parts seem to last. Almost every time i skipped the primer, i got a crappy paint job. Also, good advice w/ the aircraft primer, most don't realize the vents are aluminum.
Generally thats true...but like everything...there are exceptions. I was a body shop owner/operator for 45 years. Aluminum should have chromate primer as said. I painted planes in Okla City and a few here. Krylon BBQ black is a semi gloss I use a lot and it can be used without primer just fine. I did a lot of parts on my kit cars over the years. Primer is also good in that you can fill slight imperfections with it before painting. If you use primer, remember it needs to be sanded or scuffed before painting.


.jpg)


