Pennock's Fiero Forum
  General Fiero Chat
  84 SE Wonder Bread Chump car Build

Post New Topic  Post A Reply
Email This Page to Someone! | Printable Version


next newest topic | next oldest topic
84 SE Wonder Bread Chump car Build by agfracing
Started on: 01-17-2016 10:29 PM
Replies: 12 (588 views)
Last post by: GoGoFiero on 01-26-2016 09:07 PM
agfracing
Member
Posts: 22
From: jamestown, NY
Registered: May 2014


Feedback score: N/A
Leave feedback

Rate this member

Report this Post01-17-2016 10:29 PM Click Here to See the Profile for agfracingSend a Private Message to agfracingEdit/Delete MessageReply w/QuoteDirect Link to This Post
Alright, So im a little late to the party starting this build thread, We started this build about three weeks ago. (december 23rd was the day we went and bought the car). So Im gonna try to go back to the start and get everything caught up over the next day or so.

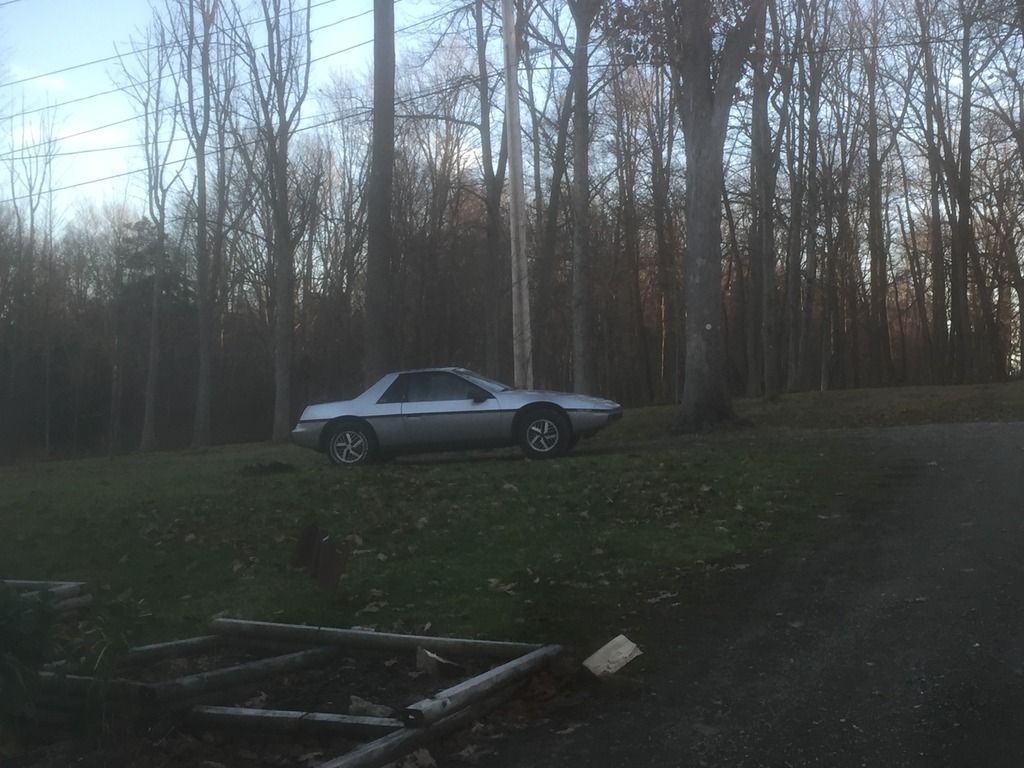
This thread is going to let you follow the build of our 1984 Fiero se 4 speed for Chump car racing. for those that dont know, Chump car racing is endurance racing meant for cars valued at under $500.
We are hoping to have the car done for the race at the end of may at Watkins Glen international raceway here in New York.

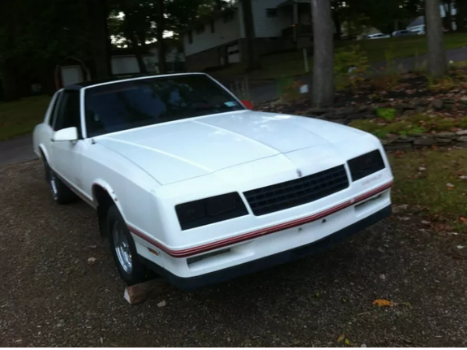
So the start. I was cruising facebook and saw a Running but knocking 84 4 speed fiero for sale in cleveland. It was a good deal but I figured by the time I could go get the car it would be sold. Fast forward a dew days the car was still up for grabs. So we made a deal and went and picked it up for $300.


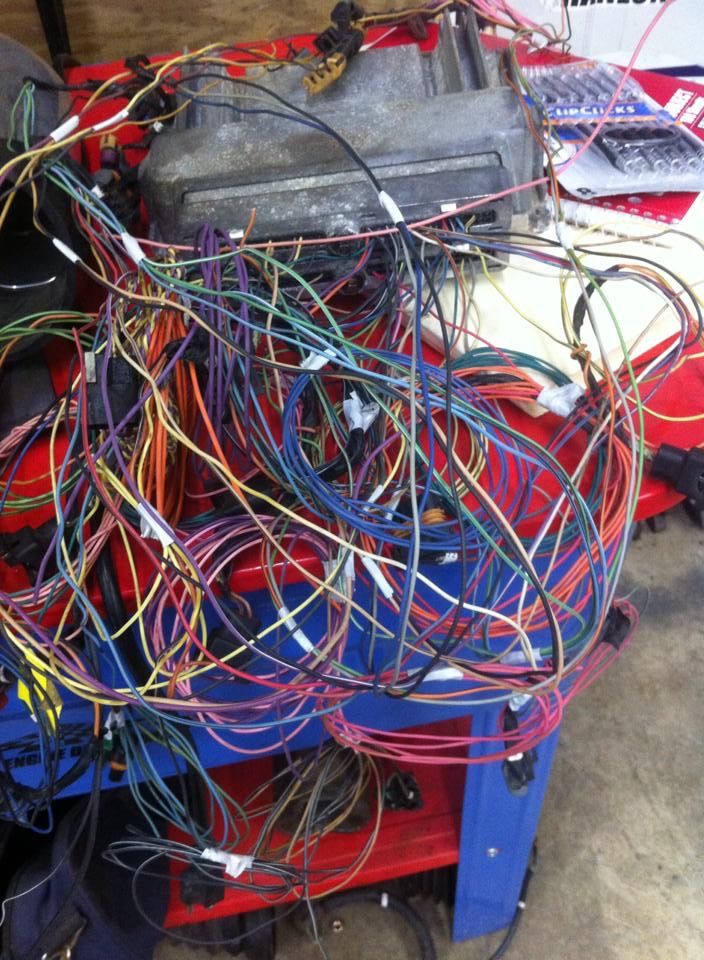
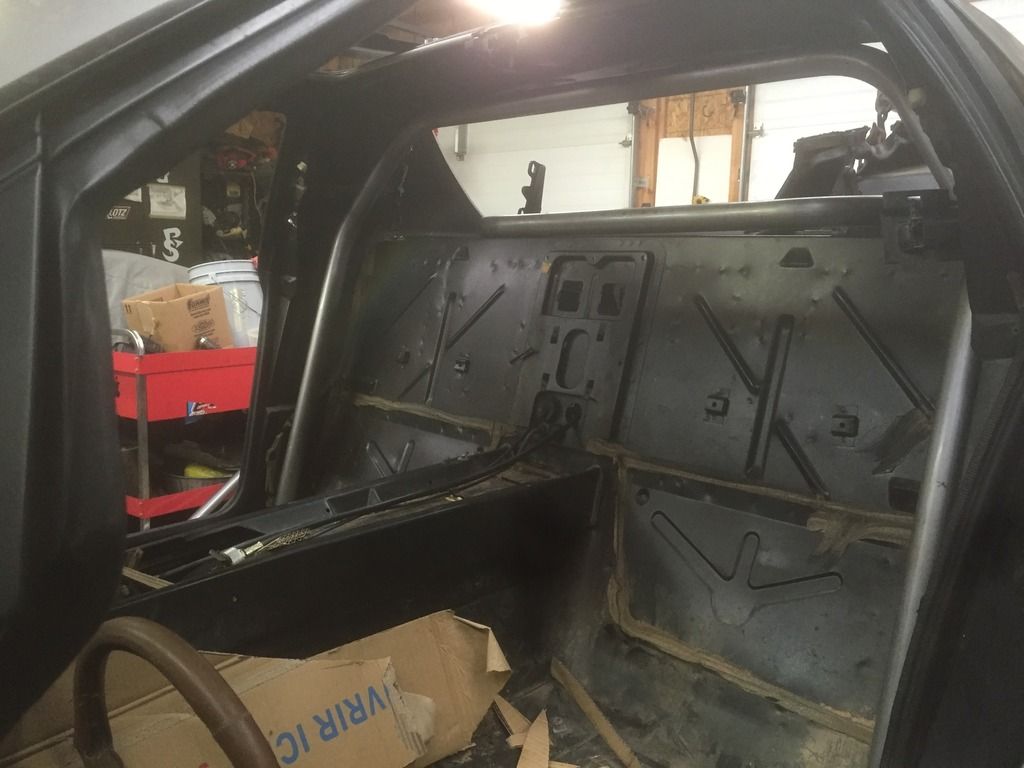
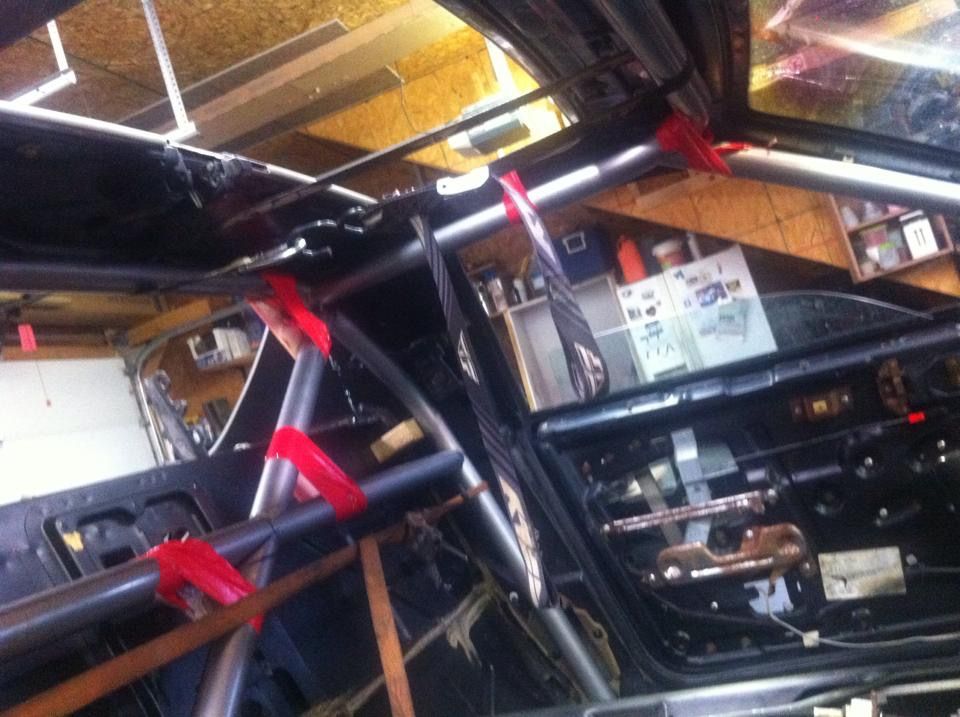
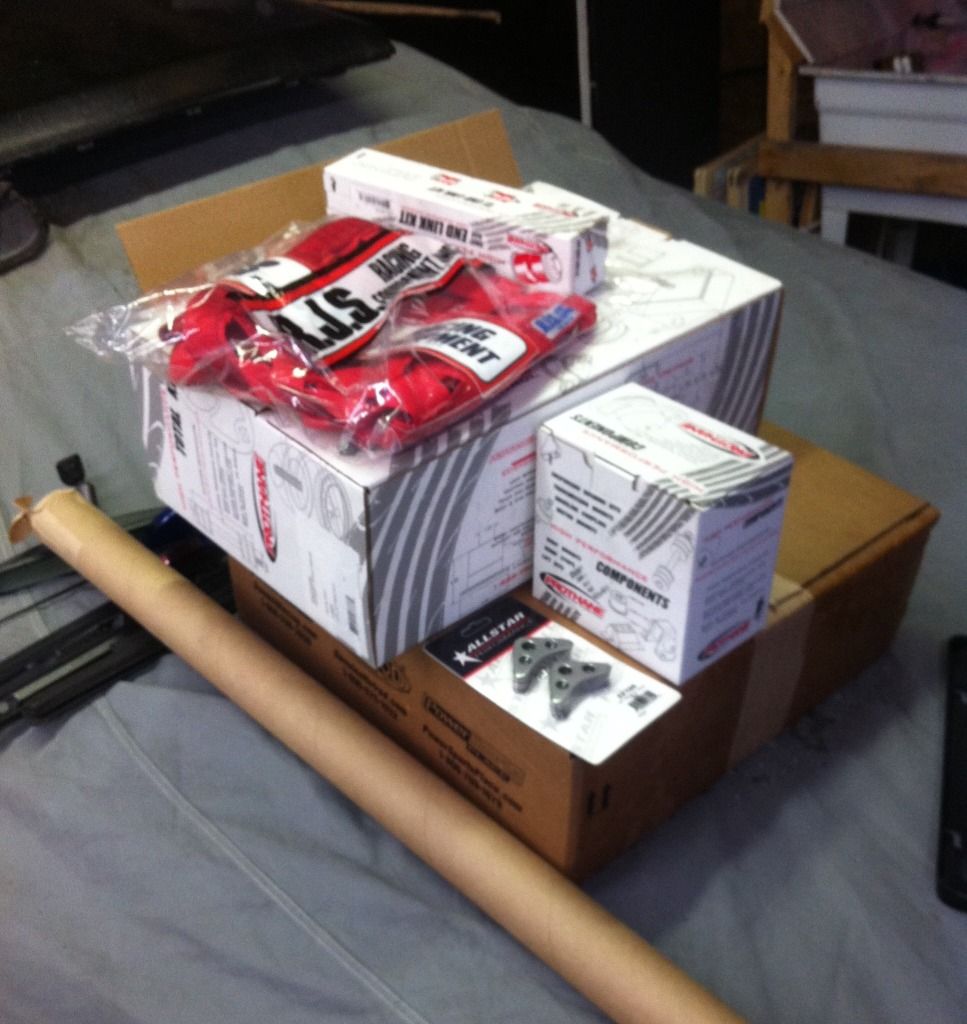
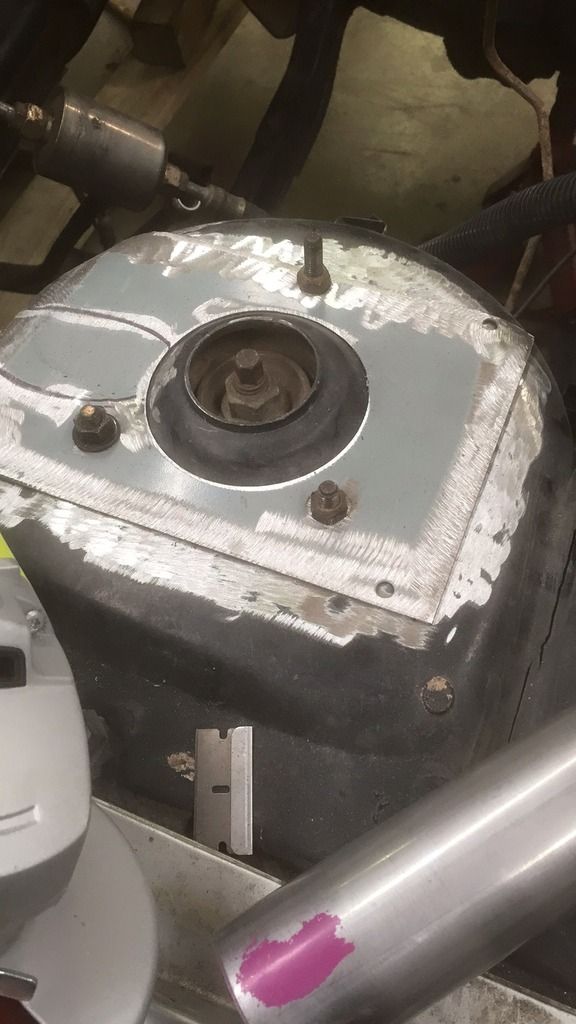
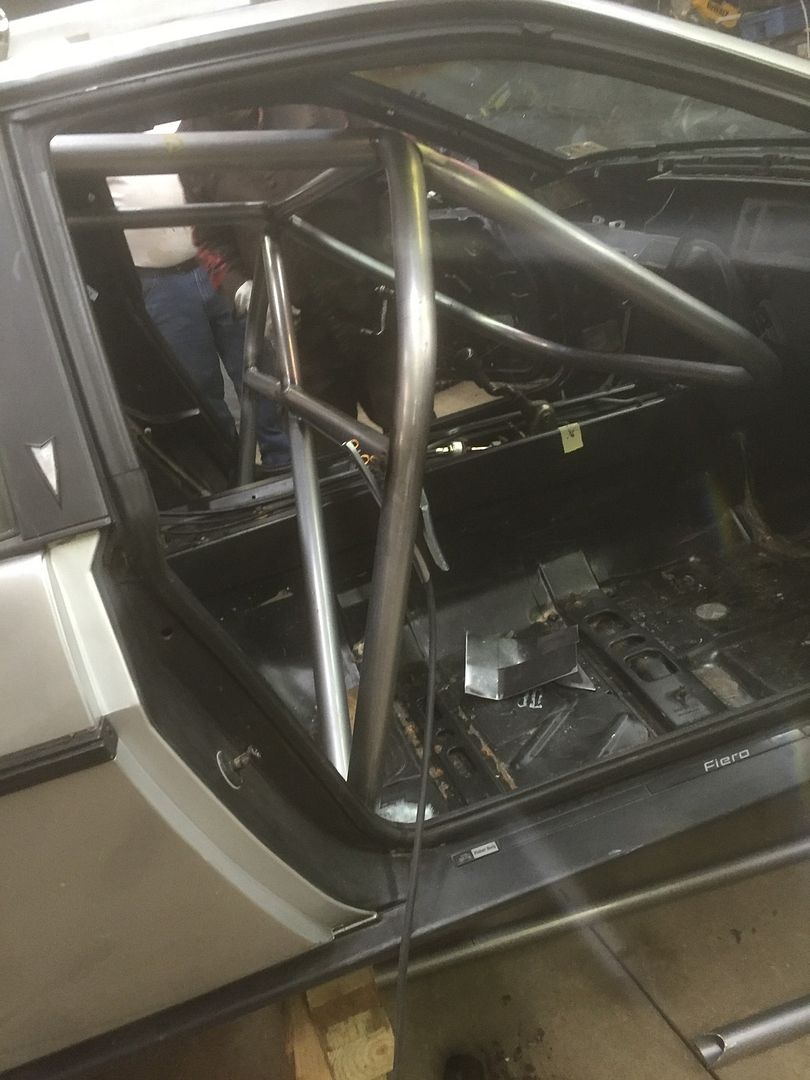
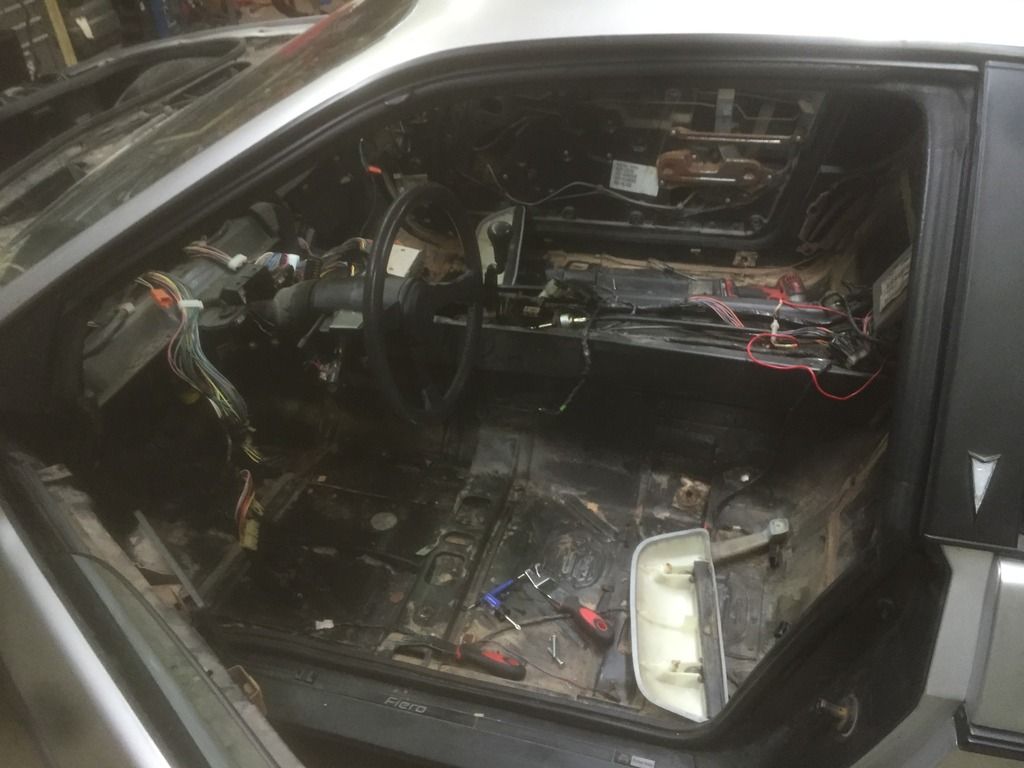
Our plans for this at the beginning. totally gut the interior. Everything out. Gut all the wiring so we can rewire the car the way we want it. Toggle switches and push buttons for everything. Get rid of everything we don't need, Radio, speakers, center console, etc. Swap in a more fitting engine and get it race worthy. Lots of safety and some fun parts as well.

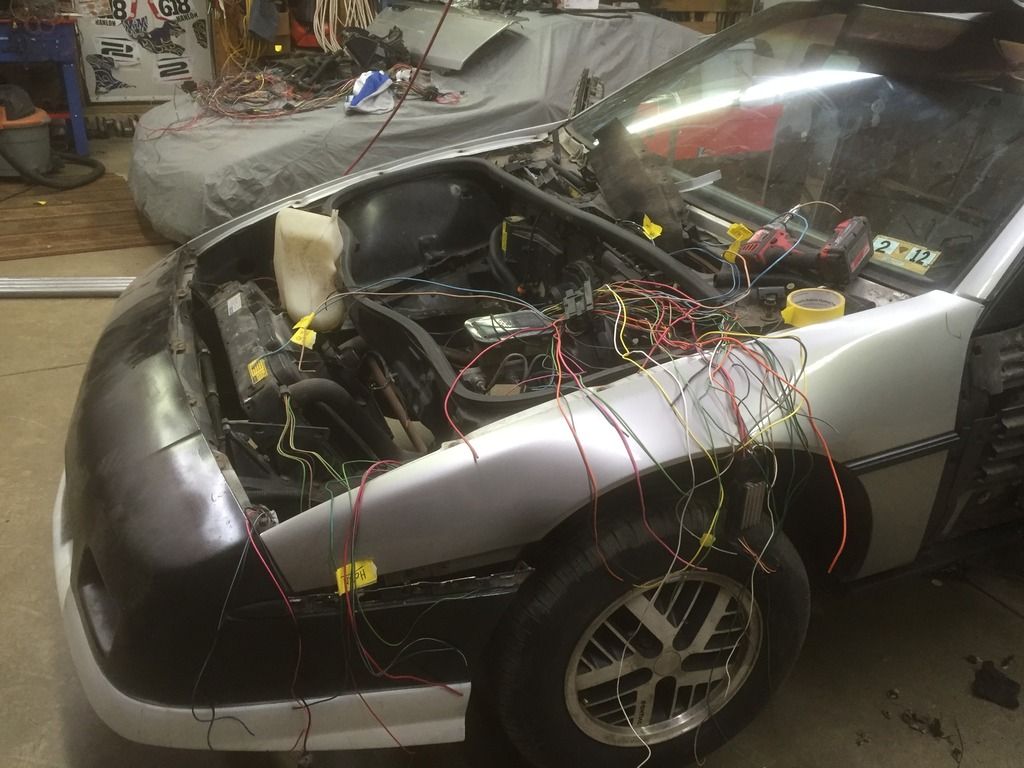
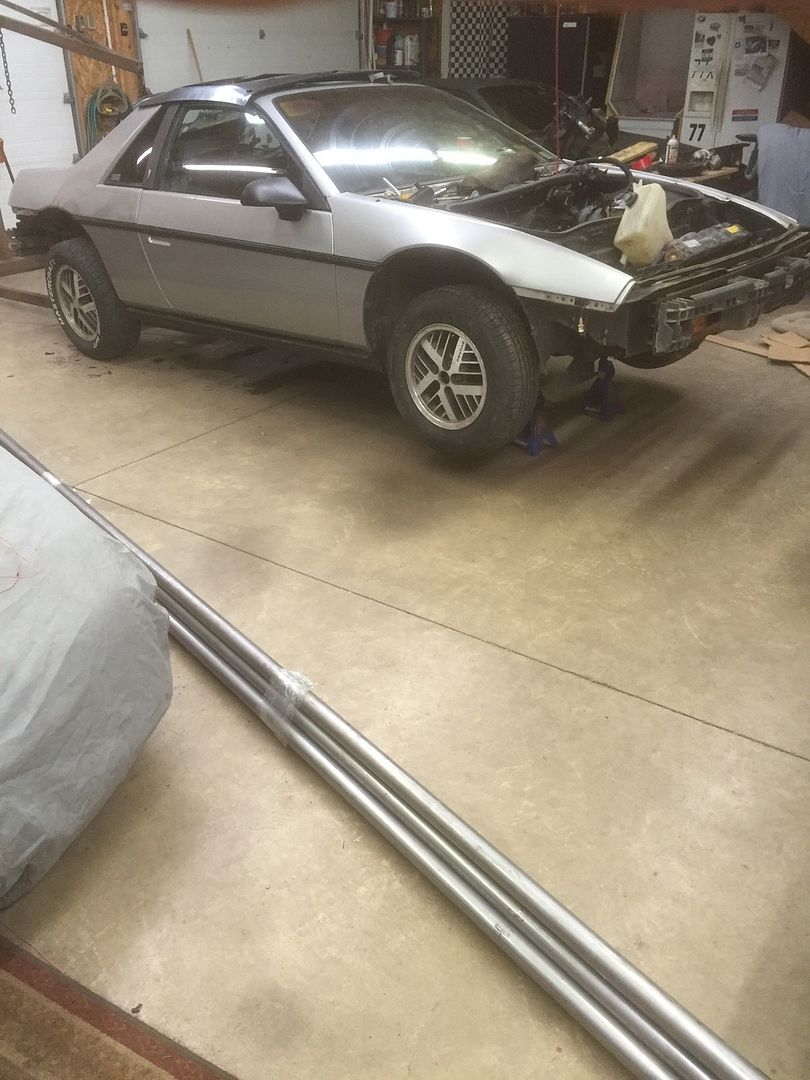
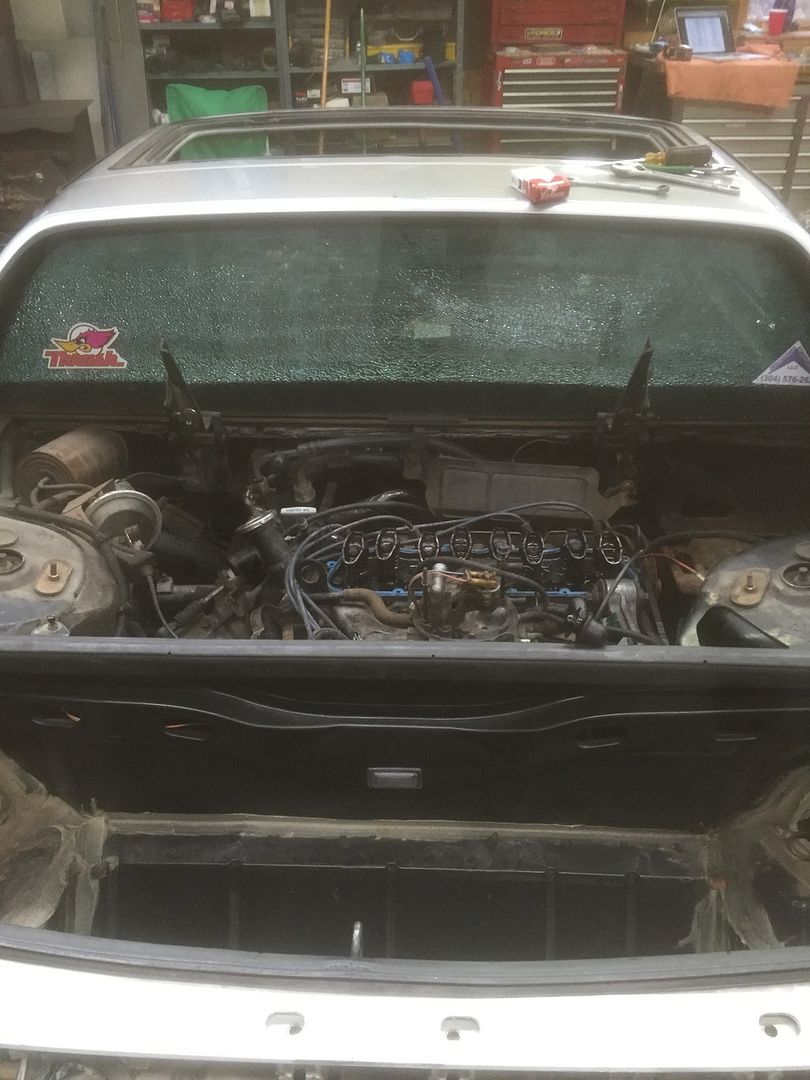
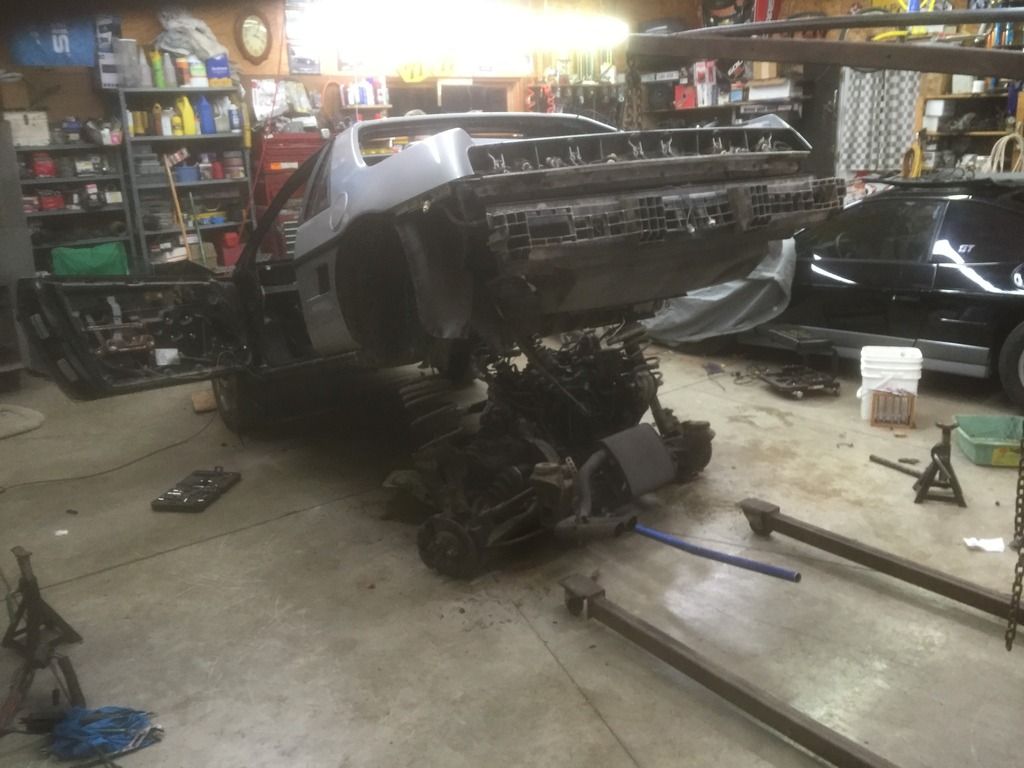
So day one of actually getting to work. First priority was to strip the interior and pull the motor/trans/cradle. I dont actually recall if this was all in the first day or over two or three days. But the interior and cradle were out pretty quick.


Hopefully nobody needed any of the parts in this picture. This was one of the trips to the local landfill. For our purpose, this is all useless extra weight.


Edit: Trying to get the pictures to work. Having no luck

[This message has been edited by agfracing (edited 01-18-2016).]

IP: Logged
PFF
System Bot
David Hambleton
Member
Posts: 1581
From: Stoney Creek Ontario Canada
Registered: Nov 2012


Feedback score: N/A
Leave feedback

Rate this member

Report this Post01-17-2016 10:44 PM Click Here to See the Profile for David HambletonSend a Private Message to David HambletonEdit/Delete MessageReply w/QuoteDirect Link to This Post
Are you using Pennocks Image Poster at the bottom of the screen to post the pics?

[This message has been edited by David Hambleton (edited 01-17-2016).]

IP: Logged
agfracing
Member
Posts: 22
From: jamestown, NY
Registered: May 2014


Feedback score: N/A
Leave feedback

Rate this member

Report this Post01-17-2016 10:47 PM Click Here to See the Profile for agfracingSend a Private Message to agfracingEdit/Delete MessageReply w/QuoteDirect Link to This Post
NO, I hosted them myself and tried to direct link them. Apparently Flickr doesnt allow direct links so im waiting for all of them to upload onto my photobucket account. They are coming.
IP: Logged
Patrick
Member
Posts: 36401
From: Vancouver, British Columbia, Canada
Registered: Apr 99


Feedback score: (1)
Leave feedback


Total ratings: 458
Rate this member

Report this Post01-18-2016 01:44 AM Click Here to See the Profile for PatrickSend a Private Message to PatrickEdit/Delete MessageReply w/QuoteDirect Link to This Post
 
quote
Originally posted by agfracing:

This images is larger than 153600 bytes. Click to view.


If you keep the image file size below 300 kb, you'll be able to avoid having that icon appear. Your image width of 1024 pixels is perfect.

I'm looking forward to seeing what you do with this car. Several other Fieros have been featured here over the years which have been prepared for Chump racing. It's always great seeing what different people have done.
IP: Logged
agfracing
Member
Posts: 22
From: jamestown, NY
Registered: May 2014


Feedback score: N/A
Leave feedback

Rate this member

Report this Post01-18-2016 11:06 PM Click Here to See the Profile for agfracingSend a Private Message to agfracingEdit/Delete MessageReply w/QuoteDirect Link to This Post
Still getting caught up. These post is about three weeks old but just now typing it up!

We've been thinking about different ideas for a motor since the stock 4 cylinder is gutless and also knocking. We have a 3800 and a 3800sc sitting in the garage and we're sure it's going to be one of those. we don't really care what class we get put in, we just want to race and have fun. It is looking like the 3800sc is going to be the chosen motor.

The next task we faced was the wiring. As I mentioned earlier. We wanted to pull every bit of wiring from the car and start fresh and do exactly what we want. Luckily my father (who also posts from this account) has been an electrician for nearly his entire life, so this task is all his.
Along with getting only what we want wired up to make it simple and fool proof, we did end up losing a bit of weight by stripping out all the useless wires. My dad ended up looking up the pin outs for the Fiero, and the 3800 harness and making a pretty close to plug and play harness for either 3800 motor we have. This is still in the works but pretty close, just needs to be fitted to the car. Here's a picture so you can sort of see what he's been dealing with.


We also knew from the start that the 84 se front bumper isn't what we want. Luckily I parted out an 86 gt and had both front and rear bumpers laying around in the garage. So we're going my with the front bumper from the gt and most likely the rear gt bumper as well. I don't have a picture of the gt bumper stuck on there except for the wiring photo above that shows the black gt bumper. .


Next stop. Figuring out the roll cage. The last picture above you can see the roll bar tubing we ordered.

[This message has been edited by agfracing (edited 01-18-2016).]

IP: Logged
agfracing
Member
Posts: 22
From: jamestown, NY
Registered: May 2014


Feedback score: N/A
Leave feedback

Rate this member

Report this Post01-18-2016 11:23 PM Click Here to See the Profile for agfracingSend a Private Message to agfracingEdit/Delete MessageReply w/QuoteDirect Link to This Post

agfracing

22 posts
Member since May 2014
We decided that one of the biggest tasks and the first thing we wanted to have completed was the roll cage. We read lots of forum posts and reviews and we're looking at the jegster Kit from jegs. After talking with Justin from Pontiaxed racing we decided to order roll bar tube and bend the cage ourselves. Pontiaxed (Justin) used the jegster cage and he clued us in that some of the cage tubing with this kit is under sized.

We ordered roughly 120' of 1.75" Dom roll bar tube from a local supplier. Luckily our buddy has an account with them and got it delivered to his place for us. He actually let us use his bender to bend the cage as well. We used cardboard to make templates for the roll cage. We also took measurements and angles the best we could. But the cardboard was probably the best help.
After a quick two hours at our buddies shop with him and his bender we had almost the entire cage bent. We ended up redoing the halo a few days later and making it a few inches wider. We had a hand ratchet bender we borrowed for this.
Here's my dad committing to cutting the first 20' length of pipe down to around 11' which was for the main hoop. We bent the legs long and will cut them off to length once it's in the car. More on that later.

Here are the bent cage pieces warming up next to the Woodstove. It was a frigid 15 degrees out when we bent the cage and the pieces were too cold to touch once we got home. Notice the sandwiches heating up on the stove. Ya gotta eat!


Chump car makes it mandatory to have rear main hoop braces going back towards the rear shock towers of the car. In the Fiero the only way to do this was through the rear window. Not only did we need to remove the window for the cage, but we planned to replace it with plexiglass to save weight as well. We put duct tape and packing tape on both sides of the Windows before trying to remove it. The theory was that this would keep all the glass from falling out after it shattered. I used a spring loaded punch tool and it 100% shattered the window with absolutely no effort. Unfortunately the tape didn't work as planned and we got glass all over everything in the process of removing the window.

[This message has been edited by agfracing (edited 01-18-2016).]

IP: Logged
agfracing
Member
Posts: 22
From: jamestown, NY
Registered: May 2014


Feedback score: N/A
Leave feedback

Rate this member

Report this Post01-18-2016 11:35 PM Click Here to See the Profile for agfracingSend a Private Message to agfracingEdit/Delete MessageReply w/QuoteDirect Link to This Post

agfracing

22 posts
Member since May 2014
We read up a ton on the best way to weld the cage. We came up with the conclusion that we needed to drill a hole in each corner of the floor pan where the cage is, so that the cage can drop down and give us access to 360* weld every joint. Luckily for us. My dad was able to borrow a tube notcher from someone he works with. We've never used one so we were a little worried about how well it would go.
The main hoop fits just about as perfect as we could Have hoped for.

Here's the first attempt at notching something. This is where the halo meets the main hoop. Somehow we got it absolutely perfect. All the notching went pretty smooth. Luckily we had the notcher because this would have been nearly impossible without it.

We got everything notched and in place, held together with ratchet stamps and tape since neither of us trust ourselves enough to weld or even tack the cage together. A guy we know who just started a fabrication/welding shop is Welding the cage for us. His welds are like artwork. He hooked us up big time in exchange for some advertising on the car.
IP: Logged
agfracing
Member
Posts: 22
From: jamestown, NY
Registered: May 2014


Feedback score: N/A
Leave feedback

Rate this member

Report this Post01-18-2016 11:49 PM Click Here to See the Profile for agfracingSend a Private Message to agfracingEdit/Delete MessageReply w/QuoteDirect Link to This Post

agfracing

22 posts
Member since May 2014
The cage holes in the floor pan needed to be covered with 6"x6" plate steel to be legal. So we got to fabbing these plates before the cage was in the way. We pulled the cage pieces out and came up with four plates that looked like this. They are currently welded and solid but I don't have any pictures of them.

Also. Got a bunch of race car Christmas presents in the mail today. Poly bushing kit. Window net and mount kit. And some cage gussets which we ended up not using on the cage.


While some of this was going on, I was sitting in an OSHA safety class or something Boring like that and got a text from my dad saying he bumped the windshield with the halo while he was chexkong the figment. He then sent this picture.

Atleast now we can get a brand new windshield and find a way to put it in with clips and make it removable. Again. Shoutout to team Pontiaxed and their build thread for the idea of making it removable.
Alright. That's enough for tonight. The posts are almost caught up to where we are at currently. So maybe by tomorrow evening we will be up to date with our current progress. The fun stuff starts soon.

[This message has been edited by agfracing (edited 01-24-2016).]

IP: Logged
Jfrost
Member
Posts: 1092
From: Brookfield, IL
Registered: Jul 2009


Feedback score:    (29)
Leave feedback

Rate this member

Report this Post01-19-2016 11:41 PM Click Here to See the Profile for JfrostSend a Private Message to JfrostEdit/Delete MessageReply w/QuoteDirect Link to This Post
Awesome work so far. Still a pipe dream of mine to do something similar to this with a Fiero. Good luck on the build and keep the updates coming.

------------------
Project L67 Fiero

IP: Logged
Indyellowgt
Member
Posts: 1950
From: Alfred,Maine,Fiero Country,USA
Registered: Dec 2000


Feedback score:    (35)
Leave feedback


Total ratings: 70
Rate this member

Report this Post01-20-2016 09:41 AM Click Here to See the Profile for IndyellowgtSend a Private Message to IndyellowgtEdit/Delete MessageReply w/QuoteDirect Link to This Post
AWESOME!
IP: Logged
agfracing
Member
Posts: 22
From: jamestown, NY
Registered: May 2014


Feedback score: N/A
Leave feedback

Rate this member

Report this Post01-24-2016 01:03 PM Click Here to See the Profile for agfracingSend a Private Message to agfracingEdit/Delete MessageReply w/QuoteDirect Link to This Post
Sorry for the delay. My computer hard drive went bad and The new one just got here. Luckily all the pictures are on my phone so I can still update this. Just been a bit behind. Still making progress on the build though! there will be updates today very shortly.
IP: Logged
PFF
System Bot
agfracing
Member
Posts: 22
From: jamestown, NY
Registered: May 2014


Feedback score: N/A
Leave feedback

Rate this member

Report this Post01-24-2016 10:49 PM Click Here to See the Profile for agfracingSend a Private Message to agfracingEdit/Delete MessageReply w/QuoteDirect Link to This Post

agfracing

22 posts
Member since May 2014
Alright so its pretty hard to go back and try to remember everything we have done and in what order. This post is going to get us caught up or atleast to within the few last days. So from here on out I can update as we go.
Currently the cage is about 90% welded in. Im gonna throw a few pictures of the cage being built on here for everyone to check out.


This images is larger than 153600 bytes. Click to view.


These two pictures are cars we sold this week to finance race car stuff. 1986 fire gt. I drove this car all summer and it is the one that started the addiction. The 1987 monte carlo ss had no motor and we bought it a few weeks before this chump car started. We were gonna build something cool with it, but time and money are both ties up into the chump car.


[This message has been edited by agfracing (edited 01-25-2016).]

IP: Logged
GoGoFiero
Member
Posts: 43
From: Raleigh
Registered: Jan 2016


Feedback score: N/A
Leave feedback

Rate this member

Report this Post01-26-2016 09:07 PM Click Here to See the Profile for GoGoFieroSend a Private Message to GoGoFieroEdit/Delete MessageReply w/QuoteDirect Link to This Post
Looks great! Keep the photos coming.

Could you post a clear photo of the Service Parts Identification (SPID) label?

It's the label stuck to the top of the driver side wheel well in the front compartment. Next to the brake master cylinder.

I'm looking at all 1984 RPOs.

Thank you!

[This message has been edited by GoGoFiero (edited 01-26-2016).]

IP: Logged

next newest topic | next oldest topic

All times are ET (US)

Post New Topic  Post A Reply
Hop to:

Contact Us | Back To Main Page

Advertizing on PFF | Fiero Parts Vendors
PFF Merchandise | Fiero Gallery | Ogre's Cave
Real-Time Chat | Fiero Related Auctions on eBay


Copyright (c) 1999, C. Pennock