Pennock's Fiero Forum
  General Fiero Chat
  Daily Driver 3800SC L67 Isuzu 88 Coupe Build

Post New Topic  Post A Reply
Email This Page to Someone! | Printable Version


next newest topic | next oldest topic
Daily Driver 3800SC L67 Isuzu 88 Coupe Build by Fiero1K
Started on: 11-02-2011 07:17 PM
Replies: 21 (1963 views)
Last post by: PRND3L on 10-16-2016 11:02 PM
Fiero1K
Member
Posts: 411
From: Midland, MI
Registered: Oct 2009


Feedback score: (1)
Leave feedback

Rate this member

Report this Post11-02-2011 07:17 PM Click Here to See the Profile for Fiero1KSend a Private Message to Fiero1KEdit/Delete MessageReply w/QuoteDirect Link to This Post
I've been putting off making this build thread for a while now, but I keep getting asked to make one. It's pretty much done by the way, I just don't have any final pictures yet.

A little bit of basic information first:
I am a severely time-stretched full-time college student and full-time web developer/designer, somehow we still got this done over six or seven long weekends. This is NOT AT ALL a quick and dirty swap. We did what was necessary to swap the engine. I'm sort of OCD about how things look and fit and function.
This car is an '88 t-top coupe.
The engine is from a '99 Bonneville SSEi.
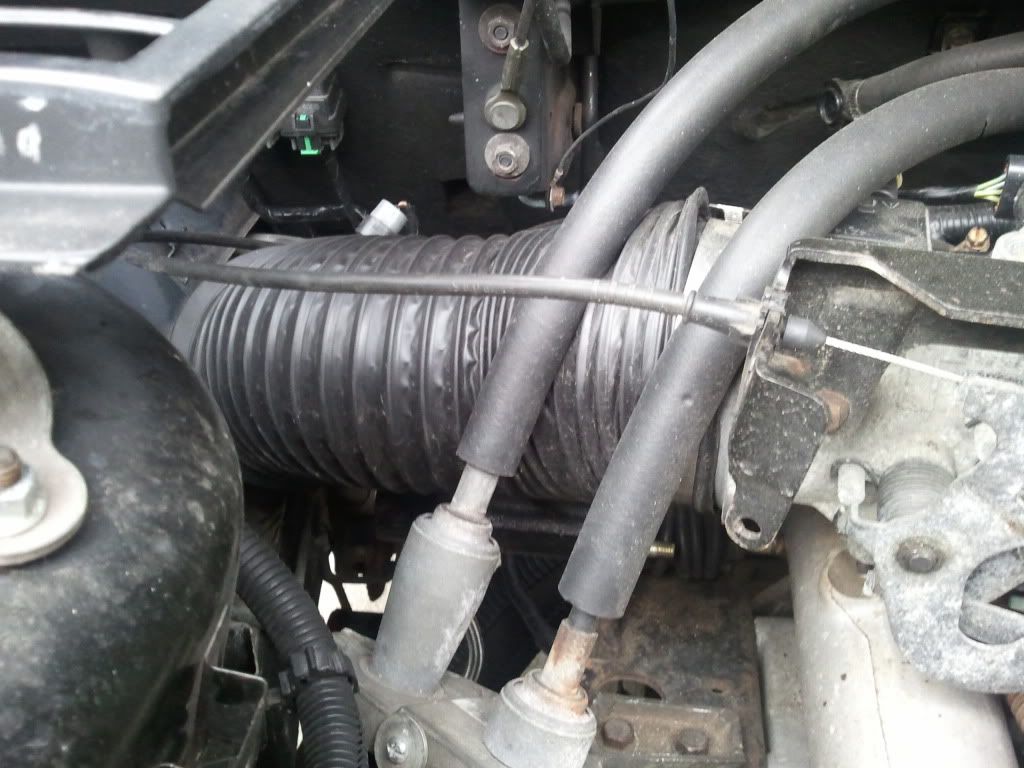
The transmission is an NOS Isuzu transmission (don't use this. Making it work is terrible, the cables (at least on this swap, with the factory trans mounts) want to be exactly in the middle of the air intake ducting.
The swap uses stock mounting of all accessories, as well as stock belt sizes.
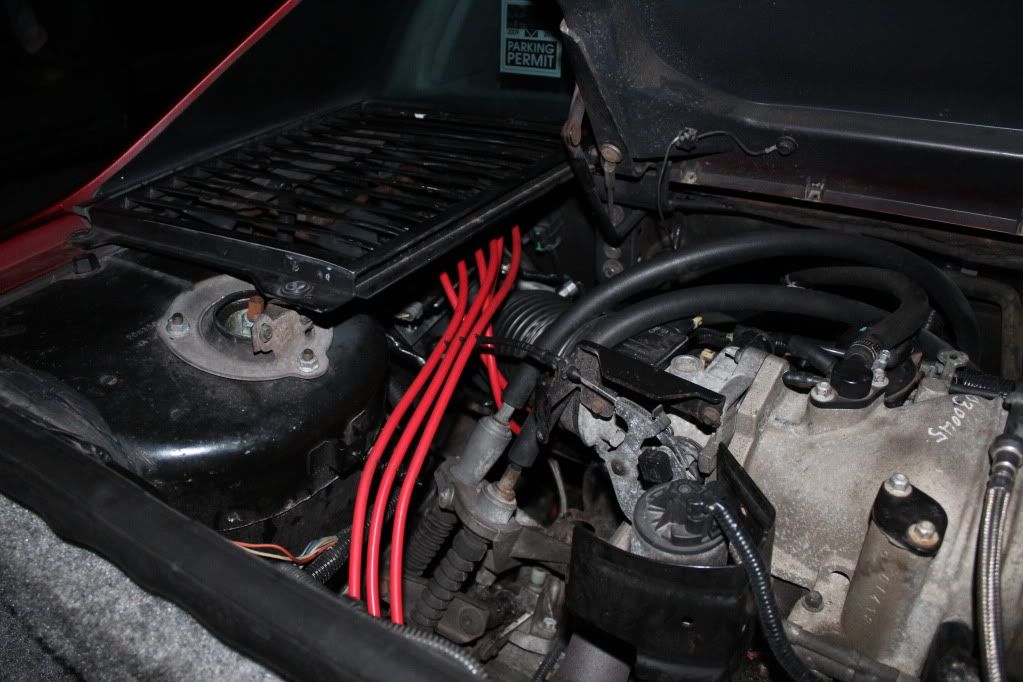
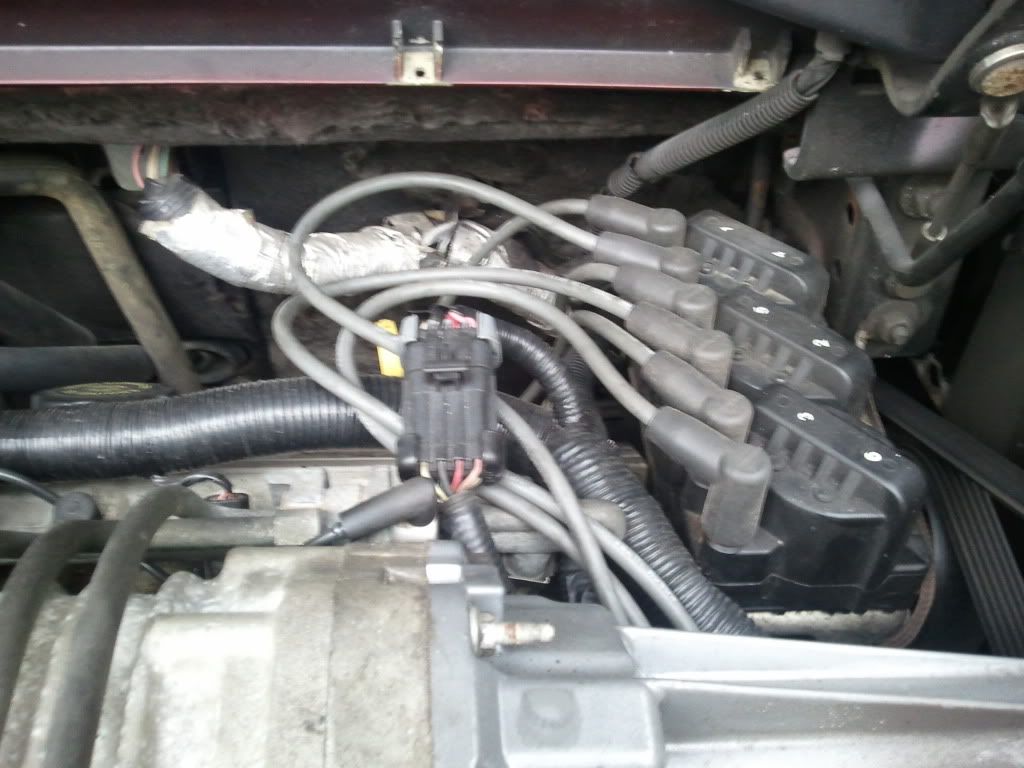
The battery is not relocated. When I do relocate it, I plan on moving the coil pack to that location, because it looks incredible.
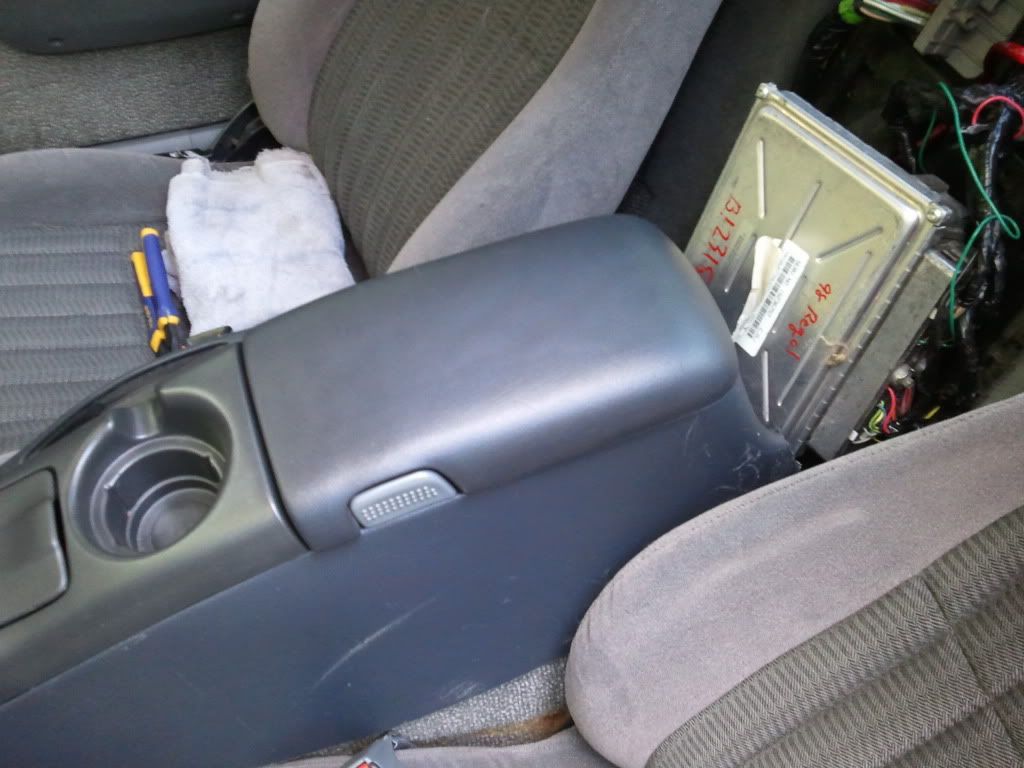
The ECU is in the stock Fiero location. It was programmed by Sinister Performance (excellent company) and the harness was made by FIEROFLYER (it is of good quality and works well).

Some thanks:
Ryan at Sinister - awesome job on the ECU, useful threads and posts, informative and helpful website.
Everyone else - this is a great community. I got a lot of ideas and motivation from looking at build threads (although we ran into a lot of problems I've never seen)
My dad, Shawn Mealey - dropped the engine, loaned me cash, helped out like crazy. Couldn't have done it without him.
Jacob Barkell - welded up my exhaust and brackets, did an awesome job. He also does a lot of BMW stuff, namely M42 swaps into 2002's. Link soon.
The guy I borrowed the compressor from - couldn't have sandblasted my parts without it, and they would have sucked. Sorry, can't remember your name, whoever you are.


This is the first round of shots - here goes.

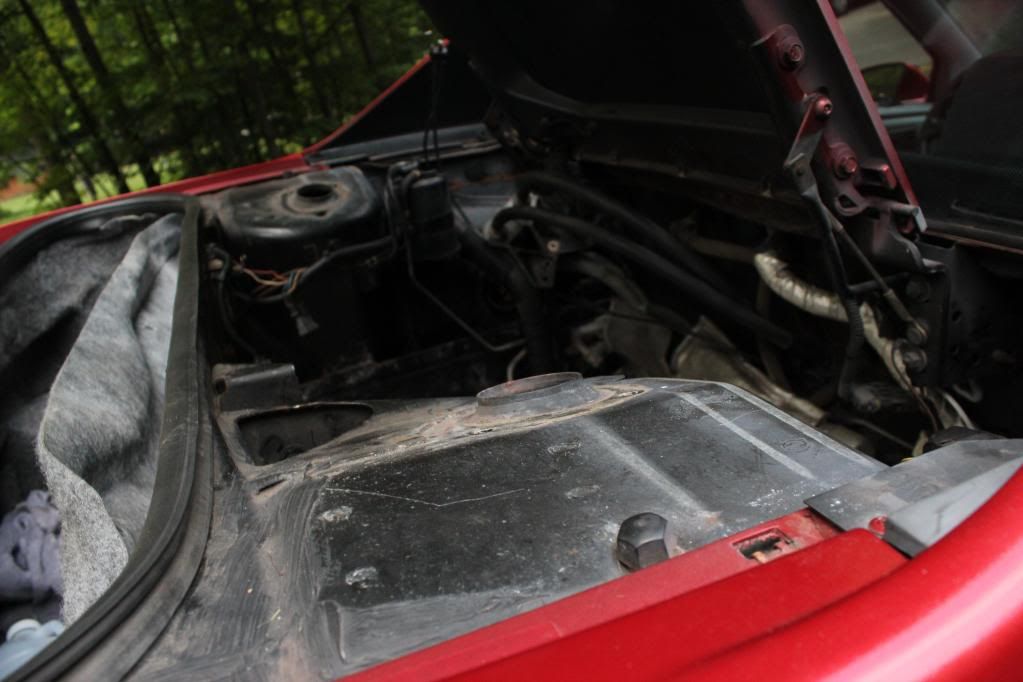
The empty engine bay:


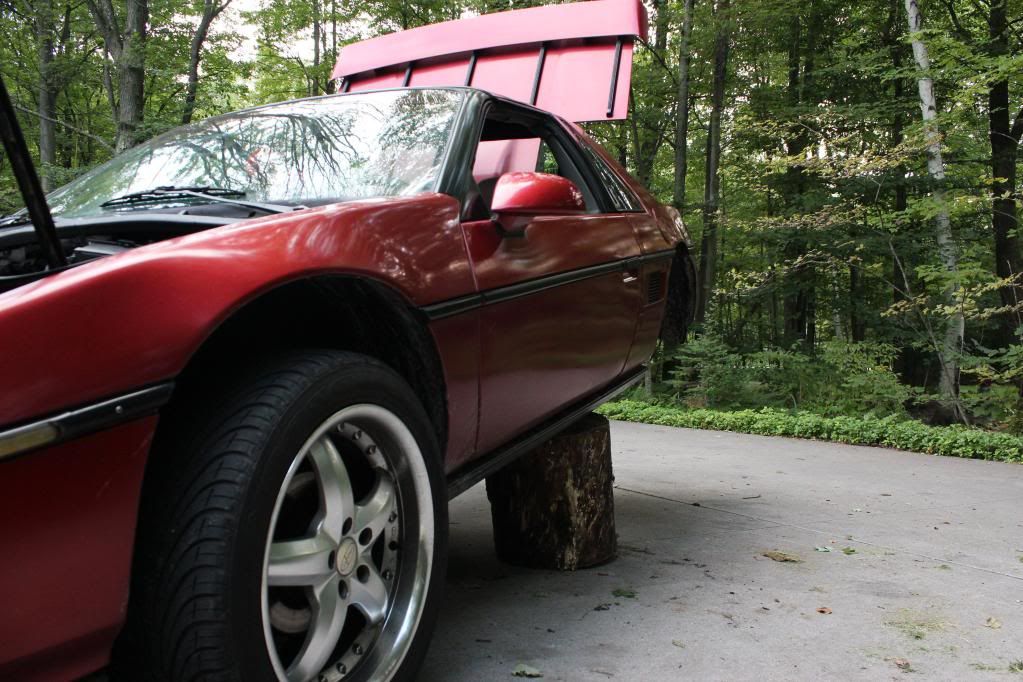
The Fiero up on stumps (hey, they held trees, they can hold a car):


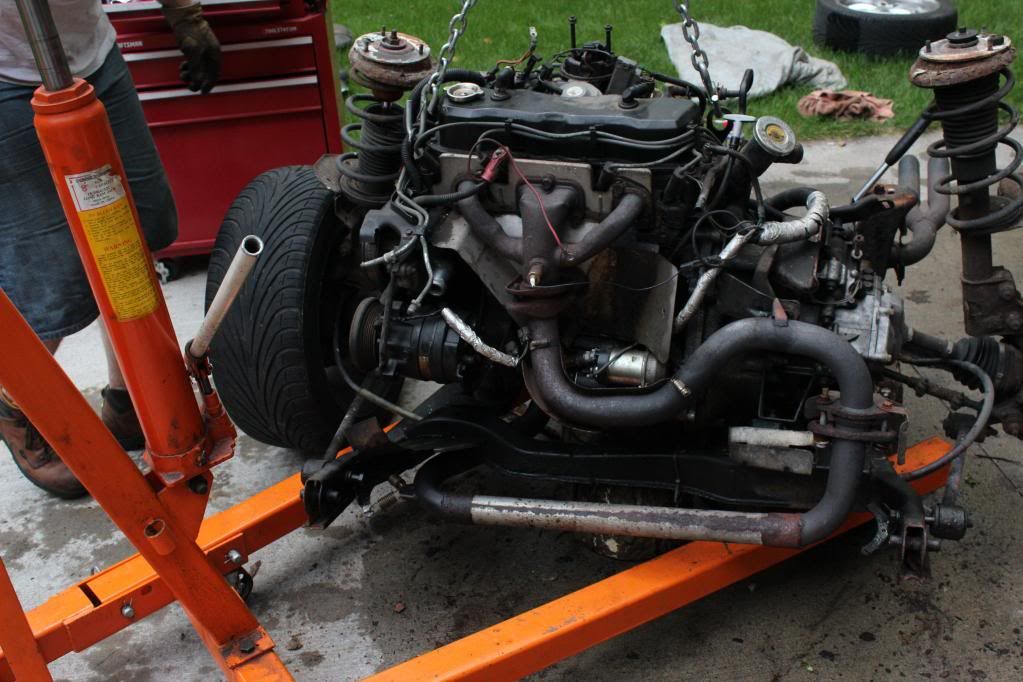
The old engine outside the car:


The whole cradle assembly. Looks pretty cool, in my opinion:


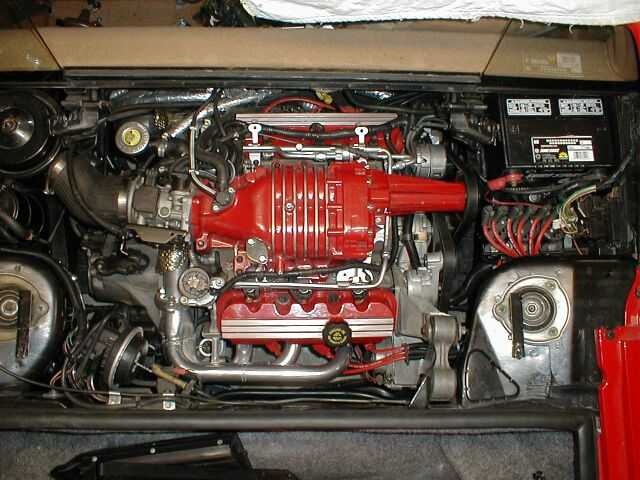
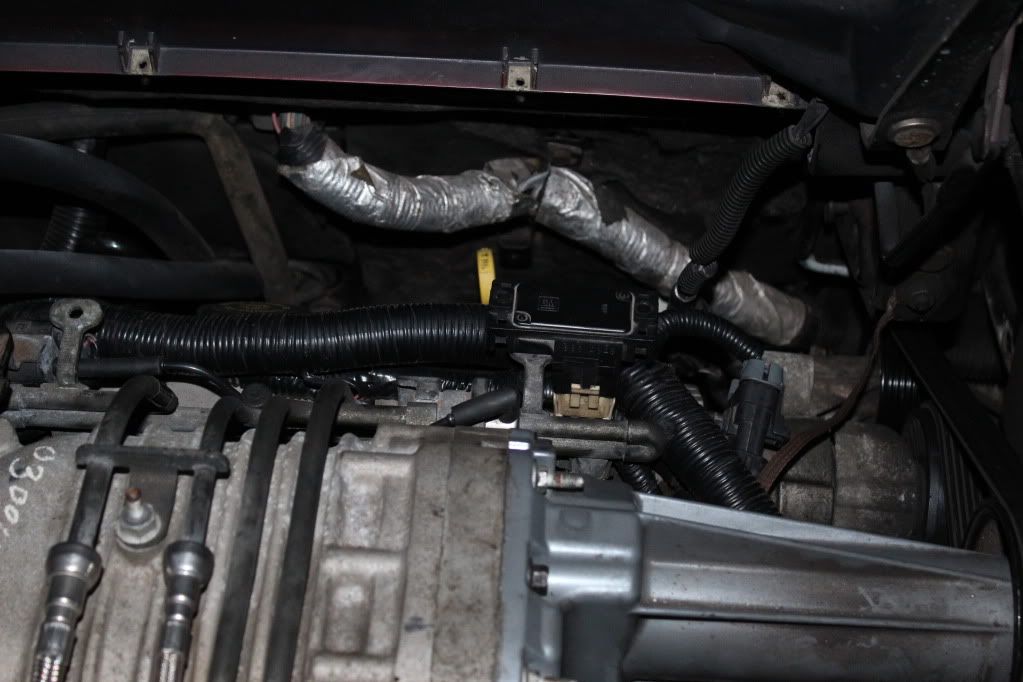
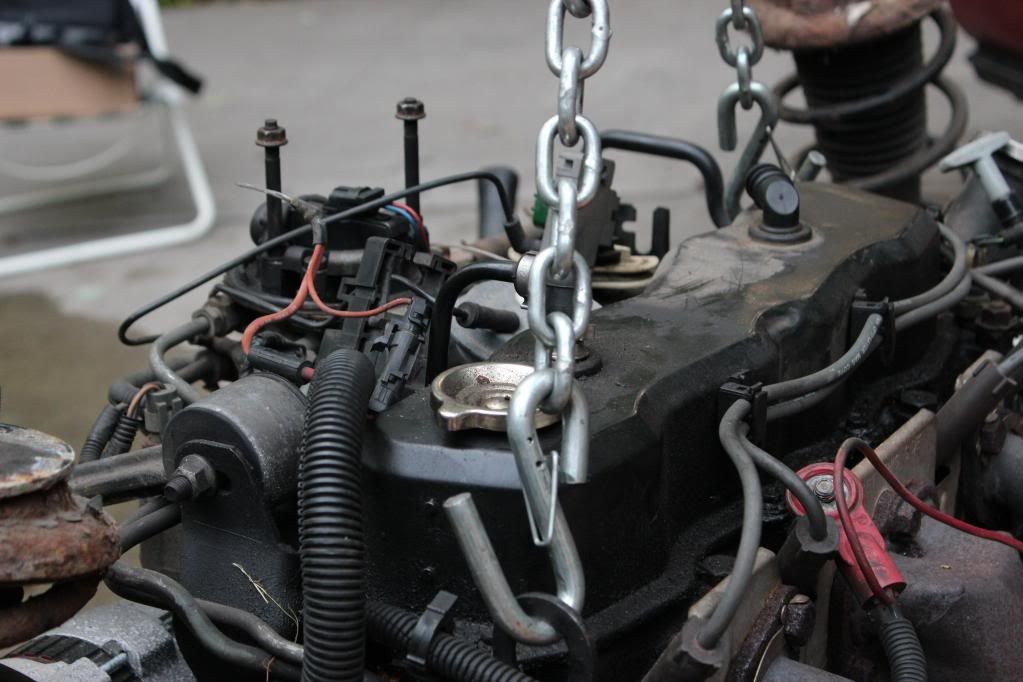
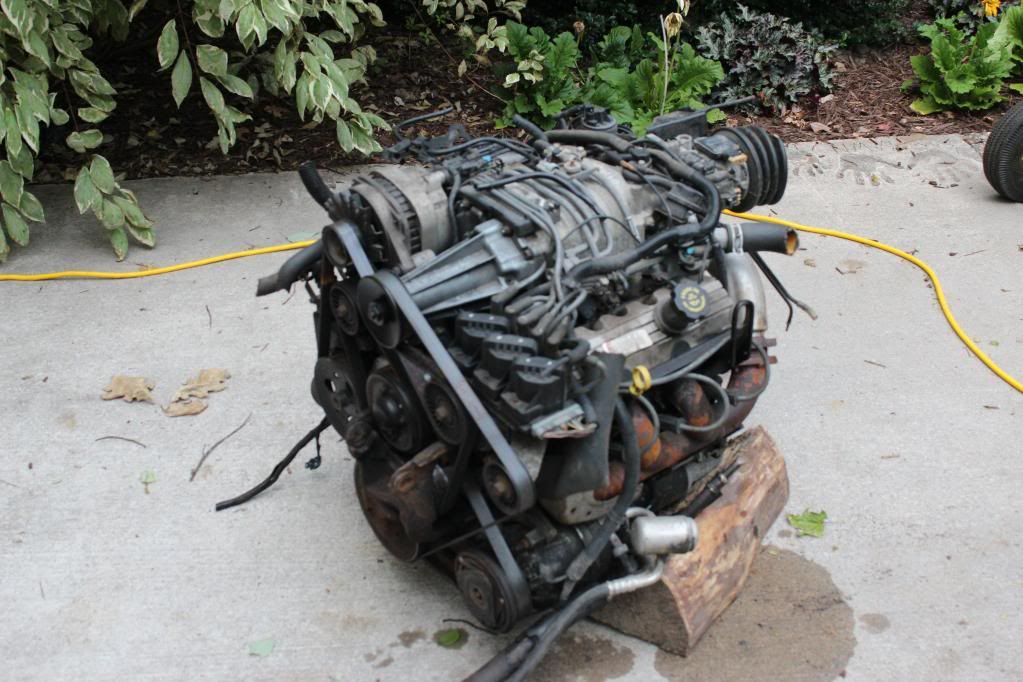
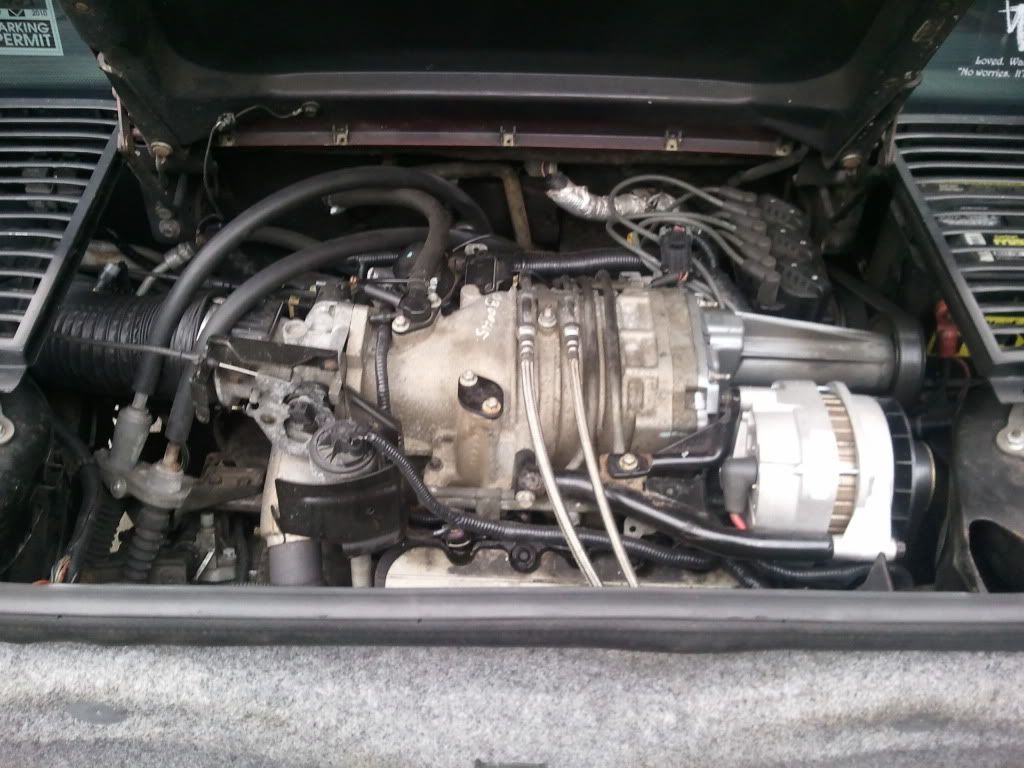
The new engine, from a 1999 Bonneville SSEi (note that ridiculous bracket on the front:
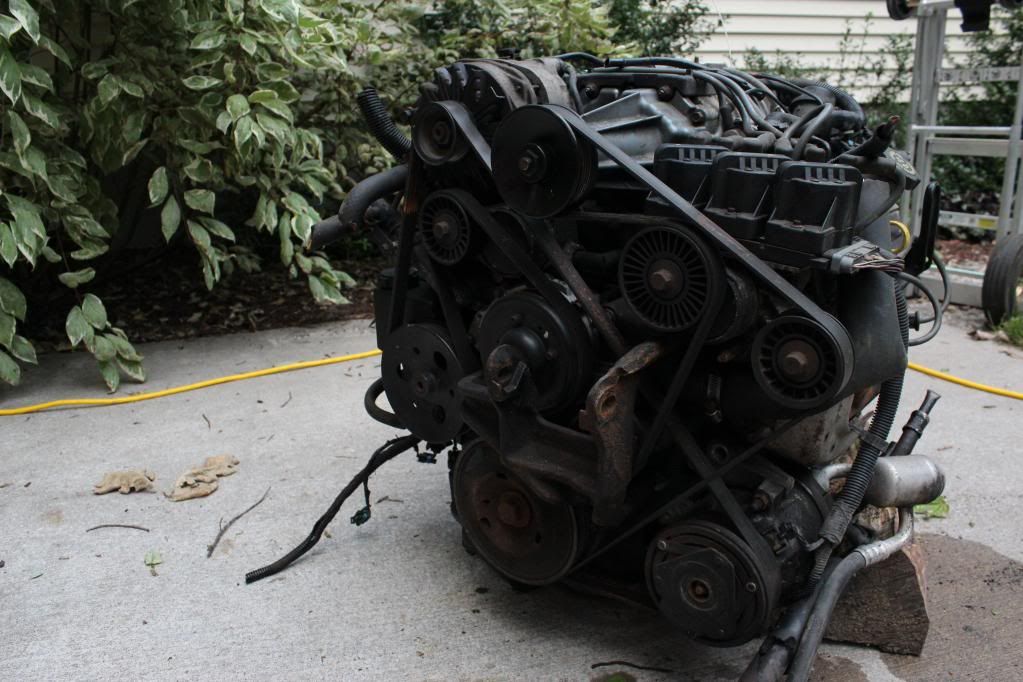

New engine again:


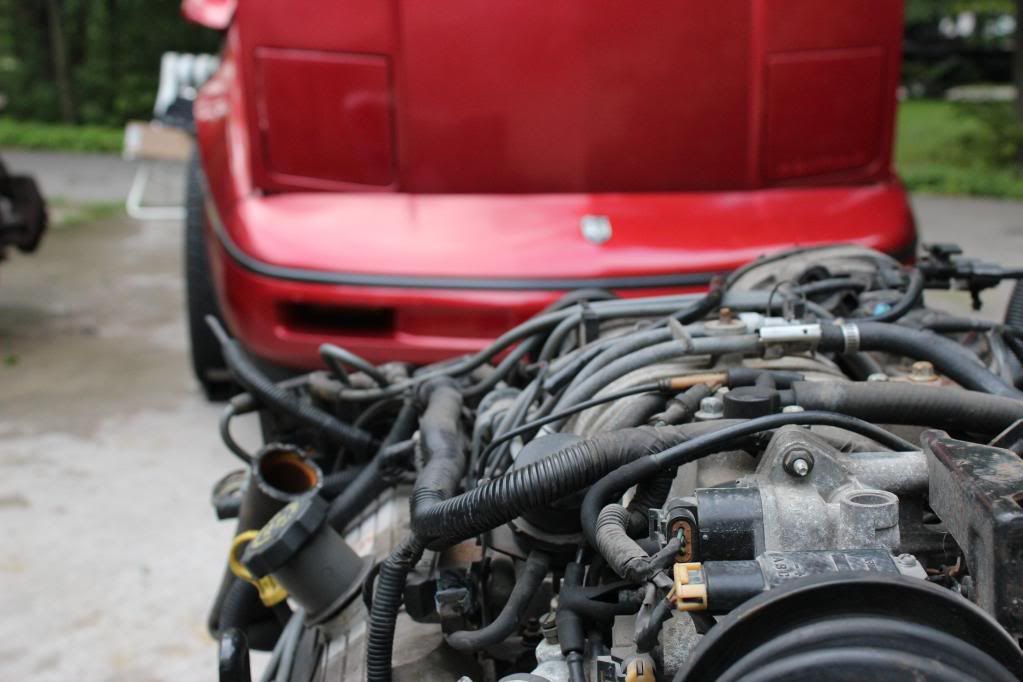
Pretty epic shot of the new engine and its recipient:


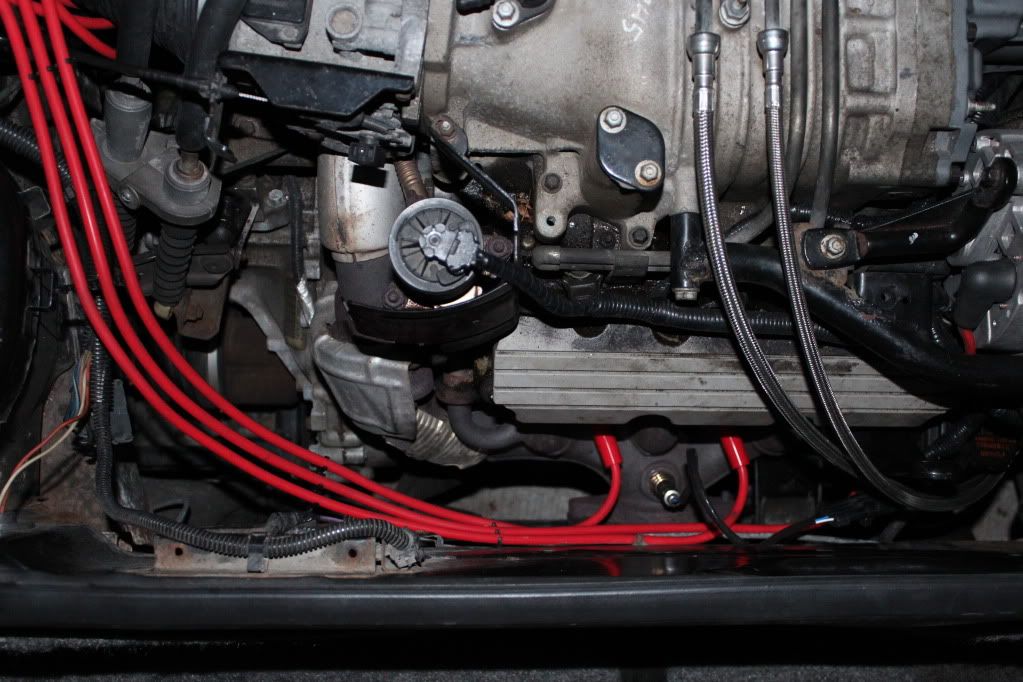
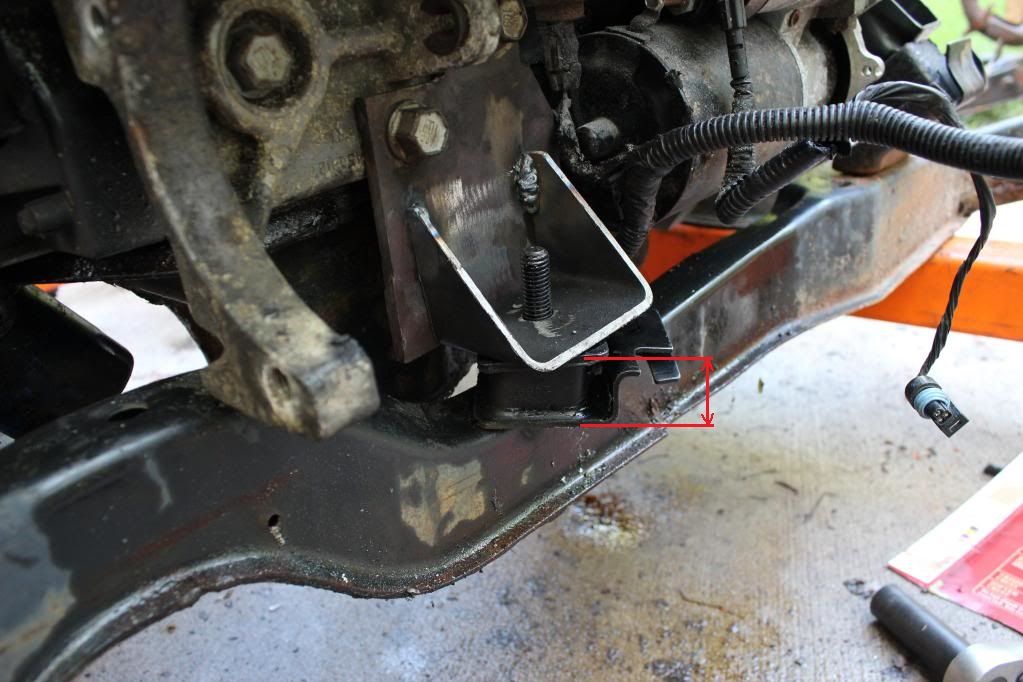
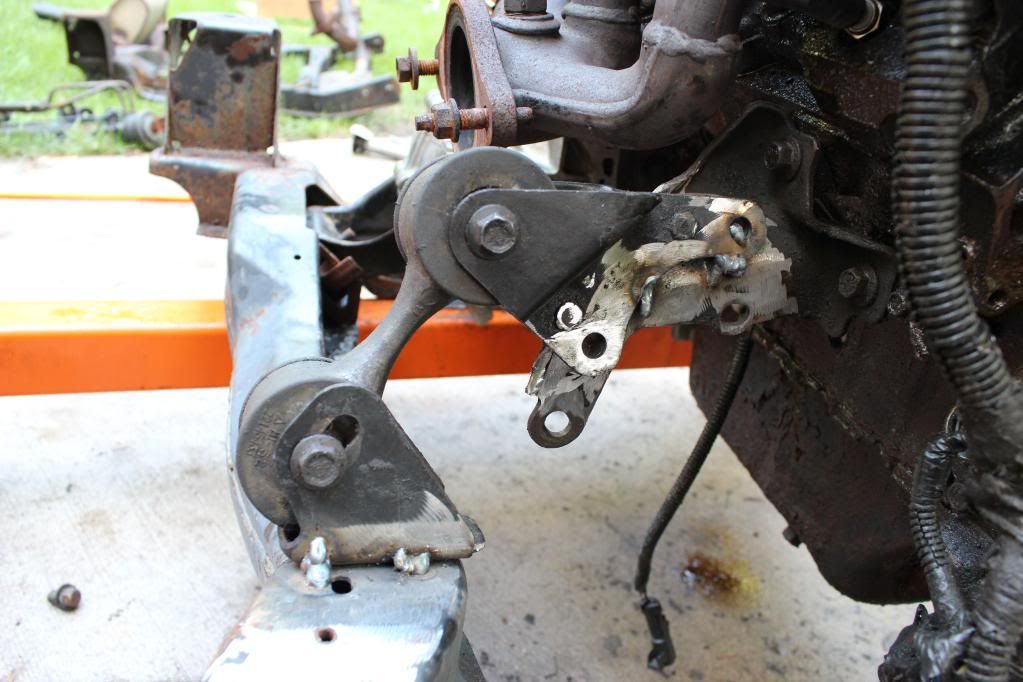
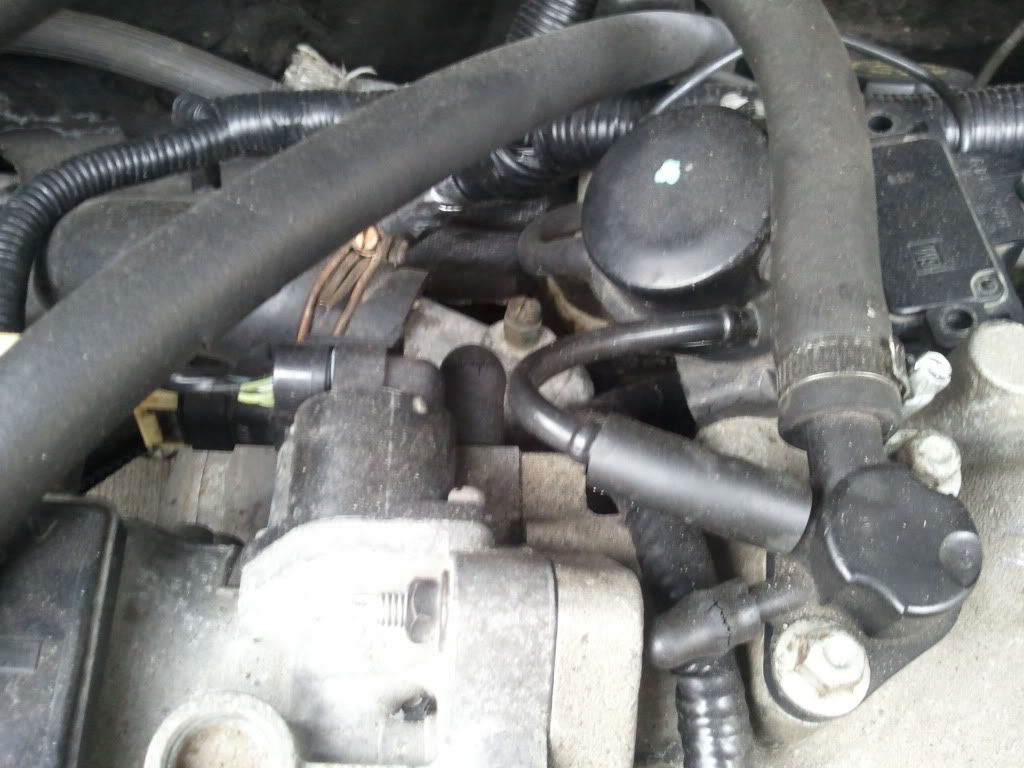
We built this mount because the oil filter adapter was in the way of the typical mount location (all the other ones I've seen have used the bracket directly under the engine). Now the oil filter is one of the easiest to reach in any car I've seen. No more stupid cartridge filter from the duke! It is basically a dogbone, removing the need to low-mount the alternator. (Note, we run the P/S pump outlet to the inlet, forming a loop and making it effectively an idler):


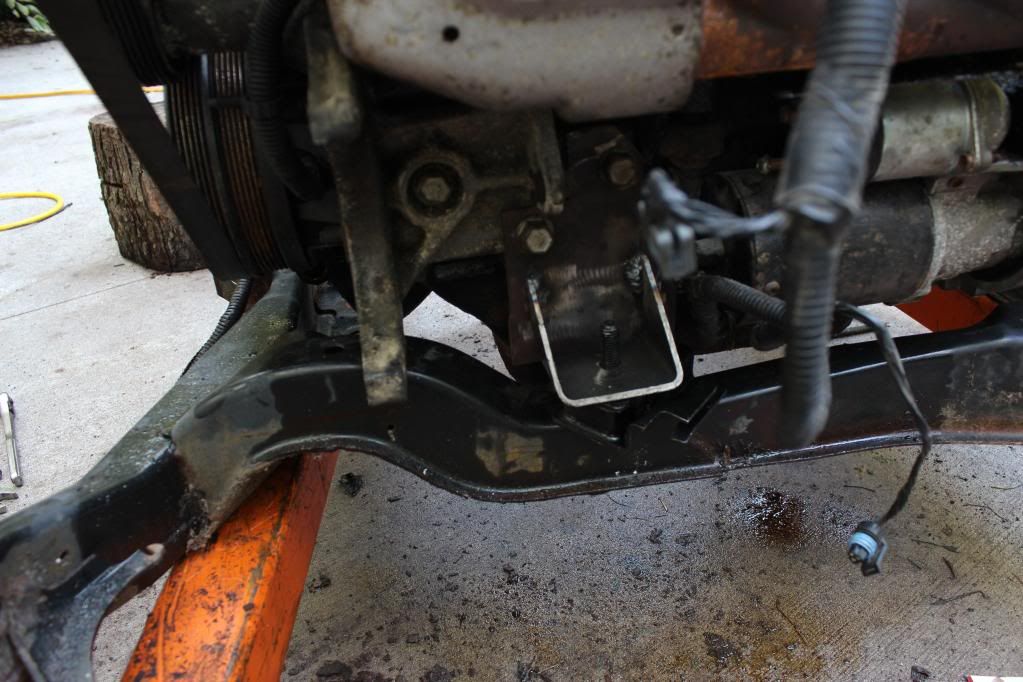
Conventional back bracket, uses '79 Dodge 318 V8 mounts, cheap and highly recommended. Mounts using bolts from A/C bracket, has more than enough clearance.


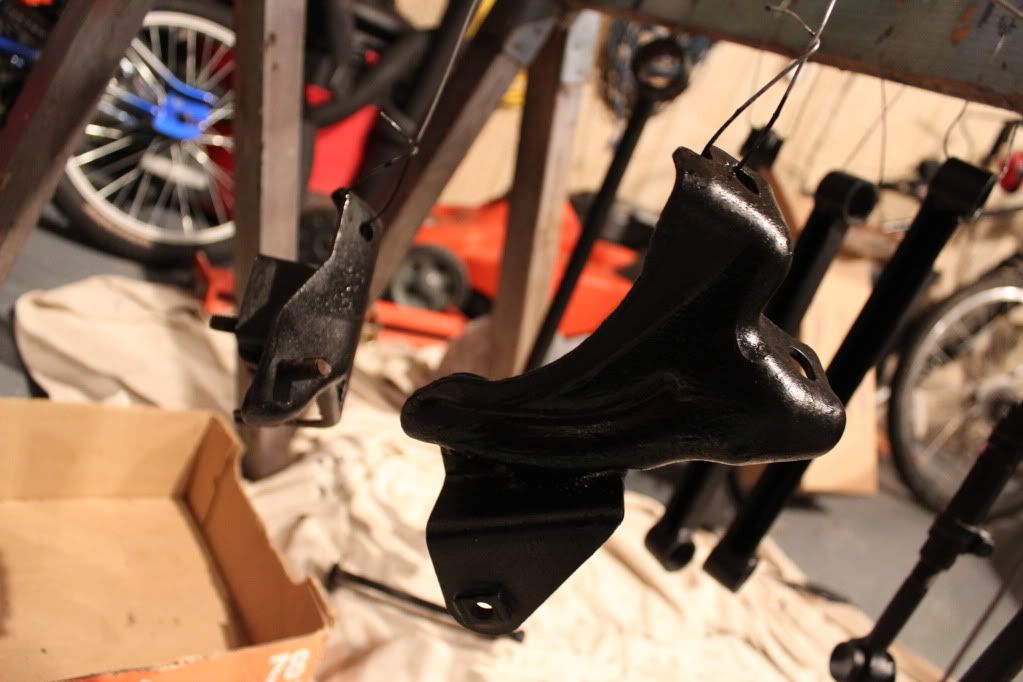
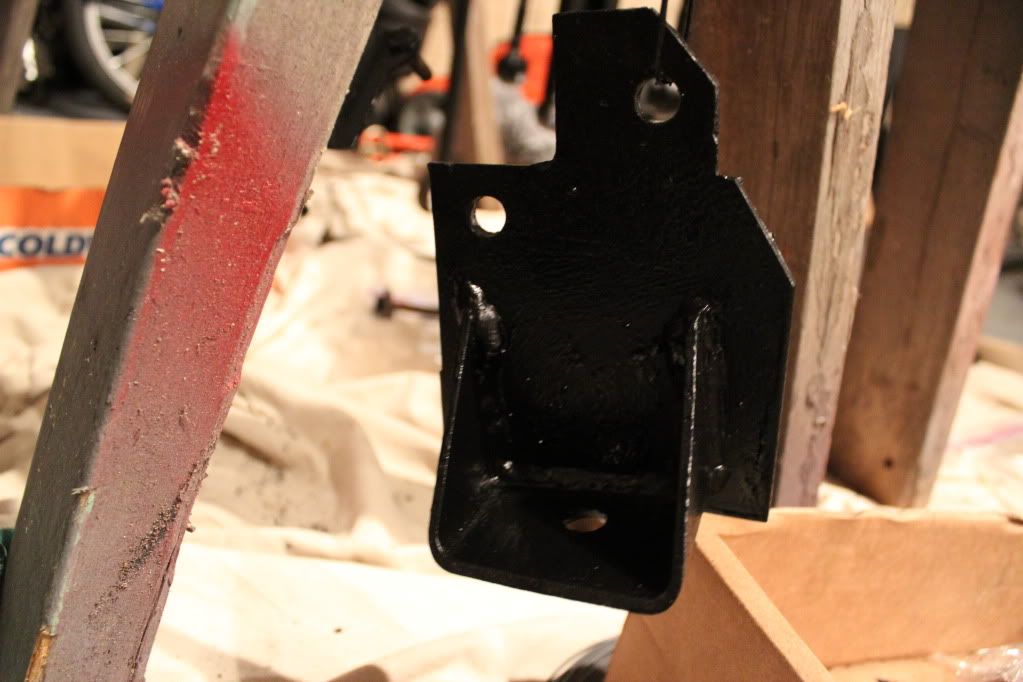
After blasting, I painted all the brackets:


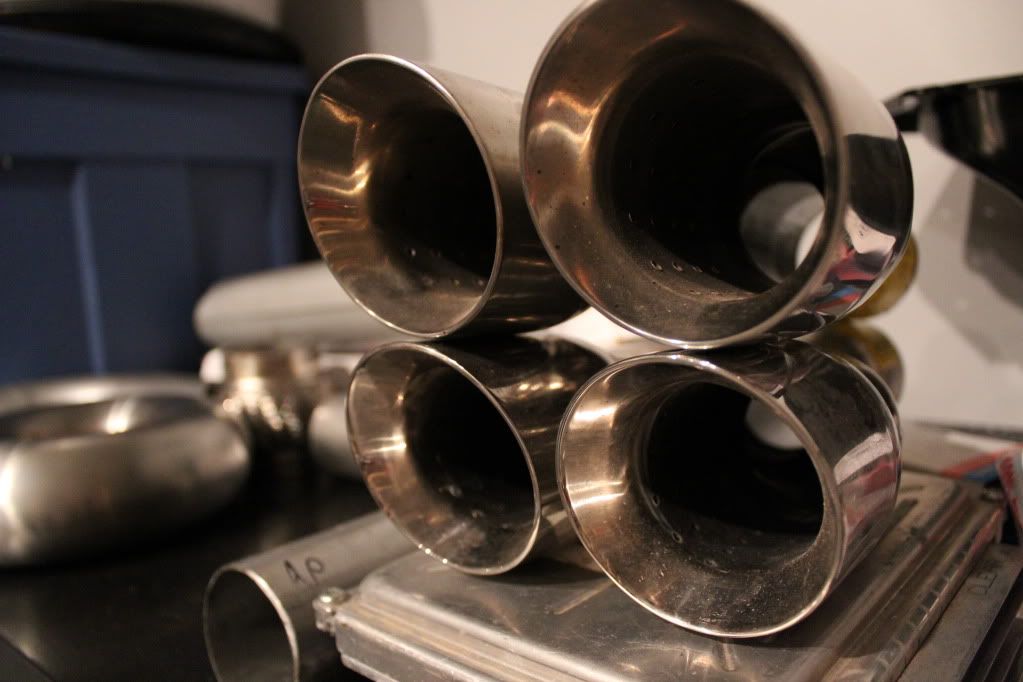
Exhaust parts, all mandrel bent, C6 tips (which aren't on yet):


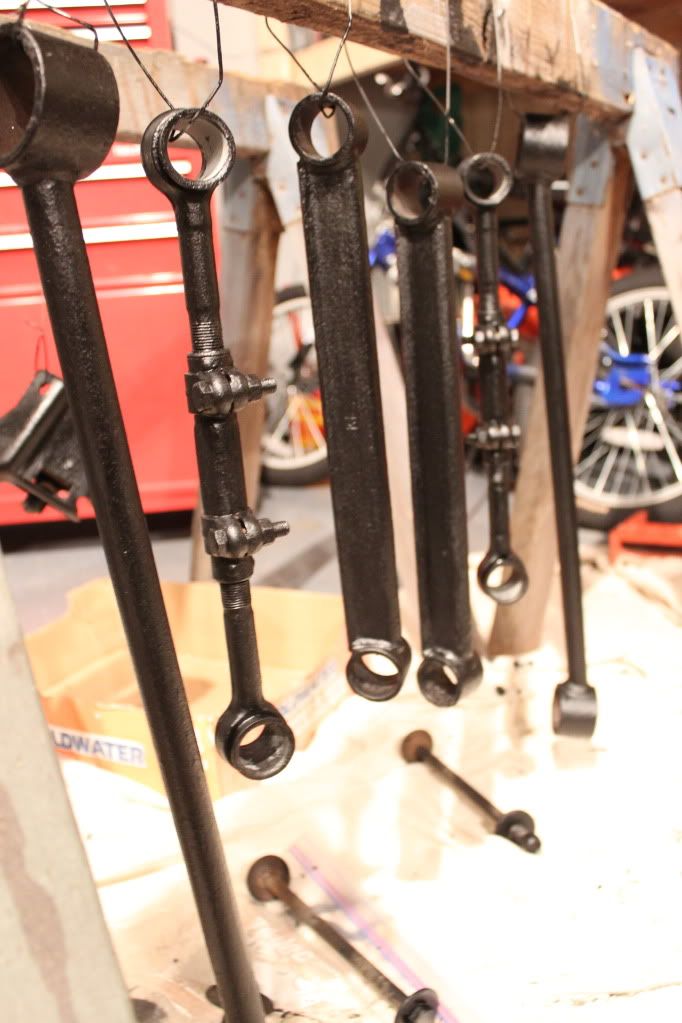
Sandblasted and then painted suspension links:


Poly bushings, I highly recommend them. The don't squeak if you use liberal amounts of lithium grease, and they look pretty cool.


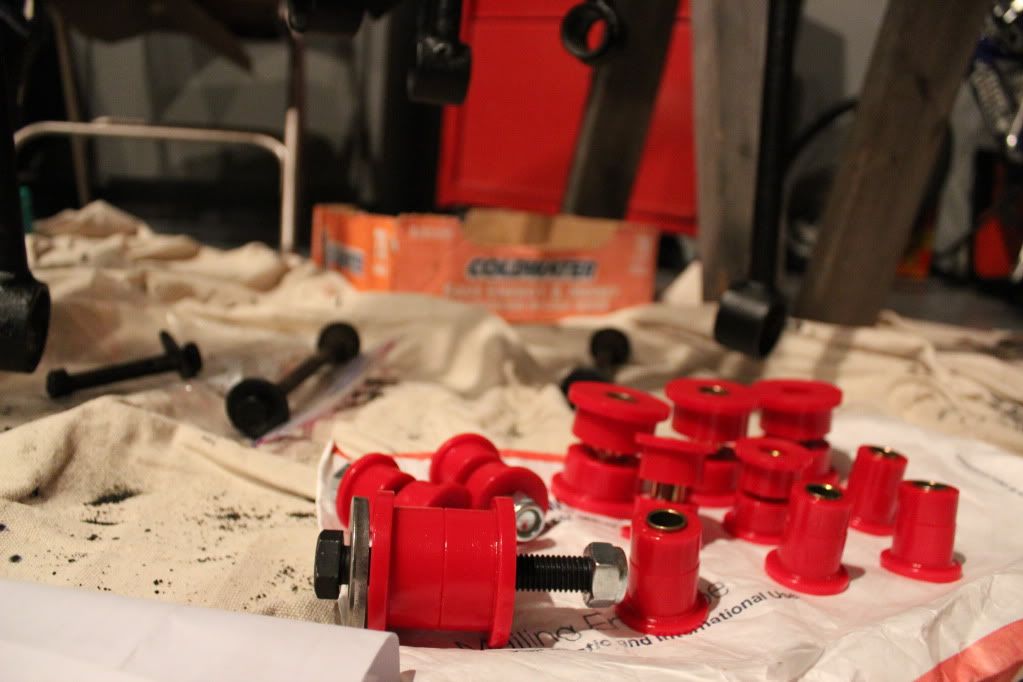
A small shot of some of the parts we used. If you're making a budget for a swap, take your unexpected/misc. costs amount and multiply it by about five. Maybe more.


*I've put on some stainless fuel hoses instead of the rubber, and will be relocating the coil pack soon. Stay tuned.

[This message has been edited by Fiero1K (edited 03-22-2012).]

IP: Logged
PFF
System Bot
thismanyfieros
Member
Posts: 3468
From: Red Deer, alberta,canada
Registered: Dec 2002


Feedback score:    (15)
Leave feedback


Total ratings: 120
Rate this member

Report this Post11-03-2011 09:33 AM Click Here to See the Profile for thismanyfierosSend a Private Message to thismanyfierosEdit/Delete MessageReply w/QuoteDirect Link to This Post
fram are the worst performing filters on the market..i would strongly consider running an oem filter. they are rated to do the job properly..just as example one of frams air filters is made up of horse hair,rope, wood chips and newspaper..
IP: Logged
Niterrorz
Member
Posts: 4119
From:
Registered: Sep 2010


Feedback score: (3)
Leave feedback


Total ratings: 132
Rate this member

Report this Post11-03-2011 03:08 PM Click Here to See the Profile for NiterrorzSend a Private Message to NiterrorzEdit/Delete MessageReply w/QuoteDirect Link to This Post
your camera has amazing quality those are nice clear shots! as for the bracket on the front of the motor i just pulled my 3800 from a 98 rivera over the weekend and that bracket SUCKED! you have my sympathy on that
IP: Logged
Fiero1K
Member
Posts: 411
From: Midland, MI
Registered: Oct 2009


Feedback score: (1)
Leave feedback

Rate this member

Report this Post03-23-2012 07:19 PM Click Here to See the Profile for Fiero1KSend a Private Message to Fiero1KEdit/Delete MessageReply w/QuoteDirect Link to This Post
Finished the swap a while ago and have been driving it - even during the winter. Had to replace the alternator, and the fuel pump went bad (replacing that is pretty much one of my top ten favorite things. Nothing like dropping a Fiero gas tank), and that's it for reliability issues.

The finished swap.


The Isuzu shift cables really interfere with the intake, we had to use some flexible intake tube from Napa to work around it.


The temporary vacuum routing setup. I'll be connecting both to the TB once I get those plugs for the holes.


The alternator interfered with the decklid. I'll be making this look nice one of these days.


The coolant fill thing. It's ugly, and temporary, and it works.


The coil pack interferes with the decklid hinge. An oversight. I'll be mounting it where the battery is right now, and moving the battery up front.
IP: Logged
mattwa
Member
Posts: 7106
From: Lorain, Ohio
Registered: Sep 2008


Feedback score:    (41)
Leave feedback


Total ratings: 88
Rate this member

Report this Post03-23-2012 08:27 PM Click Here to See the Profile for mattwaSend a Private Message to mattwaEdit/Delete MessageReply w/QuoteDirect Link to This Post
What clutch did you use? And how is that Isuzu holding up? I guess since it's a NOS unit it'll be OK for a while, since it looks like a completely stock motor, but otherwise I wouldn't recommend using an Isuzu with an L67.

[This message has been edited by mattwa (edited 03-23-2012).]

IP: Logged
FieroMaster88
Member
Posts: 7680
From: Mattawan, MI
Registered: Nov 2000


Feedback score:    (43)
Leave feedback


Total ratings: 168
Rate this member

Report this Post03-23-2012 08:30 PM Click Here to See the Profile for FieroMaster88Send a Private Message to FieroMaster88Edit/Delete MessageReply w/QuoteDirect Link to This Post

------------------

88 Coupe: 2.0L Turbo 4 Cylinder
84 Indy #64: Restoration Project!

IP: Logged
Fiero1K
Member
Posts: 411
From: Midland, MI
Registered: Oct 2009


Feedback score: (1)
Leave feedback

Rate this member

Report this Post03-23-2012 10:40 PM Click Here to See the Profile for Fiero1KSend a Private Message to Fiero1KEdit/Delete MessageReply w/QuoteDirect Link to This Post
Yeah...I will be the first to admit that using an Isuzu was not incredibly wise, but I did it in the interests of expediting the swap, ease, and because I already had it.

So a note to everybody considering an L67 swap: don't go with the Isuzu. Use a Getrag or, even better, an F23 (which is what I'm probably going to use once the Isuzu blows up). I am quite happy with my swap, but it could definitely be better transmission-wise.

I'm using a dual friction Gripforce clutch. It's full face but a little chattery. It was about 160 bucks on eBay. I tried to get a Clutchnet clutch but had a remarkably bad experience which I will not discuss further.
IP: Logged
mattwa
Member
Posts: 7106
From: Lorain, Ohio
Registered: Sep 2008


Feedback score:    (41)
Leave feedback


Total ratings: 88
Rate this member

Report this Post03-23-2012 10:50 PM Click Here to See the Profile for mattwaSend a Private Message to mattwaEdit/Delete MessageReply w/QuoteDirect Link to This Post
F23, now that's my territory. I'm close to finishing my 3800/F23 swap, if you haven't seen my build thread on it. Or at least I was, until the HTOB overextended and blew up.

Never heard of that clutch, but good to hear it's doing ok so far.
IP: Logged
Fiero1K
Member
Posts: 411
From: Midland, MI
Registered: Oct 2009


Feedback score: (1)
Leave feedback

Rate this member

Report this Post03-24-2012 10:50 PM Click Here to See the Profile for Fiero1KSend a Private Message to Fiero1KEdit/Delete MessageReply w/QuoteDirect Link to This Post
Yep, I've seen your build thread - didn't know about the HTOB issues though. Best of luck fixing that; I've no doubt you'll be able.

On anther note, skitime is an unmitigated genius. This is how I will be mounting my coil pack. I don't have to relocate the battery or anything.


edit: While skitime is indeed an unmitigated genius, I didn't mount my coil pack like him. Check the next post for details.

[This message has been edited by Fiero1K (edited 04-03-2012).]

IP: Logged
Fiero1K
Member
Posts: 411
From: Midland, MI
Registered: Oct 2009


Feedback score: (1)
Leave feedback

Rate this member

Report this Post04-03-2012 11:32 PM Click Here to See the Profile for Fiero1KSend a Private Message to Fiero1KEdit/Delete MessageReply w/QuoteDirect Link to This Post
So I relocated the coilpack. Recently I removed my non-functional evap canister (it was getting no vac because it's not at all worth the time for me to deal with, but I did keep all the related bits, both Fiero and 3800) which left a completely barren area on the left side of the engine bay.
So I removed the coil pack and bracket from the factory location, whipped up another bracket to mount the coil pack bracket to, and mounted the coil pack where you see it now.
Some Accel 8mm custom length wires sealed the deal. I had to lengthen the wiring for connector for the coil pack which was a pretty big pain, but it works perfectly.
Because the coil pack is no longer pressing against the hinge, cabin noise is down significantly. It's really great.


These pictures aren't as good or detailed as I like, I'll get some nice, more detailed, natural light shots in the next couple days.

I also re-relocated the MAP so there would be no wiring at all going over the SC. Another step in the direction of a deliciously clean engine bay (someday).


My cat relaxing in my next project: a full 1998 Camaro interior: seats, dash, door panels, center console, and gauges. Stay tuned.

IP: Logged
Fiero1K
Member
Posts: 411
From: Midland, MI
Registered: Oct 2009


Feedback score: (1)
Leave feedback

Rate this member

Report this Post07-23-2012 08:08 PM Click Here to See the Profile for Fiero1KSend a Private Message to Fiero1KEdit/Delete MessageReply w/QuoteDirect Link to This Post
I've been working on a Camaro dash swap. The dash is from a 2002 Camaro Z28, and the gauges from a 1994 Fire bird.
The dash is mounted solidly at the top, right to the metal under the windshield. I just drilled holes and screwed some extra interior screws I had in to mount it.

I love having two cup holders and a gloves box.
Without further ado, some pics.


IP: Logged
PFF
System Bot
Fiero1K
Member
Posts: 411
From: Midland, MI
Registered: Oct 2009


Feedback score: (1)
Leave feedback

Rate this member

Report this Post07-25-2012 01:10 AM Click Here to See the Profile for Fiero1KSend a Private Message to Fiero1KEdit/Delete MessageReply w/QuoteDirect Link to This Post
- double post-o-rama -

[This message has been edited by Fiero1K (edited 07-26-2012).]

IP: Logged
84se2m4
Member
Posts: 389
From:
Registered: Oct 2011


Feedback score: (2)
Leave feedback

Rate this member

Report this Post07-25-2012 10:35 AM Click Here to See the Profile for 84se2m4Send a Private Message to 84se2m4Edit/Delete MessageReply w/QuoteDirect Link to This Post


Man that mount looks a little scary, does it hold up well?
IP: Logged
Dennis LaGrua
Member
Posts: 15145
From: Hillsborough, NJ U.S.A.
Registered: May 2000


Feedback score:    (13)
Leave feedback


Total ratings: 328
Rate this member

Report this Post07-25-2012 03:10 PM Click Here to See the Profile for Dennis LaGruaSend a Private Message to Dennis LaGruaEdit/Delete MessageReply w/QuoteDirect Link to This Post
 
quote
Originally posted by 84se2m4:


Man that mount looks a little scary, does it hold up well?


They look like cold weld joints with little penetration. I would recommend turning up the heat setting and rewelding for a deeper penetration. .

------------------
" THE BLACK PARALYZER" -87GT 3800SC Series III engine, custom ZZP /Frozen Boost Intercooler setup, 3.4" Pulley, Powerlog manifold, Northstar TB, LS1 MAF, 3" Flotech Afterburner Exhaust, Autolite 104's, MSD wires, Custom CAI, 4T65eHD w. custom axles, HP Tuners VCM Suite.
"THE COLUSSUS"
87GT - ALL OUT 3.4L Turbocharged engine, Garrett Hybrid Turbo, MSD ign., modified TH125H
" ON THE LOOSE WITHOUT THE JUICE "

IP: Logged
Fiero1K
Member
Posts: 411
From: Midland, MI
Registered: Oct 2009


Feedback score: (1)
Leave feedback

Rate this member

Report this Post07-26-2012 08:12 AM Click Here to See the Profile for Fiero1KSend a Private Message to Fiero1KEdit/Delete MessageReply w/QuoteDirect Link to This Post
 
quote
Originally posted by Dennis LaGrua:


They look like cold weld joints with little penetration. I would recommend turning up the heat setting and rewelding for a deeper penetration. .


That's exactly what they are - quick, temporary tack welds with a 110v welder. We correctly welded them with a 220v Mig later at my friend's house (the 110v was because we wanted to test fit the mounts, but I don't have accessible 220v). The pictures of them post-final-weld are of them painted black, however, so I understand the confusion.


quote
Originally posted by 84se2m4:

Man that mount looks a little scary, does it hold up well?


Haha no, it was just a fitment/tack weld. The first one we made actually broke on that bracket! I was nervous just to have the engine sitting on it.
Incidentally, however, the bolts holding that bracket you see at the top to the engine simply fell out one day, and the engine was alright. Although the alternator scraped the strut tower area quite a bit.

[This message has been edited by Fiero1K (edited 07-26-2012).]

IP: Logged
GADJet
Member
Posts: 1466
From: Star City, AR, USA
Registered: Sep 2010


Feedback score: (1)
Leave feedback

Rate this member

Report this Post07-26-2012 05:09 PM Click Here to See the Profile for GADJetSend a Private Message to GADJetEdit/Delete MessageReply w/QuoteDirect Link to This Post
Do you have a write up on this dash swap? That looks nice!
IP: Logged
Fiero1K
Member
Posts: 411
From: Midland, MI
Registered: Oct 2009


Feedback score: (1)
Leave feedback

Rate this member

Report this Post07-26-2012 05:31 PM Click Here to See the Profile for Fiero1KSend a Private Message to Fiero1KEdit/Delete MessageReply w/QuoteDirect Link to This Post
Thanks! And nope, there's no write up right now - it's not done yet. I have to take it apart a couple more times yet - have to cut the steering column bracket and get the modified one welded up so the gauges fit right, have to cut up the console a little more to mount it, still need to do the door panels, still need to do HVAC ducting, still need to measure and cut the dash filler, and so on.
I'm hoping - if I can remember - to grab my DSLR and document the process. Expect that soon.
Unfortunately I don't have any shots from the initial dash fitting or from the console fitting. I should be able to give you the idea of what I did though.
IP: Logged
Fiero_gtp
Member
Posts: 37
From: largo, florida, usa
Registered: Apr 2012


Feedback score: N/A
Leave feedback

Rate this member

Report this Post03-02-2013 08:59 PM Click Here to See the Profile for Fiero_gtpClick Here to visit Fiero_gtp's HomePageSend a Private Message to Fiero_gtpEdit/Delete MessageReply w/QuoteDirect Link to This Post
Im working on a temp Isuzu l67 swap myself but I'm having horrible transmission issues already did you have to use some type of spacer for anything on the clutch assembly or anything special from a stock set up?
IP: Logged
Moar
Member
Posts: 150
From: Linz, Austria
Registered: Dec 2014


Feedback score: N/A
Leave feedback

Rate this member

Report this Post12-14-2015 02:34 PM Click Here to See the Profile for MoarSend a Private Message to MoarEdit/Delete MessageReply w/QuoteDirect Link to This Post
Can someone please measure the height of a ´79 Dodge V8 mount?


I can´t get this information form the sellers or manufacturers.

BTW, are these mounts also available in polyurethane?
Or are these OEM Dodge mounts already stiff enough?


Thanks,
IP: Logged
darbysan
Member
Posts: 949
From: Las Vegas
Registered: Oct 2014


Feedback score: (4)
Leave feedback

Rate this member

Report this Post12-16-2015 11:15 AM Click Here to See the Profile for darbysanSend a Private Message to darbysanEdit/Delete MessageReply w/QuoteDirect Link to This Post
Dodge Mount thickness measures 1.5".

------------------
'87 GT in process, including GA / Seville brakes, Poly Suspension, '95 3800 Series 1 SC ( 225 hp ) 4t60e.

IP: Logged
Moar
Member
Posts: 150
From: Linz, Austria
Registered: Dec 2014


Feedback score: N/A
Leave feedback

Rate this member

Report this Post12-17-2015 02:37 AM Click Here to See the Profile for MoarSend a Private Message to MoarEdit/Delete MessageReply w/QuoteDirect Link to This Post
Thanks darbysan,

I think I´ll order the following Dodge mounts for replacing the factory trans mounts (I have a Getrag 5-sp trany):
http://www.carid.com/dea/fr...69.html#applications

These DEA A2469 mounts look very similar to the ´79 Dodge mounts and are very cheap!
IP: Logged
PFF
System Bot
PRND3L
Member
Posts: 175
From: Homer, GA, US
Registered: Sep 2013


Feedback score: (3)
Leave feedback

Rate this member

Report this Post10-16-2016 11:02 PM Click Here to See the Profile for PRND3LSend a Private Message to PRND3LEdit/Delete MessageReply w/QuoteDirect Link to This Post
Reviving the thread for my own curiosity.

I'm currently thinking of a 3800 SC swap in my 86 with 88 suspension, I have the Isuzu 5spd attached to my Duke; even though its not recommended, etc, etc; how did it (assuming yours blew up) or how has it held up nearly a year later after the swap? Do you autox/race in any form? Did that front dog bone mount you created hold up, or did it fail and you create another engine mount? Where did you source your flywheel, have you changed the clutch since you've done the swap?

Thanks,
Alex
IP: Logged

next newest topic | next oldest topic

All times are ET (US)

Post New Topic  Post A Reply
Hop to:

Contact Us | Back To Main Page

Advertizing on PFF | Fiero Parts Vendors
PFF Merchandise | Fiero Gallery | Ogre's Cave
Real-Time Chat | Fiero Related Auctions on eBay


Copyright (c) 1999, C. Pennock