Well I've owned my car for a little over a year now and have been an "active" member since. I have gotten alotof help from many members along the way, posted a bit but I dont think I have ever
formally introduce my self or my car. My name is Ray and I live in New Hampshire, my car is an 84 four speed w/ a 350 sbc that I bought in Wisc. and drove back to N.H. with my 14 year old daughter.
me posing for my daughter in Wisc.
and my daughter posing for me. It was my daughter who named my car .
The heart beat
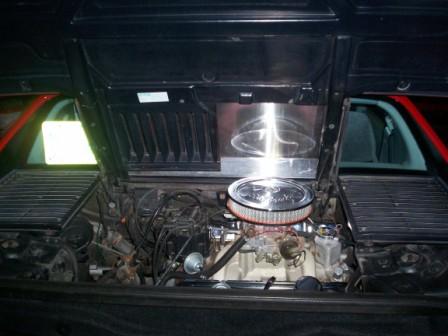
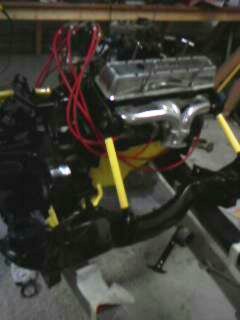
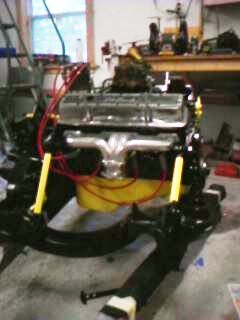
The car I was told was a new swap with a motor with no more than 1200 miles. It looked good with it's $300.00 Maaco paint job with the typical overspray in spots and did run real well. We made the trek home and it ran great minus 1 belt being thrown in a rain storm in Ohio. I got it home in Jan.of 08 so did'nt get much driving time before Iparked it in the garage and decided it was a good time to tackle the suspension. Now though the swap was done right and the motor and tranny worked great the susp. had been ignored. Weather being what it was i decided it was a good time to come up with a plan and put my own blood and sweat into the old girl. THE PLAN:
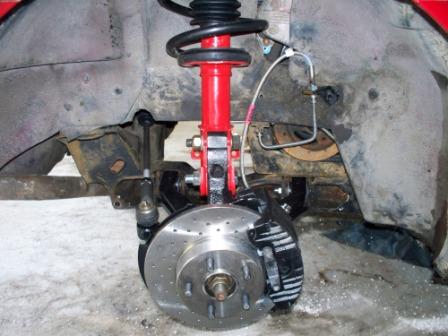
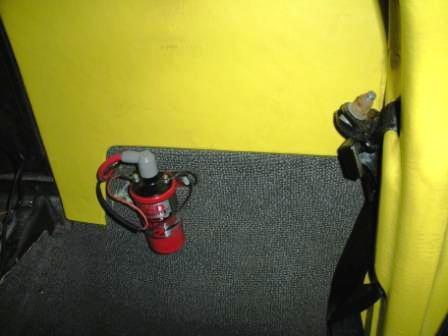
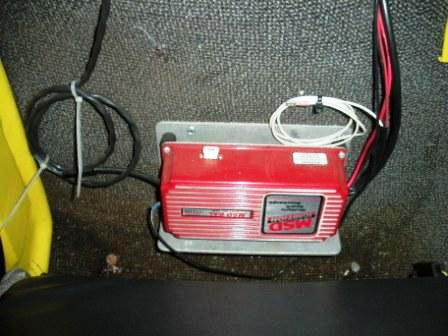
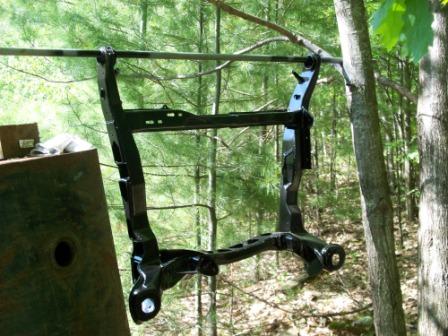
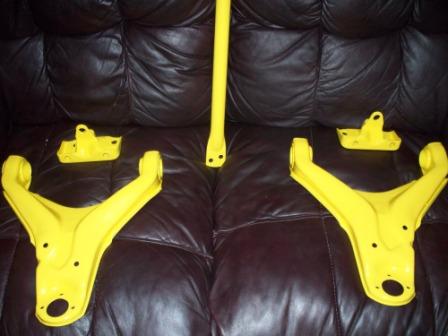
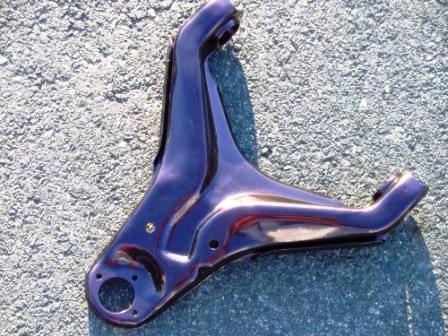
1, New susp. front to back, EVERYTHING New. 2. Work the ignition system: New dist., coil plugs, wires. 3. Clean-up wiring and engine bay 4. Do something to clean-up the look of my interior So that was the original plan, ambitous but basic. Well as we all know plans change and projects get bigger but we'll get more into that as we go. The patient prepped and ready for surgery So onto the susp., I do a thousand searches see what people are using, liking and whats working and whats not. Make my list and start shopping.Nothing to fancy Eibach springs, Koni shocks and struts, Rodney and the Fiero Store hook me up with all my bushings(rubber), ball jointsetc. etc. like I said everything New.
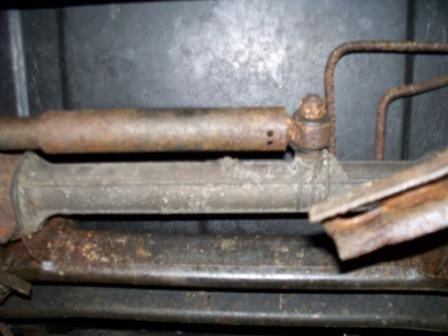
The old
My thought exactly it's got to go.
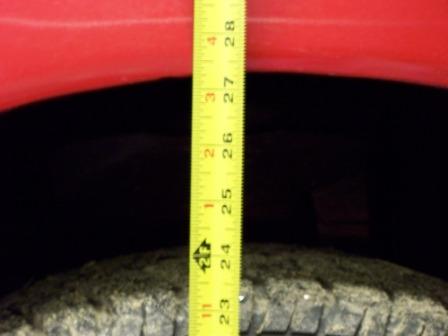
Original ride height 27 and 3/4" front
27 and 1/4 rear
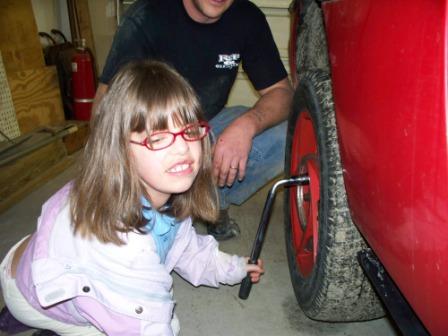
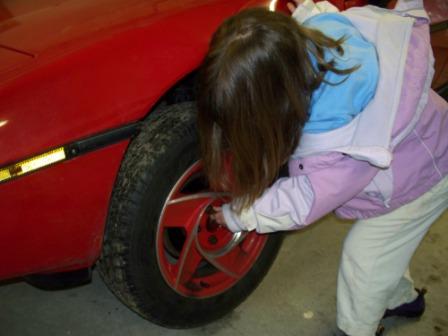
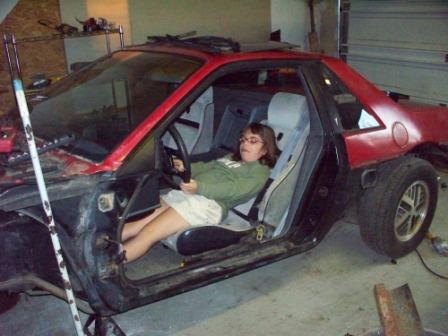
Daddy's little helper
cant wait around all day for you dad lets go!!!!
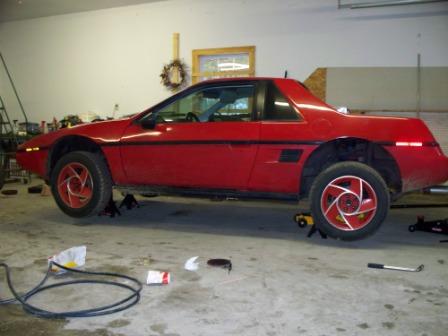
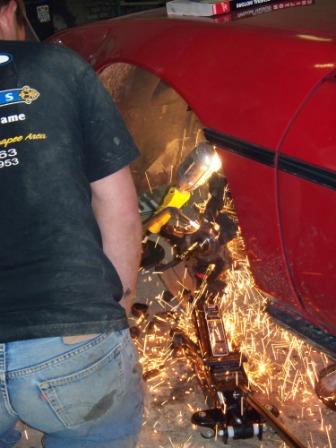
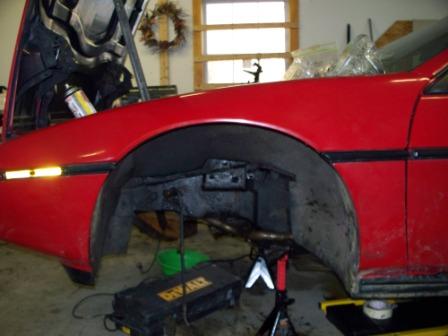
So now down to the business of out with the old and in with the new on this 24 year old car. P.B Blaster and a whole lot of patience is what it takes to remove bolts that have been in for 24 years (Oh and this)
sometimes you got to go in hot
I did notice I had to be extremely careful or I was going to melt my inner fender wells. Hind sight being 20/20 I would have removed them first they melt easy.
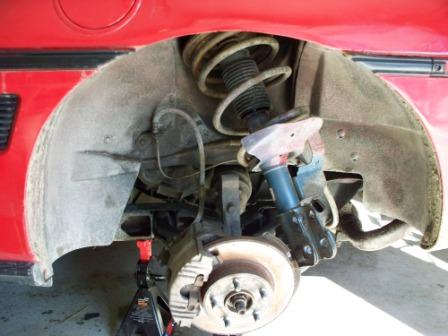
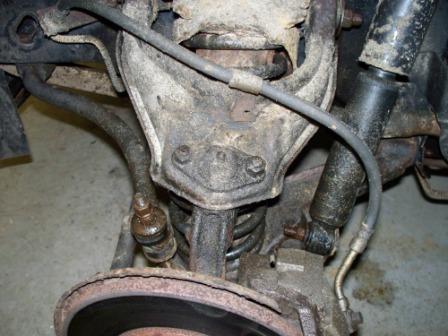
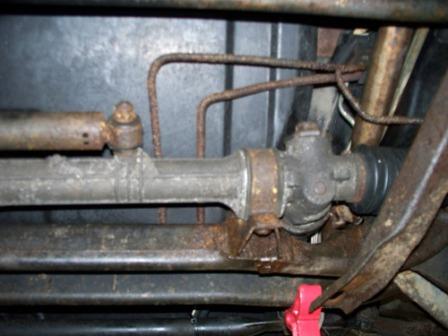
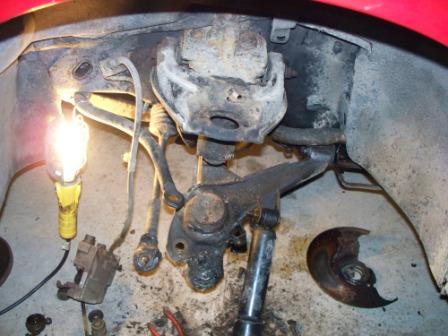
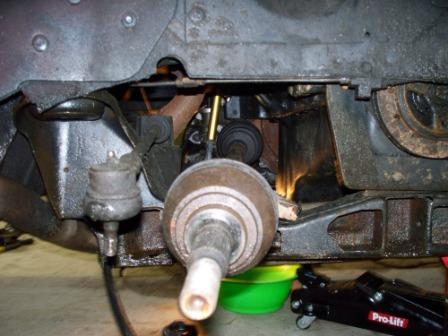
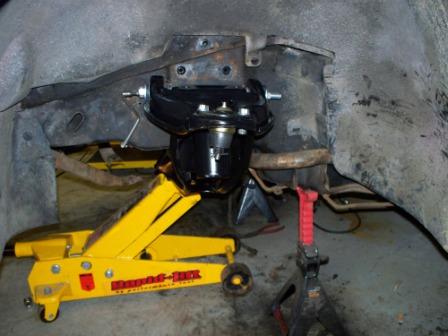
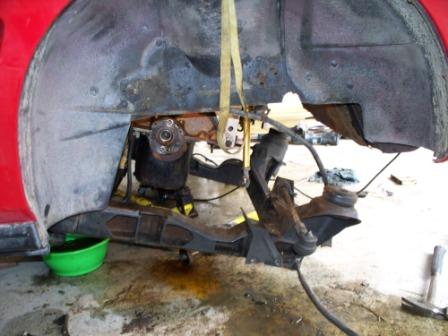
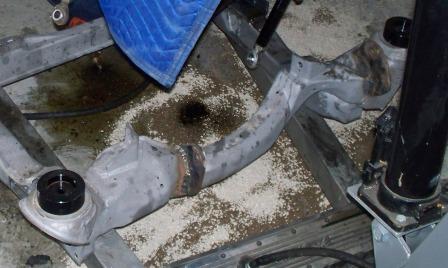
Some good progress but like I said we were going deep on this one, so the cross member,steering rack, it all had to go.
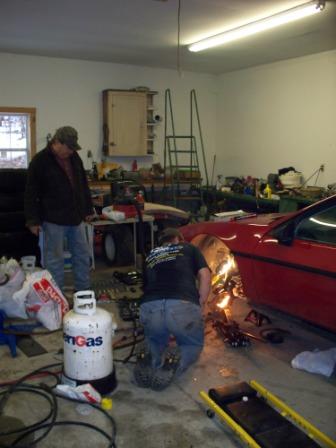
a little more friendly fire (lol)
Chiltons book and a splitting mall and we have success
crossmember out and steering rack next
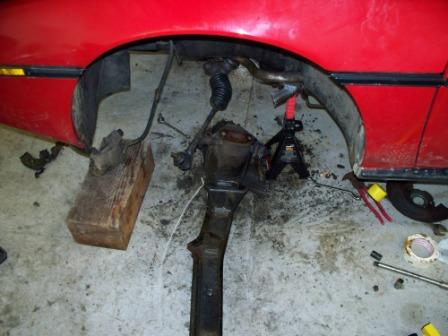
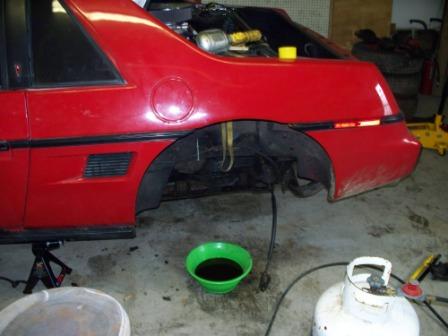
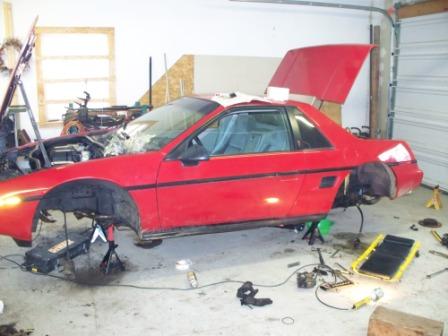
we now have a gutted out front end not bad for a few hours of work. Well I have a ton more pics. and a bunch more boring dribble that you have all heard before but if your interested i'll update every day or so with a little bit of both Thanks for watching Ray
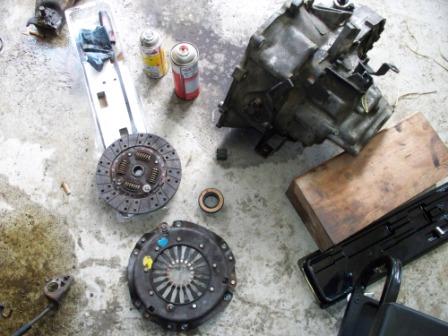
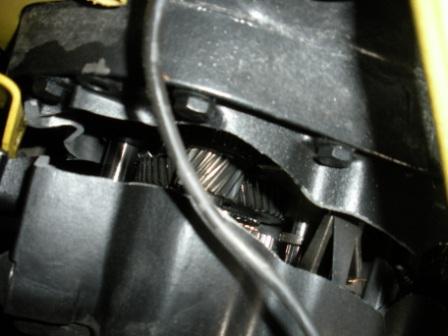
So spring finally came and it was time to put some miles on my new car with my new suspension. Like I mentioned before the p.o used a stock clutch behind this s.b.c. It didnt take long with the abuse I was dishing out to it to give up the ghost.
It was still hold but just barely and was hindering putting power to the wheels. So after lots of
searching I decided to go with a Spec stage 4+ which is the springless hub with a full face (that's where the + comes in).
Next was trying to decide do I drop the whole cradle or do the tilt and pull. I wasn't ready, especially being a 1 man show
most times I wasn't ready to drop the whole cradle. So with the car up on stands I removed the (2) rear bolts and lowered the cradle
as far as I could.
It took some muscling and a little cussing but it slid out the side alot easier than I thought. I had to remove the linkage on top and
spin the tranny a bit on the way out but it was out and didn't have to fight with lowering the whole cradle. Going in was a bit trickier
with lining up trany and clutch while trying to catch the alignment pins (did I mention I'm a one man show most times). I got it back in and with
in 3 hours was out breaking in the new spec clutch. This thing grabs hard and high, took some getting use to but Iam very happy with it.
More later on my supposed 1200 mile motors cam not lasting more than 3200 miles, Thanks for looking Ray
The frst two times I did the clutch in mine (90s) I used the cradle tilt way because I was afraid of dropping the whole thing and didn't have a cherry picker. Easier to handle the cradle alone but PITA to handle the trany in and out. Dropping the whole cradle is ok to do alone but to put it back is good to have help to get the two front bolts on. Never the less last week I was able to do a trany swap in five evenings all alone. But then I have done it many times by now. I think any serious Fiero owner needs to learn the cradle removal ritual.
Jake I don't know if it was an old show or not but I see my classic car is heading to lakeland next weekend for some big show? Thanks all Ray
I haven't heard anything about it but I have been under a rock called work and sick at the same time. If you find out any more information let me know, it would be nice to get out in the fresh air.
I spy Cair auto in Menasha my house is 5 blocks from there
quote
Originally posted by rcp builders:
Well I've owned my car for a little over a year now and have been an "active" member since. I have gotten alotof help from many members along the way, posted a bit but I dont think I have ever
formally introduce my self or my car. My name is Ray and I live in New Hampshire, my car is an 84 four speed w/ a 350 sbc that I bought in Wisc. and drove back to N.H. with my 14 year old daughter.
me posing for my daughter in Wisc.
and my daughter posing for me. It was my daughter who named my car .
The heart beat
The car I was told was a new swap with a motor with no more than 1200 miles. It looked good with it's $300.00 Maaco paint job with the typical overspray in spots and did run real well. We made the trek home and it ran great minus 1 belt being thrown in a rain storm in Ohio. I got it home in Jan.of 08 so did'nt get much driving time before Iparked it in the garage and decided it was a good time to tackle the suspension. Now though the swap was done right and the motor and tranny worked great the susp. had been ignored. Weather being what it was i decided it was a good time to come up with a plan and put my own blood and sweat into the old girl. THE PLAN:
1, New susp. front to back, EVERYTHING New. 2. Work the ignition system: New dist., coil plugs, wires. 3. Clean-up wiring and engine bay 4. Do something to clean-up the look of my interior So that was the original plan, ambitous but basic. Well as we all know plans change and projects get bigger but we'll get more into that as we go. The patient prepped and ready for surgery So onto the susp., I do a thousand searches see what people are using, liking and whats working and whats not. Make my list and start shopping.Nothing to fancy Eibach springs, Koni shocks and struts, Rodney and the Fiero Store hook me up with all my bushings(rubber), ball jointsetc. etc. like I said everything New.
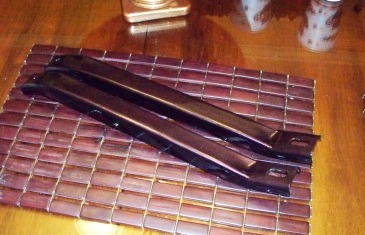
The old
My thought exactly it's got to go.
Original ride height 27 and 3/4" front
27 and 1/4 rear
Daddy's little helper
cant wait around all day for you dad lets go!!!!
So now down to the business of out with the old and in with the new on this 24 year old car. P.B Blaster and a whole lot of patience is what it takes to remove bolts that have been in for 24 years (Oh and this)
sometimes you got to go in hot
I did notice I had to be extremely careful or I was going to melt my inner fender wells. Hind sight being 20/20 I would have removed them first they melt easy.
Some good progress but like I said we were going deep on this one, so the cross member,steering rack, it all had to go.
a little more friendly fire (lol)
Chiltons book and a splitting mall and we have success
crossmember out and steering rack next
we now have a gutted out front end not bad for a few hours of work. Well I have a ton more pics. and a bunch more boring dribble that you have all heard before but if your interested i'll update every day or so with a little bit of both Thanks for watching Ray
[This message has been edited by jetsnvettes2000 (edited 05-21-2011).]
I haven't heard anything about it but I have been under a rock called work and sick at the same time. If you find out any more information let me know, it would be nice to get out in the fresh air.
The lake mier (sp?) classic is what they called it. Looks like it was pre-recorded
I have never seen the cradle tilt method before. I would imaging I could do that in my 87 Duke if I took the Filter housing off. Also, those pics look really good man. Keep em coming!
So everything was slid back in, again as a one man show but had it in in less than 2hours.
ATTENTION: Now if I can offer any words of "wisdom" it is this. When you go this deep into a
project I would advice that you make a check list of things to check before rolling out with your new goods.
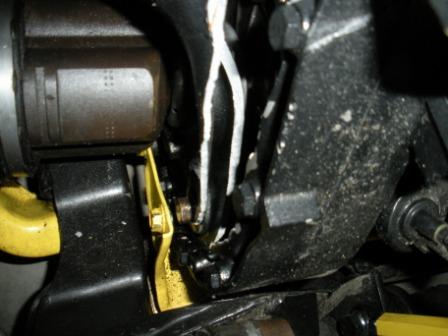
I put everything back together and pushed my clutch pedal for it to depress than nothing, hard as a ROCK!!!
I had no pressure the pedal wouldn,t go any further so I get out and inspect. I spent the next 1 1/2 sliding the
the tranny back off the motor while still in place thinking my pressure plate was seized up. Yeah scratching all
my nice new powder and paint to finally bump my clutch arm and see it spin on the shaft because I forgot too
tighten the D@%m thing. lol Problem solved so the next day I trailer it to the muffler shop cause cant drive it with open
headers. the 2 1/2 " true duel goes flawless, the guy did a great job with his bends and my car now sounds mean as Hell.
Of course I have to drive it home to only get 3 miles down the road and realize I never tightened my bleeder valves (dumb@%s)
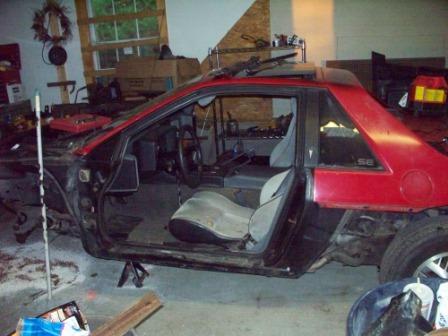
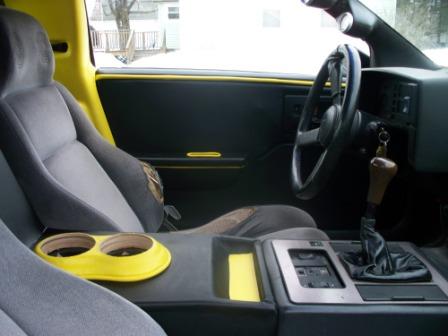
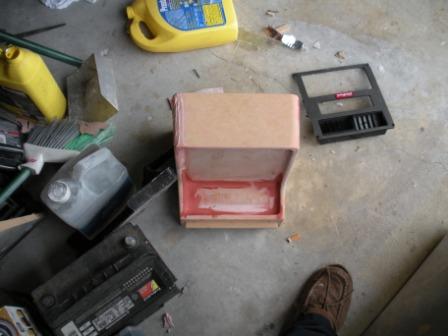
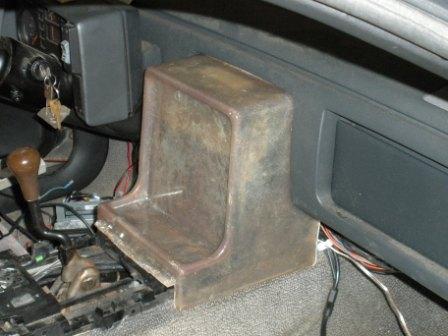
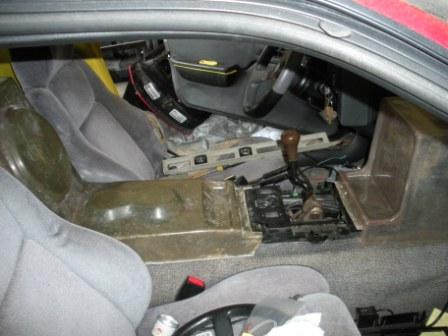
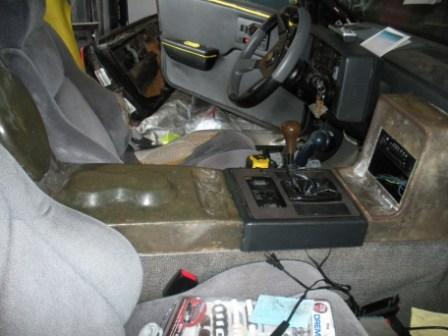
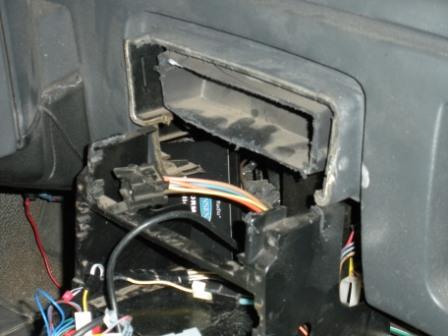
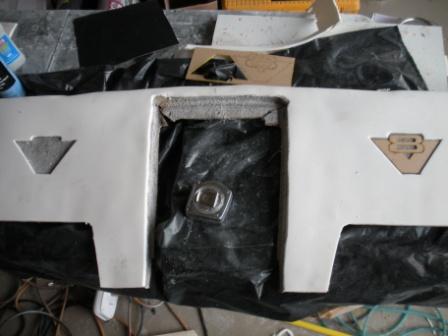
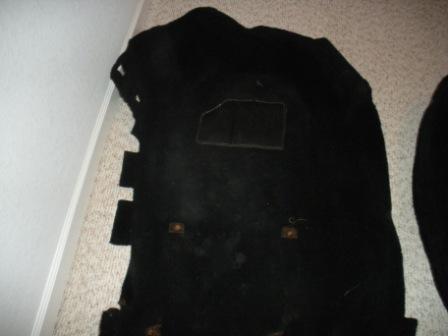
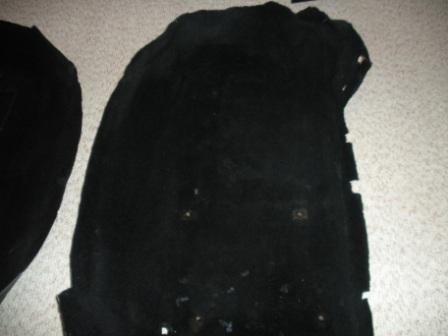
So make a list triple check EVERYTHING never be in to much of a rush. Any how lets get to the int. and some pics. The int.
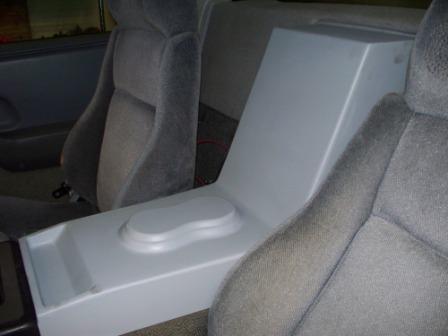
of my little 84 is in pretty tired shape and it was time to get it cleaned up, OH and some cupholders. lol So I started designing a
new middle console with some cup holders of course. I was trying to keep it simple, didnt want to change things up to much. Cupholders change tray and be done. I was hoping to fiberglass
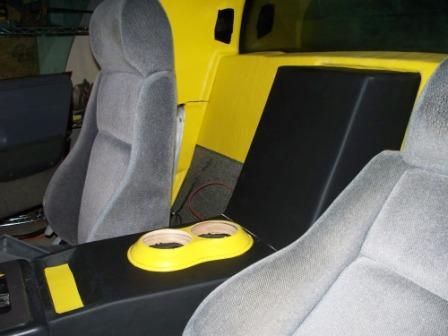
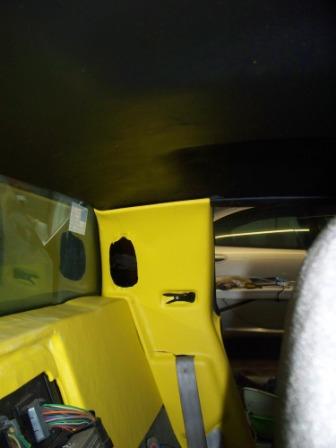
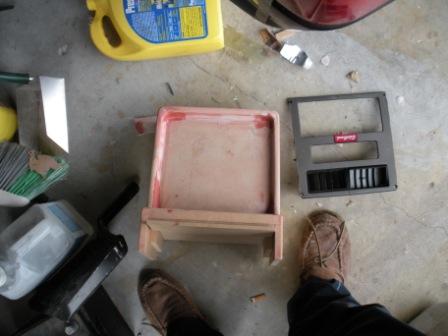
a mold and then pull a part but chickened out so VINYL it is. and the a pillars must be covered to. The black is whisper soft from Joan Fabrics closest thing to leather, really nice stuff. As you can see I got a bit colorful with the yellow
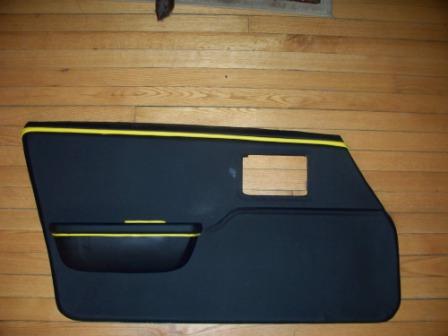
vinyl. The b-pillars were quite tricky and had a small issue by where the door closes but all in all came out nice. So on to the door panels
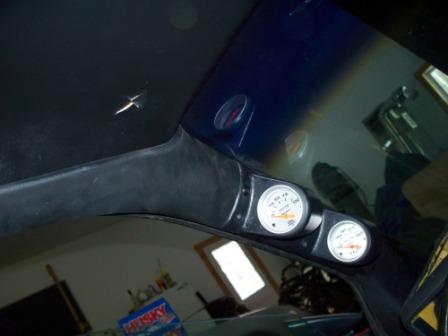
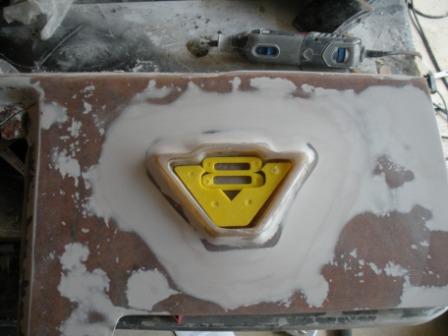
next. Again trying to keep it simple not change it up to much, I like the fiero interior look for the most part. Anyhow here's what I came up with. Maybe a little to simple (wheels start turning) Double gauge pillar pod and o yeah did I mention I also covered the headliner in vinyl.
Well it's coming still more too do and that will be my next update, thank you for looking Ray
lovin the rims o nthe first set of pictures. would look great on my yet-to-be-started project :P. also, that center console..... i wish you had made a mold of it because im tired of not having cupholders or a place to set my phone lol. im not paying over $20 for tiny piece of plastic from the Fiero Store... :P
Finally with this post I should be able to bring this build into the here and now. So the vinyl
was looking nice but I soon realized that to cover everything in vinyl I was going to have to
get an upholstery shop involved. Well besides the cost I really like doing this stuff on my own but
I really can't sew. Not to mention the yellow vinyl didn't take long to become to much for me lol. My solution
suck it up and try my hand at some fiberglassing. Before I jump head first into it I thought I would
start with something I knew I could do. I grab all my spare trim pieces and my orbital sander, some
150grit and started sanding my A & B pillars, lower trimpieces. This would also give me the oppurtunity
to blend my gauge pod into my A-pillar. NothingI hate worst than the look of the pods just screwed on. So after some sanding I hit with primer, (3) coats of color and (4) coats of clear and lots off wet sanding (2000 grit). Gauge pod with 2 coats third coat ready for some finish sanding and spot puddy and paint Done and looking factory
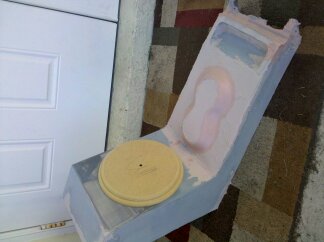
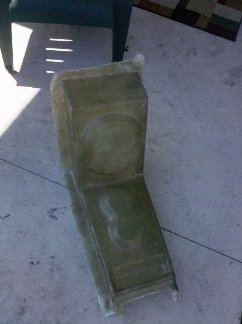
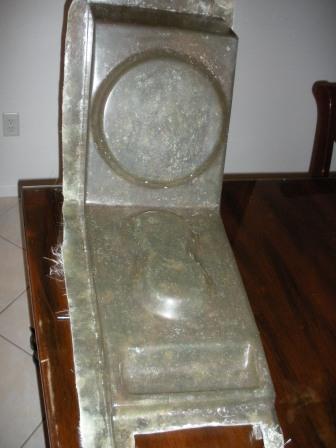
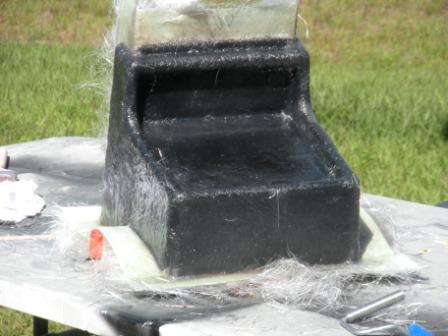
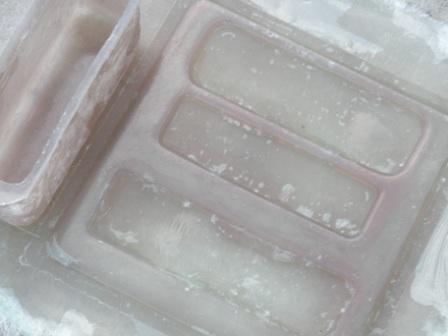
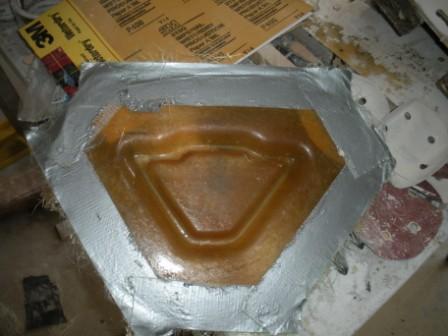
Now for my middle console and my first attempt at fiberglassing. I had to pull the vinyl off and
in doing so screwed up my plug a bit and when I was fixing it I thought it looked a little plain.
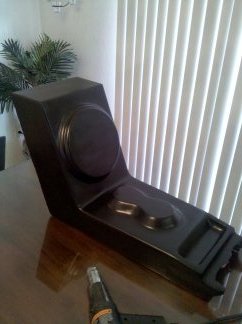
I like my music but not real into big bass but I thought a sub would look good. Plug prepped andready to pull a mold. With the way I designed it I can only use an 8" sub but I
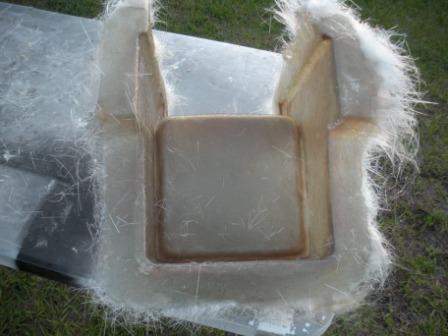
think that will be plenty. So lets get to glassing. Mold pulled was easier than I thought and now a little wet sand, some wax and plenty of PVA and we're ready to
try and pull a part. We have a part, I can't tell you how relieved I am to have pulled this off. So relieved I had to start designing
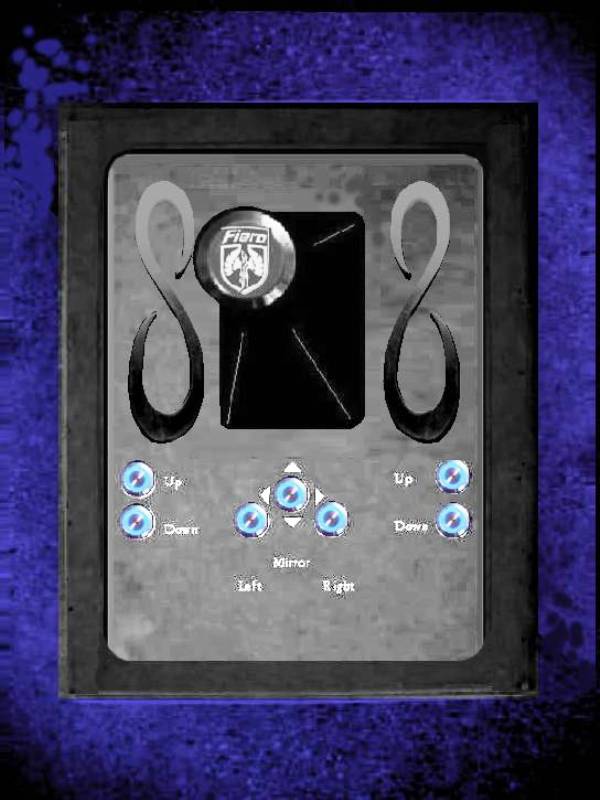
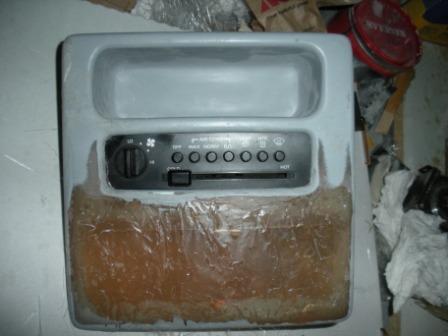
my radio surround.
Again keeping it simple just a little flair added, rounded things a bit and added yet another change tray. When I make
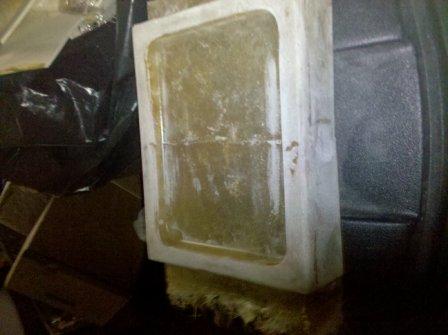
the face plate I will shrink the radio area to 1 1/2 dimm. Here's my mold cooking and my part now cooking I will demold it tomorrow, my plug didn't survive the demolding, I think my part will release a lot easier.
Alright I'm doing some big things here atleast for me lol so I expect some responses J/K I have three kids I'm use to talking to myself lol Thanks for following along, Ray
That center console is exactly what I plan to do this summer! I have never done much with fiberglass, but hoping mine will turn out half as nice as yours. I will definitely be watching this thread, and asking plenty of questions when I start my build. Oh, have you figured out which sub you will be putting in there? I really like the design of this Kenwood 8", but would prefer the 10" if it would fit...
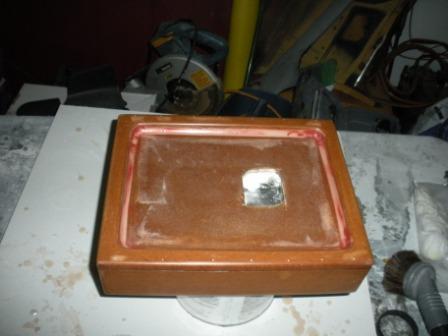
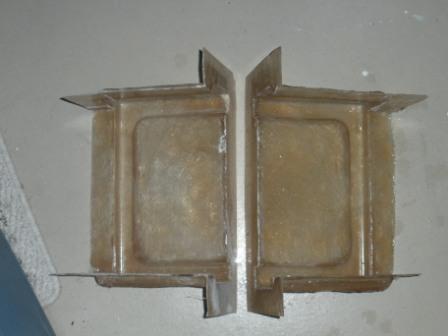
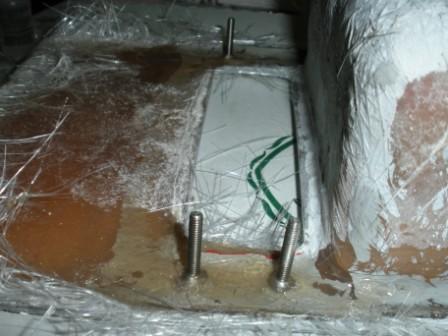
I've got to learn to make a two part mold next time. After working on pulling my part out of the
mold for more than 1 1/2 hours the mold finally cracked under the pressure. lol. I made it thin on
purpose cause I had concerns about being able to pull my part. So good news is I have a new radio
surround, bad news is I don't have a mold any more. Doesn't matter I only have one fiero any how lol. Shift surround is next but I need a little help. My thought is when I build the face plate for the radio surround
I would leave a space behind it. So my thought is I could back lite it with some led (color to match my gauges)
that way it would glow around the outside of the plate. What do you think dumb?? On the shift surround I was going
to do a gated shift but the throw on the shifter from 1st to 2nd and so on is only 2" that would look wrong lol. So I
got to figure something different. Alright it's dinner time I'll check in later see if anyone has any ideas. Thanks Ray
Finally time for an update, computer crashed down for awhile. We had a post awhile back
that made me giggle ( How do you stay modivated to finish a project) or something like that, lol.
It's hard to stay modivated when I can't paint a part to see the finished product ( humidity still an issue)
Been working on a few things though, Got alot of the smoothing done on the dash, little more sanding and it will
be ready for paint
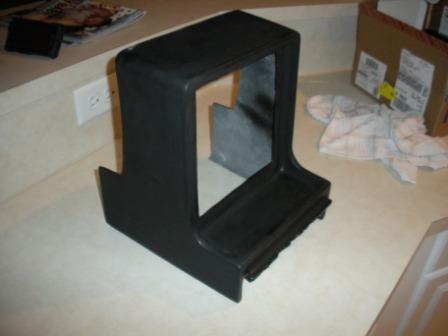
Got some ideas for the pocket area that I'm working on. Was thinking I would make a cover and use a device
like the hiding license plate to make it open and drop down. I would mount my ipod and maybe a nav. system
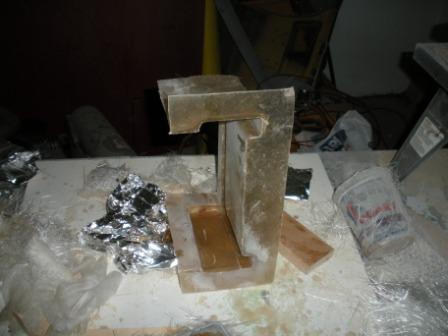
on it. Started my plug for my shifter surround and realized 2 things, 1. patience is a virtue when fiberglassing and
b. I will never try and pull a mold or a part without PVA, thought enough wax and I would be fine, well I was wrong! My plug Tried doing it as a one piece mold with no PVA and destroyed both my mold and plug. Next attempt was my first
two piece mold and worked out alright (remember patience is important)
Not sure if it's clear in this picture but some of the support returns I put in the part to make it sturdy was the reason I could'nt
pull it as a one piece. I have the part pulled but forgot the pics (will add tomorrow). I had 85SEnochie photo chop some designs
for my shifter plate and will probably go with something like this one
Decided to test fit my radio surround and face plate and learned I had to do some modifying lol.
Had to cut up the skeleton and well the heater vent. The vent is going to be deleted because of the storage compartment I
put in the radio face plate. I also realized my radio was going to fit the way I had hope so I had to modify the opening. Because
I cut up the skeleto I had to find a way to attach my heater controls, this is what I came up with. Will work out well and you can see I filled in the radio hole. Iv'e since recut it and will post pics later. I've got some more that
I will update with tomorrow maybe. thanxs for looking Ray
I must say thus far i'm very impressed. keep up the good work.
Impressed about the trans carnage or my work LOL.
quote
Originally posted by Sourmug:
Nice work! I'll be interested to see your progress.
Nolan
Thank You
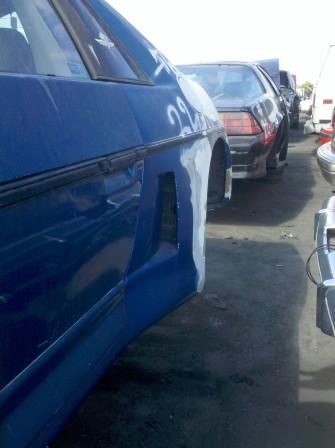
Well I didn't get anything painted or even worked on anything. I did how ever make it
to the local pick and pull to do some shopping!!! I had been scoutting it for weeks with
templates trying to find some interesting stuff. Finally found some mirrors off a Honda. Preliminary fitting looks like they are going to work great, a little fiberglassing and drilling.
The profile of the two doors are almost identical in that area.
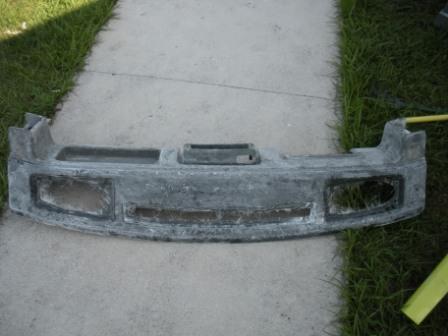
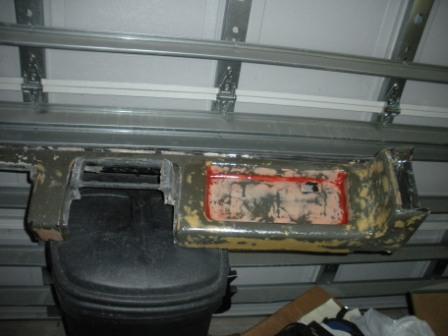
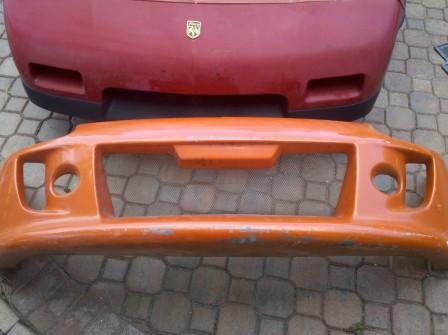
Also found a front bumper off of the same Honda, that I hope to chop up and marry it to
my 84 bumper or my se bumper.
Have to figure which one is the closest fitting and I am hoping maybe FOURPOINT9 or
FIE RO will jump in and give some tips on the process.
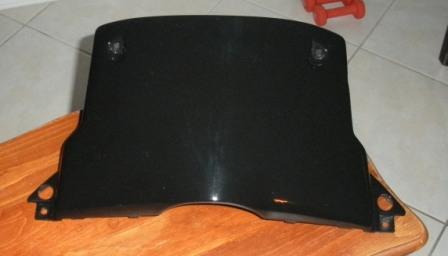
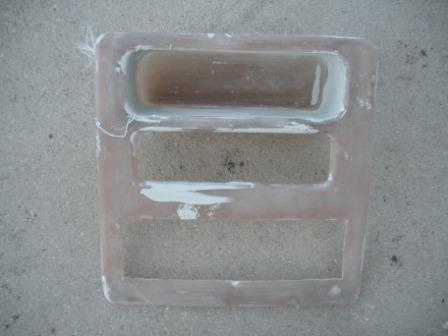
Also I found this
I think it's an IMSA kit that has seen better days.
I got some vacation coming up and am hoping to get some old projects finished and new ones started.
Ray
[This message has been edited by rcp builders (edited 12-06-2010).]
nice car, hope to see you in a fl. car show one day. in florida humidity sure is tough to work with, paint does not like to dry either. all the work you did, my back hurts just reading.


 We can't post if we are reading
  .
. 


 its inspiring. good... no, great job!


