So the time has come for me to attempt my first engine swap, with the transmission out of comission she is just sitting there collecting dust... So I figure now is a good time to clean and upgrade almost everything back there... I dicided to go with the 3.4L v6 (out of a '94 Camaro) due mostly because of the simplicity and wallet friendly the swap is... Dont want to over work myself on my first Engine swap still unsure whether to eventually go with the 3800sc or an LS4...
Heres the link to the photos as they get uploaded... not all of them will get posted here just to save some of you from bandwidth overload... lol... Renea's Photo Album
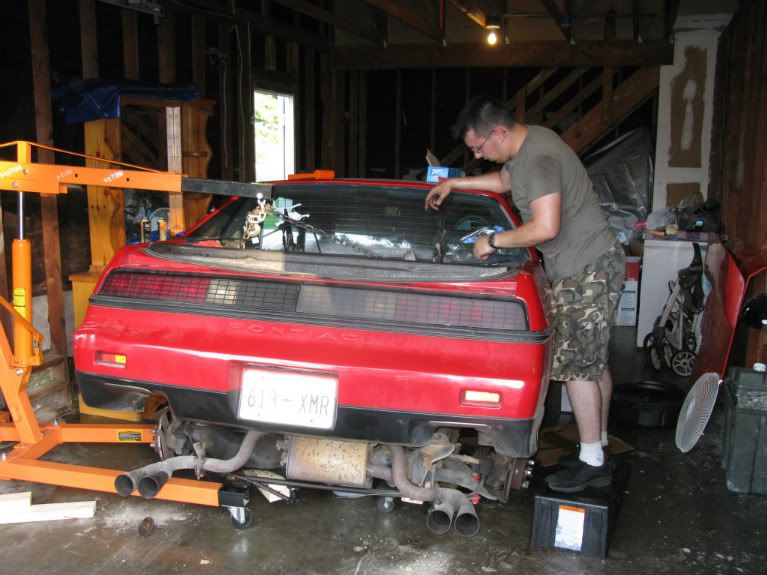
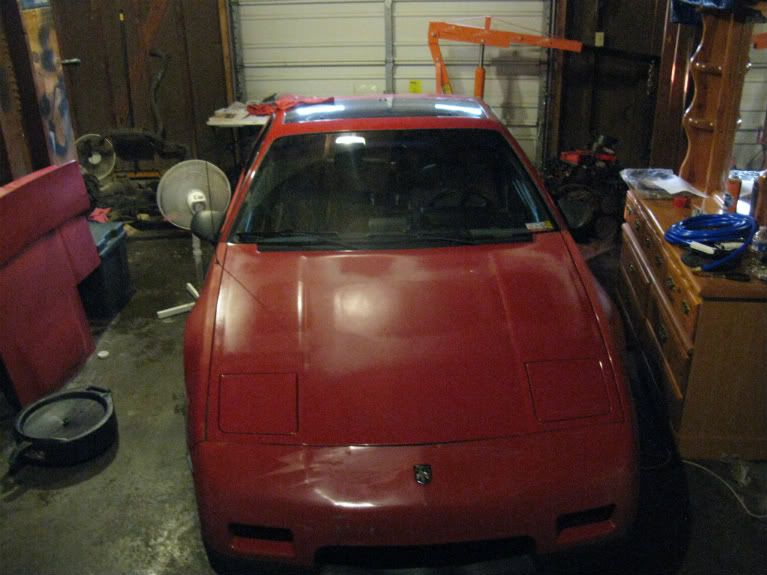
And so it begins... Had to seriously clean and reorganize the garage just to have room for the cradle once its out...
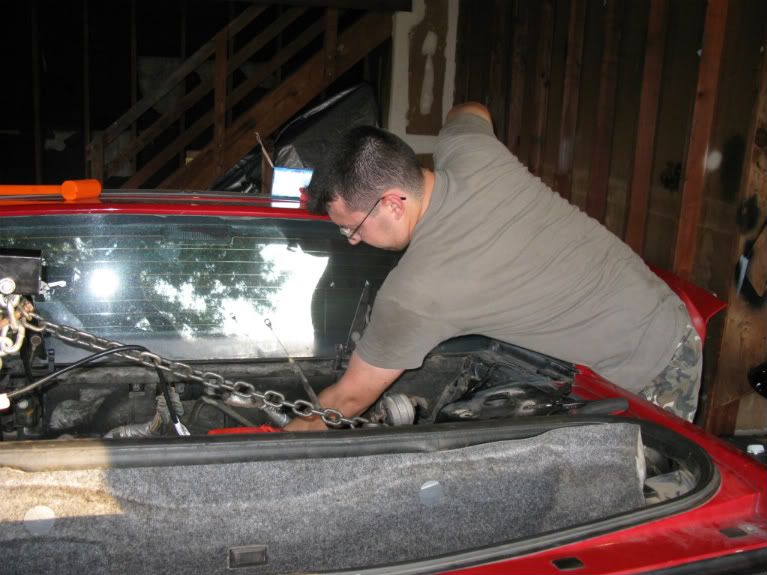
Slowly starting to get everything disconected for the drop on monday...
I would also like to ask for help here on the forums to guide me through this... just so I dont F@#$ something up...
More to come over the next few days...
Chris
[This message has been edited by Halcyon25 (edited 05-28-2011).]
IP: Logged
04:44 PM
PFF
System Bot
May 28th, 2011
Halcyon25 Member
Posts: 191 From: Rio Rancho, NM, USA Registered: Jan 2011
Had a suprise visit from my Father and two younger brothers yesterday... My Dad was game to lend a hand disconnecting things and now Im a day ahead of schedule...
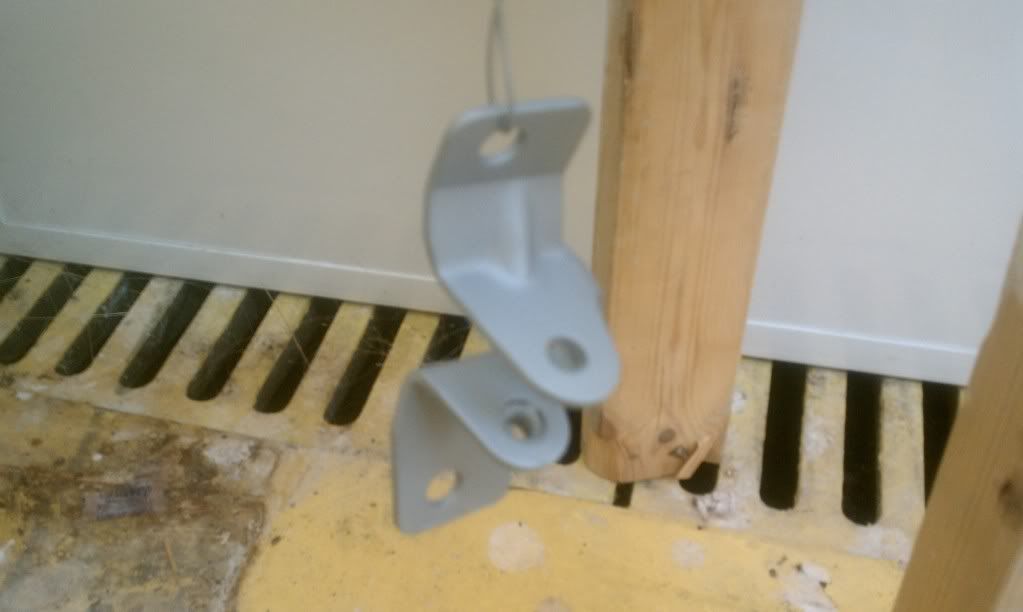
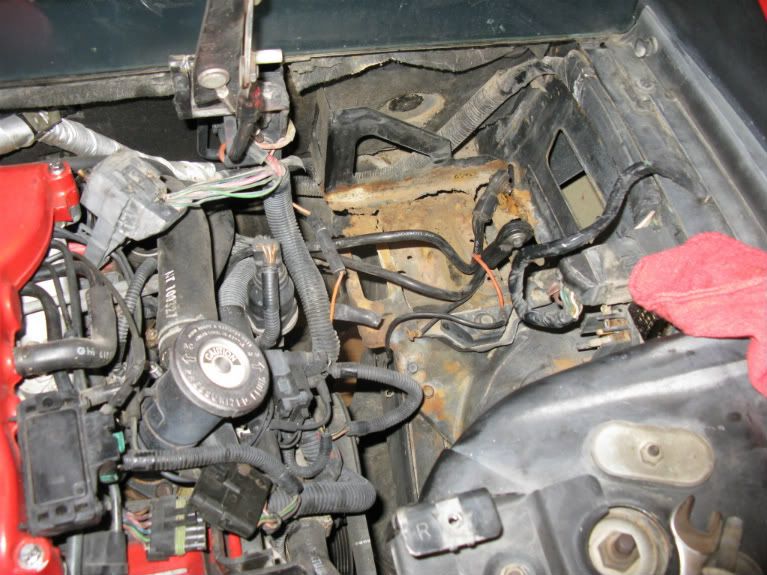
The only rust on the car... Ewhh... looks like I gotta do some fabricating, or get the Battery relocation mod...
Dad in there taking the side wall off...
Looking forward to tomorrow... If I can get a cherry picker then we'll be in buisness... Yay, Fun!!! My offer still stands if anyone wants to stop by and lend a hand or even just chit chat...
More To Follow
Chris
IP: Logged
10:00 PM
May 29th, 2011
Halcyon25 Member
Posts: 191 From: Rio Rancho, NM, USA Registered: Jan 2011
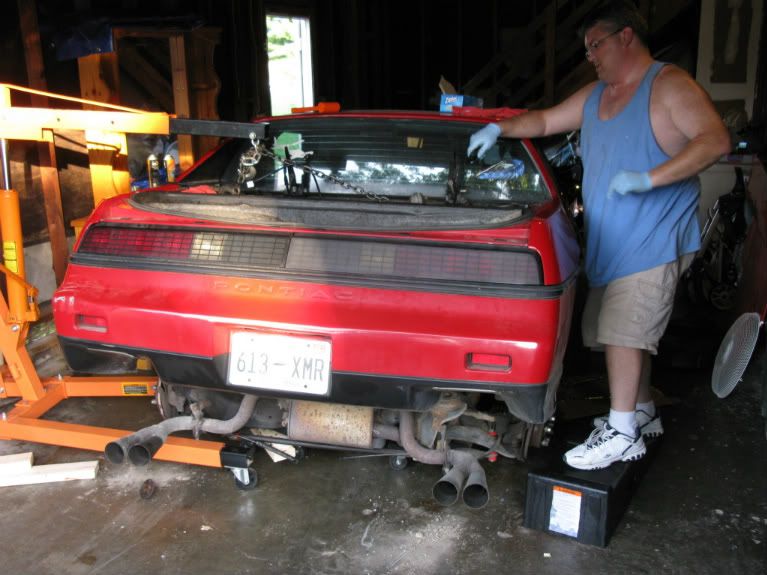
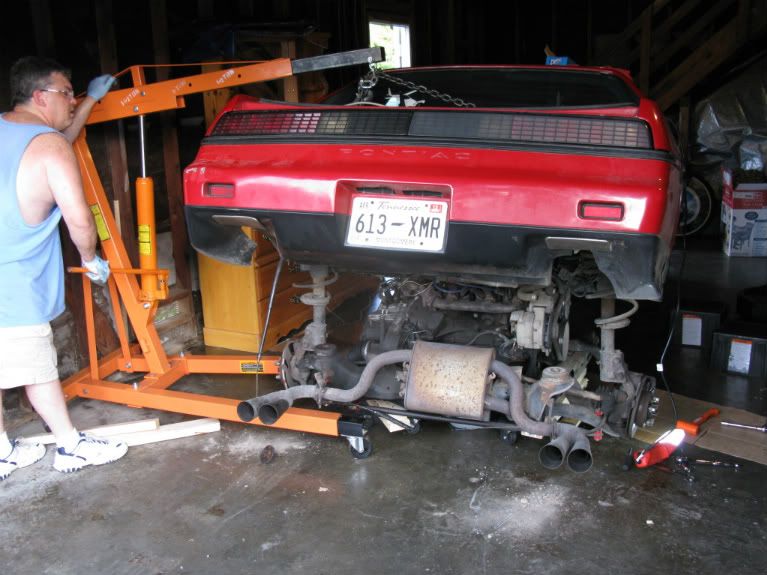
Yay!!! I was able to borrow my buddy's Cherry picker today and started getting that hooked up. There were still a few things we forgot to disconect yesterday so we took a few minutes to do that... Afterwards we spent the next hour trying to get the cradle bolts removed... that was fun... unfortunetly we forgot to rearange the blocks on the dolly so we could get the cherry picker to one side, needless to say my dad almost lost a few fingers in the proccess... I think Renea is holding a grudge against him or something... Hour or so later we were able to start lifting the body up...
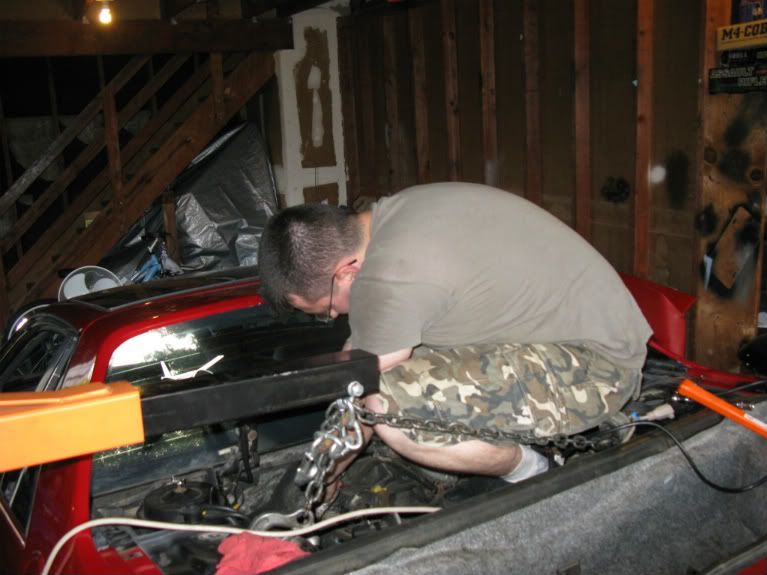
Me tearin something out down there...
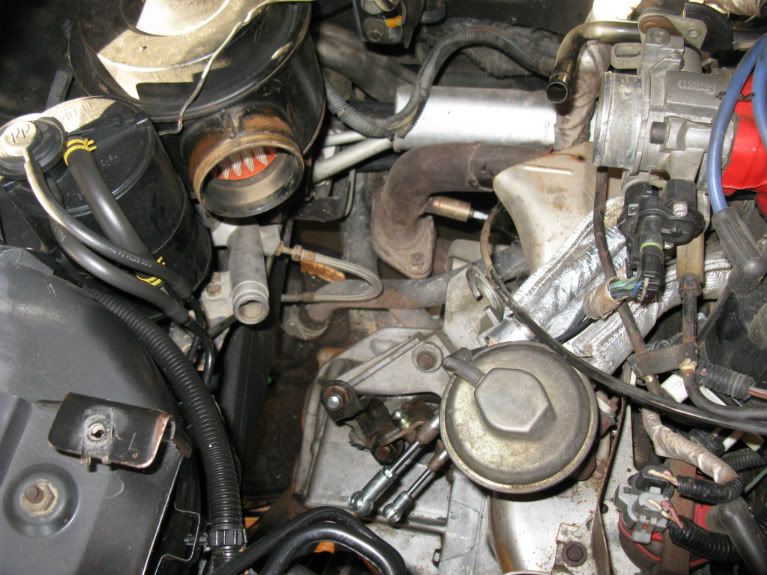
And of course being my first time as we started running into alot of snags... Mostly things we forgot to disconnect... Uhgg...
So I hopped my little 22 yr old butt back there and started pulling at things till they came loose... lol
Then the AC compressor was snaging on something, so I hesitantly crawled under the car and wiggled it free... So after what felt like 2 or 3 dozen times and 4 hrs of raising and lowering the car, we finally got the cradle out... But something had to go wrong... Our dolly setup failed, so, we just dragged it out...
*Deep sigh of relief***
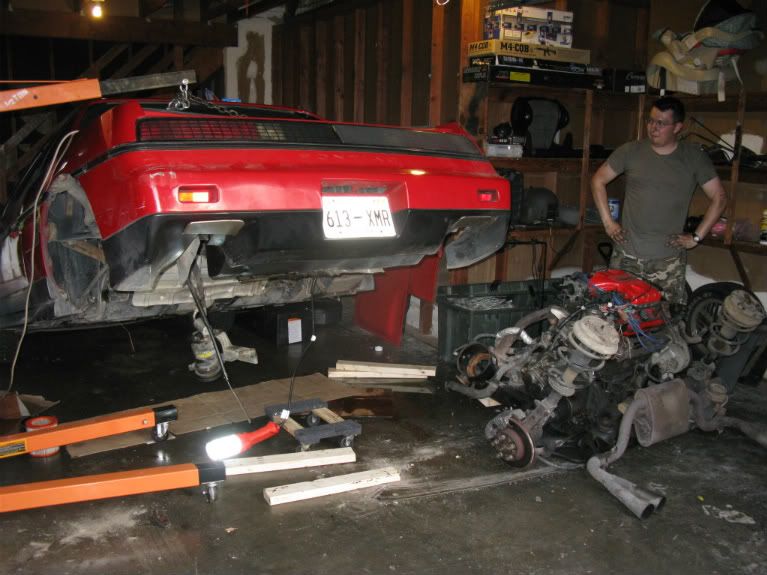
We relaxed after we blocked up the engine and had the car resting on something... Yay!!! Its Finally Out....
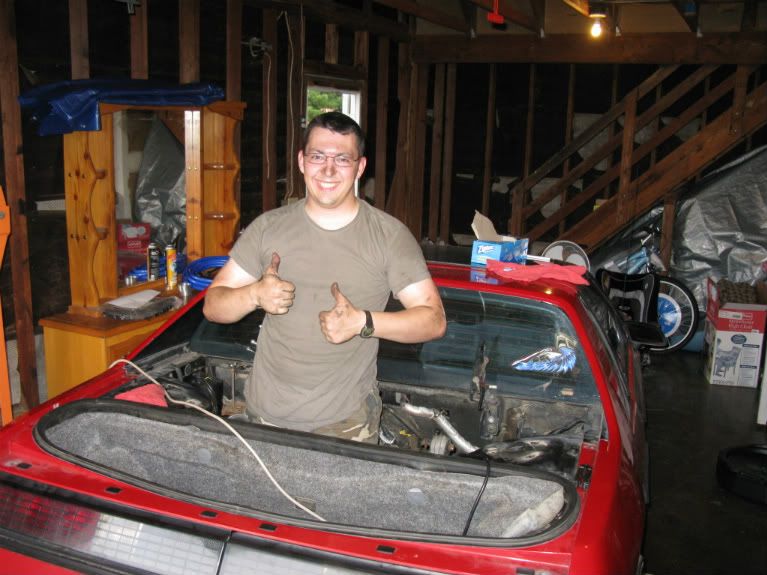
And of course we cant forget the famous Fiero shot...
Oh my goodness, that was a long day... I had alot of fun wrestling her heart out... After we got the body settled down we packed it up for dinner and bed (the Old man passed out about the time I started writing this... lol...) leaving the garage with a pungant aroma of gasoline, coolant, sweat, and bug repelant...
I will be taking the next few days at a slower pace I think...
Dont forget, I add more photos to my photobucket album then I post here, Please feel free to check them out... Renea's Photo Album
Feel free to coment or add suggestions, I love to hear feed back...
Chris
IP: Logged
11:32 PM
snakeskinner1 Member
Posts: 252 From: st. joseph,MO. Registered: Jan 2011
man you are cruising right along there! i just did a 3.4 swap on mine so i understand exactly what your going through good luck on everything and for sure keep us all posted as im watching with empathy
IP: Logged
11:48 PM
May 30th, 2011
Intel Member
Posts: 752 From: Helsingborg, Sweden Registered: May 2002
Nice job! Especially in a narrow garage like that! I vaguely remember my first engine drop. I guess I can blame that on the well deserved beers afterwards.
Now let your knuckles heal then dig into that 2.8!
IP: Logged
07:48 AM
donnie072003 Member
Posts: 1956 From: LaSalle, IL. Registered: Feb 2010
I had the same problem with dolly failure but mine was when it was going back in! LOL Make sure you beef up those wheels before you poke her back under there. Next time I pull one I think I will try the picker from the side like you did. Mine wouldn't straddle the dolly from the back of the car.
IP: Logged
08:01 AM
Jun 3rd, 2011
Halcyon25 Member
Posts: 191 From: Rio Rancho, NM, USA Registered: Jan 2011
Originally posted by donnie072003: I had the same problem with dolly failure but mine was when it was going back in! LOL Make sure you beef up those wheels before you poke her back under there. Next time I pull one I think I will try the picker from the side like you did. Mine wouldn't straddle the dolly from the back of the car.
Whats even funneier is the dollys didnt break... the cradle slid off of them... lol...
So the battle continues... whats this now, Day 8...
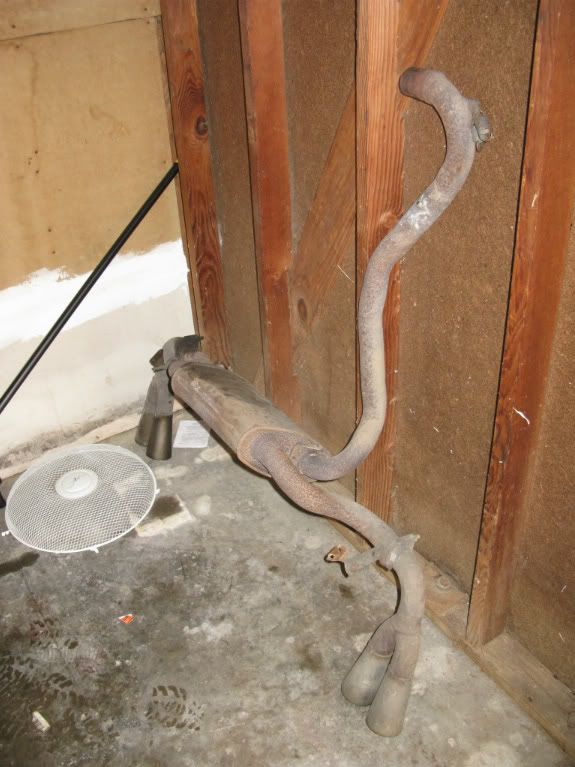
I decided I would start with the easy things first and work my way to the Engine/Transmission... So off goes the exhaust...
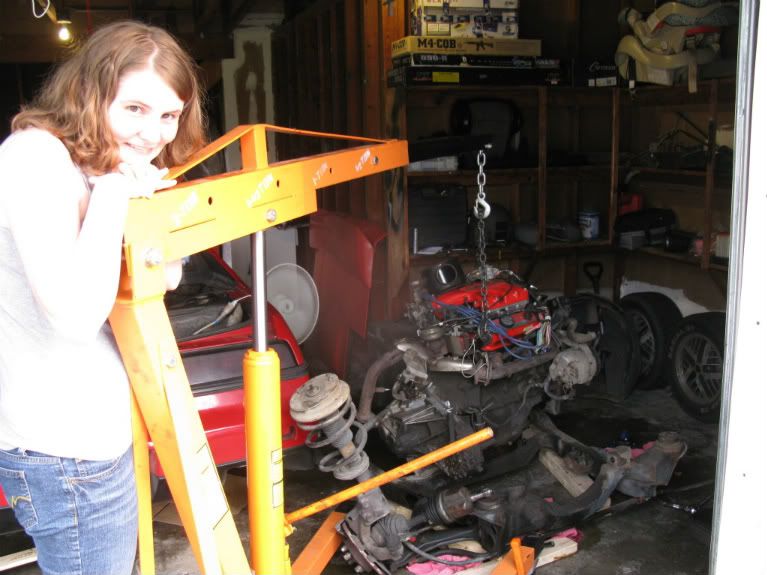
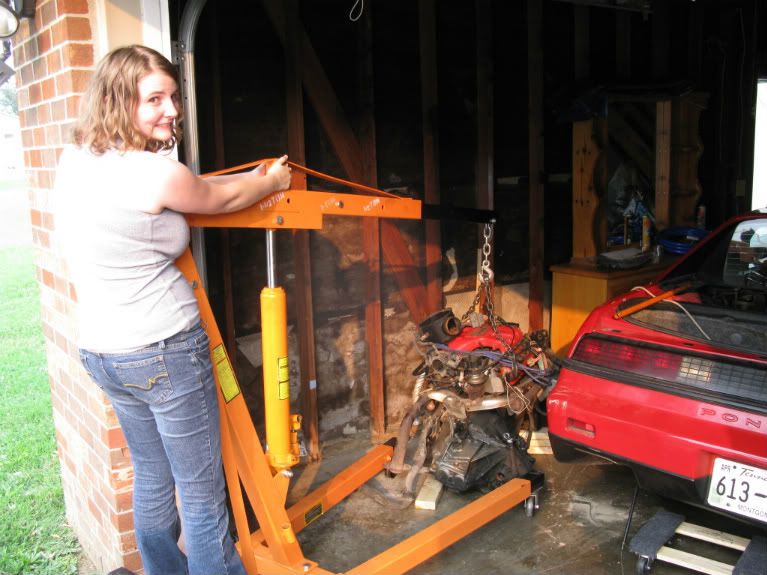
Then I started taking on the CV axles and all the components attached to the suspension, but while taking off the right hand side I ran into a snag with the E-brake... I dont know how to get it out of the cradle... So I set it aside and started hookin up the engine and disconnecting the mounts getting it ready to pull off the cradle and move it aside... I even got the wife to come out and help.... counter balance that is... lol... I love my wife...
and after we pulled it from the cradle we temporarily sat it down to reposision the picker so it was easier to move the engine around... and now its in its current resting place until its need again...
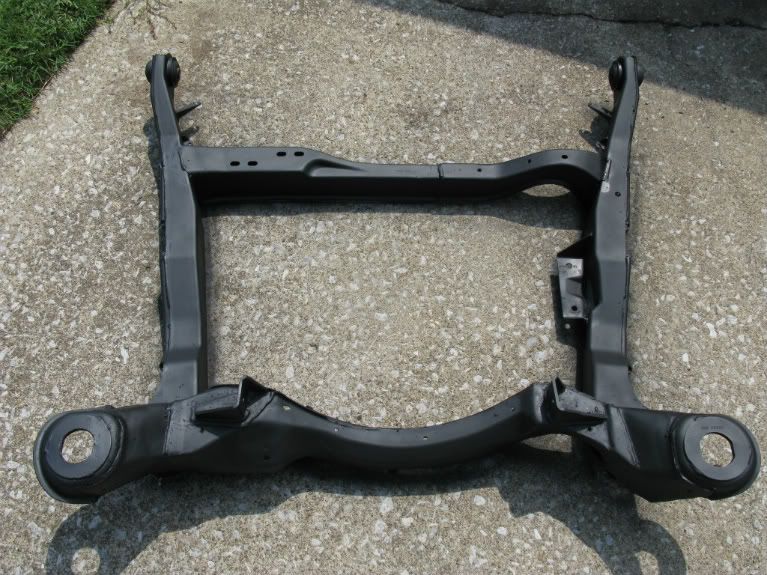
after the engine was down I went back to the cradle to look it over and... holy cow... theres mud/oil caked on at almost a half inch thick in some areas... Looks like the up coming cleaning will be highly looked forward to...
I kind of wish she was on dollys now so I can move things around and make space for things... oh well... this was the scene at the end of the day...
Any body know how to remove the E-brake cables from the cradle?
Thank you for the Help and Coments guys....
Chris
IP: Logged
08:48 PM
Stubby79 Member
Posts: 7064 From: GFY county, FY. Registered: Aug 2008
Any body know how to remove the E-brake cables from the cradle?
There are little tabs that allow them to only go in one way right where they enter the cradle. There are holes on the back side where you can reach in with a pair of needle nose plyers and compress the tabs down so they'll come out again.
[This message has been edited by Stubby79 (edited 06-03-2011).]
IP: Logged
11:08 PM
Axdrenalin Member
Posts: 478 From: Mountain City, Tennessee Registered: Mar 2011
Heh, guess I should have checked here before I posted in that other thread! Nice job so far - guess I'll keep tabs here for when I get ready to yank my 2.8 in and reinstall a 3.4 PR.
Best of luck!
Robert
IP: Logged
11:13 PM
Jun 4th, 2011
marc-alan Member
Posts: 375 From: pottstown, pa usa Registered: Mar 2010
Originally posted by Stubby79: There are little tabs that allow them to only go in one way right where they enter the cradle. There are holes on the back side where you can reach in with a pair of needle nose plyers and compress the tabs down so they'll come out again.
Ok... wasnt sure if there was some special tool need or what... but I was able to get them out yesterday, even took the time to take the cradle out to the car wash and get some of that crud off of it... now im just taking off the eng/trannie mounts and the cradle bushing so I can take a wire wheel to the fading paint and the little rust trying to form... Once thats done and Painted, maybe I'll tackle the engine bay and clean it up some... What kind of paint would you all recomend for the cradle...
Thanks for the support
Chris
IP: Logged
05:45 PM
PFF
System Bot
Jun 15th, 2011
Axdrenalin Member
Posts: 478 From: Mountain City, Tennessee Registered: Mar 2011
Not to much to update with... just been cleaning parts and trying sell 'em... the wife have me operating on a restricted budget... (probobly for my saftey)... right now im working on some deals with several people to get the parts and money to keep at this thing going regularly... the current talks right now are with,
VelociJuris to get most of the shifter components... The 1st Bat. Fiero guy (whos name I cant pronunce) to purchase my long block... this weekend... and then theres a few smaller deals being worked on in both directions to get things we all need...
Im hoping to be ready to get the 3.4 and install everything on or about the 15th of July...
IP: Logged
06:42 PM
Jun 23rd, 2011
Halcyon25 Member
Posts: 191 From: Rio Rancho, NM, USA Registered: Jan 2011
no picts today, but I sold my engine, harness, and ecu to the the 1st Bat. Fiero guy this last sunday... I recived VelociJuris's package yesterday... It came with the 5 speed shifter assy., both cables, slave cylinder, clutch pack, and a flywheel... yay!!! Now I have a reason to start playing in the interior again... I plan on picking up the new engine this weekend...
Purchased the 3.4L SFI two weeks ago and have been taking my sweet, sweet time tearing it down... Still waiting on parts for the trannie and after discovering my more receant mistake... I might be waiting on parts for the engine as well...
IP: Logged
06:11 PM
Aug 7th, 2011
Halcyon25 Member
Posts: 191 From: Rio Rancho, NM, USA Registered: Jan 2011
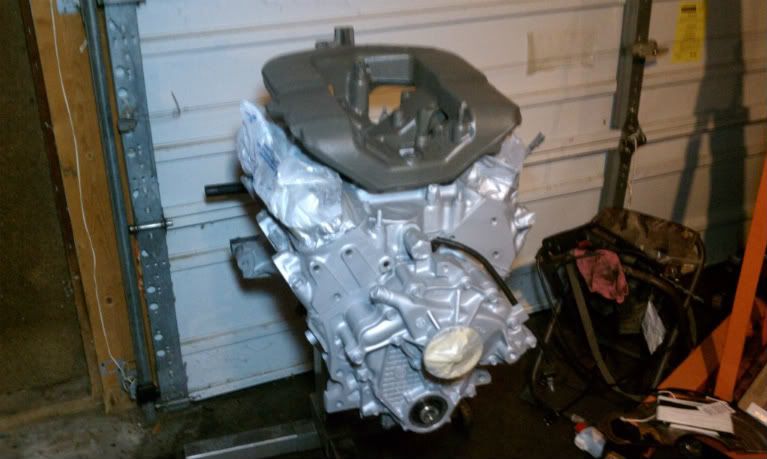
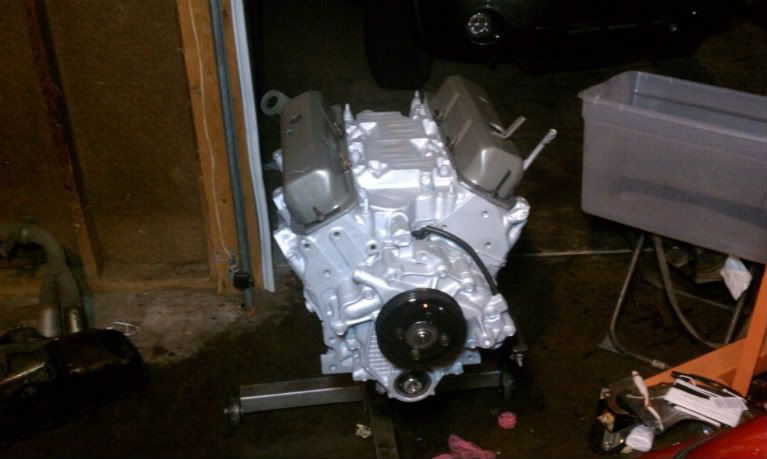
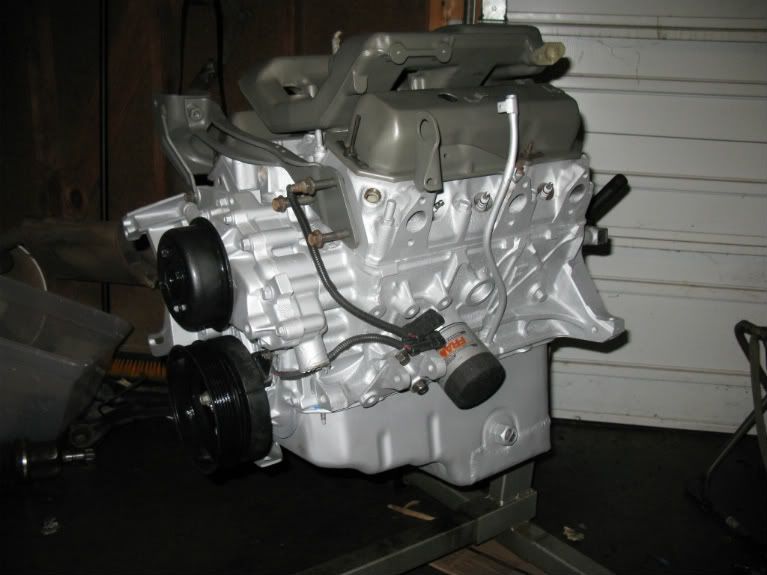
Got my self some PRK eye surgery last week so I was mostly recovering this weekend but that hasent stoped me from getting dirty or making a few purchases...
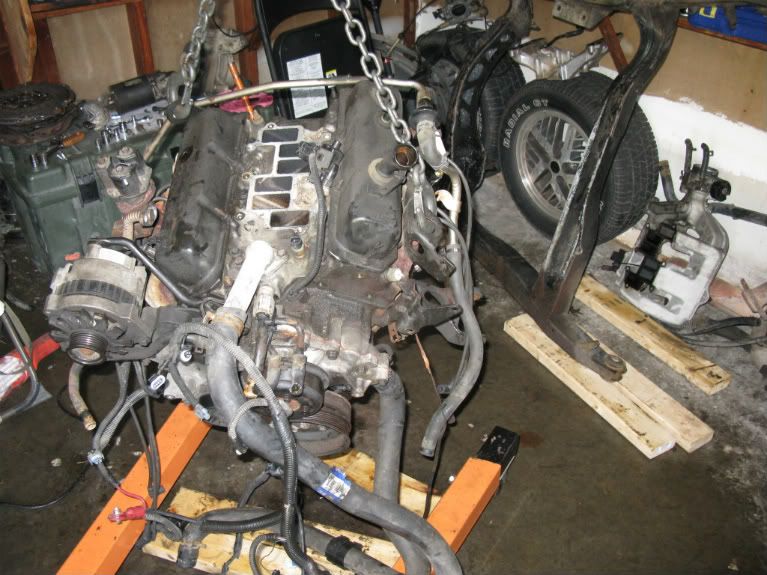
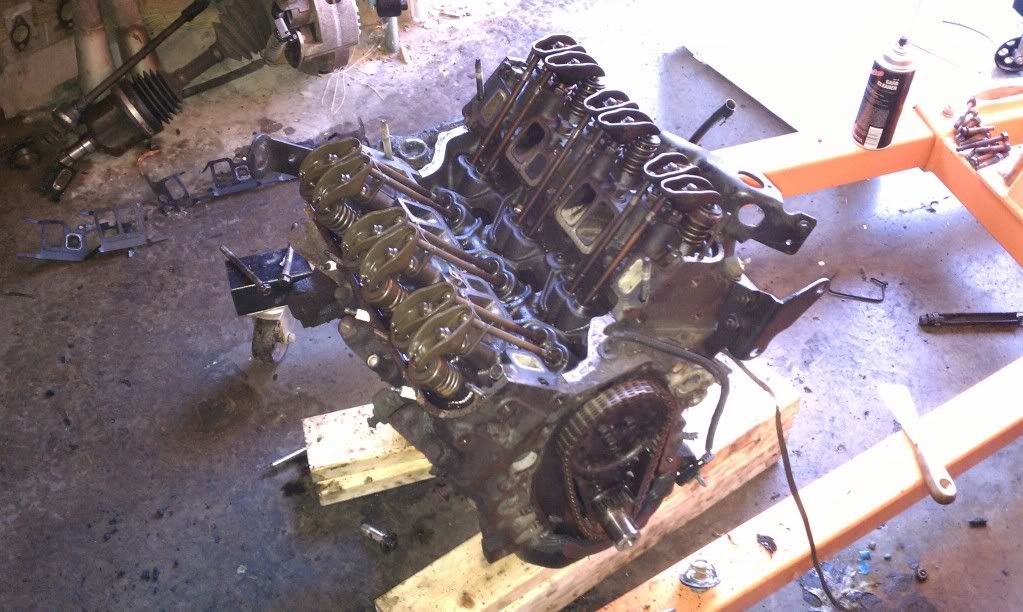
heres the engine as it sit now...
Chris
IP: Logged
04:45 PM
Aug 12th, 2011
Halcyon25 Member
Posts: 191 From: Rio Rancho, NM, USA Registered: Jan 2011
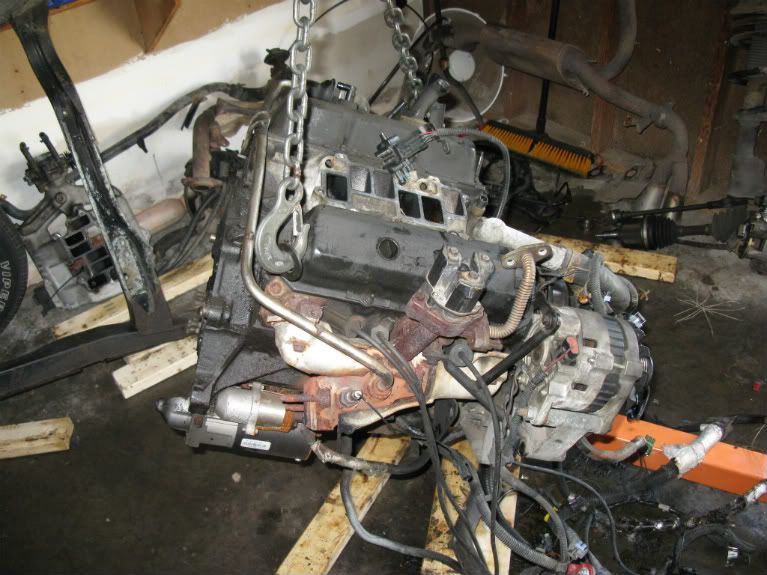
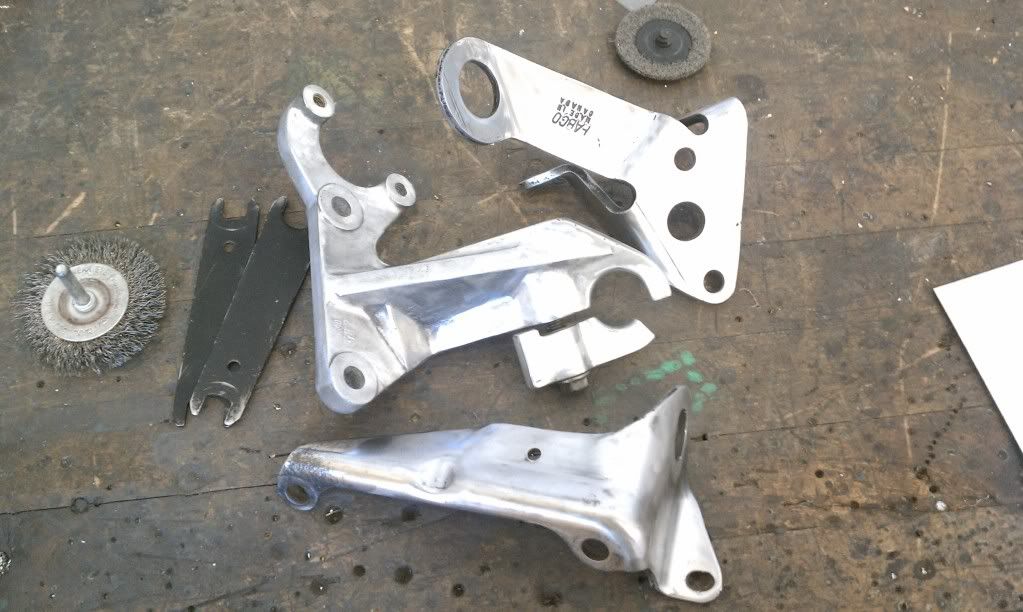
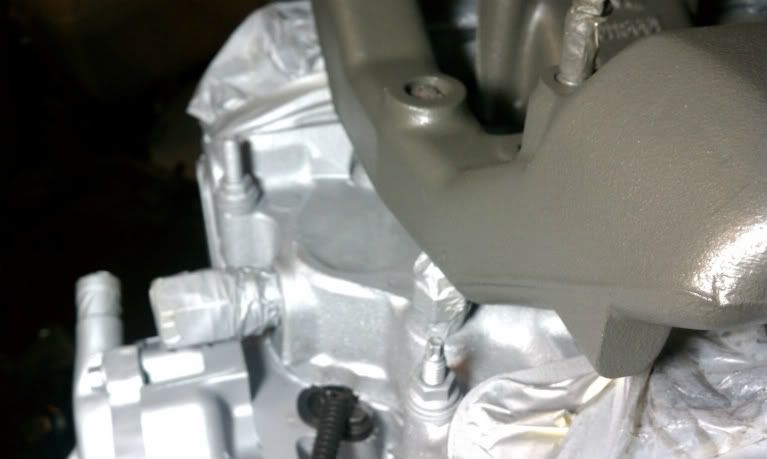
So I have spent the last week cleaning up some brackets and repainting them...
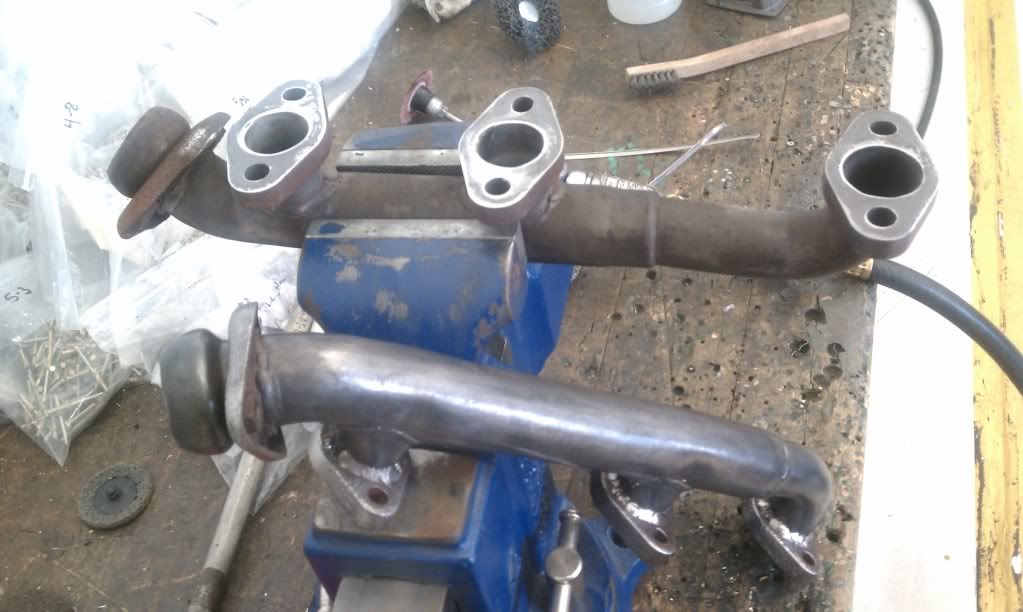
I even took some time to polish the exhuast manifolds...
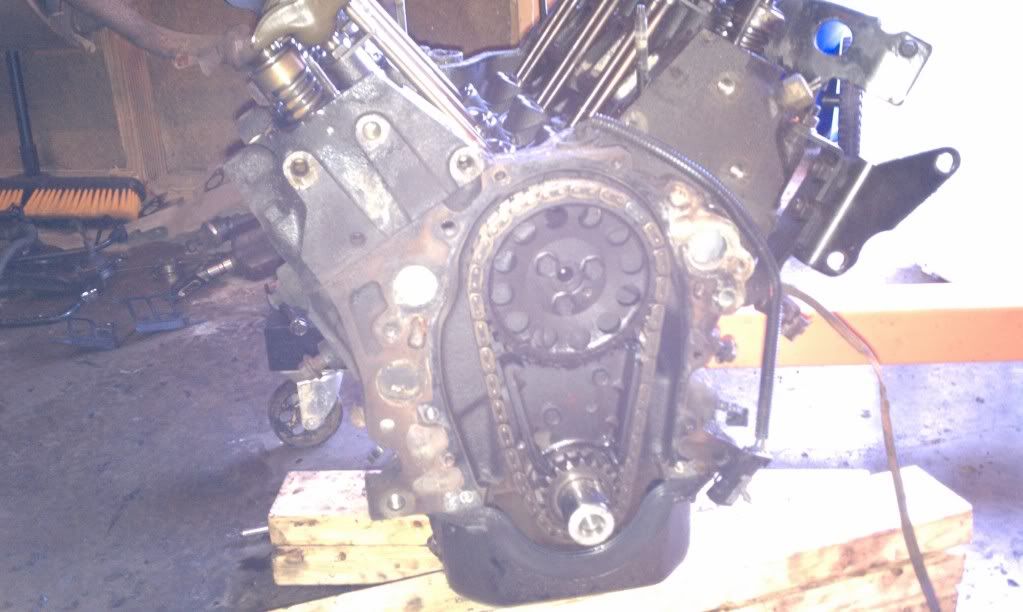
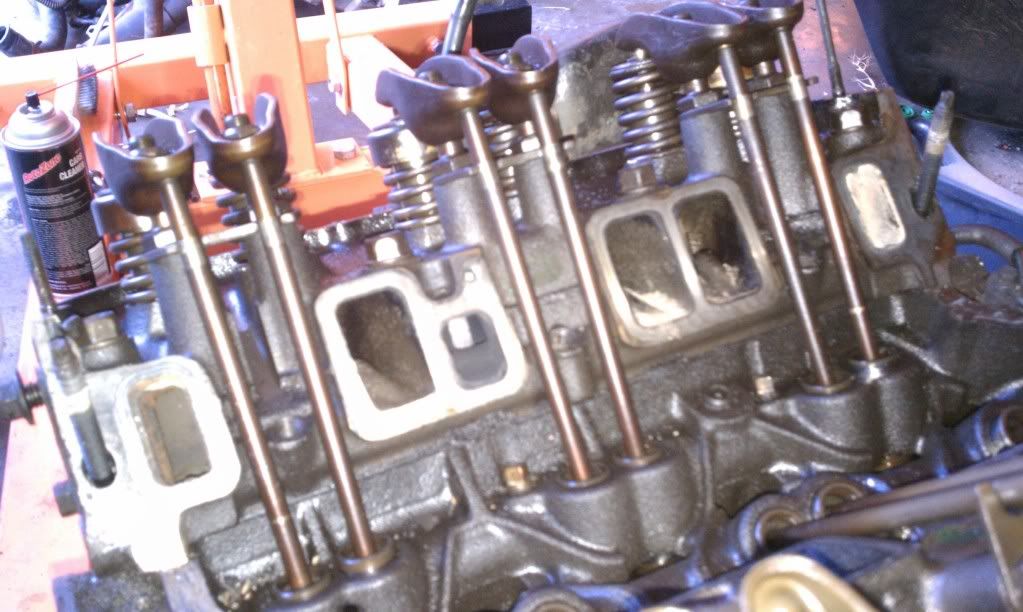
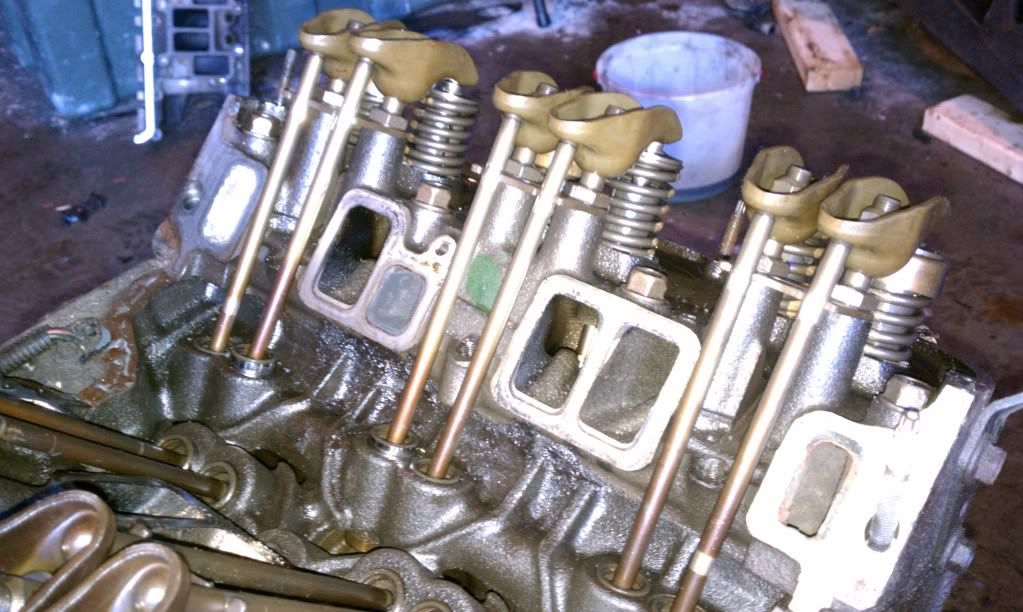
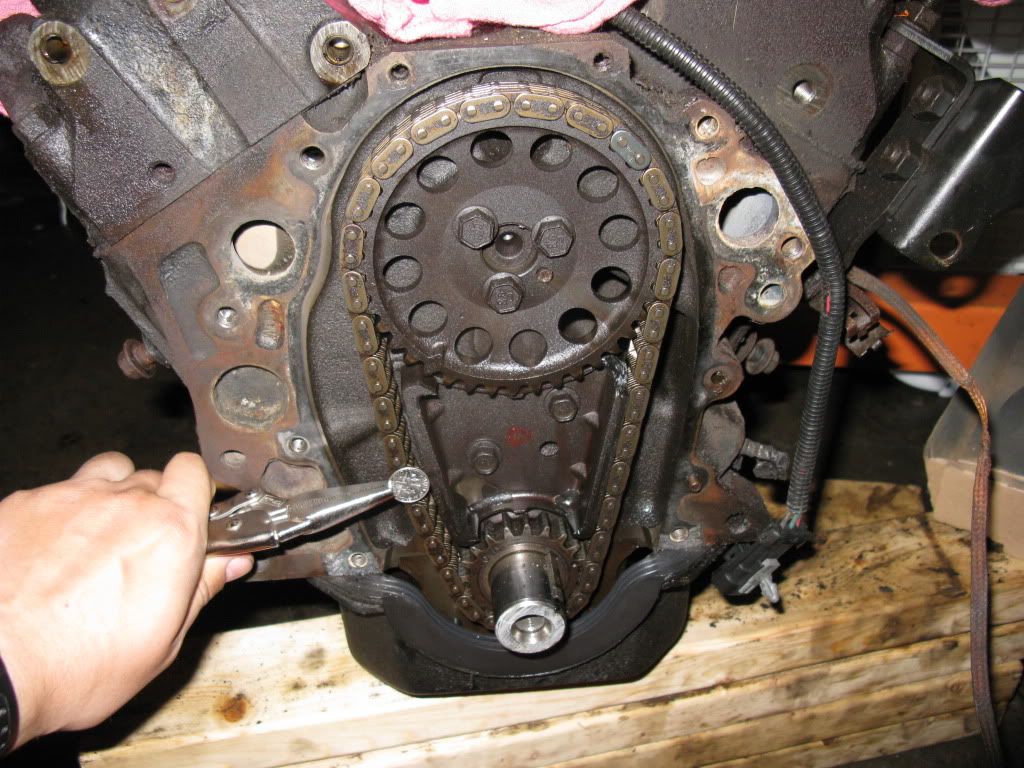
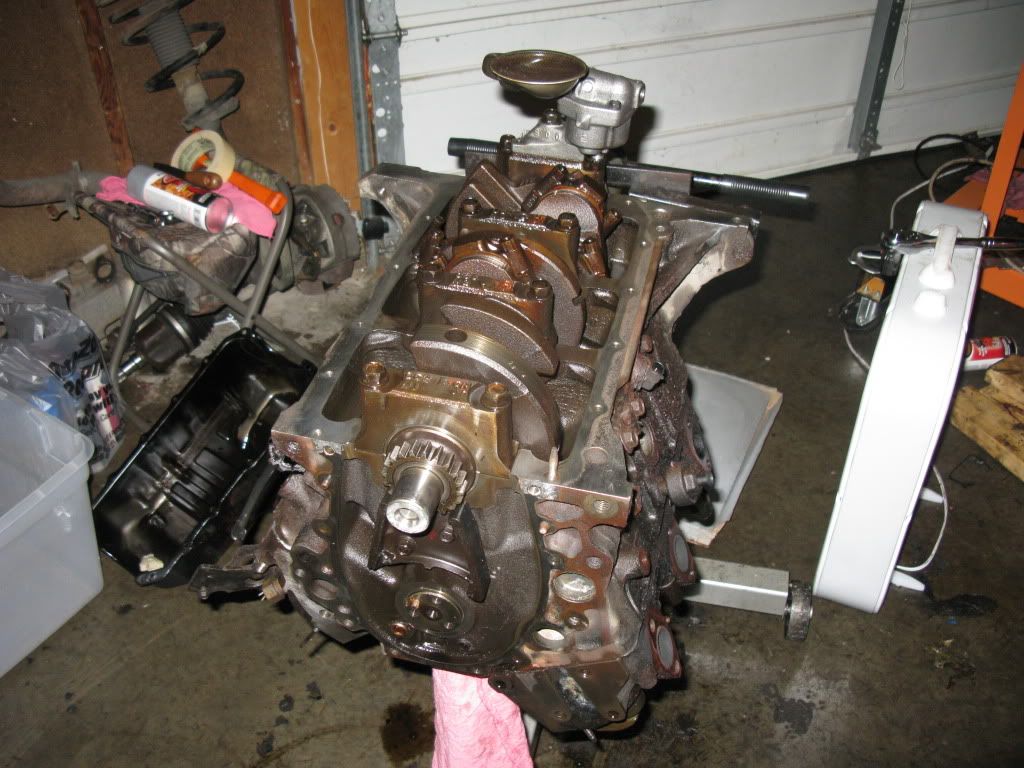
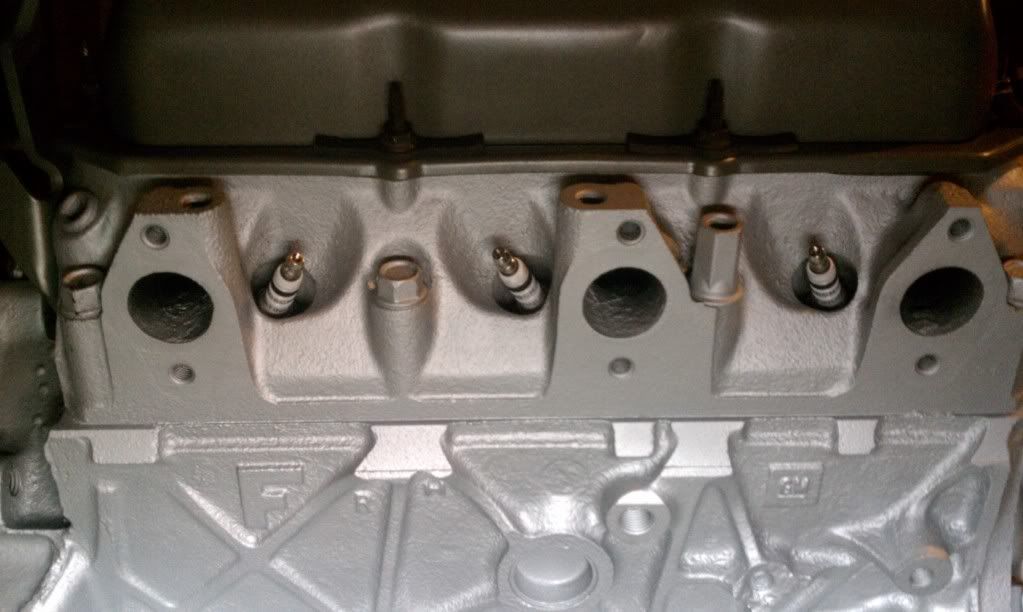
and today after being released from work early, I was able to remove the timing cover, lower intake manifold, and both valve covers...
to my untrained and surprised eye's, all the push-rods and do-hicky's there looked really good considering this engine came out with 136k miles on it...
as she sits before I covered everything...
Plus... I just recieved a generous donation from my parentsto help get this done sooner, so look out AutoZone and RodneyDickman... Here I come...
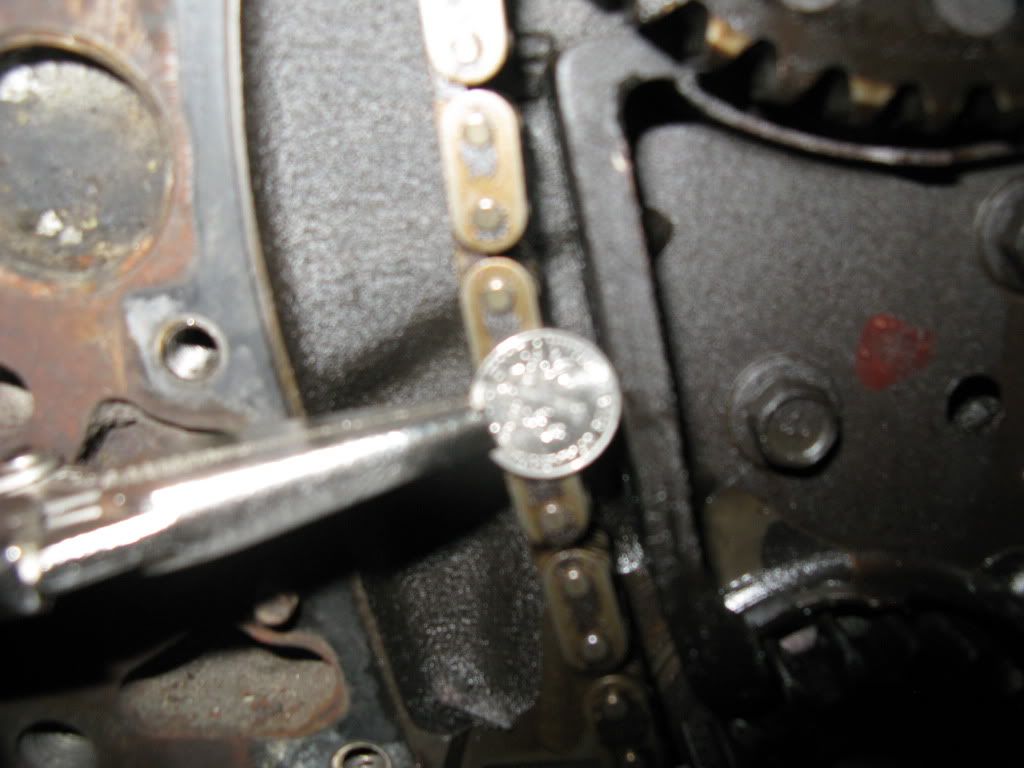
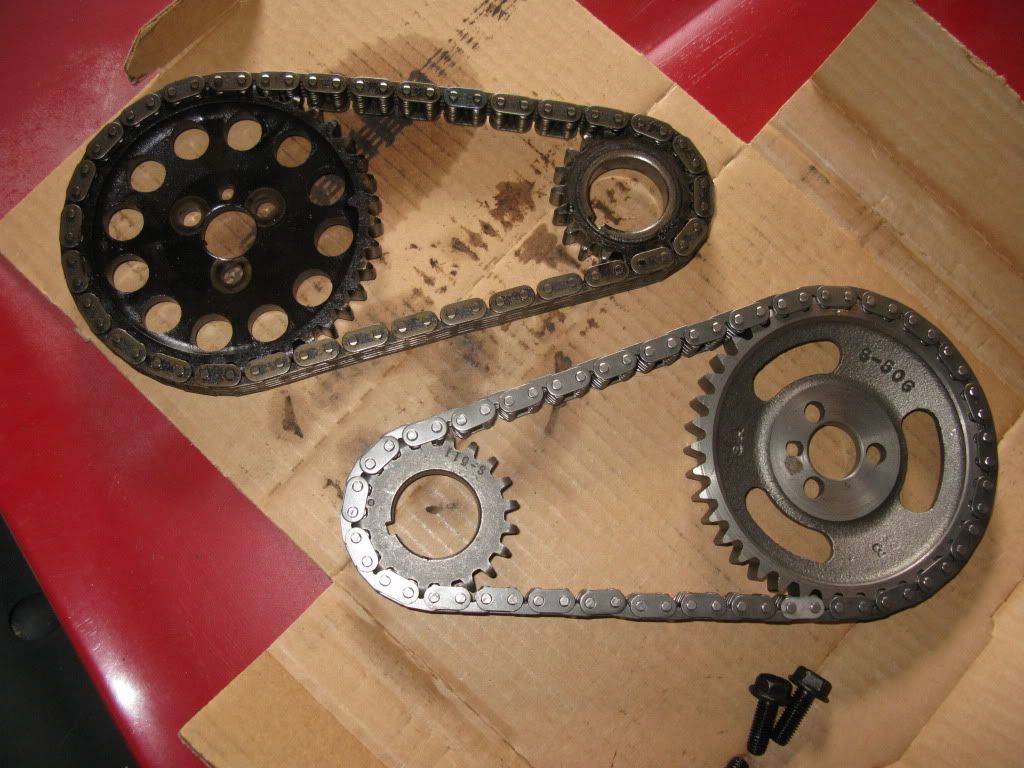
The picts are telling the truth, its as bad as it looks... (from pictures POV) On the right side the chain is tight, but on the left you can see a noticable 1/4 - 3/8th inch slack... would you guys suggest replacing it? I was allready thinking this should be fixed, but want to make sure before I go and pick up a new chain...
Chris
Edit: I'll post a better picture in the morning...
[This message has been edited by Halcyon25 (edited 08-14-2011).]
IP: Logged
11:34 PM
PFF
System Bot
Aug 15th, 2011
Halcyon25 Member
Posts: 191 From: Rio Rancho, NM, USA Registered: Jan 2011
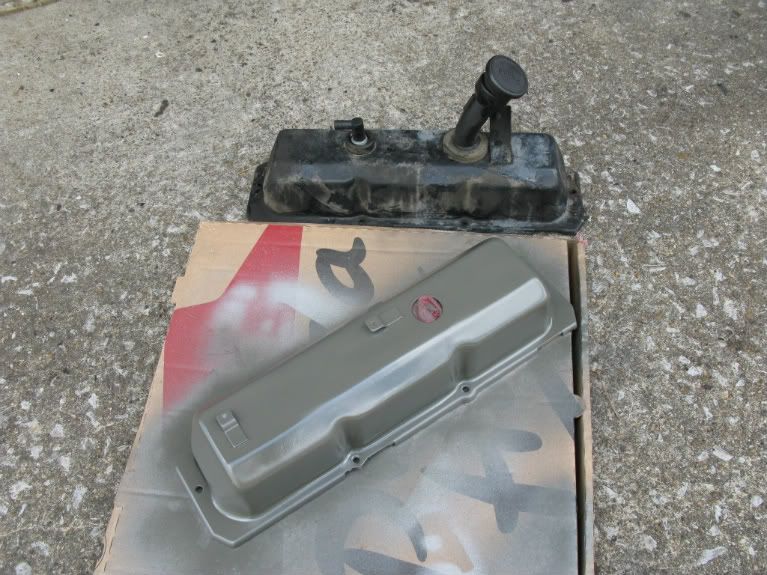
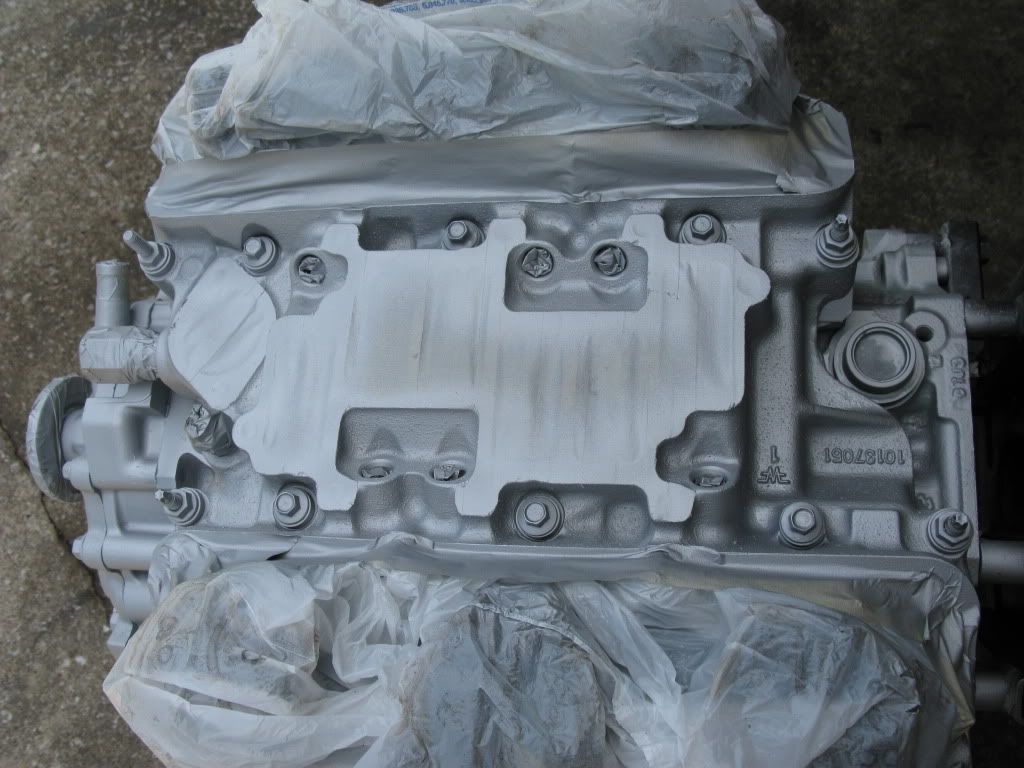
Today I was working on cleaning up the Upper / Lower Intake manifold, and Timing cover... fortunetly it didnt need an extreme cleaning session... I also srayed the third coat of paint on the valve covers, They look very nice now...
The middle of the intake hasent been touched yet...
and this is with one coat of graphite paint...
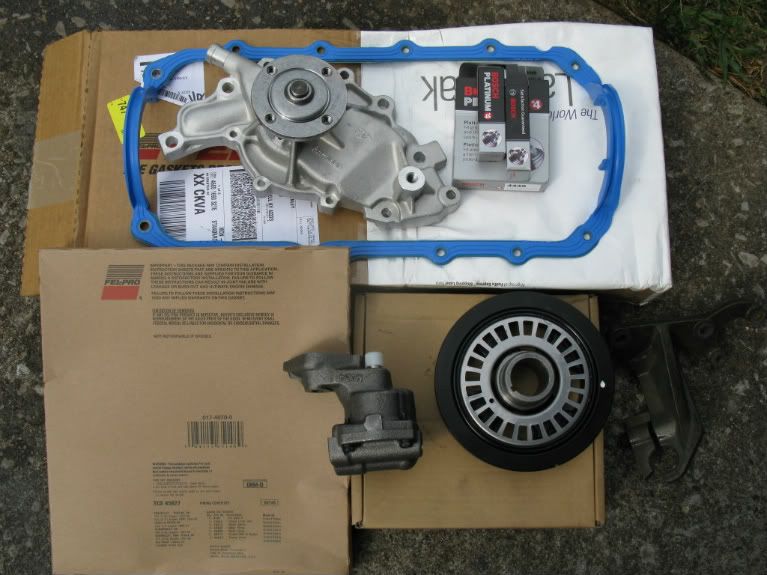
Shortly after applying the first coat, I recived gifts from Fedex and US postal...
Yay!!! more parts...
Over this next week Im going to try and clean up some more brackets and install all these goodies...
Chris
Oh, and does anyone here think I should replace my timing belt? (see posts above)
IP: Logged
07:23 PM
Axdrenalin Member
Posts: 478 From: Mountain City, Tennessee Registered: Mar 2011
I'm not sure what the exact specs are on timing belt slack for the 3.4 PR engine, but based on the looks of that one and the amount of play in it, I'd go ahead and replace it since you've got everything exposed and it's easy to get to. You're already looking at 134k miles on that engine, so I'm betting it's never been replaced before. Better safe than sorry, I always say...
I was also wondering what made you decide to stay with the original intake maniford on your 3.4PR? Seems like I was reading somewhere that the original 2.8 intakes produced a better airflow than the stock camaro / firebird intake on it (can't remember where I read that though...)
Robert
[This message has been edited by Axdrenalin (edited 08-15-2011).]
IP: Logged
08:06 PM
Halcyon25 Member
Posts: 191 From: Rio Rancho, NM, USA Registered: Jan 2011
As for the Intake Manifold... I saw the samething once, but one of the guys I work with was a certified GM machanic and was telling me there wasnt a noticable differance between the two intakes, since there both High Output Intakes, and since my aim isnt for performance I figured to hell with the norm... Plus I have this Idea for a center piece that will cover the fuel rail...
We'll see how this "Idea" turns out...
Chris
IP: Logged
08:38 PM
Aug 19th, 2011
Halcyon25 Member
Posts: 191 From: Rio Rancho, NM, USA Registered: Jan 2011
All righty... so this last week I was cleaning brackets... Again...
I have also Replaced the Oil Pump, and was in the process of replacing the timing chain until I realized I had the wrong puller for the crank sprocket...
I was also in the middle of cleaning the block when my drill went out on me... Looks like I gotta go get another one...
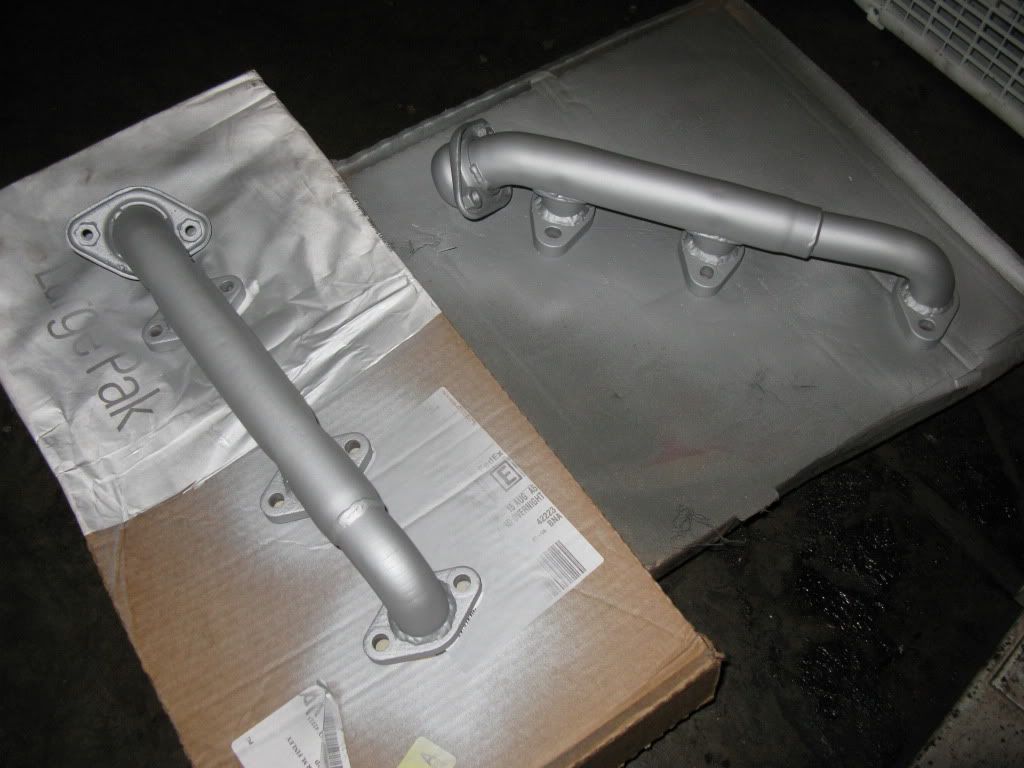
To finish up the day I applied the first coat of High Temp paint to the Exhaust Manifolds...
I dont feel like going to AutoZone or Harbor Freight today... Again... so I'll head out first thing tomorrow...
I also recieved another shippment of parts... Rodneys 3.4 starter jig, and two rear VST MacPherson Struts... I look forward to installing those this week... Hopefully...
More soon...
Chris
IP: Logged
08:04 PM
Aug 20th, 2011
Halcyon25 Member
Posts: 191 From: Rio Rancho, NM, USA Registered: Jan 2011
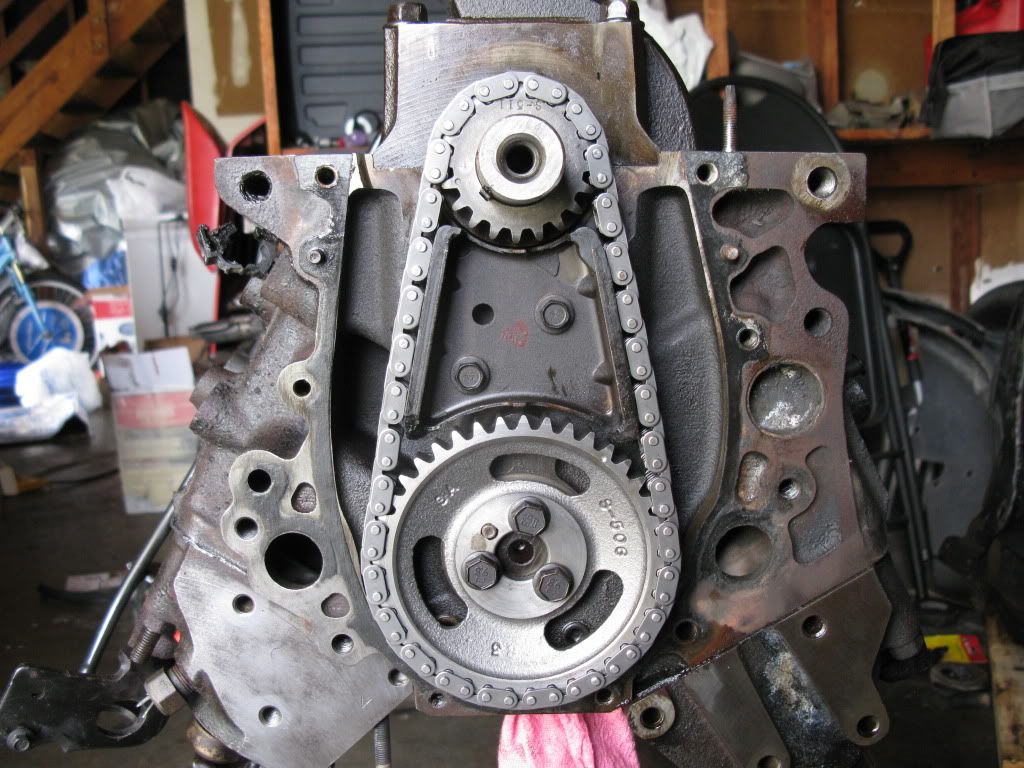
Slow day today... After getting back to the house I was able to remove the old crank sprocket and get the front of the engine cleaned up...
After that I got the new Timing Chain on... This picture was taken before I cleaned the front, I got abit ahead of myself... lol...
I also started removing the rust along the side of the engine facing the trunk... I made a dent in it, but, I still have along ways to go... Hopefully I'll acomplish alittle more tomorrow...
Chris
IP: Logged
06:19 PM
BlackGT Codde Member
Posts: 1107 From: Gallup, New Mexico Registered: Mar 2008
nice job, im liking it. the 3.4 should give you that extra oomph in the accelerator! plus it is a strong engine for turbo application. again keep up the good work and good luck with the rest of the swap!
IP: Logged
10:12 PM
Aug 22nd, 2011
Halcyon25 Member
Posts: 191 From: Rio Rancho, NM, USA Registered: Jan 2011
Thank You BlackGT Codde, I cant wait to finish this and drive it around... Even hearing the fact that I have to take it "easy" the first 500 miles on the new clutch is driving me nuts... I just want this to be over with so I can have some fun... As for a turbo... I think I'll keep it simple for now...
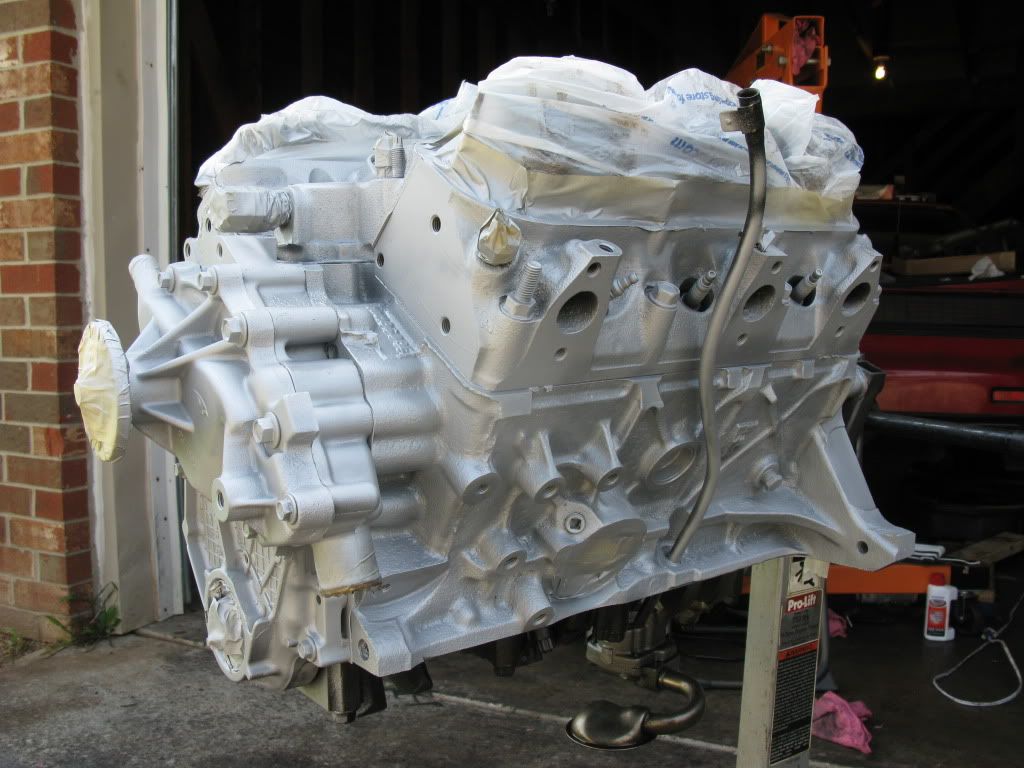
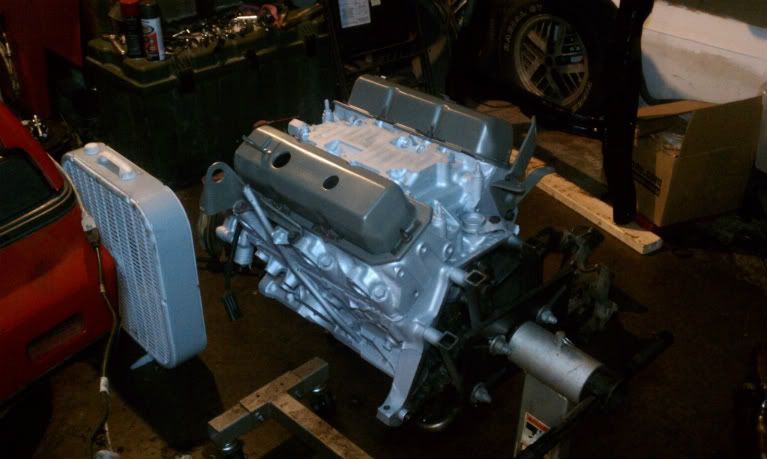
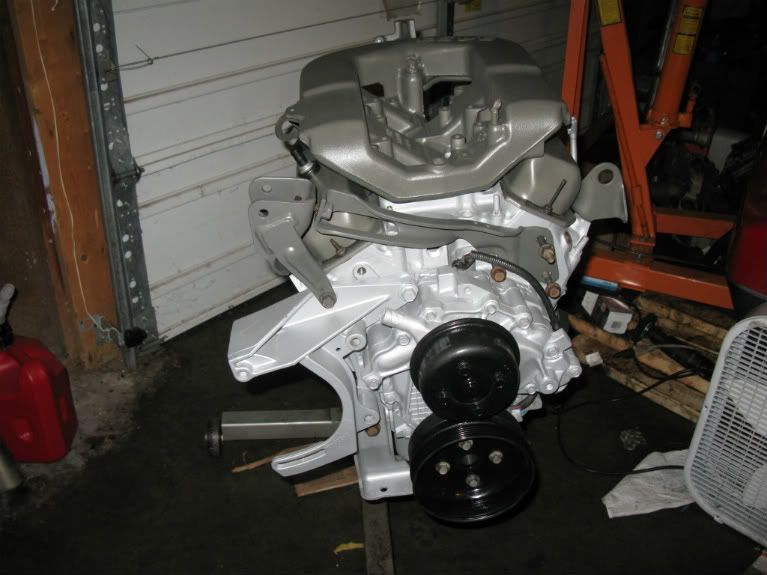
Alrighty... Today I got quite a bit done... well, sort of... I installed the Timing Cover and Water Pump...
After that, I buttoned up everthing and laid the first coat of High Temp paint on the engine...
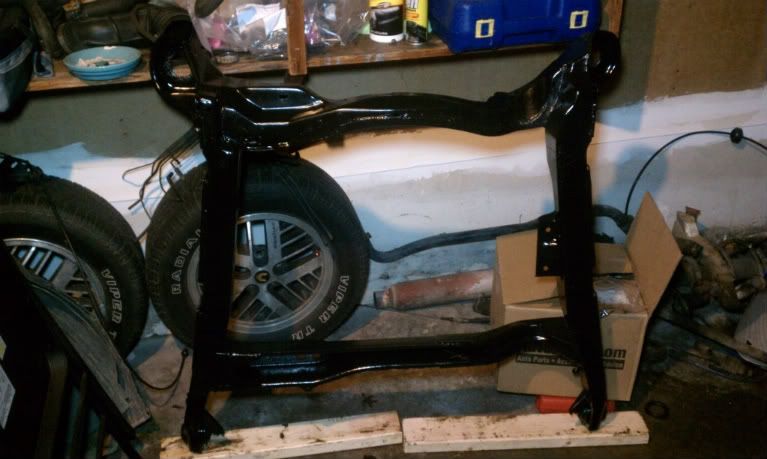
Next I preped the Cradle to be beautified... This is with the first coat of Rust Reformer, Tomorrow I'll go and lay down a coat of Gloss Black (500* resistant paint... Just incase)
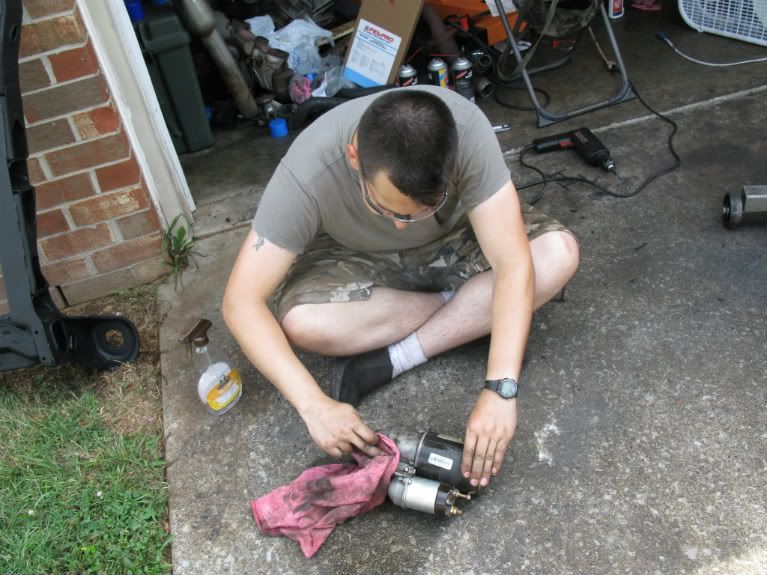
after preping the cradle I moved back to the engine and started drilling the holes for the Starter... Unfortunetly, I either didnt read all of the instructions, or didnt understand them... cause I drilled all the way through the block with the bigger bit... Boy did I feel stupid when I went to tap it... So now Im left with four options... 1. get a new block, which the wife wont let me do... 2. press a sleeve into the holes and tap those, but I dont have a lathe or a press... 3. get longer bolts and put nuts on the ends, but if I ever take the starter off I would have a loose nut in the clutch area... 4. Tap the hole for a bigger bolt, sounds like the easiest fix for this problem, I'll just need to find a bolt to fit...
Im still beating myself up over that one...
After fudging that up I proceeded to clean the starter... and no thats not your general cleaning stuff...
After I got that cleaned up I came inside and called it a day... I'll give the engine a few hours to fully dry before I go and reassemble it, as for the cradle I have to wait 24hrs after apllying the Reformer before I can do anything to it which sucks, cause I just got my package from Rodney Dickman containing Engine and Transmission Poly Mounts, and boy do they look Great... Oh I cant wait to see this done... I might not want to put it back in the car for fear of getting it dirty... lol...
anywho, More later...
Chris
[This message has been edited by Halcyon25 (edited 08-22-2011).]
IP: Logged
05:28 PM
Axdrenalin Member
Posts: 478 From: Mountain City, Tennessee Registered: Mar 2011
That new timing chain looks a bit tighter than the one you removed. :-) engine is looking great, but I hated to read about the starter relocation FUBAR. Hope you're able to get a viable solution worked out for that. Could you do a liitle welding to that area, and then re-drill or bore out the area again? Just an idea (probably not a great one) but a thought none-the-less...
Robert
IP: Logged
10:11 PM
Aug 24th, 2011
Halcyon25 Member
Posts: 191 From: Rio Rancho, NM, USA Registered: Jan 2011
haha... I occasionaly find myself staring at the picture I took of the new chain and wonder why I ever put the timing cover back on... It just looks to pretty to be covered... Thanks Ax, It has been a fun and enlitening adventure sofar... I had another Idea, or rather, a modification to an idea... You sugested welding, but rather instead of welding the holes closed what about welding nuts to the backside... I would think that has the greater chance of Not causeing something to break as compared to boring out the starter for bigger bolts... Now the fun part will be trying to find someone around here that welds AND has their own equipment...
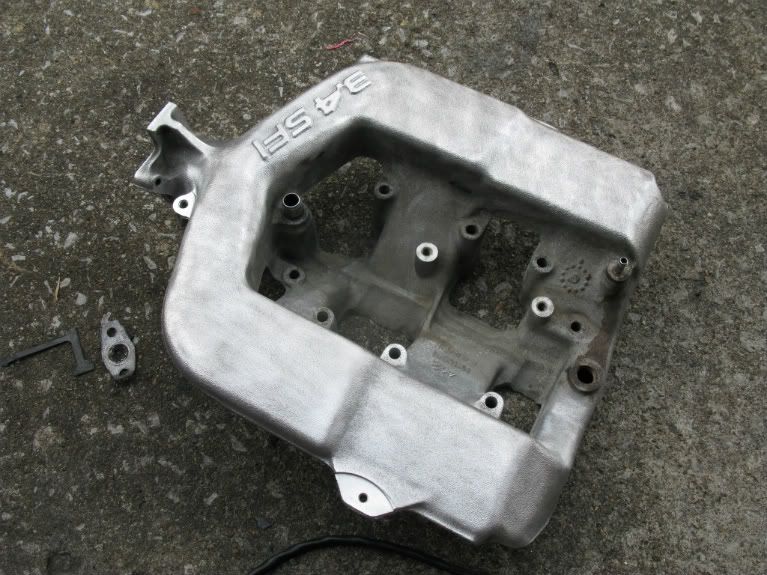
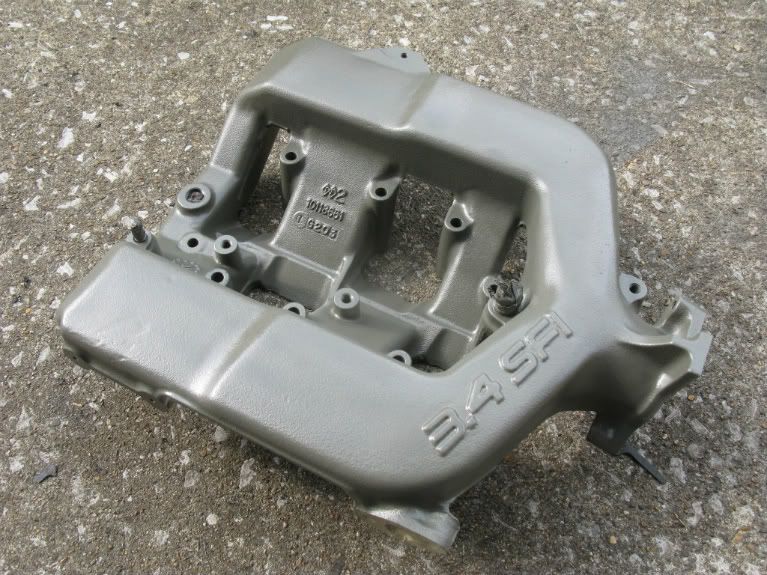
Anywho... So I started the night off wanting to see how the intake and color choices would look and I accidently figured out why the 3.4L Intake dosent get used much... As you can see in the picture, if you reverse the intake, it hangs over the coolant fill hole... and the original 3.4 piece is about a 1/4 inch too tall...
I didnt get much done after seeing that...
Tonight I got the first coat of paint on the cradle... its nice and shiny now... and this weekend I will apply the "Rino Lining" (not really... just couldnt remember the name of the stuff) to the bottom of the cradle (for added protection of course)...
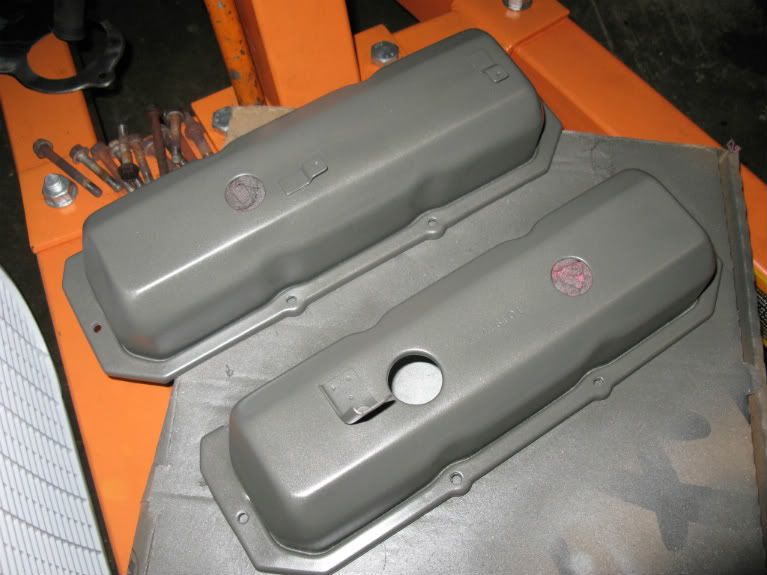
Next I moved to the Valve covers... I still had to get the old cork gasket off of it... but that came off farly easy... during that time I was starting to think the Iron/Graphite color was not the best choice until I finaly got to see the color combo together... After I got the valve covers on I took a step back and was amazed (I dont even think that is an accurated depiction of the emotion), they sure looked ugly by themselves but together, they looked Great... I also got the sling mounts and the water pump pully installed...
Thanks for watching...
Chris
IP: Logged
05:57 AM
PFF
System Bot
Axdrenalin Member
Posts: 478 From: Mountain City, Tennessee Registered: Mar 2011
That rebuild looks sharp! I guess you'll be prepping your Fiero intake after all, based on what you mentioned above. I really hate it when things don't work out like you planned, or hope they will. I've been hoping that others who have had more experience swapping 3.4's would chip in with a little more build advice in this thread, but it doesn't seem to be the case. I'm watching closely because I've contemplated doing this swap myself once I can free up some more funds or find a real inexpensive 3.4PR.
She's going to look great when you get it installed, and I'm sure you'll feel a noticeable difference once she's running again!
Robert
IP: Logged
06:17 PM
Aug 25th, 2011
Halcyon25 Member
Posts: 191 From: Rio Rancho, NM, USA Registered: Jan 2011
Thanks Robert... We'll see, Im going to try a few things before I give up on it, plus it can go on after the engine is installed for all I care... I was expecting the same thing and would really appretiate it if those of you who have done a 3.4 swap would speak out and, I dont know if I would critisize but, offer your oppinions on things, and yes, I know about the thread that walks you through this swap... Fortunetly, every swap is different, and I have pretty much garanteed that by getting rid of the 2.8 earlier then I should have...
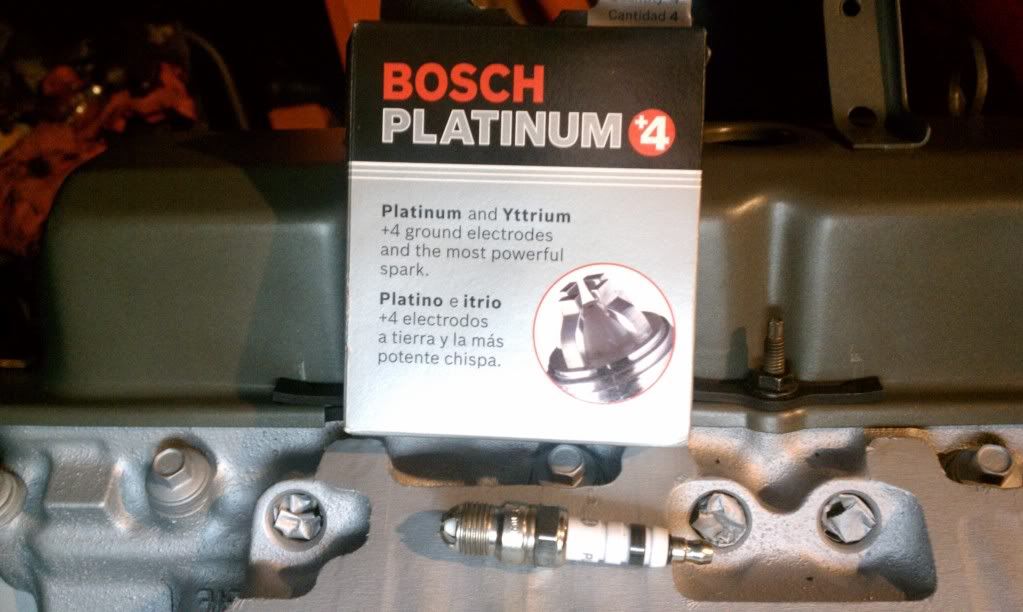
Didnt do much tonight... just installed the Spark Plugs
IP: Logged
03:40 AM
Sep 5th, 2011
Halcyon25 Member
Posts: 191 From: Rio Rancho, NM, USA Registered: Jan 2011
A realitively productive week it has been... About a month ago the A/C in my DD went out ('05 Escape) and I have pretty much restricted the wife from going anywhere she didnt "Need" to go, (Its been rather Hot this last month and for a 9 month old... ya...) and I finally had enough to get a compressor ordered last week. It arrived on saturday morning but due to the heat I dicided to wait till 6pm to remove the old one and install the new one... A 1/2 hour job for most of you took me about 2 hours, mostly due to my lack of automotive knowhow, but also cause one of the bolts was in a rather awkard position... Needless to say its fixed and I plan to recharge the system on Tuesday... Yay for Creature Comfort!!!
Anywho back to Renea... Since my last post I have mostly been cleaning... Again... Lets see here... I cleaned, painted, and Installed the Alternator Bracket, Driveline Absorber Bracket, Engine Dogbone Bracket, Engine Mount, 3.4 Water Pump Pully, Crank Pully, and the Oil Pan. The Harmonic Balancer is partly installed due to installer tool breaking, should have it fully seated by the end of the week... I also figured out the Oil Filter stud in the 3.4's oil filter bracket could come out, Yay, this was the only piece holding me back from installing the new Filter...
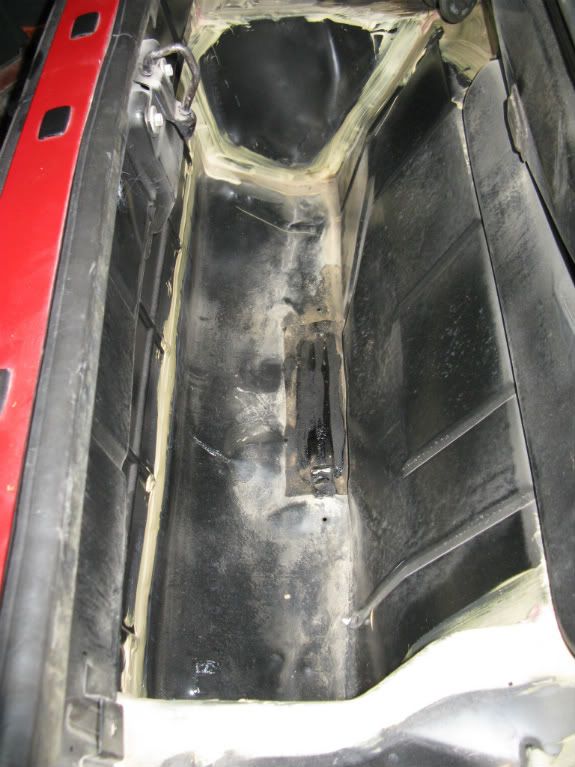
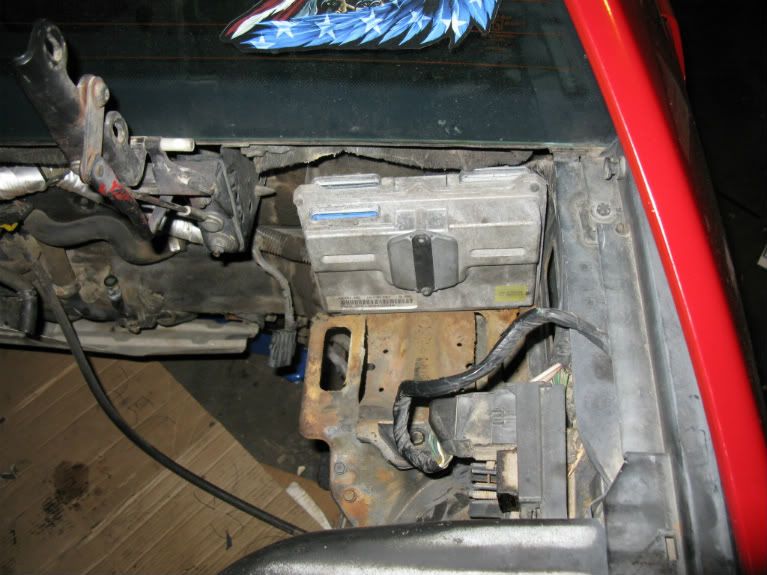
A few days ago I decided to slowly start making progress on the trunk and engine bay... I pulled out the trunk carpet expecting to find a Nightmare waiting for me... This is what I found...
YES!!! Totaly unexpected... This will make the battery mod so much smoother... I was also thinking about putting the 3.4 ECU where the battery was... much like it is in the picture...
As for the intake, I have an idea to solve the water fill problem... However it will require someone who knows how to weld aluminum... I can do all the prep and clean up work if someone could help me out with this... Any takers???
Thats all for now...
Chris
edit: Oh... I also have a replacment Driveline Absorber ordered from the Fiero Store... should be here tuesday or wensday...
[This message has been edited by Halcyon25 (edited 09-05-2011).]
IP: Logged
04:37 AM
Axdrenalin Member
Posts: 478 From: Mountain City, Tennessee Registered: Mar 2011
How much heat can that ECU take? Besides the heat factor ( and that will be a very hot area) I also wonder if mounting it where the battery used to be is a good idea because of the potential for water in that area, especially if you caught out in the rain or something.
Might be something to think about...
Robert
IP: Logged
08:41 AM
Sep 7th, 2011
Halcyon25 Member
Posts: 191 From: Rio Rancho, NM, USA Registered: Jan 2011
The ECU can take wuite abit of heat suprisingly, I dont know the exact numbers but it was installed in the engine bay on the Camaro about 10+/- inchs above the exhuast I think it'll be fine there... I actually hadnt thought about that till you said something... Fortunetly I have access to alot of sheetmetal and a bender so Im sure I could whip something up pretty quikly, I may also flip it upside down...
This is old news but I havent mentioned it before... Almost a month ago I purchased some getrag parts from VelociJuris, a shifter assy. was one of those parts... this is by no means intending to be rude to you VelociJuris, but the component looked nasty... completly rusted over, but, it still moved around and worked... I took it into work one day, cleaned it up and gave it a paint job so it wouldnt get as bad again... the only reason I havent post it earlier was I hadnt cleaned up my short throw shifter to put on it, now it is... Vuala...
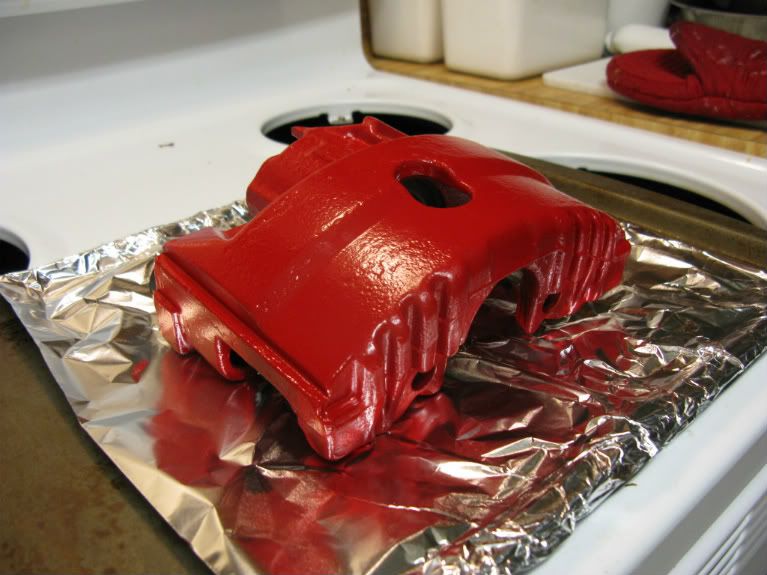
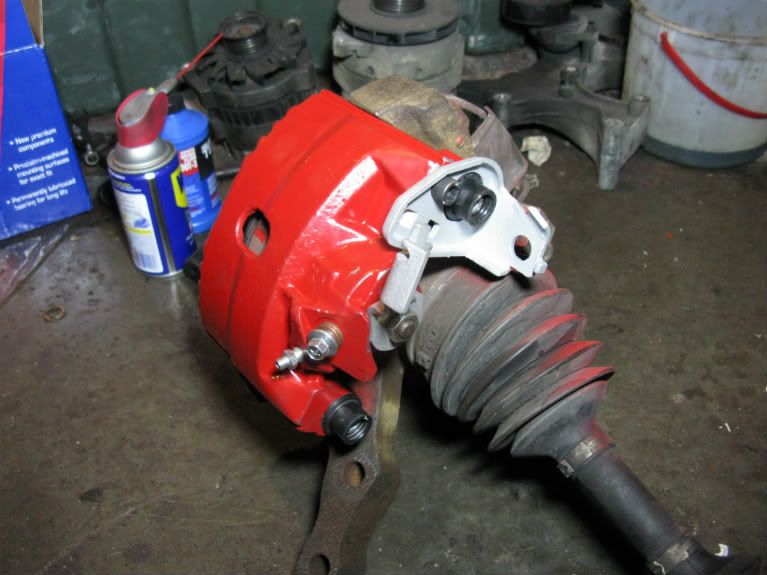
Slow week sofar, I decided to focus on the suspension while I wait for the weekend and parts to arive, plus not having the cherry picker, the engine is kindof stuck on the stand for now... I finally got the stupid left side strut off of the knukle, the two bolts refused to come out, then the nut on top didnt want to come off so I took it into my work area and used a bench vice to help hold it, I didnt have the proper sized wrenchs for the task... once on there it came off pretty easily, Got that disassembled and while I was cleaning the parts I heard one of my NCO's (Non Comissioned Officers) goofing off with the old strut, He was going to see how much of his body weight it would take to compress it... well as he braced for how much resistance he thought it would take, it quikly compressed with no effort... Sgt Baker, Sgt Creach, and myself stared at it in disbelive... It took almost twice as much preasure to decompress it then it did to compress it... I couldnt grasp the fact that this Fiero has been driving around for the last 10 years on only its springs... I was amazed yet very angry... while I wait for the freshly painted strut caps to cure, I disassembled the left side brake, cleaned, painted it and stuck it in the oven to speed up the cure time... this is it fresh form the oven minutes before this post...
Tomorrow I have to remember to pick up some brake fluid so I can put this thing back together...
More later
Chris
IP: Logged
01:41 AM
Sep 8th, 2011
Halcyon25 Member
Posts: 191 From: Rio Rancho, NM, USA Registered: Jan 2011
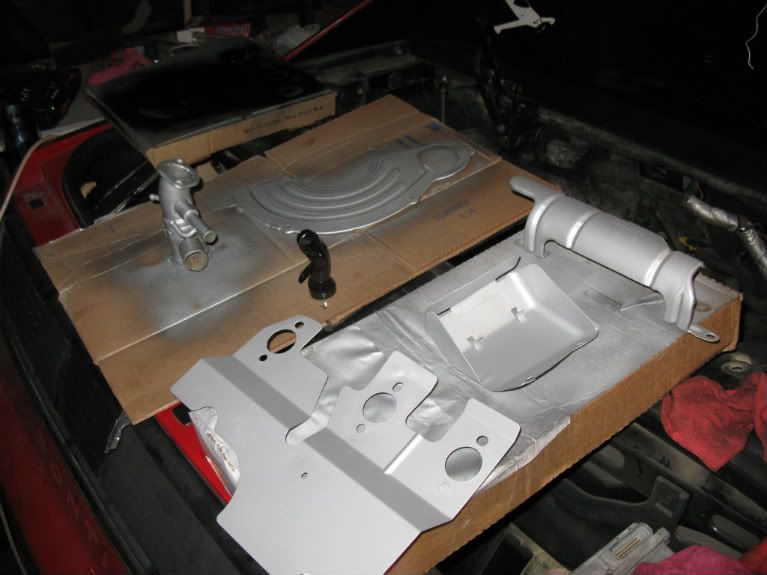
So I started the day cleaning more parts.... Im really starting to get tired of cleaning... lol... Knocked out quite a few parts, all the brackets for the top of the left side strut, the forward exhaust heat sheild, The water fill tube, Oil fill port, Trannie cover plate, and forward trannie mount heat shield... All of which are drying from there first coat of paint...
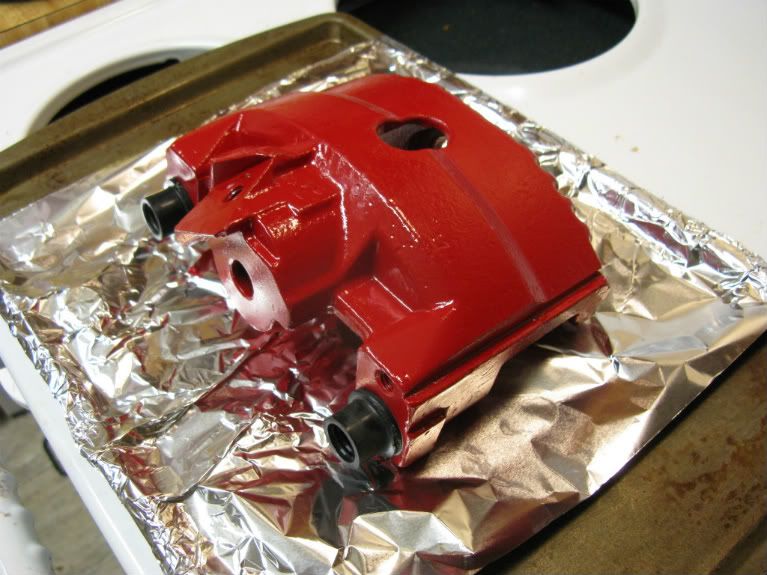
I also put together the left side brake... It actually looks pretty nice, the only thing i didnt like was how easy it was to nick the paint off... oh well... I'll toss a touch up coat once the whole thing is ready to go under the car...
Tomorrow I'll take in some more smaller parts and the alternators, I have to switch the pully's since I lost my 2.8 crank pully... Friday I might take in the other strut to disassemble it...
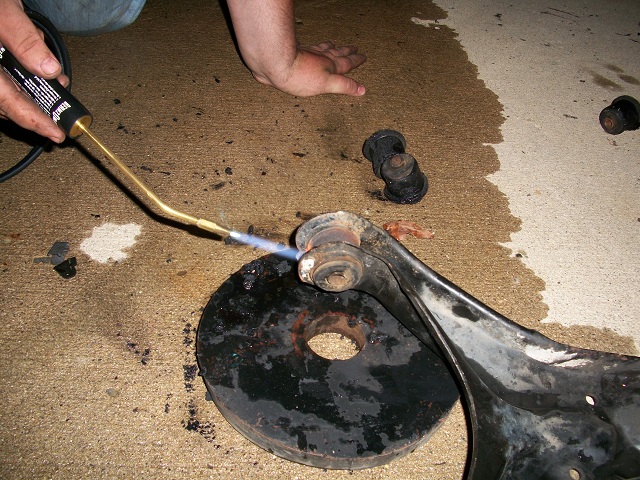
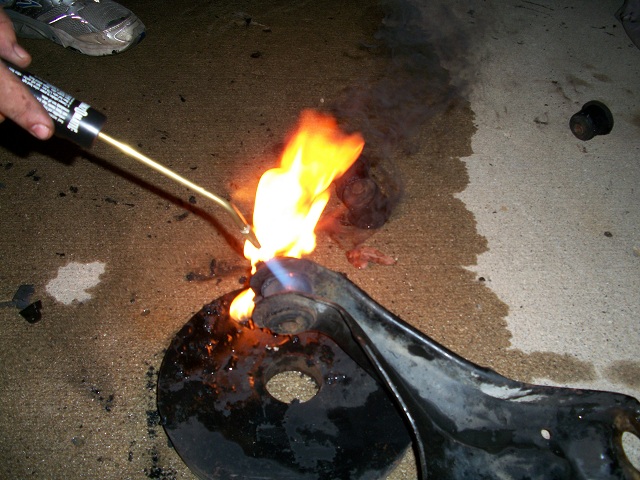
Does anybody know any easy ways to remove the old rubber bushings from the cradle and the control arms? I have virtually no budget at the moment... I do however have access to a 8 ton press... would this be ok to try?
Input is appretiated...
Chris
[This message has been edited by Halcyon25 (edited 09-08-2011).]
Does anybody know any easy ways to remove the old rubber bushings from the cradle and the control arms? I have virtually no budget at the moment... I do however have access to a 8 ton press... would this be ok to try? Input is appretiated... Chris .
Light them on fire ....use a propane torch ... worked for me... but if you need to keep them well not sure you can get them out clean and re-use them without damage... Danyel
From a previuos thread .............................. The trick is to not heat the rubber directly. Instead to heat the metal sleeve that the bushing is pressed in... After a short while, the bushing will start to smoke from between the rubber and the sleeve.. this smoke is toxic.. don't breath it. Eventually the smoke will ignite...
Lol... No, Im not worried about damage, I just dont have access to a Propane Torch, which is why I asked if there were other ways...Aside from damaging the Cradle... Of course...
Chris
IP: Logged
01:33 AM
Sep 9th, 2011
Halcyon25 Member
Posts: 191 From: Rio Rancho, NM, USA Registered: Jan 2011
This is just a quick question to confirm my suspissions...
I ordered the "84-87 REAR TIE ROD PACKAGE" from the Fiero Store a few days ago. I recived it today and noticed the Tie rod ends were different... How different... A very obvious kind of different...
Now on to the question part... has anybody else recived the same part in the kit? Is the one on the left a "front" tie rod end? Is it something as simple as they shipped the wrong part? Fortunetly this was just an inconvinence rather then a setback... I still need to clean the other strut...
I am compiling an email to the Fiero Store to find out more details...
Any help on this would be apriciated...
Chris
[This message has been edited by Halcyon25 (edited 09-09-2011).]


 good luck on everything and for sure keep us all posted as im watching with empathy


 Nice job so far - guess I'll keep tabs here for when I get ready to yank my 2.8 in and reinstall a 3.4 PR.