I'm a long-time lurker who bought a project Fiero about 3.5 years back. It ended up needing an engine and a thorough restore. I started an engine swap, and got the back end all fixed up...then, not quite 3 years ago, my daughter was born, and - no surprise - the time-sink fiero project was put on hold. And stayed that way, in spite of how much I wanted to drive it...
Well, I've had enough. I just want something to work on as I drive it, not something I can't drive until it's done - so I bought a running '86 - cheap! - yesterday afternoon and drove it home just a few hours ago. What a blast! First time I've driven one more than up and down a street or to park it. If it handles that well in the rain, I can't wait to get it out on dry pavement.
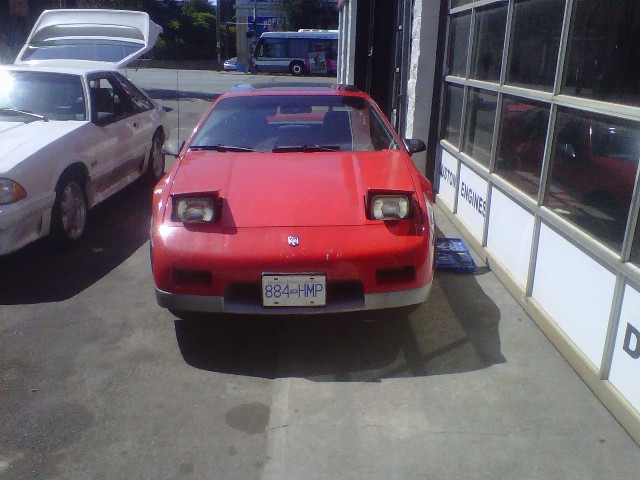
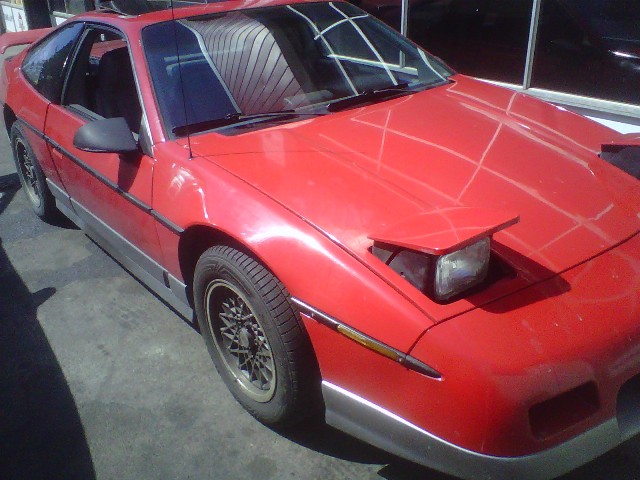
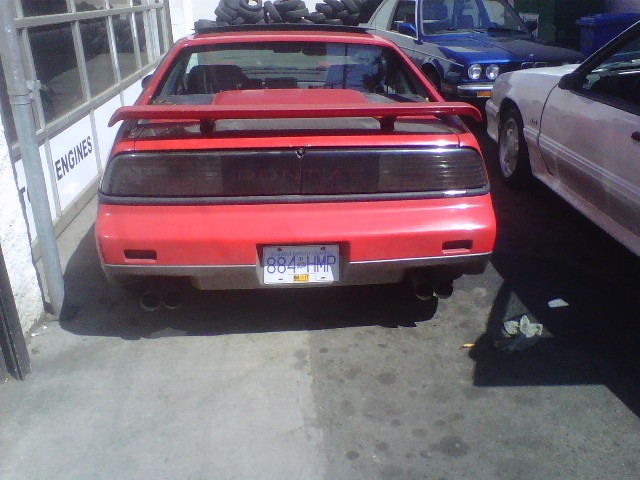
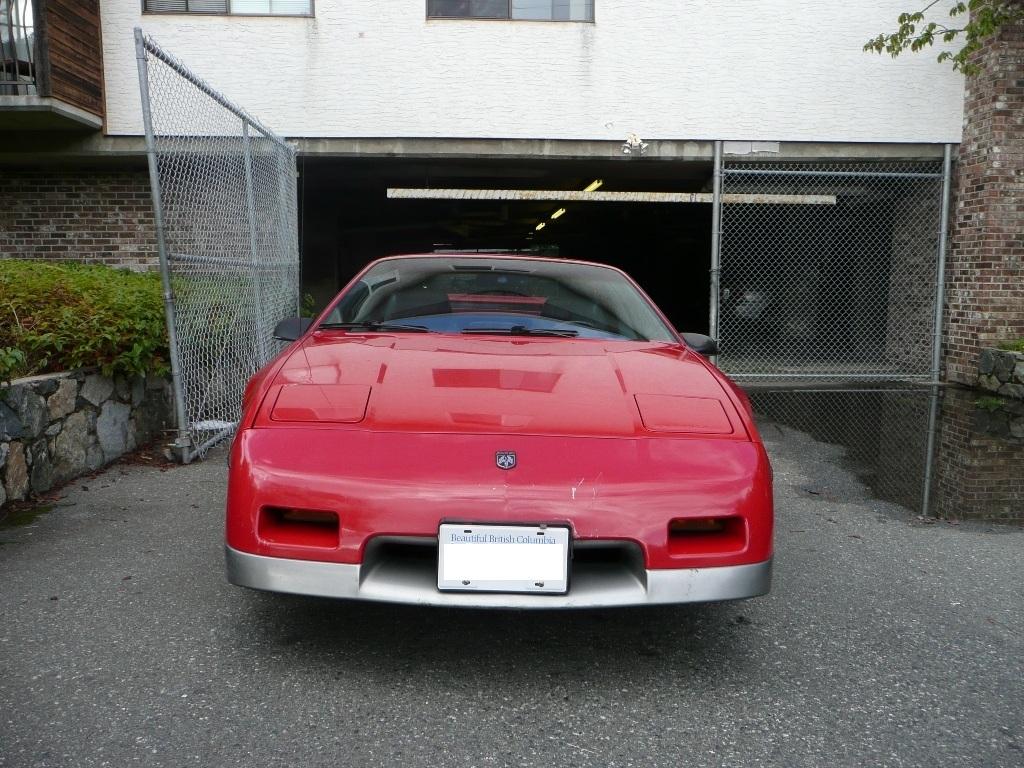
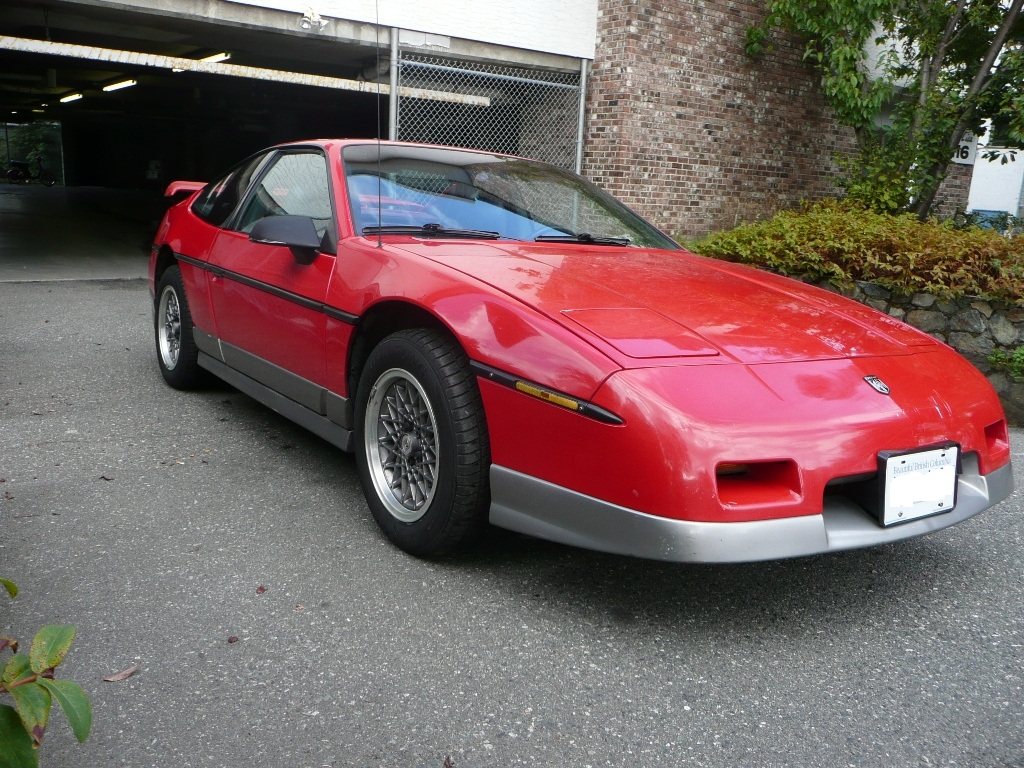
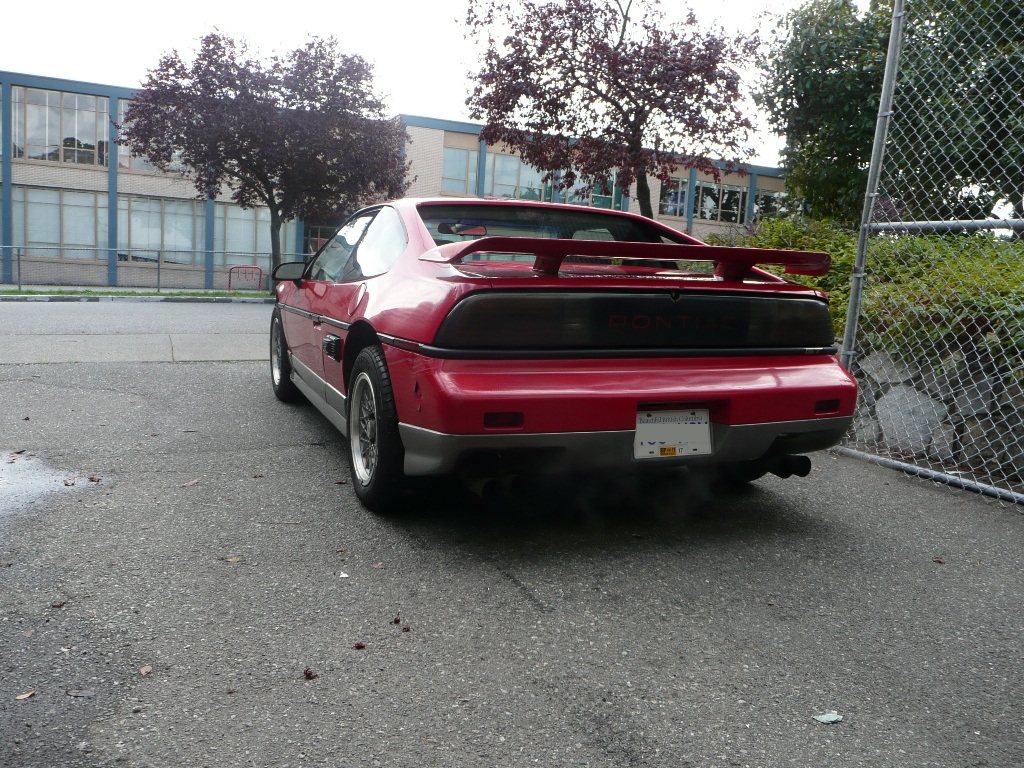
Since I think threads are useless without pictures, here's the pics the previous owner sent me not 24 hours ago:
The good: Newish 205/60R15 tires on the GT spoked wheels Came with an almost new 200-watt JVC CD/Stereo Looks to have been babied - engine, engine bay, under hood all rust-free and looks like it's 5 years old, not 25! Oil is a perfect clean amber color even! Over-all in very good condition for it's age. Has been a daily driver. Came with spare parts: Gaskets, belts, new rotors and pads, who knows what else. Only cost $800!
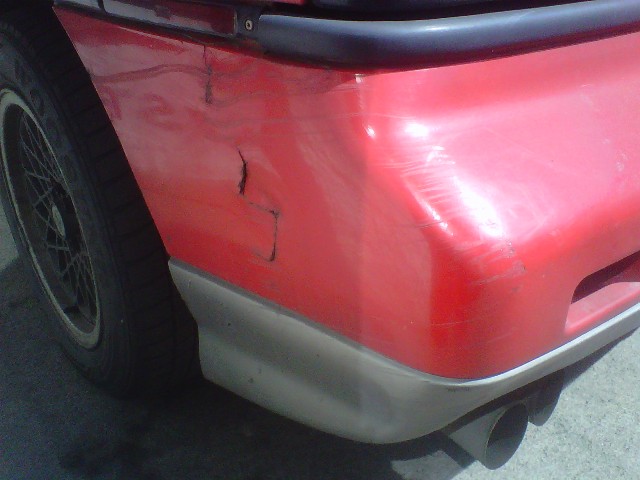
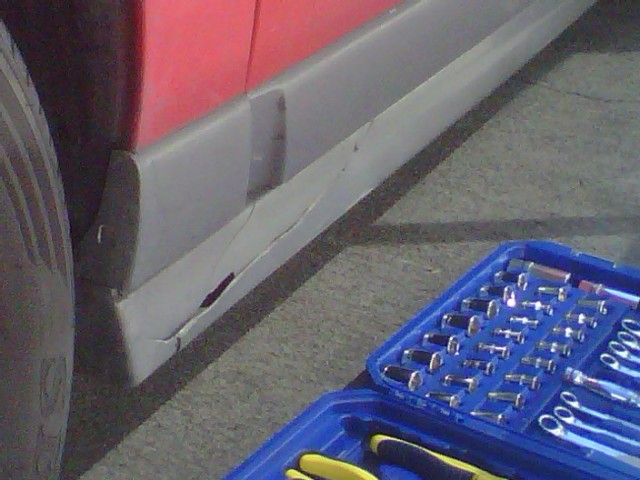
The not so good: (easy afternoon fixes) Driver seat cover torn/worn out Interior needs a good cleaning Drivers window whirrs, but doesn't move Power mirrors only move in one direction! :-P Window belt mouldings cracked/broken Some scratches on the nose, couple of small chips out of the trunk lid. Not-so-bad crack in the right rear tail light lense Tow-truck damaged the corner of the rear bumper (as seen in photo) One of the ground effects is cracked (Also seen in photo above) Headlights stuck up. (Motors not whirring, could be relays/disconnected, more likely need rebuilding) Gas pedal stiff. Clear coat on spoiler peeling. E-brake out of adjustment.
The bad: One fire-wall-side exhaust manifold bolt broken Brakes <i>VERY</i> spongy It's an automatic!!! EWW!
All-in-all I'm happy with it. The exhaust leak at the manifold isn't terrible, more annoying than anything. Makes the check engine light come on sometimes. I have the parts to fix it all, already, between things I gathered to fix up my previous project Fiero and being able to borrow the parts I need off of said Project Fiero - ie the rear bumper (Even the same color!) , the 4-speed trans with everything necessary to swap it in, brake parts and an exhaust manifold stud kit. Now I'm just debating whether I'll be droppign the cradle to do the work or going to try it without dropping it.
I've wanted a GT fastback of my own to drive for, oh, I don't know, 14 years. In other words, since I got my license and first went car hunting. Now I finally have one...and I love it already!
[This message has been edited by Stubby79 (edited 09-27-2010).]
IP: Logged
08:07 AM
PFF
System Bot
pro street dave Member
Posts: 288 From: ravenna ohio Registered: Dec 2006
Nice! Seems like it has the typical Fiero stuff wrong with it. As for the spongy brakes I found my problem to be the rears out of adjustment. Check out The Ogre's Fiero Cave(link at the top of the page) to see how to do it. Really easy and makes a world of difference.
And I think you're better off just dropping the cradle to get to that bolt. Sucky job no matter what(at least to me). Good luck!
IP: Logged
09:42 AM
nosaint Member
Posts: 293 From: Moose Jaw, SK Canada Registered: Aug 2009
At a minimum you'll need to drop the rear of the cradle to be able to drill that broken bolt out. Make sure that you repeatedly soak the remaining bolts with PB Blaster etc.before you start on them Then you will still need a 90* adapter for your drill. Oh by the way... if you have AC, it will be in the way.
The headlight motors should only have the single wire connector disconnected. That's the simplist way to get them to stay up and have the lights still work. You're right about having to rebuild the motors though. That is probably the reason they are up. There is a way to put the down motion on a seperate switch if you wish to. It involves running some wire and buying a rebounding push button switch and some connectors.
Tires: Should 205's on the front and 215's on the rear.
That broken GFX is a pain to replace, but it's doable. Requires drilling out a bunch of rivets and of course replacing them with new ones.
If the gas pedal stays stiff then it's likeky that the cable is binding inside the housing. Some have had success in getting lube into it to loosen it up. But I had to replace one cause it would stick in a partially open throttle... Not good. Replacing it takes a couple of hours and some scraped up hands. Requires removing the entire console and ecm. Then routing the replacement cable through an awkward tight turn at the pedal end.
A minor leak at the exhaust manifold normally will not cause a check engine light. An intermittent check engine light is more than likely an egr solonoid problem, but check the codes to be sure: https://www.fiero.nl/cgi-bin/main.cgi?ECMCodes
Spongy brakes: I'd try to bleed them first. Start with the driver's side rear, then pass side rear, then pass front, and end on the driver's front. This follows the routing of the brake lines. Farthest to the closest to the master cylinder. May also be related to the e-brake being out of adjustment.
The automatics aren't a lot of fun, but they are tough and just need an occasional change of the TCC switch.
You got a good deal if there is no rust in the trunk corners or the frame rails over the rear wheels. I'd surely enjoy it as a driving project. I've got an 86 GT and an 86 duke coupe. The coupe is my daily driver /project. The GT is an ocassional/weekend/show driver.
Good luck and have fun
IP: Logged
10:47 AM
Stubby79 Member
Posts: 7064 From: GFY county, FY. Registered: Aug 2008
That's my bad...too bad it's in the Topic Name, where I can't change it. I just looked it up...I'm one of those who wrongly beleived the GT's/fastback's were 86.5's - at least according to Wikipedia. The GTs came out later in '86, while the '85 styled GTs were now named SE's.
quote
From Wikipedia:
1986 was the first year the fastback roofline was offered (sometimes wrongly referred to as a "1986½" model—there was only one "GT" in 1986).
Quite why it's wrong to call it 1986.5, when it came out later in that year's lineup is beyond me.
Moving on! I just spent an hour checking things out on it, so there's some more good/bad:
Good: Recent tune up - newish plugs, wires, cap & rotor and air filter Battery only a couple of years old Battery tray not rotted/rusted out New TPS New radiator :-)
Bad: Left headlight appears to be sized in the up position. Right headlight has a broken "prop rod" (for lack of a better term)
That's all I had time to look at, considering how much fun it was getting the very rusty firewall side spark plugs out. Do people not know what neverseize is? ALso cleaned the throttle body, vacuumed out the air box, cleaned the oil slude/residue out of the intake boot, cleaned the throttle body, checked the PCV valve (do these things ever seal up properly on these engines?), yada yada yada...
Trying to decide if I want to stick all my new parts meant for the projet fiero on this one or not...all new brakes and strusts/shocks, mostly. Hmm.
[This message has been edited by Stubby79 (edited 09-19-2010).]
IP: Logged
11:08 AM
litespd Member
Posts: 8128 From: No where you want to be Registered: Aug 99
5 speed. the first 86gt's came out with a 4 speed in them
It's called an "86.5" because it came out halfway through the model year. It was supposed to have the 5 speed Getrag in it initially, but because they weren't available right away, the 4 speed was used until the Getrag became available. I had an 86 SE with the Getrag in it from the factory, but it was never referred to as an 86½. The designation is because it became available halfway through the model year, and it's not an official designation.
IP: Logged
01:05 PM
Stubby79 Member
Posts: 7064 From: GFY county, FY. Registered: Aug 2008
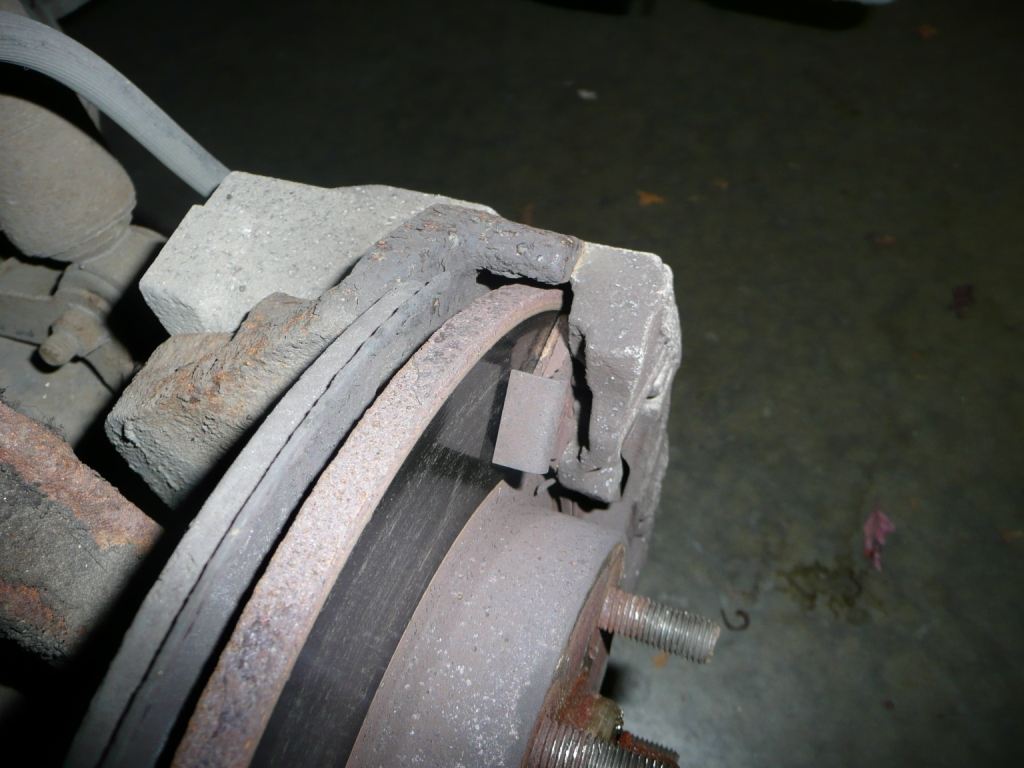
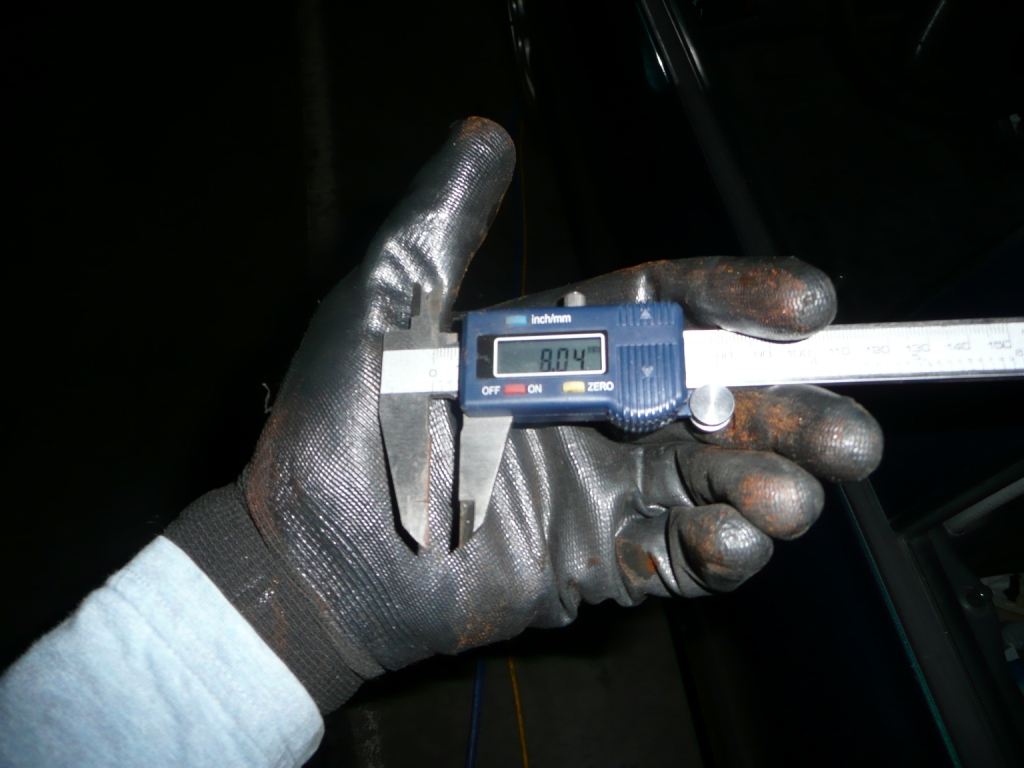
I checked out the brakes this morning. Here's the front: The pads are worn down to about 1/8", as you can see, so I understood why the previous owner was getting ready to change them. At a glance, the front rotors looked good - no ridge on the outside, just the usual rust, and no groves in the surface - so I wasn't sure why he was going to change the rotors too. Not until I measured them: They have "Minimum thickness 8.5mm" stamped into them, so now I know why he had rotors to put on it!
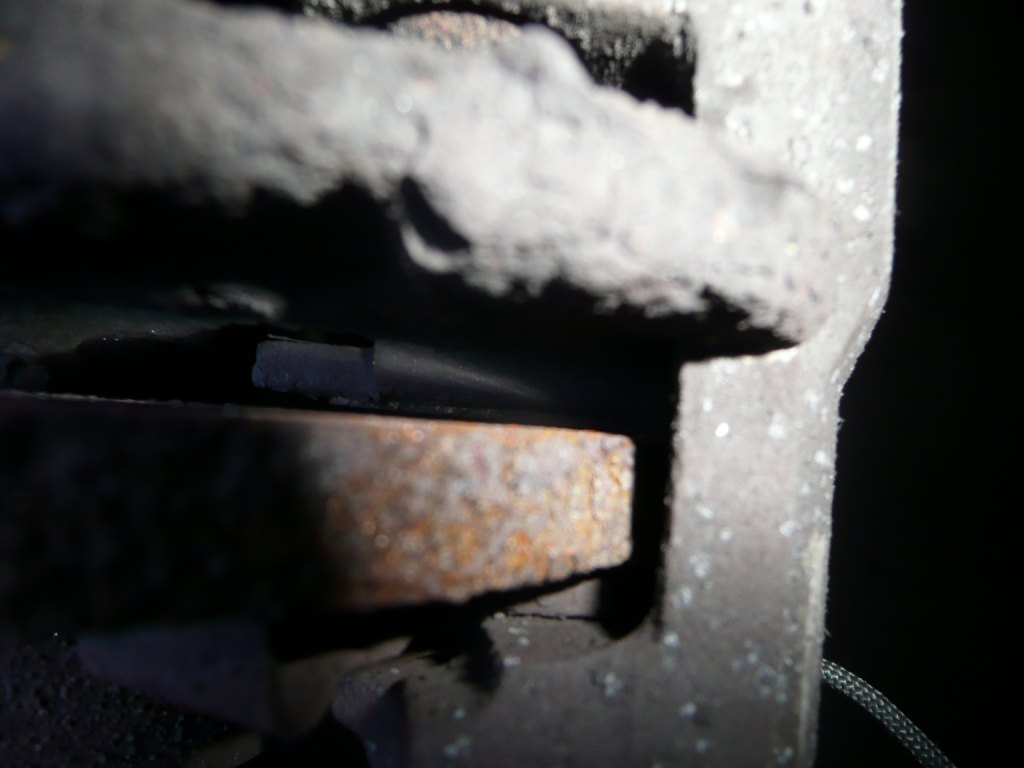
The rear pads were worn down too, but if you look closely, there's a distinct gap between the pad and the disc, so it's no wonder the e-brake wasn't working worth snot.
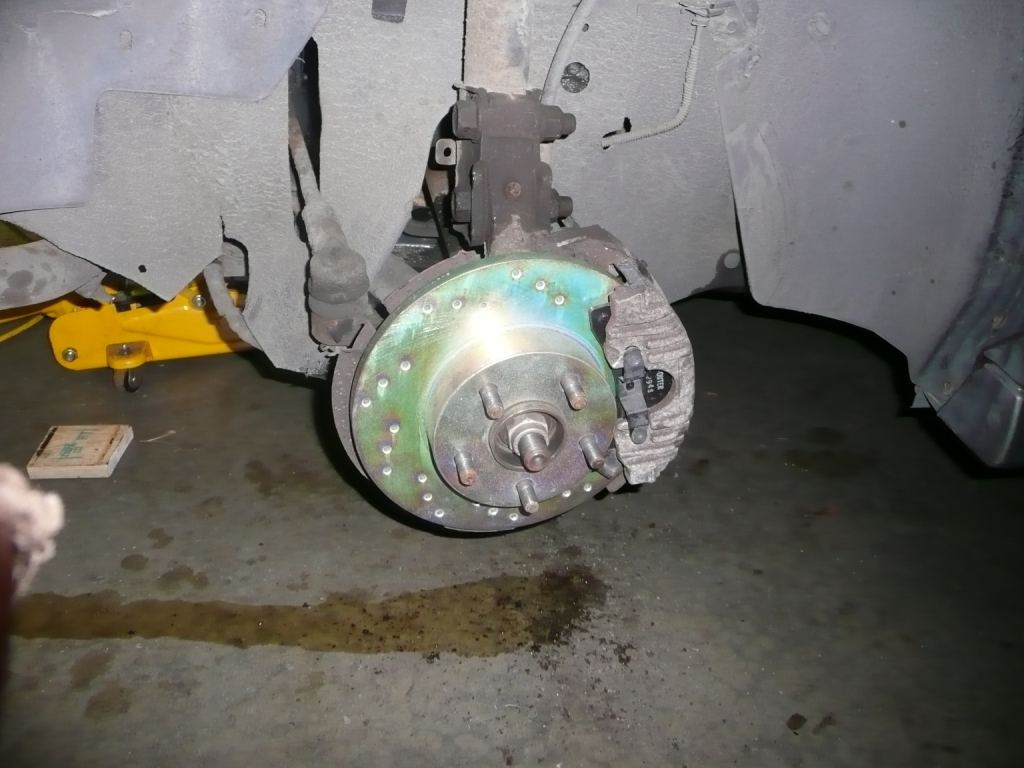
I said the heck with it, they're just hats, I have the parts on hand and I know the proper way of pushing the pistons back in...lets replace those rears and get the e-brake working. This is what it looks like now:
The first side took a good hour to work everything out....the second side a bit over 20 min, since I now knew what I was doing! I ran out of time though, just as I got it all back together. They still need bleeding and adjusting. The brakes are actually worse at the moment! I'll hopefully get that done later this afternoon, and maybe get the front ones done as well.
[This message has been edited by Stubby79 (edited 09-20-2010).]
IP: Logged
12:54 PM
jaskispyder Member
Posts: 21510 From: Northern MI Registered: Jun 2002
It's called an "86.5" because it came out halfway through the model year. It was supposed to have the 5 speed Getrag in it initially, but because they weren't available right away, the 4 speed was used until the Getrag became available. I had an 86 SE with the Getrag in it from the factory, but it was never referred to as an 86½. The designation is because it became available halfway through the model year, and it's not an official designation.
Yup, it is not official and people just stay it because they have a fastback while the notchback SE looks like the 85 GT. An 86 GT is an 86 GT... no half nomenclature needed.
IP: Logged
03:42 PM
Cliff Pennock Administrator
Posts: 11896 From: Zandvoort, The Netherlands Registered: Jan 99
Well, I just got in from test-driving it after putting in new pads & rotors on the front, lubing everything up, bleeding all 4 calipers and doing a hasty adjustment of the rears...I went through almost a liter of brake fluid in the process, but at least I know there's little to no air in there, and no old brake fluid either! Man was it dirty.
I took it for a test drive. The pedal is now firm, no going half way to the floor before the brakes start working. The new pads and rotors need wearing in a bit...they got better the more I used them, but I didn't have time for more than a spin around the block, so I have yet to see how good they'll get. Meanwhile, I think the backs need a proper adjustment...or at least the brake cable does. Come to think of it, I had it up in the air, in drive, and it stalled the engien when I hit the brakes, so the rears must be working a bit. Probably is that brake cable.
Will post pics later.
PS: I think I solved the check engine light coming on. I noticed it would tunr on or off hwen I'd go over a bump, which I found odd. But not so odd when I went to gas it up and it wouldn't start again after! The previous owner had left a note in it, saying if it wouldn't start to wiggle the positive battery lead. He also said in said note that it would need replacing...so between that and watching the volt gauge, I figured it out pretty quick. It didn't need the positive cable replacing, it needed a decent connection to it. A dremel and wire wheel to take off the rust and oxidization and replacment of the positive lead-to-battery-bolt and it's since been working great... Oh, and the battery had no clamp to hold it down, so it's no wonder!
[This message has been edited by Stubby79 (edited 09-20-2010).]
IP: Logged
07:46 PM
Sep 23rd, 2010
Stubby79 Member
Posts: 7064 From: GFY county, FY. Registered: Aug 2008
I musta lost my marbles this morning or something, when I decided replacing the window regulator in the drivers door wouldn't be that bad. 3 hours later...
I've got the old one out and the replacment out of my other fiero in to the GT. Had to stop when my kid woke up, but had to stop anyway to go and get some proper-sized bolts/locknuts to replace the rivets I drilled out. Now I know all about taking off a door skin and everythign else in there. Just need to go back to the garage and button it all up.
Phew, the things I put myself through.
IP: Logged
01:40 PM
Stubby79 Member
Posts: 7064 From: GFY county, FY. Registered: Aug 2008
Alright, it's question time! So you don't have to read, this is an '86 2.8l /w auto trans. Also note she has a broken exhaust stud, and is randomly throwing O2 sensor codes(13).
I've got two concerns that may or may not have anything to do with eachother: Most of the time she's smooth as glass and goes like a bat out of hell, but sometimes she idles roughly and usually when she does, she isn't perky when you put your foot down. Feels like a slight misfire. I've had it happen after she sat for a couple of hours, so the engine was still warm (though not longer up to full running temp) - it was raining lightly out and cool (~60 degrees) at the time. I decided to go through a drive-thru on my coffee break, and it was rough at idle the whole time. On other occasions, on a cold start, she's started up just fine, but when I throw it in to park to close the gate behind me, I get back in and notice it. Its parked under cover and it wasn't raining at these times, but was still decently cool out. Said same trips, she still felt rough at the first couple of stops, but as she warmed up, it seemed to go away. I can't quite find rhyme nor reason to it. I drove to work last night and she was very perky and idled smoothly, in spite of the check engien light coming on briefly for the o2 sensor.
The other one might be a problem (it is in my mind) or it might be something unique to GMs of this age, I'm not sure. When I start her for the first time on any given day, the volt meter will rear moderately high, and as I drive, it slowly tapers down to just above 13 volts. I checked this by watching it on my digital multimeter, and it's accurate (At least while the car is running - it only shows 10 volts when the engine isn't started, whereas the digital meter shows almost 13). It starts at 14.35 volts, give or take, and slowly peters down as the engine warms up, down to 13.5 volts usually. It has dropped as low as 13.3v. Shut off the engine, and it still has a higher voltage with the engine running than it does just off the battery(which is good, at least the alternator is still making some power). Start it up warm, and it still reads low. RPMs don't make much of any difference to the voltage I'm reading (I'm not reading right off the alternator, though). This just seems strange to me (I understand electricity quite well). I'm used to vehicles that might read a bit low at idle, but as soon as the rpms go up a bit, it's putting out a full 14.4v, unless under heavy electrical load. My only guess here is the sheer amount of heat in the engine bay might be raising the internal resistance of the alternator, thus a lower output voltage as it warms up. Or, I suppose there's a chance it's load-related: the sligtly lower battery voltage when the battery has had time to rest makes it so the alternator wants to put out more power to get/keep the system voltage up; once the battery voltage is up, it stops trying so hard. Obviously I'm guessing at this point. I'd have an easier time figuring out if it was either full voltage or battery voltage, but slowly petering down to just above battery voltage is just strange!
All my issues might be caused by the same problem, so I'm going to start by cleaning my ground connections to block and body, and might add additional ones to be sure of good continuity. I'll be doing this before poking around with the oxygen sensor, and it might turn out to fix all my issues by doing so, but in the meantime if anyone has any input, it would be appreciated!
And yes, I realize the o2 sensor code might be being tripped by the exhasut manifold leak, so if getting a good ground doesn't make it go away, I'll be seeing just what kind of output the o2 sensor is generating. :-)
[This message has been edited by Stubby79 (edited 09-25-2010).]
IP: Logged
12:10 PM
Sep 27th, 2010
Stubby79 Member
Posts: 7064 From: GFY county, FY. Registered: Aug 2008
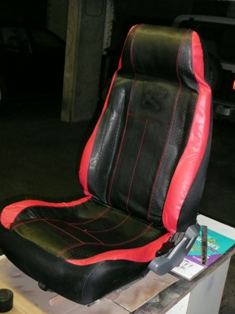
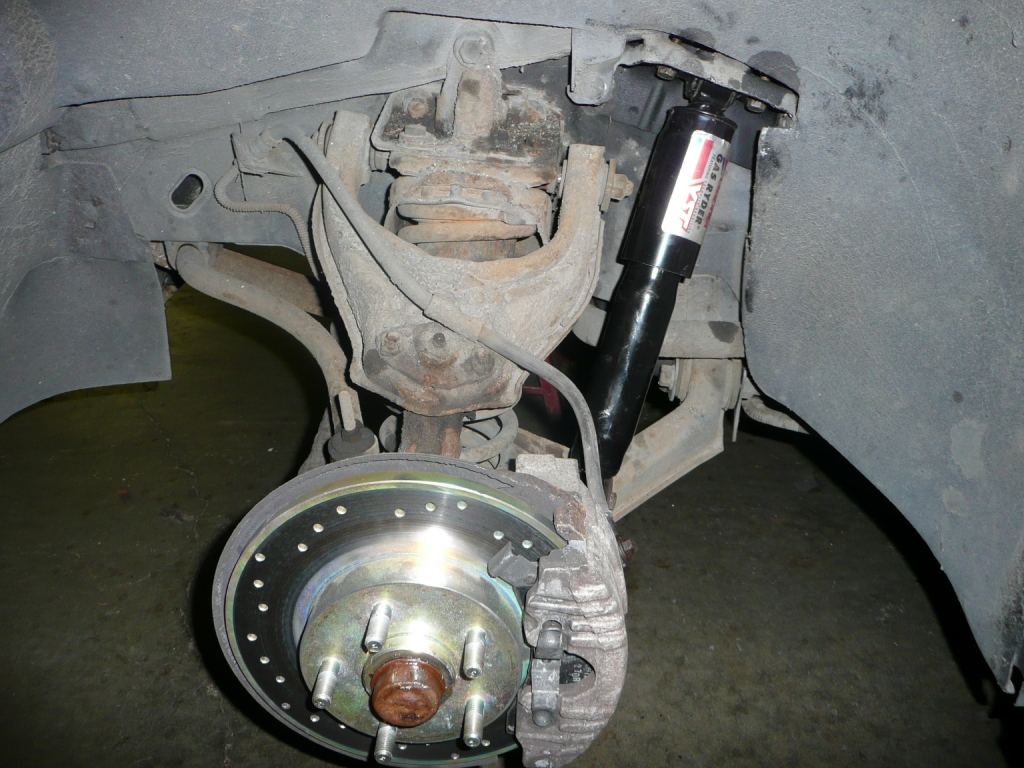
Well, I haven't touched my check engine light or the random rough idle yet, but in spite of only trying to do "little things" to give myself a bit of a break, I ended up doing a fair bit to her this weekend: Replaced front shocks (takes longer to get the car up and the wheels off than it does to change 'em!) Properly adjust rear brake & attempted to get e-brake working (cables are stretched, no-go). Confirmed left inner CV boot is cracked. Replaced trunk latch (Actuator wasn't working) Sealed leaky spoiler gaskets. Replaced three burnt out bulbs. "Reupholstered" the driver's seat.
Pics: Self Explanitory!
Look at what I found under the seat! $9 in change and a surprise! Glad I couldn't get my hand under there before to try and scoop out the junk. Oy!
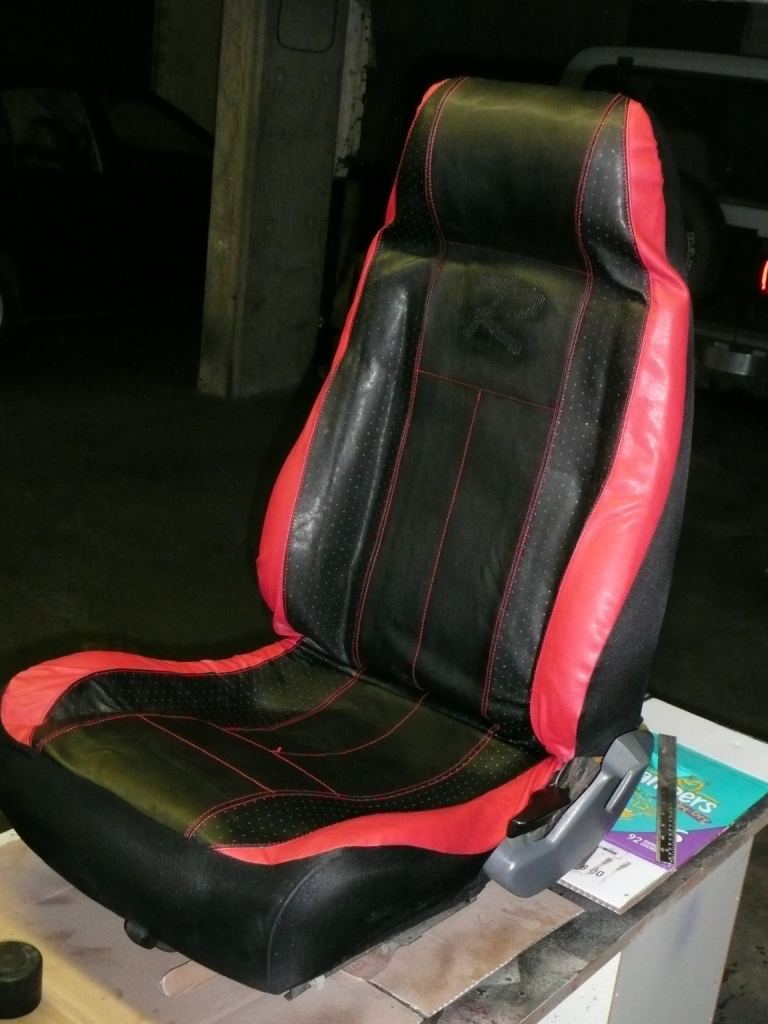
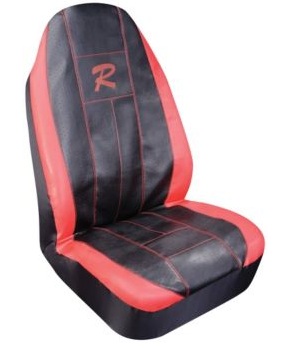
Final results of my "El-cheapo" seat cover replacement. The drivers seat cover was shot anyway, so I think I'd try this...if it survives a week of use, I'll see about posting just what I did/how I did it, if there's any interest. At least I wont be sitting on bare foam any more!
[This message has been edited by Stubby79 (edited 09-27-2010).]
IP: Logged
11:30 AM
2farnorth Member
Posts: 3402 From: Leonard, Tx. USA Registered: Feb 2001
Definetely, since I dropped some of these same coins down there when trying to put them in the ash trays. As long as I don't find any drugs to go along with the needle.
IP: Logged
10:32 PM
Jan 7th, 2011
Stubby79 Member
Posts: 7064 From: GFY county, FY. Registered: Aug 2008
Wow, it's been a while since I've posted. Well, lets see what I can remember doing in the past few months... 1. Shampoo'd the carpets. 2. Rain-X'd the windows and replaced the wiper blades. 3. Replaced driver's side CV shaft. 4. Installed new struts in the rear. 5. Lowered all 4 corners. I think that's about it. Not half as much as I'd like to have done in this amount of time, but at least it's progress! I must say, you can really feel that inch or two drop when you're trying to climb out of her! More to come, and soon hopefully.
my 86 gt was a 5 speed, i did buy it in i do belive october or november of 86. the car i own now has some change under the drivers seat. the two pennies i did find where1986 and 1988. thay are on my desk. nice build, enjoy.
IP: Logged
12:06 AM
Jan 10th, 2011
Stubby79 Member
Posts: 7064 From: GFY county, FY. Registered: Aug 2008
Thanks for the encouragement, guys. Didn't get as much done on the weekend as I would have liked (do we ever?), but made some progress: - Replaced the alternator belt, so no more belt squeal when the electrical system is loaded. - Checked/tested the trunk blower fan(much easier when you know when it's supposed to come on); it works. Thinking about wiring it to always be on when the engine is running. Depends on if the voltage output on the alternator still drops when the car is warmed up. Drove her in particularly cold weather a week or so back and noted that the voltage stayed up at 14v. - Checked to see if there was any refrigerant left in the AC system, which there wasn't any; I'm free to delete the A/C system if/when I get around to it. Wasn't a belt hooked up to the compressor anyway! - Checked the headlight motors more thoroughly. One of the arms on the drivers side was in the wrong place(past the bump-stops), which is why it wouldn't go down. Bench-tested the motor, which didn't work...found one of the brushes in the process of falling off. Might have been slavagable, but not going to go through the effort only to find something else wrong with the motor. The passenger side will go up or down, but won't stop trying to go down. Decided the heck with it and ordered the parts to upgrade it all to Gen 2(87/88) motors. Also decided that I wanted something more than working headlights to show for my efforts, so ordered a pair of 4x6 diamond headlights to make a more slimline setup. Need to decide how to mount 'em...
Think that about covers it!
IP: Logged
12:35 PM
Jan 17th, 2011
Stubby79 Member
Posts: 7064 From: GFY county, FY. Registered: Aug 2008
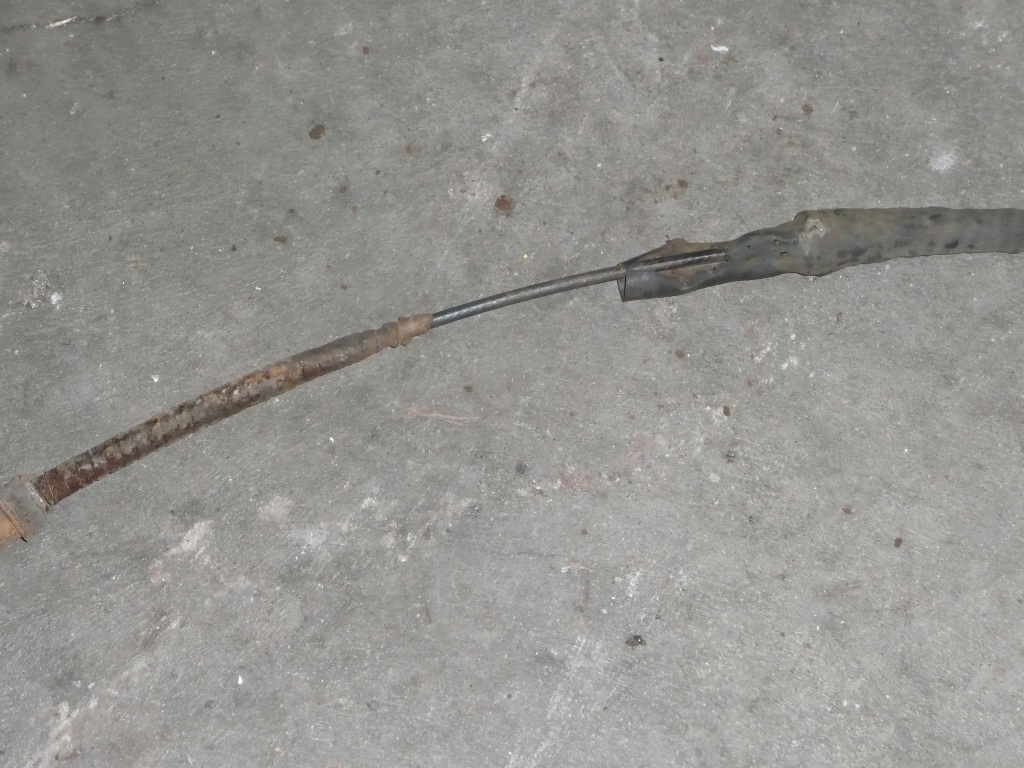
Didn't get as much done on the Fiero as I wanted to this weekend, but it wasn't a complete bust. I changed the O2 sensor - Took all of 10 minutes, if that, and didn't even have to take anything else off to get at it. And I replaced the left & right brake cables, which I thought were pretty affordable at $17 each. Such a silly thing to go without to save so little, imho.
Here's one of the old brake cables. It probably didn't help anything that the metal casing on the one side is supposed to be a single peice with the rubber on the opposite side.
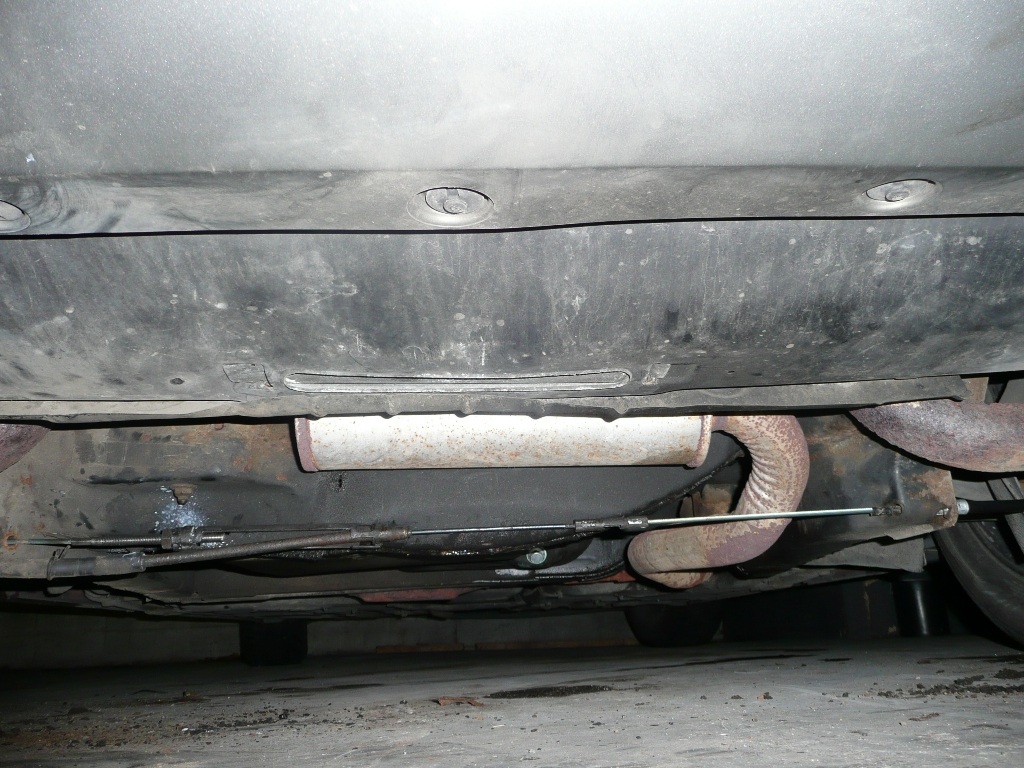
And here's the final product: Look Ma! No slack!
Much better. Once I adjsuted it to take up all the slack like that, the e-brake can hold the car in drive with all of 3 or 4 clicks on the e-brake handle. And the Brake light now tends to stay off when I disengage it. (not always, mind you. Jiggle the ebrake handle and it'll come on again). Note to anyone who might be about to do this: use a screwdriver to bbend up and break off the retaining tabs on the brake cables and it'll slide right out. Took me a minute to figure that one out. Trying to squeeze the tabs in is an effort in futility!
A bunch of the goodies I had on order arrived on Friday. Gotta decide if I'm keeping the big purchase or not, since it just barely fits me...also tring to make up my mind if I want to replace the suspension bushings with poly before getting an alignment. Lowering it firmed up the suspension enough to be noticed, but it still feels squishy, and i'm not getting the feedback from the road that I'm used to(I don't feel the little bumps and roughnesses on the road). It could be the tires, too, or perhaps the even weight distribution? Gotta figure it out before I throw over a hundred bucks at it(again).
Brakes still suck, so next weekend I should be replacing the old brake hoses with stainless ones, and since the O2 didn't fix the SES light coming on (though she does seem to run better, none the less), it's probably time to check(or add new ones) the grounding straps to the engine and frame.
IP: Logged
02:05 PM
Jan 26th, 2011
Stubby79 Member
Posts: 7064 From: GFY county, FY. Registered: Aug 2008
Alrighty! A day or two late, but what they heck. I put the SS brake hoses on, Sunday night, and got them roughly bled. I wasn't satified with the bleed, so I left it up on jackstands until this morning, when I finally got a chance to bleed them a bit more. Then I slapped the wheels back on and took it for a spin. The brakes are certainly better. They actually react before it starts taking effort to press the brake pedal, and I can just mange to lock up the front. They're "Adequate", as is about the best to expect without upgrades. They'd probably be a lot better if they weren't having to stop an automatic trans with a v6 behind it!
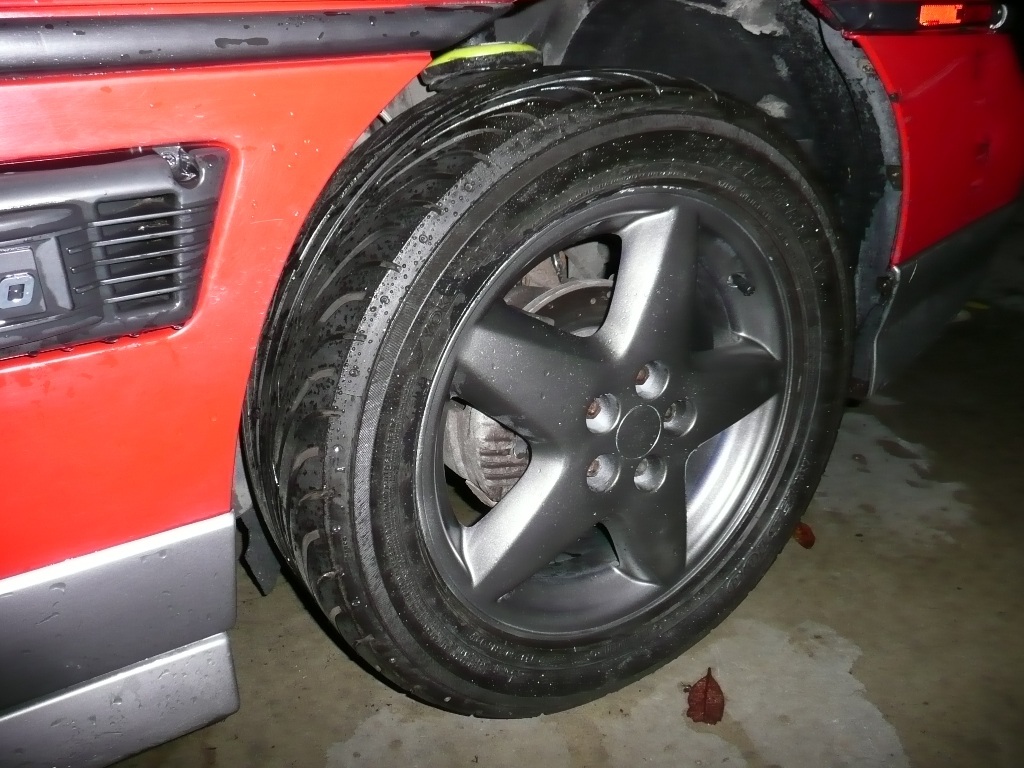
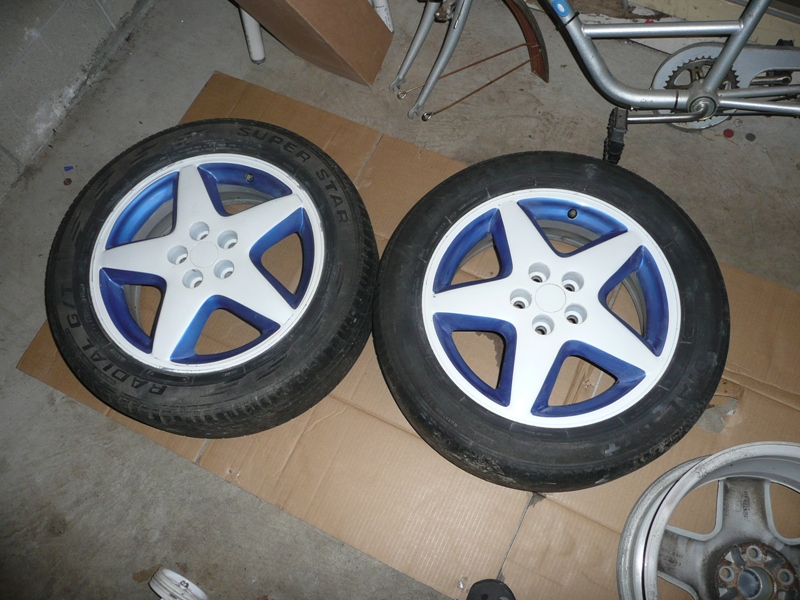
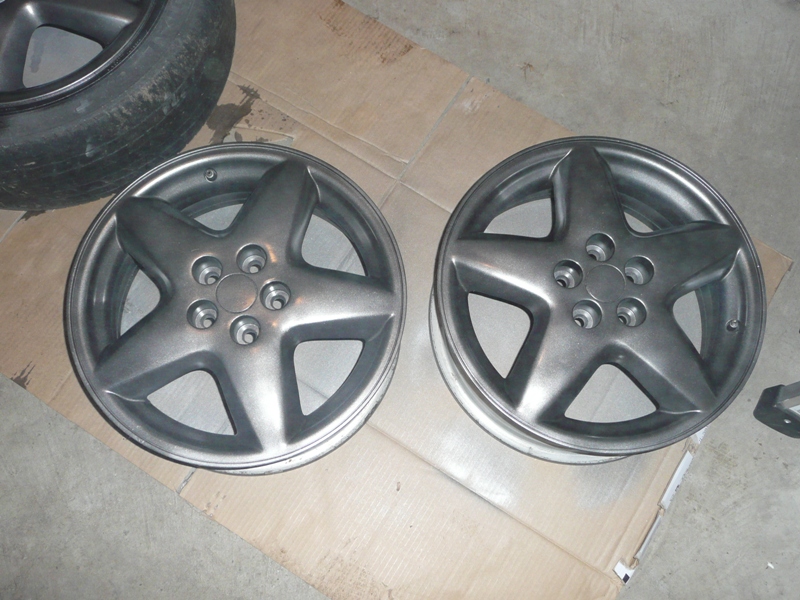
No pics of the brake lines, but I did take pics of the Cavalier wheels I prep'd and painted. I would have left them alone if the PO hadn't painted them in the first place:
I went with the graphite wheel paint. It only took one can to do all 4, including the insides and probably only half a can of the clear coat, if anyone is planning the same and wondering if they'll need more than one can. There was even a bit to spare in the spray can. Guess that means I can return the unused one!
What's next? Headlights and or alarm system...it's the never ending story, apparently.
IP: Logged
11:46 AM
Kilofox13 Member
Posts: 175 From: Millbrook, AL Registered: Jun 2010
So. Me and my Fiero had a bad day almost a couple of weeks ago. I took her out for a spin in the afternoon, using a teenburger as an excuse to do so, after putting a new ground strap on the engine. On my way back a metal scraping sound developed rather suddenly. I hadn't hit anything or gone of a bump, so at first I was stumped. And I couldn't stop because I was on the busiest street in town and two lanes over from being able to take the next turn off, so I said screw it and kept going. I figured it out a block or two later, based on where it was coming from: the megahorn exhaust tips on the drivers side were dragging on the ground. I knew the exhaust was rusting through there, but thought nothing of it. It fell off half a block from my turn off, thankfully beside the median/island's curb. I reclaimed it a few minutes later. Dang thing is heavy, for what it is. I expected a pound or two, not somewhere between 5 and 10! No wonder the rusty exhaust couldnt hold it up anymore. During my burger drive, I noticed this noise that I had heard a bit on the last couple of tips in her, happening more and more. Sounded like an electric motor running, or perhaps the sucking noise of a vacuum hose, and it happened intermittantly. Most frequently when I was braking. Couldn't for the life of me figure out what it was or where it was coming from. I could only hear it inside the car, and it wasnt the blower motor. Fast forward to that night. Almost midinight, on my way to work, to be more precise. Noise keeps happening, but nothing seems amiss. Get half way down the highway and suddenly she starts losing power, sputters, runs fine for a few seconds, sputters, etc, until she dies 15 seconds later. I pull over, obviously, going WTF? It had been running so well just a minute before! Try and start her up again, starts for a second, dies. Try again, won't fire. Keep trying. Give up after a minute. Not much I can do at midnight on the side of the highway, so I start walking. Decide while I'm walking that from where the nosie was coming from, and how it died, that the fuel pump must have just died on me. I call for a two 20 minutes later when I get to work, rather bummed out. So yes, she didn't have a good day, and neither did I.
I let her sit a few days where the two truck driver dropped it off, neitehr having the time nor the enthusiasm to do anything about it. That gave me time to mull it over. I try firing her up one morning, and she fired up after a couple of tries, runs for a few seconds, then dies again. Hmm. I was expecting it to turn over and not fire. Naw, it couldn't be...I go grab my gas jug, get it filled up and put 3 gallons of gas in, turn her over and viola! she's alive! And damn do I feel stupid. She'd been sitting at about 1/8th of a tank for the past few short trips I'd taken, the ones where the funny, intermittant noise occasionally, then more frequently, happened. Kept telling myself I need to fill her up soon. Any of my other cars would probably go another 100kms before running dry, but my luck...my Fiero's gas gauge gets stuck at about 1/8th of a tank. Now I know...and why I've read so many posts about people who watch their mileage, not their gas gauge. I considered this beforehand, but assumed I had forgotten to reset the odometer, from how manky Kms I had done. Well, now I know her range, and now I know the fuel tank only holds 35 liters! My least fuel-efficient vehicle just happens to have the smallest gas tank too. Great. I'm used to only filling up every 2 or 3 weeks.
Not trusting her, at least not to take me to work and back, without test driving her first, I parked her and set in on my lower-profile headlight modification in what few hours here and there I can scrape together. It got frustrating, so I didn't get far. I made some decent headway last night, and while waiting for the fiberglass to cure, decided screw it, I'm going to take her out for a spin. With only one headlight. To gas her up fully and to test-drive her. No noise. No break down. And it felt great to drive her again! It had been almost two weeks since I had driven her last. Two weeks where I was grumpy, discouraged or otherwise not in a good mood. One 5 minute drive in my Fiero and I walked away smiling. Still am.
I think I'm addicted. I just needed a Fiero fix. "Come'on man...just one little drive. That's all I need. Just one more, and I'll be okay..." is what I'll be saying next.
IP: Logged
12:08 PM
PFF
System Bot
SeperatedSoul Member
Posts: 469 From: Prince Albert, Saskatchewan, Canada Registered: Jan 2011
you truly have enthusiasm about this project! its great! makes me want to work on mine... just wish the snow would leave im going insane not being able to drive it or do anything to it.. all i can do is look at it in its snow bank its sitting in and every few days sweep her off. but keep up the good work i fav'd the thread and i look forward to hearing more about your project!
IP: Logged
01:31 PM
J-Holland Member
Posts: 708 From: Norman, OK USA Registered: Nov 2010
Great Post. I'm enjoying watching your progress and how you are solving various issues. The primary reason I'm enjoying your thread is that I have your cars' clone. And obviously, I'm looking for ideas on my car. Good luck and have fun.
where did you get those seat covers? are they holding up decent?
Do you really want to know? I've been waiting for someone to ask...
+ + + a lot of patience =
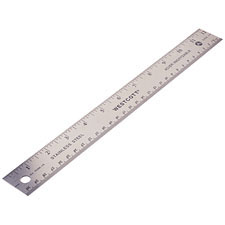
No Mr Mikes here. Cheap pleather one-piece seat covers from Canadian Tire, on sale for $15 ea, and a can of 3M spray glue, under $50 in total for both seats. I test-fitted them first, to make sure there was enough material for them to take to the contours of the Fiero seats. They were big-time baggy when just pulled over the seat, but when I pushed it into the crevaces/shape of the Fiero seat, it nicely took up all the excess/slack, and even lined up the red edges very well. So well that I didn't believe it, just holding them in place. But cetainly well enough for me to continue with my experiment/project. They were actually a little too long in the back, and not quite long enough for the base, so I cut it into two seperate pices. It would make it much easier to fit/mould them anyway. Then I started with the spray glue, doing a small area at a time. Sprayed down both the inside of the el-cheapo seat cover and the ratcheted original seat cover, doing the headrest first, being extra liberal in the crevace at the headrest's base. That's where the metal ruler comes in...once everythign was lined up and stretched tight enough to be wrinkle free, I used the thin straight-edge to push and hold the new seat cover in said crevace logn enough to get the glue to hold. And I worked my way down from there, using the straight edge in the cervaces down eitehr side, etc. Took a couple of hours to do one seat. Thankfully the back of the cheap seat covers has a thin layer of foam on it, because when I did the base of the seat, it didn't line up with the seat back and I had to pull it off and re-do it. I dont think it would have come apart if it had been pleather directly on to cloth. That spray glue, when used properly, is very strong. The last touches were to glue down the back of the seat covers, which was stretchy enough that I could pull it back to spray underneath it, and to use some vynil paint to cover up that ugly "R" in the middle of the seat cover that just shouted how cheap they were.
That's my story of my cheap seat covers. Its been on there for months now, and hasn't pulled away from the seat or anything like that. For what it is, I'm very content with the results. Wal-mart sells similar seat covers, in different colors. Just make sure you do a thorough test-fit and take your time if you're going to try it!
IP: Logged
04:35 AM
Mar 27th, 2011
Stubby79 Member
Posts: 7064 From: GFY county, FY. Registered: Aug 2008
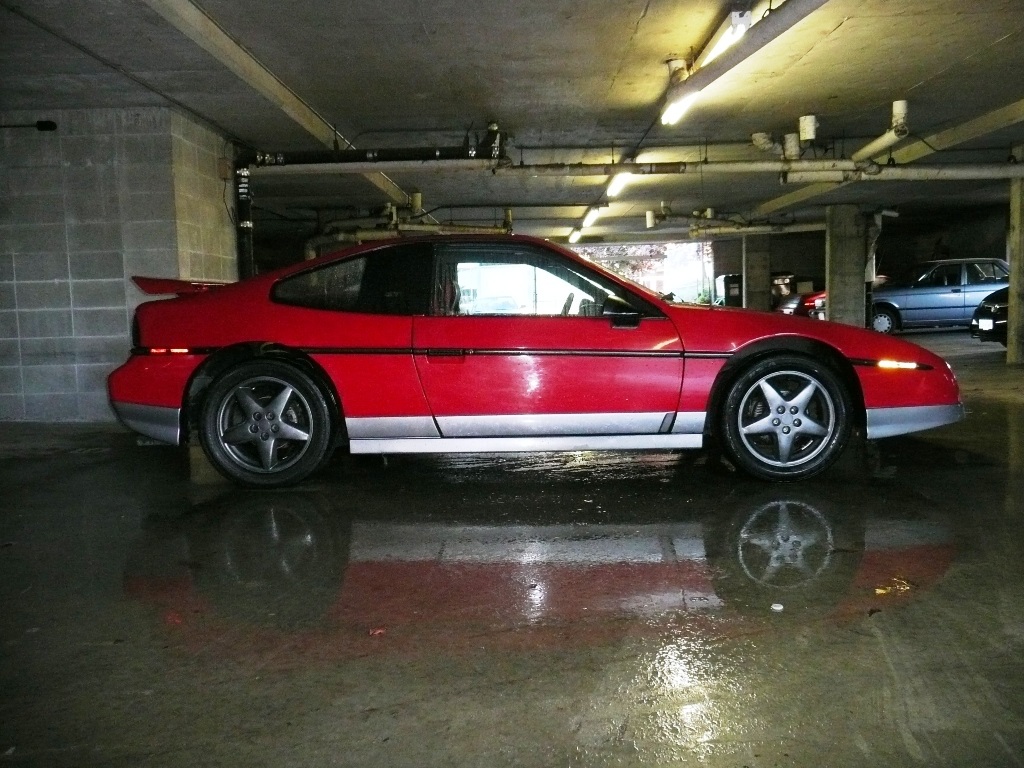
I haven't driven her in, oh, a month or so, not since fixing my truck. She had a slow leak in one of the tires, and whenever I decided I'd drive her to work, I'd find said tire low - or even flat - and wouldn't have time to pump it up, so didn't bother. Pump it up on the weekend, it'd be almost flat by monday. I replaced the valve on it when I heard it hissing after pumping it up once, thought that fixed it...was flat by the next day! I kept meaning to take the wheel off and go get it fixed, but decided it was excuse enough to put on my new wheels:
I like how the 5-spoke wheels look, and I like how they help fill the wheel wells! However, the rear look rather tucked in to me. I might have to do something about that. And some new lug nuts, for that matter. In the meantime, hopefully being able to drive her will give me incentive to get back to working on her on a regular basis again.
Too many damned projects on the go!
IP: Logged
01:29 PM
Jul 24th, 2011
Stubby79 Member
Posts: 7064 From: GFY county, FY. Registered: Aug 2008
I finally got around to installing the Gen 2 headlight motors & controller. Finished it up this morning. It's nice to have working headlights, seeing as I tend to be dirivng at dusk.
I'm glad it'd done, but of course it had to put up a fight...one of the wires had burnt away inside it's casing right at one of the connectors, which had to be traced and was loads of fun to repair.
I have a couple of weeks off coming up, I hope/expect to get the poly bushings in during this time.
On another note, the passenger's side brake cable likes to stick, even though it's only a few months old. Anything to be done about it? A stronger return spring would be nice...
IP: Logged
12:06 PM
Sep 20th, 2012
Stubby79 Member
Posts: 7064 From: GFY county, FY. Registered: Aug 2008
"New" seats. Bought 'em for 75 bucks this morn off Craigslist. Most people around here ask $300+ for anythign resembling used racing seats, and they usually get them. It was a total fluke that I got them before anyone else did. I like a good deal. There's one tiny rip at the top of one of them and otherwise they just need cleaning. I can repair that easily enough. And they measure 21" across, so they should fit just right.


 and every few days sweep her off. but keep up the good work i fav'd the thread and i look forward to hearing more about your project!

 +
+  +
+  + a lot of patience =