I've been meaning to start this for a while. I have a bunch of info to post, so bear with me
Short background: After learning about ChumpCar from some people on this forum, I decided to take my project car and prep it for a race at my local track in July. Time passes as I strip the car, and start sourcing parts. Unfortunately, I can't find anyone to do the roll cage. After some searching, I stumbled upon an ad for a 1984 SCCA ITB fiero here on the forum, basically ready to race, for the price of getting a cage done! I track the guy down from a different classified ad, exchange info, and agree to meet. So one Saturday at 4am, my dad, one of my brothers, and I set out for Chicago with a trailer, arrive sometime around noon, complete the purchase, then get the car back home to my garage at 11:30pm. Talk about an exhausting day! But I got the car, and everything was ready to go for the race in July! Well, not quite...
April 2, 2011: Picking up the car, I couldn't stop grinning for hours: The long journey home: Safe and sound in the stable:
[This message has been edited by kwagner (edited 05-01-2011).]
One of the guys racing on my team is a former racer back in the 80s. I had him come over and look at the car, to give his (much more informed) opinion on things. In short, there was a lot that could be made better, and for racing 14 hours, we need all the help we can get. I agreed to take the car to his house where the fabrication tools are, and we got to work.
April 10, 2011: This was the scene in his driveway: The fiero is not a spacious car by any stretch of the imagination, and things get worse when you're inside a cage wearing a helmet. As the car sat, neither of us were legal to race in ChumpCar due to clearance issues. The seats that were in the car were not ideal for road racing, especially endurance. The dash would need to be modified in order for the taller drivers to fit their legs. We had a laundry list of tweaks and fixes to make the car conform to ChumpCar rules, but before any of them could be addressed, we'd have to find a solution to the seat issue.
While he worked on the physical side of things (welding, cutting, and figuring out how to make everything fit), I tackled the electrical: Calling the wiring a rat's nest would have been polite. More on that later. I started freeing gauges and switches from the dash: That rectangle-shaped piece was the stereo (with a pair of speakers on top). That had to go:
On the non-electrical side of things, the first of the old seat brackets came out:
Enough fun for one day.
IP: Logged
11:46 PM
kwagner Member
Posts: 4258 From: Pittsburgh, PA Registered: Apr 2005
April 14, 2011: The old dash is out! And now to tackle the wiring: The wiring was a dichotomy of preparation. Some wires were taped and run together, while others were just given free range to go where they pleased. None of the switches were labeled (which made finding the washer sprayers on accident pretty funny, though not to the person standing outside the car). There were some odd choices in wiring splices, colors, a large grounding block, etc. After some untangling and re-splicing, I got to a point where it didn't make sense to proceed further until we knew how the new dash would be laid out: The rest of it will get cleaned up once the gauges are in their proper place.
That looks like my friend Chubba's car. He had one just like that for sale a while ago and he lives in chicago. I think he stepped up to ITA cars though. Its been a while since him an I have talked. Btw he also ownes the first of the fiero 204-T cars to roll off of Bob Carters assembly line. They only made 11 and the serial number on his is #000000001. He knows an aweful lot about Fiero's.
You're right, the iron duke isn't the best, but it's what's in the car and it's staying for now for a few reasons: 1) Time constraints. Next year may see a swap, but I'd rather take care of the things I need before the things I want. 2) The value of the car in ChumpCar is less with the 4cyl than the v6, which means I can put more performance parts on the car without getting penalized (or in the case of this car, have to take less of the components already on the car off) 3) I'm assuming I'll get more fuel economy out of it, which will play a role in an endurance race. A pit stop with fuel is required to be a minimum of 5 minutes. Any other stop is as fast as you can go.
Keep in mind this racing body is designed for entry-level keep-the-costs-down racing to go have fun. I have a bunch of parts I've bought previously that I can't use because it would penalize the car too much. The goal of the first race is just to have the car finish, and have fun doing it. Anything beyond that is gravy
IP: Logged
11:29 AM
Tony Kania Member
Posts: 20794 From: The Inland Northwest Registered: Dec 2008
A thread to follow. It sounds as if you have done your homework quite well young Padowan.
And, isn't it weird when you are able to put a face to a name? I always thought that you were an old cojer. Your level headedness, and the way that you represent yourself on the forum, is what I enjoy about your posts.
Tony
IP: Logged
11:41 AM
kwagner Member
Posts: 4258 From: Pittsburgh, PA Registered: Apr 2005
Well thanks Tony, I really appreciate that For the record, I'm 29.
I have a post or two coming before we're caught up to present day, should be doing those this evening. I also have to take pics of the whole car to show off all the good bits, I'll do that sometime this week.
IP: Logged
12:39 PM
PFF
System Bot
May 3rd, 2011
hairballrm Member
Posts: 768 From: Philomath Oregon USA Registered: Nov 2009
I assume you first event will be the "The Theodore Cleaver Memorial at the Beaver" July 9 and 10. Two 7 hour days. If you plan on running at night at other events, Let me know. I'd love to help you see.
Yes, that will be the first event. May do Nelson Ledges in October too, we will see how things go. Next year we may branch out more, depending on finances and schedules. I'll keep you in mind
[This message has been edited by kwagner (edited 05-03-2011).]
IP: Logged
05:05 PM
kwagner Member
Posts: 4258 From: Pittsburgh, PA Registered: Apr 2005
April 28, 2011: These brackets came in from Summit to help with the seat placement issue: Also looked at how to move the electrical cutoff switch to inside the cabin, per ChumpCar rules: I also moved the shift and select cables as far away from the engine/header as I could: I'm still not that happy with it, seems a bit fragile there. Anyone have suggestions? My friend started on a bracket to reposition the (monster) tach:
IP: Logged
05:15 PM
kwagner Member
Posts: 4258 From: Pittsburgh, PA Registered: Apr 2005
May 1, 2011: Made a road trip to Summit We wanted to try the seat in person to make sure we got the right size. Paint is the absolute lowest priority, but I couldn't help but look: I love blue Here's what we came home with: - new seat and cover - two 5gal gas cans (you can't refill cans during a stop) - some black paint for the replacement aluminum dash - new 5 point harness (in blue ) - steel tube for fabrication - $1 tape measure for tires The 5 point harness will ideally be used for the passenger side during track days and autocross, and taken out during the race. I am getting one of the camlock harnesses I already have rewebbed for use on the driver's side. The seat cost a bit more than the seats that were in the car, but it's much more comfortable and has much better support. I'd rather spend a bit more for something you will be in for 14 hours or more. There's enough distractions and fatigue in racing already.
We test-fit the new "office": Still clearance issues. We were able to position it to a place where it most likely would pass tech, but why chance it. The old (high) seat mounts had to come out: After three cutting wheels and half a sawzall blade, it came out. I forgot to get a picture of it, though. I'm not good at remembering pics, I get too caught up in what's going on. Hopefully I'll get better in that regard. Now that the old mounts are out of the way, the seat had plenty of clearance. However, we now had to figure out how to mount it and the harness brackets (the original ones in the car were far from ideal in terms of angle). Once you get the seat in there, there's not a lot of room to put things like brackets. Time was running out for the day, so we had to stop there. I should be back over later this week, I will take some more pics then. Once the seat's in, things will really start picking up.
IP: Logged
05:37 PM
ManMadeChickens Member
Posts: 553 From: Clackamas, Oregon USA Registered: Jun 2006
AWESOME!! Glad to see more Fieros out there racing ChumpCar. I see a lot of common parts and pieces, and a bit of similarity emerging between our ChumpFieros. We had a lot of issues with the driver height/seating position. We ended up bolting the seat literally straight to the floor board with some HUGE load washers to keep it from tearing the sheet metal.. we even cut out the raised support ridges that the seat rails normally bolt to.
Also, something we overlooked big time until our first pit stop: those cans won't fit in a Fiero fuel neck... and on top of that, if you do hog out the innards, the fuel neck is still too small to add fuel as quickly as those cans will, causing it to splash out all over the place. Our team has a solution that might work for you as well, I'll share some pictures once we've got it all put together. The basic gist is to add some clear nylon hose and a small section of PVC to the top of the caps on those fuel jugs.
We originally had our cutoff switch mounted where your car's was. We moved it to the center of the dash bar, which is nice because it satisfies both of the requirements for the kill switch location, using a single switch. Also, try testing that that switch will kill the engine while running about 2500 RPM- that's how ChumpCar tech will test it. Even as a former ITB racer, you'd be surprised how many builders don't properly wire the switch to meet the rules we race under. I'd also suggest running a constant +12v line to the power feed to the ECM, Fieros tend to run poorly when you kill power to the ECM every two hours or so. :-)
If you have ANY questions, or want to talk about ChumpCar, I'm all ears. I'd prefer to see Fiero brethren do well out there! Since you're well outside our geographic area of competition, I'm not at all worried about sharing notes with you.
Great work so far!
IP: Logged
07:48 PM
kwagner Member
Posts: 4258 From: Pittsburgh, PA Registered: Apr 2005
Sounds great, we can use all the notes/pointers we can. We also ended up cutting out the original seat support pieces and it's pretty much going straight on the floor. Good to know about the fuel fillers, that would be a bit frustrating to find out at the track
IP: Logged
09:50 PM
May 4th, 2011
ManMadeChickens Member
Posts: 553 From: Clackamas, Oregon USA Registered: Jun 2006
ChumpCar and Nelson Ledges proudly announce the return of the Longest Day... and this time, it's even longer! 25 hours, 25 minutes and 25 seconds. It's brutal, it's inhumane, it's banned in 28 States... and it's going to be wicked fun! It's also the LONGEST endurance road race in the world! Entry Deadline: 8 July 2011 Payment Deadline: 8 August 2011
This give me goosebumps This is not just some night driving.... it's ALL NIGHT driving
Even though it's not a requirement for 2011 and on, are you guys thinking of putting any kind of theme on it? You could put a Valvoline, Dole or STP IMSA paint scheme on it... of course I'm kind of partial to the Goodwrench one myself.
[This message has been edited by ManMadeChickens (edited 05-05-2011).]
IP: Logged
08:18 PM
kwagner Member
Posts: 4258 From: Pittsburgh, PA Registered: Apr 2005
I'm not sure if it will change down the road, but this race we're going with the 'fire' theme. The car will have a flame paint job, but on the back instead of the front
I'm not sure if it will change down the road, but this race we're going with the 'fire' theme. The car will have a flame paint job, but on the back instead of the front
Hey, don't encourage that myth!
IP: Logged
11:24 PM
May 16th, 2011
kwagner Member
Posts: 4258 From: Pittsburgh, PA Registered: Apr 2005
May 5, 2011: I decided to get a 'baseline' set of pics, halfway through the teardown, because I forgot to before The following shows some of the reasons I bought the car, rather than continue with the car I was using.
The hood and decklid both have hood pins. You can also see the hole in the hood to keep it steady at higher speeds. The sunroof (covered in tools) has been replaced. Antenna removed. The red nose is off of the 86gt I was using before I found this car, it will be replacing the stock nose in a later update.
Brake balance adjuster front/rear:
Better view of the hole in the hood:
All that 'creature comfort' stuff removed from under the hood, cleaned up, relocated battery:
Falken Azeni 615's with decent tread left:
Remote oil filter, oil cooler, and accusump. The trunk is cut out right in front of the cooler, and there's a hole in the bottom of the trunk for air to exit:
The rear, with hood pin, proper roll cage supports, and removed rear glass:
Other bonuses not pictured: every gauge in the dash was new from autometer. Koni shocks all around, some upgraded springs (not sure the make), aftermarket swaybars front and rear, grand am brake upgrade on all four corners. Window net (currently out of the car). Remote kill switch (which needs to be relocated). Four speed (performance version). (Near as I can tell) equal length headers. Poly bushings all around. Solid cradle mounts. Virtually no rust.
A few of the bad things: The roll cage turns out to have some areas that need addressing (the hard to reach spots, naturally). The seats were less than ideal for road racing (and too high), although the passenger seat will stay for certain track events. The harnesses were out of date. The dash wiring was a mess.
Here's something I didn't notice when I bought it (among other things). See if you can figure out what's wrong in this picture before checking the next one: . . . . . . . . In case you missed it, here's the right side of the valve cover: This was my first 4cyl fiero, and I completely missed it until we were looking for the PCV valve. Any idea why this would be done?
Here's why fitting the seat has been such a problem. Getting mounts for the seat and belts *properly* (unlike how the car was when I got it) in this confined of a space, with fairly compound angles for welds, with the seat (and thus the mounts) as close to the ground as possible:
Fortunately, the seat is almost done now, thanks to my brother-in-law and my friend putting their heads together. That update will be coming
[This message has been edited by kwagner (edited 05-16-2011).]
IP: Logged
09:55 PM
May 17th, 2011
ManMadeChickens Member
Posts: 553 From: Clackamas, Oregon USA Registered: Jun 2006
Originally posted by kwagner: Koni shocks all around, some upgraded springs (not sure the make), aftermarket swaybars front and rear, grand am brake upgrade on all four corners. (Near as I can tell) equal length headers. Poly bushings all around. Solid cradle mounts.
You might have a fun time explaining some of this to the tech inspector... just make sure you have a really solid group of "Average Internet Value" (AIV) examples lined up to prove that the car is worth what it is.... lucky for you, 2M4's go for less than half what a running V6 car does, by my research for our AIV paperwork.
IP: Logged
07:48 PM
kwagner Member
Posts: 4258 From: Pittsburgh, PA Registered: Apr 2005
Yeah, the good things are bad for ChumpCar. I already have a few boxes of parts I can't use because it would put us way out of contention. Unfortunately it doesn't look like we'll have time to replace them all with "chumpy" parts before the race, so we will either have to take the laps or race as an Exception Class (it is an ITB car after all). If we end up doing Nelson Ledges, we'll have time to replace enough parts to get under or at $500.
IP: Logged
09:58 PM
ManMadeChickens Member
Posts: 553 From: Clackamas, Oregon USA Registered: Jun 2006
4.4.4.3. Non-exempt components and their minimum values: 4.4.4.3.1. Aftermarket shocks or struts: minimum $15/corner 4.4.4.3.2. Aftermarket springs (on stock assembly, or with a ‘coil-over’ kit): minimum $75 per car (all 4 corners) 4.4.4.3.3. Commercially made camber/caster plates: minimum $ 20 front/ $20 rear 4.4.4.3.4. Non-stock sway-bar(s): minimum $50 front / $50 rear 4.4.4.3.5. Exhaust Header(s): minimum $50 4.4.4.3.6. Air Intake and open filter element: minimum $50 …OR… 4.4.4.3.6.1. Individual intake-specific mandrel tubes, silicone connectors, and performance air filters: minimum $10 each component 4.4.4.3.7. Aftermarket Ignition Coil: $20 4.4.4.3.8. Performance distributor or ignition system: $50 4.4.4.3.9. Heim joint tie rods and/or adjustable control arms: minimum $10/end 4.4.4.3.10. Non-OEM Polyurethane/Nylon bushings: minimum $75/whole car 4.4.4.3.11. Yes, we reserve the right to apply a value to any other component or part that may not be on this list but increases the value and/or performance of any car. 4.4.5. All non-exempt component values (Section 4.4.4.3) shall be added to the AIV of all cars, thereby resulting in a total “COMPETITION VALUE.” The “Competition Value” is the REAL value of your car, as it’s being presented for competition.
I'm sure you've seen that by now, but it's a bit of explanation for those who don't necessarily know what we're talking about. With the stuff you listed, you're up to $360 in added value if you count everything. Was the car worth $140 as a base without those parts, or was it worth more? Obviously more, so you'd be incurring penalty laps. Are springs on a Fiero going to make that much of a difference? Probably not. Is a header on an Iron Duke going to blow the doors off a Fox Body Mustang? Of course not.
Here's my advice, leave what you have listed there, and just don't make a point to show it off. Put together a nice AIV binder, so they can see that a Fiero is really worth $500 or less, and run it. A new team is not likely to be running at the front of the pack the first few times out, so you won't gain any necessary attention to those parts off the bat. Put together the car the way it is, run it through tech, and if they happen to make a fuss about what's on the car, just be polite and take whatever penalty they give you. Run it the way it is, have a blast, and sign up for the next one... after all, racing a Fiero in ChumpCar is more about having as much fun as possible rather than being competitive at all costs. I wouldn't worry about signing up for EC or anything, you'll be right where you belong the way it is.
[This message has been edited by ManMadeChickens (edited 05-17-2011).]
IP: Logged
10:18 PM
ManMadeChickens Member
Posts: 553 From: Clackamas, Oregon USA Registered: Jun 2006
Oh, and another thing I thought of: we took out the spare tire tub in our car... not only because of the tiny bit of weight savings, but also because it lets the radiator breathe a little bit better. It gives you a nice opening to get to things, and the front suspension brace is a great place to mount the transponder.
IP: Logged
10:22 PM
kwagner Member
Posts: 4258 From: Pittsburgh, PA Registered: Apr 2005
Some good points. Yeah, the goal is to go out and have fun and get some experience. I've been wanting to do a race like this for years I don't expect to be competitive. If that stuff wasn't on the car I wouldn't have put it on (seriously, headers on a duke?), but it is what it is. I ran some AIV calcs tonight with all the ads I've gotten, and we should be in decent shape. I figure at the very least we can take the swaybars off to get a quick $100 off the value, but the rest will likely stay. I've thought about removing the spare tire tub, but it wasn't on "the list" yet.
IP: Logged
11:53 PM
May 18th, 2011
ManMadeChickens Member
Posts: 553 From: Clackamas, Oregon USA Registered: Jun 2006
Keep the sway bars, worth it even if it draws a penalty. You should be OK - we run a stock '86 GT V6 with a factory Muncie 4 speed and have zero laps assigned...- the only mods we've done are a K&N air filter, replaced the cat with a side dump cherry bomb muffler, and added a Fiero Store rear sway bar. I even accidentally left my AIV paperwork in my apartment 100 miles away from the track, and they were OK assigning us no laps. You'll probably get no laps as well if you have a good selection of ads, and don't offer up any more info than is necessary, haha.
IP: Logged
12:53 AM
Francis T Member
Posts: 6620 From: spotsylvania va. usa Registered: Oct 2003
This may been mentioned, you can cut the rear down a bunch and lose some wieght. Just make the inner bulkhead the end of the car by ditching the trunk. If I can find the photo of it done I'll post it. Great way too race BTW: lots of track time!
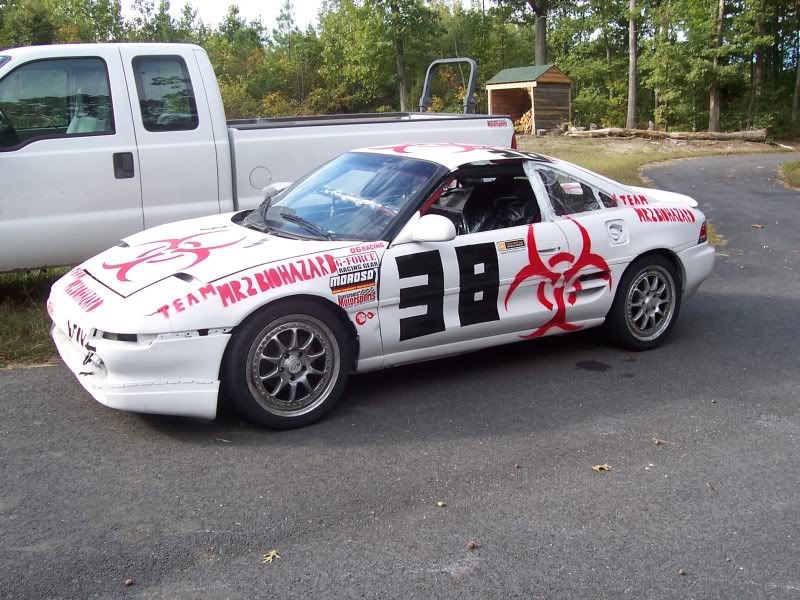
My son races this MR2 -camary v6 power- in chump. The car and drivers -team biohazrd- are very fast. They got a 32 penalty last race lol. Good luck with yoru car.
Hey, I've seen that car on the chumpcar pics before I just got the list of cars that are currently racing in July, first on the list was your son's Looking forward to it
IP: Logged
05:33 PM
PFF
System Bot
hairballrm Member
Posts: 768 From: Philomath Oregon USA Registered: Nov 2009
May 12, 2011: All set to work. Then the storm came rolling in. This was the view in the garage about a half hour after I arrived: Note that the lights aren't off by choice Here's the view from outsite: Hint: that brown stuff in the grass isn't dirt. We spent the next several hours soaking up water in the basement with towels and wringing it out into the drain. Power came on partway through cleanup. Frustrated about the wasted evening (in project terms), I decided to do *something* and put the window net in to see what it was like: Of course it had to come out again, so it was a net zero progress. We needed to shield the side of the floor next to the gas tank for welding purposes, so the protective sheet had to come off: The tank and underside was really clean: And so ends another day.
IP: Logged
06:49 PM
kwagner Member
Posts: 4258 From: Pittsburgh, PA Registered: Apr 2005
May 15, 2011: Started off by removing the headlights (per chumpcar rules, since it's not a night race), and taking out the bad radiator fan: More work on the seat mount. A very slow, methodical process. Lots of angles and things to consider: My brother-in-law got the passenger window out: I had a spare aero nose, so we decided to put that on instead of the 84 stocker: Note that those two brackets near the front of the old nose have three dzus buttons in each. From the pictures I have of the car when it was first raced, it appears they were used to hold on a splitter/chin spoiler. Those would make install/removal easy for loading/unloading onto a trailer. "New" nose placed on to see how it looked: Much better, in my opinion. Finally, testing the newly-welded front seat mount bracket:
IP: Logged
07:09 PM
kwagner Member
Posts: 4258 From: Pittsburgh, PA Registered: Apr 2005
May 19, 2011: Work on the seat bracket is really moving now. Testing clearances around the seat: Making sure the back or front of the bars didn't move while tacking was tricky: The bracket finally all tacked together: Welded, painted, and hung to dry: In order for the belts to fit without snagging, the holes in the seat needed to be enlarged: Now that the seat could go in in its proper position, we could start laying out the gauges and switches. We started with the MONSTER TACH (said in proper monster truck commercial announcer voice ), front and center, with "redline" pointing straight up. View for the driver:
IP: Logged
07:27 PM
ManMadeChickens Member
Posts: 553 From: Clackamas, Oregon USA Registered: Jun 2006
That shark car looks so cool with the rear chop ! It reminds me of two dif cars: Fiat X/19 setup for racign with windshield chop etc, and the rear of F-513.
IP: Logged
09:19 AM
Jun 13th, 2011
hairballrm Member
Posts: 768 From: Philomath Oregon USA Registered: Nov 2009
Now that the bracket was dry, final measuring and placement could be done: The correct way to put a cage in a fiero, according to Doug Chase, is to drill holes in the floor, drop the cage through, weld the top, push it up through the holes, then weld plates where the holes used to be. Unfortunately, this cage was not done this way. We could feel some bad/incomplete welds in the top corners of the cage which would need to be fixed if we wanted to pass tech (and be safe). The quickest way to do that at this point was to drill into the roof: Our initial attempt ended in a smaller pilot bit than originally intended: We used up the pilot bits we had, so I'd have to buy some more before continuing. The cause for all the breakage was the multiple layers of material in the roof, with gaps in between. The pilot bit would make through one, start to freewheel, then snag on the next before the hole saw could dig in to the first. We learned after the first hole how to best approach it. In the meantime, we took the bumper off to access the area the rear tow hook would go on:
IP: Logged
09:46 AM
kwagner Member
Posts: 4258 From: Pittsburgh, PA Registered: Apr 2005
The license plate area provided a nice location for the tow bracket to go: Checking the new dash for fitment near the windshield: Test-fitting the seat and belts: It works!


 It sounds as if you have done your homework quite well young Padowan.


 The following shows some of the reasons I bought the car, rather than continue with the car I was using.