I expect this will be a learning thread, attempting to work through re-painting my bumperpad Fiero I can't promise speedy regular updates, since like everyone else, I'm subject to life and other "engagements". Time to paint the car since I swapped roof panels (and the factory paint was destroyed on the rest of the car anyway)
I'm gonna be asking a lot of questions along the way- For example:
Q: Anybody had bad experience with Wanda products? Apparently they are to Sikkens as Nason is to Dupont.
Q: Once I get the car sanded down, can I just put down a couple coats of sealer on and block it smooth, or will I need to use primer (provided there's no major damage on the panels)
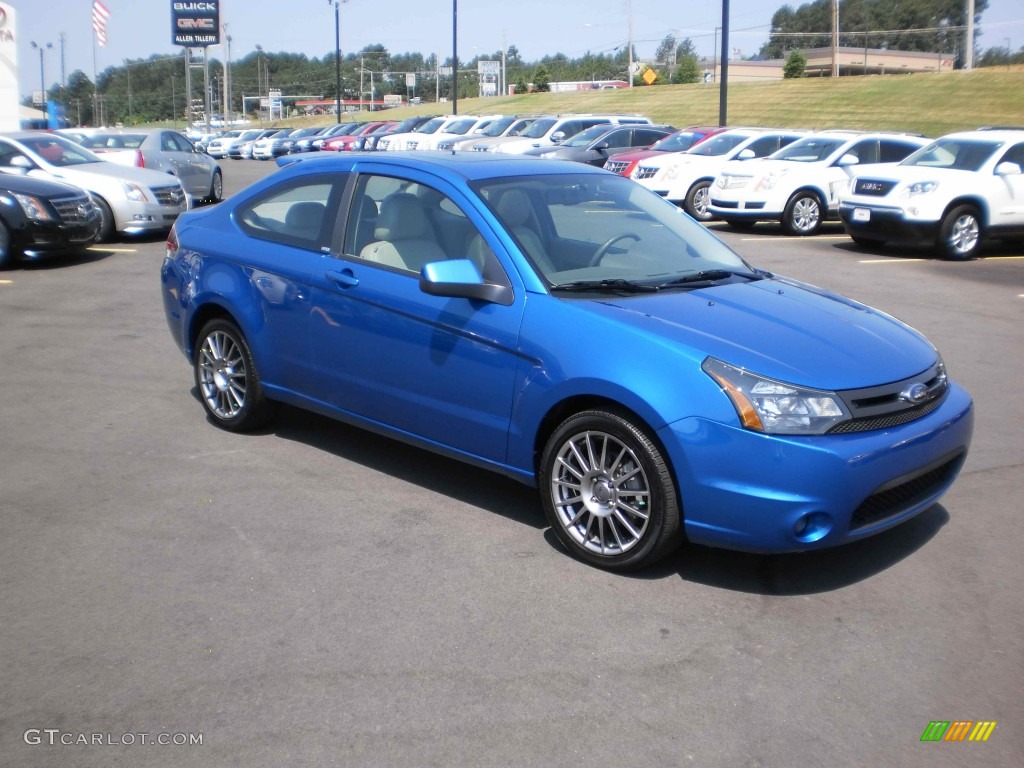
This is the color I've decided on (for now) It's Ford Blue Flame metallic, code SZ.
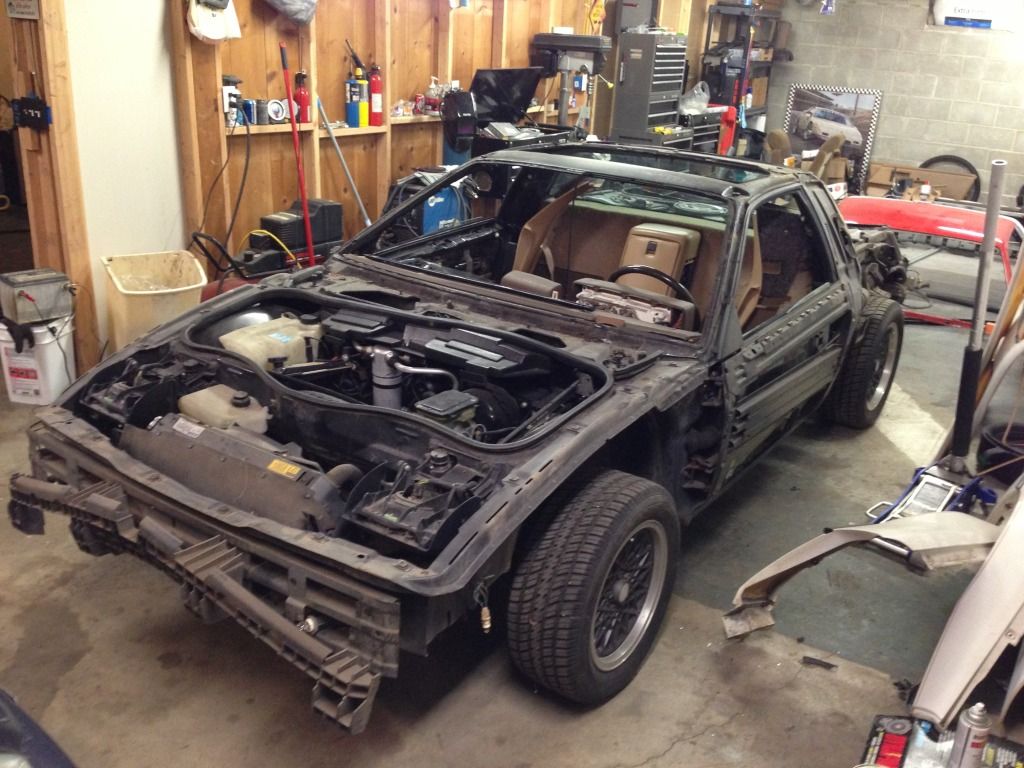
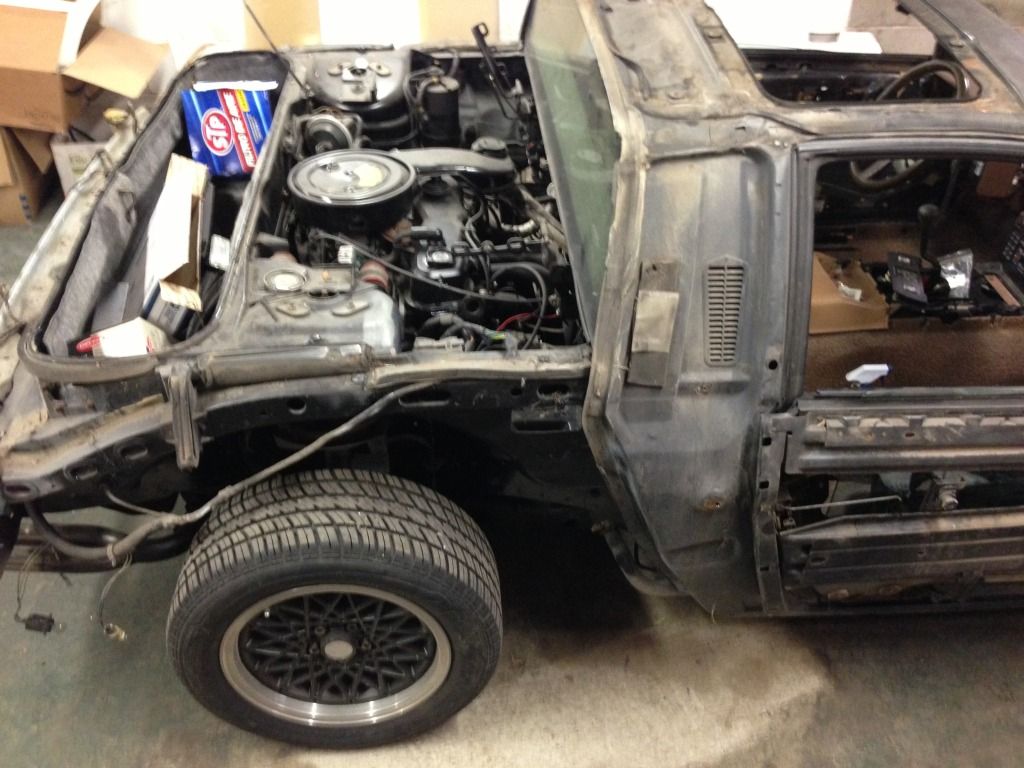
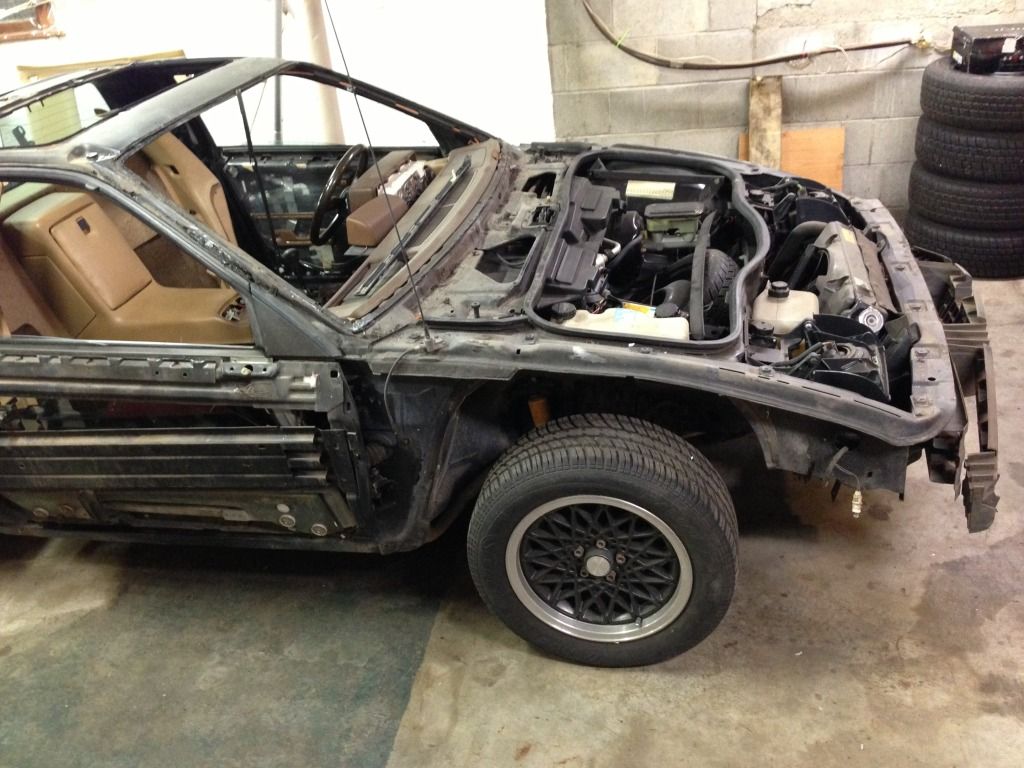
Since I'm doing a panel-off for the color change, here's the obligatory "naked" photos... Being from Michigan, I'm pretty stoked to finally have a Fiero with zero trunk rust, zero frame rail rust, and a fully intact battery tray.
[This message has been edited by KurtAKX (edited 02-02-2013).]
IP: Logged
04:04 AM
PFF
System Bot
Gall757 Member
Posts: 10938 From: Holland, MI Registered: Jun 2010
If you really are a novice at painting I urge you to find a non-metallic color. You will be much more happy with the results.
Excellent advice, the problem is that I looked at the non-metallics and, well, I don't like them near as much.
Since I'm committing myself down the road of ruin (using metallic), do you have any advice to help limit the damage?
Here are things I've been told so far by local paint guys... 1) Don't spray metallic if you don't have enough compressor behind you to have the same pressure at the end of the spray as the beginning 2) Use a minimum of 4 coats of base to prevent color shift from panel to panel 3) Don't do a full car panel-off job with metallic 4) If you do a panel off, assemble all the panels to the car before spraying the last coat or two of base, so all the panels look consistent.
Is there anything else I should do?
IP: Logged
11:21 AM
NetCam Member
Posts: 1490 From: Milton, Ontario, Canada Registered: Mar 2012
I'm planning on painting mine in the spring as well, and was thinking of doing a 'partial panel off' job. Can anybody think of a reason to not leave the roof section on and remove all the other body panels? I really don't want to get into the sunroof and windshield, that's just way out of my comfort zone. The car is a red '85 GT and I'll be keeping it red.
Don't mean to hijack your thread, but thought maybe any advice could help both of us... correct me if I'm wrong and I'll delete.
IP: Logged
11:35 AM
zmcdonal Member
Posts: 1682 From: NW, Indiana Registered: Oct 2005
In my honest opinion, and I am not a painter or a body guy, but I would definitely leave the roof section on, I would think it would be near impossible to work the roof and or windsheild post areas without breaking it. I think this is one of the first if not the first panel off thread where I have seen someone remove it. Usually it's just bumpers, decks, quarters, fender and doors that I have seen.
Good luck and keep us posted. I like the blue that you've selected, should look really sharp on a Fiero.
If you are set on that Metalic color, at least make sure you use BASE/CLEAR. (make sure to use Hardener in the base). when spraying the base coat, it's alot easier to get the color right, then just put what I call a "flying mist coat" over everything. just let the mist settle on everything,& walk away for about 45 min to an hr. Then come back & clear it it will eliminate stripes & pots that are likely to get with metalics if you are not experienced.
IP: Logged
12:49 PM
gen2muchwork Member
Posts: 861 From: dearborn, MI Registered: Feb 2012
I have to say, you really are lucky there with the way the frame is. There's NO RUST anywhere...
Mine looked like that when I stripped it too, but I still had some surface rust on the suspension. I'm very surprised at the condition of your frame... (happy for you).
As an FYI... while you're at it... I would clean up the frame, and maybe even paint it. I did this when I was going through my Fiero, and I painted the entire thing with semi-gloss black Duplicolor suspension / chassis "Epoxy." It's a bit more durable than regular paint and builds really well.
IP: Logged
02:12 PM
darkhorizon Member
Posts: 12279 From: Flint Michigan Registered: Jan 2006
Spraying metalics is nothing to be afraid of... It is not nearly as hard as people make it out to be.
I would go easy on the sanding to help your sanity as much as possible. Finish sand with 320 or 400 wet and call it a day. I do suggest putting down high build primer over anything that you have fiddled with beyond some 320/400 grit scratches.
Spray it as assembled as possible, but there really is no big press to do EVERYTHING in one day. Feel free to do everything in the same weekend/week/month just be mindful of the conditions to some degree. I would never put 4 full wet coats on of base... you will be spraying for months if you did... The typical formula for metallic base PPG is 2 half wet then a full wet coat. Dry for an hour then spray clear. Make sure your clear gun is ready to dump some material on, as clear goes on full wet and unfortunately at that point you will risk runs, as there is a fine line between wet enough to be tolerable and too wet. Dont be shy with the clear.. I use about 1.75x clear than base as a good rule of thumb.
I painted my roof off the car and then put it on. Had no trouble putting it on without breaking it, and that was a sunroof panel, so even more fragile.
Getting the old one off was a different story, but I don't really care that that one broke.
IP: Logged
03:14 PM
KurtAKX Member
Posts: 4008 From: West Bloomfield, MI Registered: Feb 2002
I'm planning on painting mine in the spring as well, and was thinking of doing a 'partial panel off' job. Can anybody think of a reason to not leave the roof section on and remove all the other body panels? I really don't want to get into the sunroof and windshield, that's just way out of my comfort zone. The car is a red '85 GT and I'll be keeping it red.
Don't mean to hijack your thread, but thought maybe any advice could help both of us... correct me if I'm wrong and I'll delete.
No worries, it's a good question! This thread isn't supposed to be about me, it's supposed to help anyone who reads it go from knowing dick about body work to a point of having the information to tackle some painting. It's a chance to learn by doing, and a chance for everyone to learn together.
IP: Logged
04:16 PM
PFF
System Bot
KurtAKX Member
Posts: 4008 From: West Bloomfield, MI Registered: Feb 2002
If you are set on that Metalic color, at least make sure you use BASE/CLEAR. (make sure to use Hardener in the base). when spraying the base coat, it's alot easier to get the color right, then just put what I call a "flying mist coat" over everything. just let the mist settle on everything,& walk away for about 45 min to an hr. Then come back & clear it it will eliminate stripes & pots that are likely to get with metalics if you are not experienced.
Is that the same thing as a drop coat?
IP: Logged
04:18 PM
KurtAKX Member
Posts: 4008 From: West Bloomfield, MI Registered: Feb 2002
Spraying metalics is nothing to be afraid of... It is not nearly as hard as people make it out to be.
I would go easy on the sanding to help your sanity as much as possible. Finish sand with 320 or 400 wet and call it a day. I do suggest putting down high build primer over anything that you have fiddled with beyond some 320/400 grit scratches.
Spray it as assembled as possible, but there really is no big press to do EVERYTHING in one day. Feel free to do everything in the same weekend/week/month just be mindful of the conditions to some degree. I would never put 4 full wet coats on of base... you will be spraying for months if you did... The typical formula for metallic base PPG is 2 half wet then a full wet coat. Dry for an hour then spray clear. Make sure your clear gun is ready to dump some material on, as clear goes on full wet and unfortunately at that point you will risk runs, as there is a fine line between wet enough to be tolerable and too wet. Dont be shy with the clear.. I use about 1.75x clear than base as a good rule of thumb.
What does that mean "wet coat" or "half wet coat"? The guy at the auto body place kept talking about wet coats. Does that just mean that you are putting another coat of paint on before the previous coat has fully cured?
Is there like an auto body "glossary of terms" somewhere?
IP: Logged
04:20 PM
darkhorizon Member
Posts: 12279 From: Flint Michigan Registered: Jan 2006
When you spray its obvious what a full wet and half wet means... you can go at a speed and overlap that will appear to dry as you spray it... the wet coat is just one that looks wet. Half wet is not going to cover well, aka you can see the under color pretty clearly if its your first coat. A full wet first coat would almost completely hide the substrate.
I don't know how much difference it really makes but many say with metallics you should also paint the panels in the orientation that they are on the car. IE the door panels should be vertical when painted otherwise the metallic particles don't lay the same way.
[This message has been edited by Dodgerunner (edited 02-02-2013).]
IP: Logged
08:34 PM
KurtAKX Member
Posts: 4008 From: West Bloomfield, MI Registered: Feb 2002
I don't know how much difference it really makes but many say with metallics you should also paint the panels in the orientation that they are on the car. IE the door panels should be vertical when painted otherwise the metallic particles don't lay the same way.
I heard the same thing about panel off metallic painting, that if you lay parts flat that will be vertical, the colour will look off.
I can help you. I am an automotive painter. PM me with specifics like exact paint system and exactly what products you are planning on using (what primers, sealers, fillers, ect) and any specific questions. I don't have time to answer abything right now but shoot me a message and I will help in any way I can.
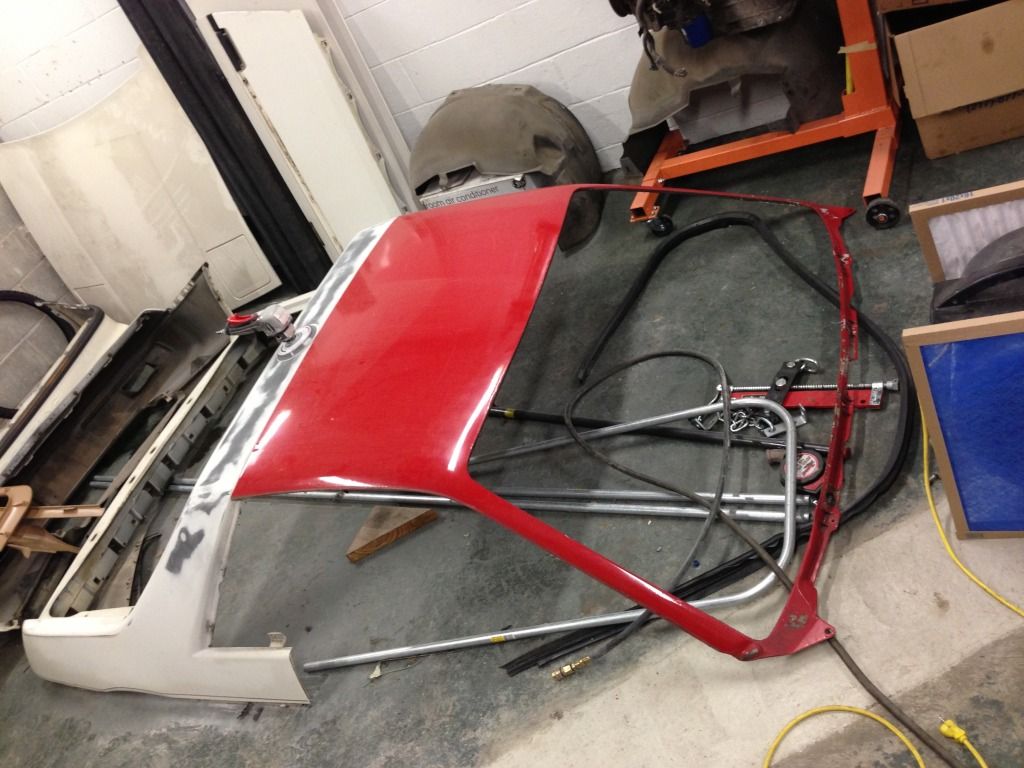
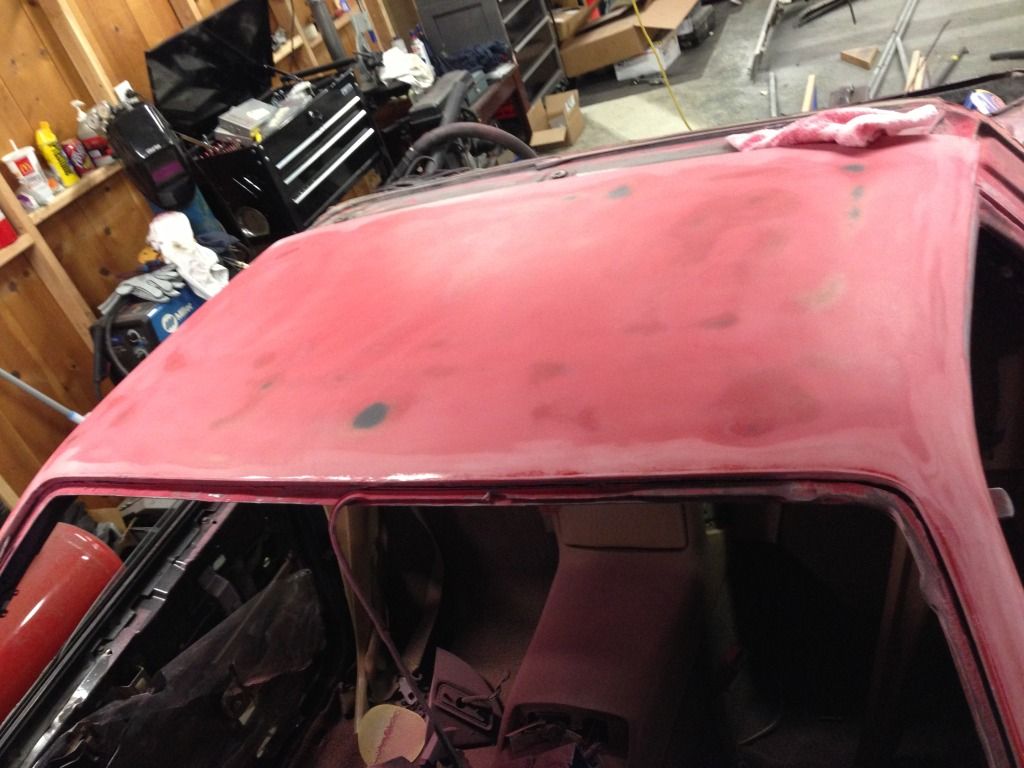
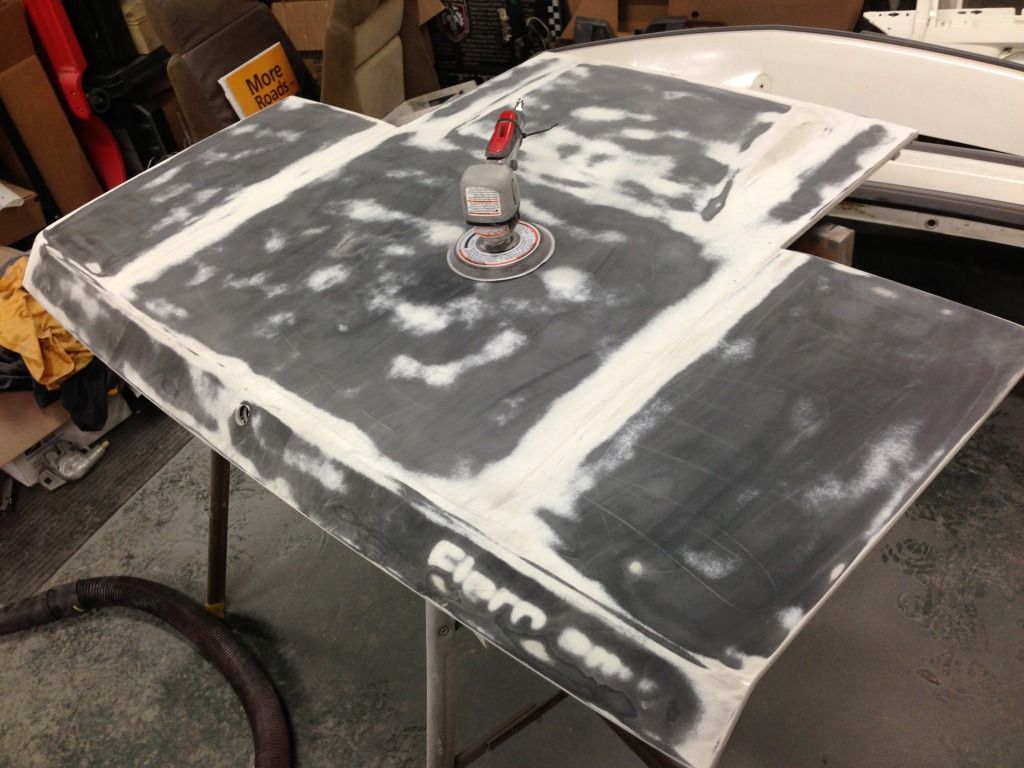
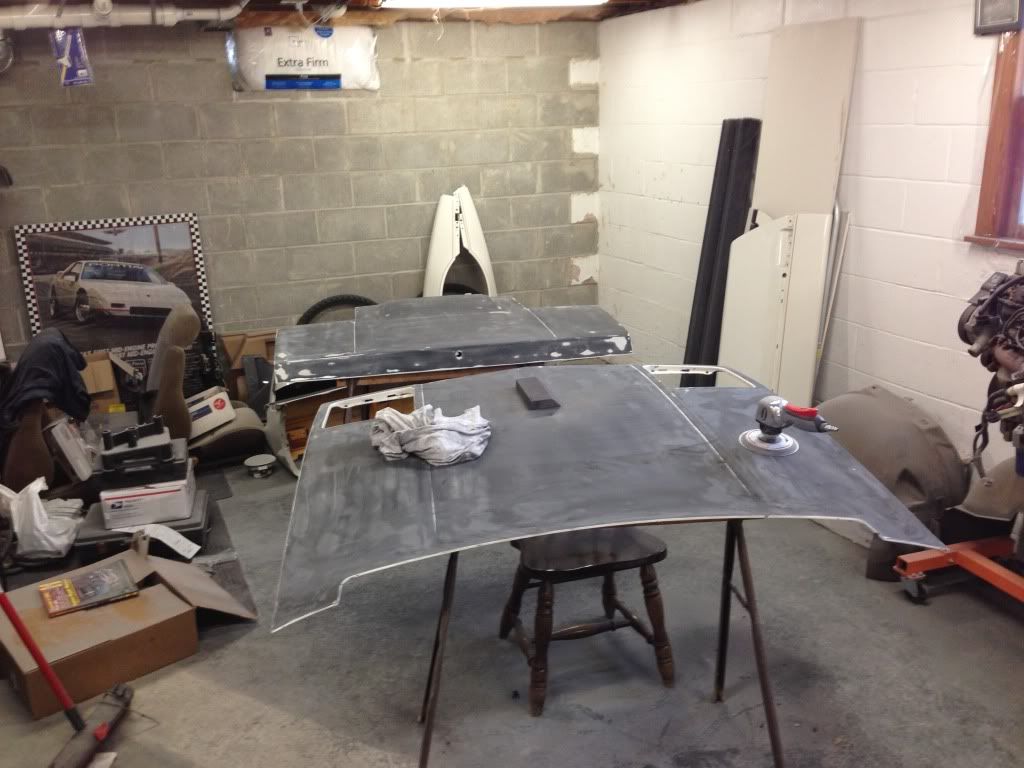
So I got about a good solid hour's worth of sanding in on my roof panel today. I'm switching roof panels to eliminate the sunroof. The panel came from the red car I used to ice race, which I purchased with a crappy base/clear repaint already done on it. The previous people chose to go the route of quantity over quality. There was quite a bit of fish-eyeing and runs all over the car.
I decided to strip off all of the material that was applied during the repaint- and it has been a pain. The factory white paint on my other panels comes off in no time with 220 grit paper on the DA. The roof, however, I worked on for a solid hour, and am not done. I don't know if clear is supposed to be this hard, but it was like sanding through a sheet of window glass. I switched to 120 grit for the roof and it still took a good 20 minutes before I was able to break through the clearcoat anywhere on the panel.
Here's what it looks like now (not done, got tired of listening to the compressor cranking away)
I assume what I'm looking at there is the scuffed clear from the repaint (whitish areas) then the repaint red (pinkish areas) then the factory paint (darker red) and then the factory primer (black) underneath that....am I getting this right? My OEM white pieces appear to have a black primer, too.
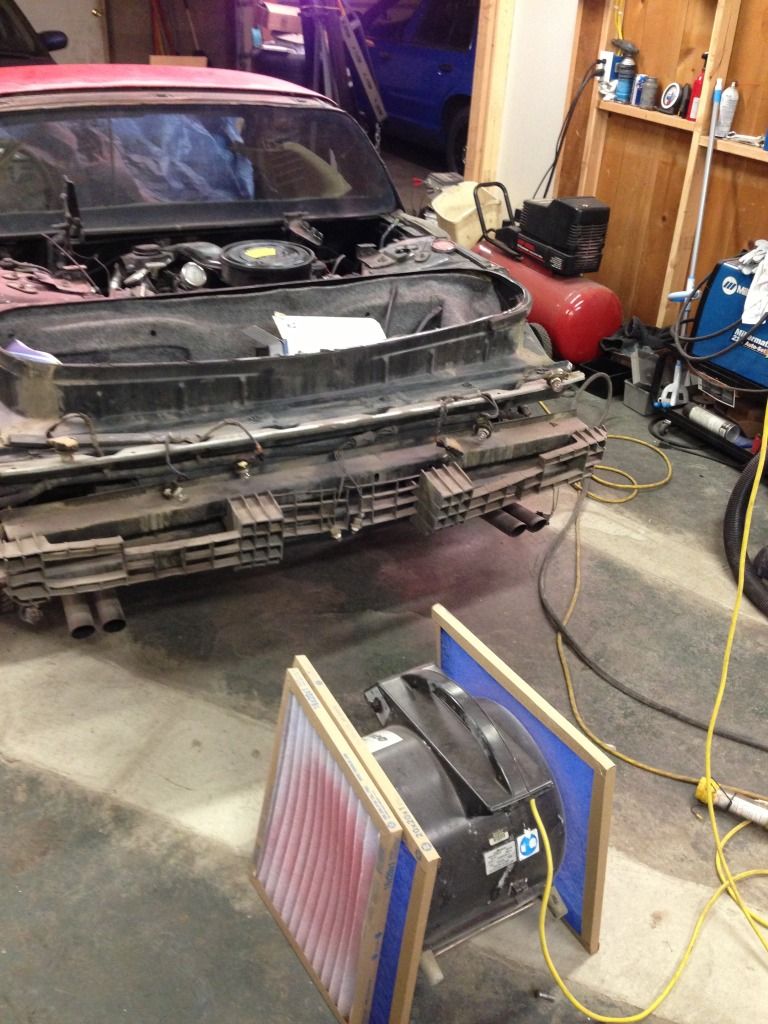
I've been wearing a mask, and when I blew my nose it still came out pink... go figure. One thing I have been surprised about is how good of a job my squirrel cage is doing with a couple filters at keeping my garage dust-free, other than immediately adjacent to the panel I'm sanding.
Does my roof panel look OK so far? Can anybody see any grievous errors I'm making so far?
[This message has been edited by KurtAKX (edited 02-03-2013).]
IP: Logged
01:06 AM
PFF
System Bot
darkhorizon Member
Posts: 12279 From: Flint Michigan Registered: Jan 2006
So I got about a good solid hour's worth of sanding in on my roof panel today. I'm switching roof panels to eliminate the sunroof. The panel came from the red car I used to ice race, which I purchased with a crappy base/clear repaint already done on it. The previous people chose to go the route of quantity over quality. There was quite a bit of fish-eyeing and runs all over the car.
I decided to strip off all of the material that was applied during the repaint- and it has been a pain. The factory white paint on my other panels comes off in no time with 220 grit paper on the DA. The roof, however, I worked on for a solid hour, and am not done. I don't know if clear is supposed to be this hard, but it was like sanding through a sheet of window glass. I switched to 120 grit for the roof and it still took a good 20 minutes before I was able to break through the clearcoat anywhere on the panel.
Does my roof panel look OK so far? Can anybody see any grievous errors I'm making so far?
2 problems.
The previous paintjob is 99/100 times your friend. It may be crappy looking or thick, but on a fiero you can have a thick paintjob under the new one with technically no problems. The previous paint has had its time to shrink and harden to the point where it will not shrink any more, which is better than anything you can spray on right now.
The problem you have now is you have 120 grit scratches all over... which mean you need to fill them and sand again. and again, and again....
General rule of thumb here... when it comes to sanding usually less is more.
As far as the busted up panels you have.. A bit of body filler would help smooth out the gruff and make for a 1 shot at cleaning it up... trick is this is in a non visible area, so I wouldnt spend any time on stuff you dont see.
Looks great so far. A few suggestions/observations: 1) You need to remove all of the re-paint (I think you already know this). Get it down at least to solid original clear or the original base coat. 2) Prime it with PPG epoxy primer (DP). It's a little expensive, but worth every penny. 3) Definitely use base/clear. 4) Using 220 on the DA as a final sand, & assuming you have it flat & smooth, you can prime with the DP & shoot the base/clear after 30 minutes without sanding. Saves you a LOT of sanding over other primers. 5) Be careful about not sanding down the fiberglass/plastic on the edges (flat-spotting). Hand sand them with the 220 dry or 320 wet paper if you have to. 6) Hang the panels as others have suggested for the metallic to lay down properly. Beautiful color BTW. I'll try to add more when I get time. ~ Paul aka "Tha Driver"
Just have to add a comment. I have been painting on and off for 30 years far from being a professional. One thing I can tell you is don't be afraid to try anything. "It can't look no worst than it does now". If it don't turn out then sand it down and try again. Practice spraying on junk panels and don't run away from metalics, they are beautiful! The Driver will give you great advise!
IP: Logged
08:32 AM
rogergarrison Member
Posts: 49601 From: A Western Caribbean Island/ Columbus, Ohio Registered: Apr 99
You hardly have any jams to paint on a Fiero, most of that is black. The biggest jam part to paint is the front fenders under the hood edges. I paint Fieros pretty much all together, except for wing/rack and headlite covers. It makes a much more consistant looking job in my opinion. Some people like to paint them apart so its the right color underneath...a reason I see no sense in. No one sees say the inside of a door unless you take the upholstery panel off. Most colors cover just fine with 2 coats of high-pigment basecoats. I have had a few reds and yellows that needed more. Putting on more paint than needed is asking for cracking down the road. After the base, I put on 2 coats of clear for a finished car or 3 if im color sanding and buffing it. I NEVER put on more than 3 coats...ever. DONT sand on the final basecoat before you clear it, metallic colors will streak where you sand...clear makes them pop. You can sand out small flaws in other coats as you go if needed....but wetsand those with #400 and recoat. I actually dont even like to tack off the basecoat before the clear...ive seen that streak it too, especially silver and golds.
_________________________________________
Retired Owner/Operator Custom Paint and Body Shop for 45 years
[This message has been edited by rogergarrison (edited 02-04-2013).]
IP: Logged
12:51 PM
rogergarrison Member
Posts: 49601 From: A Western Caribbean Island/ Columbus, Ohio Registered: Apr 99
If you are set on that Metalic color, at least make sure you use BASE/CLEAR. (make sure to use Hardener in the base). when spraying the base coat, it's alot easier to get the color right, then just put what I call a "flying mist coat" over everything. just let the mist settle on everything,& walk away for about 45 min to an hr. Then come back & clear it it will eliminate stripes & pots that are likely to get with metalics if you are not experienced.
Ill agree with Lou on a mist coat with high metallics. I do that last with about 2" of paint in the gun and the rest all reducer. I then spray the whole car all over in a 'criss-cross' X pattern to eliminate any streaks. DONT use hardener in the base unless your brand specifies to use it. I use SW and RM/BASF paint and they dont use a hardener in the base ever. Then dont put on a full wet 1st clear coat. Just a medium coat, and next coat and 3rd is very wet.
my very first paint job I used gun metal gray matalic. The only parts that came looking odd when I was done was the hood and the decklid. They had a lot of tiger strips in them. I was told that if I would have gone both directions with the spray gun on the last coat that it would have looked a lot better. also I just painted my 3rd car and I used a clear coat called 5 star Xtreme and when I was done the parts looked like glass. I never had to sand or buff the parts. Thanks Lonnie
[This message has been edited by fierofan25 (edited 02-03-2013).]
IP: Logged
01:24 PM
Feb 10th, 2013
KurtAKX Member
Posts: 4008 From: West Bloomfield, MI Registered: Feb 2002
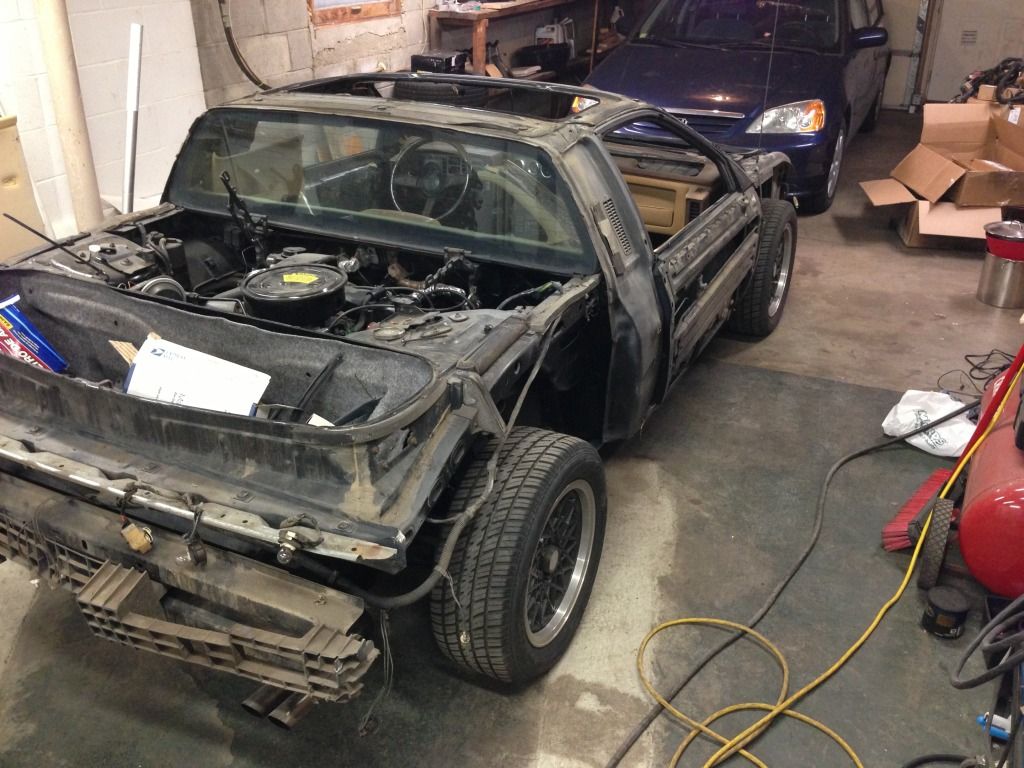
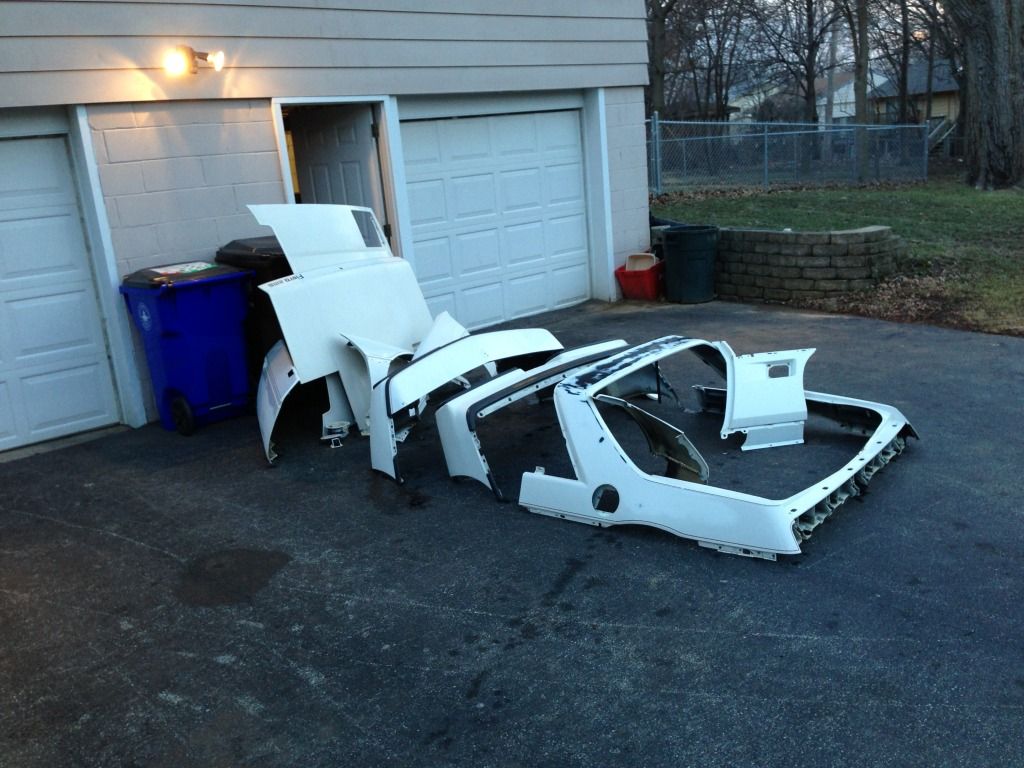
Today, I set about to sanding the other body parts, besides my replacement roof panel. I've read that if you sand dirty body parts, the grit will make scratches in the work, and that if you try to paint dirty body panels, the dirt will blow out and get in the paint when you spray.
Since it was a little above freezing, I pulled all the parts out into the driveway and scrubbed them down with a bucket of soapy water and a hose.
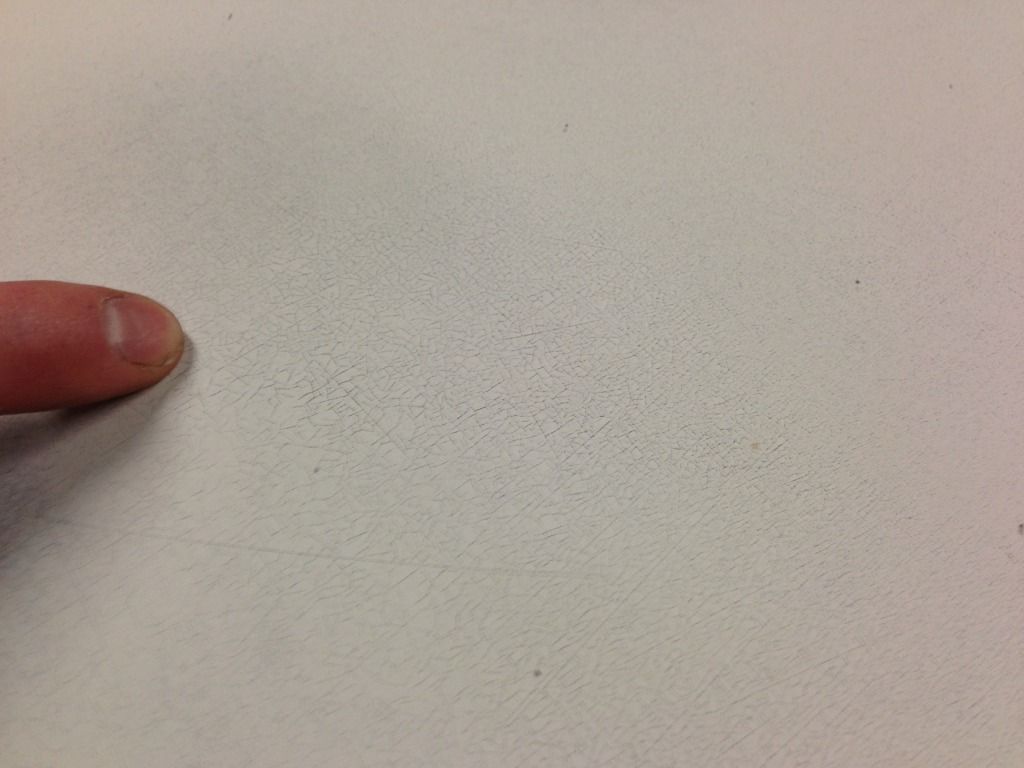
I'm sanding everything down to the primer- Most people say to put the new material over good factory paint, but I don't have good-looking factory paint to start with- it's all extremely eggshell-looking and crackly. Here's what it looks like before sanding:
I'm really bumming about the number of areas the DA sander can't reach because of curves or bodylines.
[This message has been edited by KurtAKX (edited 02-10-2013).]
IP: Logged
12:12 AM
tntcary Member
Posts: 640 From: Douglasville, GA Registered: Dec 2012
I had HORRID luck with hook and loop sanding disks on my DA. The paint you are sanding off is super super dry and weak so it comes off real easy. I used those flexible 3M sanding foam blocks to sand my entire Fiero that are 80, 100 and 320. They make different grits too. Sand Blasters is the non automotive name. You can just slap them on your leg to get the paint off them while sanding. They last crazy long and are FLEXIBLE for those non flat areas on your Fiero and the areas the DA cant quite reach. I swear by these. Sanding disks and sand paper just dont go very far. The only thing I use my DA for is for Compounding (wool h&l) and Polishing (foam h&l). I created very very small uneven areas with my DA before on some curves and swore it off for sanding. I sooo wish 3M made a 800, 1000, 1500 and 2000 grit Sand Blaster sanders and I would never sand with anything else. One side of the block will do about 33% of the entire car. They rock for sanding the primer too. All the Auto Parts stores have them. I call them sanding sponges. Here is a link of one. http://shop.advanceautopart...m=3m+sanding+sponge+
[This message has been edited by tntcary (edited 02-10-2013).]
IP: Logged
03:06 AM
Feb 11th, 2013
KurtAKX Member
Posts: 4008 From: West Bloomfield, MI Registered: Feb 2002
I'm not using the hook and loop either- I have the sticky-backed sandpaper.
Since a lot of people have recommended it so highly (most recently and adamantly darkhorizon) I have ordered myself a Devilbiss StartingLine gun set.
In case anyone is wondering how my compressor is providing enough CFM to run a big bad DA sander, well, it's not. It's a 1996 model Craftsman I bought back in high school, specs out at 25 Gallon, 4 "claimed" HP unit which is rated to deliver just shy of 7 CFM at 90 PSI.
Obviously this won't deliver the 10-12 CFM I'm gonna need. I'd need two of said compressor to achieve the flow I need. Simplest solution at this point- steal a similarly spec'd compressor out of Jefrysuko's garage, T the two compressors together, and set the regulators at the same pressure.
[This message has been edited by KurtAKX (edited 02-11-2013).]
IP: Logged
09:55 AM
rogergarrison Member
Posts: 49601 From: A Western Caribbean Island/ Columbus, Ohio Registered: Apr 99
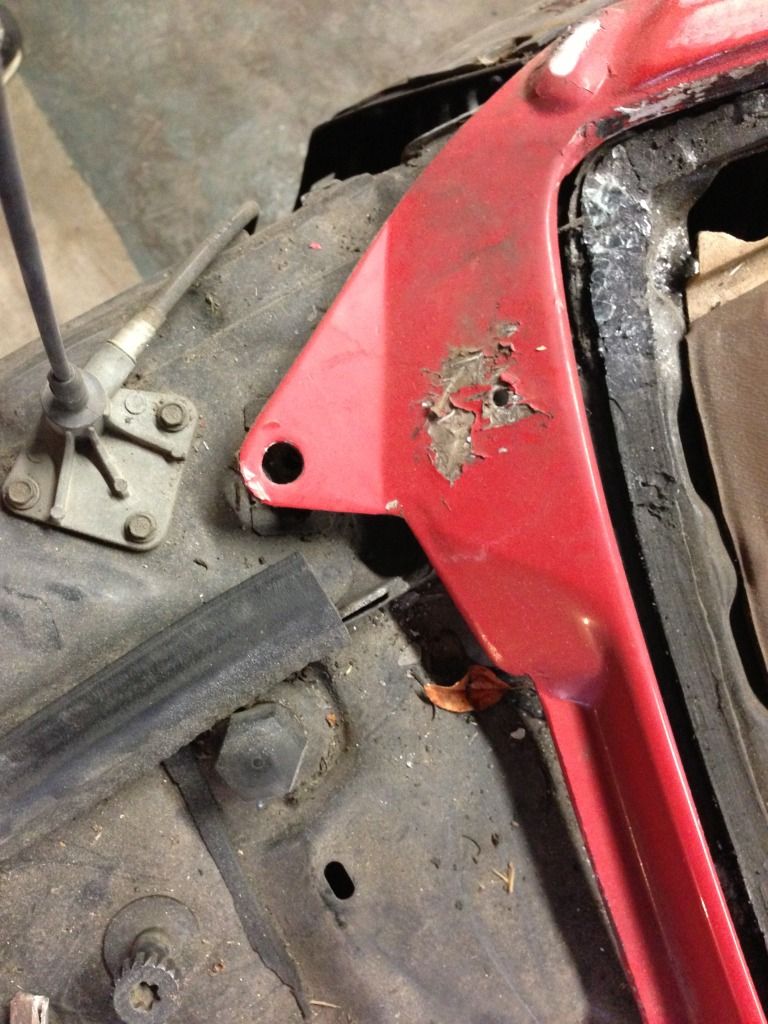
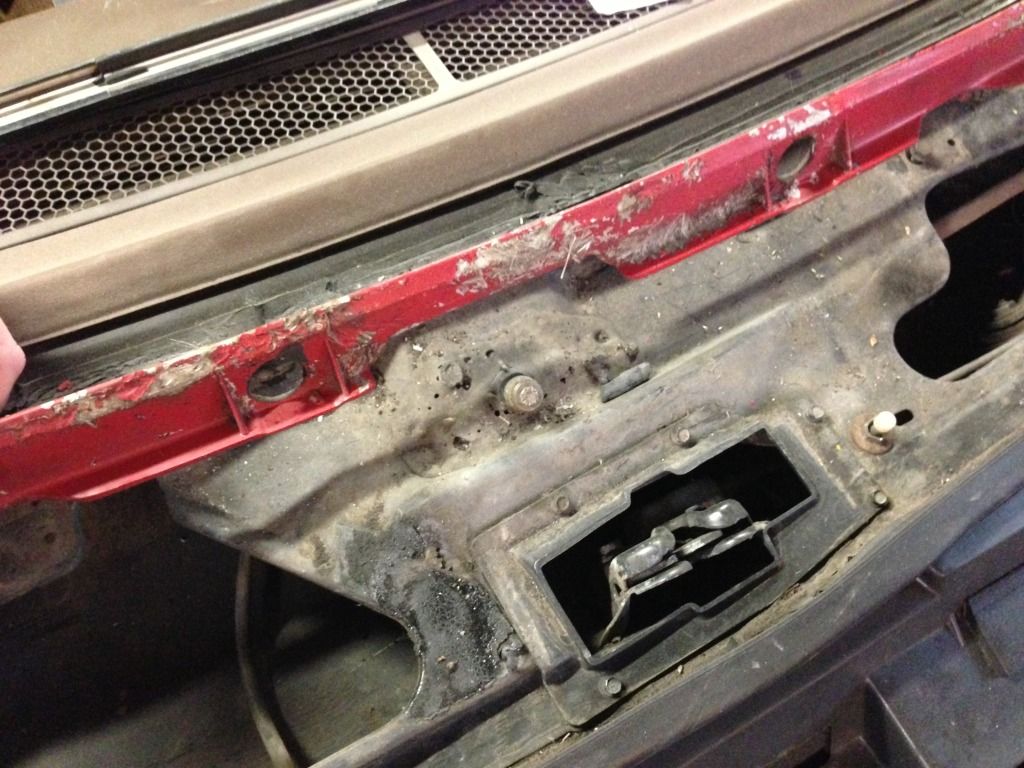
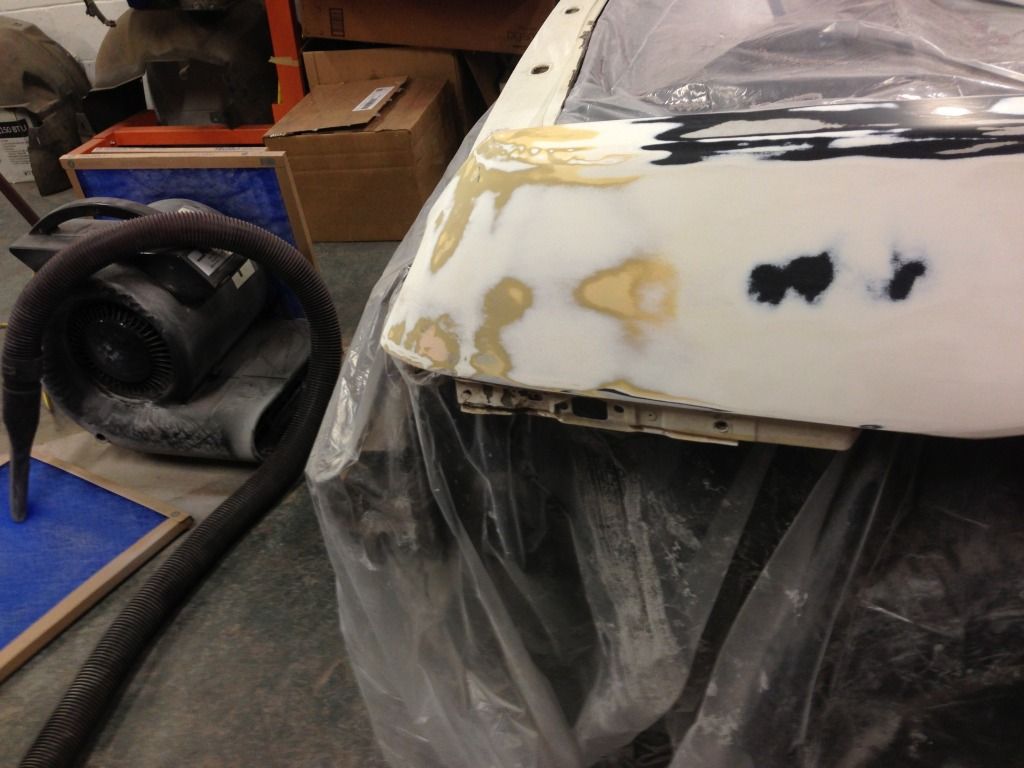
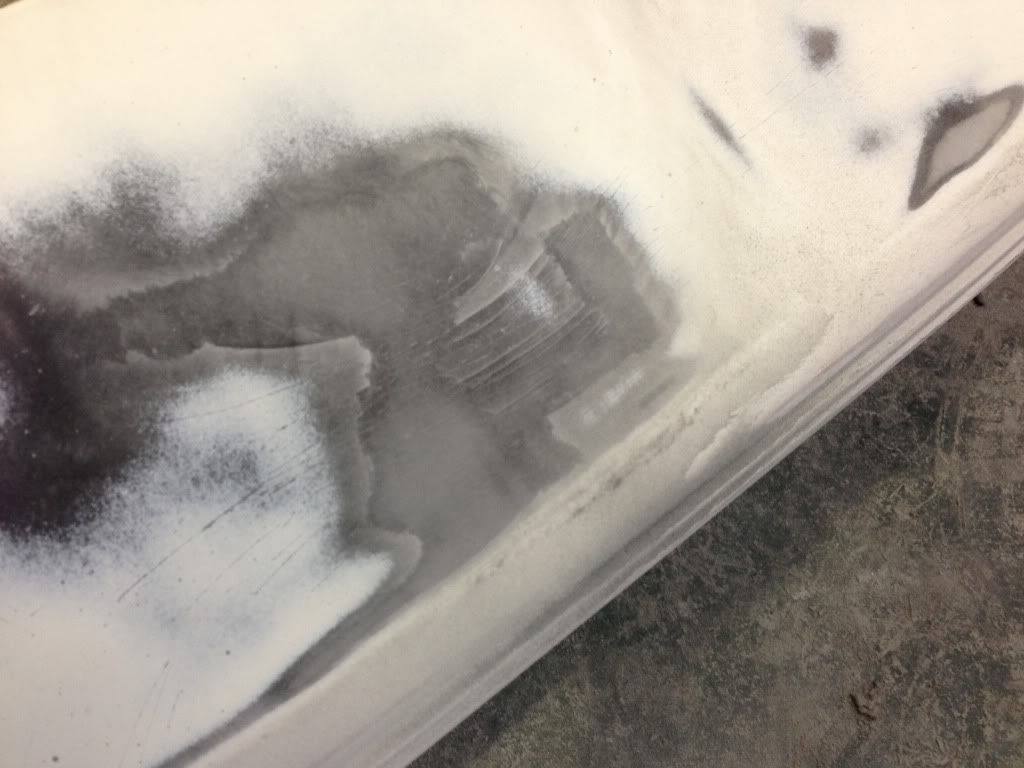
Another surprise. I had a few minutes free after Bible study tonight so I went down and did some sanding, and found what appeared to be body work. I noticed the paint there was a little blistered but never thought too much of it until today.
Hmm let's look closer... Yep, that's body work.
IP: Logged
12:23 AM
Mar 3rd, 2013
KurtAKX Member
Posts: 4008 From: West Bloomfield, MI Registered: Feb 2002
OK, here's an update. Haven't had much time on this due to other engagements.
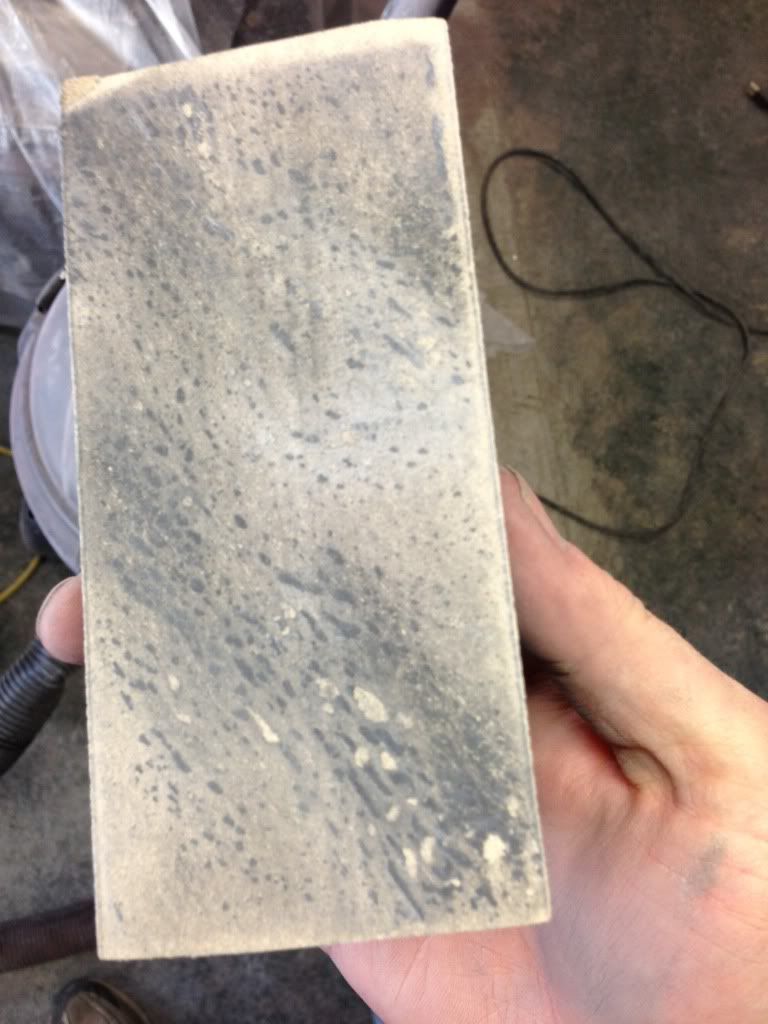
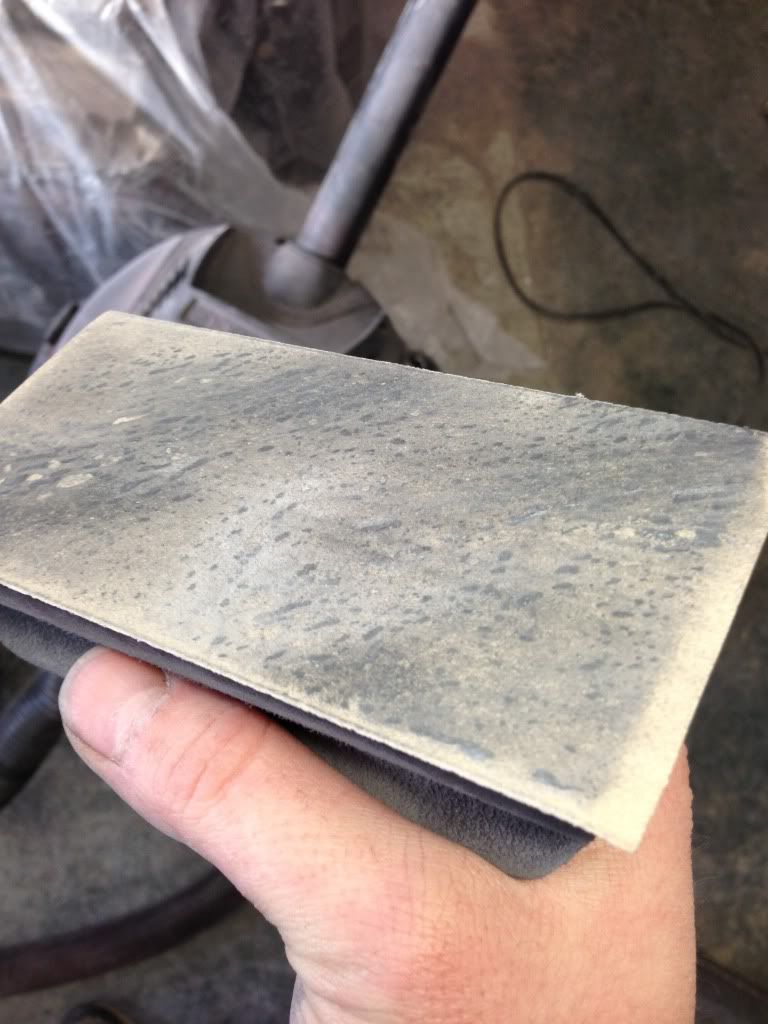
Block sanding by hand, over some areas of the car I'm getting a lot of little "clumps" that seem like they're sticky and don't come off the paper
Any idea how to prevent sandpaper filling up?
My hood, trunk, and roof are pretty well sanded down.
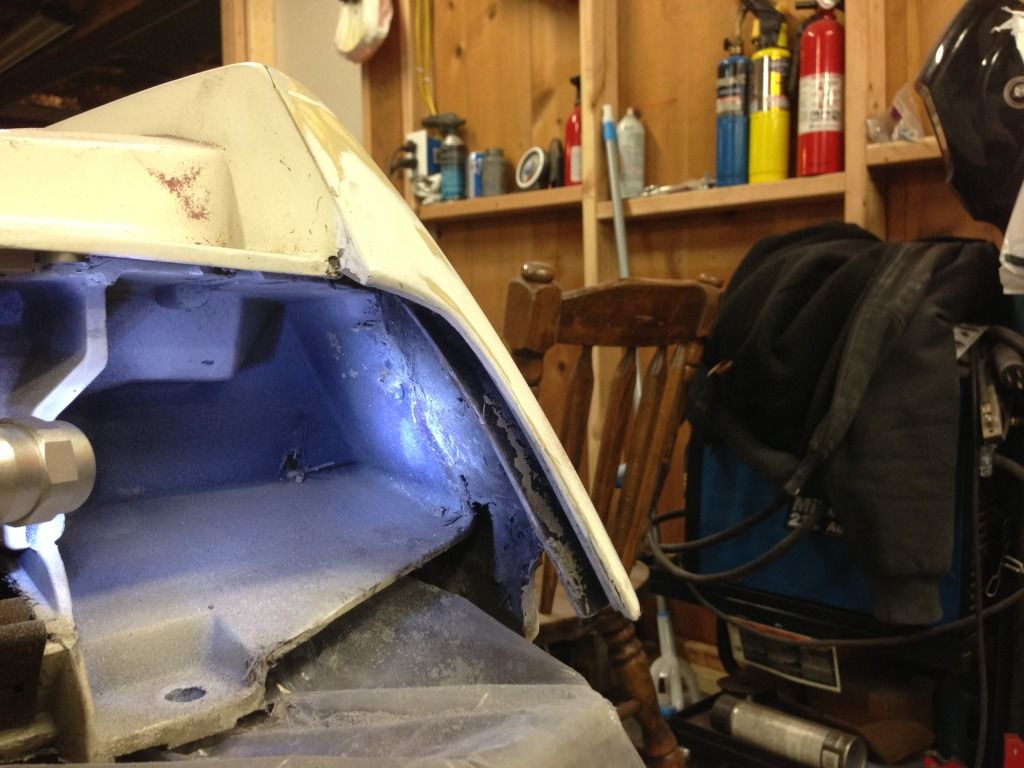
I am having some issues with the urethane parts of the body though.
When I try to sand the door panels, (they're removed from the car) they just flop around. To prevent that, I threw them across a couple sawhorses. Once I started sanding on them, the DA just instantly burned through the pressure points where they were resting on the sawhorses.
How do I sand the urethane panels like the door panels and bumpers uniformly, and without ruining them?
Also, I have some cracking on my front bumper paint. I was told to sand through the paint until the cracking stops. I'm in the primer, and I still see cracks; do I have to keep giong?
IP: Logged
03:44 PM
Mr.Goodwrench Member
Posts: 315 From: Deer Park WA. Registered: Mar 2008
As far as the sand paper goes, are you using automotive sandpaper? (I suggest 3m)
It makes a difference because the grit is aligned differently than wood working sandpaper, which looks like what you have. I think it is called open or closed grit but I may be wrong.
You want to use automotive products, like tape, sand paper, masking paper, tools ect. It really makes a difference.
To keep your paper from clogging, every few strokes beat it against your hand or leg until it is clean. Once it gets real clogged like you show, its too late. Of course a vacuum system would be best. Please tell me you wear a dust mask while sanding.
IP: Logged
05:45 PM
KurtAKX Member
Posts: 4008 From: West Bloomfield, MI Registered: Feb 2002
Originally posted by BlackEmrald: Please tell me you wear a dust mask while sanding.
I have been wearing a common dust mask, but I keep finding that an annoying amount of dust still comes around the edges of it by my nose, despite my best efforts to reshape that little metal strip across the nose.
You may try and find some higher quality masks. I used ones that had a one-way valve to let your breath out and a plastic/foam flap around the nose. They worked great and didn't fog up my glasses
OK, here's an update. Haven't had much time on this due to other engagements.
Block sanding by hand, over some areas of the car I'm getting a lot of little "clumps" that seem like they're sticky and don't come off the paper
Any idea how to prevent sandpaper filling up?
My hood, trunk, and roof are pretty well sanded down.
I am having some issues with the urethane parts of the body though.
When I try to sand the door panels, (they're removed from the car) they just flop around. To prevent that, I threw them across a couple sawhorses. Once I started sanding on them, the DA just instantly burned through the pressure points where they were resting on the sawhorses.
How do I sand the urethane panels like the door panels and bumpers uniformly, and without ruining them?
Also, I have some cracking on my front bumper paint. I was told to sand through the paint until the cracking stops. I'm in the primer, and I still see cracks; do I have to keep giong?
Water sand. Just use wet paper with a smaller grit - 180 dry paper grit is roughly the same as 280 wet. You can go to 320 wet & it will cut just fine. Use a thick blanket under the door panels, or move them around so that you're not sanding directly over the sawhorses. Sand off all the cracked paint on everything. Use PPG epoxy (DP) primer on everything. ~ Paul aka "Tha Driver"
When I try to sand the door panels, (they're removed from the car) they just flop around. To prevent that, I threw them across a couple sawhorses. Once I started sanding on them, the DA just instantly burned through the pressure points where they were resting on the sawhorses.
I've seen people staple a blanket or piece of carpet to the top of their saw horses when working on those kind of panels before. Never though about it until now. I'll have some carpet you can have later this week.
[This message has been edited by Jefrysuko (edited 03-03-2013).]
IP: Logged
09:27 PM
ericjon262 Member
Posts: 3141 From: everywhere. Registered: Jan 2010