Pennock's Fiero Forum Technical Discussion & Questions - Archive
Rewiring thread. Time to save the Indy from previous owner nightmare. Advise welcomed (Page 1)
T H I S I S A N A R C H I V E D T O P I C
Rewiring thread. Time to save the Indy from previous owner nightmare. Advise welcomed
So I bought my Indy years ago... Though out my ownership I have had many challenges. The car was left in a field to rot when I rescued it. We performed the basic tune ups. Then came the entire hydraulic clutch system. Then a stock brake system rebuild. New clutch, water pump, shocks, struts, coil, starter, exhaust system and sensors... etc....
Well I though I had the worst of it behind me... I had an intermittent start issue and tried multiple fixes: new grounds, another new starter, traced and fixed the neutral safety, and even the ignition switch was replaced. Well I had made it happen less and less... but still every 20th start or so, the car failed me. Then the alternator started reading extremely low on the gauge. The car would try and die at night if anything other then the lights were on (no heat or radio)... something was way odd. Then the last time I drove it the gauge spiked extremely high. My spouse was behind me in another car and swore there was the smell of an electrical fire... So I parked it and decided since I was doing a stereo upgrade anyway... it was time to get a 140amp alternator.
Then the economy tanked. I lost my job and the Indy sat and waited patiently. So two years later, I'm finally able to finish what I started...
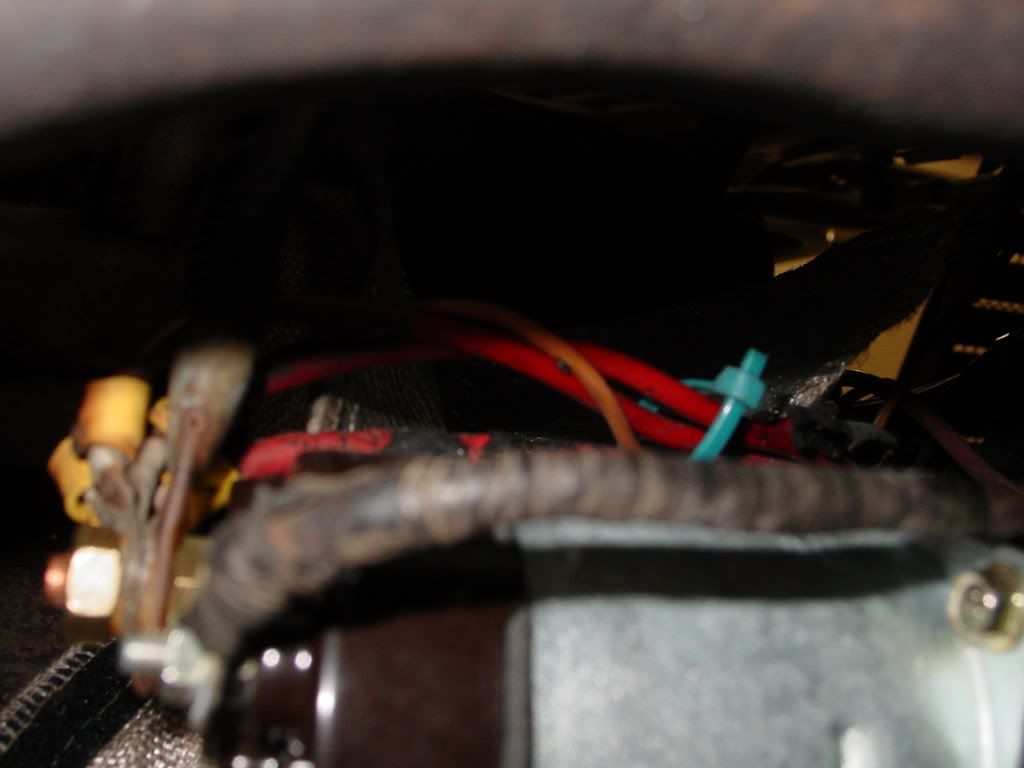
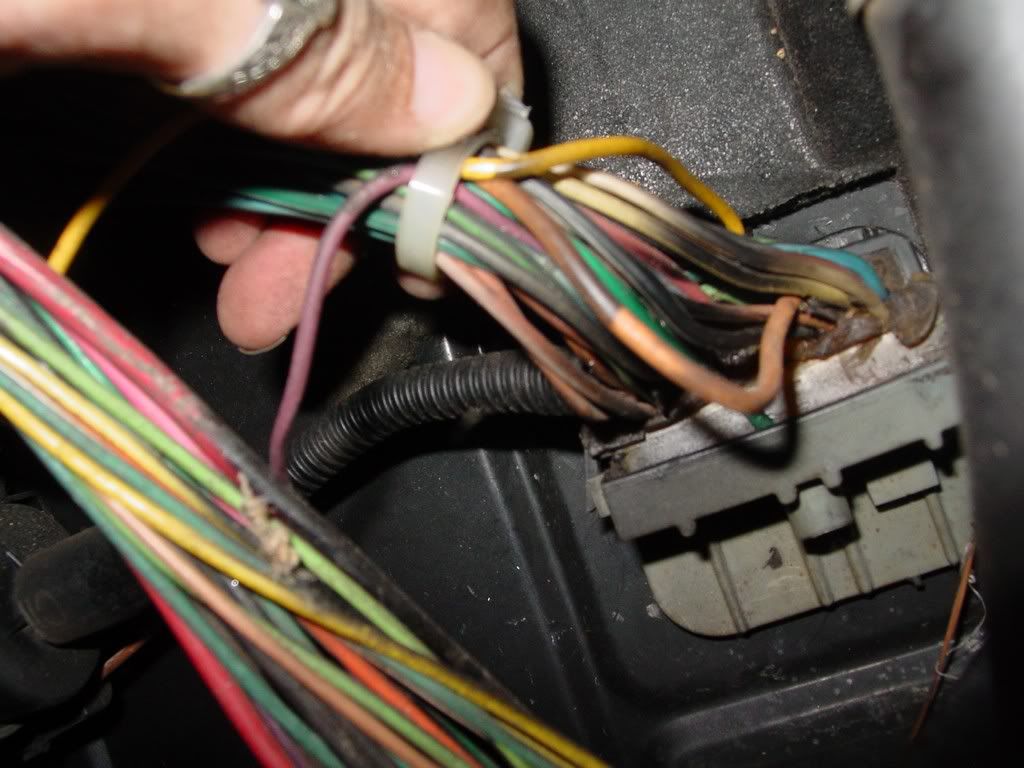
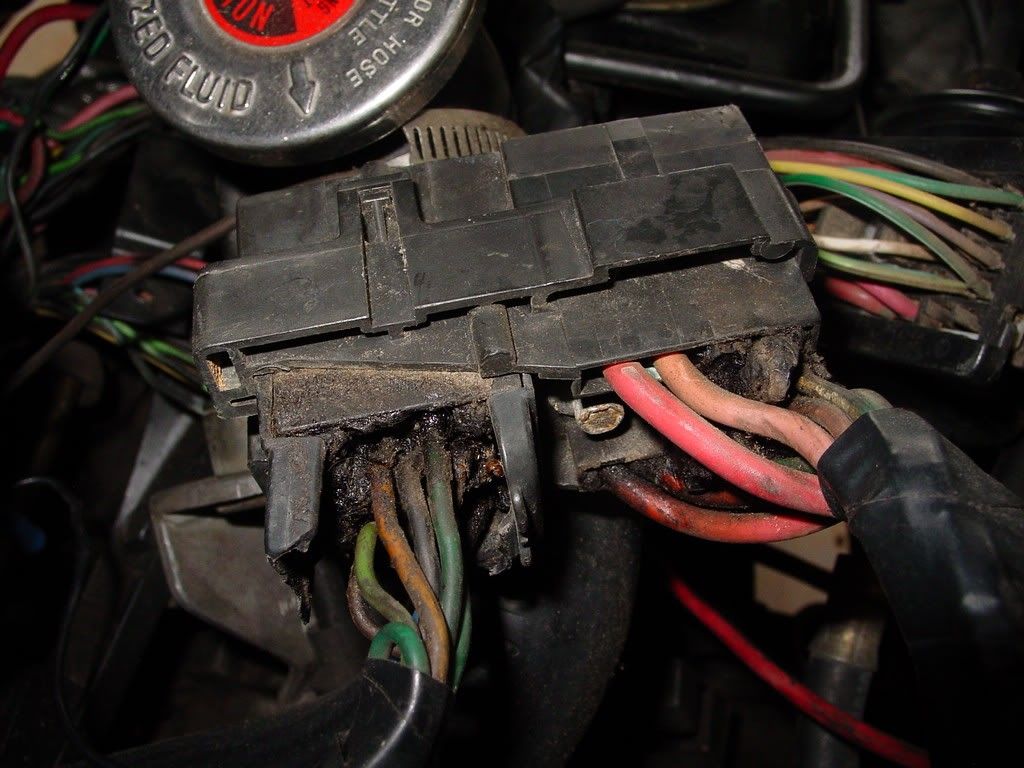
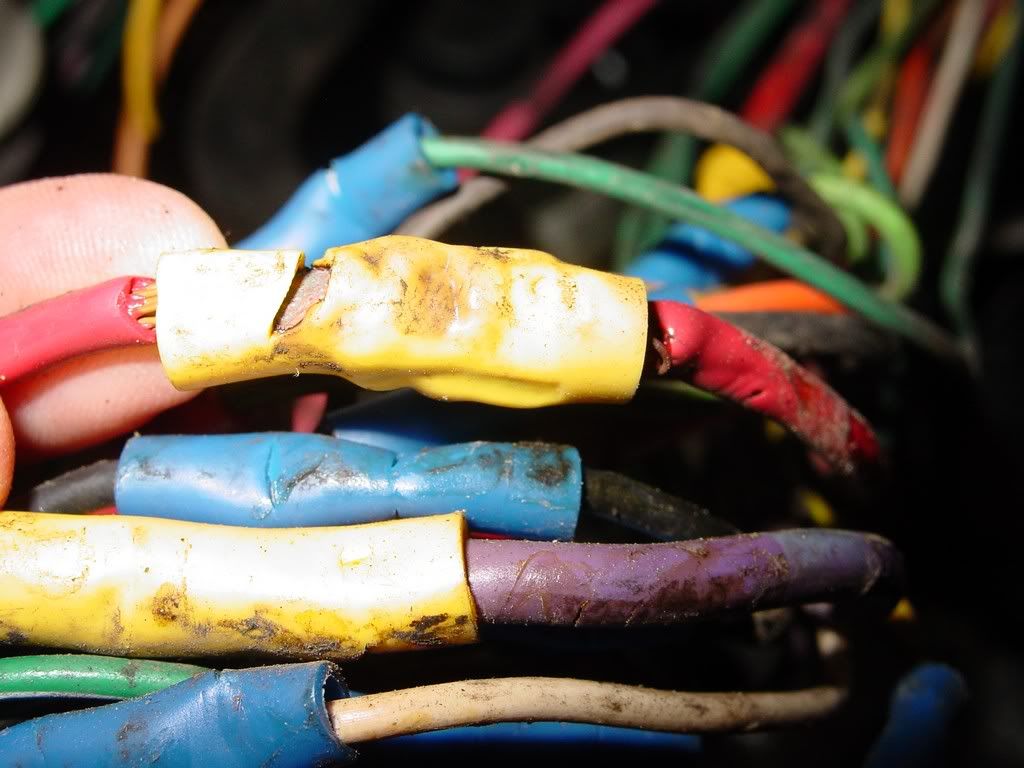
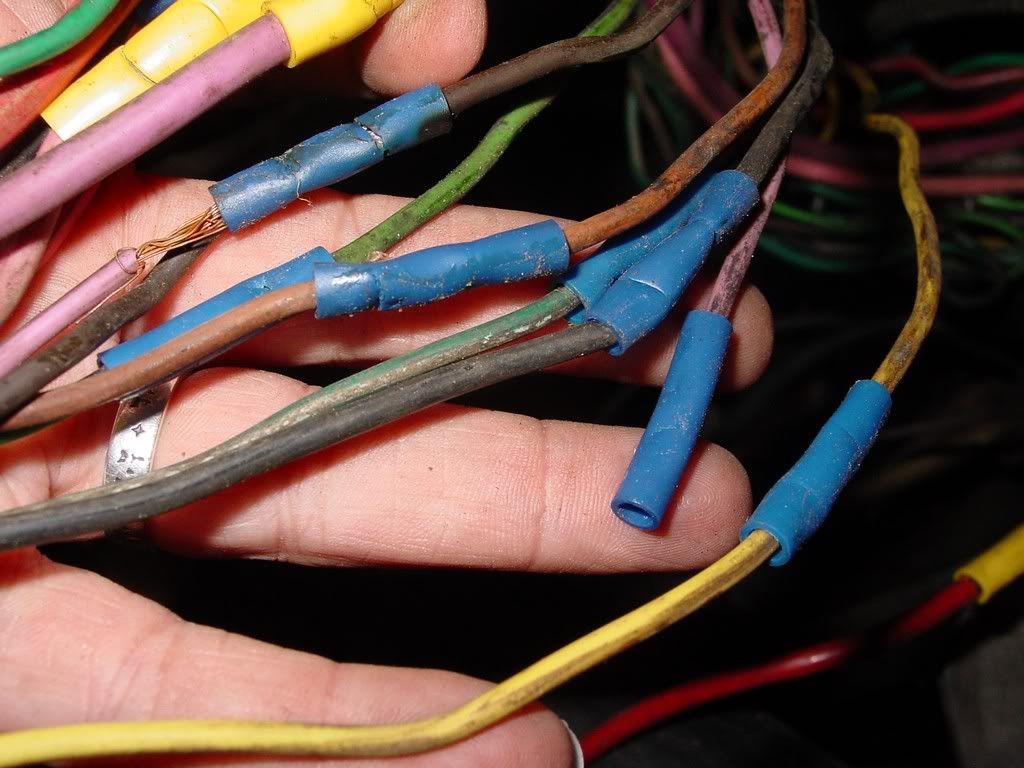
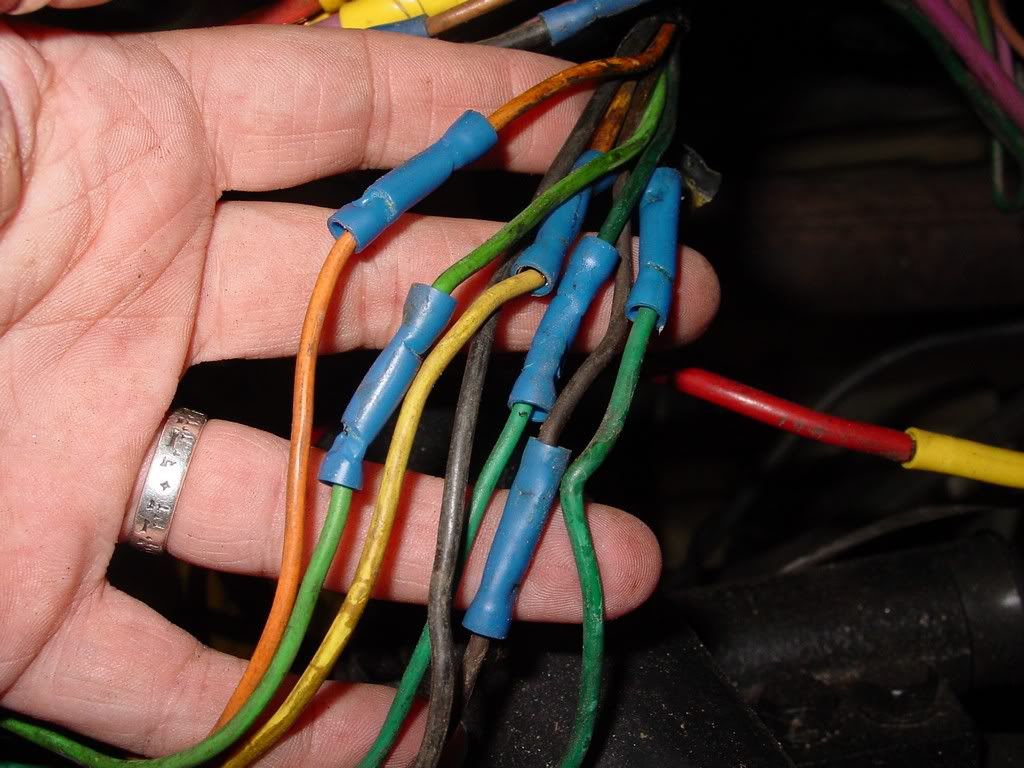
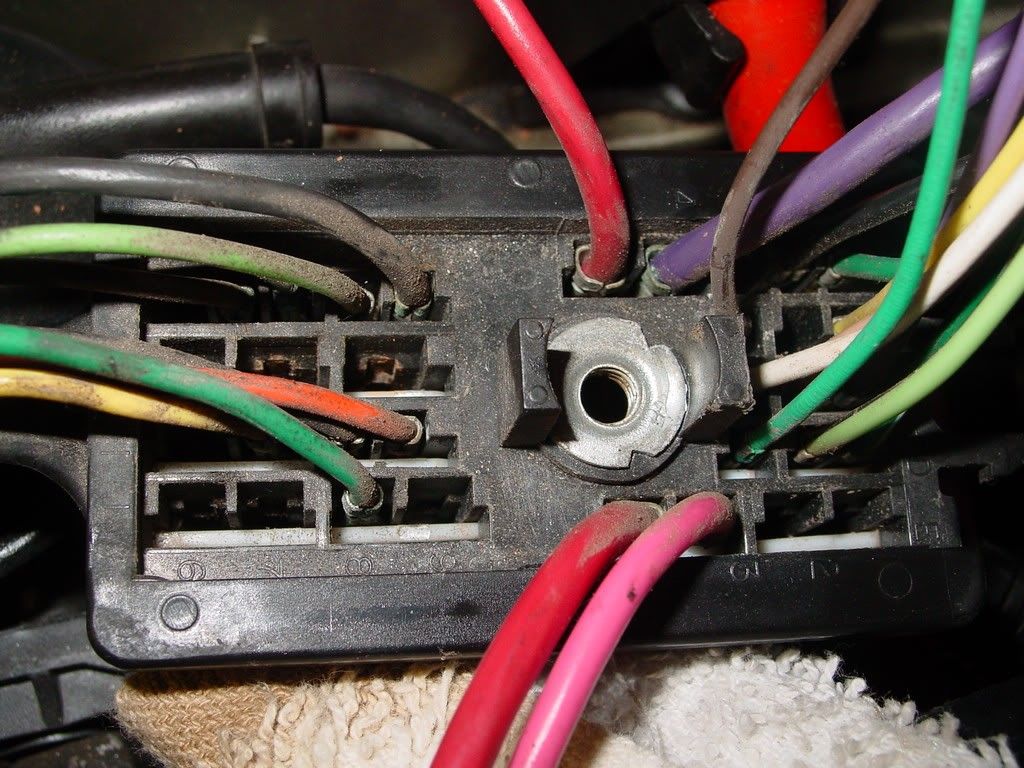
I knew the previous owner had done some sorry rewiring, but every step seems to uncover more and more. The deeper I dig the more I uncover...
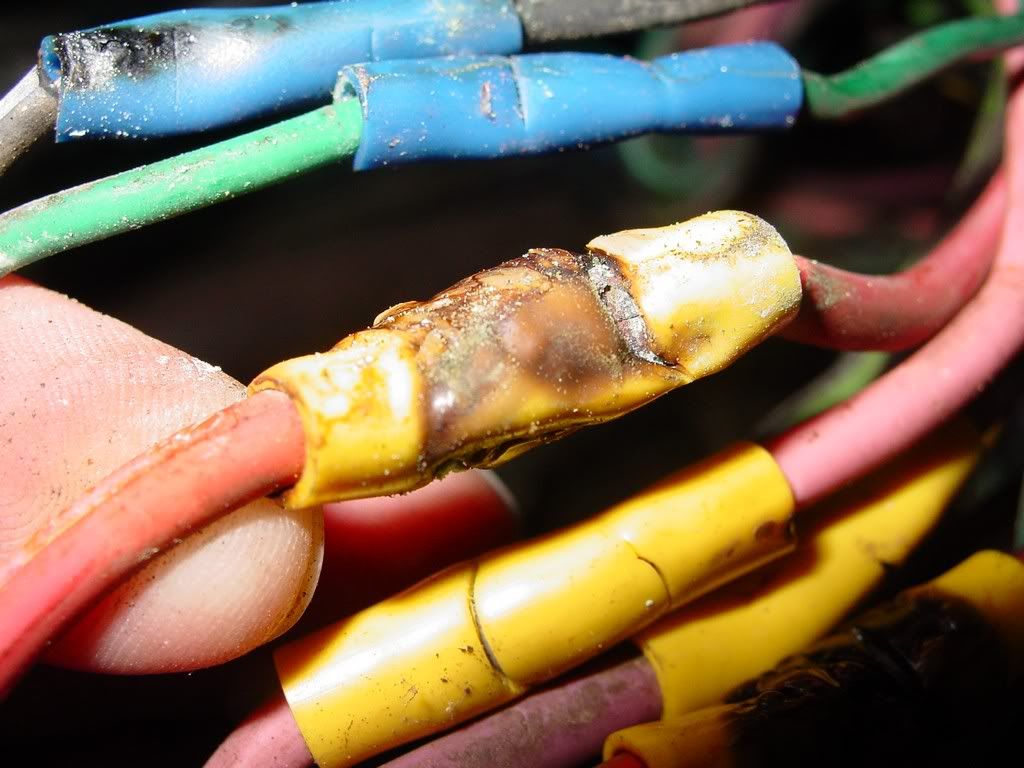
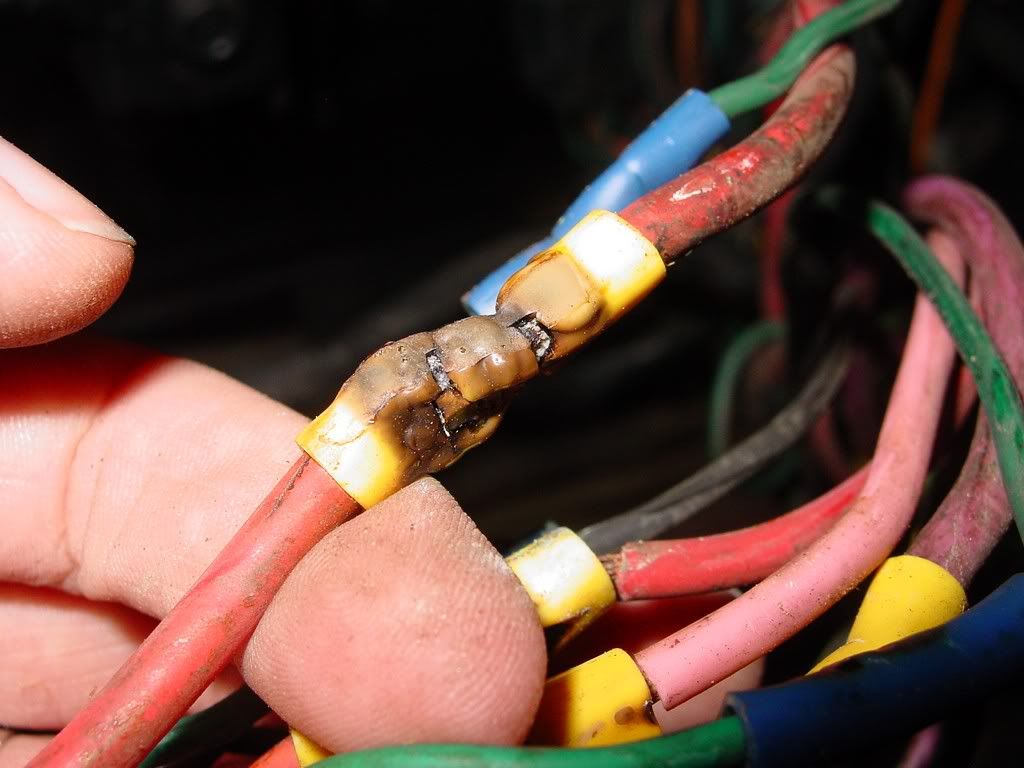
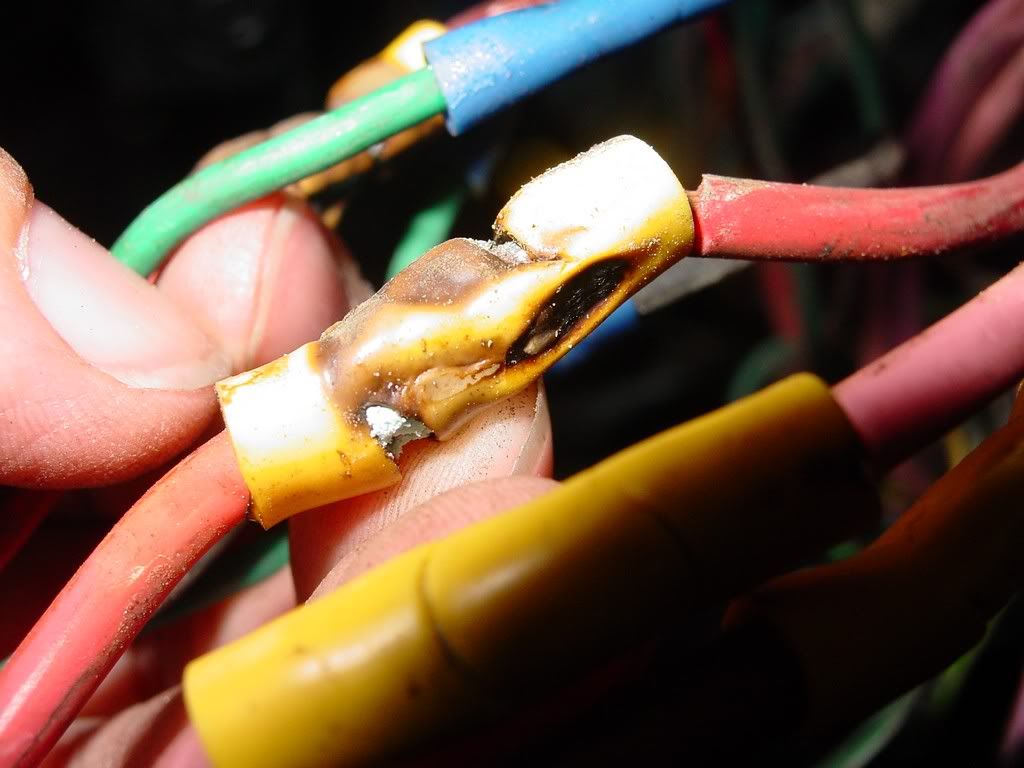
Pictures of what I have found are below, but lets just say, I can't believe the car did not burn up!
BTW: The Orge has been helping me so much, his cave is an EXCELLENT resource! Please if you are doing any rewiring... Please help yourself out and read. It made things so much clearer.
[This message has been edited by redraif (edited 08-23-2011).]
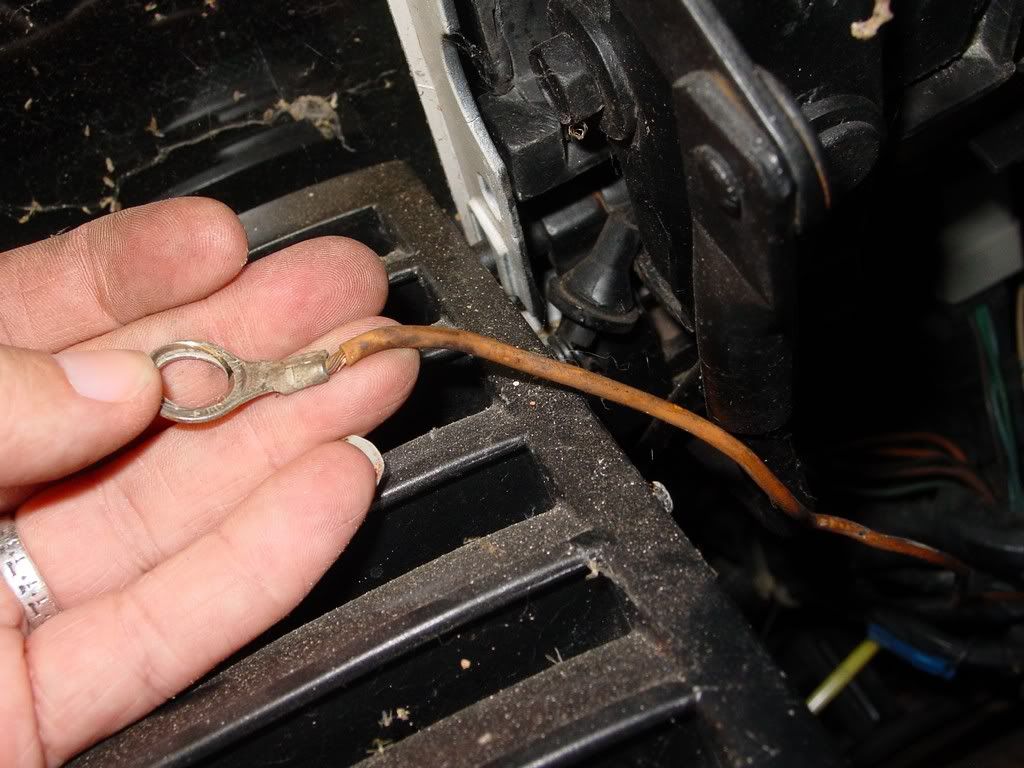
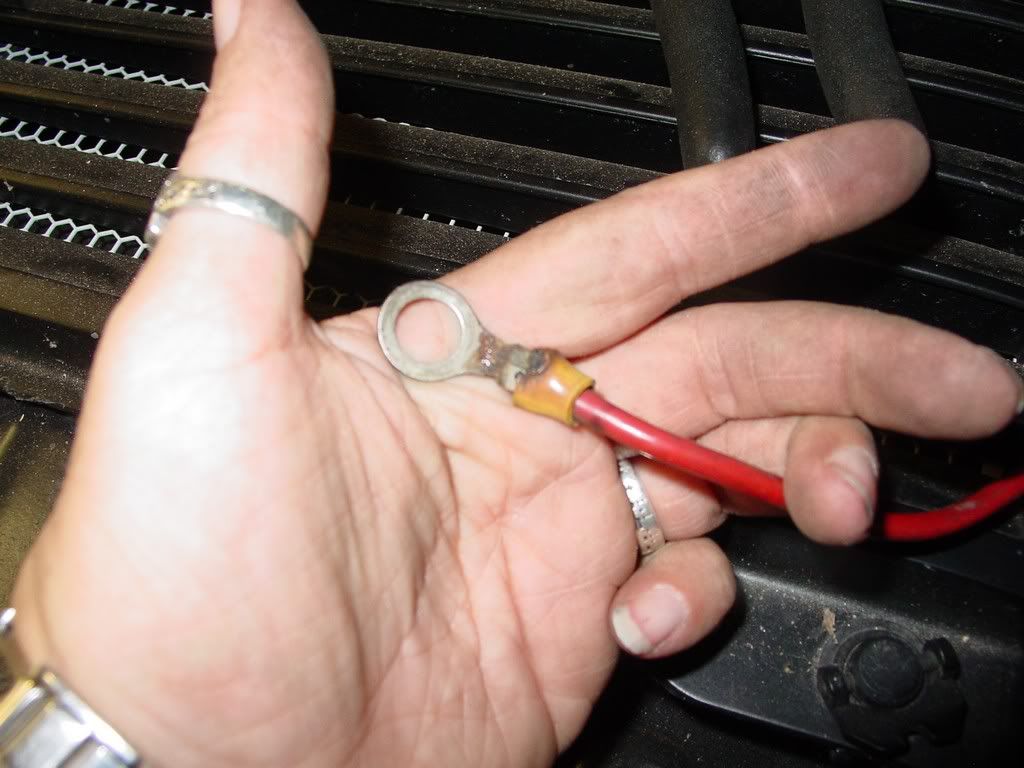
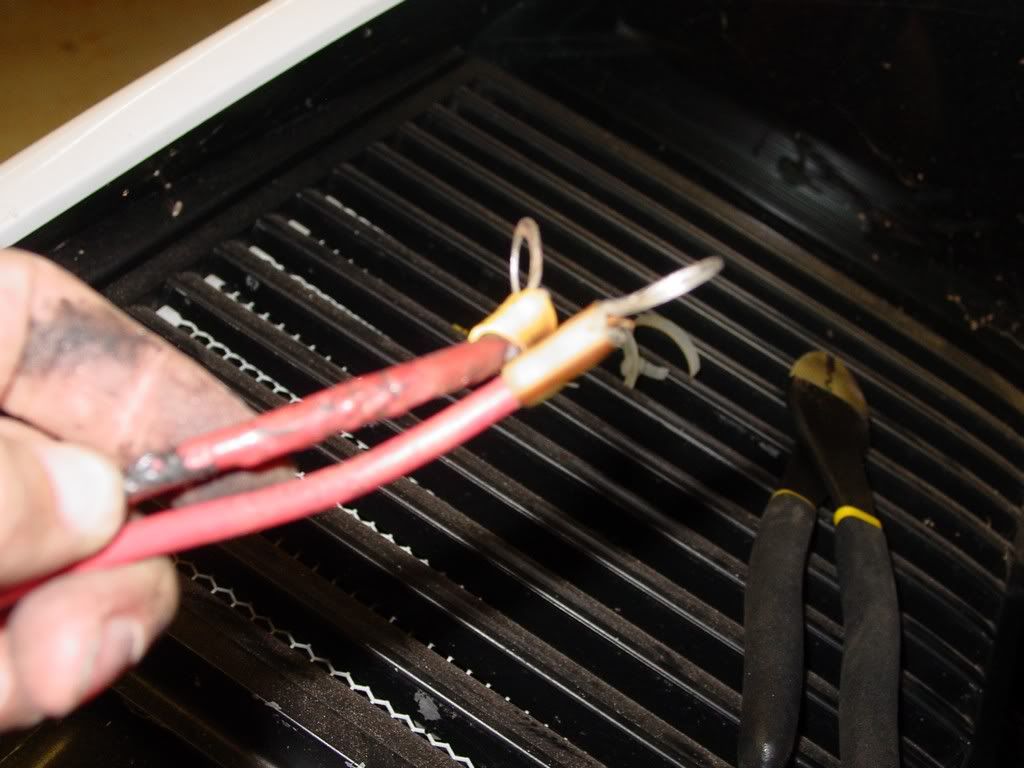
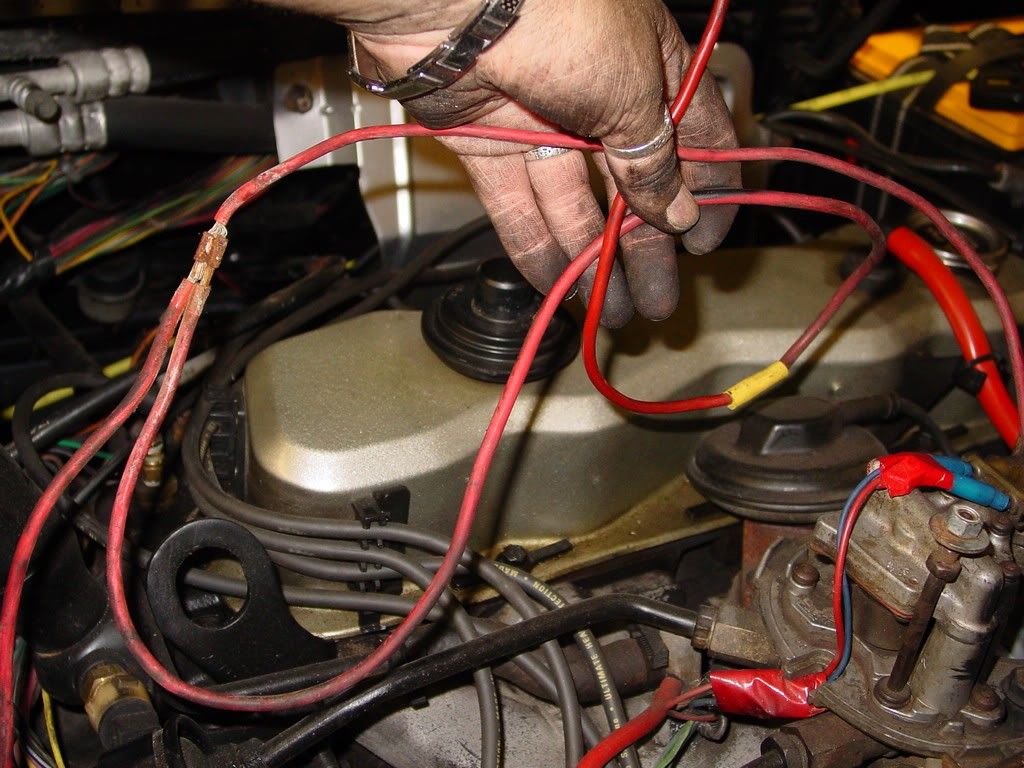
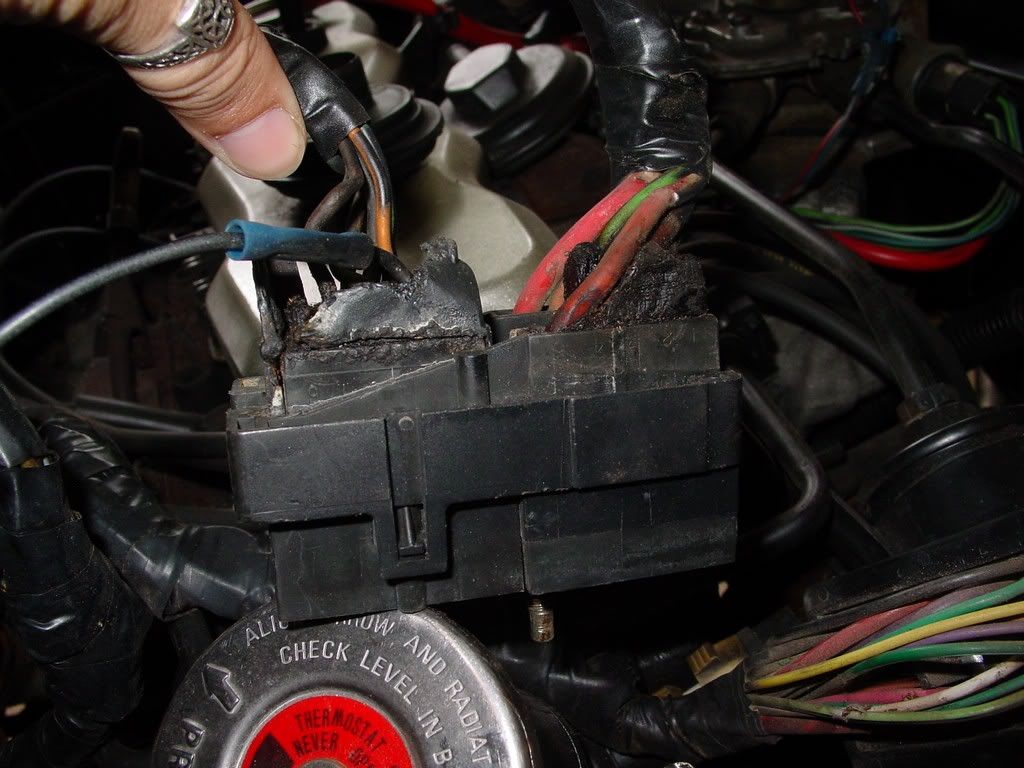
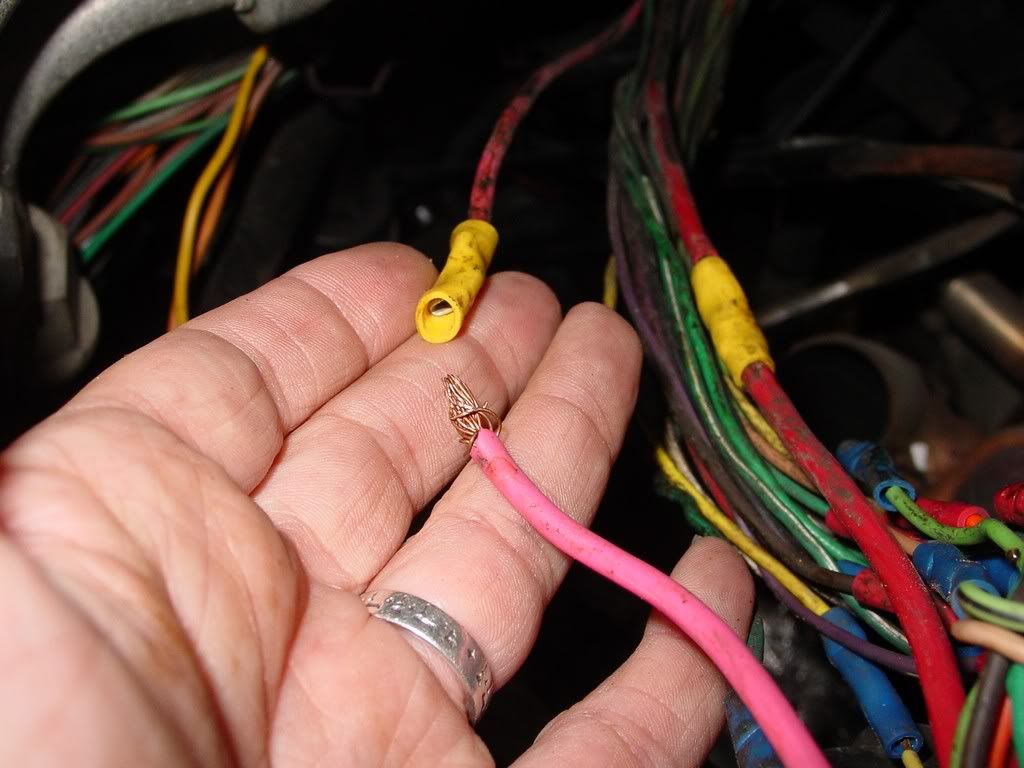
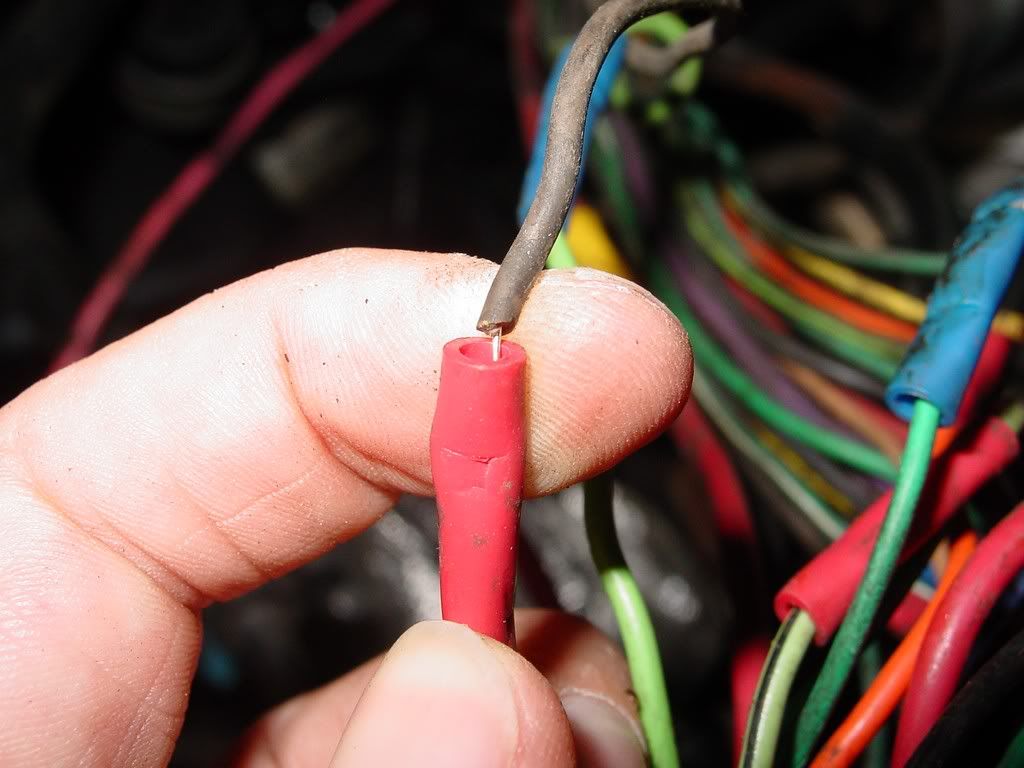
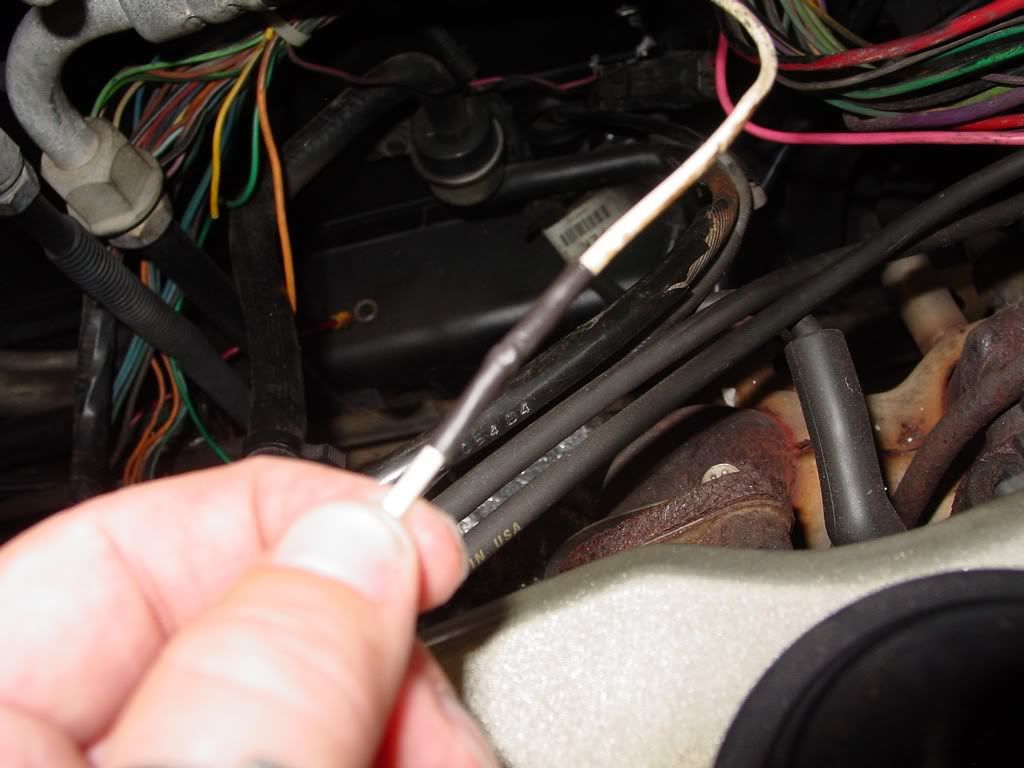
The other red wire traces to the alternator output bolt on the alt... here are both ends.
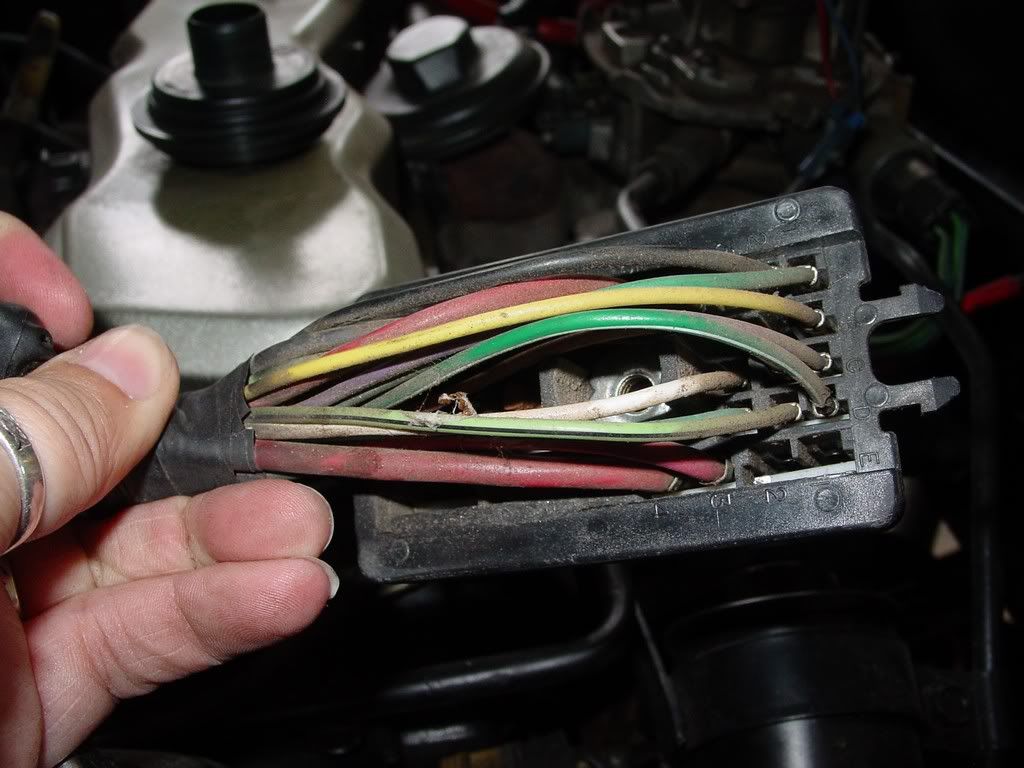
Now the last red wire... the one I could not figure out before, but it goes to the alternator's plug in line...
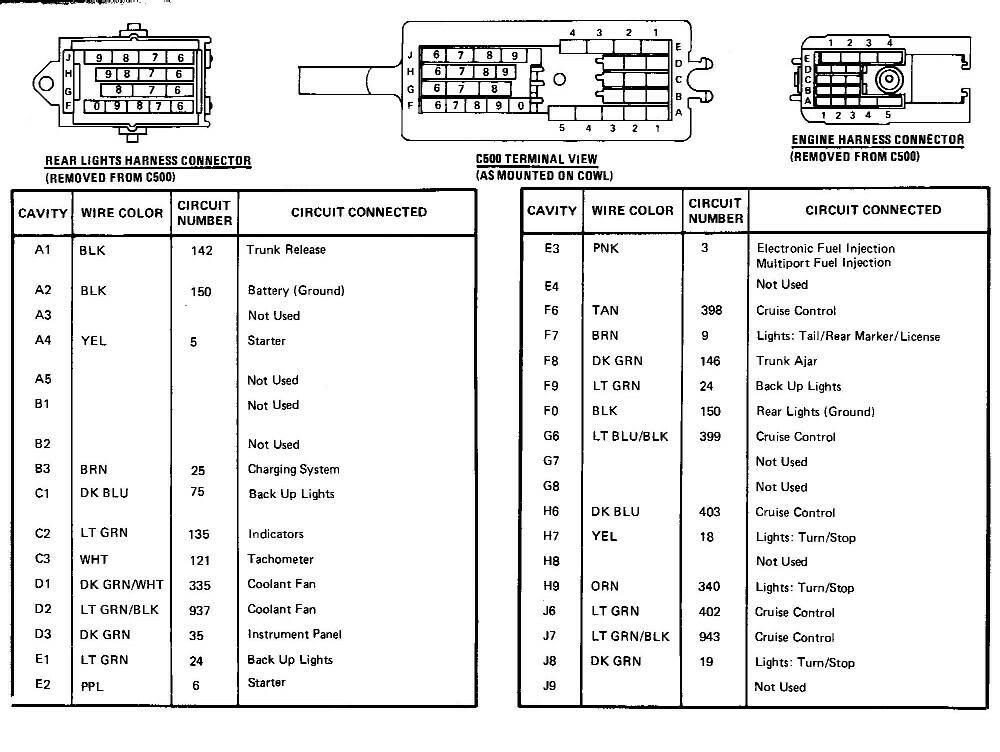
it has the spliced line that leads to the C500... Interior curcuit
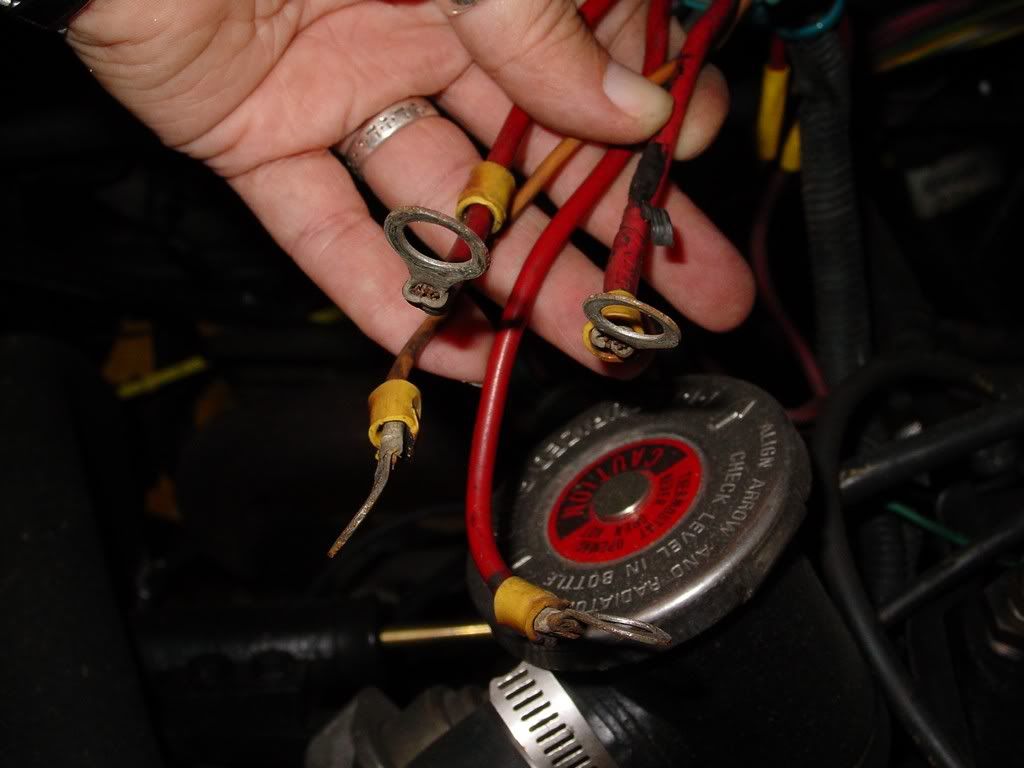
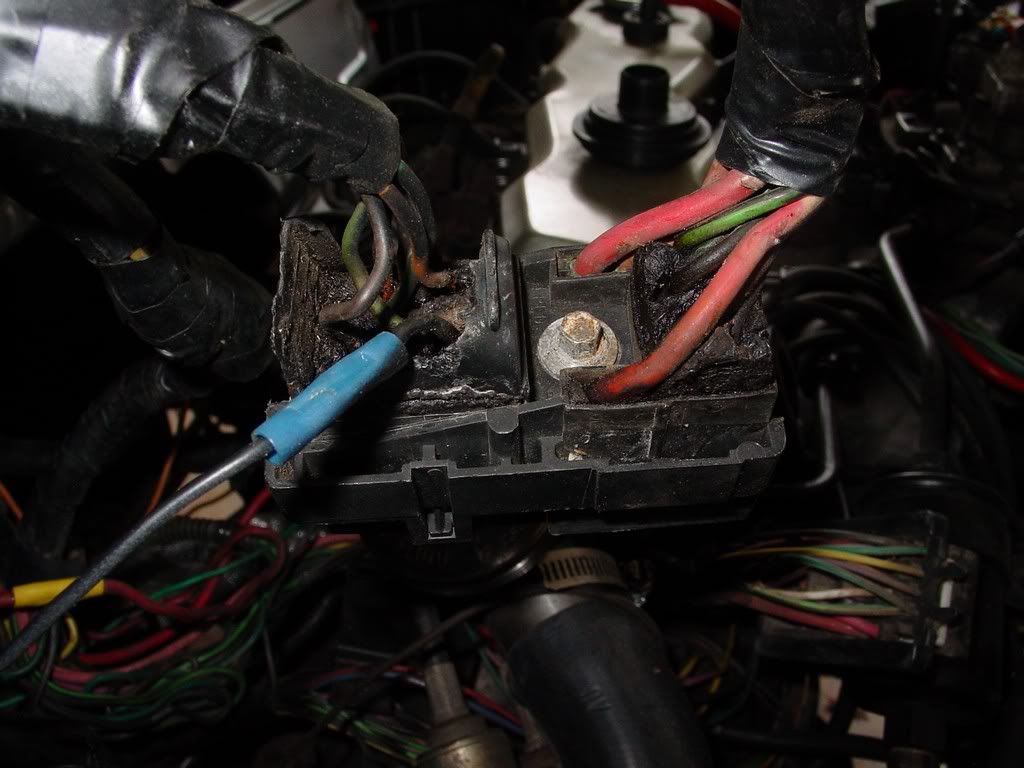
Here are all three connections from the alternator
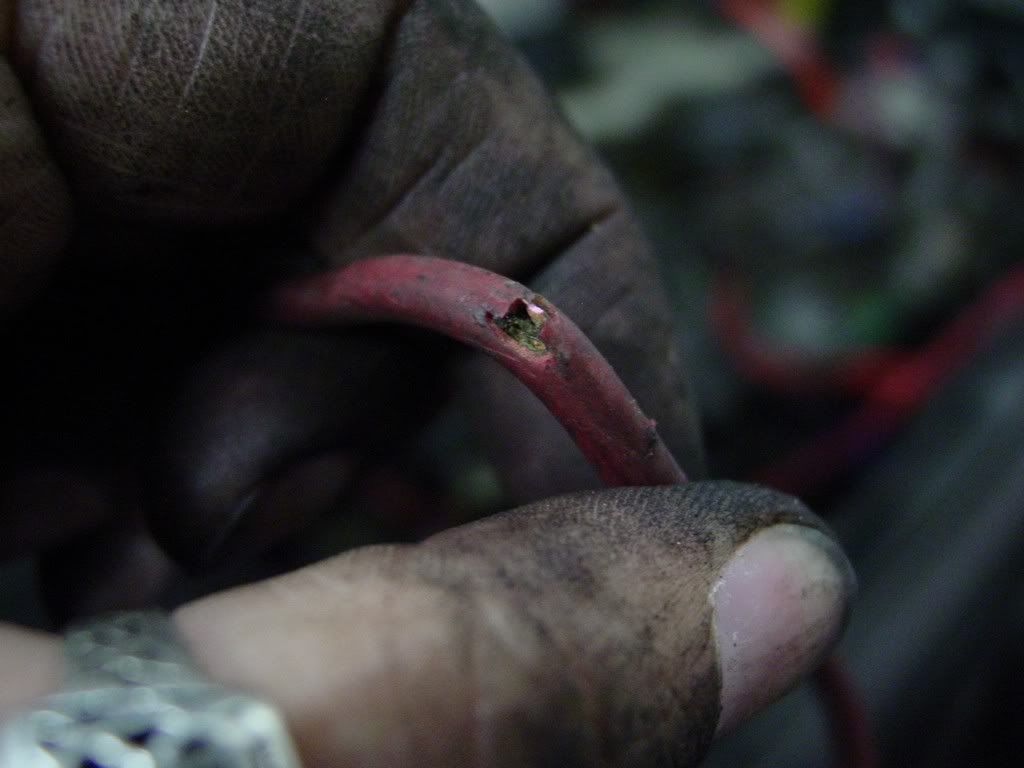
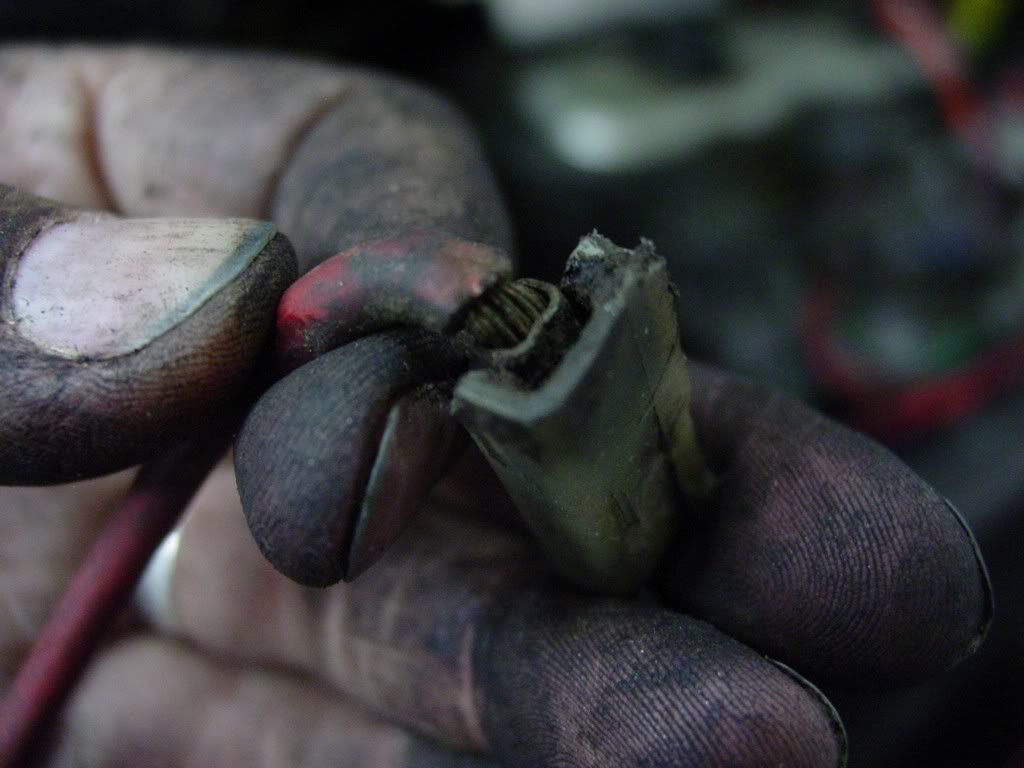
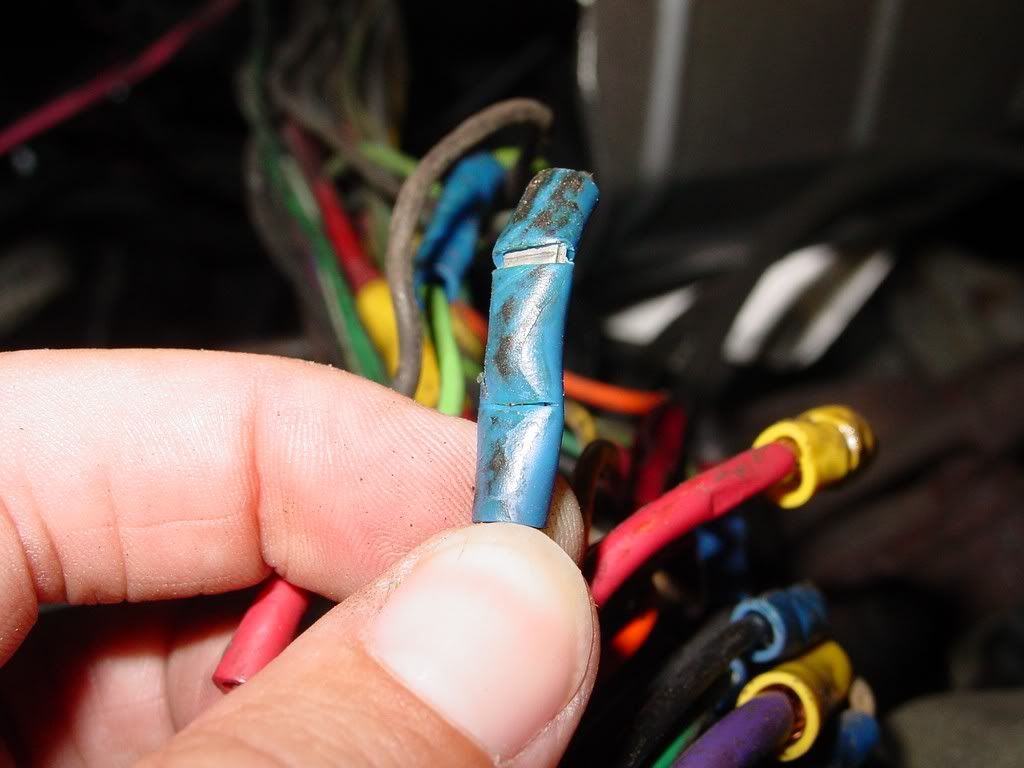
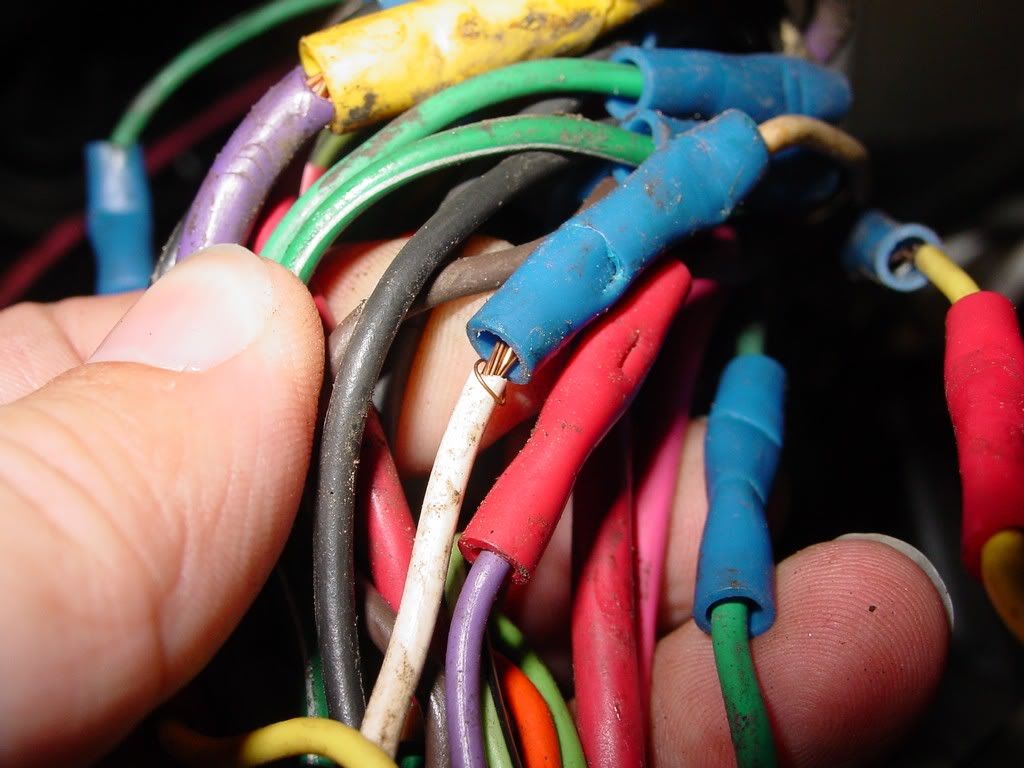
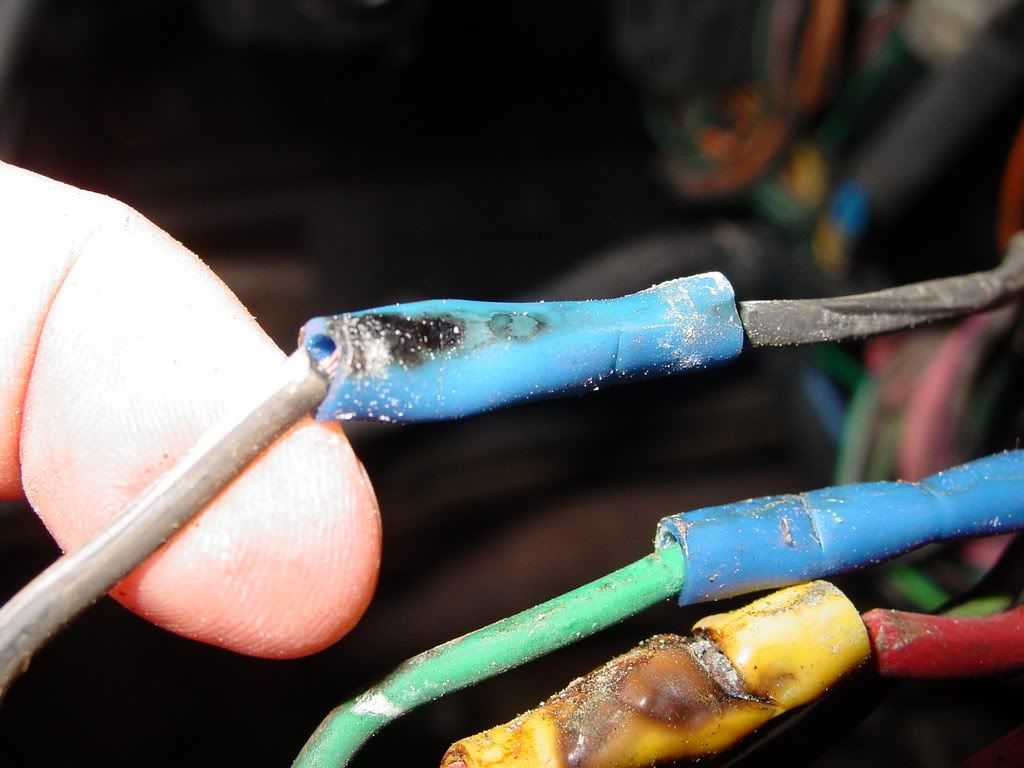
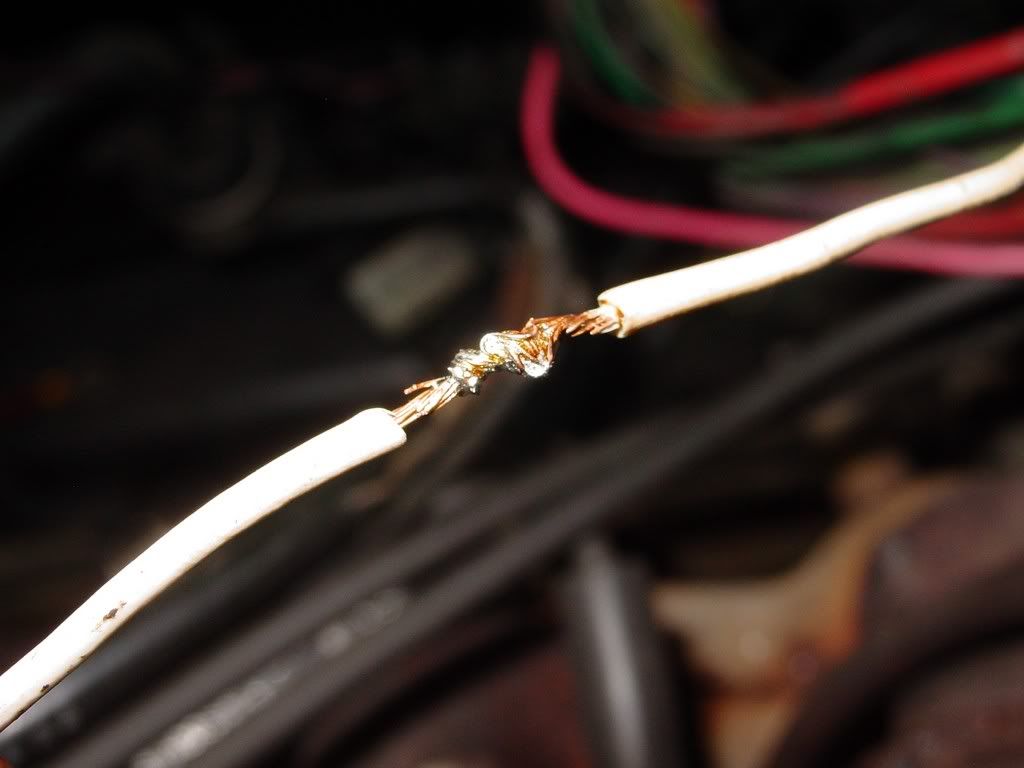
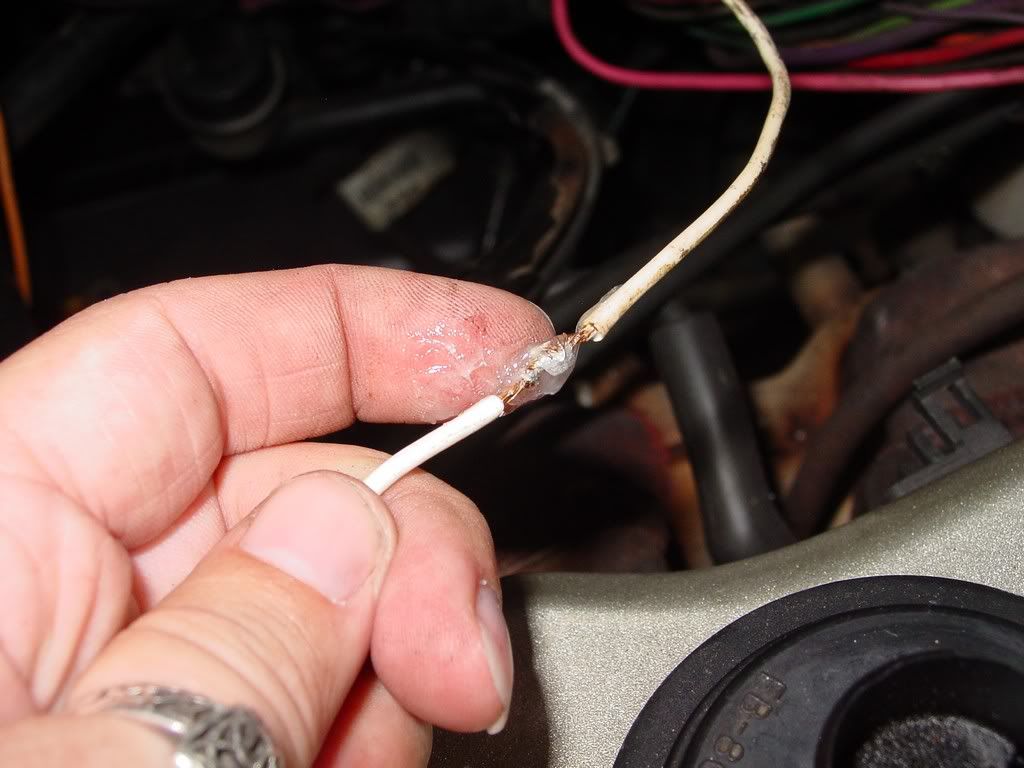
Now the close ups... on the spliced line on the alt side
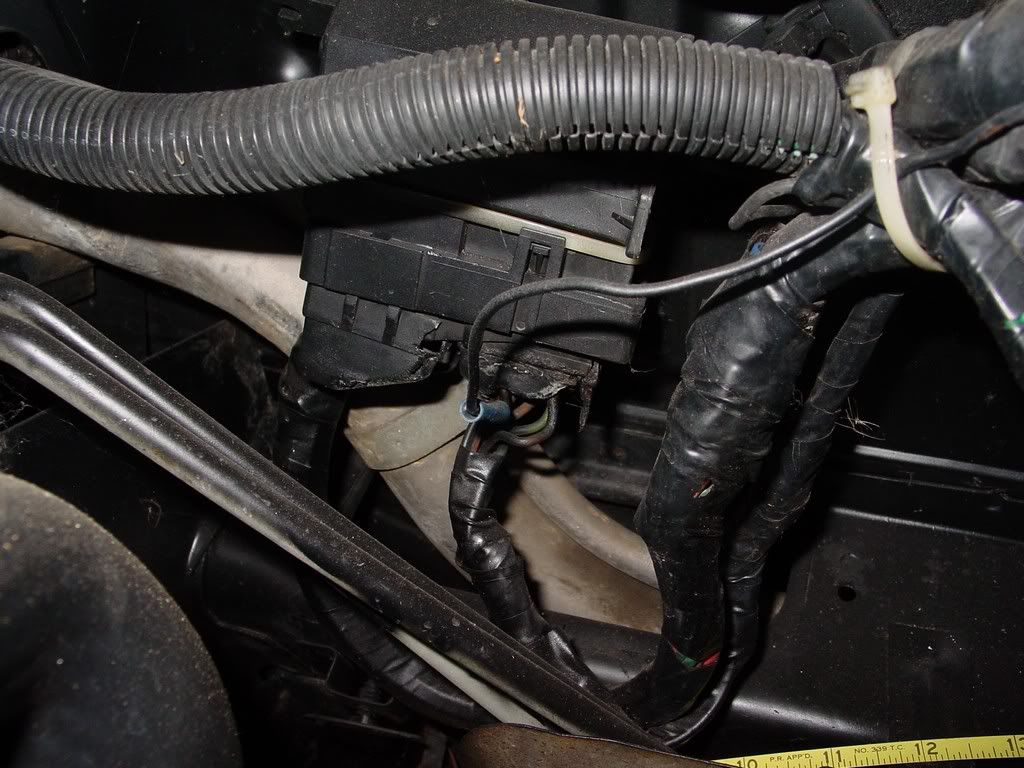
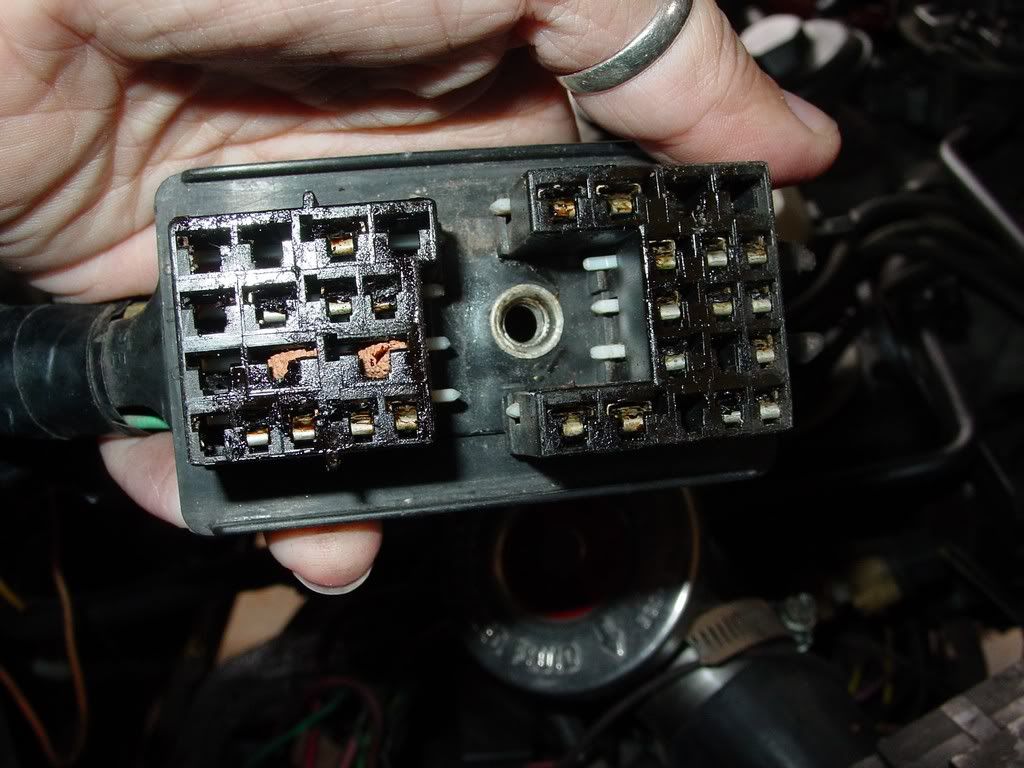
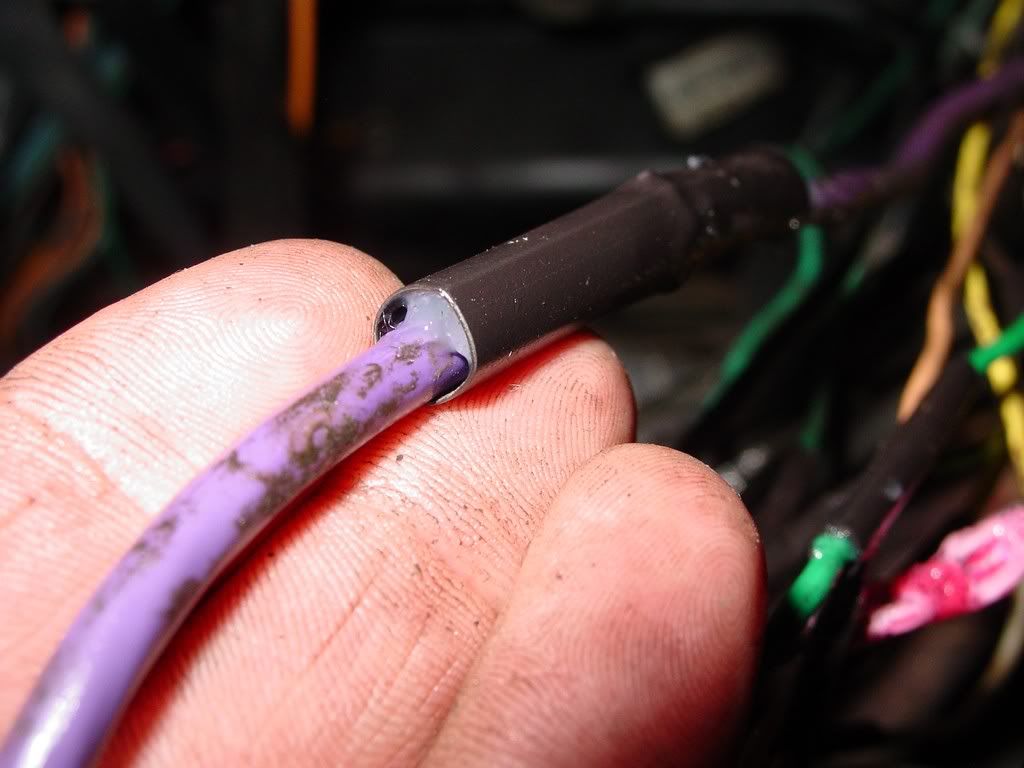
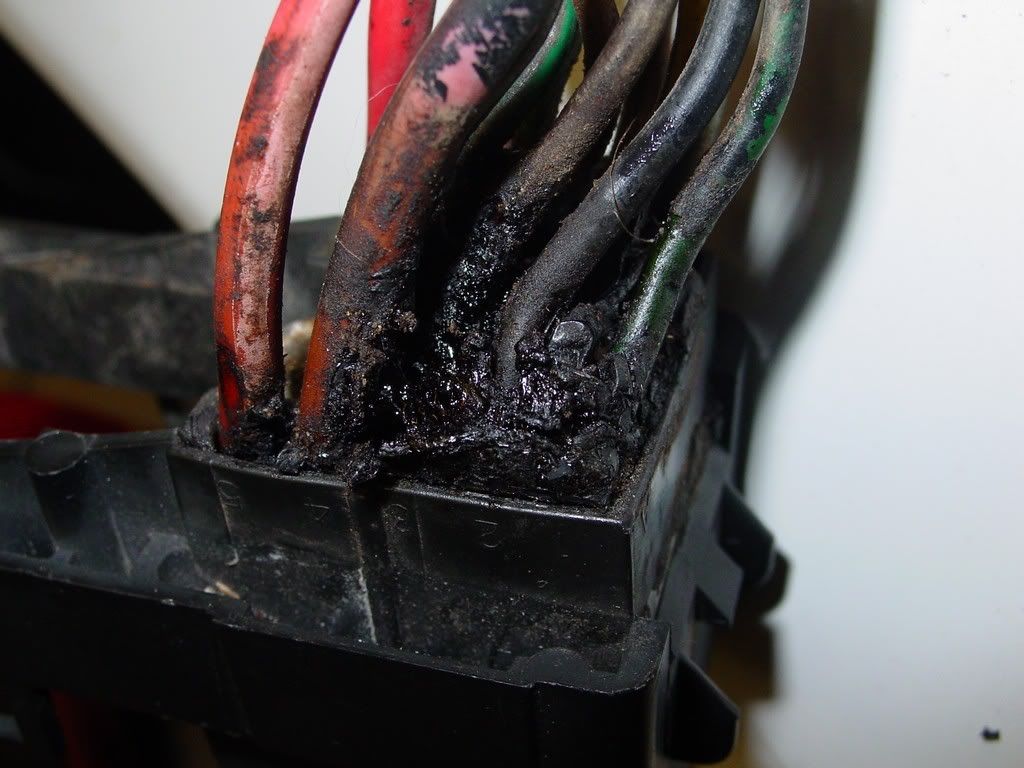
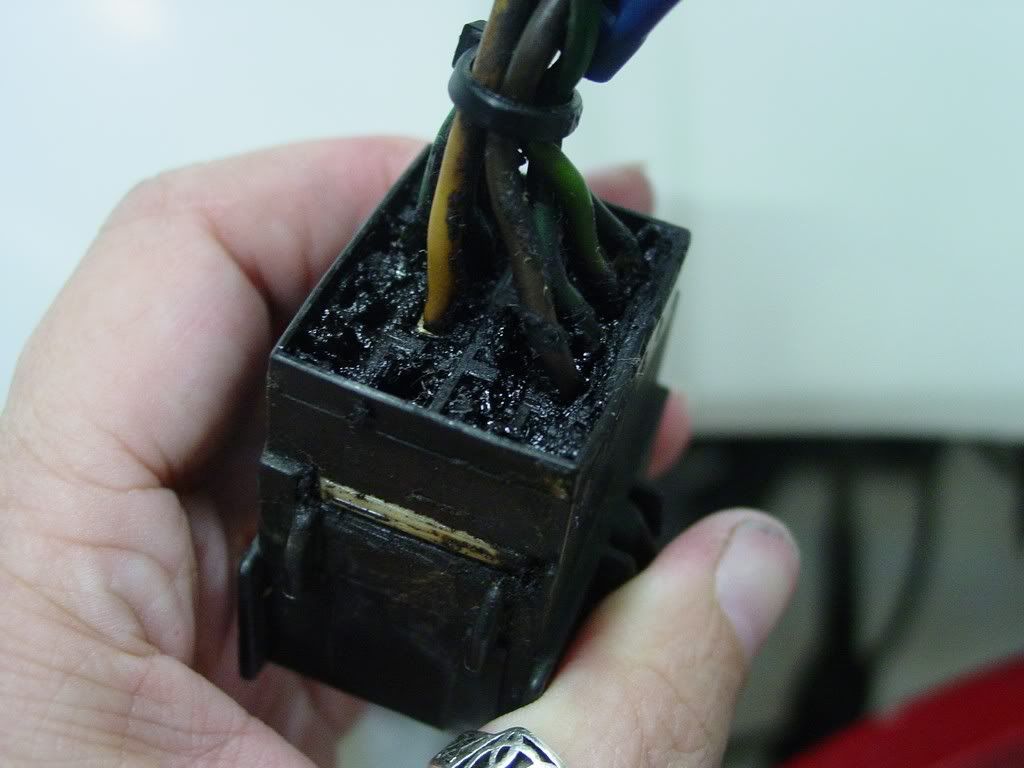
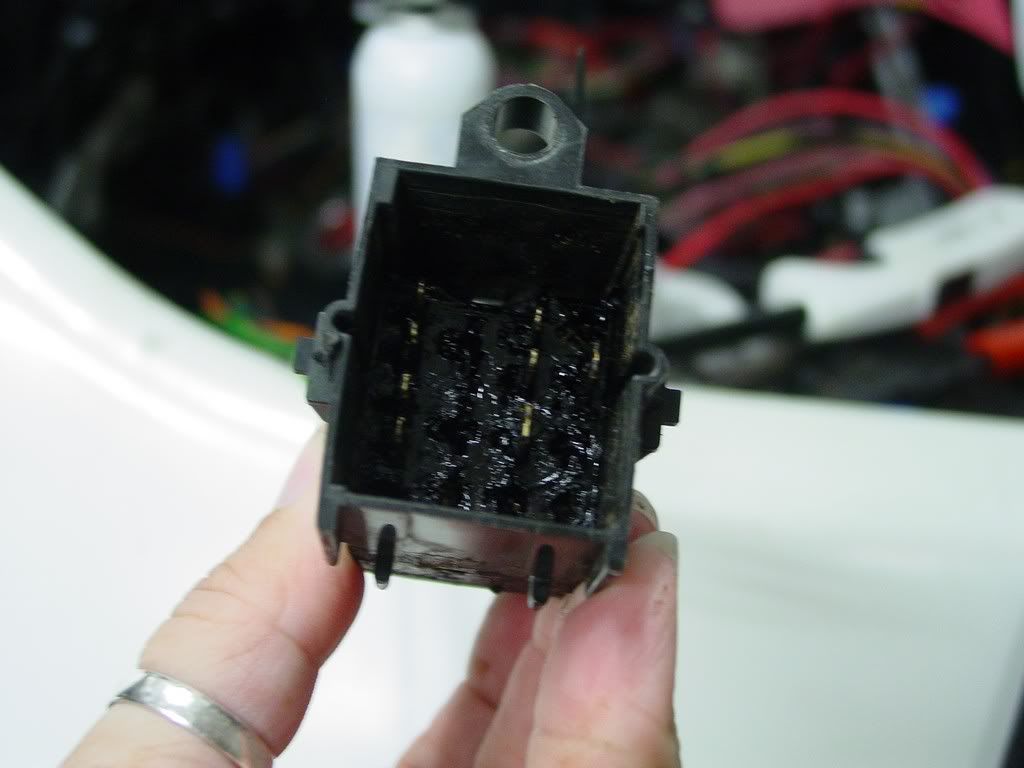
Now the actual alt plug in weather pack... ugh!
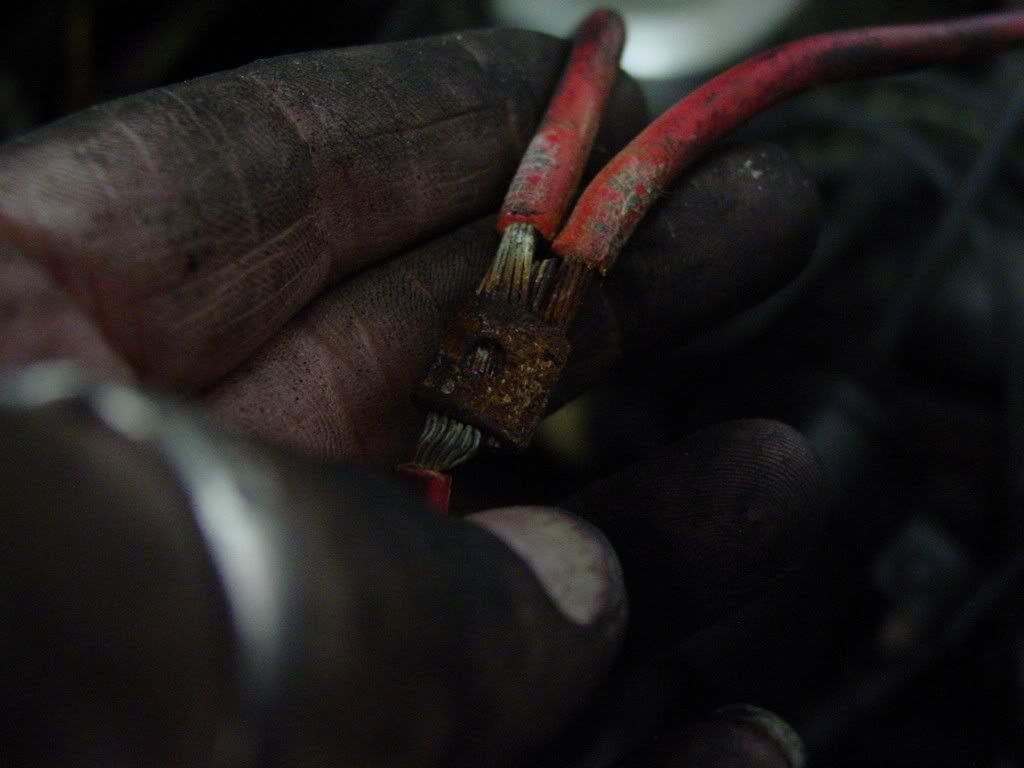
The splice
They all look like they have water/corrosion damage!
What I did not find while searching wires... the line that runs to the alternator output is supposed to have the injector wire spliced into it with a fusible link (according to an 84 wiring diagram). Mine does not. The injector wires both run to the ECM plug in at the firewall. no link... WTF? This whole group of wires seem untouched (all coming from the ECM straight to the engine) Well that is one less thing to mess with!
[This message has been edited by redraif (edited 08-23-2011).]
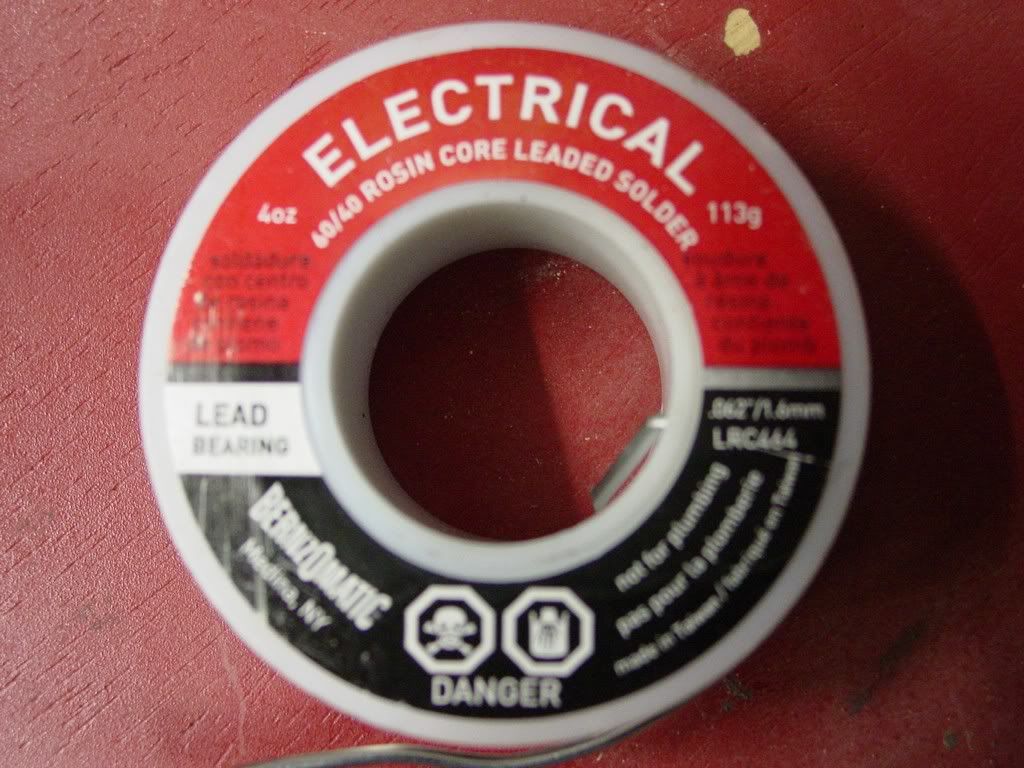
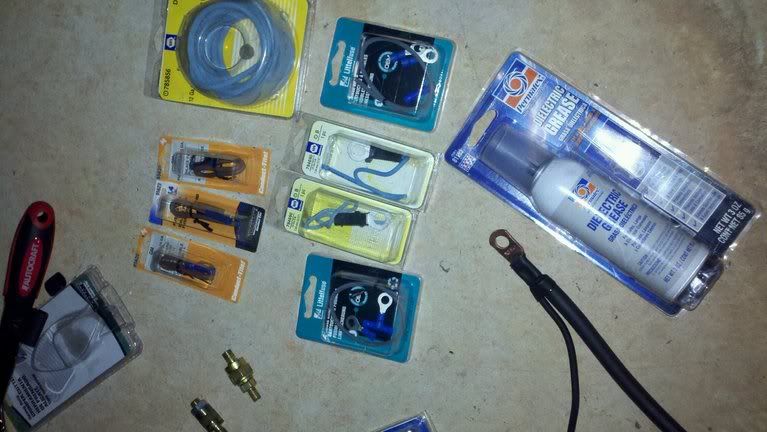
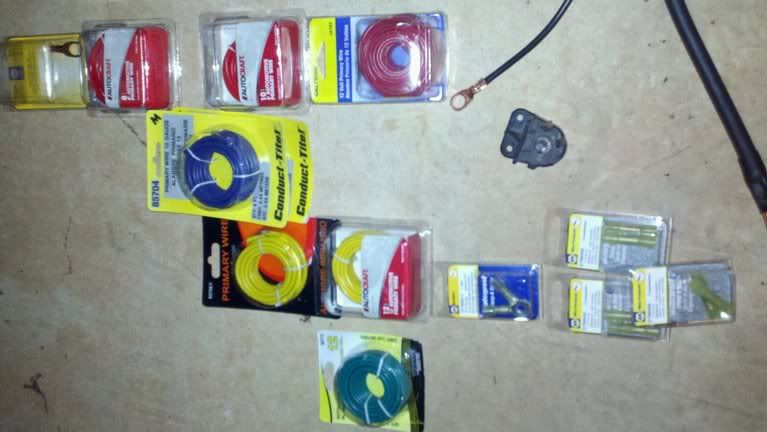
After these finds, it was time to gather supplies...
And again I mention...Not a single fusible link to be found anywhere!
I went to go get fusible links... autozone and advance only had 14 gauge links and the packing has no mention if they are to protect a 14 gauge or if they are 14 gauge (AWG) UGH! One must assume they are 14 AWG though. I still need 12, 18 and 22. So I will try O'Reilly and NAPA. O'Reilly's turned up some 16 gauge links, 14s and a spool of 14.
Now I decided with all this I should really just bite the bullet and replace the battery cables. I opted to upgrade from a 4 to a 2 gauge. Better to have a sound system then not. Esp when upgrading lights, sound system, and alternator. Hard to find the side post battery cables in 2 gauge. Tons of 4s in top and side. Autozone had a few 2s in side, but not one short enough for my ground. The odd thing is the small aux wire off the cables, they are so small, but it turns out, they are fusible links themselves and you just add in your own wire to them and run them over to the junction block.
Napa was the bomb though! I located the waterproof connectors the Orge recommended. Got some 10 gauge waterproof butt connectors for my C500 work around on the headlight and interior lines and connectors for the dist block. They had 14, 16, 18 and 20 gauge fusible links and 12 gauge fusible link wire in a spool. Could not find the 22 gauge fusible links though... So I got my 18s and spool of 12. The 22s can wait for now... They did not have ANY 2 gauge battery cables, but the guy made one up for me with all new wiring and ends! He even greased the connections and shrink wrapped everything to help with water.
[This message has been edited by redraif (edited 08-23-2011).]
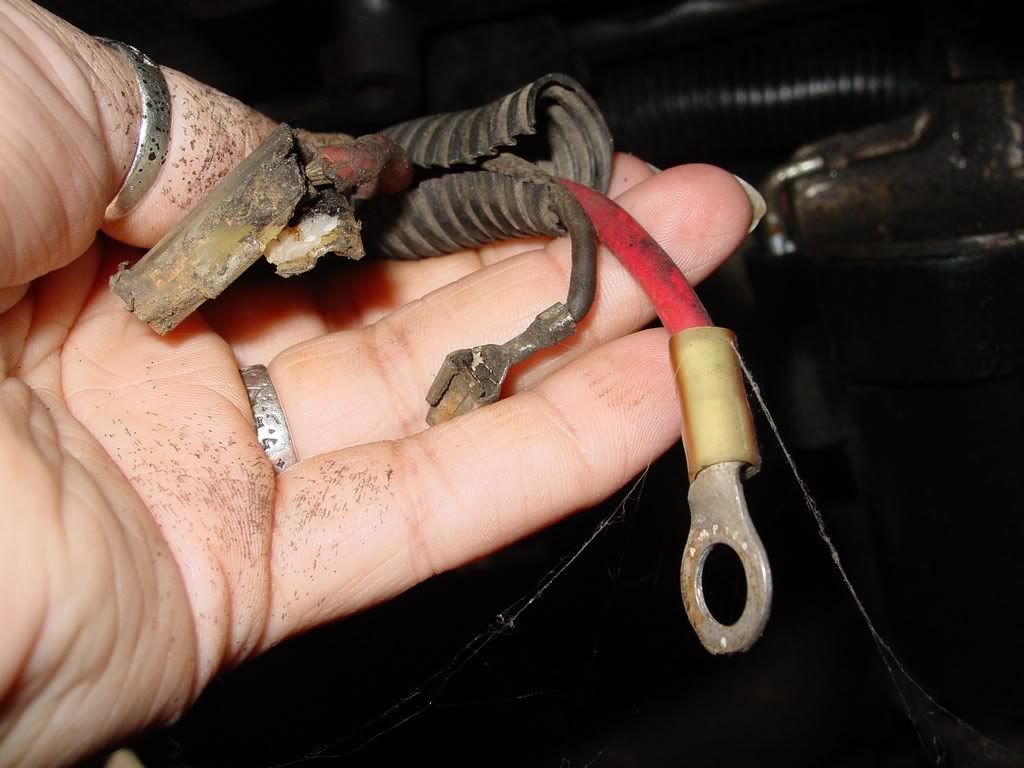
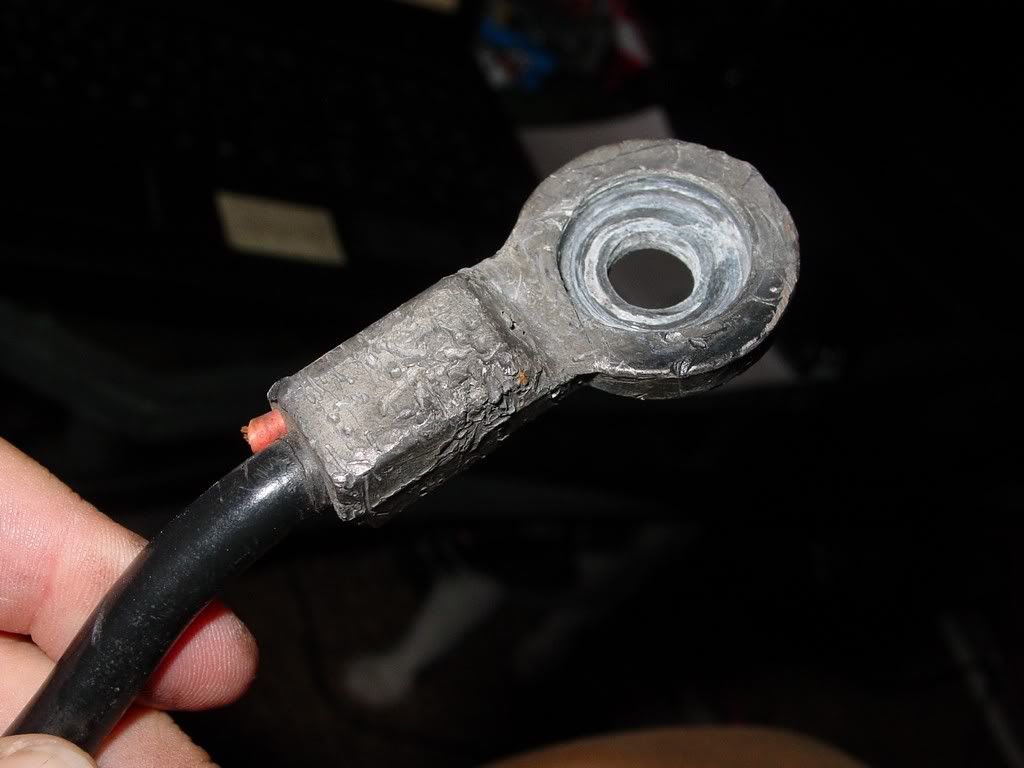
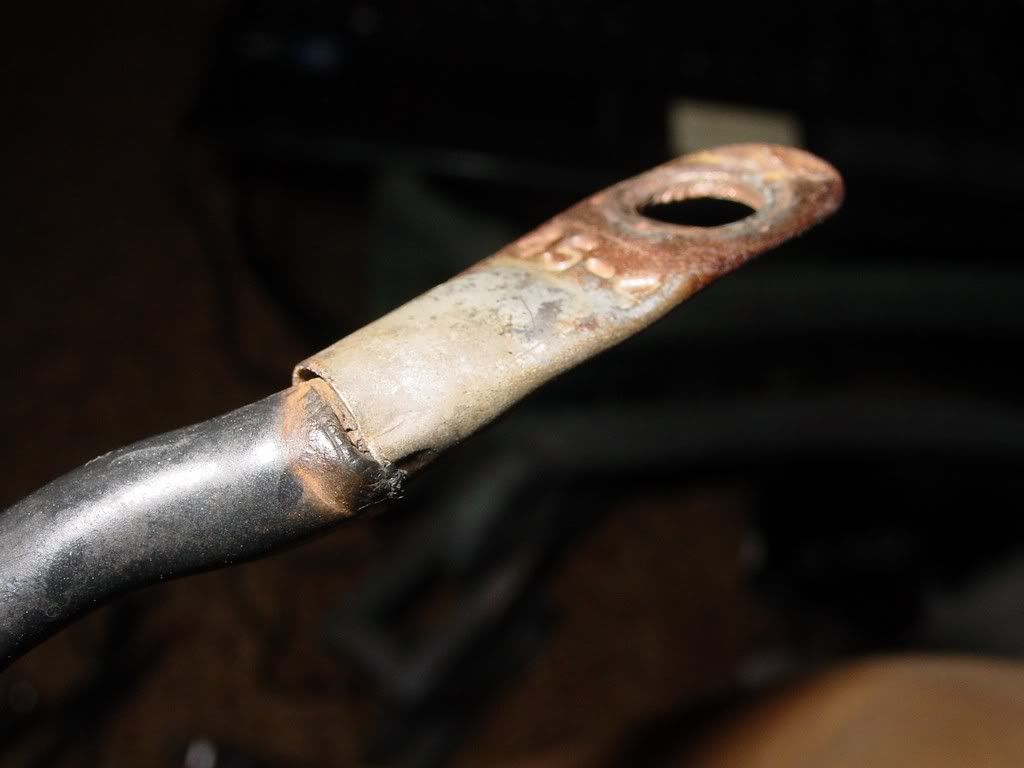
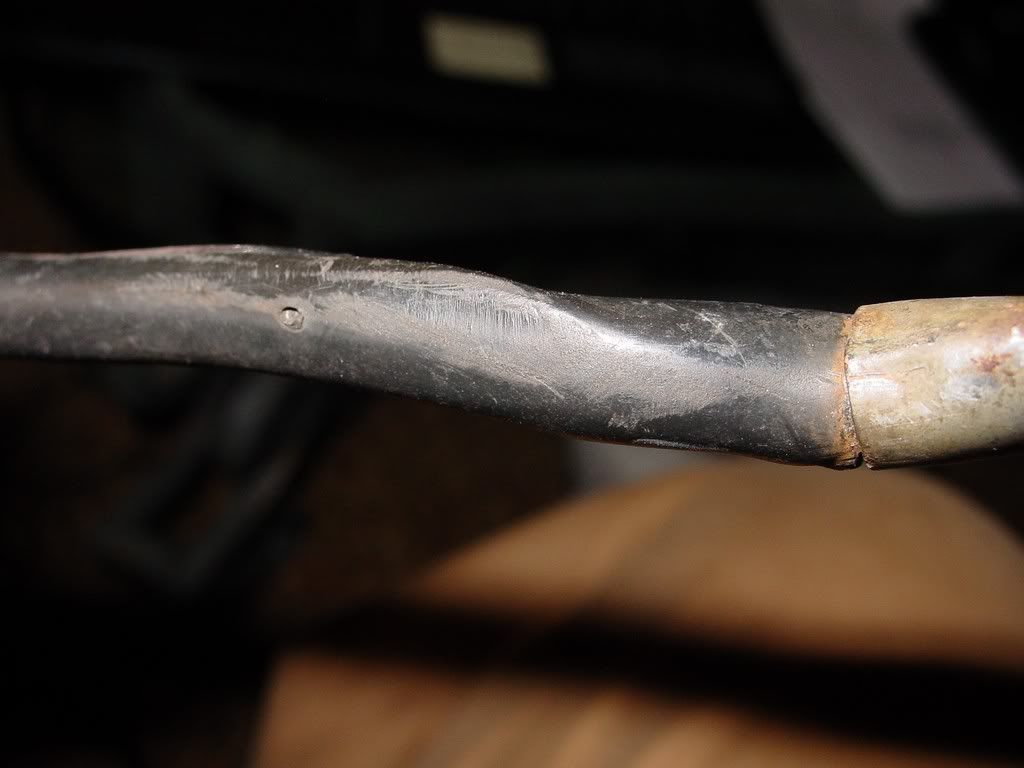
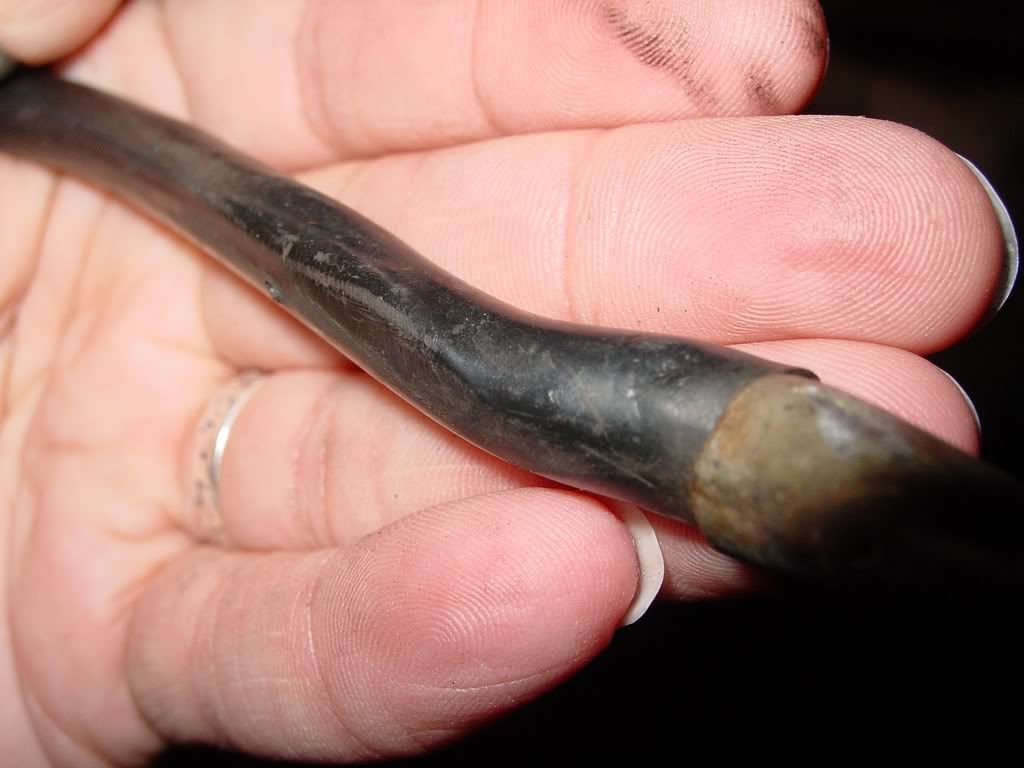
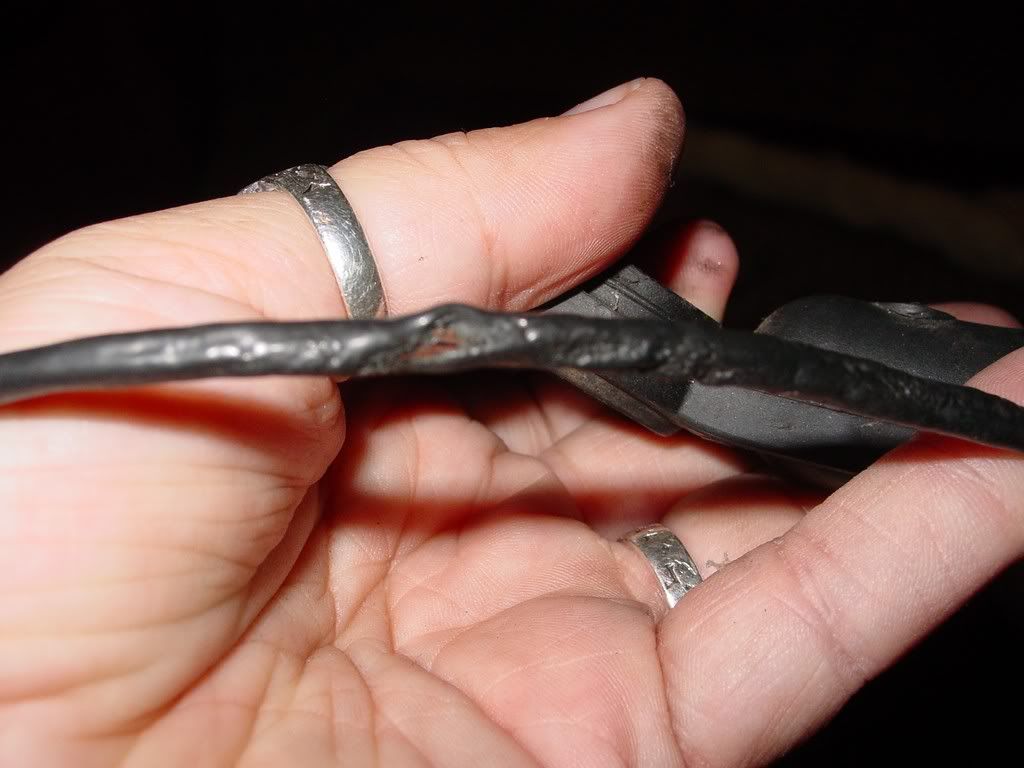
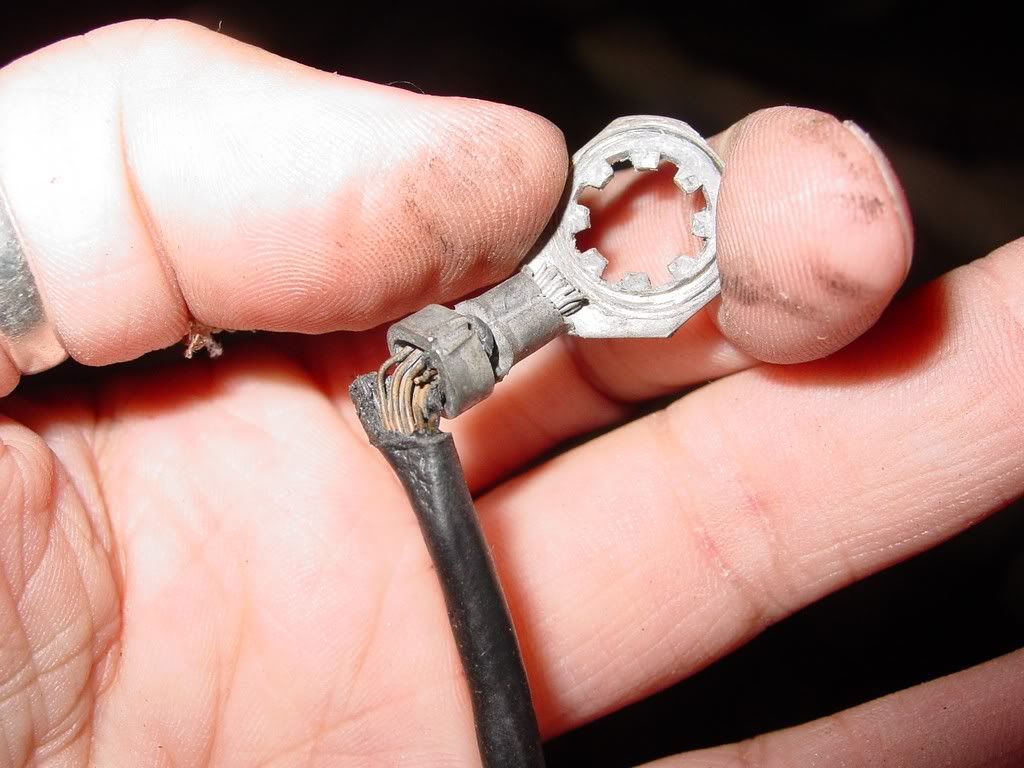
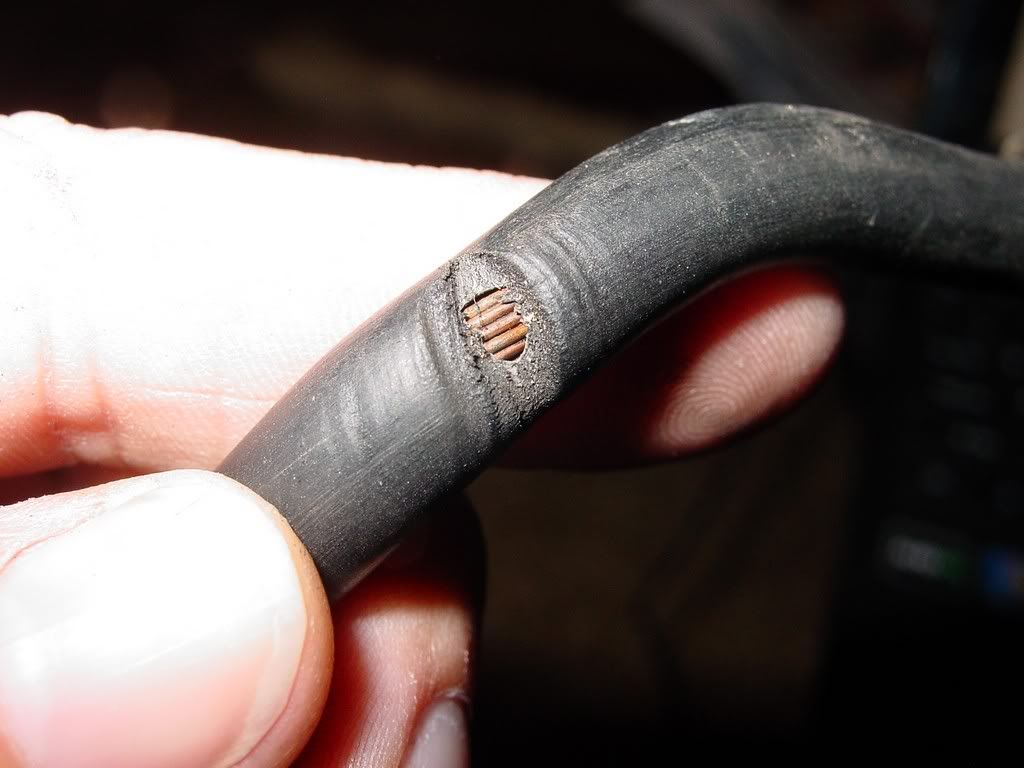
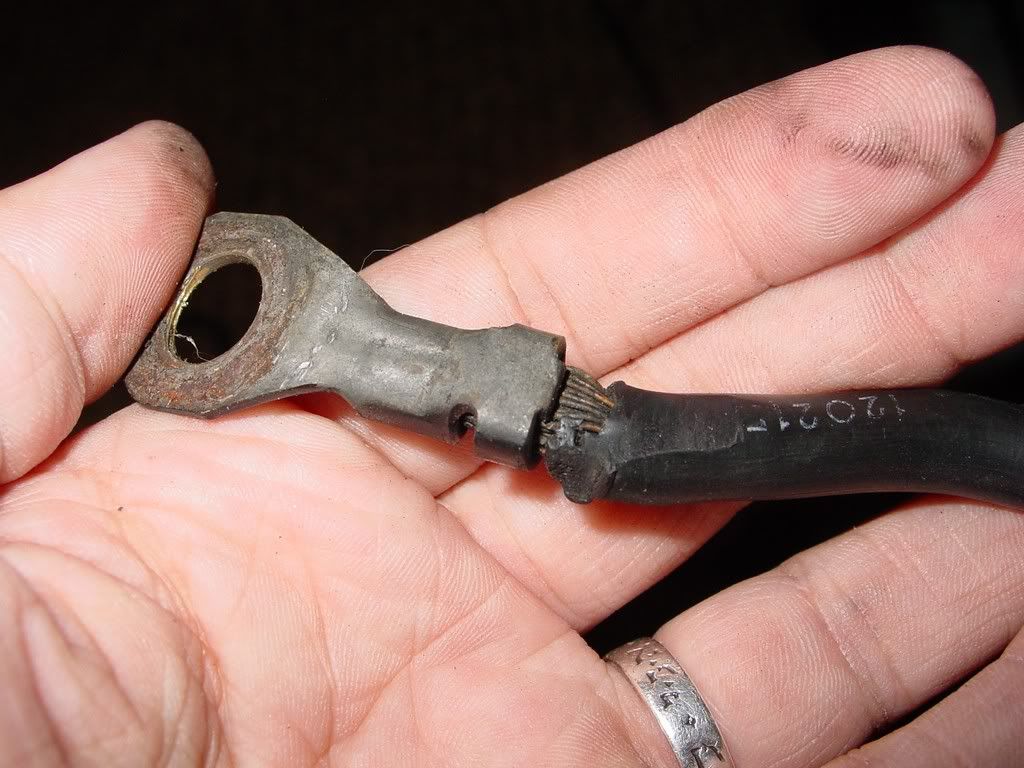
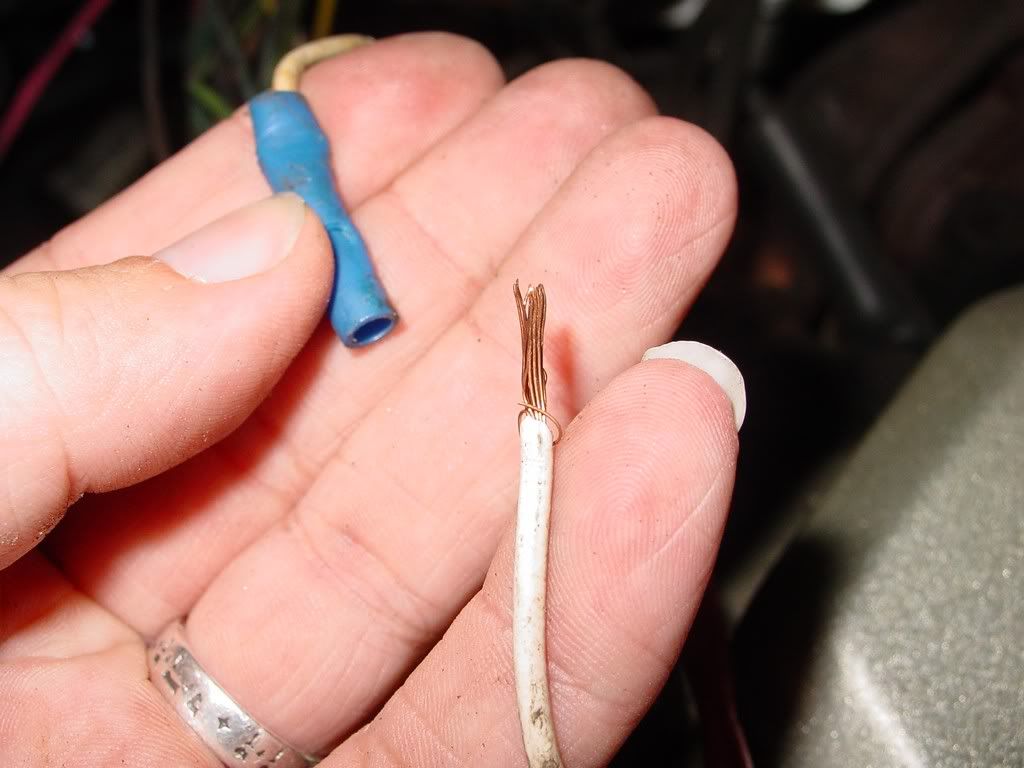
Here are the old battery cables I took off the car... Ok and wow my negative cable was a bigger wreck then I thought. Positive was a bit suspect where it connected to the starter.
Here are the pictures...
Positive:
Negative:
Now here are my new cables
New Positive
Negative
[This message has been edited by redraif (edited 08-23-2011).]
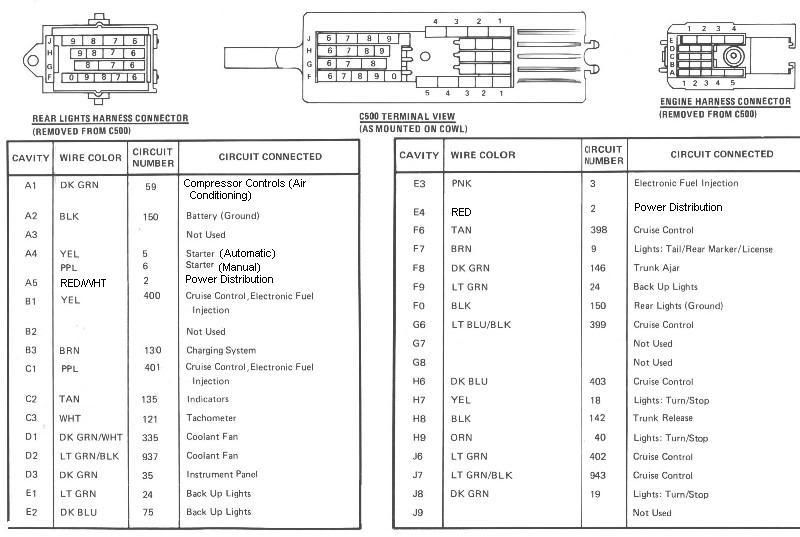
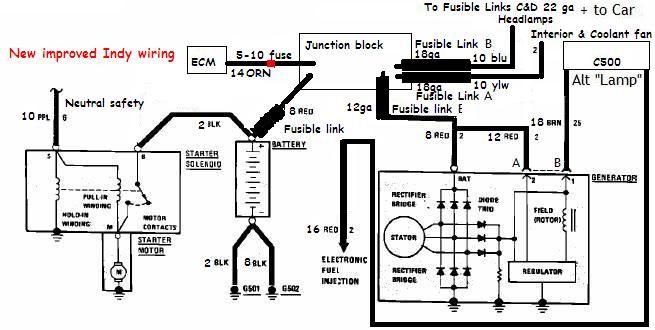
Now my modified wiring diagram. I added in beefed up wiring for my new alternator. All wiring is listed in AWG so I don't have to look back at the charts when I wire it! Yes its over done, but I don't want issues down the line!
I took into account suggestions from the previous thread and tried to incorporate them. I will be bypassing the C500 with my interior and headlamp wiring per the Orge.
[This message has been edited by redraif (edited 08-23-2011).]
Oh My Gosh, just give up. The ol' girl is dead. So much to replace and trace and rewire.
I have a electronics degree and wouldn't challenge that one. It's time to pull it all out and just replace the entire harness. Sorry you have to go through all that.
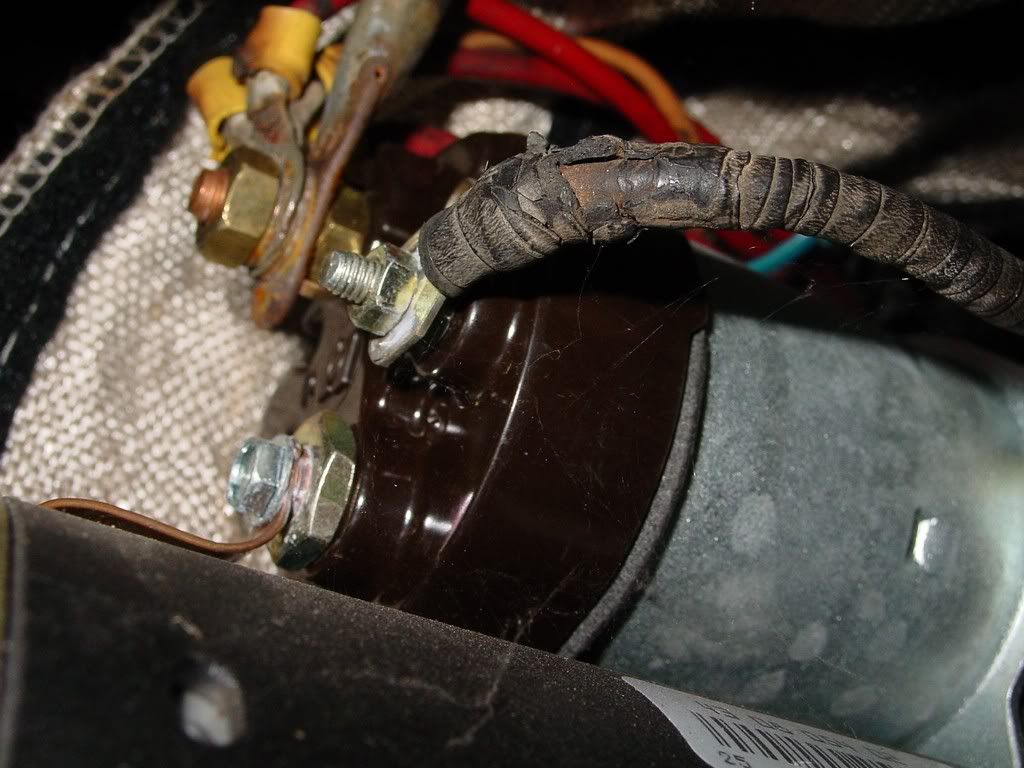
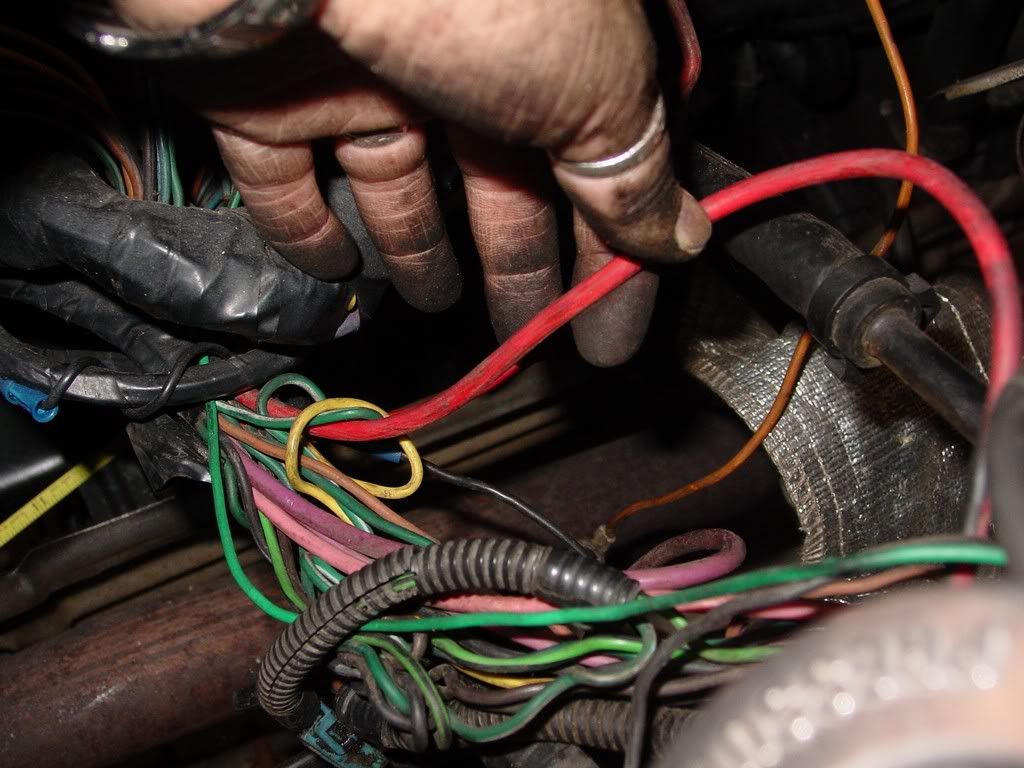
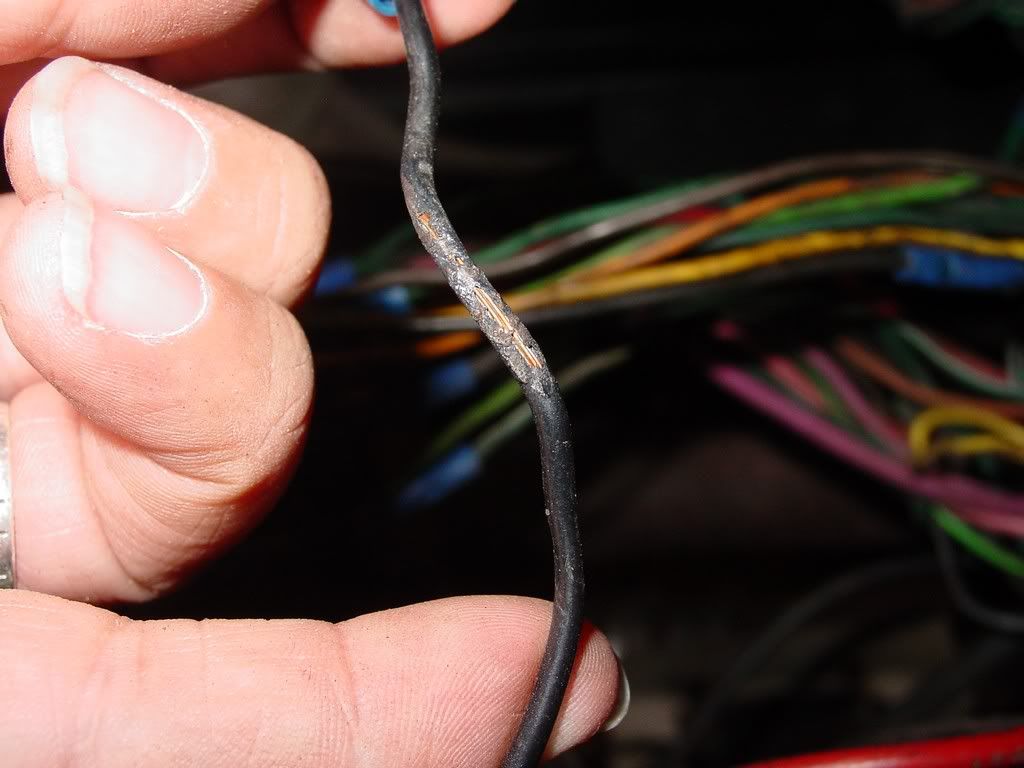
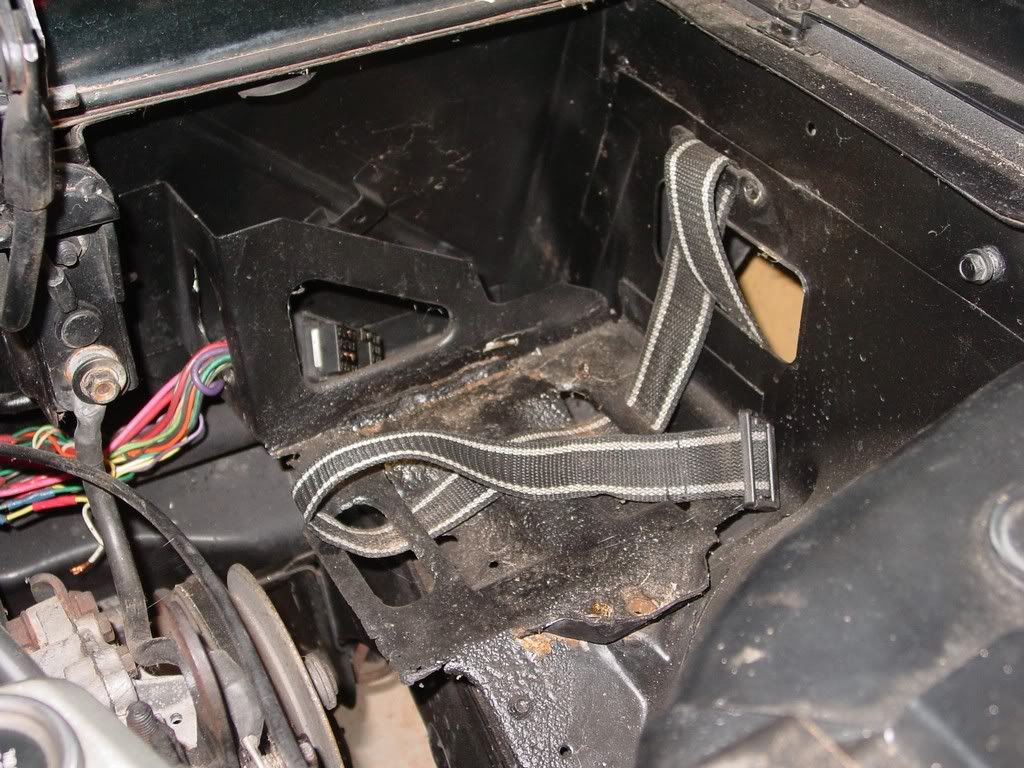
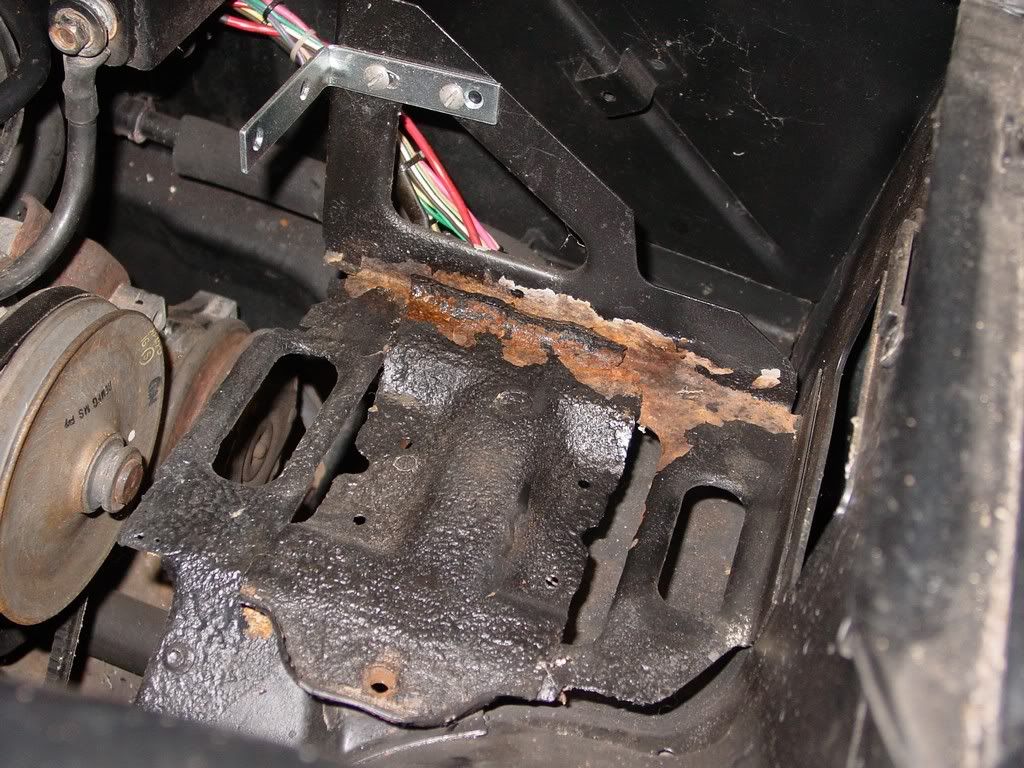
This was the main ground on my fiero when I bought it. I don't have pics of the headlight wiring...
Holy crap... Thank goodness mine was only a rub on the ground. Were your headlight wires just as bad???
quote
Originally posted by KurtAKX:
I have had good luck in the past getting very high quality cables made at a marine supply/repair facilicheap universal type wires like you have pictured, will quickly rot again.
I only bought one "universal" cable. It was the 2 ga power from Autozone... the ground was made from scratch for me by napa. So that's definitely not universal. I would hope it would hold up like what your marine place made.
On a side note. My friend at Summit said they had discontinued all battery cables under 20 feet. Way to shoot yourself in the foot with the race crowd. Can't help you unless your doing a battery relocation.
quote
Originally posted by jwrape:
Oh My Gosh, just give up. The ol' girl is dead. So much to replace and trace and rewire.
I have a electronics degree and wouldn't challenge that one. It's time to pull it all out and just replace the entire harness. Sorry you have to go through all that.
Well if I had confidence I could find one in a junkyard that was any better... lol. I did ask painless if they had a replacement harness and was told no. On a good note, everything in the cabin looked fine when I had the seats and center console out for my soundproofing attack on the interior. So that part should not need any replacement! So it would just be the engine bay harness.
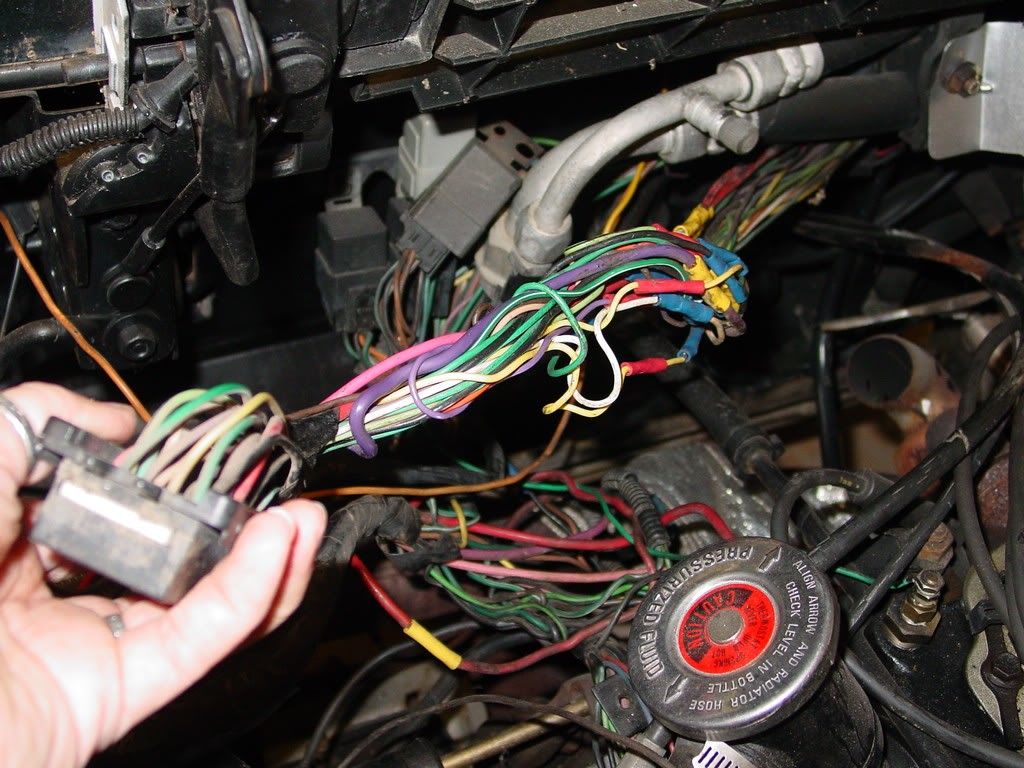
If only he had not hacked it up on the ecm side of the c500, I could have just plugged in a replacement harness at the C500 on the engine side. No matter what, I have to repair where he cut the ecm side. I figure the best place for even a "replacement" harness to plug in is at the C500. The good thing is that side seems to have not experienced any melting.
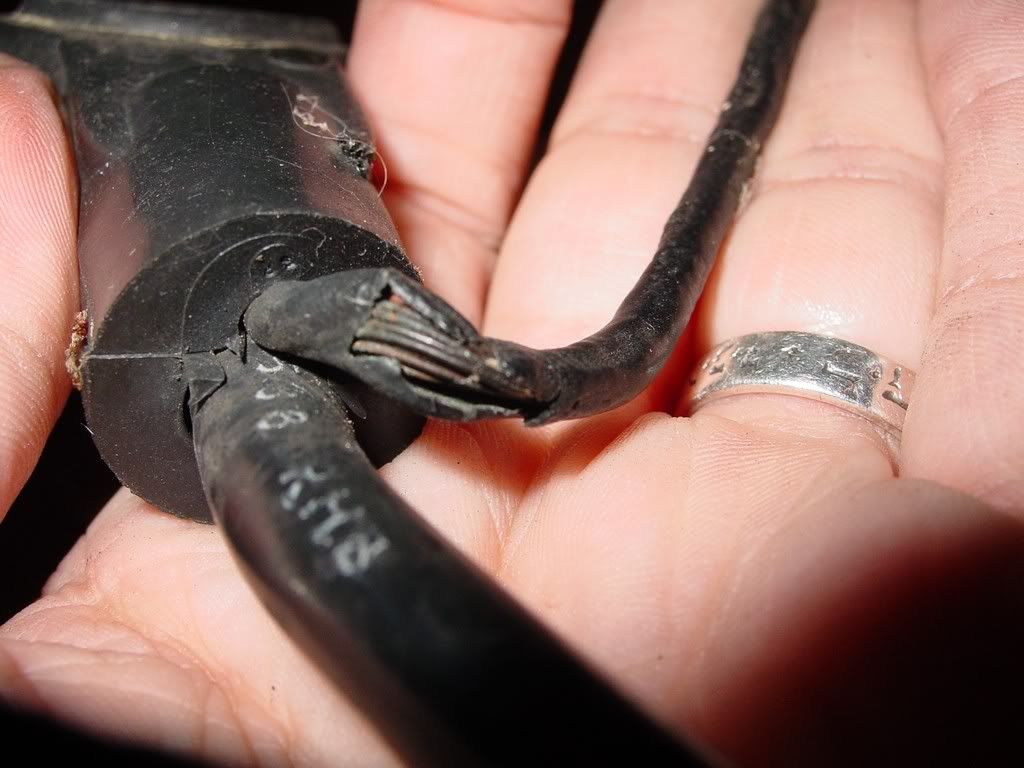
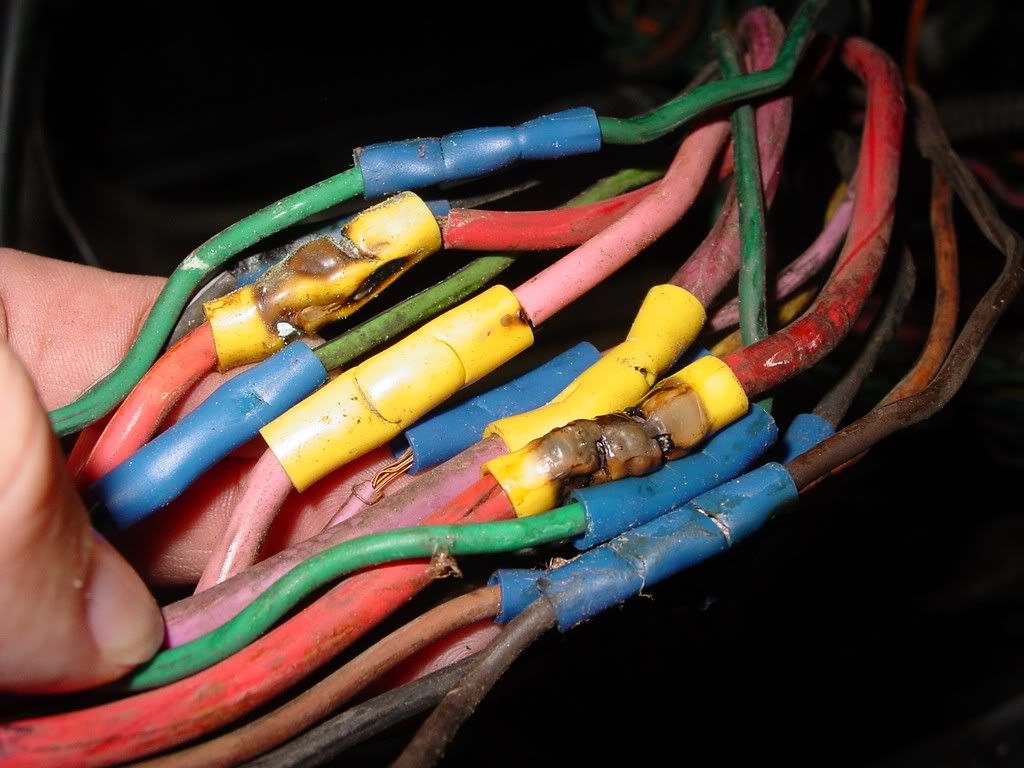
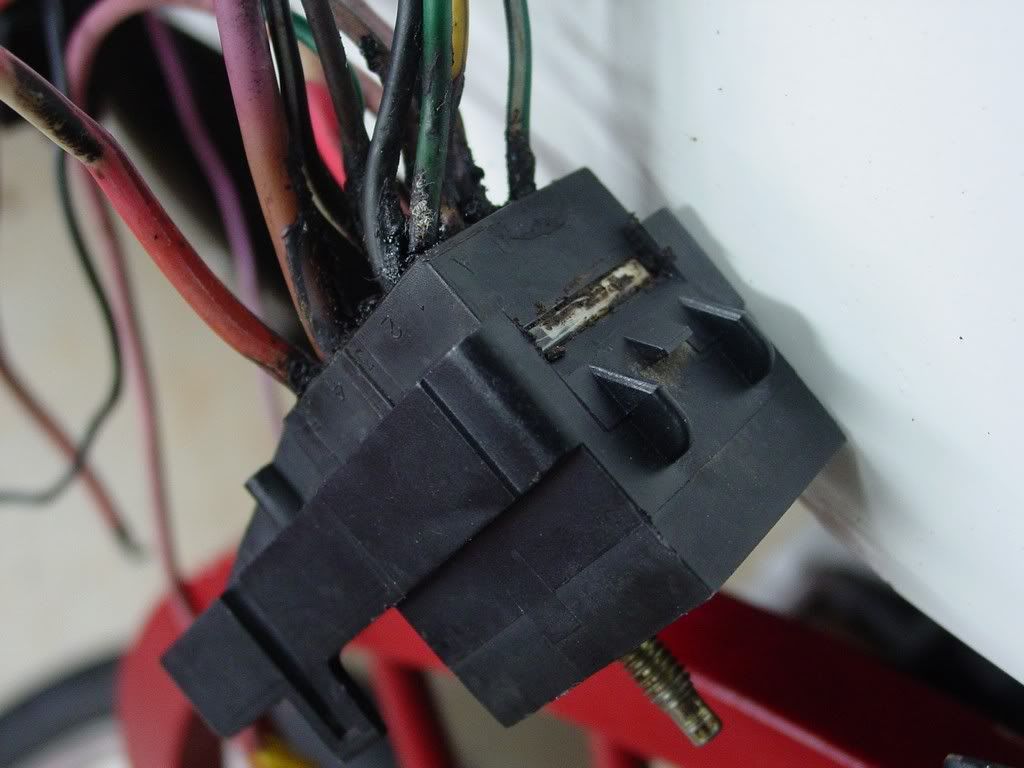
Thinking out loud here... I wonder if half the issues were his cracked connectors touching each other and the butt connectors not making adequate contact. Looks like he used the cutting end as a cripper. Fortunately, I was already prepared to replace all the power lines and bypass the c 500 on the large power wires anyway. These are the most damaged. The plan was to beef everything up from stock since I got the new alternator. Those were the worst of the injured wires, so replacing them would be cutting out the worst of the melted stuff. Seems it was isolated to the big 3 power lines anyway. All the rest looks to be a by product of their proximity. Heck it might have even been due to the crappy resistance/factory probe line on the alt side going... Orge was worried this "alternator sence" line was the real heart of my stock alternator acting up so oddly. We think the alternator started over producing amps the last time the car was driven. This might be why only the power distrubution wires started frying. And since I caught it with in one mile of it starting and stopped the car and parked it, it progressed no further!
[This message has been edited by redraif (edited 08-23-2011).]
From the gitgo you should have called the Fiero Factory for an entire harness. You might want to rethink the safety issue of working around any vehicle with rings on.
From the gitgo you should have called the Fiero Factory for an entire harness. You might want to rethink the safety issue of working around any vehicle with rings on.
No power going to the car at all for my rings to ark on. Battery has been disconnected from the get go and completely out now. Rings do come off if I'm working where they might get pinched or get me stuck. (if I can get them off... LOL)
I had explored a new harness in the past (when the car was first parked 2 years ago) and everyone pointed me to the scrap yards or painless. I had no idea Fiero factory had new ones. I will check it out. Thanks! Any idea where they tie in the engine bay off hand?
[This message has been edited by redraif (edited 08-23-2011).]
IP: Logged
10:18 AM
olejoedad Member
Posts: 20126 From: Back home again in Indiana Registered: May 2004
Have not heard back yet on the harness. Worse case I will try calling. I just have no cell service at work and can't dial long distance from the job... Short lunches this week trying to make up time, so the call might wait till next week.
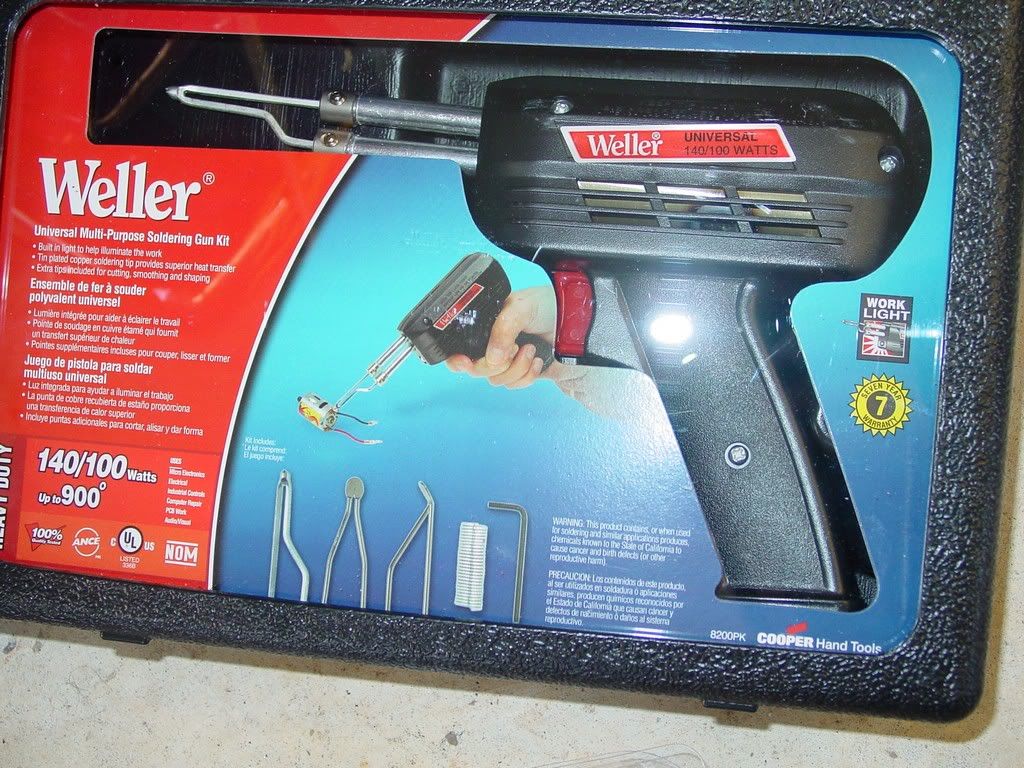
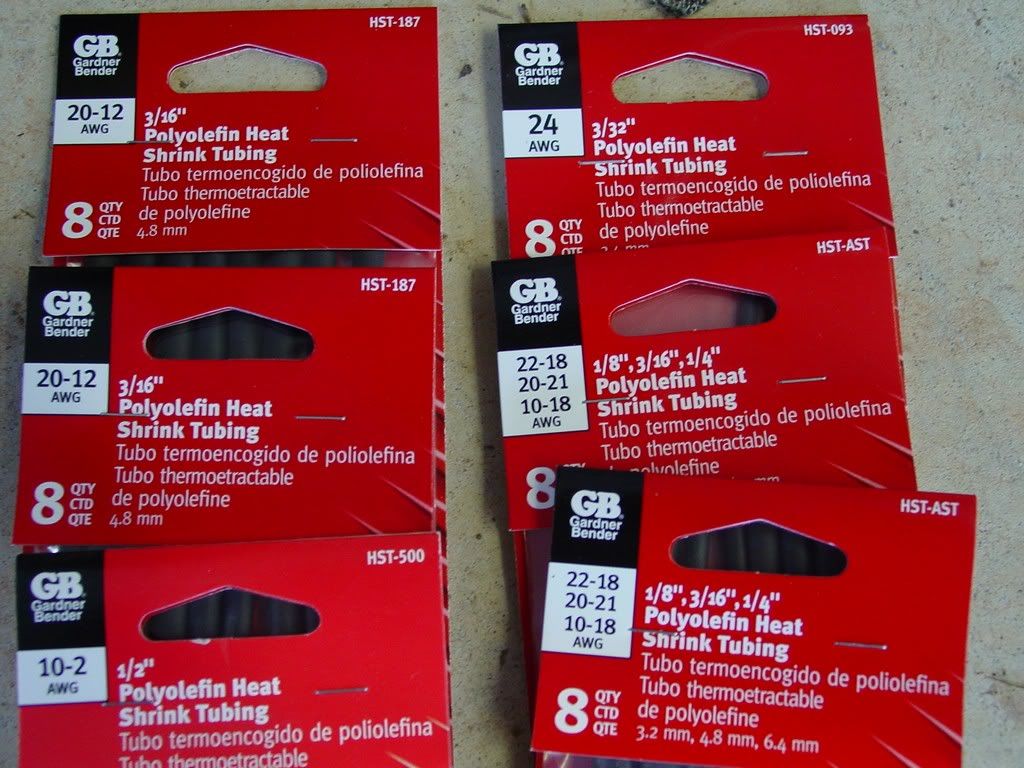
But I did get a new soldering gun and tons of heat shink last night. New used harness or not, I have to be able to move the wires off the starter, shorten the alternator sense line, and add a junction/distribution block, so I might as well have the right tools and do it the right way. No redneck version like the previous owner saddled me with! I will use my solderless waterproof connectors for my new fusible links though!
[This message has been edited by redraif (edited 08-24-2011).]
IP: Logged
01:15 PM
ericjon262 Member
Posts: 3168 From: everywhere. Registered: Jan 2010
Holy crap... Thank goodness mine was only a rub on the ground. Were your headlight wires just as bad???
the passenger side headlight was wired in with an old extension cord and a cheap toggle switch... the funny part about that ground, the PO "soldered" "the joint" then put a hoseclamp on it, after that, he put a old heater hose around it, and then wrapped it in electrical tape...
IP: Logged
02:16 PM
phonedawgz Member
Posts: 17108 From: Green Bay, WI USA Registered: Dec 2009
I have some stock 2.5 engine harnesses here. Not sure on their condition but if you let me know what you are looking for I can see what I have. I can rebuild the harness for a power distribution block also.
[This message has been edited by phonedawgz (edited 08-24-2011).]
Well It seems I only need the section that comes off the ecm and runs through the C500... the disaster starts between the c500 and the ECM not far off the firewall. From there the problem is repeated just after the C500... The thought is that the previous owner swapped in a replacement C500. In the process, he did an inadequate job with the butt connectors. The poor condition of the sense wire in the harness I believe led to the overcharging of the alternator and thus the melting of my power wires.
So I would only need from the ecm through the c500 to the engine bay.... I don't know enough about how the bundles behave once they pass through the firewall. Maybe this one bundle just disconnects from the ecm as a separate bundle?
If it is not that easy to isolate and replace only the injured section... the way the cuts are it should be very straight forward to solder everything back together. The only issues would be the melted power lines, but those I need to cut back and bypass the C500 anyway, so that should rectify the worst of it. Yes/no????
IP: Logged
10:18 PM
Aug 25th, 2011
olejoedad Member
Posts: 20126 From: Back home again in Indiana Registered: May 2004
Well.... after not getting a good answer on the harness replacment... I just opted to repair it. If I have more issues I can always replace it when I can get one on my terms.
Pics will come tomorrow (hopefully)... LOL!
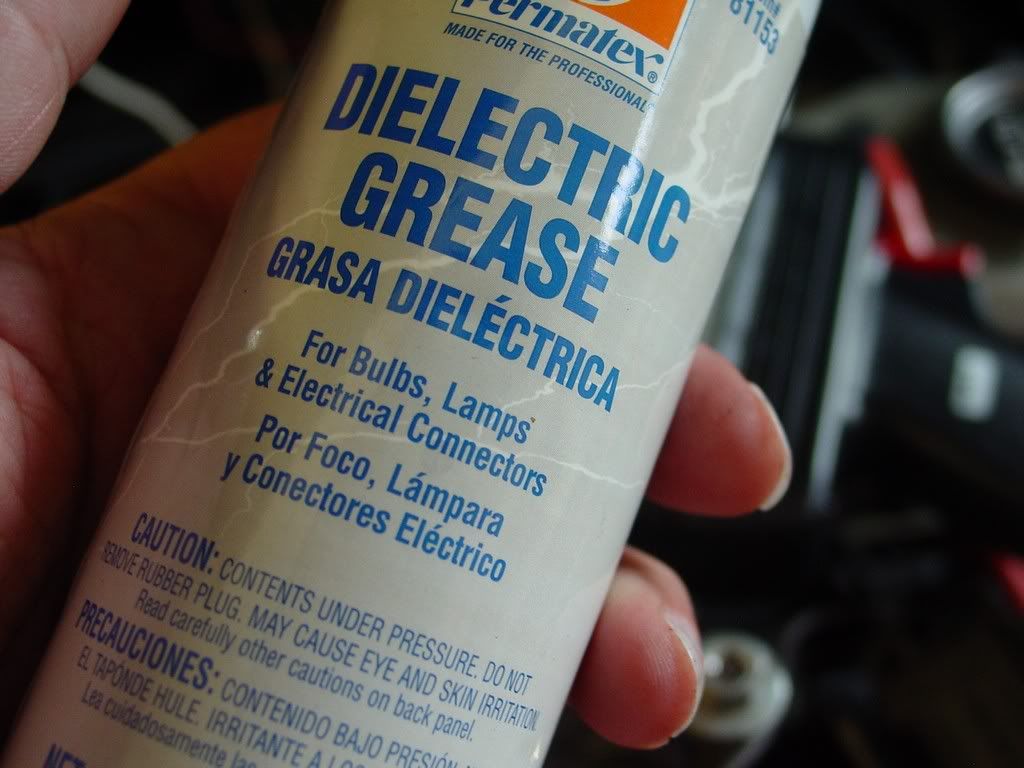
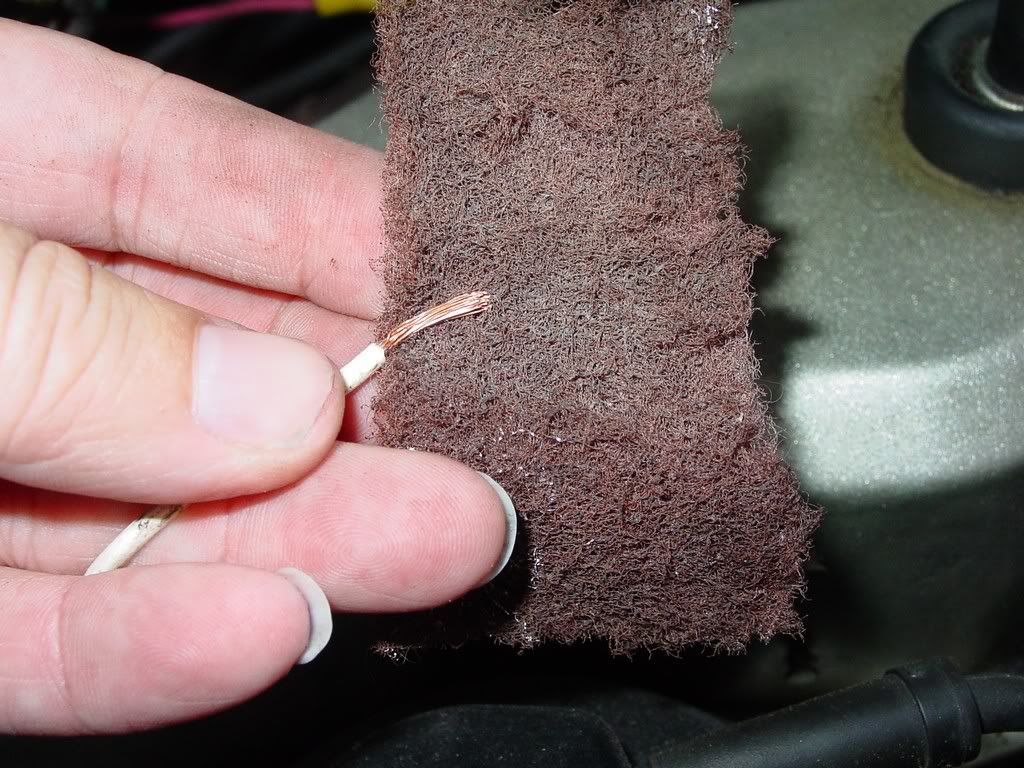
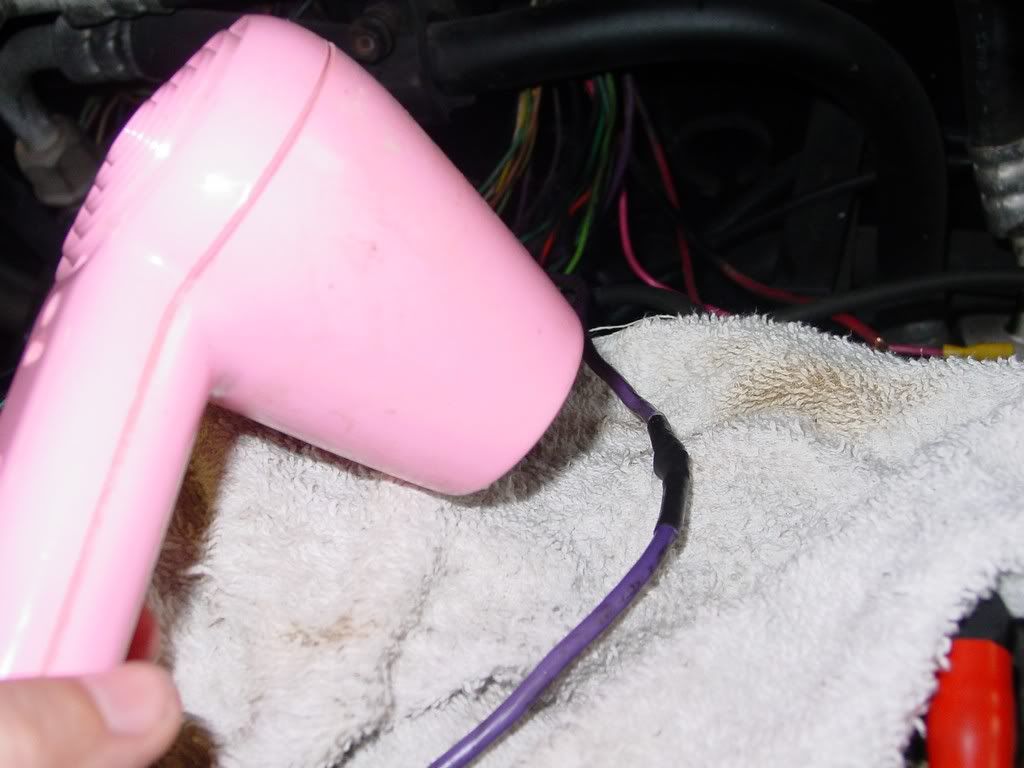
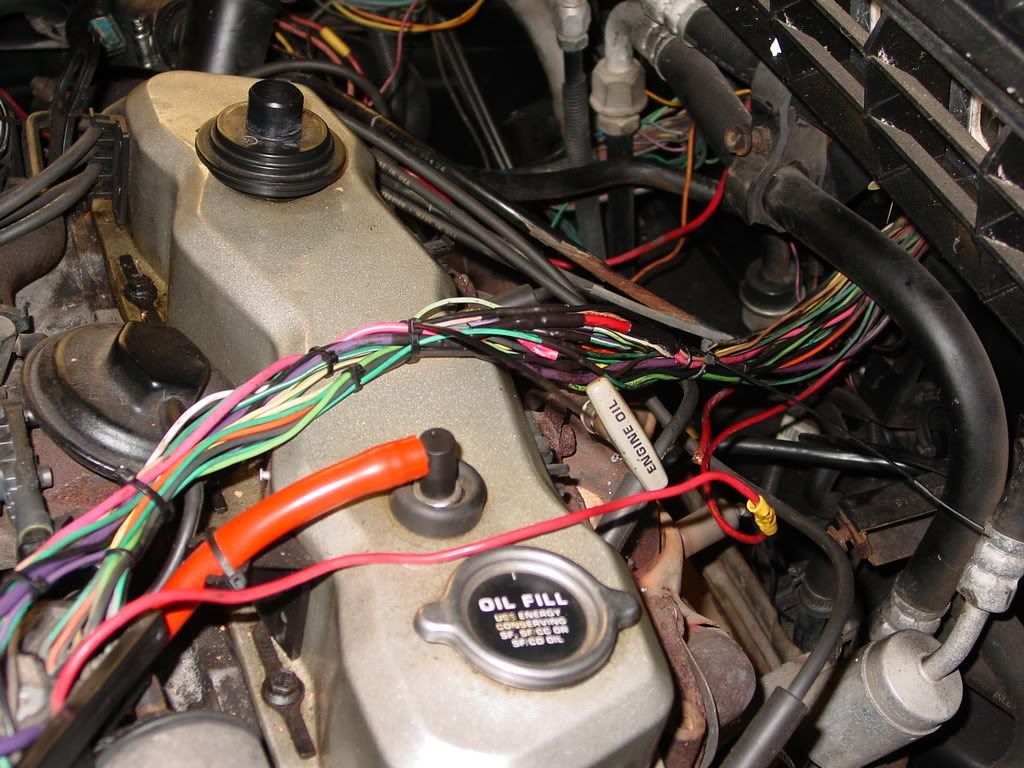
But I isolated the bad joints and cut them out... I cut back to good wire. I cleaned and used a scotchbrite to remove any possible corrosion I could not see on the wire ends. I twisted them and used a solder gun with lead combo solder to join them. I used dialetric grease to surround the bare wire, slid over a heat shrink tube and sealed it up with heat. I did this on both sides of the c500 at the trouble spots. I bypassed the c500 on the headlight & interior circuit (fusible link A&B) (a5 and e4 on the pin out) All links were added back with waterproof connectors lubed with Dialectric. A junction block was added by the battery. The battery cables were upgraded to 2 gauge. The alternator output was upgraded to 8 gauge and run on a shorter route. My factory sence wire was replaced and run separate to the junction block with a shorter route. The bad grounds (one off c500 and one off tailights) were soldered and grounded. The other grounds were cleaned and out back.
the neutral safety was trimmed and cleaned up and it and the battery line to the starter were wrapped in a heatsheilding conduit.
All this took place this past week and weekend. Outside of punching myself in the face, there were no injuries. Tensioning the alternator and the prybar slipped. I punched myself and knocked my head back into the decklid. No video, sorry! LOL! Gave my spouse and friend a good laugh though!
I replaced the oil, treated the old gas, topped off the coolant system, bumped the motor to move the oil about... crossed my fingers and started my little follow up. The new alternator souned like a jet engine for about 5 minutes and then quieted down, and the squealing from the pulleys stopped pretty quick. Then the car just purred....
The Indy lives! Now to get him on the street (dry rot tires) and my broke foot (stick car)
IP: Logged
04:45 PM
Gall757 Member
Posts: 10938 From: Holland, MI Registered: Jun 2010
you sure do wear a lot of jewelry for working on electrical.... lol just teasing, I had a nightmare like this on my 87 IROC but I didn't have the kind of damage that you have here. I guess I caught it in time and redid everything and zip tied everything then put the wire mold around it. I feel sorry for you but at least you decided to do this and found all this before something really bad happened.
the passenger side headlight was wired in with an old extension cord and a cheap toggle switch... the funny part about that ground, the PO "soldered" "the joint" then put a hoseclamp on it, after that, he put a old heater hose around it, and then wrapped it in electrical tape...
you sure do wear a lot of jewelry for working on electrical.... lol just teasing, I had a nightmare like this on my 87 IROC but I didn't have the kind of damage that you have here. I guess I caught it in time and redid everything and zip tied everything then put the wire mold around it. I feel sorry for you but at least you decided to do this and found all this before something really bad happened.
Well I feel good knowing I have been through everything now. It should be a good upgrade over stock too with the larger wiring and cleaner routing. It was so nice to hear the car crank up... and crank up better then it did before it sat for 2.5 years!
1 - start looking for a 84 engine wiring harness and just swap it all out for one that has not been bastardized by someone that knows nothing at all about electrical let alone electronics. using harbor freight lowest cost butt splices like that is a very bad sign. Keep looking, not everyone wants rolls royce prices for a wiring harness. Post a looking for message in the mall.
2 - rebuild the wiring harness yourself. you can get real metripack and weatherpack connectors (what you called a weatherpack was not a weatherpack, that was a non waterproof connector) for reasonable prices on amazon.com and you can get the big connectors apart and buy new pins to rebuild a wiring harness yourself.
I'd go the find a new wiring harness route.
Also what nightmares await you inside the cabin?
#1 I was very back and forth on this. I was worried I would ahve to diassemble so much of the car to swap things over. I had to get the car going and the harness hunt was not going well either. Plus even a good harness I was going to have to cut up to upgrade it. Once I got to trimming out the bad stuff, the rest of the harness was actually looking decent. I guess I caught the failure on the previous owners part just in time, as it was starting to cause a problem.
#2 Ummm... I have not posted any pics of the after... I paid like $5.00 a piece for the waterproof "butt" connectors I bought from napa and packed them with dialectic and covered with heatshrink, then topped with new looms. These were only used where I was adding in fusible links or ring ends, and I added heatshrink with dialectric just to be sure. The rest was all soldered back together. I have not posted pics yet but will today at lunch...
On the cabin... I had everything out when I was sound proofing and swapping interior parts years ago, and from what can tell the interior wiring is untouched. The radio wiring was even entact. Go figure. Now the cooling fan... um that is gonna need some TLC... LOL! Hot wired for the time being, but it will be dealt with ASAP.
[This message has been edited by redraif (edited 09-07-2011).]
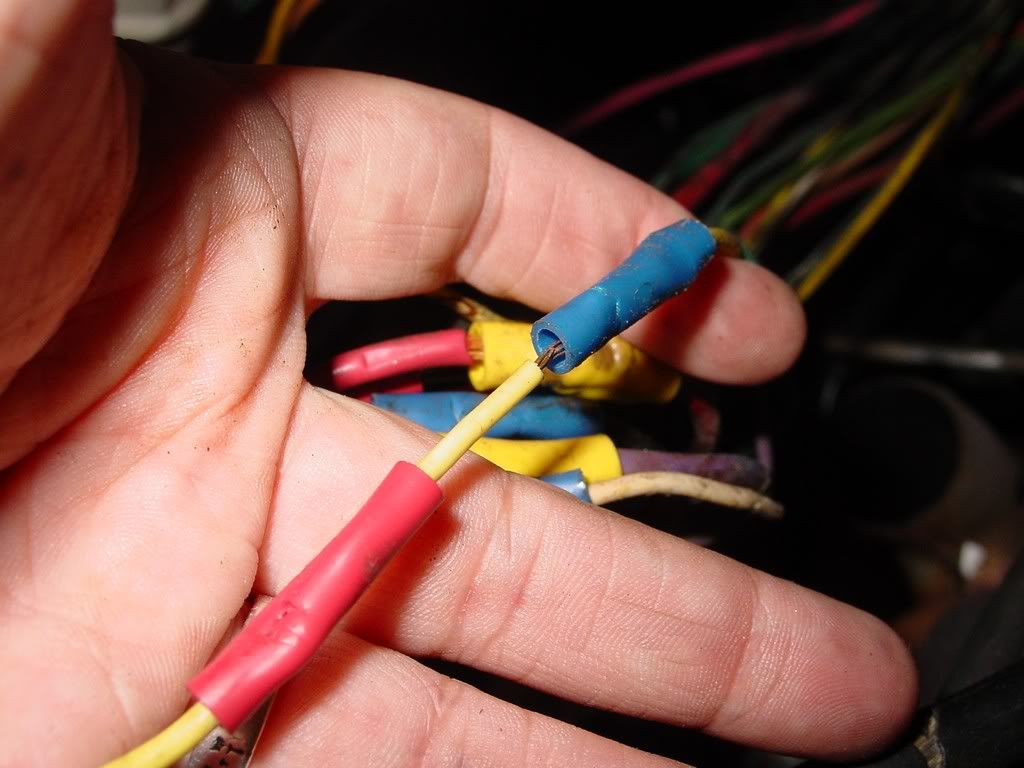
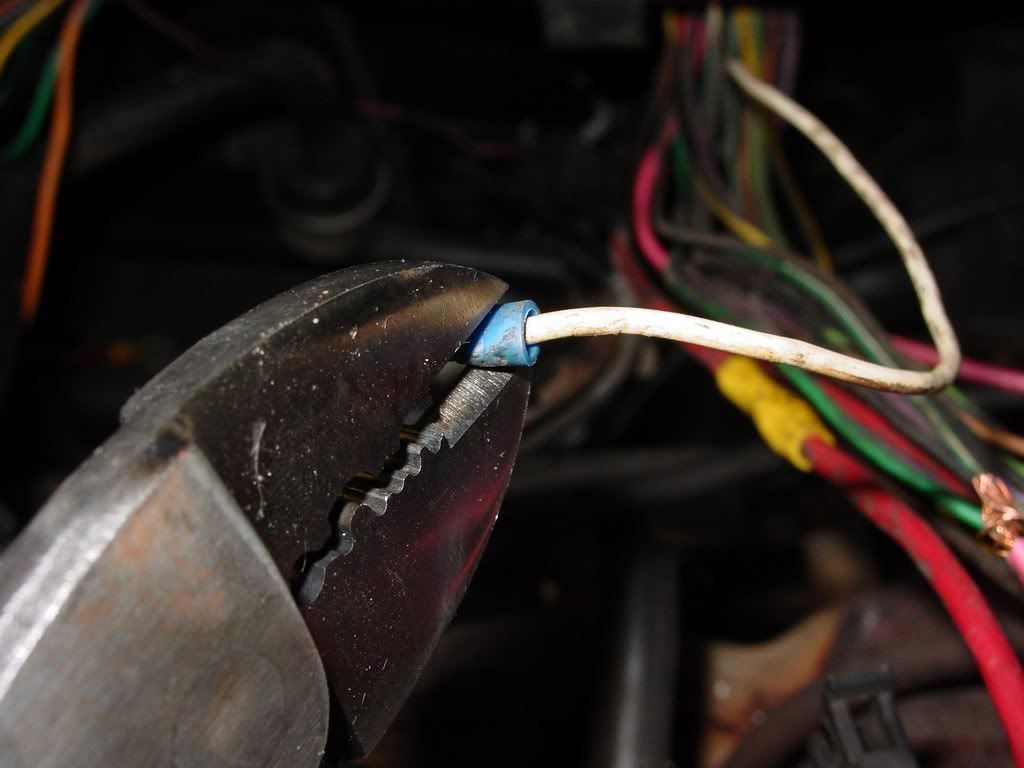
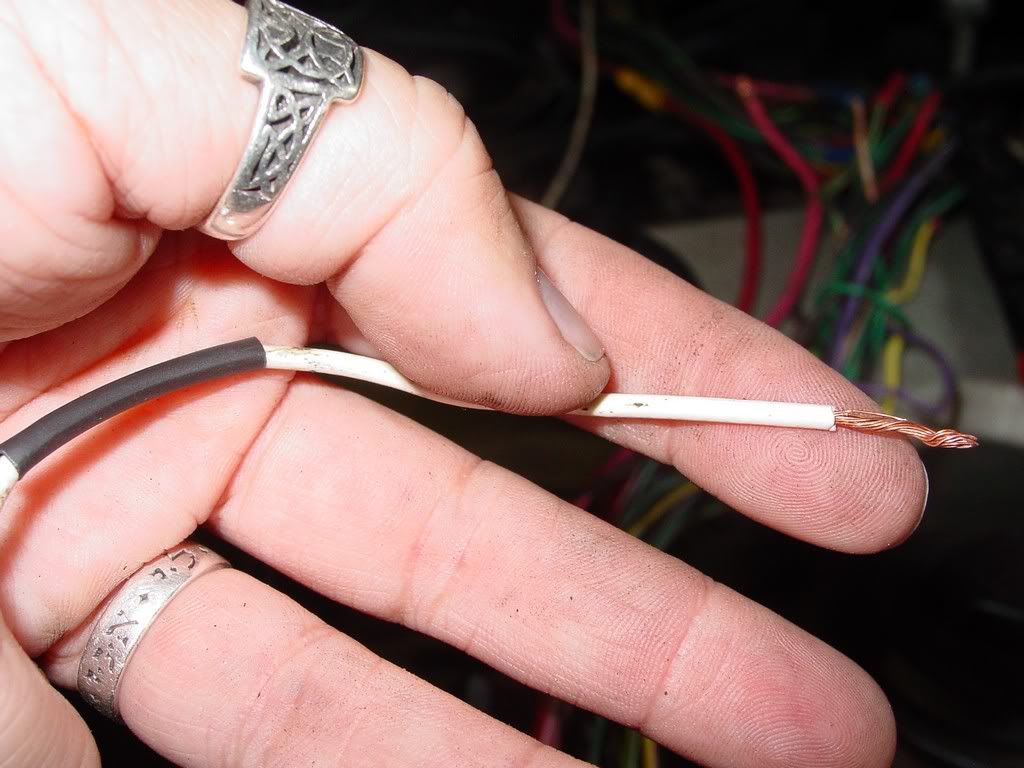
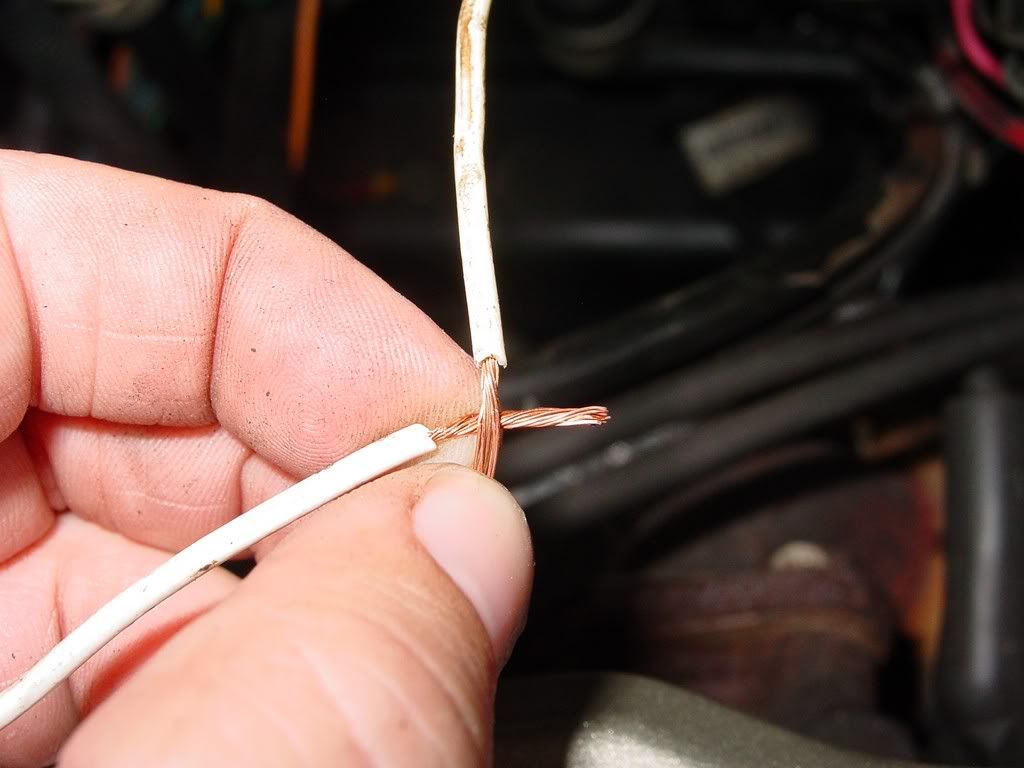
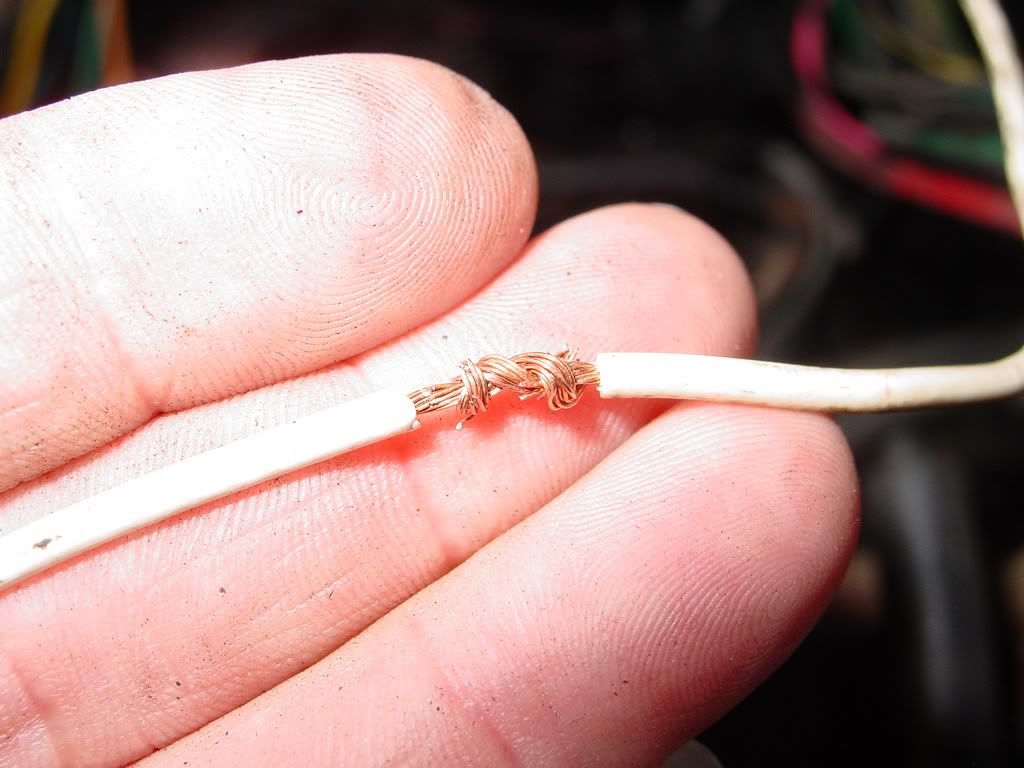
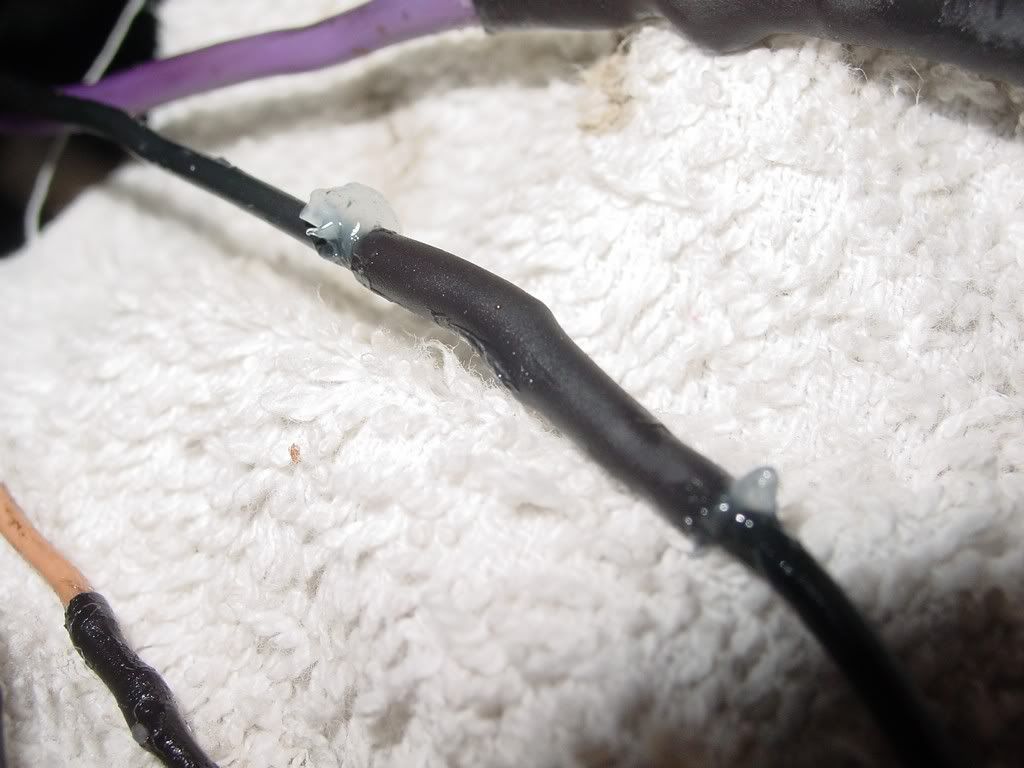
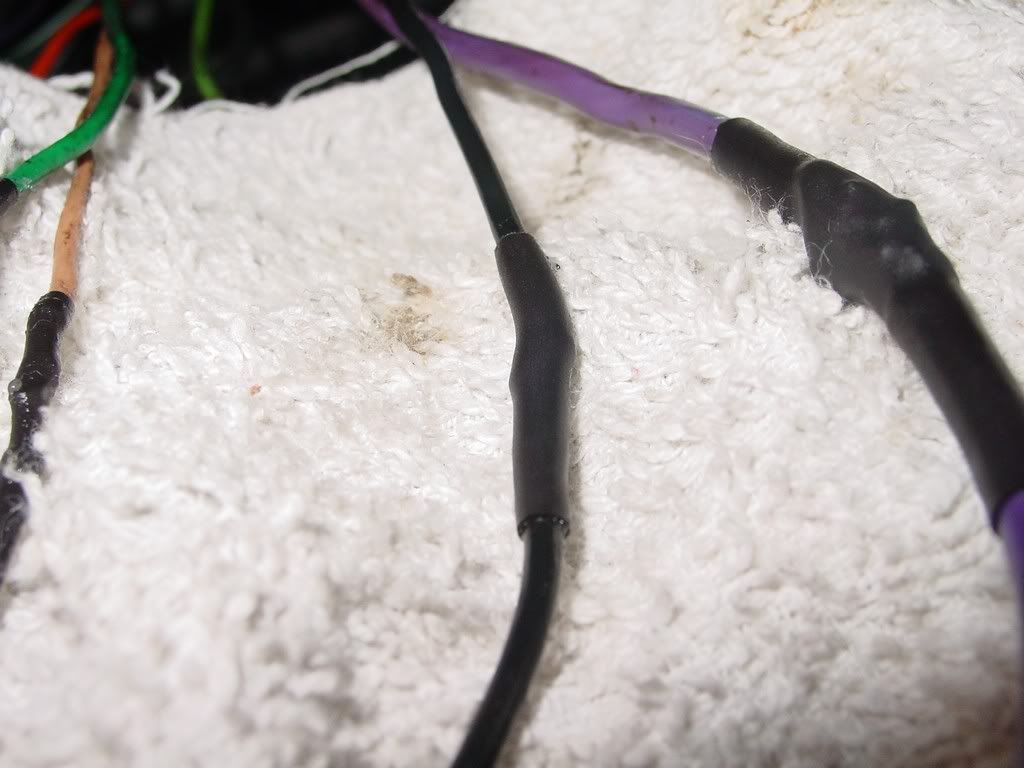
The process for each and every wire on either side of the c500... OMG... LOL! It was alot of time, but I learned a new skill. It was worth it. Just took my time. Cut, strip, clean, twist, solder, grease, shrink, and repeat! LOL!
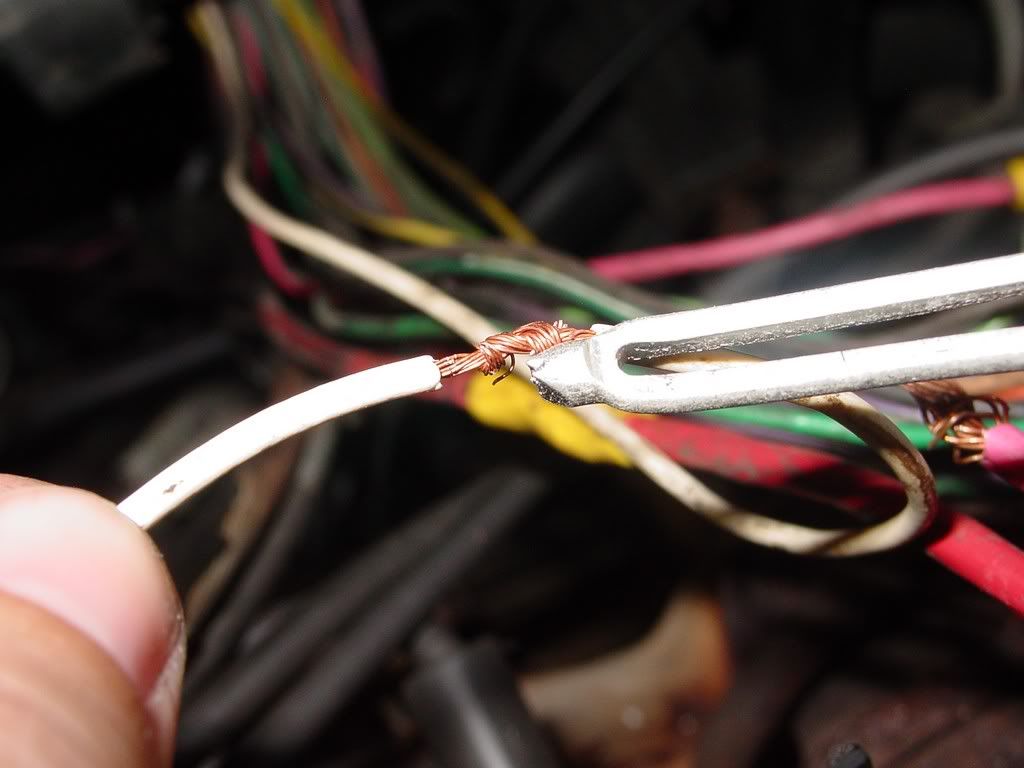
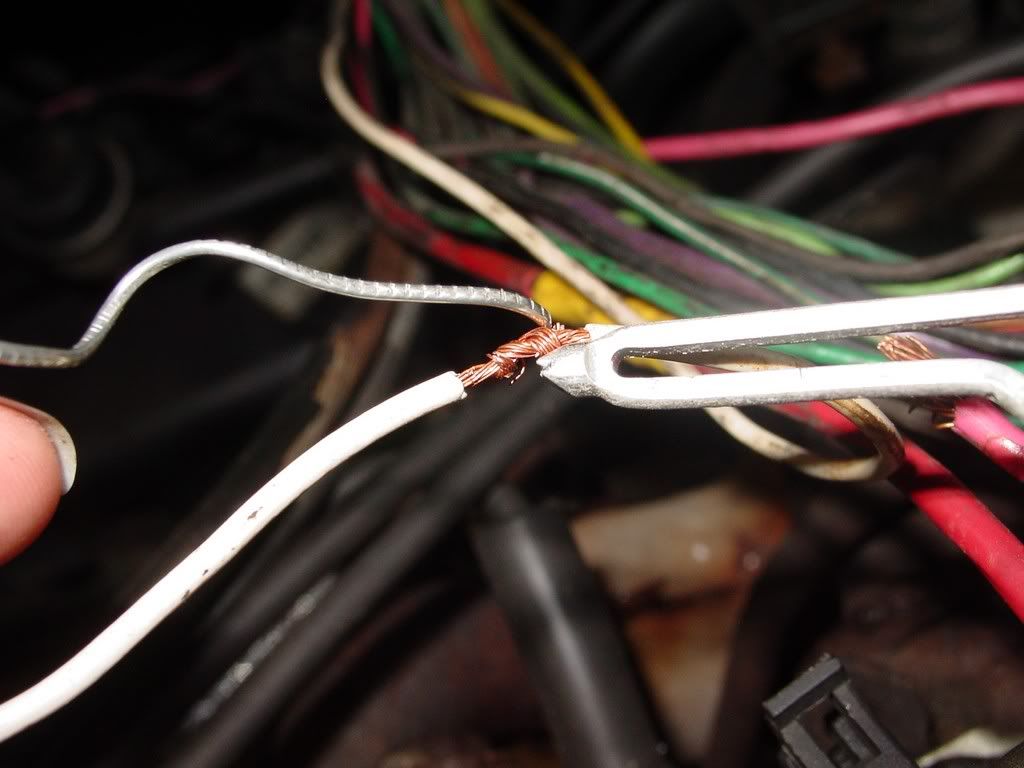
And the bundle all soldered... and one butt connector (this one was a fusible link)... I did not have one small enough so I had to go with a cheapie. Don't mind the red 10 over on the side... I had not yet bypassed the c500 in the pic, so this one was still unfixed...
C500 all cleaned up from the wasp dirt!
[This message has been edited by redraif (edited 09-07-2011).]
Cleaning up the C500 removed some of the old dried up black grease GM used. I left the stuff that was still tar like & fresh and gooie.
I repacked it with Dialectric, but did not get pics. I thought I did, but I was so full of the dialectric I must have meant to go back after I cleaned my fingers. I had that stuff everywhere... LOL!
[This message has been edited by redraif (edited 09-08-2011).]