SMC Sheet Molded Compound makes up the hood, roof, rear upper quarter, and rear decklid. (Fiberglass)
RRIM Reinforced Reaction Injection Molding make up fenders, door panels, and lower rear quarters. (the rear lowers were later changed to injection molded nylon)
RIM Reaction Injection Molded Urethane is used for the facias.
TPO Thermo Plastic Olefin is used for the rocker panels. As a side note, the 84 engine cover grill is magnesium!
All Fiero panels are painted with high solids acrylic enamels, and covered with a clearcoat.
Edited to add body panel compositions.
[This message has been edited by hercimer01 (edited 03-20-2012).]
IP: Logged
10:59 PM
Nov 14th, 2010
hercimer01 Member
Posts: 2336 From: Rockford IL. Registered: Mar 2008
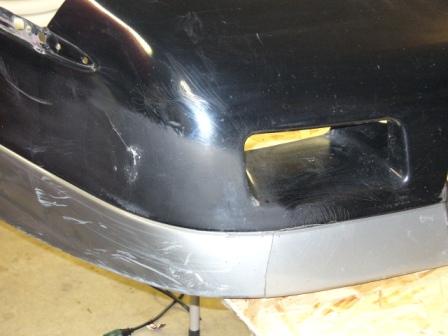
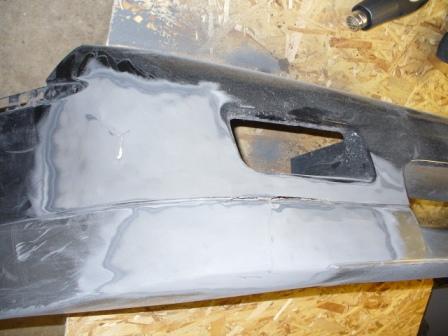
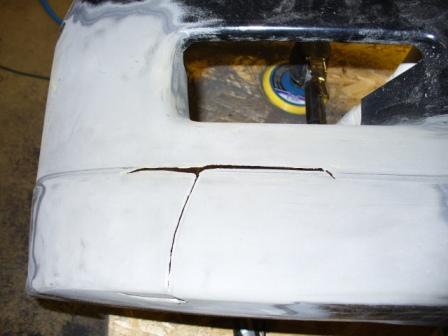
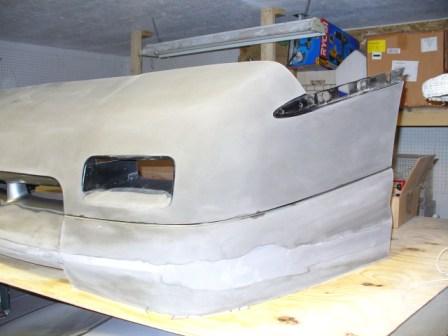
Reinforce the backside of the repair or it will easily be redamaged too. On the wavy top, I suggest you dont use the heat gun, your very likely to make it worse. Just sayin...
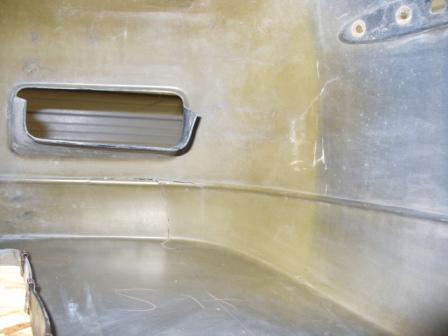
I cant tell if those dark 'Patches' on the inside are permanent or just some tape stuck on temporarily. I use some fiberglass matt laid on and covered with the flexible bumper filler at least a few inches bigger than the repair on all sides.
[This message has been edited by rogergarrison (edited 11-15-2010).]
IP: Logged
08:54 AM
dsnover Member
Posts: 1668 From: Cherryville, PA USA Registered: Apr 2006
Reinforce the backside of the repair or it will easily be redamaged too. On the wavy top, I suggest you dont use the heat gun, your very likely to make it worse. Just sayin...
I cant tell if those dark 'Patches' on the inside are permanent or just some tape stuck on temporarily. I use some fiberglass matt laid on and covered with the flexible bumper filler at least a few inches bigger than the repair on all sides.
Hi Roger. I greatly respect your opinions on repairs, so with that in mind, what do you recommend for effective 'sagging' repairs of the nose? I've got two GT noses that need some attention in that area.....
About all you can do is use adhesive and bond wood or metal panels on the inside to keep it flat. If its already sagged, your pretty much out of luck. Its either live with it or replace it with a better one. Corvettes have the same problem and Ive done a lot of them with replacement noses made from fiberglass. It would be cool if one of the vendors would make replicas of OEM bumper in ABS or Fiberglass. I know some people just put some aftermarket front ends on, theres a few Ferrari 'like' noses. You cant use even flexible filler to level it out, because as soon as the radiator or sun gets hot on it, it warps anyway. Each of the bumper styles has its own honeycomb reinforcement to help it keep it shape, but if its wrong, damaged, etc, it dont do much good. Maybe Driver has something hes tried that kept it straight. Ive never had any luck other than using liquid nails to hold metal panels on the inside under the reinforcment on new ones or ones in good condition.
IP: Logged
04:15 PM
Nov 16th, 2010
hercimer01 Member
Posts: 2336 From: Rockford IL. Registered: Mar 2008
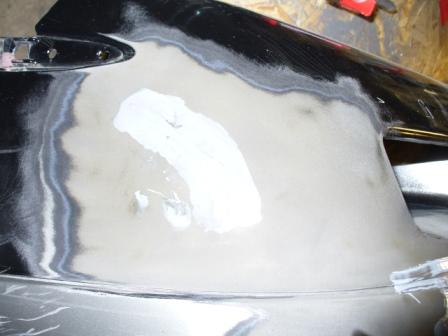
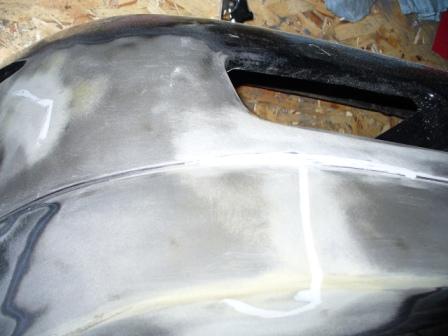
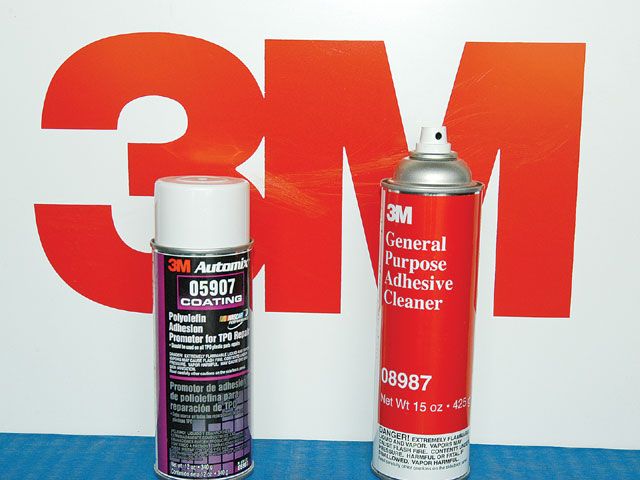
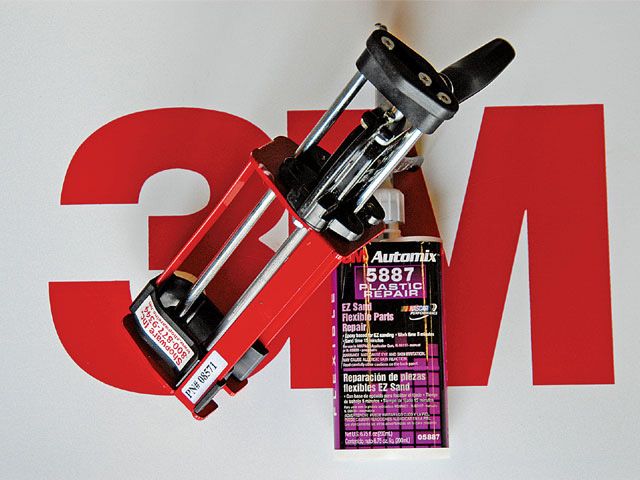
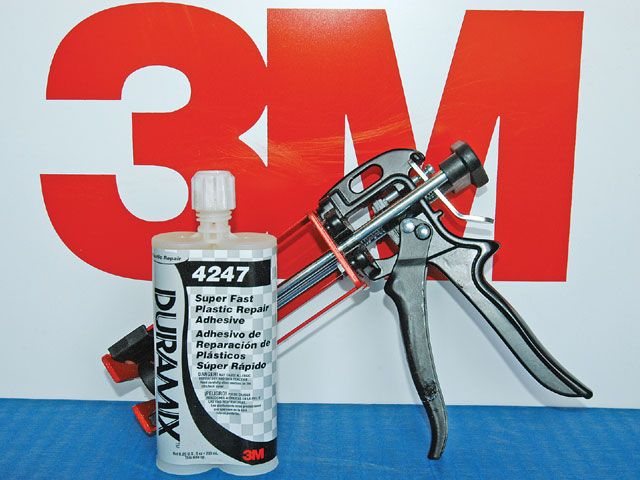
This is what i used to do the repair. The link i gave above shows how to do it.
Cleaner and Adhesion promoter.
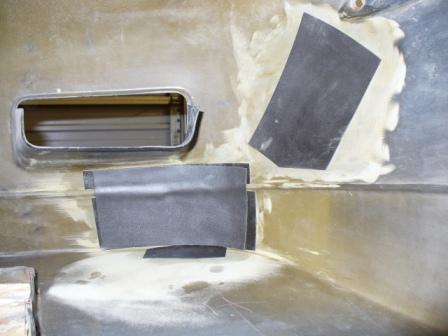
These go on the backside of the crack for rigidity. They are self adhesive and permanent.
For RIM repairs. Flexible, sandable filler.
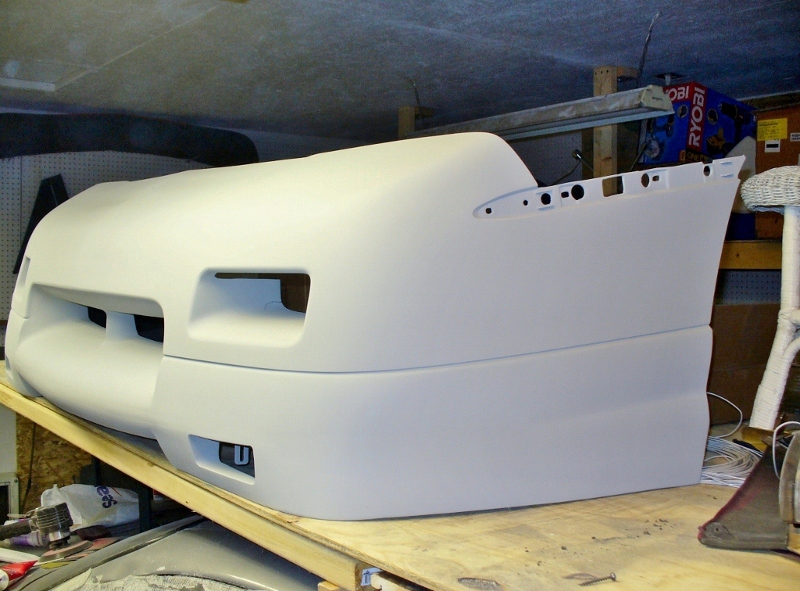
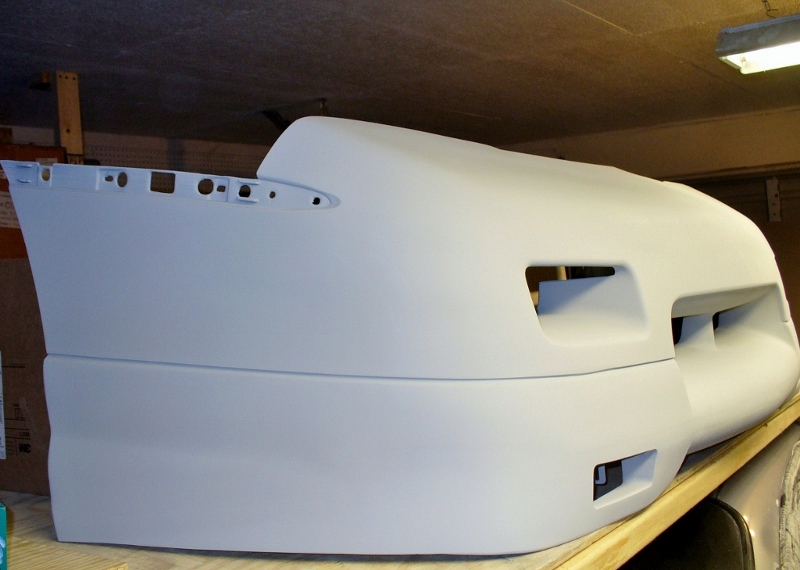
For RRIM repairs. This is for fabricating broken off tabs or whatever you want to make. The side Quarters are RRIM. Great for modifying them. This article covers the mounting tabs on the edge of the fascia and some minor SMC repair.
Reinforce the backside of the repair or it will easily be redamaged too. On the wavy top, I suggest you dont use the heat gun, your very likely to make it worse. Just sayin...
I cant tell if those dark 'Patches' on the inside are permanent or just some tape stuck on temporarily. I use some fiberglass matt laid on and covered with the flexible bumper filler at least a few inches bigger than the repair on all sides.
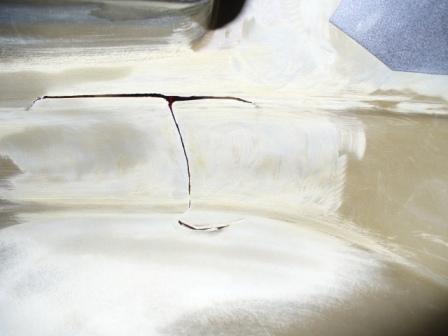
Your saying you think i should skim coat the repair?
Should i grind it out a little first?
IP: Logged
02:34 AM
rogergarrison Member
Posts: 49601 From: A Western Caribbean Island/ Columbus, Ohio Registered: Apr 99
I dont know exactly what you mean but ill take some guesses. On the inside, I put some of the bumper repair material over the prepped area, lay the patch in it while its wet, then put more over the top of it all in one step. If you put more on afterward, you need to rough the patch up with something like #80 grit. On the outside, after the repair looks good with correct shape and so on, I do put a final thin layer over a wider area making sure the whole place im putting it is prepped. Dont just wipe some over the smooth cover. After I final sand that thin coat (you may sand most of it back off in the end) then its ready for primer. Any defects you see in the primer after its sanded will show in the paint. You can fill minor things with 2 part spot putty over the primer.
IP: Logged
08:57 AM
PFF
System Bot
Jan 14th, 2011
hercimer01 Member
Posts: 2336 From: Rockford IL. Registered: Mar 2008
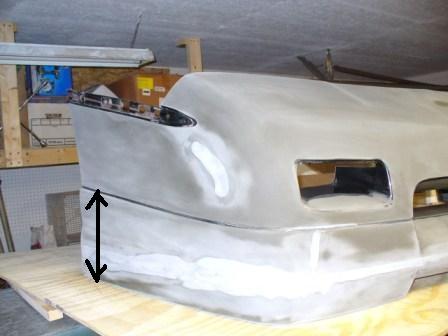
Just where the arrow is. Its been added on to and i dont know how low to leave the rear of the added onto portion to make it level. I just guessed and made it 8 1/2"
IP: Logged
04:29 AM
Old Lar Member
Posts: 13798 From: Palm Bay, Florida Registered: Nov 1999
My 88 GT has a fiberglass chin spoiler which I "bolted in place". Since installing it in 2006, It has been removed, repaired and repainted twice as since it makes the front low and it gets scraped, cracked and chipped easily. Yours will be more flexible as it was made from another Fiero nose. I don't have those measurments, but if you cut the aero nose correctly, those measurements should just be equal which is all that is necessary for looks.
IP: Logged
10:04 AM
infinitewill Member
Posts: 2358 From: Overland Park, KS U.S.A. Registered: Mar 2009
Nice job. I had to repair my bumper (twice!) and also did the 'chin spoiler' mod to mine. As far as the measurement goes that you're looking for, it's a personal preference. I just went out and measured that part on my bumper, and it's about 6 1/2" from that line to the bottom edge. It was originally lower, but when I first bolted the bumper to the car and looked at it from the side, it didn't look right. The side ground effects were higher than the back edge of the bumper. The top of your blue tape in one of the previous pictures is about where mine is at. Seems like a lot taken off, and it is, but it flows much better, in my opinion. I also tapered the nose up slightly. I didn't like the way it looked parallel to the ground. Here's an old thread after I got my car assembled. There's a good side shot of my car showing what I mean.
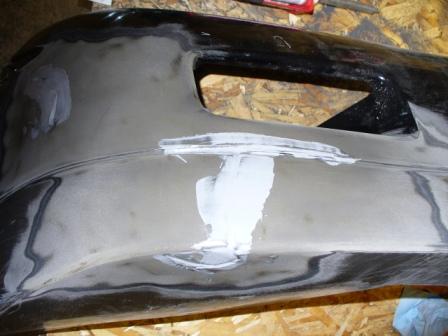
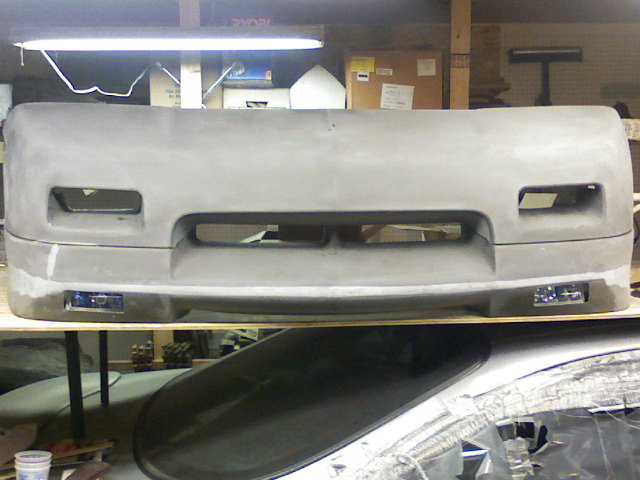
I used this. Its single stage, (no hardener.) Every time i sprayed it , the previous layers were re liquified and got the RIM to swell making it a PITA to smooth sand.I have DP50LF epoxy primer now and will respray it starting over with high build sandwiched between the DP50.
Edit: 3/20/12 actually the primer has sat unfinished for a while now and has started to crack due to shrinkage. It may not be good primer or i sprayed it to hot.
[This message has been edited by hercimer01 (edited 03-20-2012).]
IP: Logged
01:17 AM
hercimer01 Member
Posts: 2336 From: Rockford IL. Registered: Mar 2008
I've found a donor bumper but its warped at the bottom lip, anyone think I could straighten it with a heat gun to get it good enough for this mod? The guy only wants $20 for it so why not?
IP: Logged
11:02 PM
Nov 15th, 2011
hercimer01 Member
Posts: 2336 From: Rockford IL. Registered: Mar 2008
I've found a donor bumper but its warped at the bottom lip, anyone think I could straighten it with a heat gun to get it good enough for this mod? The guy only wants $20 for it so why not?
I have a formula bumper just getting moved around my garage and it seems to take on the shape that it rests in. ie. a mild flex will straighten out if it rests straight. I would give it a shot.
$20 bucks was what i paid for my donor bumper too. I noticed Tyler Shipmans car has the lower bumper mod http://www.tylerstoy.com/ . There is no filler on the seam and I think it looks good. This brings up the cost of the Automix, I would suggest keeping the lower bumper add on removable for ease of repairs and keeping the cost of the mod down.
IP: Logged
01:50 AM
nitroheadz28 Member
Posts: 4774 From: Brooklyn, NY Registered: Mar 2010
I have a formula bumper just getting moved around my garage and it seems to take on the shape that it rests in. ie. a mild flex will straighten out if it rests straight. I would give it a shot.
$20 bucks was what i paid for my donor bumper too. I noticed Tyler Shipmans car has the lower bumper mod http://www.tylerstoy.com/ . There is no filler on the seam and I think it looks good. This brings up the cost of the Automix, I would suggest keeping the lower bumper add on removable for ease of repairs and keeping the cost of the mod down.
I gotcha, for $20 I'll give it a shot. Yeah I actually like it not filled in cause it makes the bumper less prone to damage if the lip catches something- and I don't like how it looks with one large lip. Thanks!


.jpg)
.jpg)
.jpg)

.jpg)


.jpg)
.jpg)


