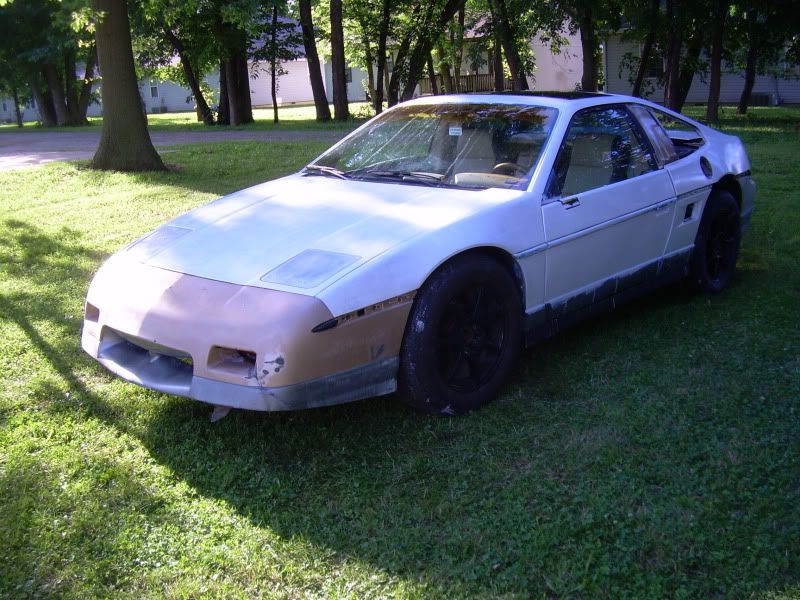
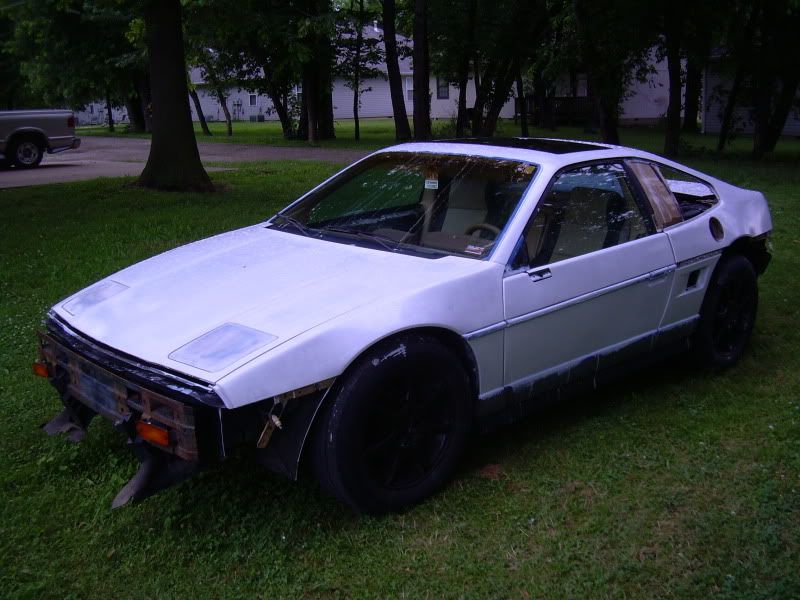
Hi guys, I asked a while back about what I should do for prep work for a roll paint job. Well... I've started it after pulling some panels, trim, and making some repairs. I thought I'd share some pictures as I go. So far, I've got two coats of paint down and I'm goign to do a third in a few hours. Then tomorrow it'll be wet-sanded, the jambs painted, and then a few more coats on the body put down.
Anyway, here are some pictures
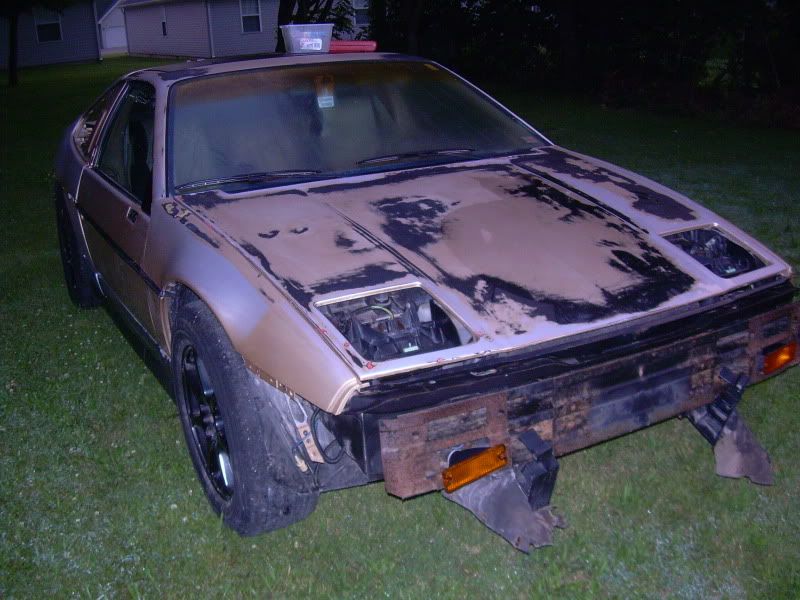
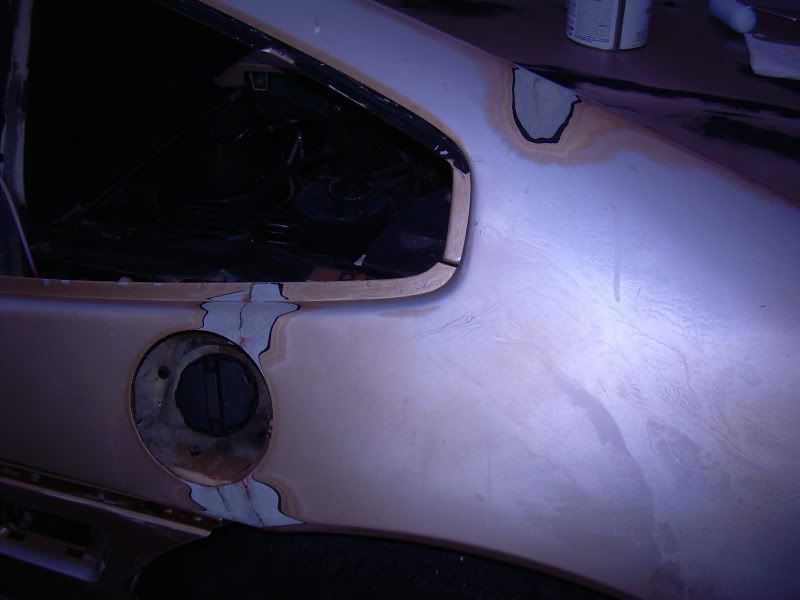
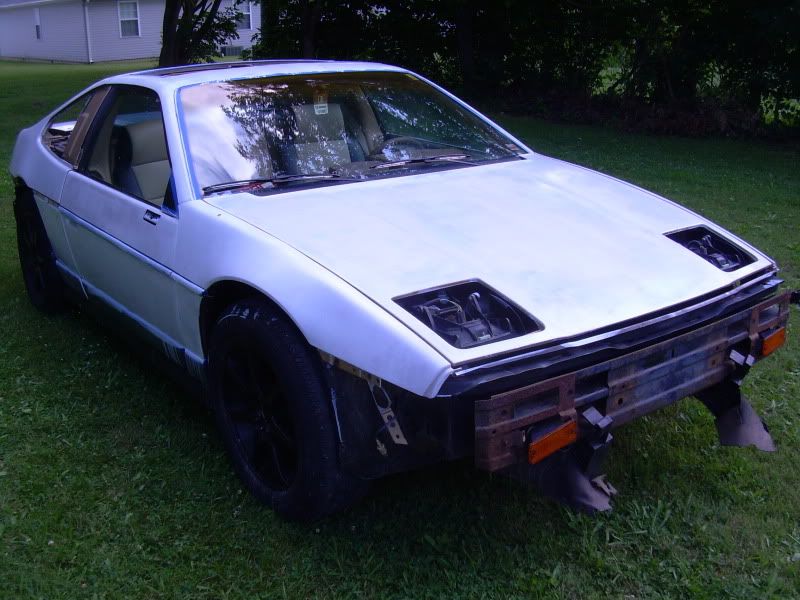
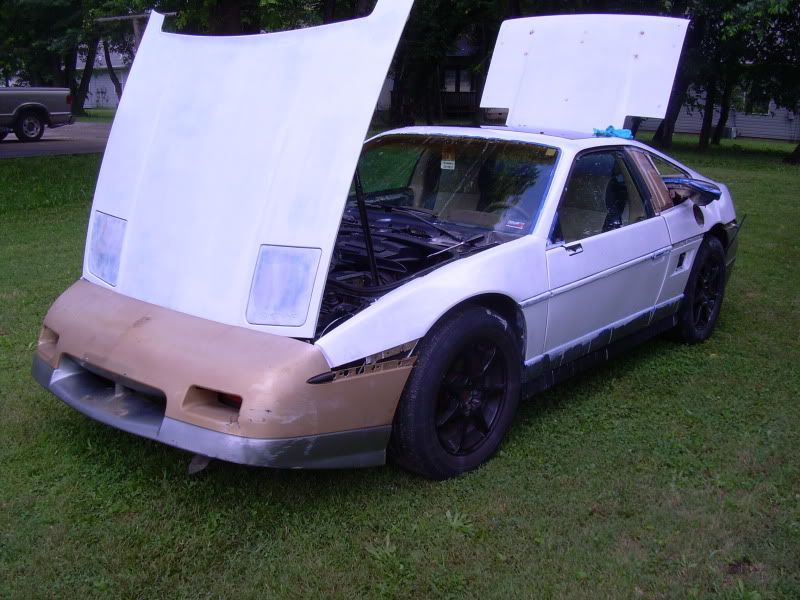
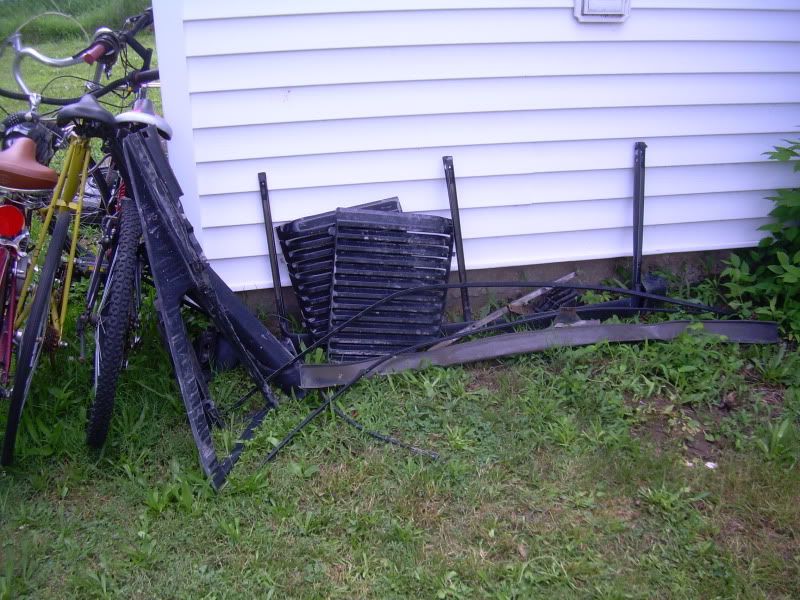
Body Panels removed:
After being sanded... lots and lots of oxidation to cut through. Used 150 grit for stubborn stuff then went back over everything with 320 wet.
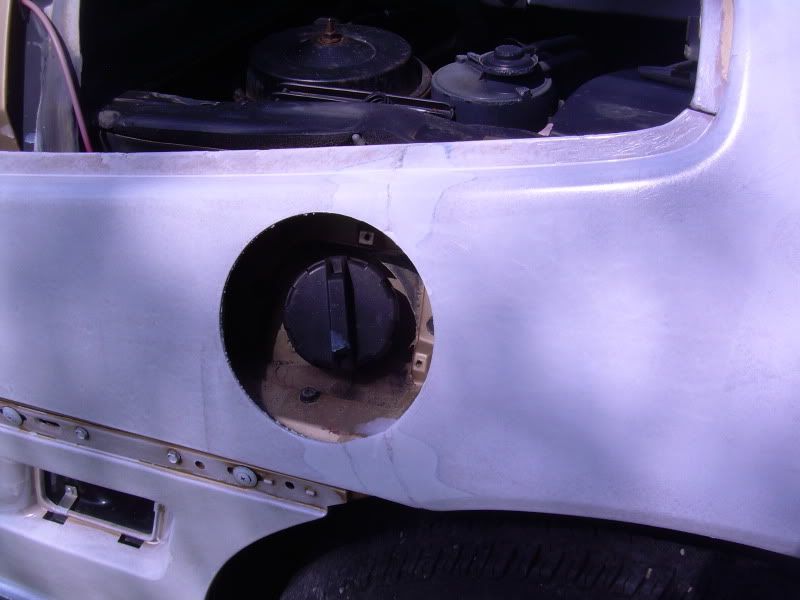
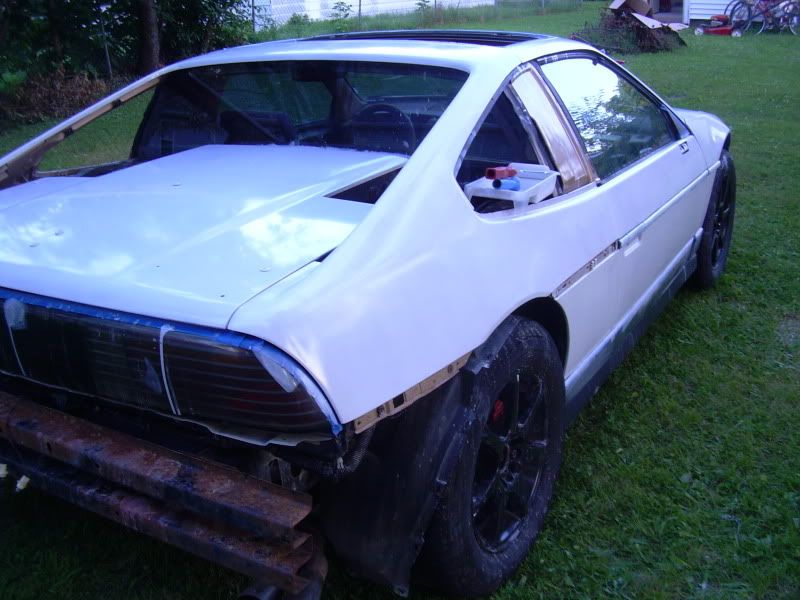
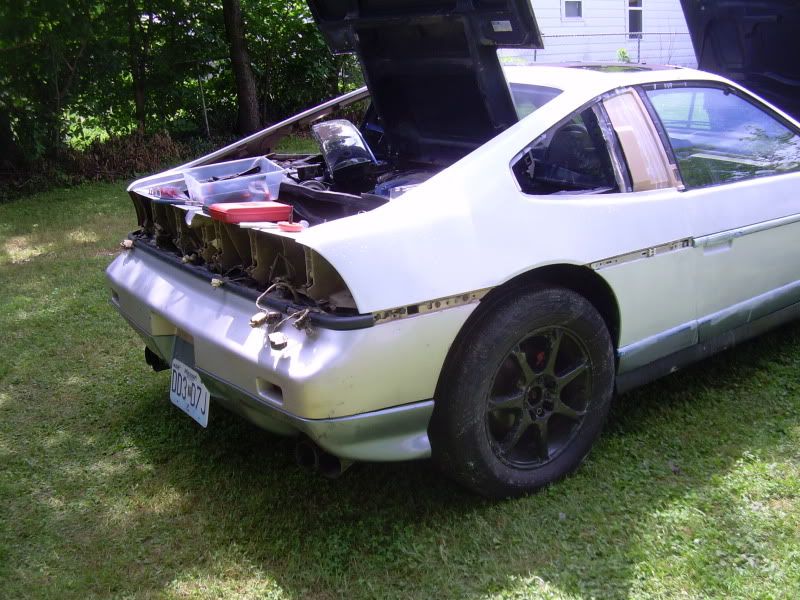
Repaired some damage to the rear fastback quarter. Bonded back with 2 part plastic epoxy and sanded. Cracks filled with spot putty and sanded.
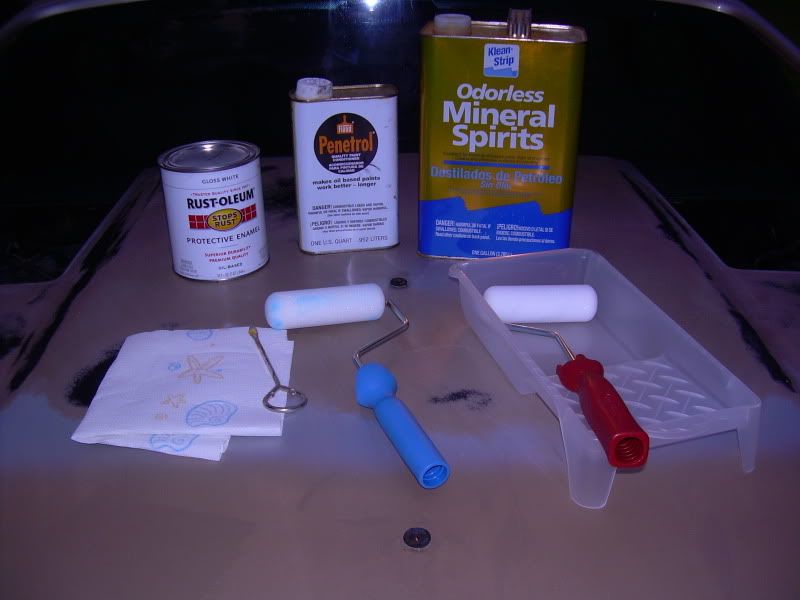
My paint materials. I already owned most of it from my last roller-paint job so all I needed was another can of Rustoleum.
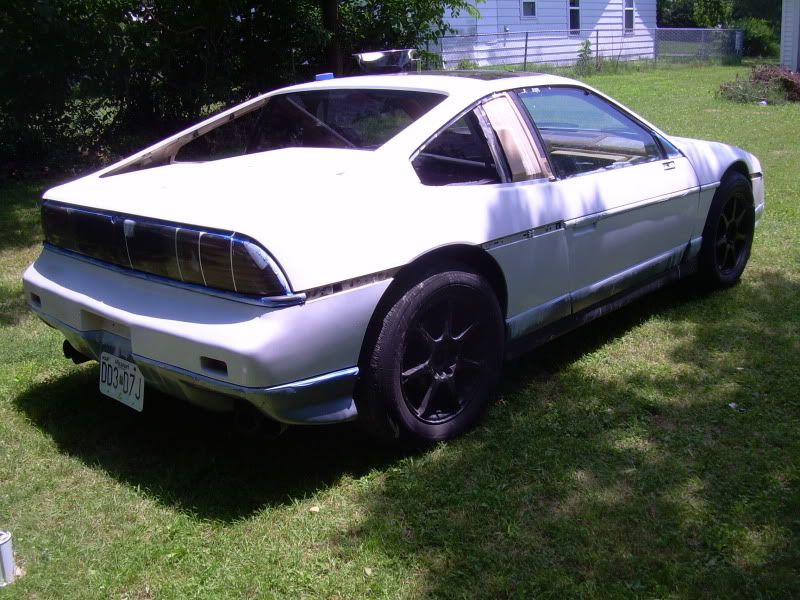
Gave the car one more wipe down, masked off some trim bits and gaskets and started painting. So far its just two coats so the coverage isn't great. I'm putting down one more coat then I'm going to let it cure till tomorrow when I'll wet-sand and probably work on getting the bumpers fixed and back on.
IP: Logged
11:48 AM
PFF
System Bot
Firefox Member
Posts: 4307 From: New Berlin, Wisconsin Registered: Feb 2003
Nope, no primer. The first few layers of paint acts a primer of sorts, otherwise the Rustoleum doesn't need it.
I went outside and checked it and its hardening up nicely. I can feel some debris in the paint so its time to go ahead and do some wet sanding. Then I'll probably wash the body down, paint the jambs and maybe put another layer of paint down. I also need to sand the headlight doors and install and start looking at sanding and installing the bumpers... or maybe I'll do those off the car, I haven't decided yet.
IP: Logged
04:48 PM
Firefox Member
Posts: 4307 From: New Berlin, Wisconsin Registered: Feb 2003
Nope, no primer. The first few layers of paint acts a primer of sorts, otherwise the Rustoleum doesn't need it.......
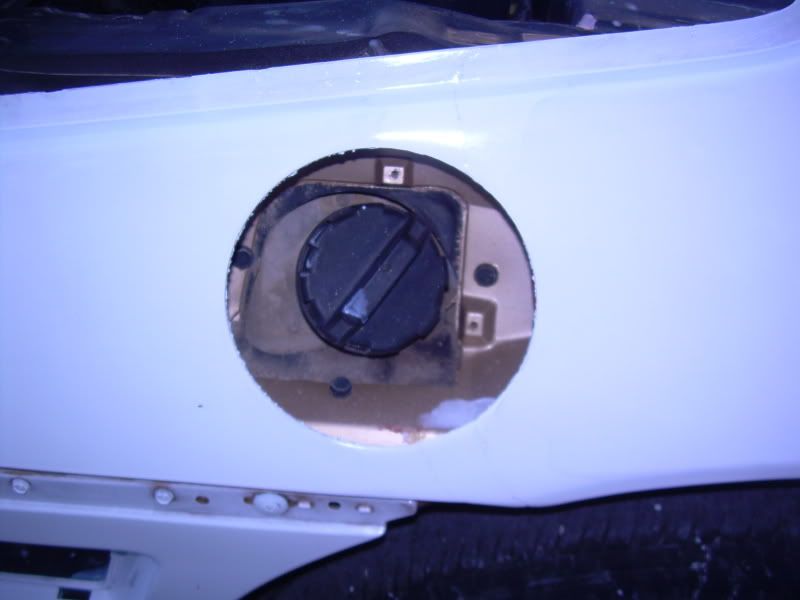
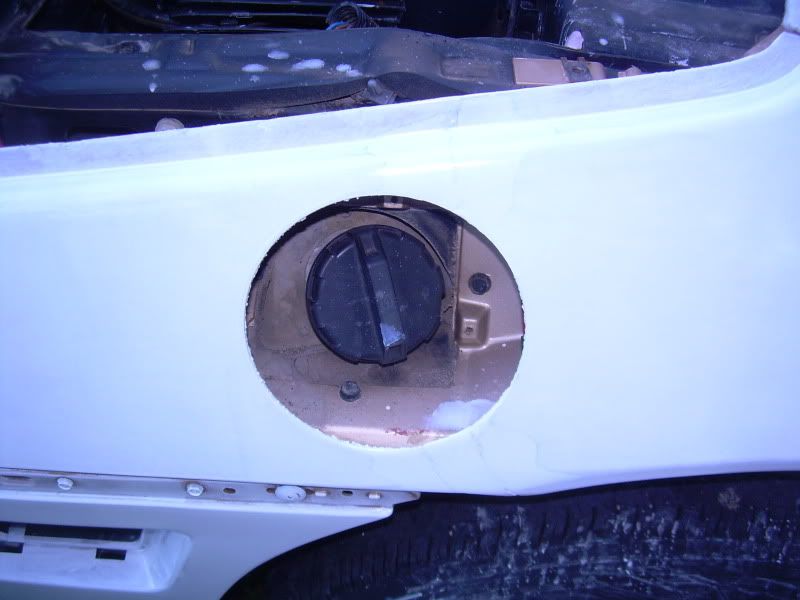
Acts as a primer? Really? Paint is not primer.......if it was, no one would make primer. Why does Rustoleum itself make primer? Primer helps paint bond to surfaces that cannot accept paint properly. Bare fiberglass is one of those surfaces. You didn't repair the cracks around the fuel door so those will surely show through, crack and then your Rustoleum will flake off at those crack edges because the paint didn't adhere to the fiberglass properly. You need primer for that to work out.
Good luck.
IP: Logged
05:09 PM
Pete Matos Member
Posts: 2291 From: Port St. Lucie, Florida Registered: Jan 2010
Alibi, Glad to see another $50.00 paint job going on.... I am considering trying this on my 86GT and at first I was like many others and kinda balked at the idea... But after seeing all of the different cars painted with nice results and reading of the longevity of these paint jobs I was intrigued. SO last week I decided to give it a shot. I removed the wing from my car and did a little smoothing and puttied some light scratches. Then I wetsanded the whole thing with 320 grit wetsandpaper and then wiped it down with some mineral spirits. Let it dry for a little while then I sprayed it with four coats of rustoleum Sunrise red. I then let it sit for more than a week to fully dry. This weekend I took some spare cash and bought a nice high speed buffer and then took the now dry wing and wetsanded it with 1000 grit paper, then 1500 grit paper, and then I hit it with the buffer. I buffed it with some 3m machine buffing compound on a nice new pad and I gotta say that I am now a believer!!
I am quite amazed at the shine and the smoothness of the paint once it is wetsanded. I chose to spray it on because I own some nice quality spray guns and I have some experience there. However after reading thru too many paint job threads on Rolledon.com it really does not matter how you apply the paint. So long as you get an adequate buildup so that you can wetsand it smooth without cutting thru the method of application is pretty much down to how much sanding you want to do on the car once it is painted. I did not spend a ton of time sanding or buffing and it really shines and looks like a professional paint job. I also gotta say that the Sunrise red I chose is a VERY beautiful red color. I has a slightly less amount of red than the factory red on the car but it is really a nice color. In fact I was so impressed with this process that this afternoon, I removed the primered decklid from my fiero and wetsanded and puttied it and prepped it for paint. I just finished spraying the thing out in the shop and I am really looking forward to being able to wetsand and buff this thing. If the decklid comes out nice I am seriously thinking I will bust this car apart next weekend and spray the whole damn thing.... I gotta say that you really need to see the shine of this red in person to beleive it. If I can get the rest of the car to look as good as this wing does I will be pretty damn happy....
Good luck with your paint job man, I do have to say that the white color is one of the better looking colors once it is buffed out. That color really seems to produce good results from the pictures I have seen on the forums. I was also quite surprised that there are a great many Honda civics and tuner cars that have been painted this way. I do have to say that there are some guys that just slap the paint on and do not seem to do the wetsanding and buffing necessary to produce good results. There are too many pictures to show bad paint jobs but there are also far too many pics of cars that were painted this way and the owner took the time to apply the paint carefully, wetsand thoroughly, and buff it out properly and those pics also show... I really like the idea that if I manage to get a scratch, chip, or whatever, I can just paint some more on and buff it out and I am back to shiny again. This in addition to the low cost of the materials is the reason I am considering this method. The results speak for themselves..... here is a link to one of the better paint jobs I have seen and there are many more.... peace
I didn't say it *really* was a primer, but that it just sorta acts as one because the paint is built up in layers to get full coverage. The nice thing about the rustoleum is that if I do get some cracking from the fiberglass, I can always go back and make repairs and just repaint. Its not a big deal. I don't have a show car so at this point I don't really care if the paint isn't perfect, I just want something that looks less crappy than the paint that was on the car.
I don't own a buffer so I plan on just doing my best on the last coat and let whatever gloss I get out of the paint work till I have a chance to use a buffer. I chose white partially because I hear its the easiest to work with and because I don't want a bright color to attract unwanted attention.
Anyway, I wetsanded with 400 grit and put another coat down (#3). No pictures because my camera wouldn't really show much of a difference from the last coat anyway. I'm using really thin coats so its drying really fast so that I can get more coats in. Also, the first 4-5 coats are just to get coverage over the old paint anyway. I'll probably actually end up with 8-10 coats, but its not like its a big deal if I do more like 12-14.
IP: Logged
06:34 PM
Pete Matos Member
Posts: 2291 From: Port St. Lucie, Florida Registered: Jan 2010
Well good luck man I am anxious to see how it comes out. I would however highly recommend either borrowing or buying a high speed buffer and going to work on it. It really smooths out the paint and adds some serious gloss to it. The one I bought I got at Auto Zone for like$69.00 and it works real nice, also came with a brand new buffing pad and a velcro pad so you can use a foam pad with it. I have read a few threads that showed guys using some of the better mequiars buffing products to buff it out and then follow it with some meguiars quality waxes and it makes a huge difference. The paint does however go on rather glossy so it would be okay I suppose to leave it. The real shine and gloss only comes from the real good wetsand with at least 1500 grit followed by the buffing out. It is not hard to do either and you could always sell the buffer once you get it finished if you are short of cash.... The paint looks and feels real nice and shiny once it is done and I am gonna hit it with the buffer again tomorrow after I wetsand the decklid. I did manage to get a few fish eye holes in the decklid that I am gonna have to deal with tho but the nice thing about this paint is you can just retouch whenever you need to.... I will try to post some finished pics of the decklid once I get it where I want it... peace
Yeah, put up some pics of your decklid... I'm curious what it looks like sprayed and buffed vs. rolled and left alone. I do plan on getting a buffer eventually, but for now I think I can leave it as-is and be OK.
Sweet man, got any close up pics and maybe some pointers? Is that the sunrise red? How did you buff it? What are your thoughts on the paint now that it is done and you are driving the car? peace
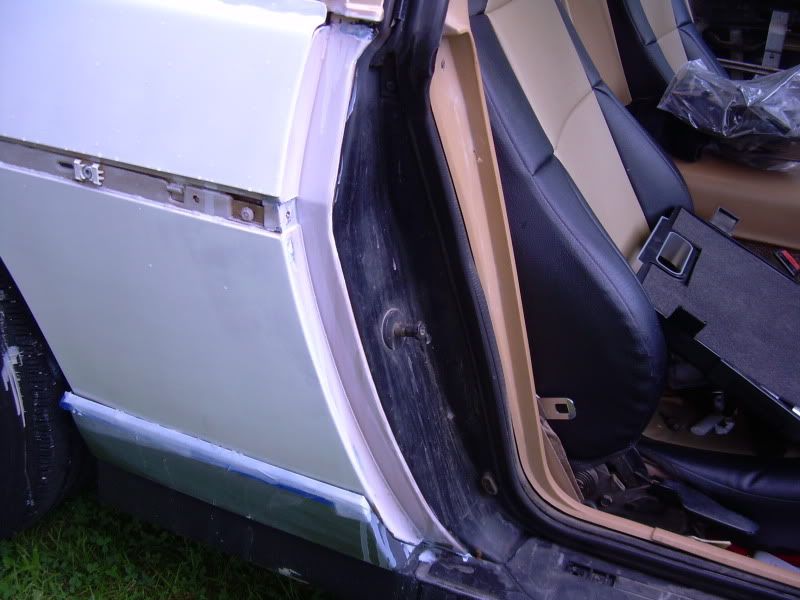
Just painted all the jambs. I've got probably one more coat for the jambs and then a tad more body work, then it'll be ready for more paint. I need to paint the edges of the headlight doors and put those on tomorrow too... well, I may do that tonight but we'll see.
Its coming along nicely though! I think after I get some paint on it tomorrow that I'll start working on repairing some wire damage that I found under the rear bumper and then install the rear bumper after I paint its edges. The front needs some work though, but I may just end up replacing it so I may not do too much with it.
It got dark so I didn't get any more pics though, but I'll update tomorrow.
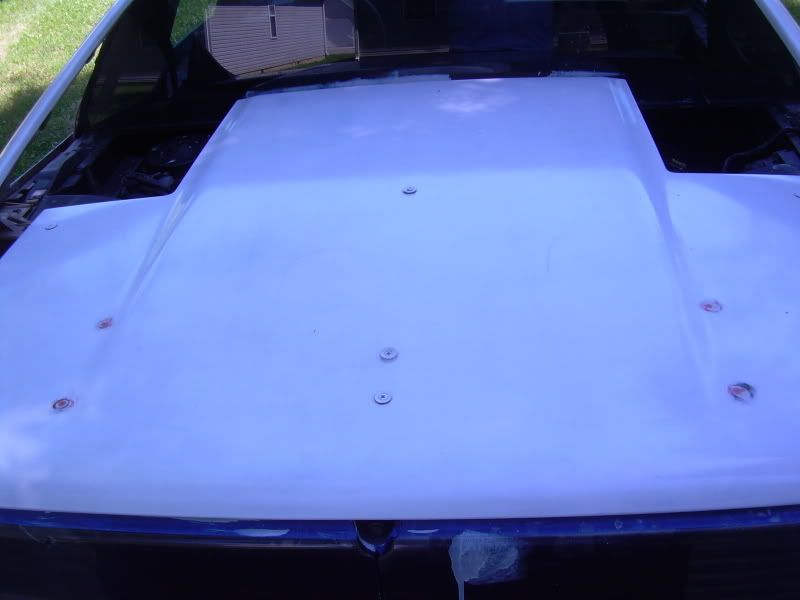
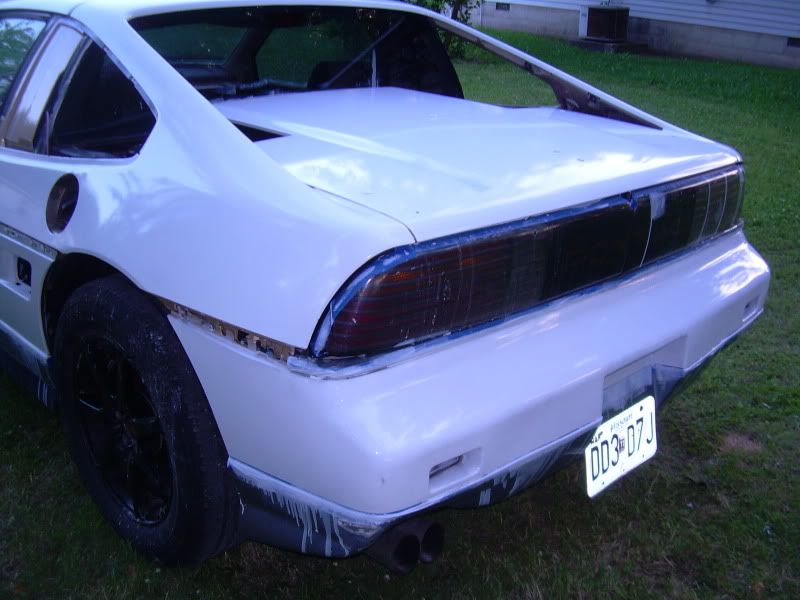
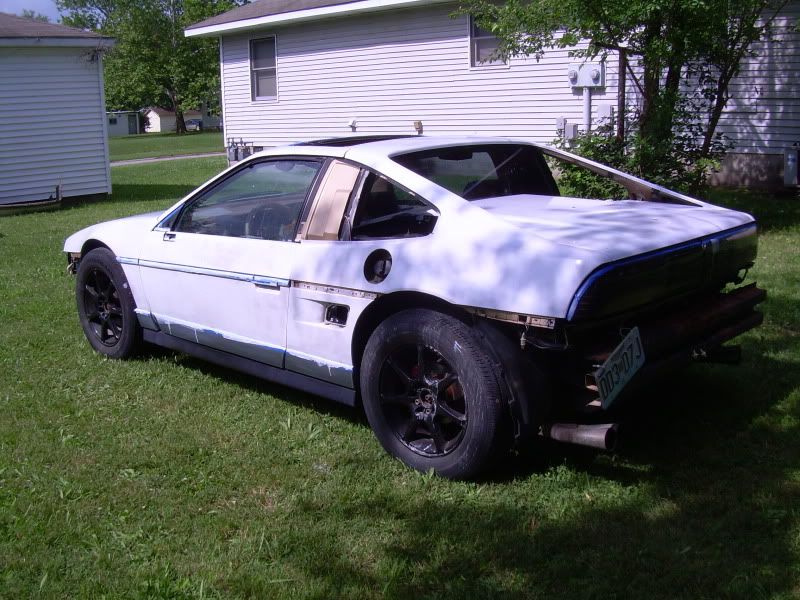
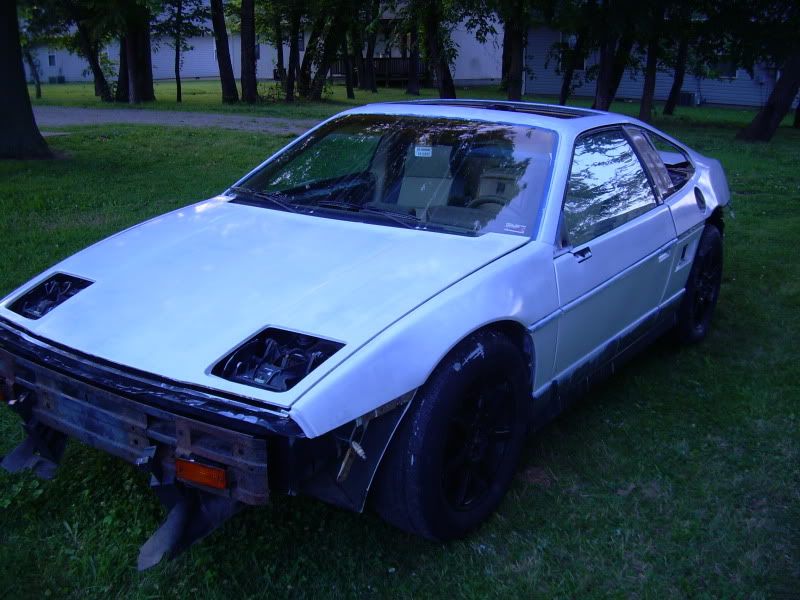
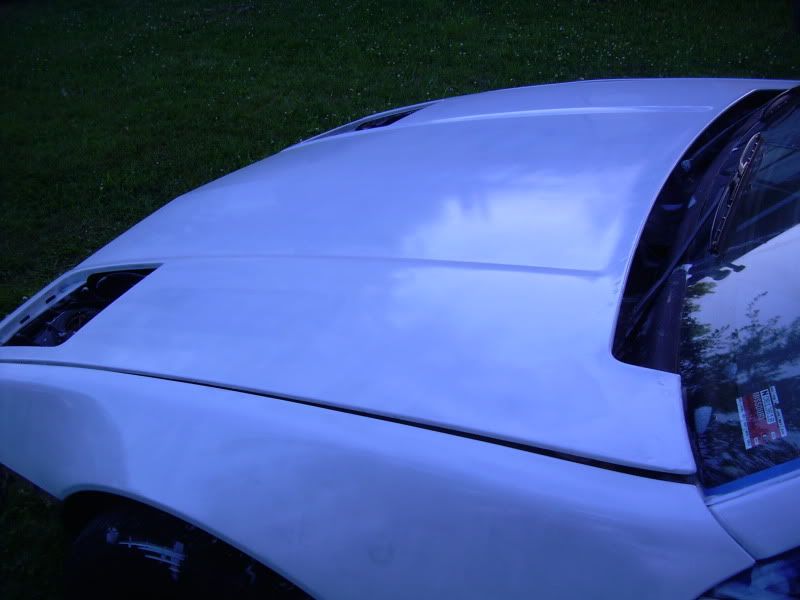
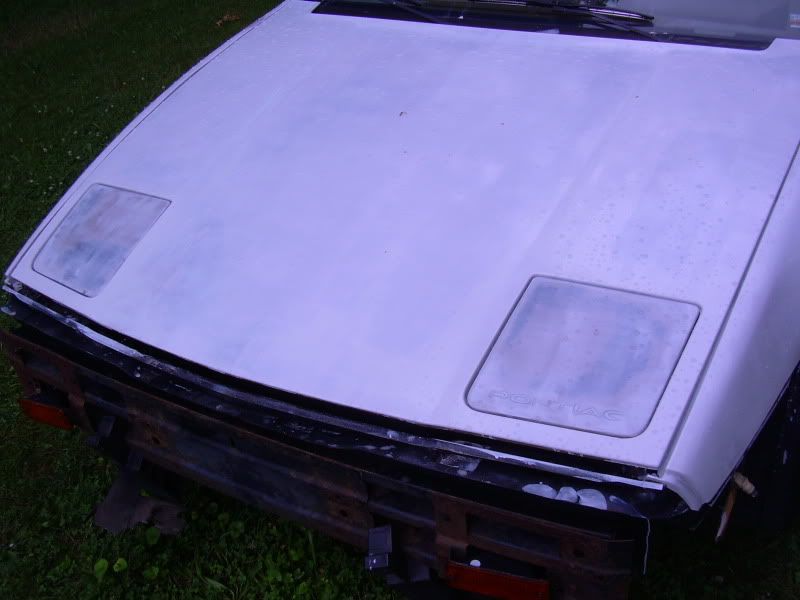
Didn't get much done today since its been raining. But here are some pictures of updates The white is very forgiving of flaws, but its slow to cover up the relatively darker colors of the old paint beneath. However, as it builds I am getting a nice enough gloss to get some reflections so by the time I get to coat 8 or 9, it should look nice enough without buffing.
Third coat, starting to get some decent coverage now:
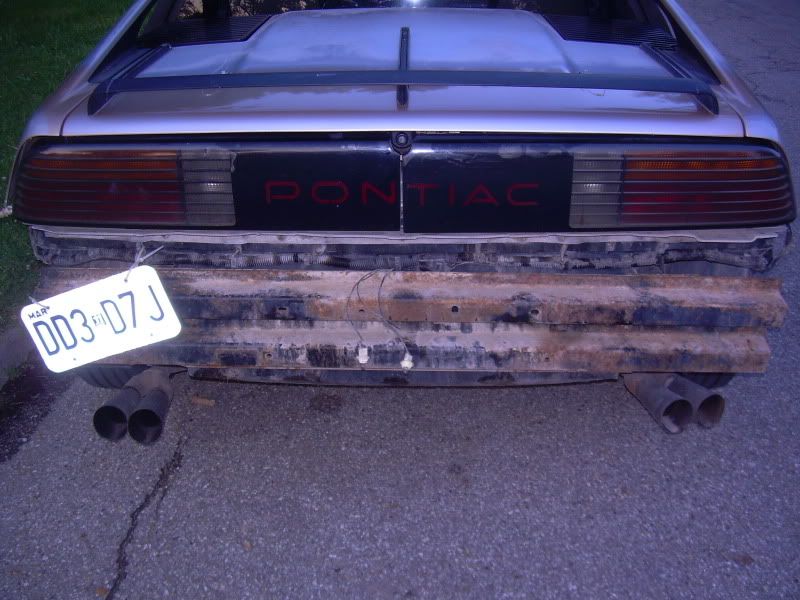
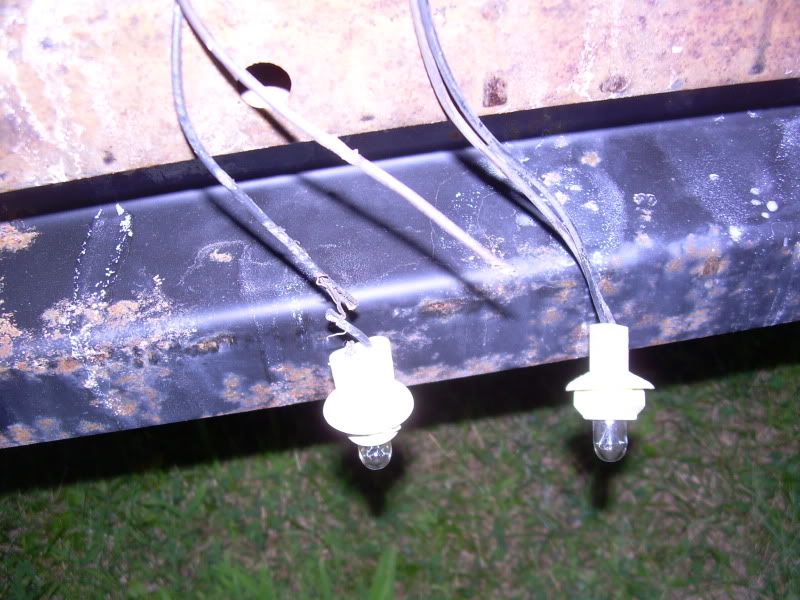
Mouse-chewed wires under the rear bumper to fix before I can put the bumper back on:
Prepping and installing the headlights and giving them their first coat:
Painted the jambs... needs another couple coats and they'll be done tho:
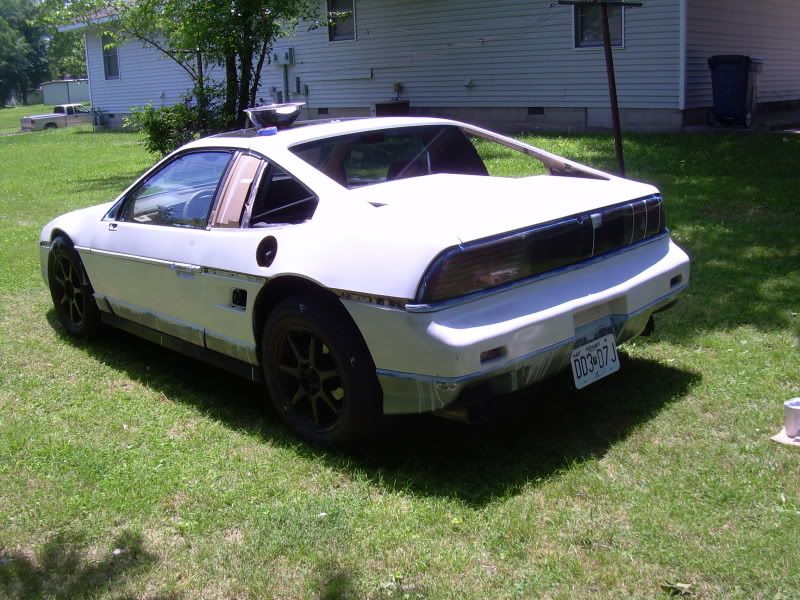
And worked on hiding my antenna:
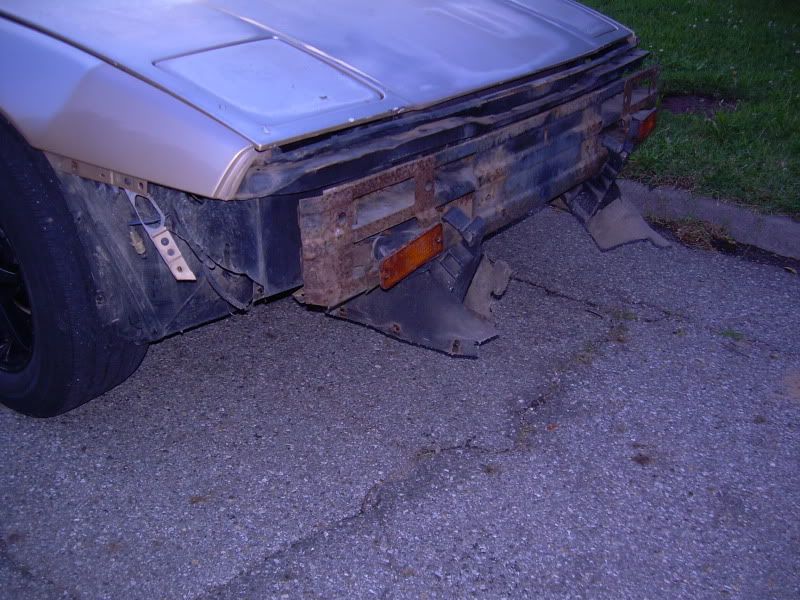
And any thoughts on what I can do to fix my bumpers?
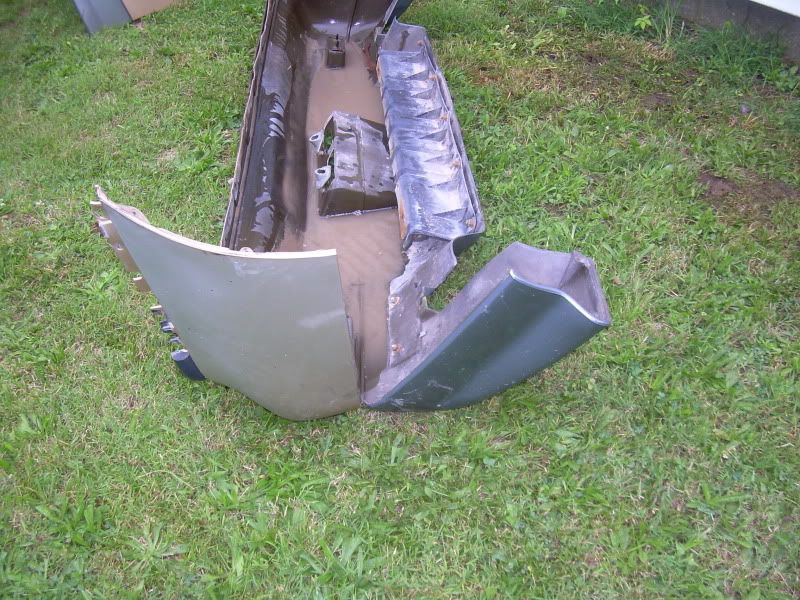
On the rear, the GT trim has torn away from the upper part of the bumper. I think I can just epoxy in a patch behind it and be OK, not that anyone would really be looking at the bumper very hard.
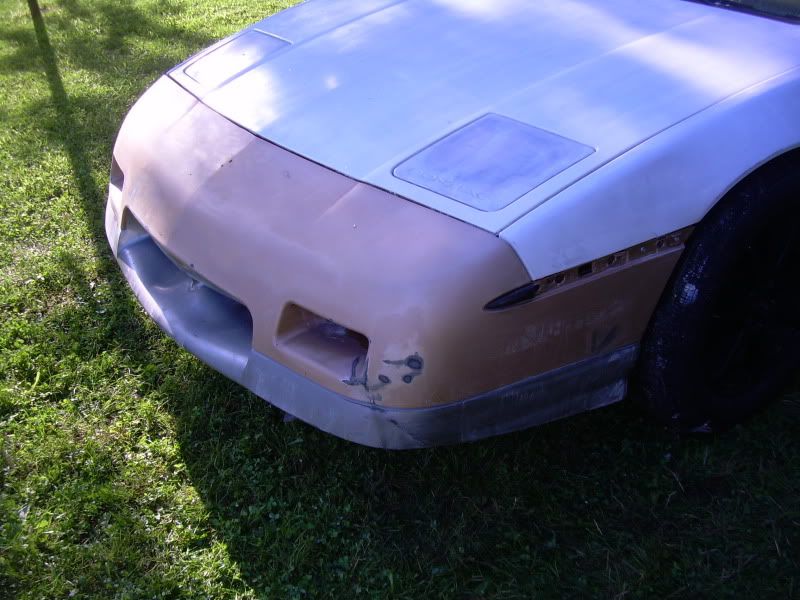
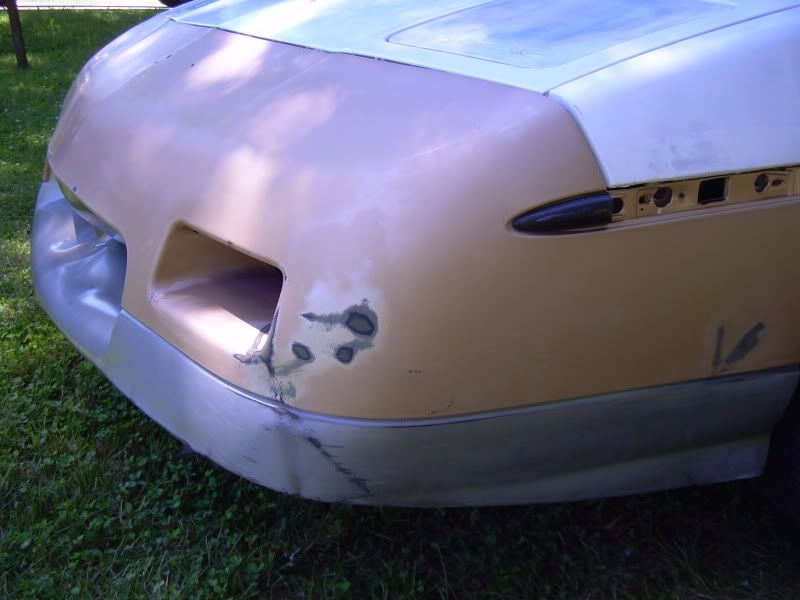
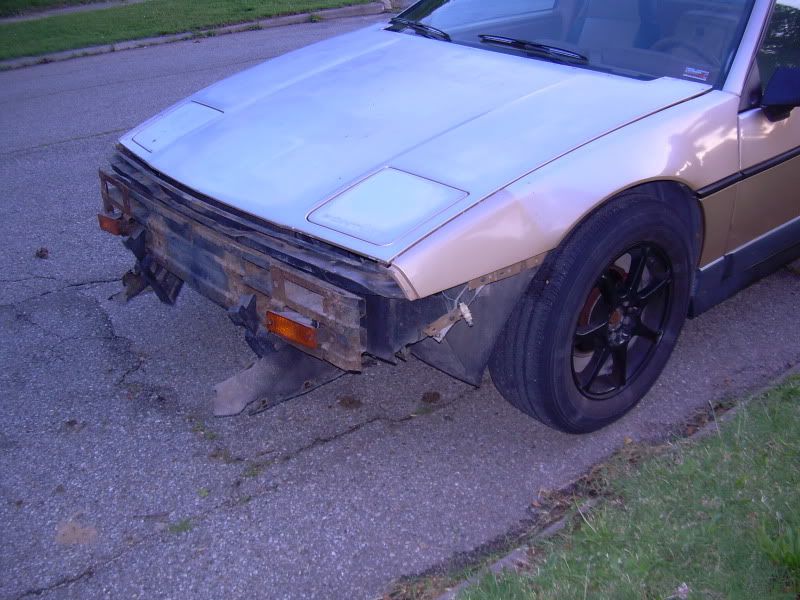
The front was damaged over the winter when I hit some ice and spun out into a concrete divider. I got most of the dent kicked out after I got the bumper off, but the plastic is still deformed. I think I may just leave it alone and paint it the best I can and just keep an eye out on a replacement.... actually, I've had my eye on a Ferrari-styled nose for a while now and this would give me a good excuse to pick one up eventually
IP: Logged
08:56 PM
Pete Matos Member
Posts: 2291 From: Port St. Lucie, Florida Registered: Jan 2010
Hey man looking good.... I painted the decklid yesterday but I managed to get some fish eyes in there and I am gonna hafta recoat it this weekend but I did get out there and wetsanded it tonight. I also managed to hit it with the high speed buffer and then with my orbital and some mothers .... It is really taking on a nice shine but I gotta add another coat to get the fish eyes out and then to buildup the paint a bit. I actually enjoy the wetsanding, if you add a little dab of dish soap it makes the paper glide over the surface with ease.... Here are some pics I snapped with my phone outside, sorry it is kinda getting dark but I tried to get the shine from the light in there so you can get an idea of the shine capable.....the pics do not do it any justice.... peace
Ooooh.... shiny! Not bad for an $9 can of paint, eh? I'm not getting any fisheyes in my paint, but the first couple coats had some orange peel... nothing serious that some 400 sandpaper couldn't fix.
Looking forward to seeing you paint and polish your whole car, considering how nice the decklid is turning out
IP: Logged
09:44 PM
Pete Matos Member
Posts: 2291 From: Port St. Lucie, Florida Registered: Jan 2010
Thanks man, Yeah I am not sure why I get fisheyes sometimes when I spray things but once in a while I get some. No big deal here, I gotta respray it as I said before to build up the paint for a final wetsanding but I just wanted to see what I full panel all polished and wetsanded will look like. The interesting thing about this paint is that you really can make it look awesome but it takes some work and wetsanding. I would seriously reconsider wetsanding and buffing the paint because it can take a good paint job to a great one especially with this stuff... The rustoleum paint seems to like to shine and actually goes on pretty glossy and I have read of several guys that have painted their cars a good while ago and it seems to hold up if you take the time to wax and polish the car at least occasionally. I understand from your post that you have painted a car this way before so I guess you know all this huh... Anyways, good luck with yours, I am gonna try my hand at a hood scoop somewhere in here so I am not gonna repaint the whole car just yet. The Body mods and some bodywork on the area around the sunroof need to happen first, I have some pretty good little cracks in there and I am gonna hafta crack it out and rough it up and fill it in with something I suppose... fun stuff... I actually like the paint part and the buffing part is fun too... I guess just the idea that you are gonna have a new paint job soon is kinda what makes it fun.... I have never rolled on the paint but from what I see there is no reason not to except that you have to wetsand the car between coats and there are a lot of coats to build it up properly for final wetsanding. I sprayed four coats on the decklid but they were kinda light and after I wetsanded I can sorta see some of the primer underneath on a little spot. I also have the damn fisheyes too so RESPRAY!! No big deal really but I am gonna lay it on a little thicker on the rest of the car so I do not have to spray it twice. I was just not real sure about the way it would spray yet and I was trying to avoid runs... Anyways, good luck again and too bad you are not nearby, I'd let you borrow my buffer if you wanted... peace
Not really sure... Would never park my car in 110 degree sun anyways.... where do you live? In Hell?!! Seriously, I have not heard anyone say anything negative about the paint in florida and there seems to be several cars on the rolledon forum from down there.. As far as the Black goes, black is always difficult to spray and make look good but I have seen several cars with black paint and they seem to come out nice. I have heard a couple people make reference to the fact that once sanded and buffed that the black takes on more of a deep charcoal gray color instead of a true black. Altho when the paint is going on it is black as night.... The Yellow seems to come out VERY nice and so far the sunburst red is nice too from what I can tell.... There are a couple light blue cars that came out great on the forum, mostly hot rods, there is a very nice 57 chevy and an old ford pickup. If you are considering this paint at all you really should peruse the projects section on the rolled on forum and you can see what others have come up with... peace
IP: Logged
10:36 PM
Pete Matos Member
Posts: 2291 From: Port St. Lucie, Florida Registered: Jan 2010
Here is a couple pictures of the black rolled on a nice jeep wrangler. If you scroll down the thread you can see them. I think it looks real nice but it does have a kinda charcoal color to it. Perhaps it is the pictures.....
I rolled my '89 Buick LeSabre T Type in black a couple summers ago. I think I only did 5 coats just to hide the 4 or 5 different colors of paint so I need to do some bodywork and put more paint on it.
Anyway, after 2 years of living outside (no carport or garage), the paint has held up just fine and if I actually bothered to clean it, it looks like it did the day after I painted it with the exception of some rock chips on the leading edge of the hood.
Before I painted the Buick, I spent about a month going through 3 or 4 main thread over on the Moparts forum where the $50 paint job first took off a couple years ago. Probably a couple thousand pages worth of information I would guess. Hell of a read though
It should help. Just take a wire brush to get the worse of the rust off and then slather on the Rusto generously. I assume you've got rust problems in the trunk corners and around the battery tray?
Basically, its just sanding with water to shave off the very top layer of paint to remove the peaks to create a smoother finish. When its done between paint layers not only does it smooth the most recent layer, but also it gives the next one something to "bite" onto for better adhesion.
IP: Logged
06:28 AM
cerulean Member
Posts: 137 From: Shrewsbury, MA Registered: Jun 2008
For the dent in your front bumper, try a heat gun to warm it up and reform it. The plastic should hold the new shape as it cools. I've never done it myself, but the guy on "Trucks" on Spike used this technique on interior plastic trim.
Bob
IP: Logged
08:13 AM
Pyrthian Member
Posts: 29569 From: Detroit, MI Registered: Jul 2002
I am in the process of fixing some damage from an accident, and am almost at the point to prep for painting. my car will NEVER be a trailer queen - in fact - quite the opposite - I beat & break it every season, and bring it back even better the next year. this sounds like a nice way to make it look alot better - yet keep it carefree.
Originally posted by Pete Matos: Thanks man, Yeah I am not sure why I get fisheyes sometimes when I spray things but once in a while I get some.
I'm sure that someone will correct me, but I think the fisheye comes from a small cup in the surface where it isn't smooth...
Either way you guys look like you have good stuff there... I was at the store and headed over to the paint section to check out the Rustoleum colors. It looks like they had a nice blue. I'm not sure where you might get the best variety of colors to sort from. Do you think that the Krylon would work the same way? I wonder what would happen if you mixed in some silver flake like in the 87 burgundy...
I know you can buy metalflake off of e-bay. They sell any color you want as well as pearls. Price is cheap too. They say one container will do a whole gallon of paint. I forget how many grams comes in a container.
------------------ Sad to say this is the best looking part of the car so far!
I've heard that metallic colors, pearls, and flakes don't really work with the rustoleum method, at least with rolling. You can always give it a go though on a spare panel to see what happens. As for Krylon... well, I suppose it would work as long as you thin it down like the Rusto but why? The Rustoleum is tried and true so I'd stick with what I know works and its not like its hard to come by. If you don't like the colors, you can always mix two colors of rusto together and make your own but the downside to that is if you ever need to repaint a panel or make a repair you're stuck trying to re-mix a custom color and you won't be able to use a rattle can of the same color.
Just food for thought
Anyway, I've been up and fiddling with the car this morning. I fixed some of the wiring under the rear bumper but I couldn't find my replacement marker light bulb connector for the life of me. I guess I'll just have to add it later.
As for the rear bumper... well... I think I'll probably just end up replacing it too if I can ever find a suitable replacement. On the other hand, by the time I get some paint on it, it may be "good enough" considering some of the damage to other panels. In a perfect world I'd have another GT parts car that I could pull the bumpers, the fastback clip, the DS door skin, and the DS fender to replaced all the damaged panels on my '86 but I don't, so I'll just live with what I have and at least enjoy some "fresh" paint on top of it.
For the front bumper, I figured I might as well heat it up and try to fix it as suggested. Well, my heat gun is an hour and a half away in my mom's basement so I used the next best thing which was my MAPP torch. It did a fine job of heating the plastic while I pushed it out with the handle of a big screwdriver. Its not perfect, but its TONS better than what it was. I'll take some pictures here in a bit and post them later on.
IP: Logged
12:28 PM
Gokart Mozart Member
Posts: 12143 From: Metro Detroit Registered: Mar 2003
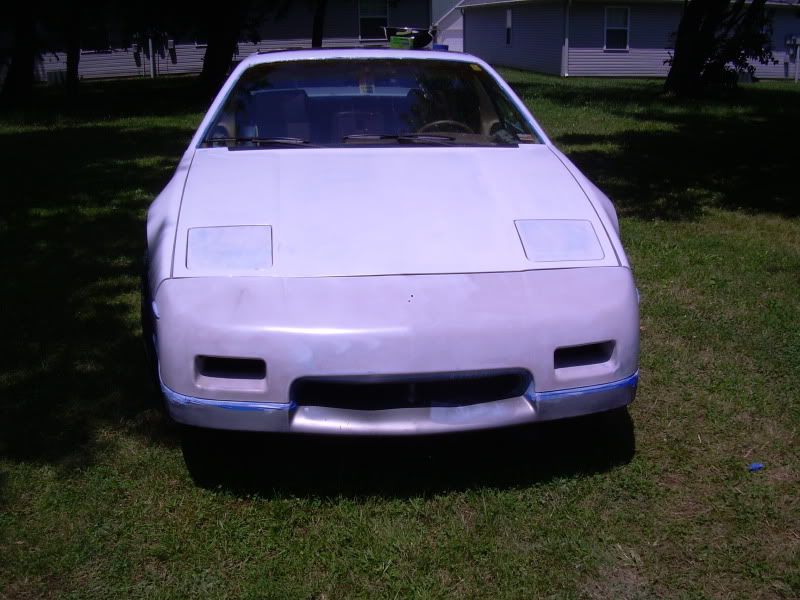
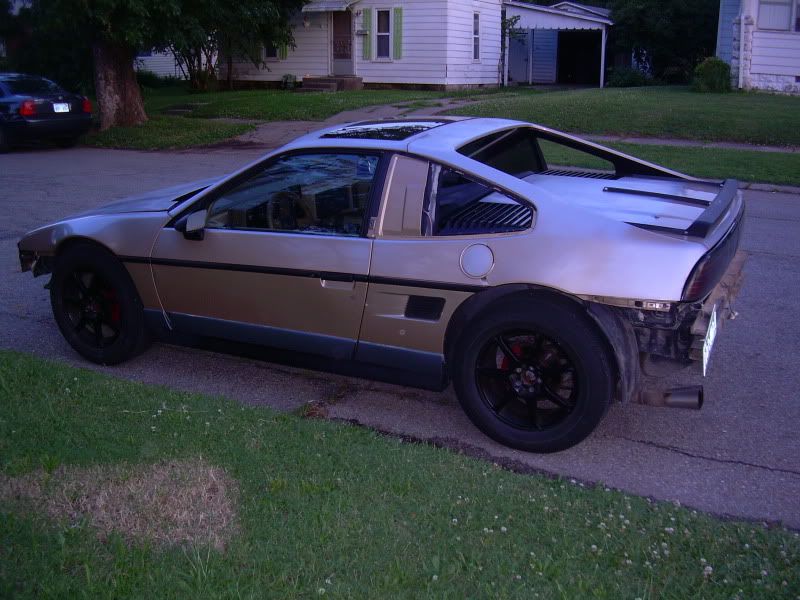
Here is the front bumper just kinda laid back in place. Its not bolted on or anything. I did go ahead and pull the front license plate bracket. Too bad I can't just leave it off but Missouri requires a front plate (I have my permanent addy listed as my mom's place in Sarcoxie MO while I've been moving around a lot through college).
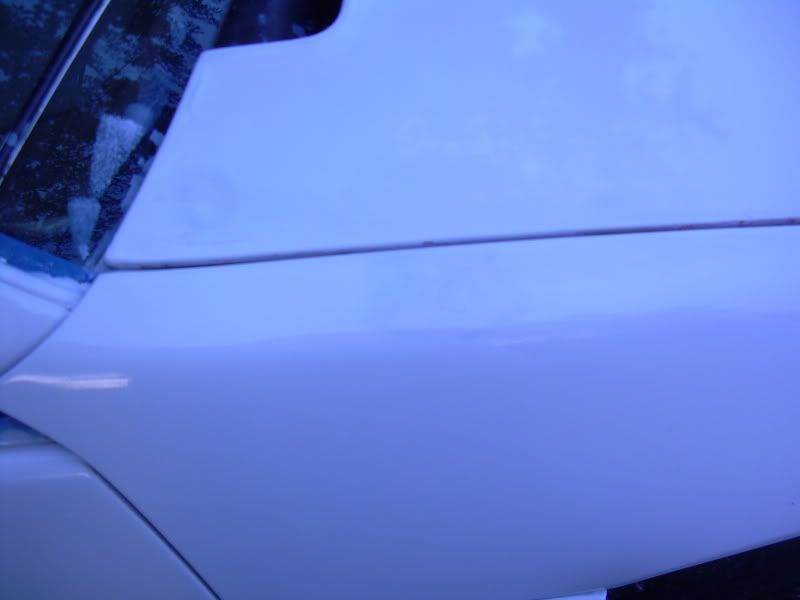
The color difference between the ugly faded and cracked gold and the fresh white is rather stark, don't ya think? The front bumper actually isn't faded too bad because I think it had a bra on for the better part of its life...
And a close-up of the dent in the front bumper pushed out via heat:
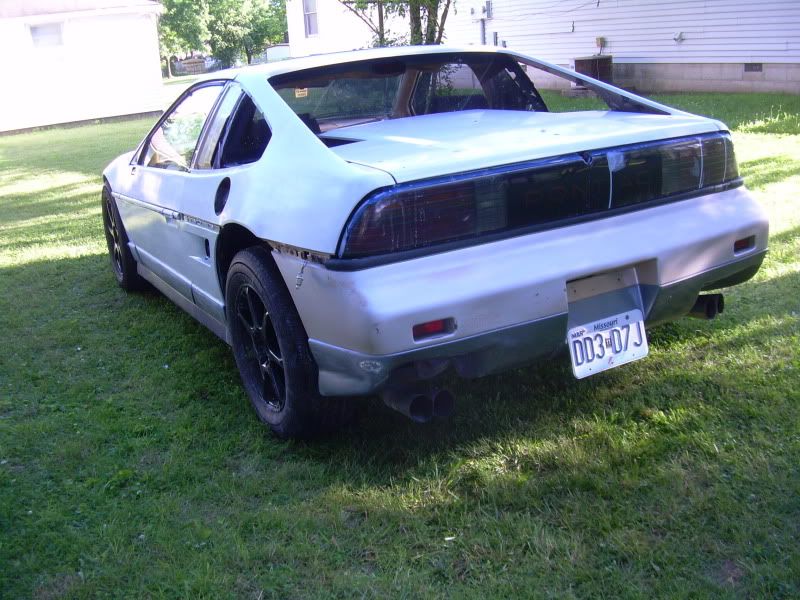
And the rear bumper. Its mostly attatched except for some fasteners underneath, but the ground is soaked so I'll get those put on later. The split GT trim on the PS is being held up by the wheel liner so it sorta looks ok. I'm going to paint the trim black so the void should be a little less noticeable.
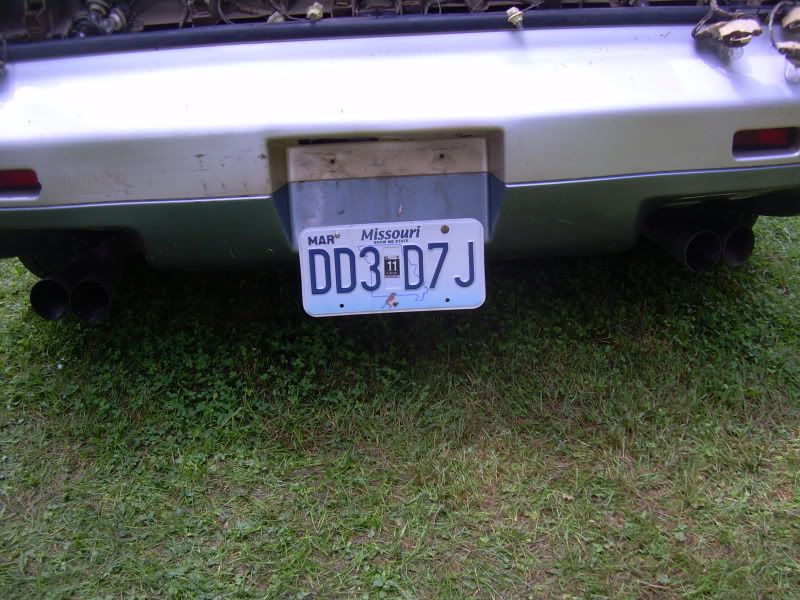
I mounted my rear plate low so that I could mask the lower GT trim and still be able to paint without the tag getting in the way for now.
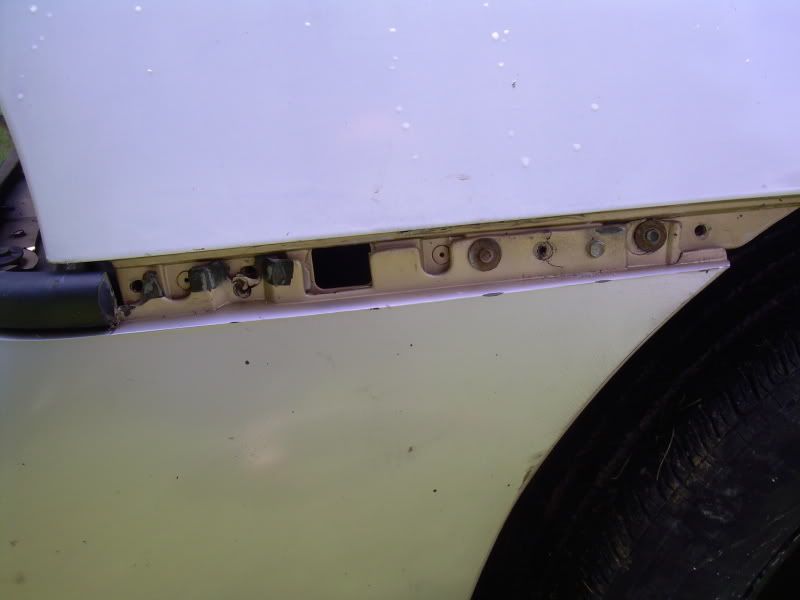
This bumper has had a rough life. The mounting points behind the side marker lights are pretty screwed up so I just had to make do with what I had:
And my pile of trim bits and parts that are in the way of painting. Most of them will get rattle-canned gloss black before I put them back on so they'll look fresh too.
No clear. It would get in the way of making repairs to the paint and it buffs out pretty shiny as-is.
Its fairly resilient against chips, but if enough rocks hit it, it will chip. My Buick is a good example of this as the leading edge of the hood has several spots where its chipped... however, since Rustoleum has their tins of colors in rattle cans also, all I would have to do to repair the panel is spray some on, let it dry, wet-sand the repair paint to feather it in with the older stuff and re-buff.
Anyway, I got both bumpers mounted on the car after a bit of struggling and have them both sanded down. I don't have all the fasteners on for them on the underside as the grass is pretty wet, but to just run over to the car wash I'm not too worried about it.
IP: Logged
07:15 PM
Pete Matos Member
Posts: 2291 From: Port St. Lucie, Florida Registered: Jan 2010
You can put on a clear coat if you choose to. It does make the paint more glossy, it can make it more durable but that is also making it more difficult to repair when it does get damaged. The paint can be buffed to a very high gloss if you take the time to wetsand it to 1500-2000 grit and then hit the paint with a thorough and careful buffing with a high speed buffer. Then use an orbital buffer to finish the shine with some quality wax like meguiars. The red decklid pics I posted are just a poor example of the gloss that can be had if you do the work, I just spent maybe fifteen minutes quickly wetsanding it with 1500 grit and then maybe another five minutes with the buffers to get it to shine like that. Imagine if you really carefully wetsanded it and buffed it thoroughly how shiny it will be. It is not actual automotive paint, it is enamel, it is VERY inexpensive, it is very forgiving to work with, and it is relatively durable IF you take good care of it. If you have the cash to pay for a quality paint and a quality paint job, then do it.... if you are like me and have too many obligations and too many other things you need to spend your money on and are willing to trade your elbow grease for the difference in the cost of the paints so that I can do it myself at home in my spare time... then it may be for you. I feel that if I can get the car to look presentable at a local car show and look good driving around with this process I will be pretty happy, that is why I have investigated this process and then bought the paint and did some testing. You should see the wing on the decklid, it came out better than the decklid did..... I am gonna keep working on the decklid until I am happy with the smoothness of the panel and the shine. If it comes out as good as I think it will, then I will definitely paint the rest of the car.... peace
Got both bumpers back on and two more coats of paint (these pictures are before paint). Hopefully, I'm done tweaking the body any more so all the rest of the paint will be for covering up. I'm thinking I'm looking forward to around 6 more coats of paint. I figure I can probably get 3 done tomorrorow after a wet-sanding and then 3 more the next day and then maybe a little more if it needs it.
Then it'll be time to mask off the trim and rattle-can it gloss black and bolt everything back on. Should be a decent 5-10 foot job when its done and thats good enough for me.
Heres the front bumper back on:
Damage to the front corner fixed. I'm going to have to find a "before" picture that shows the full damage before I kicked the dent out.
Back Bumper:
Decklid:
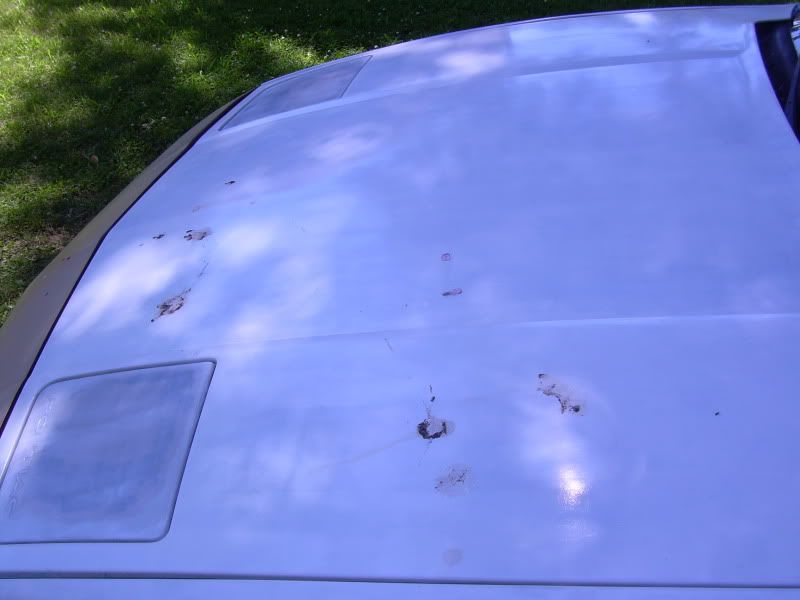
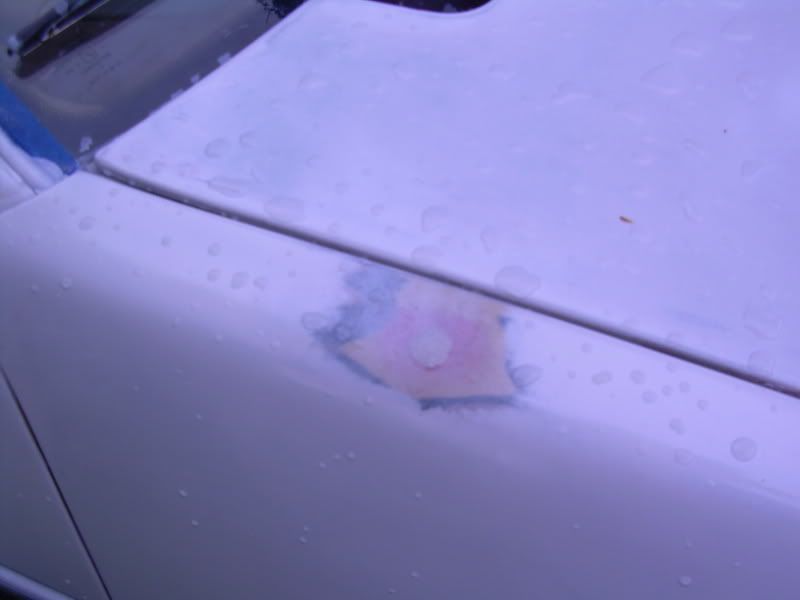
Stupid friggen birds crapped all over the hood:
[This message has been edited by Alibi (edited 06-18-2010).]
2 coats then 400 grit 2 more coats then 600 grit 2 more than 800 grit 2 more than 1000 2 more than 1500 or if its the last coat then leave it alone for a couple months to cure, then wet sand with 2000 and buff.
You are much better off to wet sand by hand to keep from "burning through" with a power/air tool. You can use power/air during prep/body work though, but if you do you may actually need to use a primer to fill in the swirl marks lefts from power tools.
[This message has been edited by Alibi (edited 06-18-2010).]
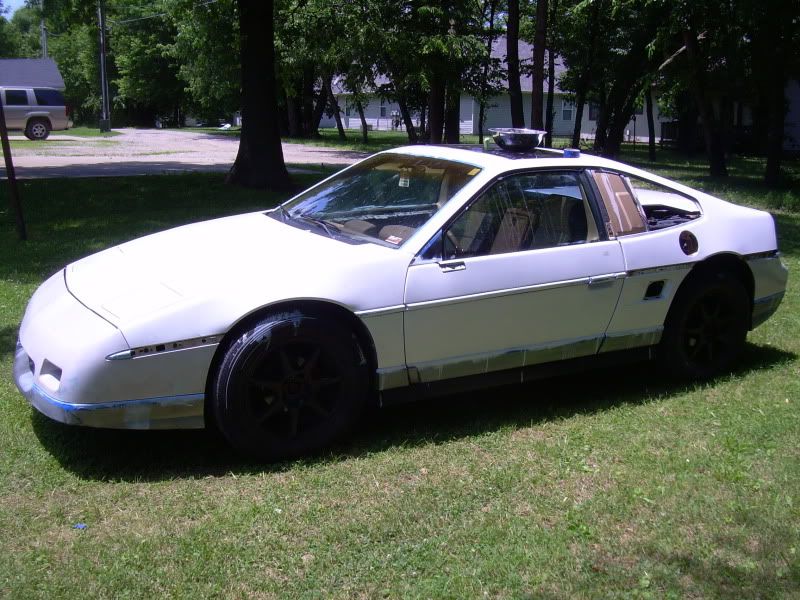
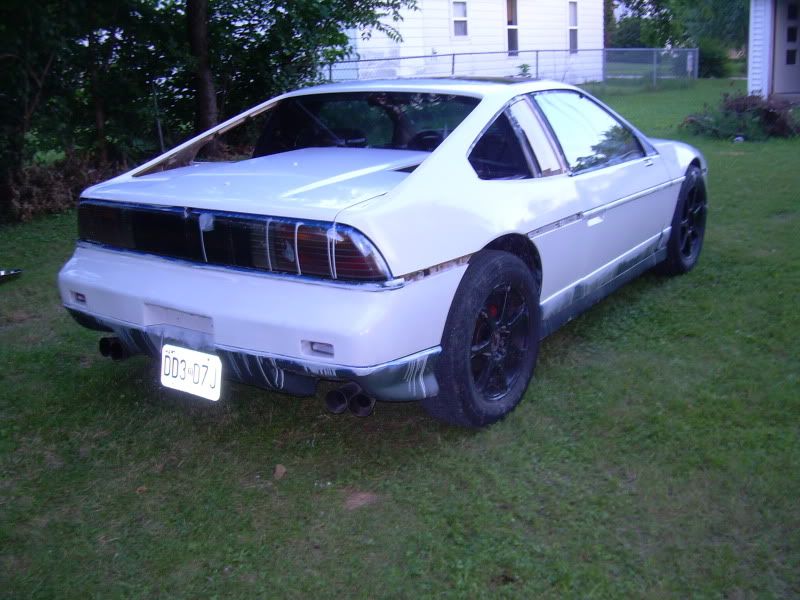
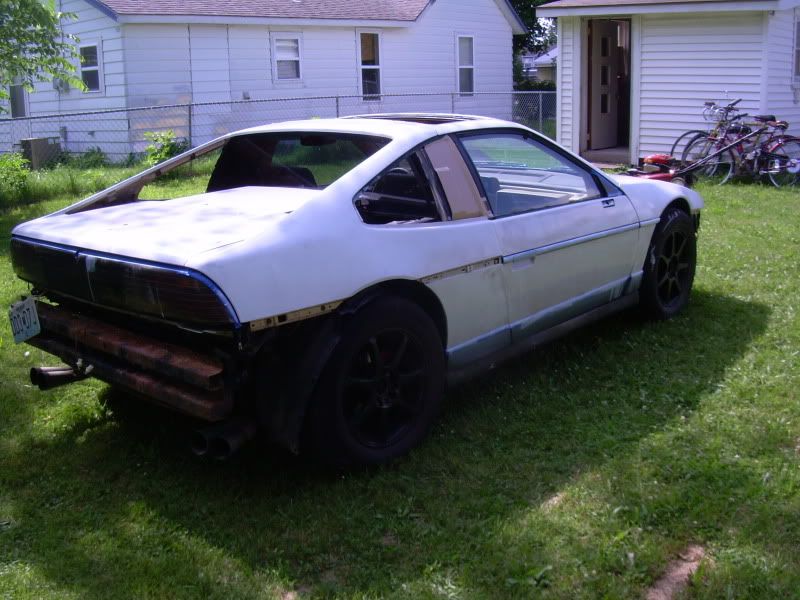
Just went outside to take some pictures. This is of the body with about 5 coats of paint and the bumper with 2. With 5 coats, its got pretty decent coverage but still looks somewhat "muddy" beneath the white in spots. I think by the time I hit 8 coats that it'll be just fine though. 2 coats on the bumpers are starting to cover too so by the time I have 8 on the body I should have 5 on the bumpers so I think I'll be ok by then.
After the body is done, I'm pulling all the tape off and then I'm going to paint my mirrors, the luggage rack, inner GT sails, drip rails, and any other small trim bits black. After that is done, I'm going to mask and sand all the lower GT trim cladding and paint it black as well. The weird teal-gray color thats on there now was sprayed by a previous owner and its just ugly. That, and I've gotten some runs from painting the body dripped on it anyway, not that it matters that much since I'm painting it anyway.
2 more coats since the last batch of pictures. I'm starting to get really good coverage now so I'm thinking another 4 coats or so and I'll be done... basically when I'm done with my can of paint.
The bumpers now have 2 coats and are covering nicely and the rest of the body has around 5 now I think. Most people quit around 8 so I think I'm on track. Tomorrow I'll wet sand and then wash the car in my local car wash, dry, then put down 2-3 more coats of paint. I think that by Monday I'll be painting my trim bits to put back on and then working on the lower GT trim to prep it for paint.
Is this too many pictures all at once or is more better?
[This message has been edited by Alibi (edited 06-18-2010).]


.jpg)
.jpg)
.jpg)


.jpg)
.jpg)