I was wondering if anyone has painted outside with decent results??? This is my first eperience painting a car so I am expecting lots of orange peel and runs. I do not have access to a garage. We do have a barn but it is all sand and dirt floors and I was thinking I would be better off outside on a calm day. I was going to use an insect fogger around the area to help keeps bugs away and I was going to paint in the shade. Anyone have any suggestion, comments, or warnings I would greatly appreciate them.
I paint 1/2 my (show quality) stuff outside except in winter. Get a catalyst that dries quicker to keep dust/dirt down. Best to take the car apart & hang tha panels if you want to do it right. Insect fogger might be a LARGE problem... ~ Paul aka "Tha Driver"
If possible, set up a decent windscreen out of tarp and aim to where the wind normally comes from where you're at. No matter how calm the day is, as soon as you get ready to spray that first spray the wind will kick up!
I had the same issue painting my deck vents and mirror covers, could only do it outside. Not too bad of a day, nice, sunny, only a slight breeze all day long. Got out and WOOOSH.
IP: Logged
10:10 PM
87antuzzi Member
Posts: 11151 From: Surrounded by corn. Registered: Feb 2009
Dude rent a spray booth. 100 bucks and you have a ideal painting area
Not really. I know of several shops that have $50,000-up paint booths & they get as much dirt in them as I do outside (actuall even more than I do). The thing about a booth is they pull air through with a strong fan, & it's hard to seal it to keep out dirt. ~ Paul aka "Tha Driver"
"James Lewis - get away from that wheelbarrow; you know you don't know nutin' 'bout machinery!"
[This message has been edited by Tha Driver (edited 07-16-2009).]
IP: Logged
03:05 AM
groble Member
Posts: 138 From: Coral Springs,FL,USA Registered: May 2009
Painting outside is no problem. Use a lot of clear coat. About 3 days after it dries you can wet sand with 1000 then 1500 then 2000 grit sandpaper. Be carefull not to sand off too much clear. You want to get the surface to about 80% smooth. The polish will take care of the rest.Then use a good polish with no wax or silicone in it to bring it to a glass like shine. Do not use any wax on it for at least 3 months to give the solvents a chance to escape. If you wax too soon it will blister. If you paint it a dark color like red or black you willl not see the dirt. Do not use a metalic like silver. It is too hard to get a nice finish that won't look cloudy. Good luck.
IP: Logged
08:21 AM
Dennis LaGrua Member
Posts: 16187 From: Hillsborough, NJ U.S.A. Registered: May 2000
Can't paint outside around here as I live in a forest. Too many bugs will get trapped in the paint. Maybe if I used a large exhaust fan at one end that will create an air stream over the car it might work out but it would also upset the spray pattern of the gun. I paint in the garage only with a wet floor to keep the dust down.
------------------ " THE BLACK PARALYZER" -87GT 3800SC Series III engine, 3.4" Pulley, N* TB, LS1 MAF, Flotech Exhaust Autolite 104's Custom CAI 4T65eHD w. custom axles, HP Tuners VCM Suite. "THE COLUSSUS" 87GT - ALL OUT 3.4L Turbocharged engine, Garrett Hybrid Turbo, MSD ign., modified TH125H " ON THE LOOSE WITHOUT THE JUICE "
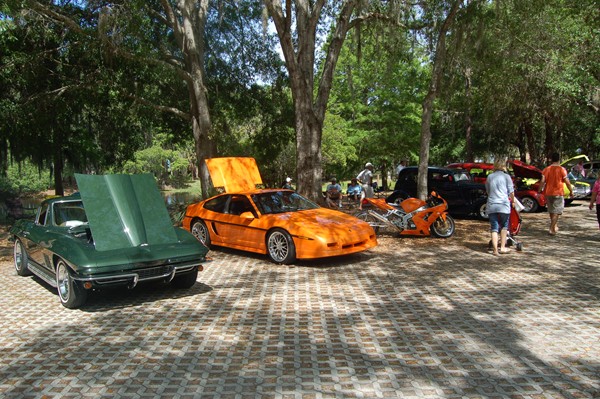
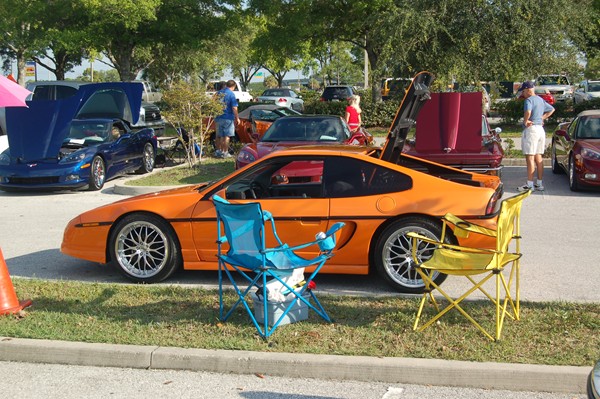
Forum member Randye, had his car painted recently and it was painted outside in his driveway. His car recently took a best of show trophy at a local car show in Tampa. So to answer your question... Yes a car can be painted outside with excelent results.
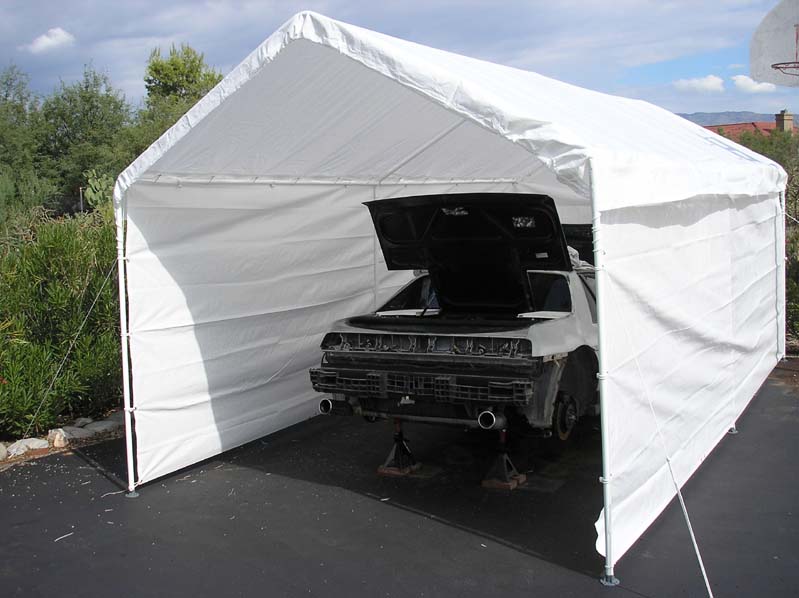
I went down to the local Auto parts store and bought a temporary carport structure. Cost me about $70.00 out the door. I painted the fiero in it. It kept the wind breeze down and the dirt down.
IP: Logged
11:05 AM
olejoedad Member
Posts: 20072 From: Back home again in Indiana Registered: May 2004
A buddy of mine always painted outside. The secret is to paint early in the morning, before the bugs get active. To reduce orange peel, make sure you have the gun pressure and feed set properly, and the right solvent for temperature and humidity conditions. Talk to the guy at the paint store, sometimes they will turn you on to an experienced painter who does work on the side. Some of them will spray a car for a case of beer or little money if the body is prepped and ready to go.
A buddy of mine always painted outside. The secret is to paint early in the morning, before the bugs get active. To reduce orange peel, make sure you have the gun pressure and feed set properly, and the right solvent for temperature and humidity conditions. Talk to the guy at the paint store, sometimes they will turn you on to an experienced painter who does work on the side. Some of them will spray a car for a case of beer or little money if the body is prepped and ready to go.
Good luck.
I took a class in high school, does that count? Can I get the beer?
IP: Logged
02:16 PM
jeffndebrus Member
Posts: 2772 From: Jacksonville, Fl- usa Registered: Aug 2001
I went down to the local Auto parts store and bought a temporary carport structure. Cost me about $70.00 out the door. I painted the fiero in it. It kept the wind breeze down and the dirt down.
Nice How do you keep our winds here in Tucson from blowing it away? sparx22
IP: Logged
08:52 PM
Blue87Fiero Member
Posts: 245 From: Onsted, Michigan, U.S.A Registered: Mar 2009
So I can paint outside. Why is insect fogger a bad idea????????? Also I bought a single stage paint is it still ok to wetsand that when I am finished?????
IP: Logged
10:24 PM
86GTBen Member
Posts: 401 From: finksburg, MD, North america Registered: May 2009
So I can paint outside. Why is insect fogger a bad idea????????? Also I bought a single stage paint is it still ok to wetsand that when I am finished?????
Chemicals spraying in the air? Not good. I wouldn't bother with single stage, unless it's a solid color (I still try to avoid them). You're much better off with base/clear especially if you're not a professional, as you can let the color dry (15 to 30 minites) & sand/repair it if you make a mistake or get trash & then keep painting. ~ Paul aka "Tha Driver"
That's not meth! That's Professor Cuyler's liquid miracle wake up claificational get thin & steal sterio equipment stay up for four days & lose your teeth juice tonic!
IP: Logged
03:15 AM
IFLYR22 Member
Posts: 1775 From: Tucson, AZ. Registered: May 2007
Nice How do you keep our winds here in Tucson from blowing it away? sparx22
Unfortunately, I wasn't able to. It lasted for about 2 years until a large (read VERY VIOLENT ) monsoon took it out. The poles were nailed to the asphalt ground. The support lines were also nailed into the ground. It was able to handle 30- MPH winds, but one good micro burst, and it was done. The sides were separate parts, so I would just roll them up when a large wind (more than 30 MPH) came. The storm took out the metal poles, the tarp material is fine. I still have that part of it.
At least it was only $70.00. It was something I got to paint my car. I was actually surprised at how long it did last.
[This message has been edited by IFLYR22 (edited 07-17-2009).]
Unfortunately, I wasn't able to. It lasted for about 2 years until a large (read VERY VIOLENT ) monsoon took it out. The poles were nailed to the asphalt ground. The support lines were also nailed into the ground. It was able to handle 30- MPH winds, but one good micro burst, and it was done. The sides were separate parts, so I would just roll them up when a large wind (more than 30 MPH) came. The storm took out the metal poles, the tarp material is fine. I still have that part of it.
At least it was only $70.00. It was something I got to paint my car. I was actually surprised at how long it did last.
If you don't mind me asking, where did you buy it at?
Forum member Randye, had his car painted recently and it was painted outside in his driveway. His car recently took a best of show trophy at a local car show in Tampa. So to answer your question... Yes a car can be painted outside with excelent results.
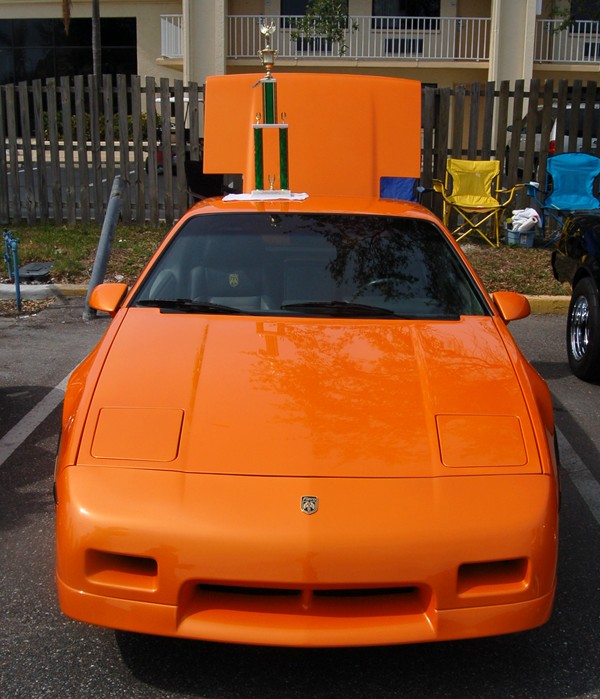
Actually it's now 2 Best of Show and 4 First Place trophies so far this summer Other than that, Jimmy is 100% correct, my car was painted in my driveway and when I tell people that at car shows they don't believe it. It wasn't easy though.... I'm at my office right now, but I'll post some photos of the project when I get home later.
IP: Logged
10:54 AM
rogergarrison Member
Posts: 49601 From: A Western Caribbean Island/ Columbus, Ohio Registered: Apr 99
I think those insect foggers have wax....bad thing. Ive painted outside. Do it away from where tree leaves may fall, no wind, make sure its not going to rain or DEW overnite, like said do it early right after sunup to cut down on bugs, DONT do it on sunny day.....wait for overcast one or paint will be like 80 grit sandpaper. When the big van shop opened back in the 70s that I did custom painting for, i painted 2-3 vans a day in a barn with no glass in windows and dirt floor. I had just 4 big photo flood lites, one on each corner.
IP: Logged
02:06 PM
PFF
System Bot
Blue87Fiero Member
Posts: 245 From: Onsted, Michigan, U.S.A Registered: Mar 2009
if there is dust in the air the spray pressure will pick it up and place it on the horizontal surfaces. never again. used a paint booth set up in my garage with 1 by 2 strips and used poly plastic for walls and top. worked good. without the booth the gun blows up any dust in the air and it will mix with the paint spray.
if there is dust in the air the spray pressure will pick it up and place it on the horizontal surfaces. never again. used a paint booth set up in my garage with 1 by 2 strips and used poly plastic for walls and top. worked good. without the booth the gun blows up any dust in the air and it will mix with the paint spray.
That's why an HVLP gun works best if you're going to paint outdoors.
IP: Logged
08:07 AM
IFLYR22 Member
Posts: 1775 From: Tucson, AZ. Registered: May 2007
How to paint your car outdoors and get "show quality" results:
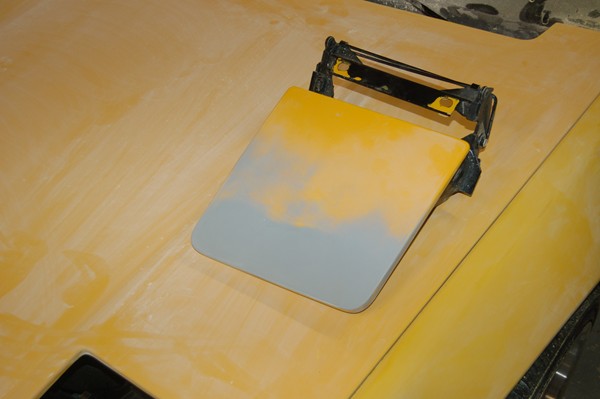
Start by disassembling the outer door panels, decklids and bumpers, body moldings and other parts and then roughing the old finish with a DA sander using 800 grit paper. Hand sand all the creases and crevices the DA cannot get to.
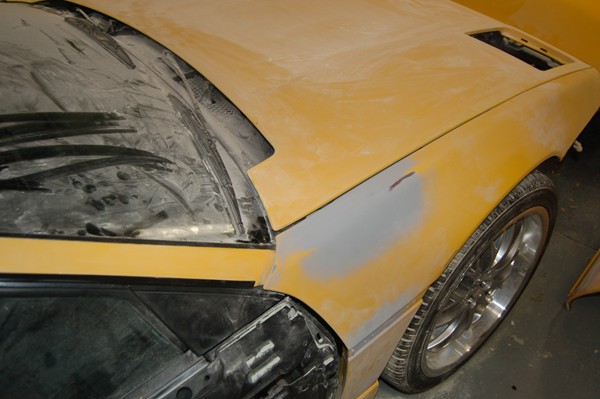
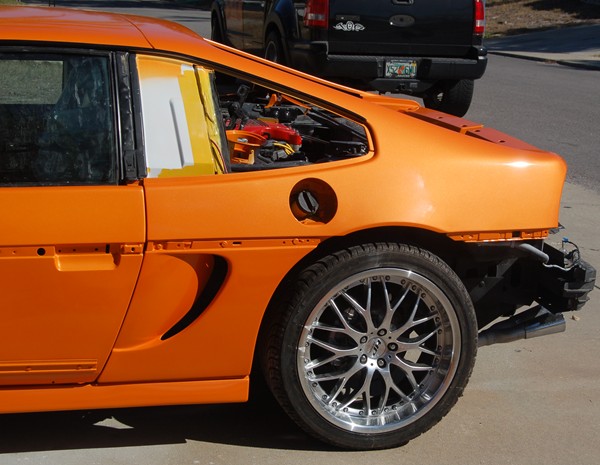
Fill in the antenna hole in the passenger side fender. There are other threads here on PFF on how to do this properly.
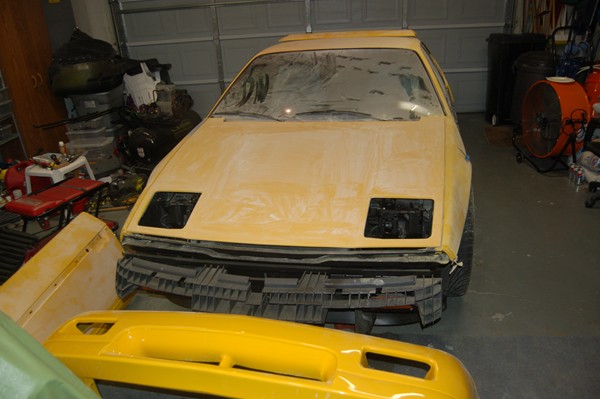
Next remove all the old finish down to the original fiberglass and fill in the "PONTIAC" legend in the headlight door with a good fiberglass filler. Prime and sand smooth:
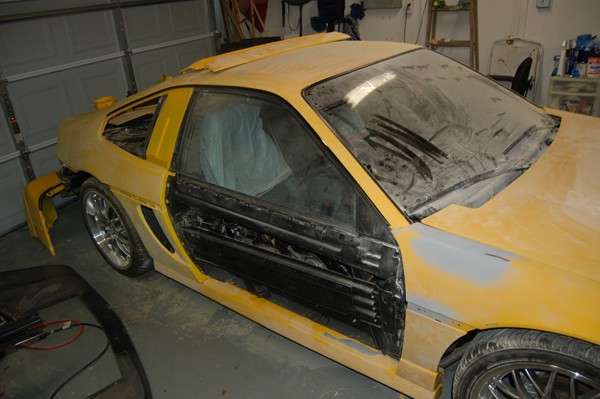
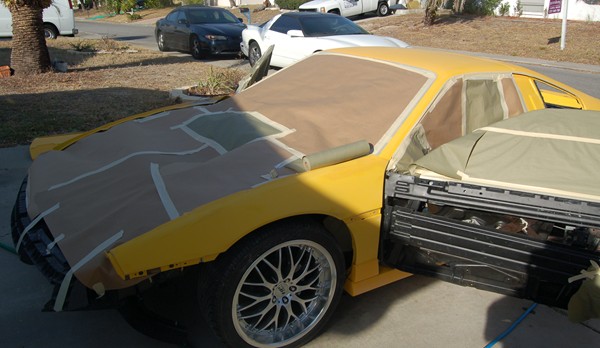
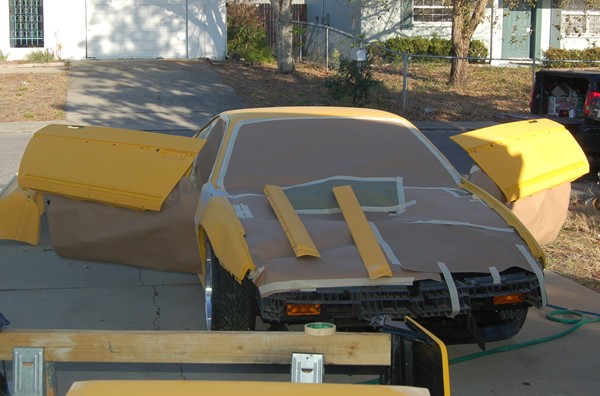
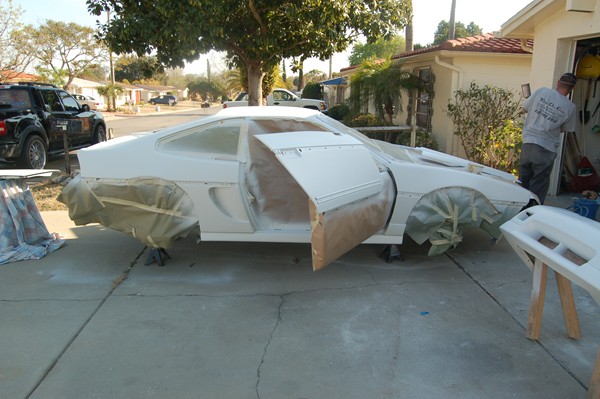
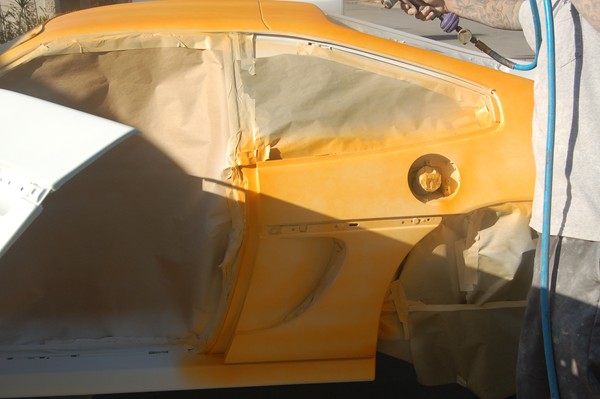
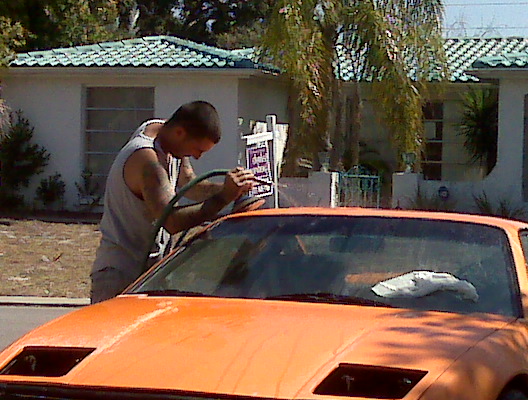
Once all the bodywork is done and the car is rough sanded, move it out to the driveway and wash it down throughly, dry it and start masking everything off: We have used "roll-back tape" to pull the windshield molding back so that we can paint under it without removing it.
Find some creative places to hang all the parts that need to be painted: Notice that the front fender bolts have been removed and the fenders moved out slightly so that we can paint all the edges and a little behind them. We don't want any of the old color showing anywhere.
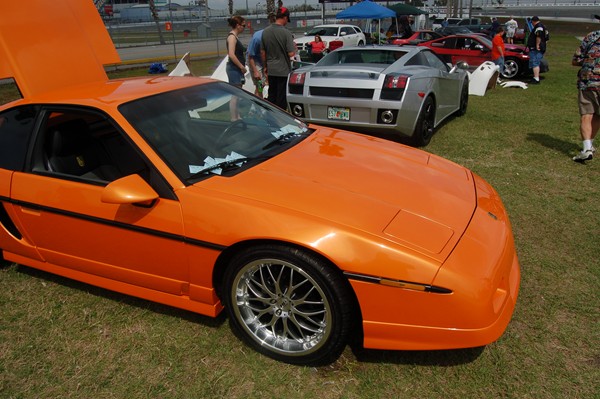
We will be painting this Fiero GT with Laborghini "Arancio Borealis", (pearl orange) just like this:
[This message has been edited by randye (edited 07-18-2009).]
Laborghini "Arancio Borealis" is a "tri-coat" paint, meaning that it is applied to the car in 3 stages: a base coat, (in this case White), a mid-coat, consisting of the orange pearl, and a final clear coat. Normally you would have the car all in primer and then apply the white base coat, but we already have a good foundation on the car from the old paint job, so by recommendation from the paint supplier, and in order to save us a lot of extra time and work we used a brilliant white catalized primer / sealer as our base coat. This saved one entire painting session on the car.
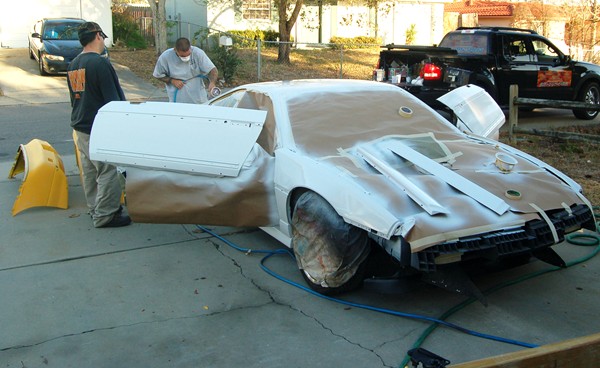
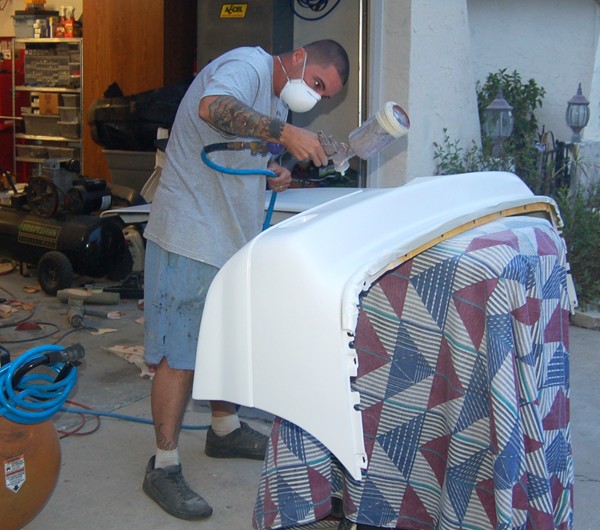
The entire car is blown off with compressed air and wiped down with prep solvent and a tack rags. Then the white primer / sealer is applied:
Paint is bad stuff to inhale, but catalized paint is particularly nasty stuff. It will harden IN your lungs, TO your lungs. Billy wears a mask even shooting outdoors.
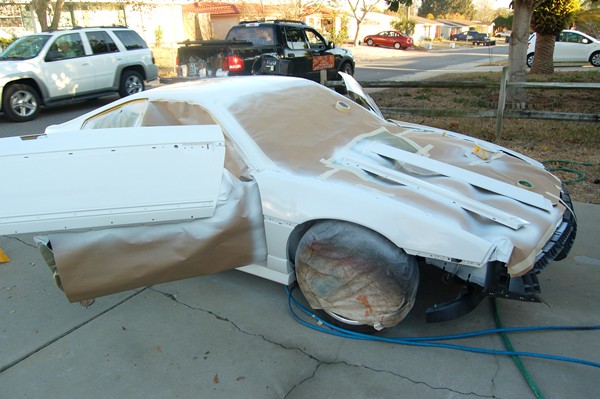
Two coats of white primer sealer now applied, sanded smooth between coats and after the final coat. It's almost ready for some color:
At this point the finish was so smooth and nice we could have put clear over it and had a beautiful white Fiero GT
[This message has been edited by randye (edited 07-18-2009).]
We rolled the car back in the garage and allowed the primer sealer to cure for 48 hours and touched up some small problem areas and made certain that everything was nice and smooth with just a little "tooth" to the surface with 800 grit sandpaper. You don't want it super smooth. You want it to have just enough roughness to hold the color coat well yet be a nice even "egg shell" consistancy over the entire car.
We're just about ready to get some ORANGE on this car, but first we made sure that we had a nice low humidity day with no rain forecast and no strong wind. The driveway was hosed down and cleaned to get all loose dirt and debris off it and the ground surrounding the driveway was wet down to keep any sand, leaves or grass from blowing onto wet paint. We let the driveway dry completely before starting. The evaporting water would have acted just like high humidity and possibly caused the paint to "blush" or have cloudy areas in it.
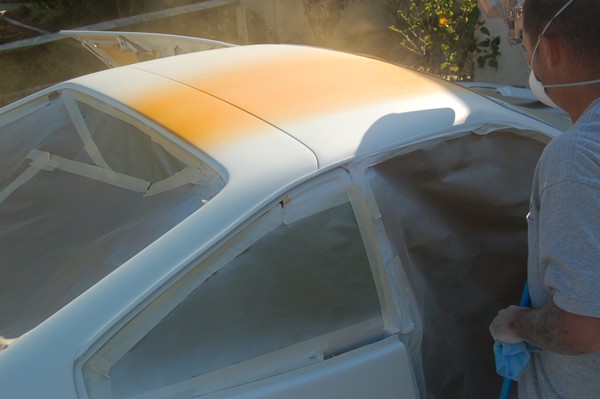
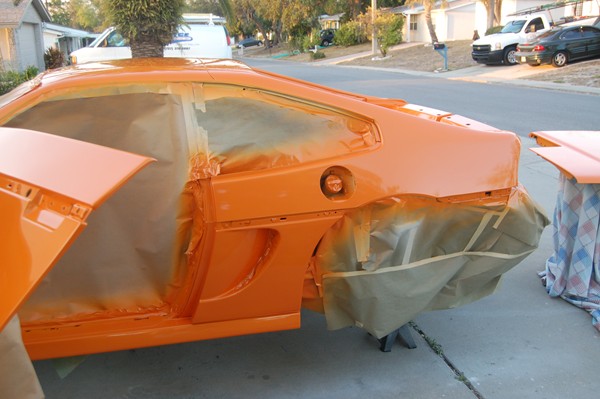
Now let's start getting some color on this car!
We are using R+M brand paint mixed to the Lamborghini spec. It's a good quality paint and at $800 a gallon, not cheap. We are also using a HVLP gun to apply the paint. This means we won't be kicking up a lot of dust with high air pressure and we will be able to lay down a nice layer of paint on the car. This particular paint goes on a little thin, but that's OK as we want to build up our color coats slowly and evenly. It's also why this color is applied over a white basecoat. Most light, bright, colors have a lot more vibrancy and brightness to them when applied over a white base as opposed to a gray primer.
On the first light coat we are paying attention to edges, corners and other areas we don't want to be too thin once we're done, so we hit most of those first. Notice that we have taken the wheel well liners out and removed the wheels and have the car sitting on jack stands so that we can get under the rocker panels and inside all the edges we need to hit.
[This message has been edited by randye (edited 07-18-2009).]
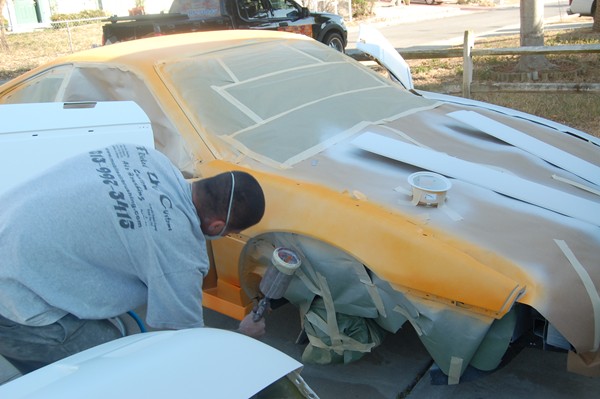
We have applied 3 nice color "Mid coats" to the car now, allowing each coat to "flash off" for about 15 minutes between coats. This allows some of the volatile solvent in the the paint to evaporate, but leaves the paint "tacky" enough for the next coat to bond properly.
We had a couple of tiny bugs land on our fresh paint, but a small wad of masking tape rolled into a small cone shape allowed us to "pick" them off after the paint had flashed enough. This left some tiny uneven spots about the size of a pencil eraser on the fresh paint. The small spots where the bugs had been picked off were "misted in" with the gun before we applied the first clear coat. Can't tell they were ever there now.
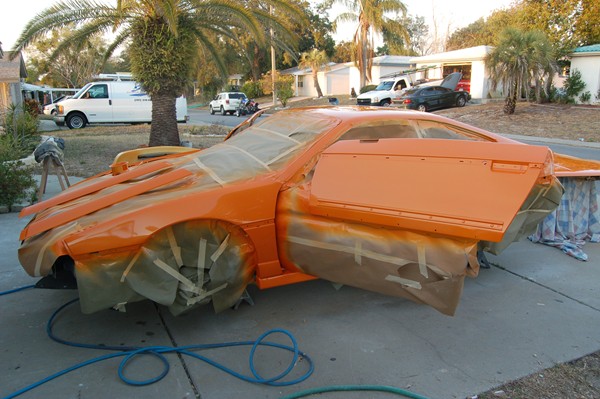
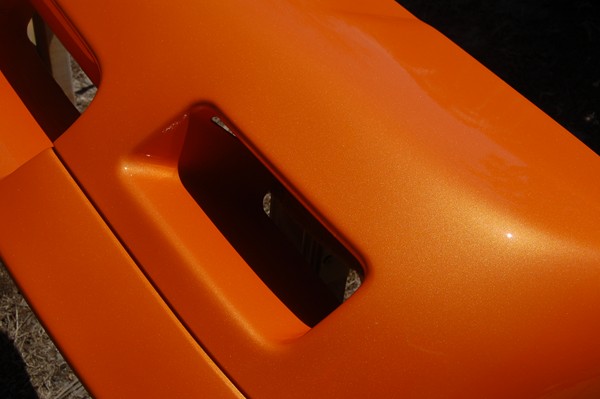
All the colors coats and 5 nice coats of clear on the car: We had about 4-5 more bugs the size of gnats land on the final clear coat as it sat drying, but we left them alone since the wet sanding later would easily remove any trace of them. Keeping the driveway clean and no wind, meant that we ended up with no dust or dirt particles in the finish.
The driveway doesn't have orange paint dust all over it. Just a little primer sealer from a few days earlier where we got a little sloppy... A few weeks later I sprayed on a strong concrete cleaner, let it sit for about 30 minutes, and it all hosed off nicely. No scrubbing! The HVLP gun puts the paint on the car with very little overspray. Notice how little is even on the masking paper..
[This message has been edited by randye (edited 07-18-2009).]
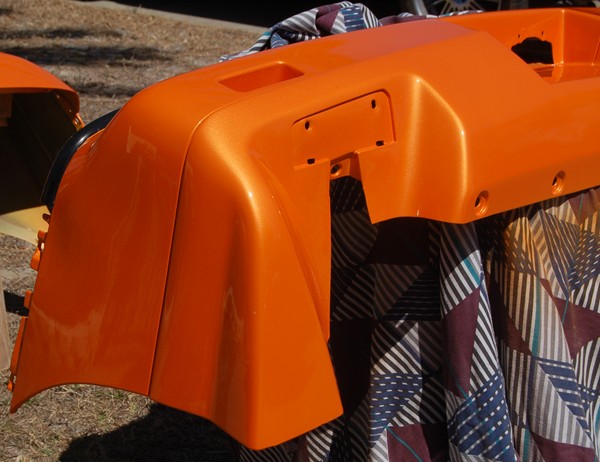
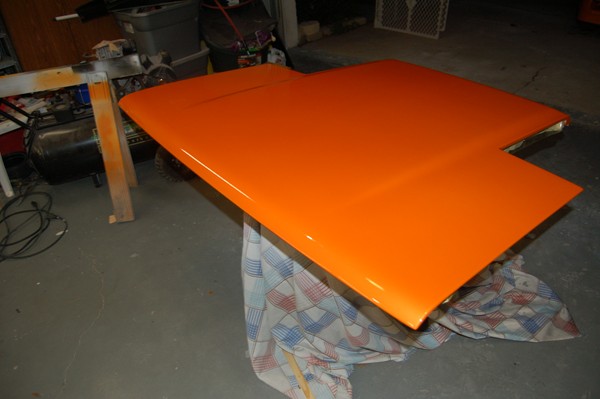
Both bumpers and decklids, as well as the mirror housings, headlight doors and aero moldings were also painted during the same painting session. The bumpers and decklids must be painted while off the car to get all the edges and undersides painted correctly.
[This message has been edited by randye (edited 07-18-2009).]
Next we went back and used the airbrush to touch-up some small areas and get into any corners and crevices we missed with the HVLP gun. Both color and clear were "melted in" these areas and matched up with the fresh paint elsewhere.
Special attention was given to areas that normally would only be seen if you were specifically searching for them. We don't want any of the old color showing *anywhere* on the car.
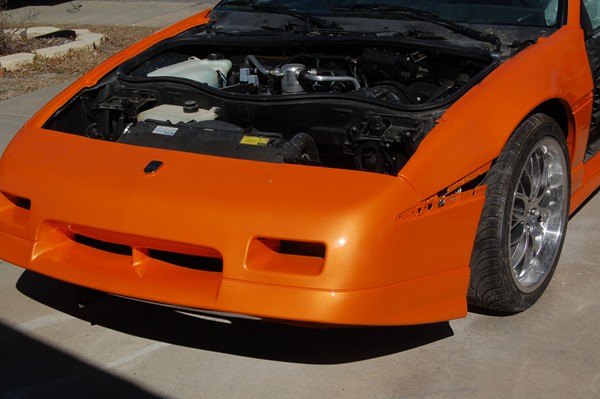
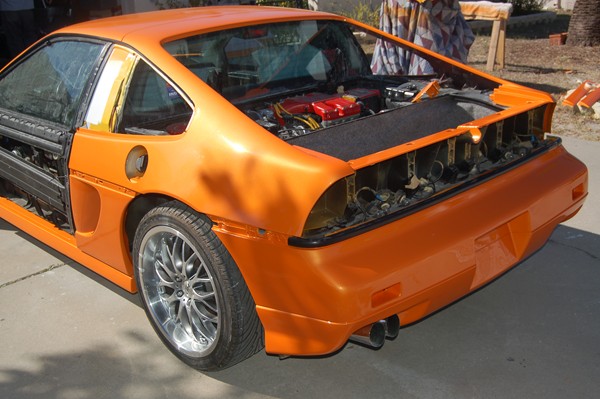
The car was rolled back in the garage and the new paint job was allowed to dry for 72 hours and then the body panels were carefully reassembled to the car: We will need to "cut & buff" the nose, but I have placed the badge on the nose loose just to see what it will look like. It will be off when we begin the final finishing steps.
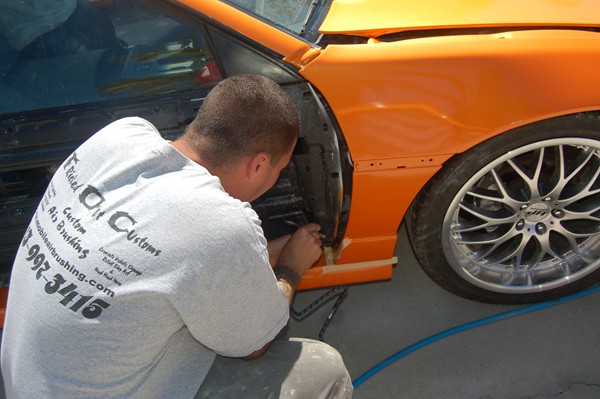
Door panels going back on: Notice that the aero moldings have been left off. We want to wet sand and buff the door panels and moldings separately so that we can get to all the edges of the moldings and the door panels just behind where the moldings attach. Details count!
Rear bumper going back on. Yeah, I had to remove the door panels. Forgot I needed to install the door handles and locks first!!
I managed to scratch a couple of small edges when reassembling the body panels, but they were quickly fixed with the airbrush. Always set aside enough of your original paint for touch-ups!!
The door panels and bumpers are flexible, so you want then mounted back on the car to stay as rigid as possible while cutting and buffing the finish. If you try to buff them off the car, you'll be constantly fighting with "floppy" panels and leave an uneven finish. We will do the first "cut & buff" on the hood, rear decklid and headlight doors off the car to avoid burning the edges of them or the edges of the fenders. These are always problem areas and we don't want to have to re-paint burned through edges at this point.
[This message has been edited by randye (edited 07-18-2009).]
IP: Logged
01:34 PM
Ambush Member
Posts: 546 From: San Francisco, Ca USA Registered: Aug 2001
BOLD.. i give you points, looks nice. I am the manager of a body shop and I would have NEVER tried to do anything outside. Not just the obvious of bugs and dust, but people, kids, and more important, pollution!! Here in California fees for painting a car outside are high as he!! and punishment can include a lil jail time depending on the judge. Not to mention the over spay that can "mist" the surrounding area, including but not exclusive to OTHER cars...wow. look good though, if you need a job, come see me
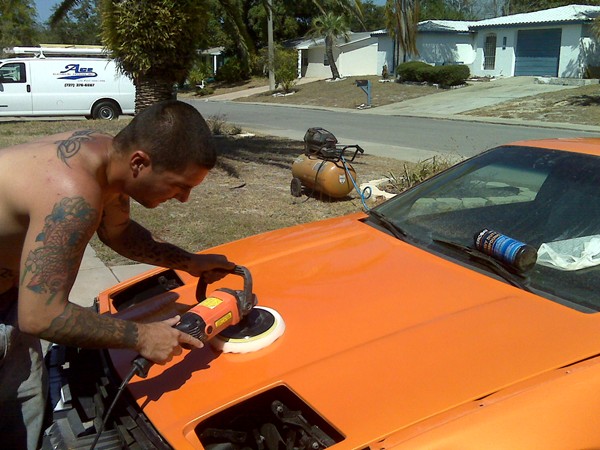
All of the clear coat is now wet sanded with 1000 and then 2000 grit using a DA sander and also by hand.
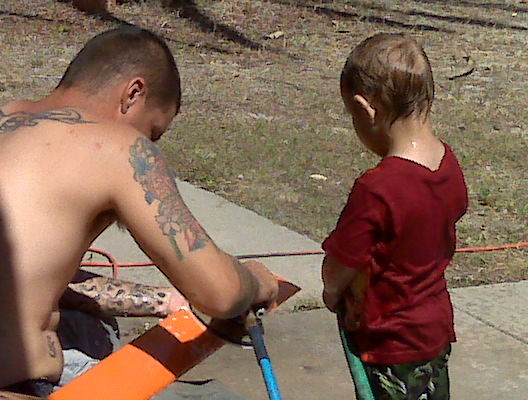
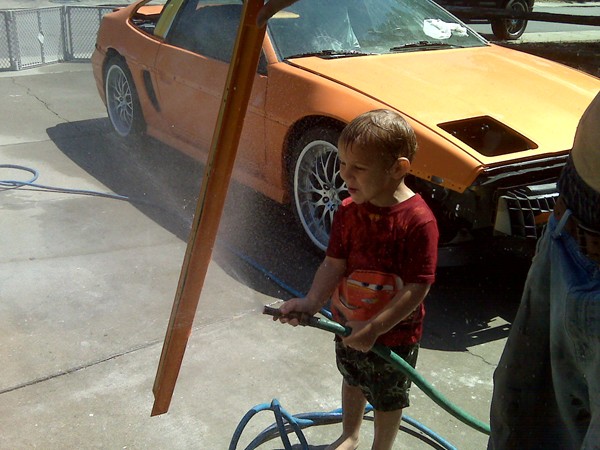
Use lots of water to rinse the parts frequently. Employ "expert" help from someone who enjoys using a garden hose
Work carefully. You want to knock down any orange peel and leave a nice smooth even surface without cutting through your clearcoat or paint. We have already wet sanded the hood and rear decklid and set them temporarily on the car while working on other areas. We will take them back off and set them on stands for their first buff and polish.
Use both a cutting pad and a buffing pad. Don't try to use a single pad for both, you'll leave swirls in the finish. This was a "show" finish so we actually changed both pads several times to ensure we kept them clean and fresh at all times.
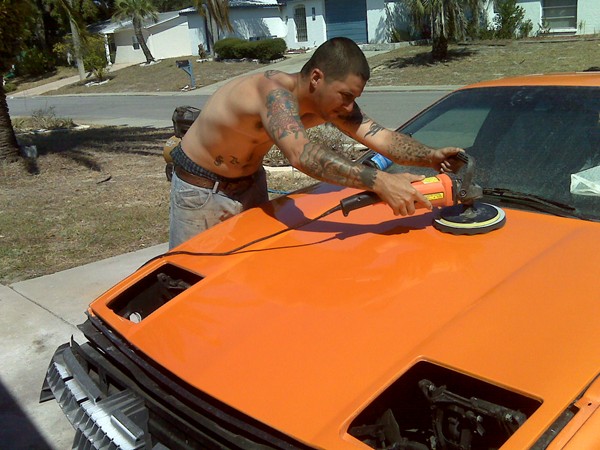
The hood and rear decklid have already received their first cut & buff and have been placed back on the car now. Note that we still have the tops of the fenders loose and pulled slightly away until we finish buffing and polishing their edges and the inside lip.
Work with your "cutting" or rubbing compound first and work in small areas, then "feather out" to wider areas later. Cut, then buff, each individual section of the car one at a time. Rinse the surface with clean water frequently and wipe it dry to gage your progress. Once you have a nice smooth, even surface with the cutting compound, *then* move on to the polishing pad and compound. Do one step at a time. Get too aggressive with the buffer here and you will be repainting burned through areas. You don't want to do that at this point. Work smoothly and carefully. Let the buffer and the compound do the work. Don't stay in one spot. Keep moving and don't push down on the buffer hard. Just hold it firmly and keep it from wobbling around. Be smoooooooth.
Here you can see why you leave the aero moldings off until last. We have buffed and polished all the way down to the mounting rails and have all the edges of the molding done too. There won't be any un-polished recessed areas or grooves we couldn't reach with the buffer. The body trim molding is also left off until all the polishing is done so that we can get right up to, and into, the recesses. Once again, it's all about the DETAILS....Billy even made me take the door handles and locks back off AGAIN to get everything polished!
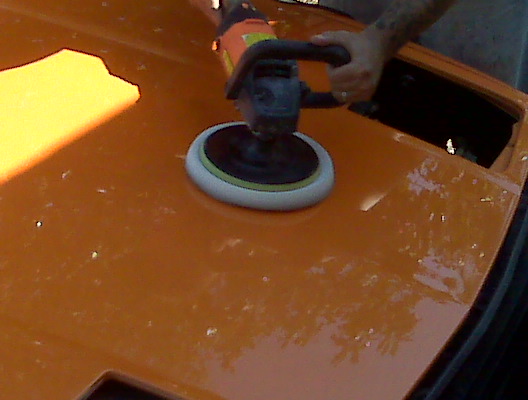
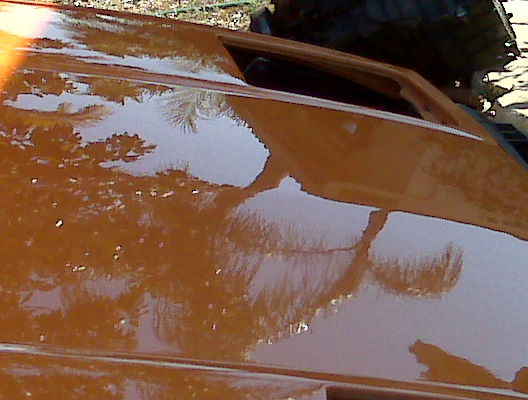
As smooth and glossy as you think the paint might be before you cut, buff and polish it, you will be amazed at what the results are after it's finished properly: Here we are using a terrycloth bonnet on the buffer and a final finishing, swirl remover / glaze compound.
[This message has been edited by randye (edited 07-18-2009).]


 ) monsoon took it out.