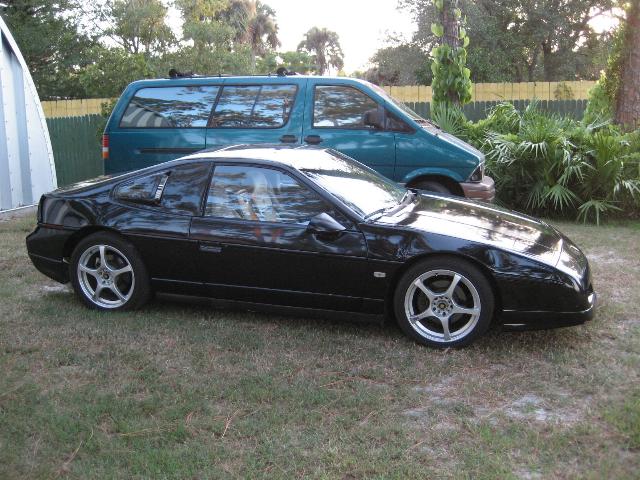
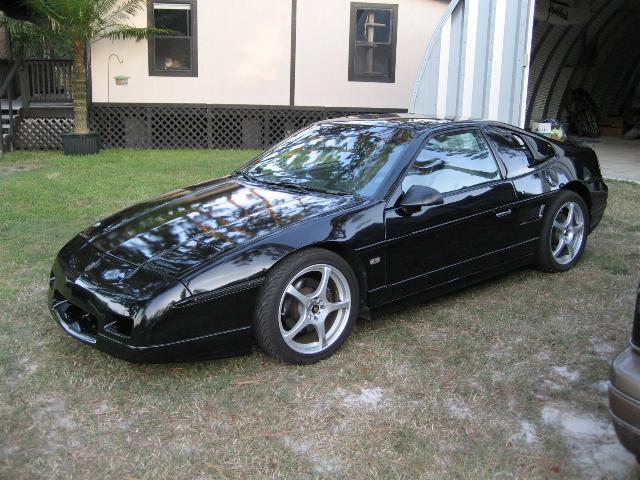
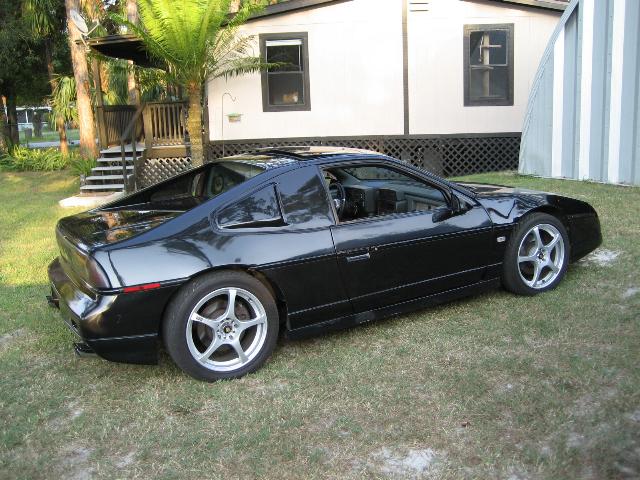
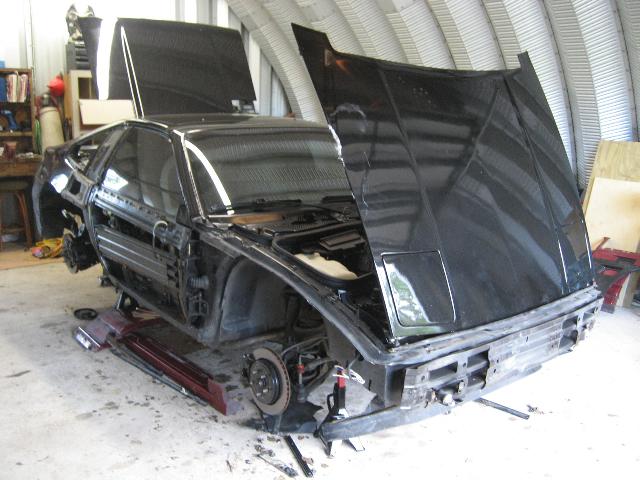
Underneath this black V8 Fiero GT's skin is actually a base 2.5L coupe that was found collecting dust in a grassy field somewhere near Norman, Oklahoma. The previous owner, located in Ohio, got his hands on the car and began to build his own SBC V8 Fiero GT. He started by combining '87 GT body panels to the base coupe's rust-free frame. The suspension was completely rebuilt with polyurethane bushings and was lowered using standard Eibach lowering springs. The brakes were upgraded using Archie's 11.25" brake rotor conversion. The wheels and tires were also upgraded to 17x7.5" Enkei RS5's with 215/45R-17's tires on the front and 235/45R-17's on the rear. The battery was moved to the front using Archie's relocation kit, and several Rodney Dickman accessories were also added throughout the car.
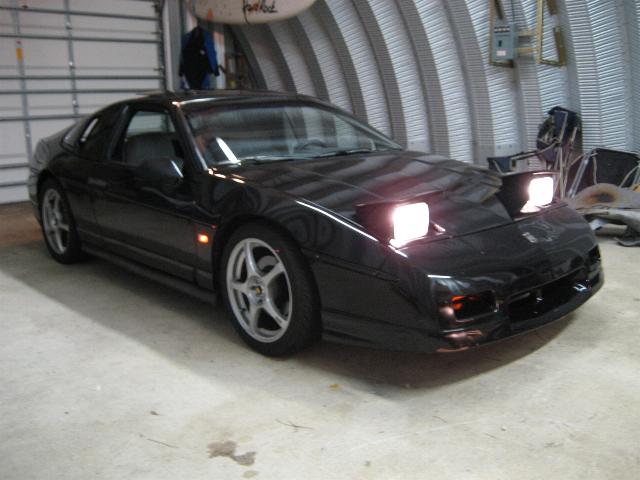
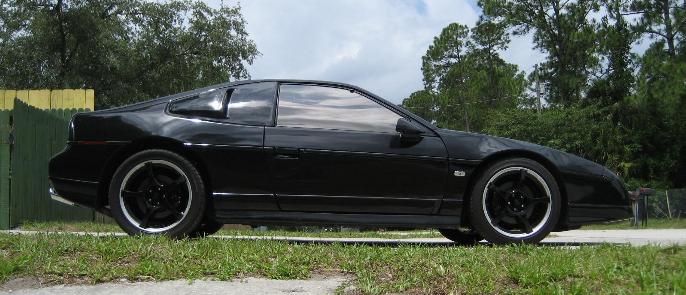
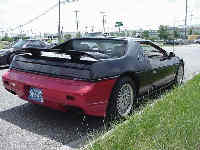
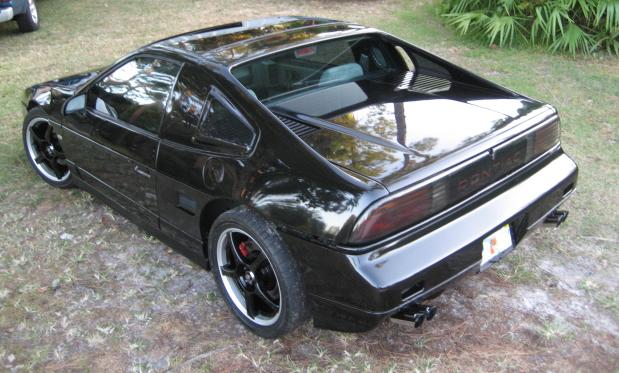
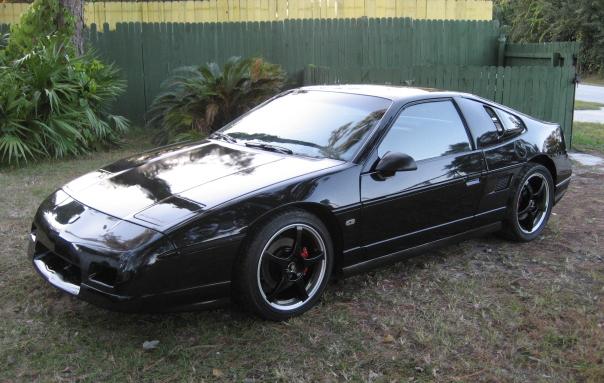
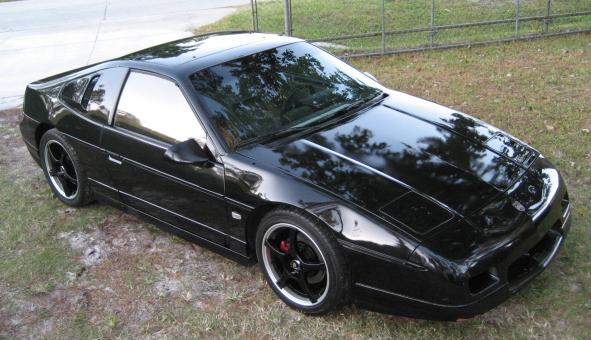
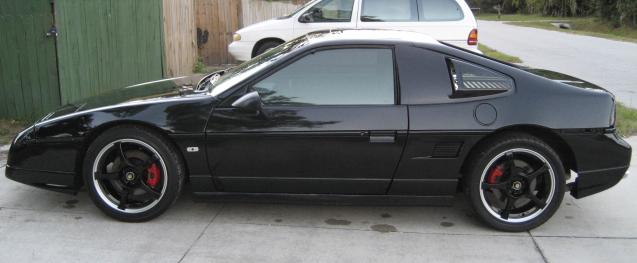
Here are a few pictures of the car before I purchased it:
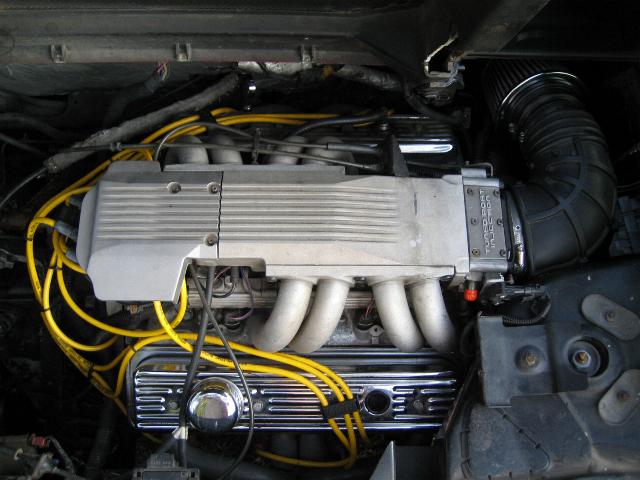
In January of 2003, the Fiero got it's first V8 transplant; a mostly stock mid-80's Chevy 305 TPI V8, put in by Archie himself. Later, the 305 was swapped out with a rebuilt 350 V8 with a four-bolt main block, rebuilt rotating assembly, cast-iron Vortec "fast-burn" cylinder heads, Scoggin-Dickey lower intake, a mild CC "High Energy" 262H hydraulic flat-tappet cam, 24lb. Accel fuel injectors, and a custom-burned Street & Performance ECM chip. The throttle body and upper intake was left stock, with the exception of a small cone K&N air filter. A new exhaust system was made utilizing Sanderson shorty headers, stock cat converters and glasspack mufflers:
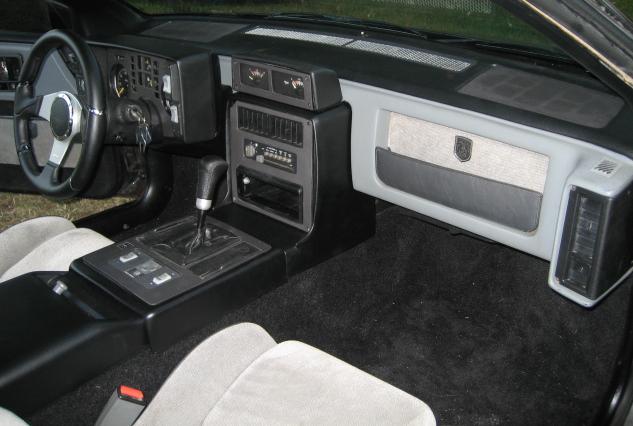
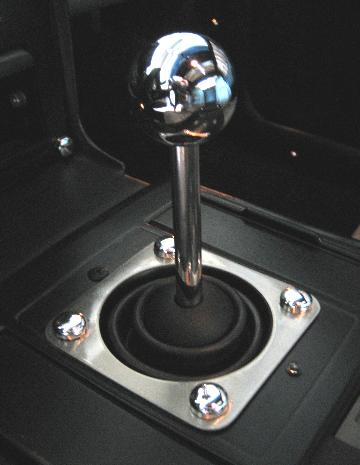
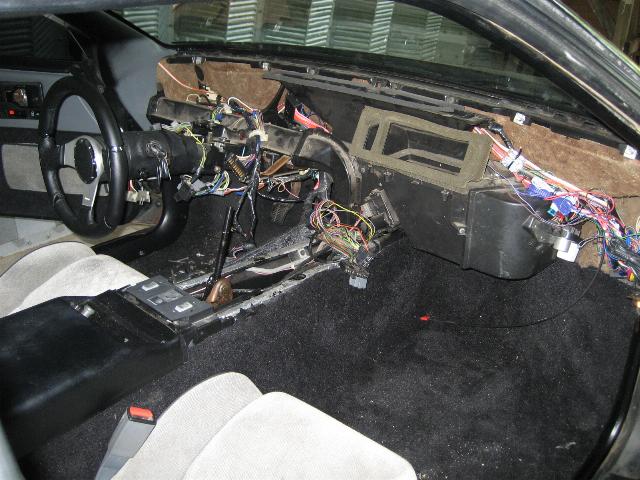
As for the interior, the stock steering wheel was tossed for a 350mm MOMO Millennium steering wheel. A MOMO Anatomic leather shifter knob was mounted on a Rodney Dickman short shifter made for aftermarket shift knobs. Sound deadener and new black carpet was also installed on the floorboards and firewall. Black vinyl was used to cover the headliner and firewall panels. A Viper alarm was also installed, along with a few stereo goodies. The rest of the interior was basically left disassembled/untouched when I finally got my hands on it:
In the early part of 2006, the previous owner lost interest in this project and offered it for sale here on the Pennock's mall. Apparently, the new-at the-time Nissan 350Z was more enticing to him than a properly done V8 Fiero needing only a little work to finish. When I arrived to buy the car, a new black 350Z was parked in his garage.
His loss. My gain.
On May 7th, 2006... my 30th birthday... I grabbed a flight from sunny Florida all the way to Ohio to purchase the car... and then proceeded to drive it all the way back home. After two full days of driving, many miles traveled with a malfunctioning clutch slave-cylinder, I was back in Florida with my first SBC V8 Fiero.
[This message has been edited by ITALGT (edited 11-08-2016).]
The first thing I did to the Fiero after getting it home from Ohio was fix the clutch slave cylinder that went bad. After that, it was time for its first polish/wax/detailing. Although the paint was fairly new, it had lot's of flaws (orange-peel, over-spray, debris in the clear coat, scratches, etc).
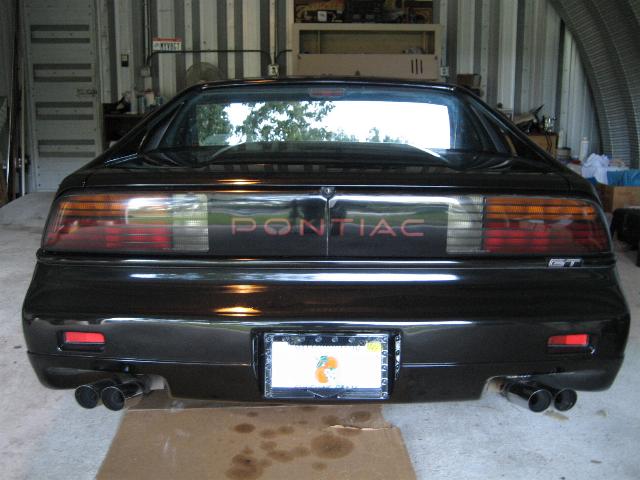
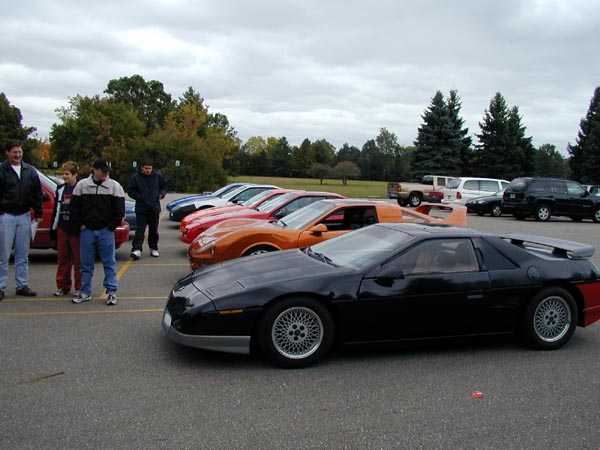
Here are the very first pictures that I took of the Fiero after spending an afternoon buffing and waxing the paint. At this point, the Fiero was still exactly how I bought it, other than the paint being really shiny!
[This message has been edited by ITALGT (edited 04-24-2015).]
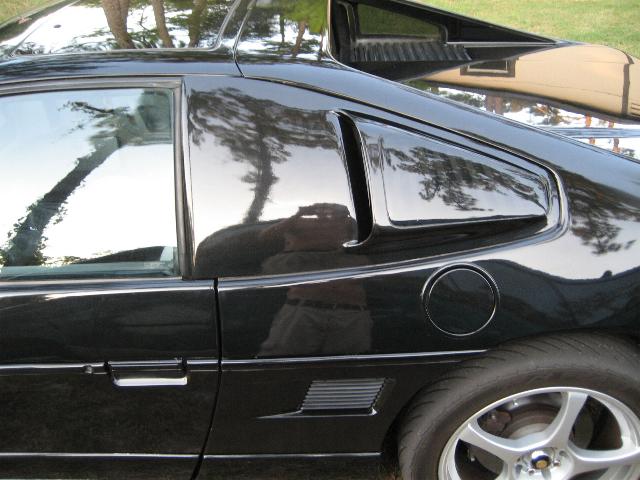
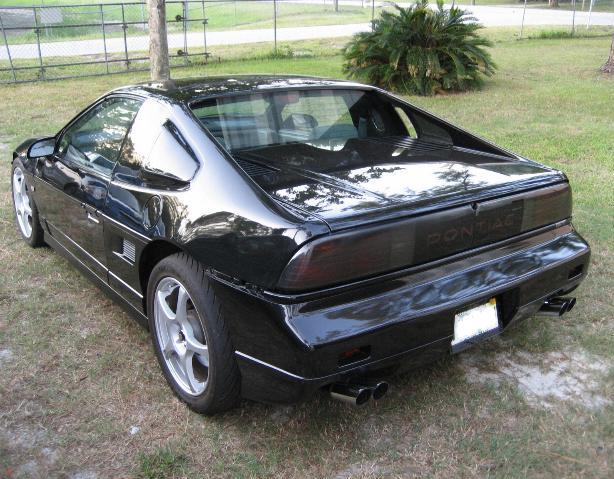
So far, the body has had very few modifications. About the only thing different than stock was the aftermarket quarter windows with scoops and the tinted tail lights.
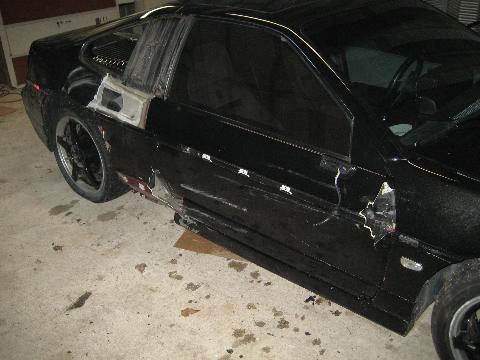
Sadly, the Fiero was shiny for only so long. In January of 2008, a wooden bridge covered in early morning Florida frost sent the car spinning uncontrollably into several sign posts (see page 3 of this build thread for the nitty-gritty details):
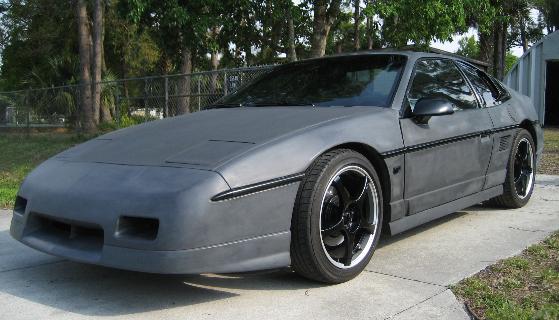
After all was said and done, I took apart the Fiero and put it back together thanks to lot's of help from the Central Florida Fiero Club and some newly acquired fiber-glassing skills... what a great group of Fiero guys and gals we have down here in sunny Florida! Here is what it looked like after busting my a$$ getting it back together and on the road (temporarily sporting some dark grey primer):
Cruising with the Fiero gang during the 2008 Daytona car show:
[This message has been edited by ITALGT (edited 05-26-2016).]
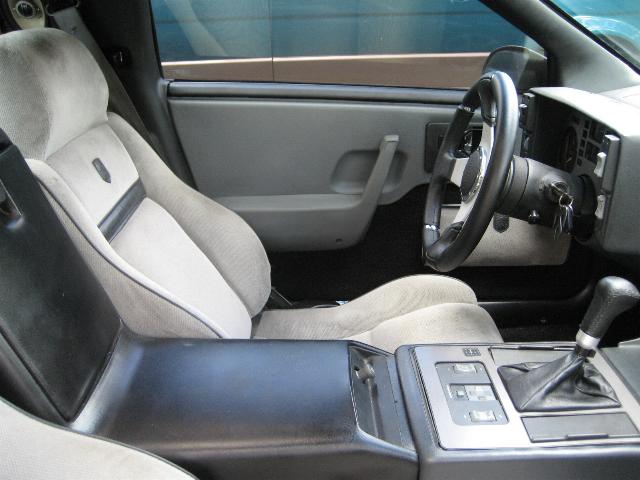
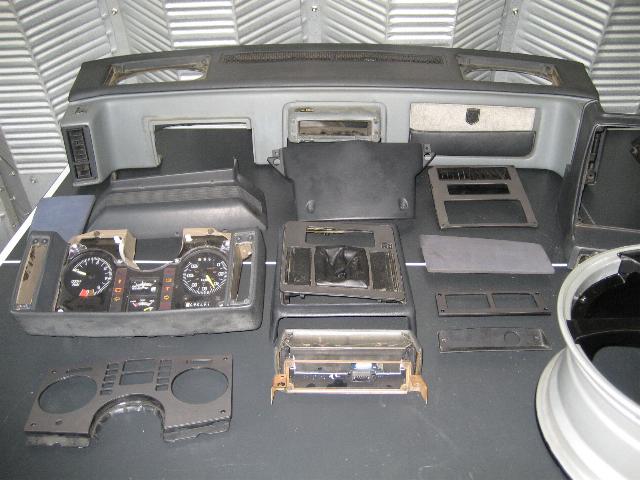
When I first got my hands on this GT, the interior upgrading was started but no where near finished. I bought the car with the MOMO steering wheel and shifter already installed, as well as new black carpet and new headliner and firewall vinyl. Otherwise, here's what I started with; your basic stock Fiero interior:
During the first phase of the interior build, I am utilizing the original design of the Fiero's interior to my advantage. The "boxy" appearance of the stock Fiero interior already gives the purposeful and visceral "jet-fighter" feel that I'm looking for. I want the inside of this car looking more like a cockpit than an interior. So far it's been given the "blacked out" treatment by painting the interior panels and face-plates/gauge surrounds satin black. I also added new floor mats, the map-pockets on the doors have been removed, and some cheap aluminum pedal covers were installed:
...the custom shifter surround and boot I made:
1/2" solid aluminum rod I am fabricating for the doors and dash... still a work in progress:
[This message has been edited by ITALGT (edited 04-24-2015).]
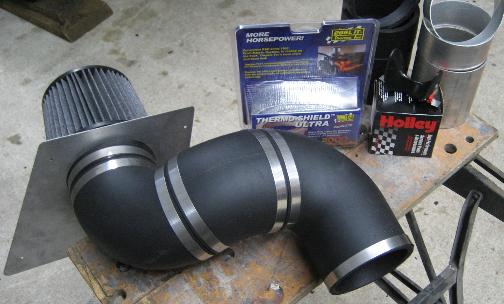
*Rebuilt 350 V8, four-bolt main block, stock bottom end, Tuned Port Injection *Getrag 5-speed manual (upgrading to a late model Getrag) *Vortec cast-iron heads, Scoggin-Dickey lower intake plenum *Accel 24lb. high-flow injectors *Competition Cams "High Energy" 262H hydraulic flat tappet cam *AEM dry-flow air filter, custom "cold air" intake, Holley air-foil *Proform 50,000 volt ignition coil, MSD 8.5mm plug wires, Accel hi-output ignition module *Sanderson headers... cracked and busted, time for some 180's *Street and Performance custom burned computer chip *Mobil 1 Synthetic oil, Lucas oil stabilizer
I made the "cold air" intake using 4" rubber hose, aluminum tubing, firewall mount plate, Holley air-foil and a AEM synthetic "dry flow" air filter:
The transmission that was originally used was an old Getrag 5-speed. It held together for me for a couple of years before it finally blew up at the drag strip in April of 2008. Here it is as it sits today, January 30th, 2013:
Now that the engine cradle has been dropped for a transmission swap, I will begin adding a few goodies to wake up the 350 to extend the upper RPM range and increase overall performance with the low-geared Getrag 5-Speed. I will be ditching the stock TPI and SD Vortec base intake with a carburetor and appropriate cam. I will also be getting rid of the old mechanical water pump and install an electric one.
New Schoenfeld 180 headers... see page 6 for installation details:
Main strut tower brace in place with welds cleaned up:
More to come...
[This message has been edited by ITALGT (edited 05-26-2016).]
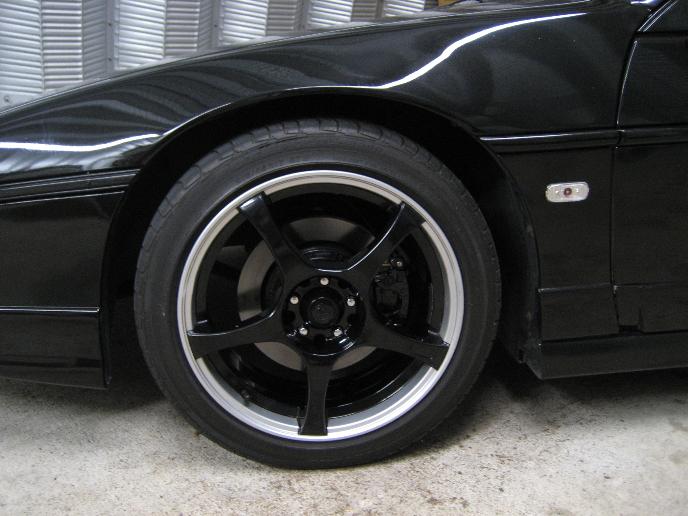
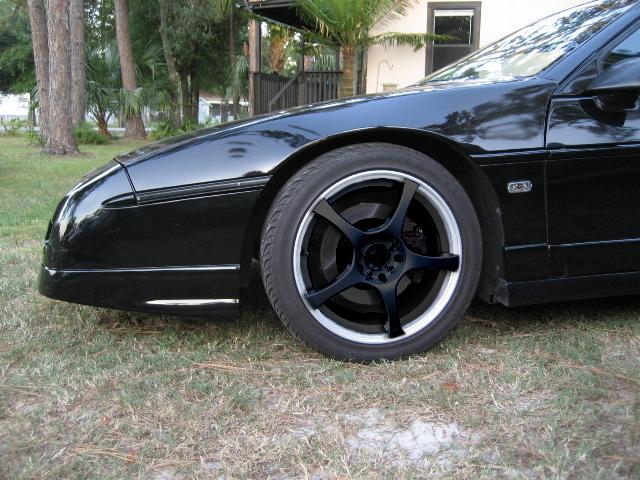
The suspension was completely rebuilt using polyurethane bushings and was lowered using Eibach springs. The brakes were upgraded using Archie's 11.25" brake conversion kit along with braided stainless steel brake lines. The wheels and tires were upgraded to 17"x7.5" Enkei RS5's with 215/45R-17's on the front and 235/45R-17's on the rear:
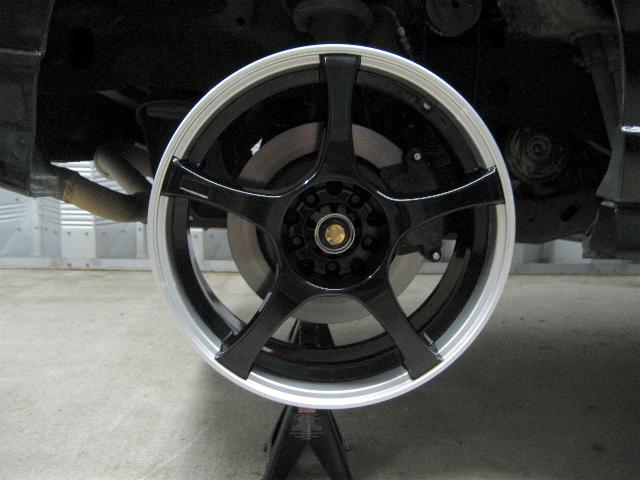
One of the first things I did for this build was powder coat the centers of the wheels gloss black. The calipers, rotors and center caps were also painted black. I finished the wheels off with chrome "spline-drive" lug nuts for a raw, clean look:
In the future the wheels will be upgraded and possibly the brakes as well. Here's a quick photoshop of the Fiero with a 19"/17" wheel combo:
[This message has been edited by ITALGT (edited 05-26-2016).]
The actual build begins with the clutch master and slave cylinder being replaced as they failed before making it home from Ohio. Because it's been discussed a thousand times here on Pennock's, I will skip all the boring removal/installation! It wasn't long after that the alternator stopped charging properly, and began making all sorts of nasty noise while the engine was running. I took out the old one and installed a rebuilt unit, which fixed the problem... no big deal.
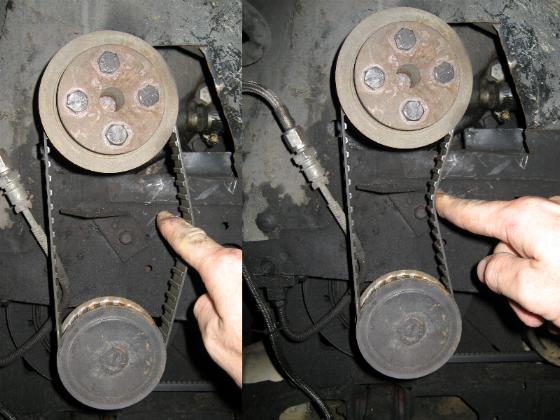
I had taken off the passenger side rear wheel while I was replacing the alternator, and noticed a problem with my water pump belt. I took the opportunity to snap a couple of pictures of the excessive play. Even though this belt is cogged, it was stretched enough to slip when it got wet (not a good thing). After a bit of searching, I found a new belt and installed it... very tight fit, but problem is solved. Note also all the oil and gunk all over the frame as well... I think it's the front seal on the engine.
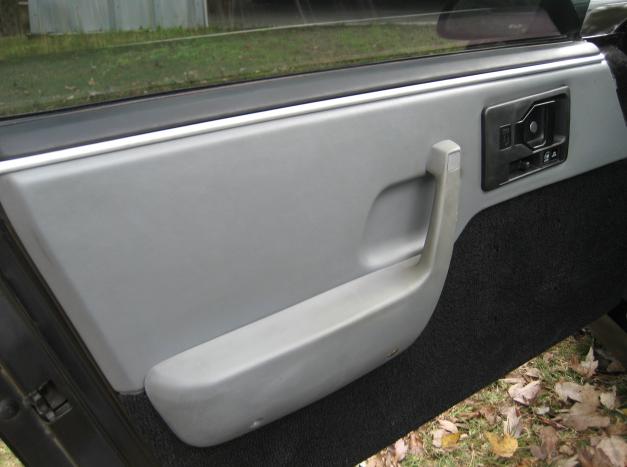
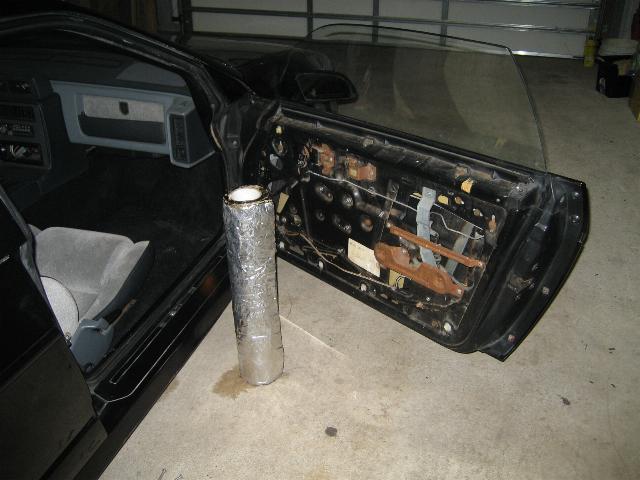
Next, it was time to start some interior work to achieve a black and gray fighter-jet theme. The first thing I needed to do was to redo the color of the interior panels using semi-gloss and flat black vinyl paint. Some parts had already been painted black, other parts were still the factory gray. The door panels were basically untouched originals. While the door panels were removed, I also took the time to put sound-deadener on the doors:
For the Fiero's interior panels, I started with the prep work by scrubbing them down good with a scotchbrite pad and alcohol. You can also buy a spray-on adhesion promoter to help the paint bond to the surface... I elected not to use it, as I've found that the paint sticks just fine with proper prep as I just described. Next up was masking the door panels. I choose to leave the map pocket attached as well as the door carpet to keep things simple. I used black Duplicolor flat-black interior paint... you can get this stuff at Walmart and most auto parts stores. This paint can be used on carpet, but it's best to re-coat/scrub it in good a few times to get it dark... it does lighten a bit after it's dried. Replacing the carpet is always the best option, but I'm not worried about it at this point.
Notice I painted the top of the door panel black to flow better visually with the rest of the interior. It also looks better when standing outside the car... nothin' but black!
Panels reinstalled:
Much better, eh? =)
Look for similar black and gray treatment on the rest of the interior.
[This message has been edited by ITALGT (edited 04-26-2015).]
Looks good! Say, are new seats in the works? Some black Mr. Mikes or Corbeaus would be rad.
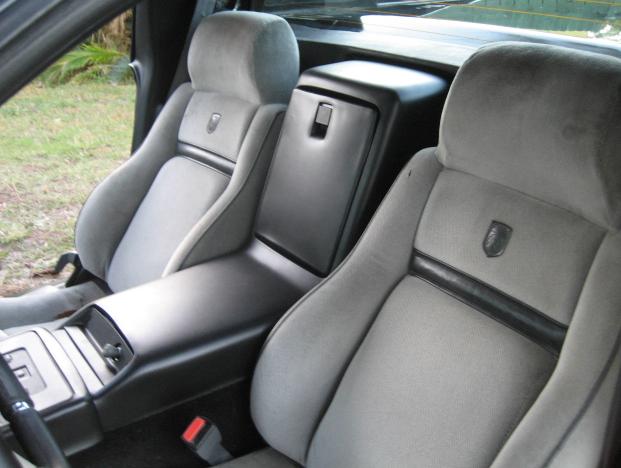
New seats are definitely going to be needed! Driver's side is in ok shape, but the passenger side is torn up some. I will be replacing them both with aftermarket racing seats at some point in the future.
[This message has been edited by ITALGT (edited 01-30-2013).]
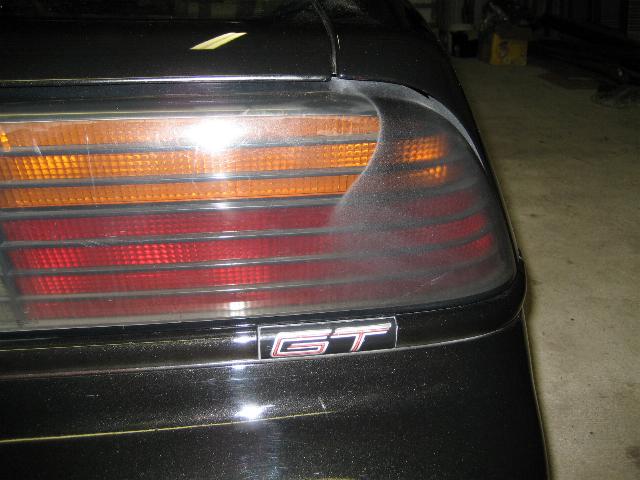
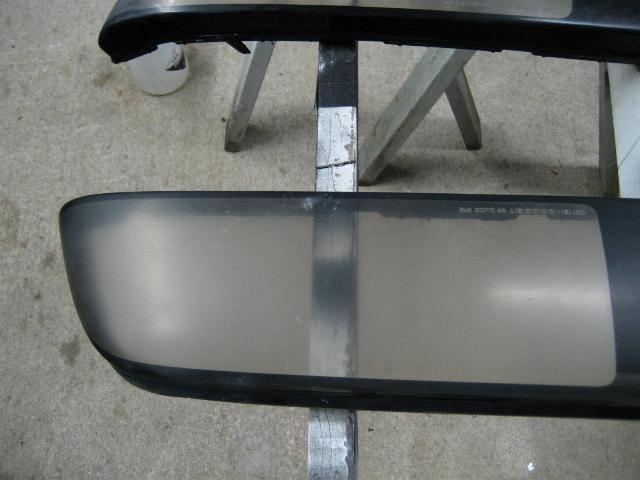
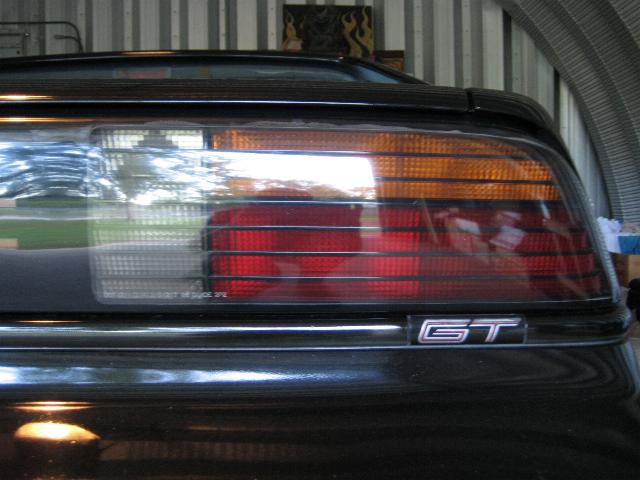
When I bought this car the exterior looked good visually, except for the front bumper which had a couple of small spots where paint had been rubbed off. The only other obvious cosmetic issue was the tail lights, which had a lot of over-spray from when it had been previously painted. The lenses also had some minor scratches and scuffs, along with the delamination that you typically see:
I first removed the over-spray using a scotchbrite pad, alcohol, and lots of rubbing. Then I wet sanded the lenses repeatedly with 1500 grit sandpaper then 2000 grit, working out some of the more obvious pits and heavier scratches.
Next I attacked the lenses with rubbing compound using a power buffer, followed by some plastic polish and a couple of coats of wax. Here's the end results:
I was actually quite surprised how well they came out, and it wasn't all that tough. I will eventually finish this project with a black-out treatment using Night Shades spray tint. While I have them apart, I will also fix the delamination problem.
[This message has been edited by ITALGT (edited 02-02-2013).]
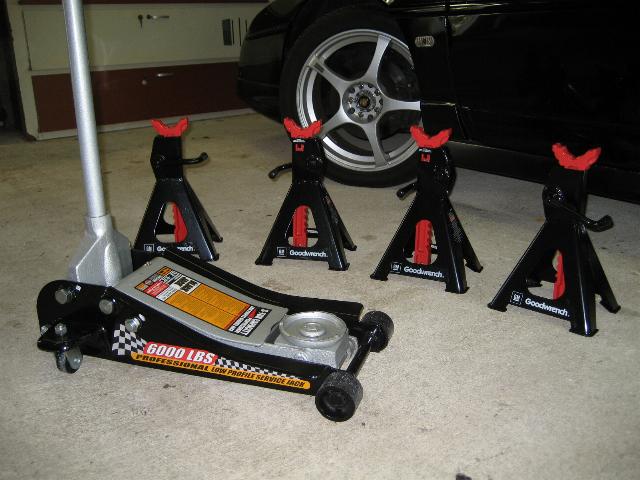
Today I took a closer look at the tires and no doubt about it, they absolutely have to be replaced ASAP. They are getting pretty bad and I'm actually quite surprised how quickly they are wearing, considering an alignment had supposedly been done before I bought the car. So... a long story short... time for some new rubber, an inspection of the suspension, an alignment... and I get to finally powder coat the centers of the wheels black!
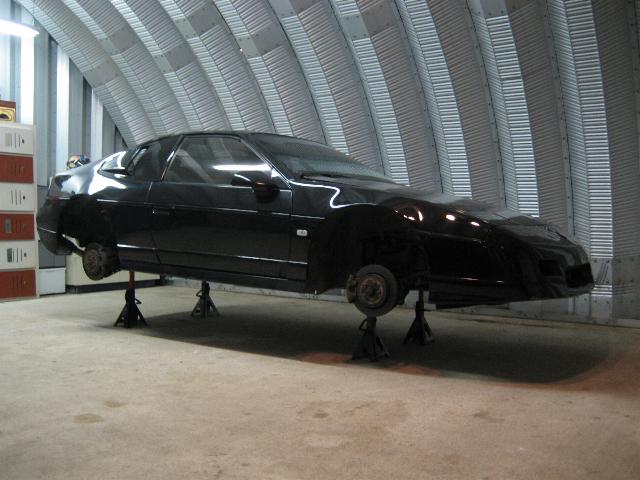
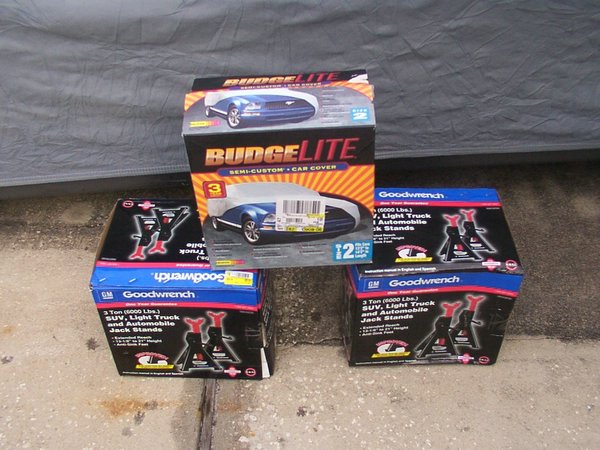
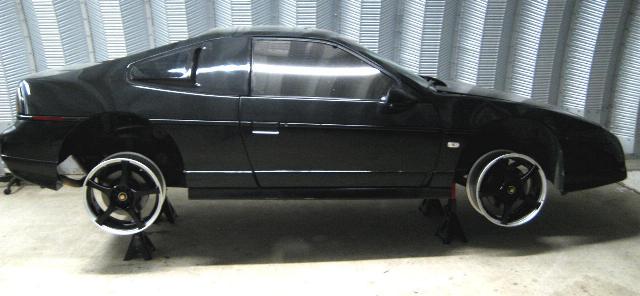
I knew I was going to be putting the car up on stands eventually for some work, just not this soon! That's ok though... today I broke down and bought a el-cheapo "Black Jack" 3 ton low-profile jack (steel) from ol' Wally-World, $68... 3.3" height minimum. Also bought some GM Goodwrench 3-ton jack stands with a 21" max height... those sold for $17 a pair. About $100 and a trip to Walmart gets you this:
I just tried it on the car... it does clear nicely, and also lets you inboard enough to reach the engine cradle. The steel lift pad is a little big for lifting in the factory jack locations... I'm sure a rubber pad would be useful here, but I won't be using it there anyway.
The existing tires are Falken 215/45ZR-17 front, 235/45ZR-17rear. I will probably go the cheap route for now and find some good used rubber. Down the road I would like to install more of an 18" diameter wheel front and 19" or 20" rear wheel combination. For now, it's time to start pricing out some new rolling stock... and start playing with the powder coating machine at work!
Stay "tuned!"
[This message has been edited by ITALGT (edited 02-04-2013).]
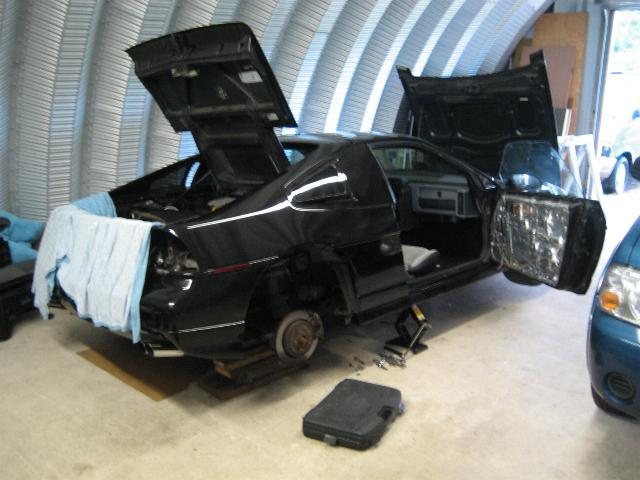
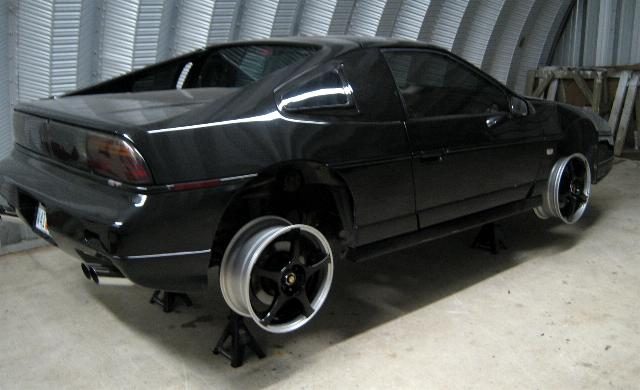
Today I got the car up on stands and removed the wheels for the inevitable... it's time to get started on powder coating the wheels. I'm also taking this time to thoroughly inspect the car, as I really haven't since it was bought. I like the idea of catching the little problems before the big ones arise... like the suspension/alignment issue.
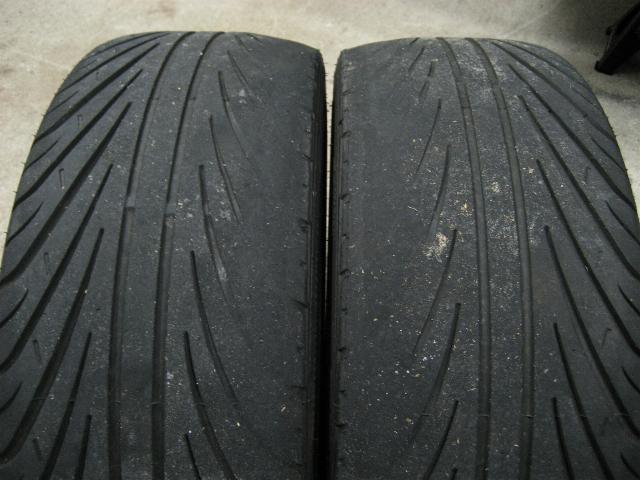
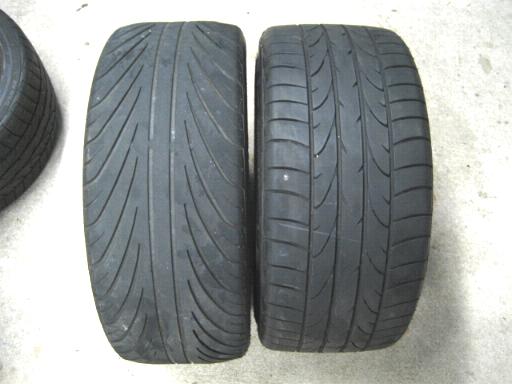
I am thinking about replacing the 11.25" solid rotors with cross-drilled units eventually, and possibly upgrading the calipers. In the meantime, here's a look at those nasty tires heading for the dump:
Front tires:
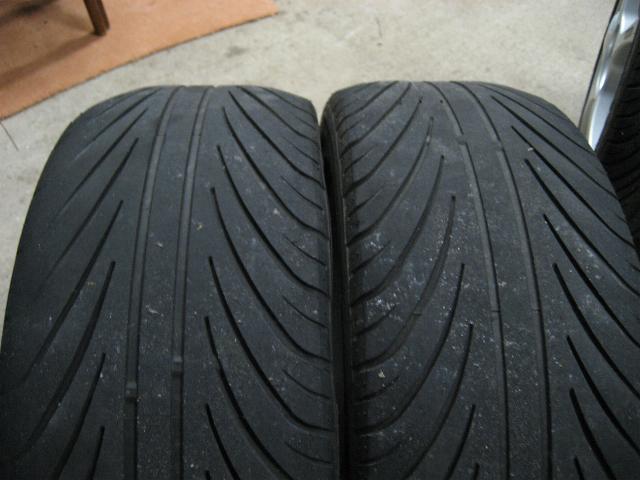
Rear tires:
Yeah, we seem to have some suspension issues, don't we? Hopefully nothing that a good alignment won't cure. The passenger side rear tire is actually the only one that shows no excessive wear. The driver's side rear tire actually has a broken belt on it's inner perimeter (you can see it in the picture) and also has some obvious wear on the outside patch of tread. I suspected this was the issue when the car shook madly at about 70mph. I'm glad THAT chapter is over with!
[This message has been edited by ITALGT (edited 02-01-2013).]
Wow. That's an awesome looking car. I think my favorite thing is the idea of powdercoating the wheel centers black....the photoshop of that looks wicked.
At this point I won't be able to make it to the Keys unless I win the lotto, and I don't play! Seriously though, my intentions were to have the car ready by then but I've just had too many financial set-backs over the past several weeks. I just bought this Fiero AND a house within a couple of months of each other, so as you can imagine I'm just a wee-bit tapped out at the moment. I've never been to the Keys before, but it's been a dream of mine for years. I just hate to do this, but I'm going to say the words... "maybe next year."
There, I said it.
Have patience, my fellow Fiero freaks... I'll be coming out of the woodwork here shortly. I just moved here from the mid-west not even a year ago... and I feel I'm just now getting settled in. I'll be working on this car to get it back on the road as soon as possible and get to those club meetings and shows. In the meantime, I've got some work to do! Tomorrow I will be bringing my wheels and tires to a tire shop to have them separated, then begin the prep on the wheels for the black powder coat.
Stay "tuned."
[This message has been edited by ITALGT (edited 02-01-2013).]
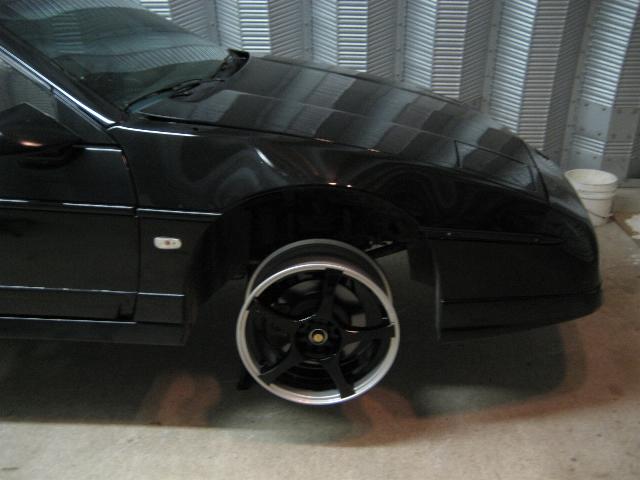
Update! A little change of plans on the powder coating... a quick photo-shop to demonstrate:
While I was masking the first wheel tonight, I came up with a change in design that I think will make a big difference in the way these wheels come out. In the following picture, I blacked out the inner lip of the wheel... much better looking in my opinion. It makes the wheel look bigger than it really is, and gives it a smoother look. By the way, the chrome and gold Enkei center-caps will be retained for now, it just isn't shown in these photos.
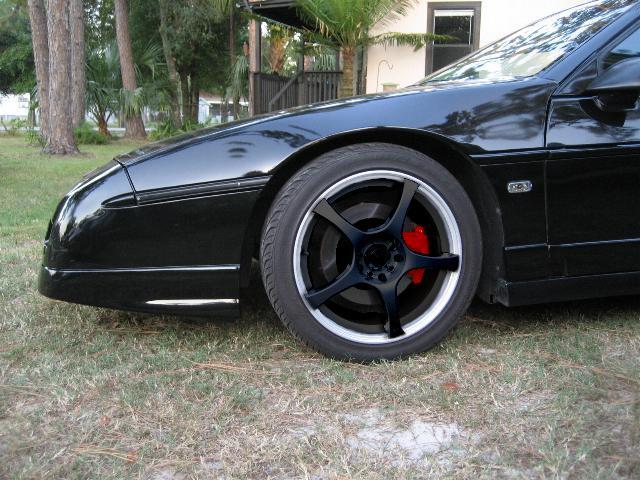
Red calipers maybe??? Hmmmmmm...
[This message has been edited by ITALGT (edited 02-02-2013).]
[ I suspected this was the issue when the car shook madly at about 70mph.
Was it a shake or a wobble? If its a wobble it could be solve by putting a hood vent, I had no Idea that was causing(or at least contributing to) my wobble problem till I took a trip down the highway with the hood off.
[This message has been edited by jmbishop (edited 10-06-2006).]
...it was definately a shake, and by looking at the belt that is broken, I'm sure that it was the culprit. About the hood... a vented hood is in the future. Nice to know it will make it handle better too... =)
I think you're headed for a mistake by painting your wheels black, personal preference I guess, but I think you'd be eliminating your contrast to the black. Also you don't just paint a set of Enkei wheels..too expensive a set of wheels, paint a set of Koning's.
Very interesting idea... I've never thought of that before. I personally don't like a lot of hood vent styles out there, but there is one that to me just looks great on a Fiero:
I was thinking about what color to do the calipers in, and the choices I narrowed down to are red or black. For the traditional "performance" caliper look, I like red; black though... aside from matching the wheels and body... would be very subtle/clean... and would enhance the "roundness" of the wheel and brake rotor. It also darkens the wheels area even more.
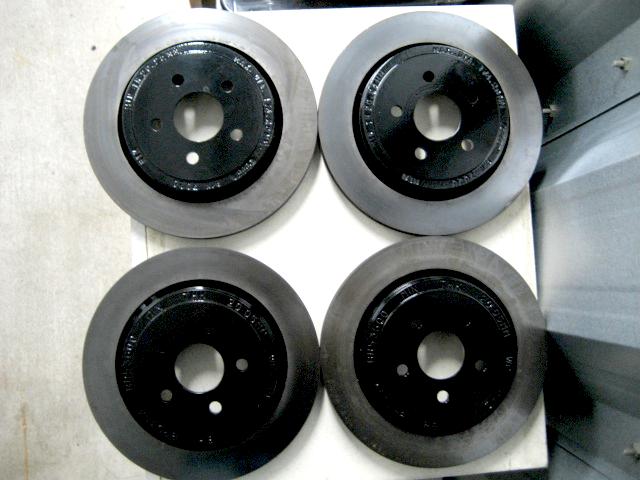
Until I can get the upgraded calipers I want, I'll see if it's possible to powder-coat the ones that I have now... same with the rotors (black). Not sure if the rotors will make it back on the car though... I'll be ordering some shiny-new cross-drilled units to take their place one of these days.
[This message has been edited by ITALGT (edited 01-30-2013).]
Oh, there it is, on my handy-dandy portable ping-pong-slash-work table!
While I've got a little time on my hands before I get the wheel and tire project done, I figured now would be a good time to do a little more interior work. Look for the similar black treatment that I did earlier on my door panels, along with a few other neat little details I have in the works for the rest of the interior.
[This message has been edited by ITALGT (edited 01-31-2013).]
Thanks for reminding me... I'm gonna' be needing one of those car covers myself. Black is such a pretty color but such a b!tch to keep clean!
Quick update while I'm at it... I've got the other three wheels prepped and ready for masking, which I will have done this weekend. My plan is to have them powdered by the end of next week... then it's just a matter of time until I get enough money rounded up for the tires and alignment. Today I powder-coated my brake rotors black, now all I have left is to paint those calipers... how's red sound, Tony? =)
Now how to convince you to chop it or get it chopped?
No convincing necessary! Let's just hope Archie doesn't quit chopping anytime soon... I highly doubt I'll be doing it on my own... then again... hmmmmmm.....
[This message has been edited by ITALGT (edited 01-30-2013).]
i like that idea of painting the carpet. How does it feel now? does the carpet feel britle, or does it flake off?? I've got the beechwood interior, but i'm making the bottom half black to be different. Are you pleased with this paint from wal-mart??
Once i get my v-8 Archie choptop down here to florida you are more than welcome to check it out, if u want.
Tony
Thanks Tony... I can't wait to see your Fiero in person. I've seen plenty of Archie's work and the one thing that doesn't cross my mind is his lack of quality or craftsmanship... always top-notch stuff... and his shop has definately been putting out some mind-blowing Fiero projects lately. Hope your's turns out just as cool!
[This message has been edited by ITALGT (edited 10-19-2006).]
I like that idea of painting the carpet. How does it feel now? does the carpet feel britle, or does it flake off??
...Now that the paint has dried, the carpet doesn't feel much different than it did before. But... the carpet that I started with wasn't in that great of shape to begin with. In the future I will be completely redoing it THE RIGHT WAY, so for me this was a perfect alternative to new carpet. If you really want black carpet, I would suggest just that... the end product will be much better. When using the interior paint on carpet, this paint does leave a slight brittle feel as you say, but it doesn't appear to flake off at all (providing you clean it well and let dry prior to painting). The key to getting the carpet nice and dark is to multi-coat, allowing plenty of time in between coats to allow for soaking into the threads. After a couple of days, my panels were ready for the final "soaking." In my opinion, definately worth the few $$$ invested.
quote
I've got the beechwood interior, but i'm making the bottom half black to be different. Are you pleased with this paint from wal-mart??
...For my intended purposes, I'd say the Duplicolor does just fine. You may also want to check out other brands of interior paints out there... lots of colors available too. Cost will vary depending on the brand, but generally speaking, you get what you pay for. =) Just remember to prep your surfaces thouroughly so the paint sticks.
[This message has been edited by ITALGT (edited 01-30-2013).]
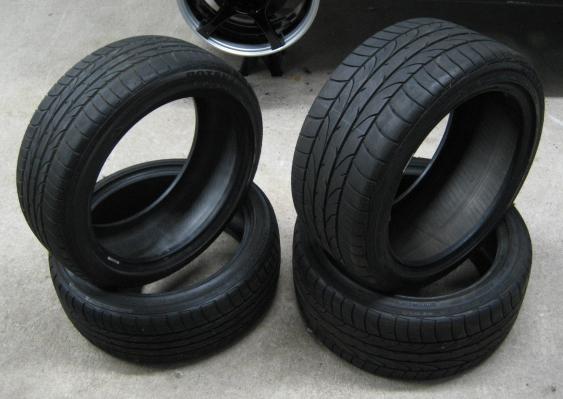
Today I needed to replace a bad tire on my work van, so I went to a used tire shop just around the corner from where I work to see if I could buy a decent used one. Just out of curiosity, I asked them if they would happen to have any 17" tires laying around. Sure enough, after sorting through several "iffy" pairs and oddball tires, we came across these beaut's... Bridgestone Potenza RE050's 215/45R-17 front and 245/40R-17 rear:
The rears are little short on the sidewall, but for the price they will work fine for now. The tread on all four tires is deep and they even have those little rubber nipples on the side-walls. And the kicker? $180 for all four, mounting and balancing included. I couldn't pass a deal like this up; the cheapest new tires I found so far were over $450 for the set... and that's not even including mounding/balancing.
I had originally intended to replace the rears with 235/45R-17's but... that's for another day. Side by side with the old tire:
[This message has been edited by ITALGT (edited 11-15-2014).]
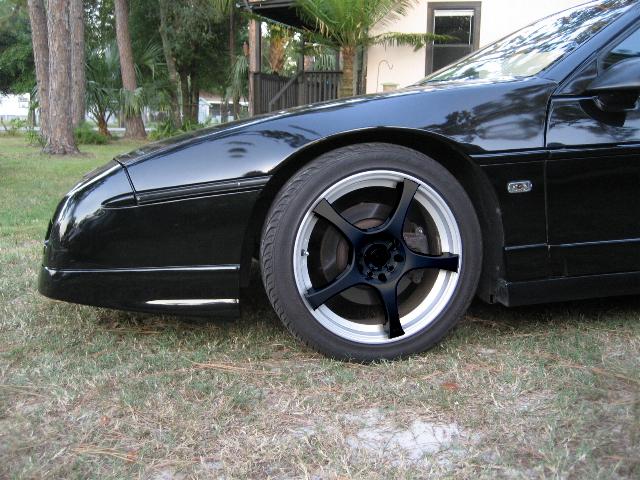
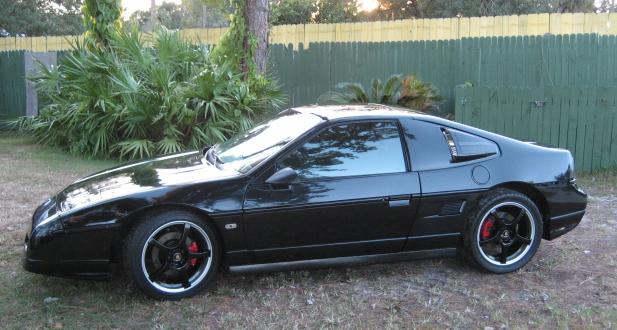
Well, it's been a LONG three weeks of sanding, masking, sand-blasting, painting, and finally powder-coating the wheels. It's funny... three-plus weeks of work and the final powder-coating process lasts only about 20 minutes! If you ever wonder why powder-coating wheels is generally an expensive endeavor... now you know why! ...most of what you end up paying for is labor. Of course, I did start with wheels that needed some work to begin with (they had some road-rash that needed to be fixed too). But on the other hand, it was also nice to start sanding on wheels that weren't all pretty and new!
These were the first wheels I've ever powder coated, so it was also a learning experience for me. Now that I've done a set, I for the most part know what to do and what not to do... but I assure you, I won't be jumping at the chance to do another set of wheels anytime soon! It's not that it's that difficult of a job to do... it just requires A LOT of patience, attention to detail and elbow grease... four times over! The only reason I decided to do it is because "powder-coating" happens to be my day job. Someday I plan to have my own powder coating equipment and my own oven.
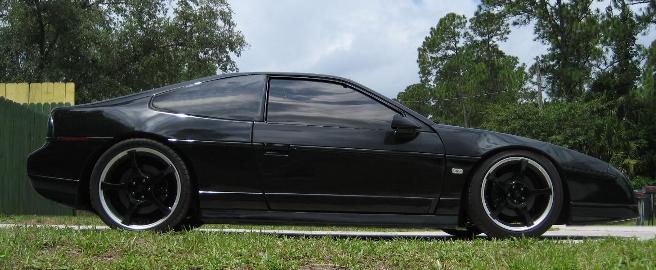
Overall I'm very pleased with how these wheels came out... and even more pleased how they look on the car. The "personality" of this car just did a one-eighty! I like the look of black-centered wheels on any color car, and I think they look best on a black. The other thing I really like about them is that they resemble the factory black-centeredd "honey-come" wheels that were standard issue for GT's and such... so not only do they look cool, they keep some of that original/stock Fiero look. I like that a lot!
The dash, center console, door pillars, gauge pods and trim were treated to the same semi-gloss/satin-black treatment as the doors. I also powder-coated the heater-vent grills with "Silver Reflectra" (basically looks like chrome). I haven't done anything with the gauge face plates yet... I'm thinking about painting them in a satin aluminum finish or black.
The car is now back together with an alignment scheduled for tomorrow morning. I have to say I'm very pleased how well the car is coming together. Next up is a list of small things: tail-light tint, rear-window tint, possibly install a rear wing, installing rear wheel-well liners, overall car detailing, and fixing a couple of other minor things. I am also in the process of buying another GT which comes with all sorts of parts I'll be needing.
Now it's a matter of preparing the car for the 2006 Fiero Fall Haul, on November 11th... this is going to be fun!
[This message has been edited by ITALGT (edited 02-07-2013).]


 In January of 2008, a wooden bridge covered in early morning Florida frost sent the car spinning uncontrollably into several sign posts (see page 3 of this build thread for the nitty-gritty details):
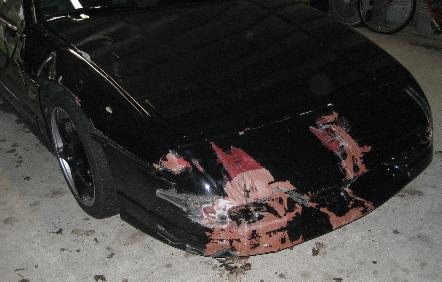


 ...most of what you end up paying for is labor. Of course, I did start with wheels that needed some work to begin with (they had some road-rash that needed to be fixed too). But on the other hand, it was also nice to start sanding on wheels that weren't all pretty and new!