I started a build thread in the link below, but the title didn't really give the proper information. I am going from the reverse perspective since this is already built, not quite finished, but it is running and driving. I will recap on a couple of things, mainly the build list, then start from the engine and work though the build process from the beginning including lessons learned, points of contact, and as complete of a list that I can provide.
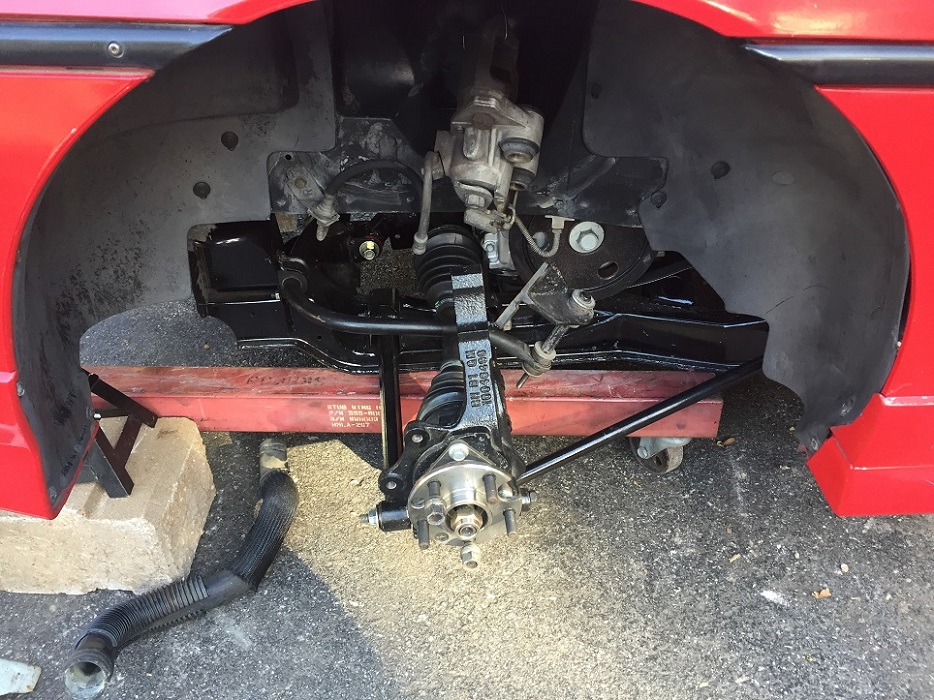
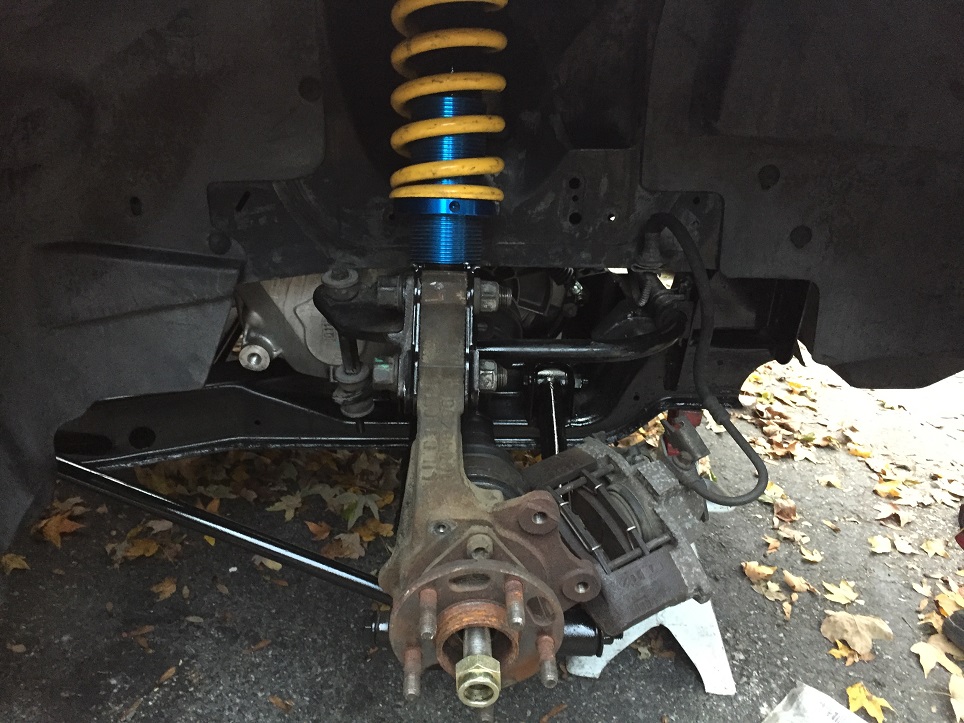
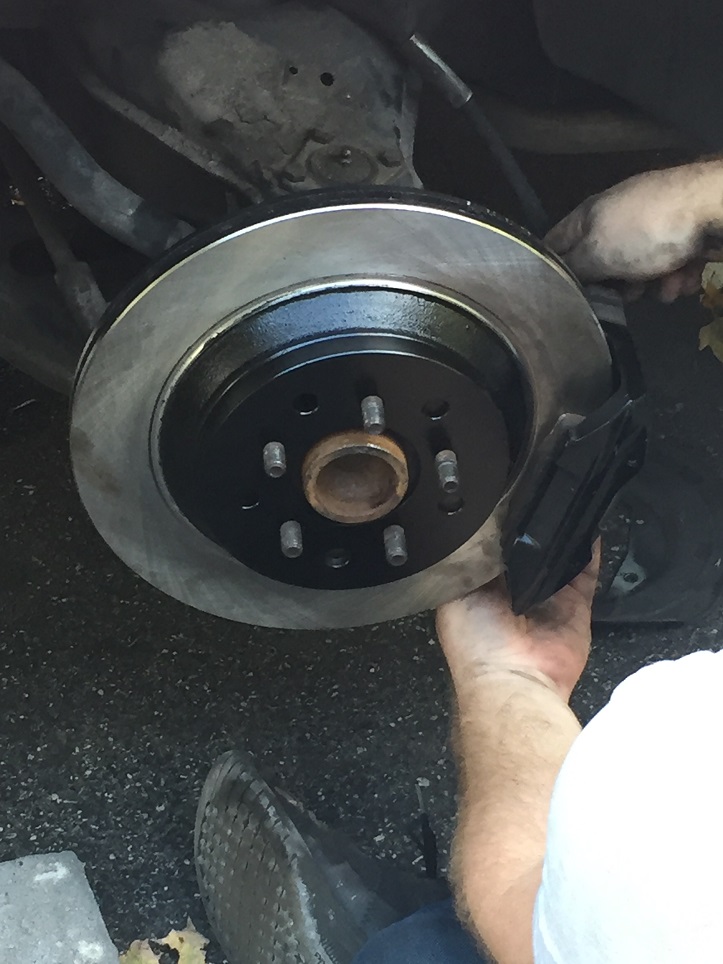
1988 Engine Cradle 88 cradle w/ suspension Pick a part San Diego 200 Rear wheel bearings Advance Auto 130 Rear suspension bushings Rodney Dickman 149 Knuckle Long Bolts Rodney Dickman 8.89 Rear Knuckle Girdle Kit Rodney Dickman 59.95 EBC-DP2325 Green Stuff Brake Pads Summit 177.36 RUS-692110 Russell SS Brake Lines Summit 99.97 TFF-2232NB 11in Brake Booster Summit 123.99 YH141897 / YH141898 12 Inch Corvette Rotors (15 lbs) Carquest 279.96
Coolant System Water fill neck West Coast Fiero 275 Champion Radiator Fiero Thomas 175 Coolant Hose Autozone 16.95 Coolant Hose Autozone 14.99 Heater Hose (by the foot) Advance Auto 18.45
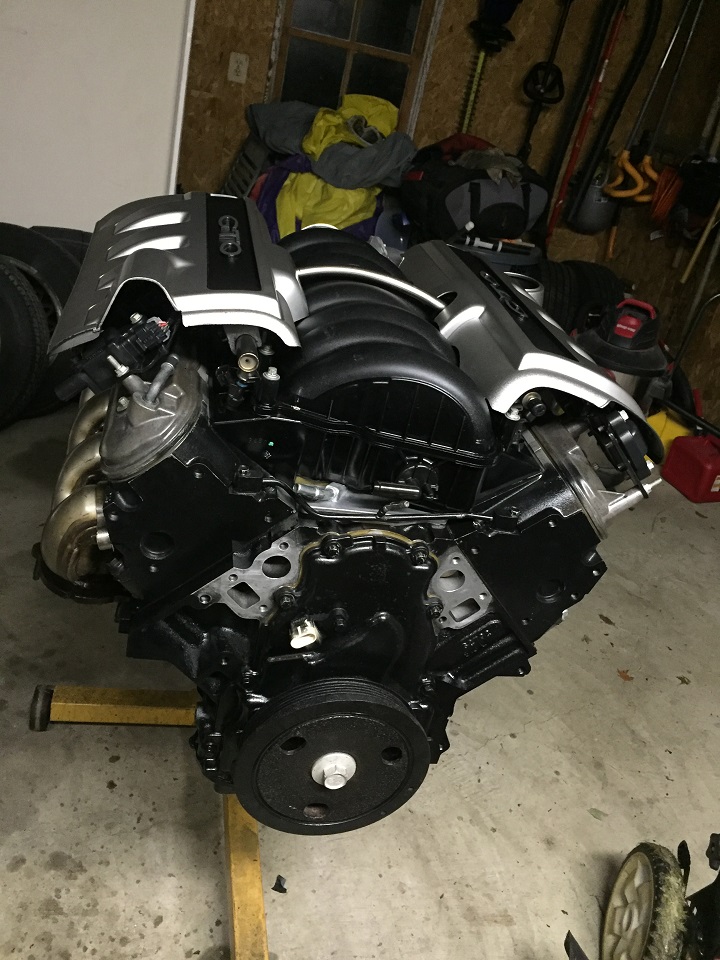
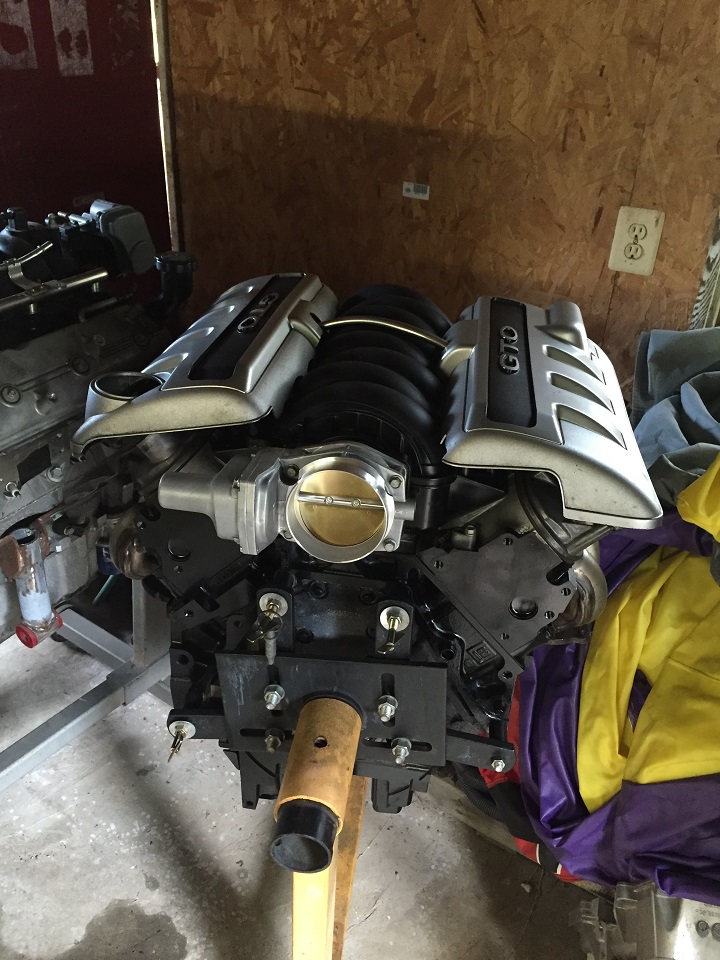
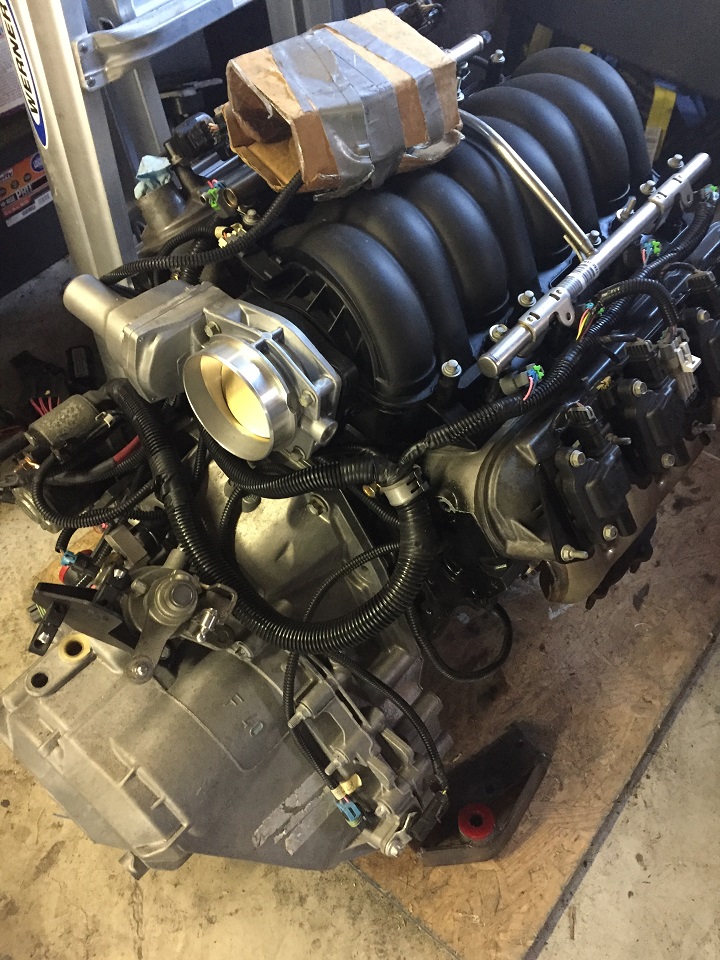
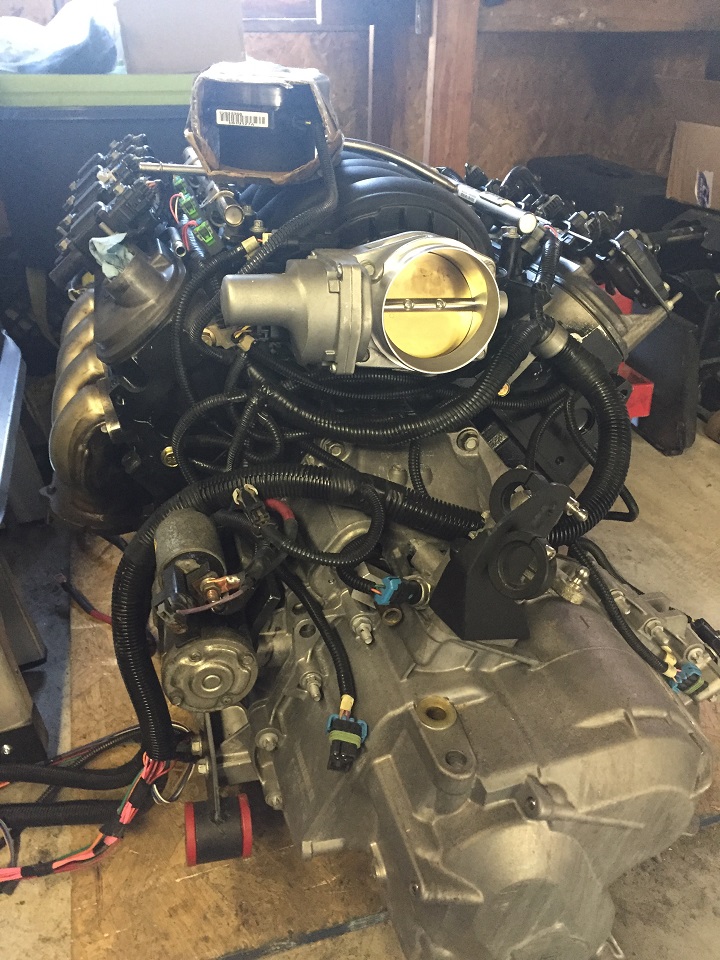
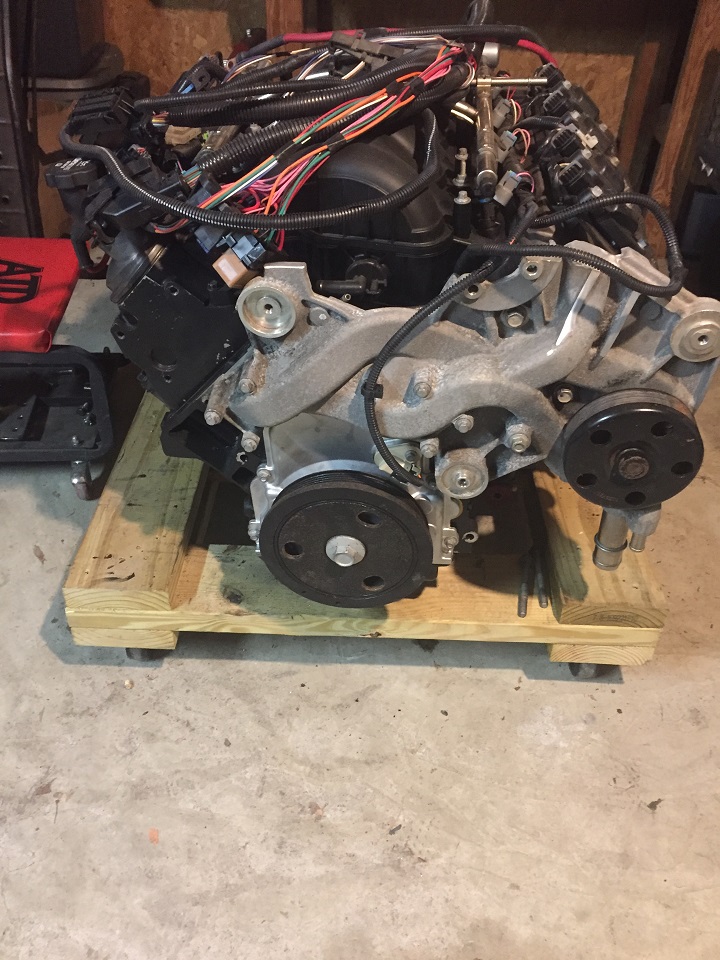
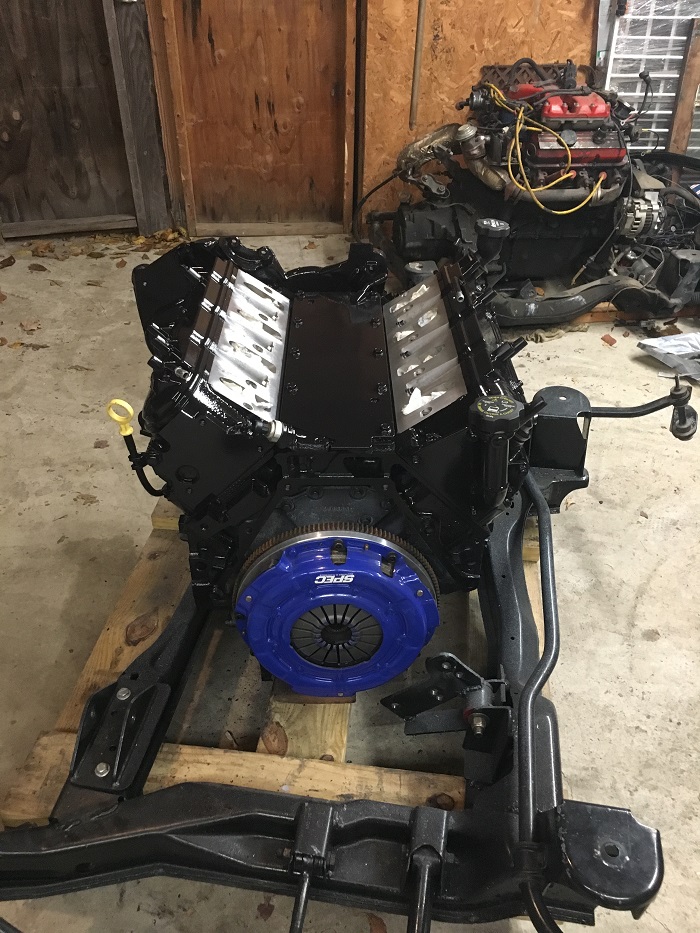
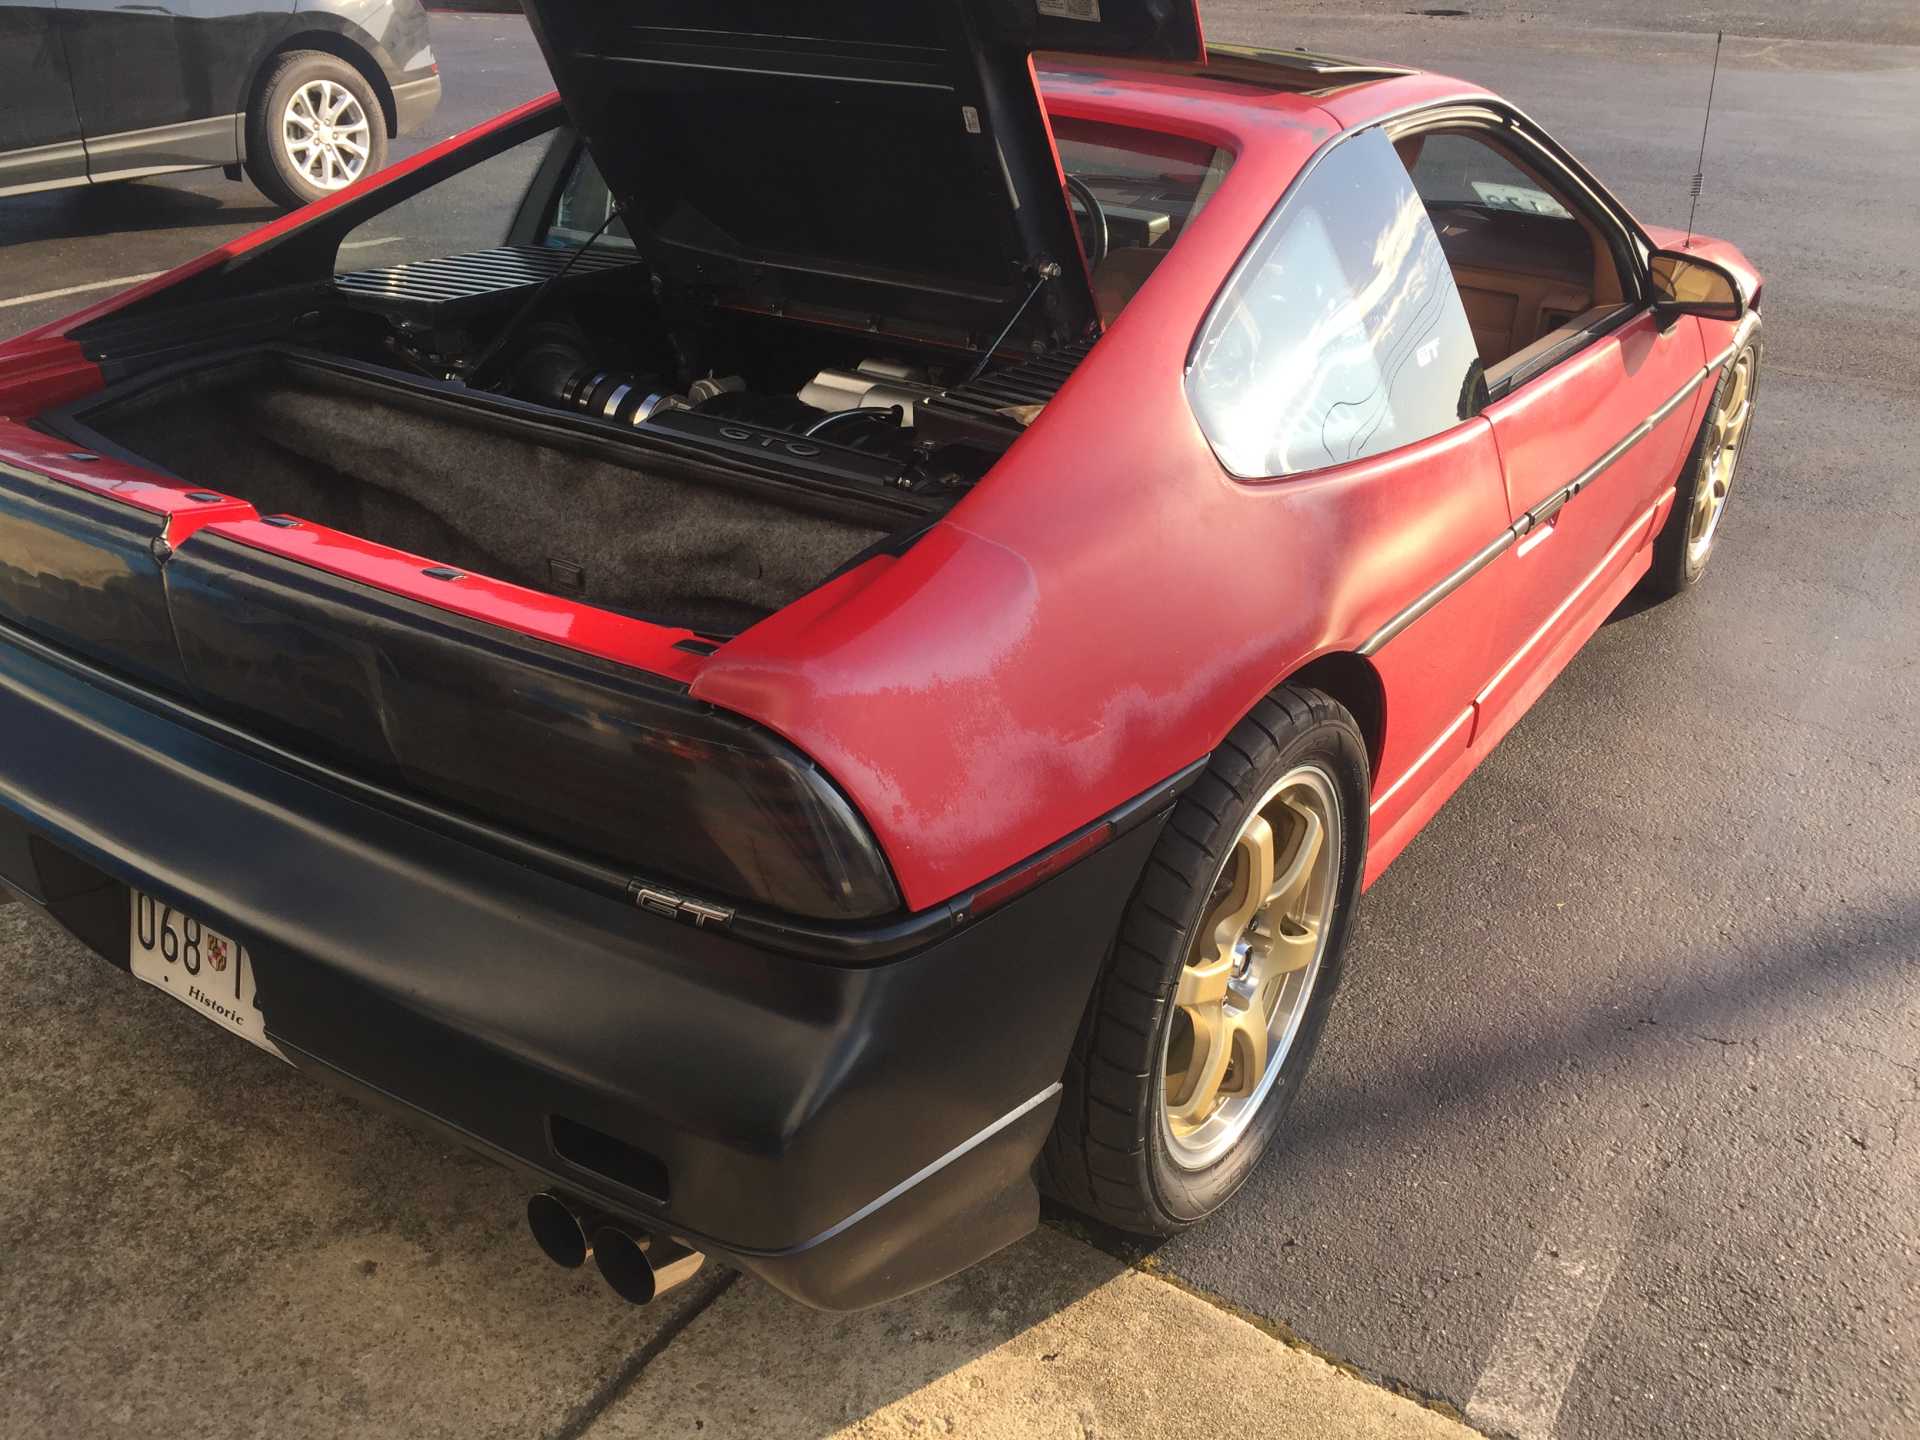
This swap obviously starts with the engine. We brought an earlier model with lower miles with us from California, but ended up finding other parts, the main one being a PSI wiring harness that came with connectors to support 58X timing through an E38 ECM. ECM connectors are completely different for other versions, so we ended up sticking with the higher mileage engine for that reason alone. You can convert the timing wheel from 24 to 58, but didn't want to pull an otherwise very clean engine apart. I will use that one for my second swap.
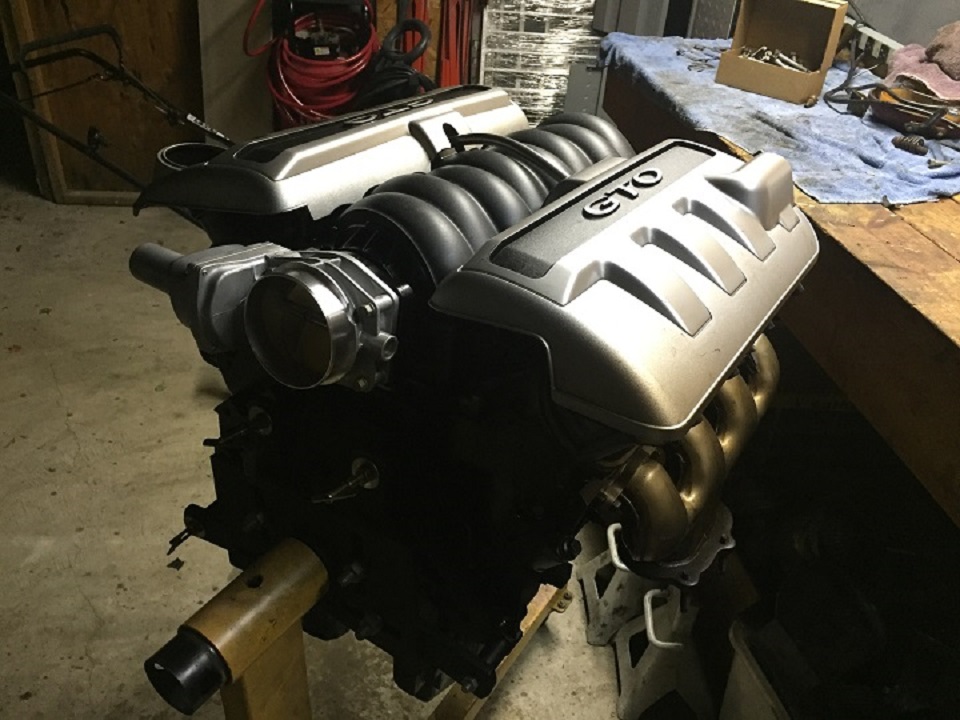
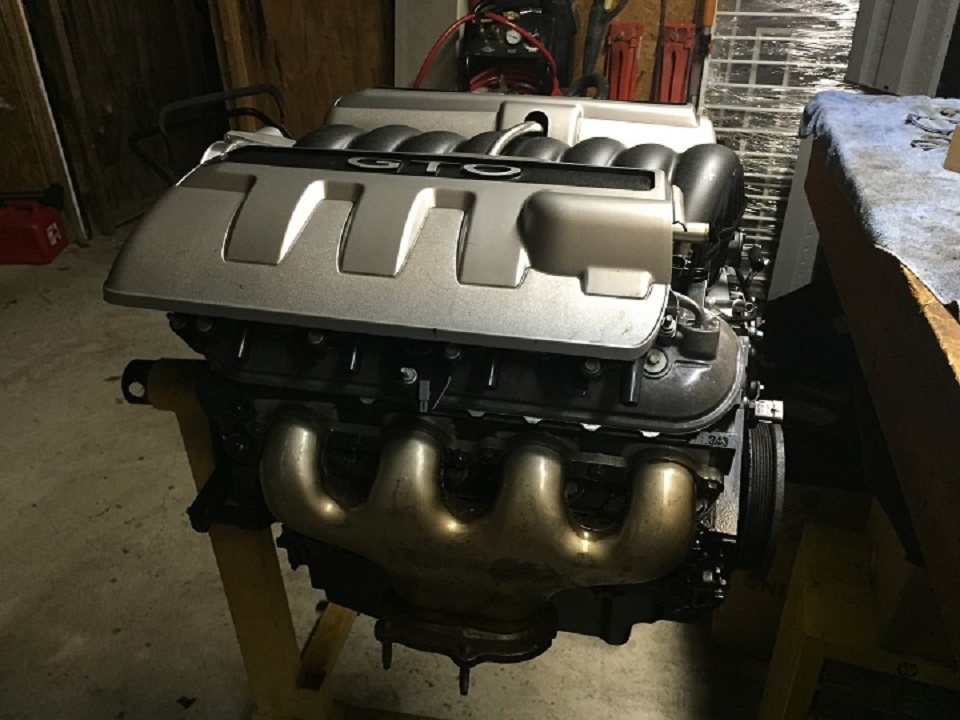
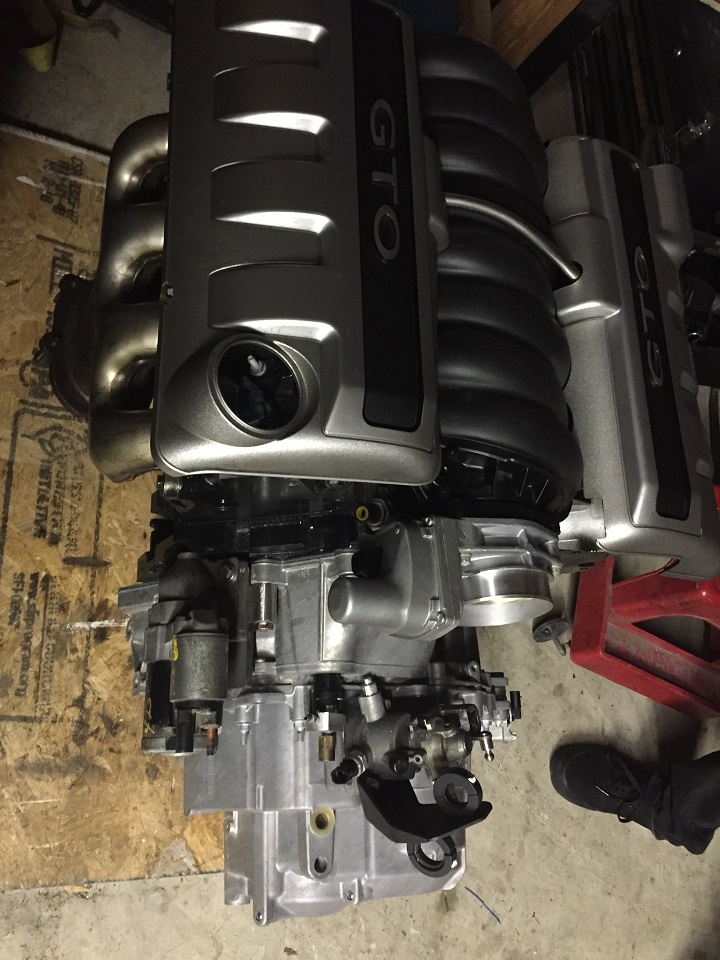
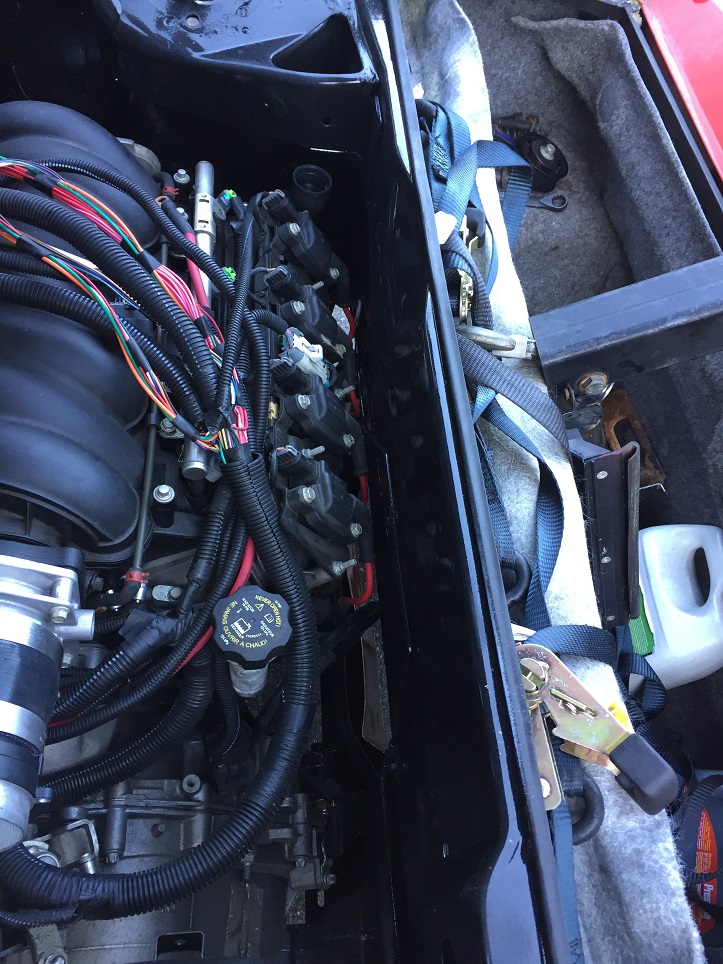
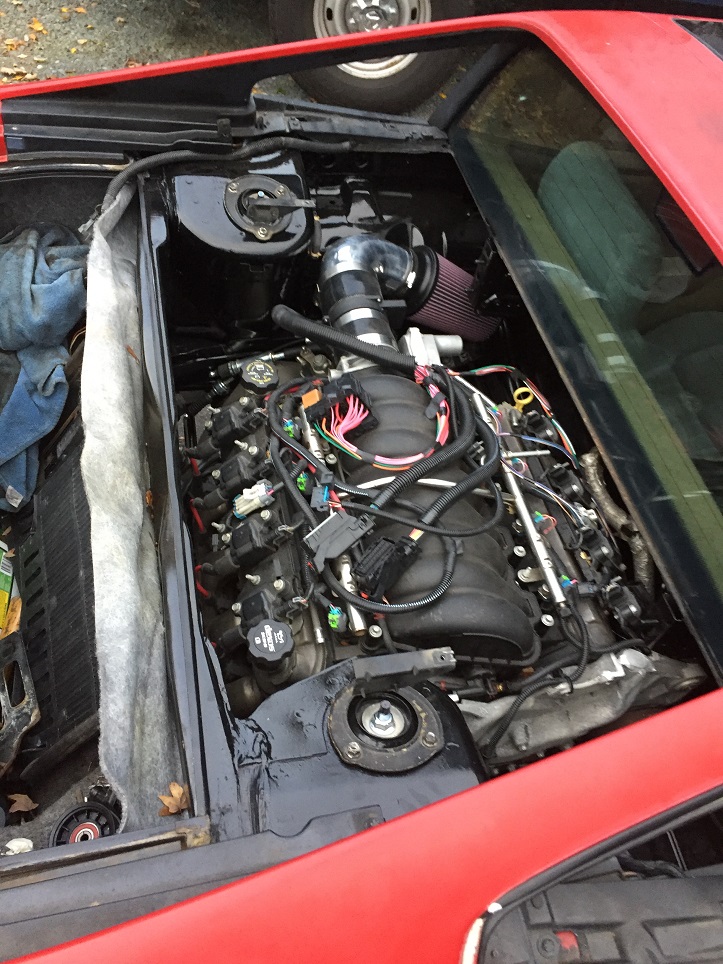
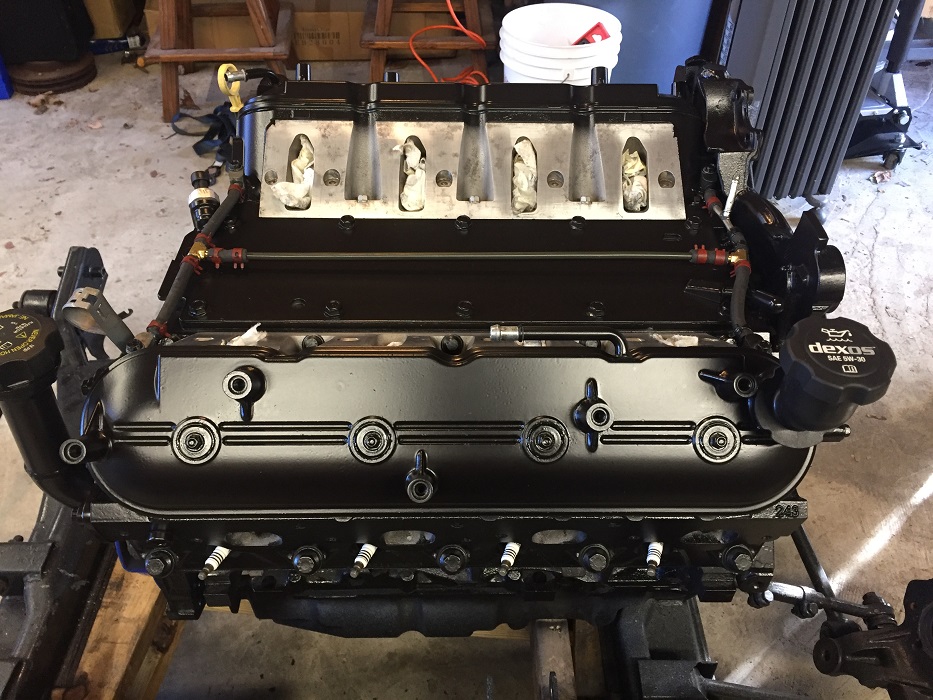
Our first step was to do the DOD delete. This requires a new valley cover, at least (4) lifters, pushrods, and trays (LS7 type). I found a member on the forum that was doing a swap on a MR2 and had gone another direction. The valley cover was an LS6 style and he had the OPSU mount machined, and bought a Katech angled OPSU adapter for the LS2 intake. I also capped the vent port as I didn't need the additional outlet for my build. For my second build, I will use a plain style valley cover and purchase Fieroguru's distribution block that runs off of the oil filter adapter on the engine block.
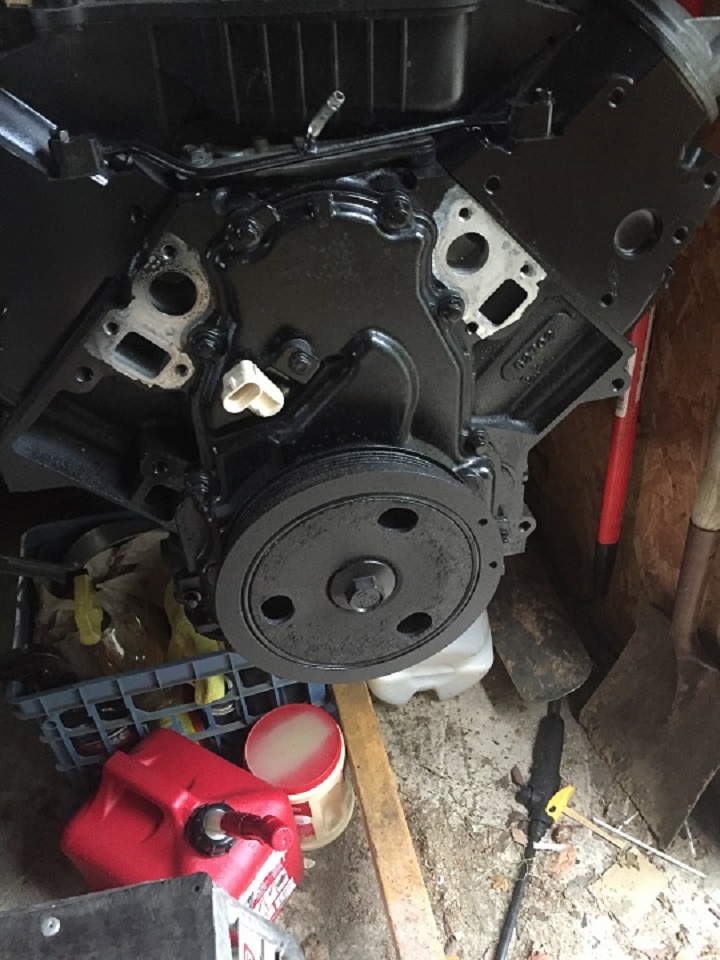
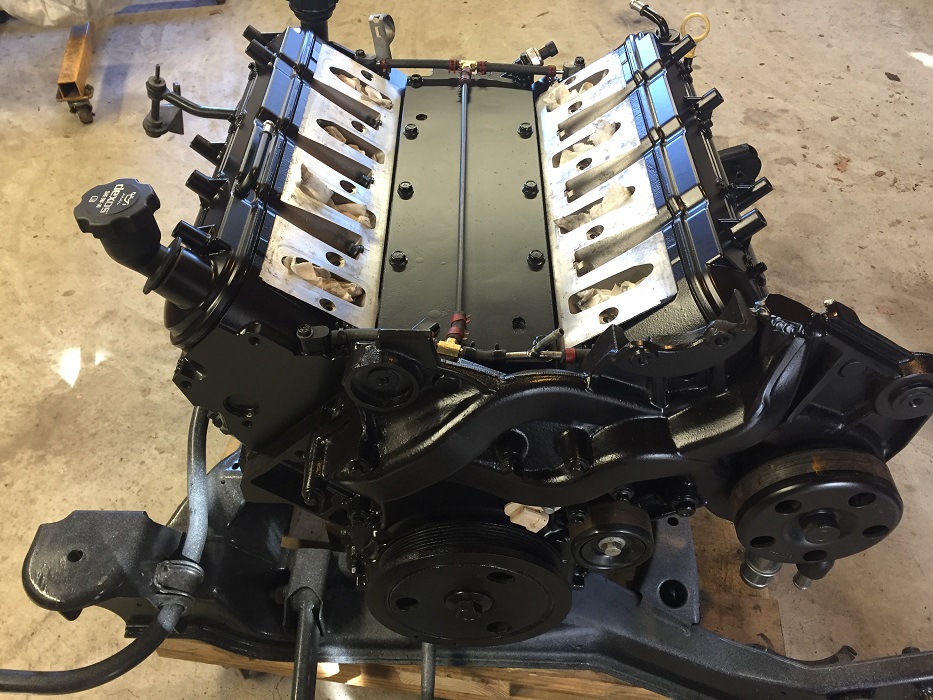
Got everything built back up, and learned I needed an LS2/LS3 style Front timing cover so I pulled everything back apart. As part of the cam install, I had already installed the new timing chain set and was able to find a single bolt LS3 cam even though I had purchased a 3 bolt timing set from Brian Tooley racing. I will have it for the second build if needed. For the timing cover, depending on the belt routing you end up with, this dumps out in the middle of the cover just above the balancer pulley so you will need to plan for that. You will see the LS2/3 setup in later photos
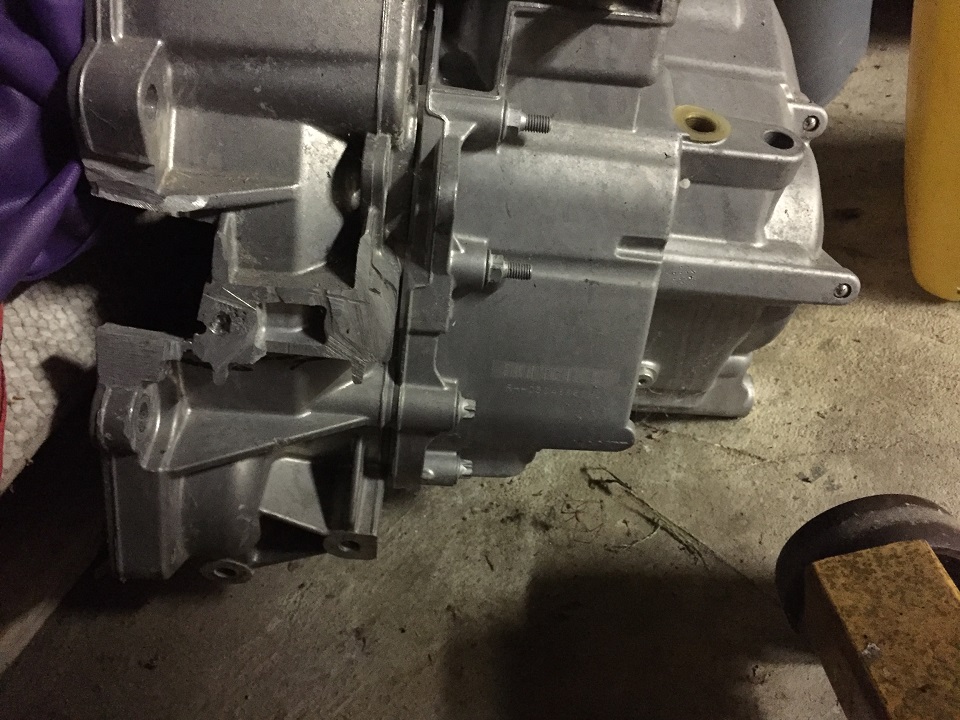
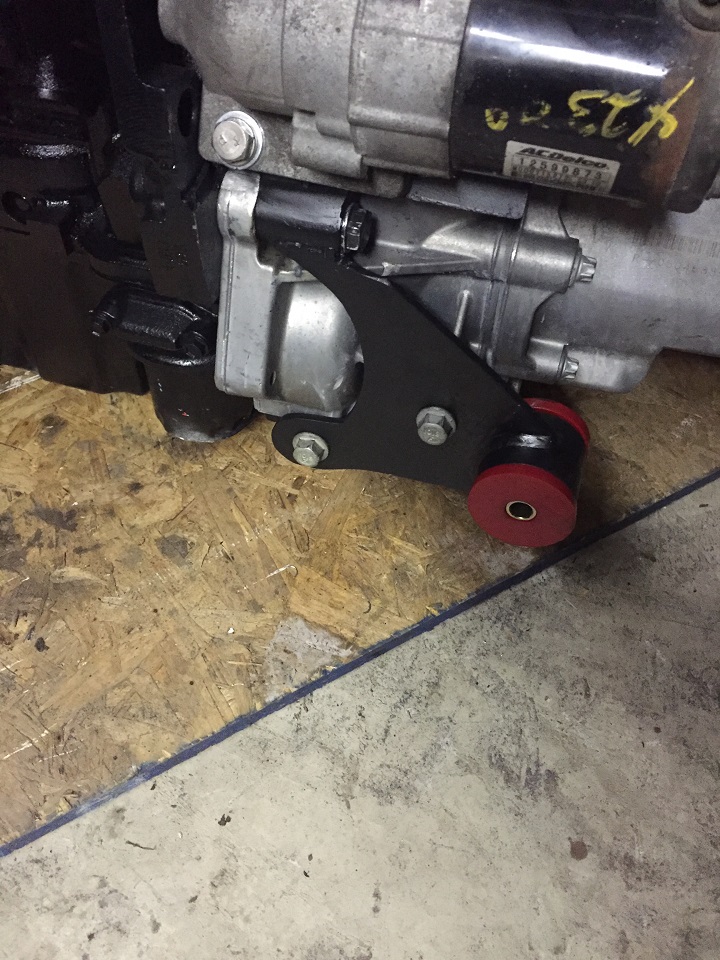
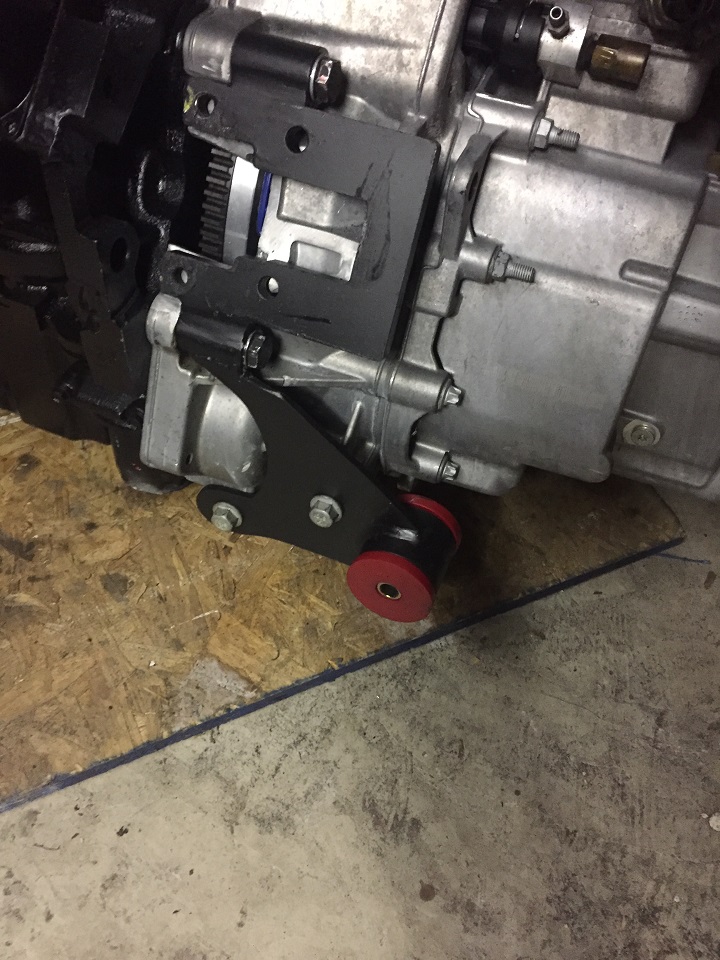
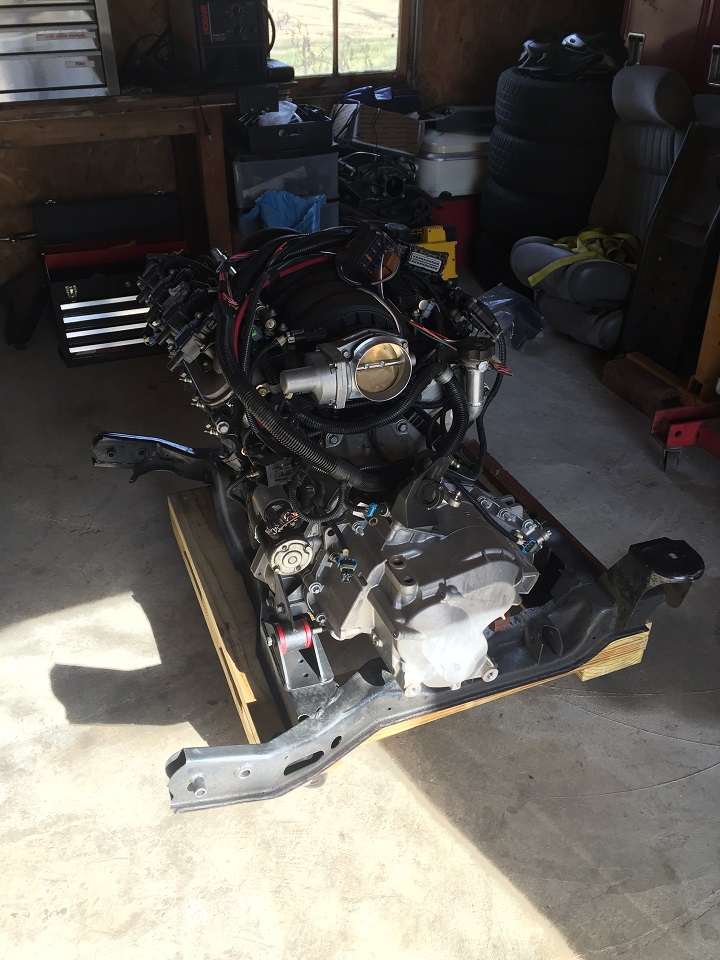
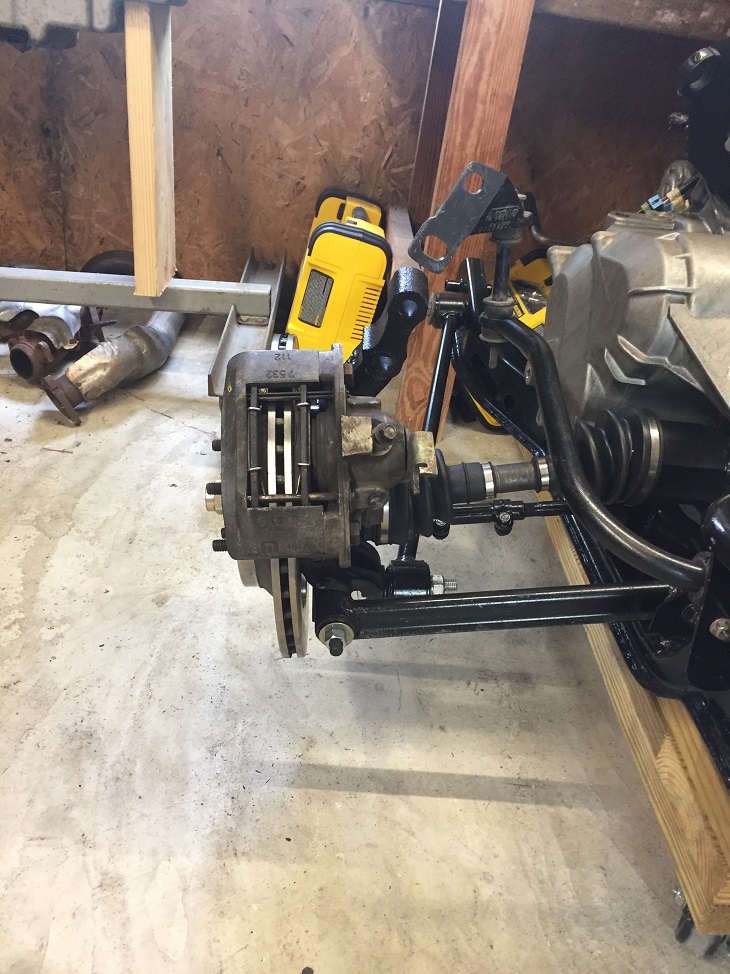
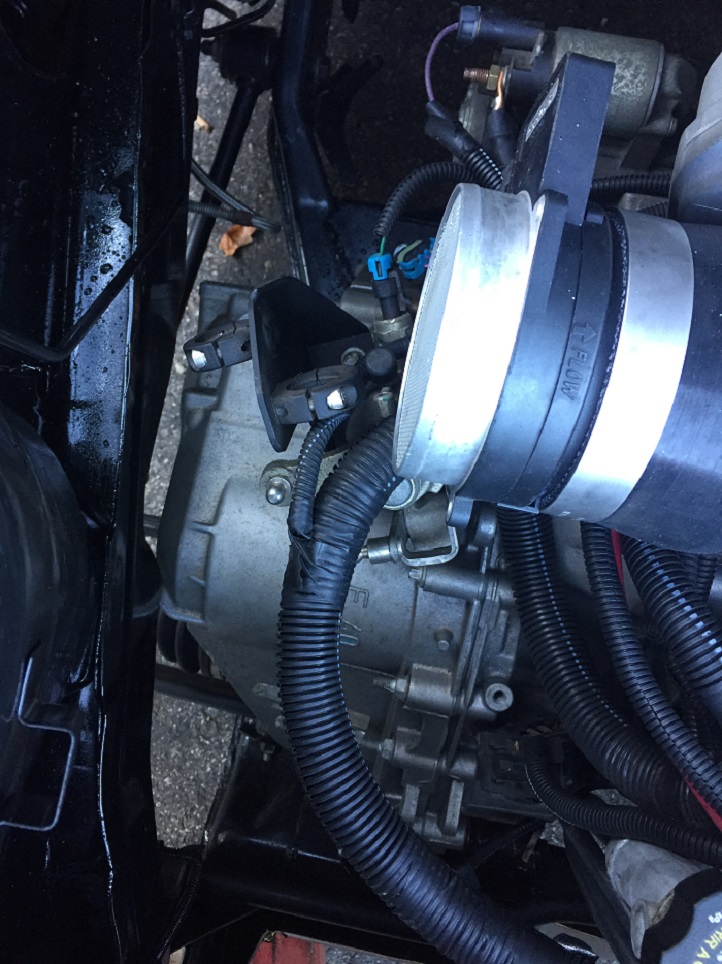
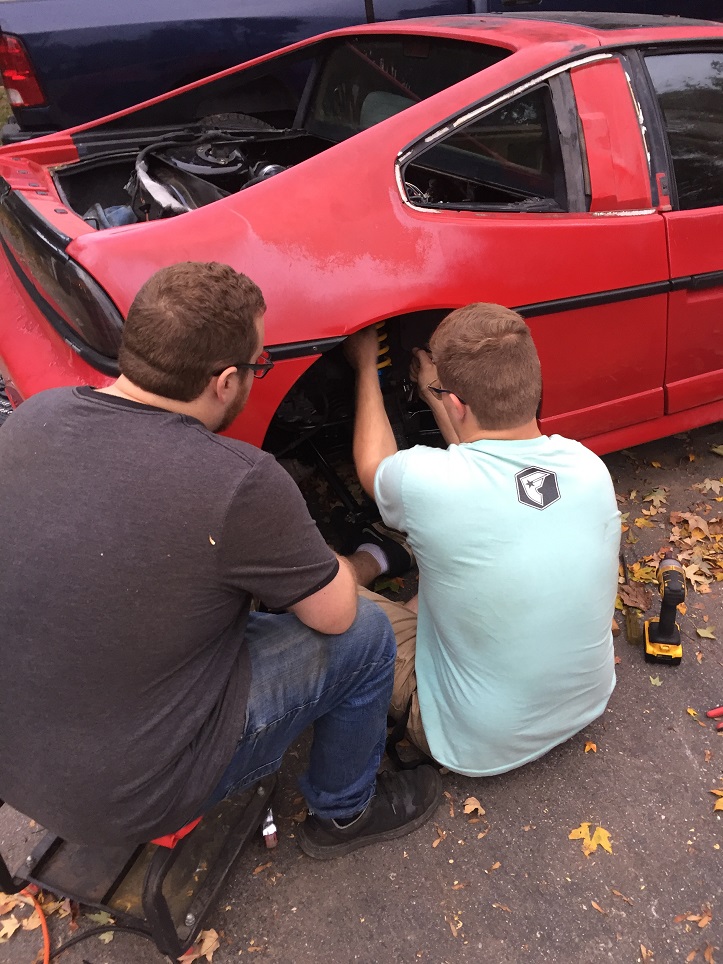
Next we move on to the transmission. Same issue as everyone else, we have to cut the hole for the starter bracket. 2 things - start small once you ge the bracket to mark the area, you can always go larger, and get Fierogurus new bracket, it works well with no additional mods. I did incorporate the WCF mount on this bracket by welding the lower portion to the Fieroguru starter bracket.
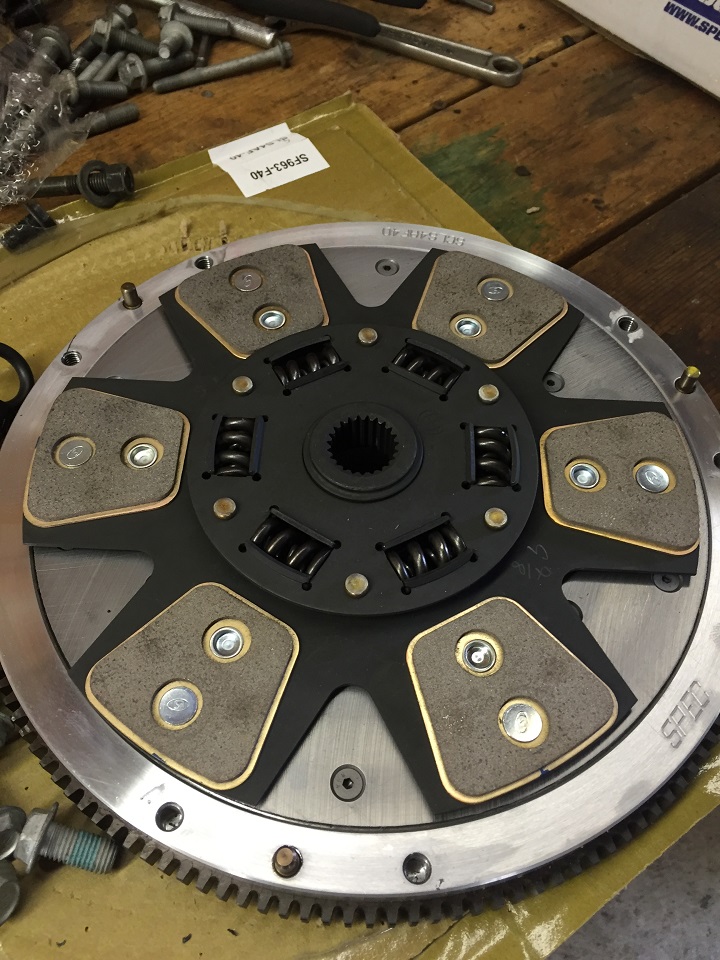
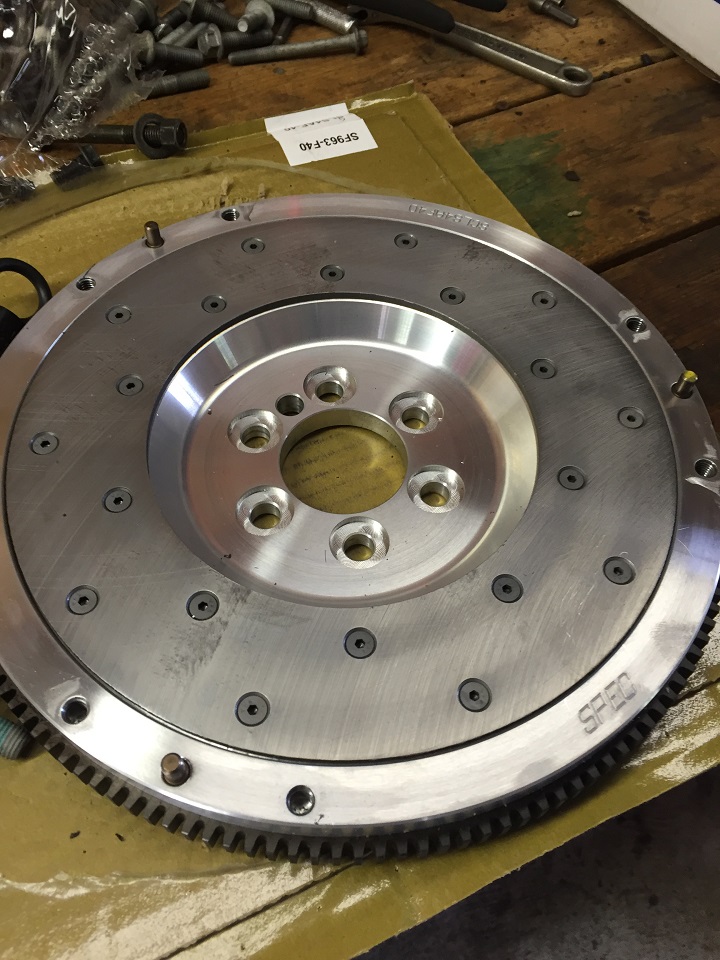
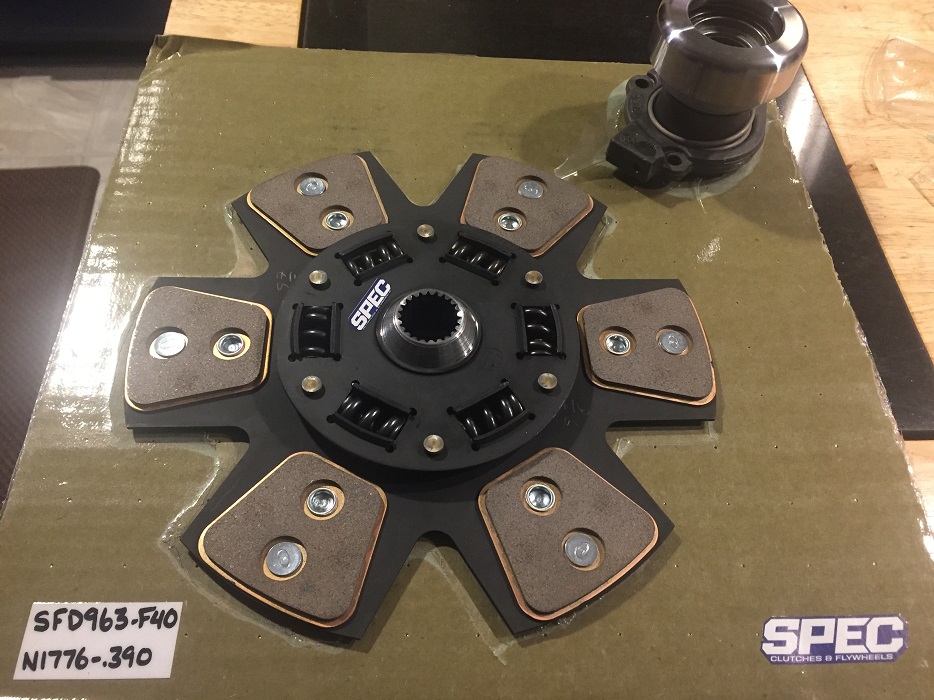
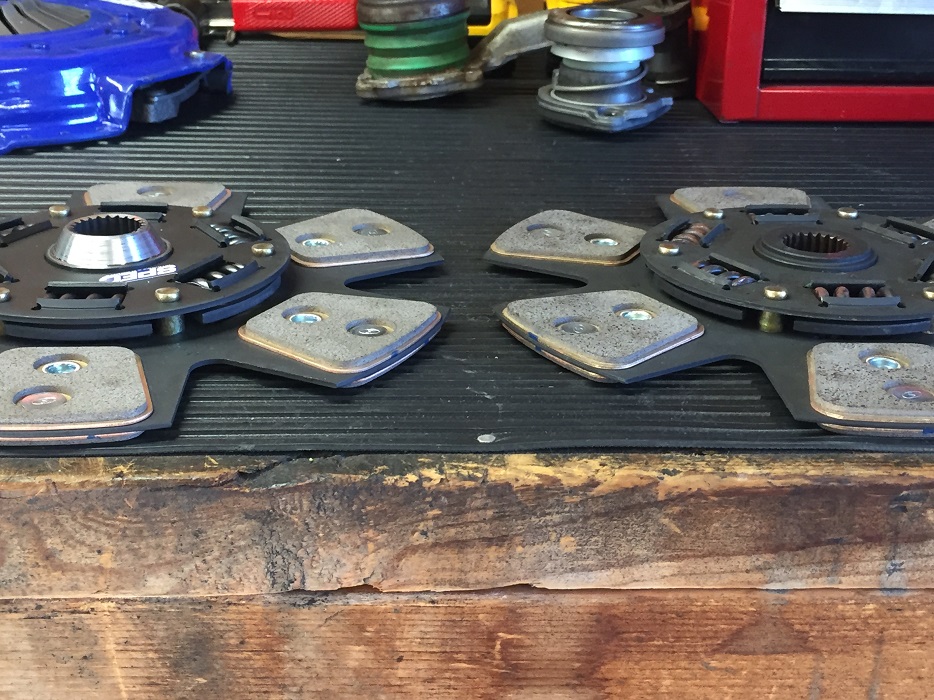
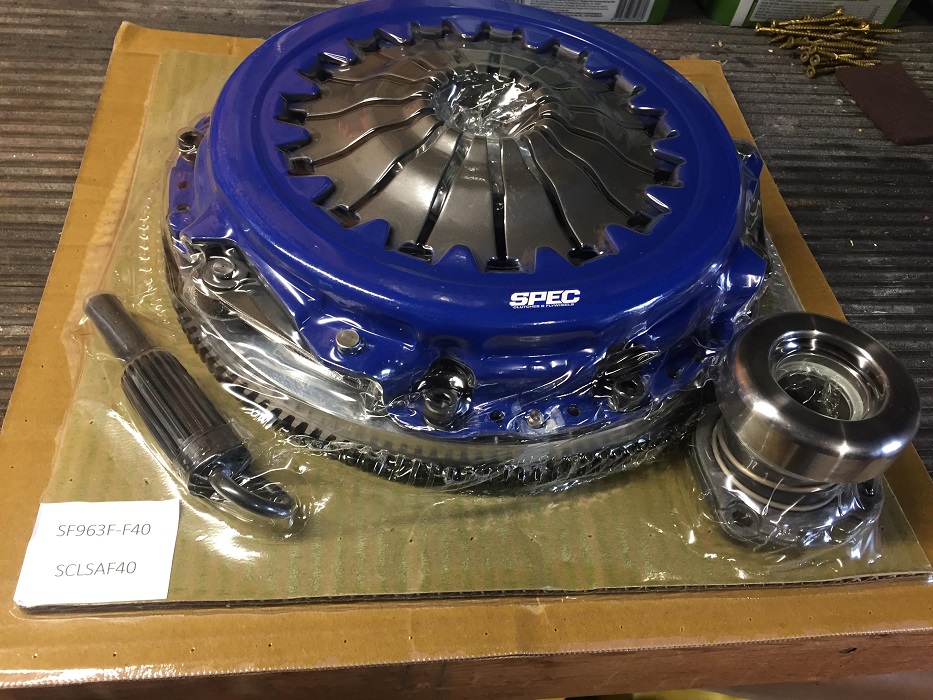
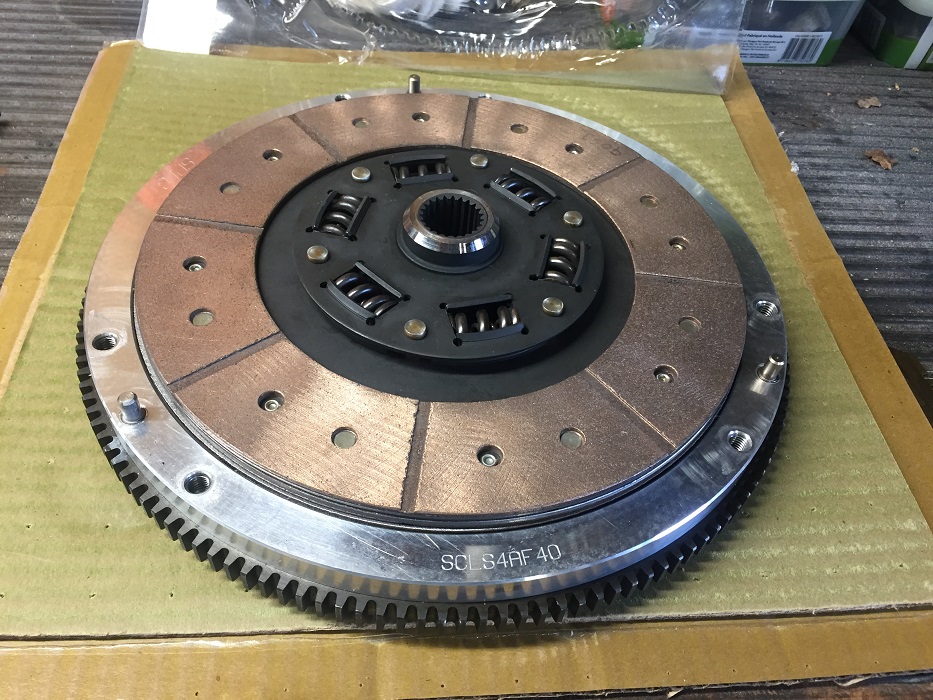
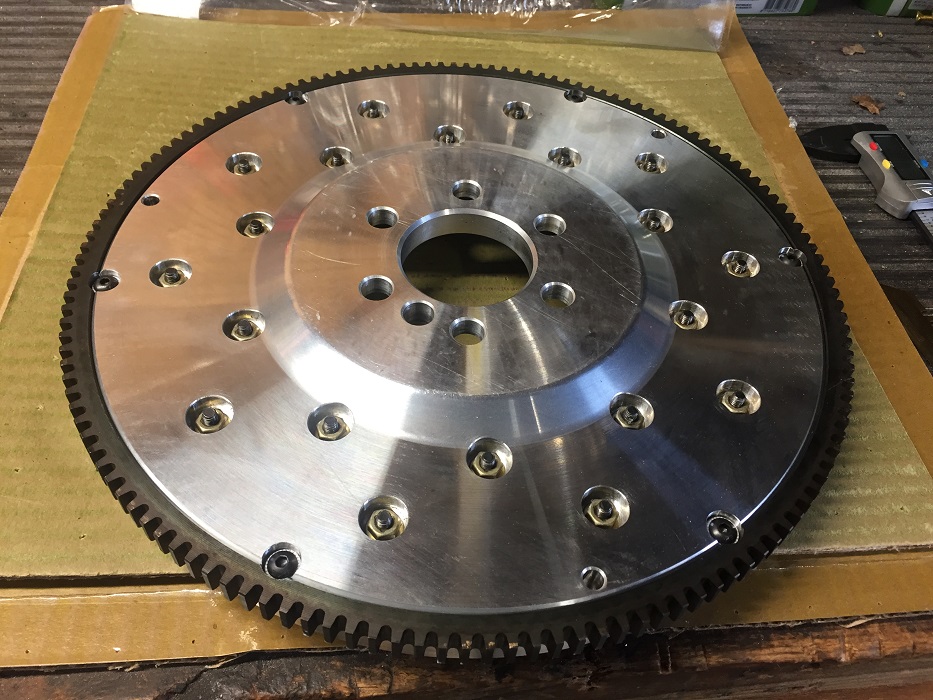
I called and found that SPEC had a flywheel and clutch setup for the conversion. If you go to their web site you will find the LS4/F40 under their conversion options. As you will read more about later, this is the first setup from SPEC, but was nice and came with everything including longer flywheel bolts. We went with the Stage 3, 6 puck setup and even though it works well, it does take some getting use to for normal driving conditions. This part of the build probably cost me the most in terms of time and money and as you will see later, took the most work to fix all of the issues.
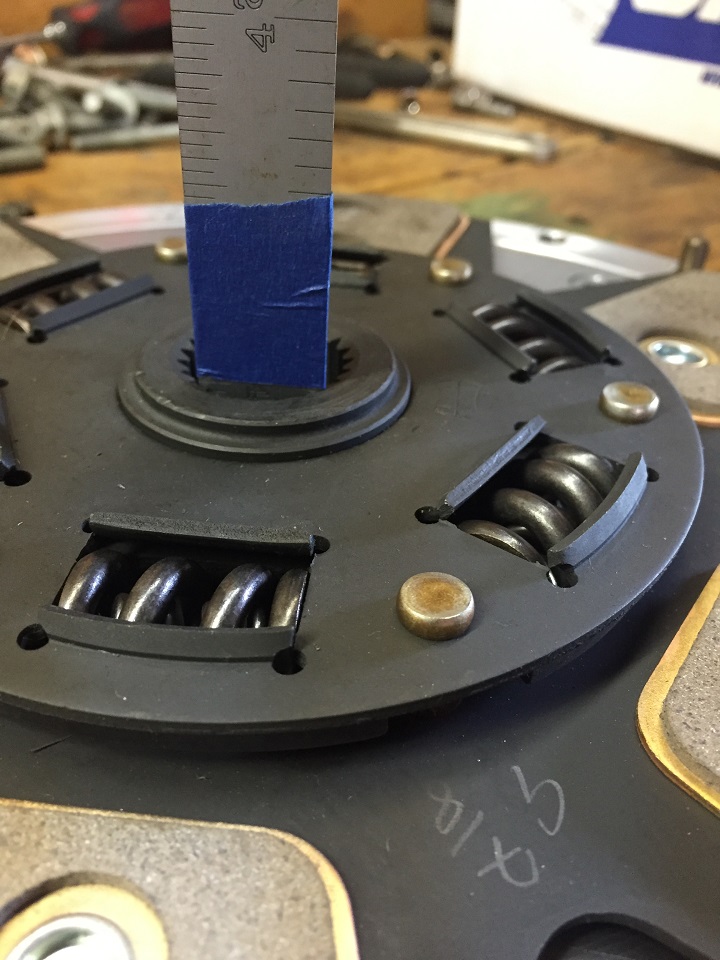
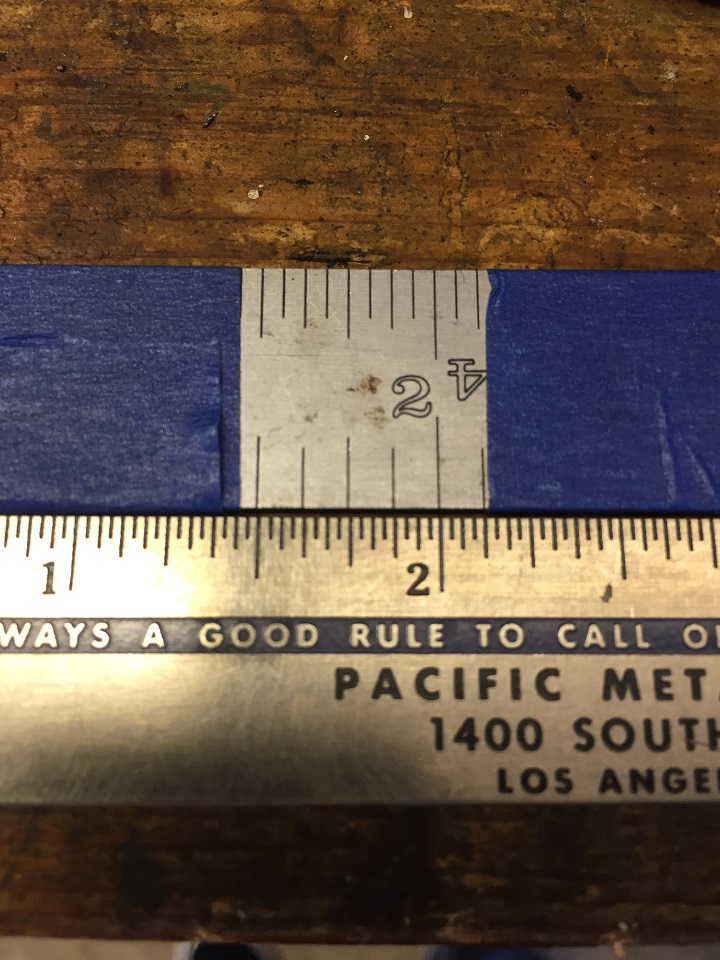
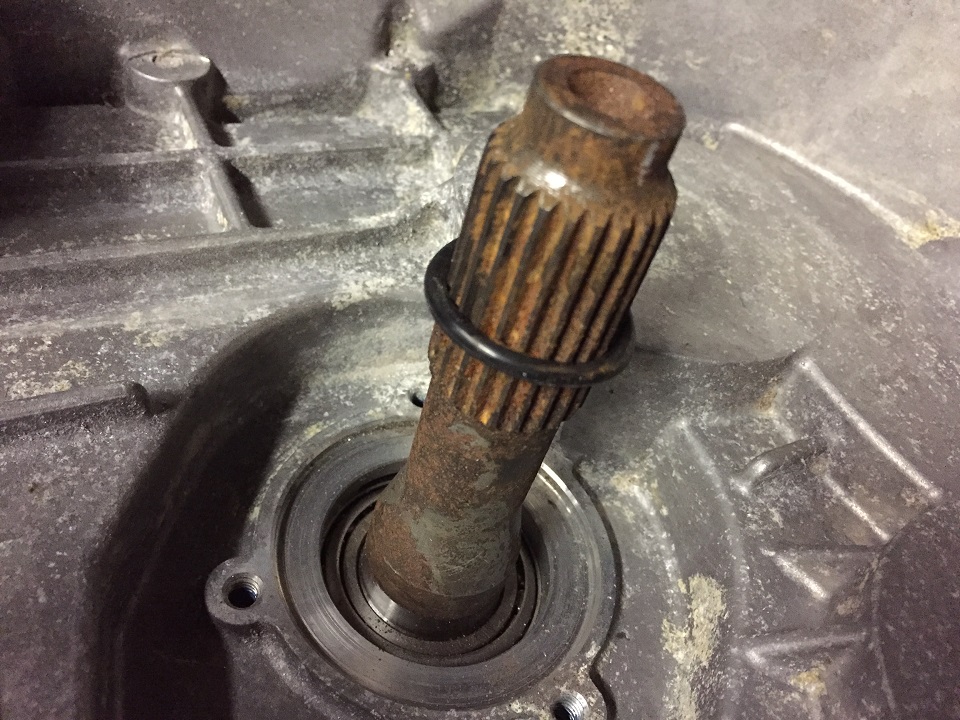
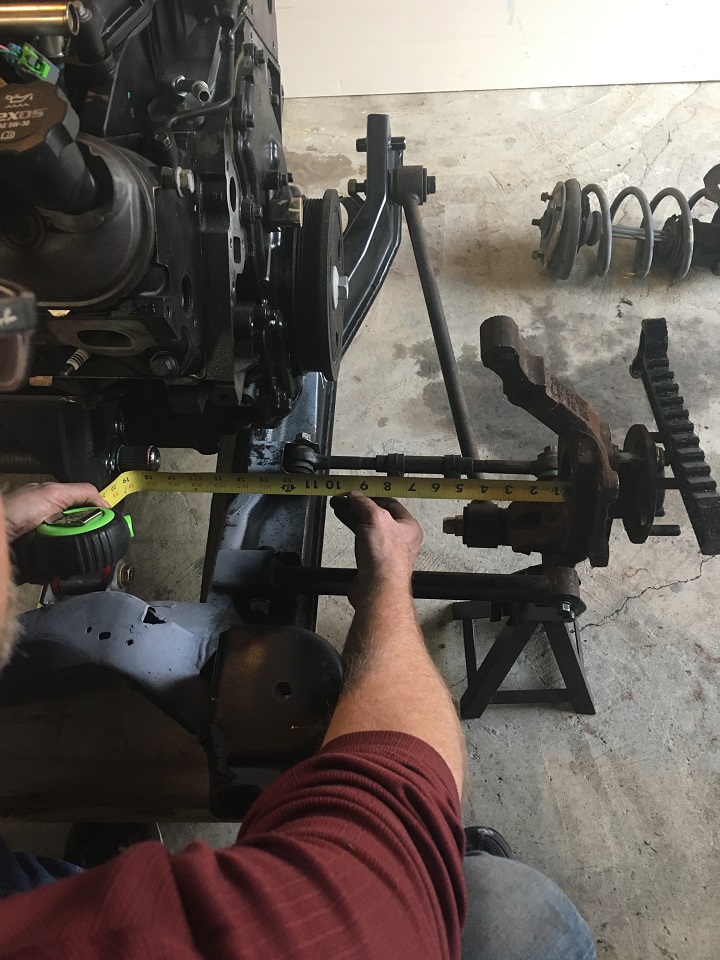
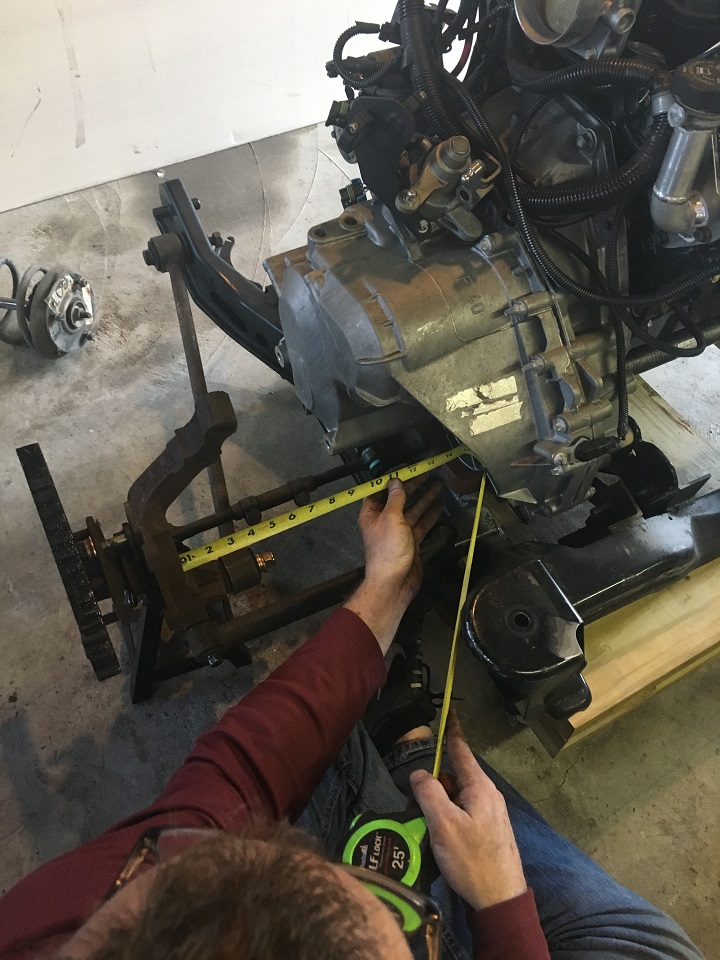
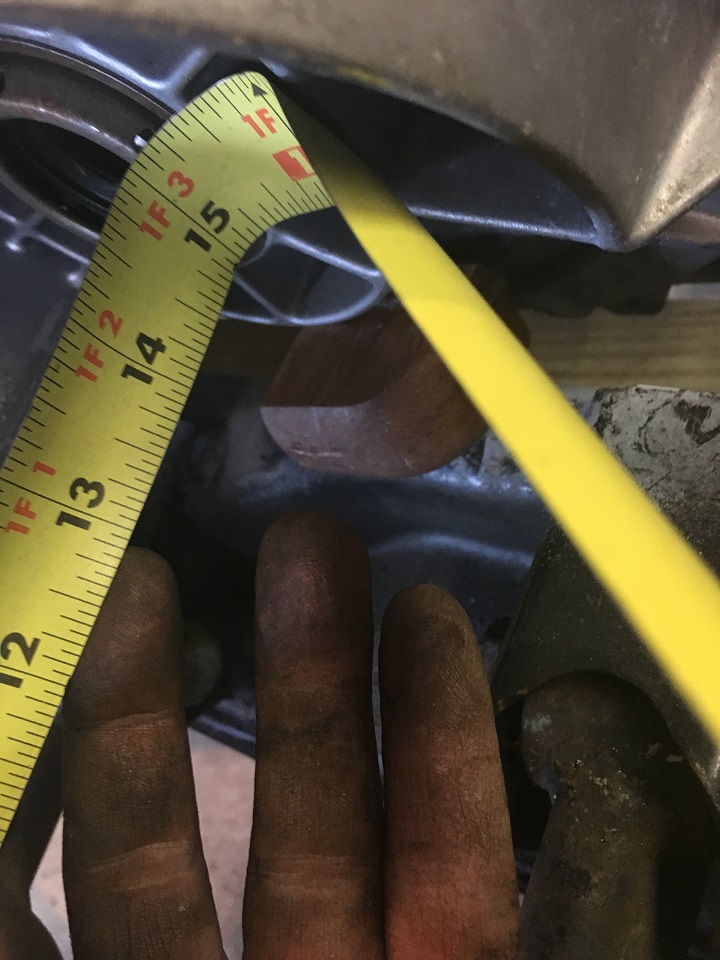
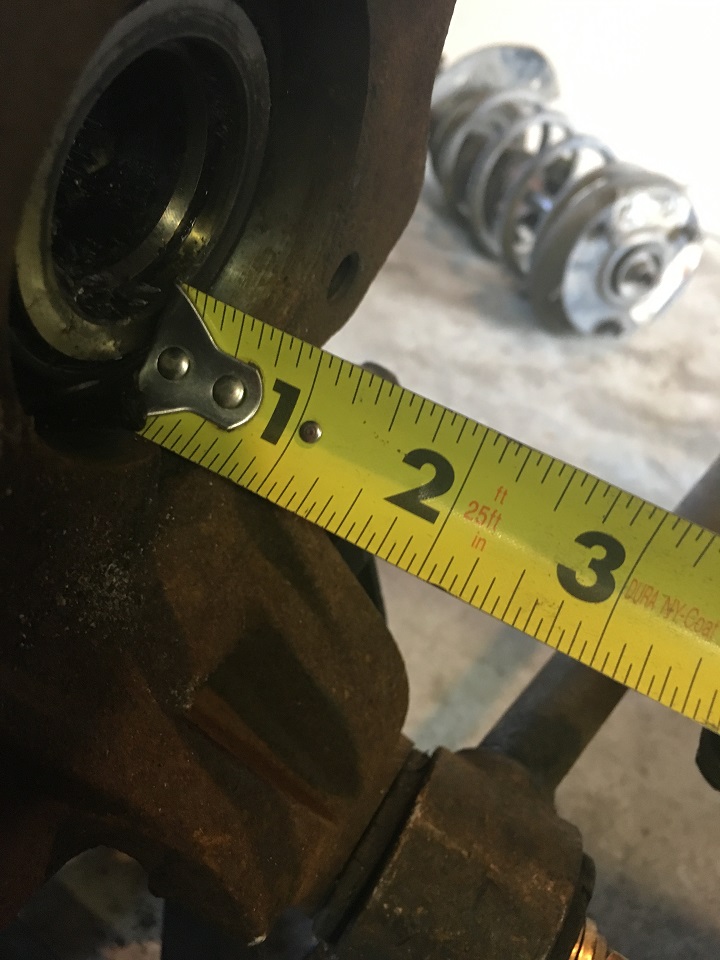
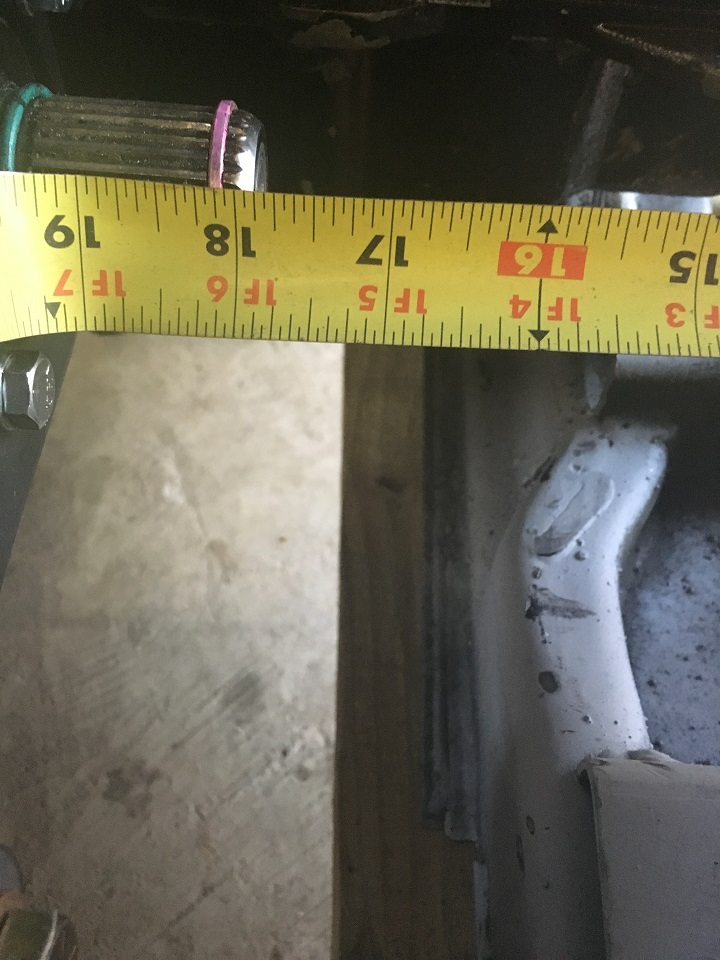
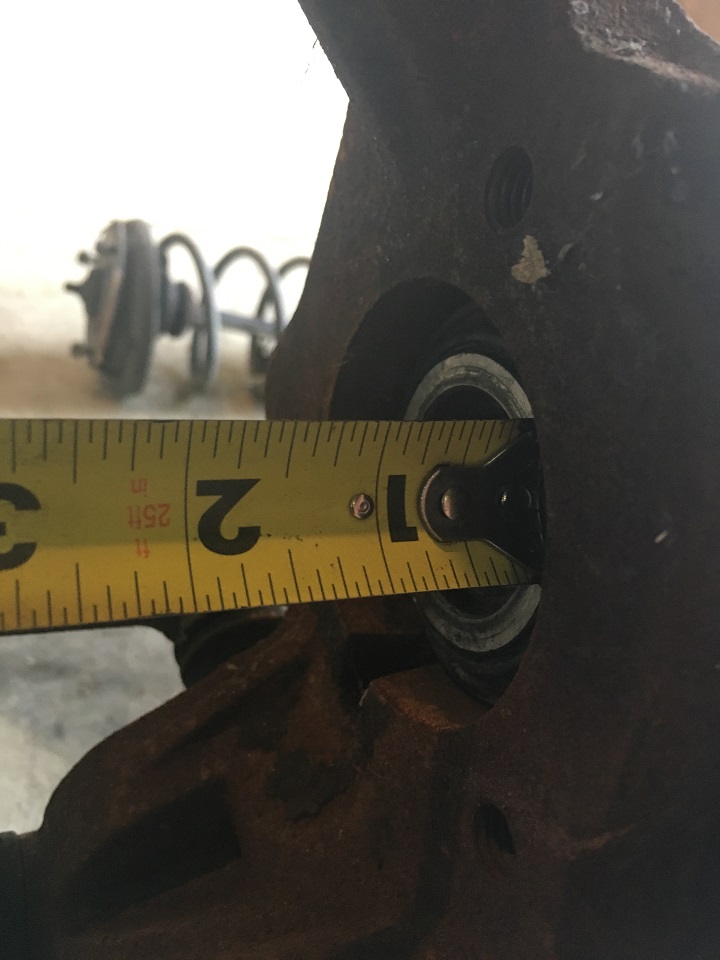
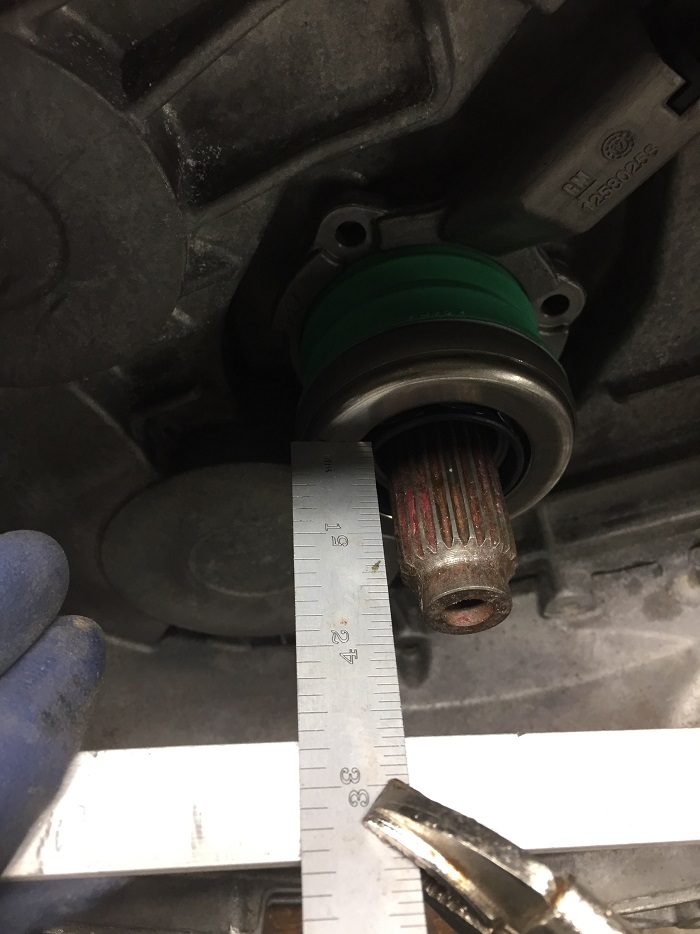
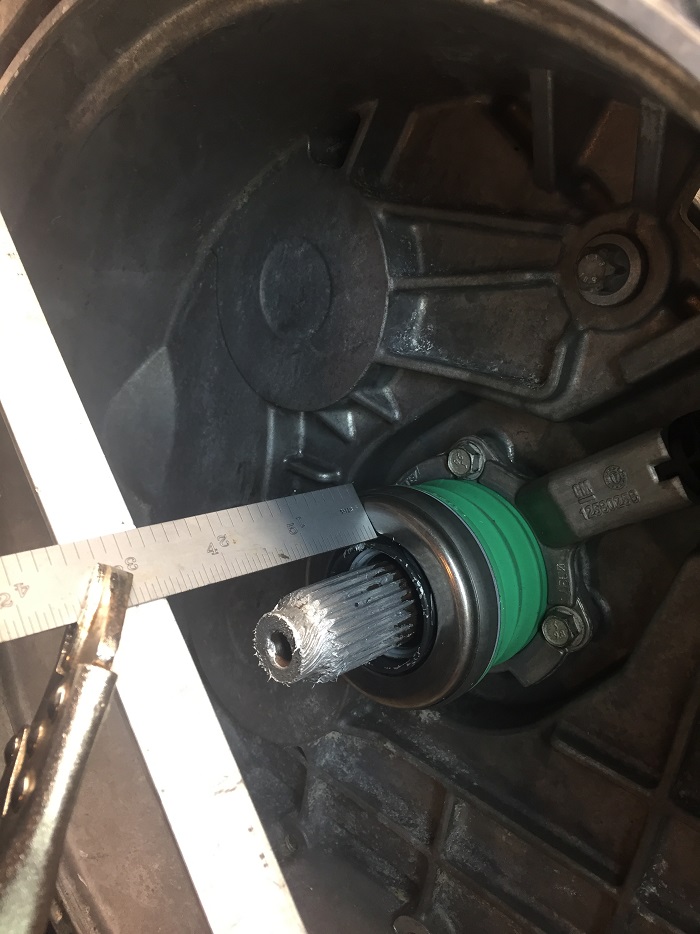
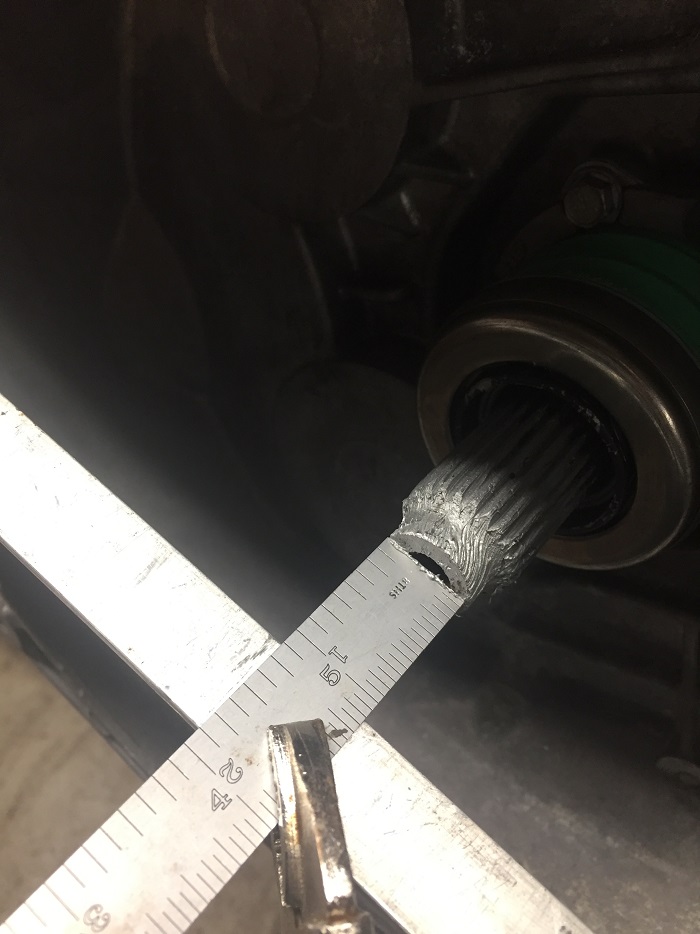
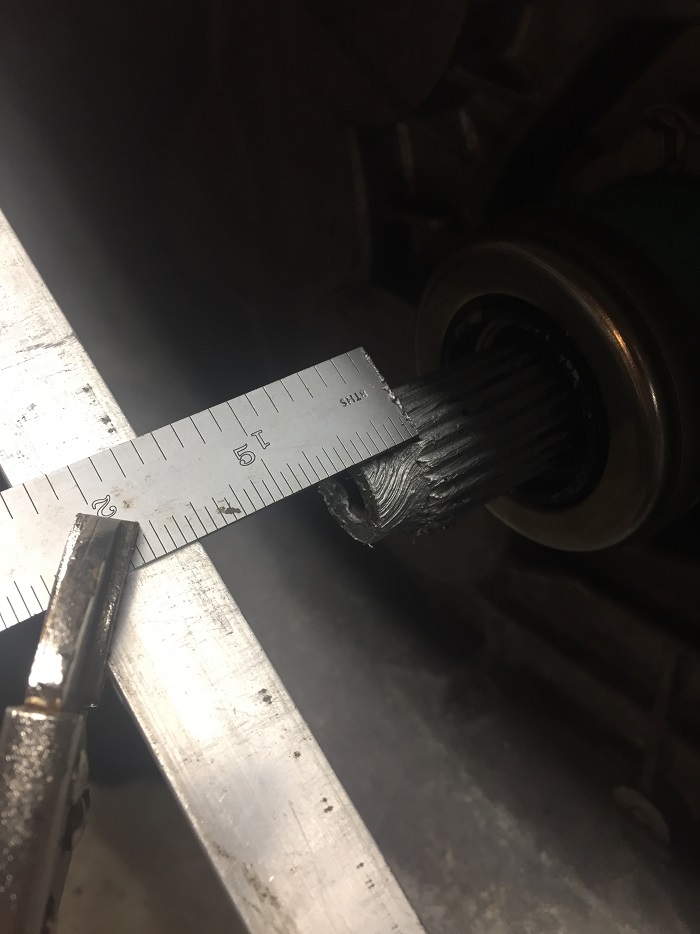
Next step was to measure and check the spline engagement. I measured the distance from a flat surface to record how much engagement there would be, but you can get a better idea using an o-ring slid over the input shaft and bolt the assembly together to see how much shaft engagement you have.
[This message has been edited by GPickardt (edited 06-09-2018).]
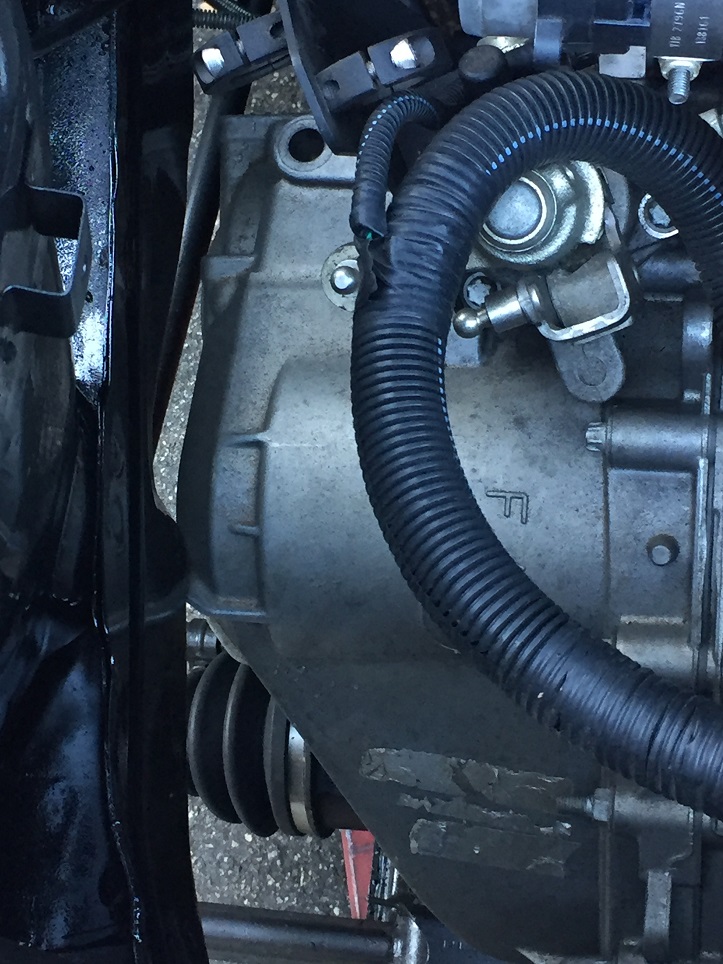
Besides the mount for the starter and cradle, the Fieroguru cable bracket and clutch line adapter were purchased for this build. Since this trans was already setup for a Fiero install, it already had the line adapter with bleeder already installed and I ended up reusing it on the final assembly.
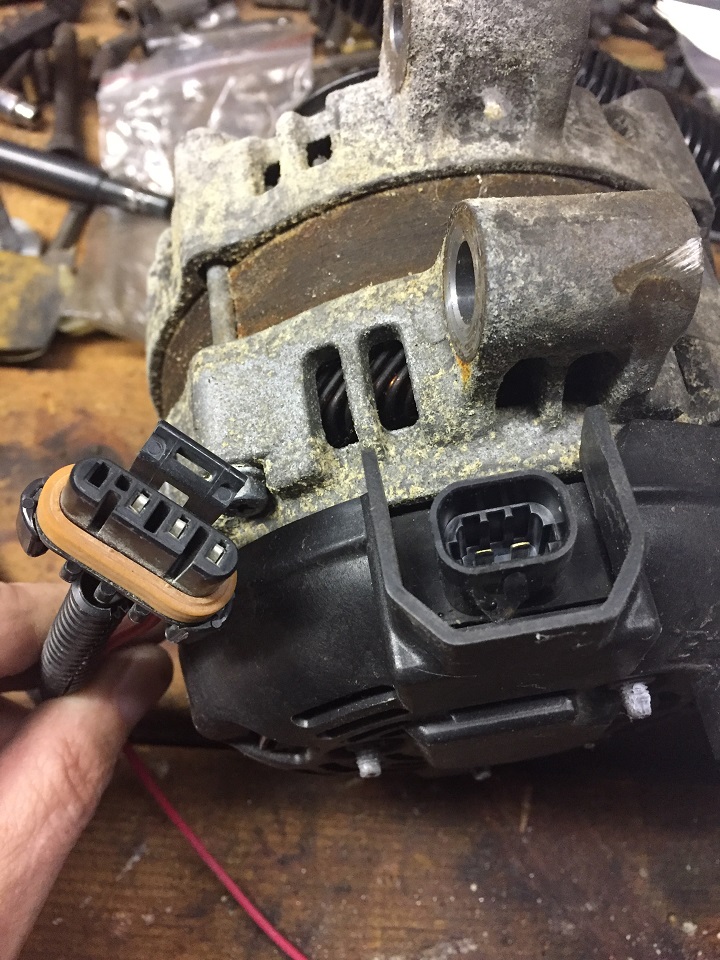
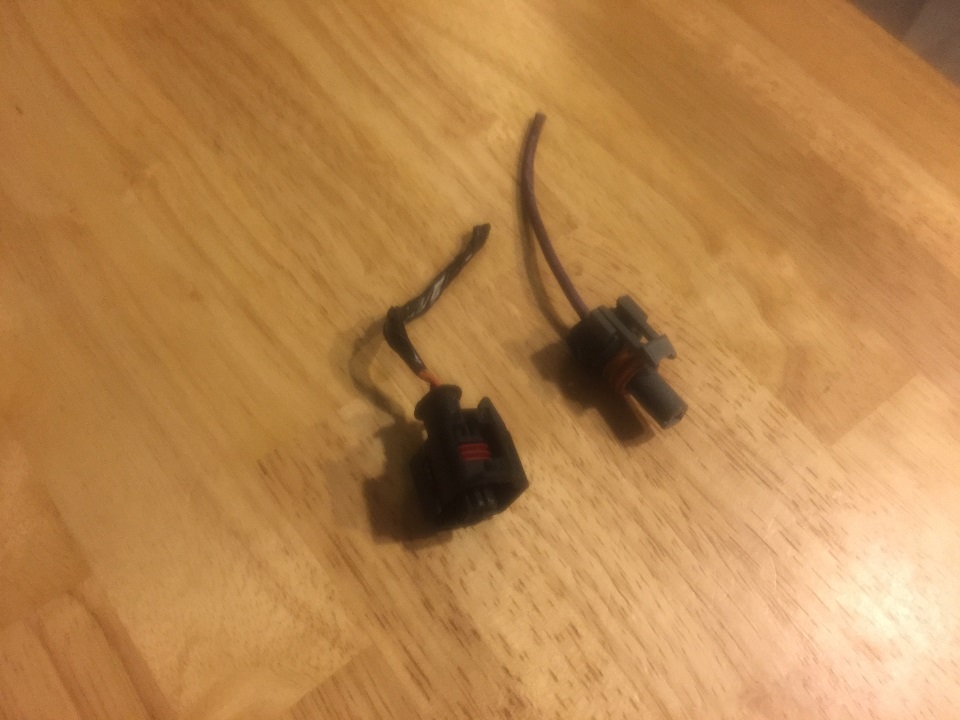
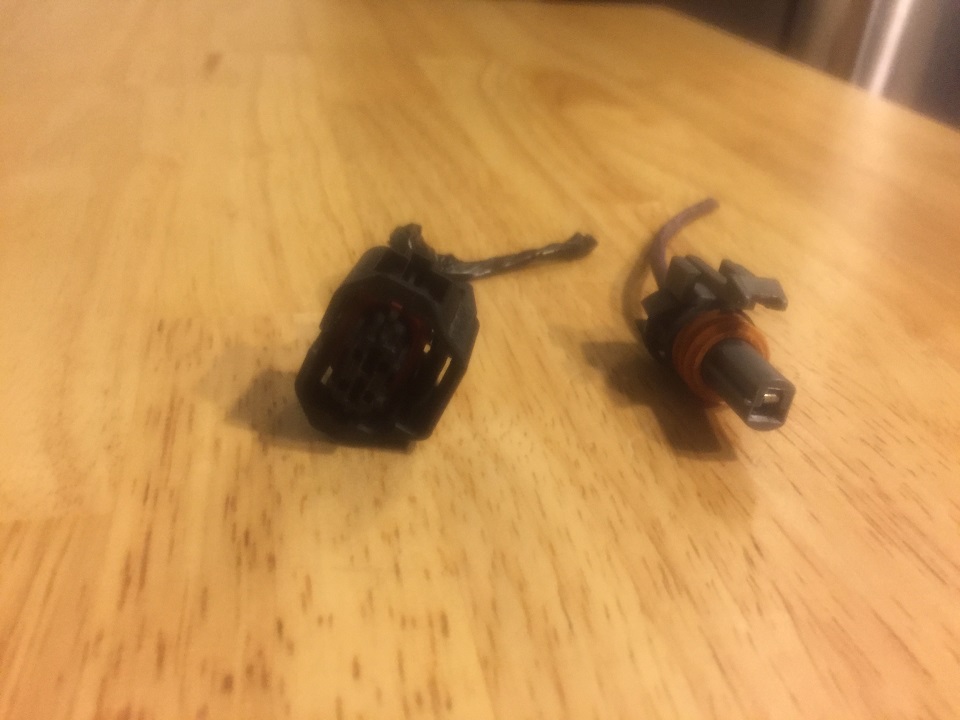
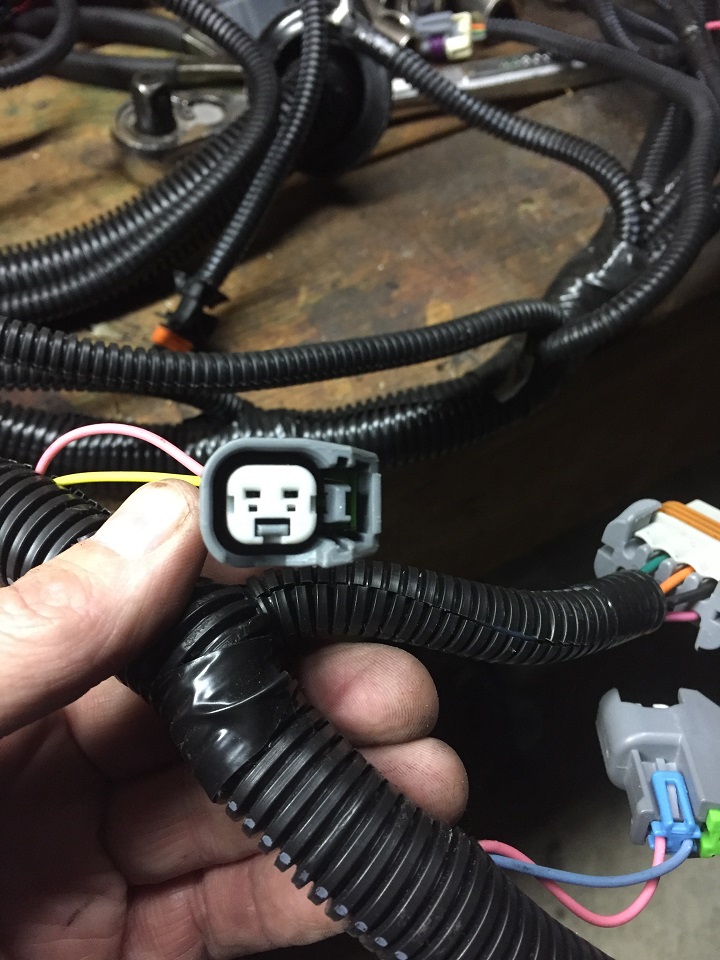
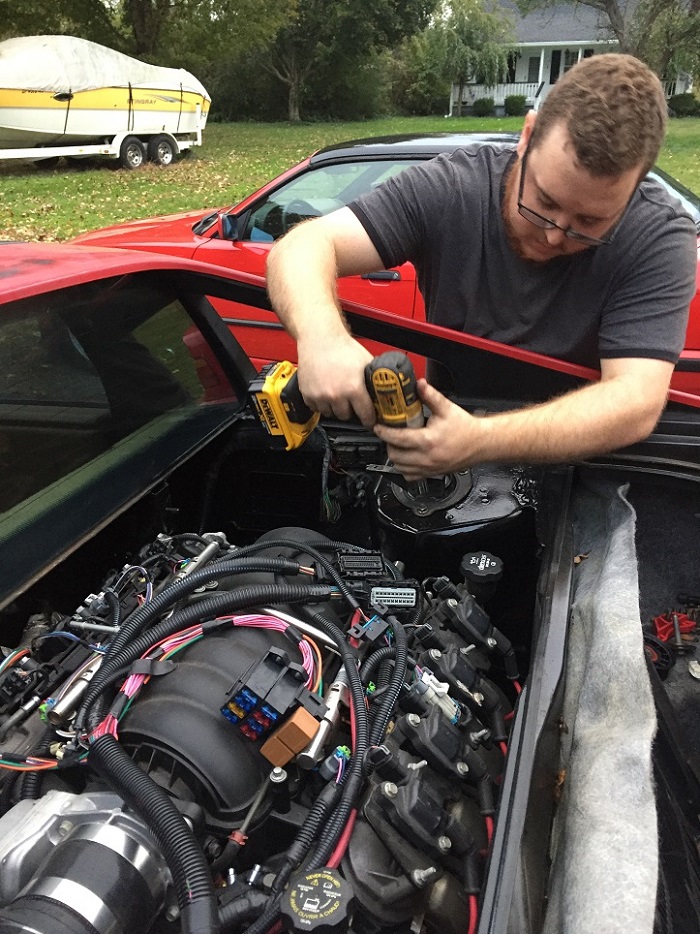
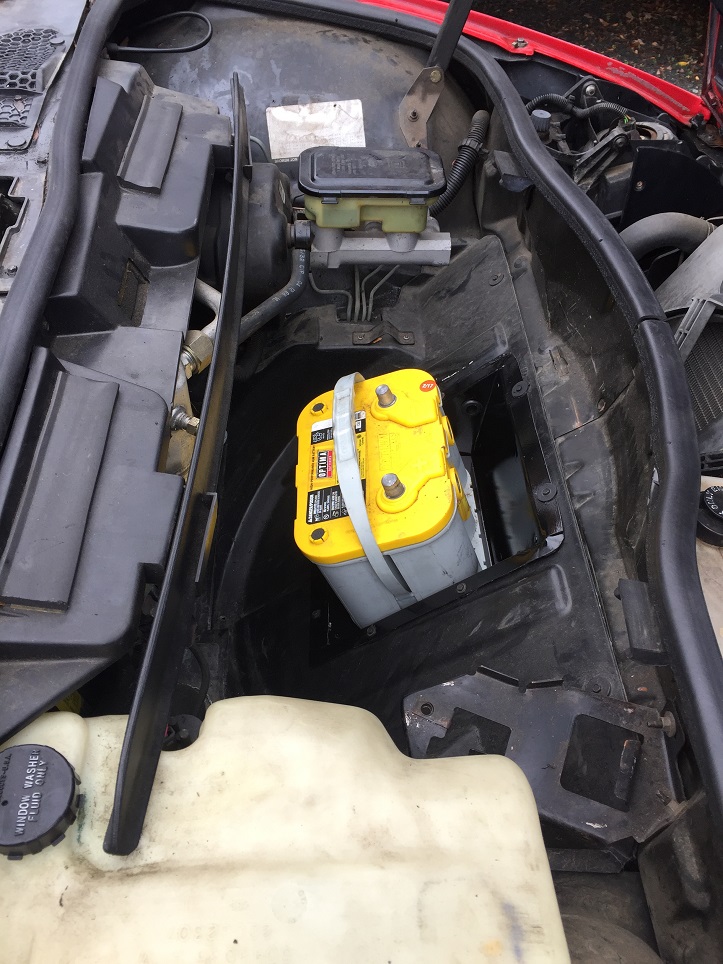
With the engine and trans now together, I reached out for some help with the wiring harness and got in touch with Joe Sokol (Fiero King) for the wiring harness mods. Joe ended up modifying my PSI harness to work with the Fiero connections, built battery re-location cable set that included a battery power block out of a Caddy for quick dis-connect when removing the cradle, and modified the VSS, starter, and Alt connectors for my specific application.
The finished product is great quality, but because I started with a generic stand-alone out of the box harness, it is not a clean as I would have preferred. Looks and works great, but I will likely pull the second harness apart and re-wire the complete engine myself for the next build now that I understand a lot better what is needed.
[This message has been edited by GPickardt (edited 06-09-2018).]
Can't wait to see more. What did you end up doing for the accessories up front? Did you keep the AC?
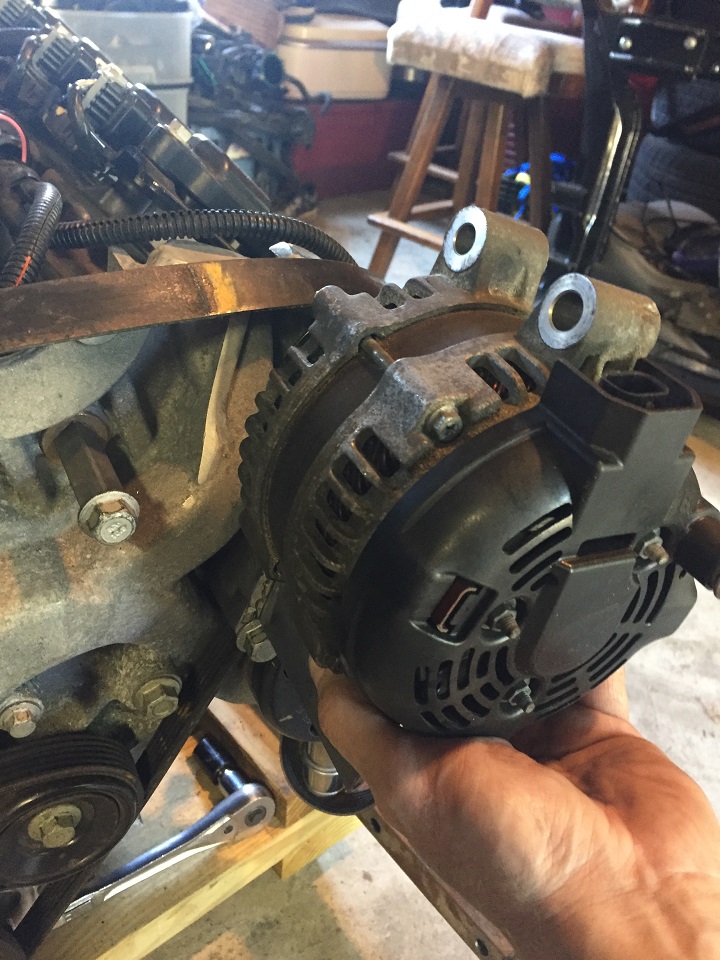
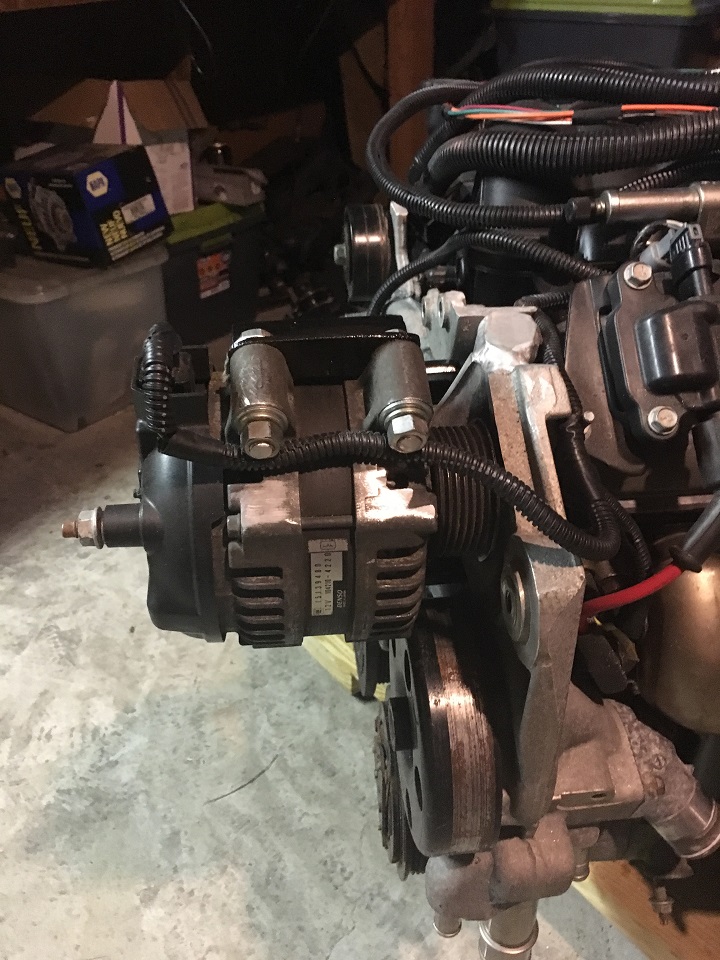
I will post photos, but no, I did a top mount alt and used a belt tensioner where the ac comp was. Plan is to put it back in later if I can get a tune that will support running ac.
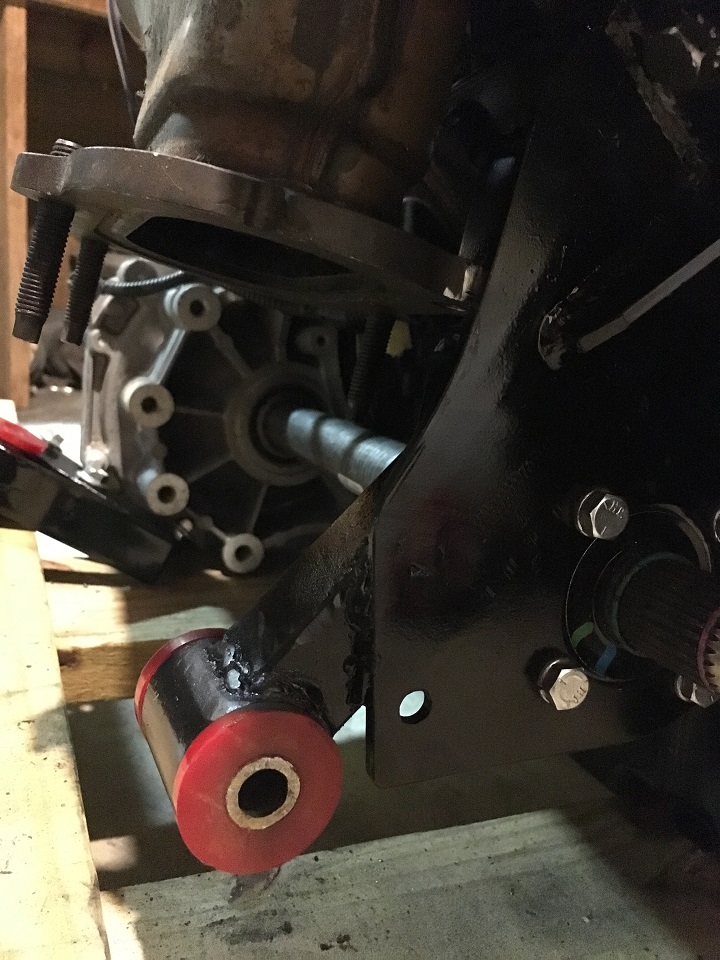
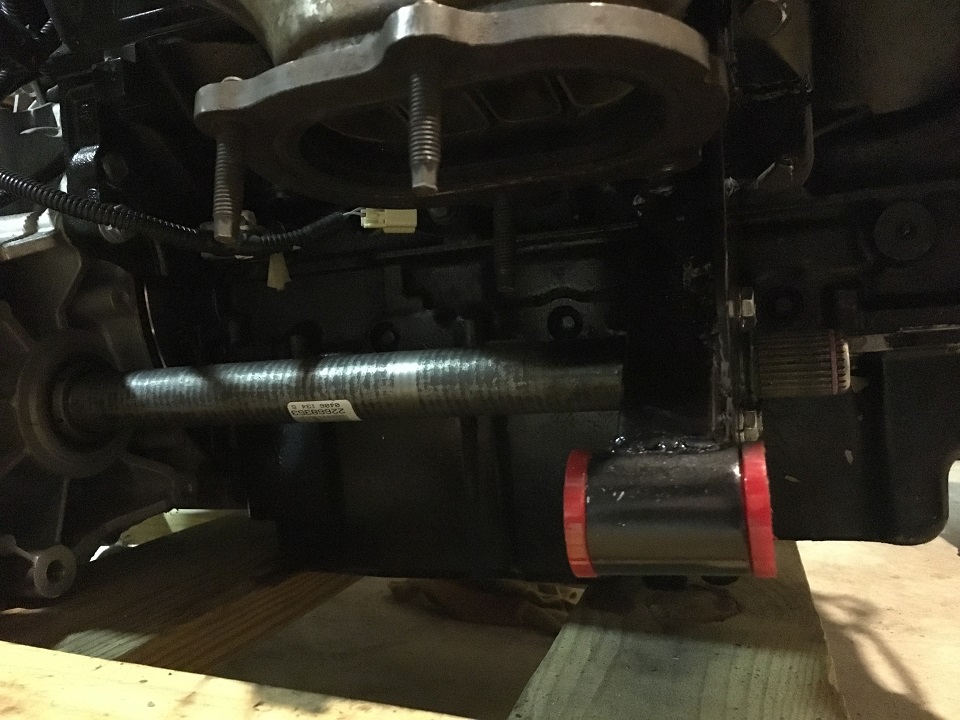
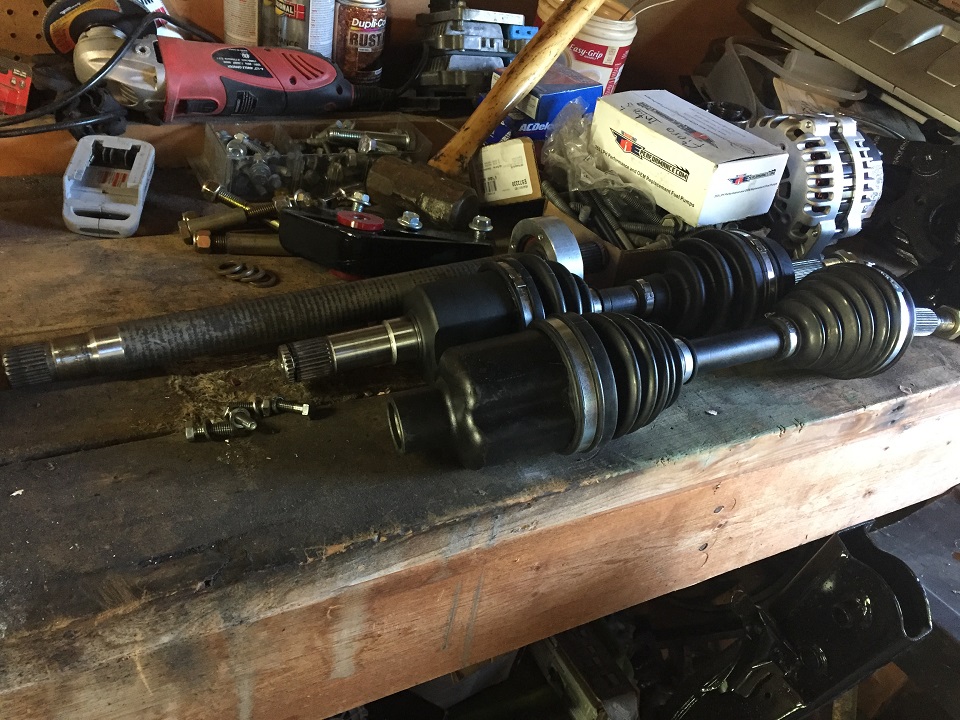
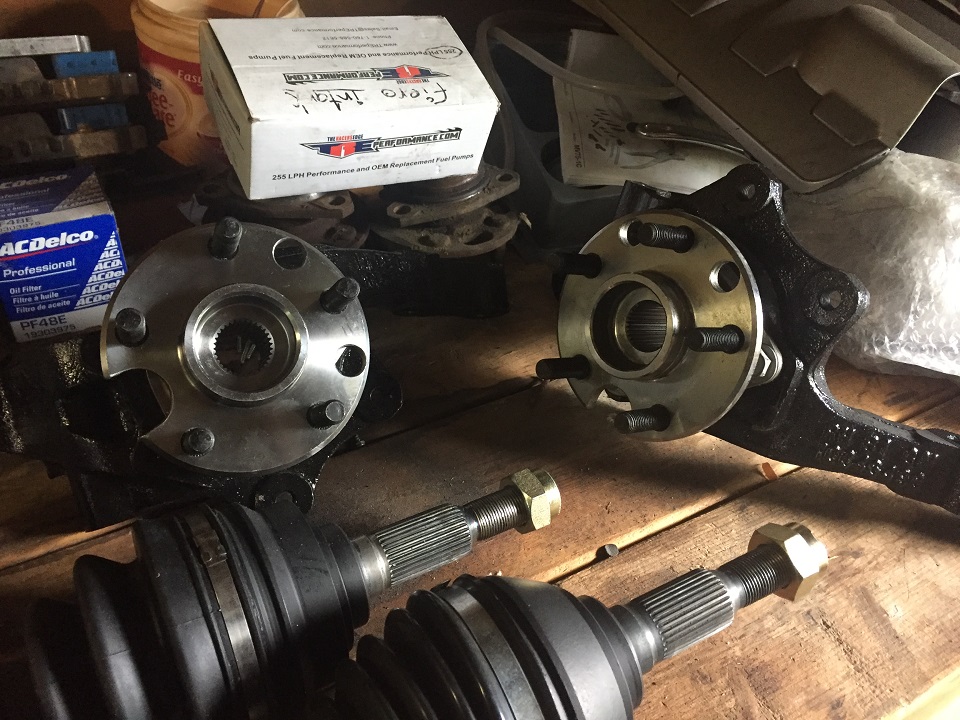
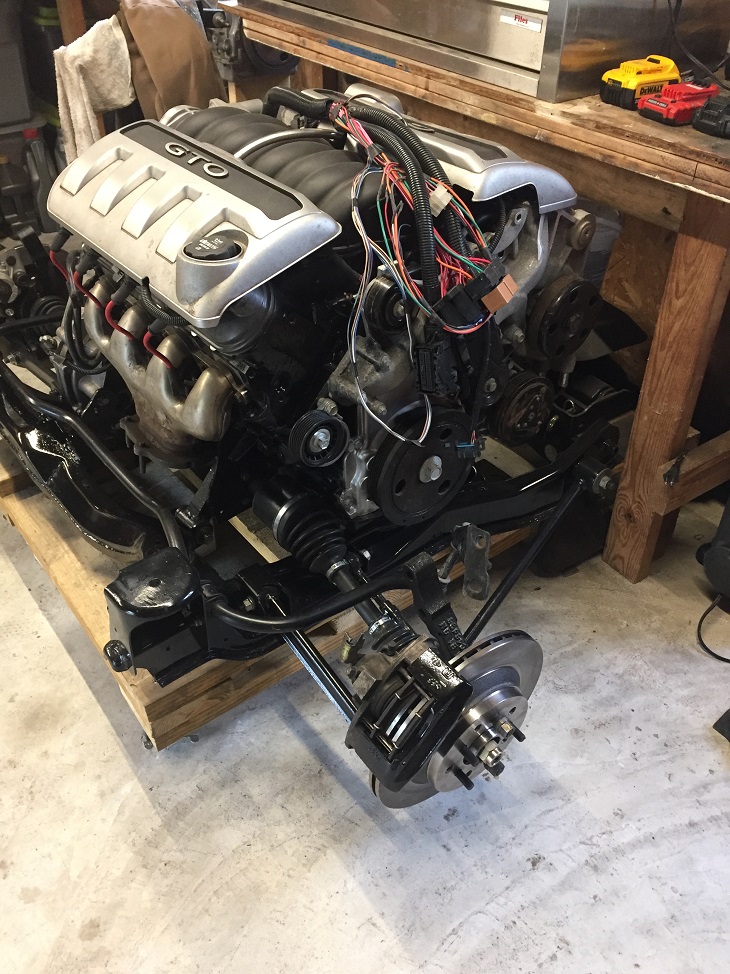
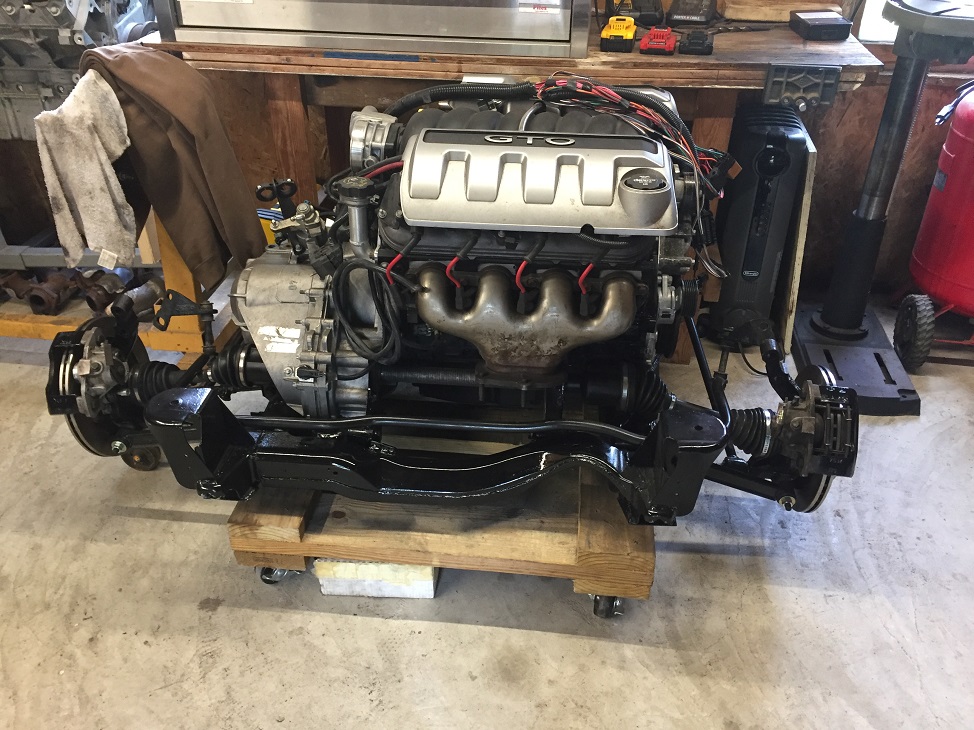
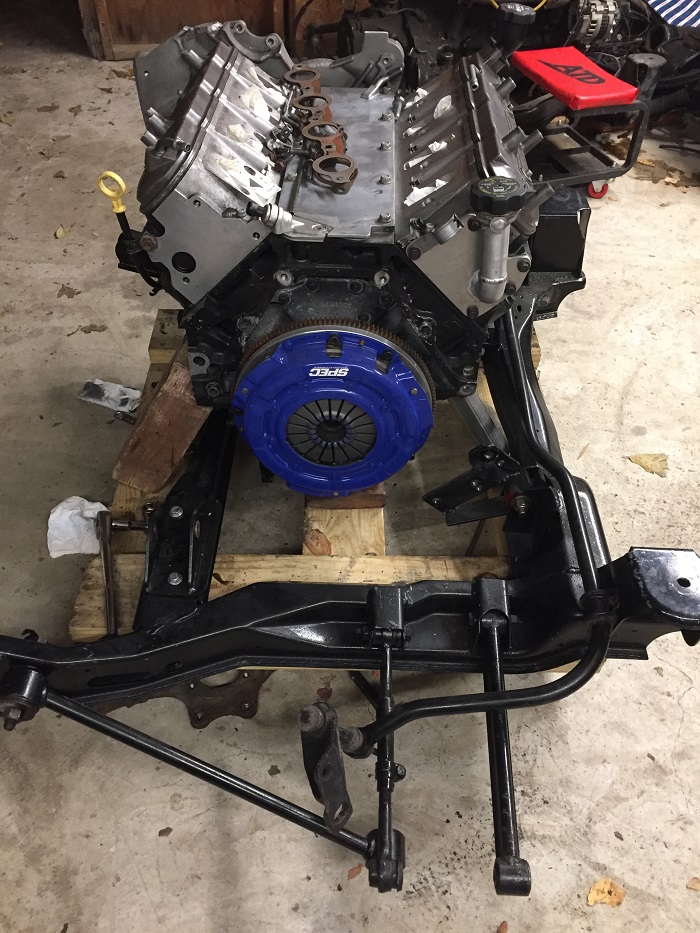
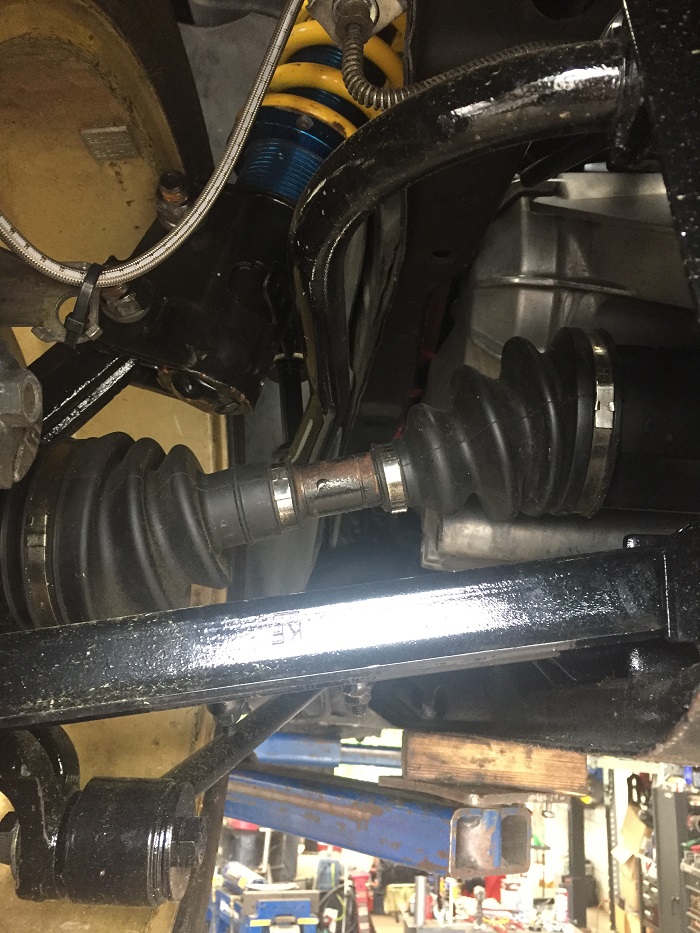
Before we moved to Maryland from California, I had built the engine and trans brackets with some help from a friend. When I bought some of the parts from various PFF members, one of the things I had acquired was a trans/starter mount from WCF. Although it would have worked as it was, I preferred Fierogurus mount, and as I mentioned previously, I modified the WCF mount and welded the new starter bracket to the integrated starter/trans mount. It bolts directly on where the stock mount location was. I called and spoke with Chris at WCF, and he was extremely helpful. He did tell me up front that they were very busy and that if I needed parts made quicker, I might want to explore other options. Long story short, I went with WCF and had them make a rear engine mount with an integrated bearing carrier, a water fill neck, and axles. I used the dimensions for engine placement from Fierogurus build thread for I think the auto or build #2 and I can tell you that all of my measurements came within 1/8th of his. This was very helpful to do a single install test fit. In the end, I made no changes to the setup and outside of removing the engine for other reasons, it fit well the first go.
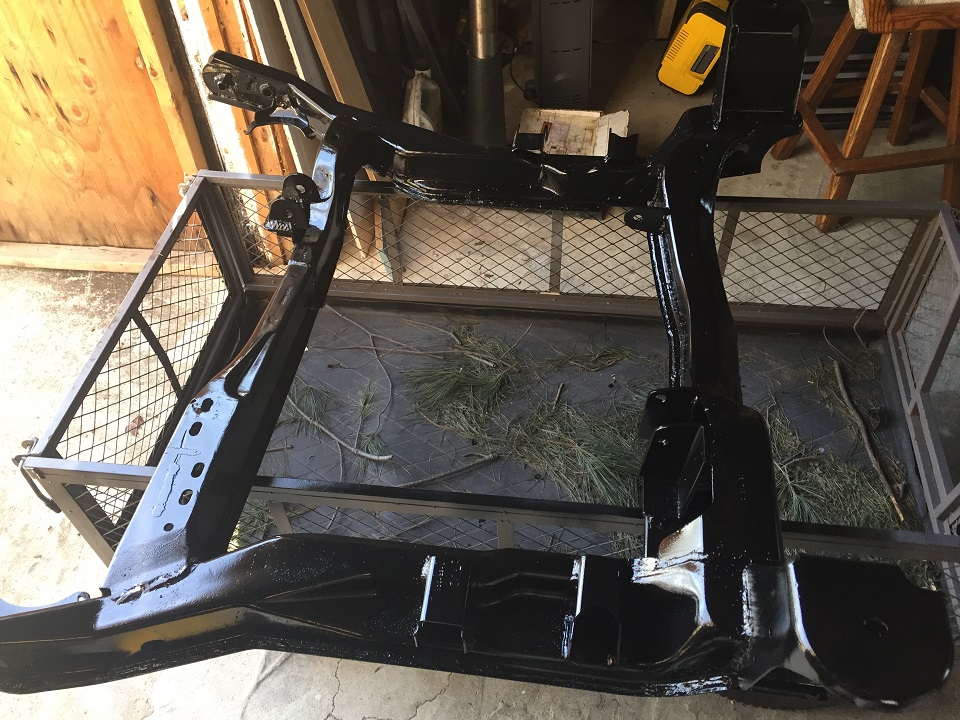
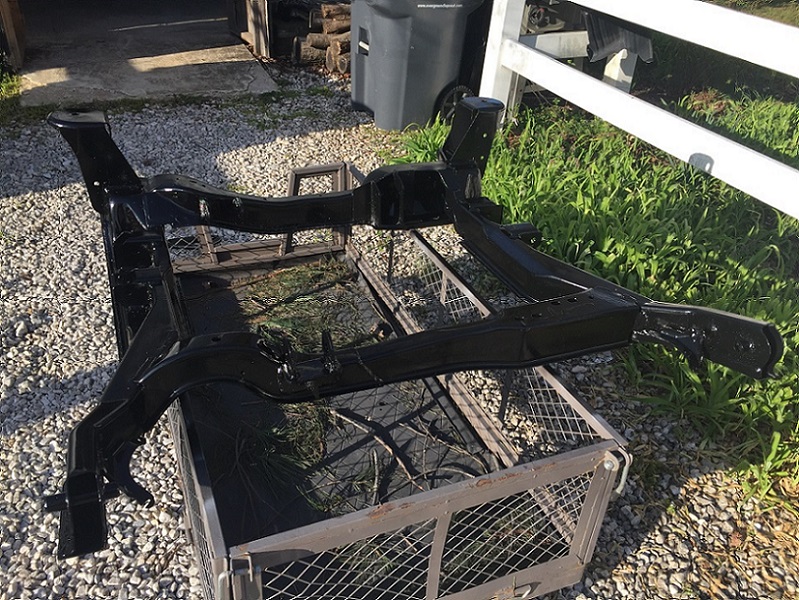
One of the other things I didn't do, but wish I had done, was to invest in getting the cradle powder coated. I used the rustoleum professional series paint in the large silver can that you can get from Lowes, or any parts store.
Another note: I ended up modifying the WCF engine mount/bearing carrier to add the mount I had made with a poly bushing instead of the solid mount WCF provided. I also modified their mount for additional clearance on the LS7 manifold. You can see I had to remove a stud in one of the photos, and trim the mount down to clearance the collector plate for the exhaust build up. I will show you photos later of how it turned out with the exhaust bolted up.
[This message has been edited by GPickardt (edited 06-16-2018).]
Back to posting, been working on some of the drivability issues and getting the rest of the interior put back in.
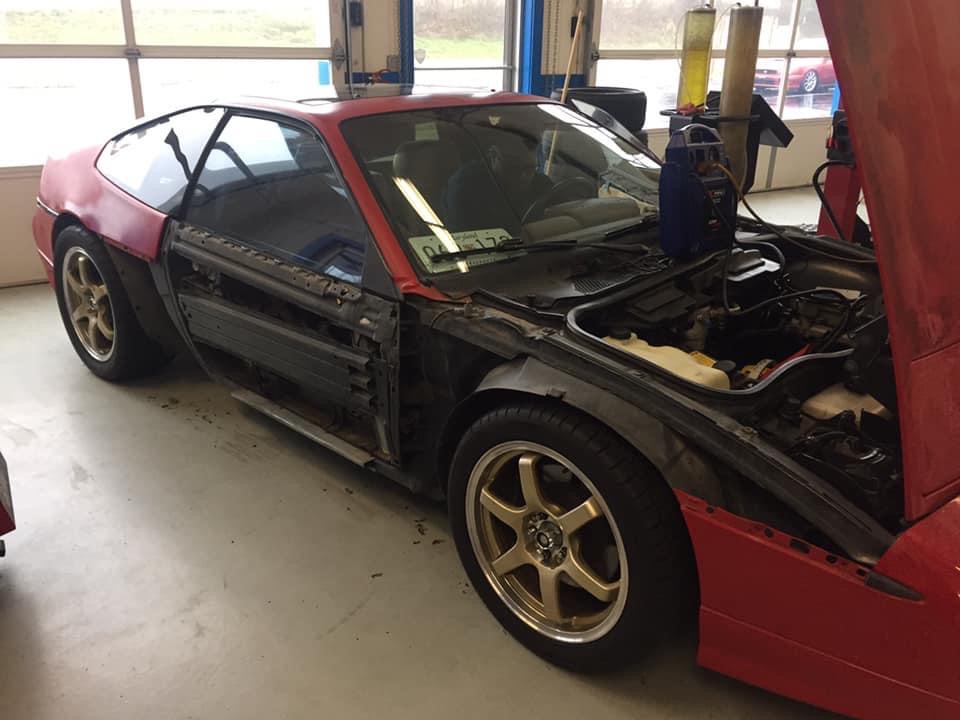
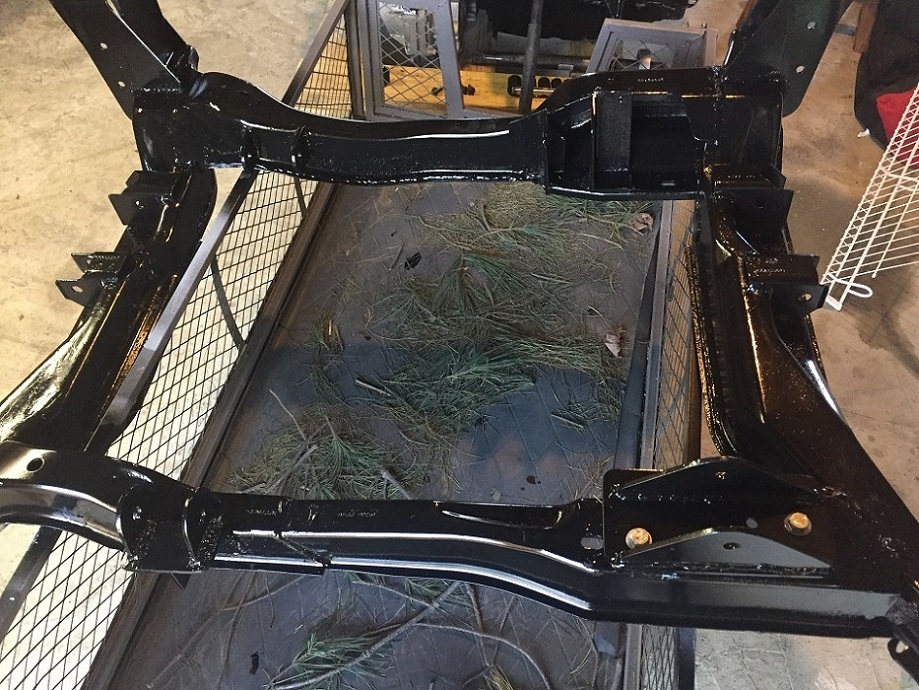
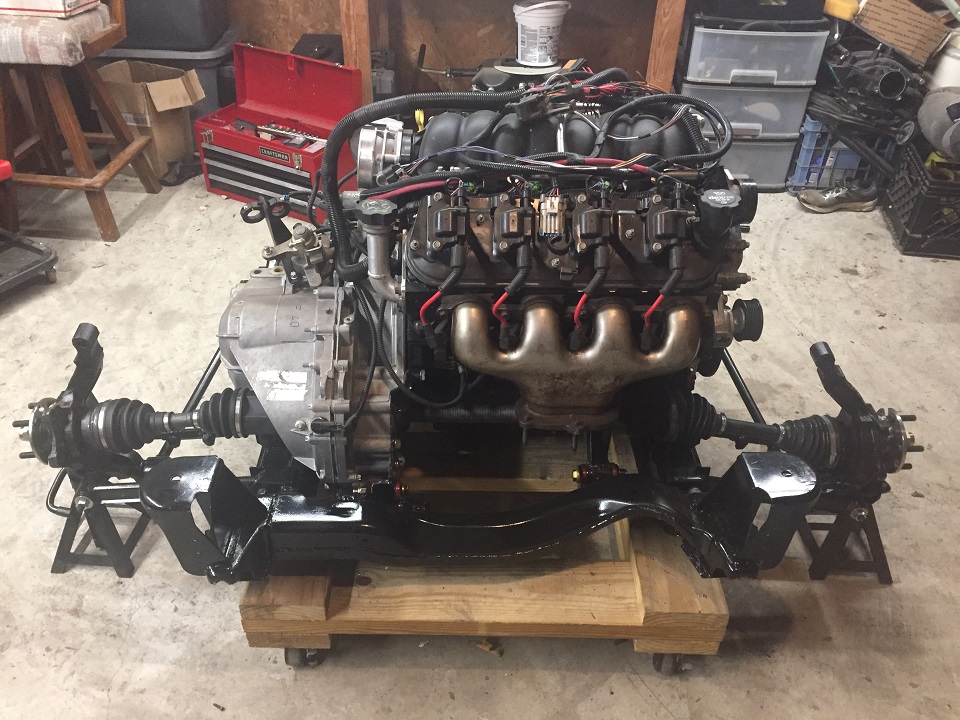
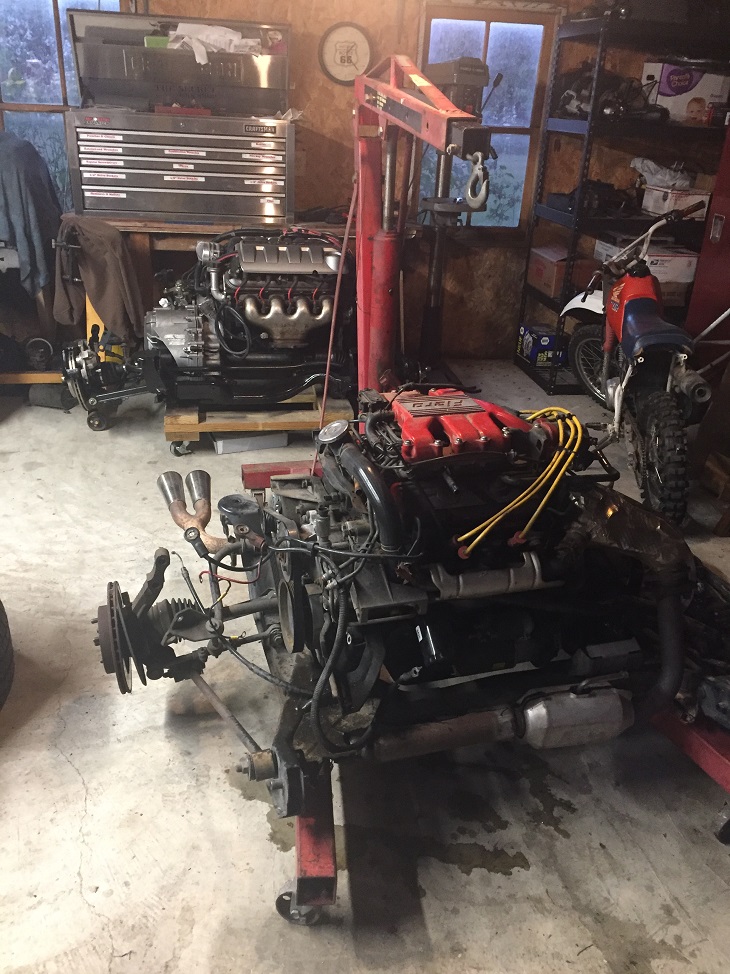
So now that I had everything up to this point, it was time to put it all on the cradle. The next series of pictures show us building the engine cradle up so we can pull the original 2.8 and just swap out the cradles. That was the nice thing about having the spare cradle and just building the new installation as an assembly.
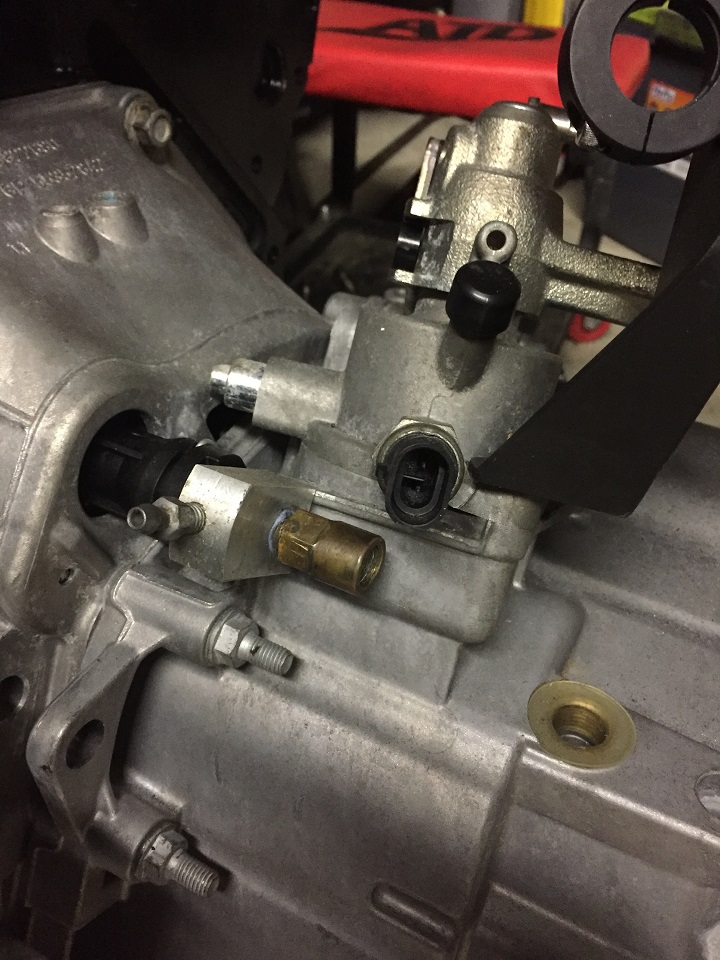
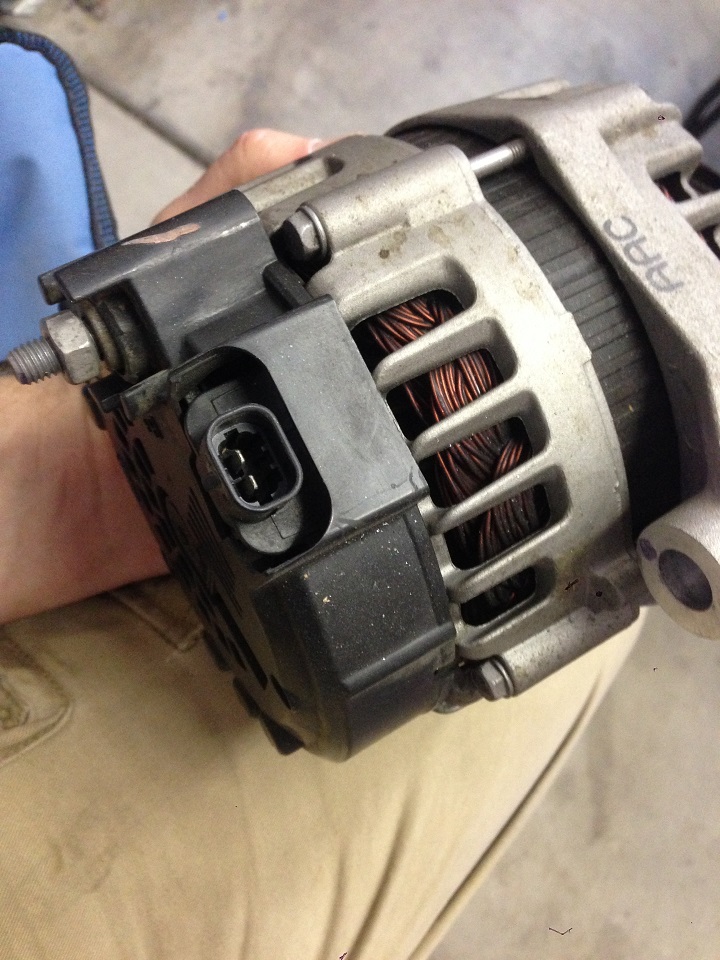
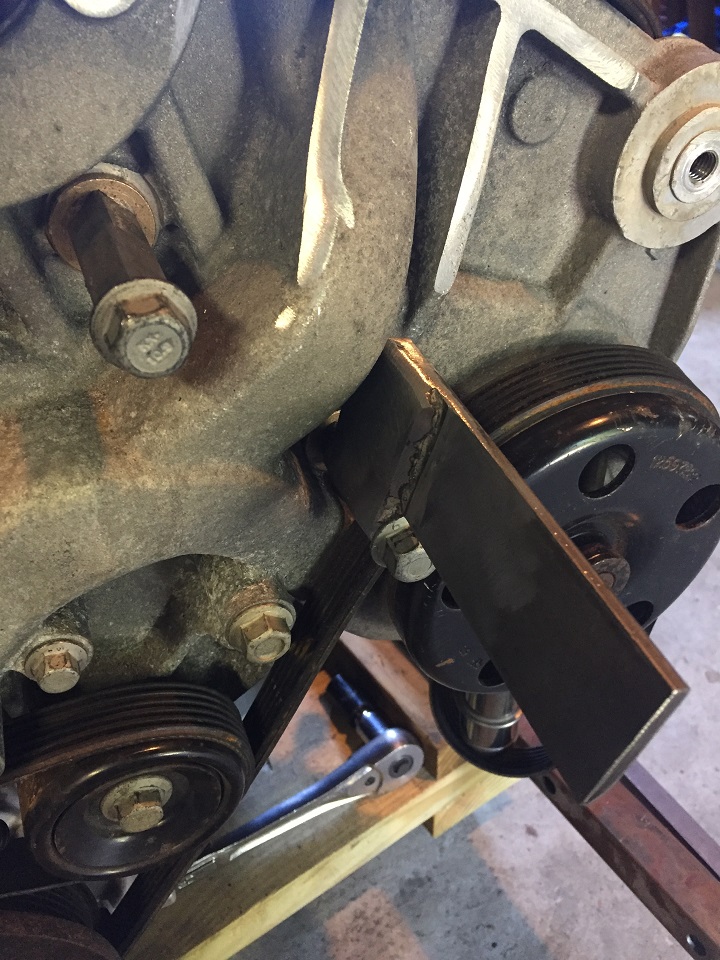
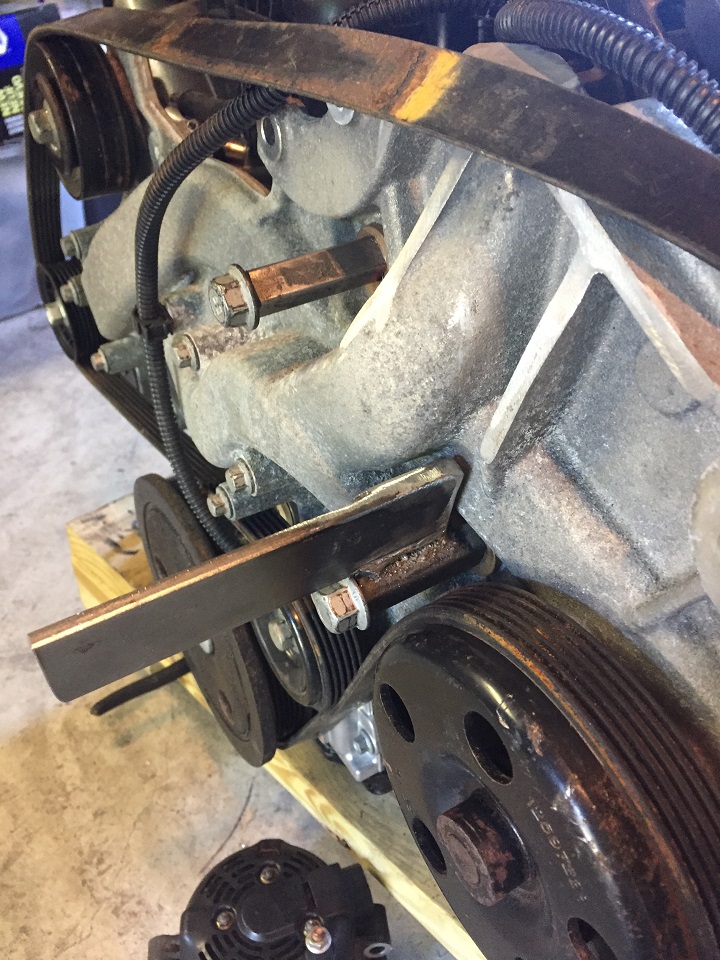
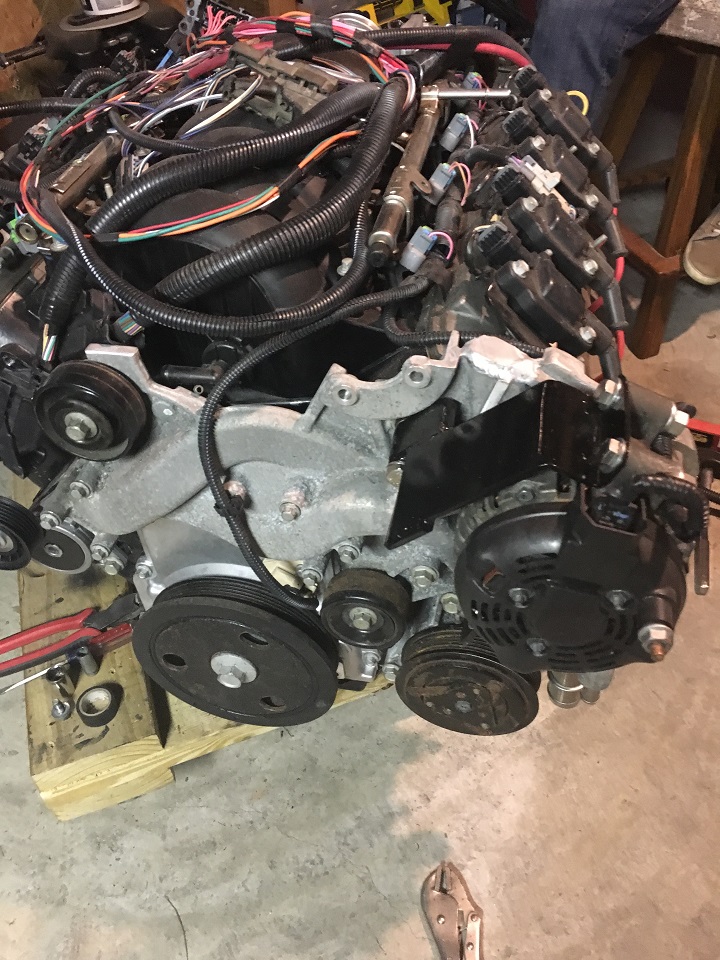
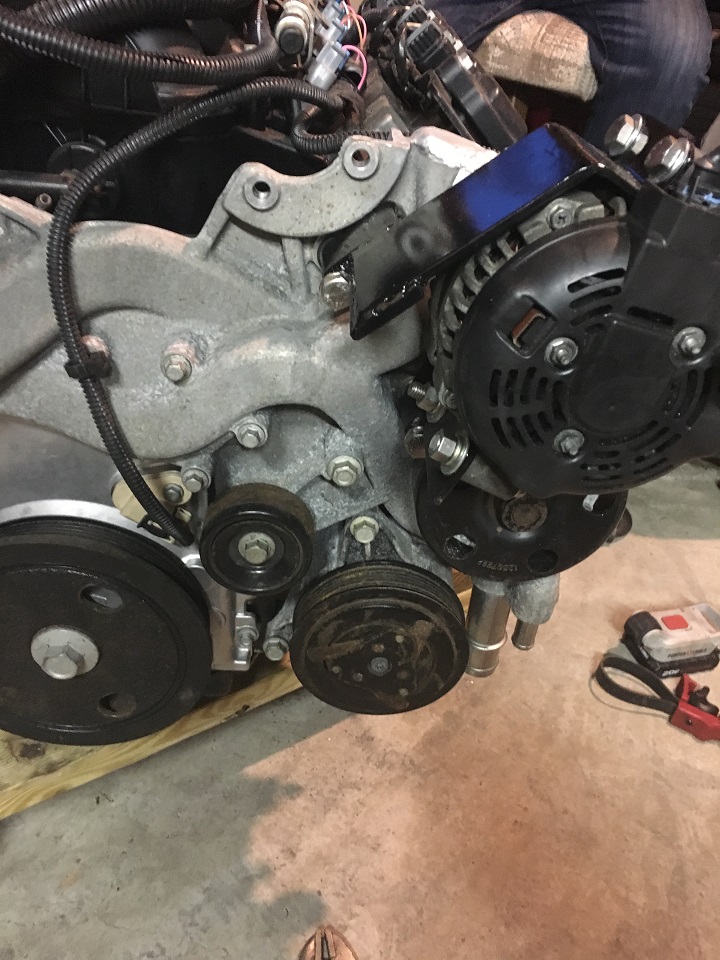
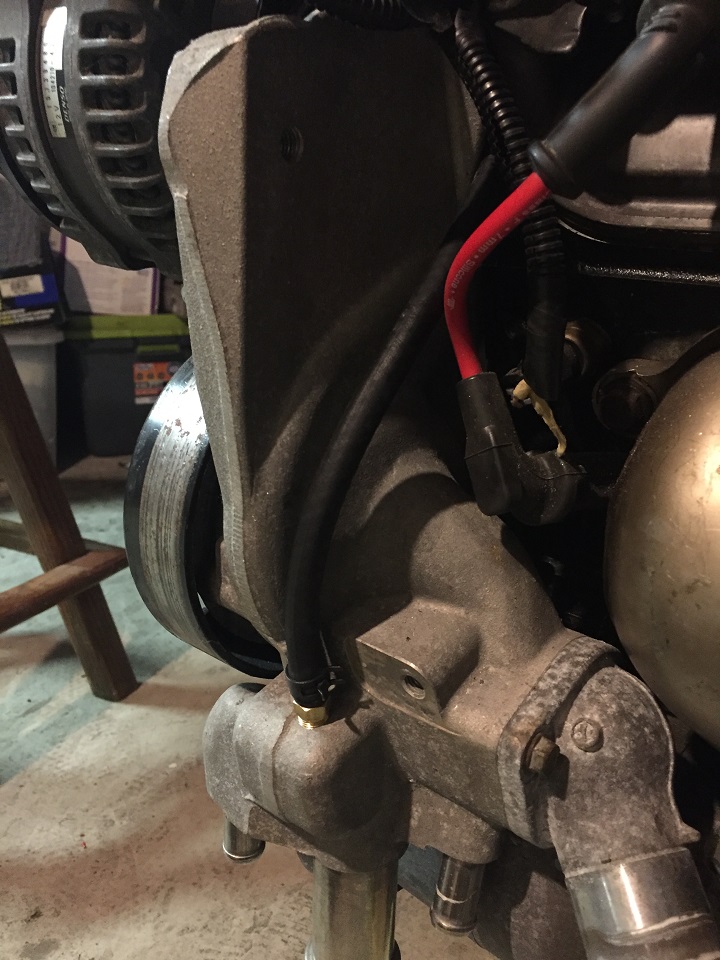
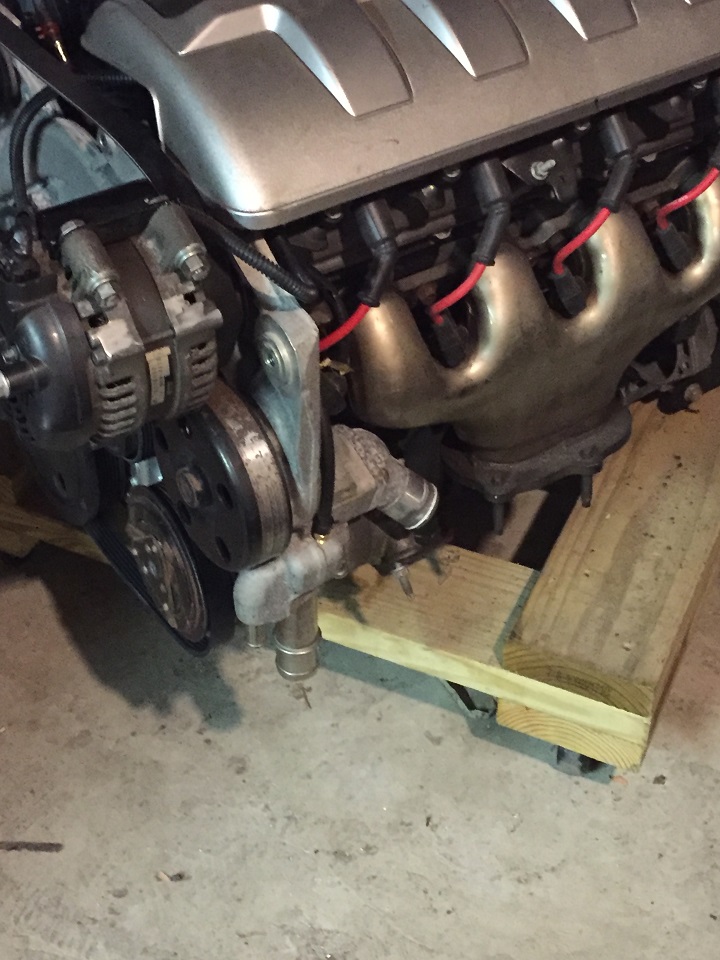
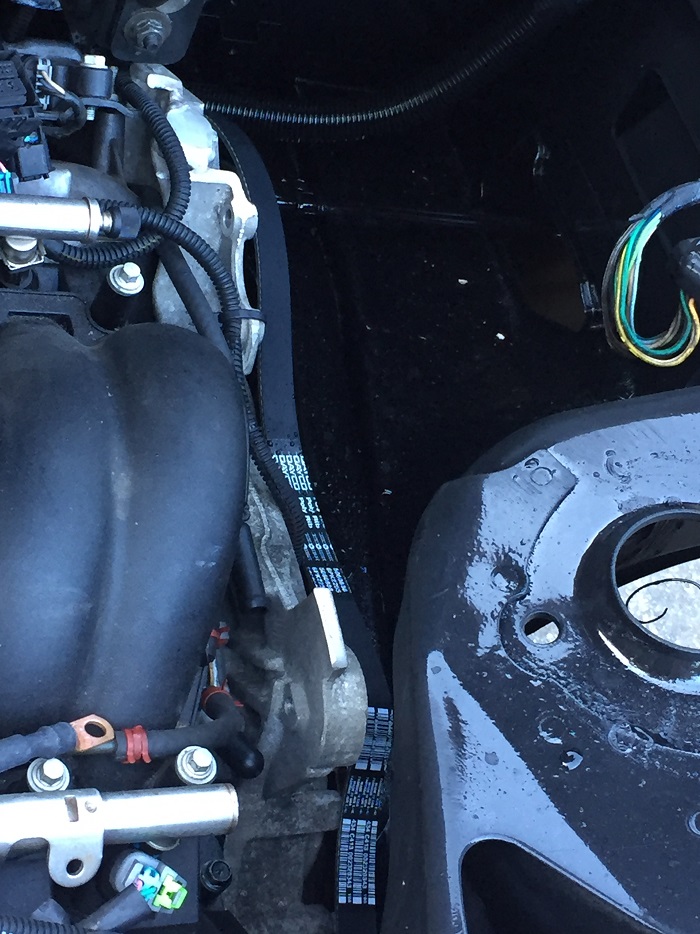
Actually, before we put the engine on the cradle, I built a top alternator mount and worked out the belt routing. Photos below are of us working on that portion before installing the engine and trans on cradle.
One of the other things we had to intall was the steam port dump on the water pump housing.
Been a while since last build post but made a few changes. Clutch is definitely starting to hold better so I think it may actually get to stay in. For how long, I guess we will see. I am still hoping that I can reevaluate the upper mount location for the alternator later to support installing ac compressor install back to the stock location.
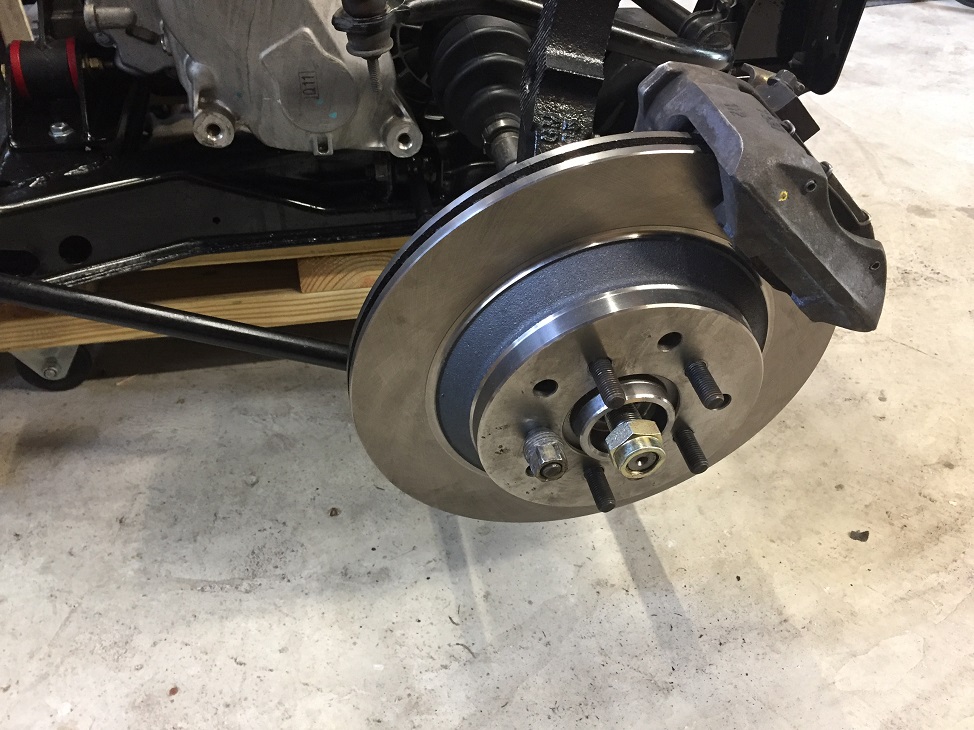
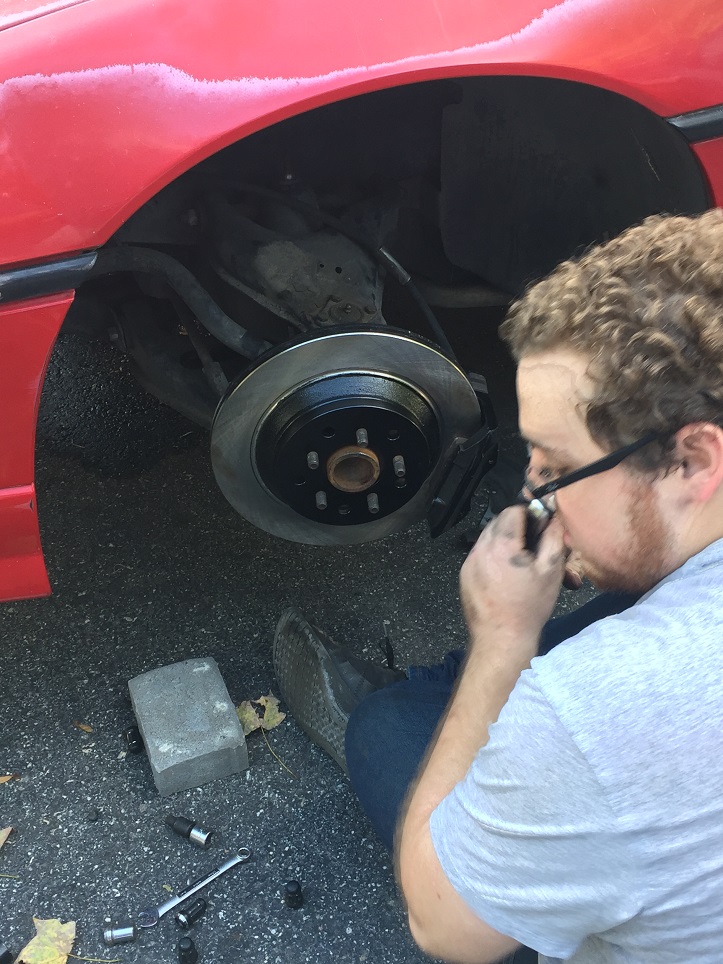
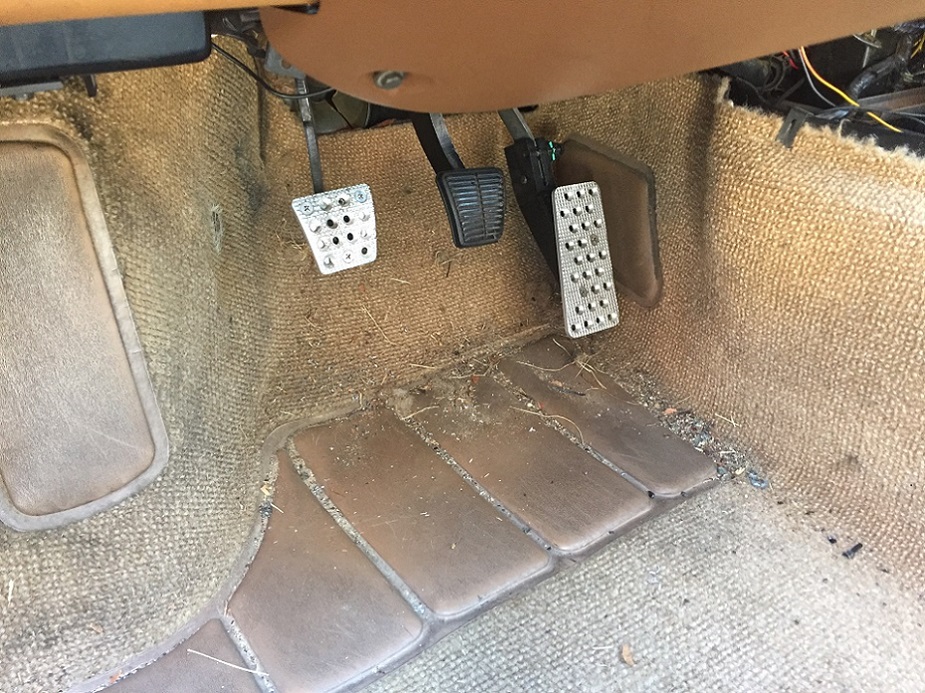
Back to the build though. Posting more photos of the cradle, brake upgrade to 12 corvette brake rotors with stock 88 calipers, stainless steel brake lines, and added a bigger brake booster using the old bracket from OEM booster and brake pedal adapter from Rodney Dickman. Summit Racing booster part number listed in the beginning of the build. I have to say, we have had numerous discussions between me and my sons, and other Fiero builders / owners and I have to say that this setup is very effective. Especially for the cost. The CARQUEST brake rotors are 15 lbs, so not a lot more weight than the stock, and with the addition of the Green Stuff brake pads, there is a significant difference in braking performance.
I will post more later. Next is pulling the stock 2.8, cleaning up the engine bay, and getting ready to roll in the LS4.
Another test drive video (Yes, it is vertical). Clutch seems to be settling in, more hopeful now that it will actually retain clamping force and not slip like it did initially. Changing alternator to low mount, will post later, then off to the DYNO.
Been driving the car a lot and running in to a lot of Fiero fans here in SOMD. Car is doing well and as soon as I get the car tuned, I can finish putting the interior back together.
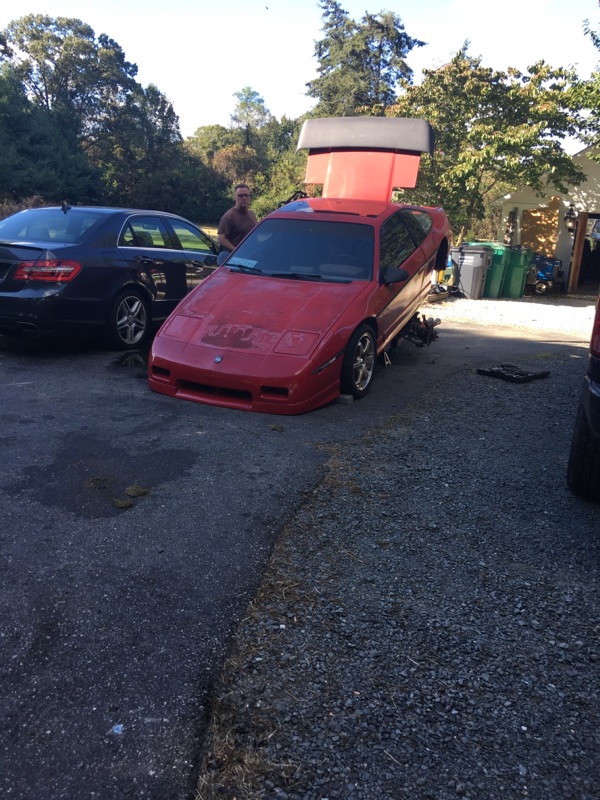
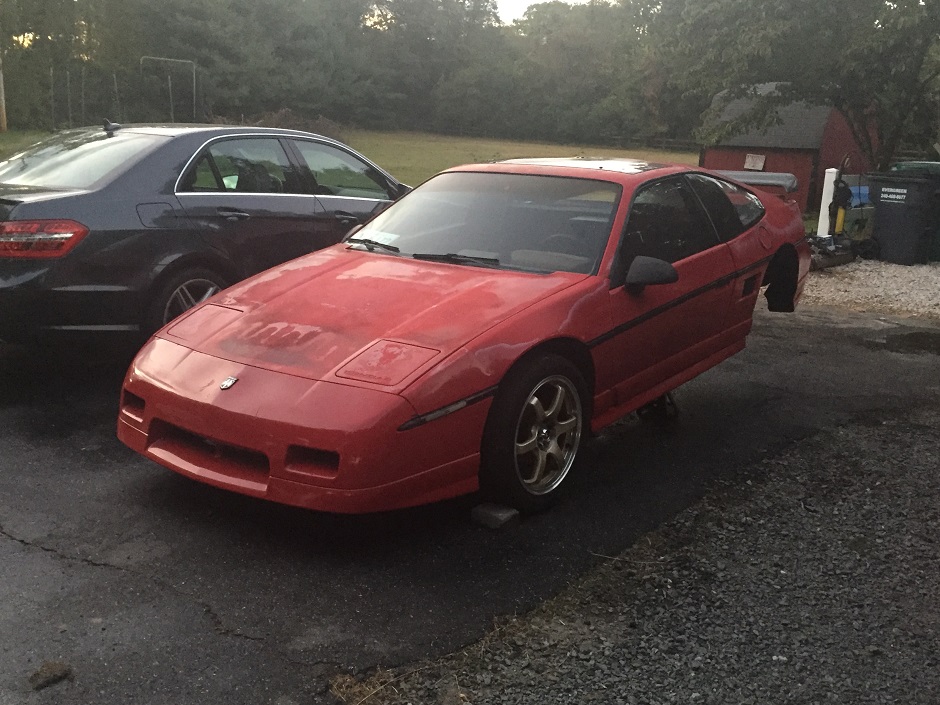
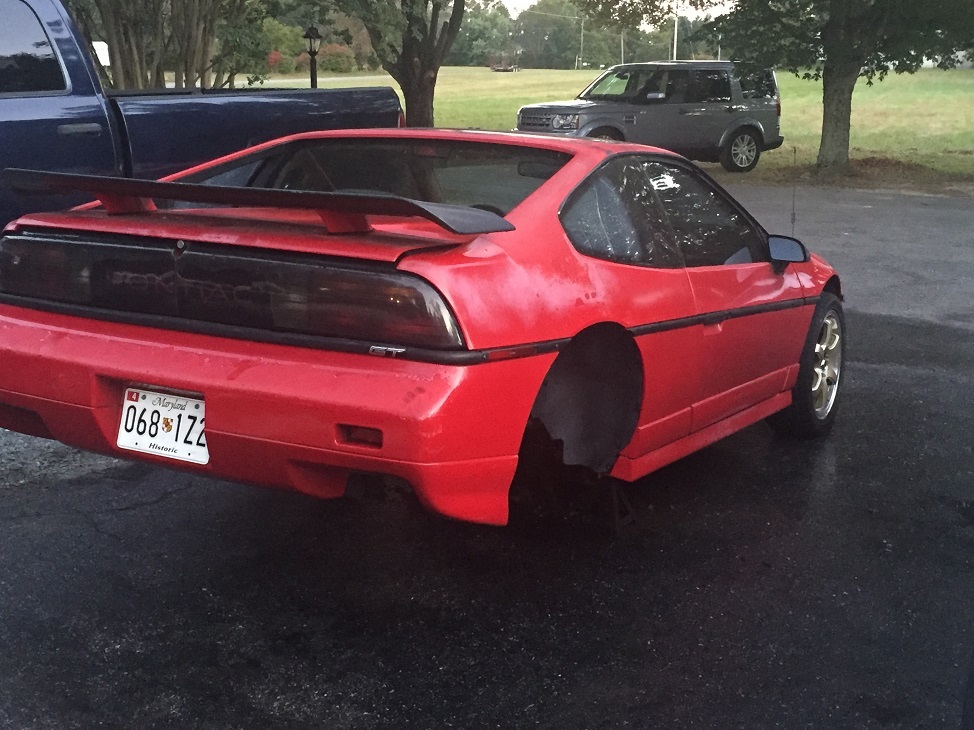
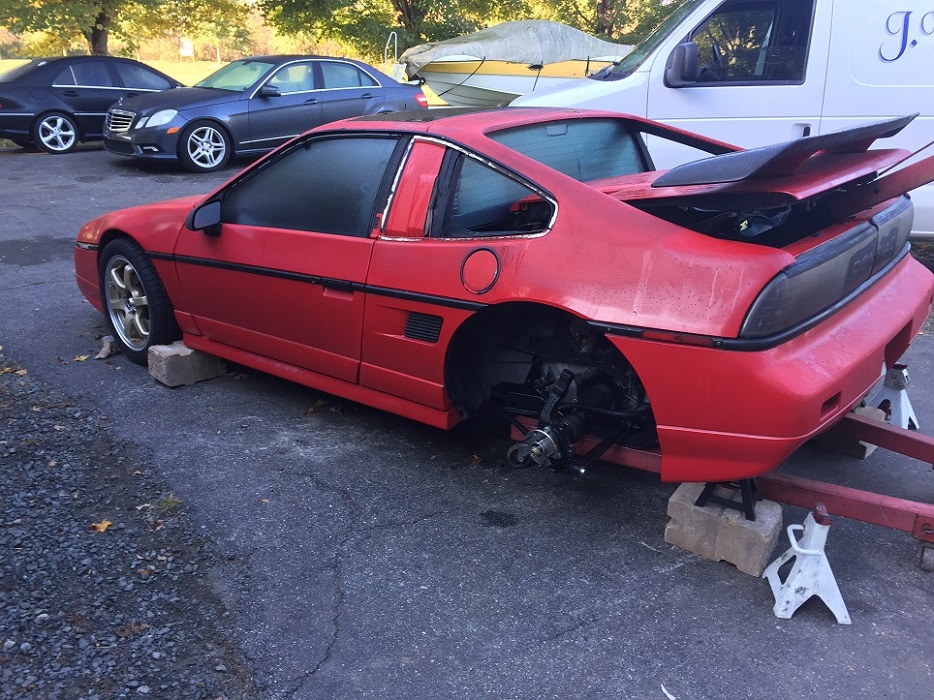
Here is some more of the build from where I left off. Car was running all the way until the day we were ready to start the swap. So, here is out with the old...
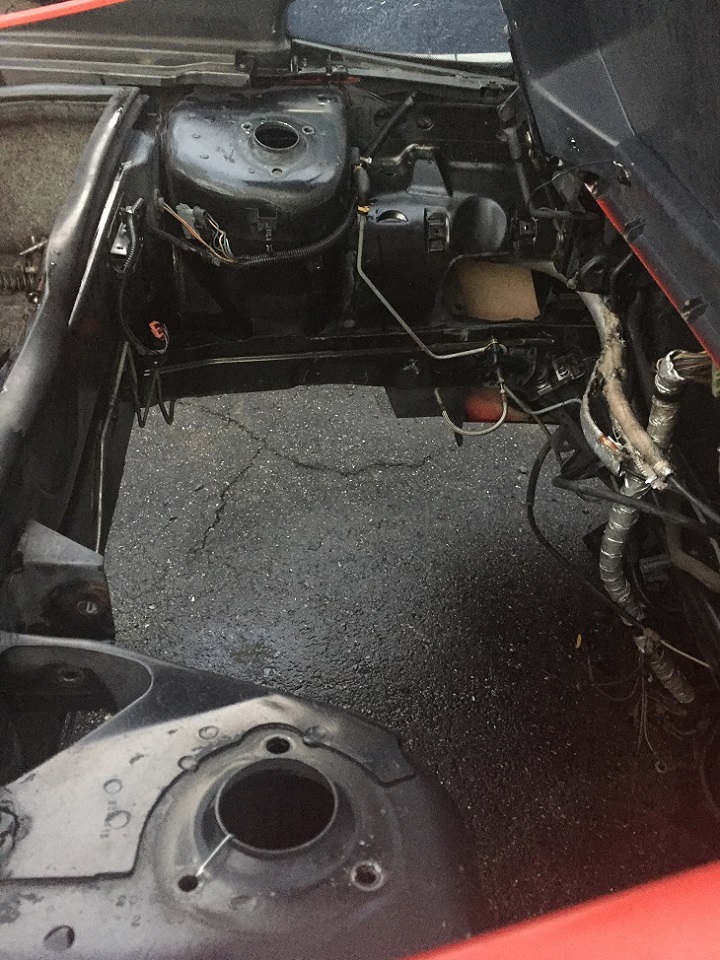
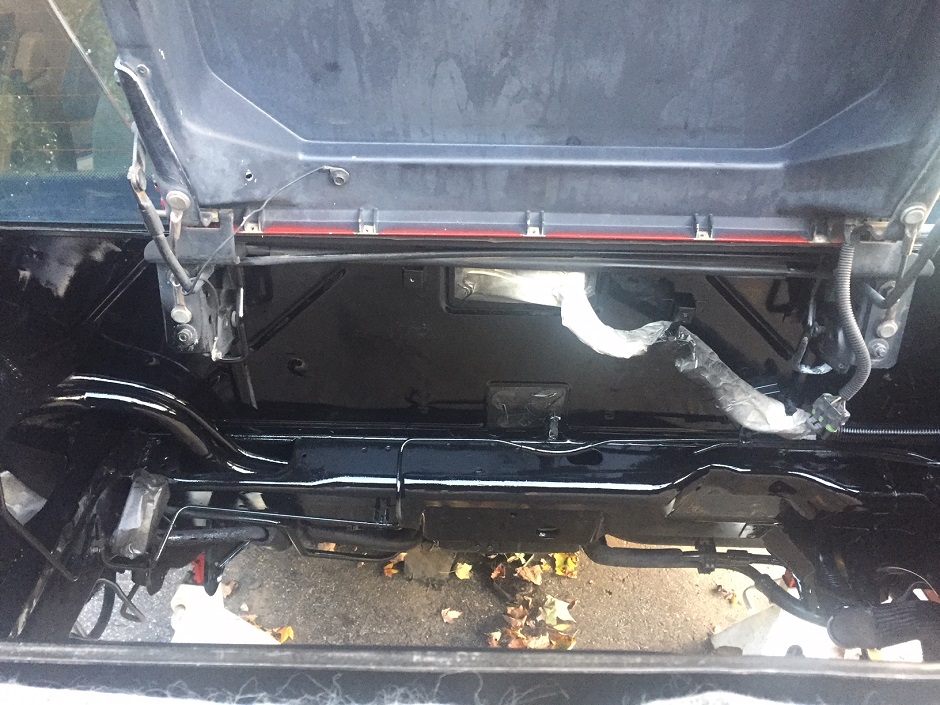
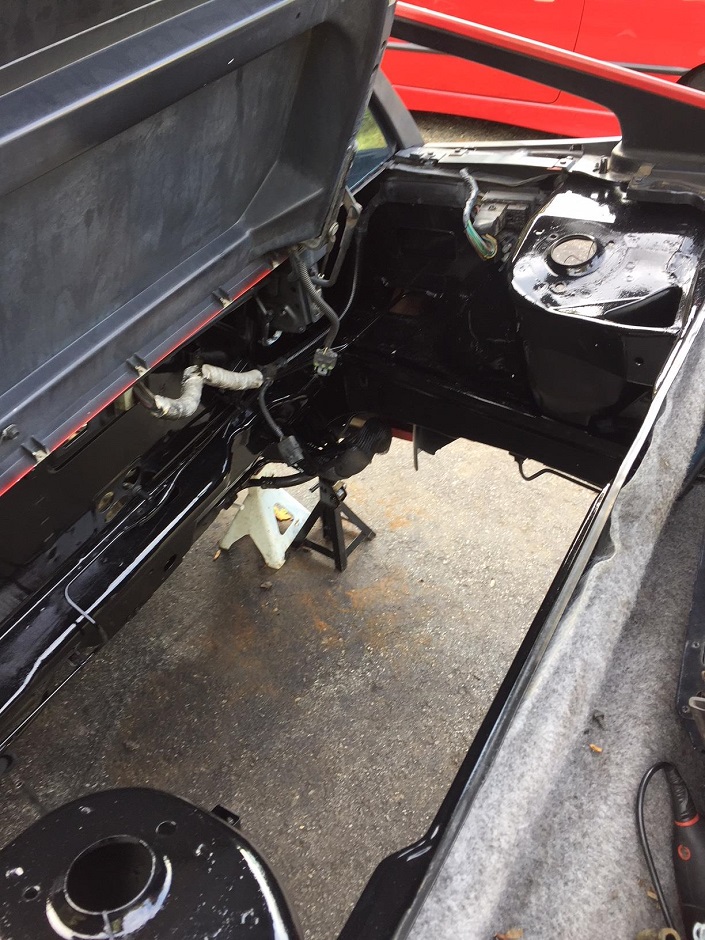
Now that we had everything out, I wanted to remove all of the excess clips and brackets and old heat matting.
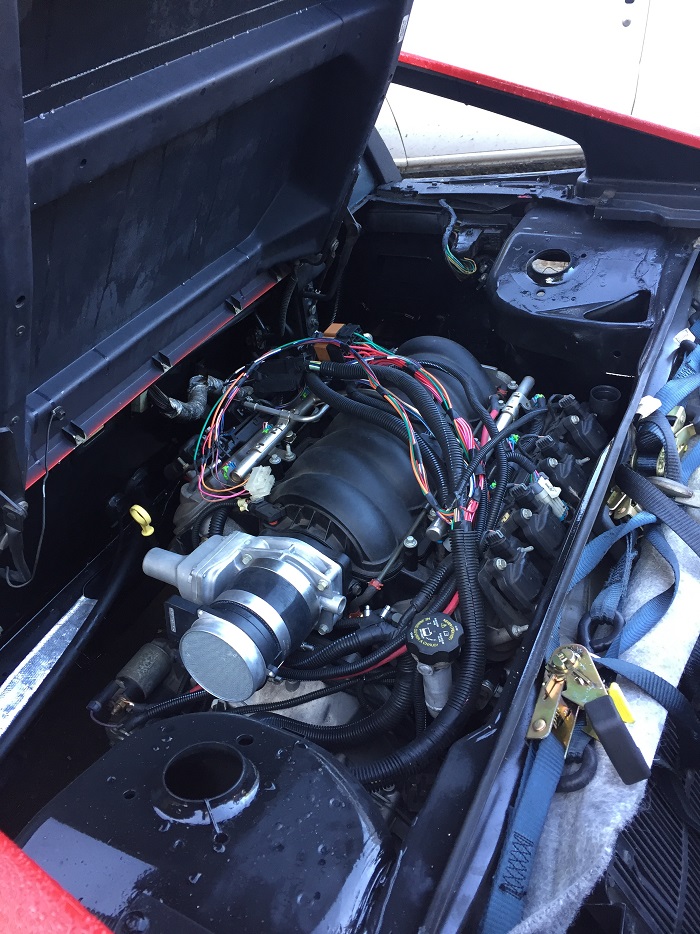
So we got the engine bay cleaned up and painted, fuel line in with wix fuel filter that I will show you from a bottom shot what it looks like a little later, and relocated the evap canister where the battery previously was. We also ran the front vacuum line for the brake booster and had it on the rear frame rail to trim and install once the engine was in. I swapped out the high flow fuel pump, and the tank looked clean. I did leave everything else stock except the fuel pump. May go back later and upgrade the fuel sending unit for better accuracy.
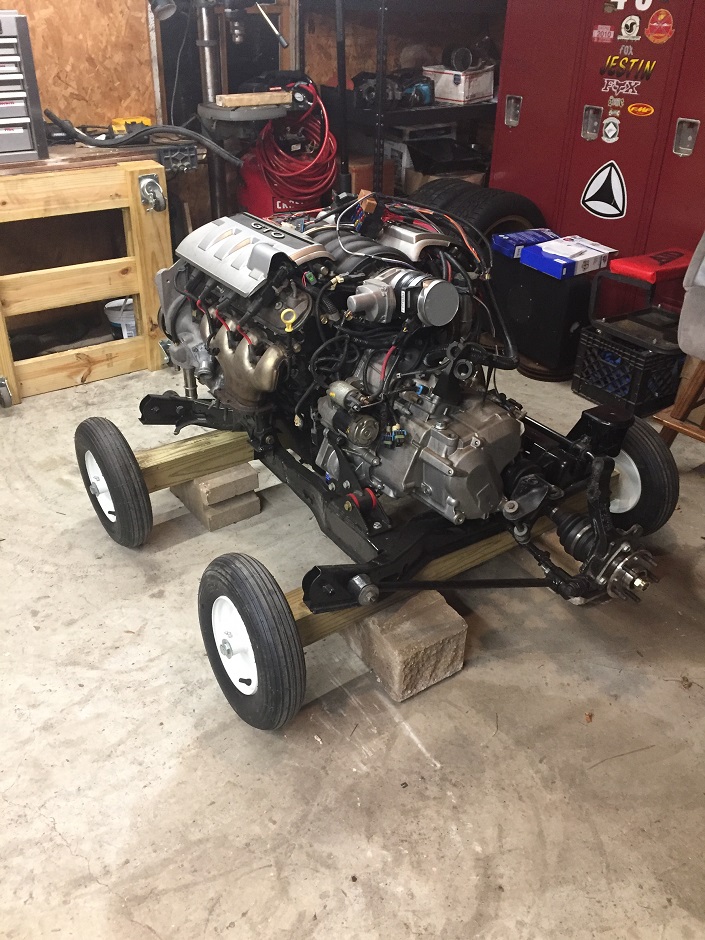
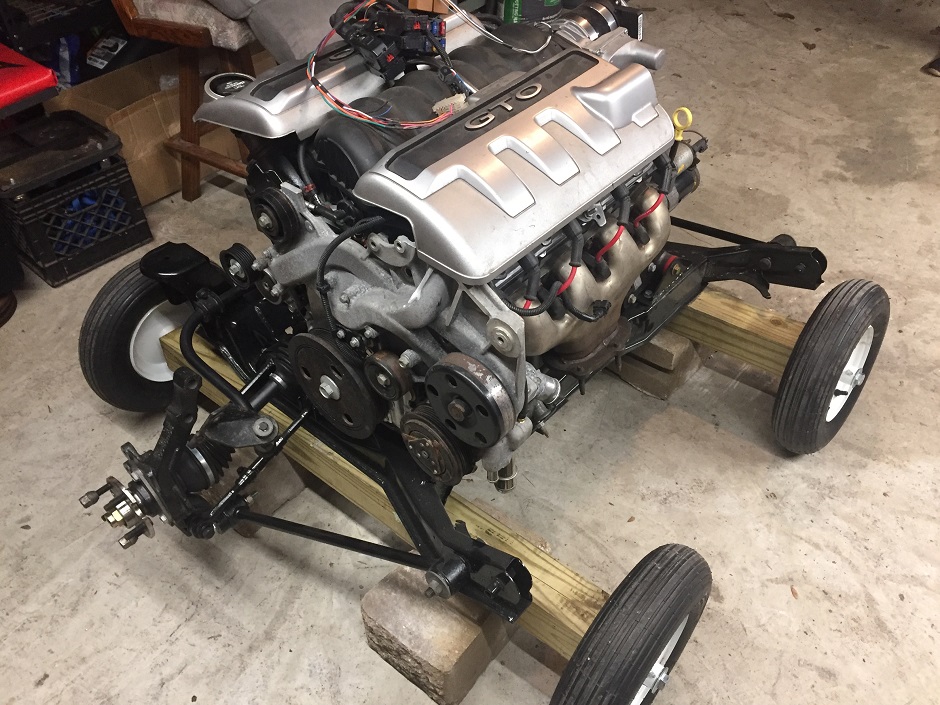
I we have an old house with a small garage, so we have done all of our work outside, sometimes under an easy-up. But there is gravel between the garage and driveway where the car is parked, so we had to put he engine on wheels and roll it to the car.
And here she sits, eagerly awaiting the new power plant.
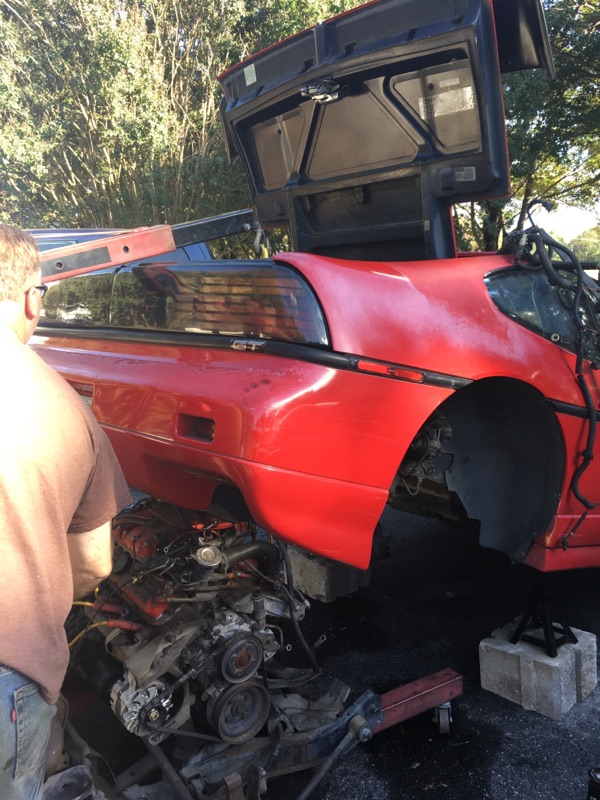
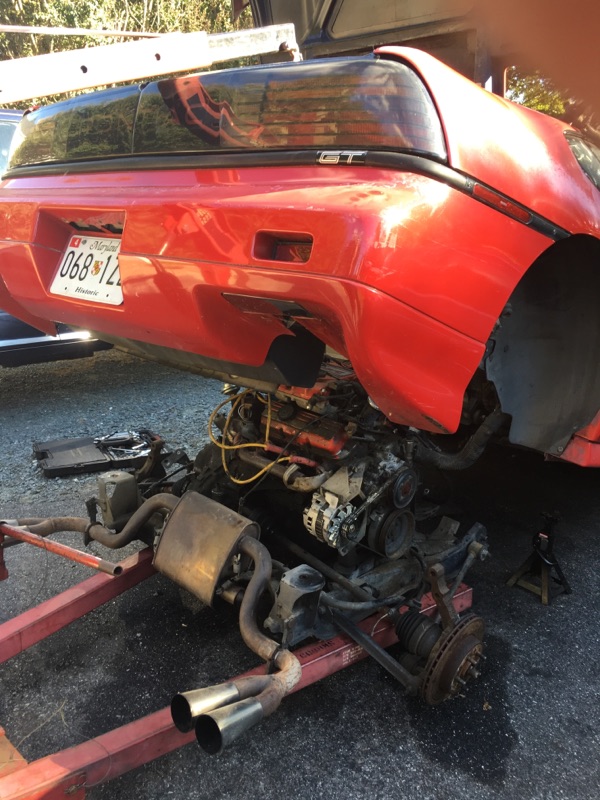
Time to install the engine. I didn't take photos of the fuel pump replacement while we had the engine out, but there are a ton of PFF posts for info if you should need it. We pulled the brakes, and upgraded the rotors to 12" corvette rotors using the bracket kit from another PFF member (refer to parts list in beginning) and the larger brake booster listed on Rodney Dickman when you also buy the booster adapter. We got ours from Summit Racing and along with the Green Stuff pads, stainless steel braided brake lines, this braking system is light weight using stock 88 calipers, and really works well. I can't see spending a ton of money on upgraded brake systems unless you have a purpose built race car. My only complaint would be the amount of brake dust from the Green Stuff pads, I may try another version next go around.
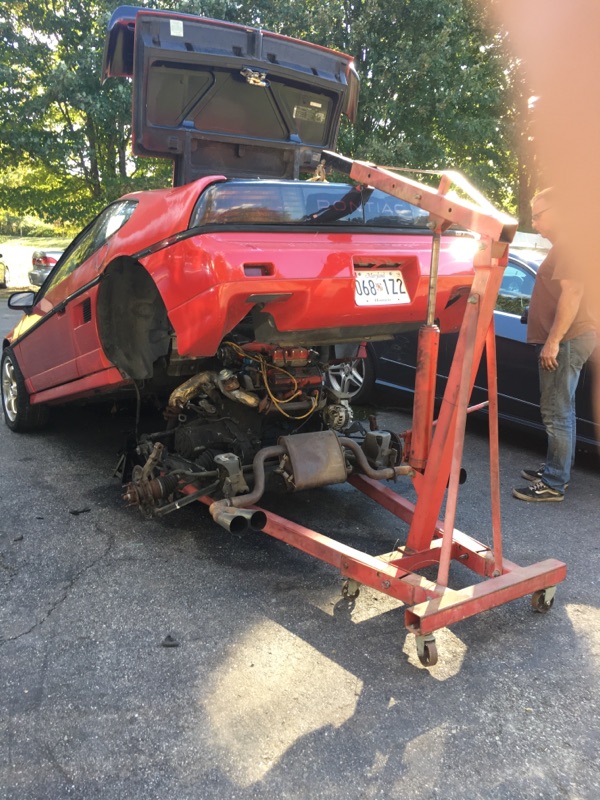
After repeated tries to get the front cradle bolts in, then lower the car to get the back of the cradle up, we kept running in to interference issues. FINALLY, after some careful consideration, we took the front cradle bolts out and kept the cradle flat on the cherry picker and lowered the whole car down on the cradle. MUCH BETTER!!!
Brake upgrade photos
Finally Installed, now to hook up all the systems and bleed everything.
I just realized you did the hard work outside, I've done enough of that in the last couple of years to last me a lifetime (shop's too full of crap and now I'm moving )... I feel your pain. Have you got it tuned yet?
Its in the shop now, Tempest Racing in Waldorf Md. I was having issues with it going into limp mode, verified today that it was the gold blade throttle body causing it. I took him another silver blade and we will see how much we can get out of it hp wise. As long as it runs well, I don't really have a hp goal, it is quick as it is. We are saving to build a shop in the next couple of years, but yes, it was fun doing all of the hard work outside. I did borrow a lift once everything was installed to finish up some things on the bottom. Been watching your build as well, curious to see how you like the trans. I am actually happy with the F40, I had doubts in the beginning, but it works well and feels great. I picked up another F40 and we are in work on the 2nd son's swap now. I'll do the same and post those pics later. Just excited to get the first one back from tuning, then put the interior together and start on the paint.
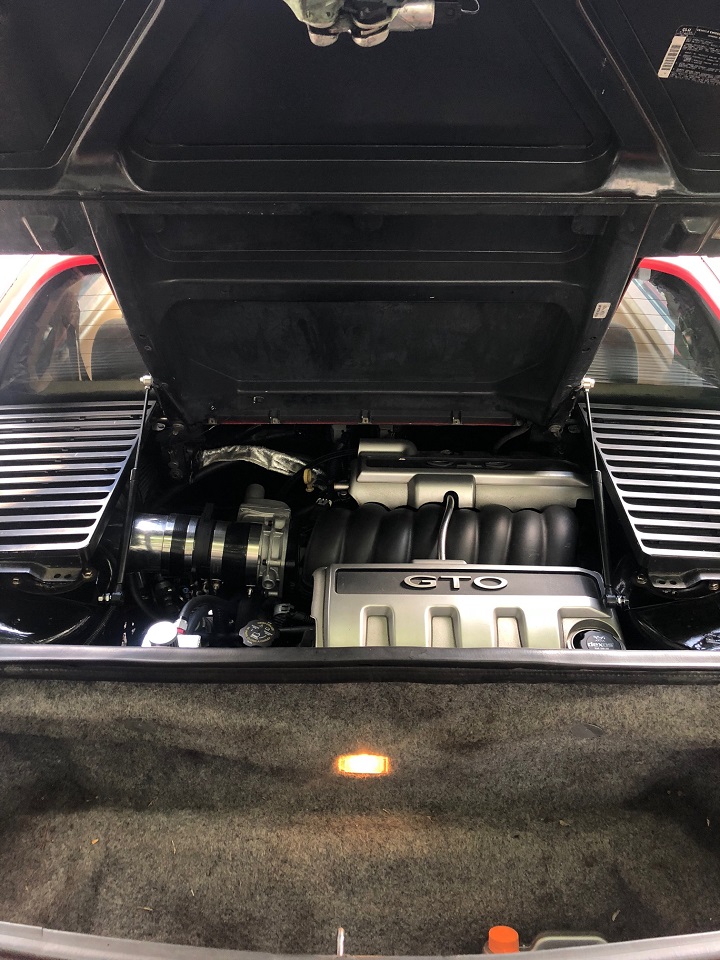
All I can say is wow! Mad props to Joe at Tempest Racing in Waldorf Md. This is a whole new car. I thought it was pretty fast and sounded good on the base tune, but Joe did an excellent job on the tune. It idles smooth and runs great, and when you open it up, it really comes alive and the exhaust roars. I will have one of my sons drive and take a video, but acceleration is incredible. I have driven some fast cars, but this is hard to explain how hard this thing accelerates.
Thanks to FIeroGuru, I was able to verify everything through measurements prior to doing just a single install. After the install, we hooked up all of the coolant tubes, ran the electrical connectors through the stock locations and resealed the bulkhead grommets, relocated the battery to the front and ran the new cables, bled the brakes, everything seemed to be going well. Almost too well.
After getting the clutch line installed, we installed a new master cylinder from Rodney Dickman, along with the adjustable banjo, and started bleeding the clutch. My son was in the car working the pedal commands while I bled and filled fluid in the master cylinder. It started feeling pretty normal, so I had my son get out so I could feel the pressure and see also what adjustments may be needed on the banjo. Then I heard a pop, more like felt it in the clutch, and my son said, "dad, there is fluid leaking from the transmission". That is where we started the process of pulling the engine.
As soon as it happened, I knew what it was, no use in doing all of the second guessing and wasting time, out it came.
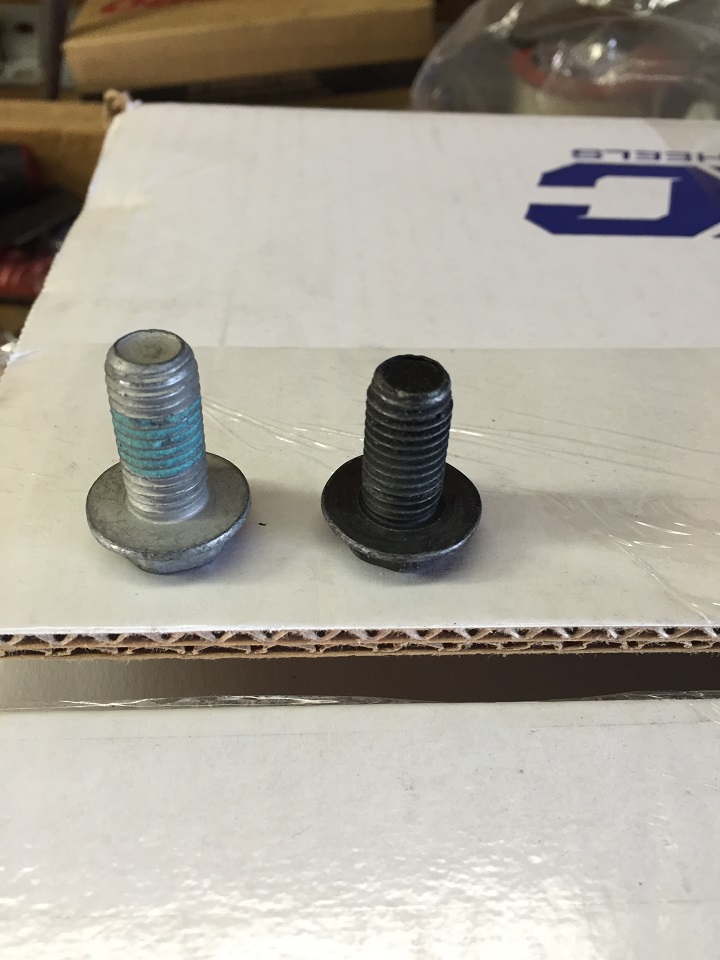
Shortly after we pulled the engine to pull the trans and verify what we were thinking (which was correct), I called Spec Clutches and spoke with Danny, their engineer. He had me pull several measurements and in the end, ended up sending me a new clutch disc, and a bearing spacer that is listed on the build list in the beginning. If you order from Spec, please make sure you are getting the correct LS4 version. After several discussions with them, I believe Spec may be calling the truck 5.3 an LS4, or at lease they took measurements from a 5.3, not the actual LS4. When I discussed it with them, they were not completely familiar with the FWD LS4 specific motor specs. Bottom line, now that I am driving and messing with the car more, I still think the measurements are off with the spacer they gave me, and Spec's 3800/F40 conversion flywheel has different spec dimensions other than just the different bolt patter that I've asked them to take another look at their "LS4" flywheel and see if they need to re-program any of their manufacturing tolerance. I'll post the final results on this, looks like I may be pulling the engine out again this winter and sending them the clutch and flywheel to examine.
For now, back to the build. I have a bunch of measurements that Danny asked me to send. I am attaching in case anyone else has had a similar issue, or plans to order their flywheel from Spec.
After the measurements were sent, Spec sent me a new disc and spacer.
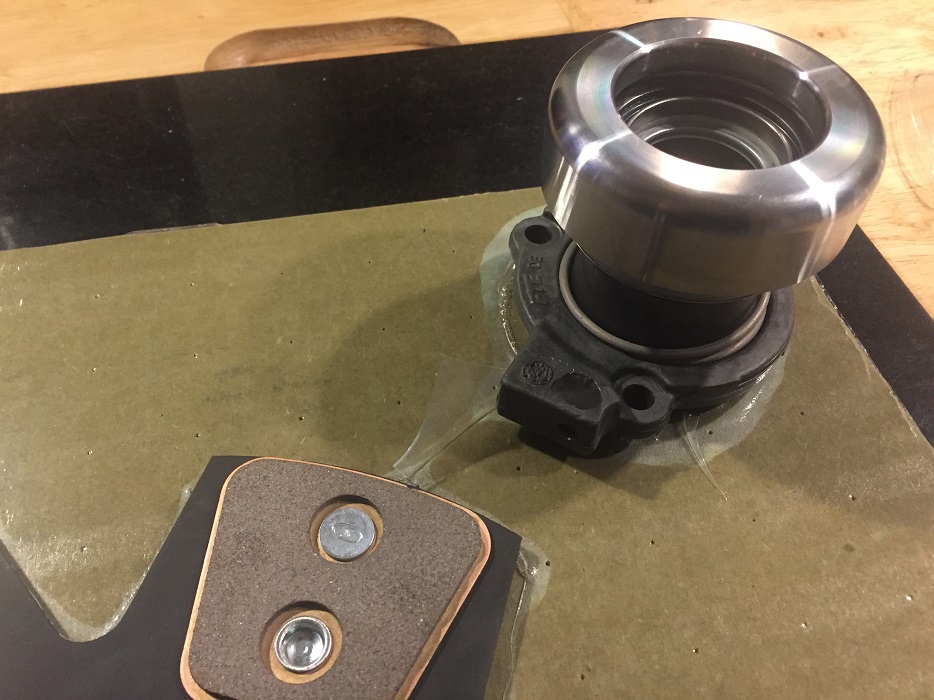
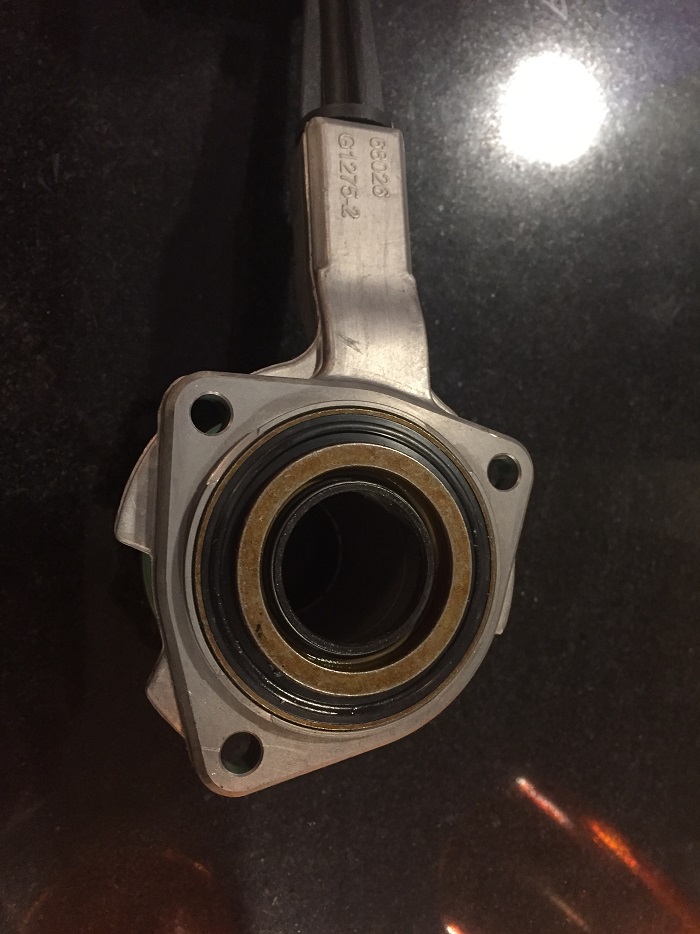
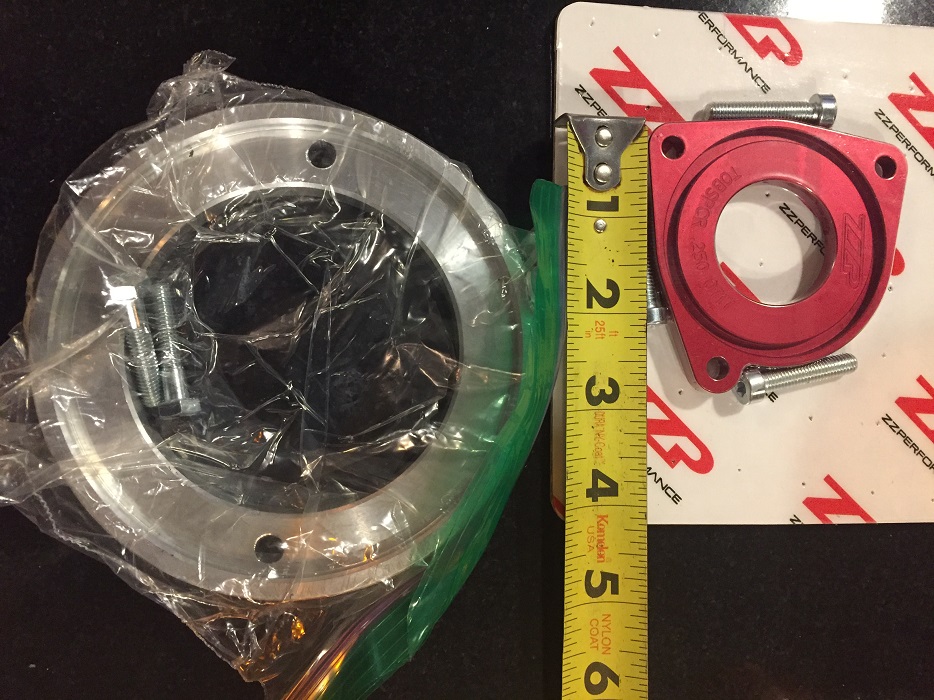
I installed another new gm slaver cylinder with the bearing spacer from Spec. ZZP does make a spacer that works with the F40, but is on the base of the slave cylinder if you have other spacer requirements, that one only goes up to 0.25. The Spec spacer required was 0.39.
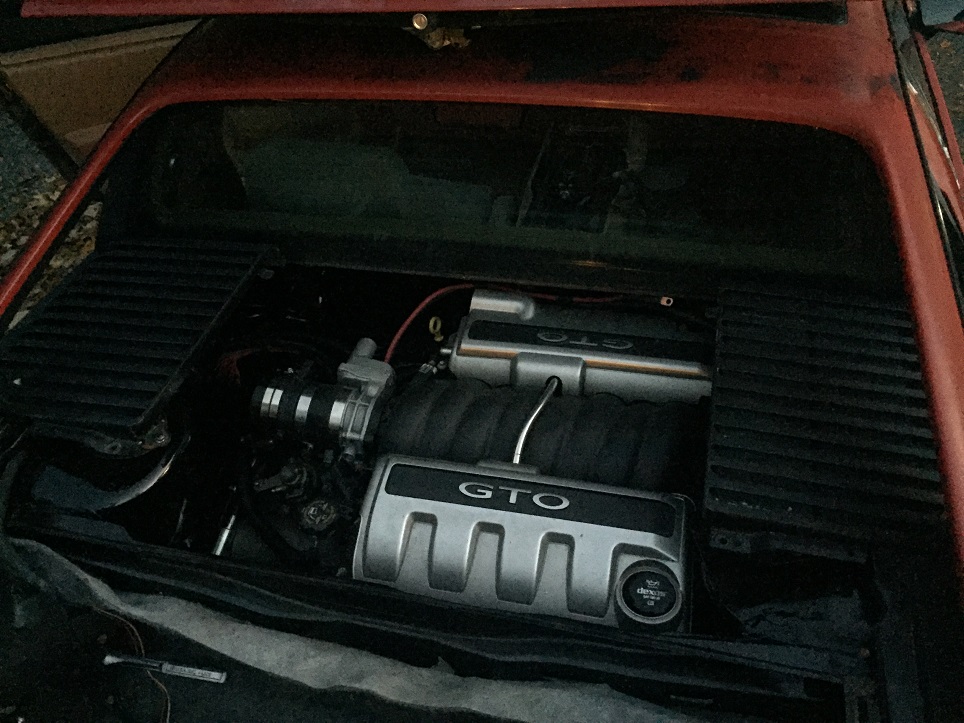
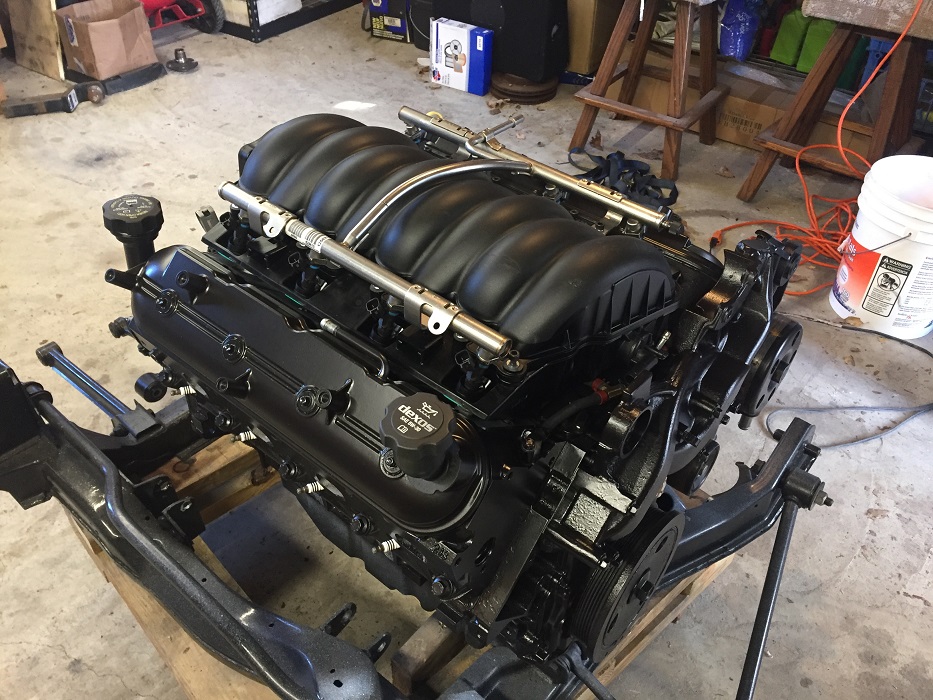
Since the engine was out, we took the time to make some improvements to a few things we noticed during installation. While we were waiting on the spacer, we also repainted the engine to include the water pump housing, valley cover, and valve covers. I used BBQ grill paint that seems to work very well, even with a few hundred miles, I don't have any scratches on the engine so it appears to be holding up well.
Did some troubleshooting this weekend and after talking with FIeroguru, I think I finally have a solid plan to figure out this clutch issue. My main problem was trying to correlate the rattling noise in the transmission as a clutch cylinder rattle, but learned it is the F40 notorious rattle. Now I know.... Either way, I am going to loosen up the transmission mounting bolts and separate the trans enough to put some spacers to pull the clutch fingers away from the cylinder hopefully enough to test a theory that the spacer I have is causing premature pressure on the fingers, which is causing me to lose clamping force on the clutch and thus slipping when it shouldn't be based on the clutch setup I am running.
I will post those results later, but for now, back to the build.
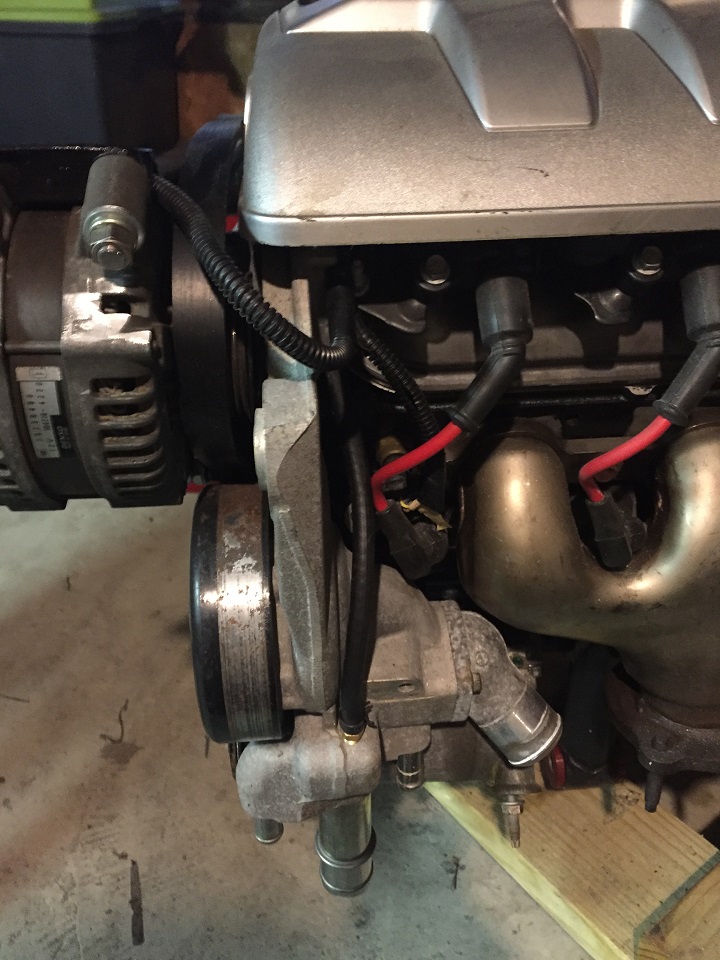
While the engine was out, I touched up a few things, and repainted the engine to include the water pump. First install I left it raw, but didn't really like it. After breaking everything down and checking everything, I also decided to upgrade to a 4 corner steam vent system.
For the 4 corner steam vent, I robbed the front vent off of the second LS4 and cut all of the ends off. I used some brake line and connected them with hose then connected the front vent line down to the water pump housing that I installed a vent fitting in.
With the new clutch disc installed, and new throw-out bearing installed in the trans with the spacer, it was ready to all go back together and install everything in the car.
I took some time to drill holes in the very back of the frame rail on the top ledge and welded a couple of bolts in for grounding points. While the engine was out, I also made a couple of grounding cables left over from battery cables and installed them on the engine and trans. After I installed the engine, I just attached the cables to the lugs I installed and it tucks up nice and neat along the back edge of the frame rail.
Installing the engine went very quickly this time. I did not attach the front mounts first on cradle, I just set the whole car straight down on the engine and cradle assembly and bolted everything back together. After we got everything installed, it took a couple of days to bleed all of the systems again, but no issues with the clutch over extending this time.
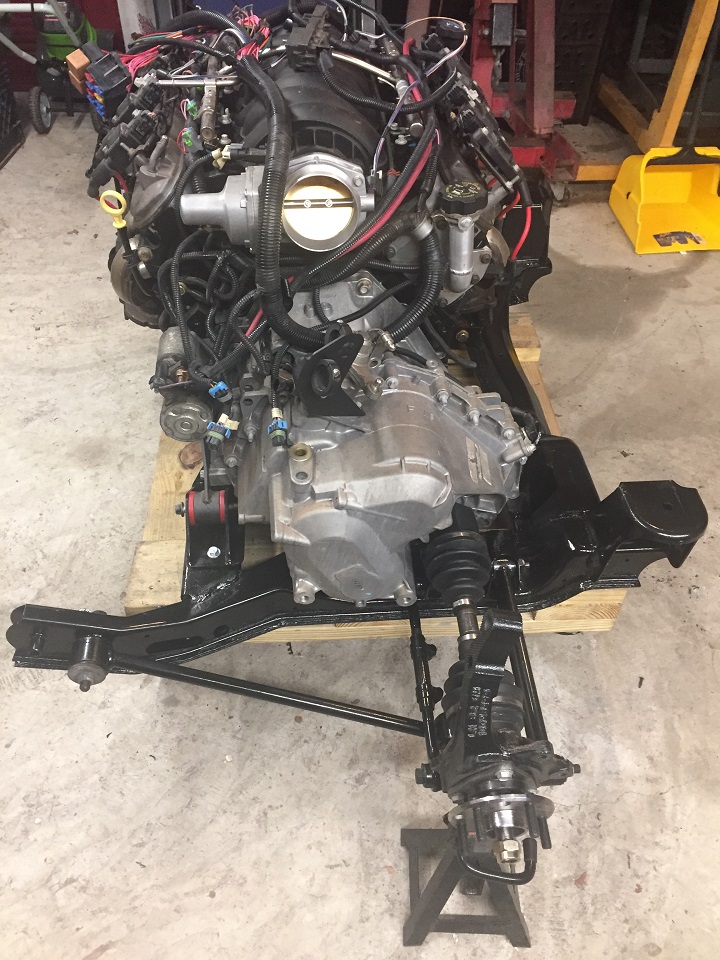
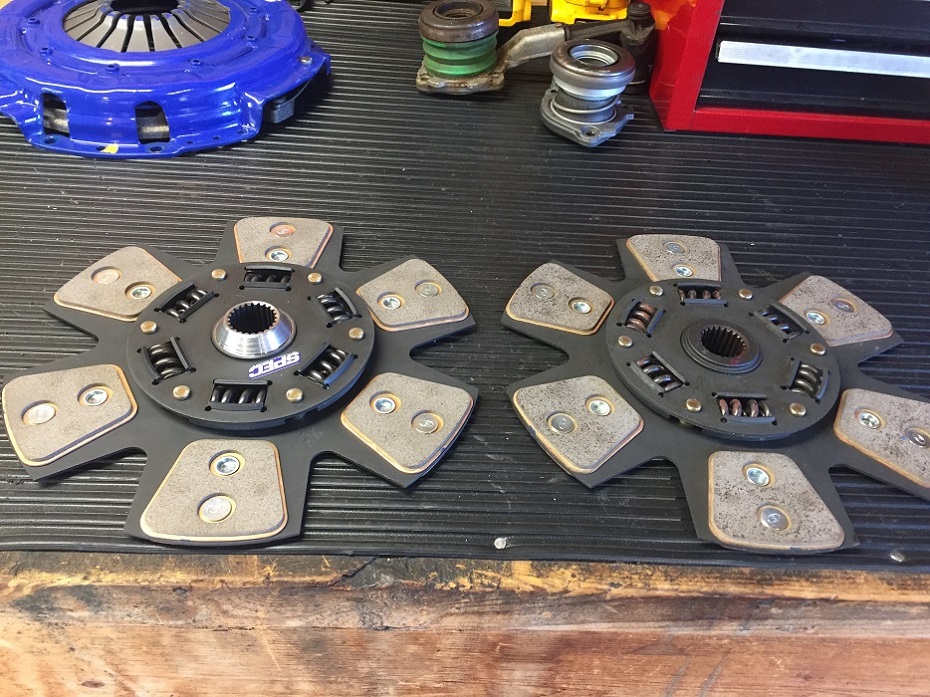
Because this first build was done in my older sons car, my younger son has been collecting parts and getting ready for his LS4 swap. Below are a couple of photos of the engine put together for the second LS4 / F40 swap. This one will be a little different, but I will save those details for when we get to the build post for that swap. It will be different, and hopefully a little smoother now that we have learned what not to do.
More to come on the first start of the first swap and exhaust install, then on to some fine tuning while working out the clutch issue. Hope to get some of the interior done this winter, then finish exterior paint early next year. Gary
I have to just add you are a brave individual leaving your taillights in place while jacking the car up into the air! That was probably the first thing I took off the car before going any further with my engine pull.
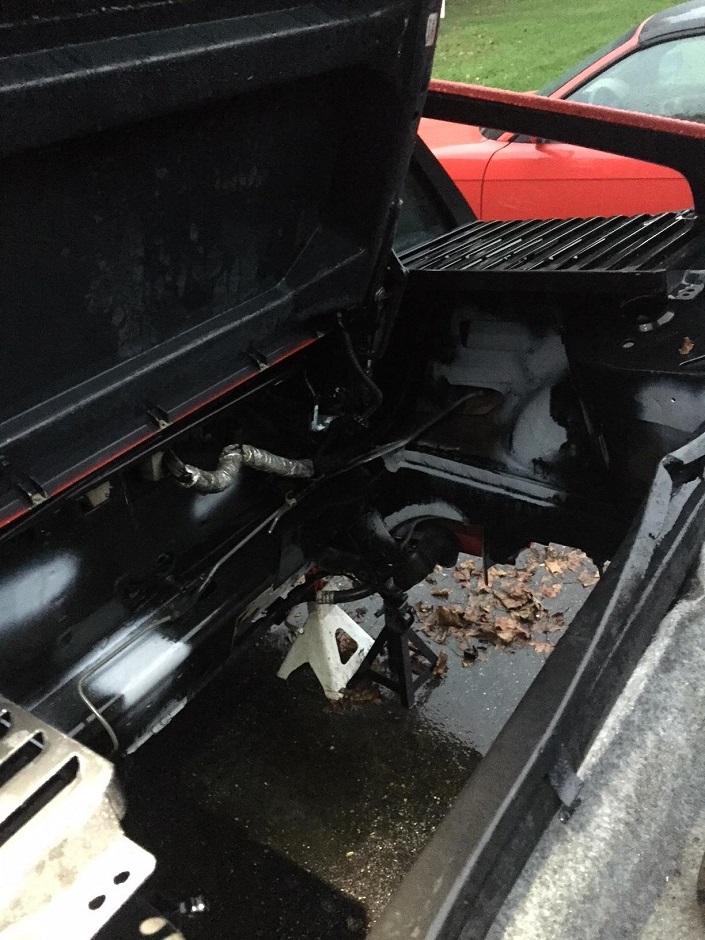
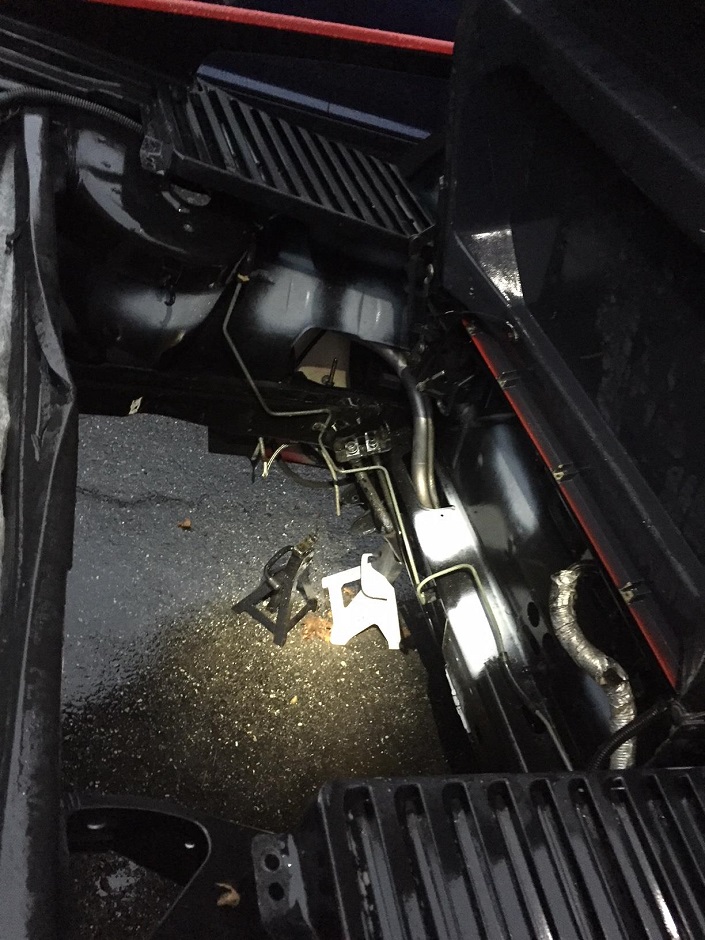
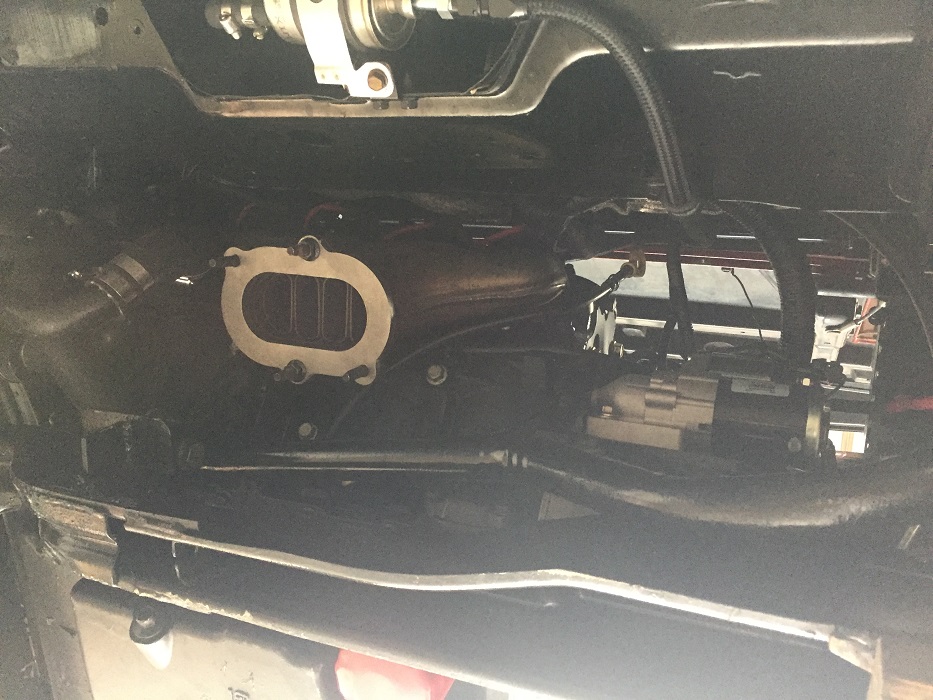
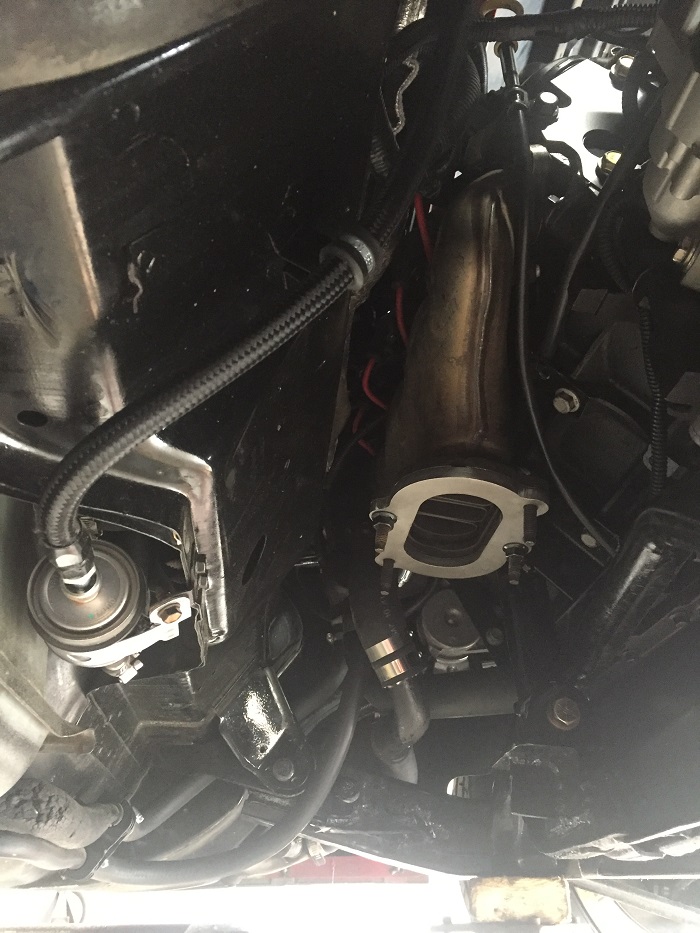
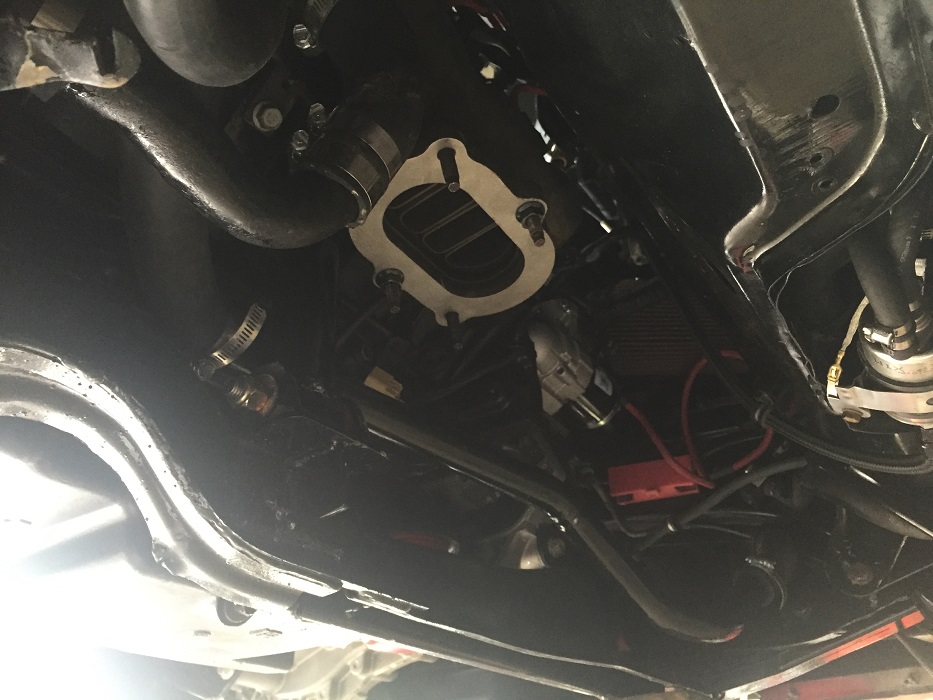
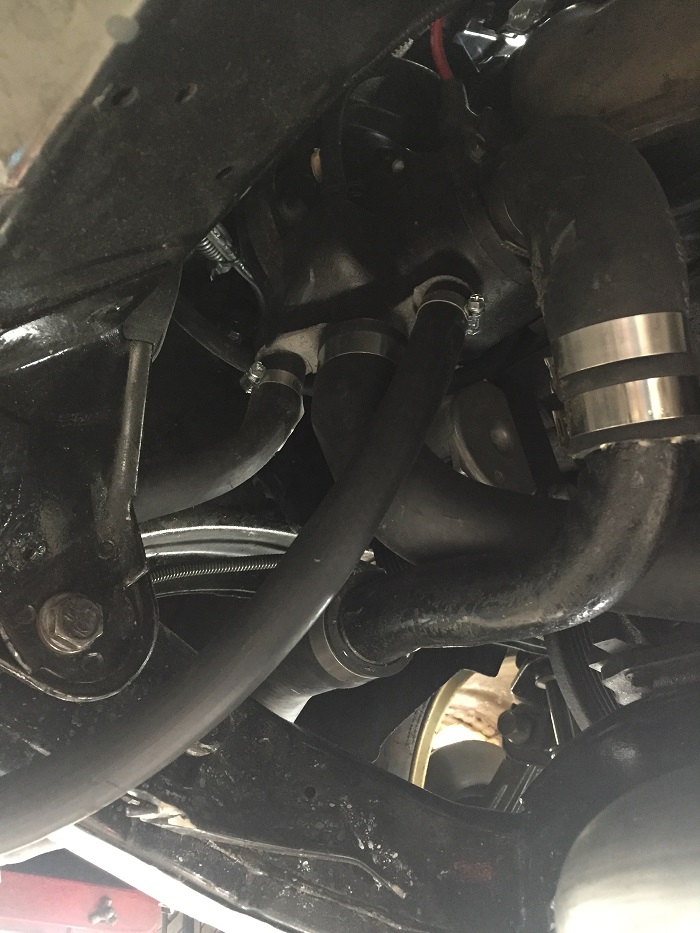
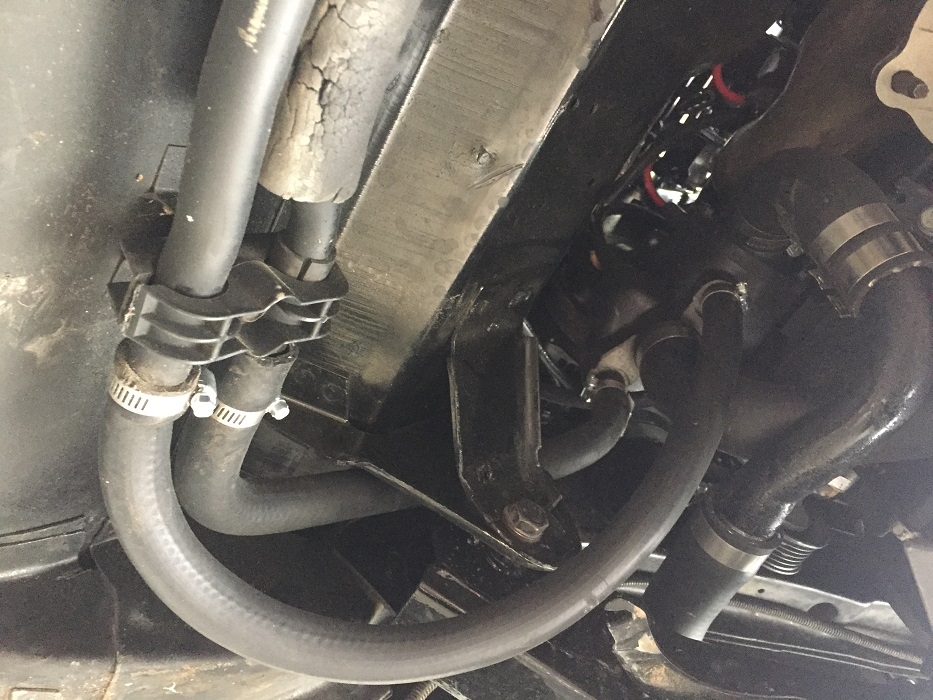
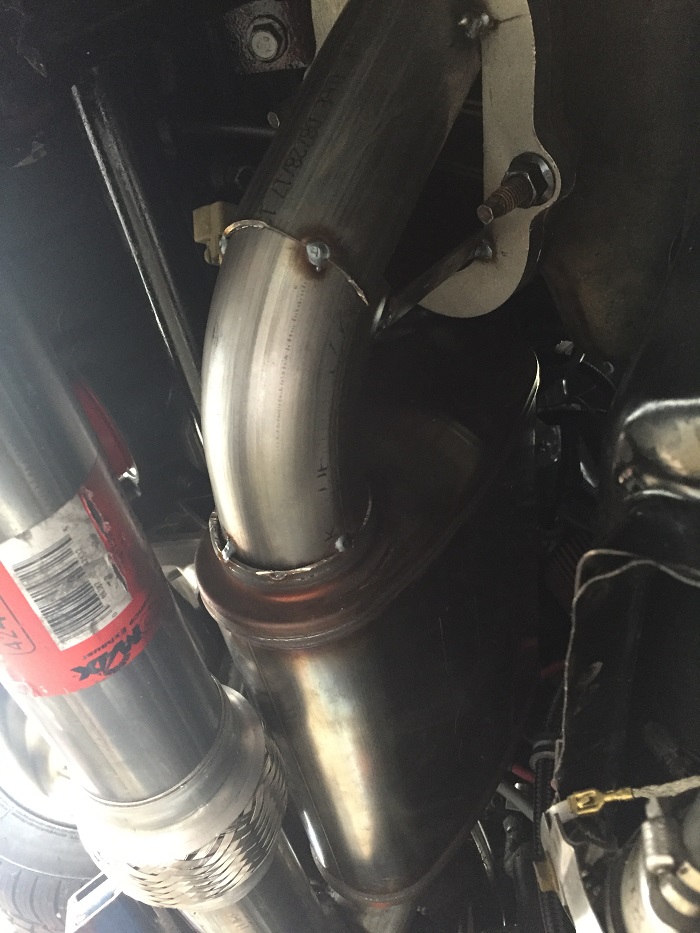
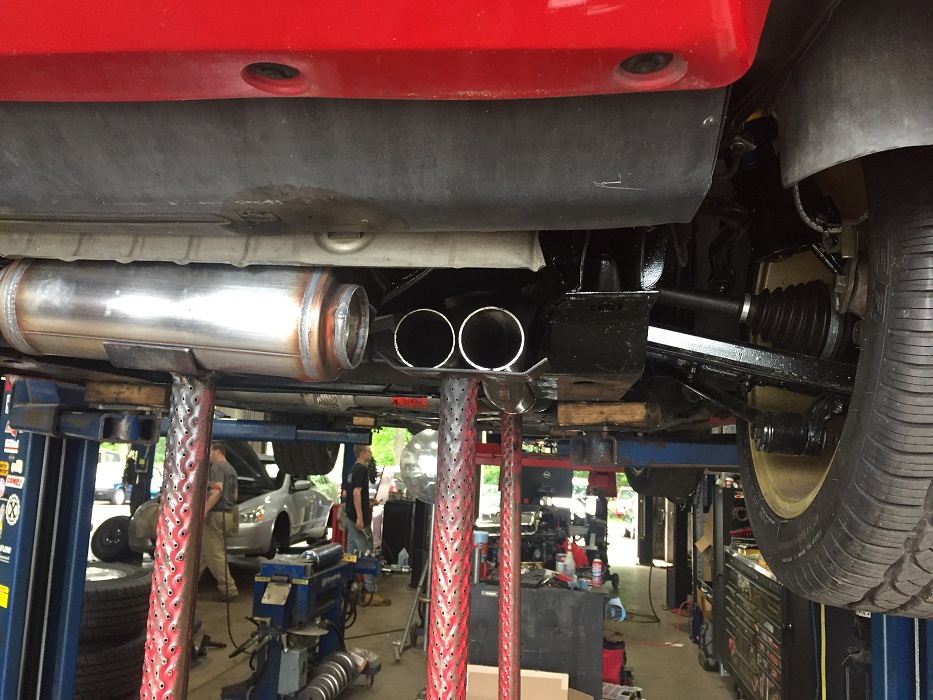
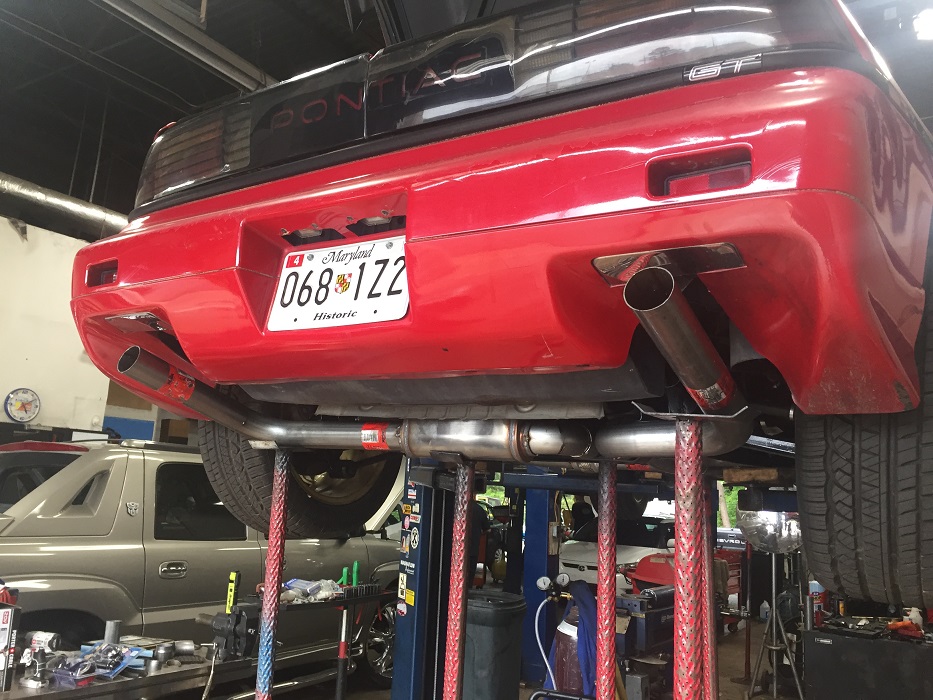
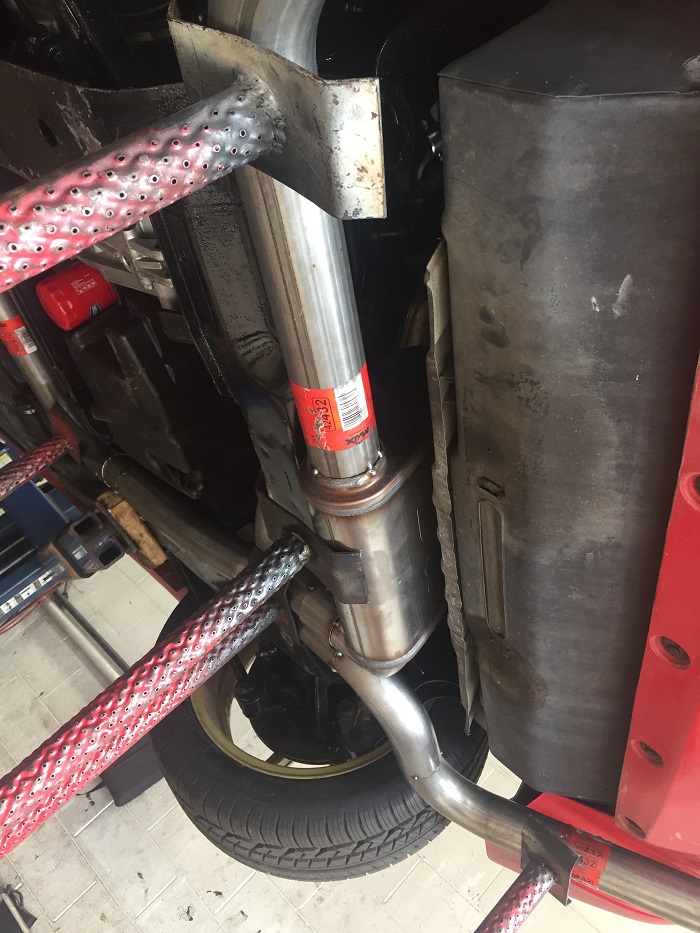
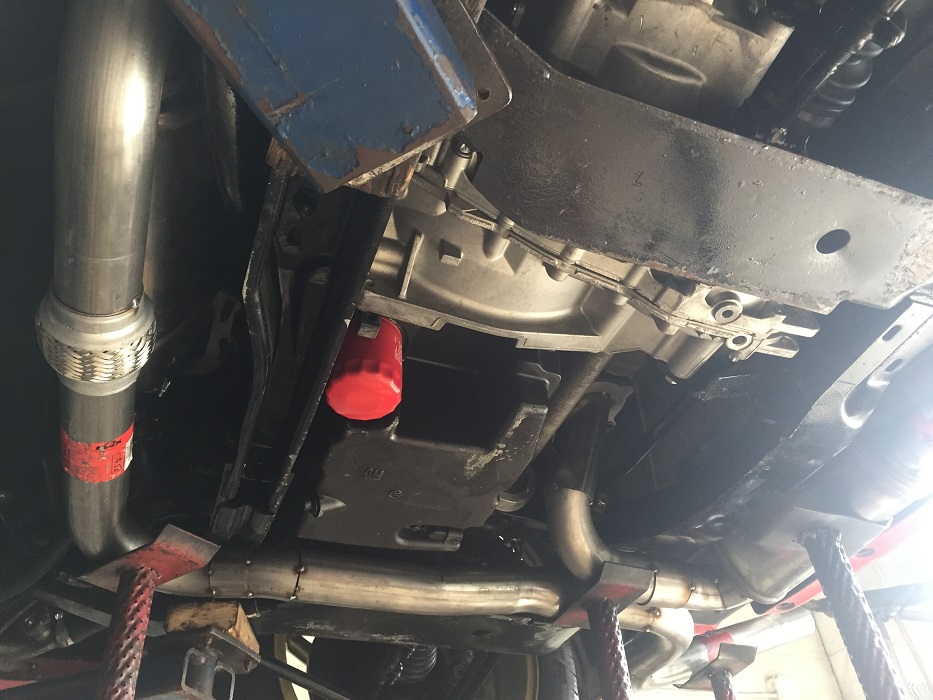
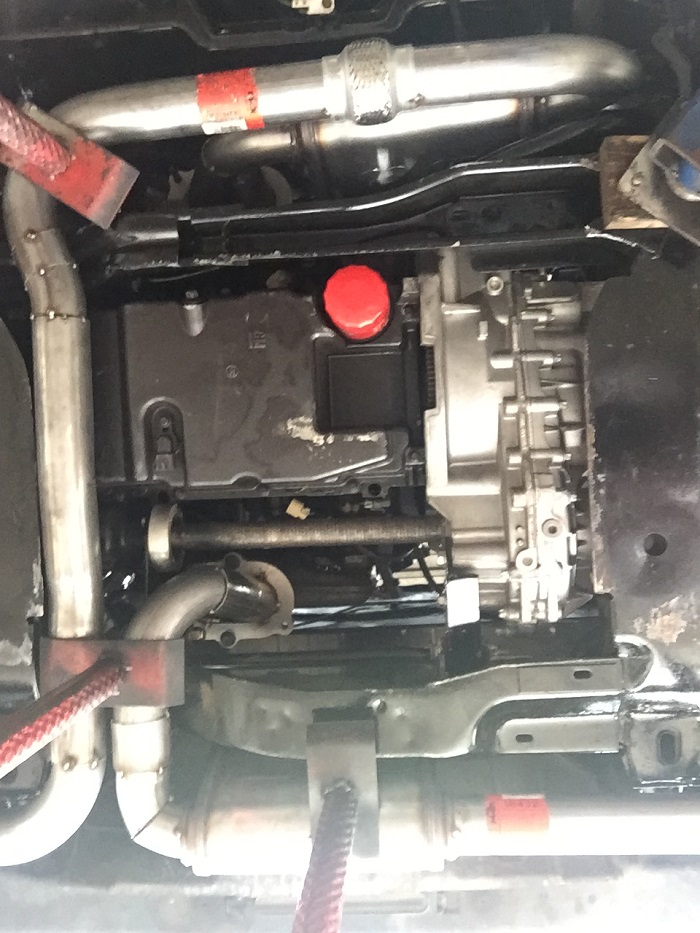
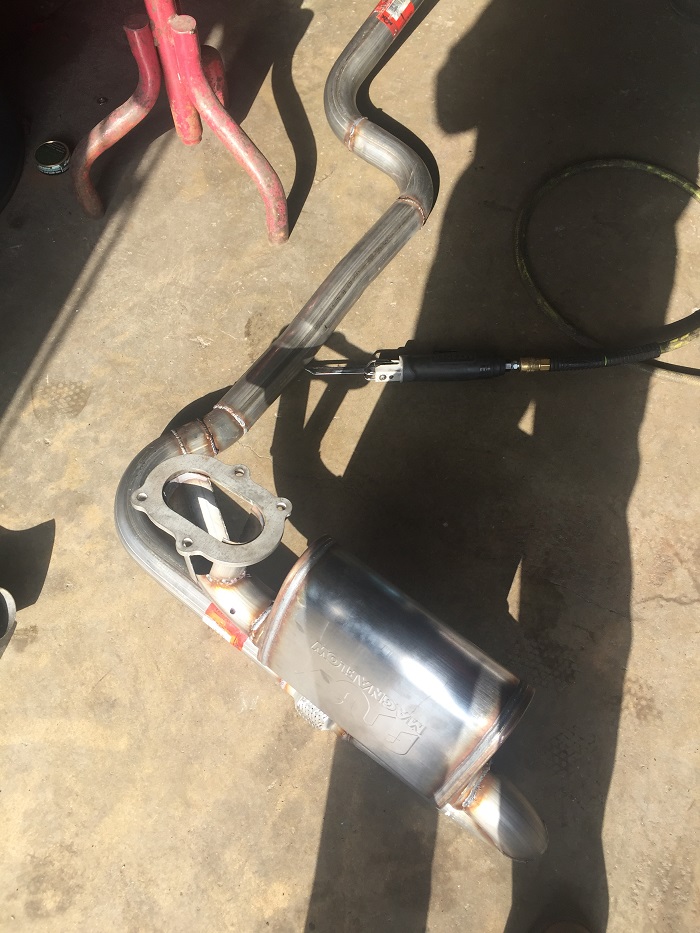
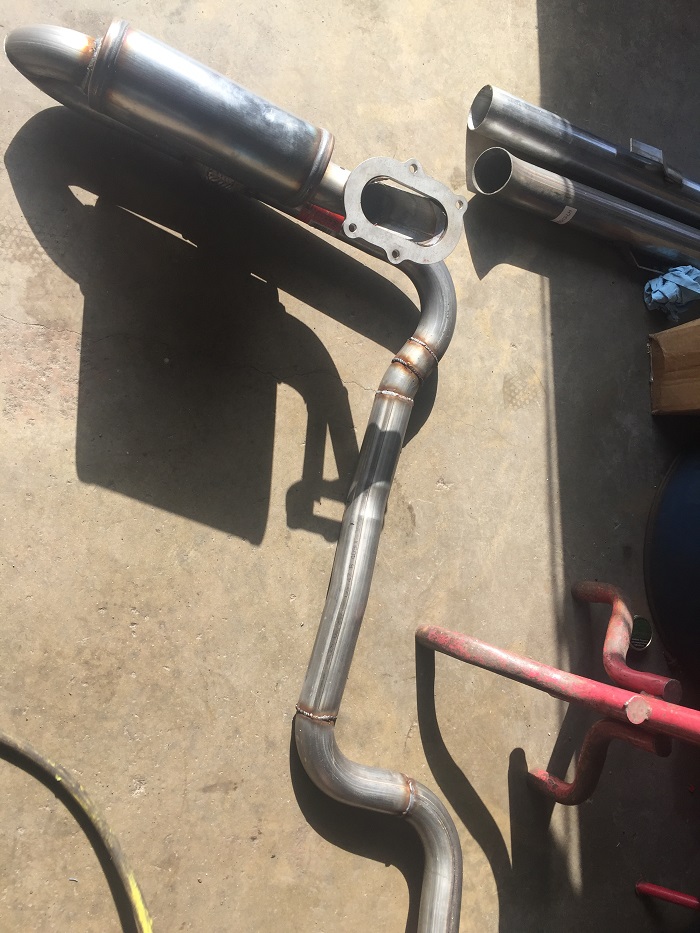
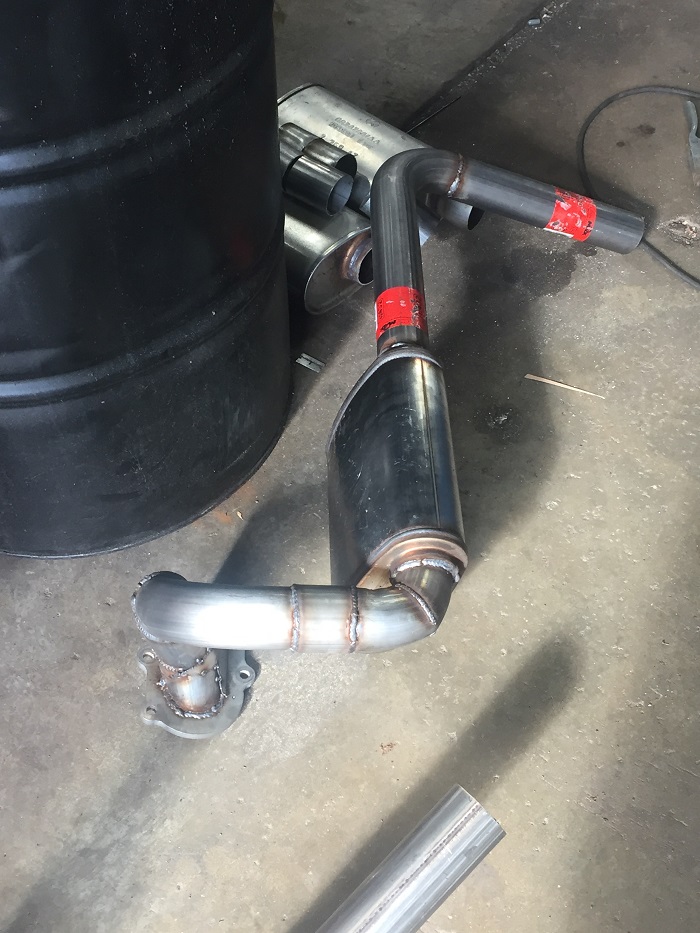
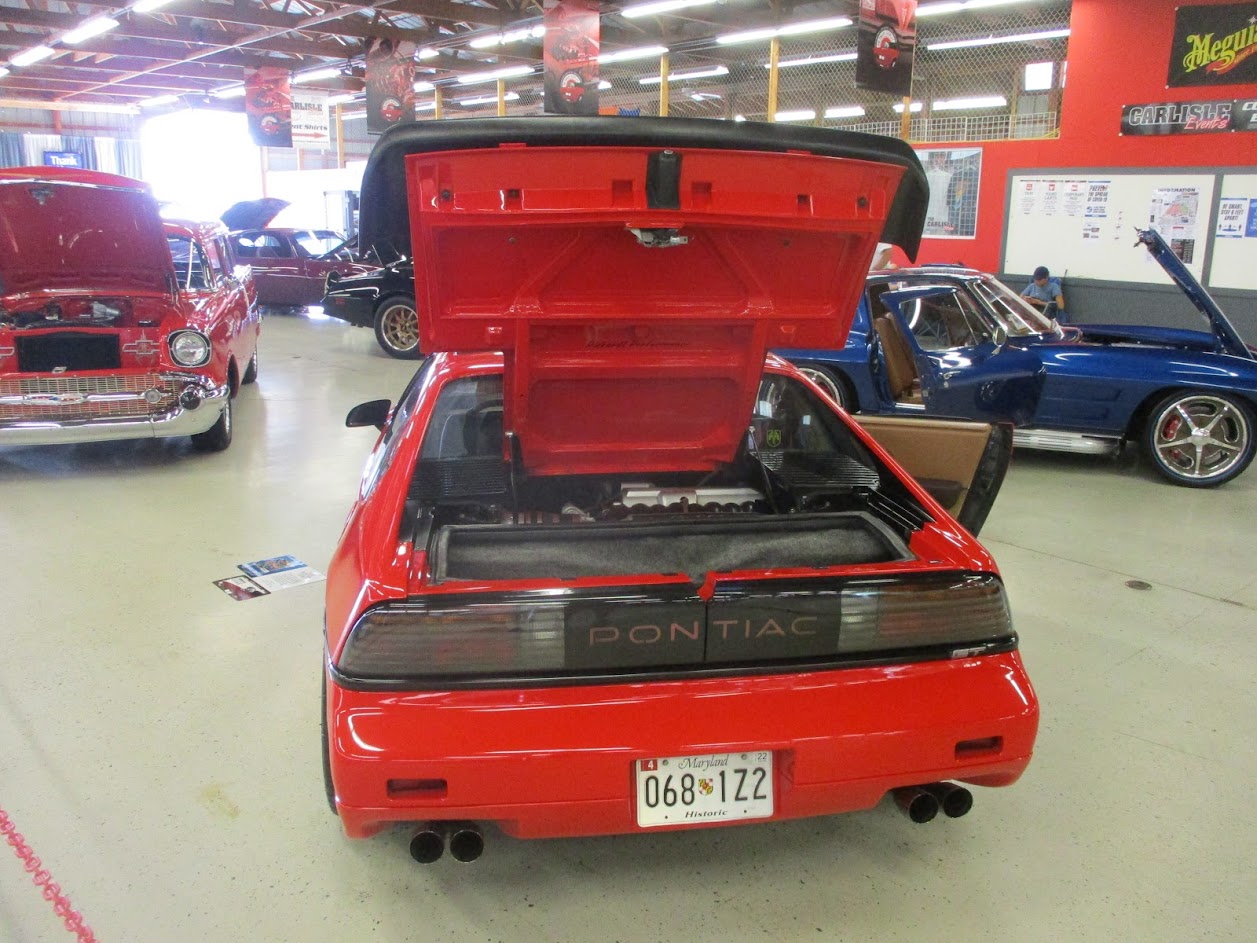
With the engine back in and hooked up, everything was running well and extremely loud. I had been talking with a shop about my idea for an exhaust, so next was off to the shop. The next series of photos show the build from the bottom. I didn't take any after this set up on the lift, but of note after studying this set of photos I noticed the heater lines were installed backwards. I have since corrected that and thankfully have no leaks. We did blow a coolant line off during one of our first set of test drives, but that was an easy fix that required a little longer hose section. Using the stock water pump with no modifications other than removing and capping off the stock filler neck, I did find it easier and cleaner to cut off the tube coming off of the thermostat housing to route the line next to it from the crossover pipe.
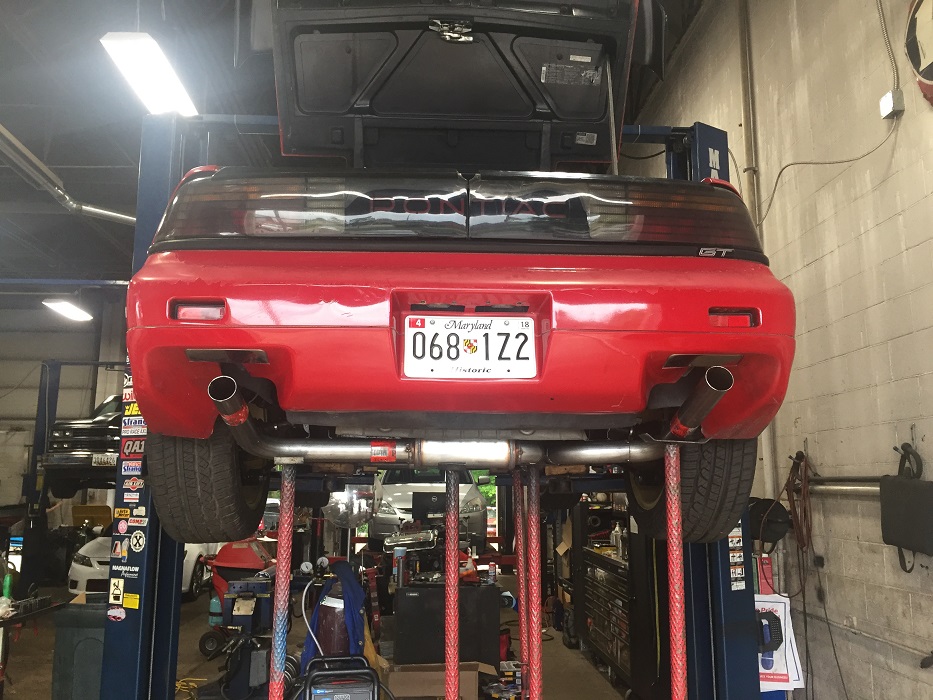
Knowing now what I didn't know then, I would have had the shop order the magnflows in an off-set inlet / outlet setup. You will notice some tight bends that could have been avoided with off-set mufflers. Other than that, I like the true dual setup and although I like the look of the Corvette tips, I am not crazy about the slight muffling sound that comes out of them. It does go away, but is more pronounced at lower idle. I will post some of those videos later.
Gary
[This message has been edited by GPickardt (edited 09-30-2018).]
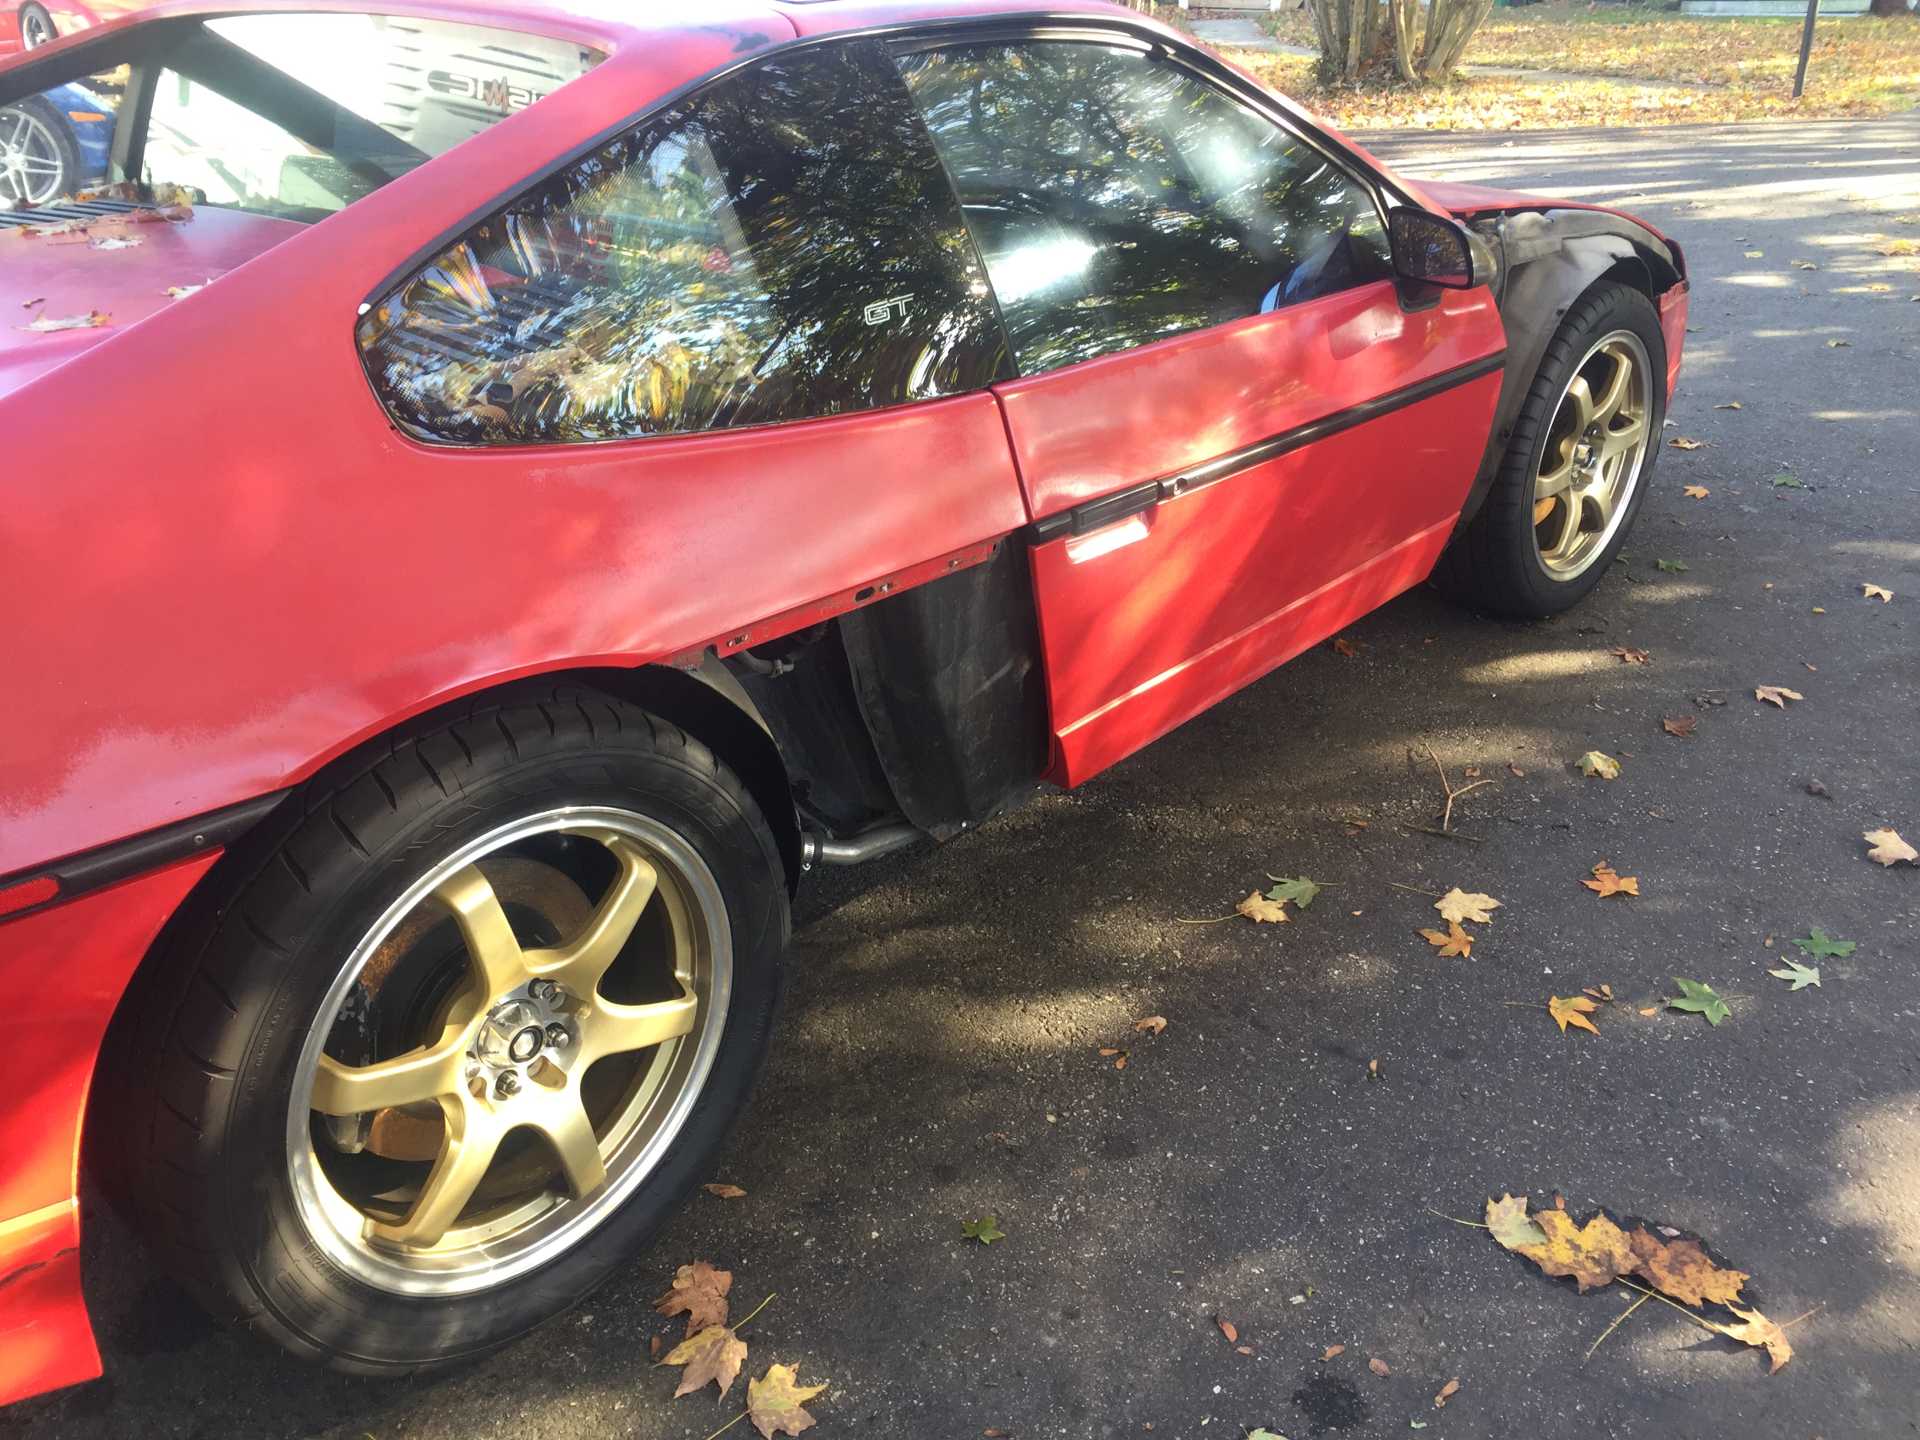
Found a set of tan interior pieces for 88 GT. I am going to install the interior hopefully this week, but looking for recommendations on where to purchase headliner material. Would like to match the color on the top of the dash, darker brown and will order new seat covers and carpet from Mr. Mikes.
Gary
[This message has been edited by GPickardt (edited 09-30-2018).]
I started this build post to show that any regular person, with some help, could do this swap. I know there are people looking for a "kit" to do an LS4 swap, and there are some that are fairly close, but no complete kits that I have seen. Which is why I am pretty satisfied with the results from this swap that my sons and I have been able to achieve. If you research Paul Smith's build thread for the LS4 / F40 swap, he is much more detailed, and is what I used as my goal and inspiration for out build. I have asked him a lot of questions and he was always very helpful, but I think I have reached a point now that I want to worry more about the other builds I have rather than what I have built. I will wrap this thread up with a few more photos, but will offer this; Each build is it's own project so is different for each one. The one thing I learned that I think everyone will need to know is the clutch and flywheel piece. No matter what else you do, there are no more important things in my mind than getting this portion of your build spot on. I underestimated this, and thankfully, both SPEC, and FIeroguru have helped me figure it out. If you take nothing else away from this build, please keep this last portion for reference if you are doing an LS4/F40 swap.
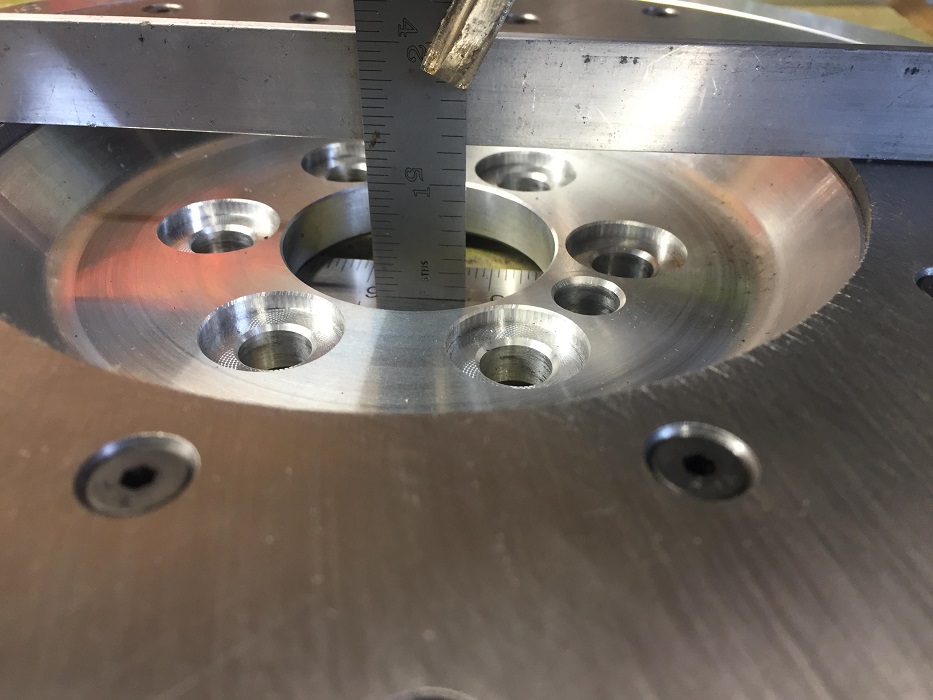
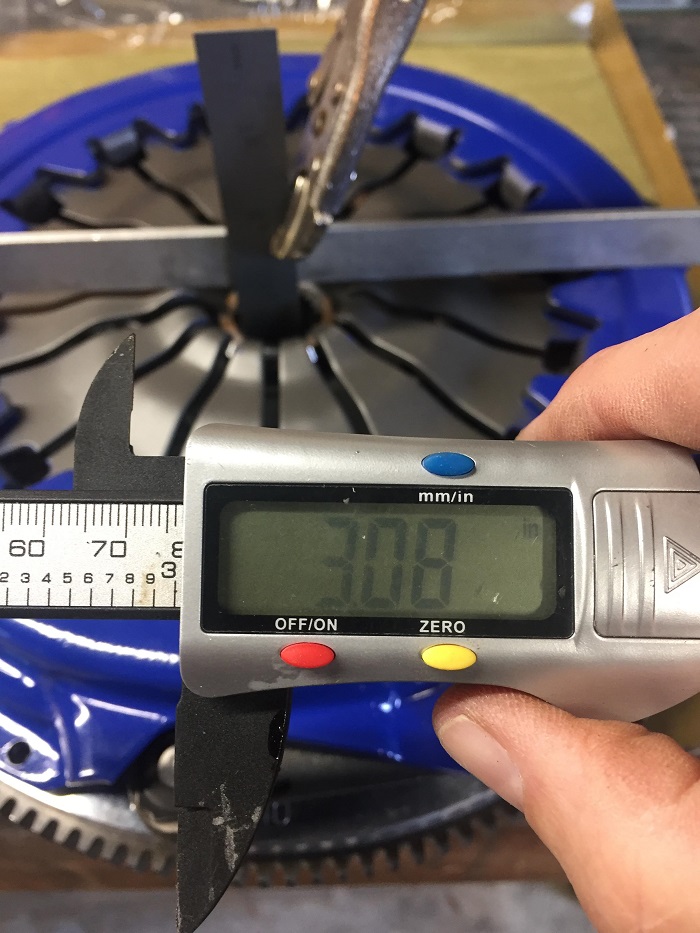
LS4s crank is recessed .007 from the bellhousing flange
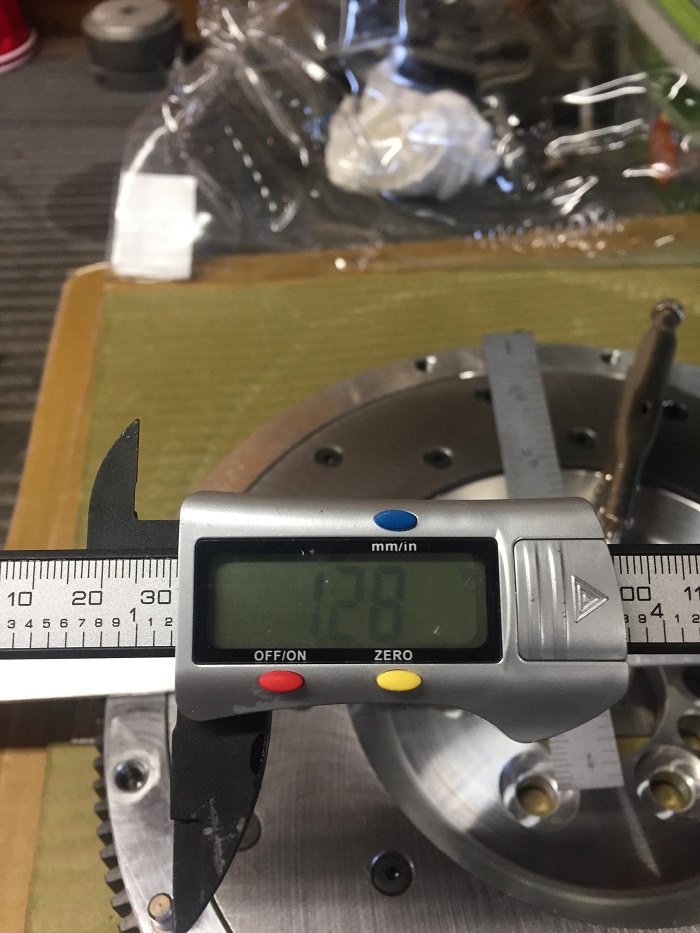
The F40's throwout bearing is 3.58 totally collapsed.
Spacer with Kit is .260
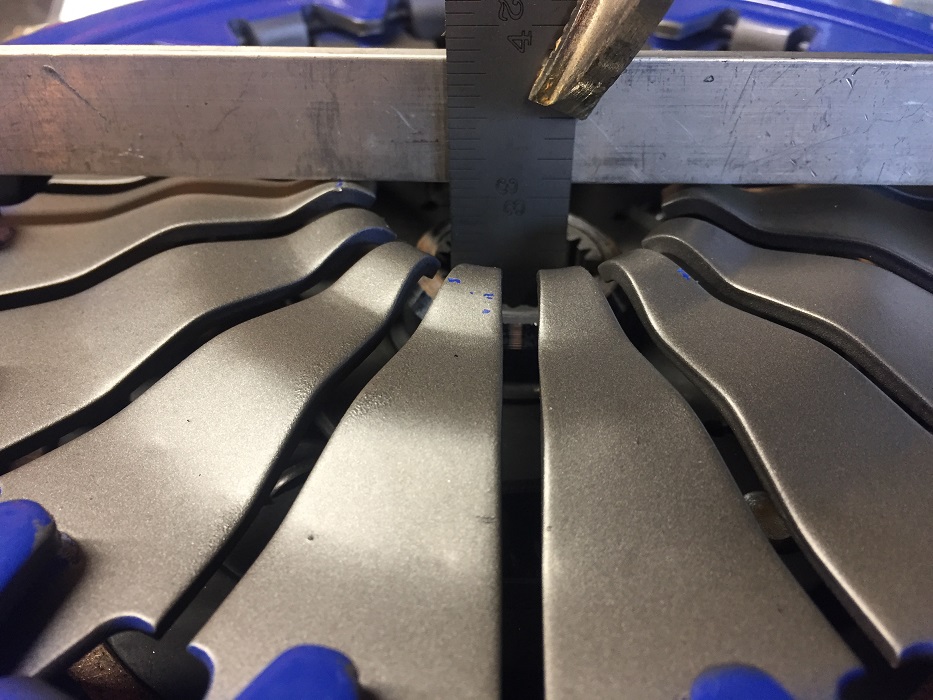
SPECs clutch and flywheel (3+) is 3.08 from the end of the flywheel to the fingers on the pressure plate torqued down
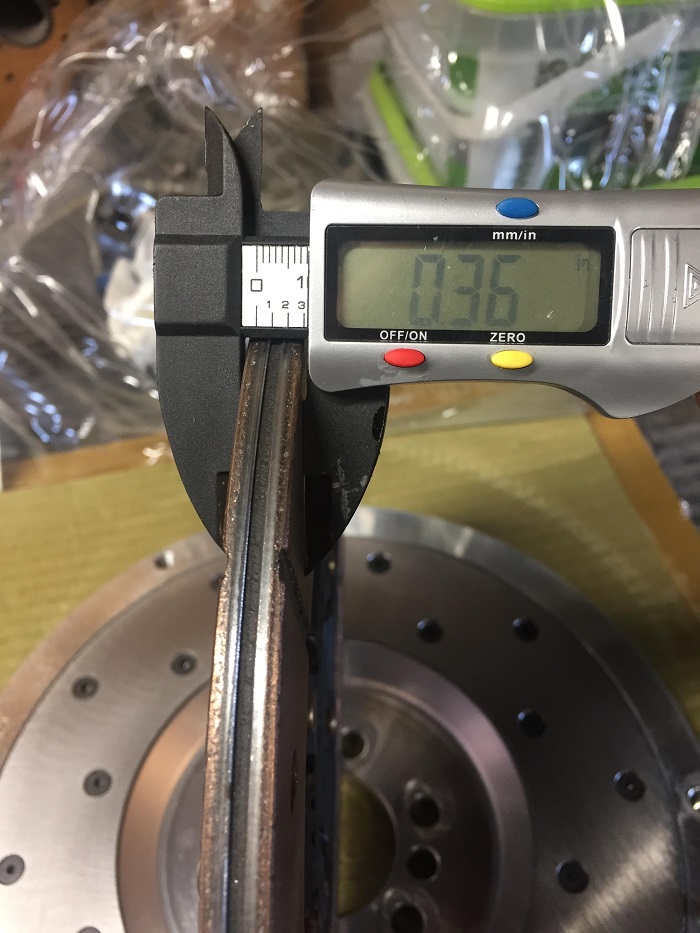
The pressure plate thickness is .36
Distance from belhousing face on block to edge of fingers on pressure plate - 3.16
The reason this is important, is because I got this wrong initially, and even though 2.88 is close, it isn't right. That and SPEC thought that the flywheel was recessed further than it was.
So your final formula should look like this: 3.58 - 3.16 = .420
The clearance to use for throwout bearing is .150 to .200 so .420 - .260 (This is the thickness of the Spec spacer) = .160. Well within the range.
If you use the SPEC flywheel and clutch with your LS4 swap, this is now their standard spacer that will come with the conversion kit.
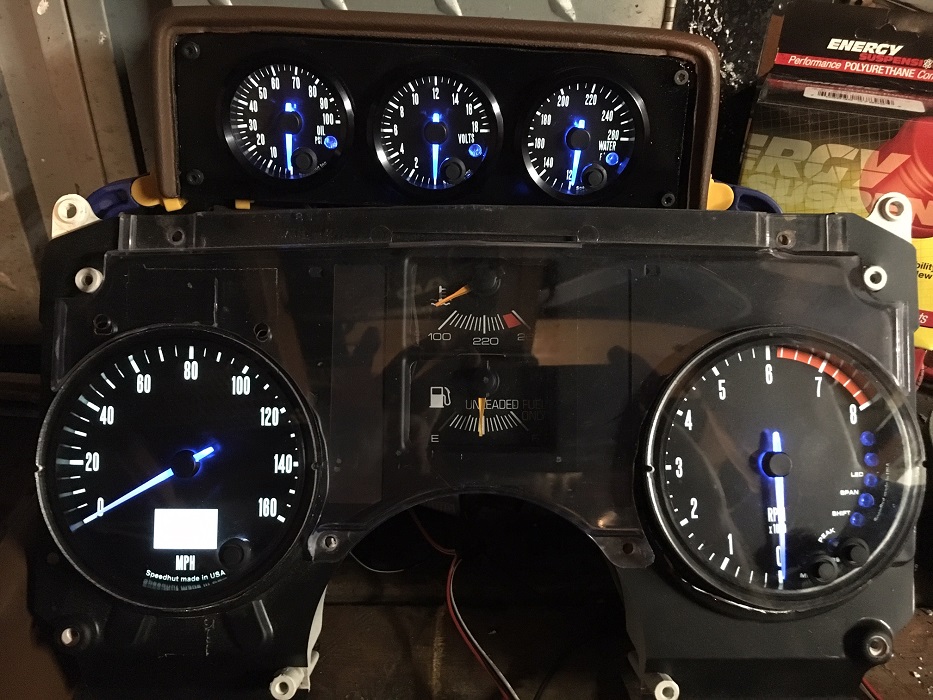
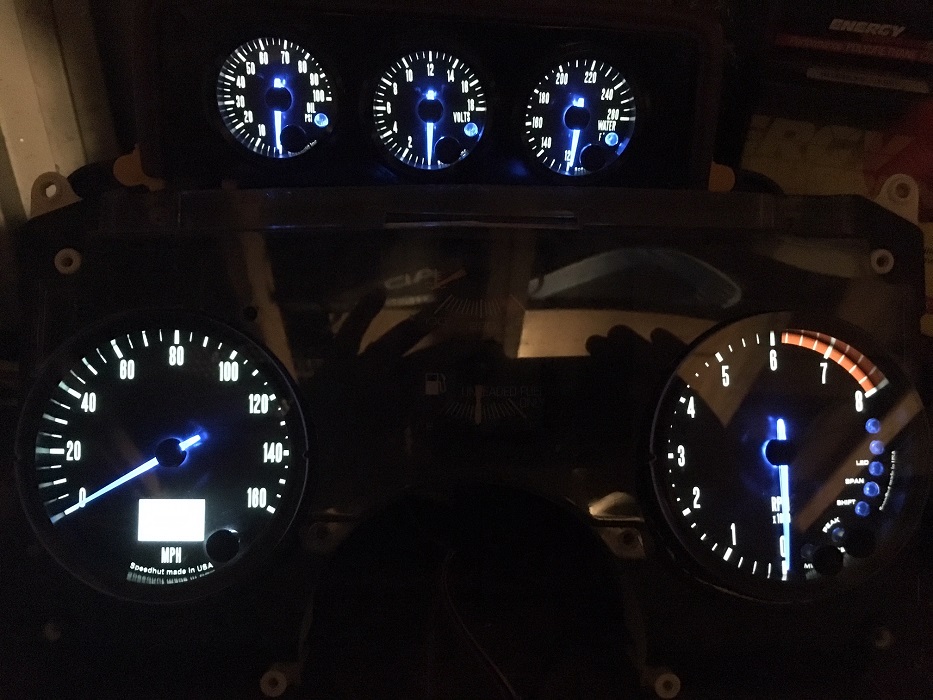
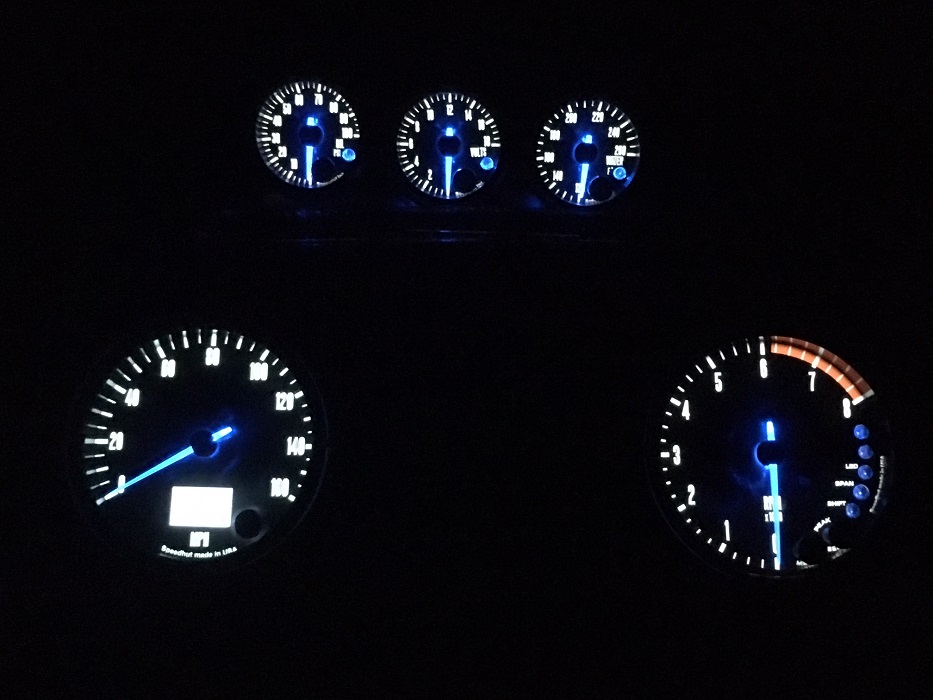
The Speedhut gauges are probably the other thing about this swap that really make the build. Their Freedom can-bus OBDII gauges work off of the OBD harness and get the data straight from the ECM so no additional senders, wires, or transducers are required. I got the extension cables from Speedhut to chain the battery, oil pressure, and water temp from the small gauge cluster in the center, over to the speedometer and tach that have built in settings, trip computer, and other modern advantages. Everyone has google, so I am not going to put the link.
Other than the interior update with seats and other trim features from Mr. Mikes planned, I also have the door pins, inner and outer dew wipes, then finally paint and installing the sail panels, but there are plenty of information on Pennocks for that. I have had a lot of fun with this car so far, and later this winter I will remove the engine cradle one last time to remove the F40 and replace the .390 spacer for the correct one. Even with the clutch not 100 percent (occasional slipping), there are a couple of angry Mustang owners out there that got owned by a Fiero!
No matter what your build is, we wish you the best of luck and hope to see you all out there as we now spend time getting out to other car shows. I would like to give a special shout out again to Fieroguru, thank you for your time and patience. Need to meet up sometime for a cruise and just enjoys the cars. I also owe Joe Sokol , and Ryan at Sinister performance a big thank you. All of these gentlemen are busy guys and have lots of other projects so your time and excellent work in making this project a huge success.
Although I am done posting, please feel free to message me any time. I am not a technical expert by any means, but I can share my lessons learned and experiences from this build. My cell is 951-200-0982, send a text if you would like.
Gary
[This message has been edited by GPickardt (edited 10-14-2018).]
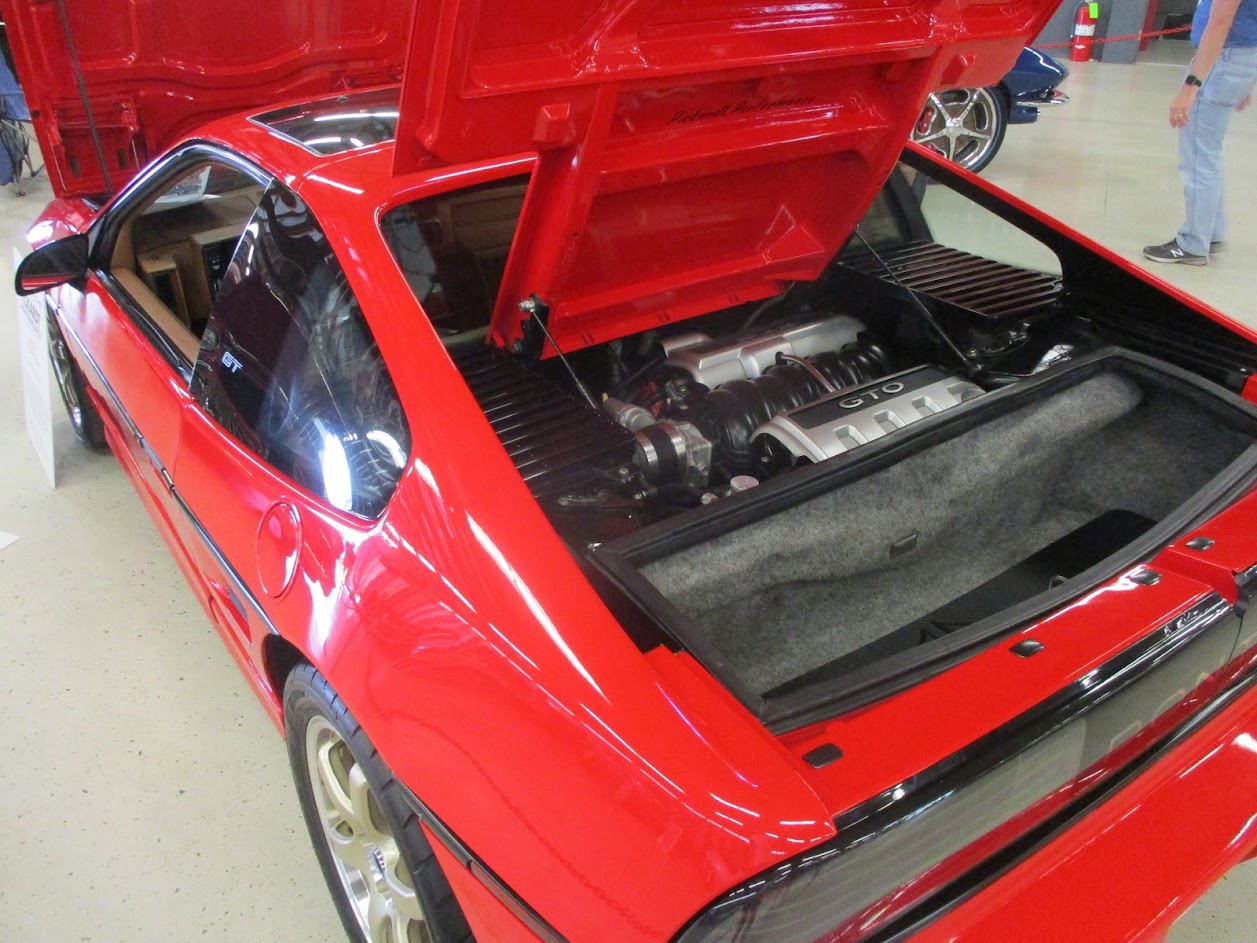
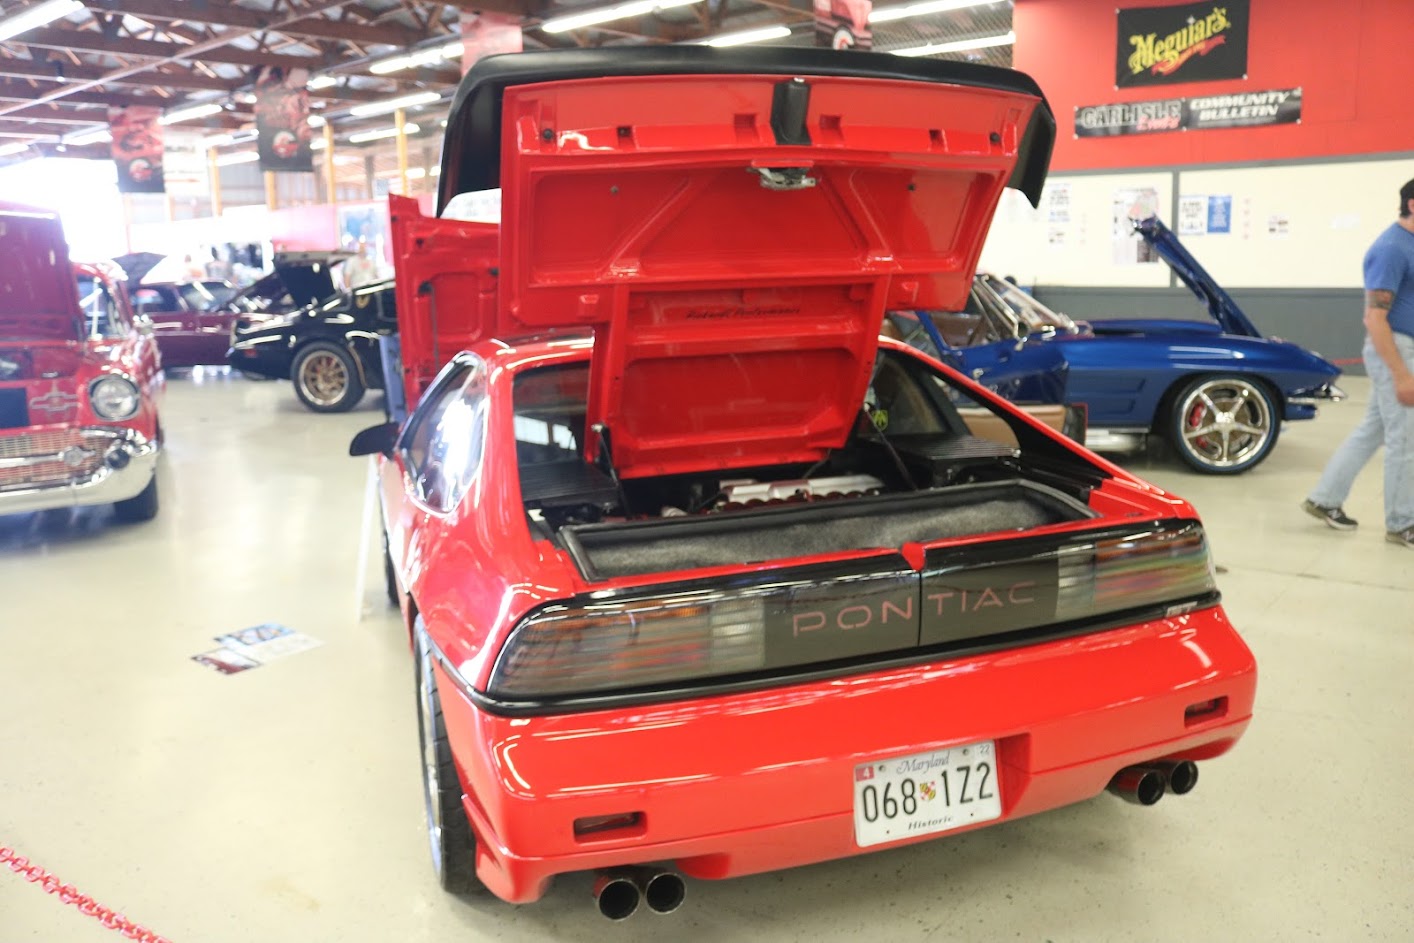
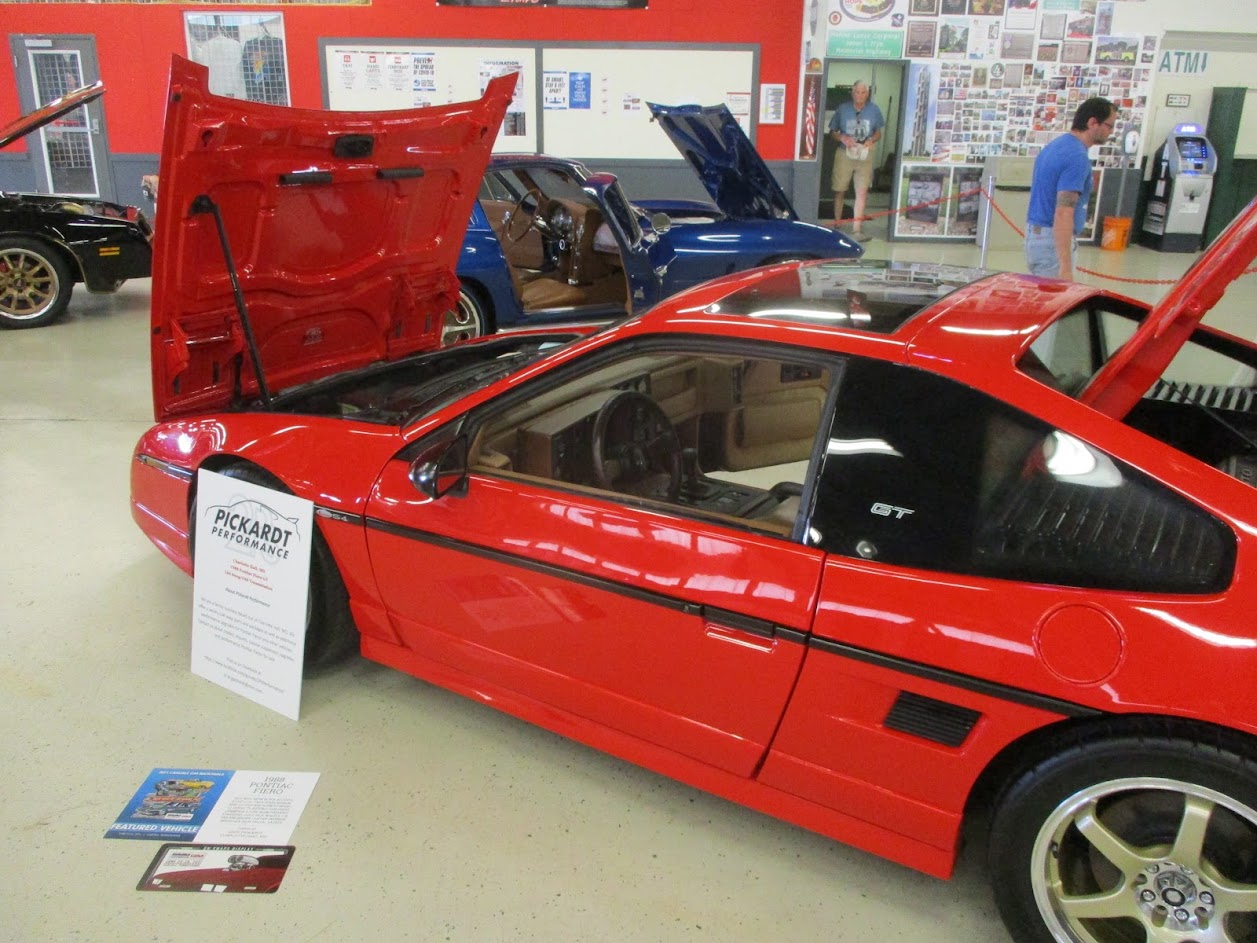
Can’t believe it has been 3 years already and so much has changed. Yet 1 thing is still the same, the engine package and still running strong. Here are some recent photos from Carlisle GM Nationals where were fortunate to be chosen as a feature display in the GM LS engine swap series. Will go through some of the changes and updates over the past 3 years as well as some other project highlights.
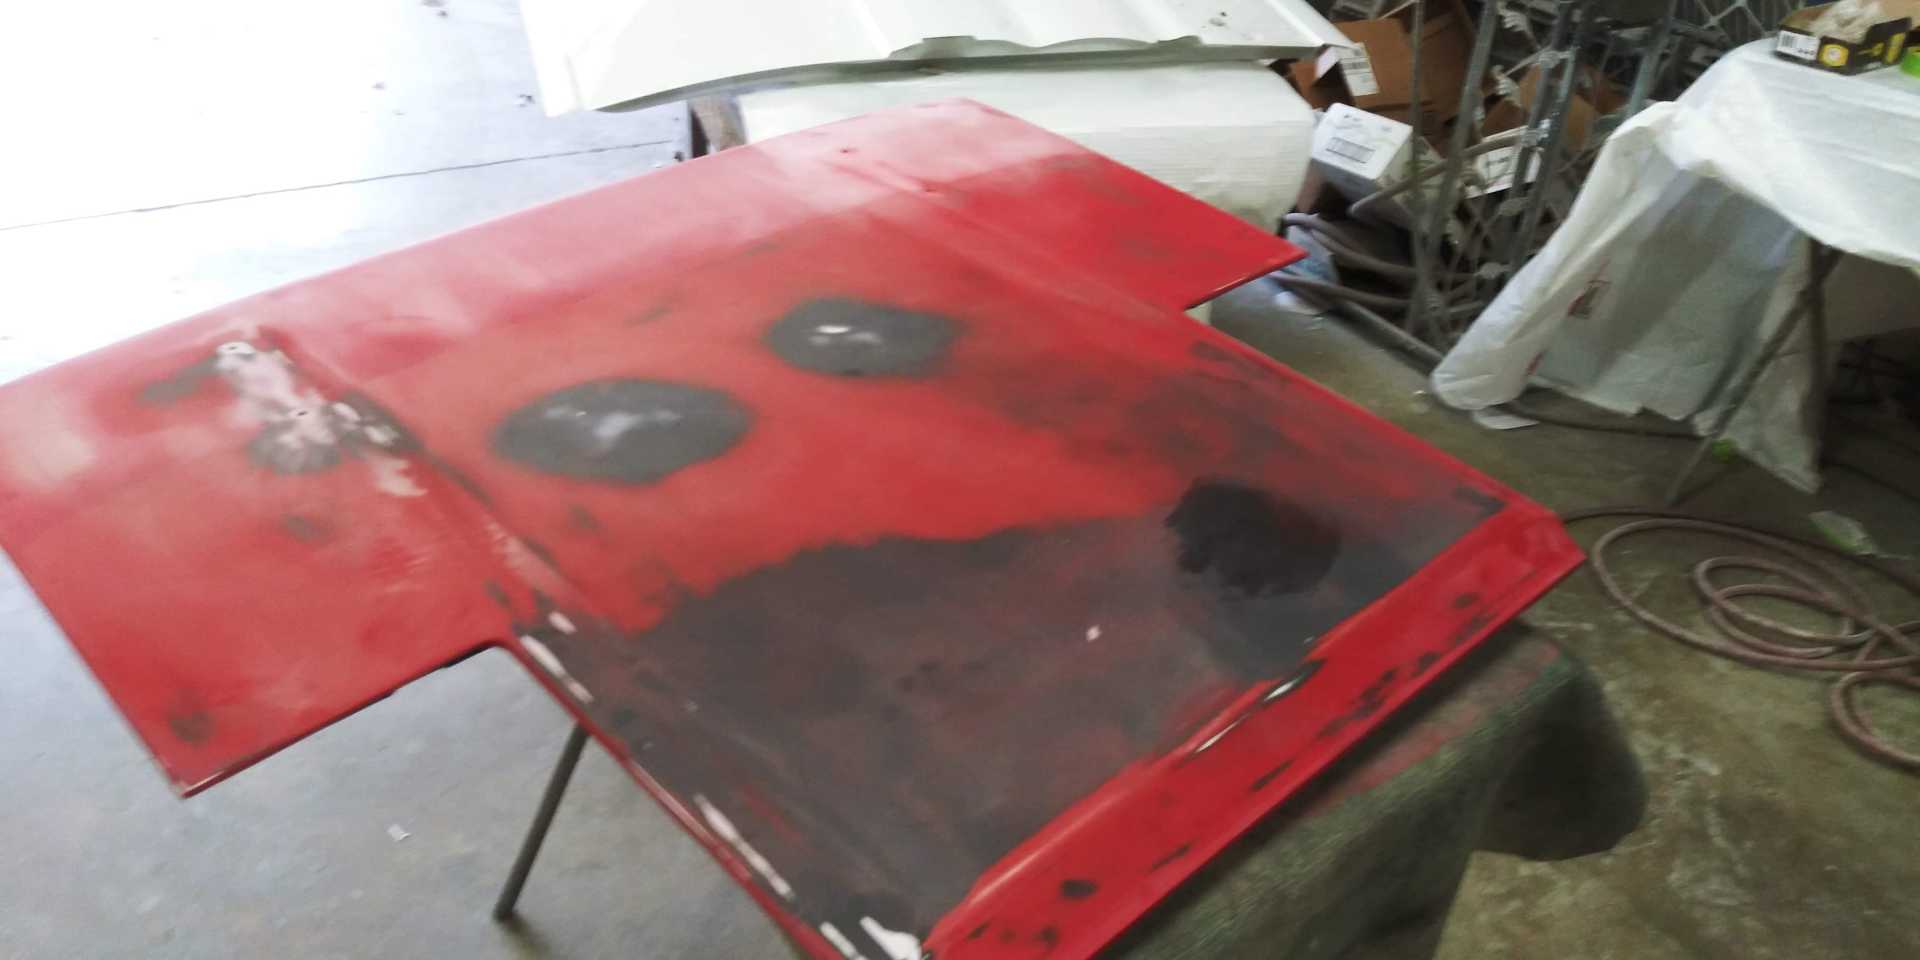
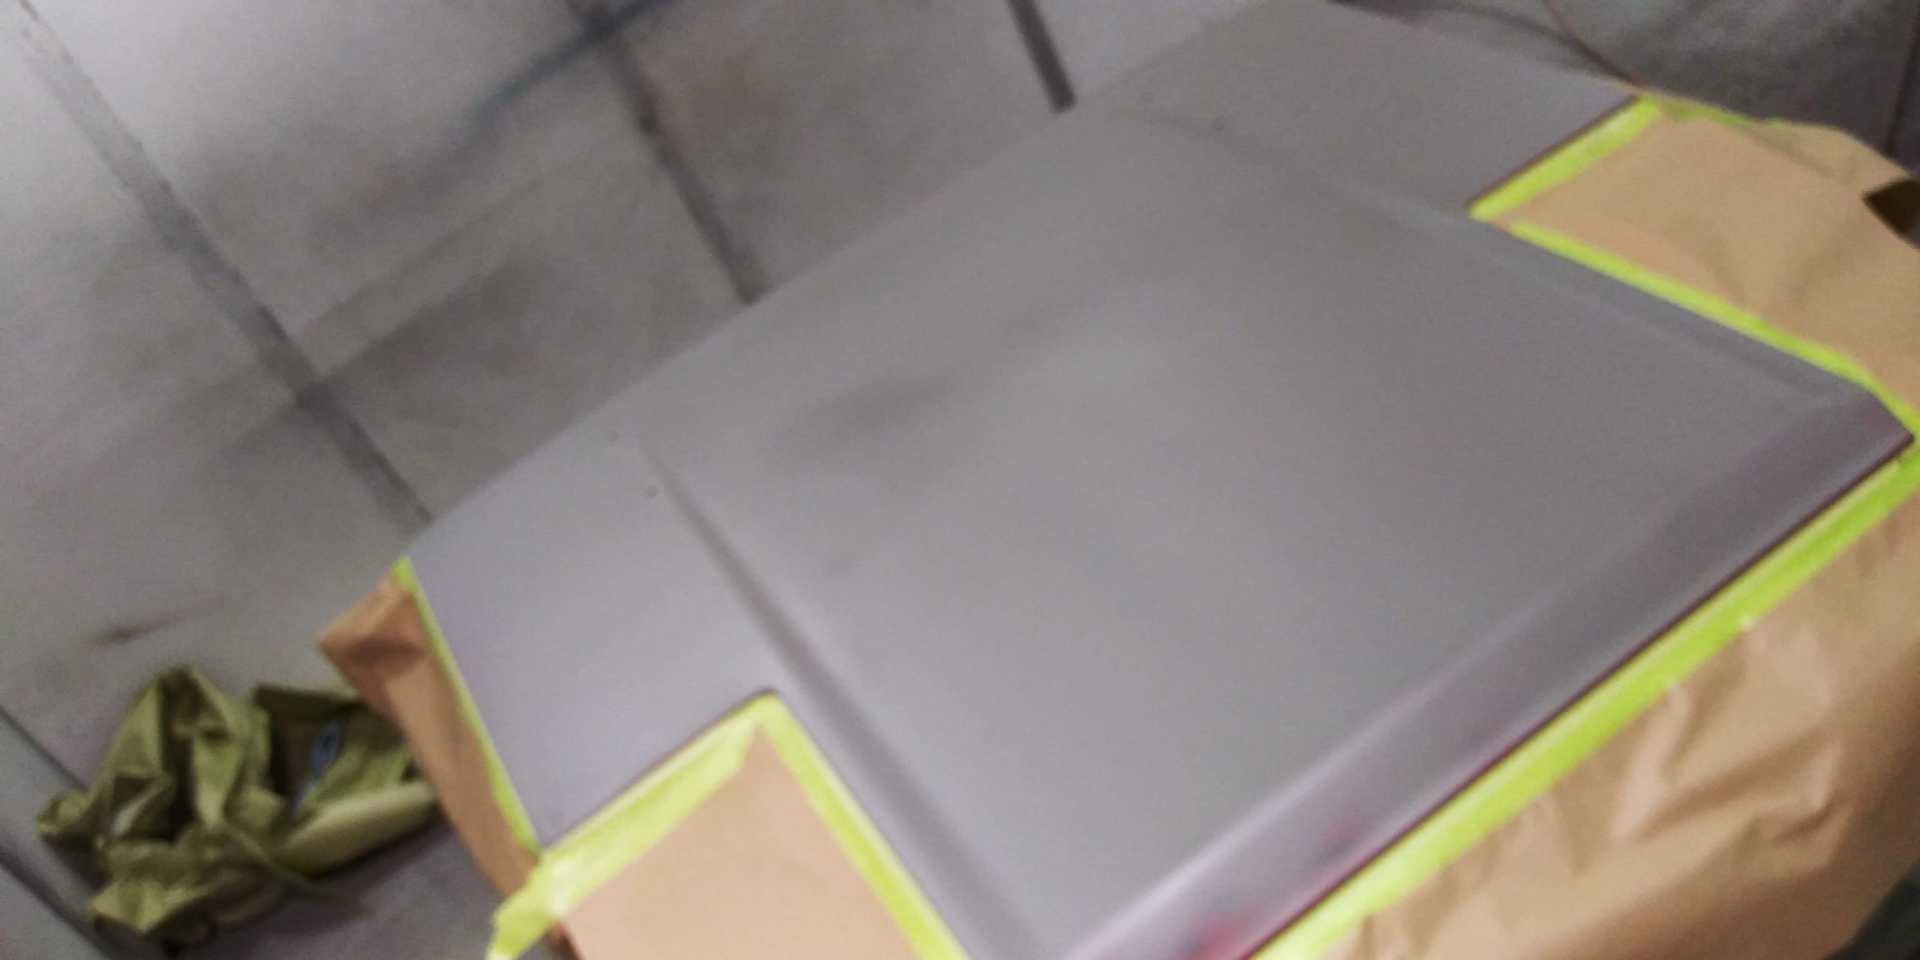
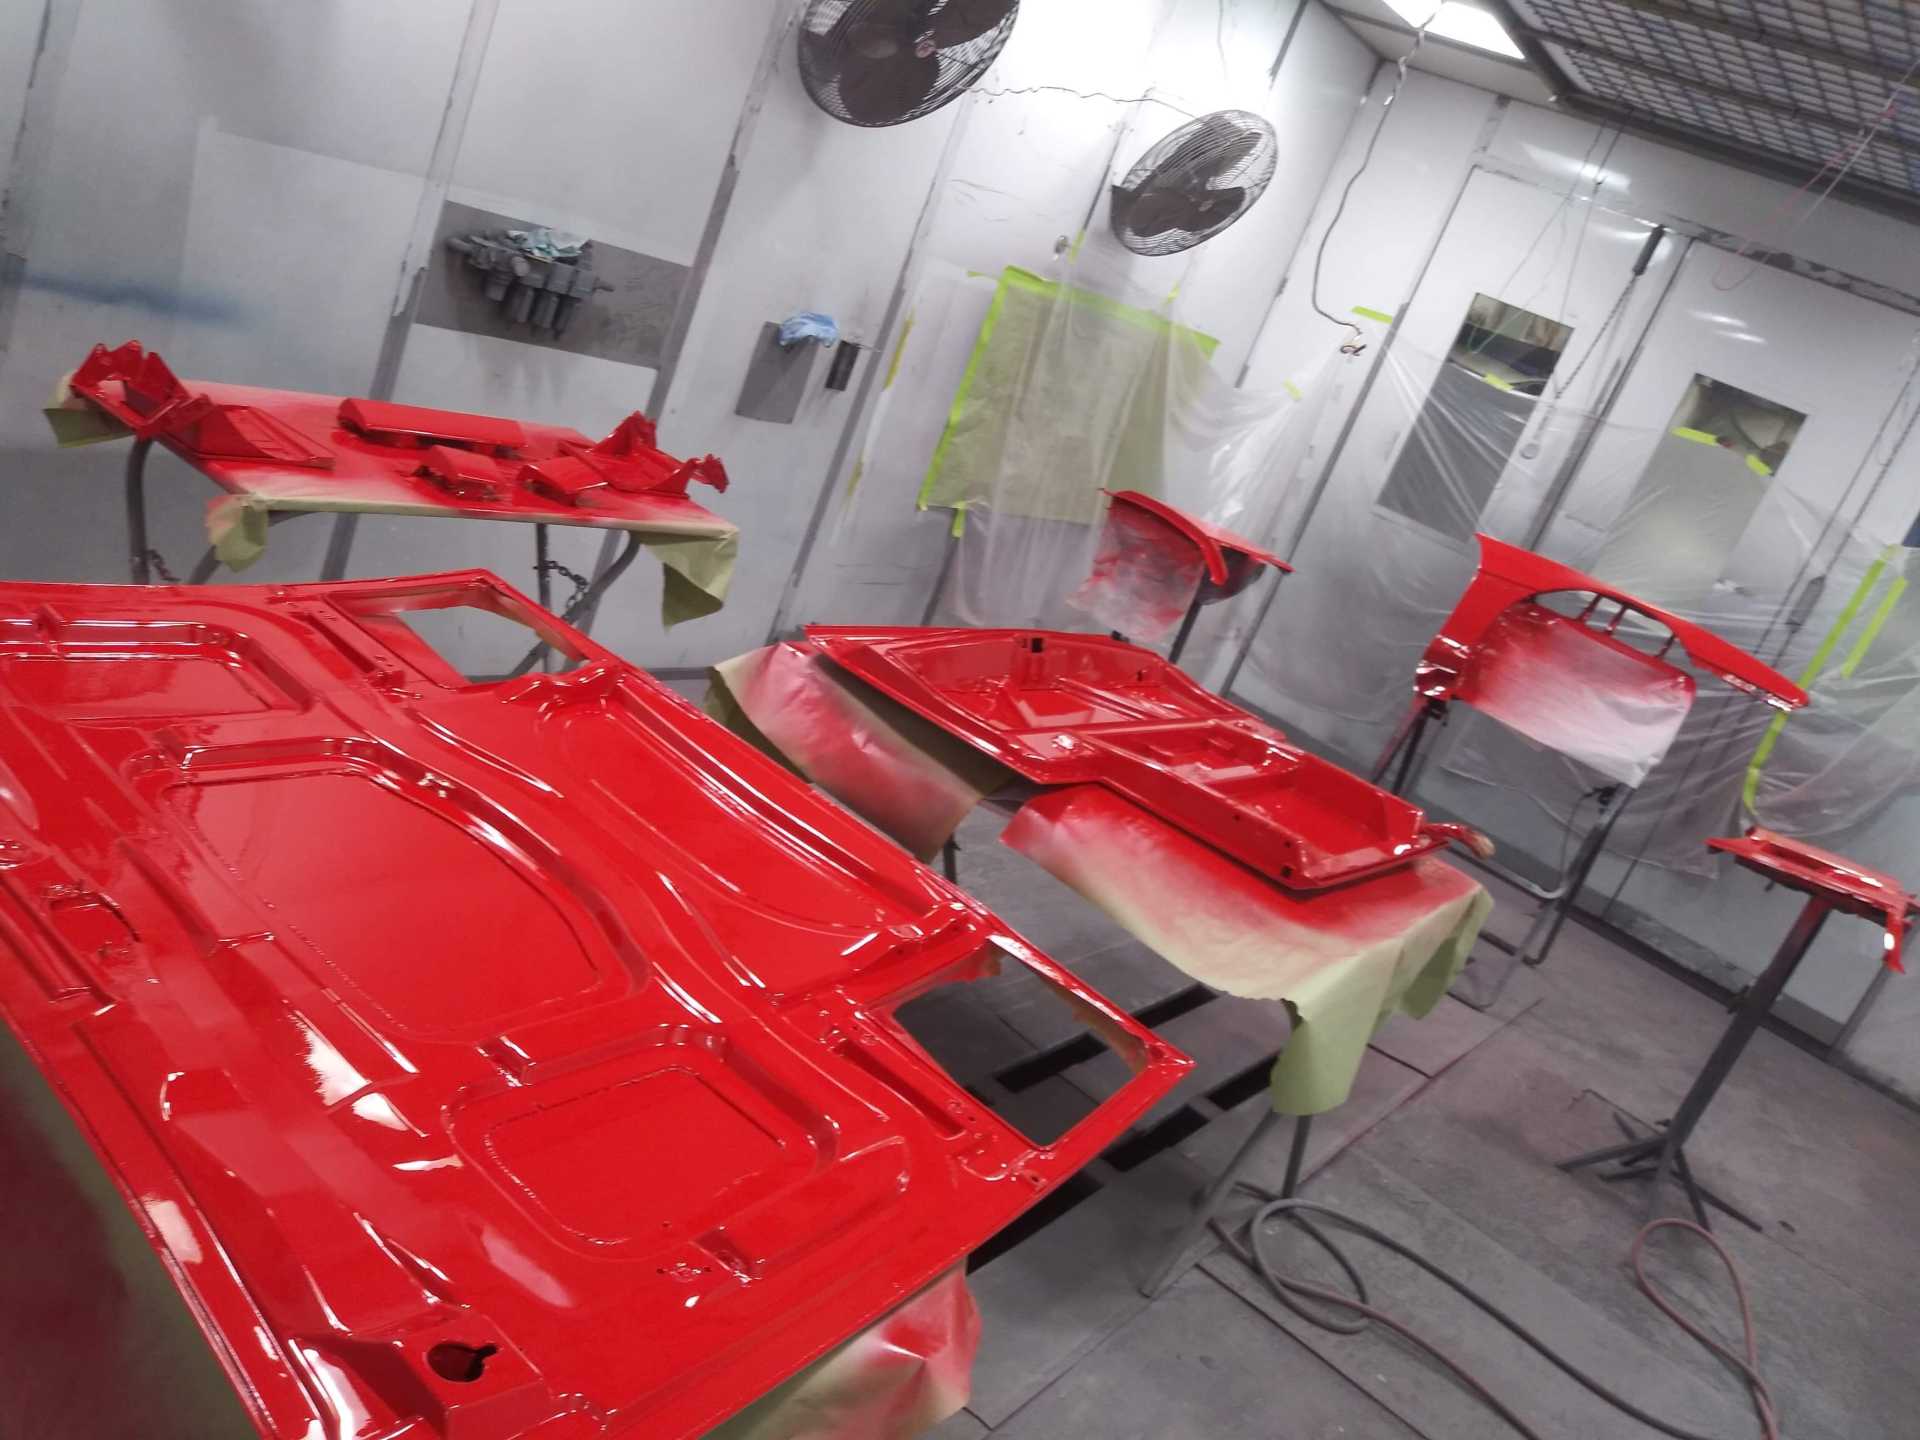
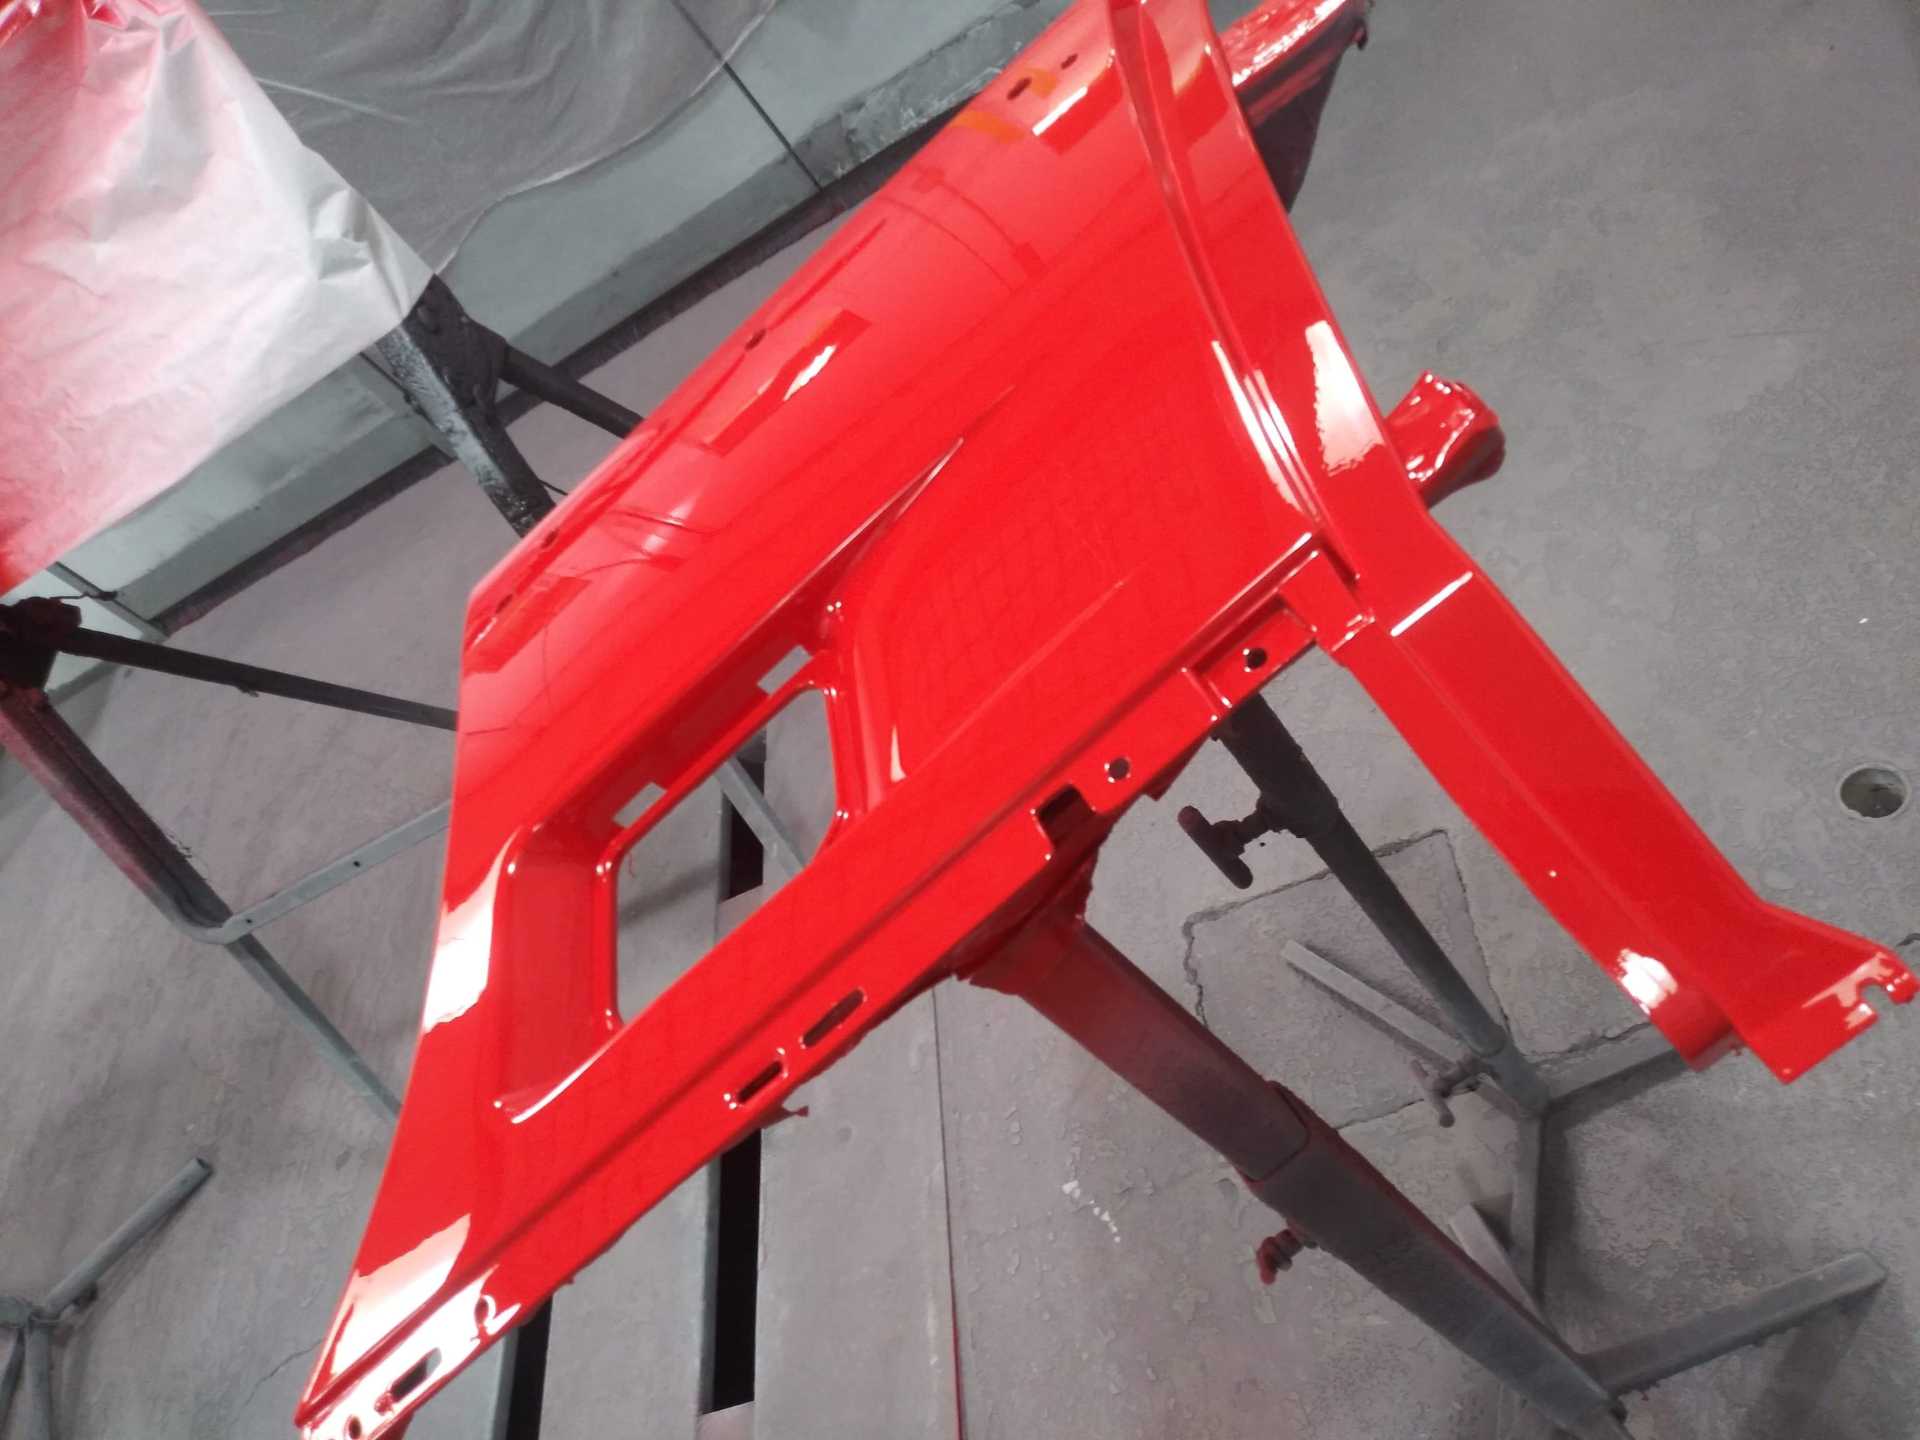
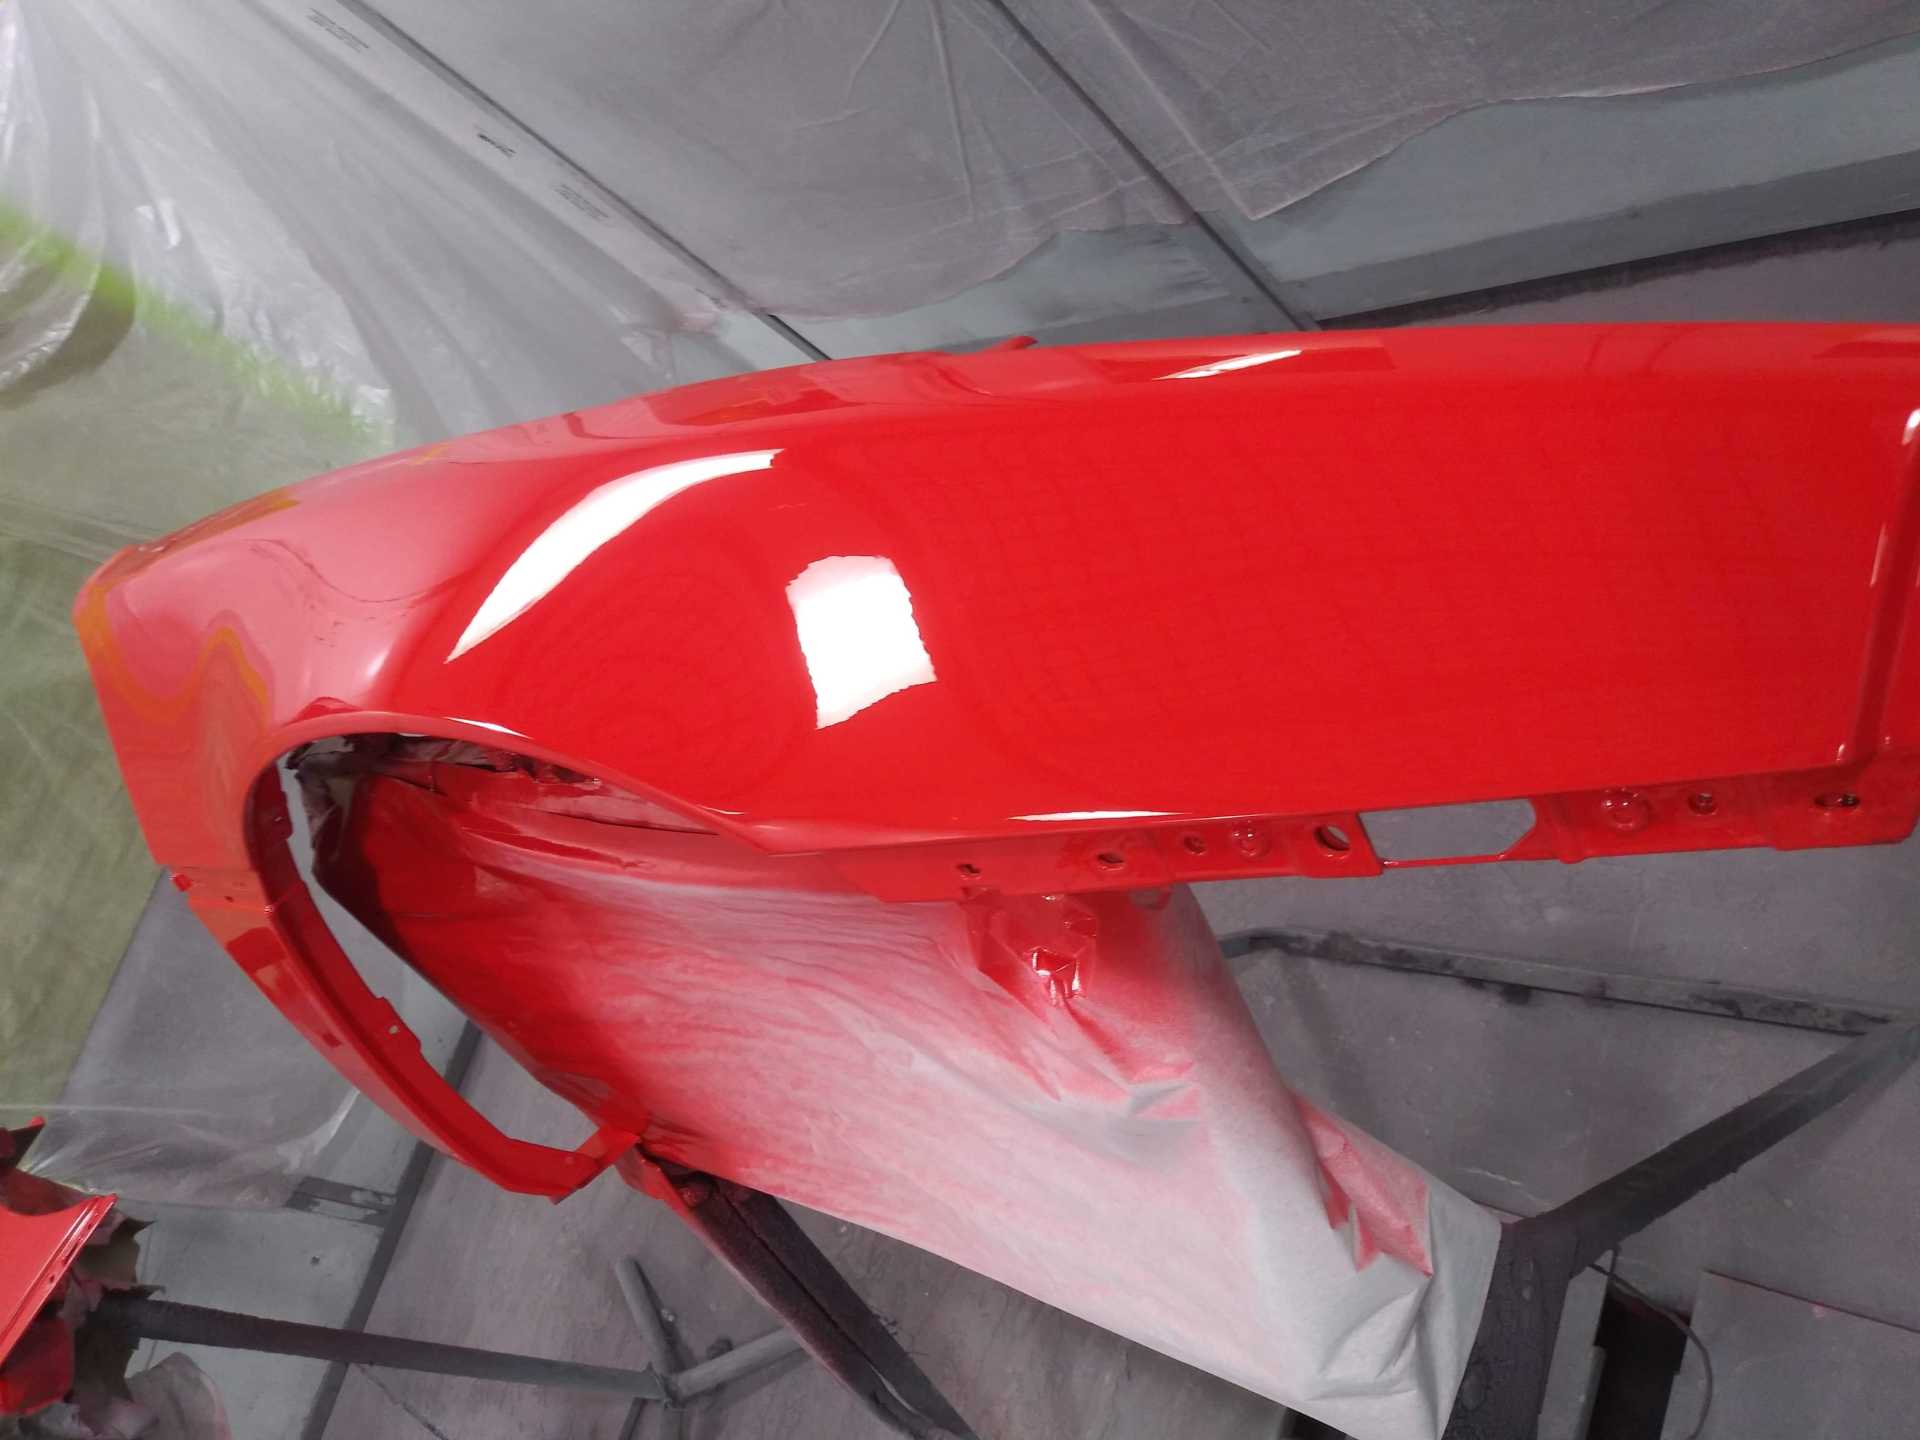
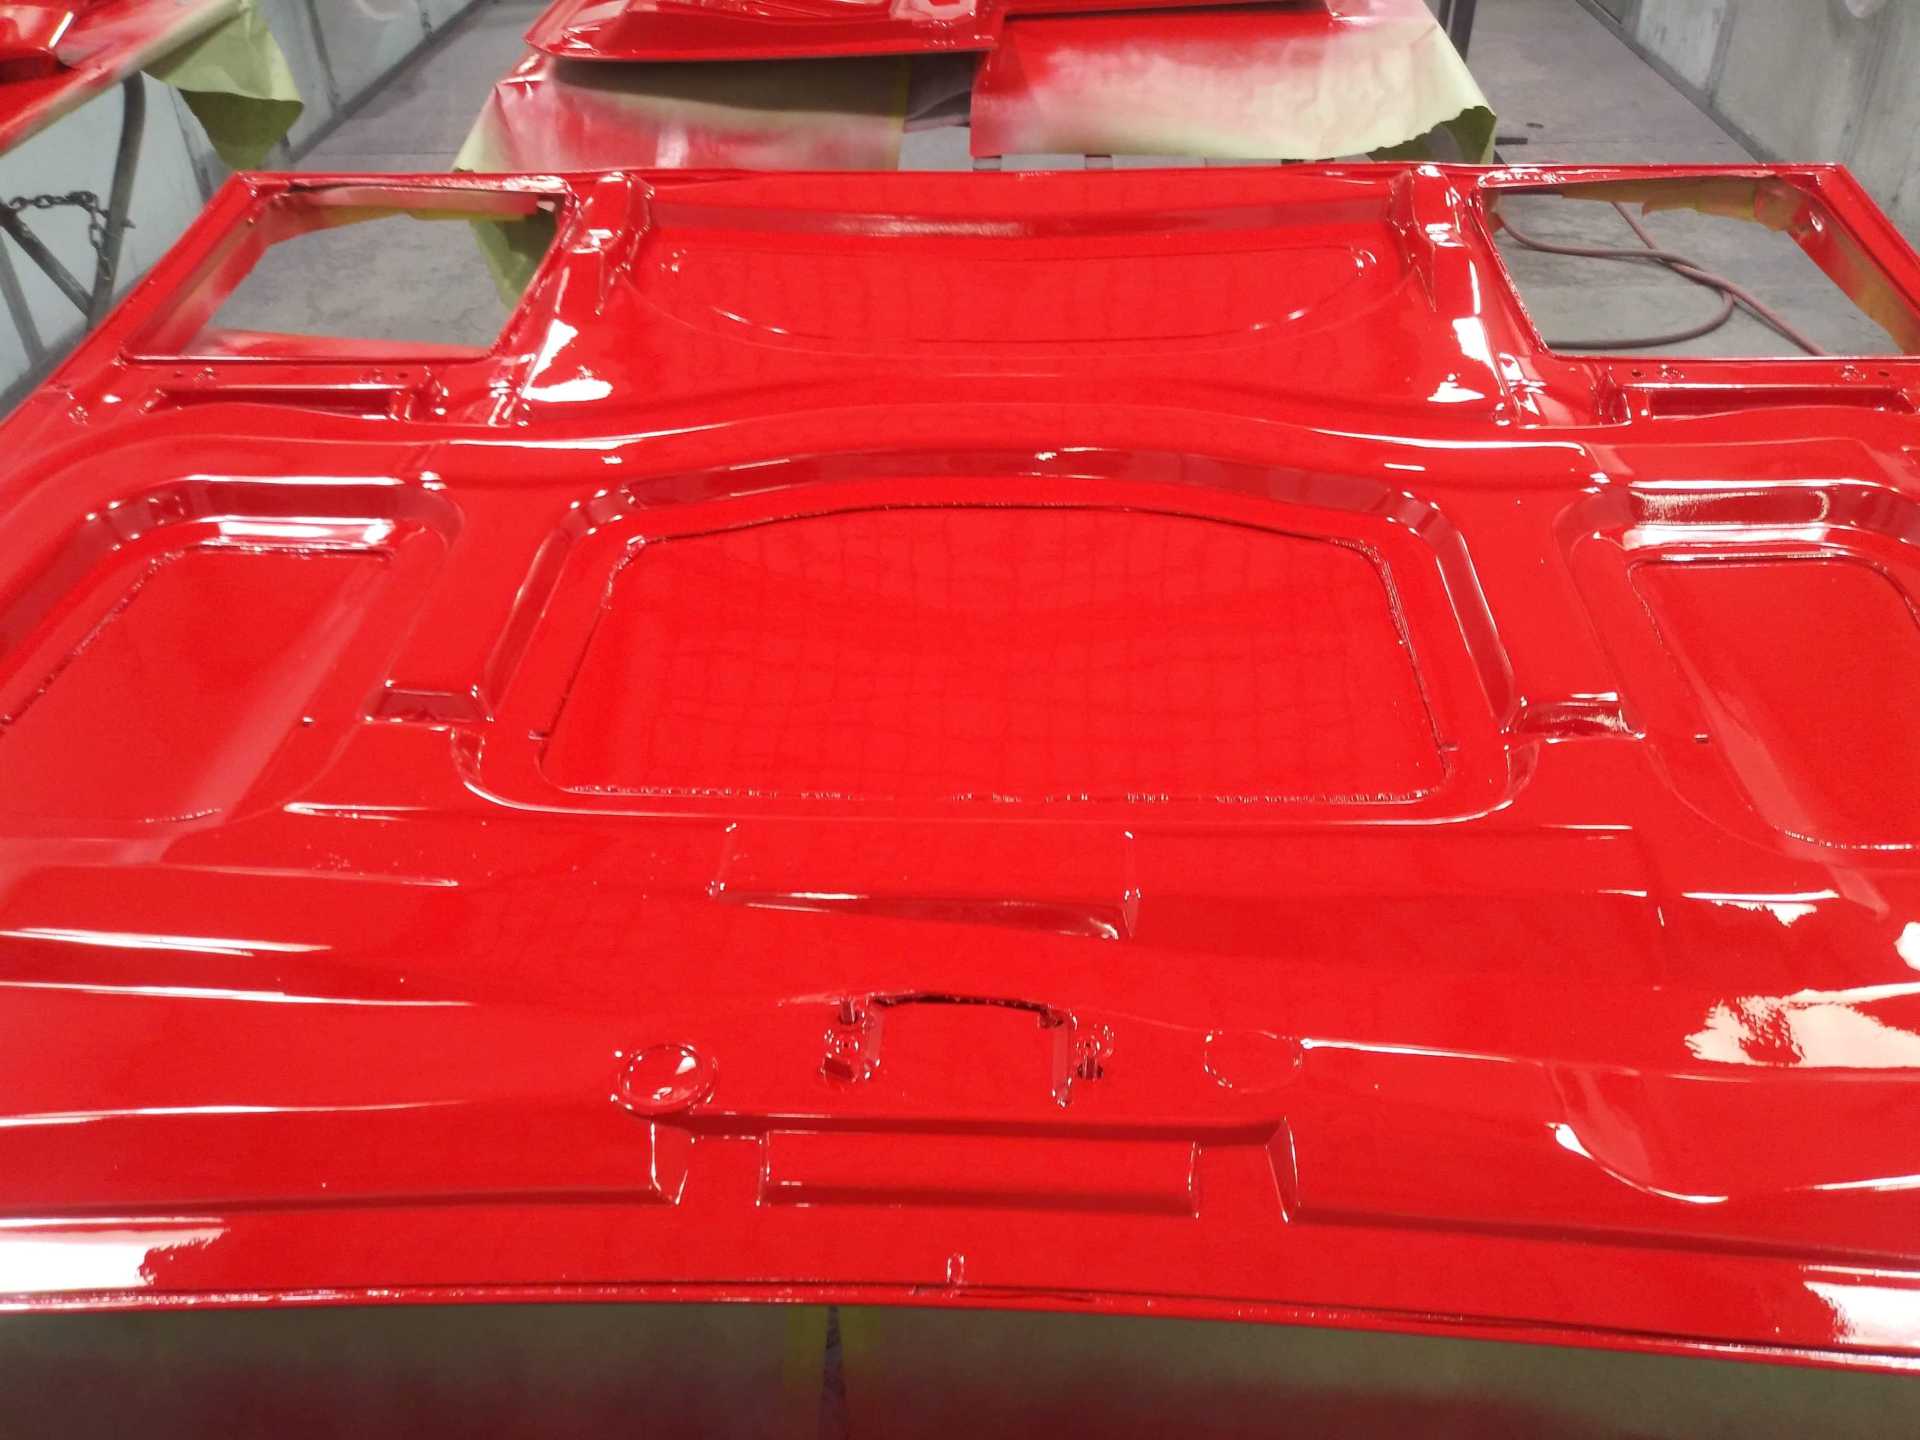
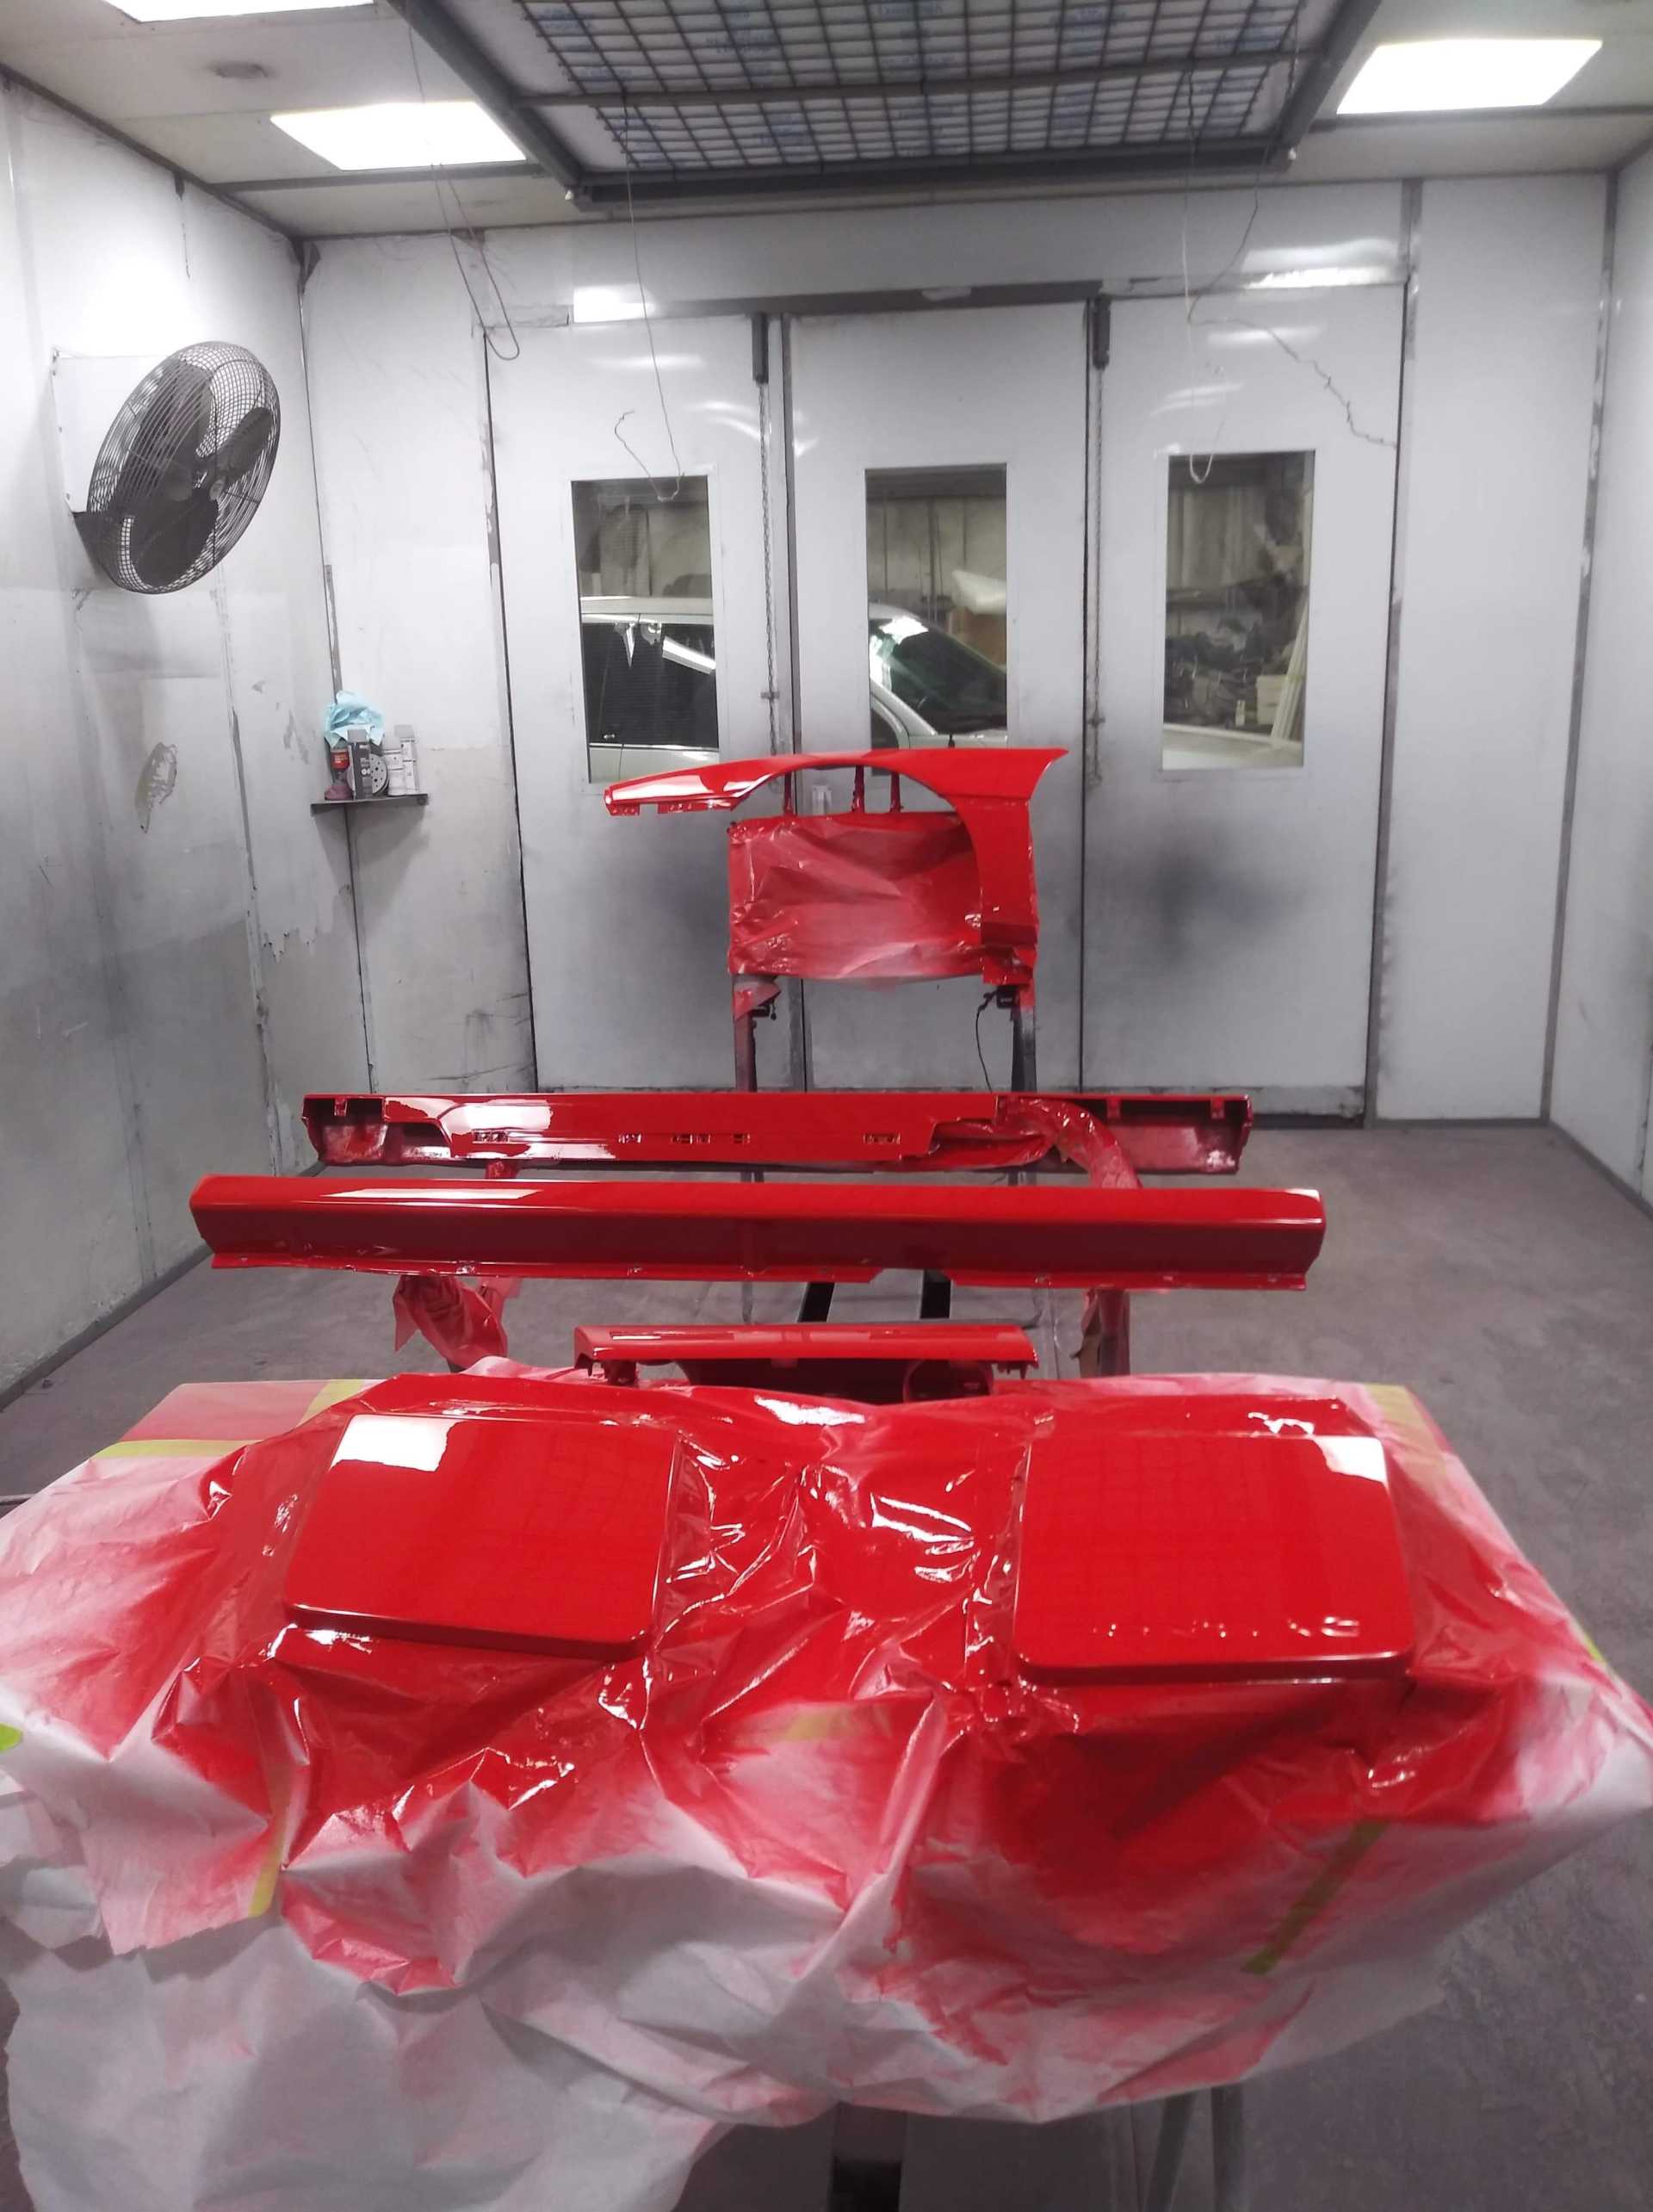
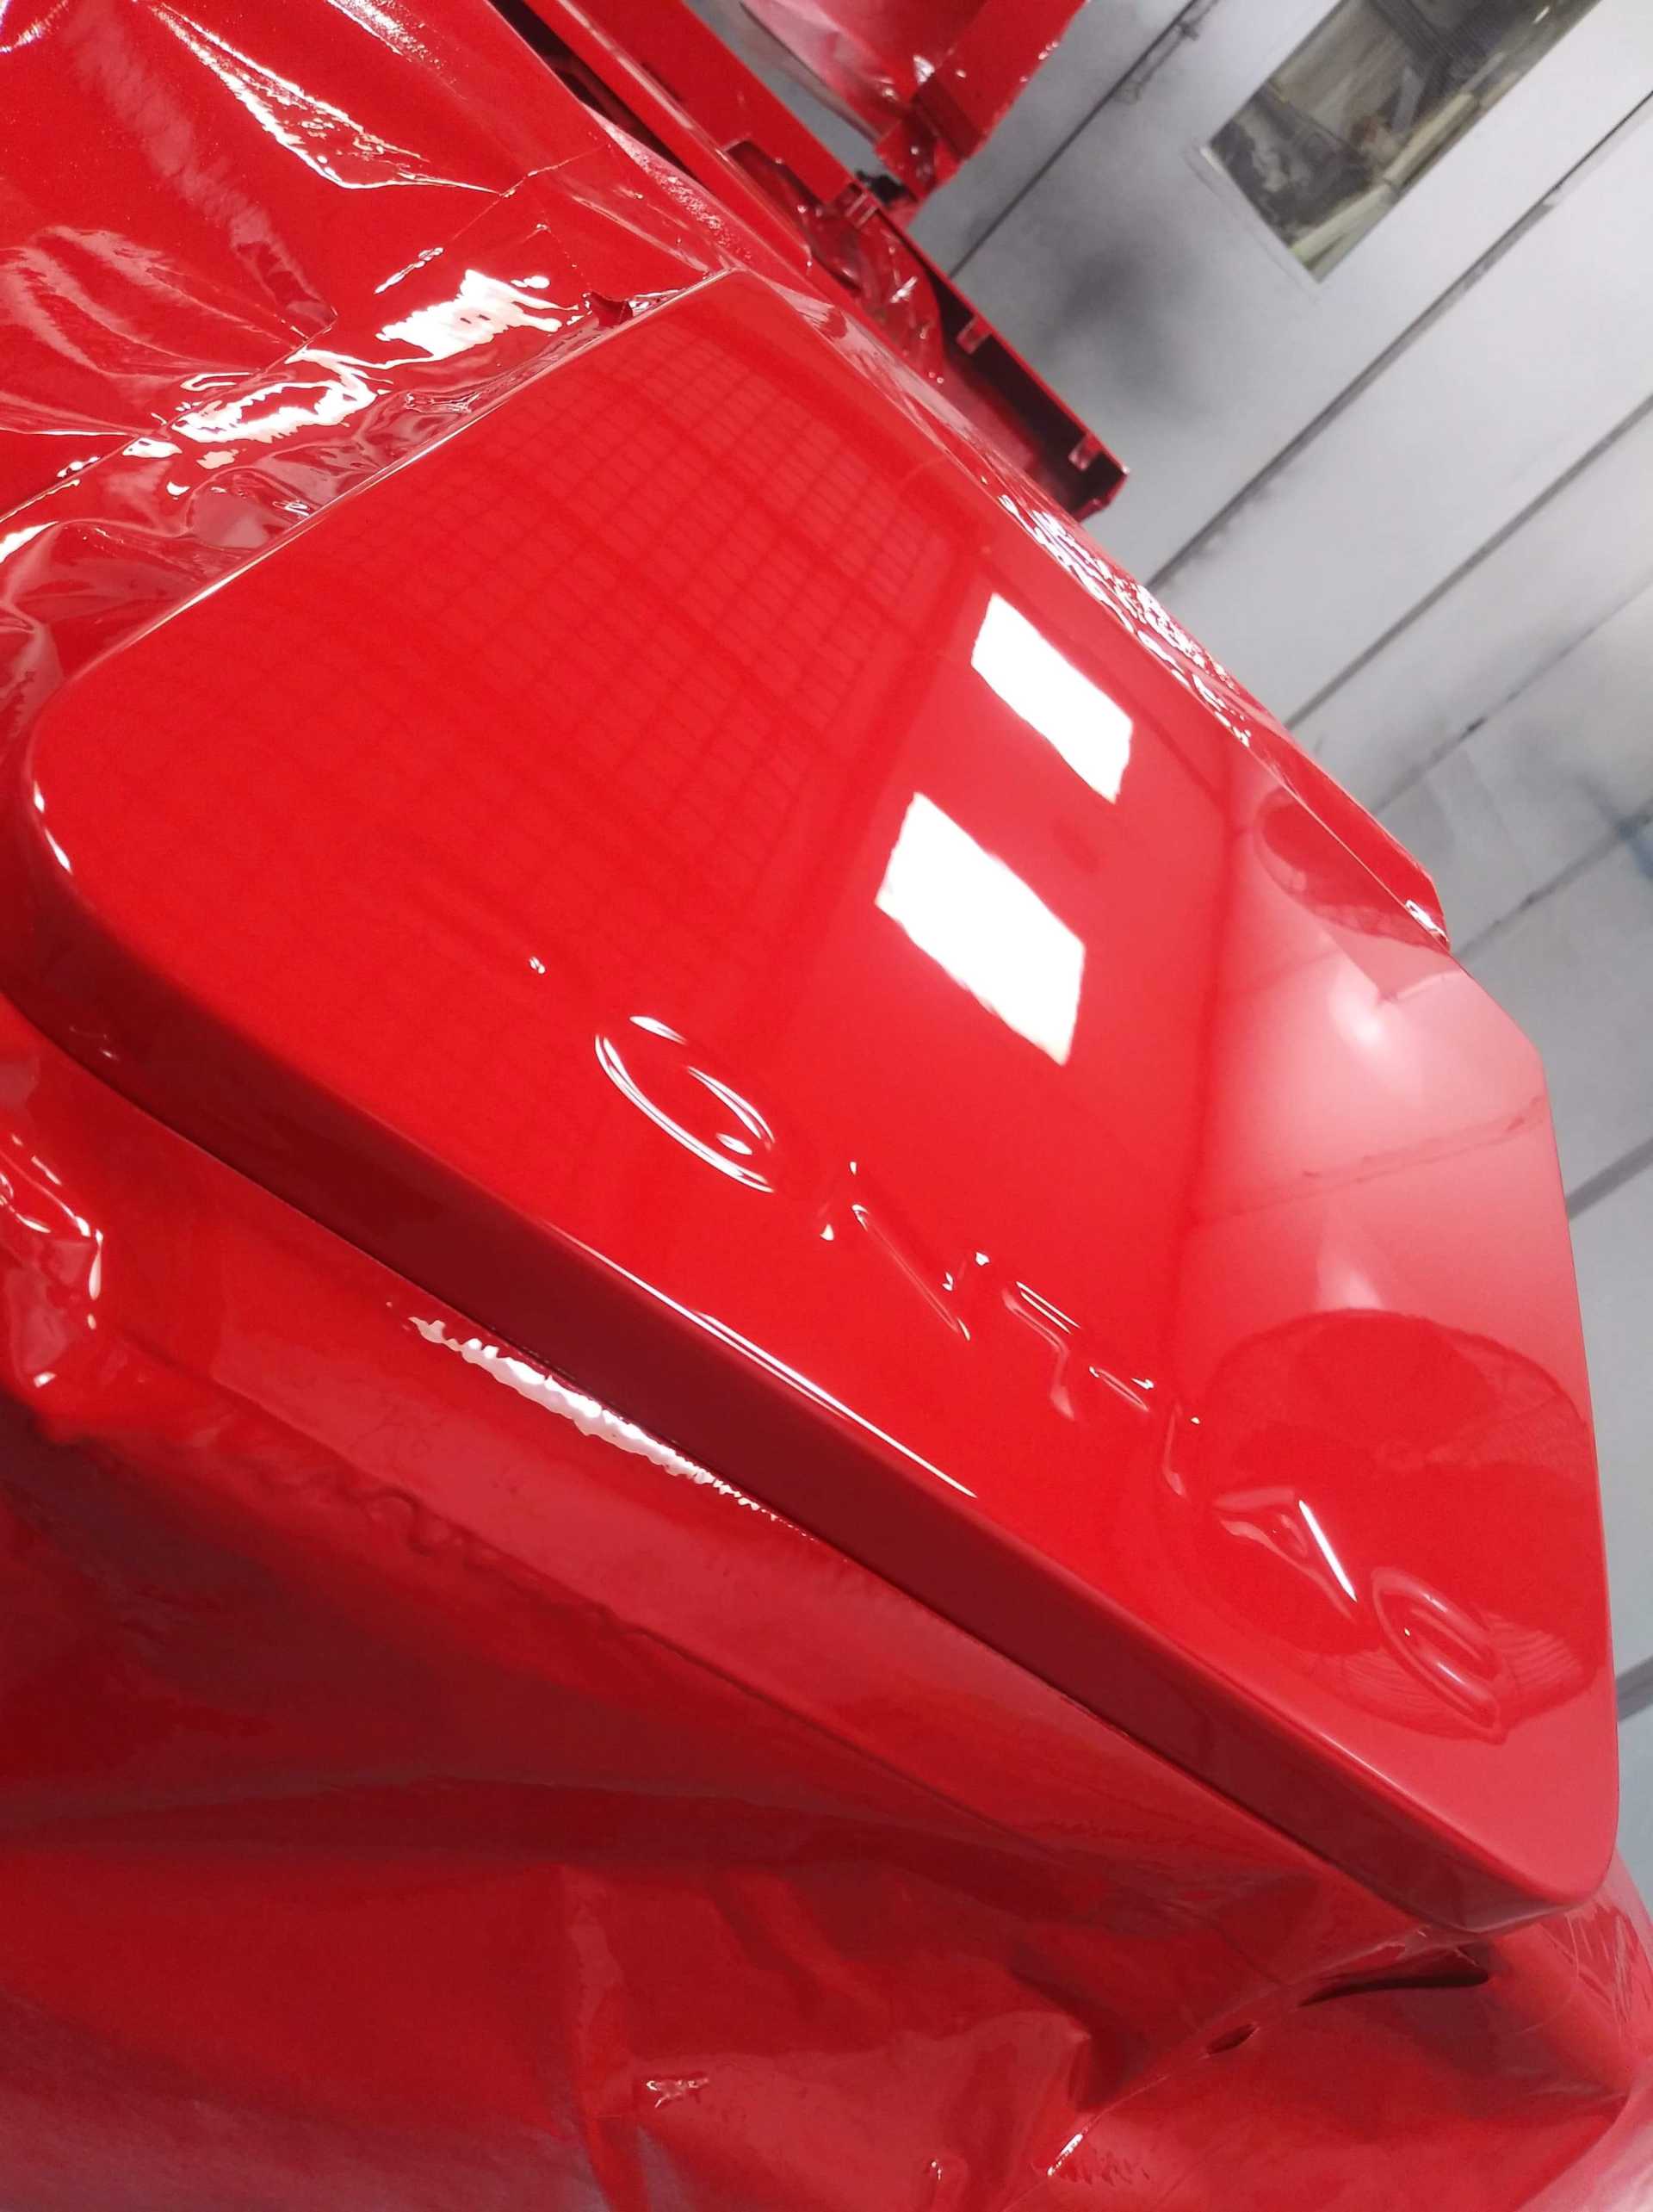
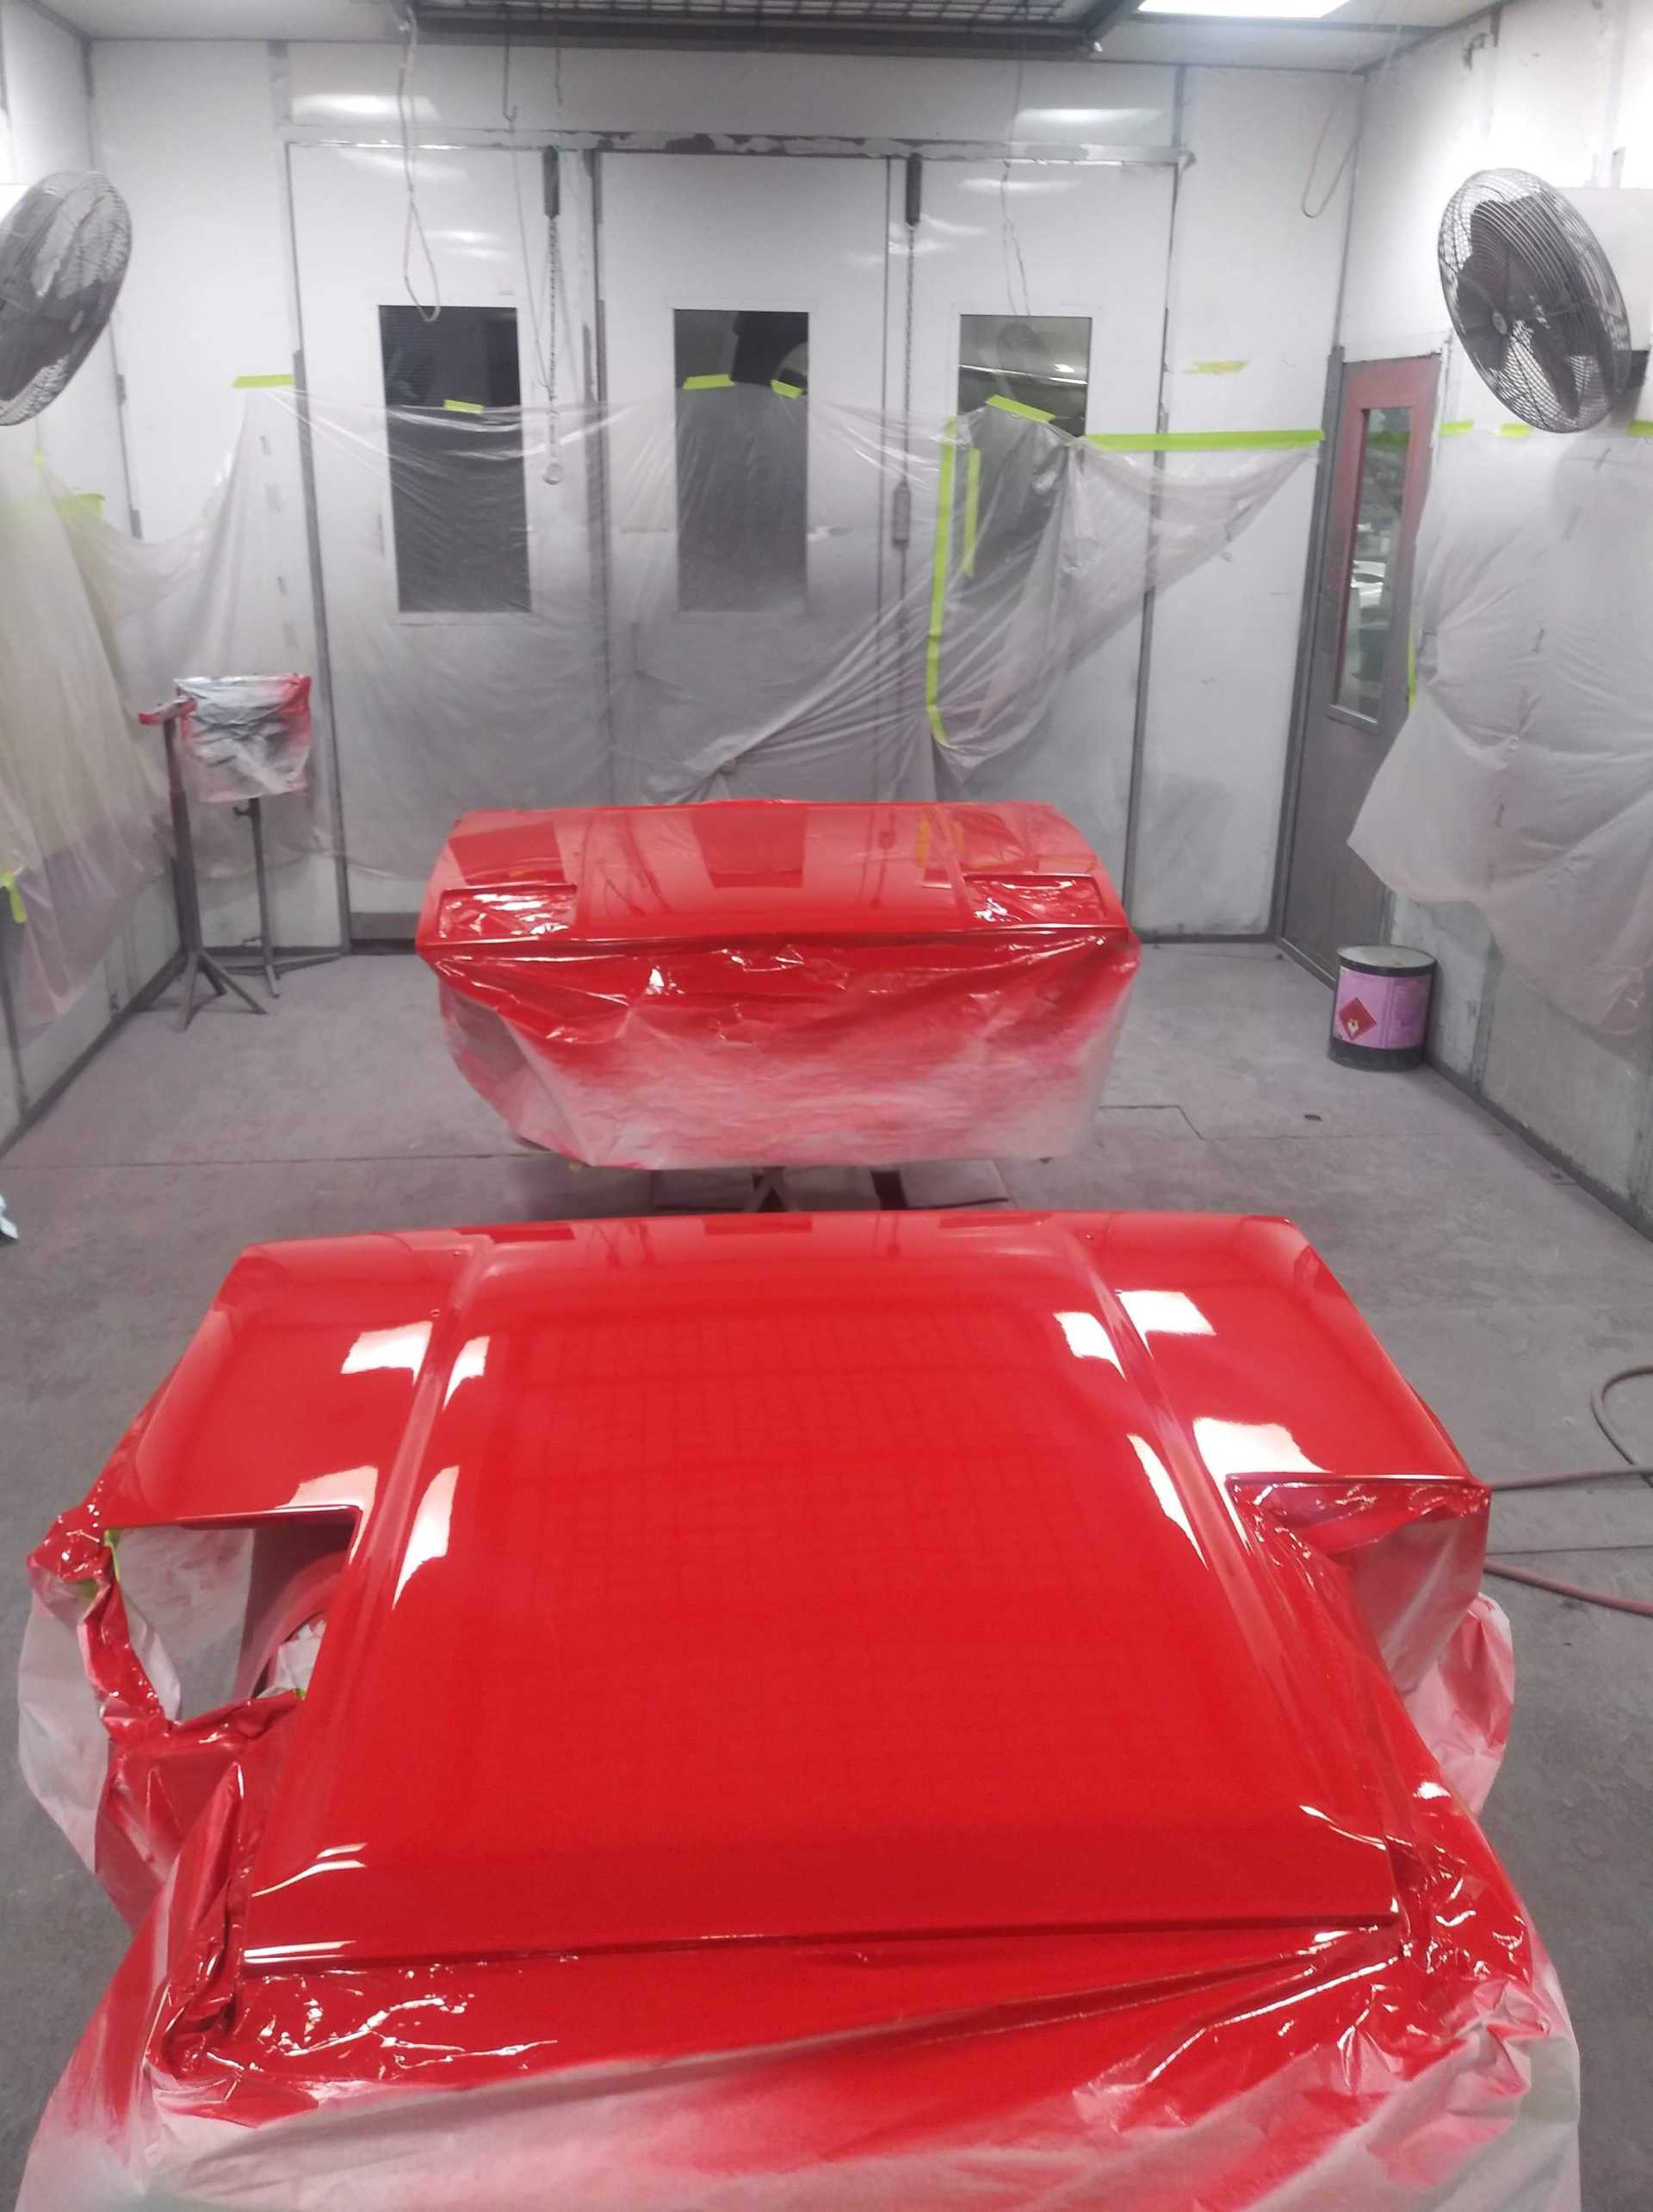
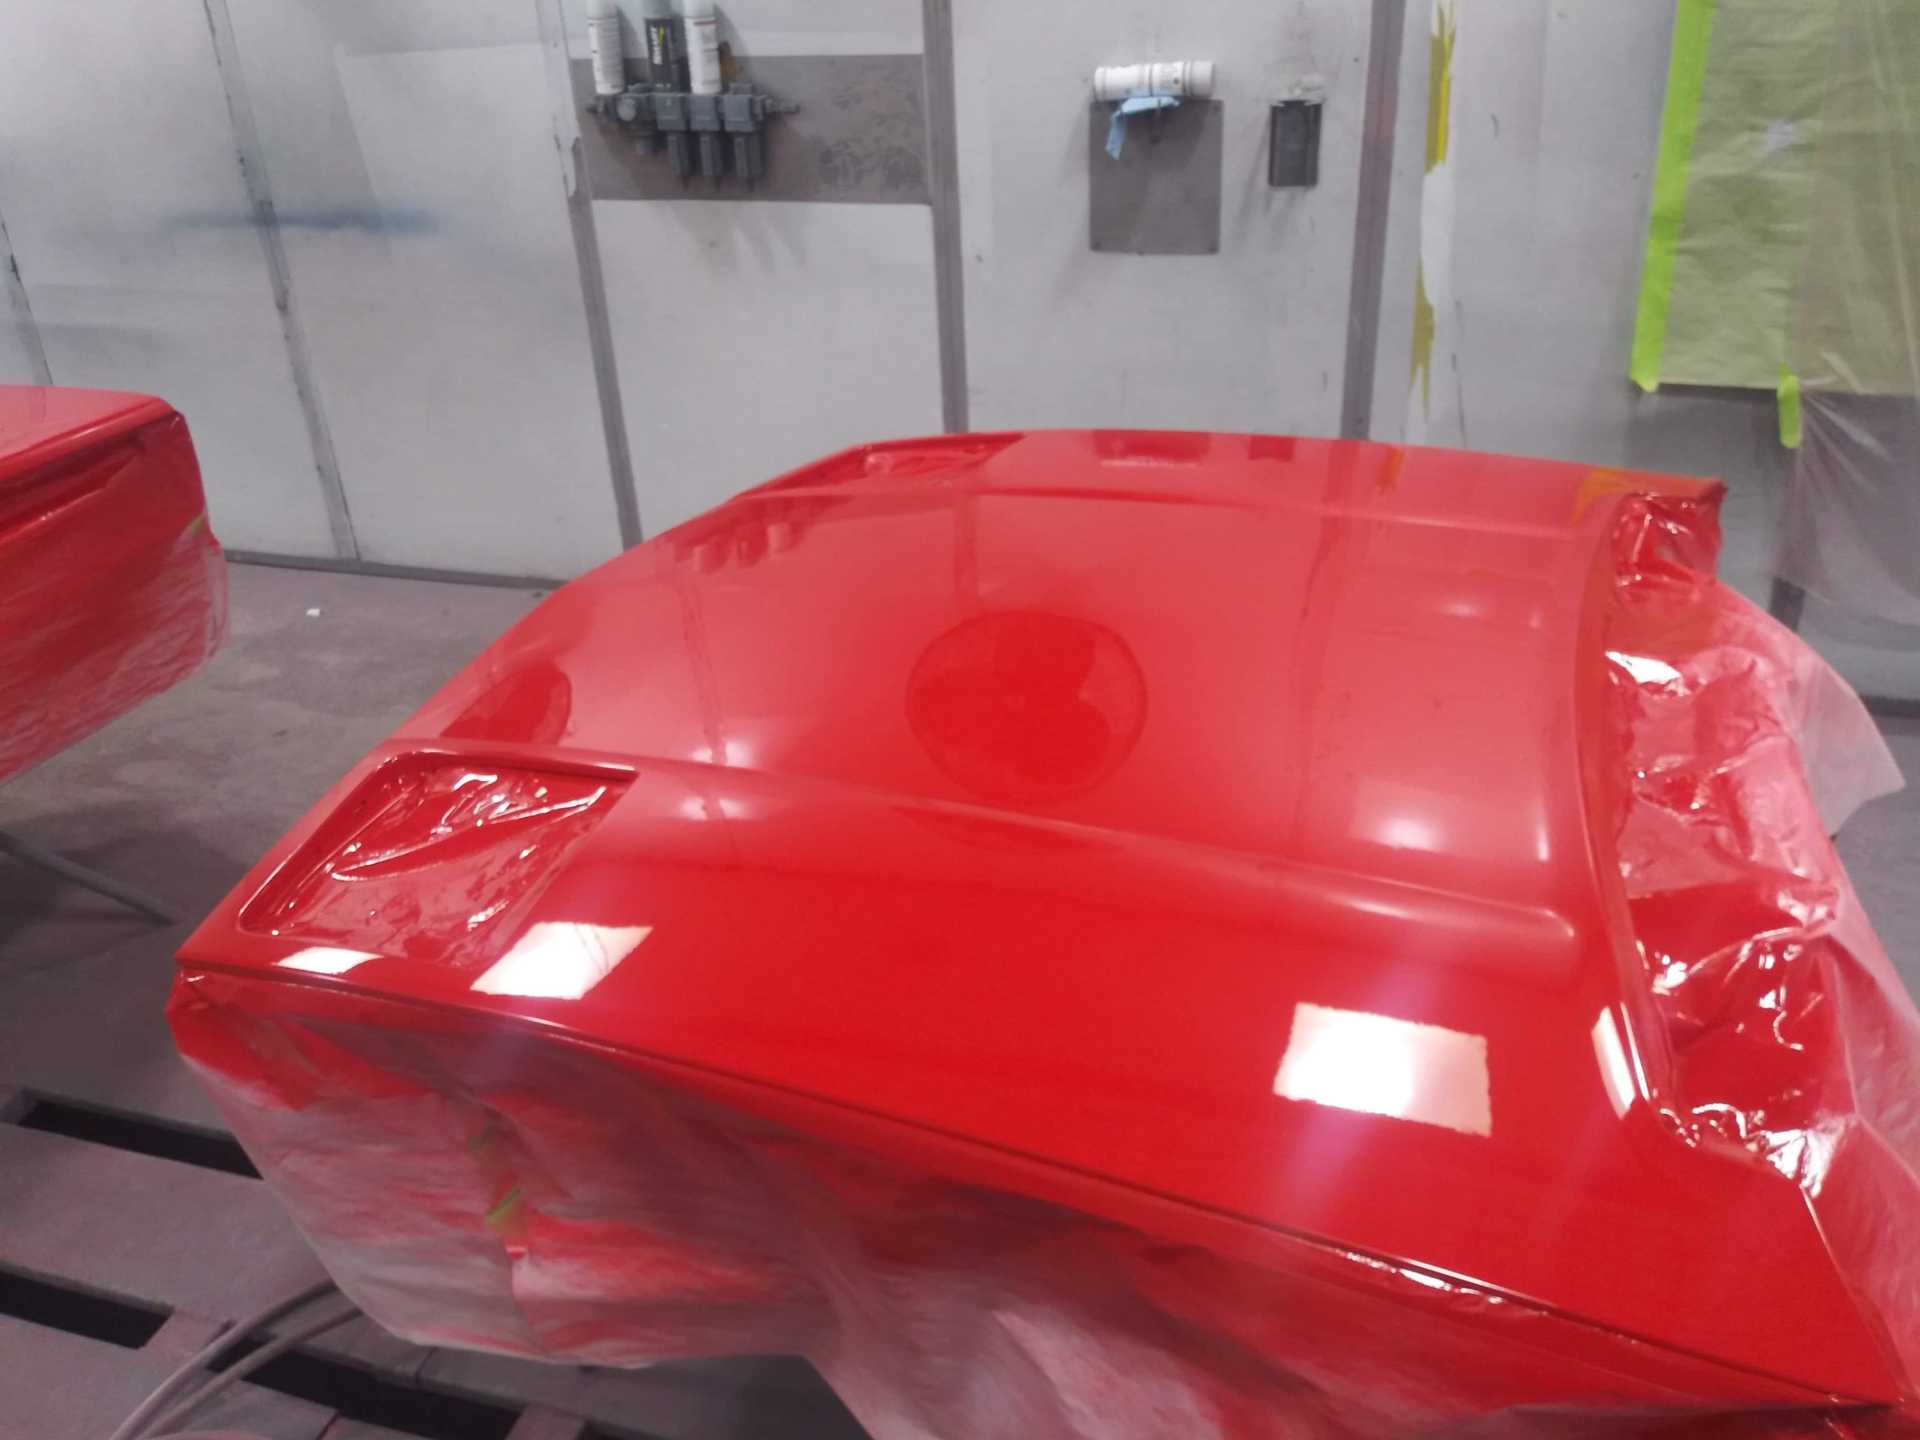
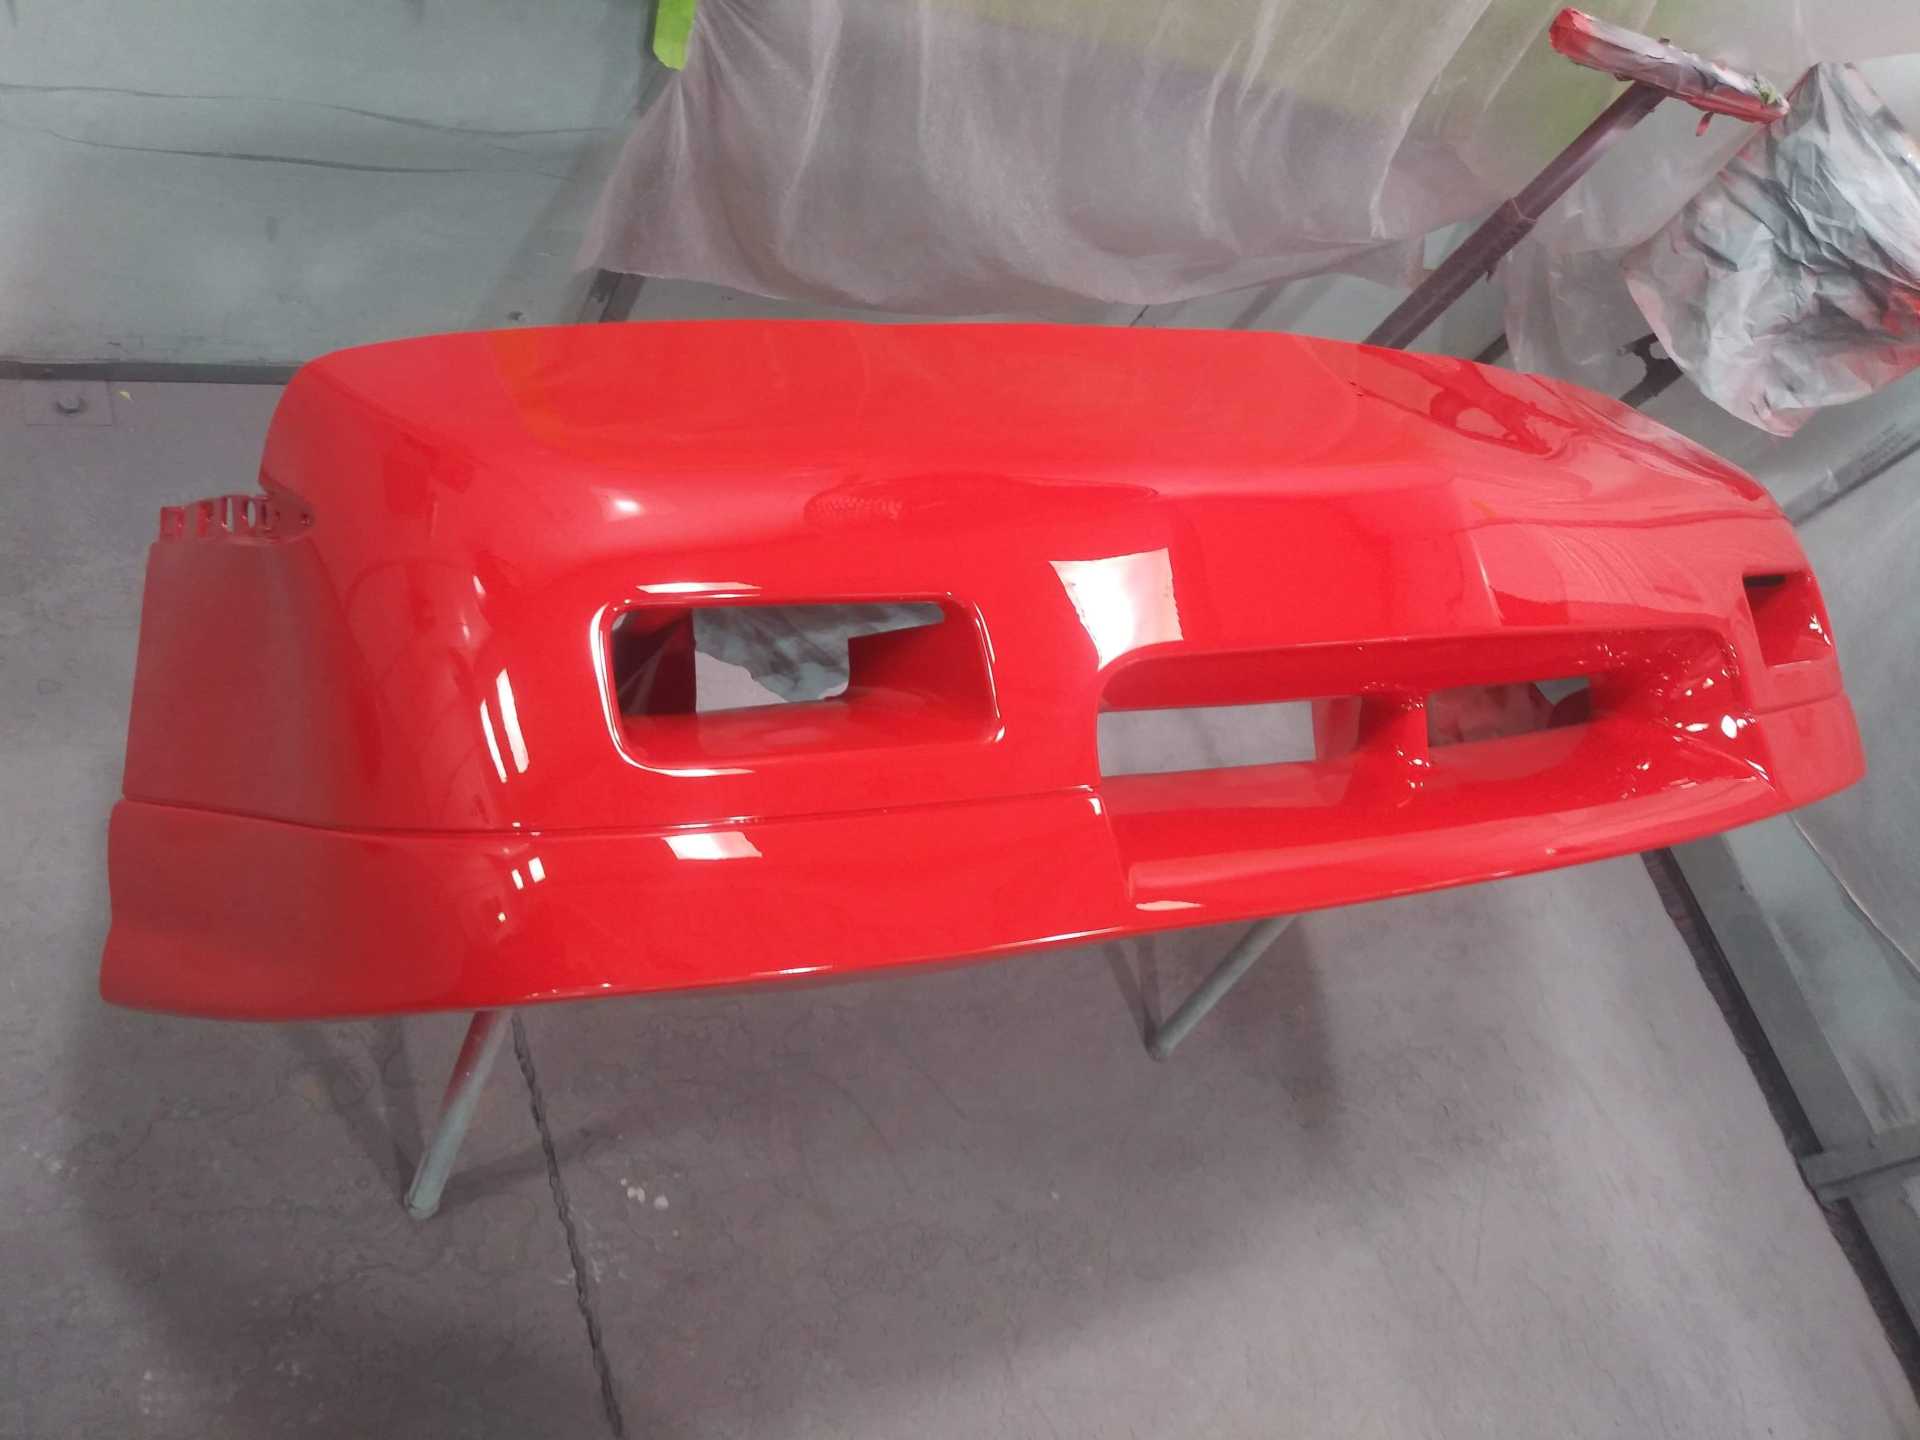
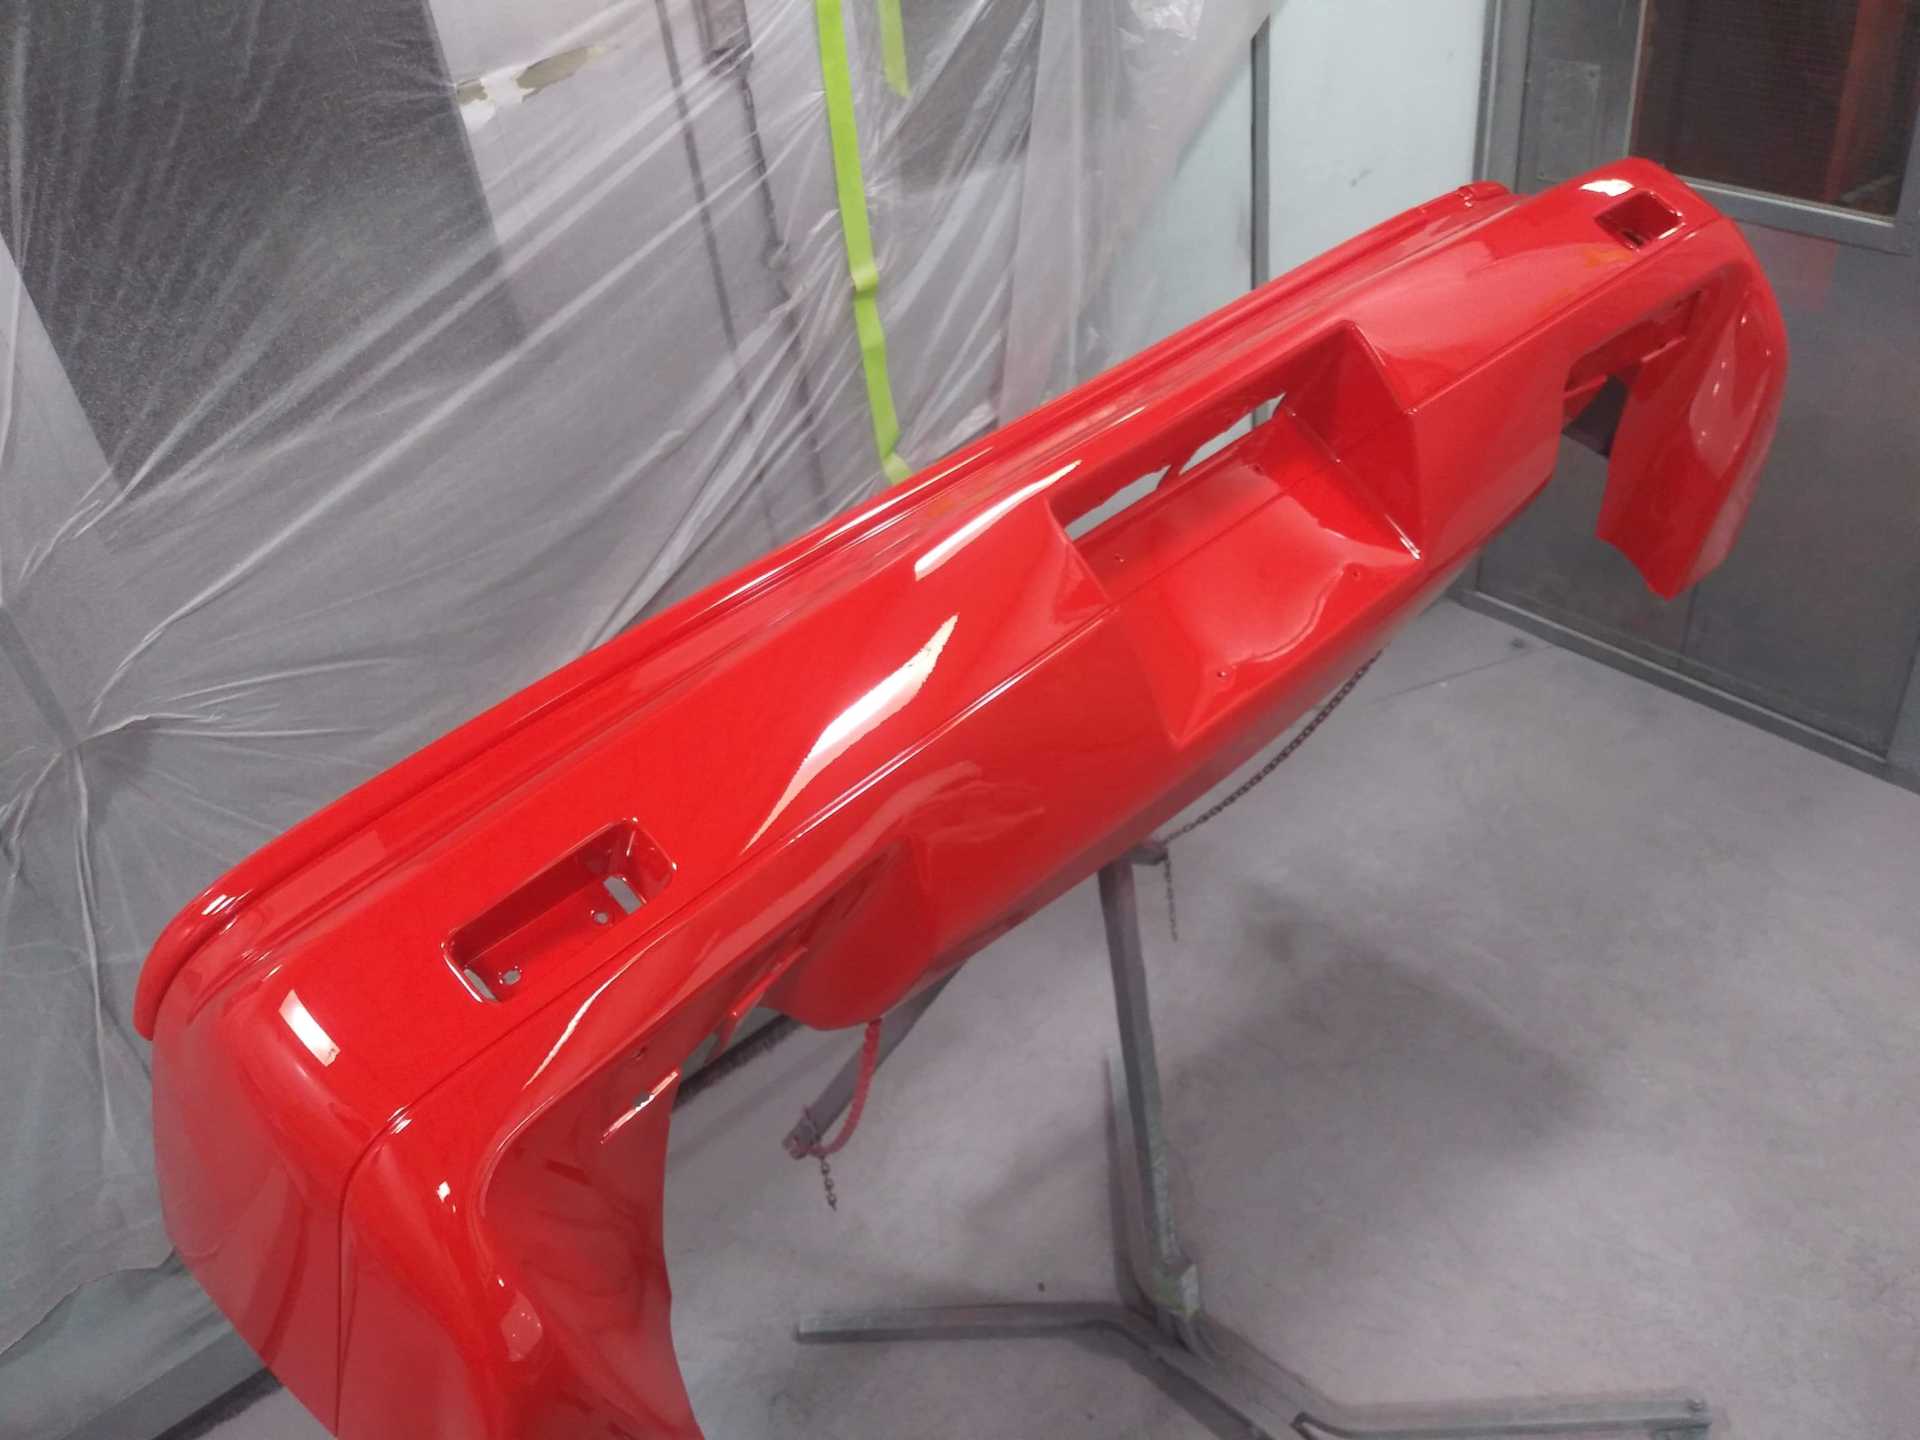
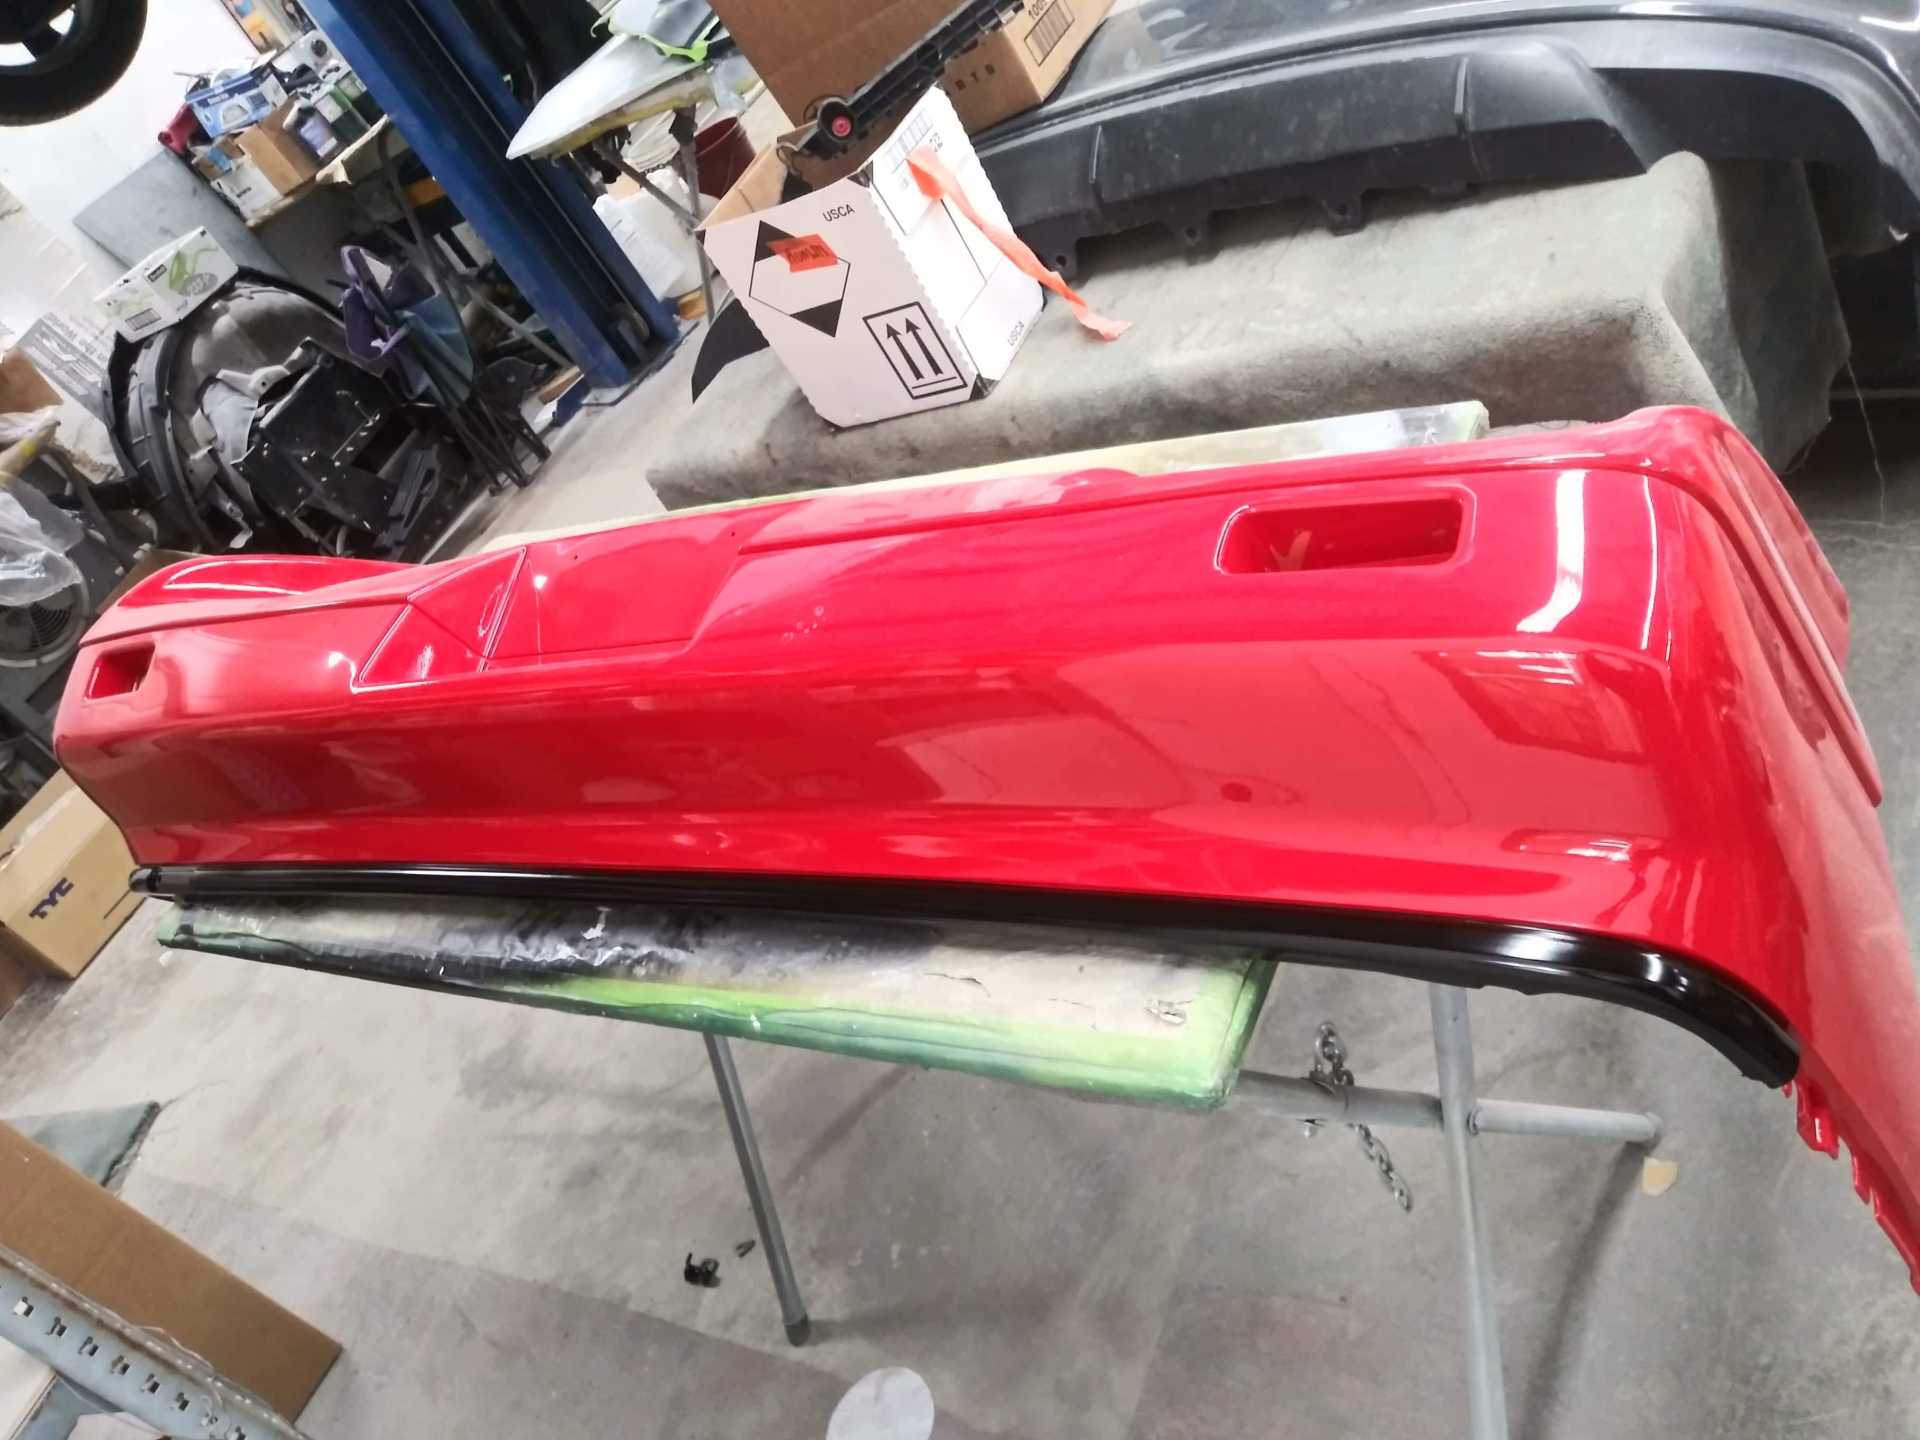
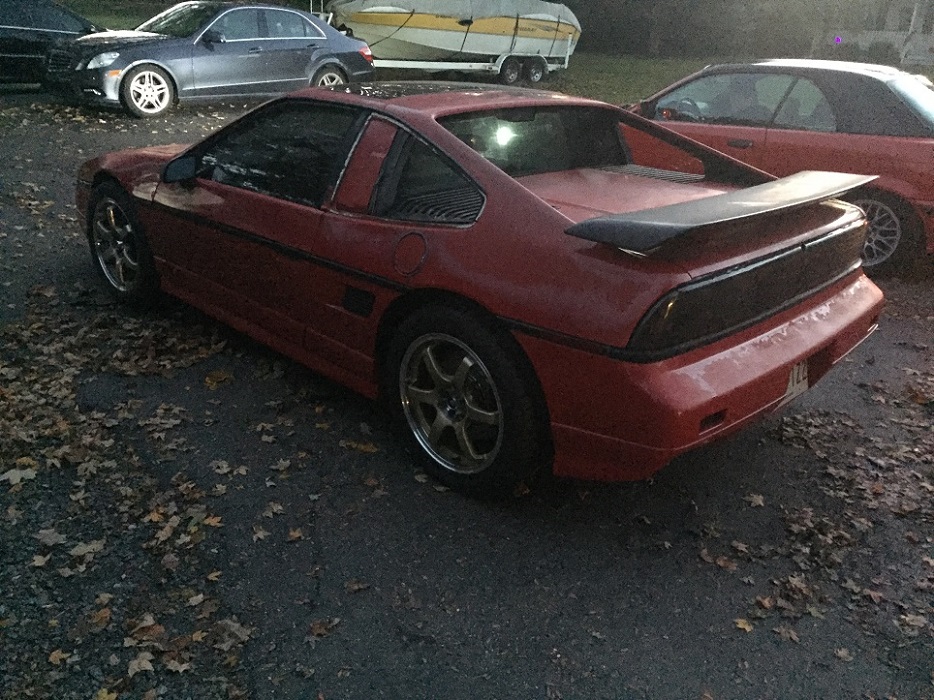
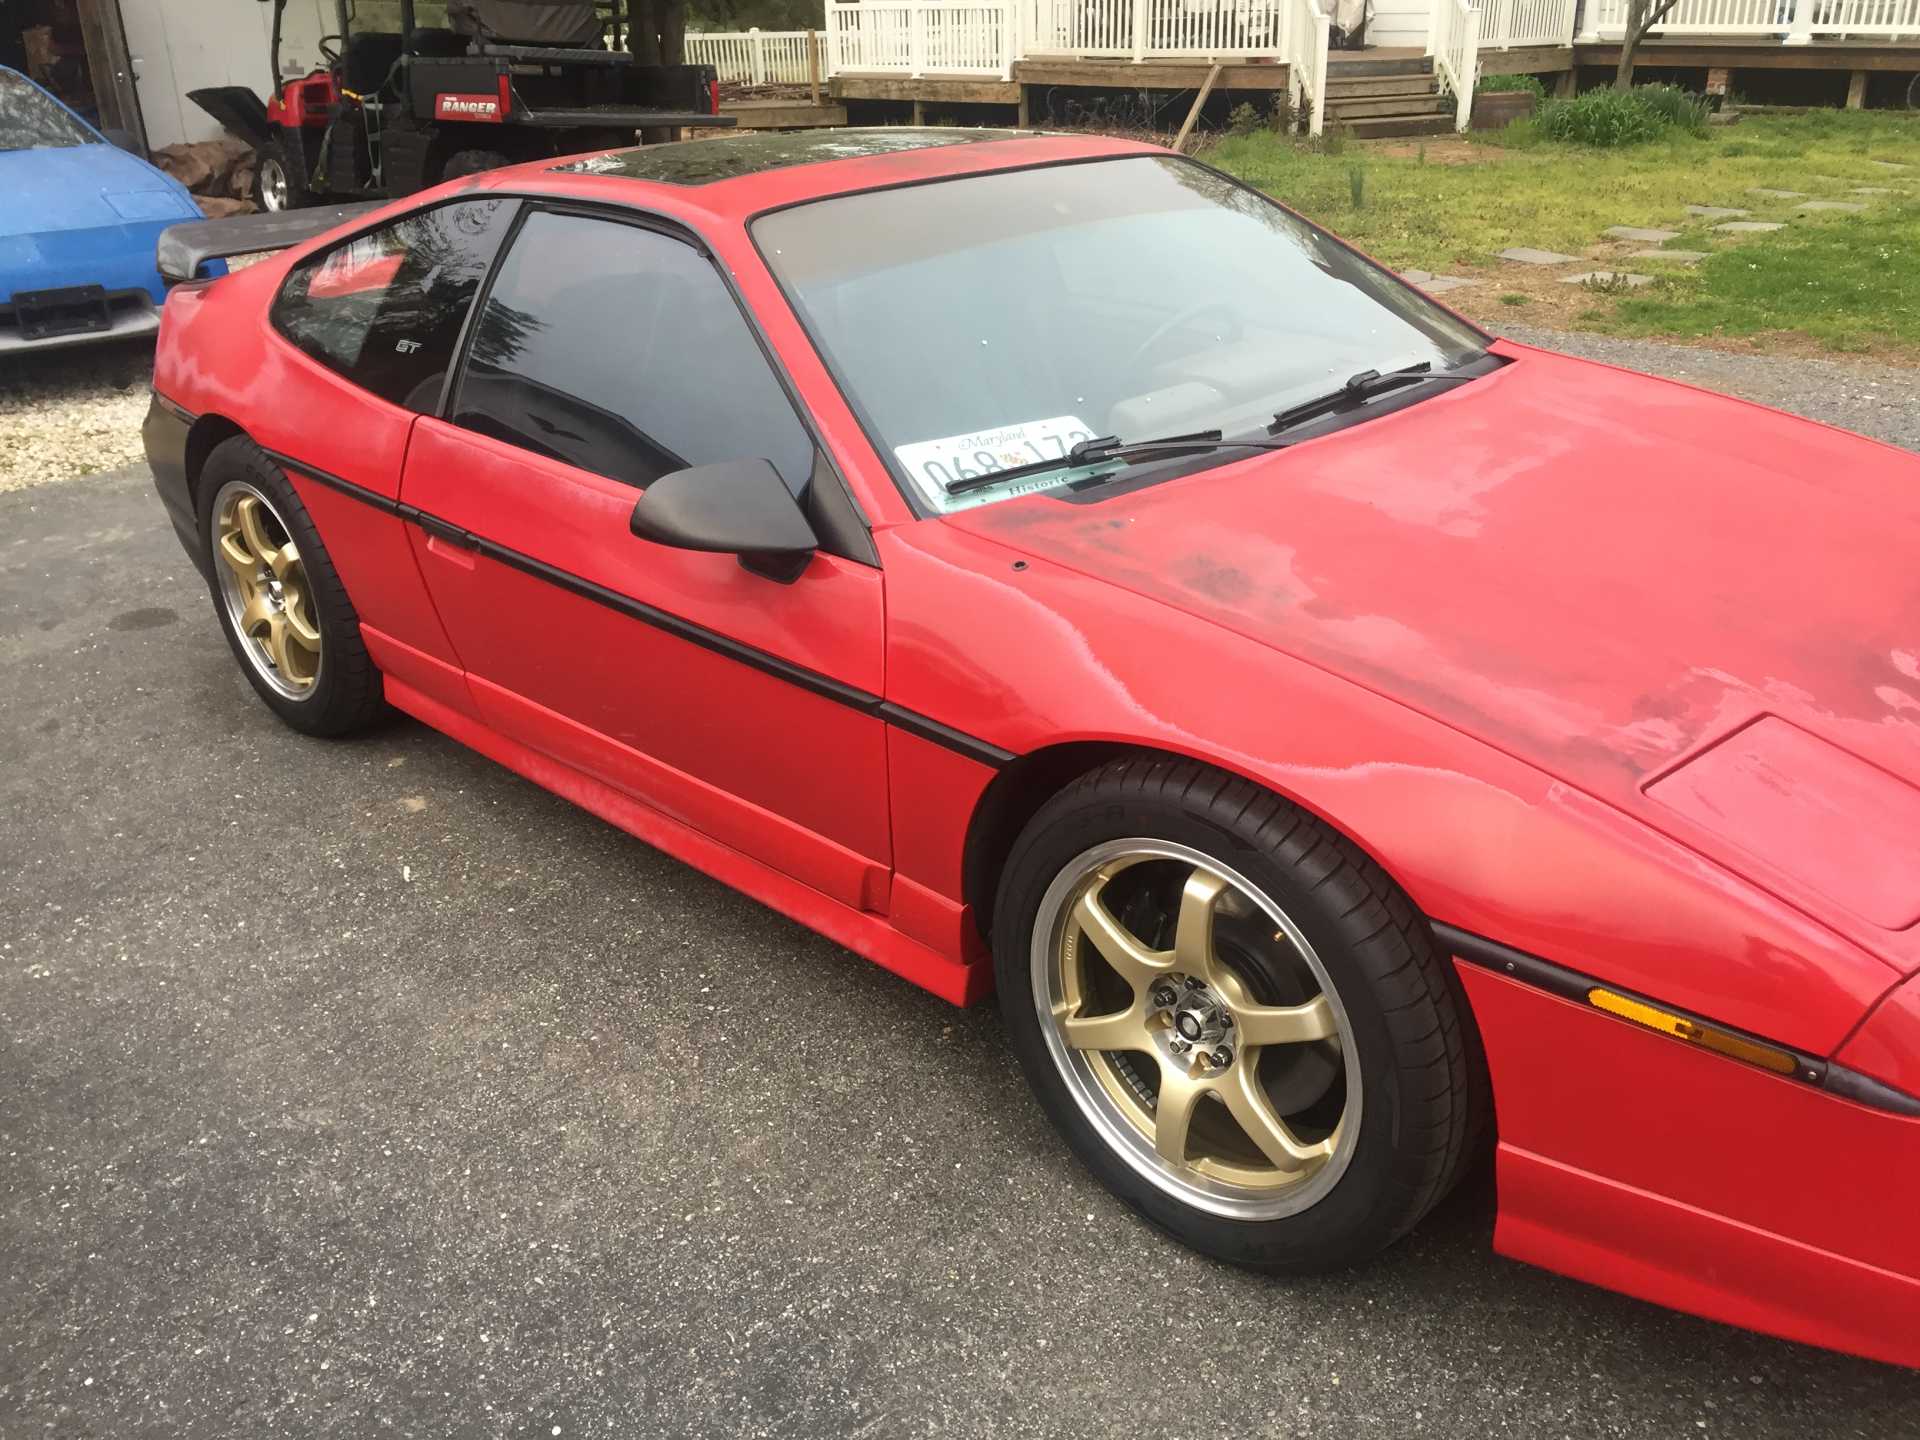
The first obvious change is the paint. I have to thank Earl and Bill Sessions, as well as Matt and Jen Goss for recommending Steve's Autobody in Brandywine, Md. We removed all of the outer panels and took them to Earl and Bill, then later we took the car to finish rather than removing the top and rear fastback clip. Overall, we are extremely happy with the results. This is a driver, so we went with a single stage 2019 Mustang red, yeah, I know, please don't disown us. A few months after paint was fully cured, we took it to DJ down here in SOMD for ceramic coating. As a side note, this not only helped with a more durable single stage finish, but also gave it more depth and high gloss finish. The other advantage is that there are different levels of ceramic coatings and DJ did a full exterior coating to include the plastic sail panels, and new Keith Goodyear tail light lenses. Almost 3 years later, they still look like new, and I think it helps with a lot of the surface scratches, or at least gives them another layer of protection against surface scratches.
Jen, its been a truly great experience throughout this build to meet so many great people and Fiero enthusiasts. Looking forward to future projects with you and Matt!
quote
Originally posted by Fierochic88:
Thanks for being an inspiration!
[This message has been edited by GPickardt (edited 07-30-2021).]
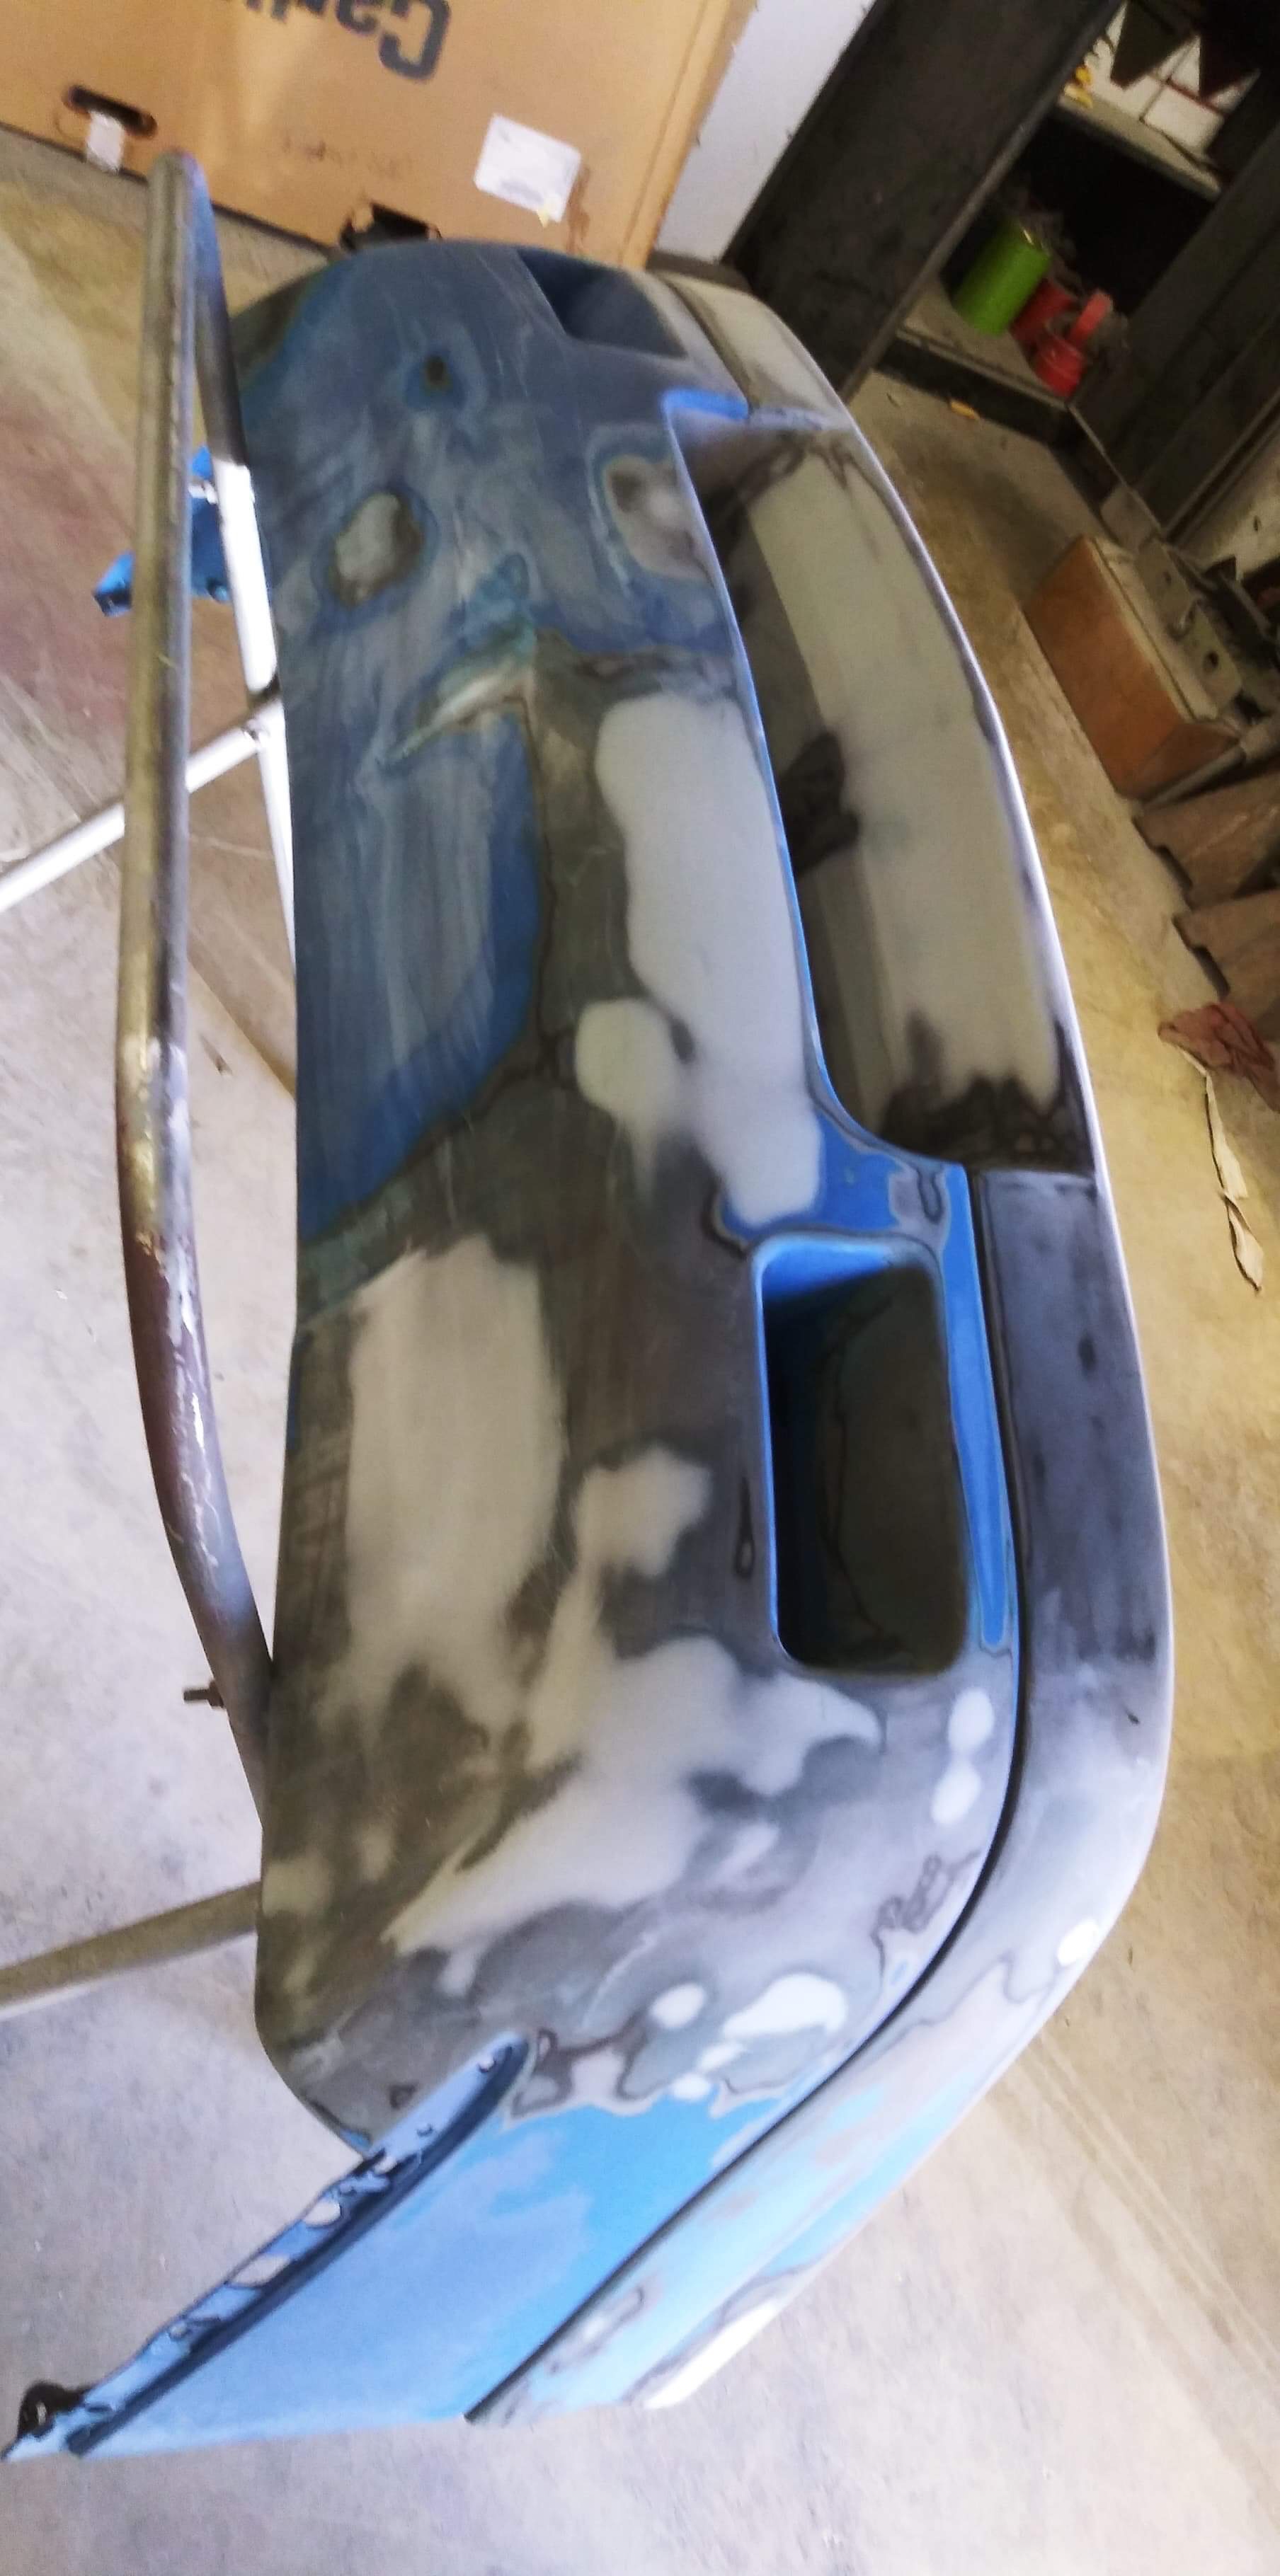
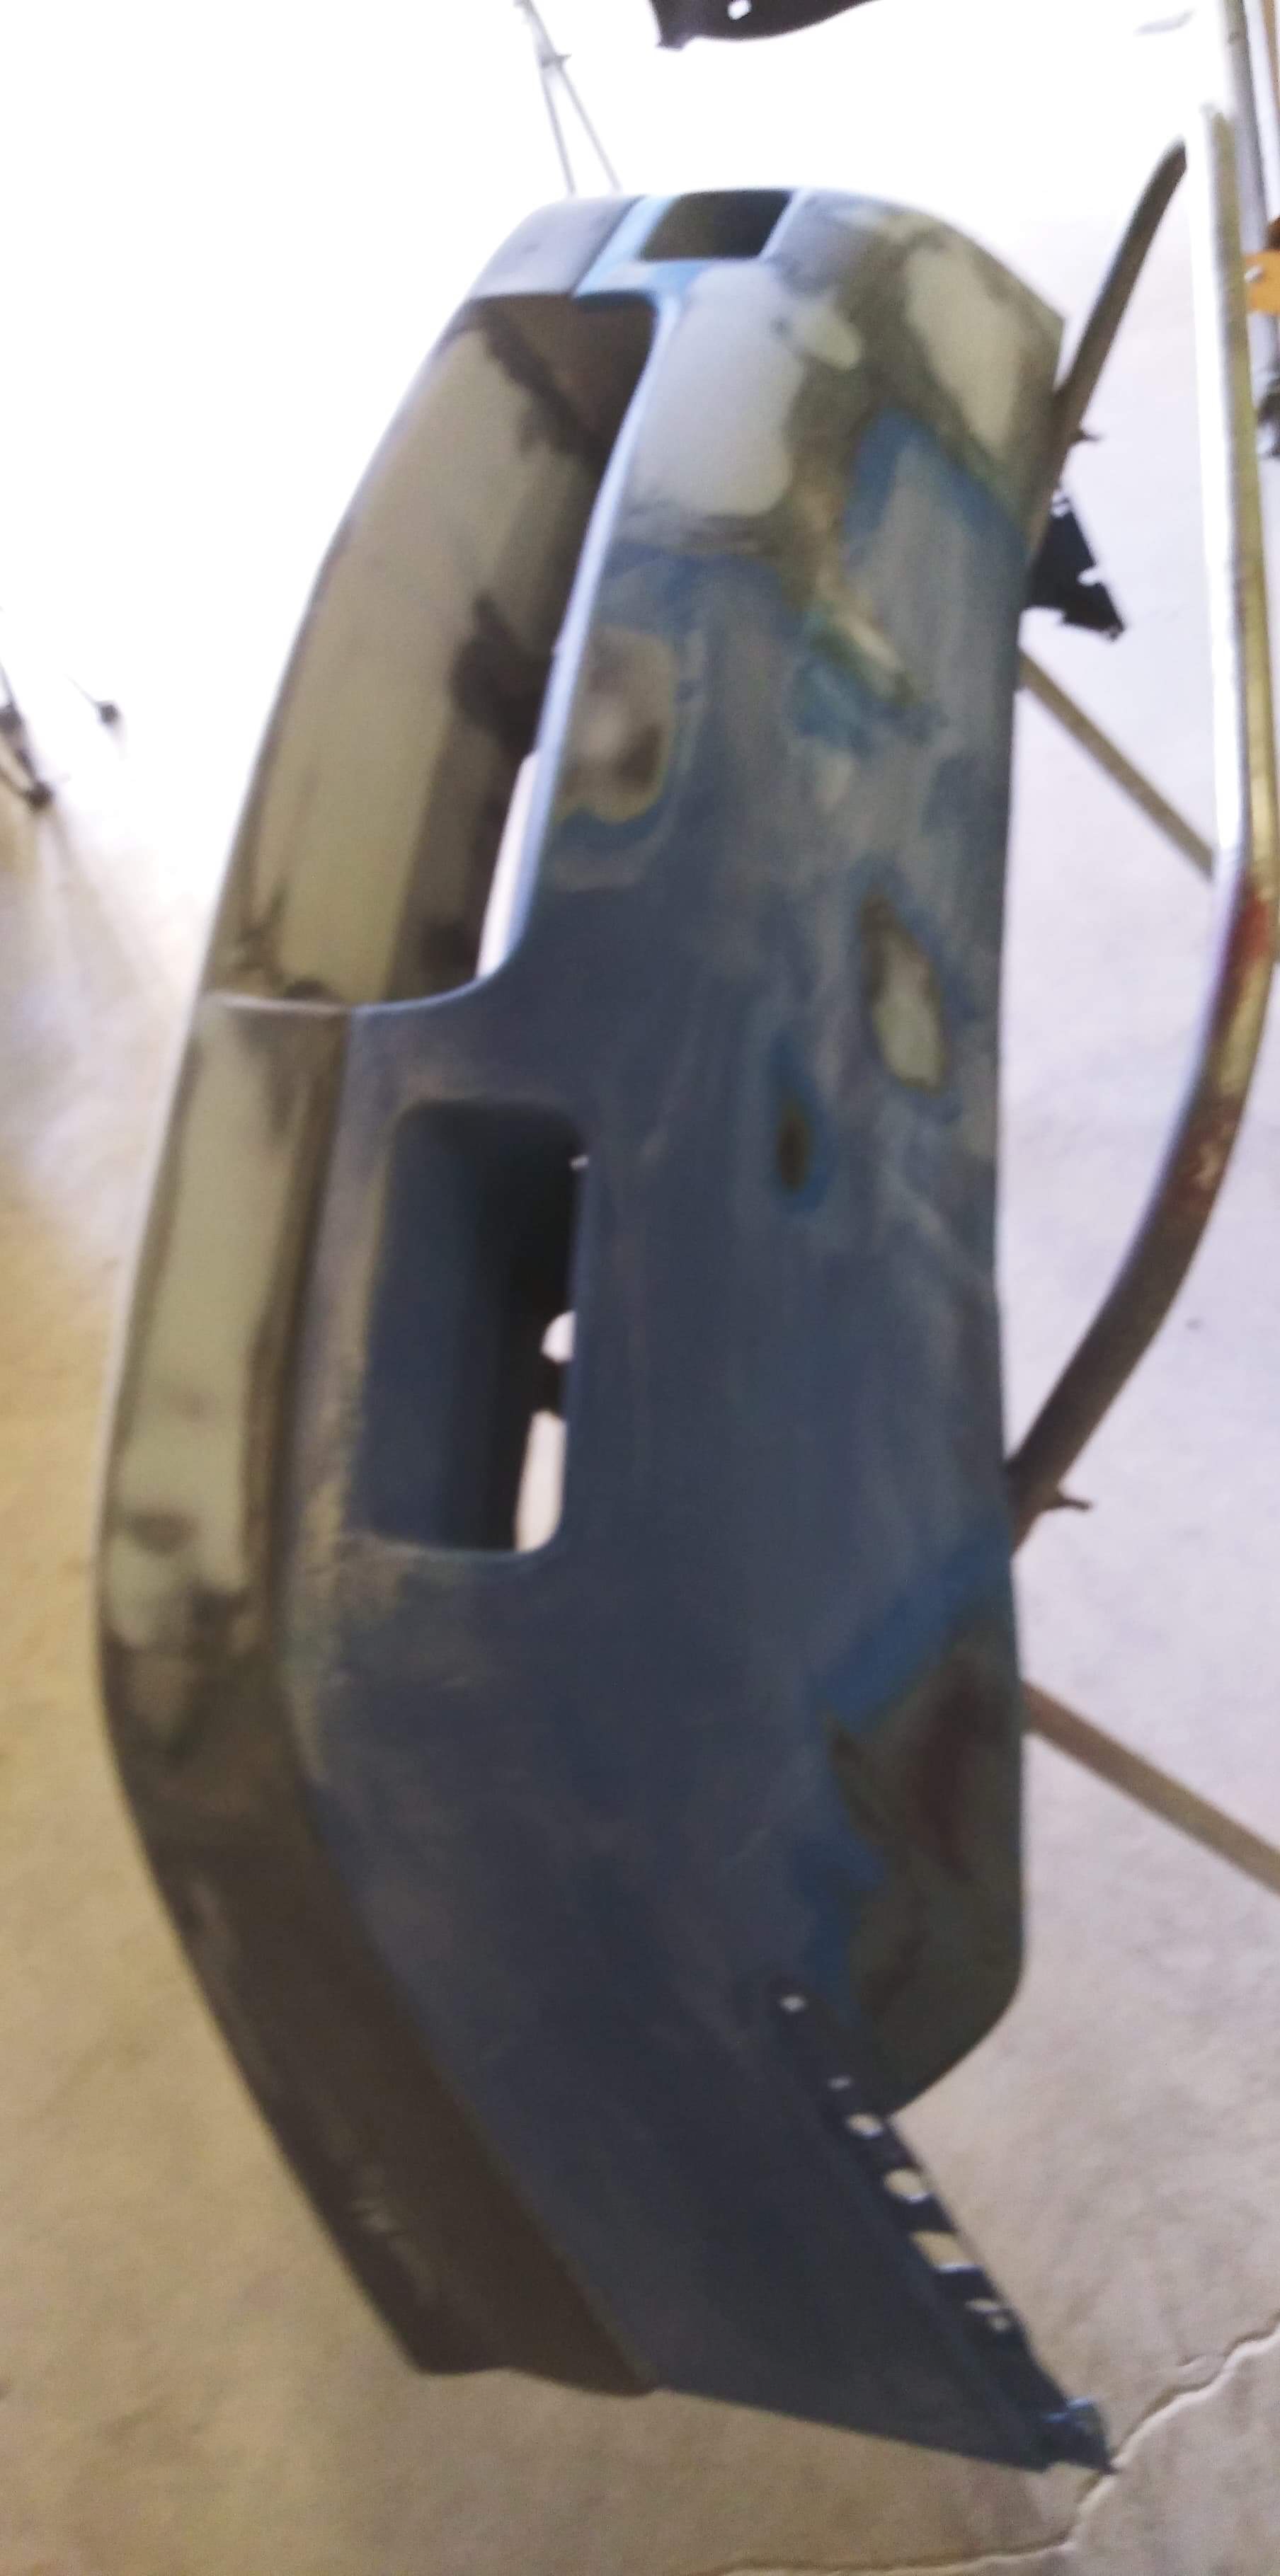
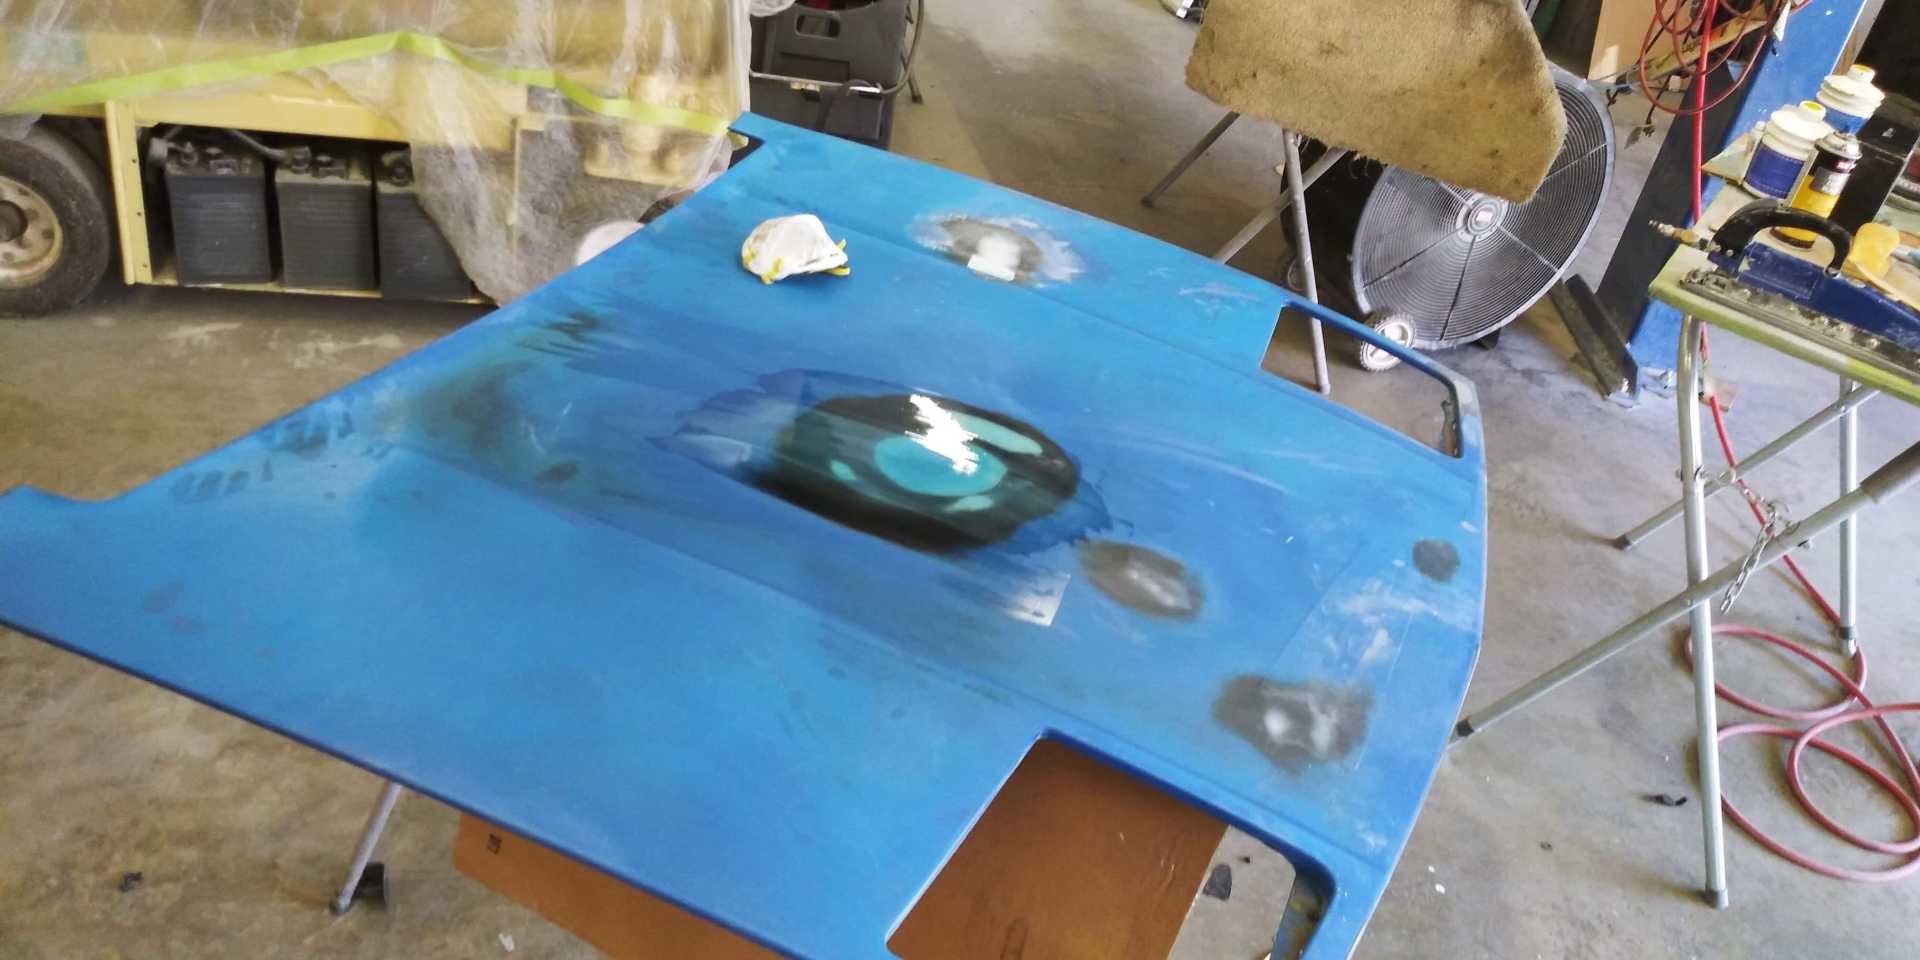
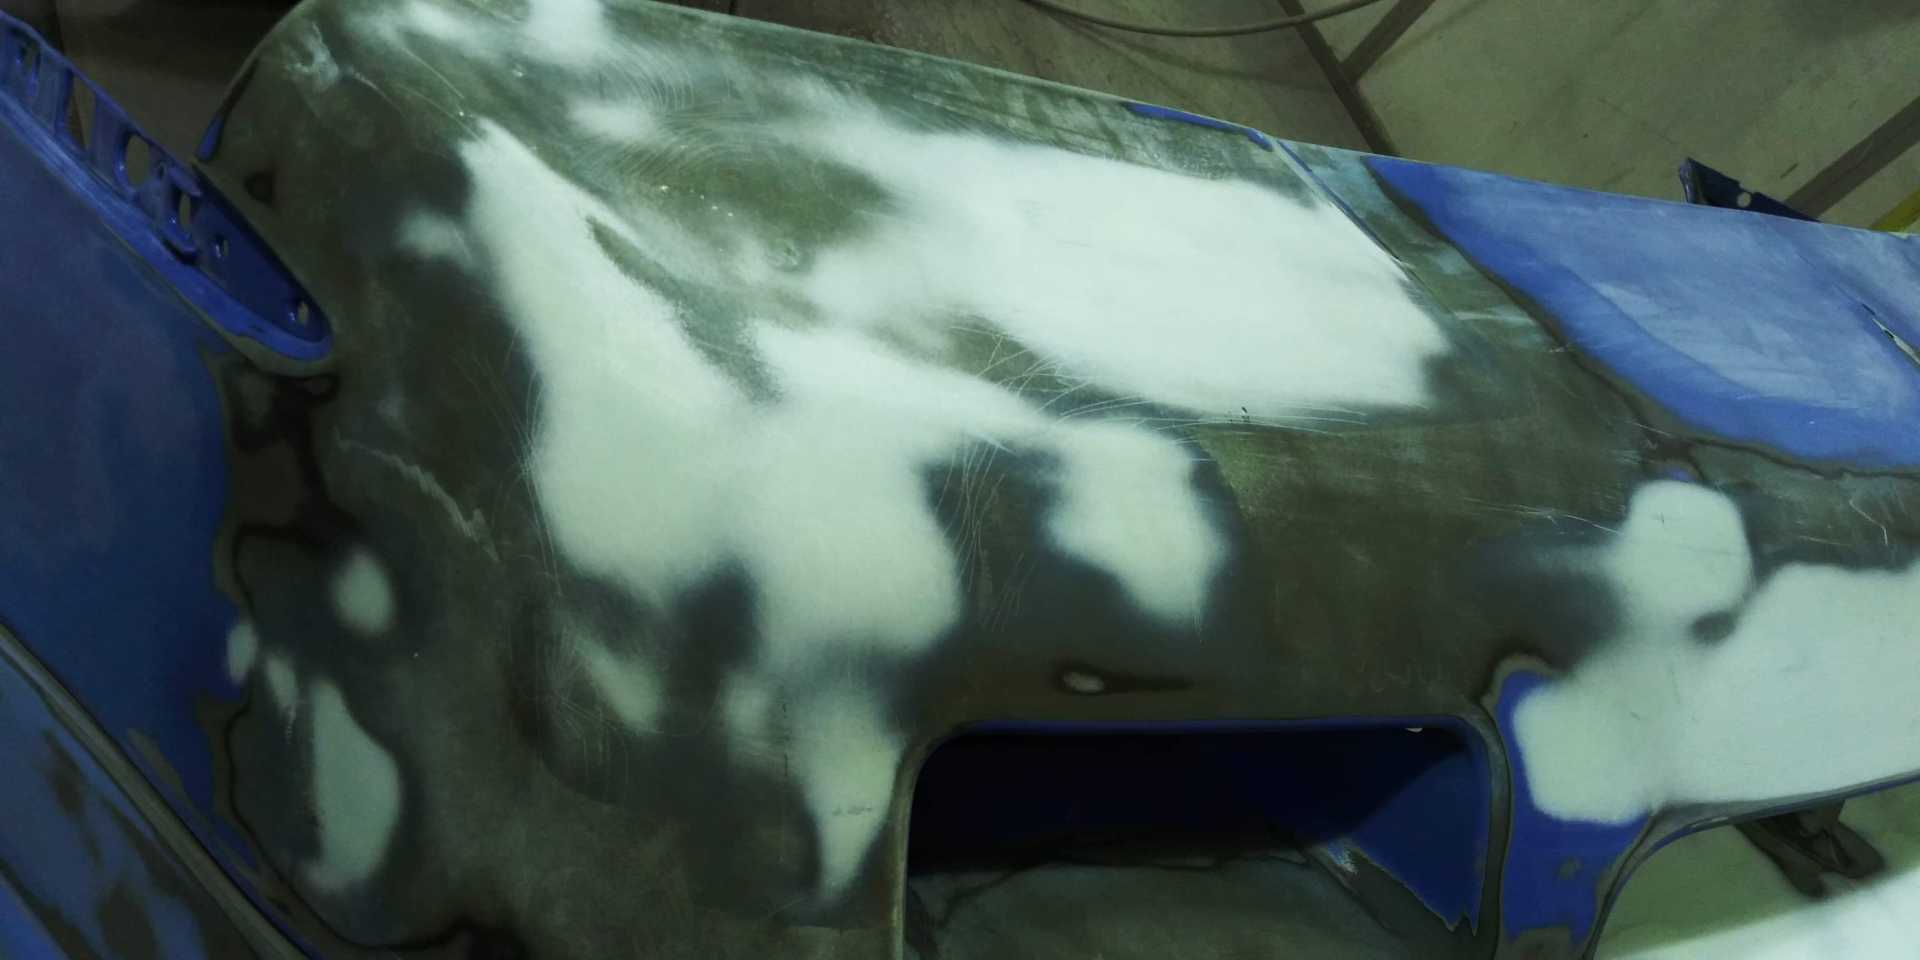
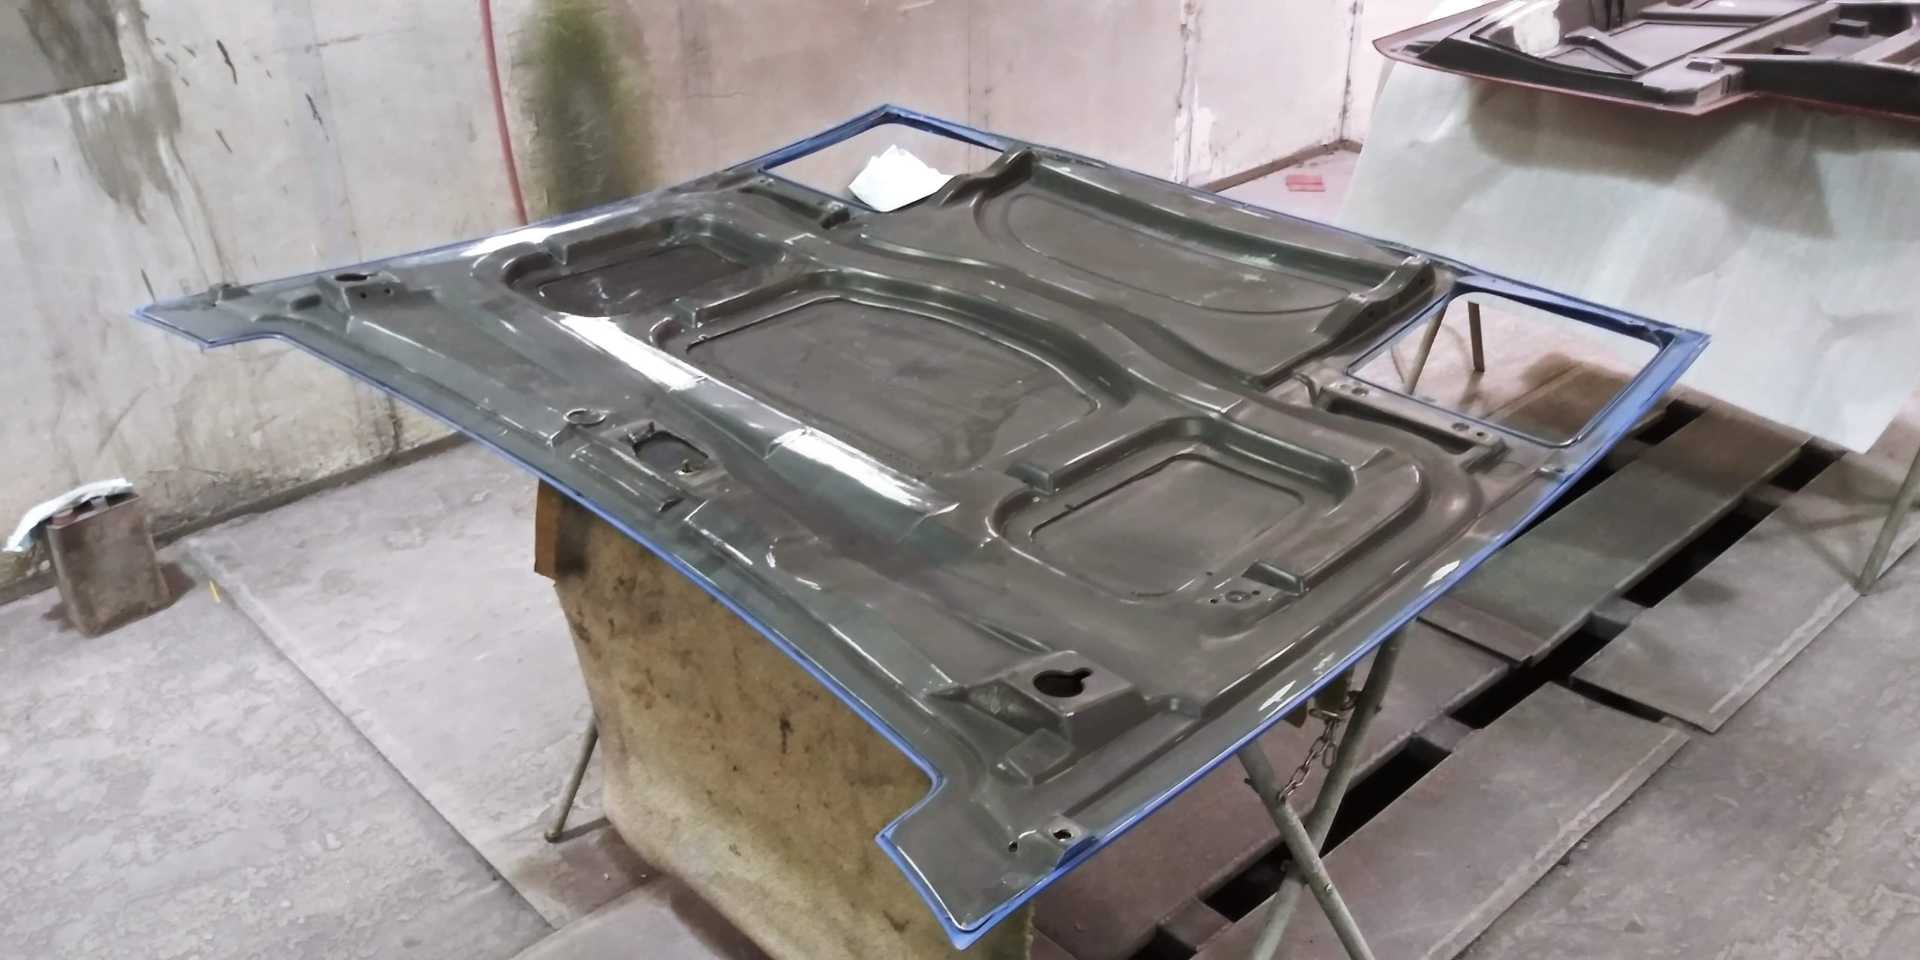
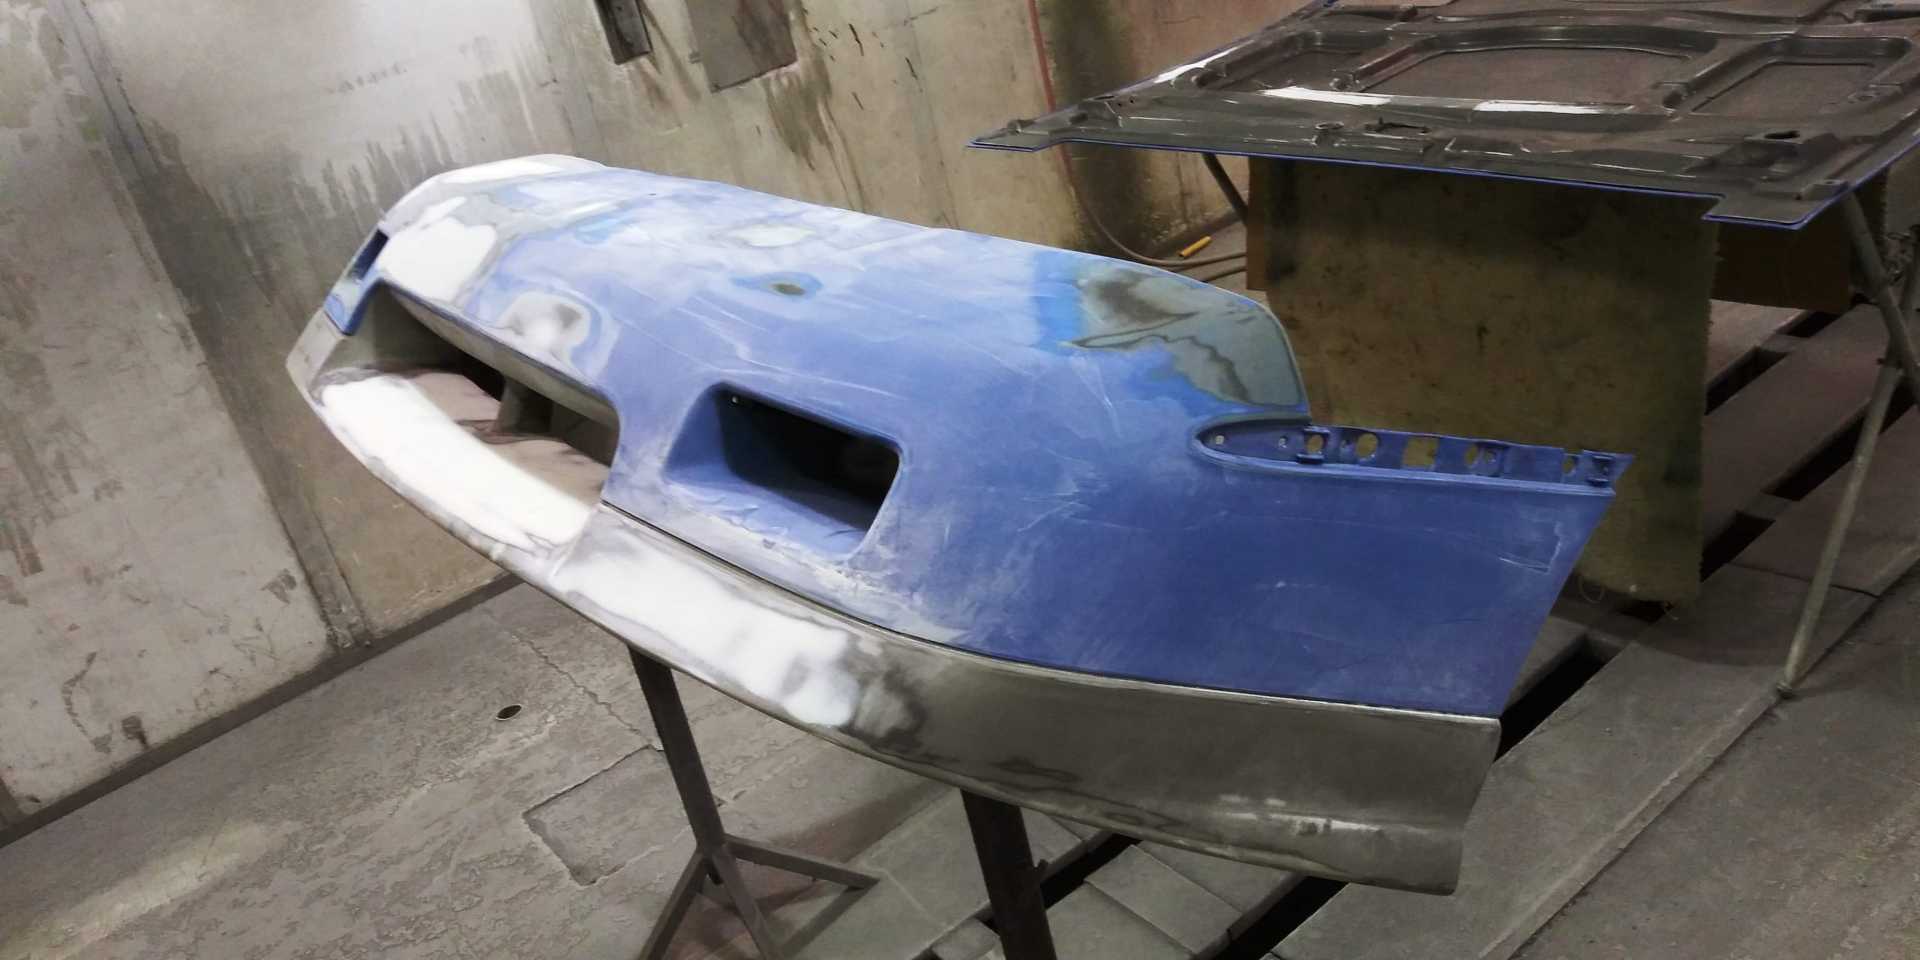
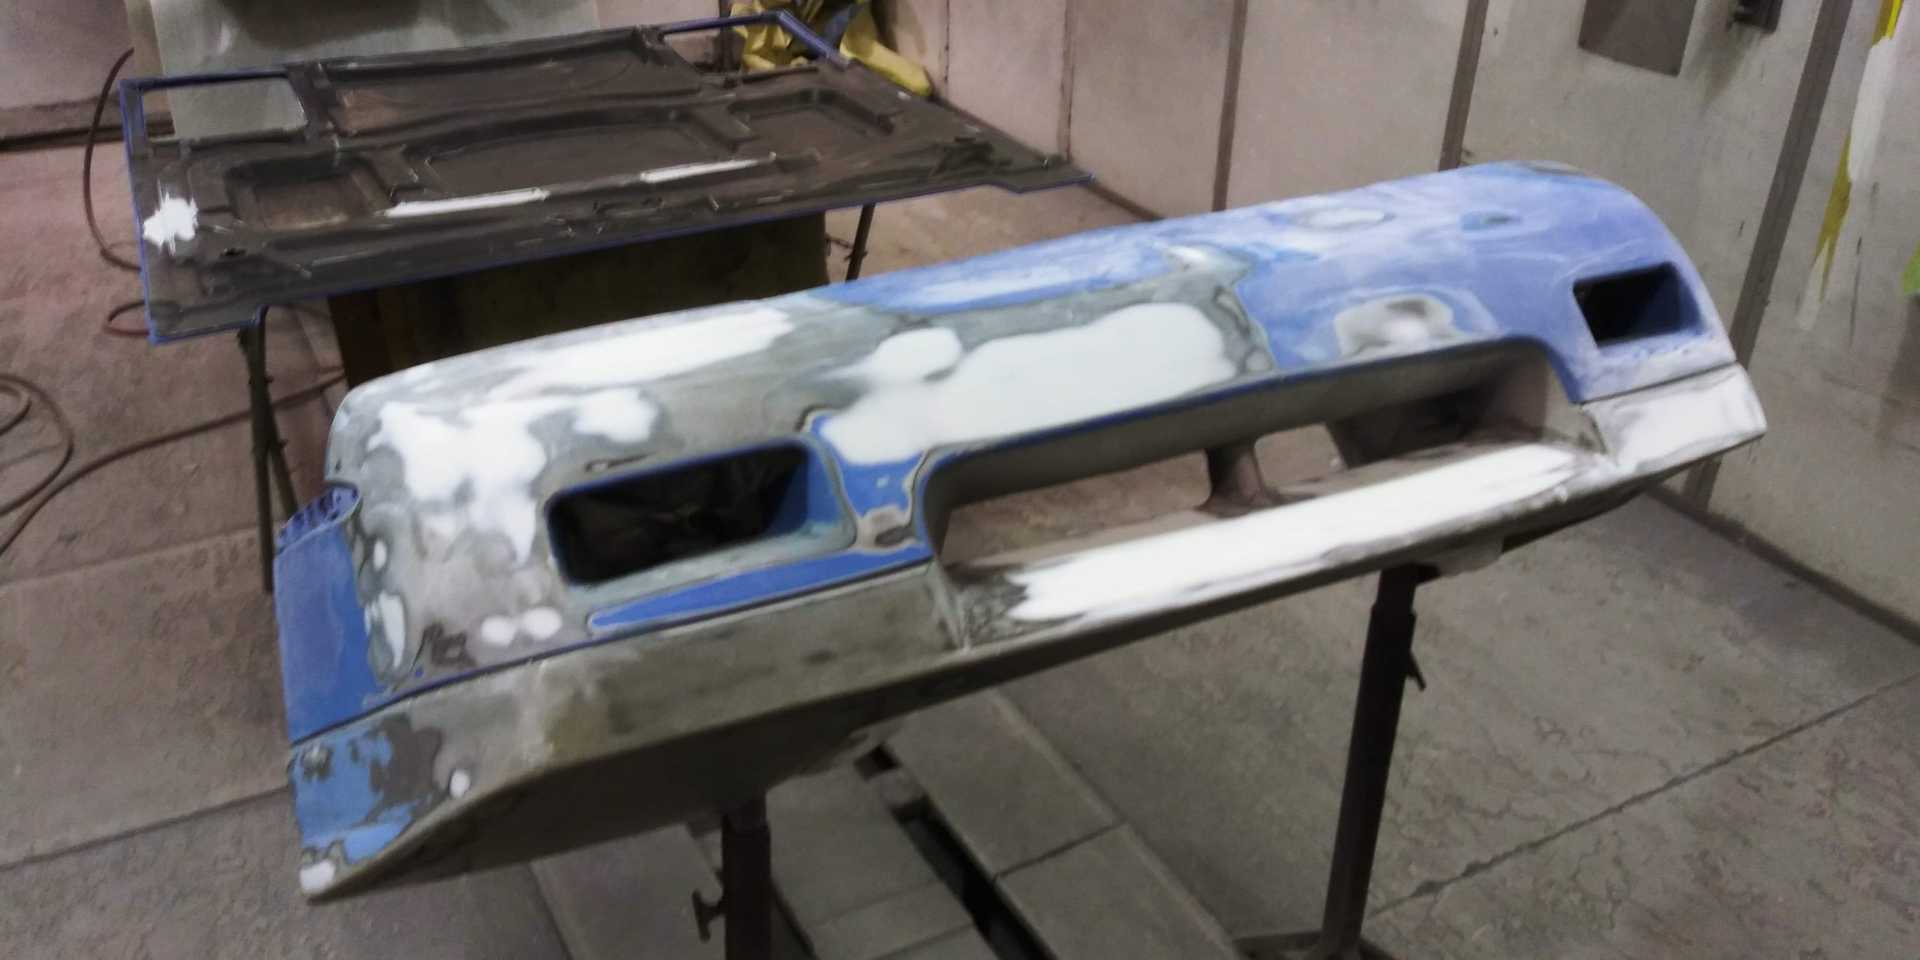
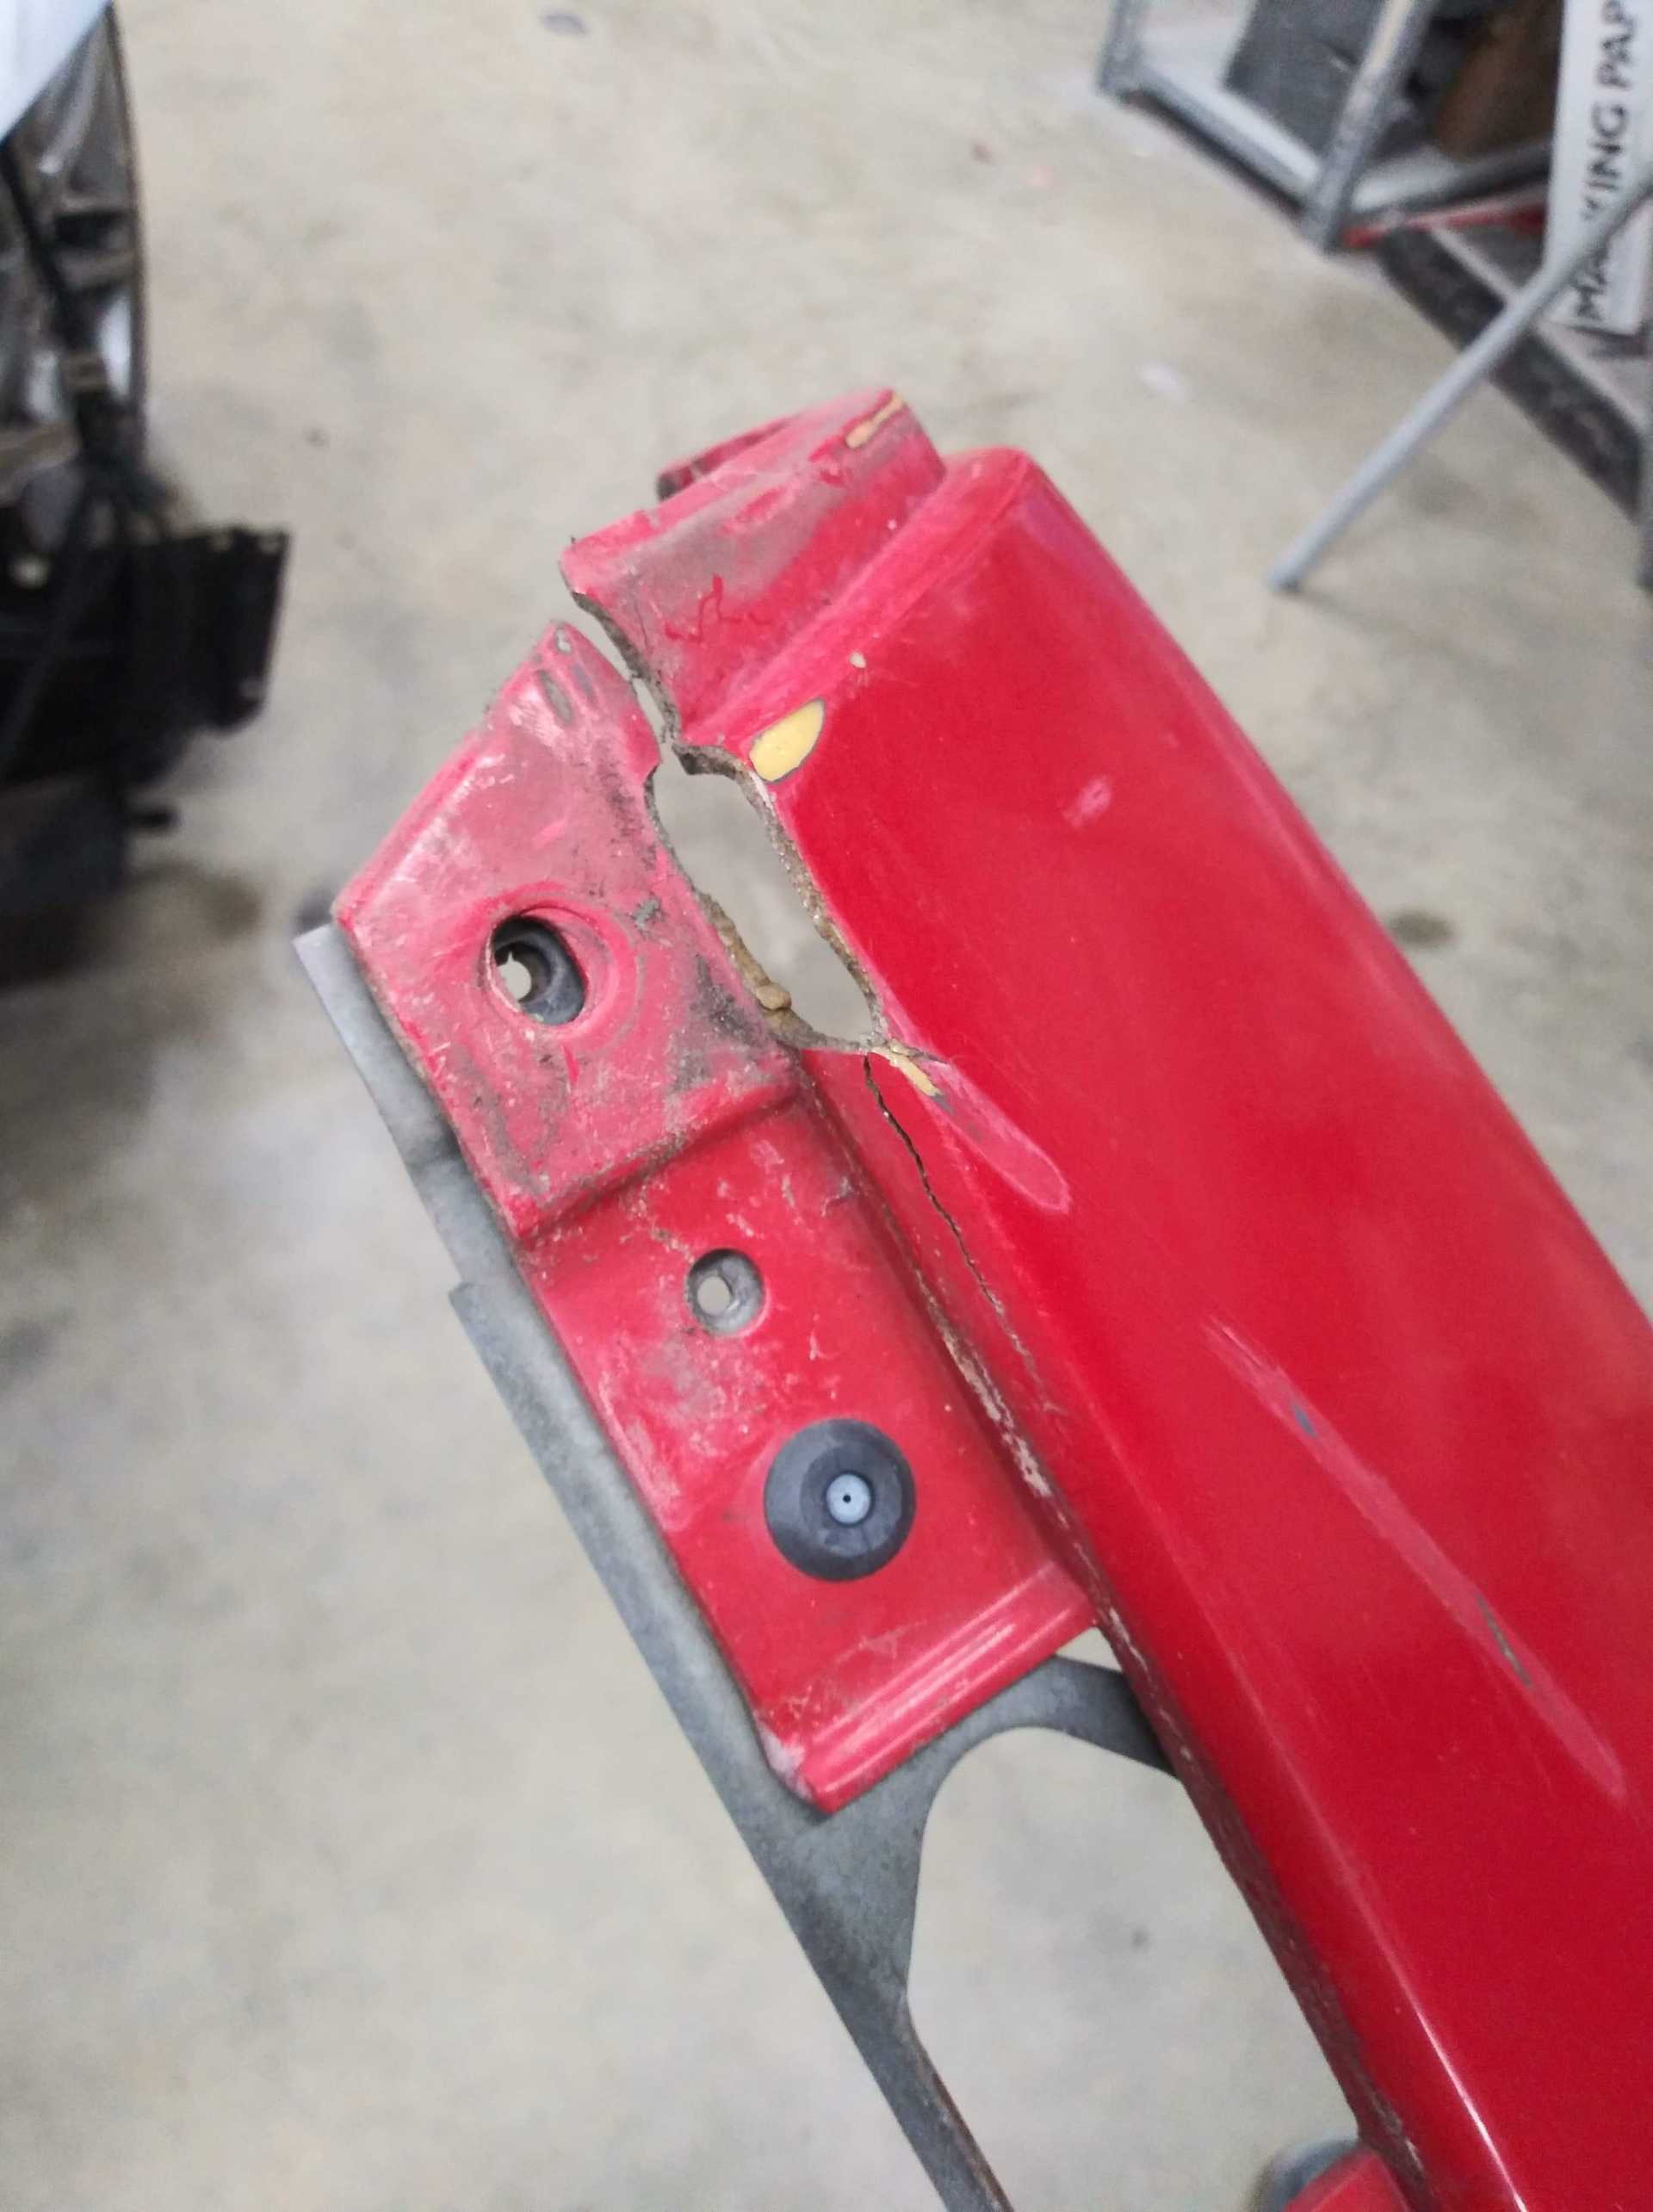
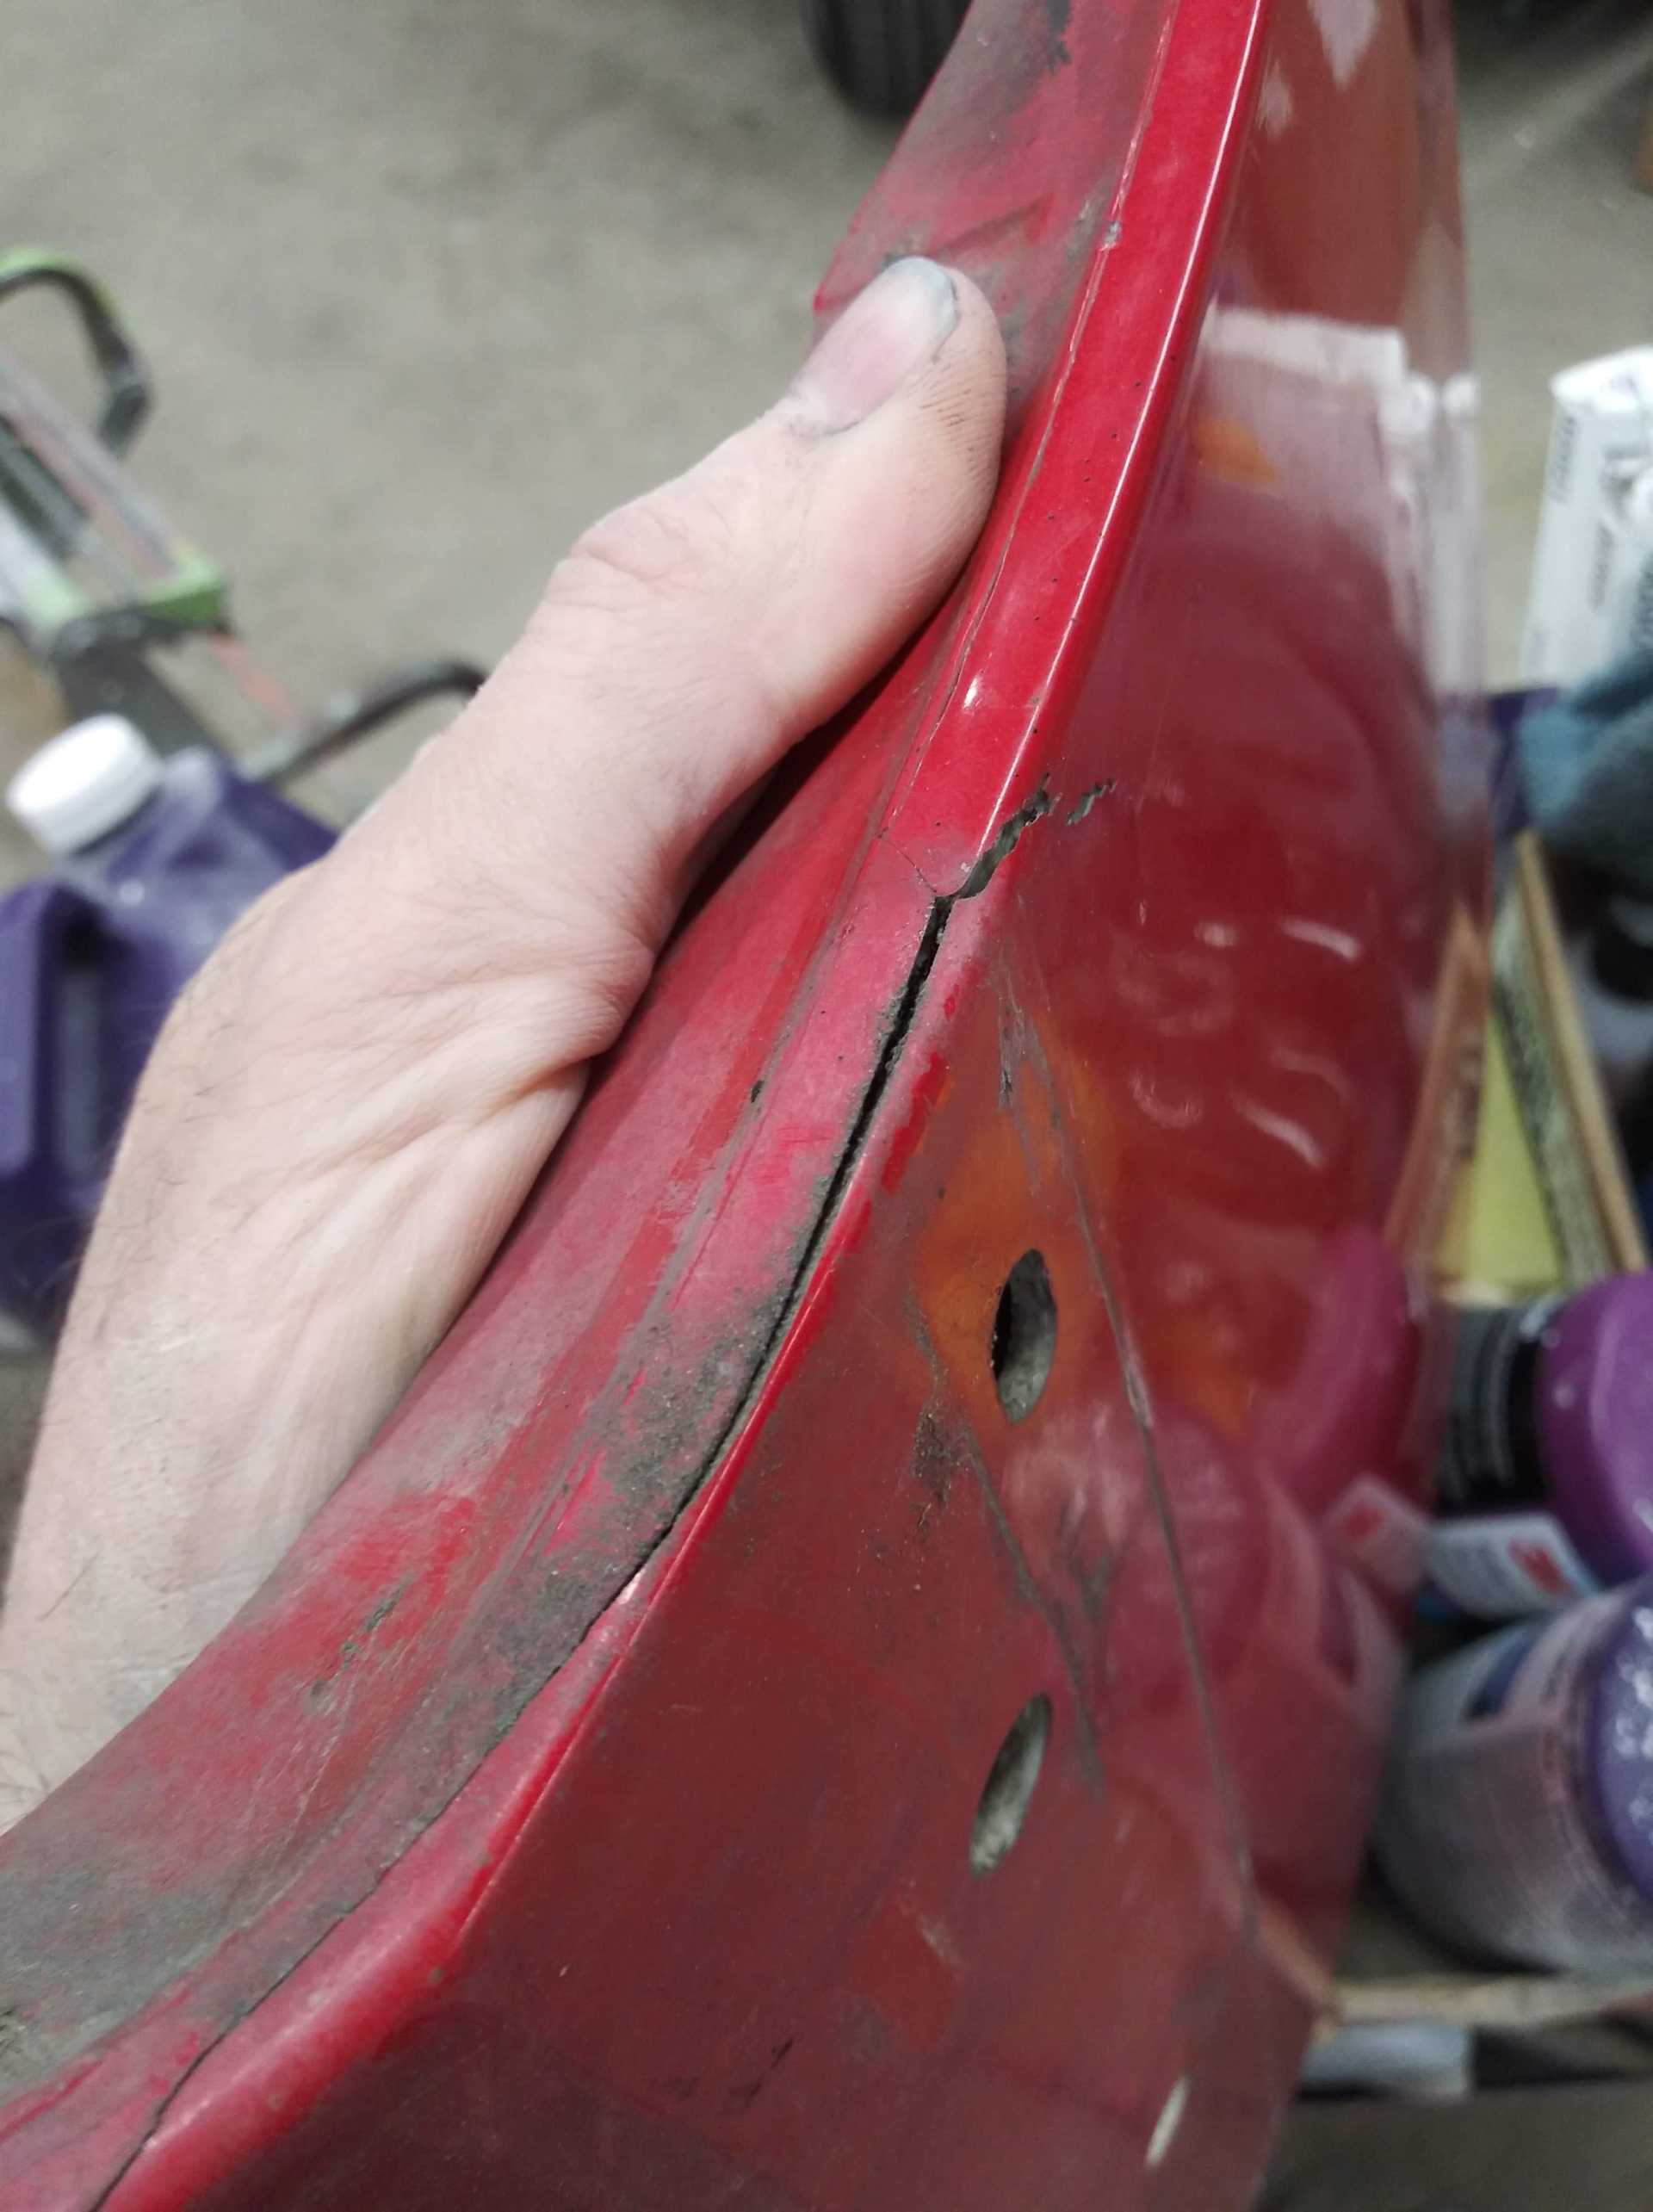
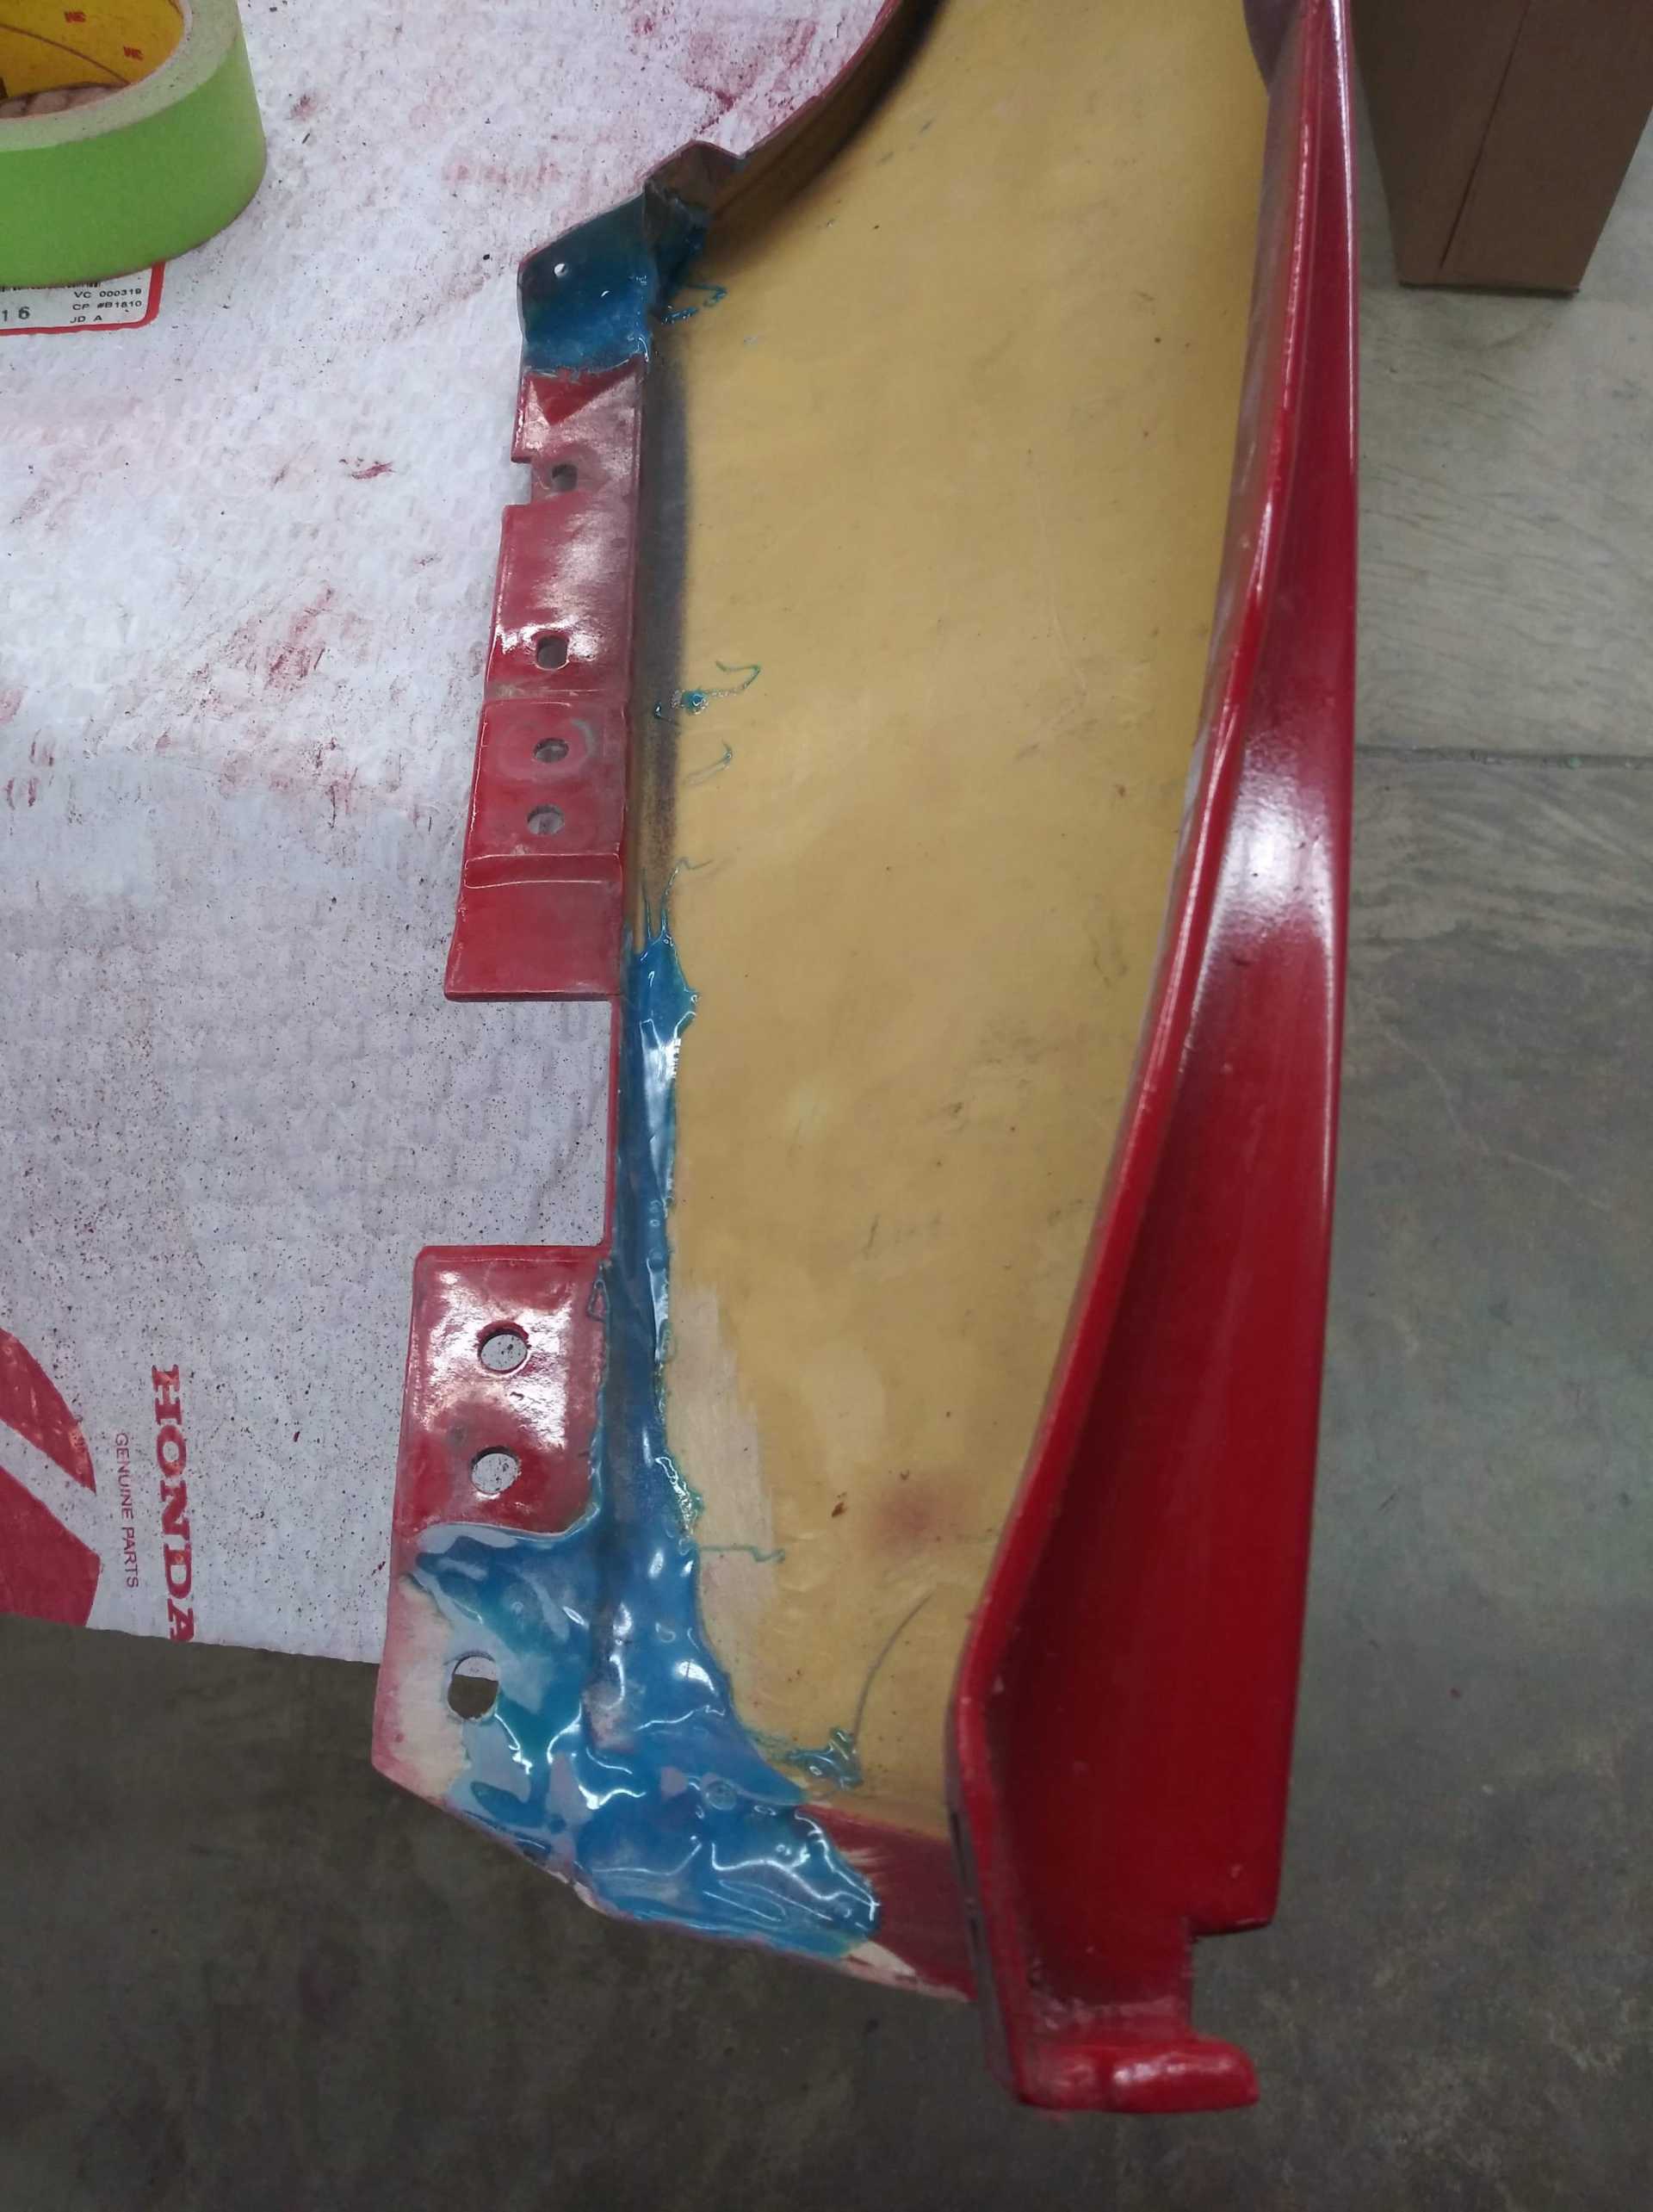
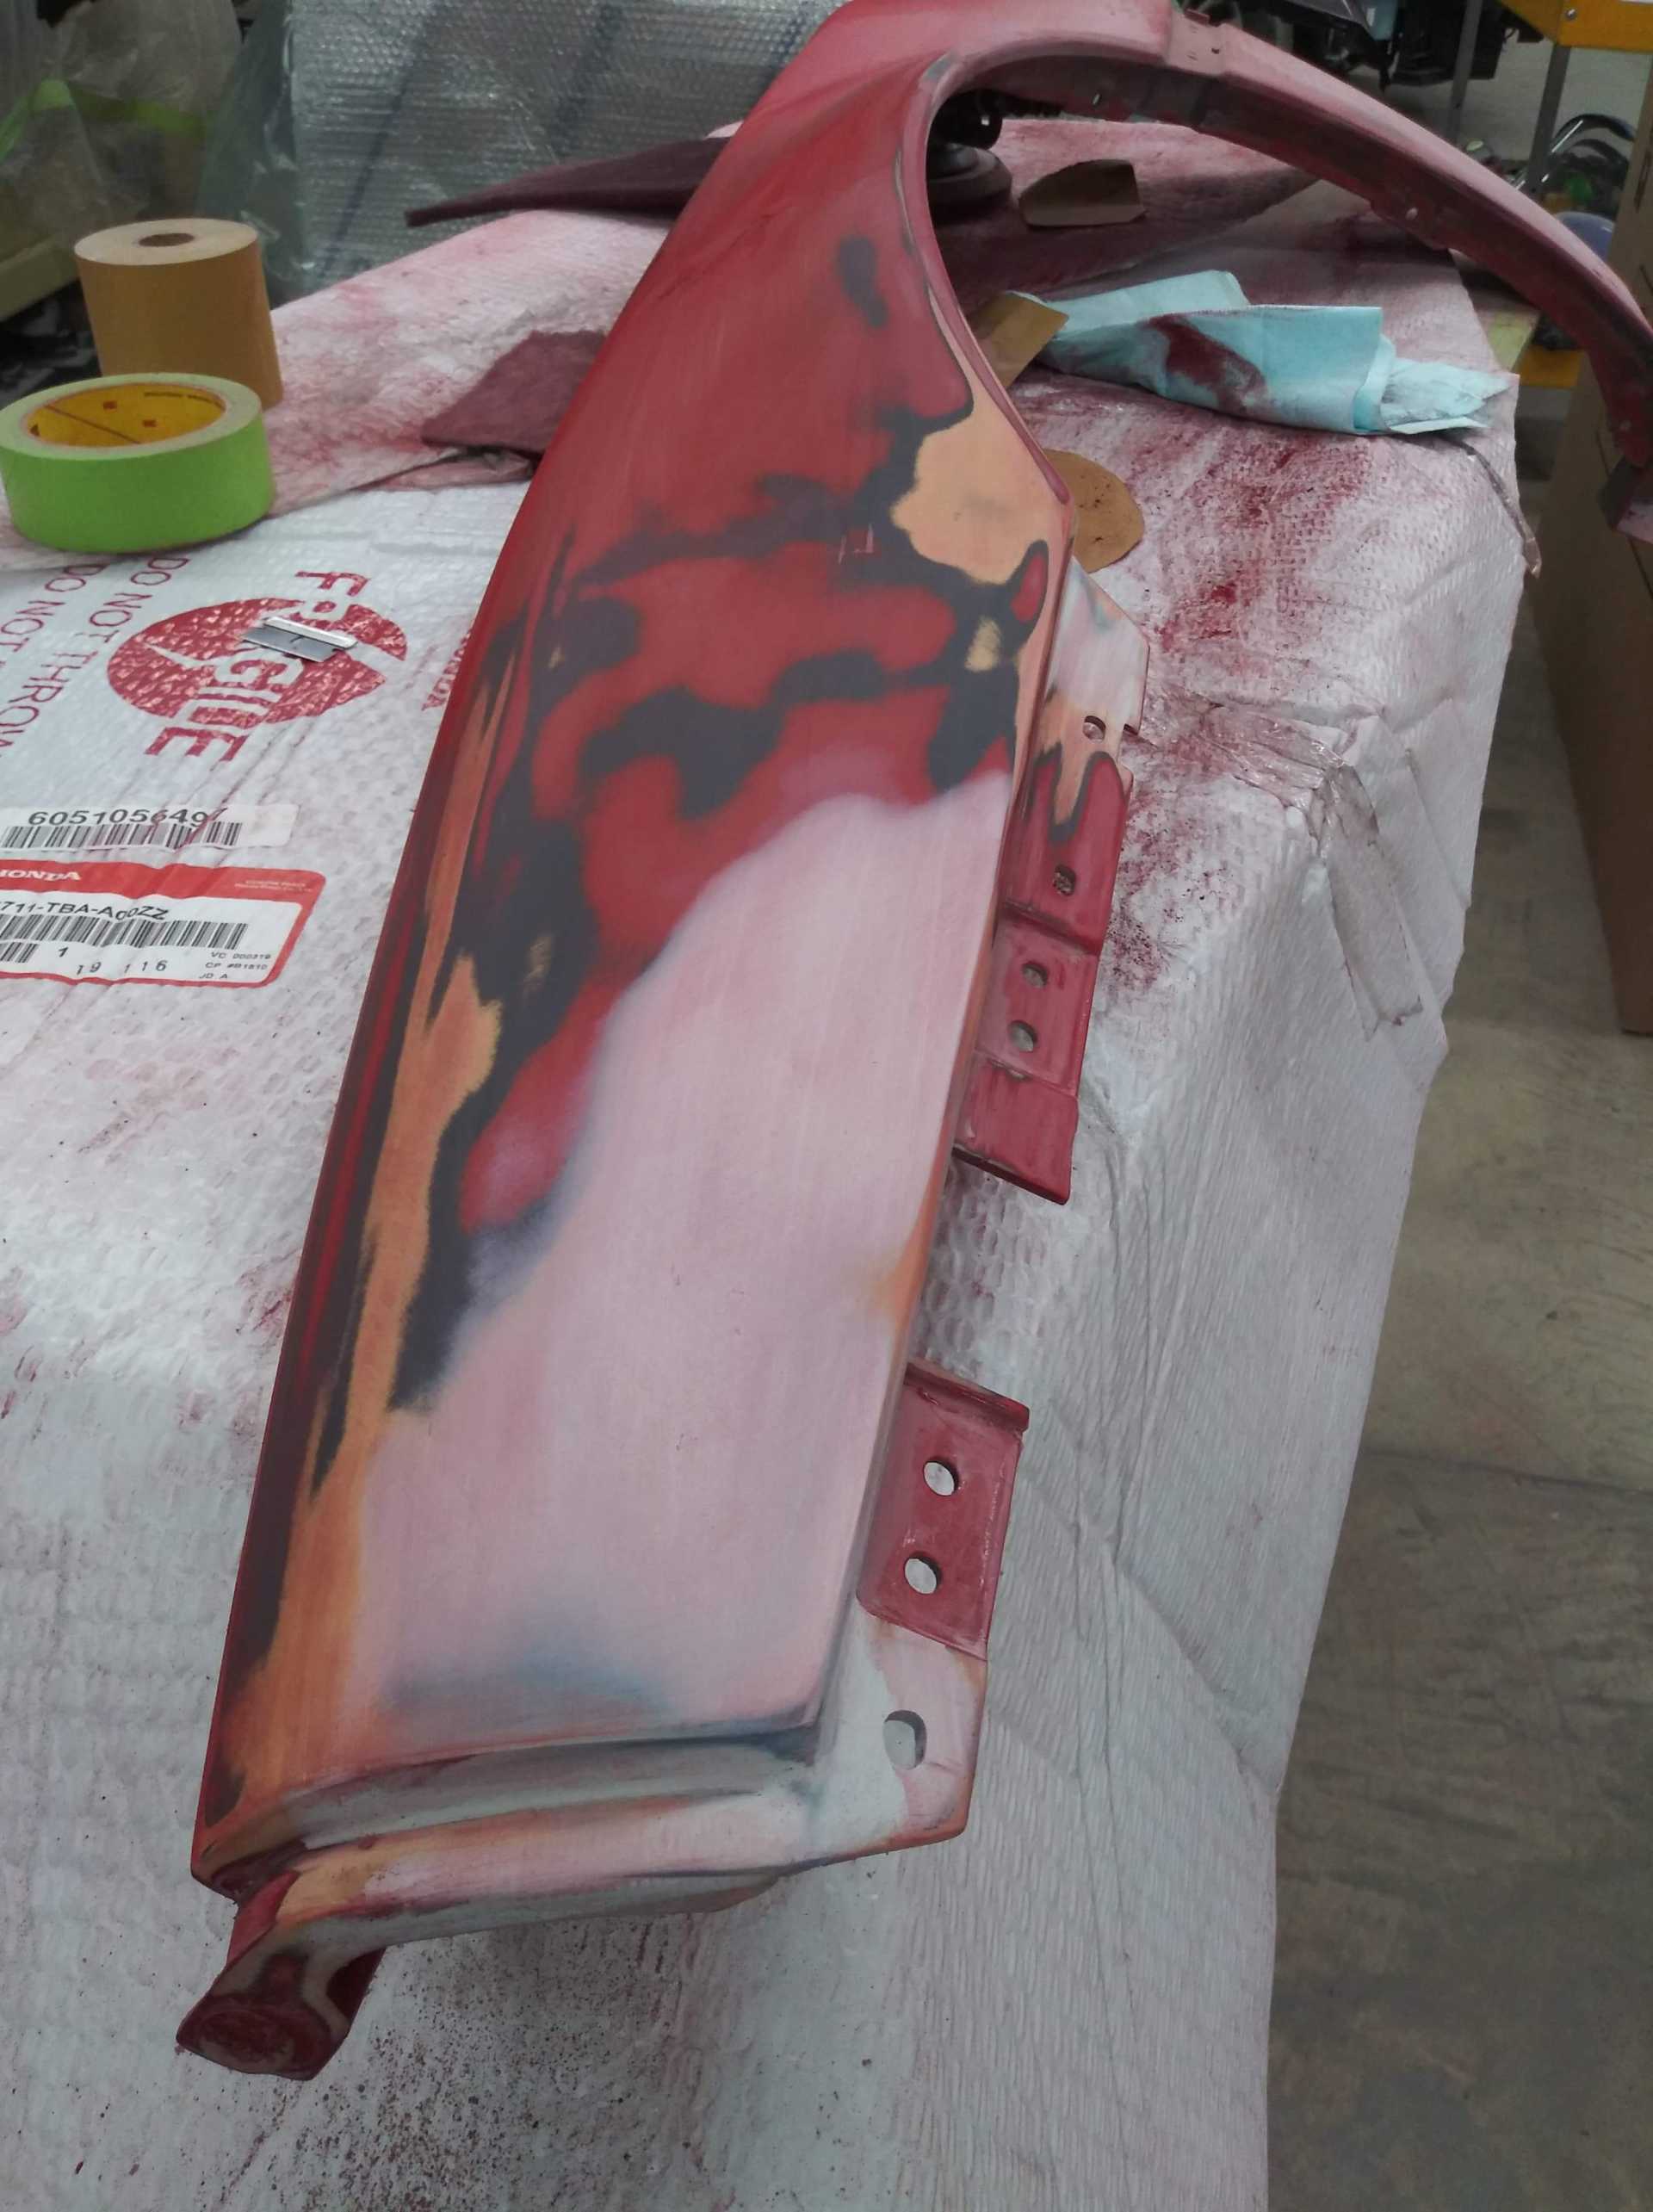
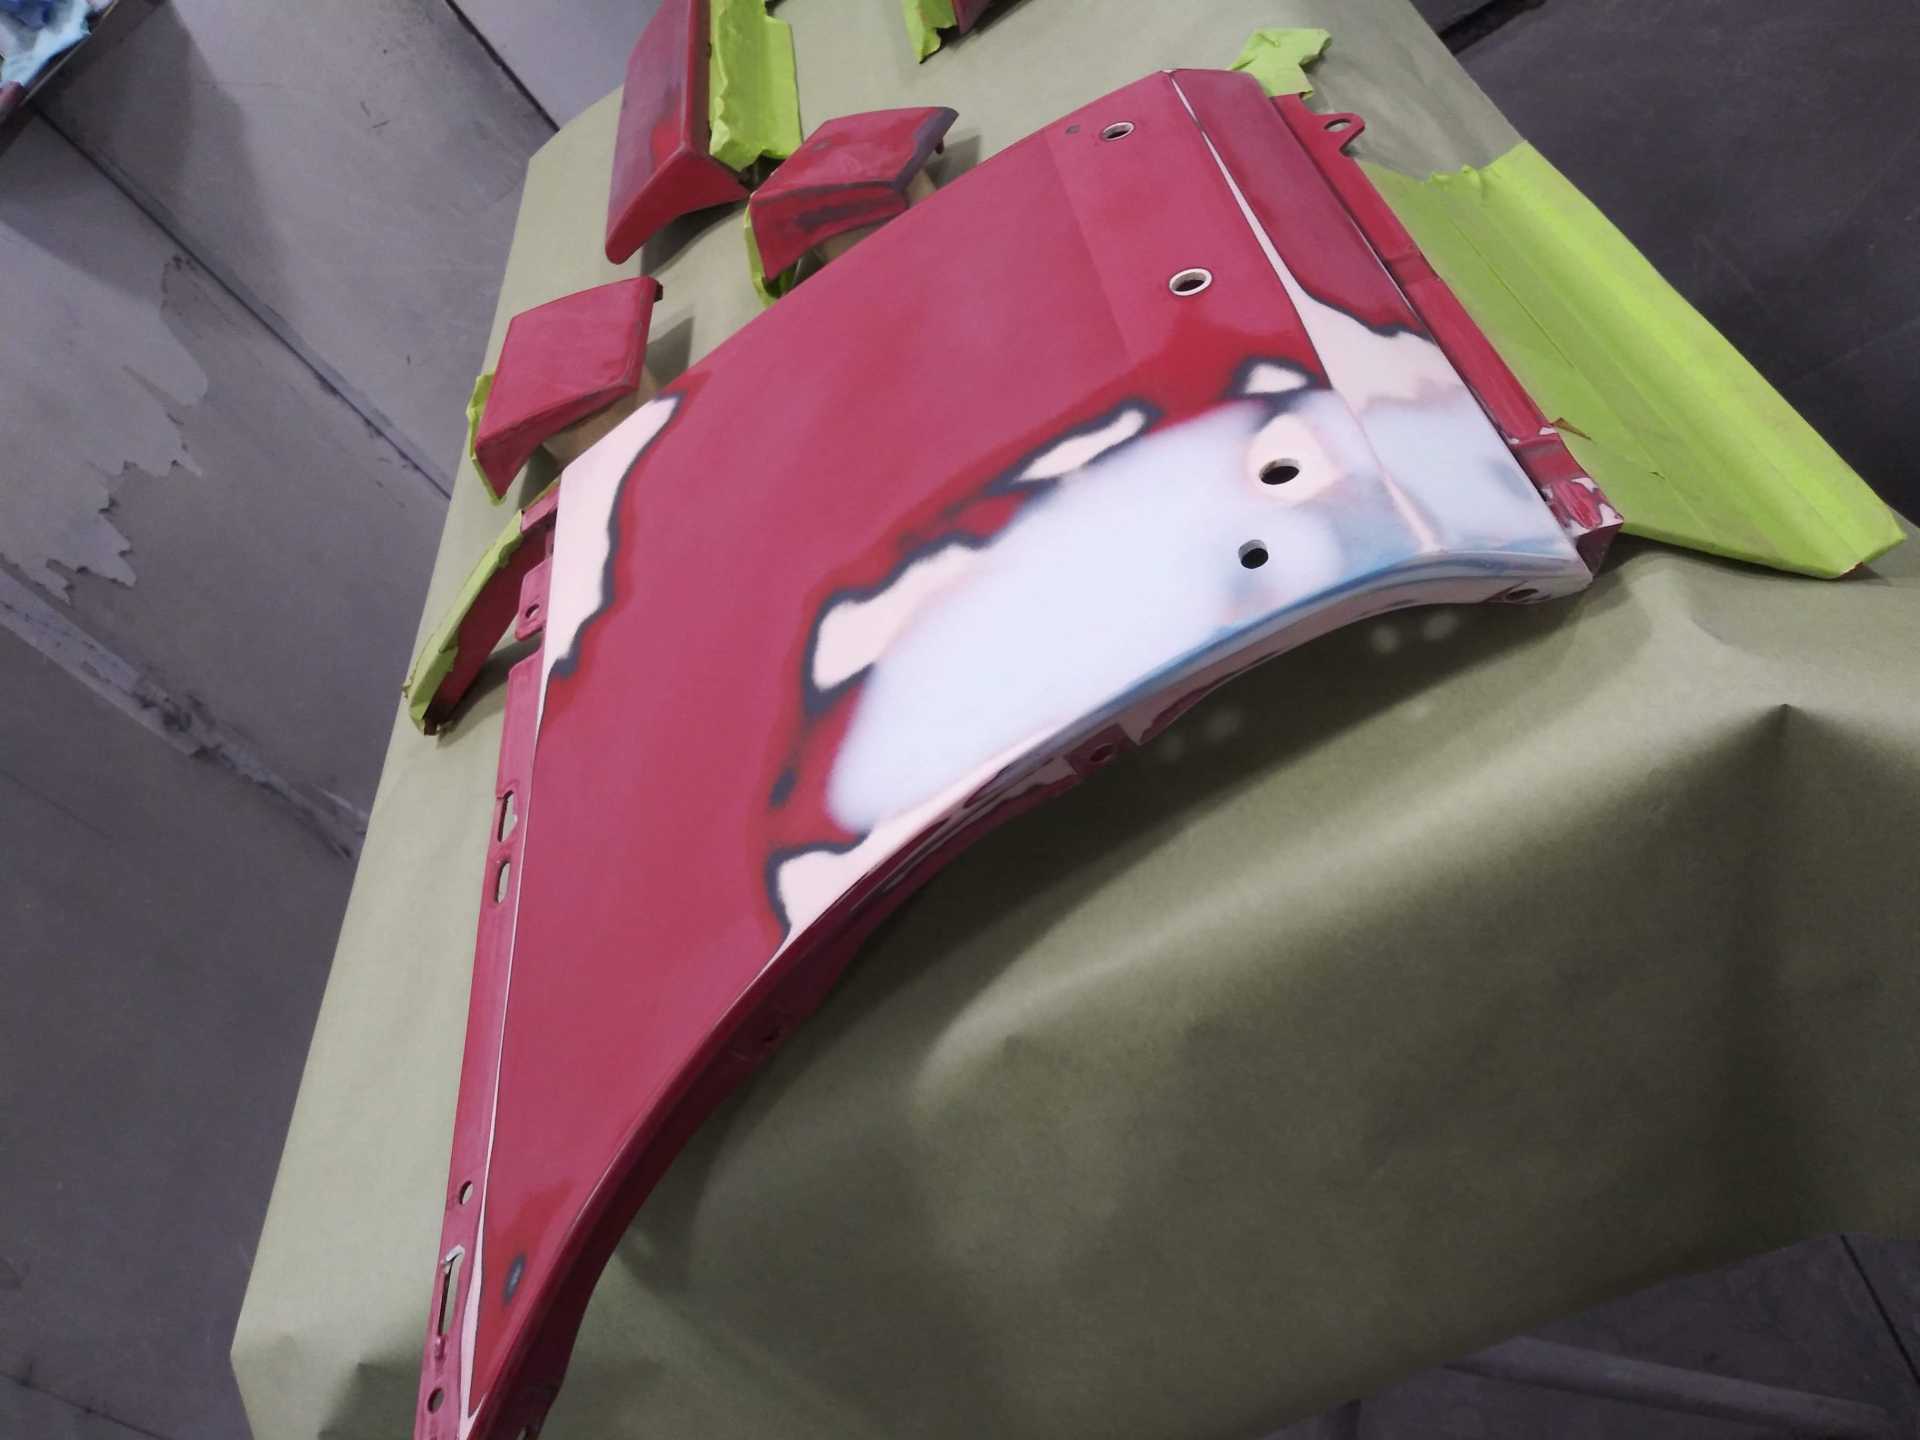
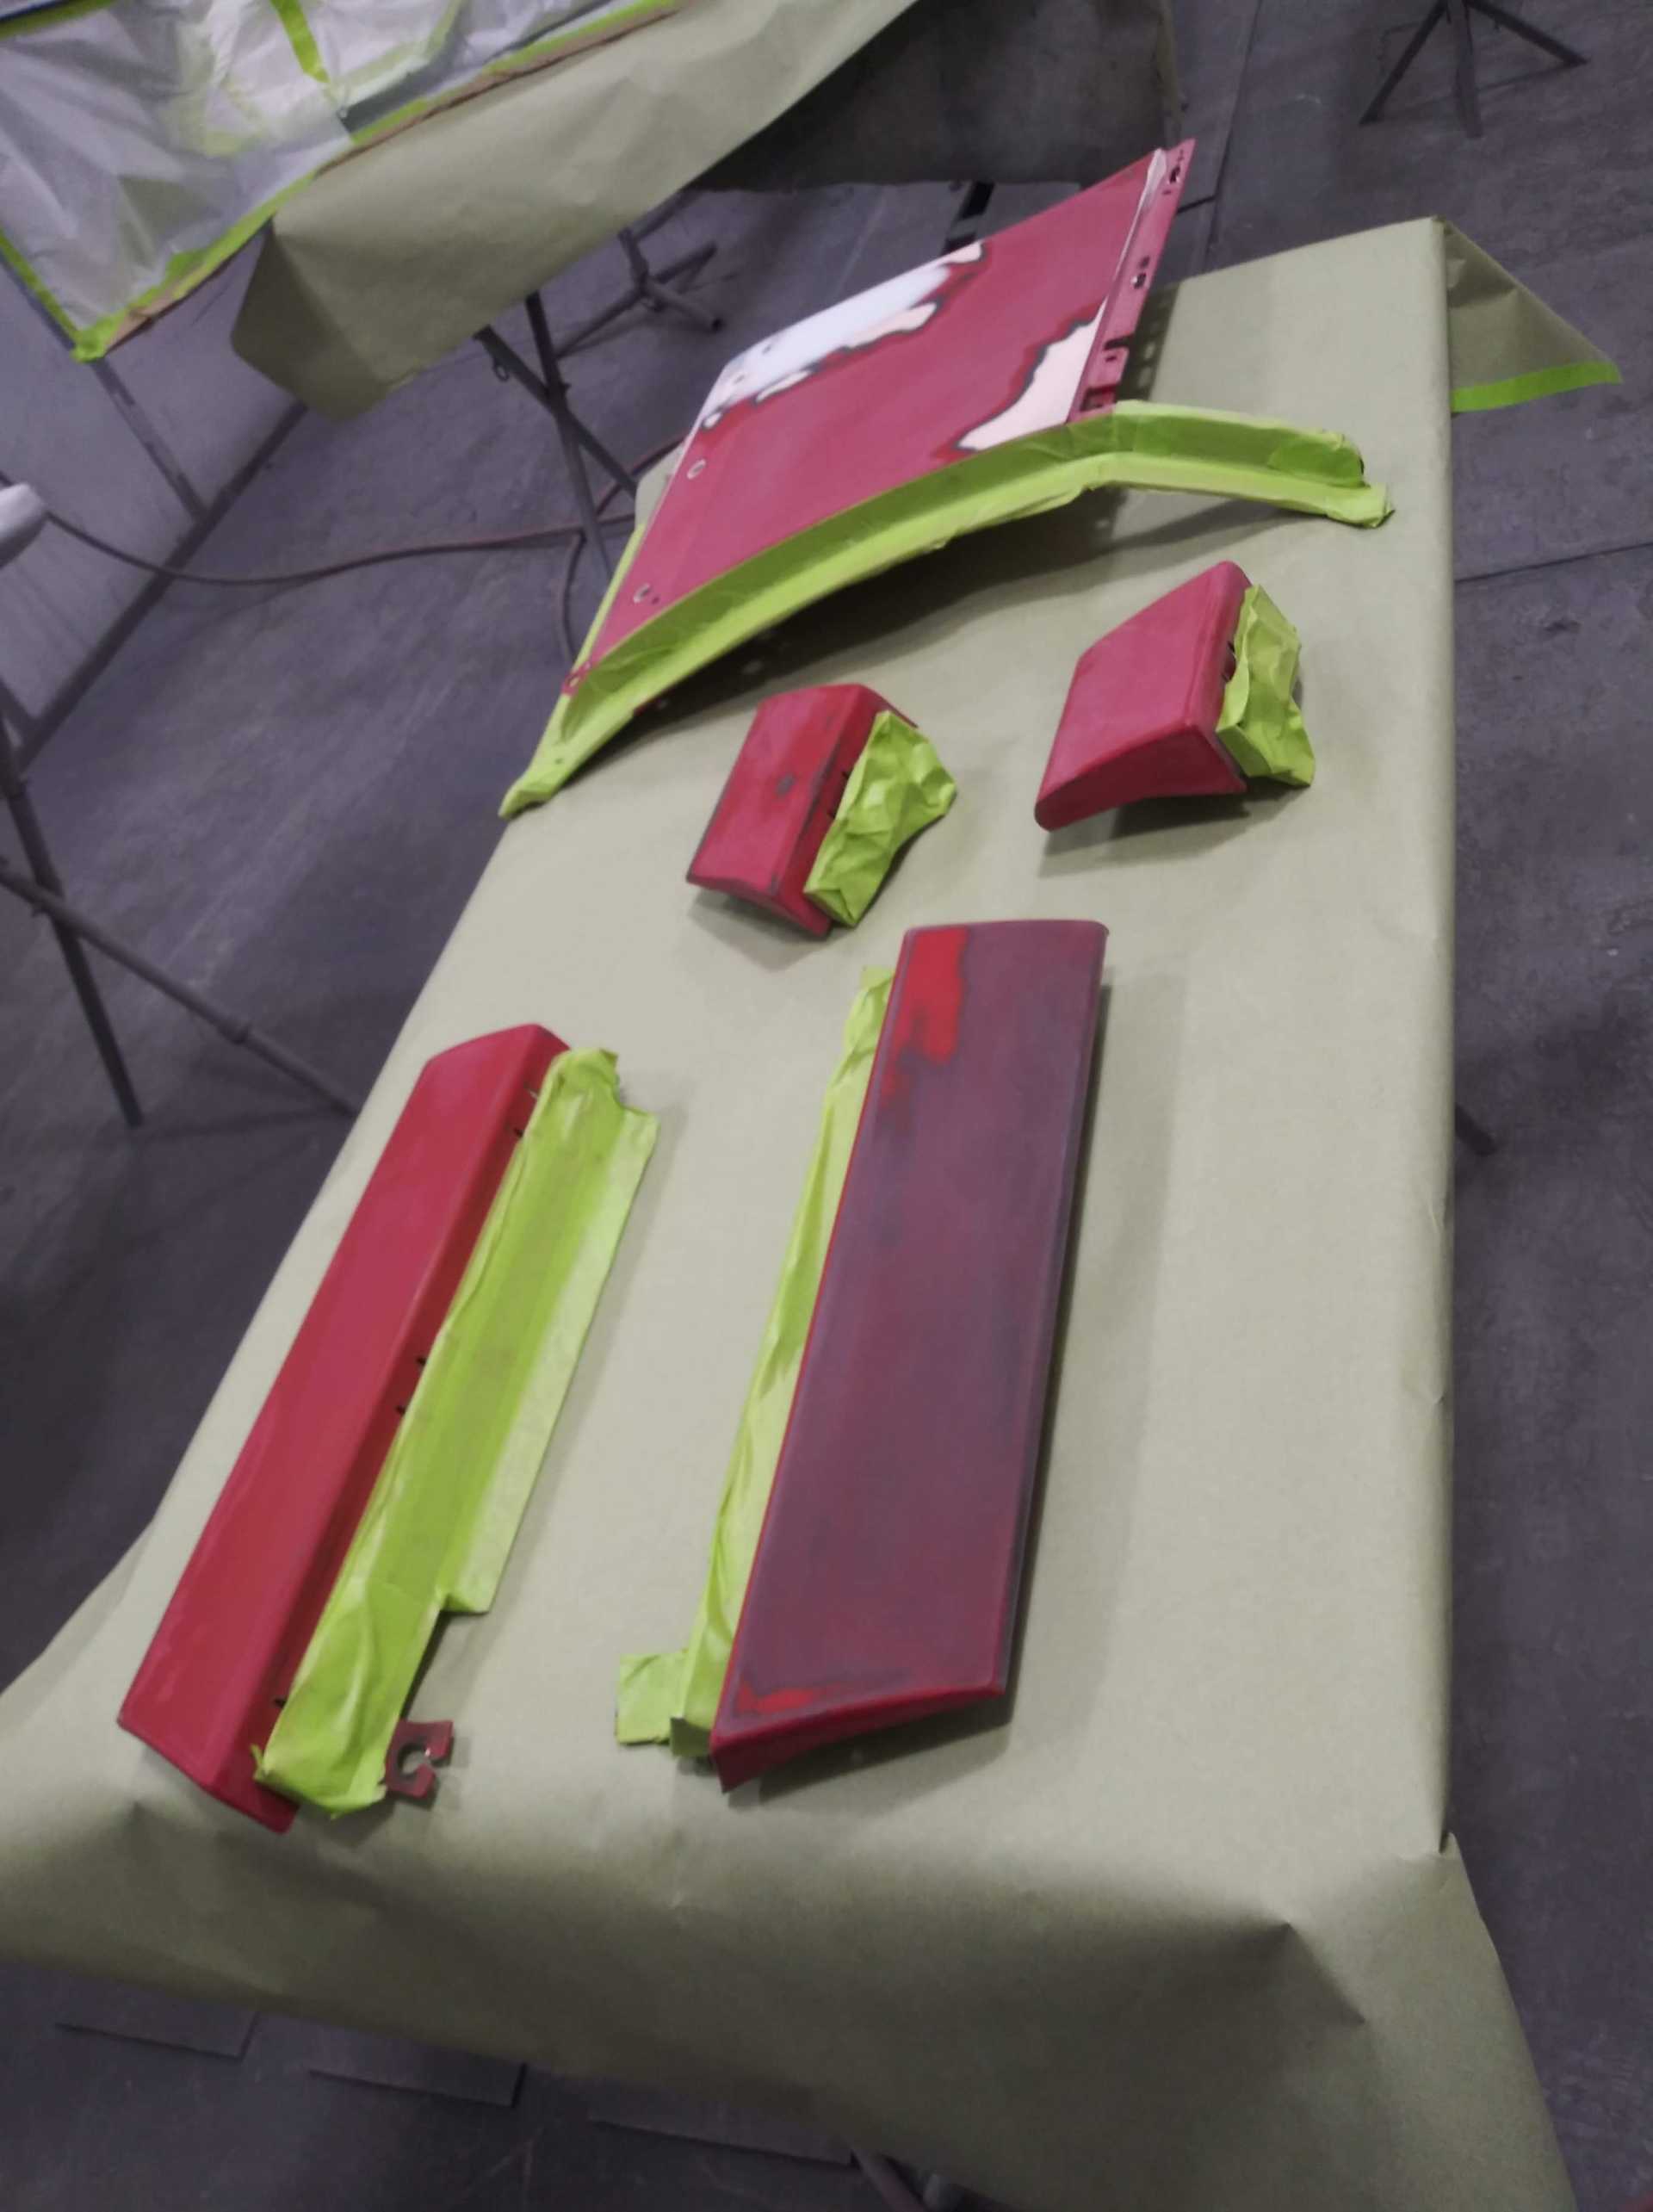
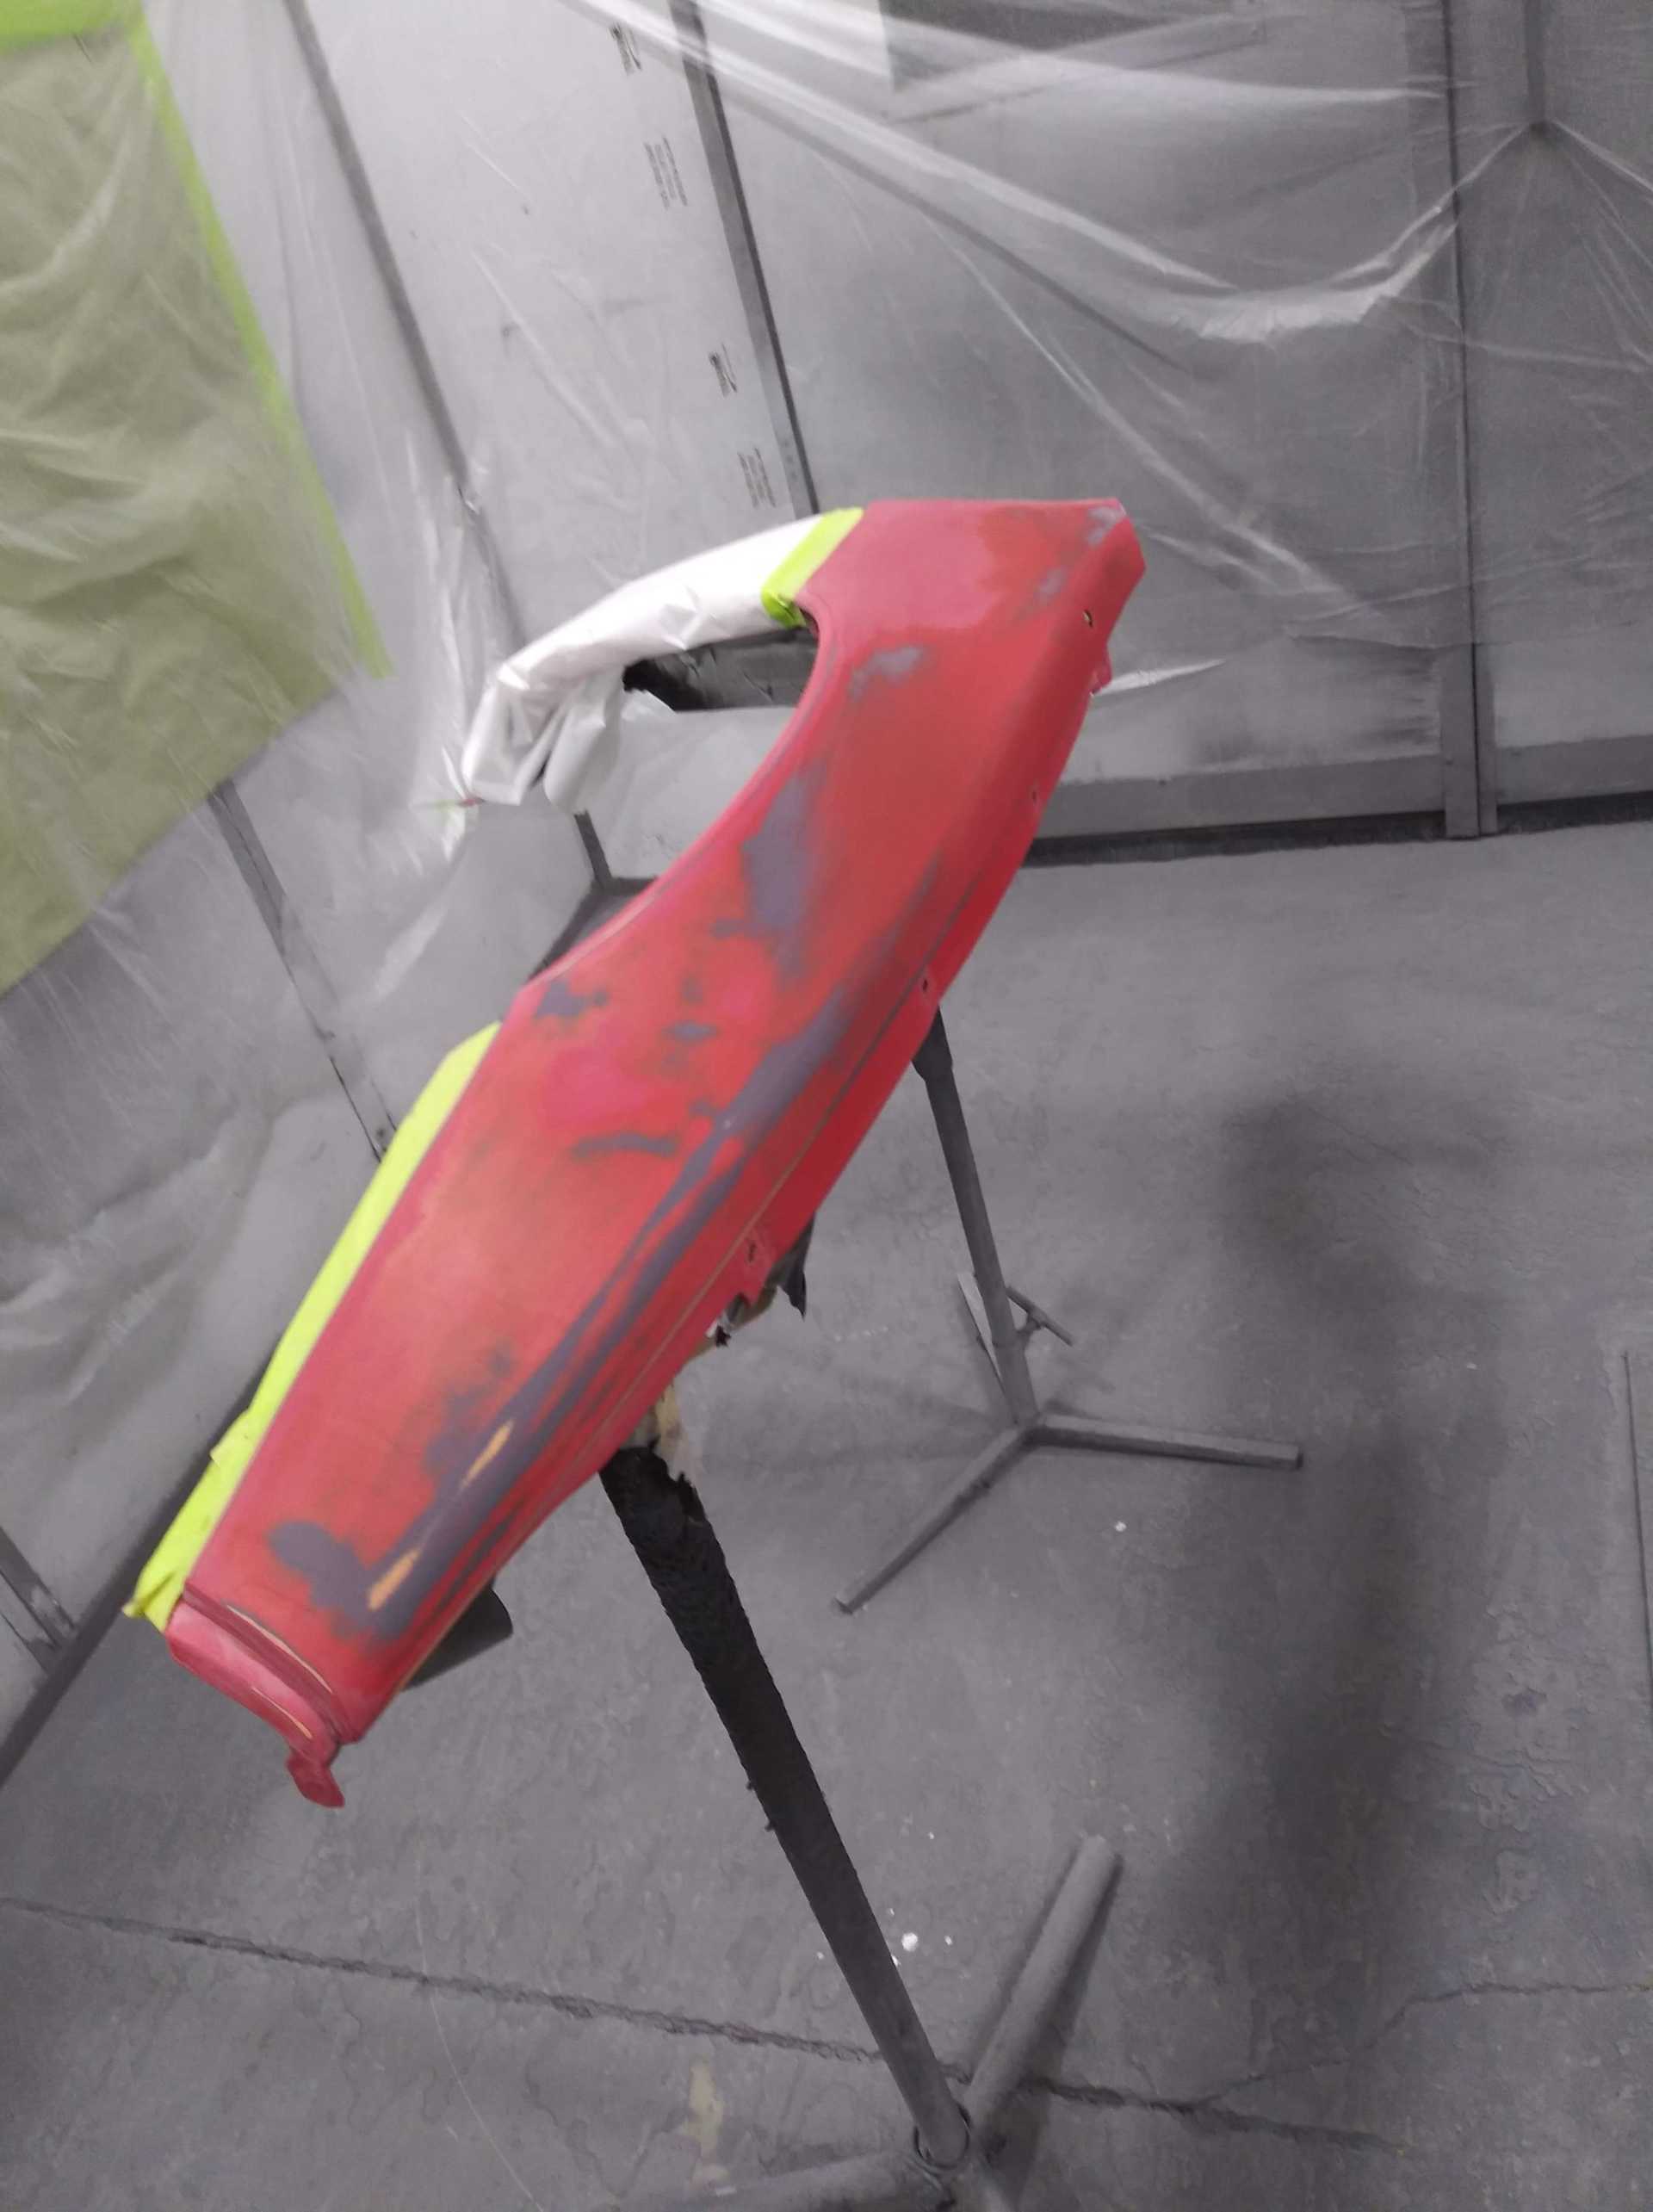
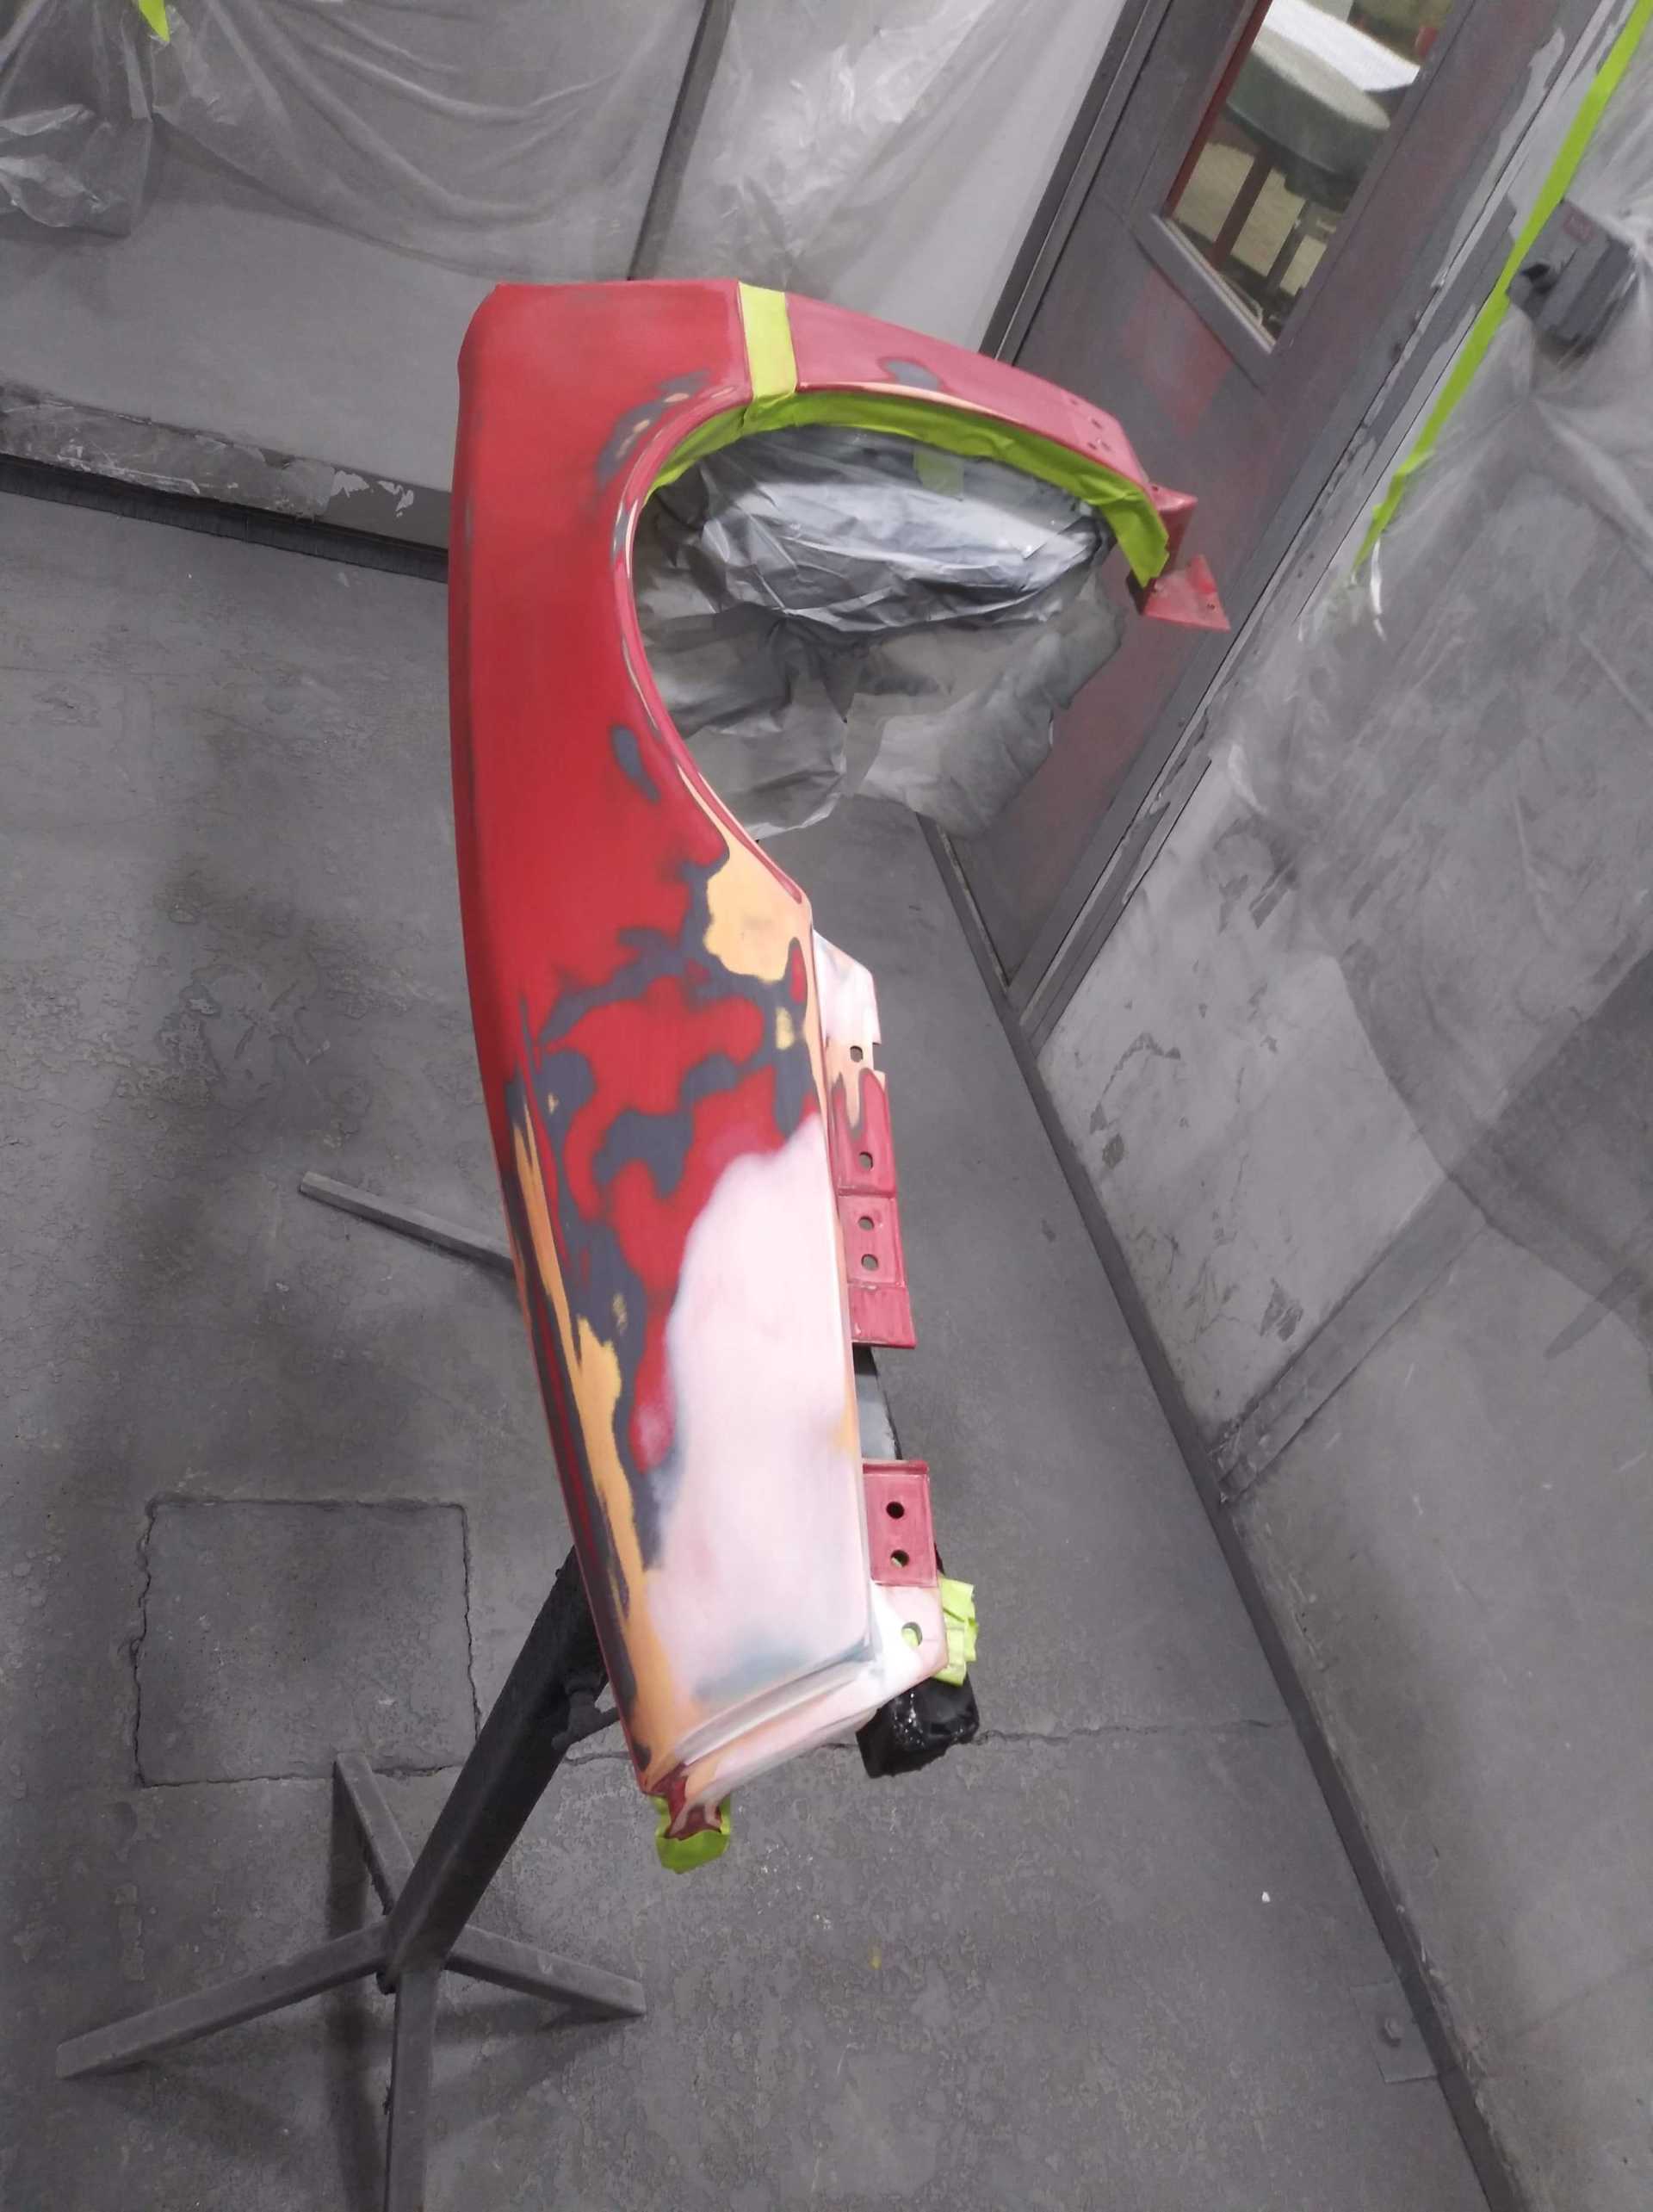
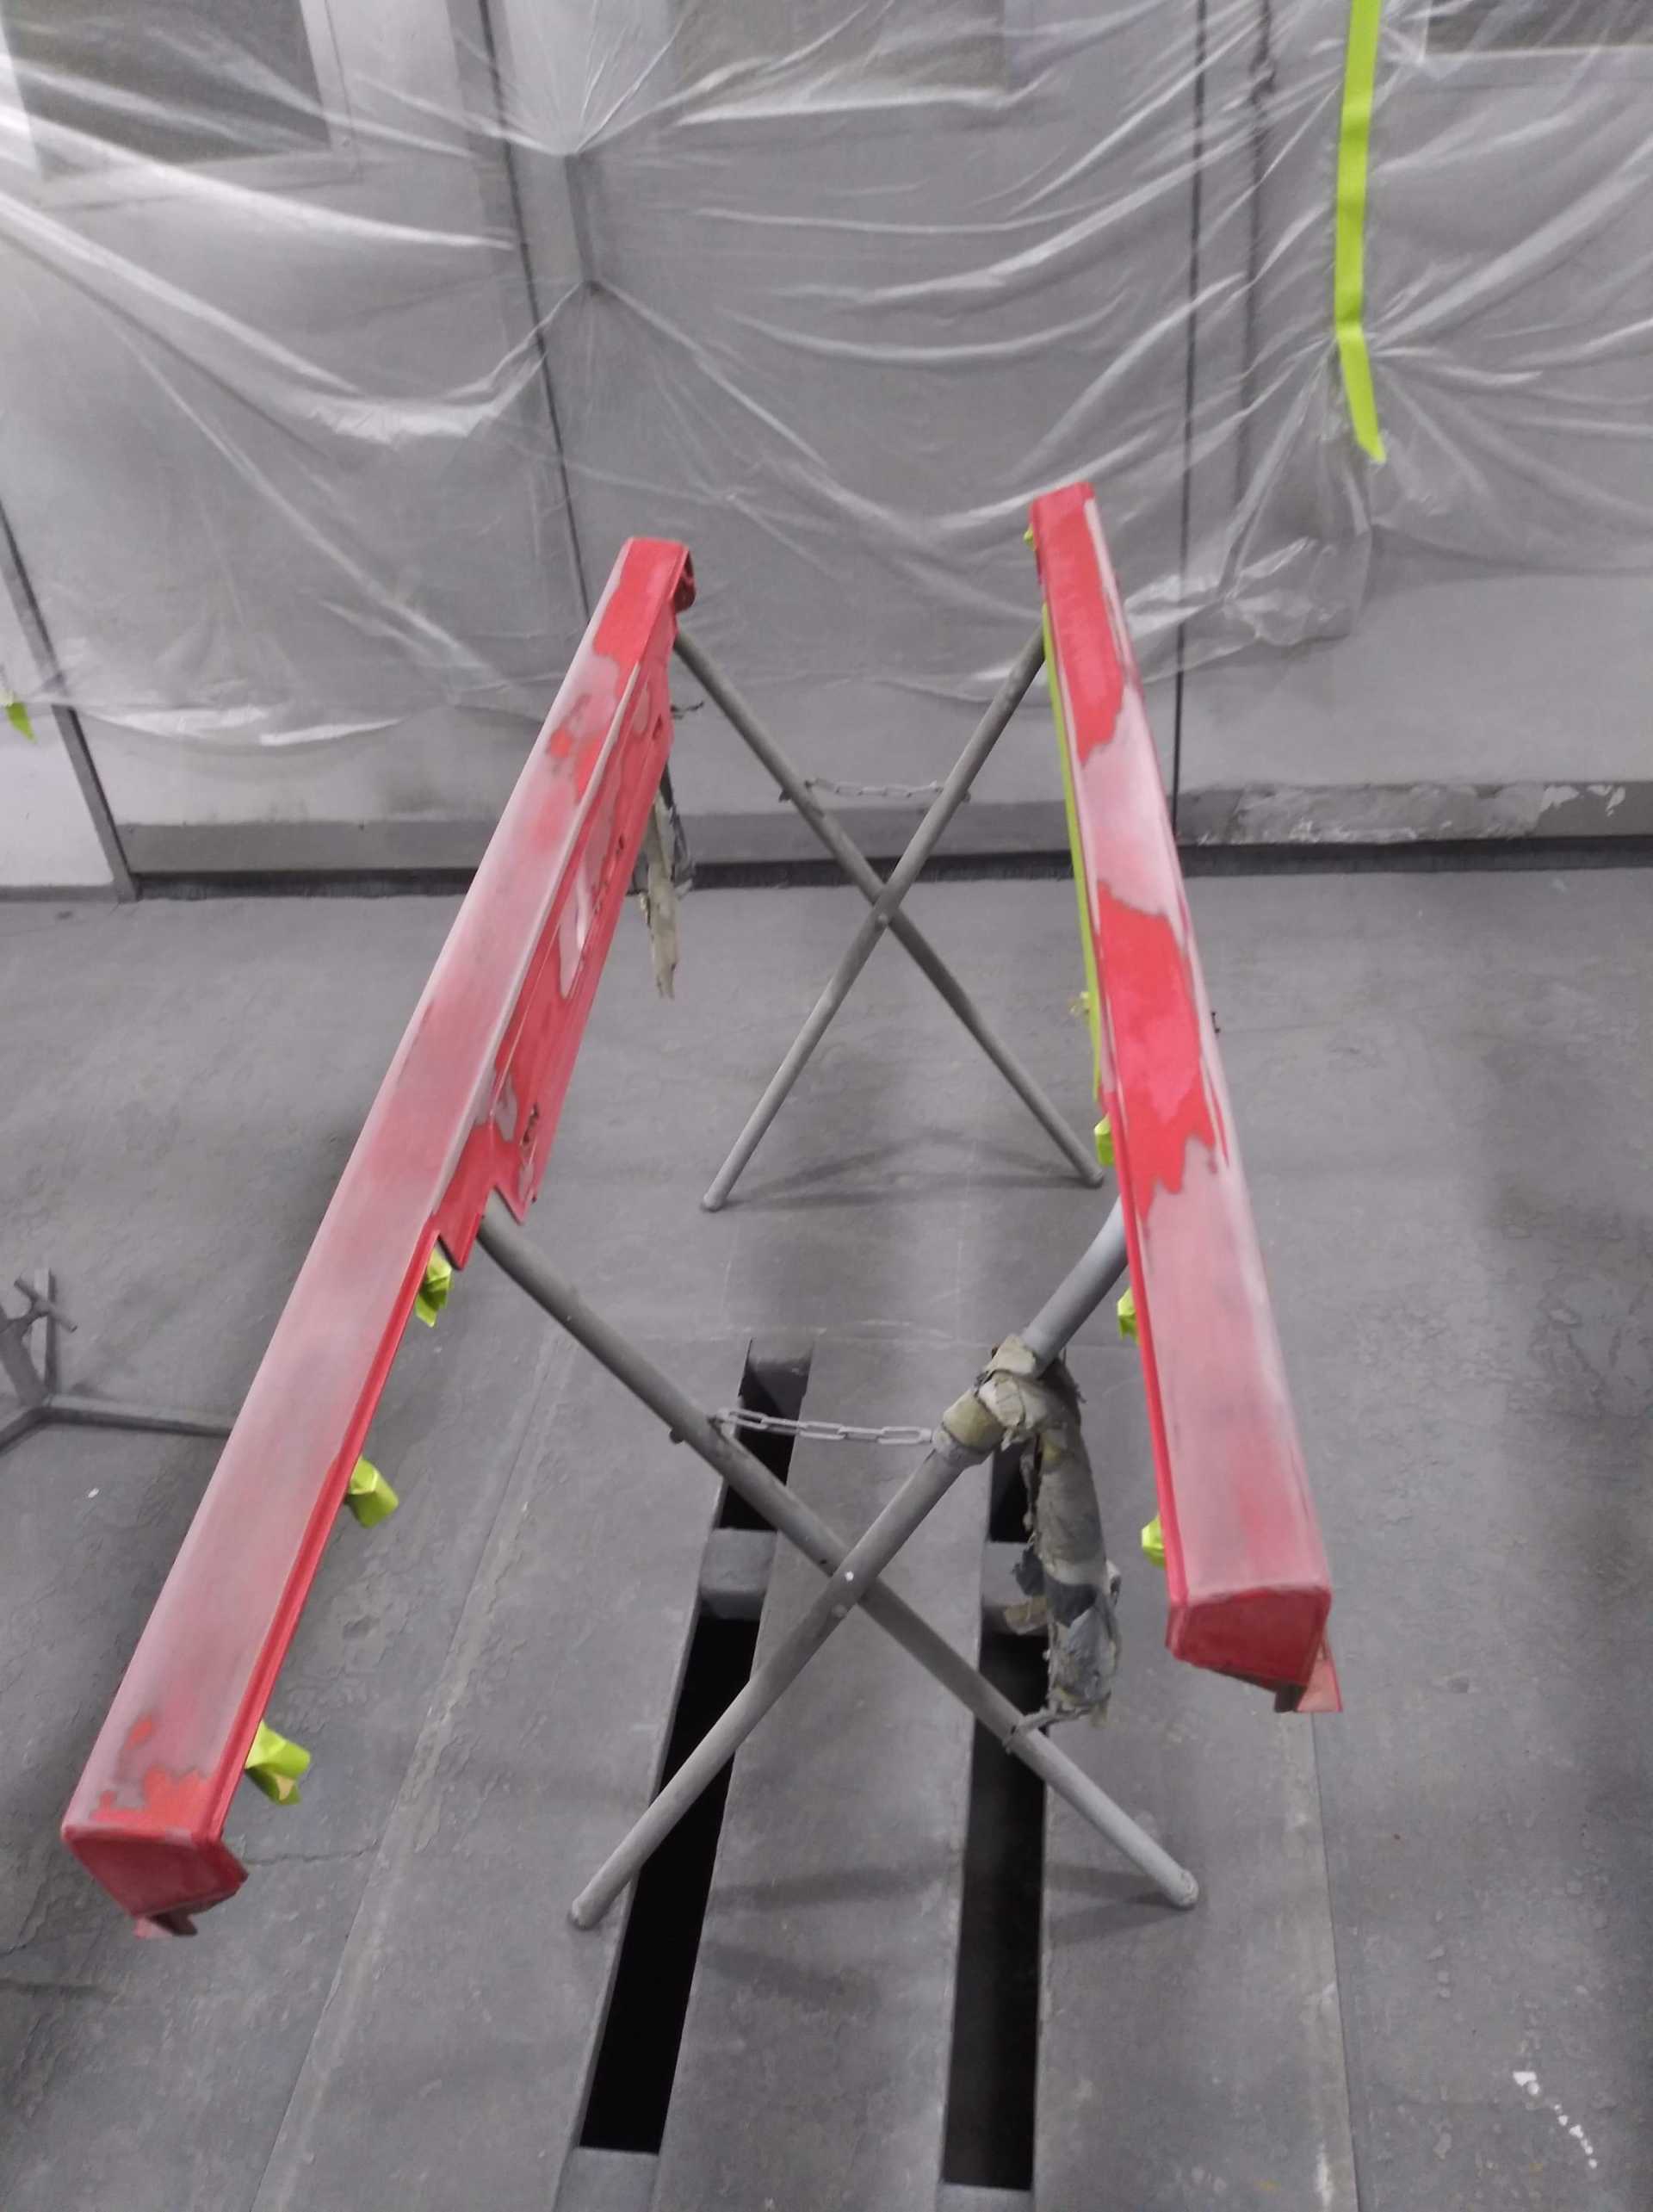
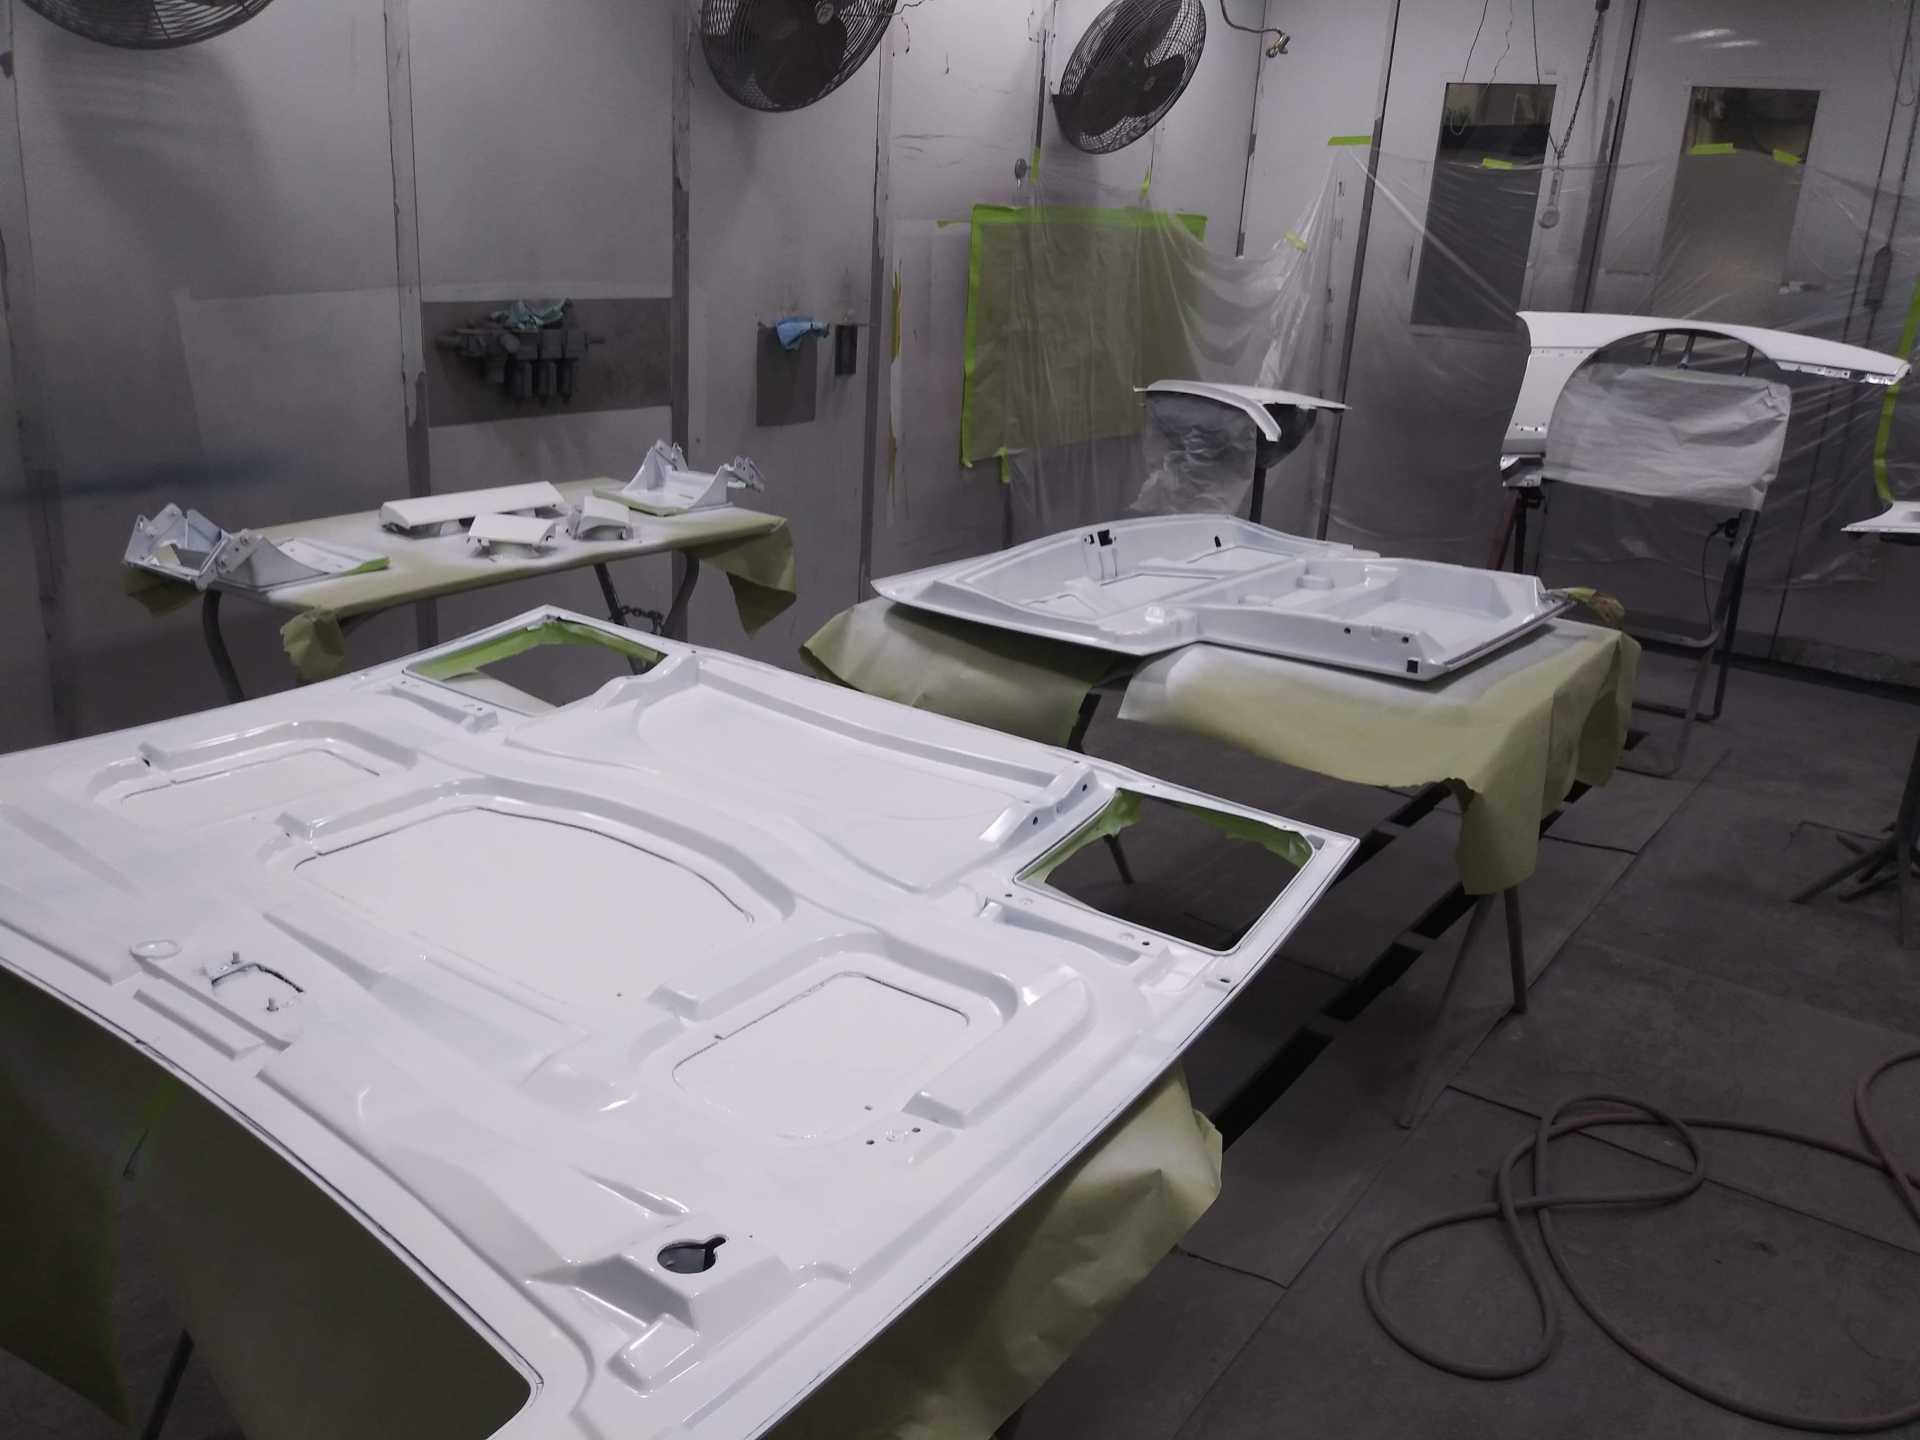
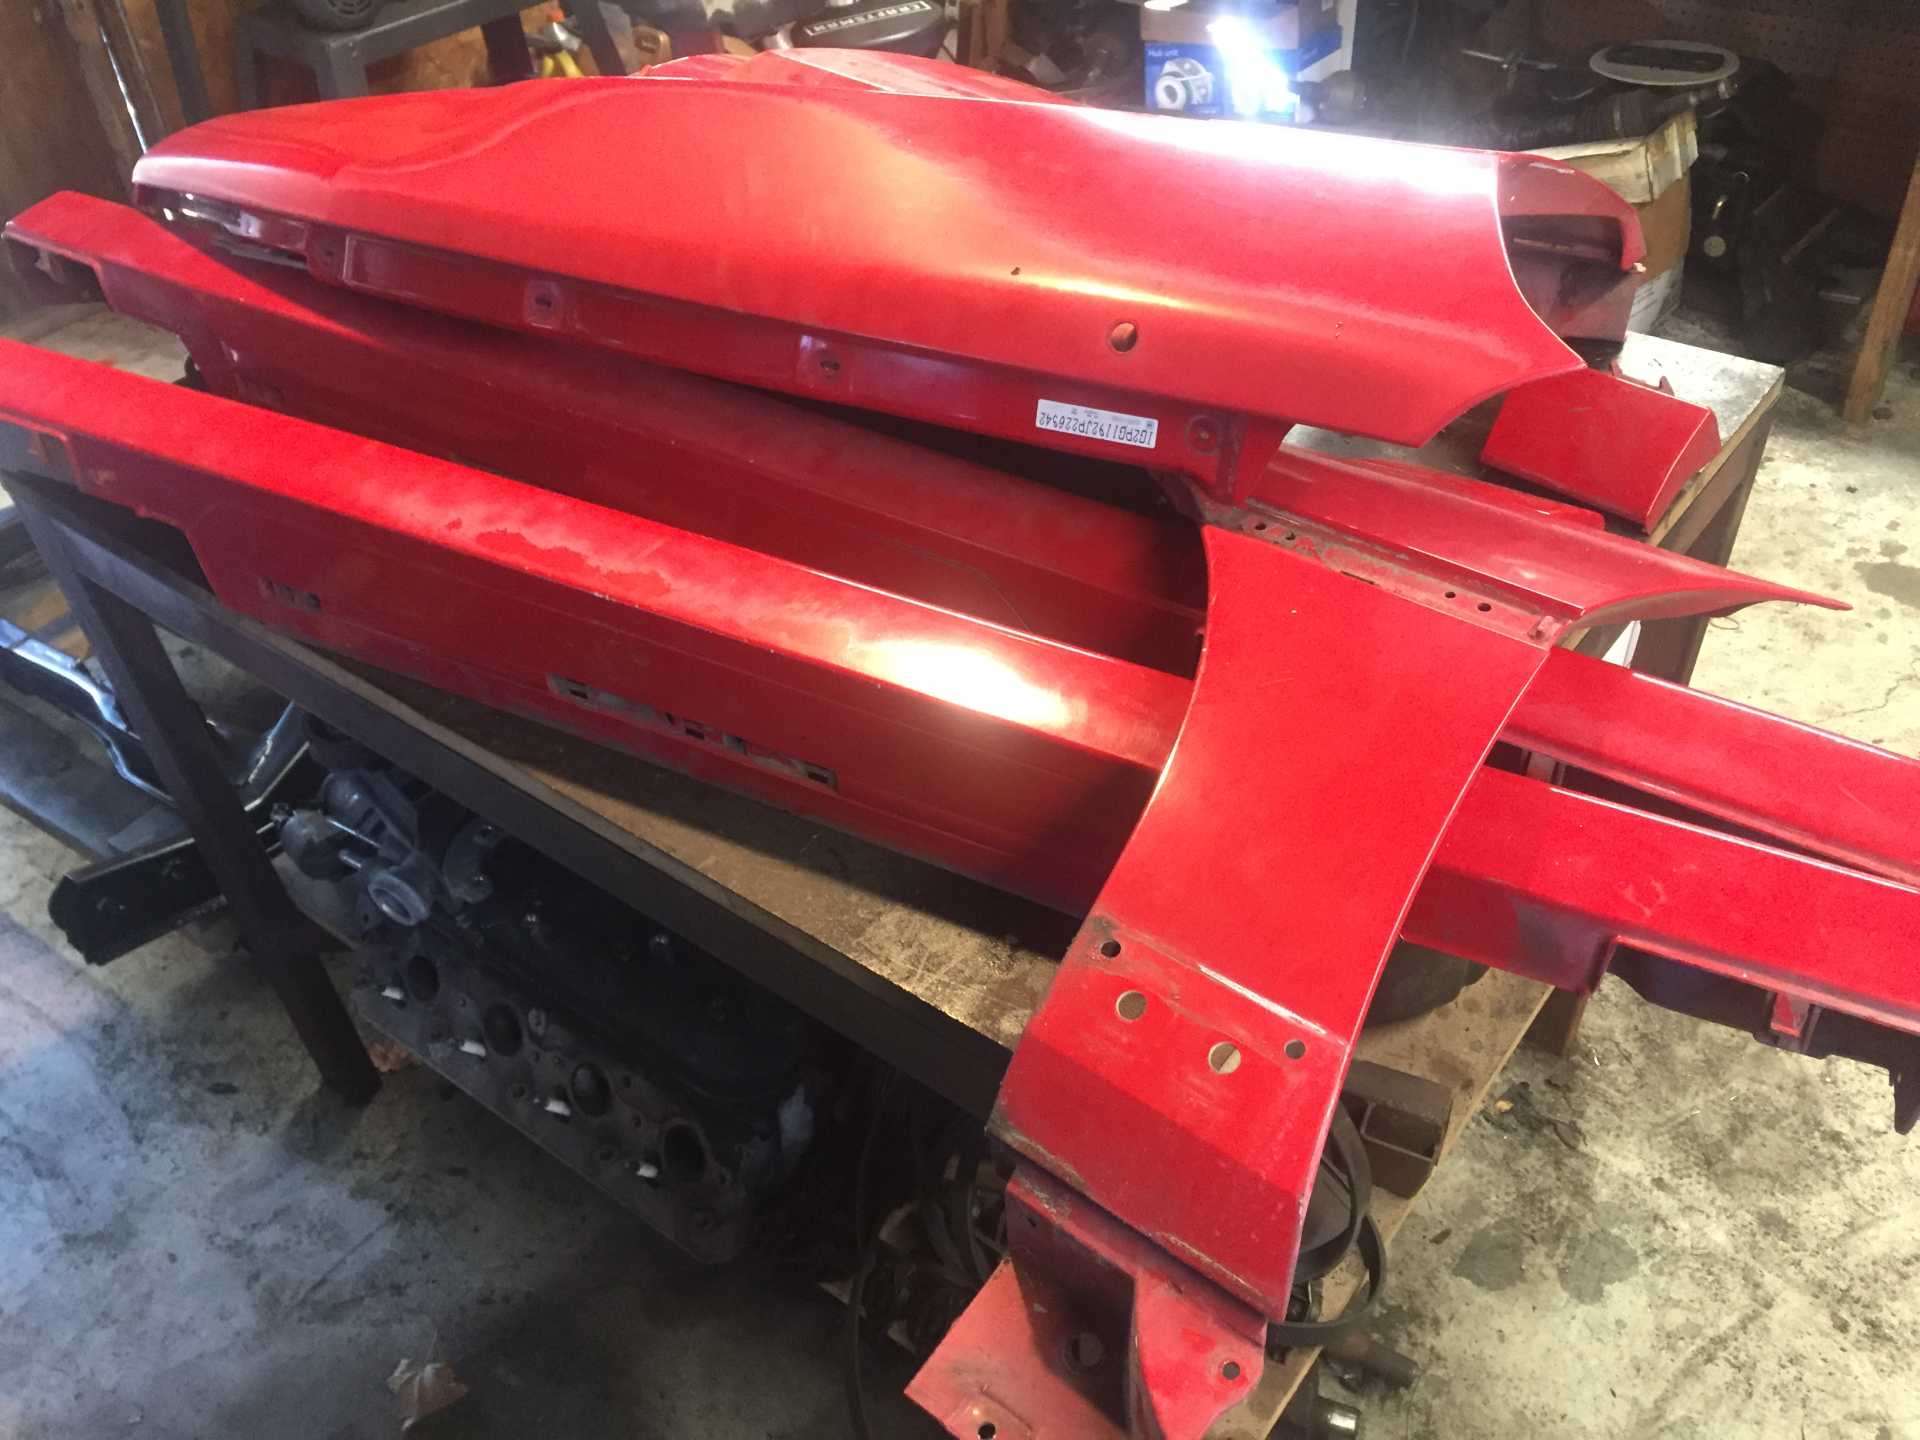
Panel prep complements of Earl and Bill Sessions. At the time, I sent some of the panels off of our blue 87 because it was in better shape. If I were to do it over again, I would prefer to have kept the body panels with the original car on both cars and pay the extra to repair.
[This message has been edited by GPickardt (edited 07-30-2021).]
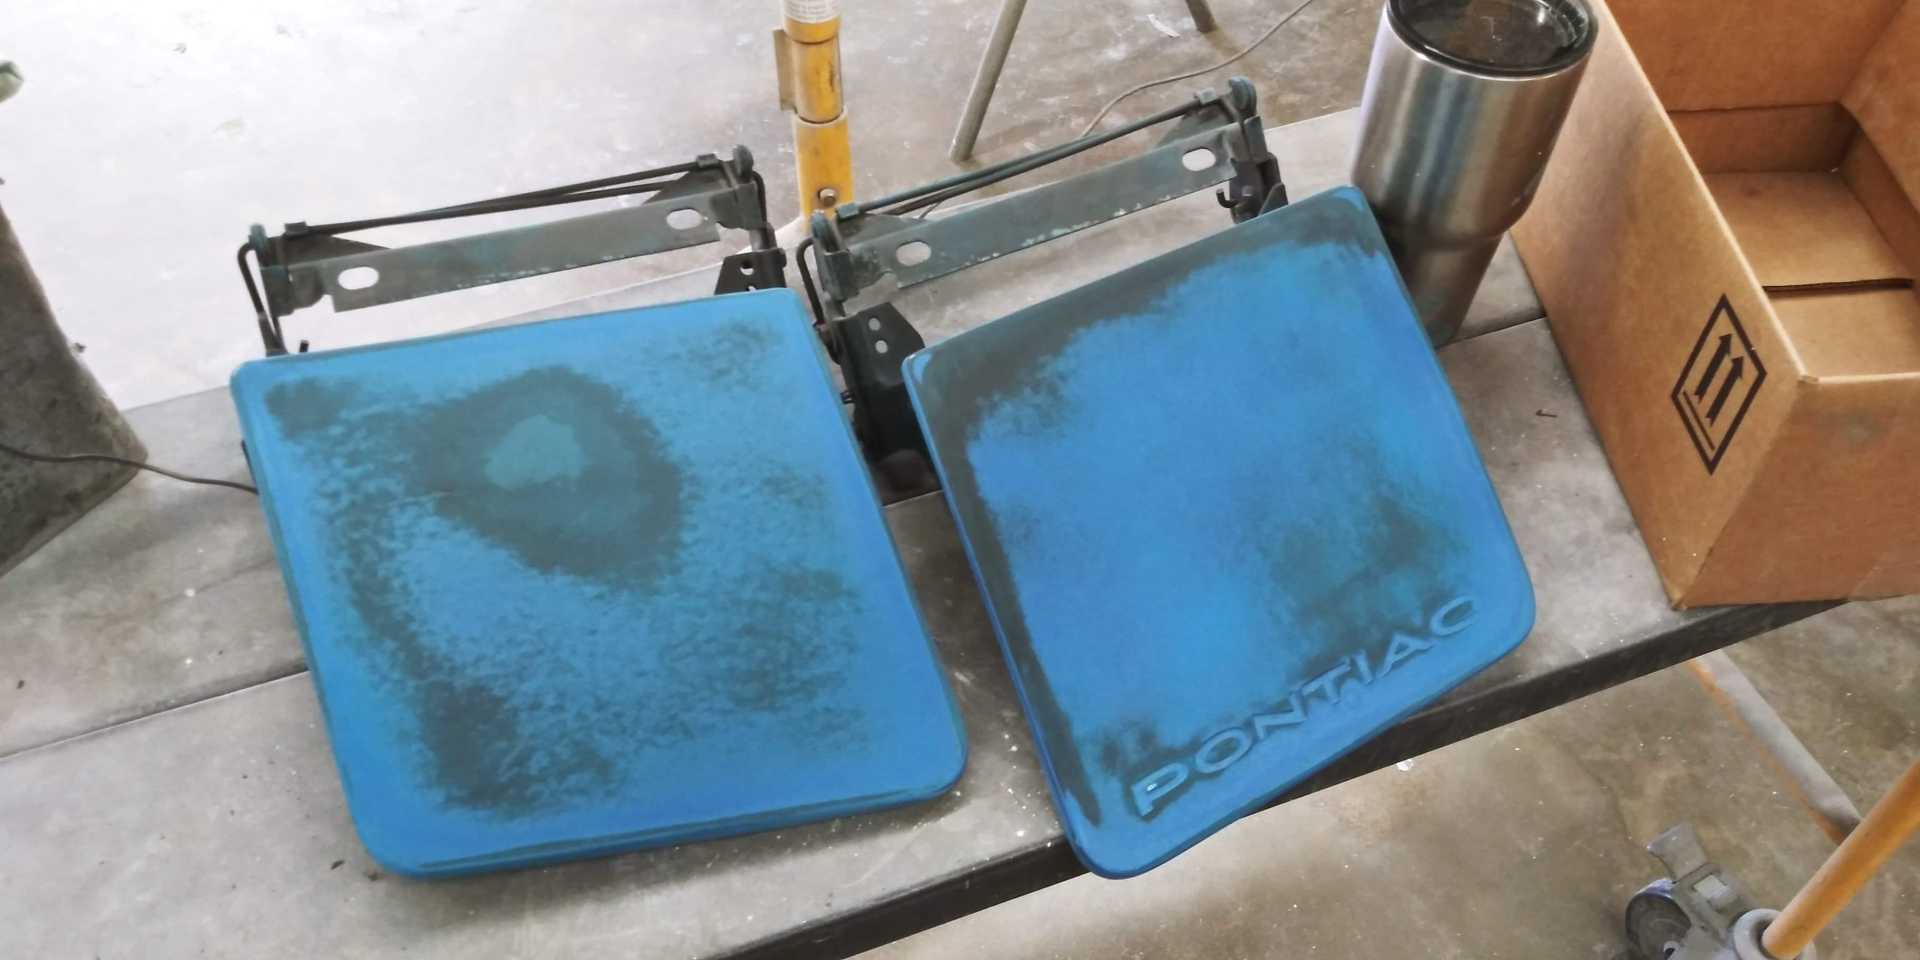
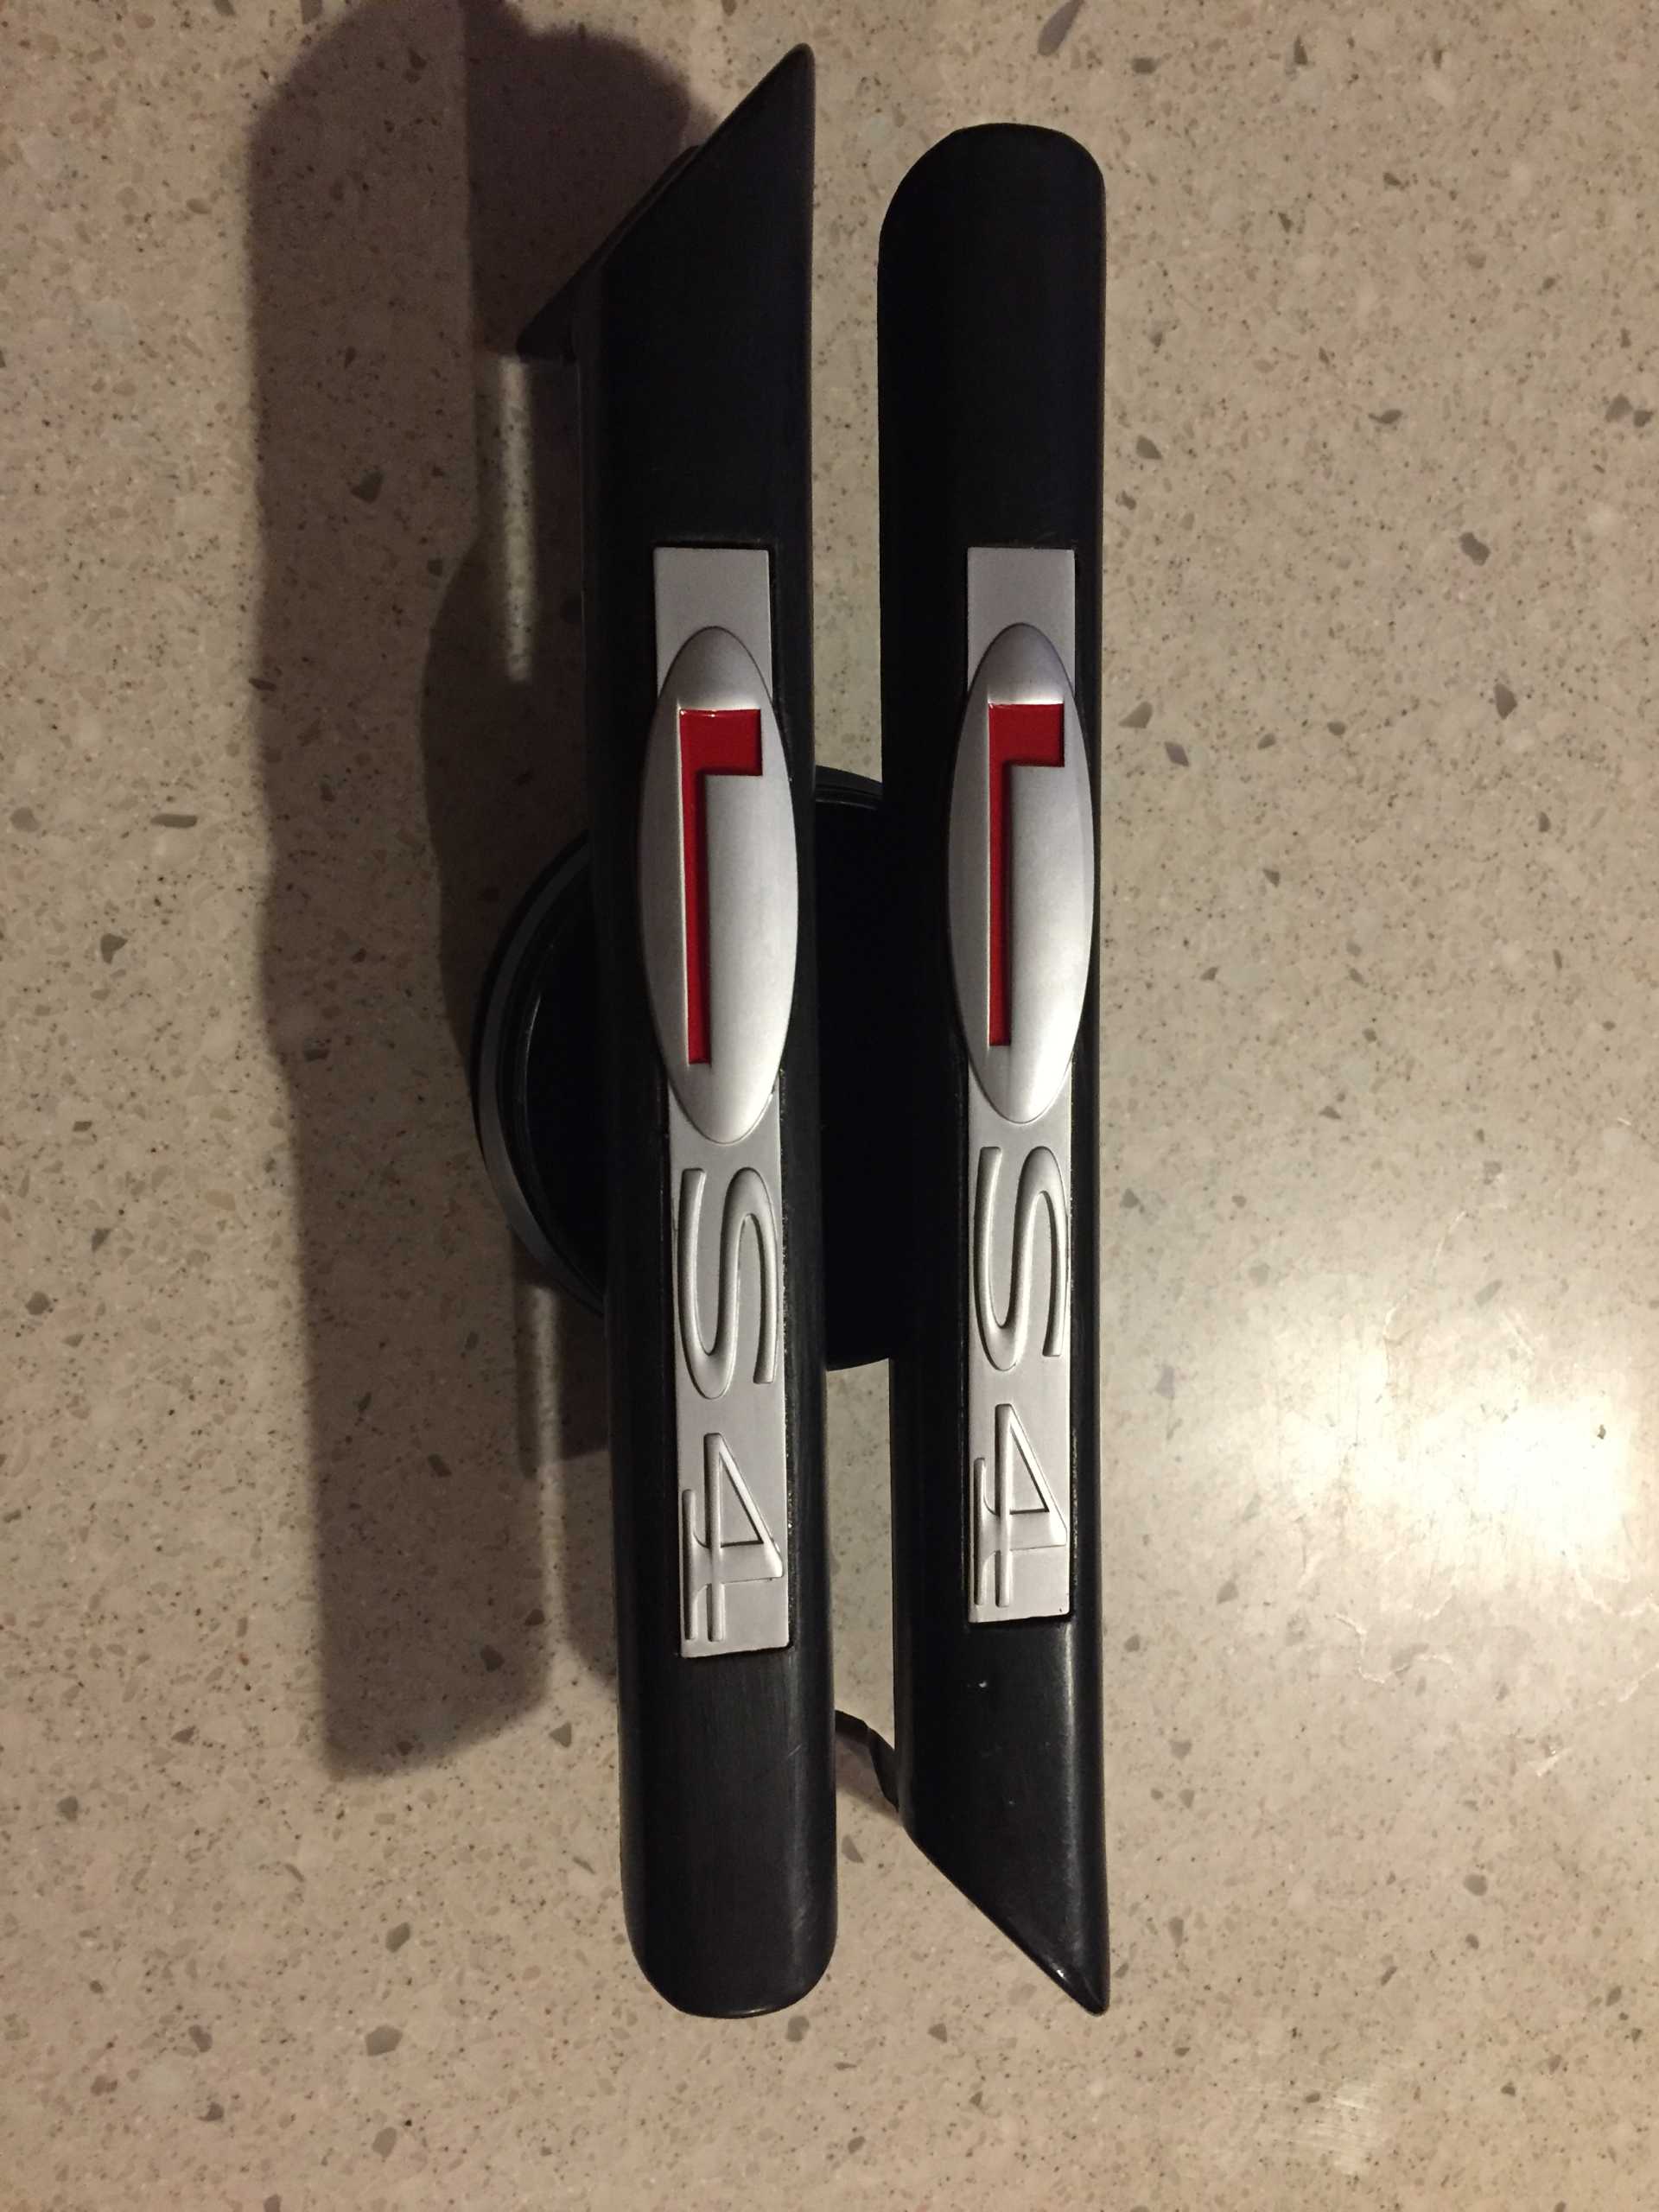
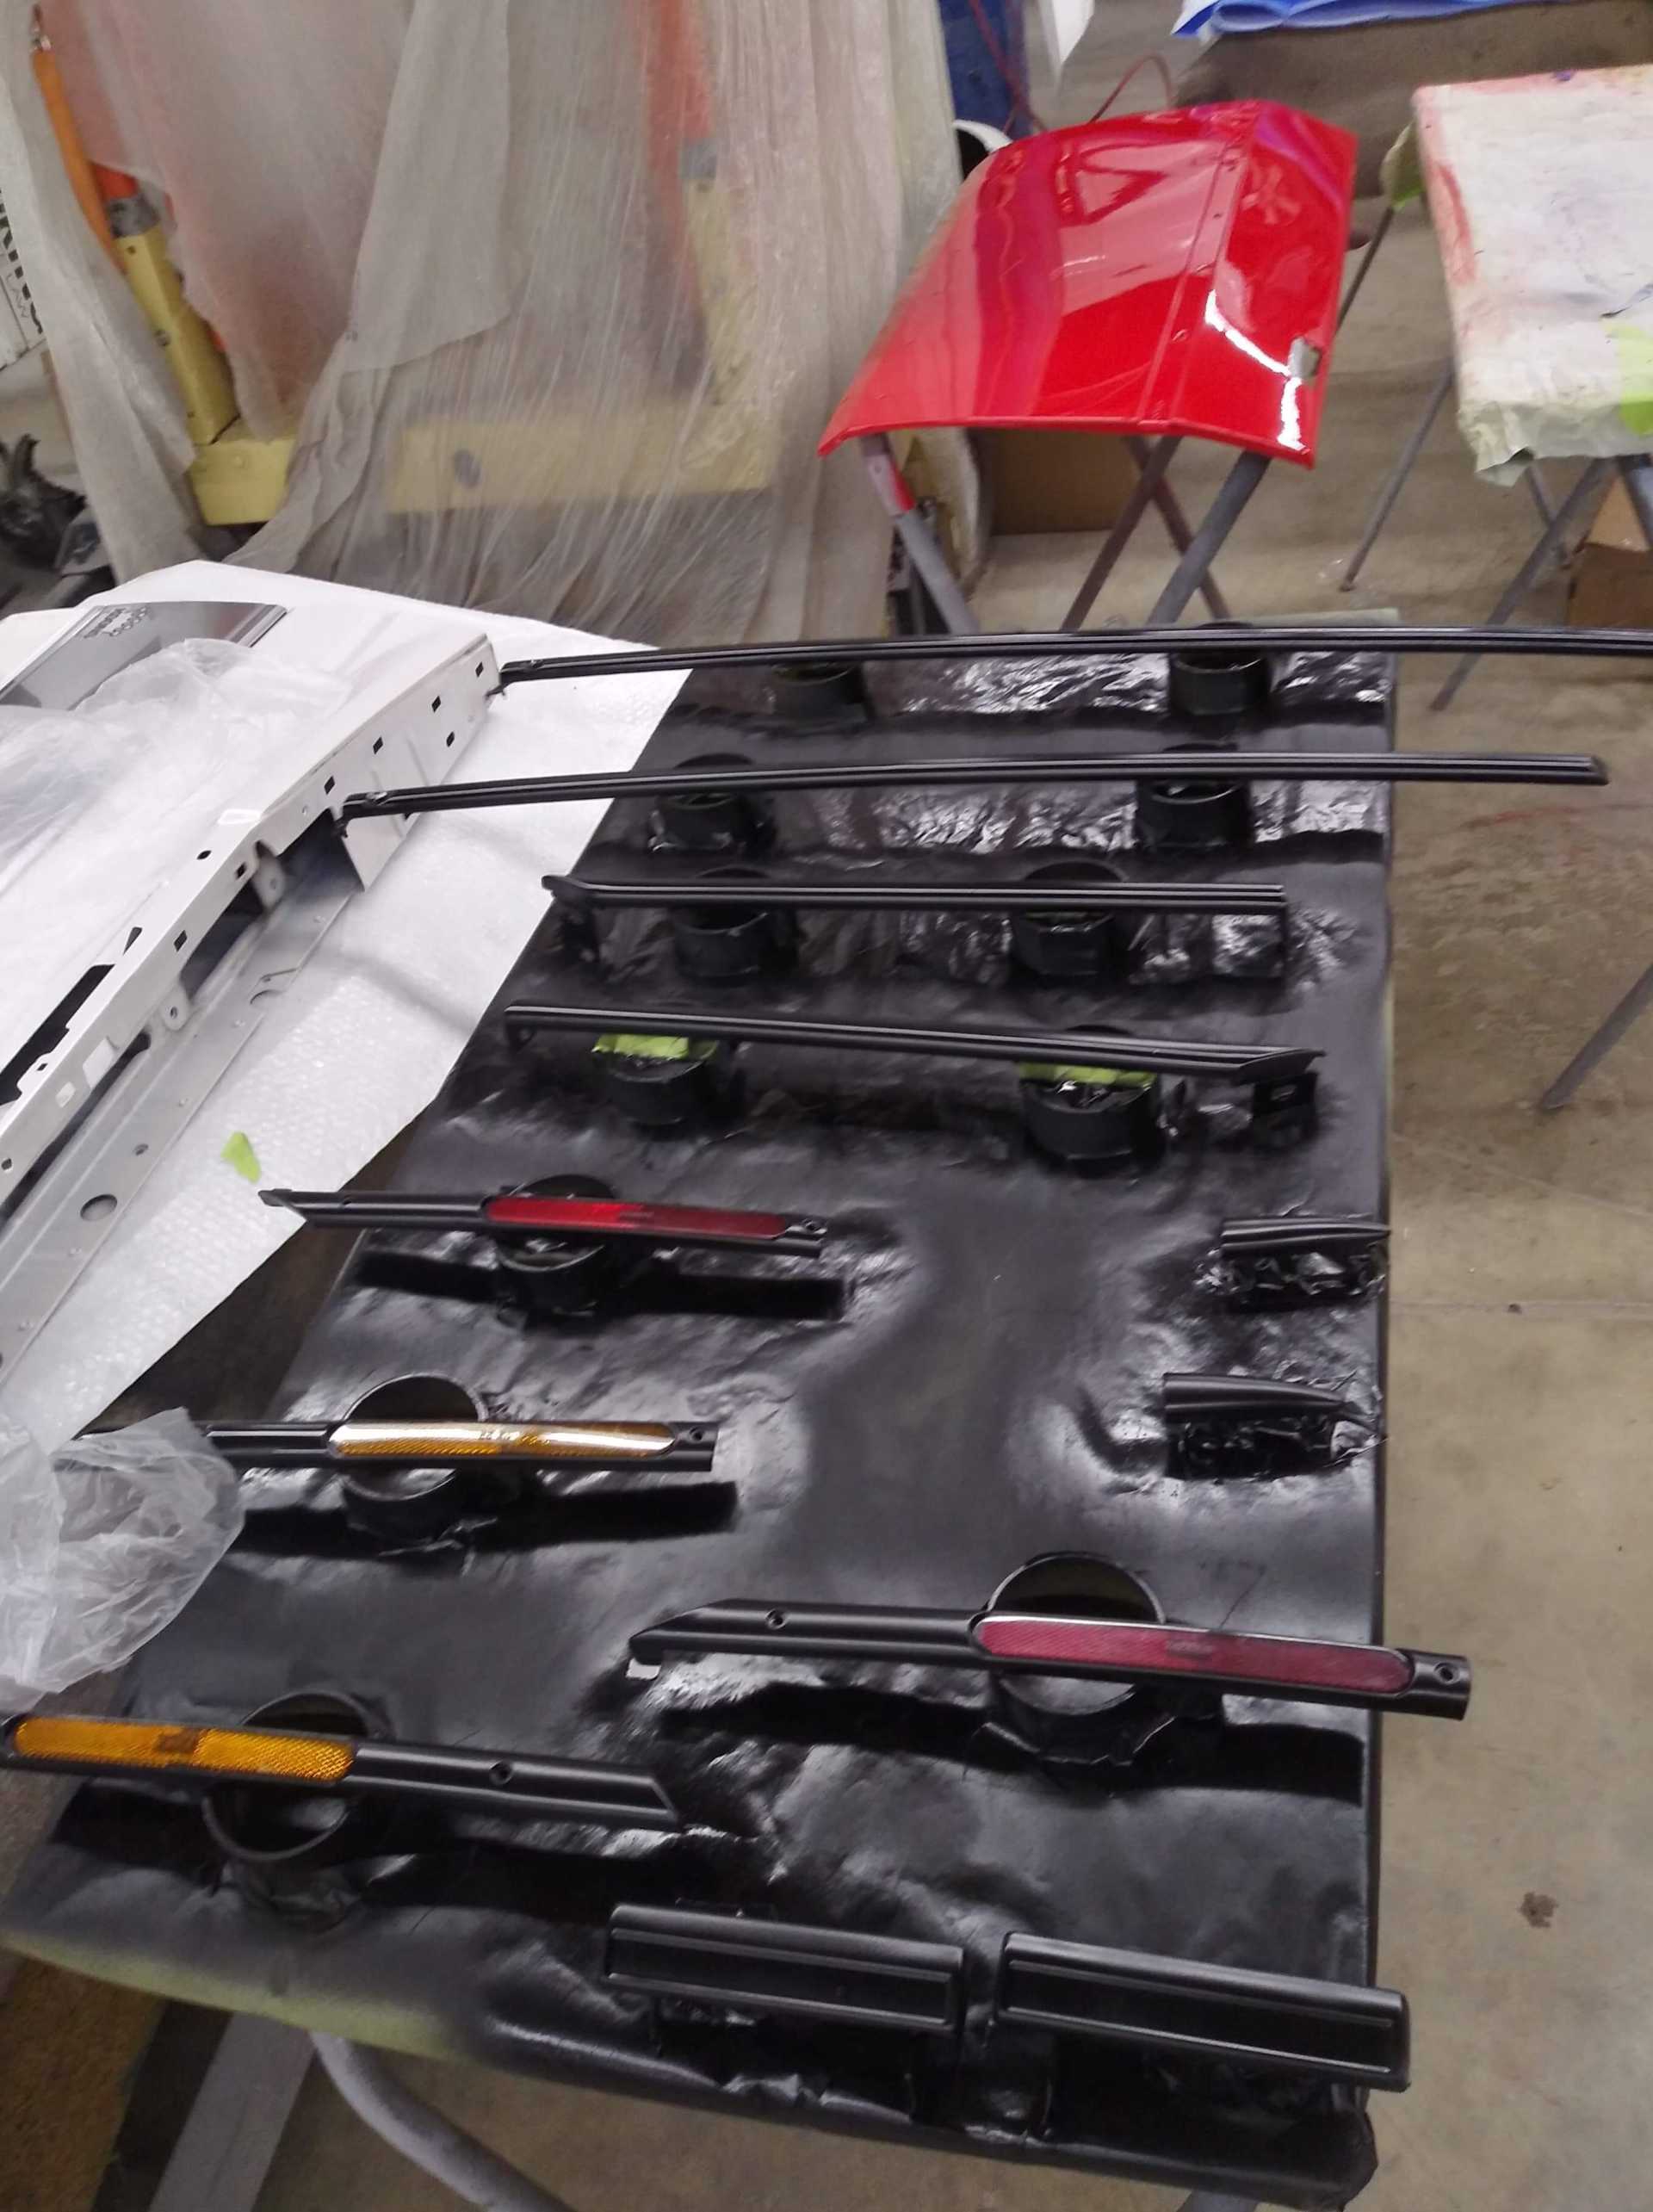
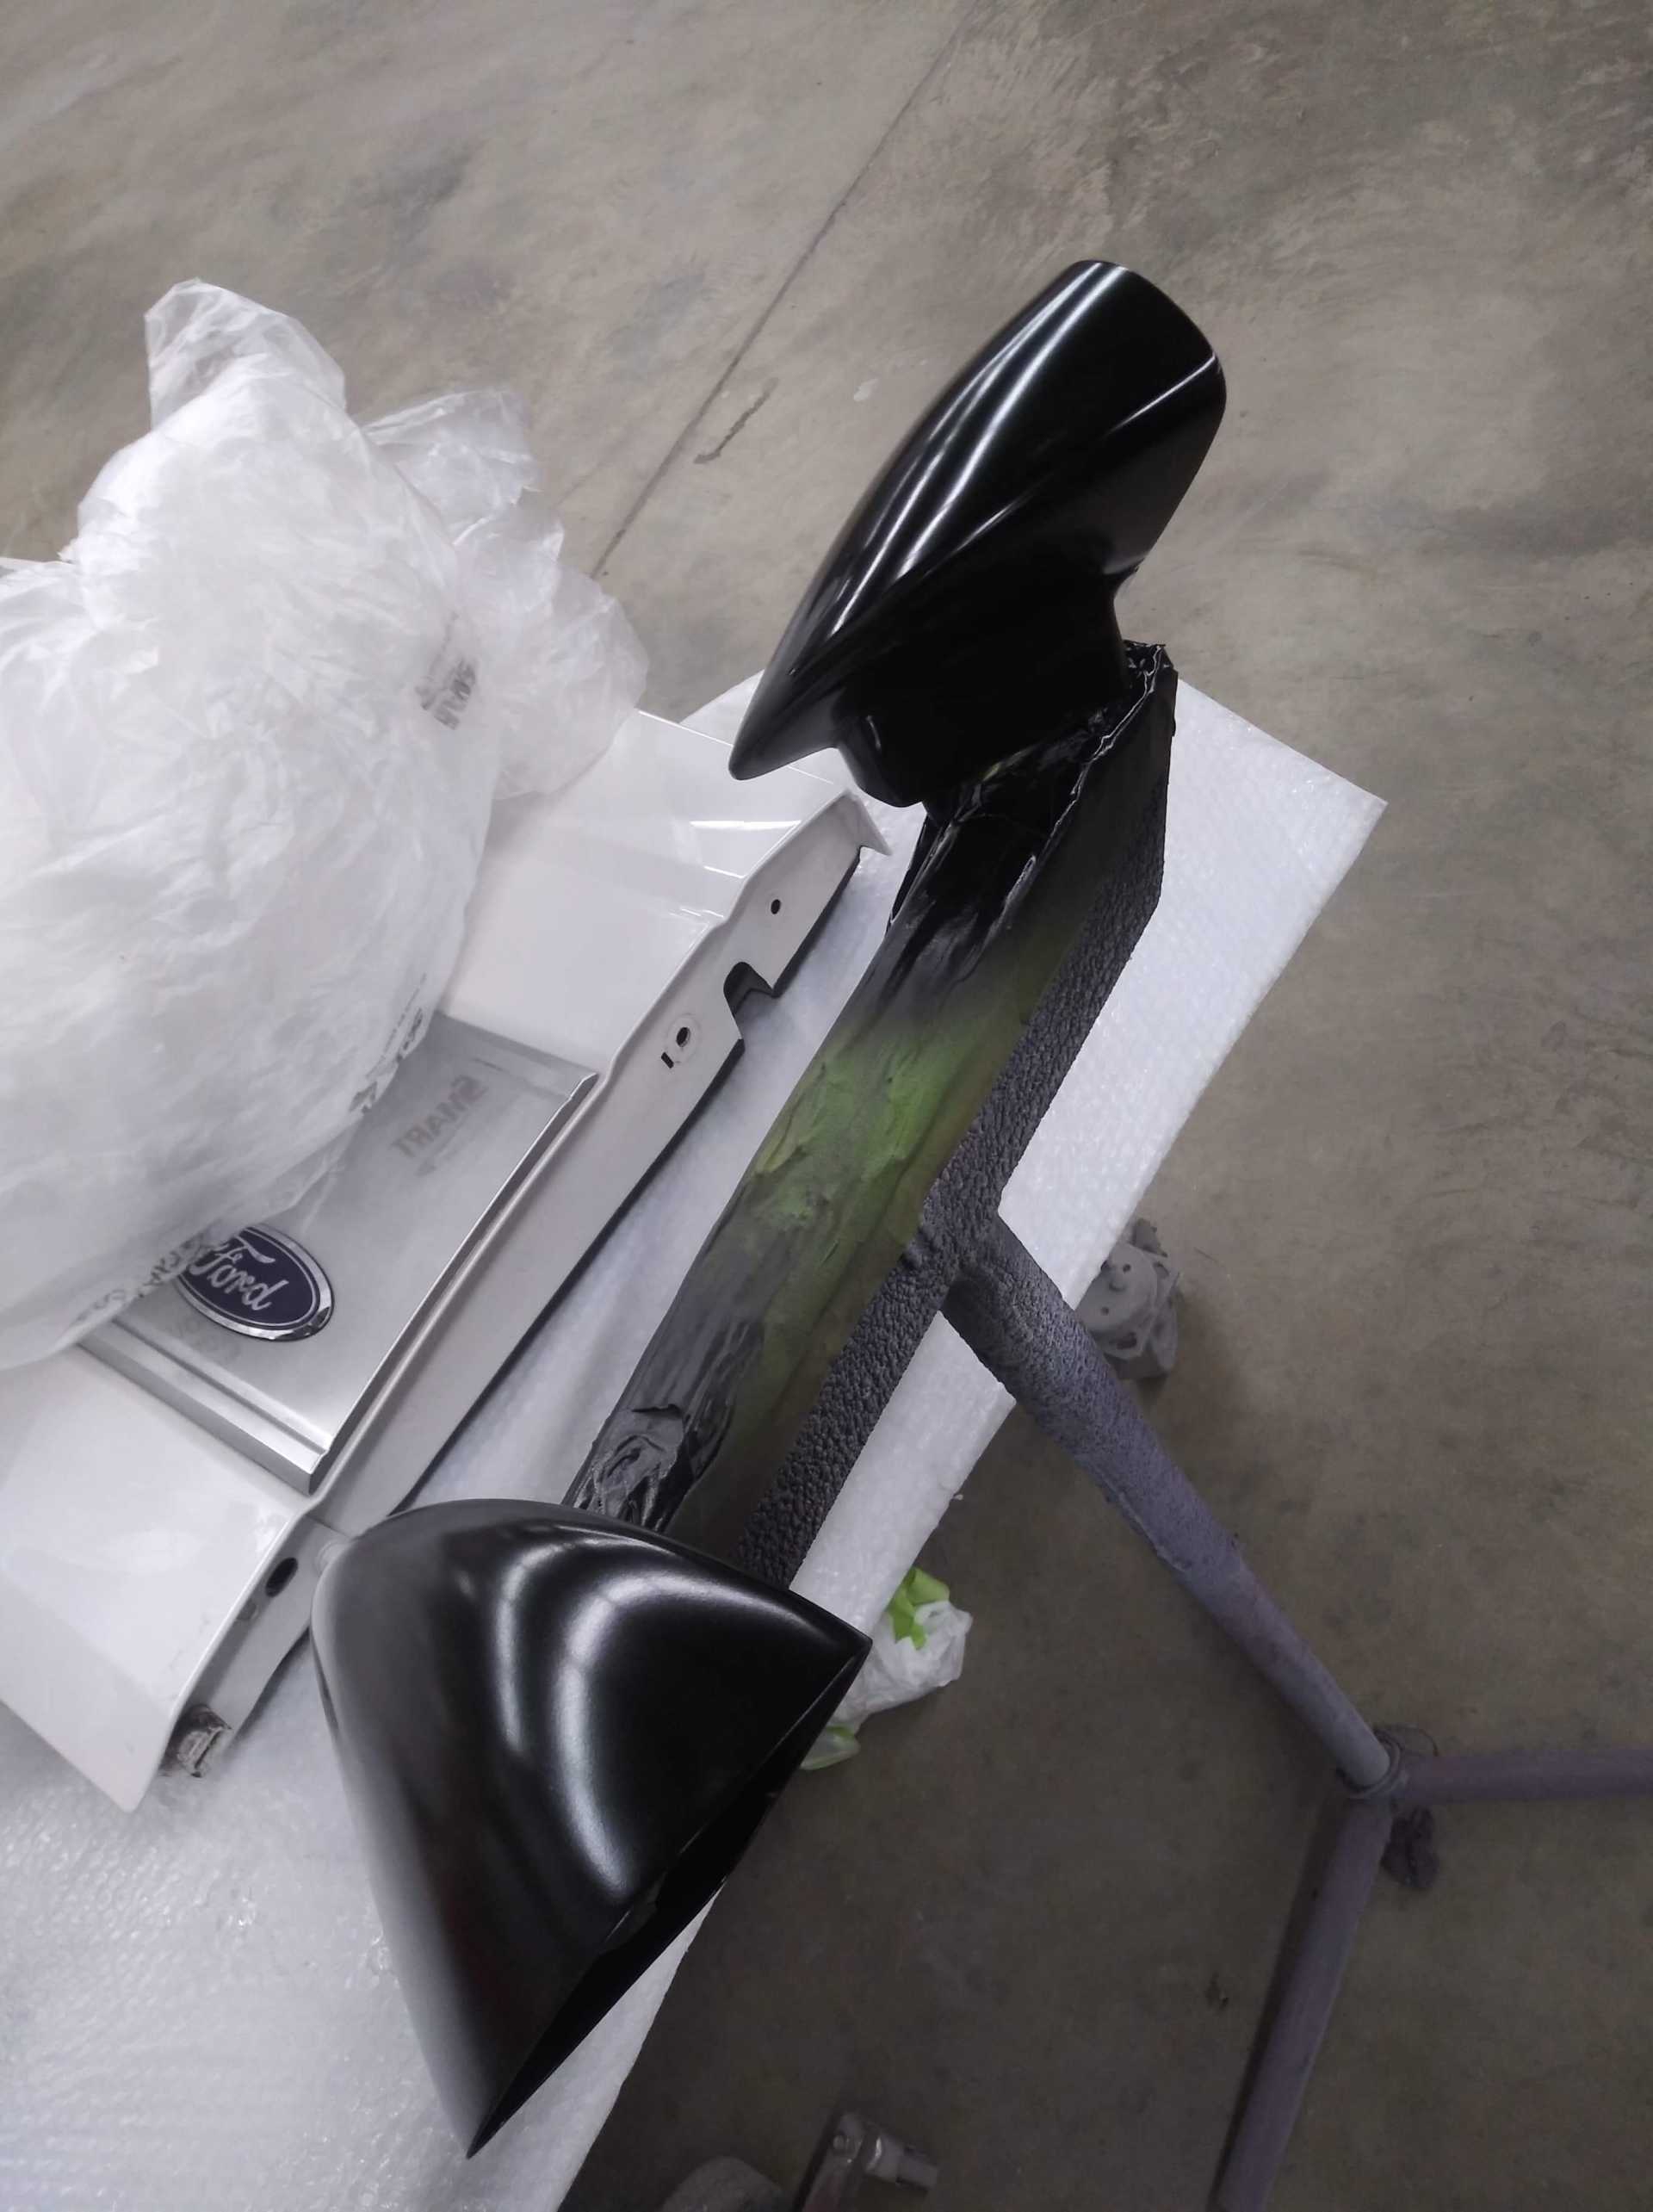
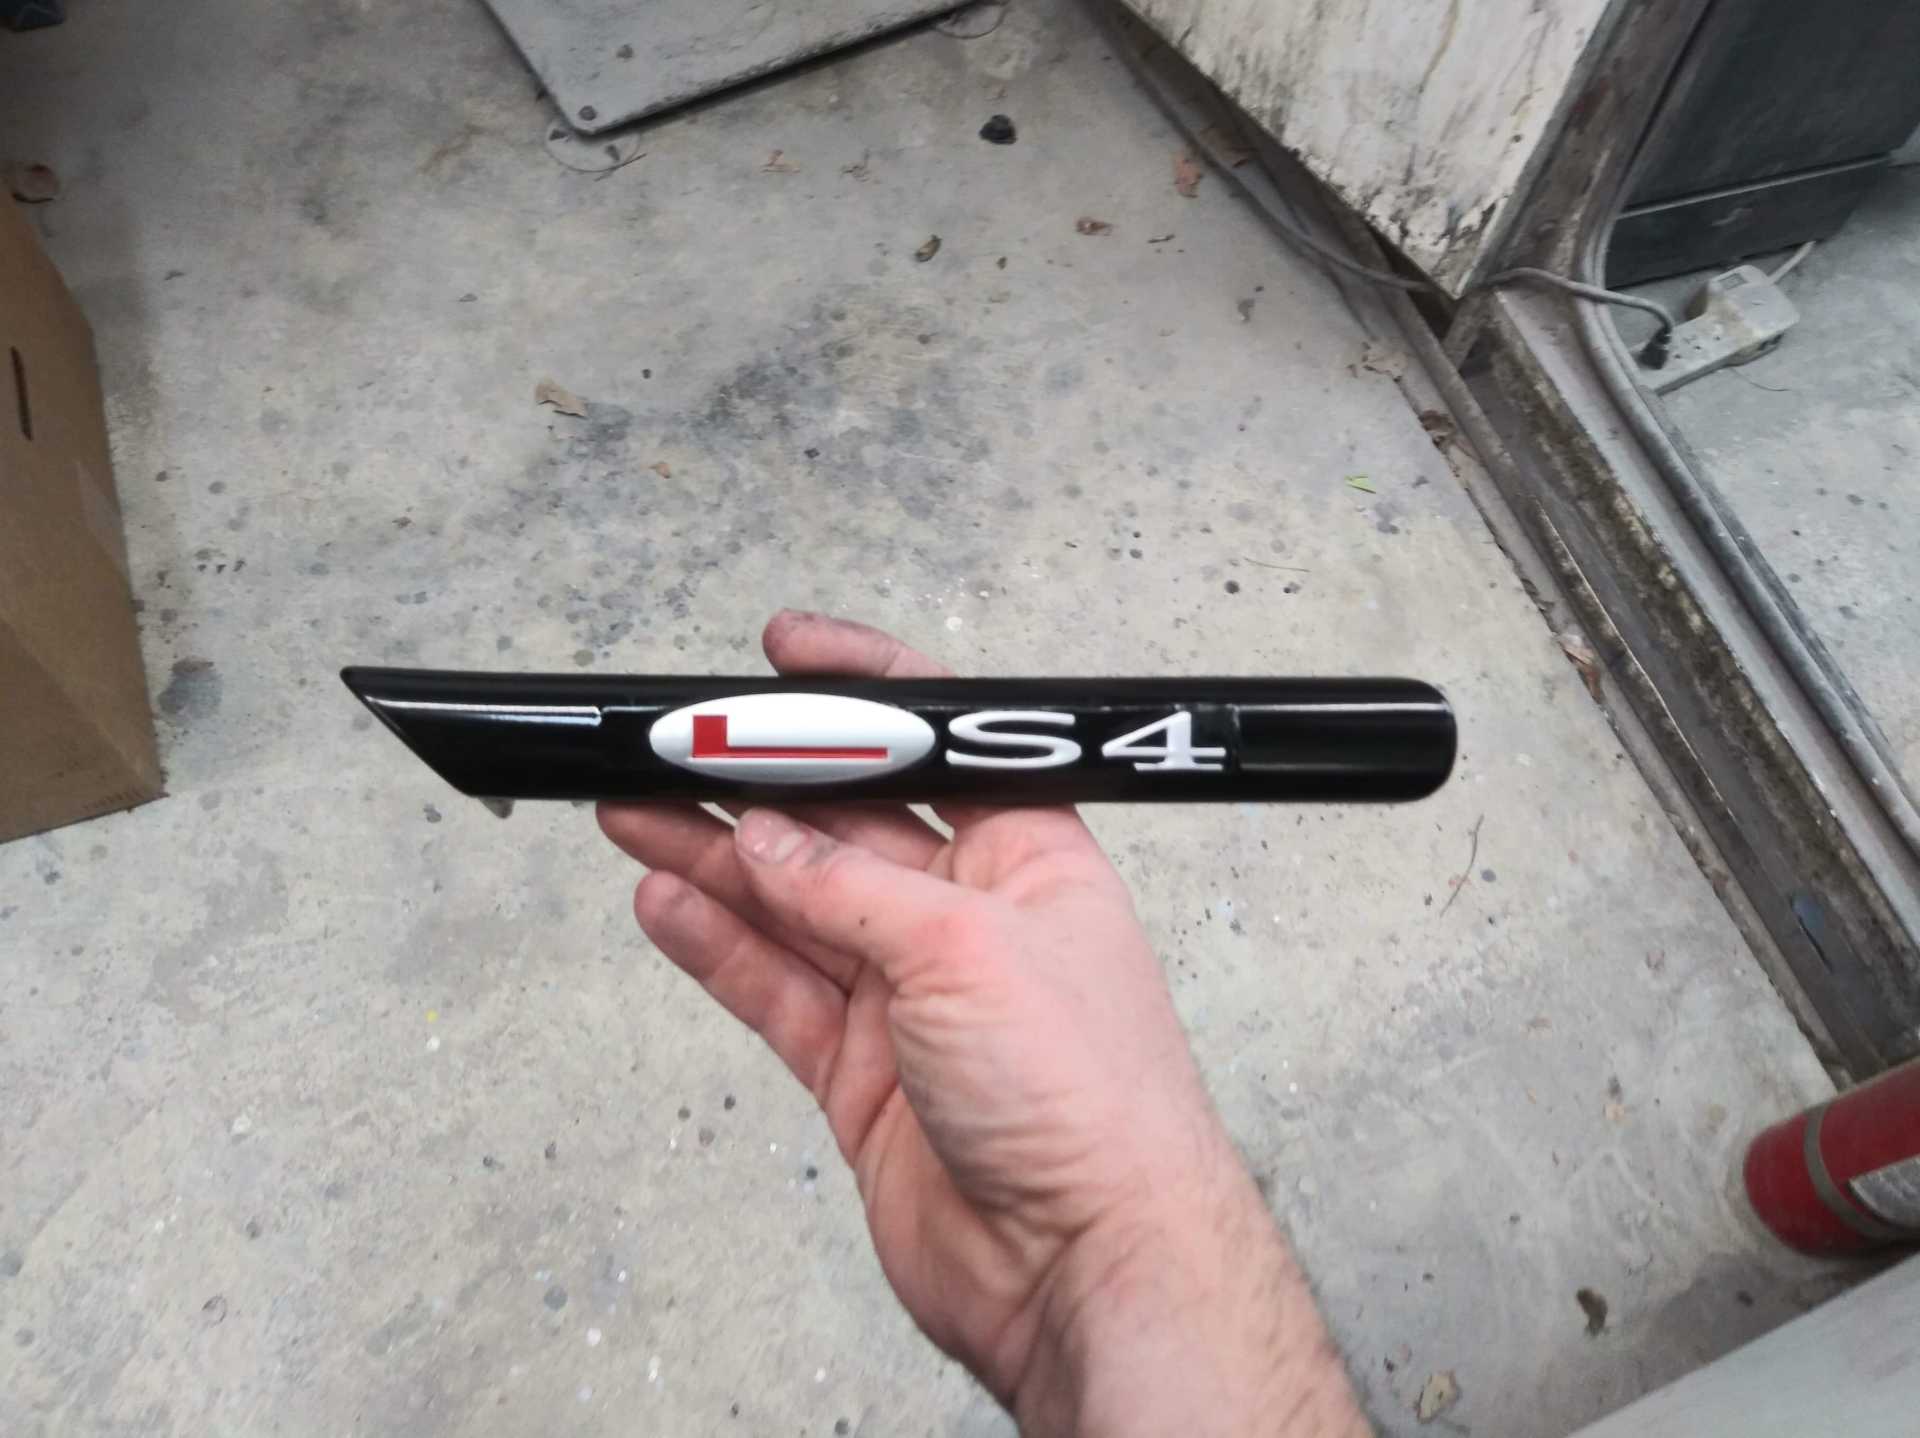
The next step was all the trim and other black pieces. We also painted the wing black and added small features like the LS4 badge bonded in to the front fender side molding.


 (End bracket is missing.)


 )... I feel your pain. Have you got it tuned yet?


 [img]https://images.fiero.nl/userimages/GPickar dt/D0E594C9-FFA8-41D5-88C3-926F981B43D5.jpeg[/img]
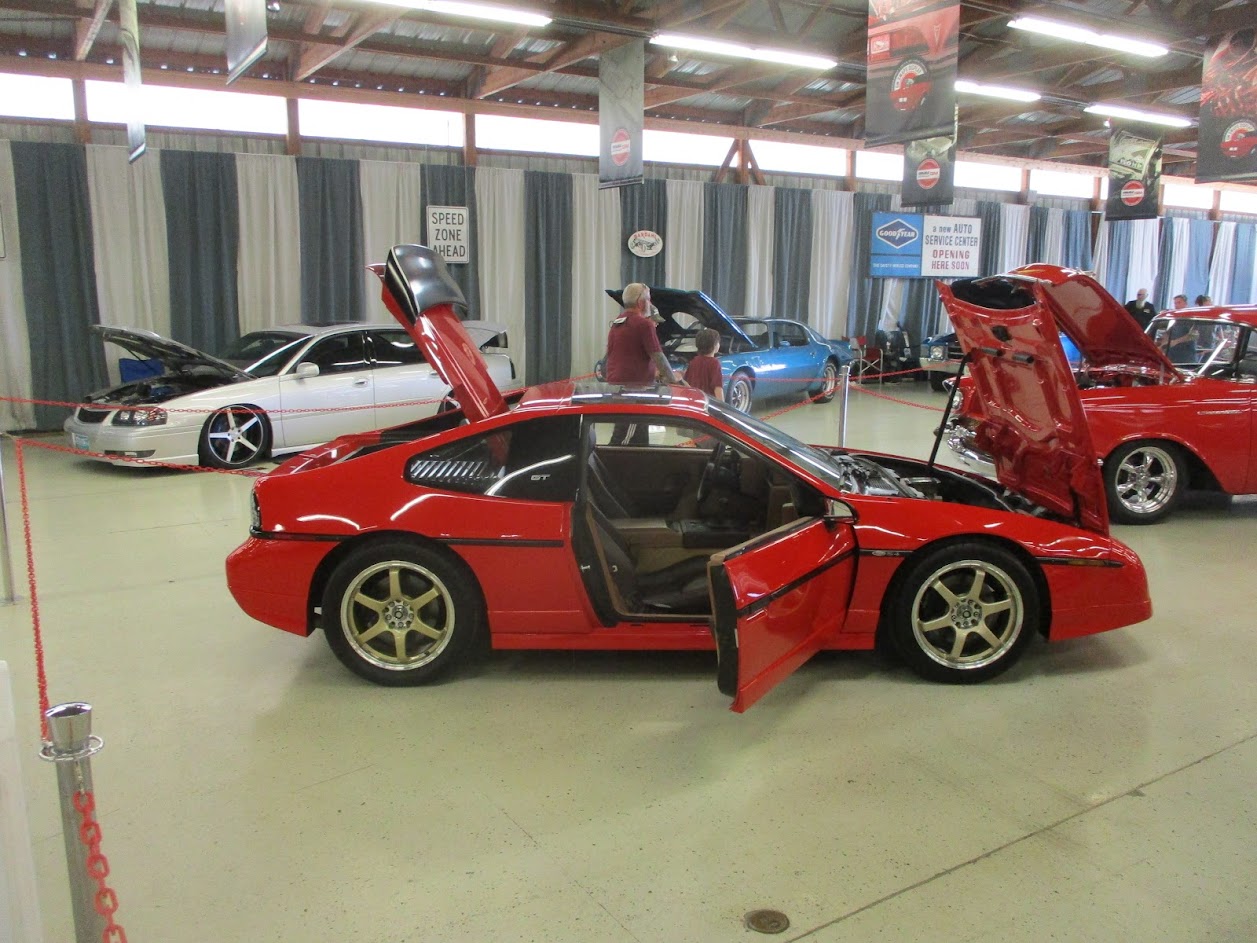
 [i mg]https://images.fiero.nl/userimages/GPickardt/80B86DCD-BCDC-4DFD-8296-8AC1C62C84D4.jpeg[/img]
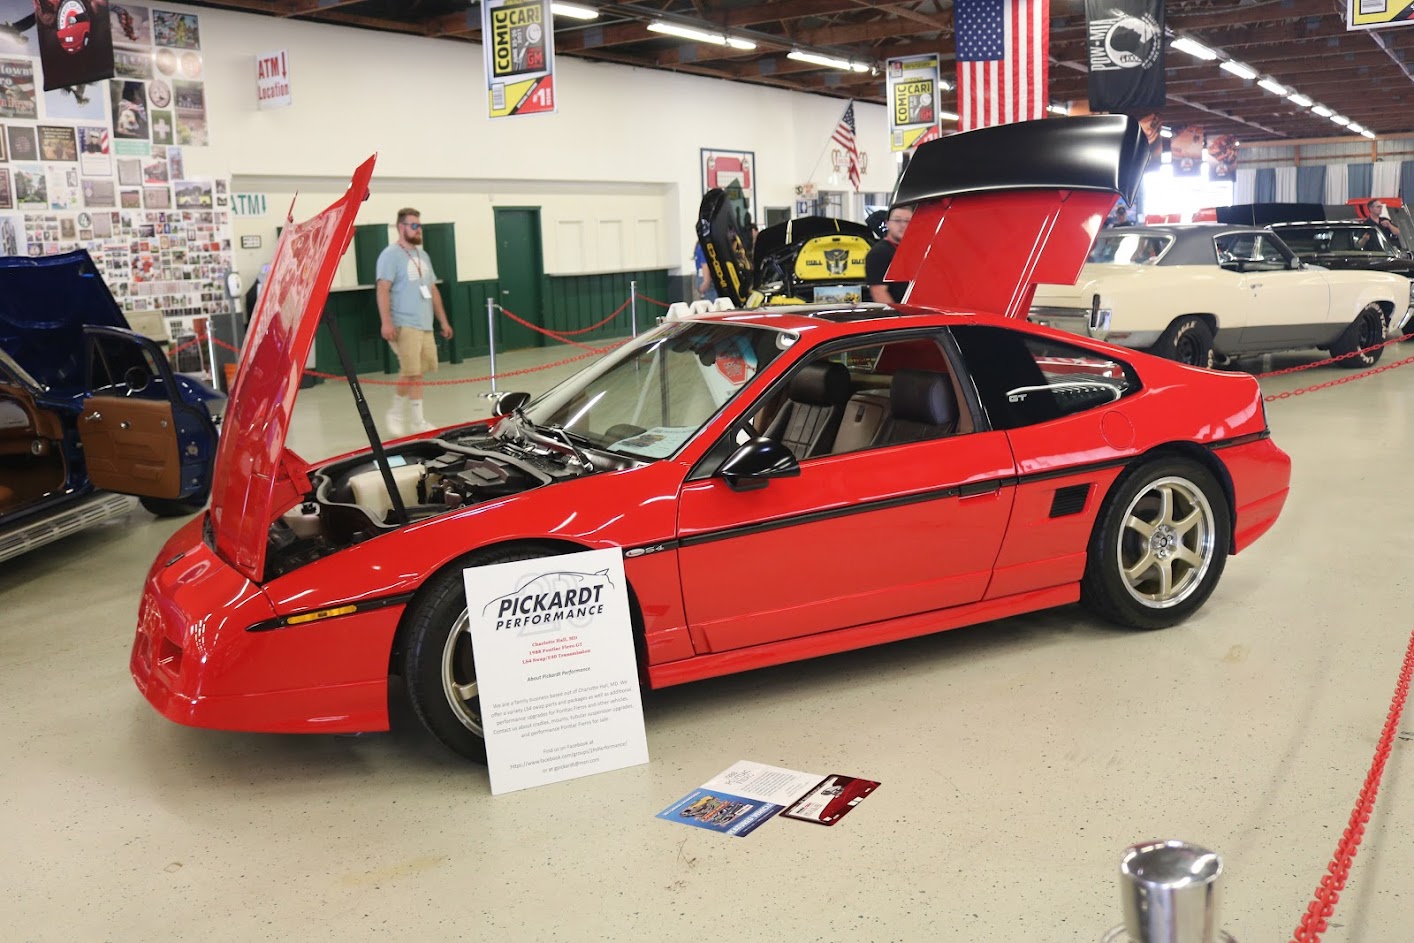
 [img]https://images.fiero.nl/use rimages/GPickardt/IMG_4311.JPG[/img]