only thing i would do different right now is take your splitter design and mate it to the body on the sides (it stops abruptly and doesn't look right @ all IMO, if you mated it to the fender piece & brought it up flush with it that'd be awesome!
YAY PAGE 3!
[This message has been edited by greasemonke50613 (edited 06-14-2009).]
IP: Logged
11:53 PM
Jun 14th, 2009
Galliero Member
Posts: 83 From: Calera, Alabama, USA Registered: Jan 2009
thanks for the comment, I left the sides long because I haven't finalized the splitter design so I left the sides long so I for the exact reason that you mentioned.
quote
Originally posted by greasemonke50613:
only thing i would do different right now is take your splitter design and mate it to the body on the sides (it stops abruptly and doesn't look right @ all IMO, if you mated it to the fender piece & brought it up flush with it that'd be awesome!
YAY PAGE 3!
IP: Logged
09:21 PM
Jun 15th, 2009
Austrian Import Member
Posts: 3919 From: Monterey, CA Registered: Feb 2007
Looks good. I think you could angle it a bit sharper though. The middle part could scoop better into the factory radiator and aid in cooling. The side parts could angle in a bit more too, and with a lip. Maybe make it less tall like on the Lamborghini LP 560-4 if feasible. The Lambo version looks more delicate. It'll make the Fiero look "faster" and more nimble.
IP: Logged
03:16 PM
Jun 21st, 2009
Galliero Member
Posts: 83 From: Calera, Alabama, USA Registered: Jan 2009
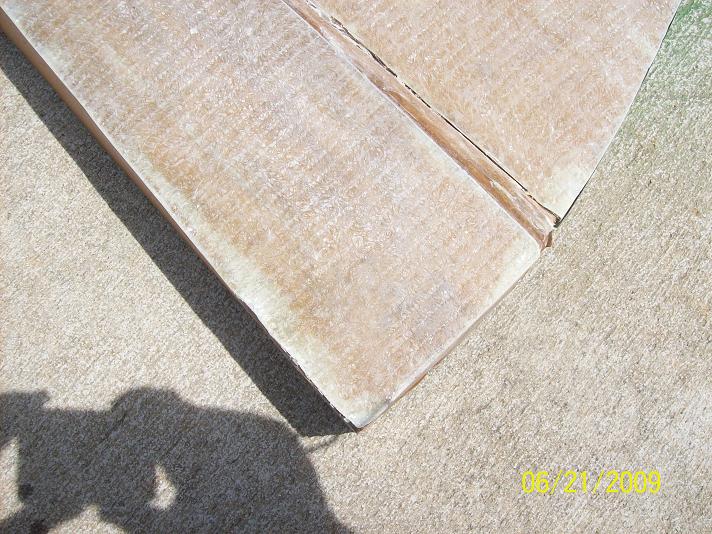
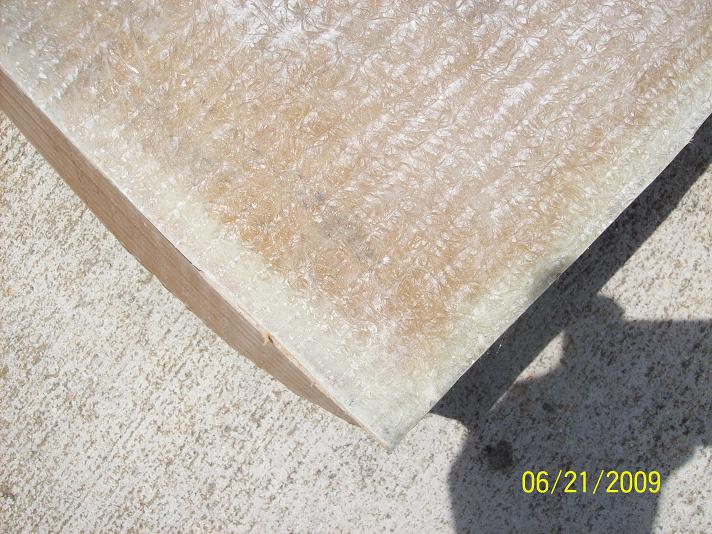
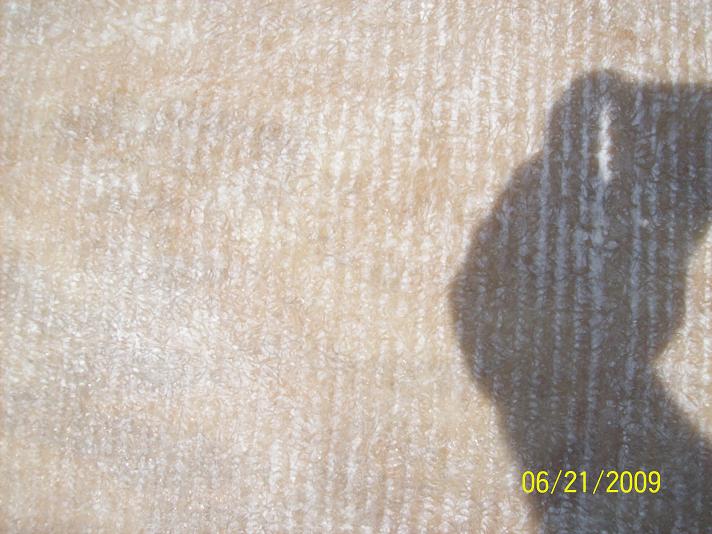
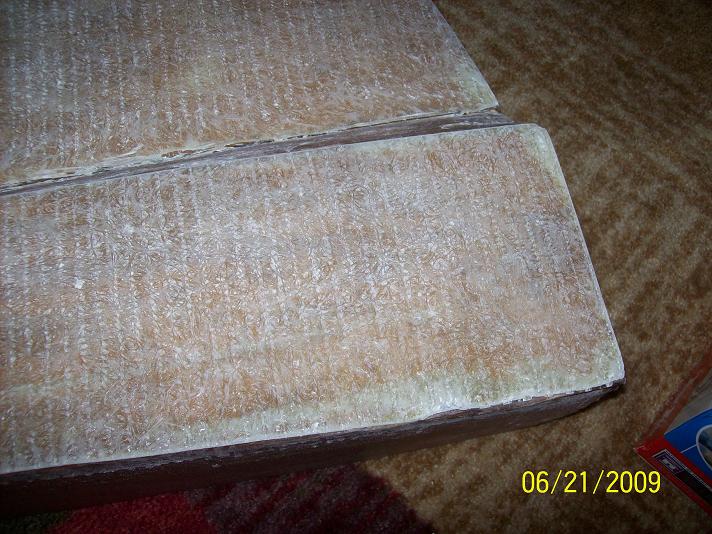
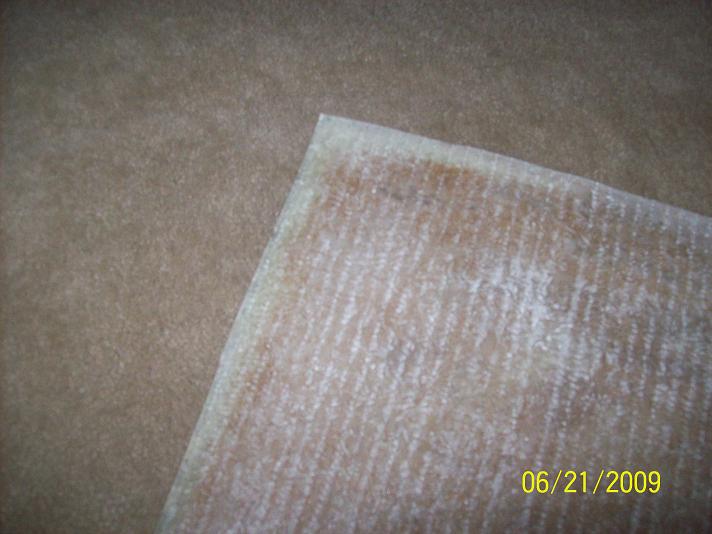
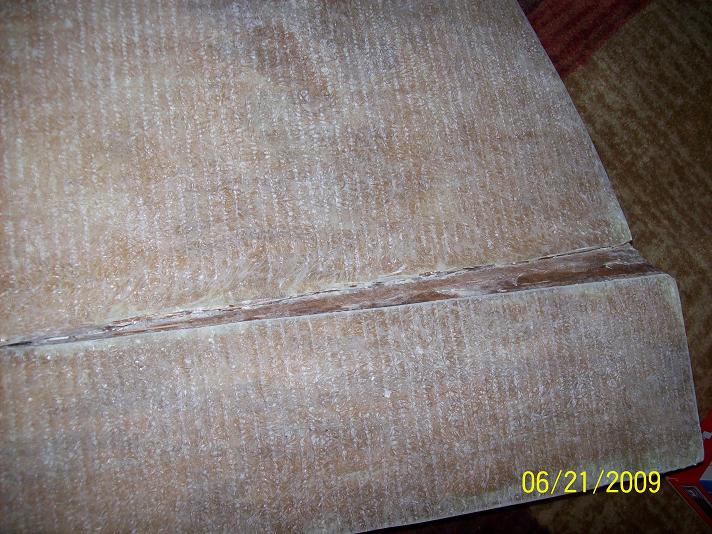
OK, guys tried some glass this weekend I think it went, ok, but I know I made some mistakes so please give me any opinions you may have on what i need to do to fix my problem areas which are the areas where the glass looks cloudy it all looks cloudy now because I have been sanding on it but I'm refering more to the milky areas around the edges of the door. I already know a couple of then are air pockets.
I know its not perfect, after all i am a beginner so don't slam me too hard, but thats why I'm on here so you guys can kind of walk me through the process.
Thanks
IP: Logged
11:26 PM
Jun 22nd, 2009
whodeanie Member
Posts: 3819 From: woodstock,Ga.,USA Registered: Jan 2008
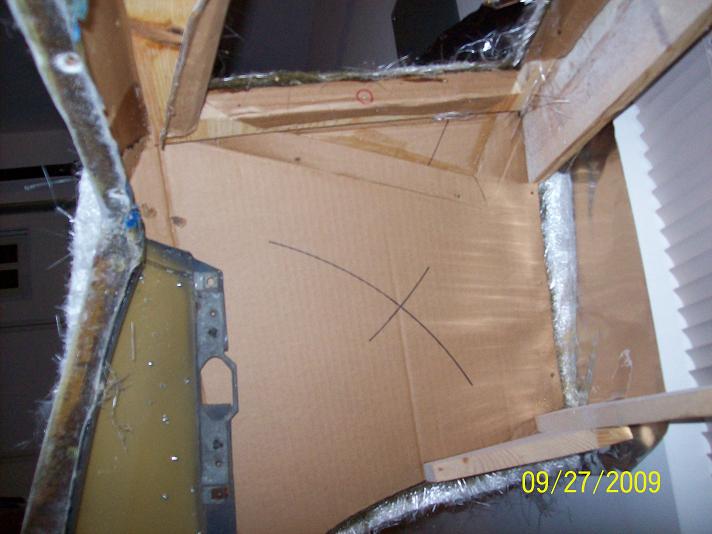
Looking good so far the edges are always going to lift a little the key is to let the fiberglass overhang a little and once it is setup you can trim it back to size. one other thing I would do to save you some work and make a better part would be to use bodyfiller or sheet rock mud or what ever you decide is easyer or cheaper and cover the cardboard with it and sand it smooth spray it with mold release then glass over it this will get rid of the cardboard ridges you now have to deal with. also after you lay the glass you need a fiberglass roller to roll out the resign this will keep the resign even and smooth. D.
PM sent!
[This message has been edited by whodeanie (edited 06-22-2009).]
IP: Logged
08:43 AM
Jun 24th, 2009
Austrian Import Member
Posts: 3919 From: Monterey, CA Registered: Feb 2007
Yeah, I was hoping to get the car semi back together to take some pics but things have been slow going here lately. But I will get more pictures hopefully its not pictures you have already seen enough of.
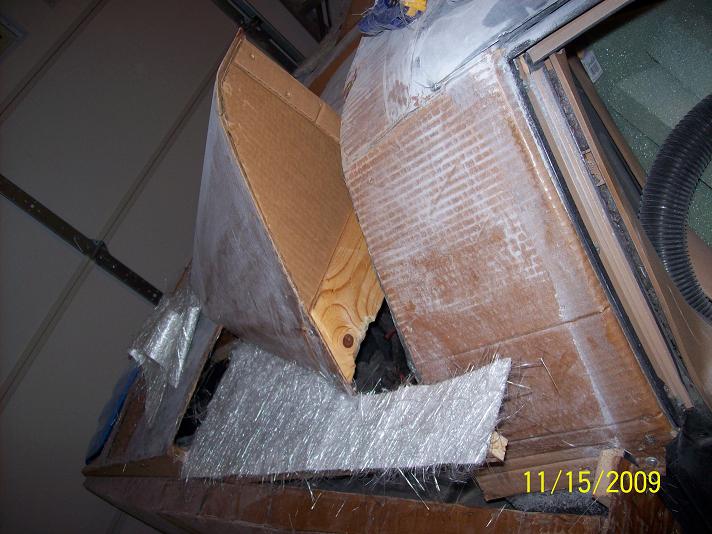
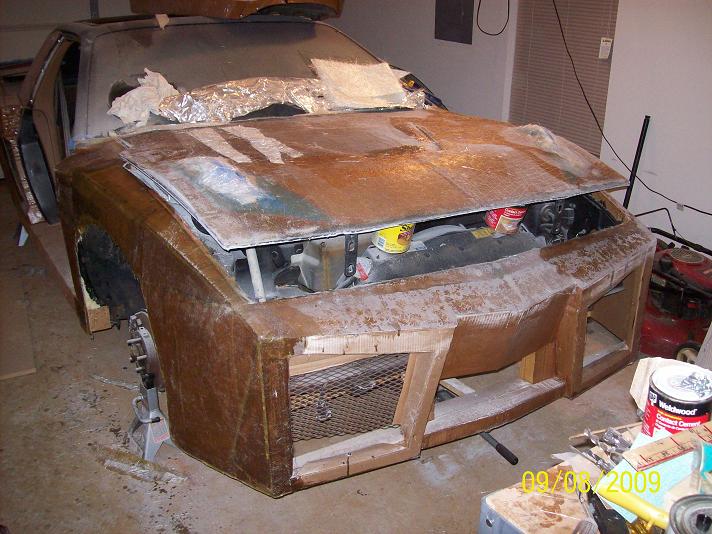
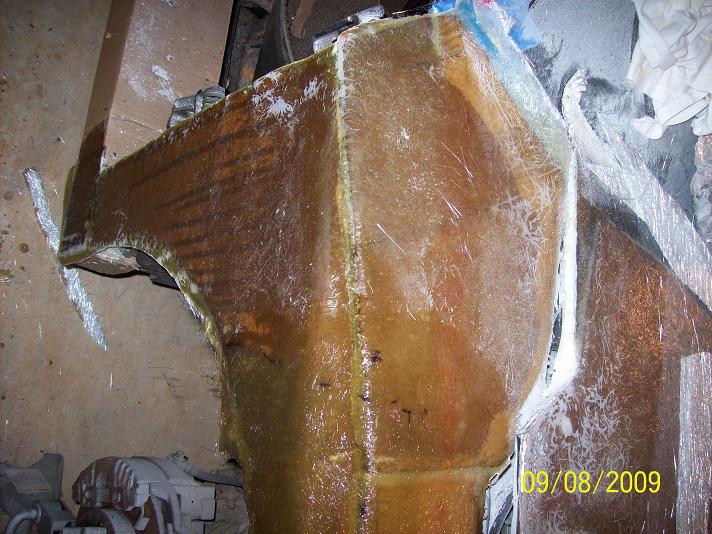
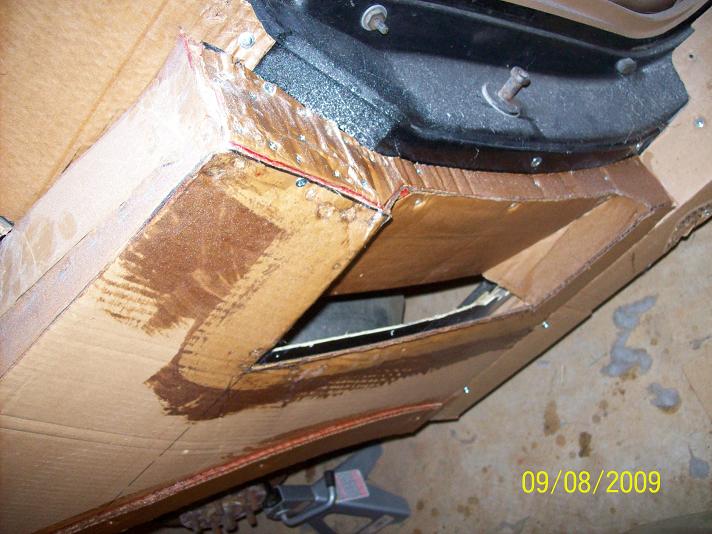
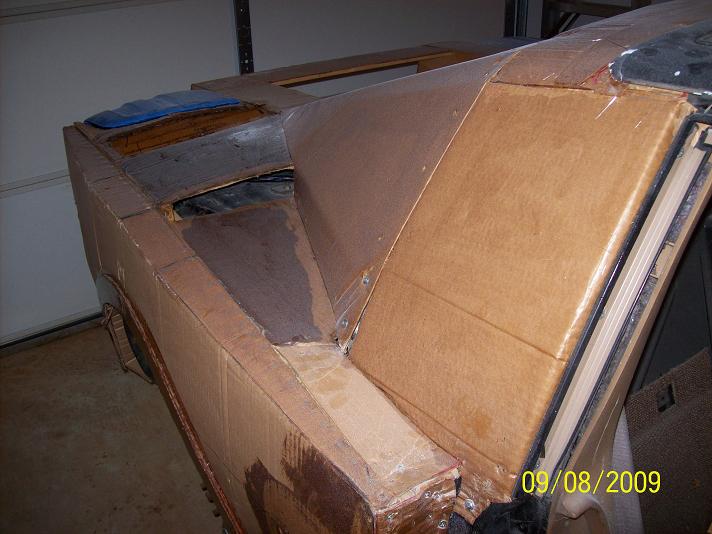
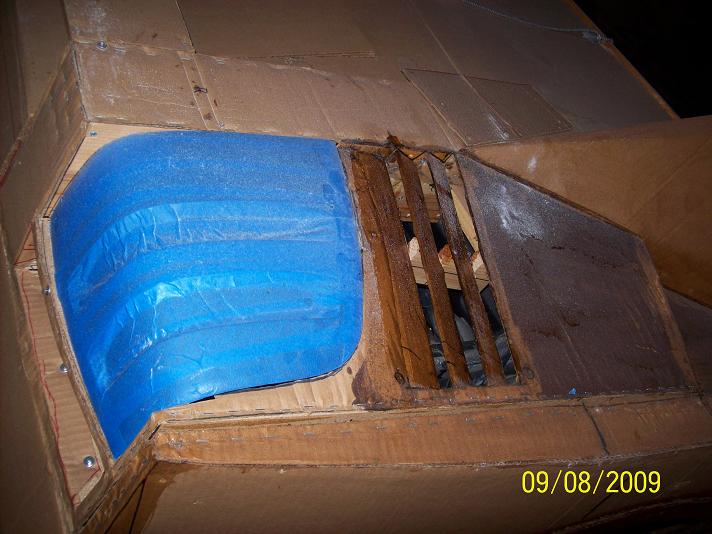
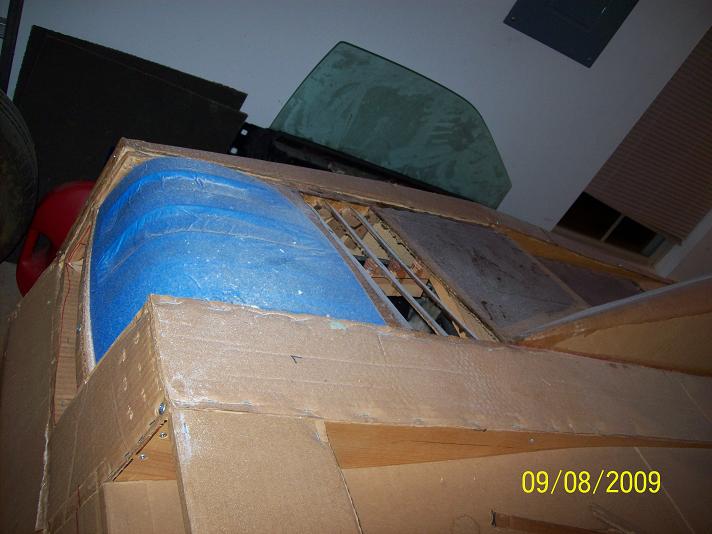
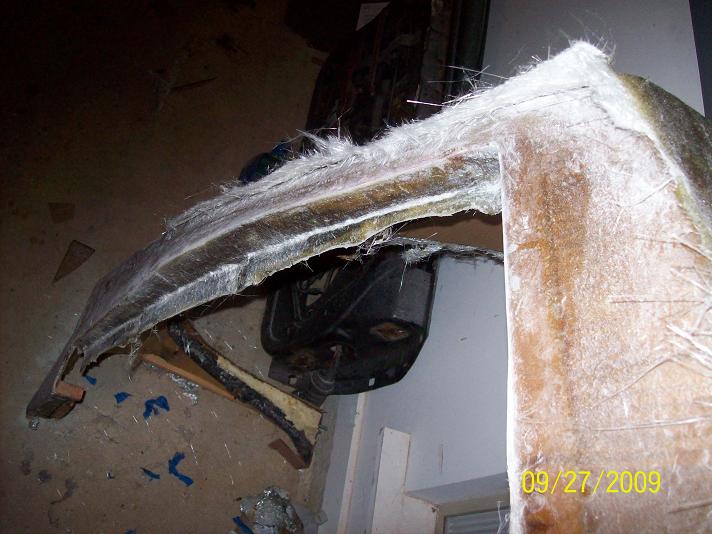
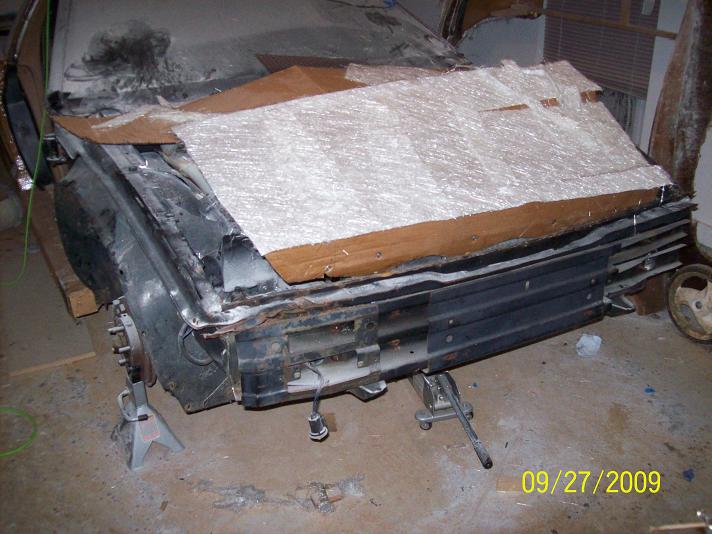
Long time no see guys. Well I layed glass across the hood and fenders in one peice then cut the hood free from the fender and front bumpers. the fenders and front bumpers will be one peice. The pictures I have posted are after the peices were cut apart and this is why the edges do not have glass on them. they need to be sanded down first. Lessons learned: 1. Epoxy is easier to work with and less smelly, but more expensive 2. Polyester does not give you alot of time to work with. 3. If you are going to be doing multiple layers do not get resin with wax because you have to sand between coats. 4. The mat you get at wally world aka Wal-mart is much thinner than the same mat bought at boat supply of fiberglass store. 5. Brushes, buckets, buckets, brushes... 6. If you use a good thick plastic bucket you can reuse if after the resin hardens.
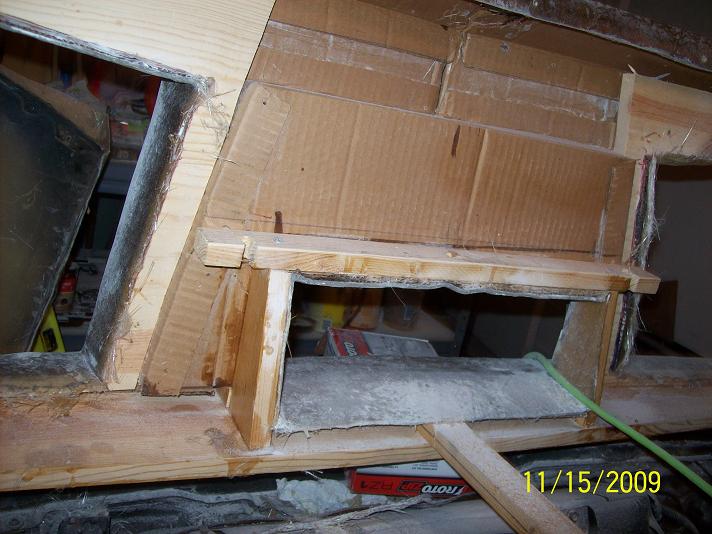
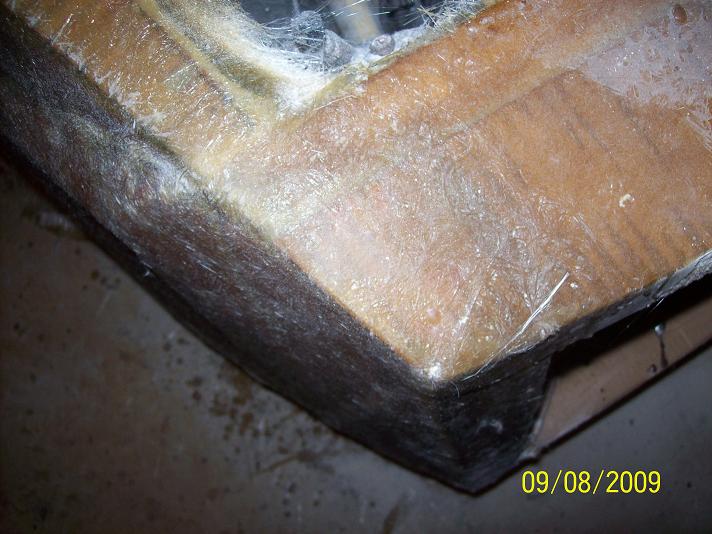
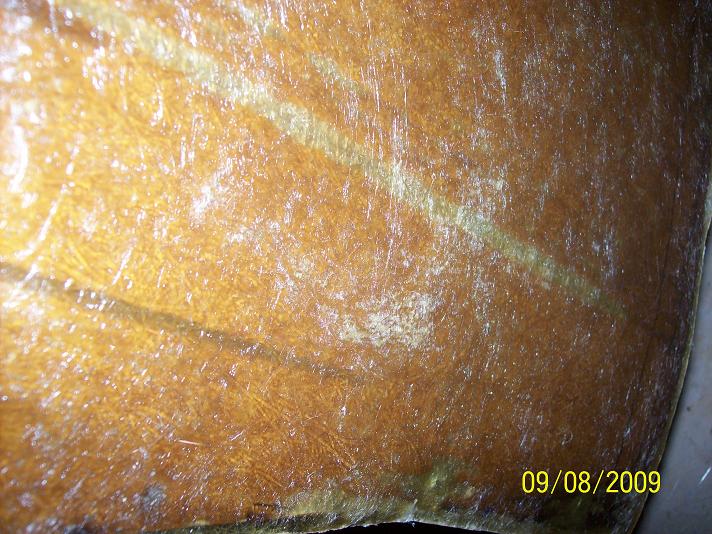
I'm still learning, guys, so check out the pictures and give me any comments or suggestions as well as point out any areas where its looks like i may have made a mistake and let me know what i need to do to fix them if I still can fix them. All areas have atleast 2 layers some already have three layers and some areas have more. I plan on doing one more layer on the hood. I started with the front because most of the areas are relatively flat so I thought they would be easy, unlike the back which has lots of angles and openings. Also I wanted to make sure my cardboard technique would work before I called Dean over to help me lay some glass
In the following pictures i took the left over resin and coated the areas where vents will be and after the resin dried I cut out the openings . The resin made it stiff enough to cut those areas without them sagging.
[This message has been edited by Galliero (edited 09-08-2009).]
I am not a fiber glass expert. Not even a little knowledgeable about the stuff. But, I commend you on the effort that you have put forth so far. I like watching your thread. Good luck, and keep up the work. It will pay off in the end.
Tony
IP: Logged
10:38 AM
labbe001 Member
Posts: 814 From: Alabaster, AL Registered: Jun 2008
BRAVO! It just goes to prove... it doesn't matter what material you use or experience you have - where there's a will - there's a way. Make your dream a reality!
My hats off to you, Sir!
[This message has been edited by Sofa King (edited 09-09-2009).]
IP: Logged
12:46 PM
Galliero Member
Posts: 83 From: Calera, Alabama, USA Registered: Jan 2009
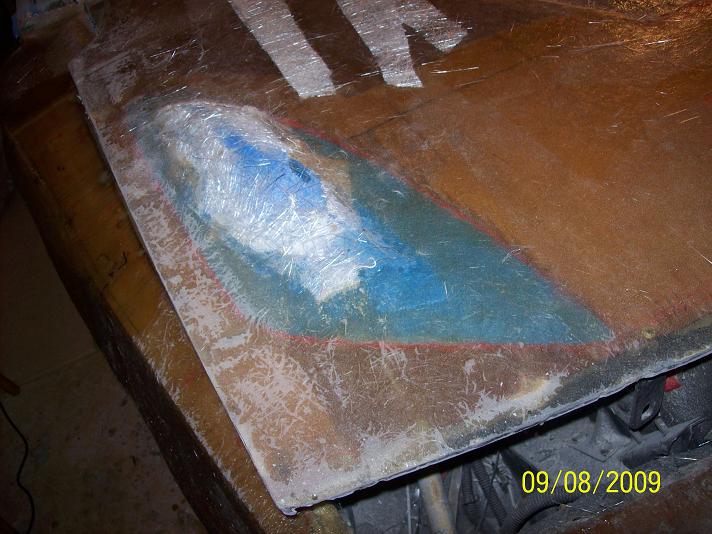
Thanks guys I really appreciate the kind words. Especially since you all know I am a true beginner doing glass. Its been a learning process and I still have more to learn but it is starting to take shape. The more I get done the more I want to do. I forgot to post it but the areas on the pictures I posted where you see the red lines is where I need to cut out or sand down to that line. I did the hood with the headlights in place. Once I get the hood off I have to lay glass on the edges then I can the I will be through laying glass on the hood and I can begin sanding and bondo work. After that I will do the inner edges of the fenders and front bumper before I remove the front clip and lay glass on the back side. Then its on to the doors and rockers. It is exciting to see it start to take shape even if its a lumpy shape right now and yes for those of you who wonder the cardboard and glass thing appears to be working. I haven't had any of it come apart after the resin hardened. Take it from me once cardboard has been soaked in resin it is super hard and strong.
So now you guys know Im still at it and now that im this far along there not much chance that Im going to quit I having too much fun now so the only question is how will the finished product look. If it looks anything like the picture I have in my head its going to be awesome. I'll try to post more often now that I got some experience under my belt and I'm in my groove. As long as my money holds up things should progress a little faster now and after I get my resin without wax so I don't have to sand between layers.
Wish me luck!!!
quote
Originally posted by Sofa King:
BRAVO! It just goes to prove... it doesn't matter what material you use or experience you have - where there's a will - there's a way. Make your dream a reality!
My hats off to you, Sir!
IP: Logged
11:26 PM
Sep 10th, 2009
whodeanie Member
Posts: 3819 From: woodstock,Ga.,USA Registered: Jan 2008
Looking good ! you learn quick I told you it was not that hard to do, and the best way to learn is to do it. and you sir are doing it keep us all posted. D.
IP: Logged
08:43 AM
Gandalf Member
Posts: 647 From: Stockport, England Registered: May 2009
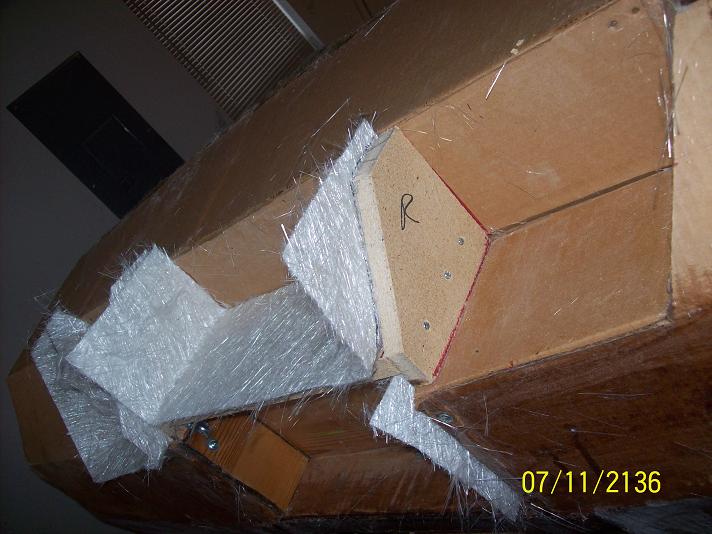
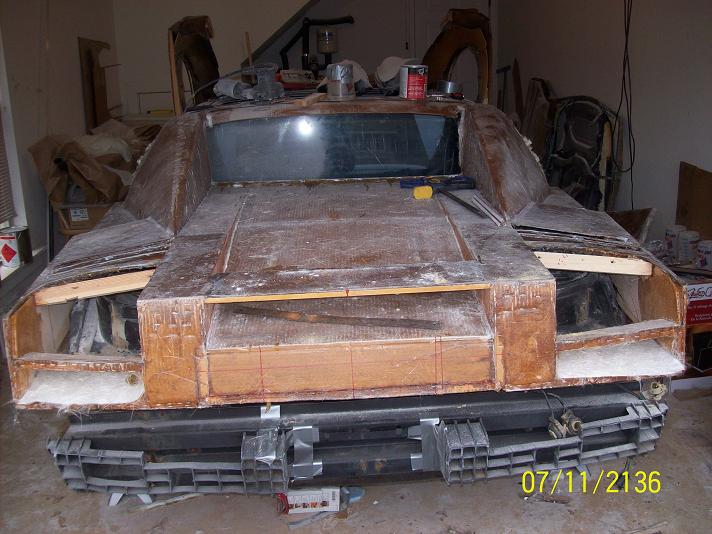
Latest update guys! I finally got enough glass on the front clip to be able to remove it from the car. As I mentioned in an earlier post. I glassed the front bumper and front fenders as one piece. Now that I have three layers of glass on the outside i can start laying glass on the backside of the front clip. You should be able to notice that the original front fenders are still there and the front bumper is completly fabricated of cardboard and wood.
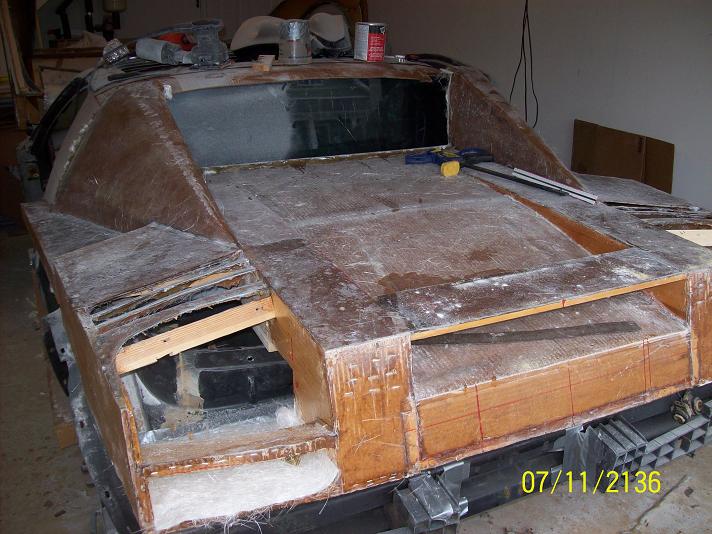
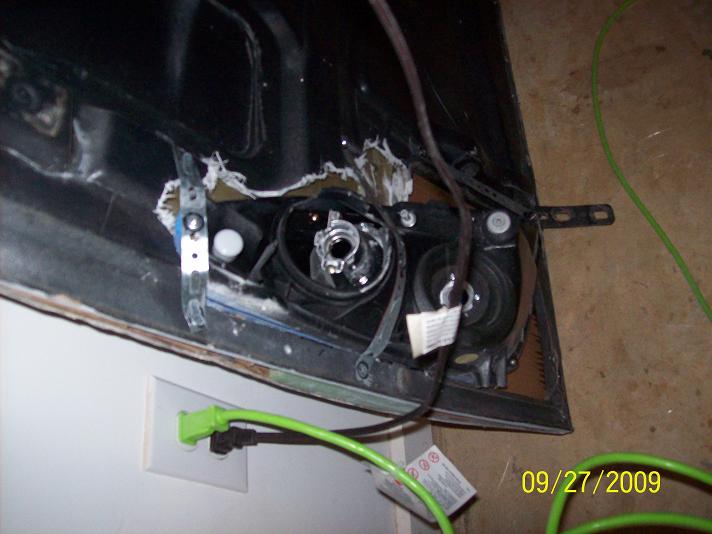
These next three photos show the back side of the hood and how the headlights are mounted, at least until I glass in a backside cover. I used existing holes where the pop up headlights were and made the openings bigger to except the celica headlights. One neat fact is that although the celica lights are twice as long the are the same with as the opening in the fiero hood
That looks rediculously familiar. loll Thats how I built my first widebody. Then I switched to a foam version so that I could make it more rounded.
I agree that cardboard works great to get some lines going. For sure. If your looking to smooth things out a little bit, plaster works great, even if you have to cut a few corners of the cardboard (you have some sharp corners on the bumper, cut them, duct tape the underside, and plaster over it. When I get back to work with my kit I'll be trying out some drywall compounds to see if the resin will effect it. Because they are a breeze to sand.
When I get back to work with my kit I'll be trying out some drywall compounds to see if the resin will effect it. Because they are a breeze to sand.
Resin will not affect drywall compound. Works rather well, actually. The biggest issue I had with it is the length of time to dry. Apparently there are some types that dry much faster, but I used the ready-mix stuff. Takes 24 hours+ to dry. - I switched to Bondo - drys faster.
Bob
IP: Logged
06:02 AM
PFF
System Bot
Galliero Member
Posts: 83 From: Calera, Alabama, USA Registered: Jan 2009
Thanks for comment 2M4. Its funny because I was just looking through your thread last night and thinking the same thing that you said..lol...the saying goes great minds think alot come to mind, but the phrase "there's a thin line between madness and genius also comes to mind. Keeo watching the post and I'll be watch ing yours because I especially like how you kept having to remind everybody that your project was nor going to be finished over noght and that the techniques you/I are doing require alot of finish work as well as creative latitude because the design is always evolving as you get new inspirations. I'm liking the cardboard to, I have already come up with a preliminary design for turning a cavelier into a 2010 camaro using cardboard.
quote
Originally posted by Custom2M4:
That looks rediculously familiar. loll Thats how I built my first widebody. Then I switched to a foam version so that I could make it more rounded.
I agree that cardboard works great to get some lines going. For sure. If your looking to smooth things out a little bit, plaster works great, even if you have to cut a few corners of the cardboard (you have some sharp corners on the bumper, cut them, duct tape the underside, and plaster over it. When I get back to work with my kit I'll be trying out some drywall compounds to see if the resin will effect it. Because they are a breeze to sand.
You only want to use plaster if you're making a plug. IIRC you're going to run this body without making a mold & parts. Do not use plaster if that is the case. You'll wind up with cracks everywhere. ~ Paul aka "Tha Driver"
Which do you most can't the least? What I most can't the least, would be do not a bad job but always a good.
IP: Logged
12:40 PM
RCR Member
Posts: 4432 From: Shelby Twp Mi Registered: Sep 2002
Thanks for comment 2M4. Its funny because I was just looking through your thread last night and thinking the same thing that you said..lol...the saying goes great minds think alot come to mind, but the phrase "there's a thin line between madness and genius also comes to mind. Keeo watching the post and I'll be watch ing yours because I especially like how you kept having to remind everybody that your project was nor going to be finished over noght and that the techniques you/I are doing require alot of finish work as well as creative latitude because the design is always evolving as you get new inspirations. I'm liking the cardboard to, I have already come up with a preliminary design for turning a cavelier into a 2010 camaro using cardboard.
Thank you. I've been concentrating on my new house / garage and finishing the engine before getting back to work on the body side of things. Once I get back, I have alot of parts that people haven't seen (finished) :P.
PS. I wouldn't waste my time trying to convert a cavalier into anything... I'm not sure about your time, but I wouldn't reccommend it. I was young once. Then I got married (I'm 21). Time flies, and runs dry fast at the same time.
Cheers
quote
Originally posted by RCR:
Resin will not affect drywall compound. Works rather well, actually. The biggest issue I had with it is the length of time to dry. Apparently there are some types that dry much faster, but I used the ready-mix stuff. Takes 24 hours+ to dry. - I switched to Bondo - drys faster.
Bob
I'm in construction and use drywall compounds all the time, from plaster to ready mix, to fast set etc etc. I'd honestly use fast set, it drys in 20 mins, ready to sand. If you mix it with less water, It'll dry faster, more water = slower. Its also alot cheaper than bondo, way easier to mix and a billion times easier to sand.
The only problem I could forsee is that it absorbs moisture. So you'd have to be sure to put a release agent ontop before the glass. I can see it being easy to break out of the molds because it doesn't flex, and you can clean the molds with water and the compound will wash away......
I'll have to really test it out, but it seems like a good alternative.
thanks for the bump guys and yes I am still working on the car and I should have new pics sometime this week. I basically ahve the front clip to the doors 90% glassed. Just need to touch up a few areas. I still have alot of work to do not including bondo wok, but I want to get the car completly covered in glass before I start bondo work so I can make sure all the body lines line up correctly. I got the sides and edges of the hood done and got the headlight openings cut. I need to touch up the edges of the openings I trimmed off too much in a couple of places so i need to build it back up which is good because it gives me an excuse to add another layer of glass which I think the hood needs anyway. I know all this info is useless without pics to back it up but I will correct that problem before the end of the week. AND IT WOULD BE A BIG KICK FOR MY THREAD TO BE PUT IN THE CONSTRUCTION ZONE....I'm just saying!
quote
Originally posted by carbon:
Send it to the Construction Zone I say... not that I have any say...
IP: Logged
03:58 PM
Nov 15th, 2009
Galliero Member
Posts: 83 From: Calera, Alabama, USA Registered: Jan 2009
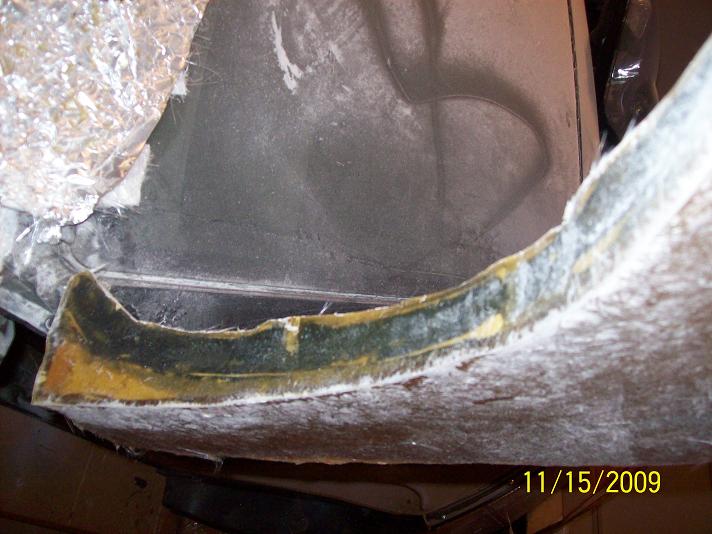
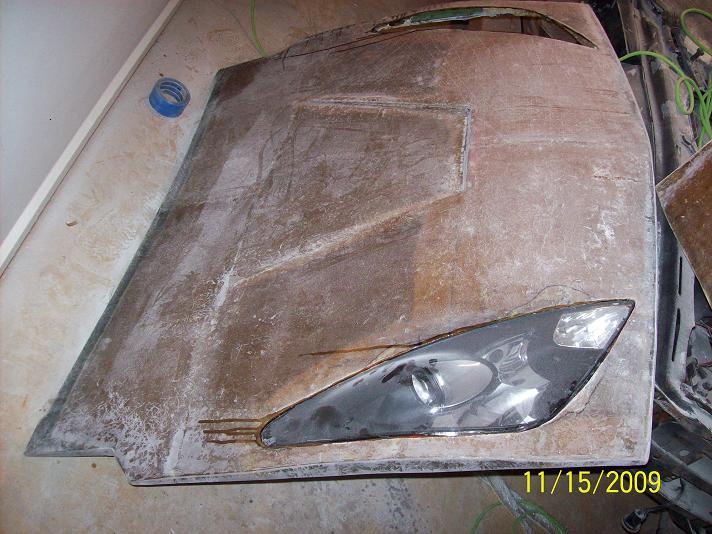
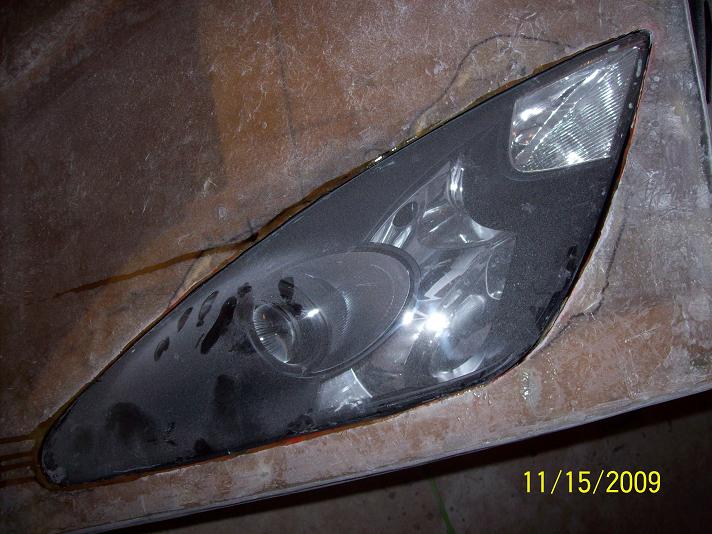
Here are the photos I promised. The first pic is of the hood with the the headlight openings. I still need to do some touch up work on the openings to get then just right so they precisely follow the lines of the light, right now there are some areas where the gaps are a too big. I have given it some thought and I'm going to add one more layer of glass to the hood.
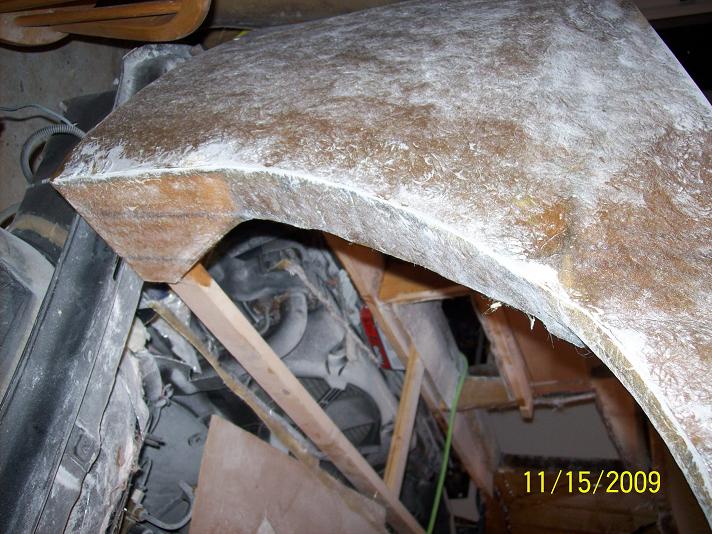
This is the the front clip glassed and the first of many sandings. You can see the openings in the reventon inspired design. I have also glassed the wheel openings.
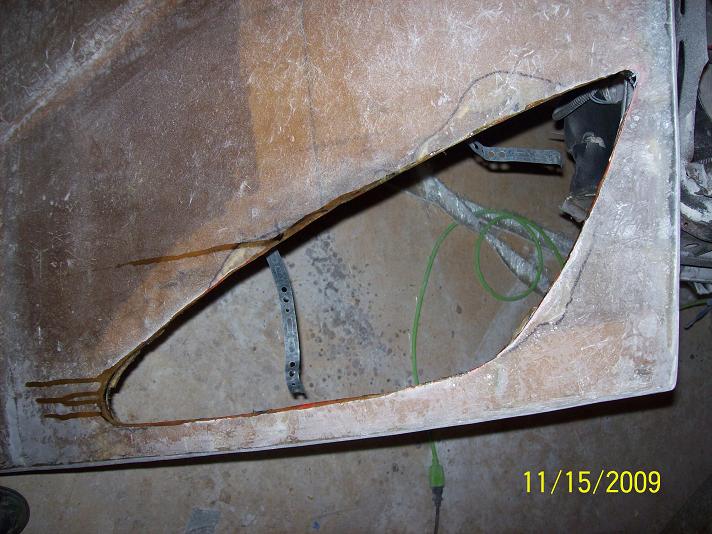
Here is close-up of the headlight opening.
This a teaser shot of me getting ready to move to the back half of the car. The back of the car has alot of flat areas and I am more experienced with laying glass (by no means an expert or even close) so it should go alot faster and like I said before there is still a ton of sanding and bondo work to do when all the glass is layed but it will be one step closer to a finished project and at that point I will be able to pass of peices to local body shops to do the finished body work.
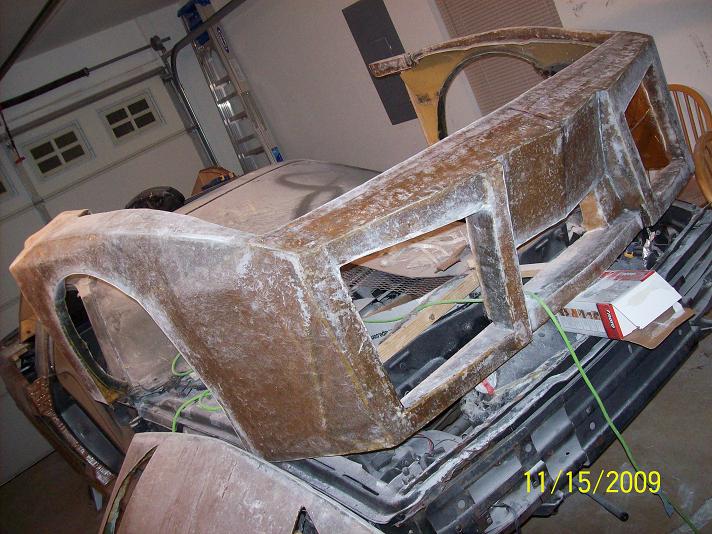
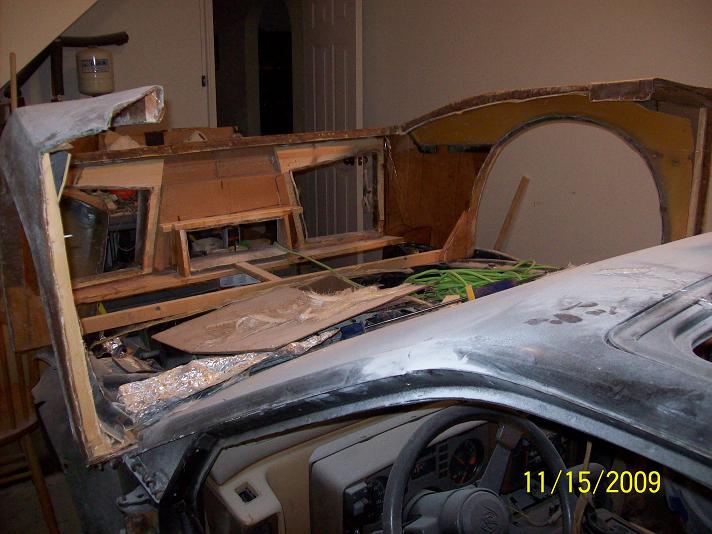
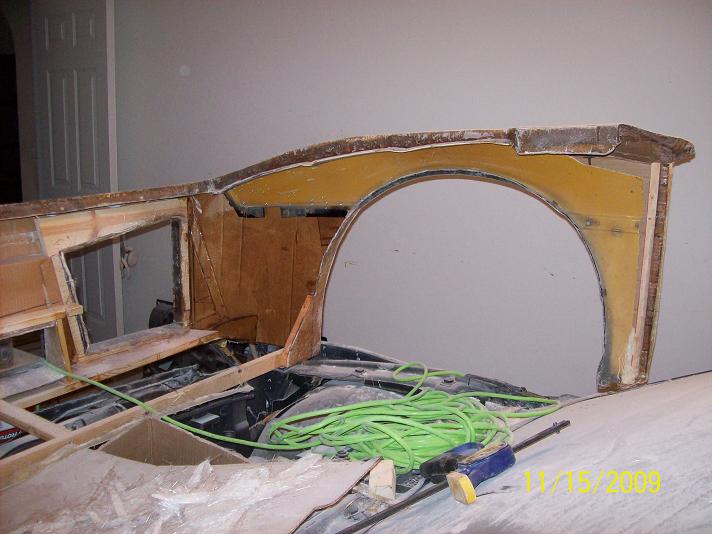
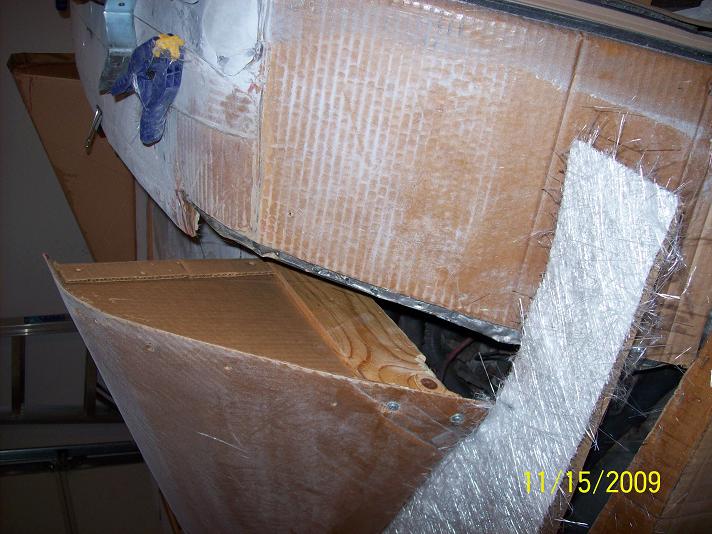
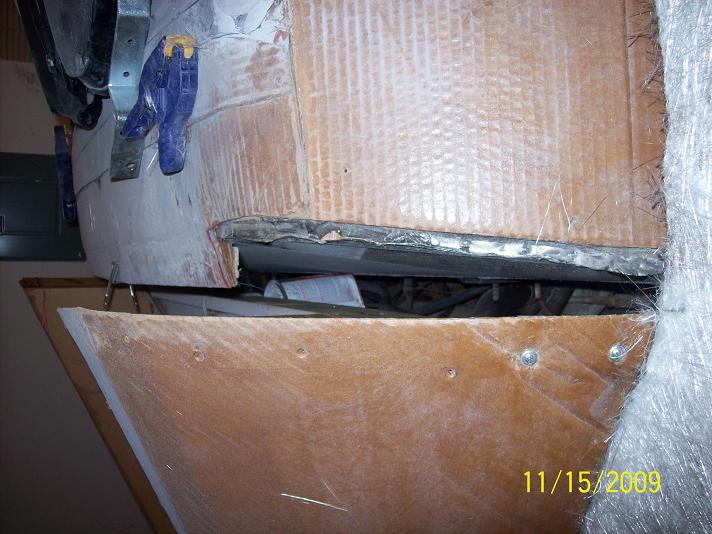
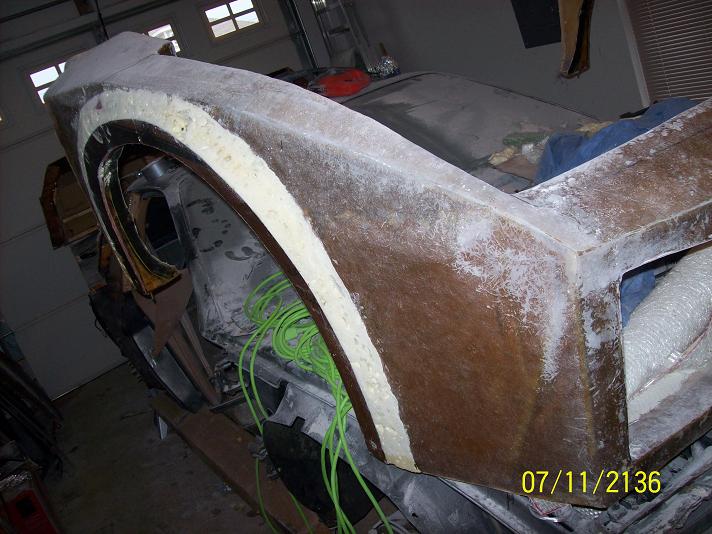
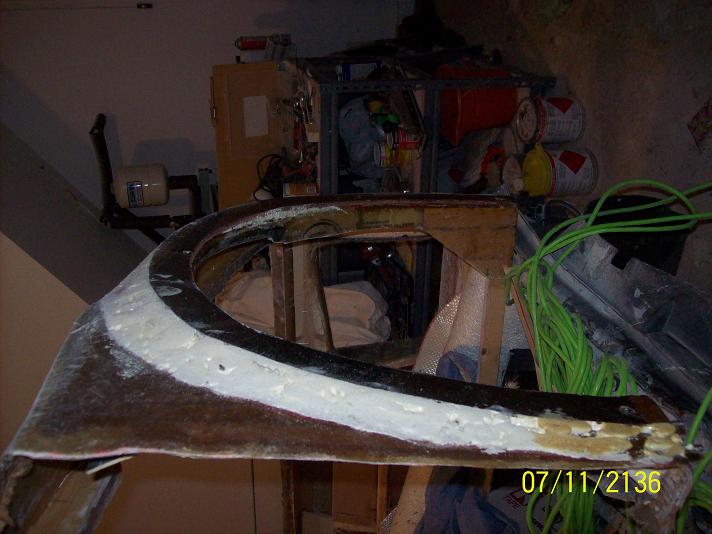
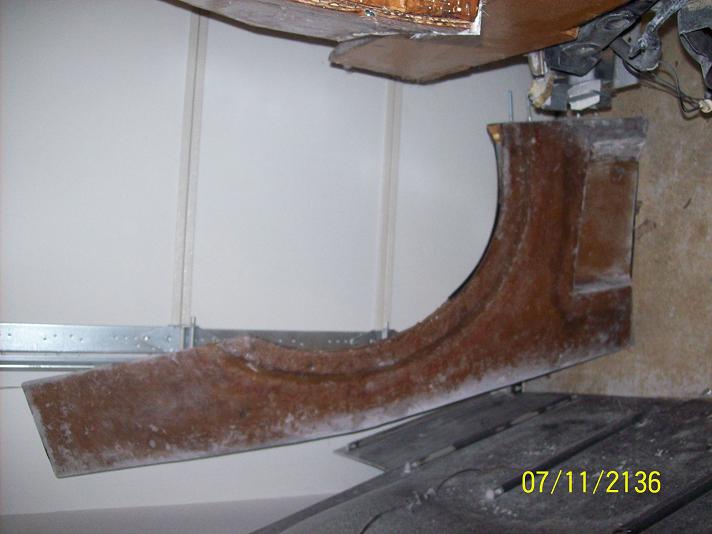
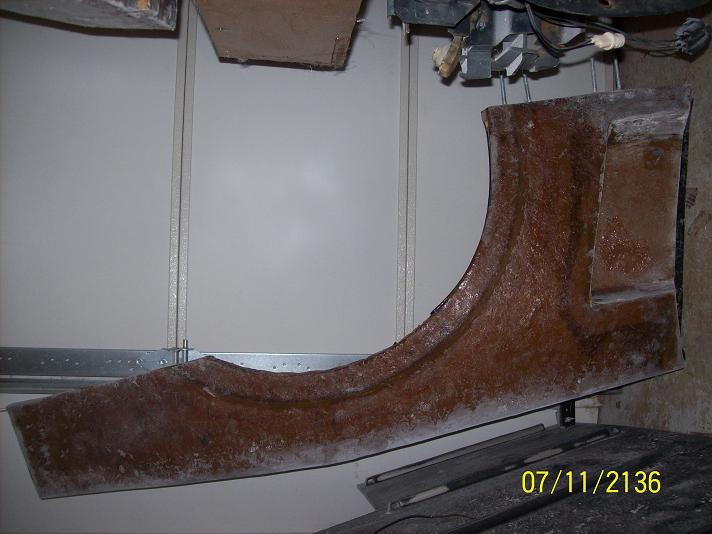
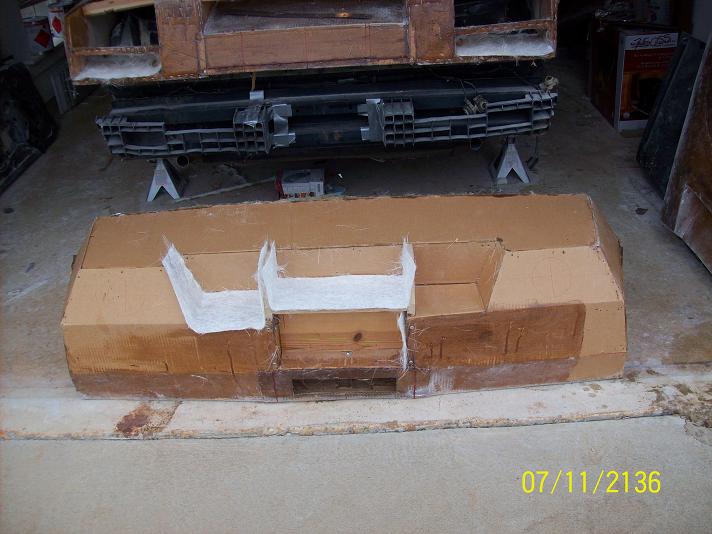
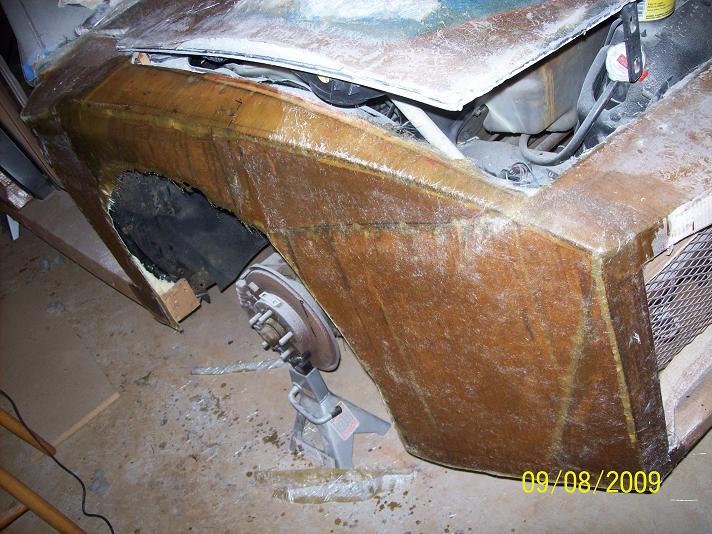
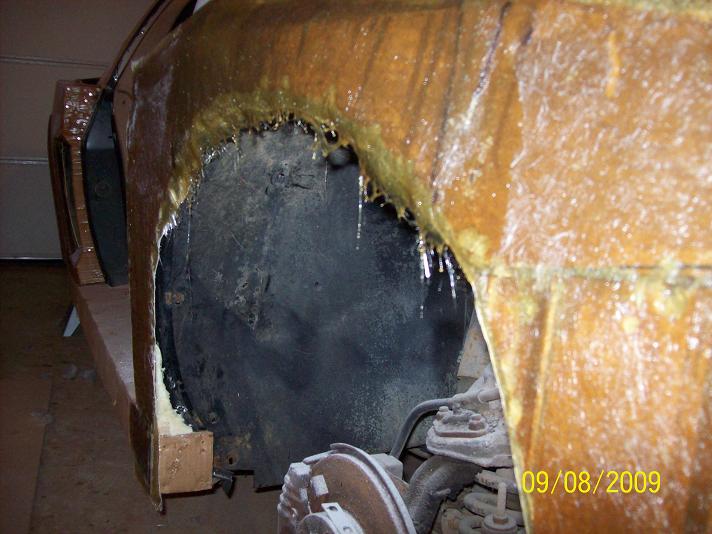
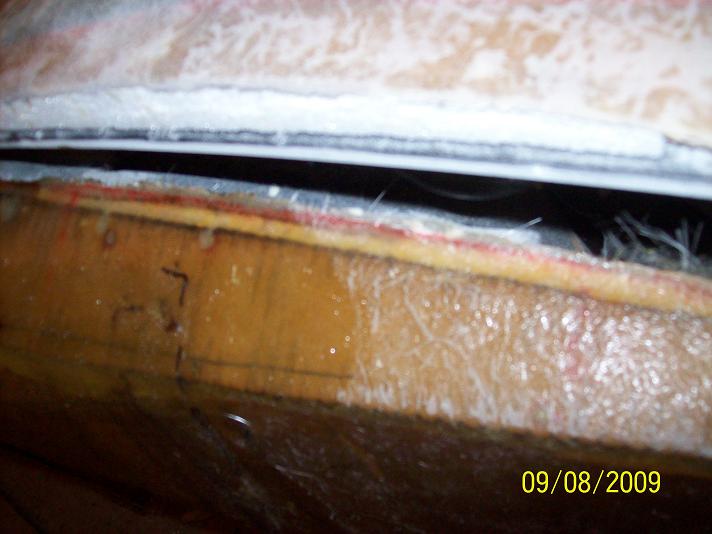
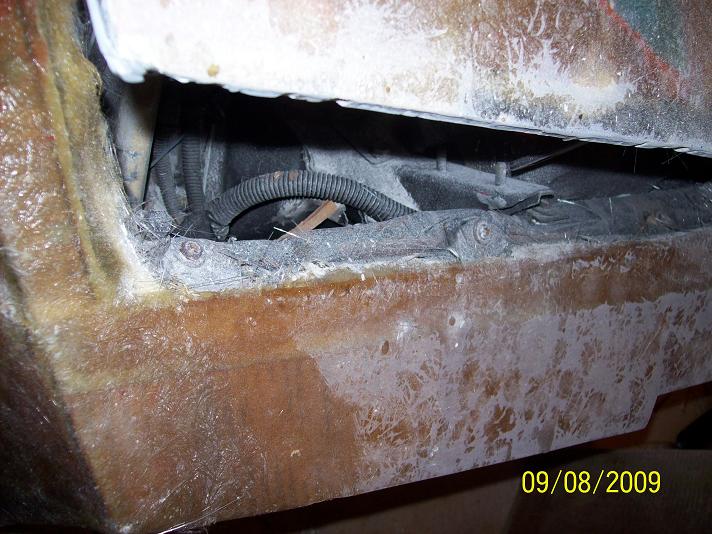
Here is a shot of the back side of the front clip. I wanted you all to see how it was constructed. I also wanted you to know that when I say the peices are constructed of cardboard that I'm not exaggerating. You can clearly see the original Fiero fenders from this side. Using the fiero fenders allows me to be able to use the original mounting holes on the fenders. The front bumper is completely made of cardboard over a wood sub;structure.
These two photos are close-ups of the glassed wheel openings.
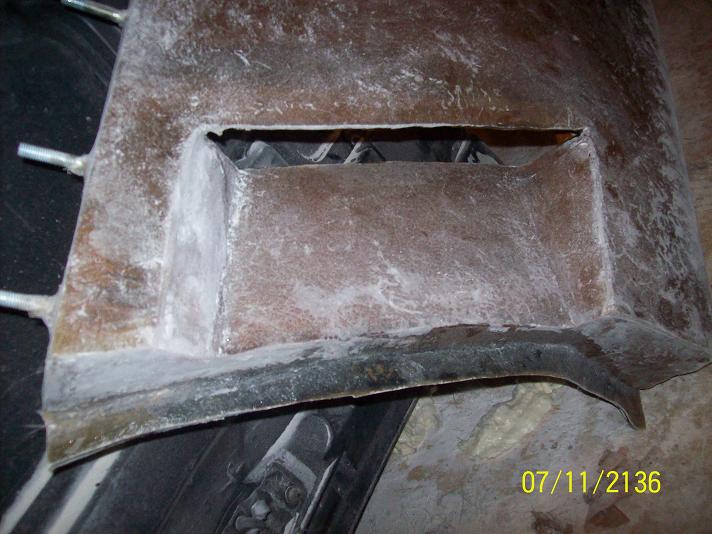
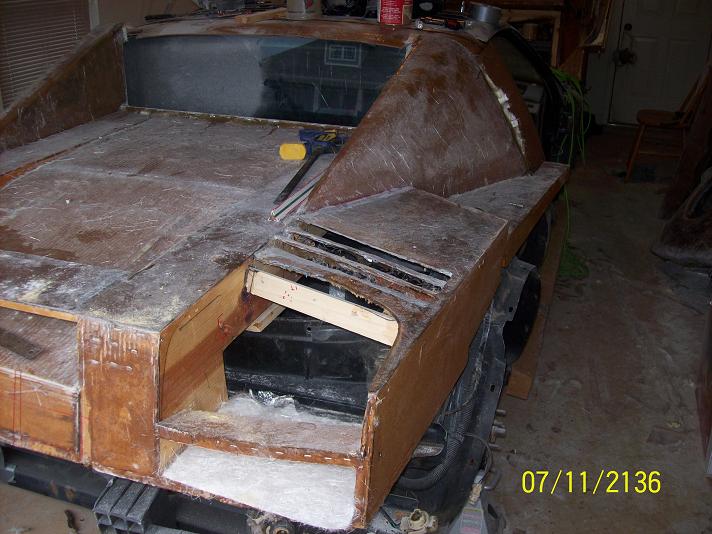
This is a rear close-up of the center opening in the front clip. This opening allows air to the radiator. I plan to make sceens to cover these openings
Another shot of the fender hope this gives you a clearer picture of how the cardboard was formed around the factory fender.
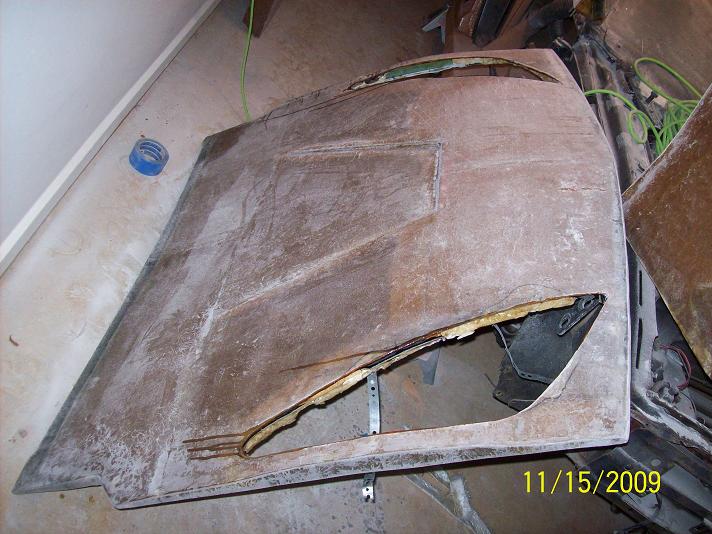
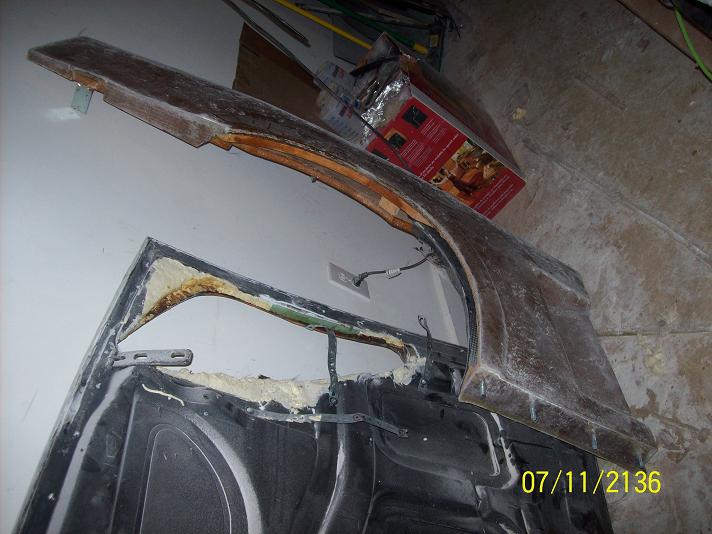
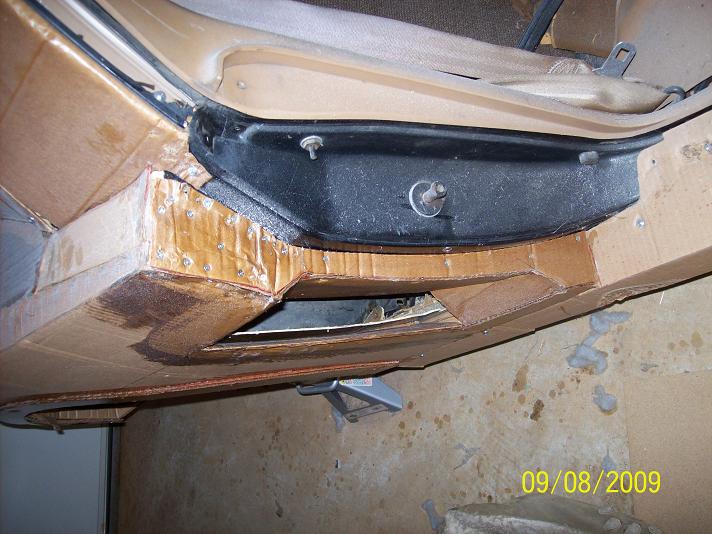
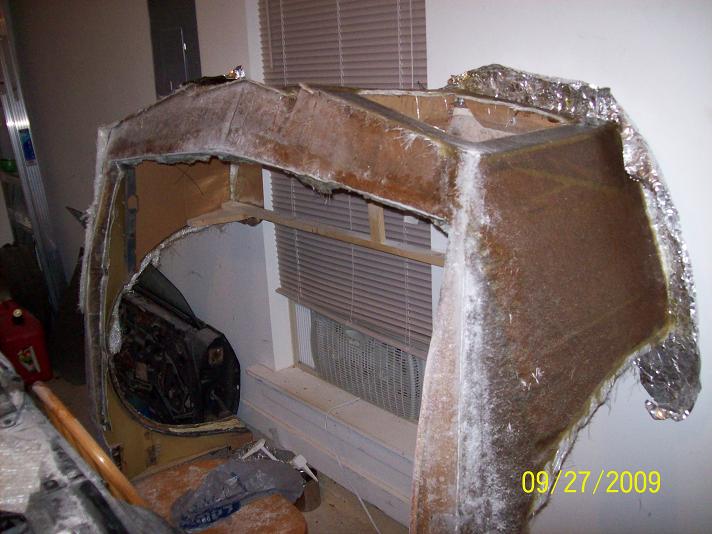
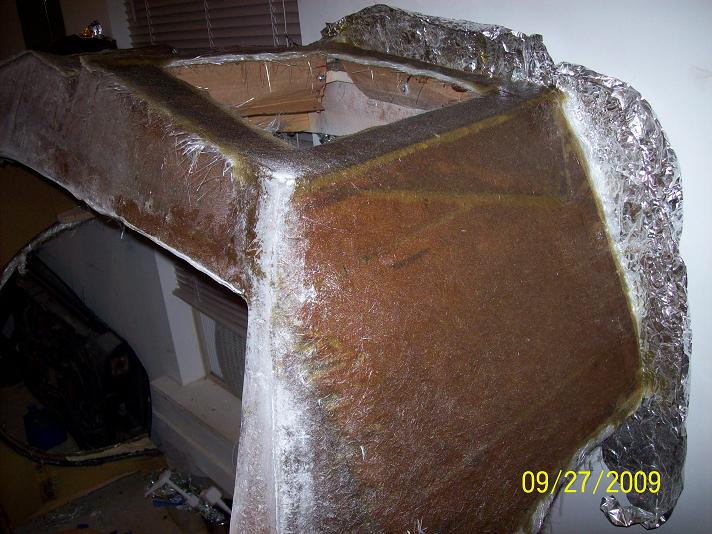
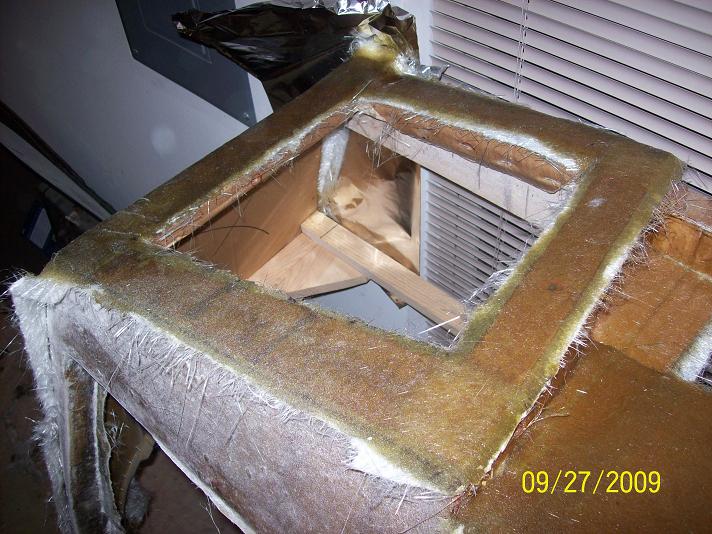
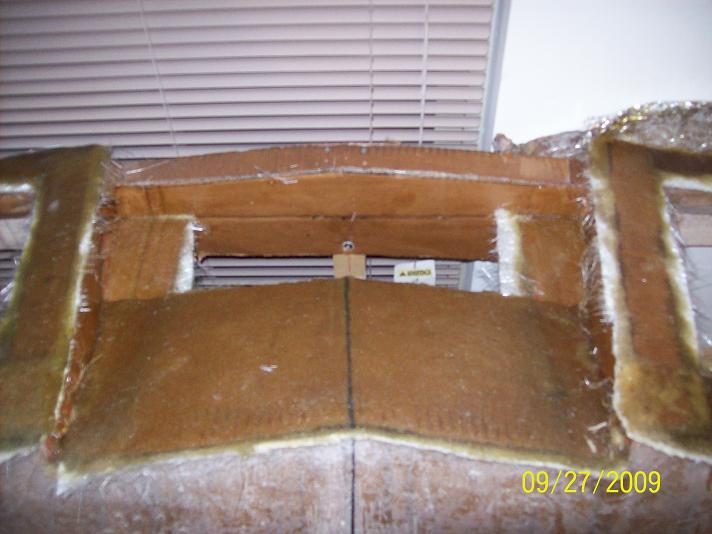
These next two pictures are of the engine cover and show where the cover rest on the roof frame and sit in the groove over the rear window. I had to trim the metal flage that hangs over the rear window so that the trubk cover would sit flush against the rear glass.
In these two pictures I places one of the headlights in the opening so yall could see how close the openings are to being just right. I wanted it to be about an 1/8 inch gap between the opening and the light. Keep in mind that the light is only placed in the opening so yall can see it in place it is not correctly or securely position just propped up.
I didn't post any pics of the door skins but both are completed thats why I'm moving on to the back half of the car. I am so excited about moving to the back because that means I'm one step closer to my goal. The rear quarter like the frong fenders contain the original fiero body panels but unlike the hood which is built on top of the fiero hood the engine cover is completly fabricated of cardboard over a wooden frame. I still have a little work to do on the rear bumper, nothing major, one of the sides was a little off so i had to cut it apart to fix it and I haven't gotten around to glueing it back together with all the excitement over starting glassing. I hope to have the car completely glassed by spring which would keep me on track to have the car road worthy by summer even if its just in primer.
Galliero LST......Coming Summer 2010 (Hopefully)
[This message has been edited by Galliero (edited 11-15-2009).]
IP: Logged
09:06 PM
Nov 17th, 2009
GT86FASTBACK Member
Posts: 757 From: Monroeville, PA Registered: Jul 2009
Hey guys, still plugging away at it laying glass. I'm working on the back half now. I'll have to go back and fix some stuff but most of it is minor so i decided to continue laying glass and see if I can get the car completely covered in glass by the end of the year (notice I said "TRY") Even if I don't I will be really, really close. I should get alot done the week before and after Christmas because I am off work so I can work on the car all day long all week long and not just on the weekend. So expect new pics soon I have been working on the engine cover (my favorite part) and its going pretty good but I'm going to run out of mat before I can finish so I have to wait to get my allowance from my significant other to get more mat and resin. Still trying to have the outside done by the time Ironman2 comes out.
[This message has been edited by Galliero (edited 12-02-2009).]
IP: Logged
05:01 PM
Galliero Member
Posts: 83 From: Calera, Alabama, USA Registered: Jan 2009
Yaaaaaawwwwwnnnnnn!!!!!!!! Hey guys just woke up from my winter hibernation and thought i would post some updates and new pics. I have been hampered by Alabama's freak weather the last two months and financial shortfalls as I'm sure many of you have experienced, but any way here are the updates with very brief descriptions.
In this pic after reading a couple of threads where memebers added fender flares I also caught the fender flare bug so I decides to add flares to the front since I already planned to put flares on the back I felt I had to do flares in front for consistancy. That is just spray can foam that i applied and then sanded down and next I will glass over.
Here are couple of shots of the rear quarters they are turning out pretty good I am really happy with how they look. I still need to do the wheel well and back side when i get more resin but its looking really good, there may be a few alignment problems with the doors when I place them back on the car.
Here are some pictures of me getting the rear bumper ready for glassing when i get more resin. I used my last bit of resin to stiffen up the botttom, it the flat part at the top of the first picture the glass is on the back side so you can't see it but you can see how flat the bottom is it was sagging and bowwed severly. The bumpers is upside down in these pictures and this is the last major part that i have to fiberglass. I still have side skirts and rear roof panel but these should go pretty fast and I also have to finish the the rear deck lid but its 80% done.
Last are a few pictures of the rear decklid its not finished but all the major parts are covered except the backface. I have to do alot of trim work on the decklid especially around the vents and light openings.
Well thats it but keep in mind I'm not done and I still have alot of work to do because after all the glass I have to bondo and sand everthing but I'm still excited about the project and eager to finish it. I am inspired everyday when I log on to PFF and read about all the amazing things the members are doing and I agree with the member who said the longer you take to finishe the more changes you want to make. Later guys post more pictures soon when decklid and rear bumper are completly glassed
Later Guys Hope you enjoy!
[This message has been edited by Galliero (edited 03-14-2010).]
Galliero, Hey. Matt from YouTube here...remember me?
I just wanted to chime in and ask (BEG!) you to keep the pics coming. When I saw the progress, I have to admit, I was so excited...don't make fun of me now...I got wood! (Well, technically it was really thick cardboard...but you know what I mean.)
I had just about made my mind up to spend $4K on a Merci kit, but after seeing your work, you have all but made my mind up for me. I think I'm going full on scratch built! Thanks man! Keep up the outstanding work!
PS...
I would LOVE to see some profile shots of this baby. Pull her out into the sun and snap away!
[This message has been edited by LamBozo (edited 03-26-2010).]
IP: Logged
08:51 PM
Mar 27th, 2010
jetsnvettes2000 Member
Posts: 3311 From: Menasha,Wisconsin,USA Registered: Dec 2009


 What Paul said