
 
     |
| '84 - '87 Manual Transmission Axle Replacement - Step by Step Photo Log (Page 1/4) |

|
Bloozberry
|
JUN 27, 11:33 AM
|
|
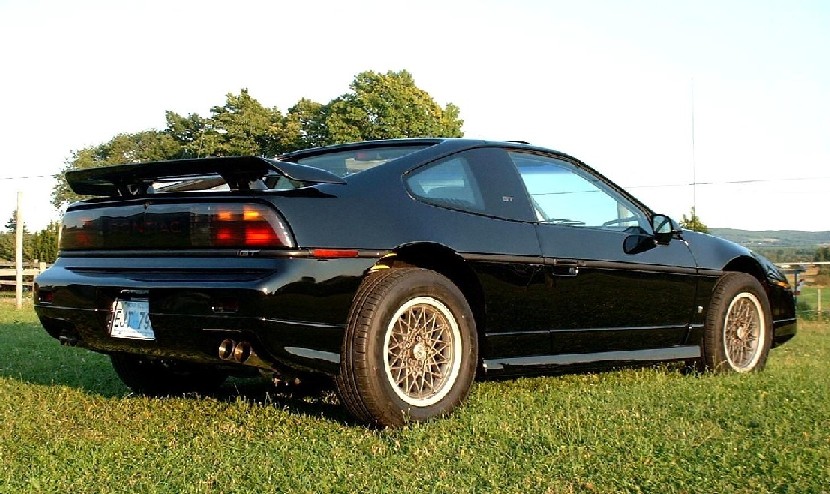
I'll be honest, I didn't check to see if this had been documented before, but since I had the camera nearby, I decided to create a new thread about how to go about doing this. As some of you know, I did a ground-up resto on an ’86 fastback two years ago. I bought the car, drove it home five minutes away, and that was the extent of my driving experience with this particular car before I dismantled it. There were a lot more pressing safety issues with the car than driving it around to see if the axles were worn!
Anyways, about 5000 kms after the restoration, I could hear slight clunk coming from the passenger rear wheel area every time I started to accelerate from a stand still. I jacked the car up, held the passenger side tripot joint steady, and could twist the axle by hand a couple degrees, so I knew the tripot was shot. I ordered an entire axle from Cardone for $88.00 CDN… hard to go wrong. With axle in hand, I decided to photograph the procedure and share with the Forum. Following these instructions, you won’t have to break into the brake hydraulic system nor undergo an alignment once you’re done.
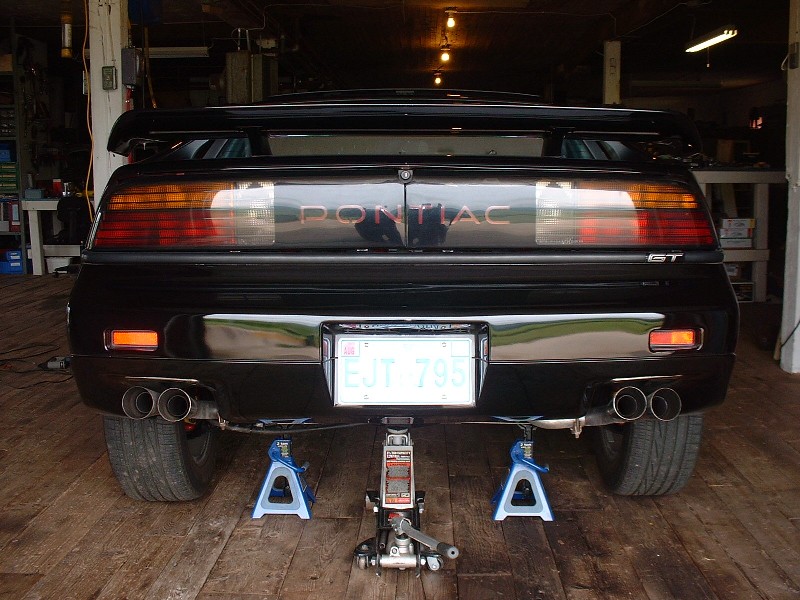
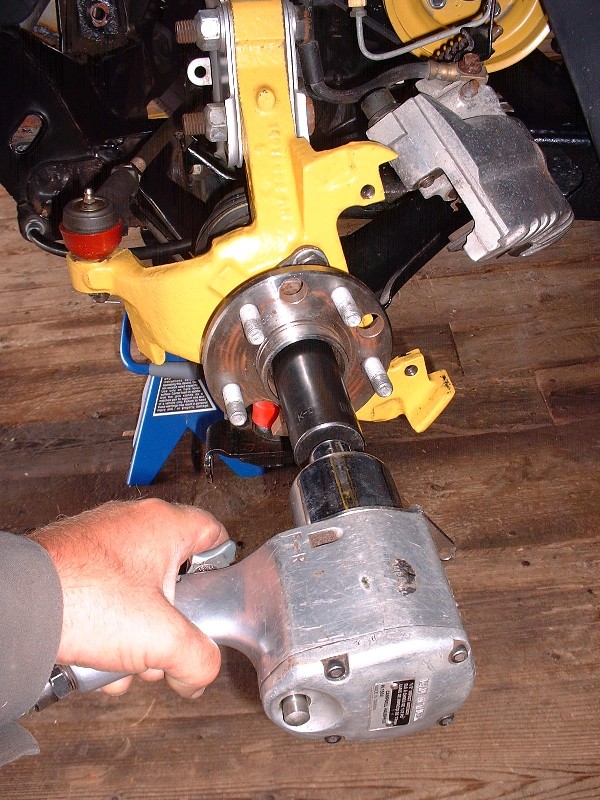
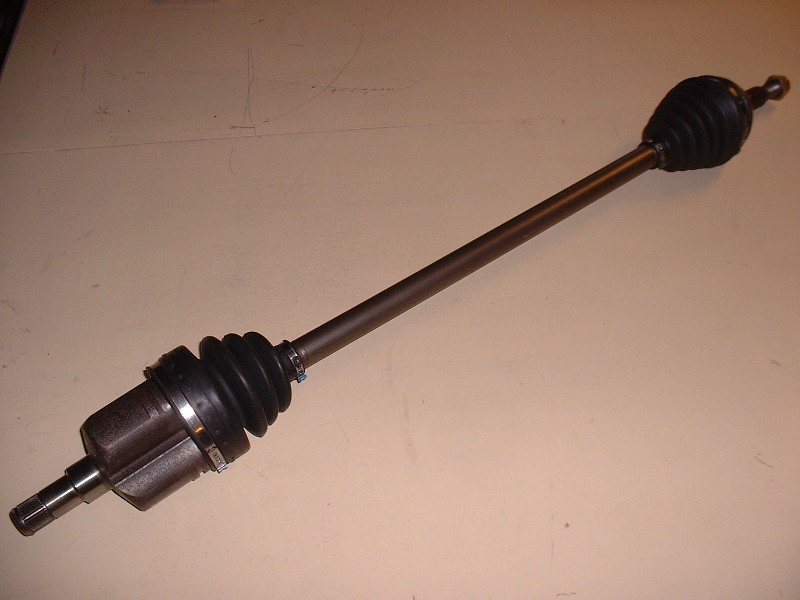
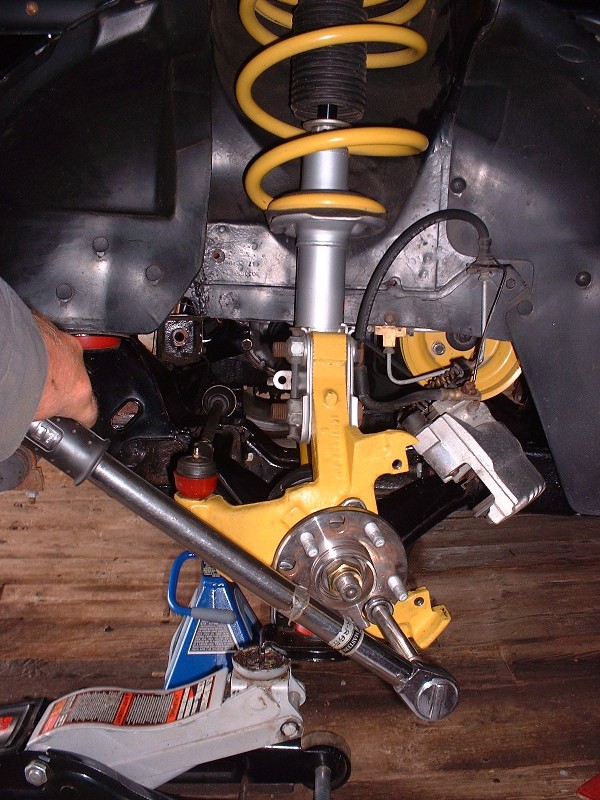
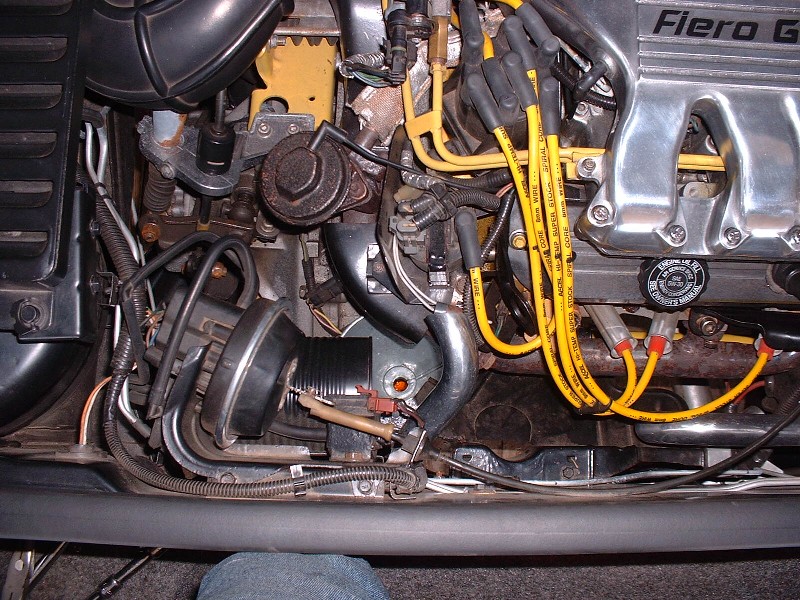
So on with the show… here’s the patient awaiting knee surgery.
At this point, if you don't have an impact wrench, then the first thing to do is pop the wheel center out and using a 30mm socket on a long handled wrench, remove the axle nut. It's on with 200 lbft of torque so you'll need to put the car in gear and apply the parking brake to hold the car from rolling. If you do have an impact wrench, then this step is done later. Next, jack up the car and use axle stands to support the weight since hydraulic jacks often leak slowly, and occasionally leak fast. The problem is that they're insidious... they creep down slowly enough that you can find yourself trapped just when everyone else who might be around to help you is on lunch break. They'll come back just as your eyes are popping out of your head from the pressure on your chest. 
Next remove the wheel lugs using a 19mm socket wrench:
I was surprised how well the underpinnings have stood up over the past two years.
Then remove the brake caliper by unbolting the two slider bolts using a T50 Torx bit. The lower one is a little tougher to get to because the e-brake spring is in the way a bit. But it flexes out of the way enough to get the tool on the bolt.
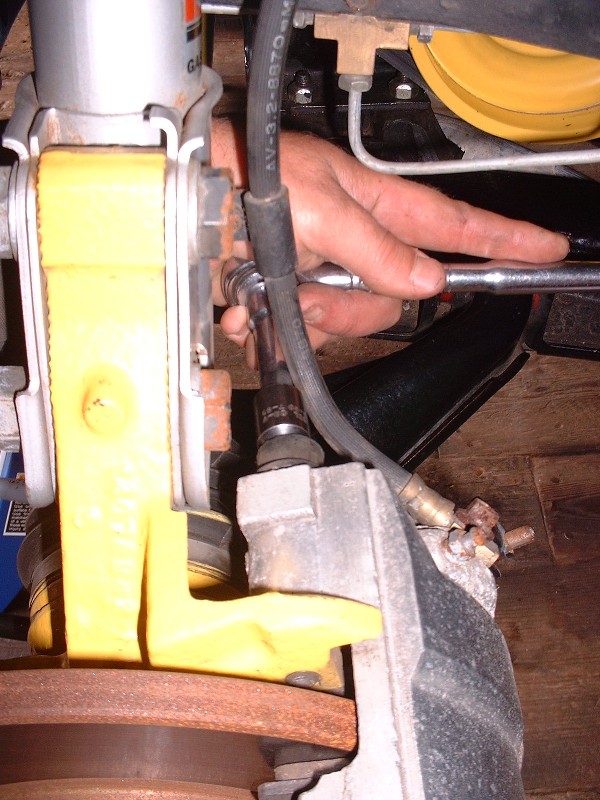
Then hang the caliper out of the way without disconnecting the hydraulic line. I just use a piece of an old coat hanger.
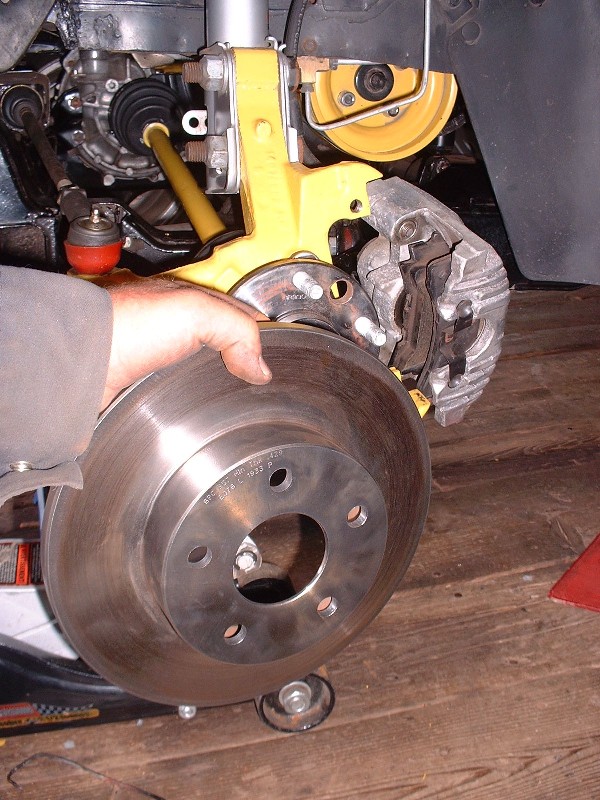
Remove the brake rotor… it just slips off.
And it should look like this:
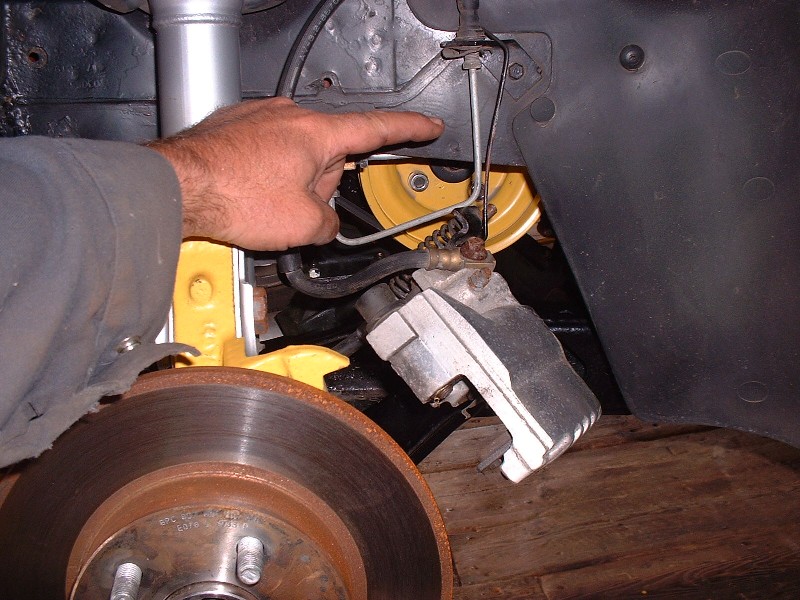
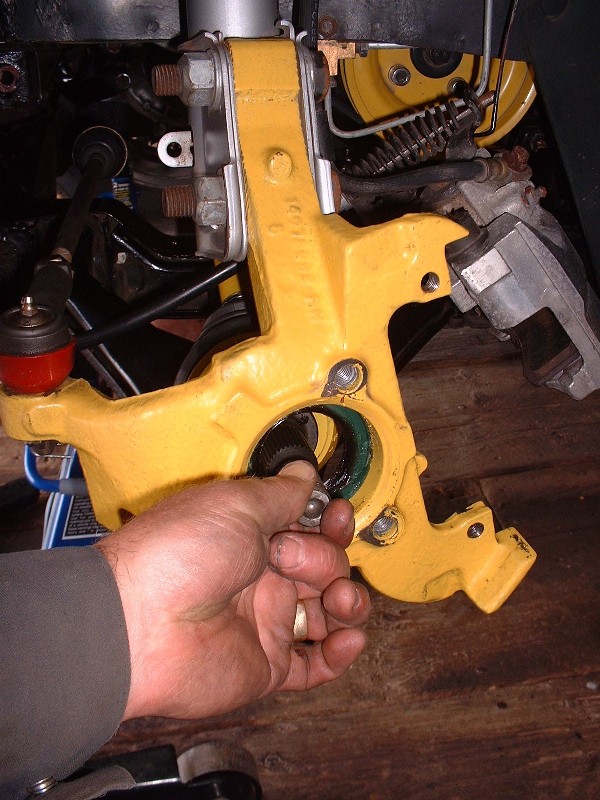
In order to have enough room to be able to pull the axle out of the knuckle, you have to be able to swing the knuckle outboard considerably. What prevents you from doing this is the tie rod and the lower ball joint. So next up is to disconnect these two parts.
Starting with the tie rod, there’s two ways to do this. One way is to disconnect it at the outer tie rod end (at the knuckle), but I find that each time you use a pickle fork to separate the rod end you risk tearing the boot. Plus, I find it easier to disconnect it at the cradle instead. With the car jacked up it’s easy to access. The nut is 19mm.
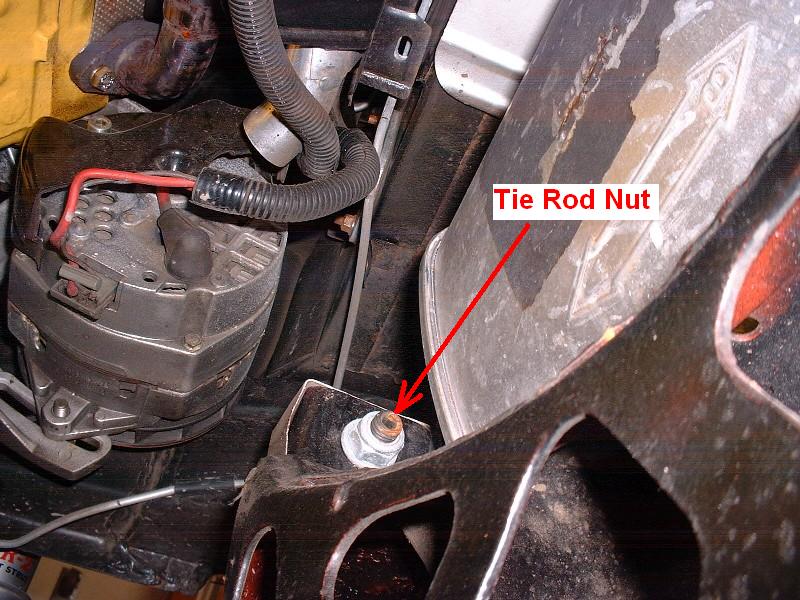
With the nut off the inner tie rod end, it takes a little heave-ho to swivel the knuckle enough to pop the tie rod bolt out of the mounting ear on the cradle, but once it’s out, swing it out of the way like this.
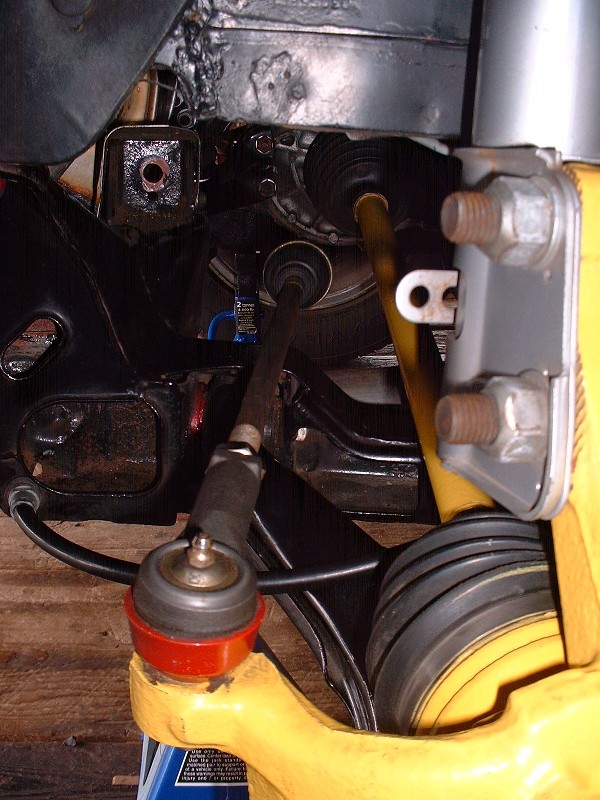
Next unbolt the 15mm pinch bolt on the lower ball joint and pull out the bolt.
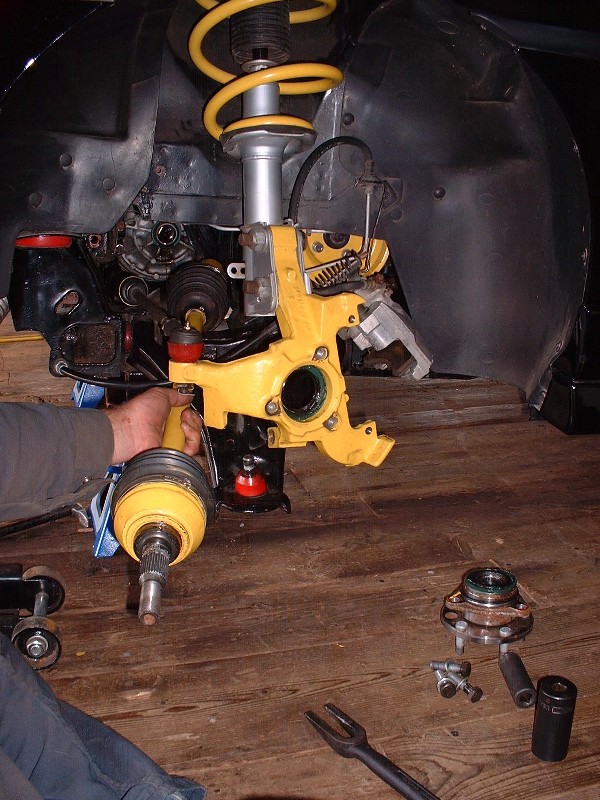
Then separate the knuckle from the lower ball joint. Here I’m using a pickle fork for leverage, but it’s not necessary since it’s not a tapered pin. I actually found that I had to jack the knuckle up using the hydraulic floor jack to get it off the ball joint.
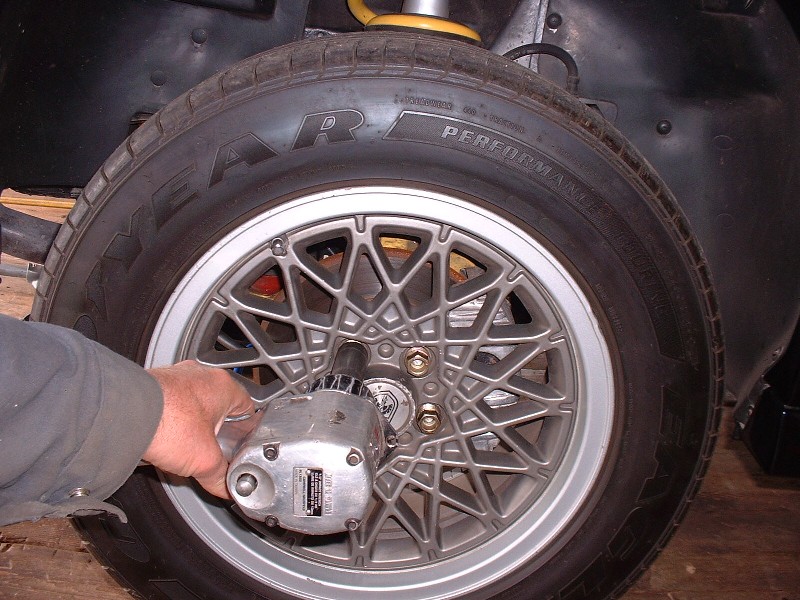
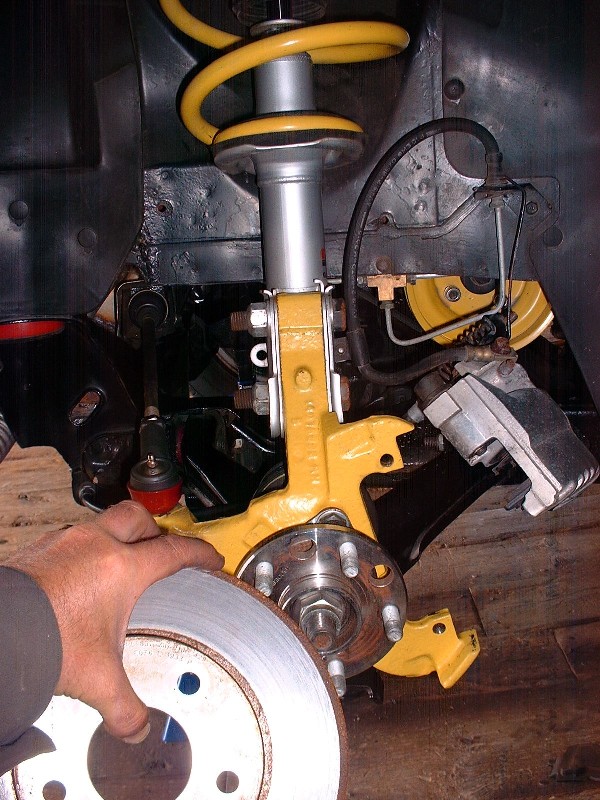
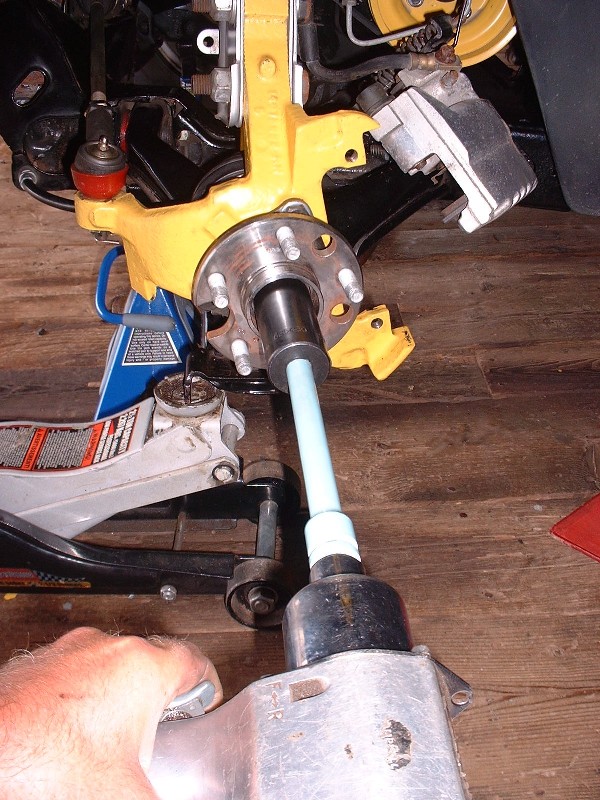
Once the knuckle is separated from the ball joint, remove the axle nut if you haven't already done so. It’s a 30mm nut.
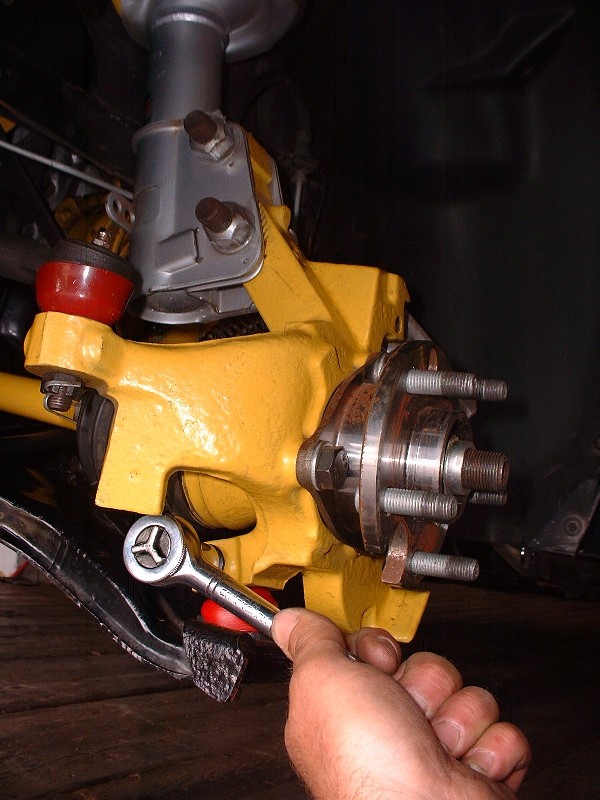
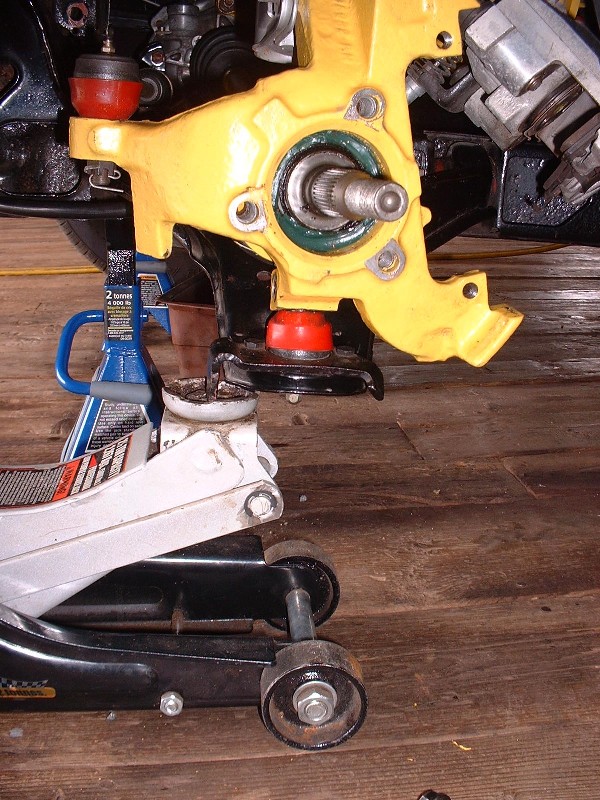
At this point, I had expected to be able to push the axle out of the bearing assembly but found that the tripot joint wouldn’t compress enough to let me get the threaded end of the axle out of the knuckle. So to give me more wiggle room, I removed the three bearing assembly bolts (19mm socket wrench)…
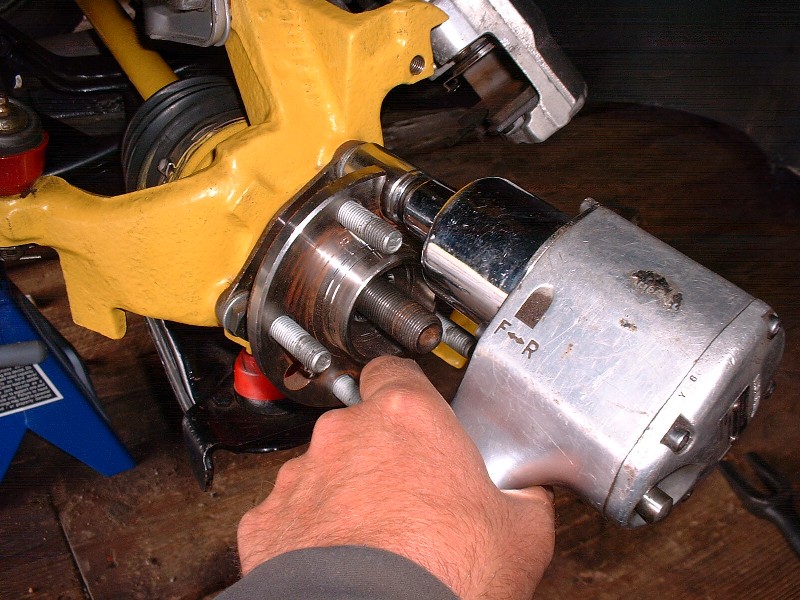
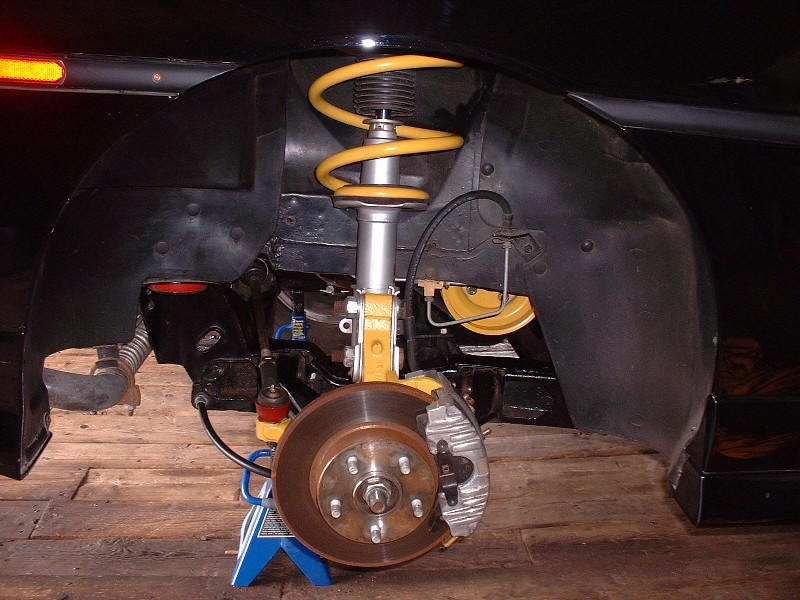
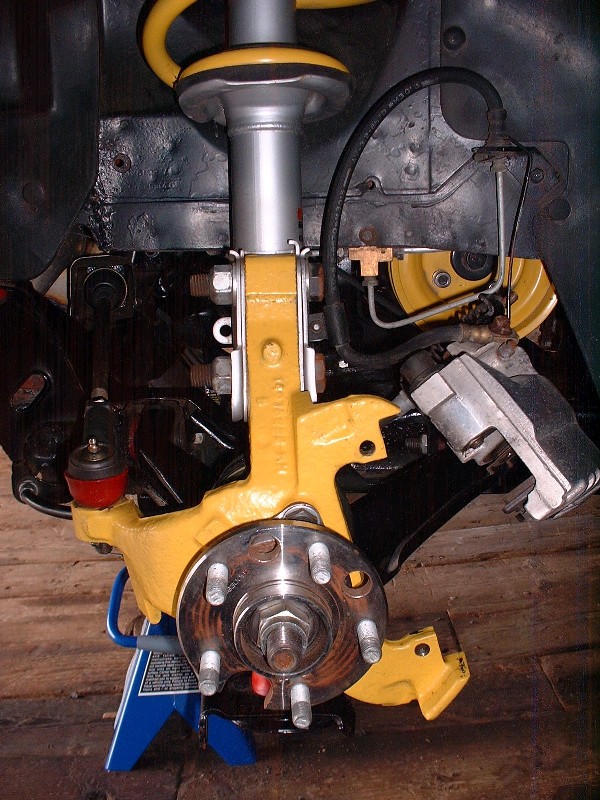
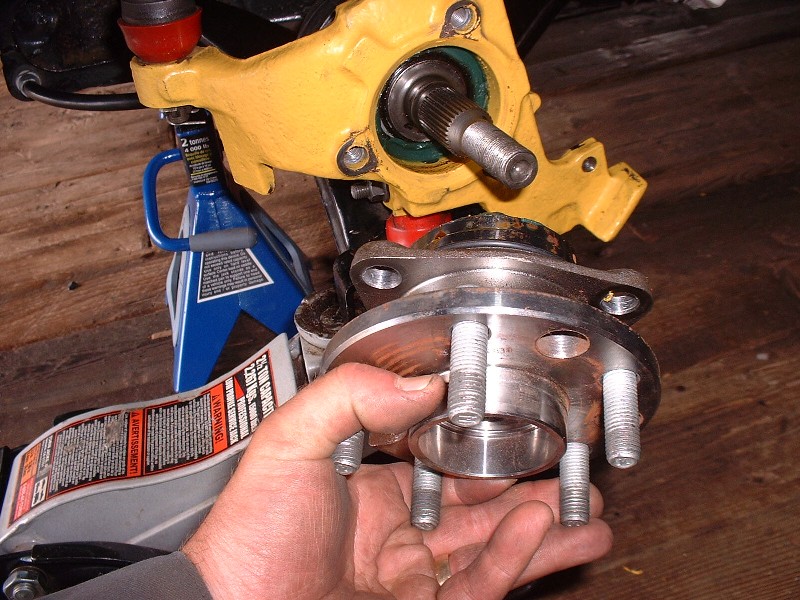
… and removed the bearing.
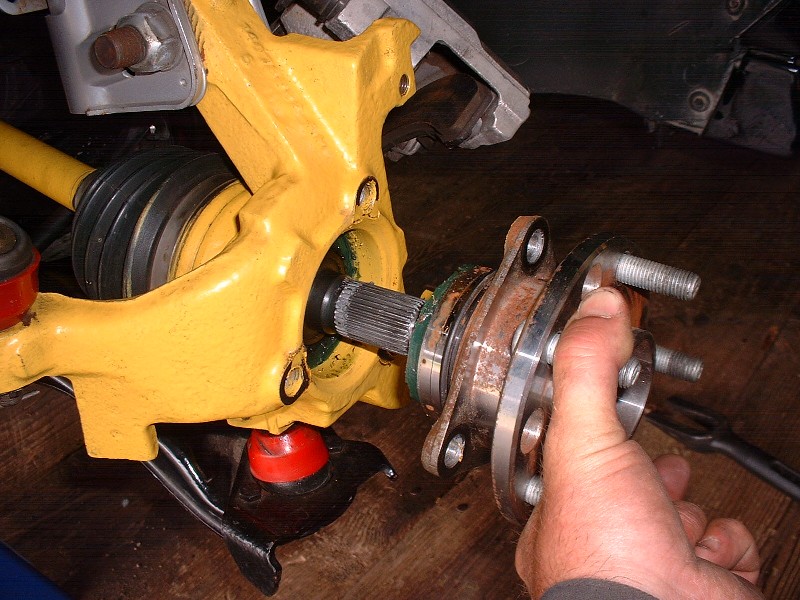
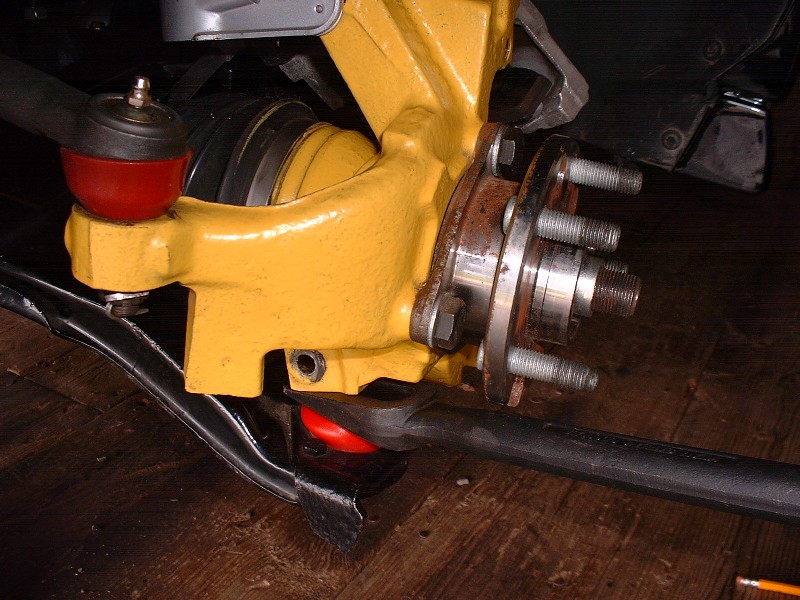
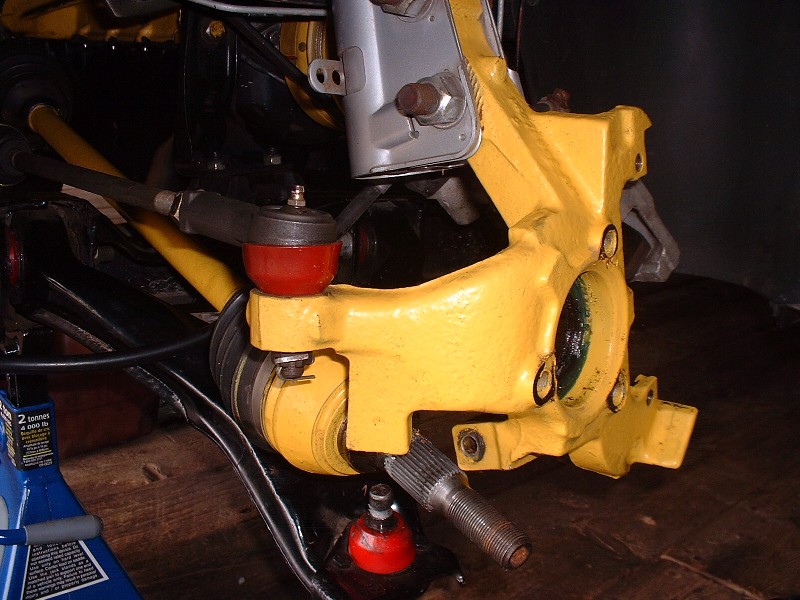
That gave plenty of room to pull the axle out of the knuckle.
The next step is to pop the tripot joint out of the transmission. Some people drain the transmission oil first, but I find that simply putting an oil pan under the transmission results in exactly 1 liter of oil draining out of the axle hole, making it easier to refill later without having to use the little dipstick. To pop the tripot joint, just use a small pry bar or a large screwdriver and lever against the transmission housing like this:
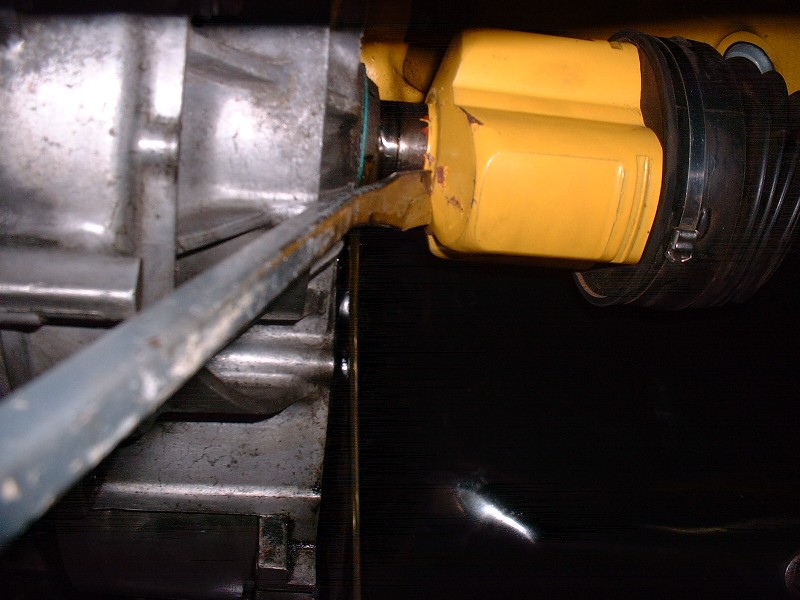
The axle is only held in the transmission by a snap ring so it comes out rather easily.
Lastly, route the axle assembly out though the wheel well.
Next post, I’ll cover the installation procedure. It’s mostly the reverse of the disassembly, but there are a few things that are different or to watch for. Stay tuned!
|
|

|
jon m
|
JUN 27, 12:04 PM
|
|
good thread
I have one question which is on this topic - I am in the middle of stripping down my 87gt and on the axles i had both of them side by side out of the car, when i took out the wheel bearing assembly there was only one washer/spacer behind the 30mm nut.
now from which side does this washer belong is it the driver's or is it the passenger side axle or is there supposed to be a washer on both axles???
jon
|
|
|
|
Bloozberry
|
JUN 27, 12:11 PM
|
|
|
There should be a heavy washer under the axle nut on both axles.
|
|
|
|
pmbrunelle
|
JUN 27, 01:23 PM
|
|
| quote | Originally posted by Bloozberry:
The next step is to pop the tripot joint out of the transmission. Some people drain the transmission oil first, but I find that simply putting an oil pan under the transmission results in exactly 1 liter of oil draining out of the axle hole, making it easier to refill later without having to use the little dipstick. |
|
What transmission does this tip apply to?
|
|
|
|
Bloozberry
|
JUN 27, 01:51 PM
|
|
|
Sorry... this is an Isuzu, but I would imagine they're all going to be within the same ball park.
|
|
|
|
theogre
|
JUN 27, 01:51 PM
|
|
Nice write up (and thank you for using PIP)
You do not have to take wheel bearing off.... Main nut for axle yes but not the whole bearing. The Knuckle can turn enough to get the axle off. ------------------
Dr. Ian Malcolm: Yeah, but your scientists were so preoccupied with whether or not they could, they didn't stop to think if they should.
(Jurassic Park)
The Ogre's Fiero Cave (It's also at the top and bottom of every forum page...)
|
|
|
|
fieroguru
|
JUN 27, 02:39 PM
|
|
Great write-up! I prefer to keep the wheel bearing in place as well as the brake caliper. Removing the botton pinch bolt and the tie-rod end at the cradle is enough to pull the suspension out to clear the axle.
The only thing missing is the information if they are running an aftermarket rear sway bar - it needs to have the ends disconnected so the a-arms can move independently to allow removing of the upright from the a-arm ball joint.
|
|
|
|
Bloozberry
|
JUN 27, 03:40 PM
|
|
| quote | Originally posted by theogre:
You do not have to take wheel bearing off.... Main nut for axle yes but not the whole bearing. The Knuckle can turn enough to get the axle off.
|
|
| quote | Originally posted by fieroguru:
I prefer to keep the wheel bearing in place as well as the brake caliper.
|
|
I'm sure I've done it your way in the past too, but for whatever reason, this time there was no way the axle was coming out of the bearing. It's like it grew a couple extra inches. It wouldn have been less work for sure to leave the brakes and bearing in place, so anyone reading this should try it that way first. If it doesn't want to cooperate, then at least you can follow along with the instructions above.
|
|
|
|
Bloozberry
|
JUN 28, 08:01 AM
|
|
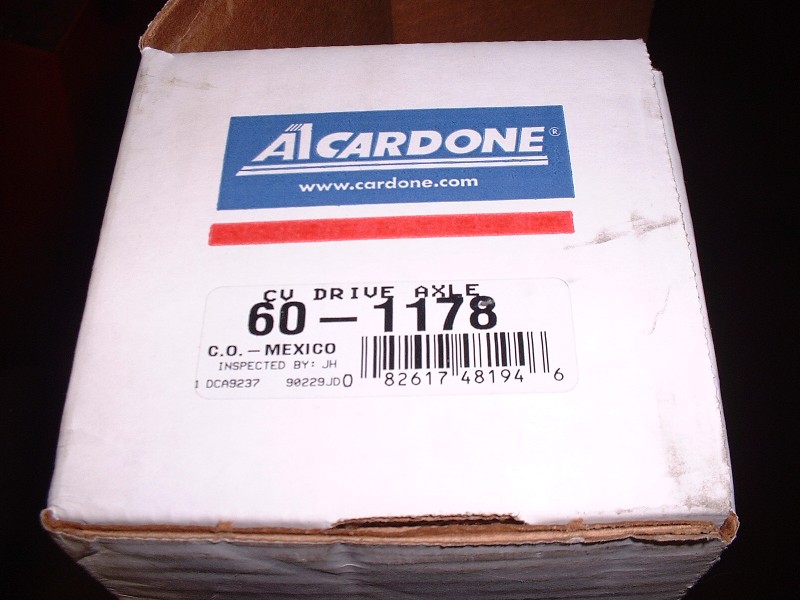
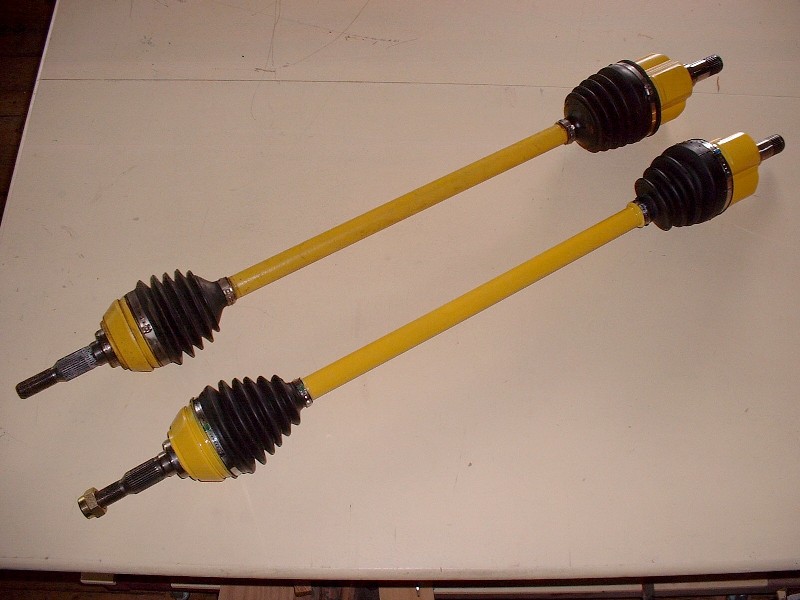
On to Part 2 - Reinstallation! I ordered an axle from Cardone (through a local auto parts shop) for $88 plus $15 core charge. At that price I decided to keep my old axle since it could come in handy when I start needing custom axles fabricated for my F355 N* six speed project. Here’s the part number for the RH axle:
It’s supposed to be a remanufactured axle but based on the condition of the parts including the axle itself, I’d say it’s new.
I primed it and painted it to match my old axle to keep the rust bug from tarnishing an otherwise pristine piece. Here’s the old one on top and the new one below.
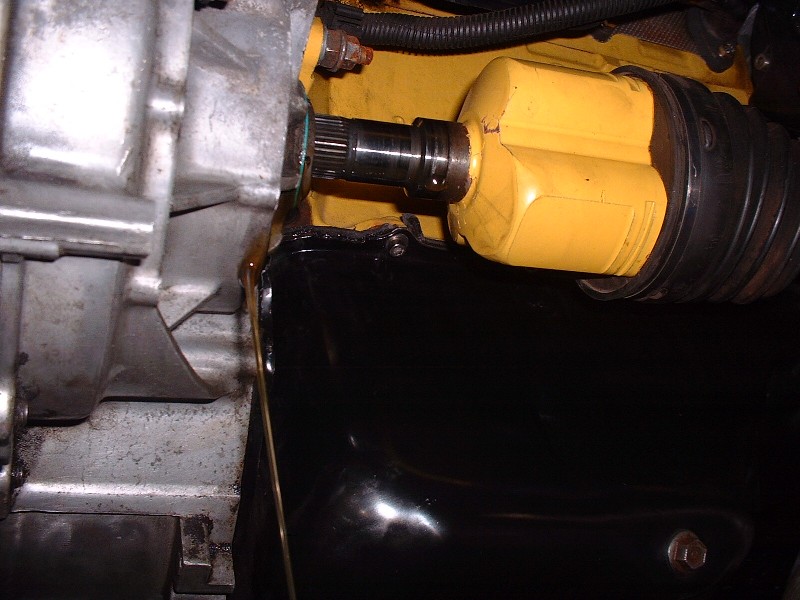
In my case, I had replaced the transmission axle seals only 8,000 kms or so, so I didn’t replace it again, but in most cases, you’d want to pop it out with a pry bar and put in a new one. So in reverse order of disassembly, I started by threading the axle through the wheel well, above the e-brake cable and into the transmission. You must take care not to over-extend the tripot joint otherwise the big roller balls and the little needle bearings inside the joint will fall inside the boot and you won’t know it until you try to take it for a spin. To seat the tripot joint I use a large screwdriver in one of the grooves near the boot and give it a couple taps with a hammer.
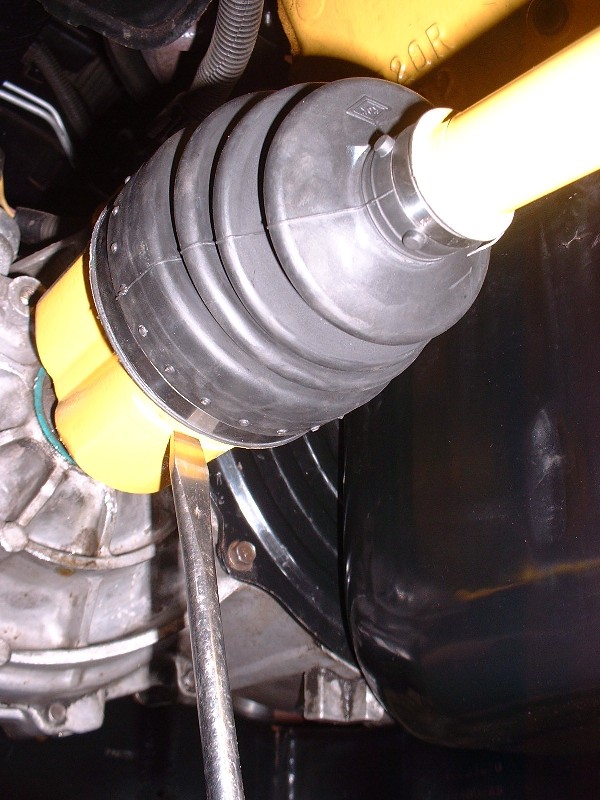
It’s a little hard to know just how far the tripot joint should seat into the transmission if you’ve never done it before. The journal on the tripot joint that the seal rides on still partly shows once the tripot is fully seated. Here’s what it should look like once it’s driven home.
The next step is to thread the other end through the knuckle, (you'll notice in this photo that I accidentally threaded the axle under the e-brake cable when the picture was taken. I had to correct this by pulling the axle out of the tranny again and start over.)
Then using a floor jack, raise the lower control arm up to meet the knuckle and thread the lower ball joint shaft into it’s hole as you’re raising it. I find things just go better if you raise the lower control arm so that it’s approximately horizontal. The pinch bolt should slide easily through the bottom of the knuckle and the ball joint shaft. If it doesn’t, then raise or lower the ball joint shaft a little to get the notch in the shaft to align with the bolt hole. Once you’ve got it through, tighten the pinch bolt nut to 37 lbft.
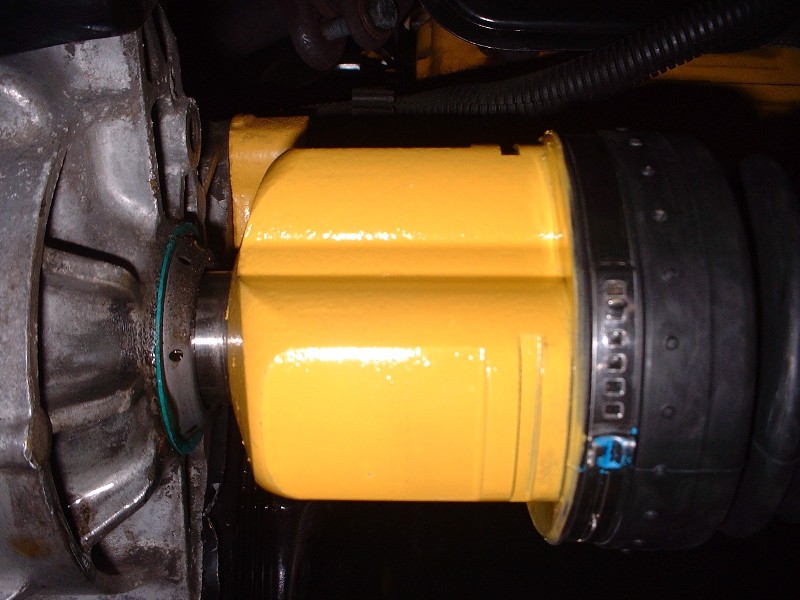
Reinstall the tie rod into the cradle mounting ear and torque the nut between 50 – 70 lbft. Next, reinstall the bearing assembly if you’ve removed it.
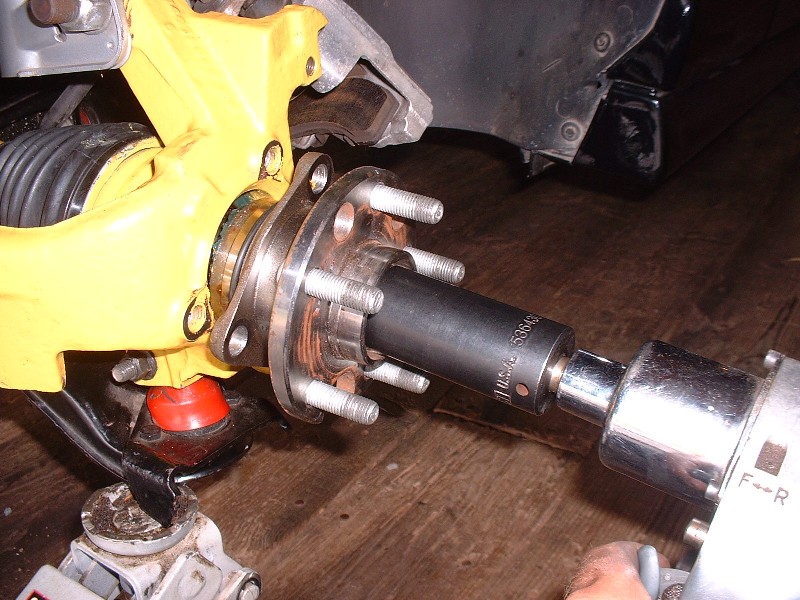
I found that threading the bearing assembly over the axle splines was a little tight to be able to draw the bearing assembly all the way to the knuckle by hand. So I installed the axle nut at this point and used it to draw the bearing into place.
Then reinstall the three bearing retaining bolts and torque them between 55 – 70 lbft.
Finish up torquing the axle nut to 200 lbft if you have an impact wrench and a torque bar, or if you don’t, then tighten the axle nut as tight as you can at this point and wait until you have the car back on it’s wheels to finish the job with a torque wrench. A note about axle nuts… there are two kinds out there and only one is suitable for the Fiero. One kind has a very thin collar on it that you’re supposed to stake with a punch onto the axle. But these only work if there’s a slot in the axle to peen the collar into. The Fiero axle doesn’t have such a slot and so the only acceptable axle nuts are the ones with heavy duty collar about 3/16” thick. They’re a prevailing torque type nut, meaning that they’ve been distorted to make them tight enough that they won’t back off by themselves.
We’re almost done… just reinstall the rotor on the wheel studs…
…and then the caliper by torquing the two T50 bolts to 30 – 45 lbft.
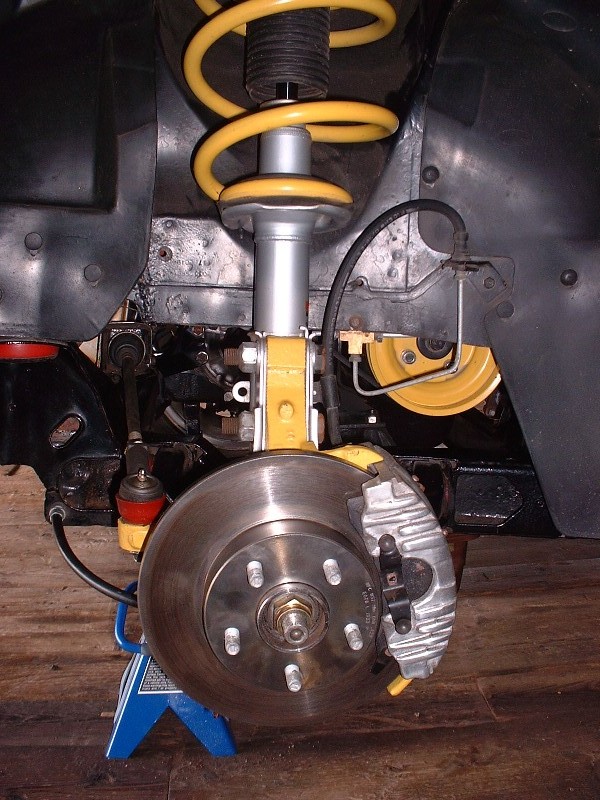
Reinstall the wheel and torque the lug nuts to 100 lbft. Lower the car onto it’s four wheels and if you didn’t complete the 200 lbft of torque on the axle nut, now’s the time.
The last thing to do is to refill the transmission since a bunch of oil drained out when you removed the axle. Always do this with the car level since you won’t be able to get it all in if it’s at an incline. There’s more than one way to fill the tranny, but the easiest way is to remove the VSS. A 10mm socket wrench on a couple extensions is all you need to remove the one bolt holding it in place.

Just be careful when you pull the VSS out of the transmission as it usually takes a bit of tugging to get the O-ring to unstick itself from the sides of the hole. Mine came out rather suddenly and of course, the speedometer gear on the end of the VSS got hung up on the inside edge of the hole and came off, falling back into the transmission. No biggie though, a pair of needle nosed pliers is all it took to reach in and retrieve it. If this happens to you, the gear can only go back on one way. There’s a small plastic stopper molded into the bottom of the hole in the gear that won’t allow you to put the gear on more than about 1/8” if you’ve got it up side down.
Next, weave a funnel down into the hole in the transmission like so:
Then from up top, pour your favorite transmission oil into the funnel. Even if you have cruise control hardware cluttering the view, you can still pour it in from the top as I did without getting any oil where it isn't supposed to go. Just tip the bottle slowly on it’s side and it’ll pour straight down without burping out and making a mess. 5W30 was the original oil recommended by GM for the manual transmissions, but they have since changed that to Syncromesh oil available at your local dealership for about $15 per liter in Canada or $6 per quart in the US. If you followed my advice earlier, you’ll only need to add one liter (quart), otherwise if you drained the transmission entirely, then here’s what you need to add for the various models: 4 speed Muncie – 2.8L (5.9 pints); 5 speed Isuzu – 2.5L (5.3 pints); 5 speed Getrag – 1.9L (4 pints).

Reinstall the VSS and you’re good to go![This message has been edited by Bloozberry (edited 06-28-2010).]
|
|
|
|
Pyrthian
|
JUN 28, 09:38 AM
|
|
for those of us without air tools: both loosen & tighten axle nut with the wheels on the ground.
pop out the wheel center cap, and break the nut loose before you jack the car.
and tighten as a last step when car returns to the ground.
and - I like the idea of removing the tierod from the cradle, instead of breaking loose the end at the knuckle. that is a much safer way to go to avoid breaking the tie-rod ends rubber
|
|
|
|