|
| Ferrari 288GTO build (Page 60/63) |

|
dobie1
|
DEC 02, 08:42 PM
|
|
|
|
|
Sage
|
DEC 03, 06:55 AM
|
|

HAGO! 
|
|
|
|
andreww
|
JAN 30, 10:18 PM
|
|
|
Wow, Ive been away for a while. It looks amazing!
|
|
|
|
dobie1
|
FEB 09, 09:08 PM
|
|
Thanks for stopping by Ted and Andrew 😁
Lots of different jobs going on at the moment with the car,
I’ll break them down into individual updates as to much for a single post.
So my upholstery guy is really killing me with delays , it’s been extremely frustrating!!
But when you’re building a custom car and a custom interior I guess patience is an important part of the build!!
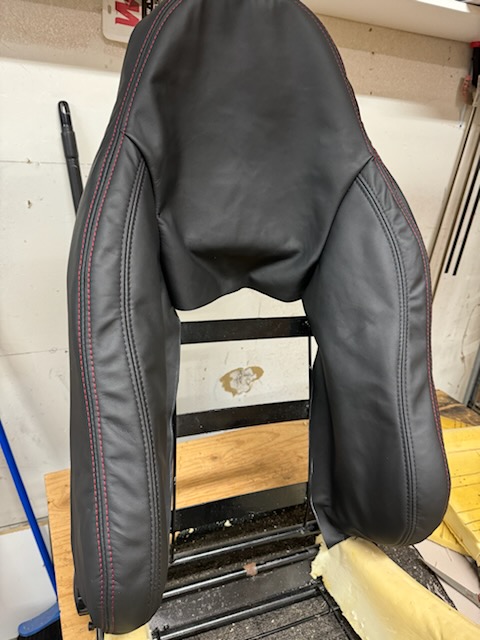
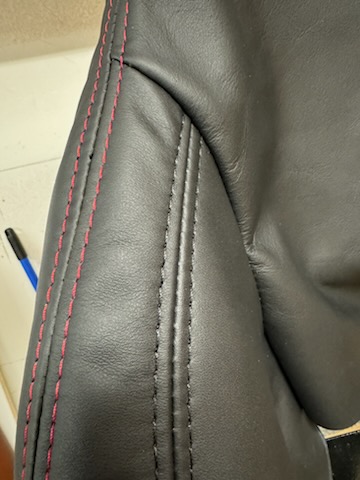
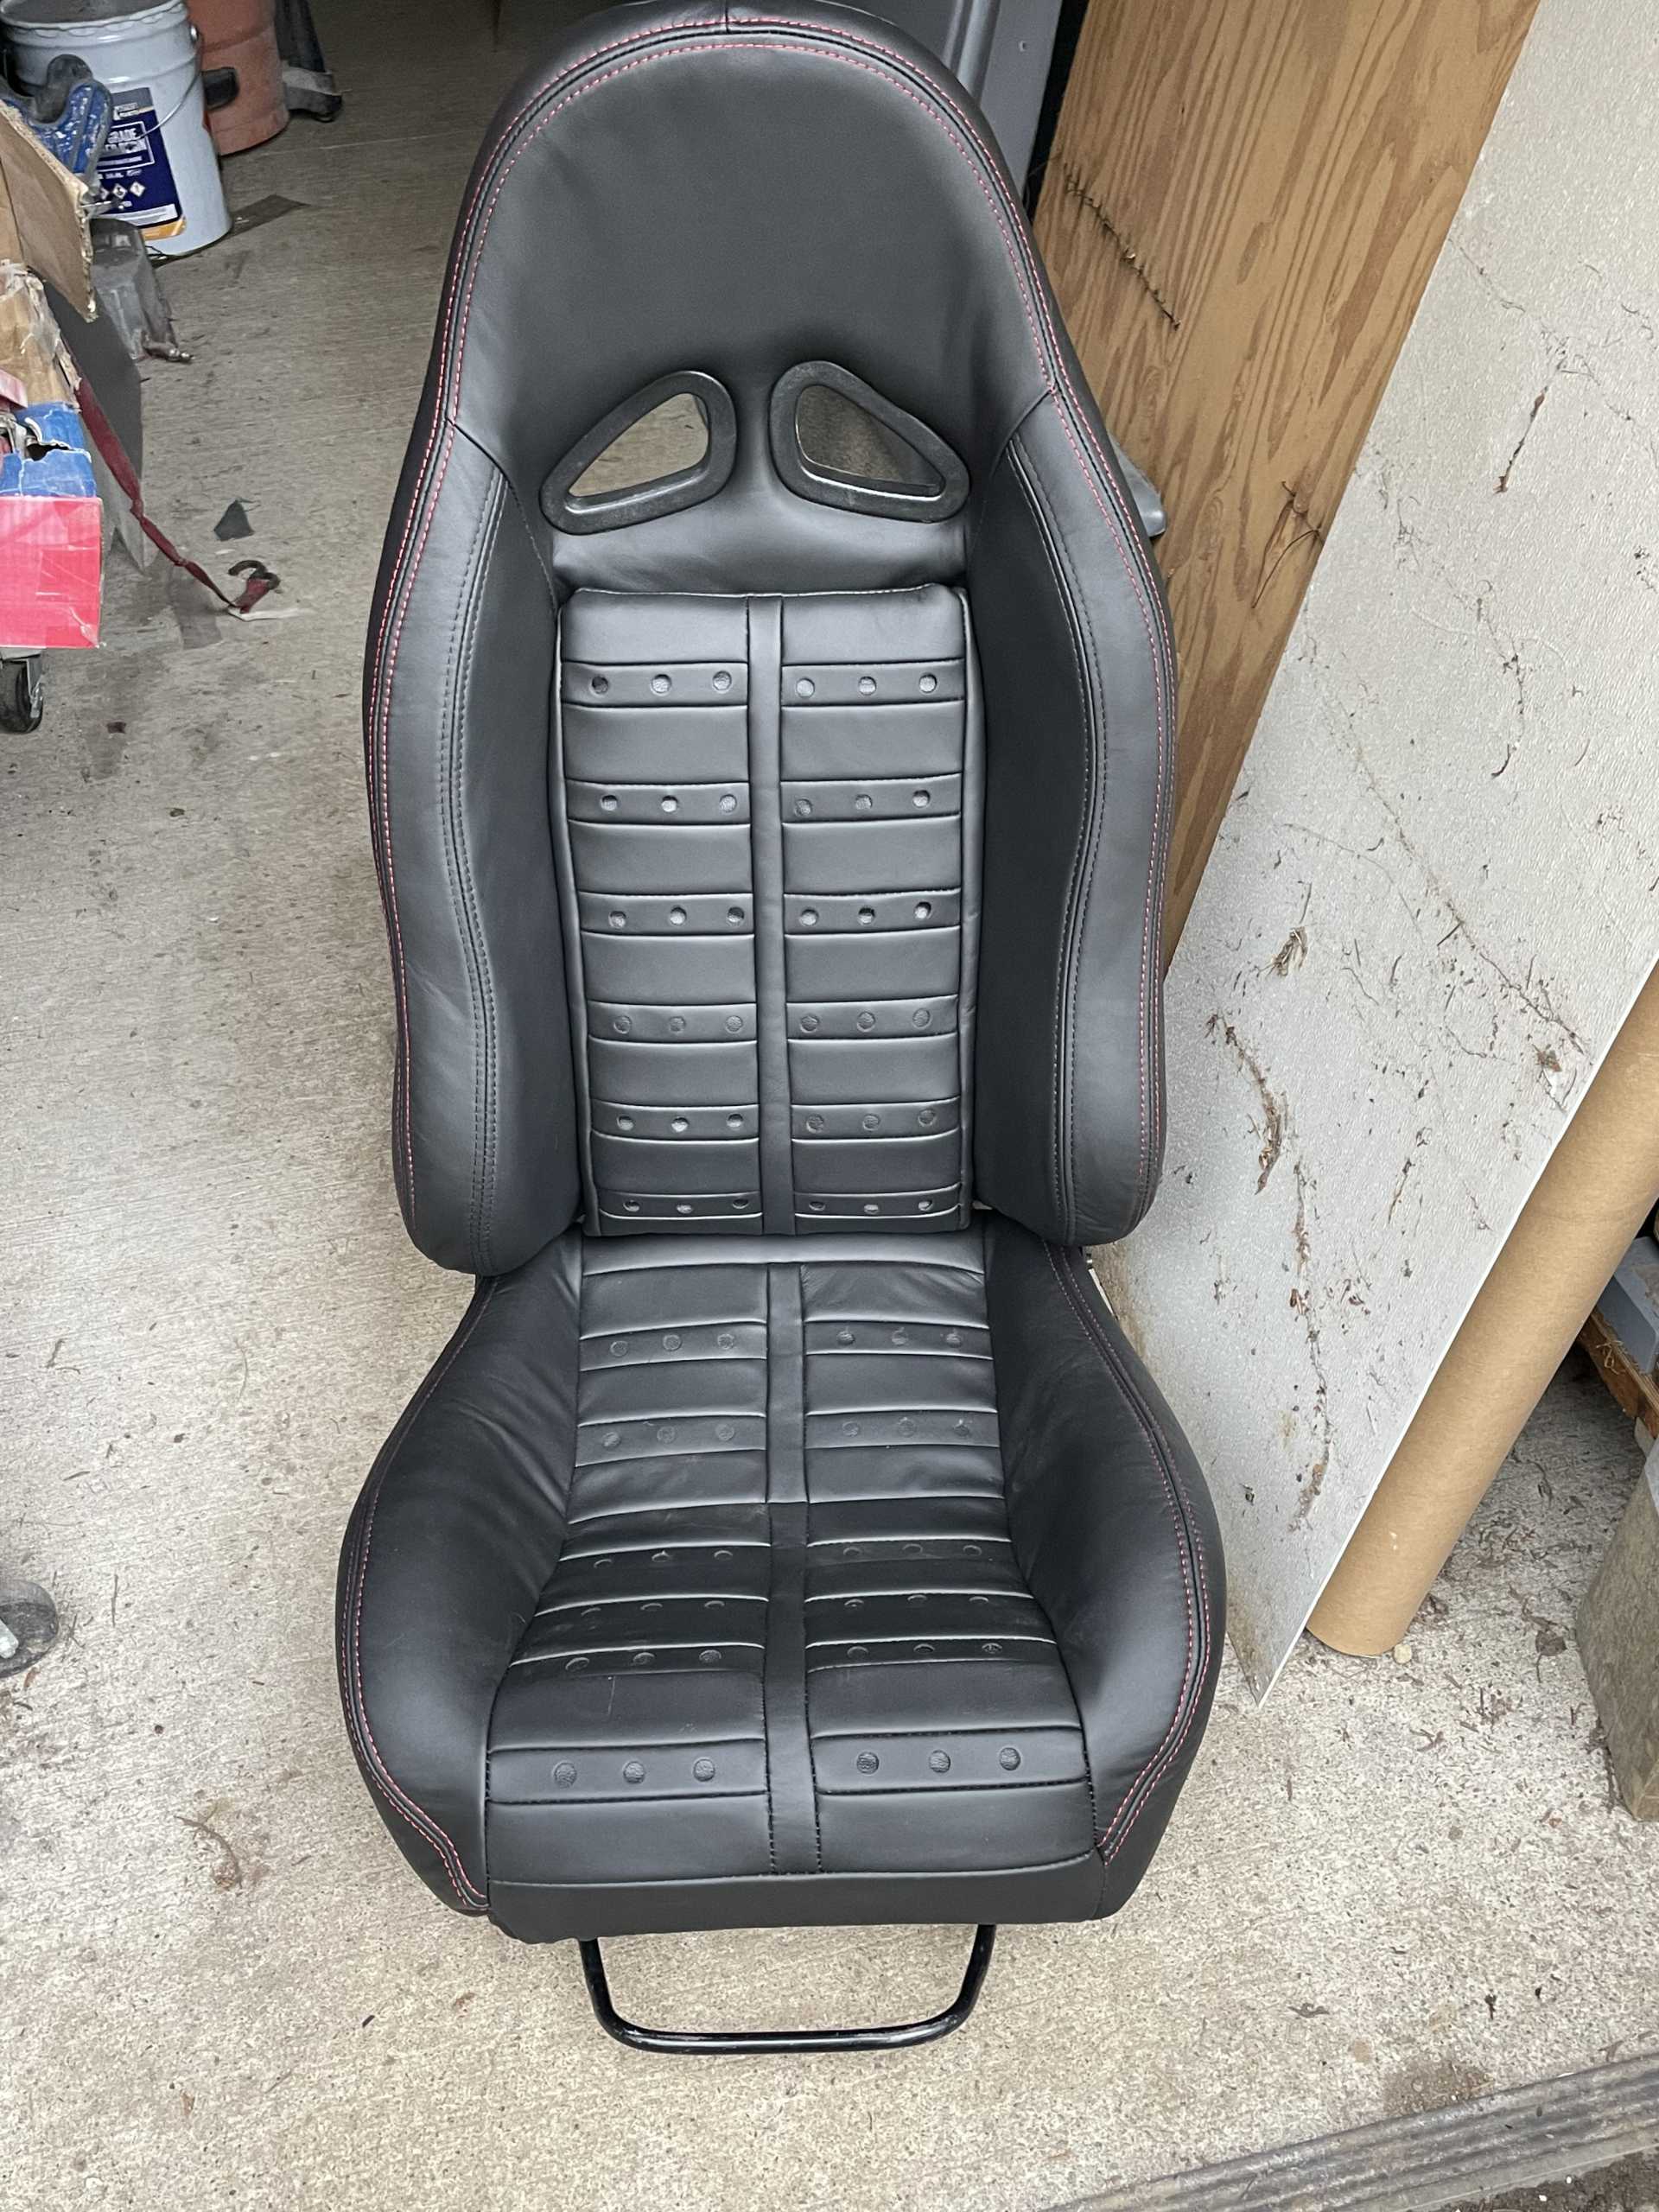
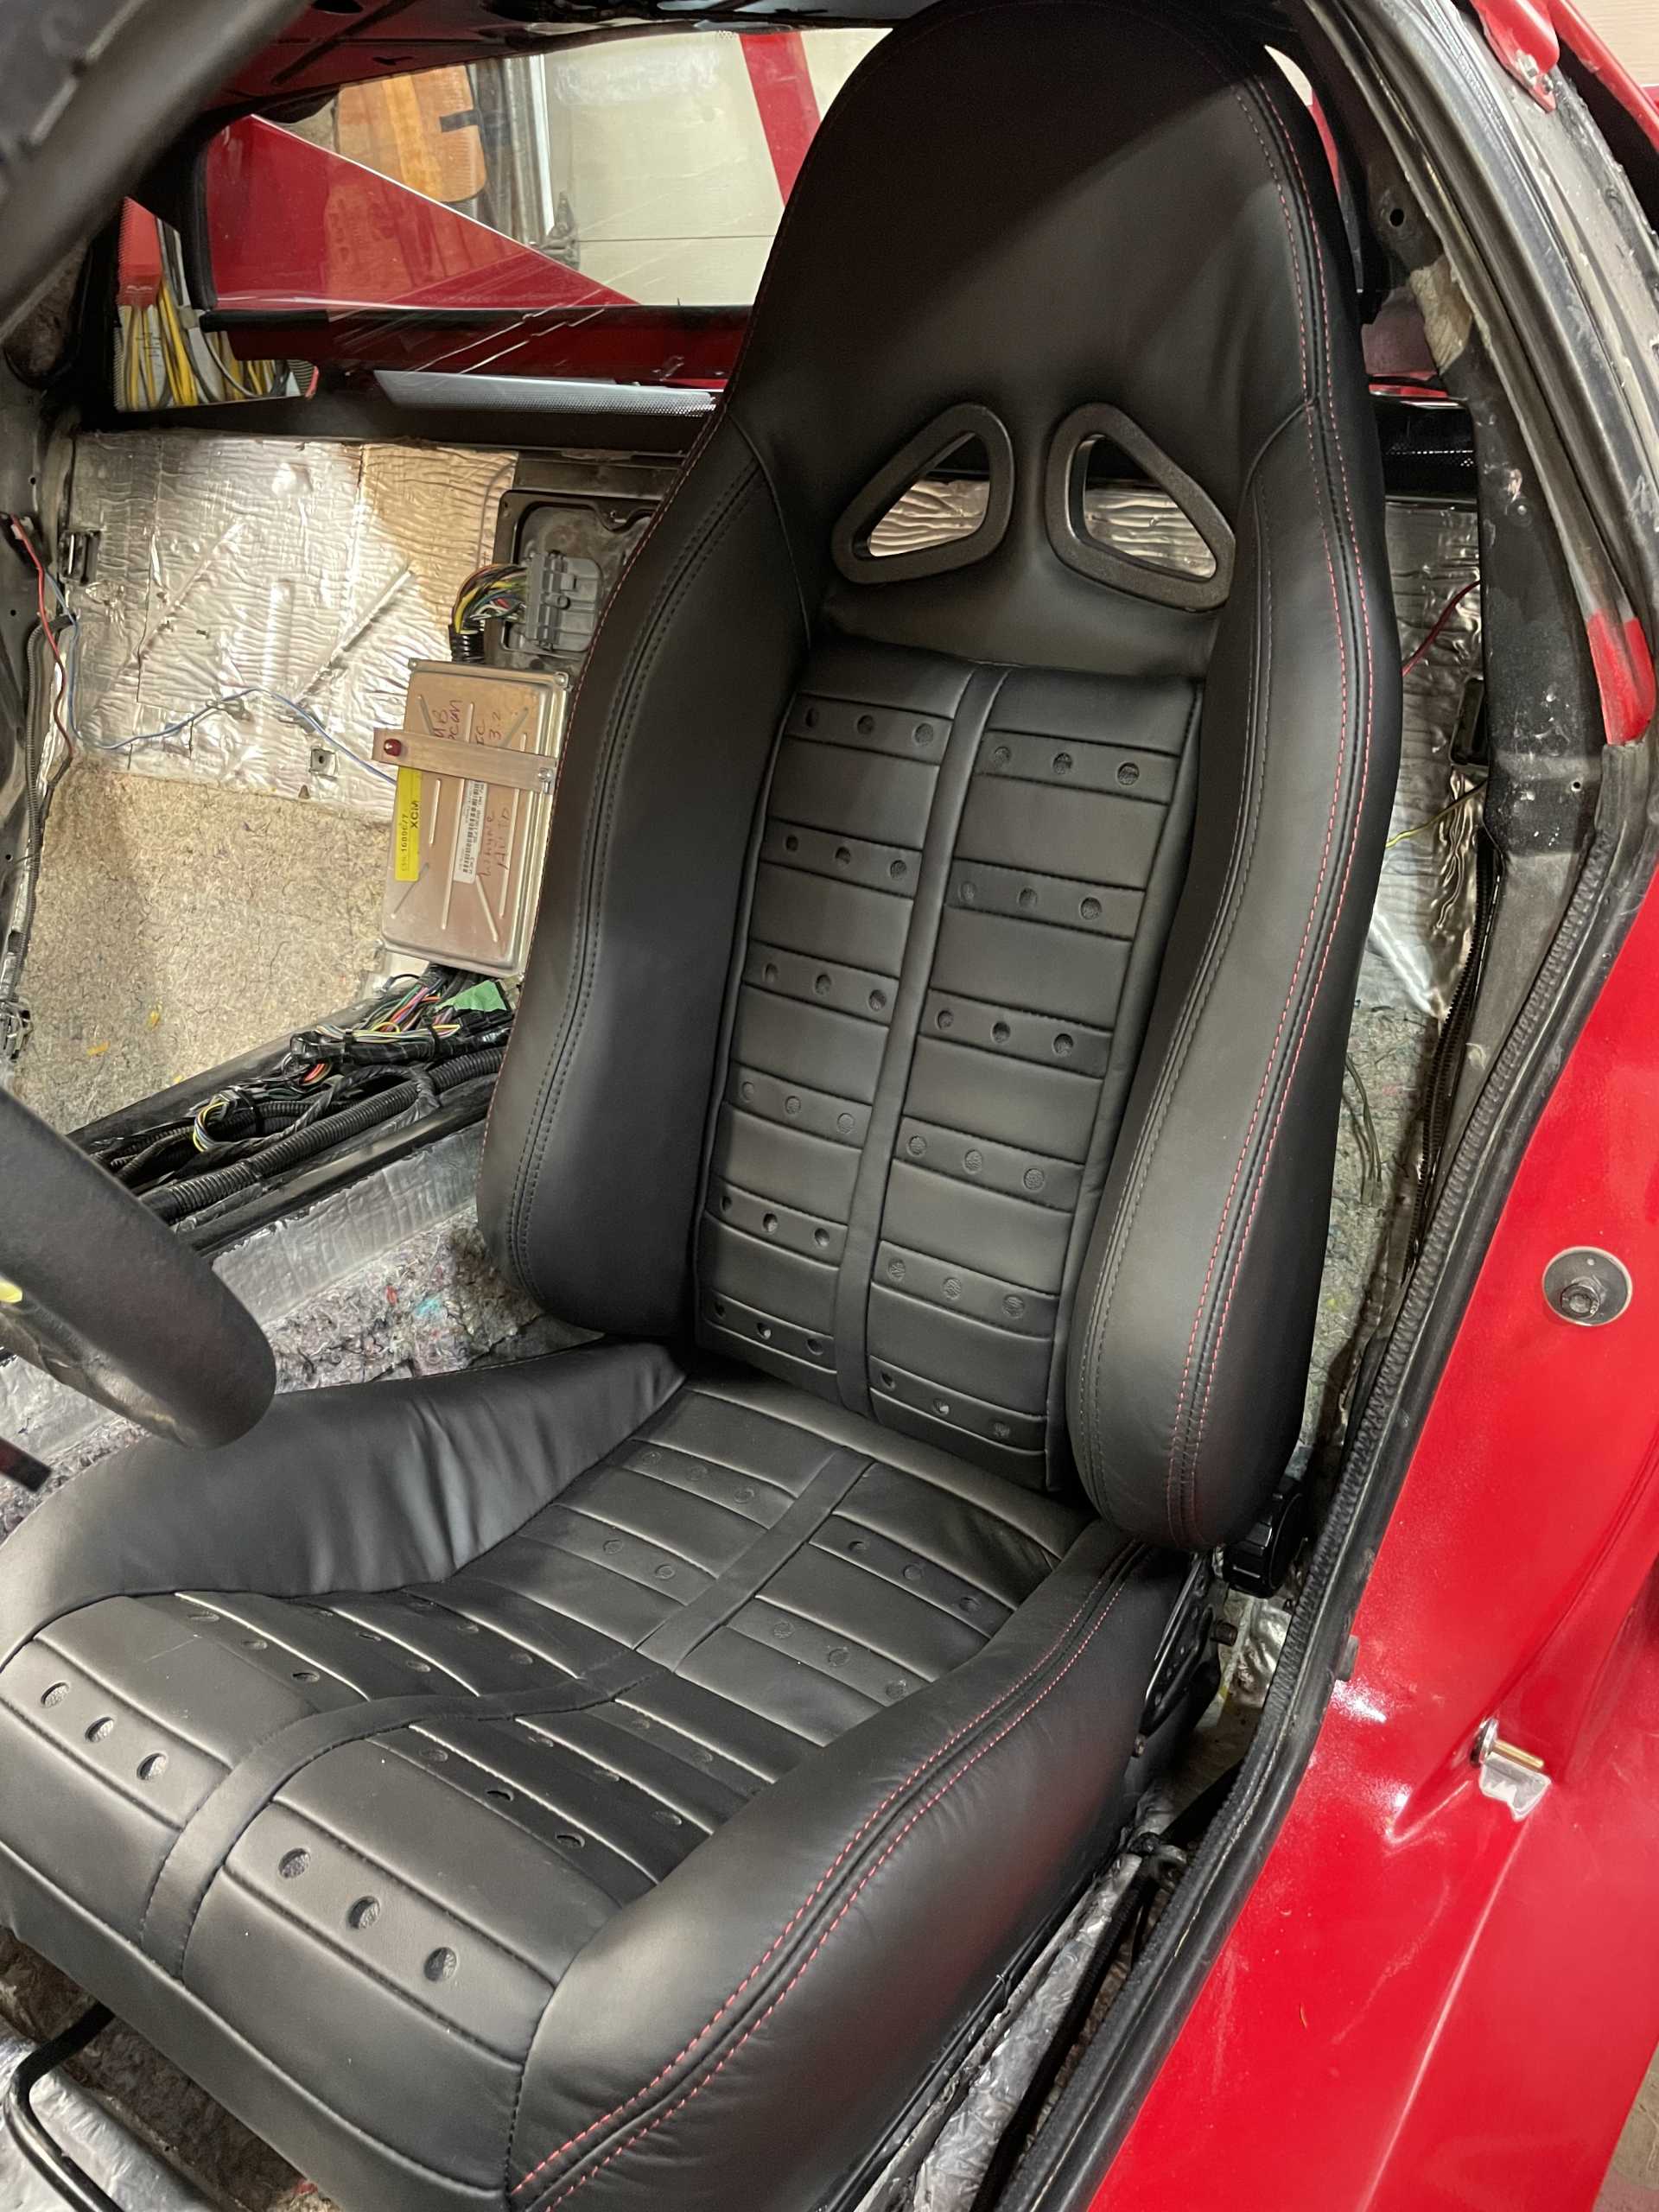
So you have all seen the finished dash and instrument pod and I’m very happy with the finished pieces.
He has been working on the seats for over 4 months.
Unfortunately for me he’s had a lot of personal matters during this time and not a lot has been finalized or finished.
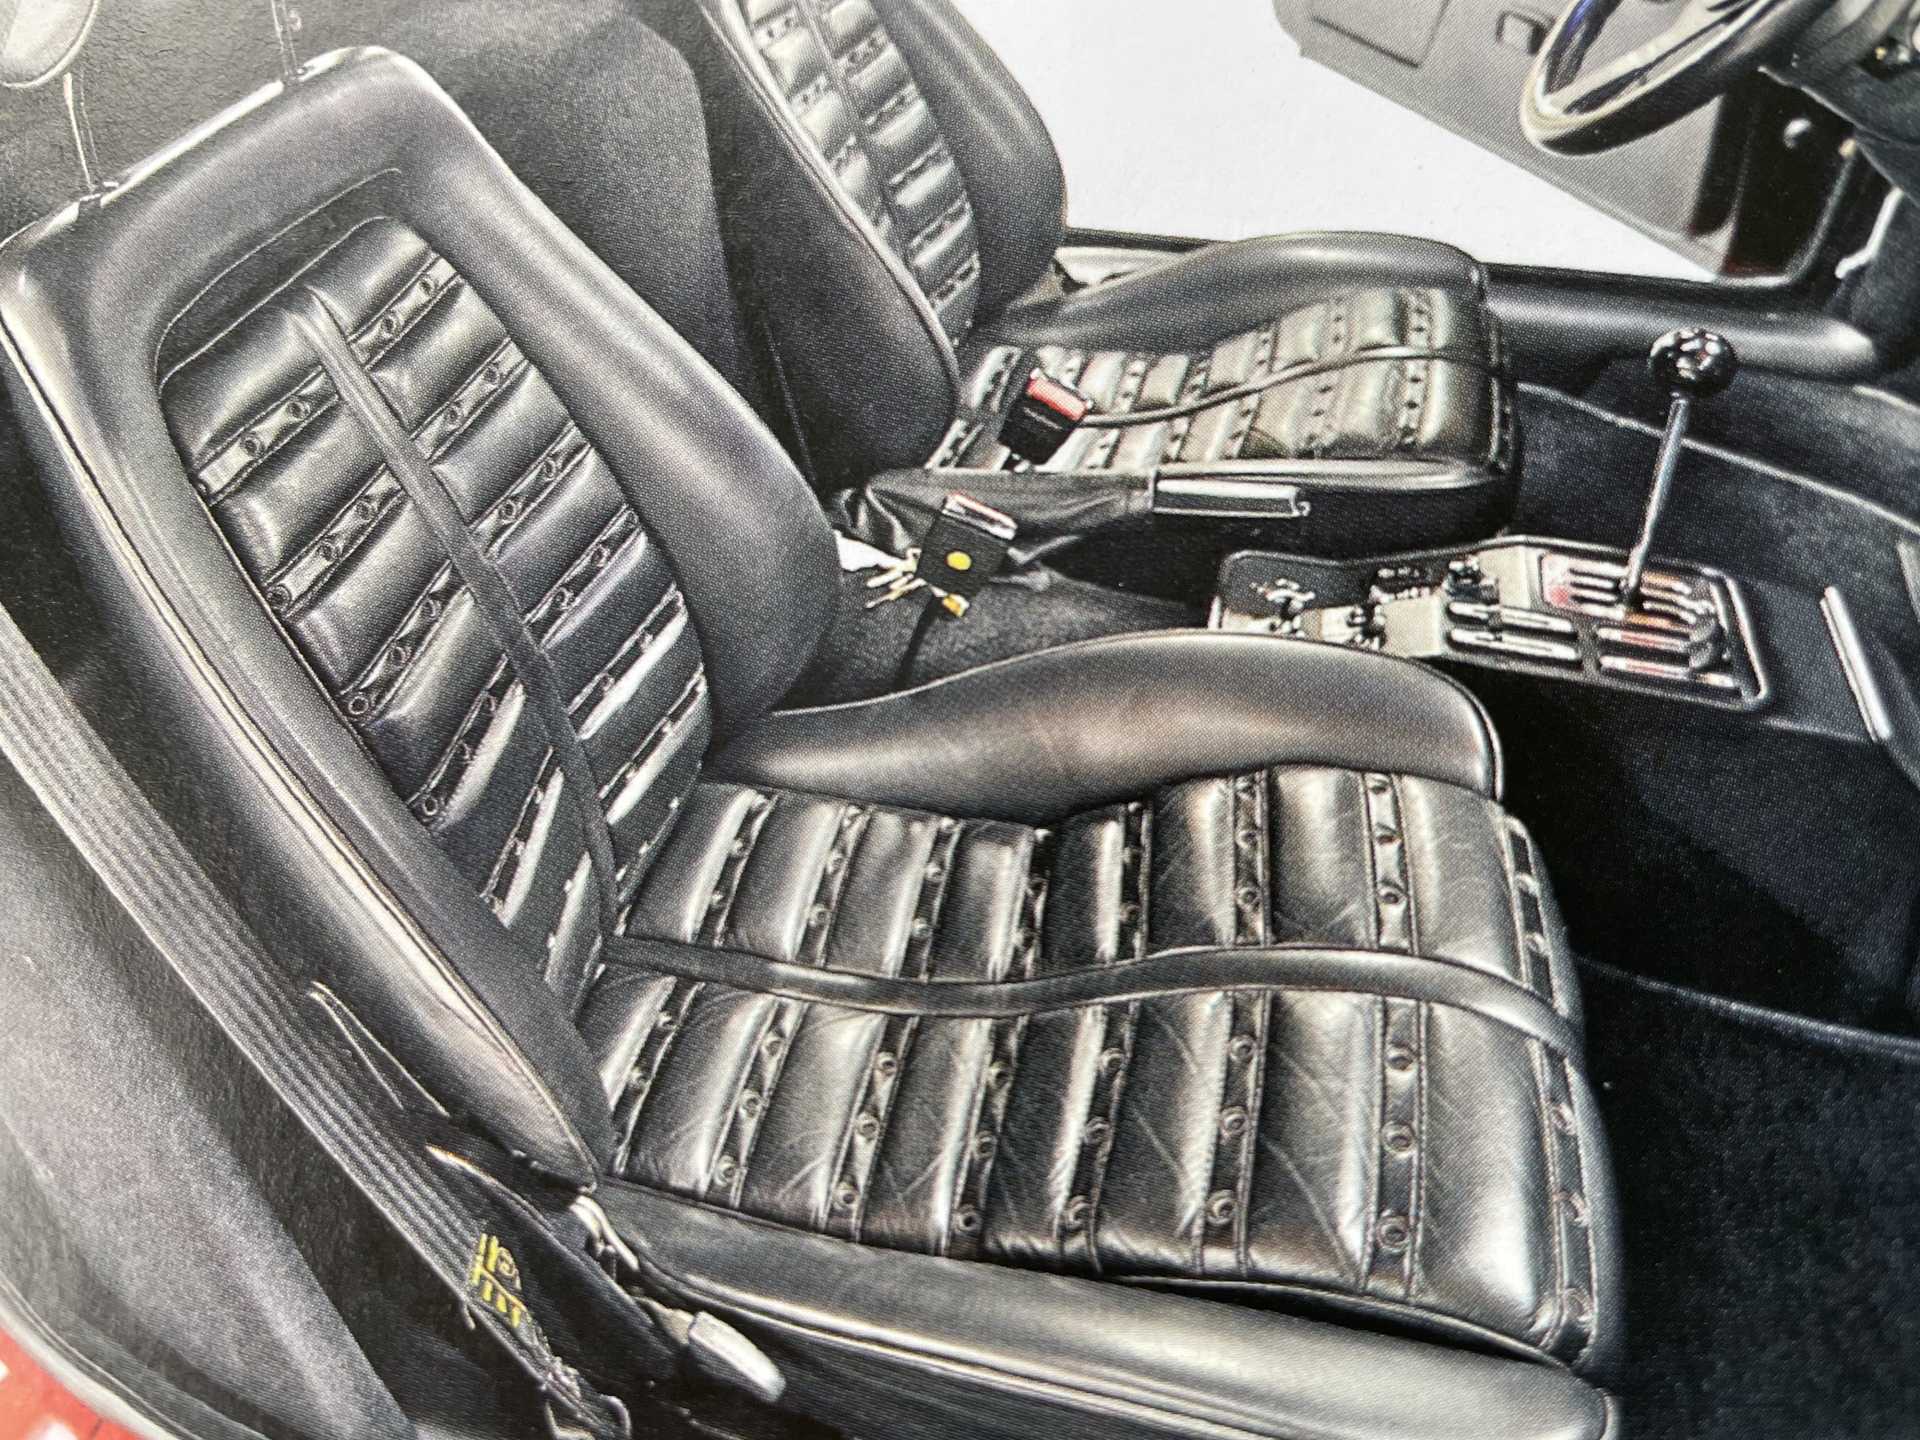
However they are progressing , my goal has been to modernize the OEM GTO seats keeping the original seat pattern but updating to high back buckets.
This is the OEM seats

So the high back seats I have needed to be modified shaving down the side bolsters at the top as they ran into the “B” pillars , doing this mod requires the steel frame to be modified.
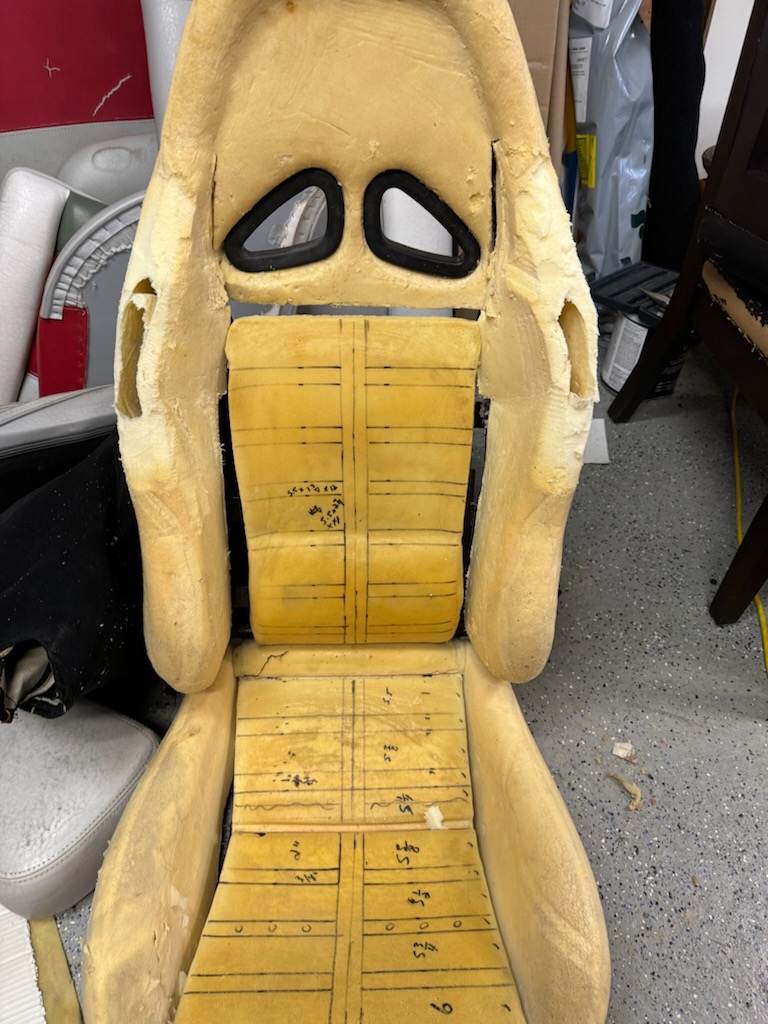
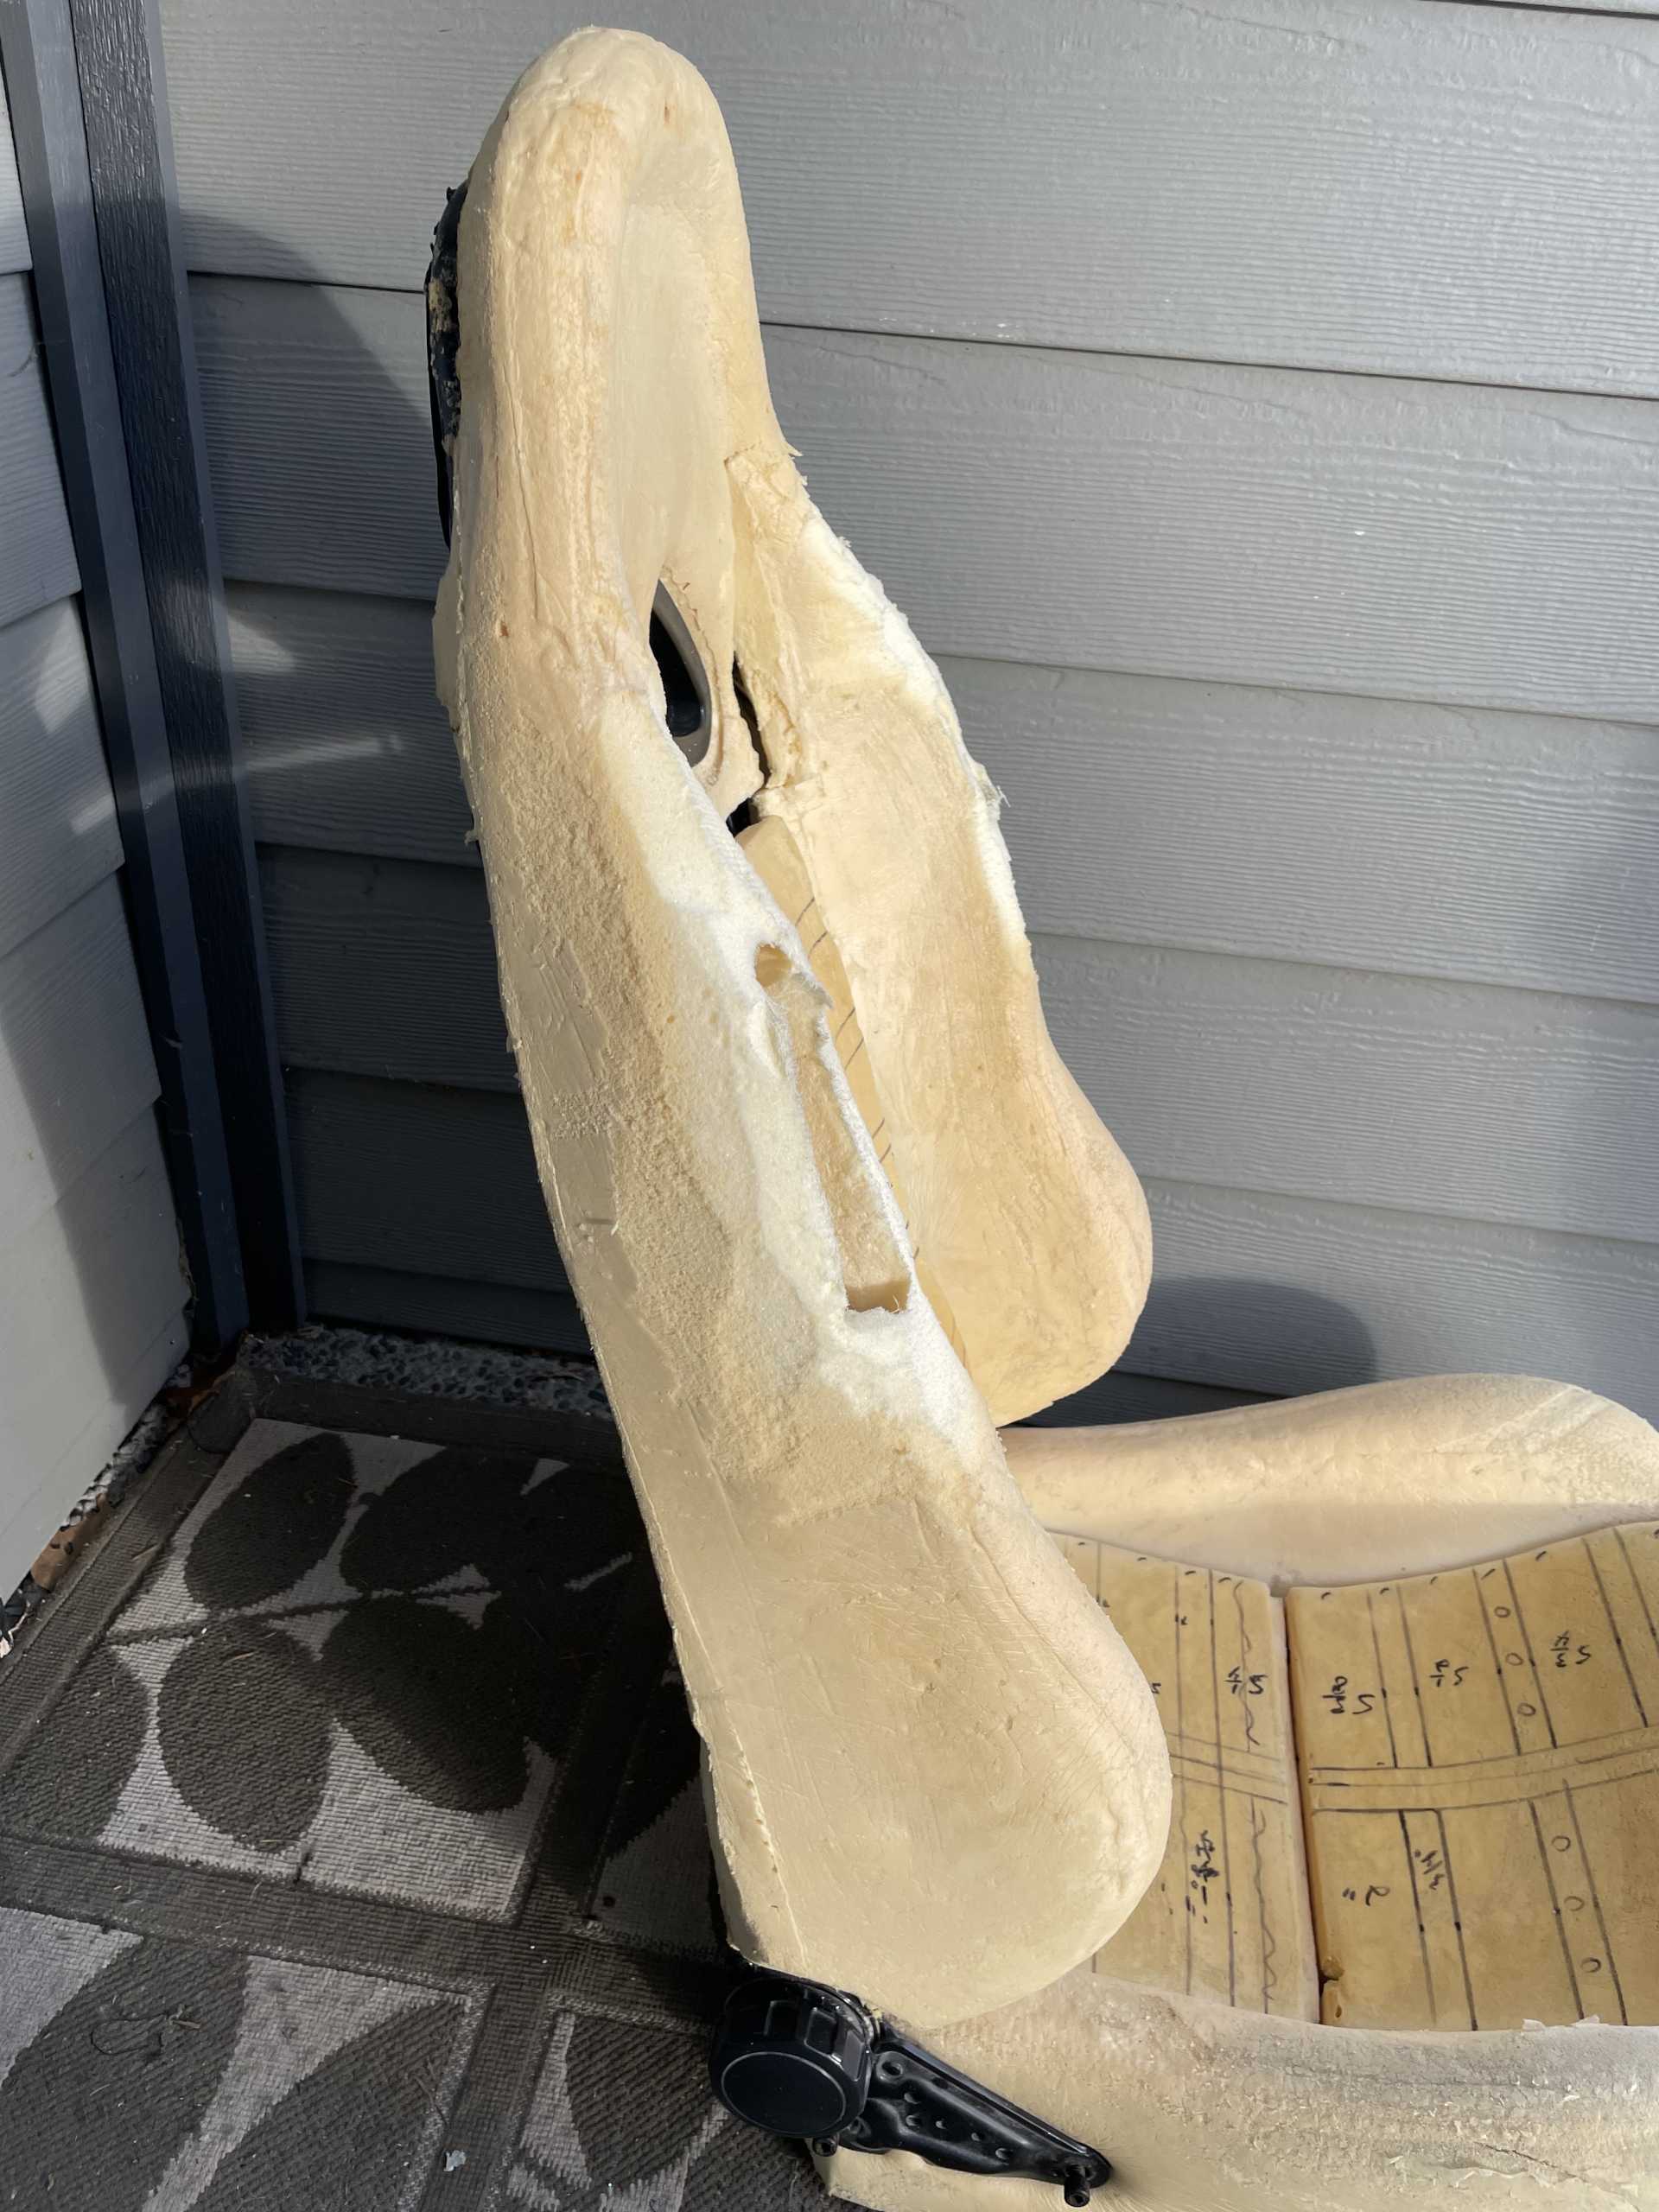
He then made up new side bolsters
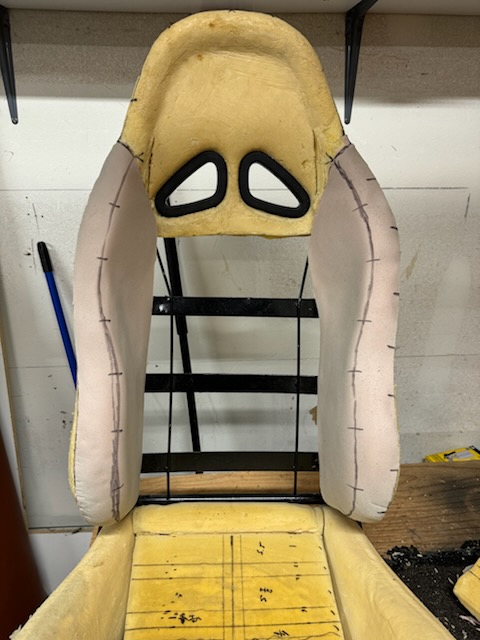
He has drawn up the seat pattern design
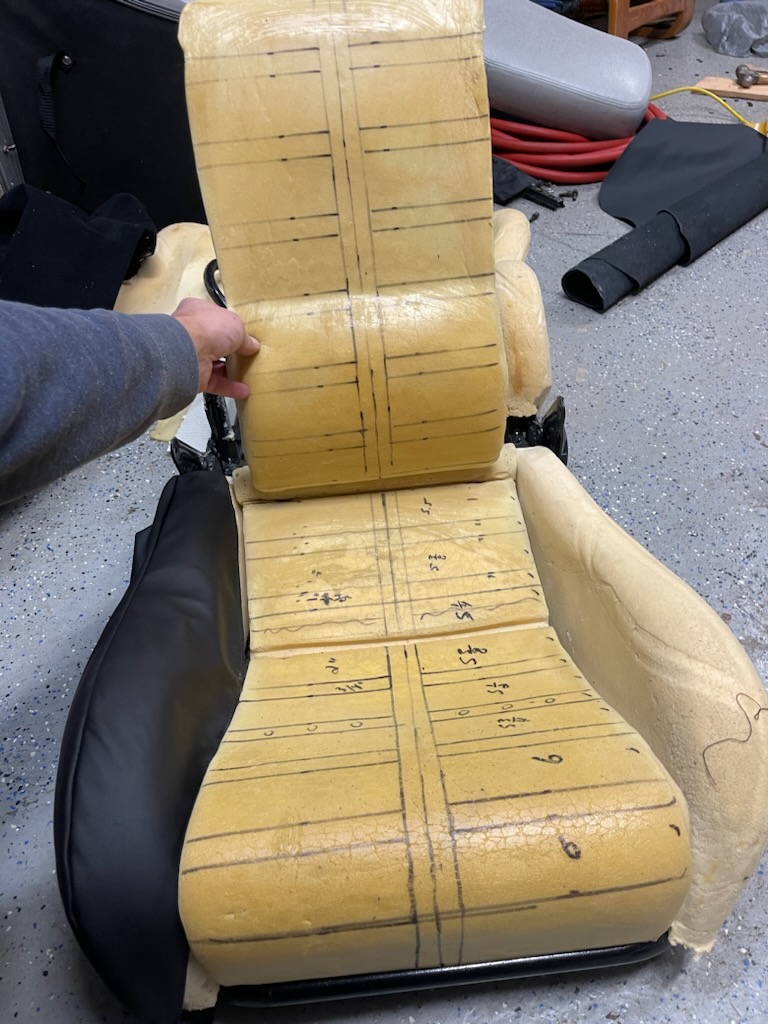
And made the first panel
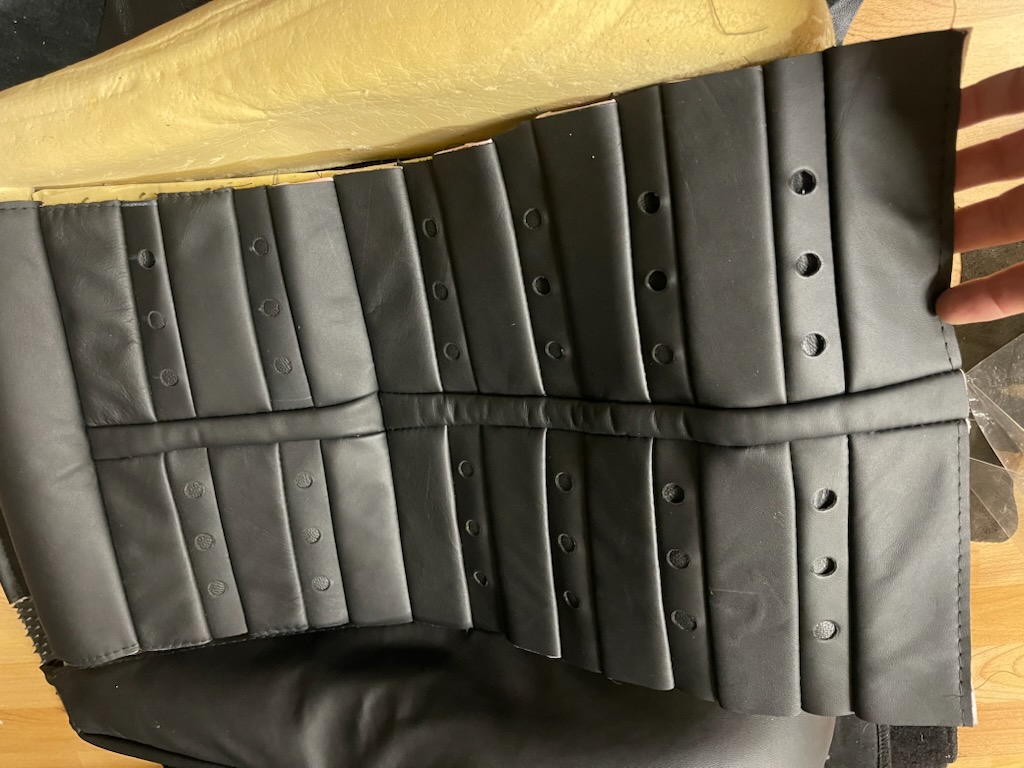
These are some of the other panels done for testing and I’m happy so far with the results
 h h

I’m working currently on the rear window fill and B pillar mods currently , I’ll post some pics later
That’s it for the seats,
Wayne
|
|
|
|
dobie1
|
FEB 10, 07:56 PM
|
|
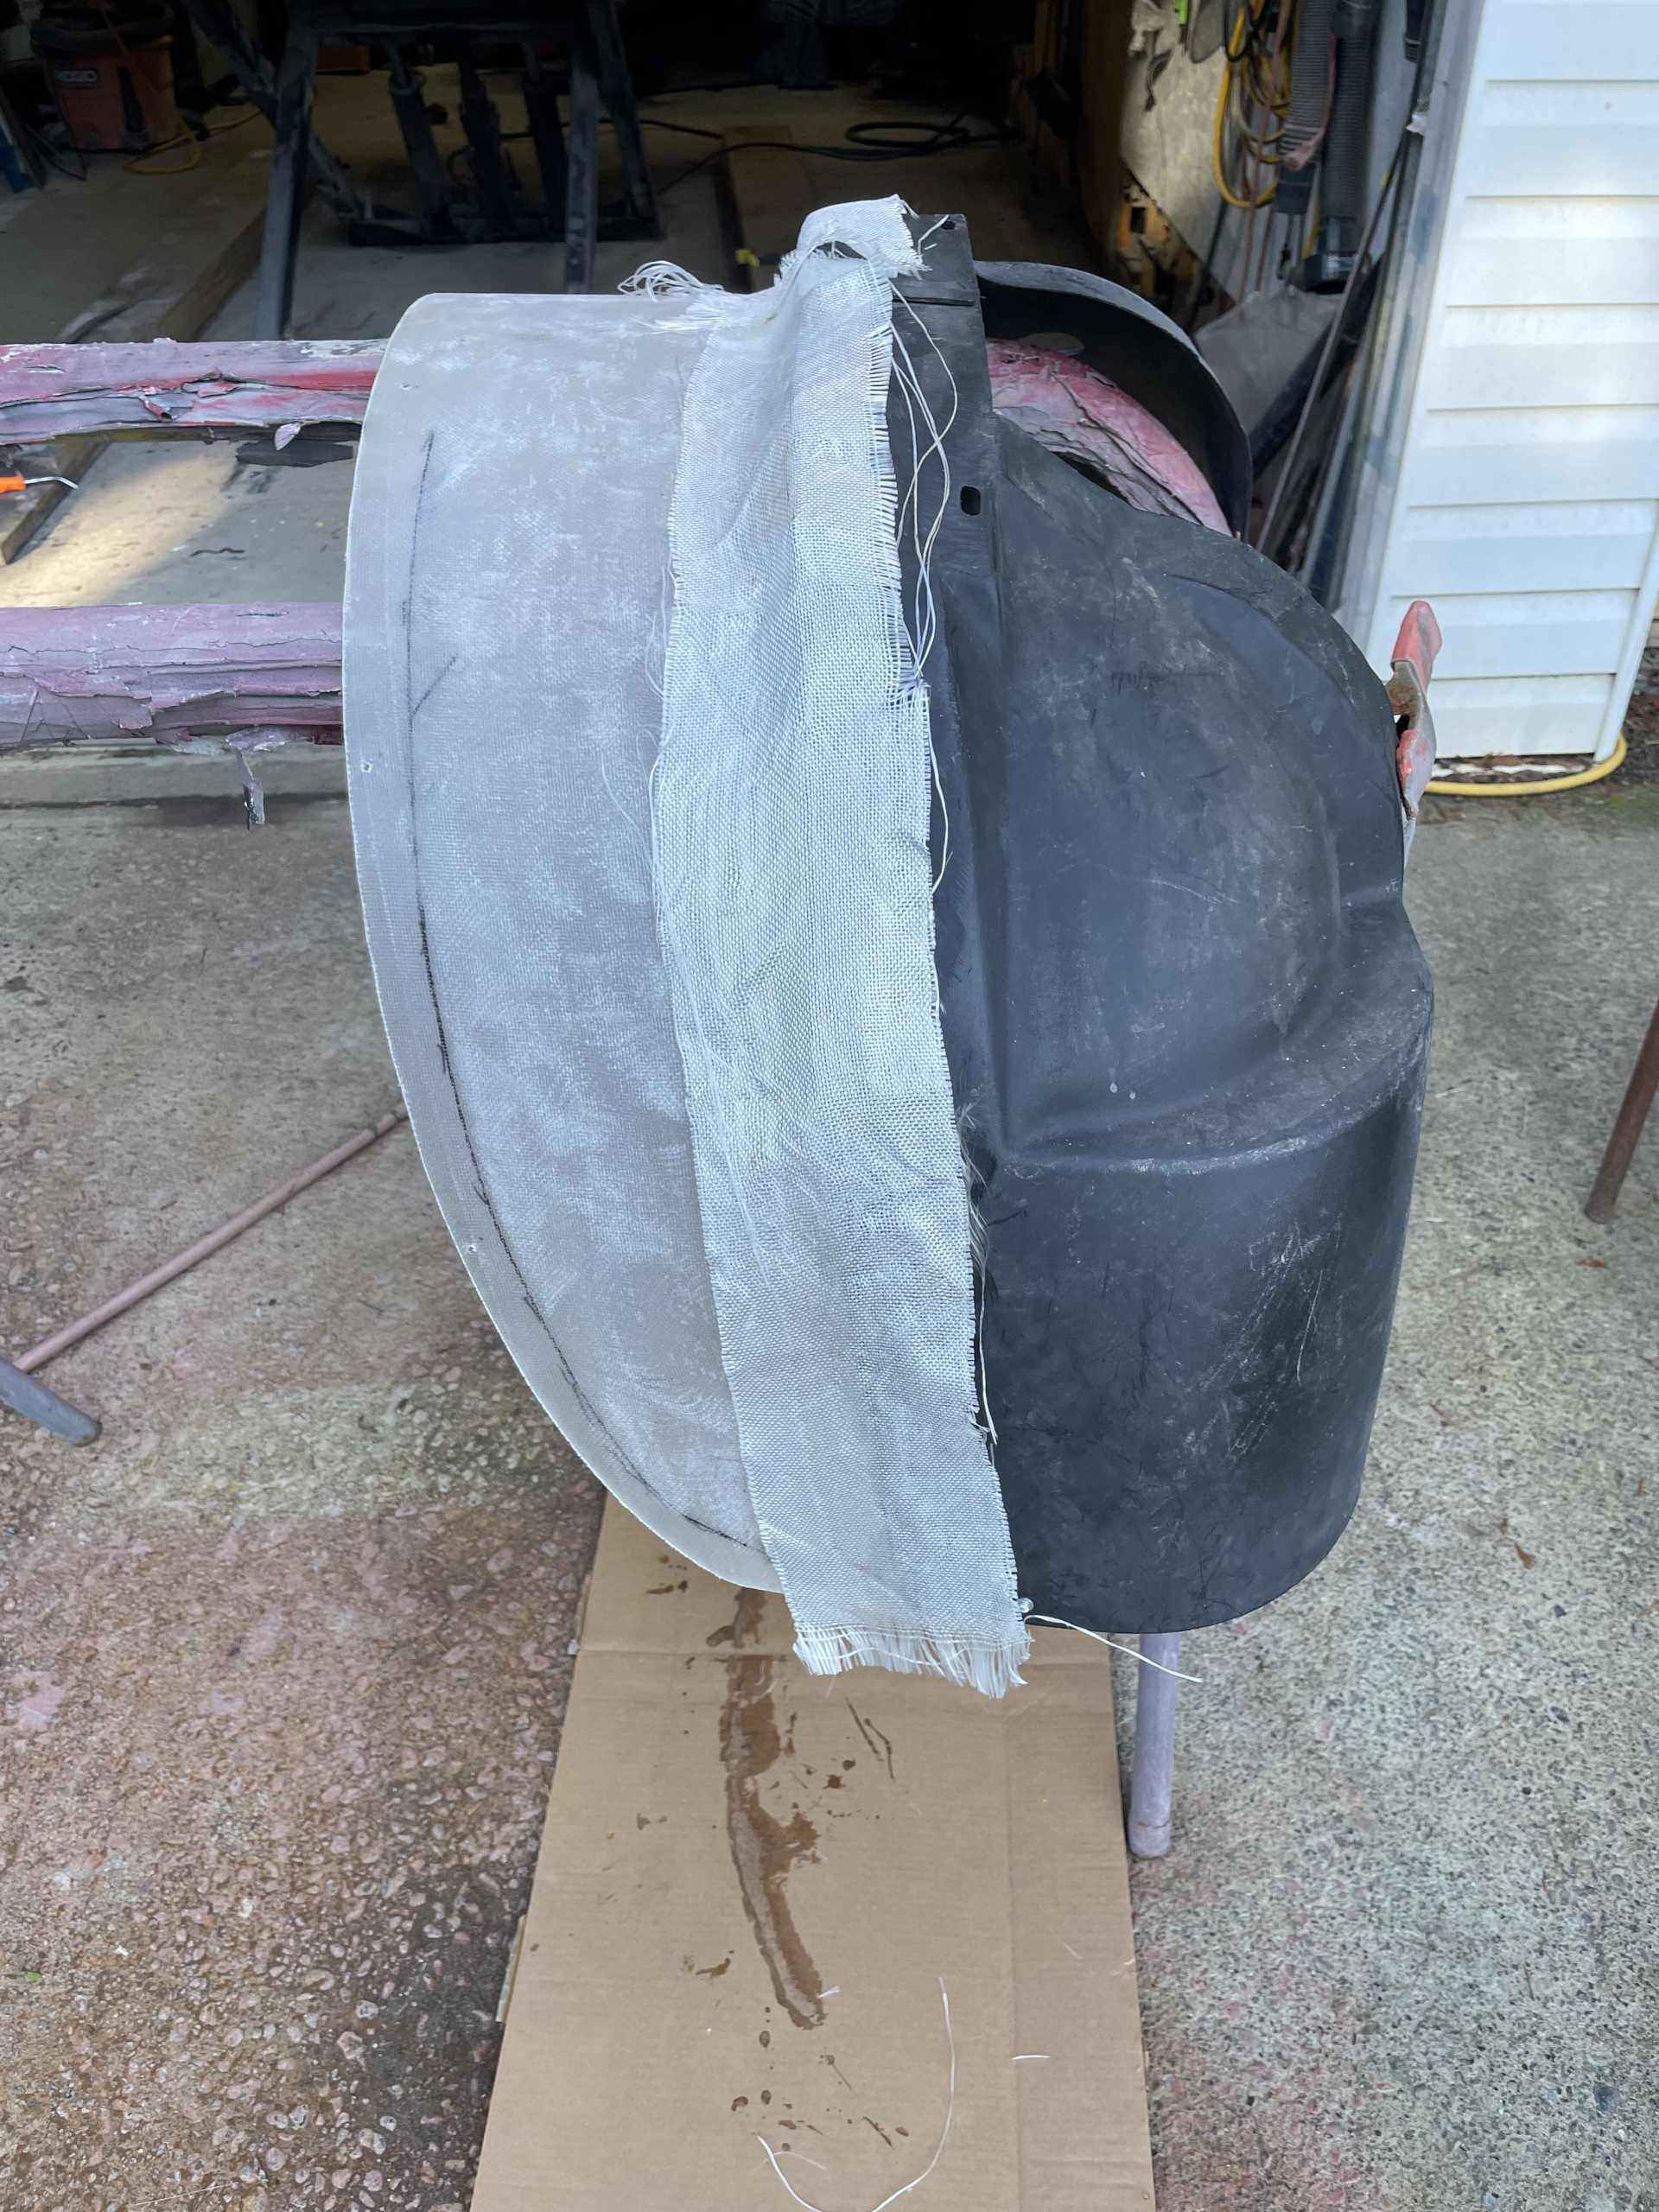
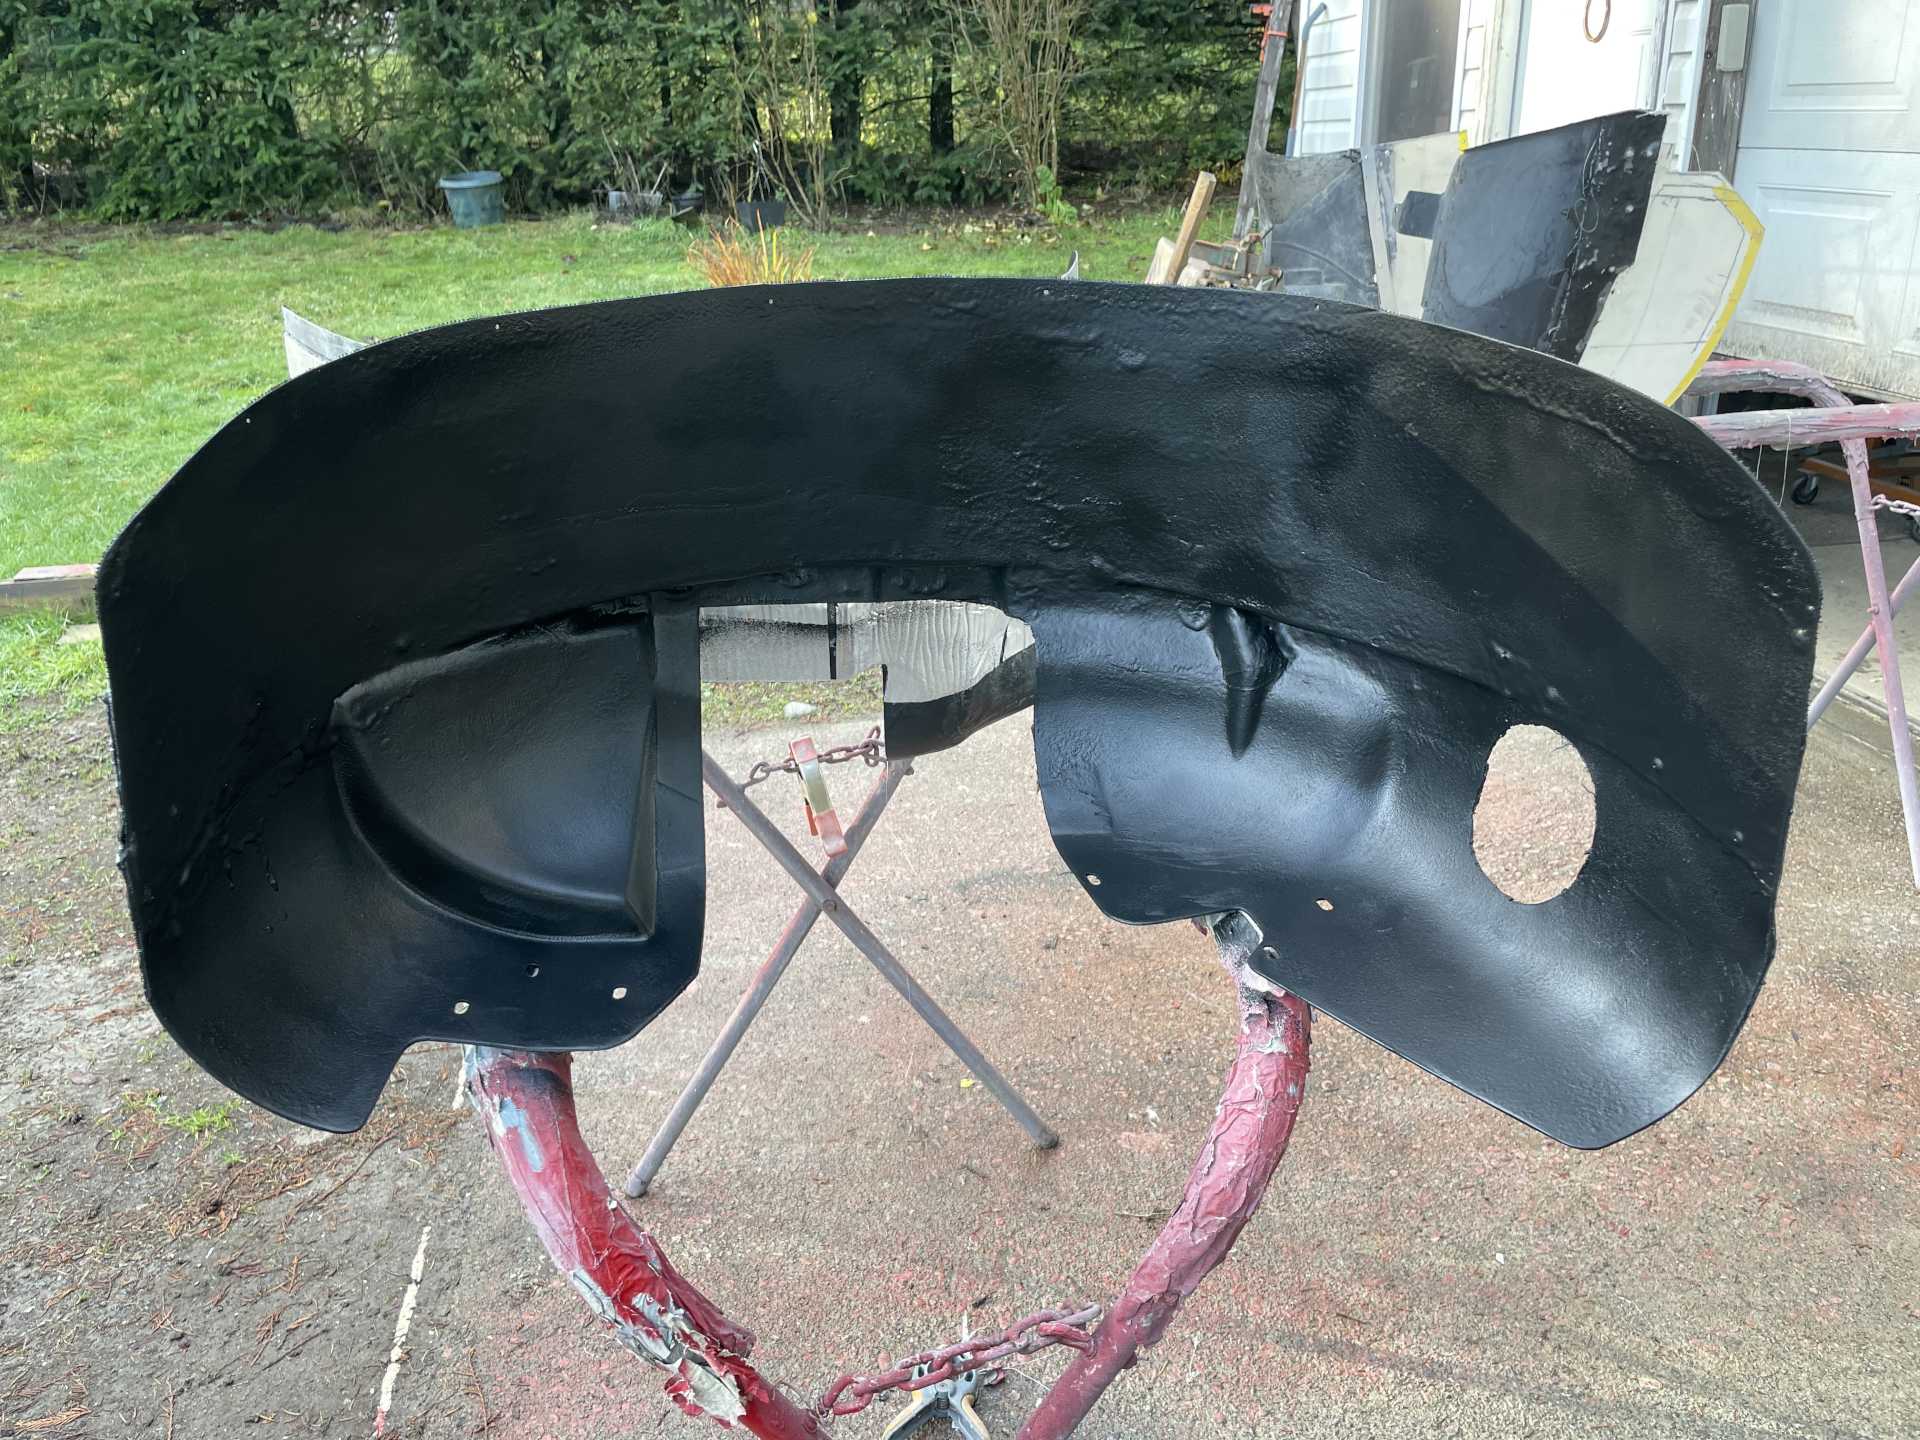
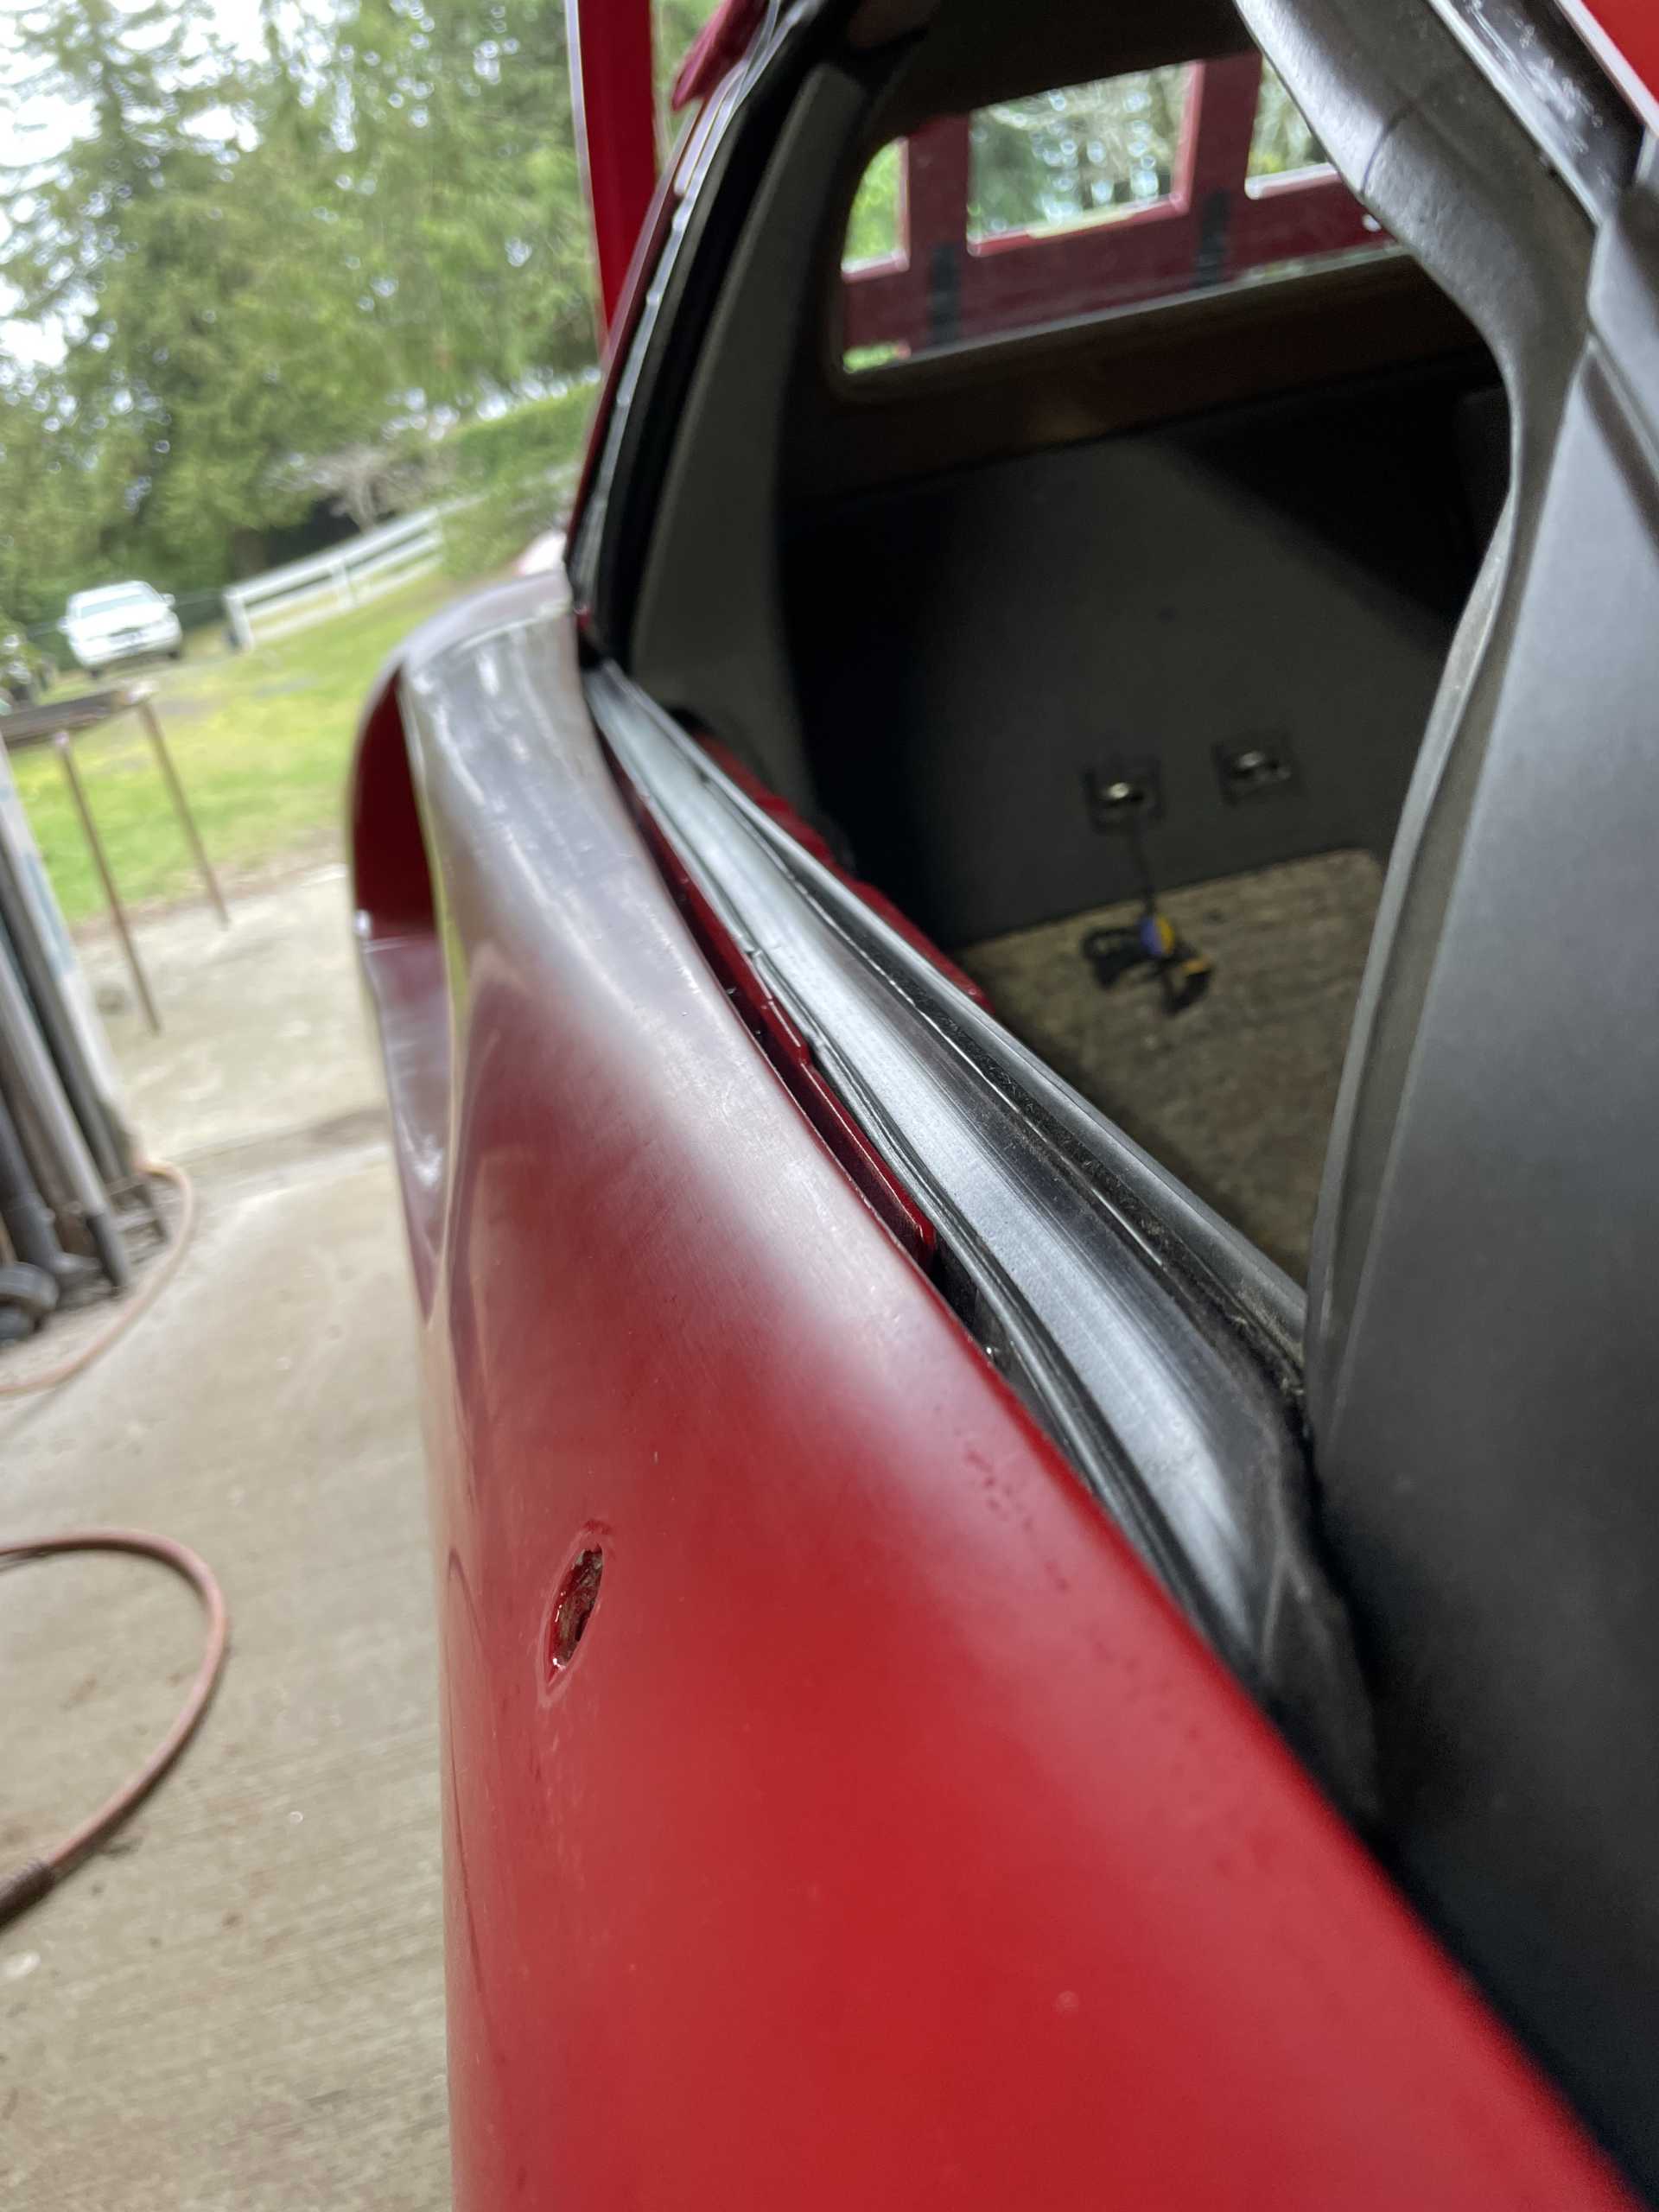
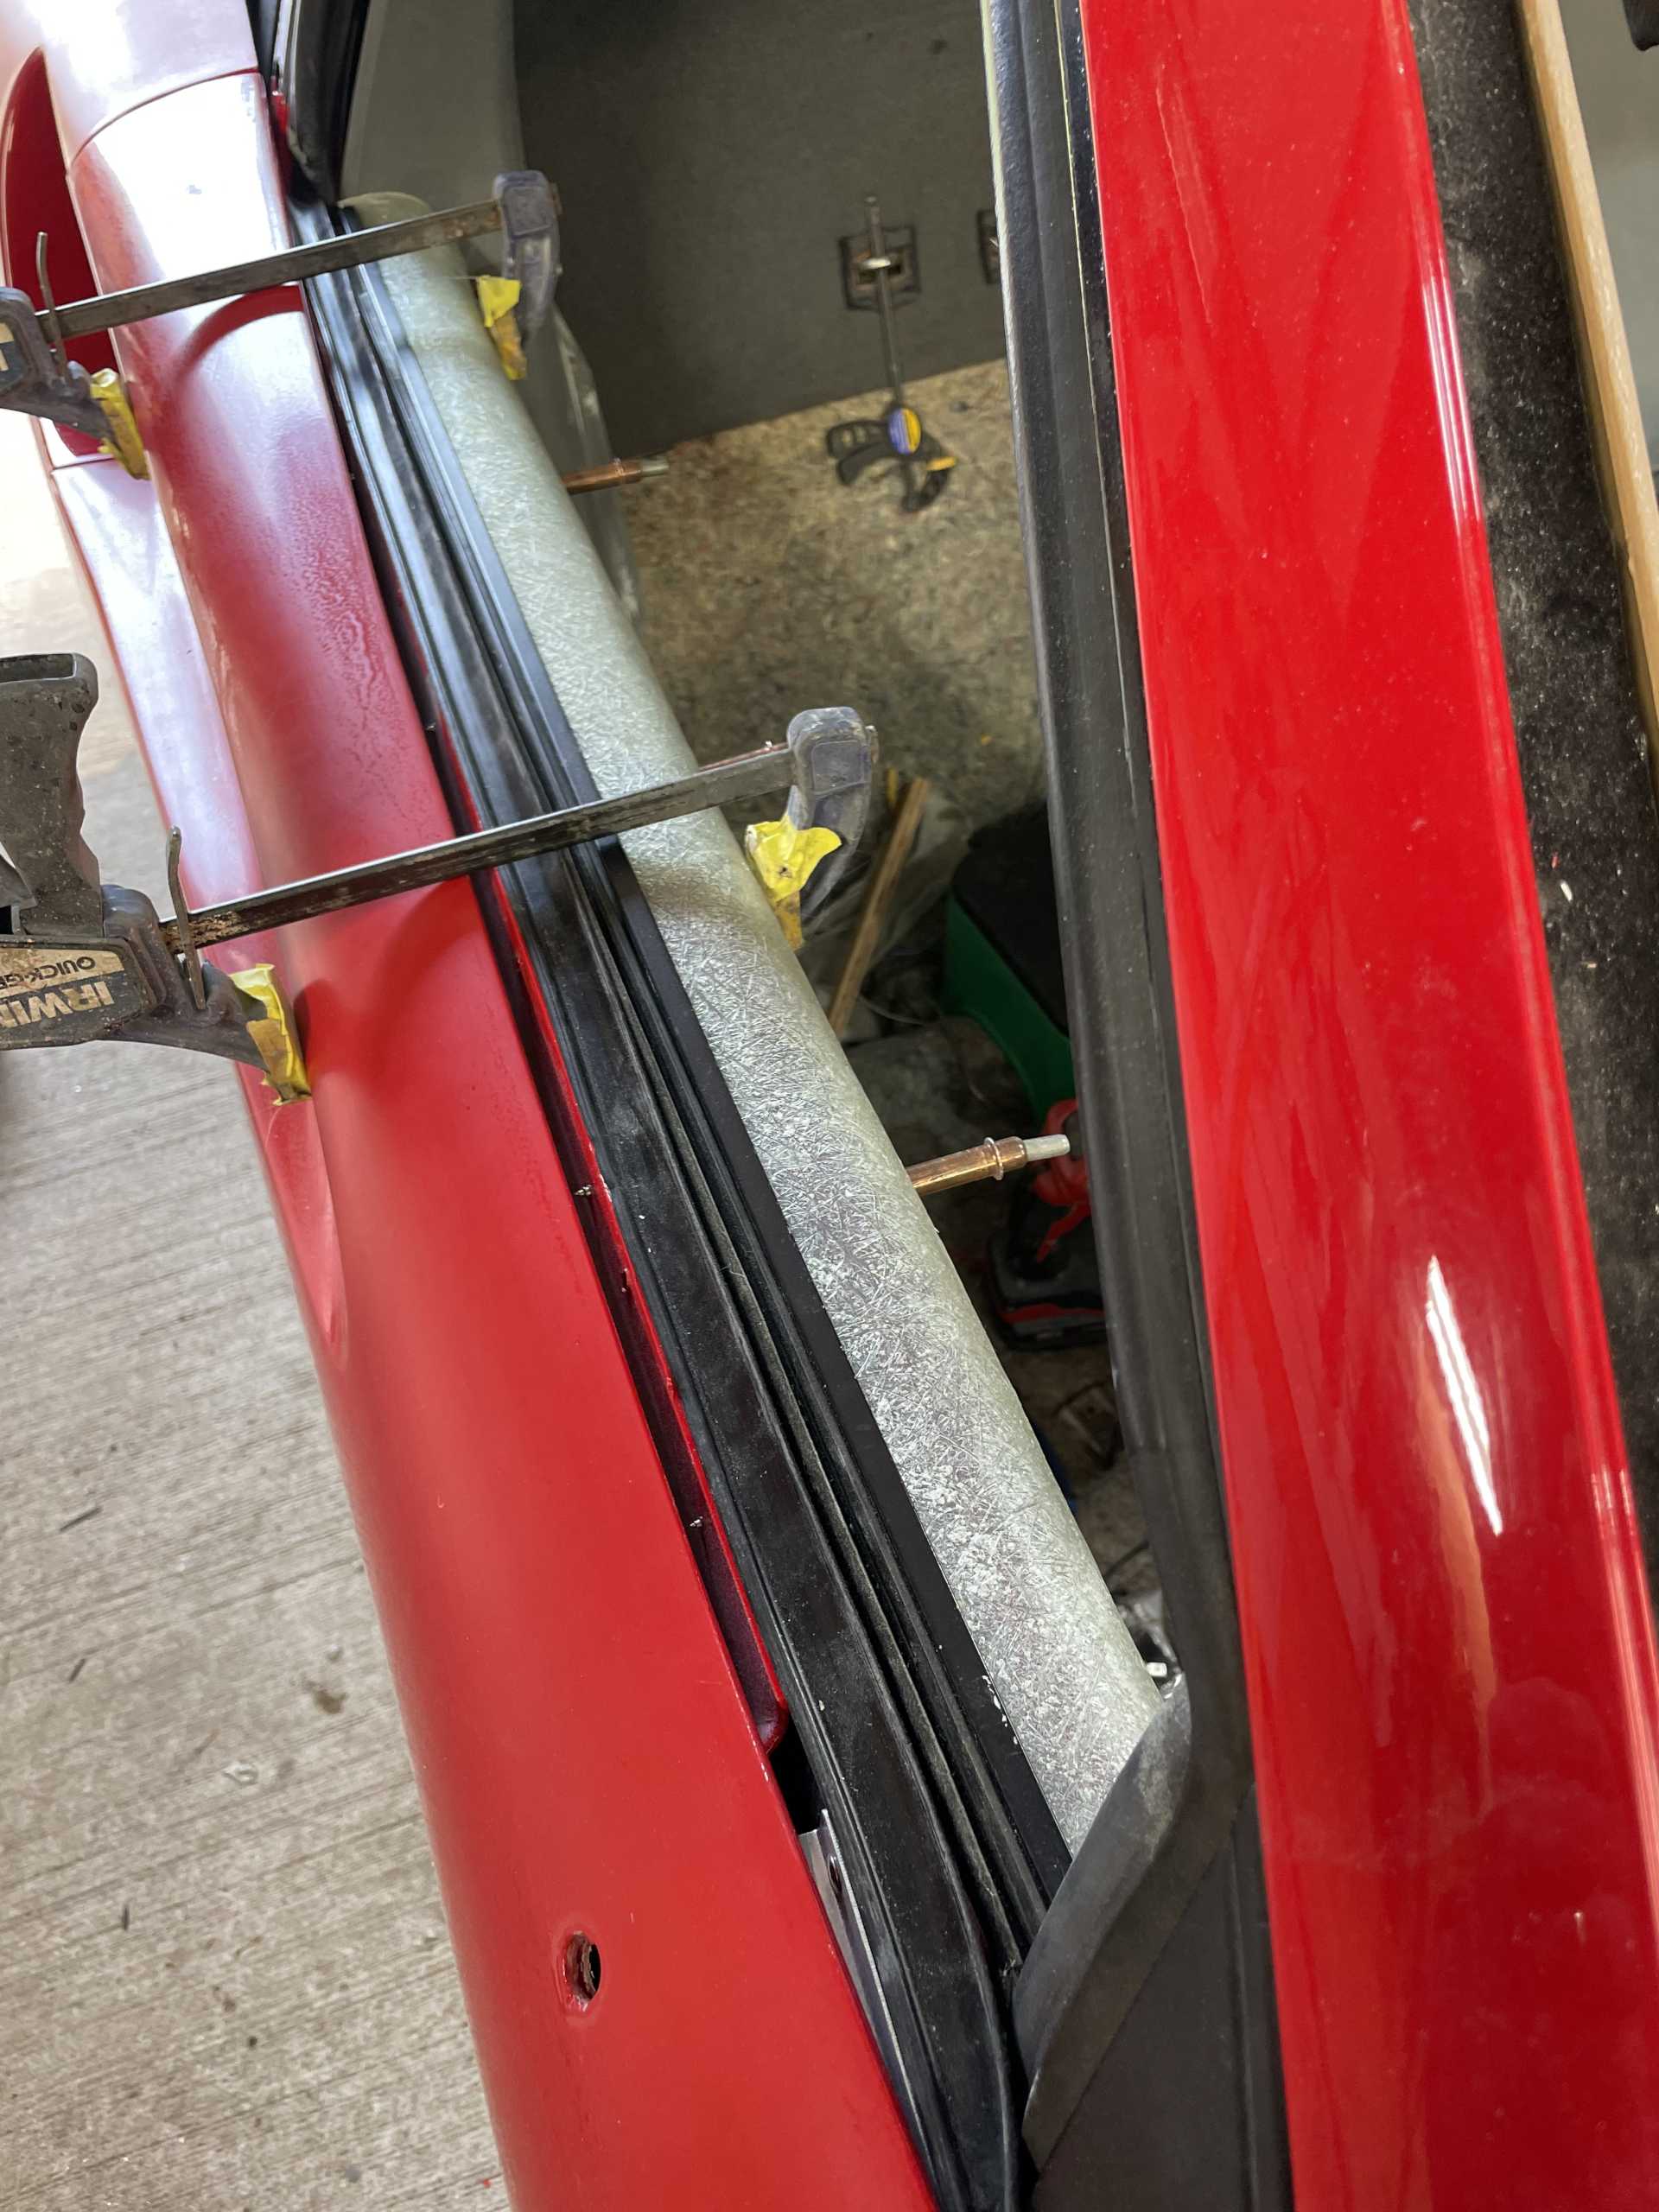
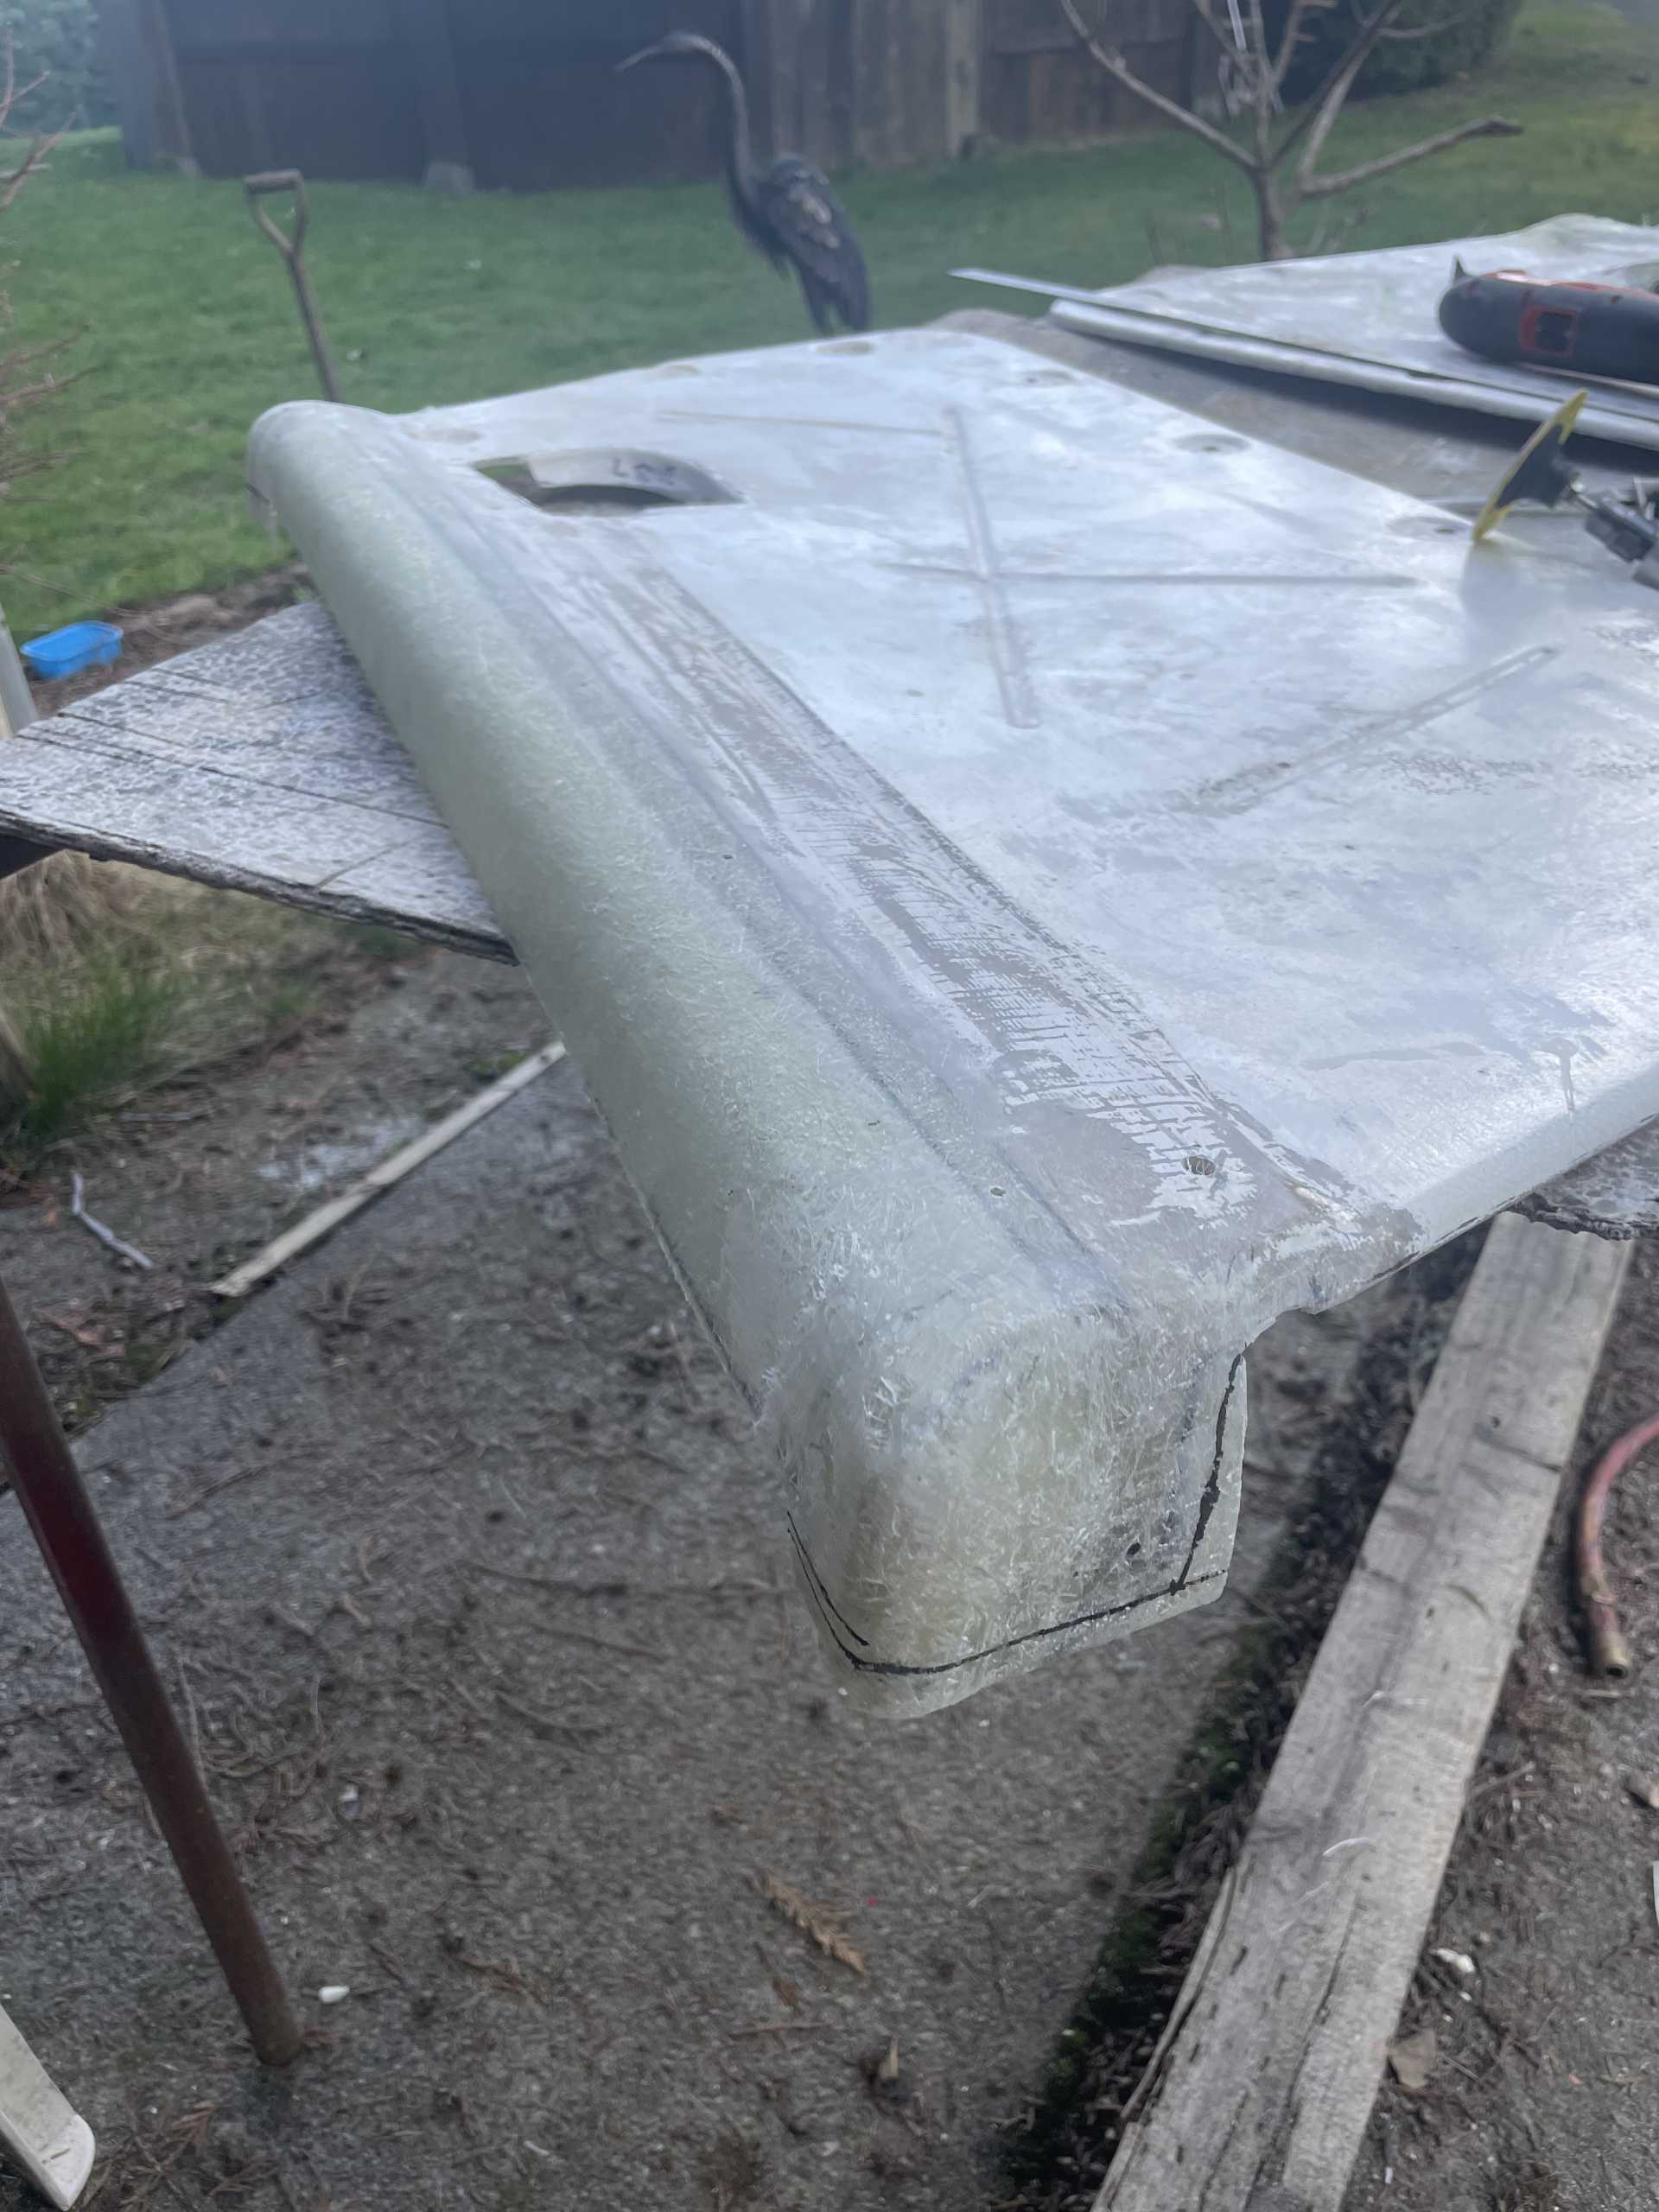
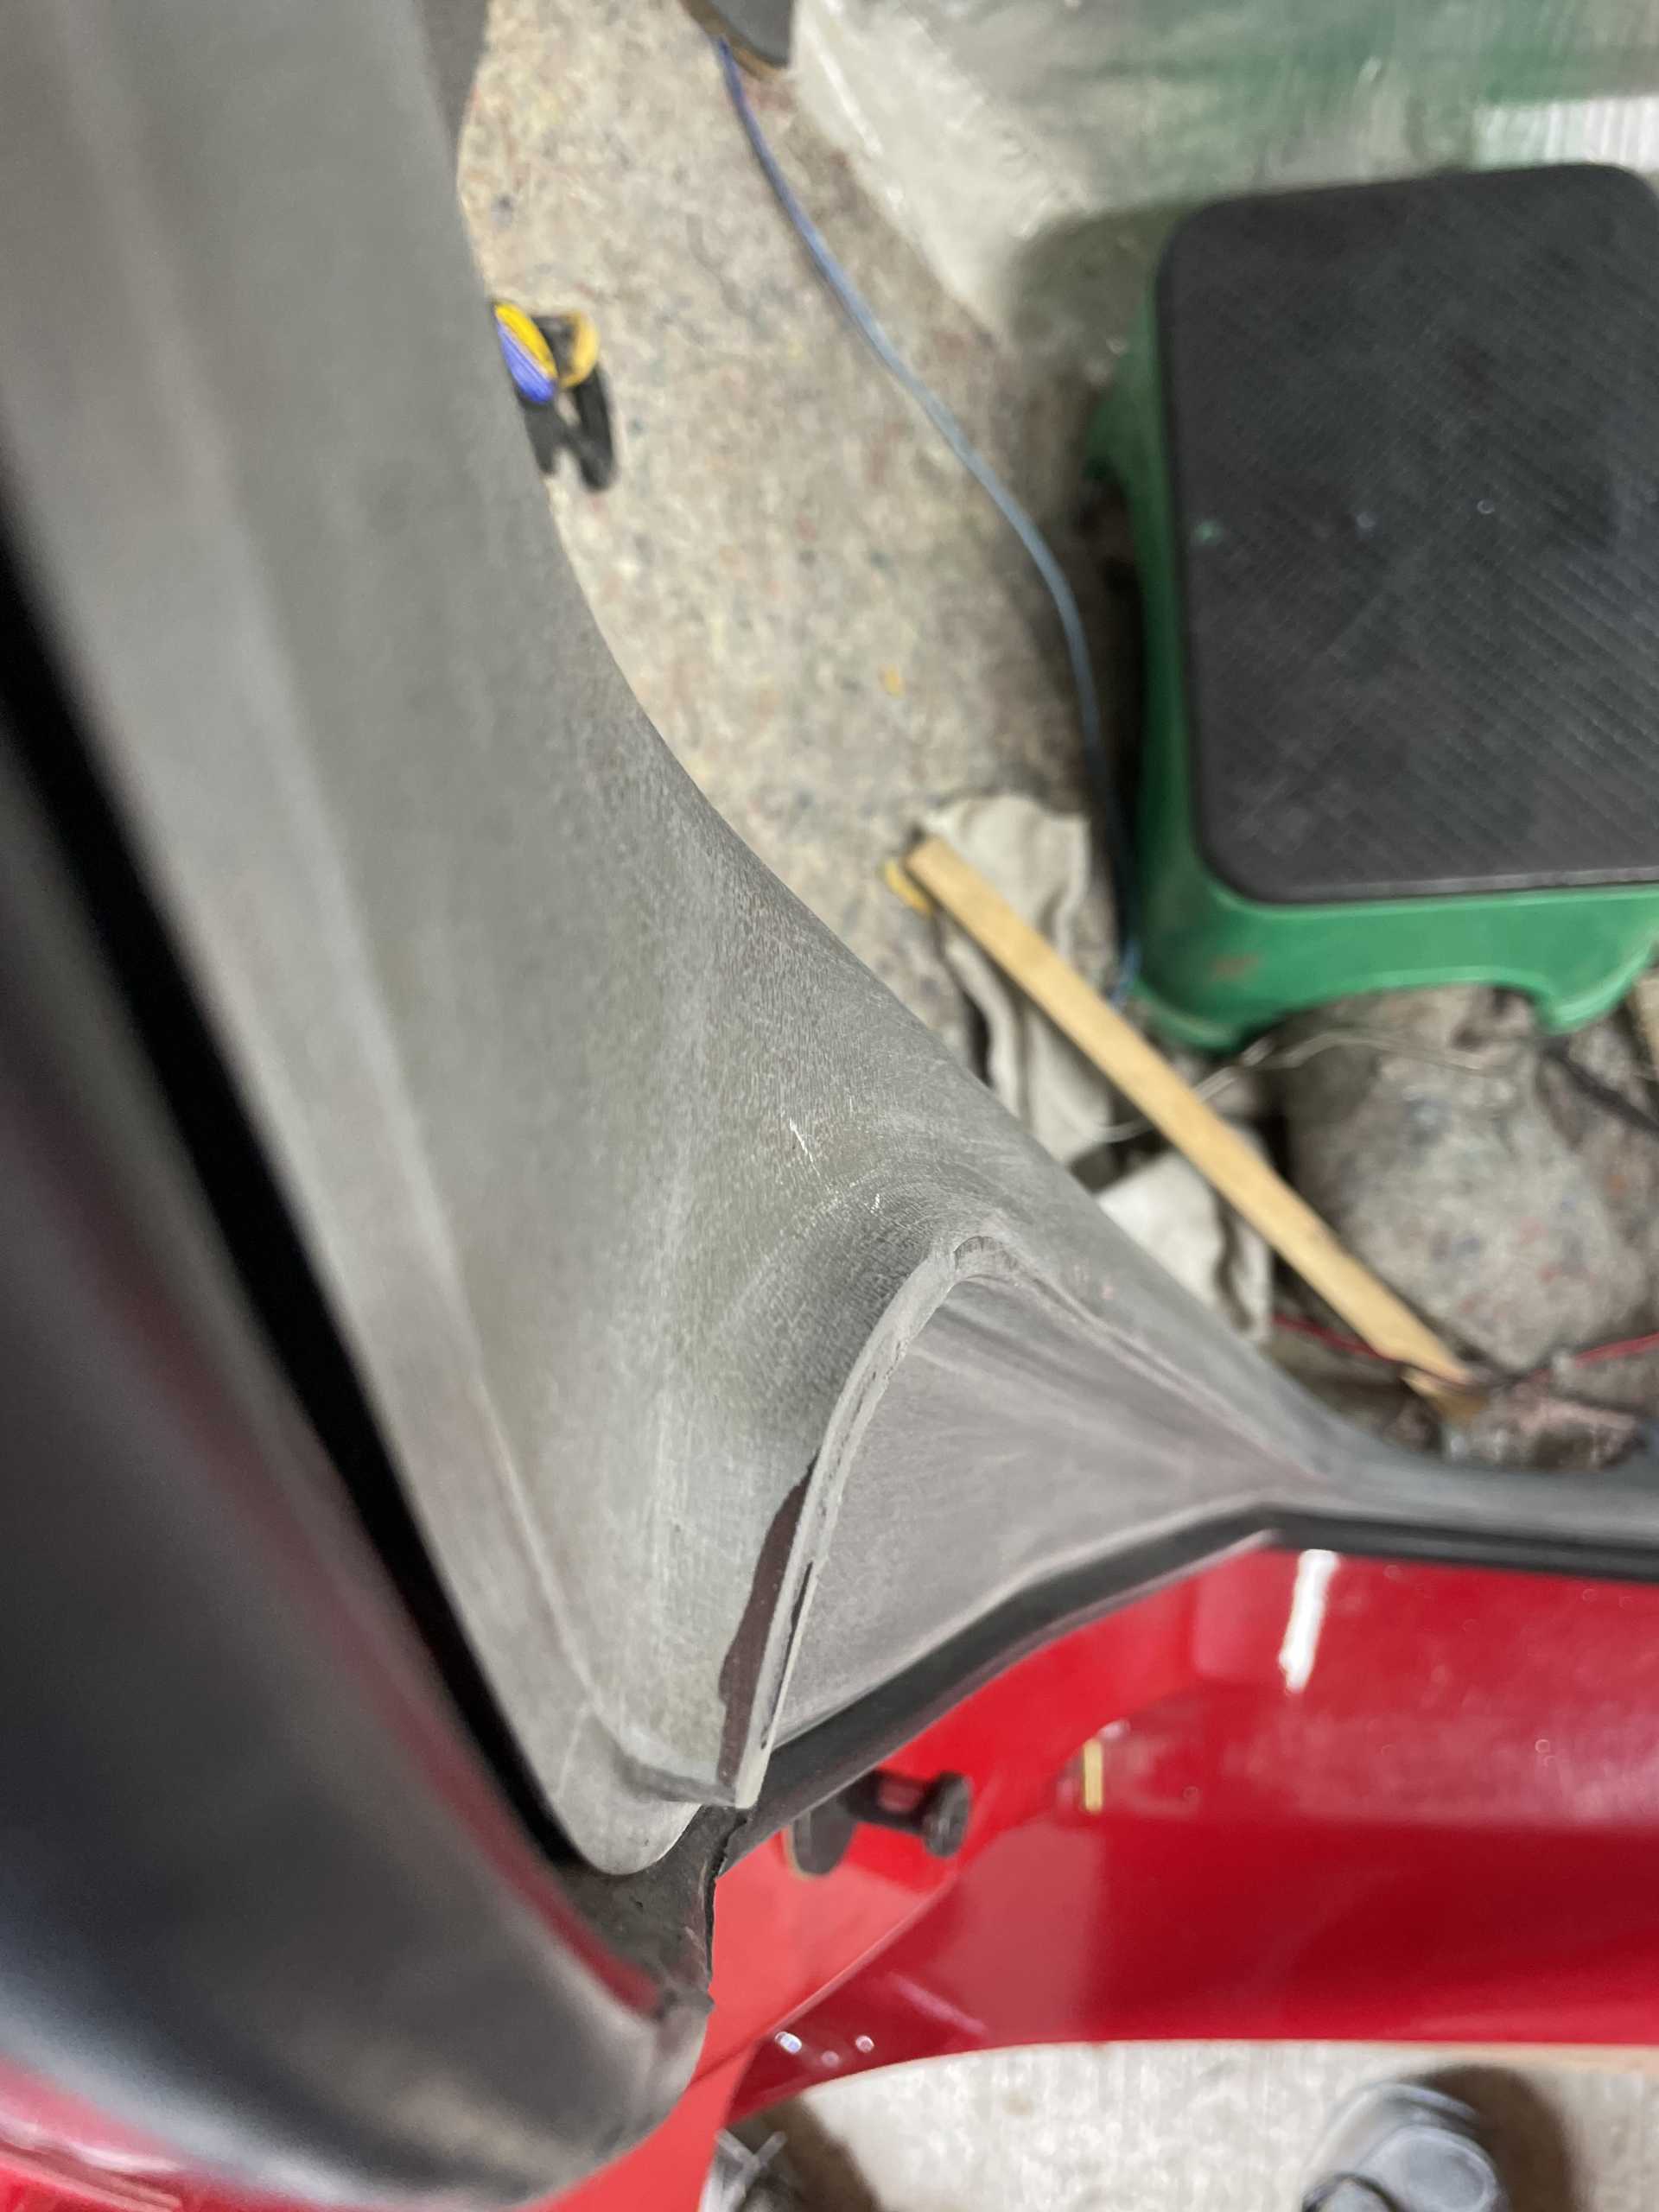
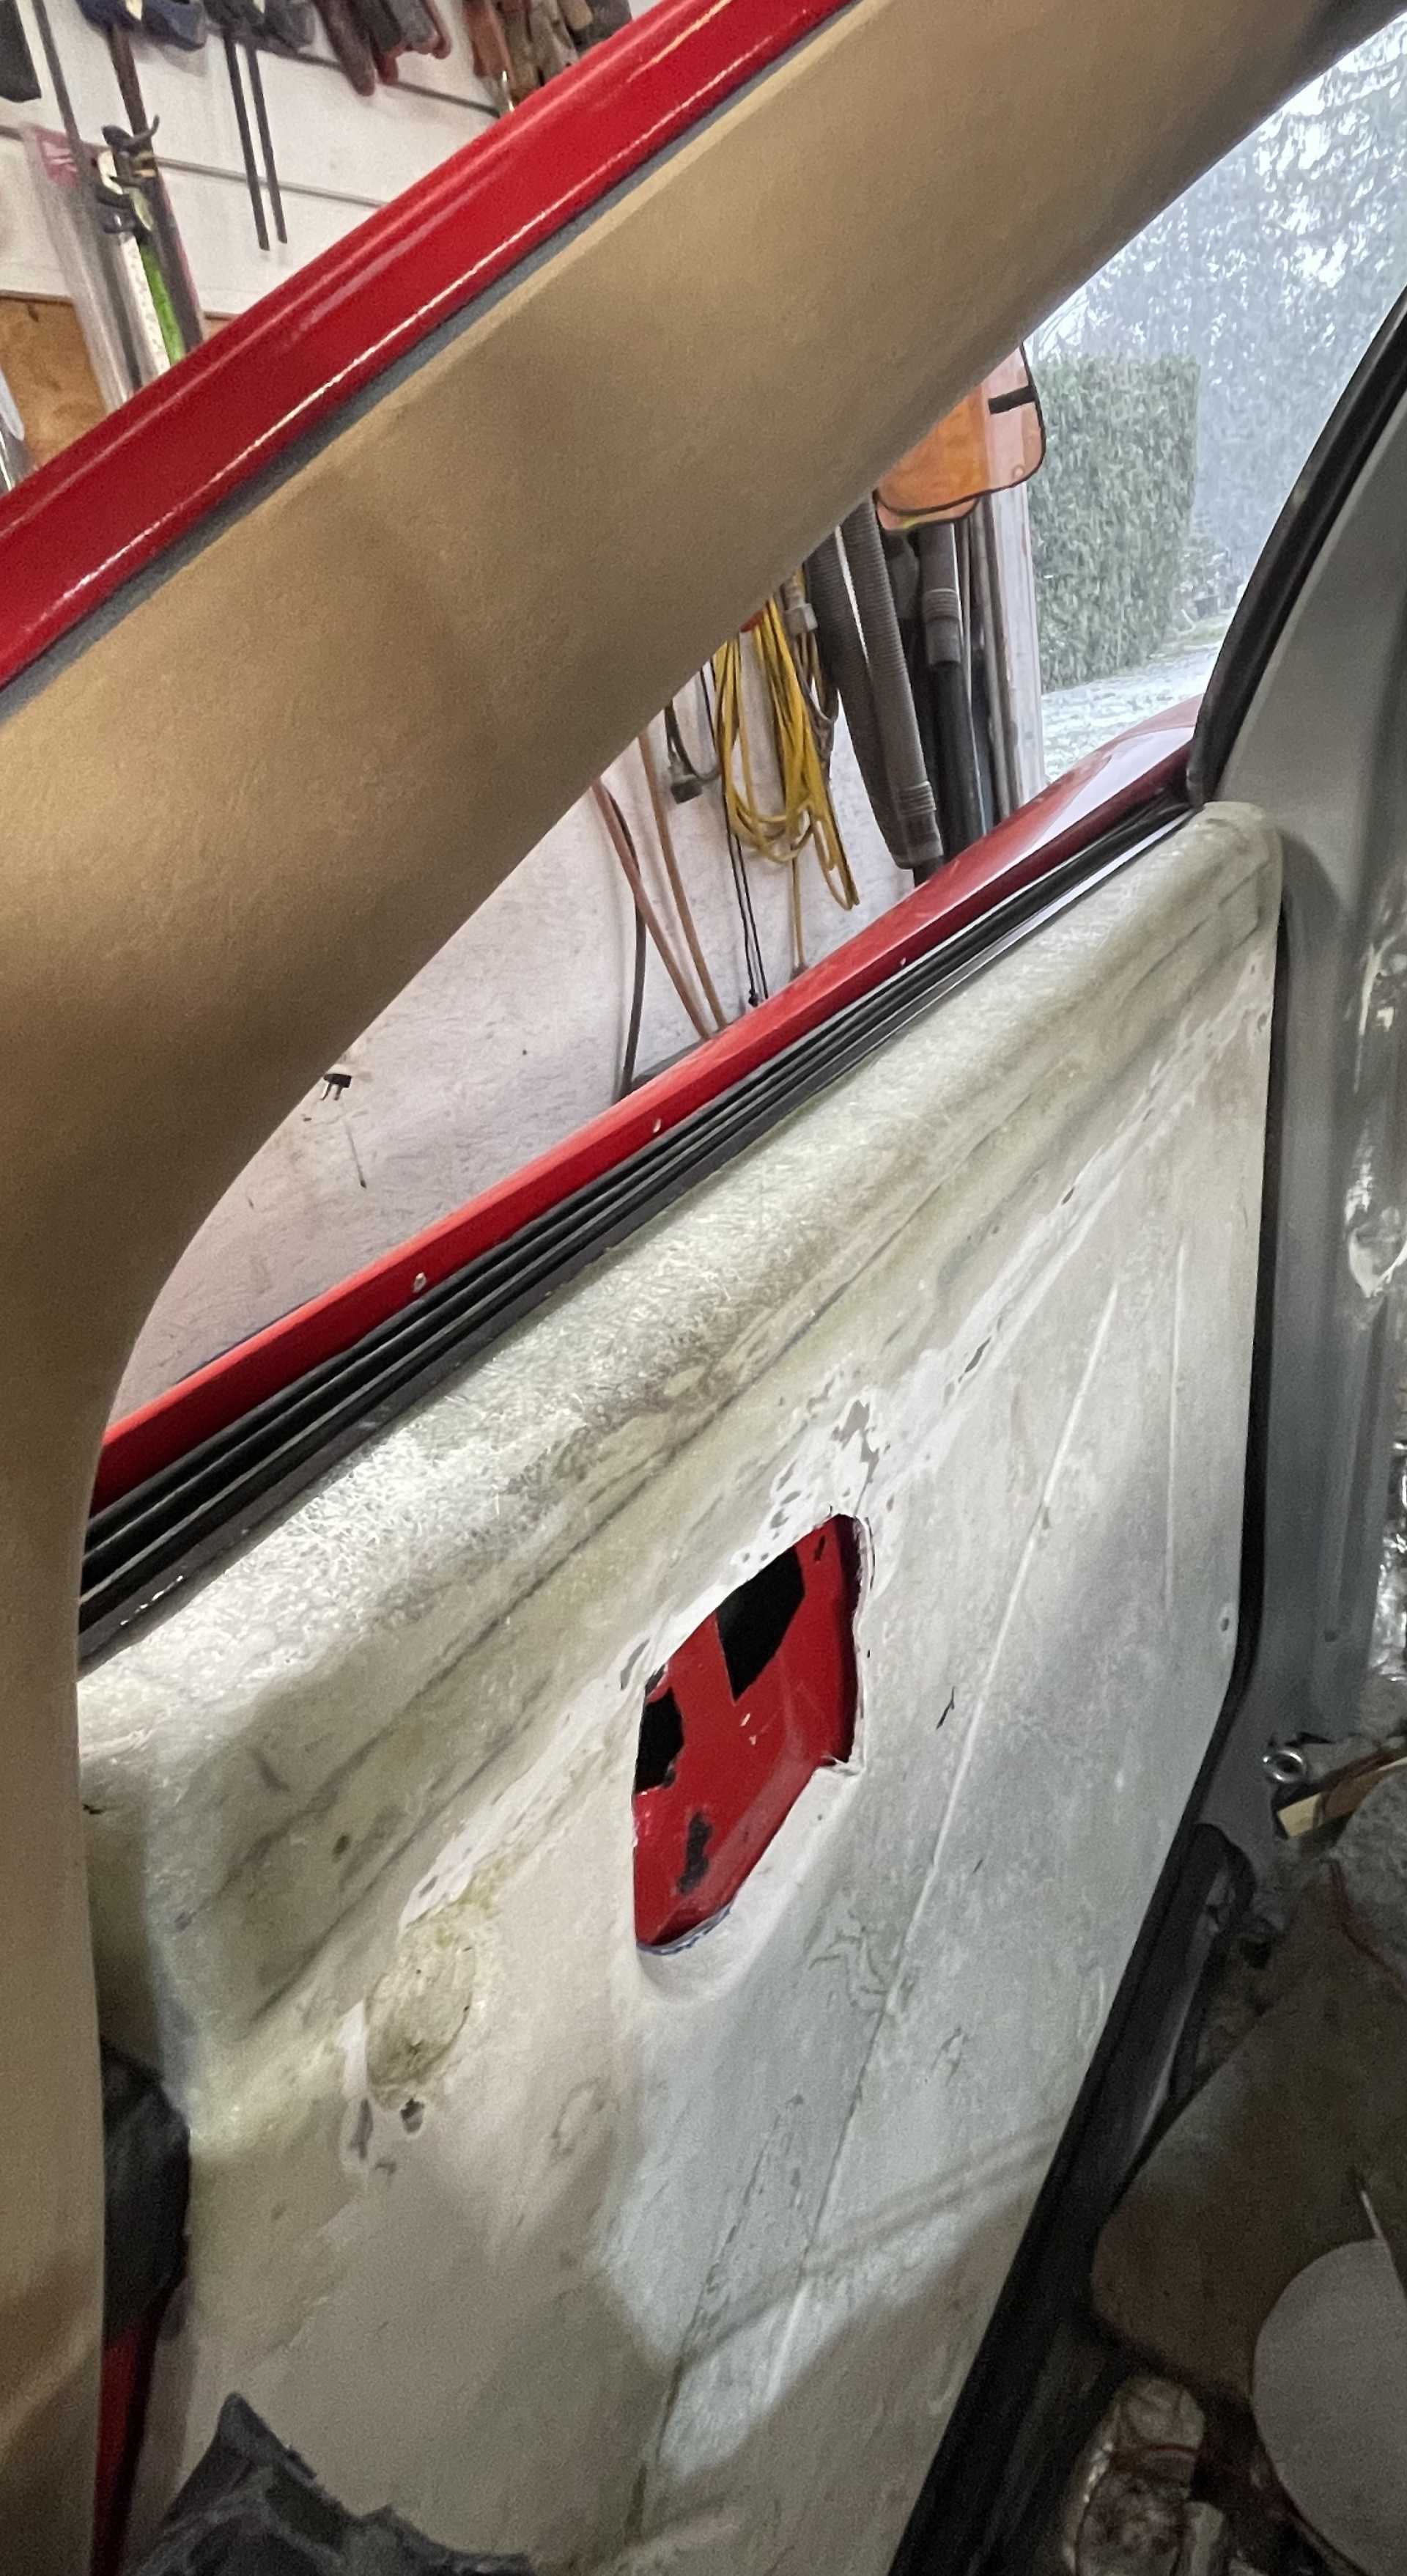
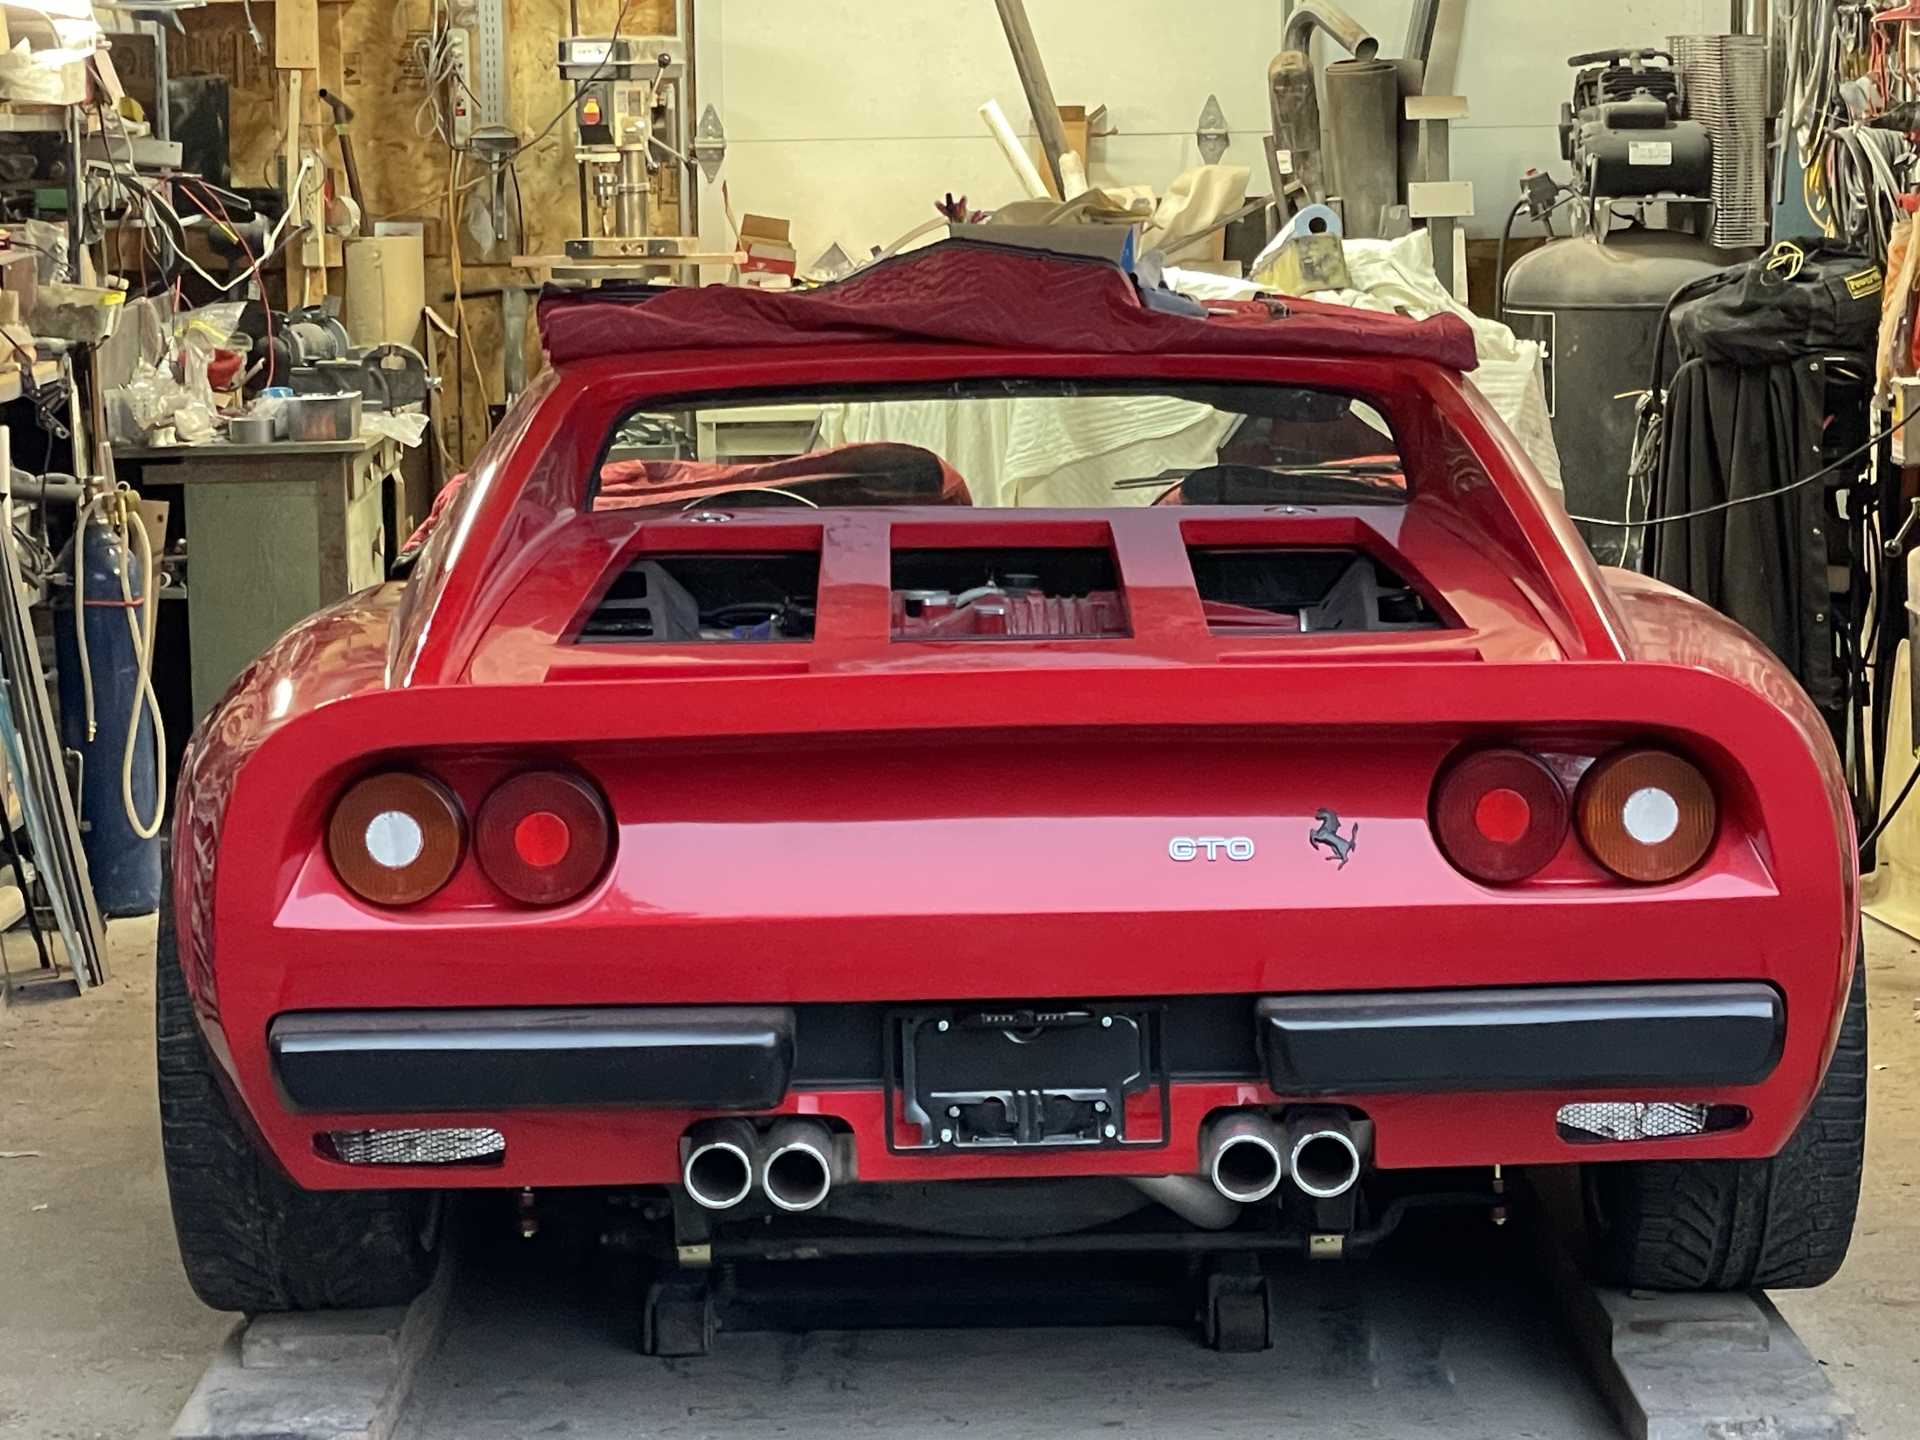
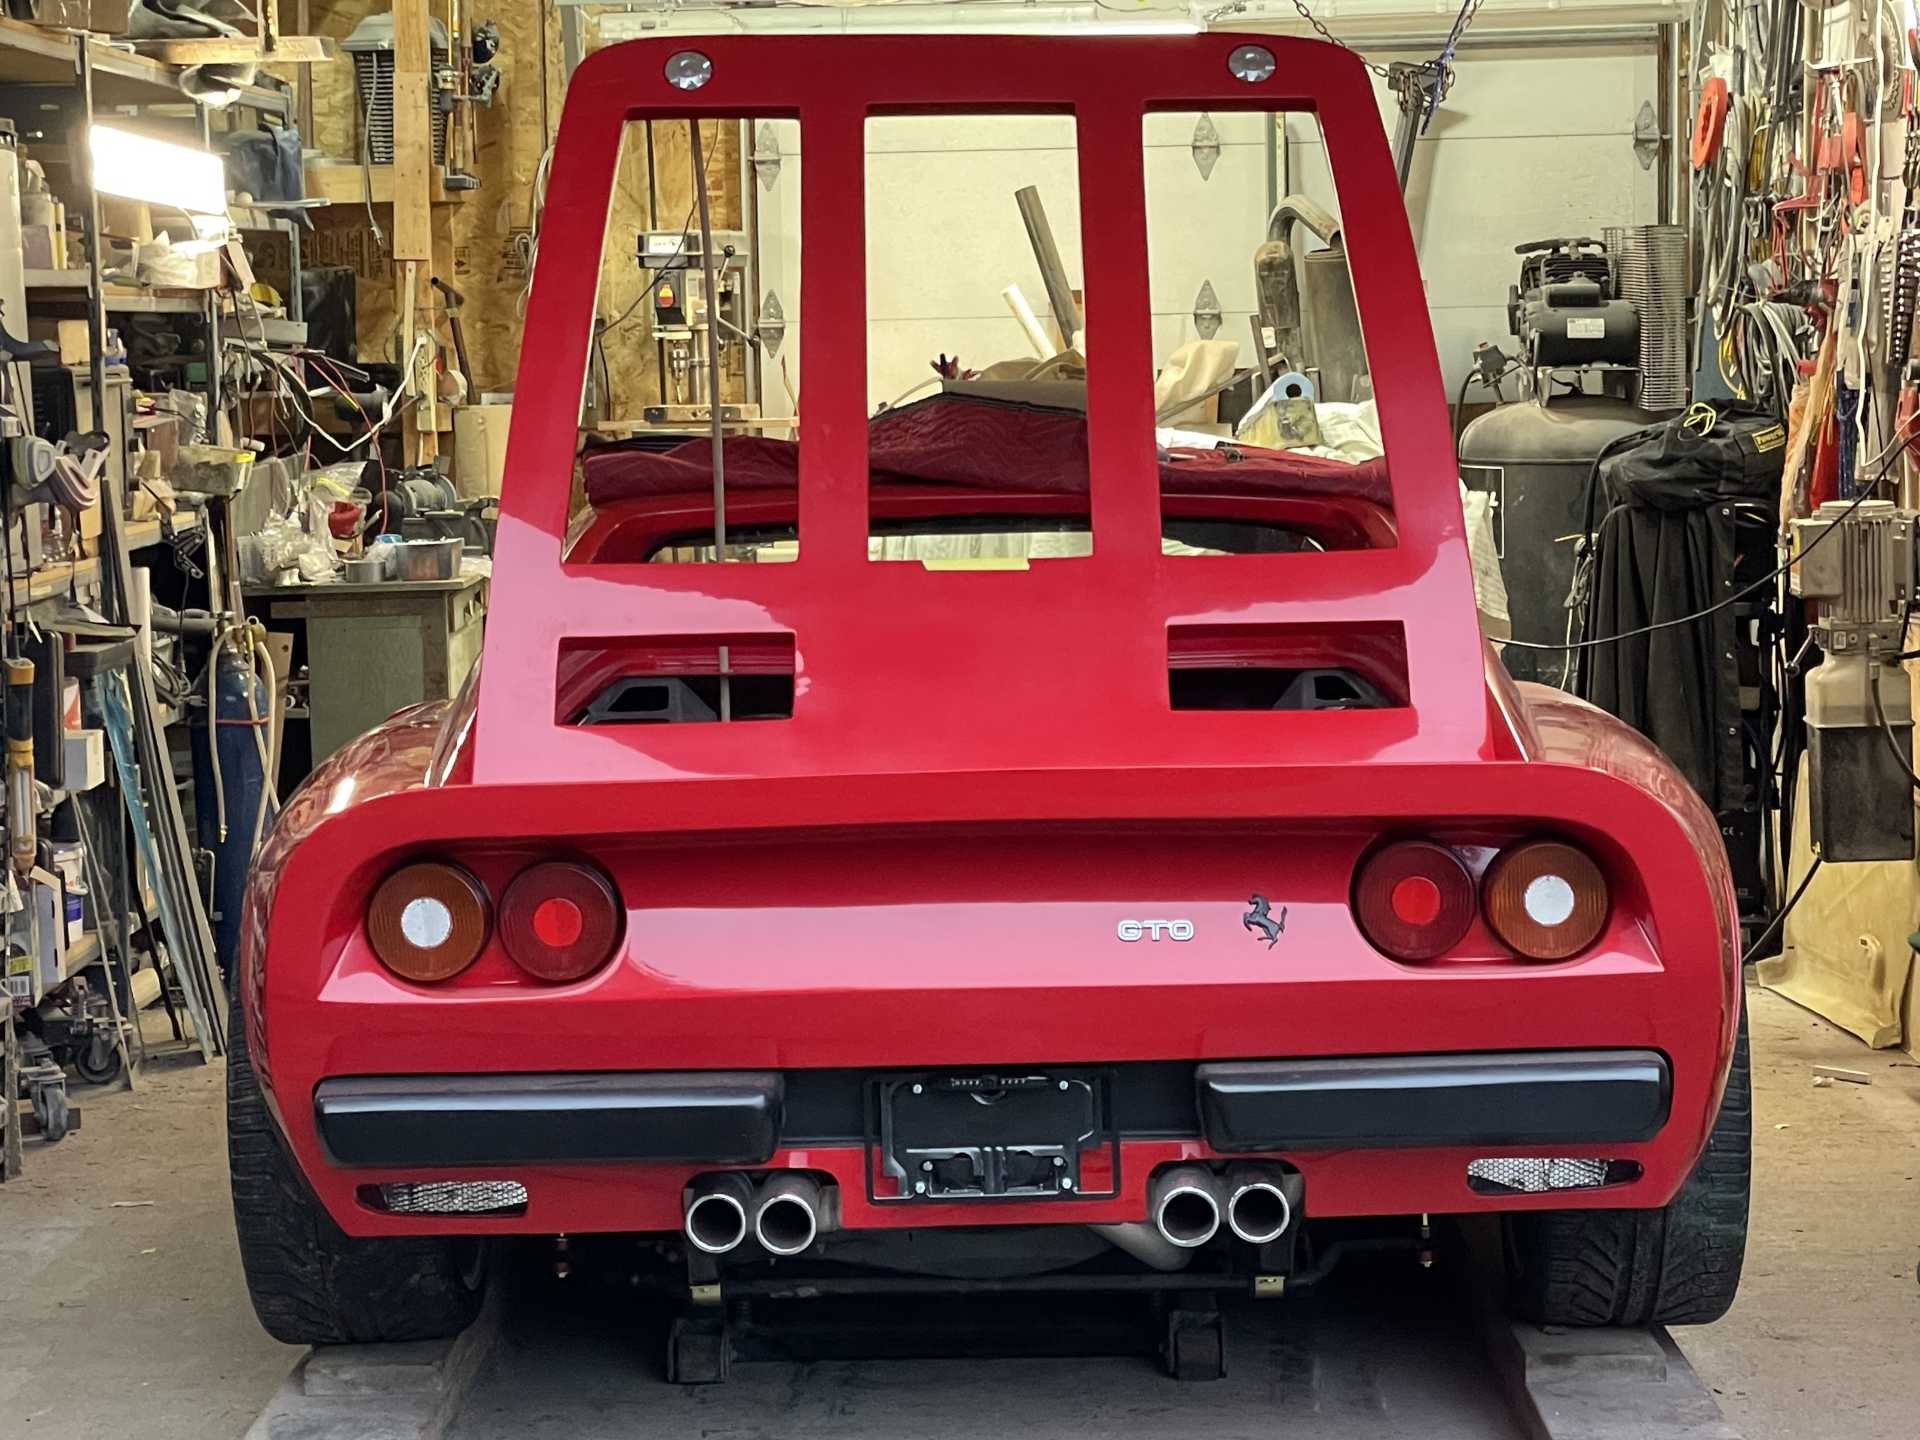
Here is one of the other areas I’ve been working on.
One of the modifications we’ve completed is raising the top of the inner door . When building a so called Kit car and using a fiero chassis , adding the outer door skin panels usually leaves a tell tail gap above the window seal whiskers . Most builders just add a fill piece on top of the inner door card.
You can see how high the door skin is above the window seal
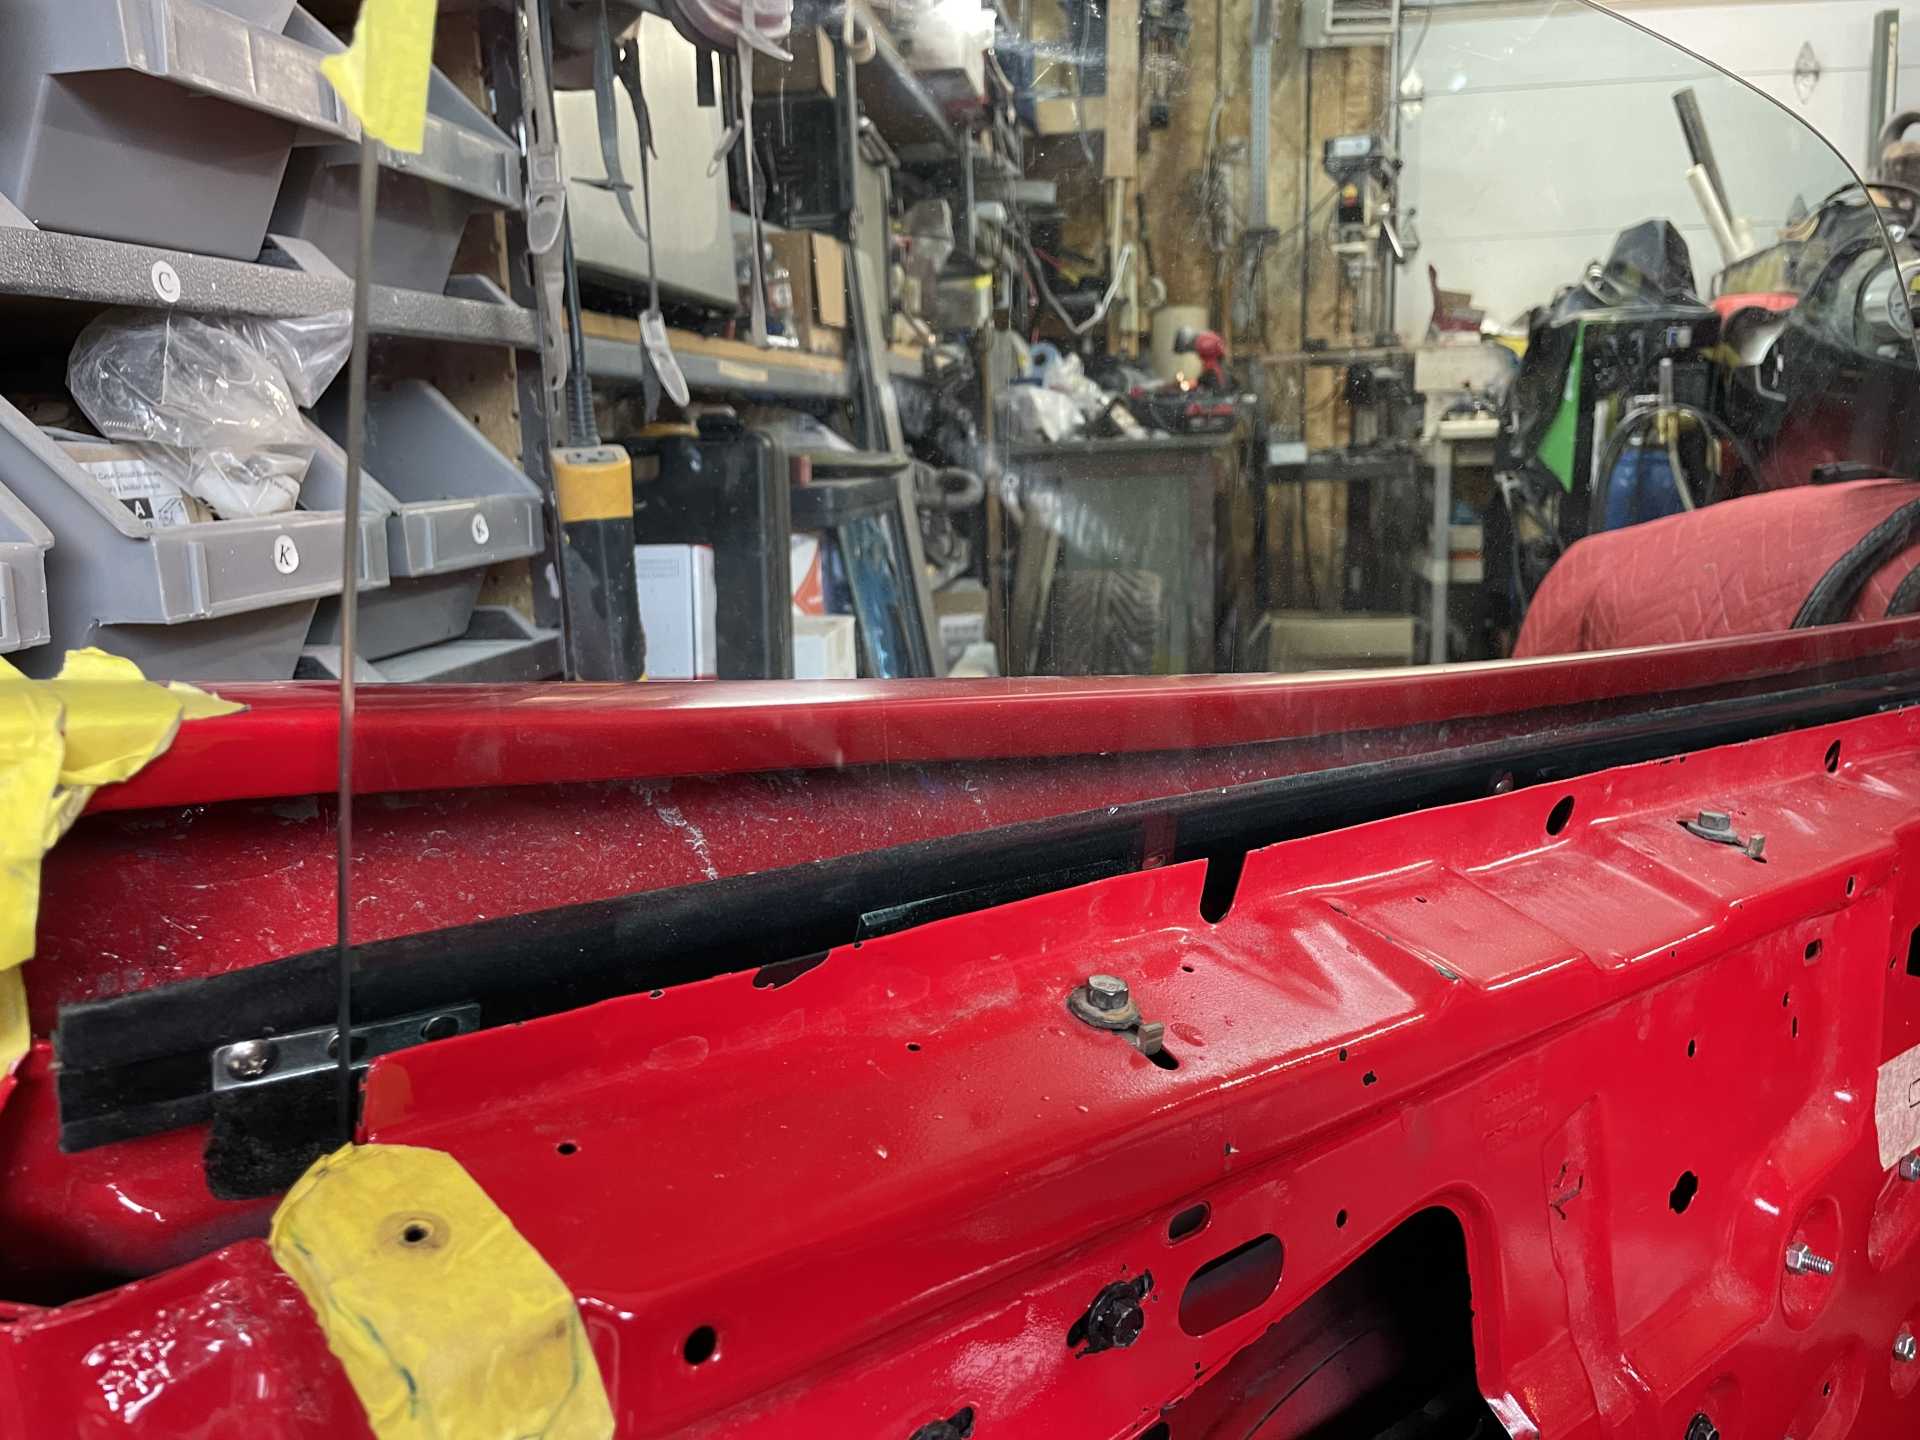
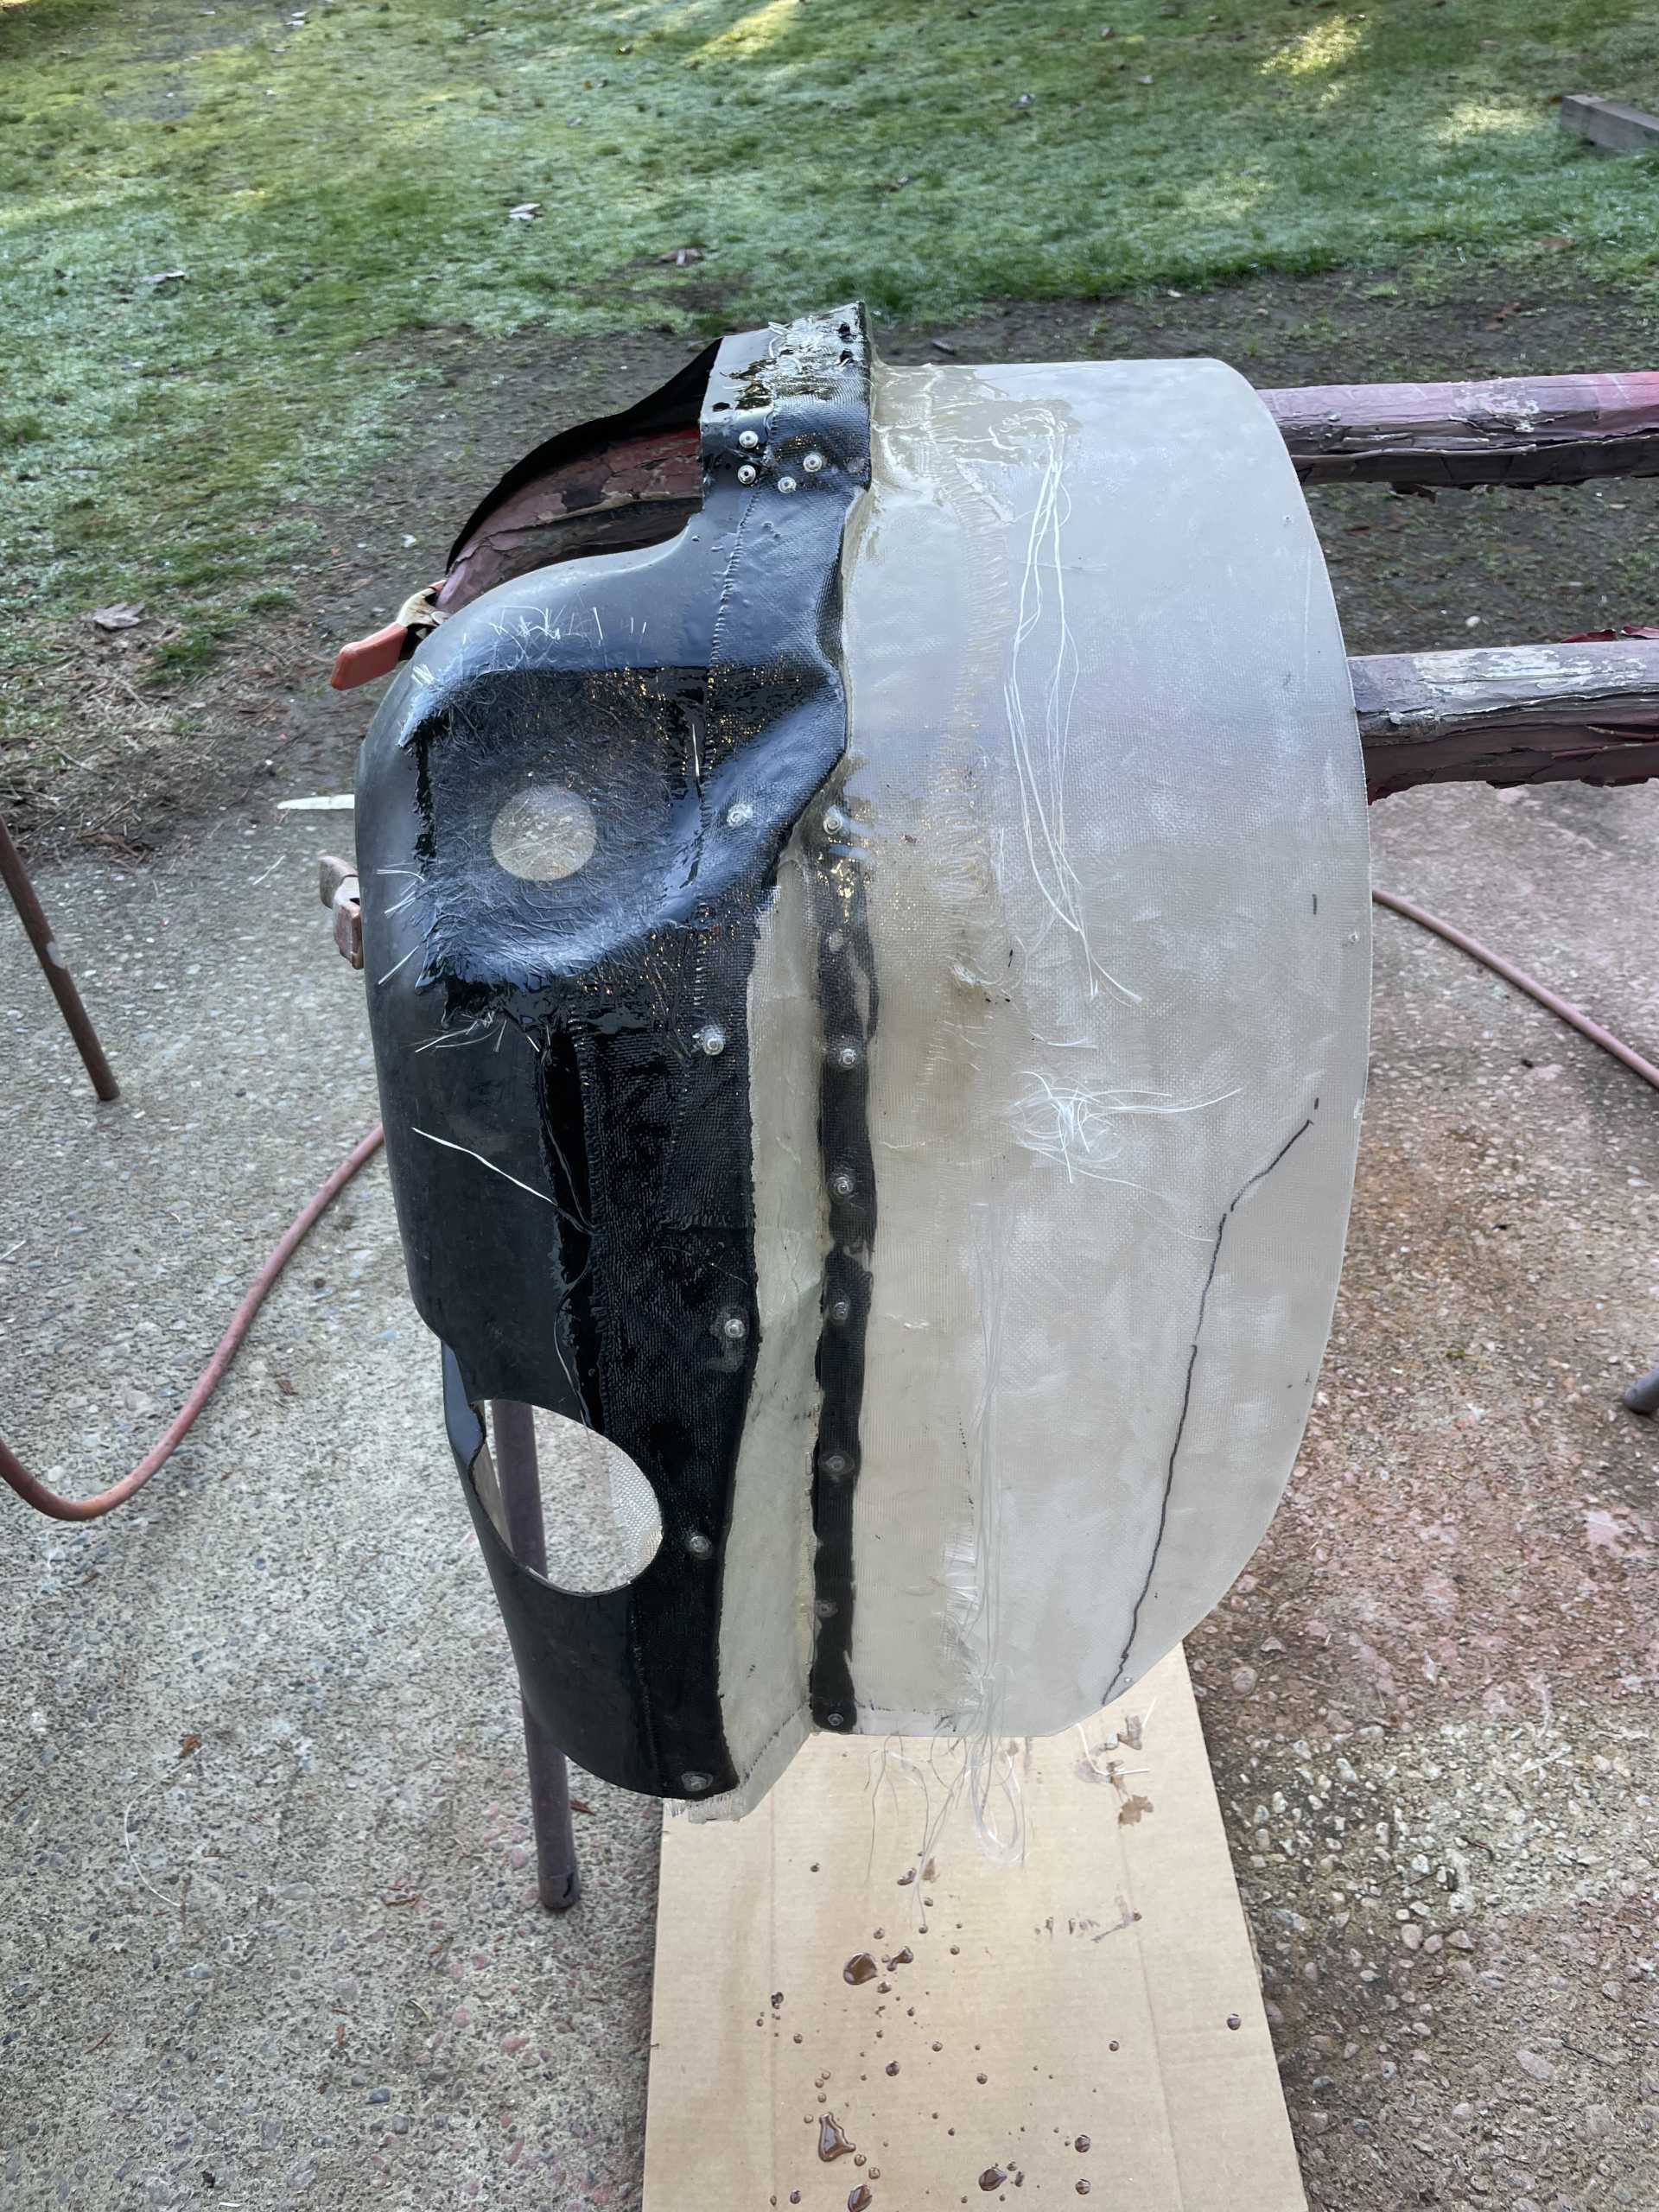
So my buddy Phil talked me into raising the door and make it look more factory, he is a great fabricator and quite honestly I could not have done it on my own..
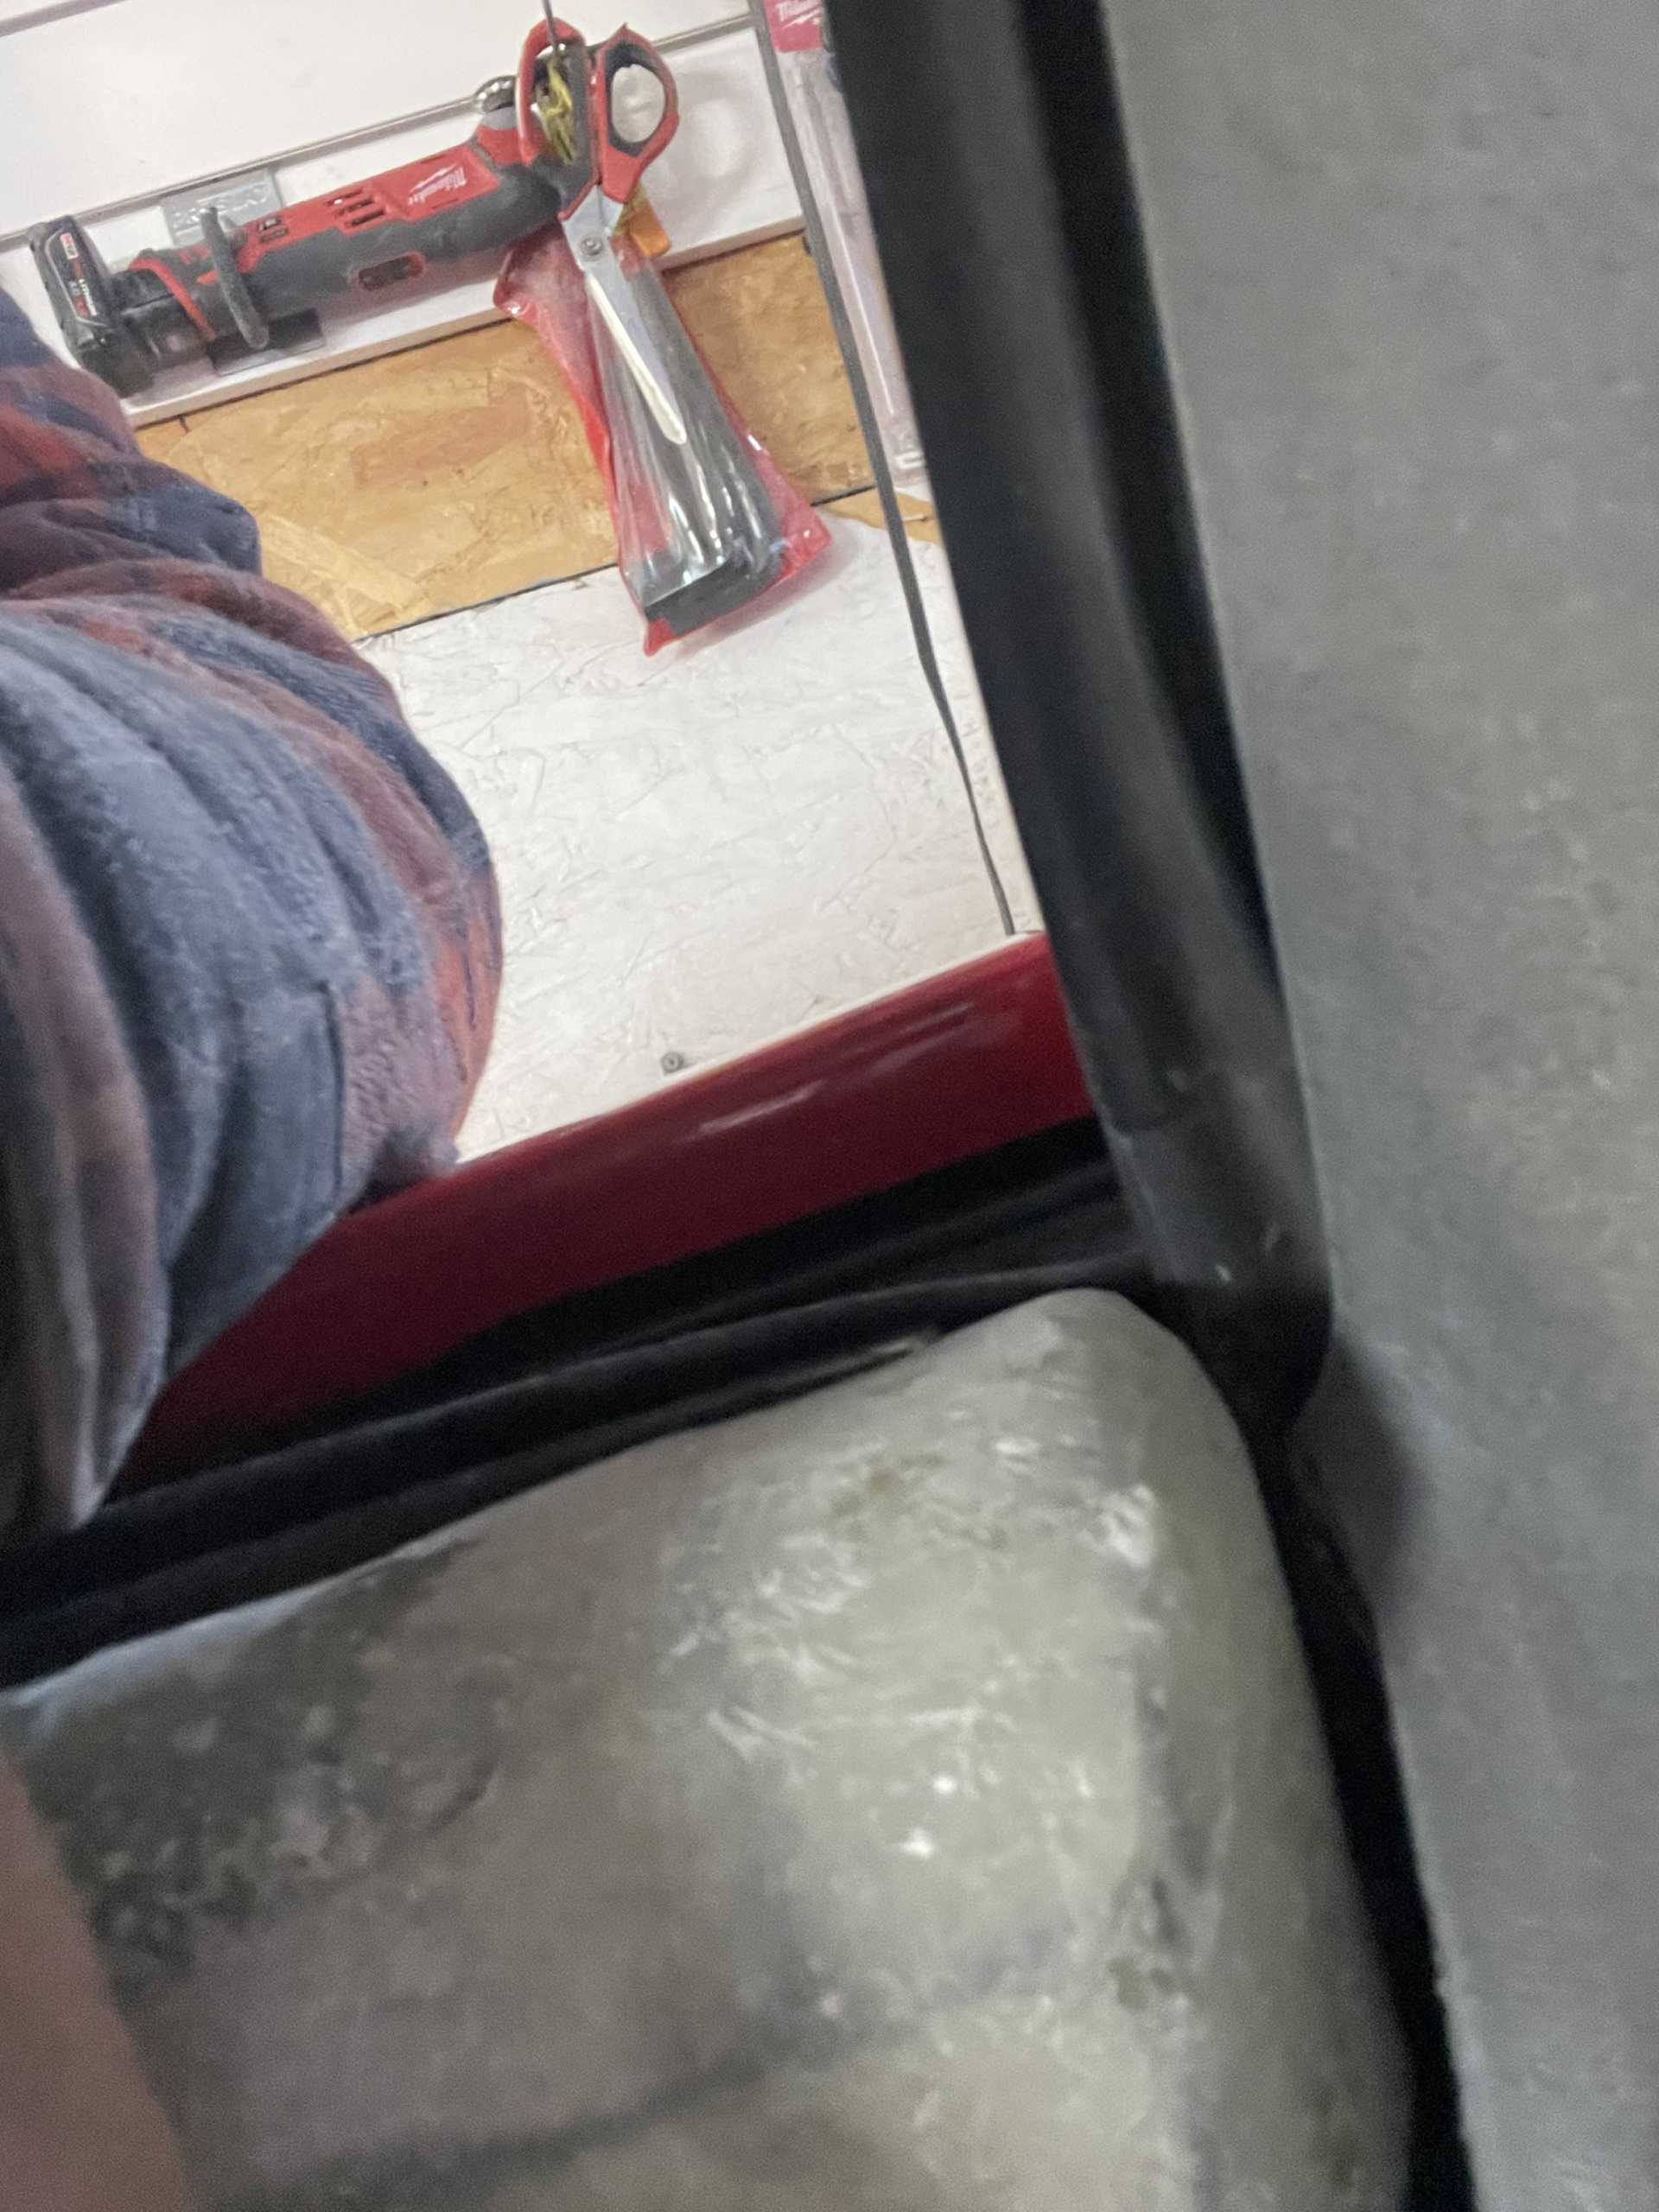
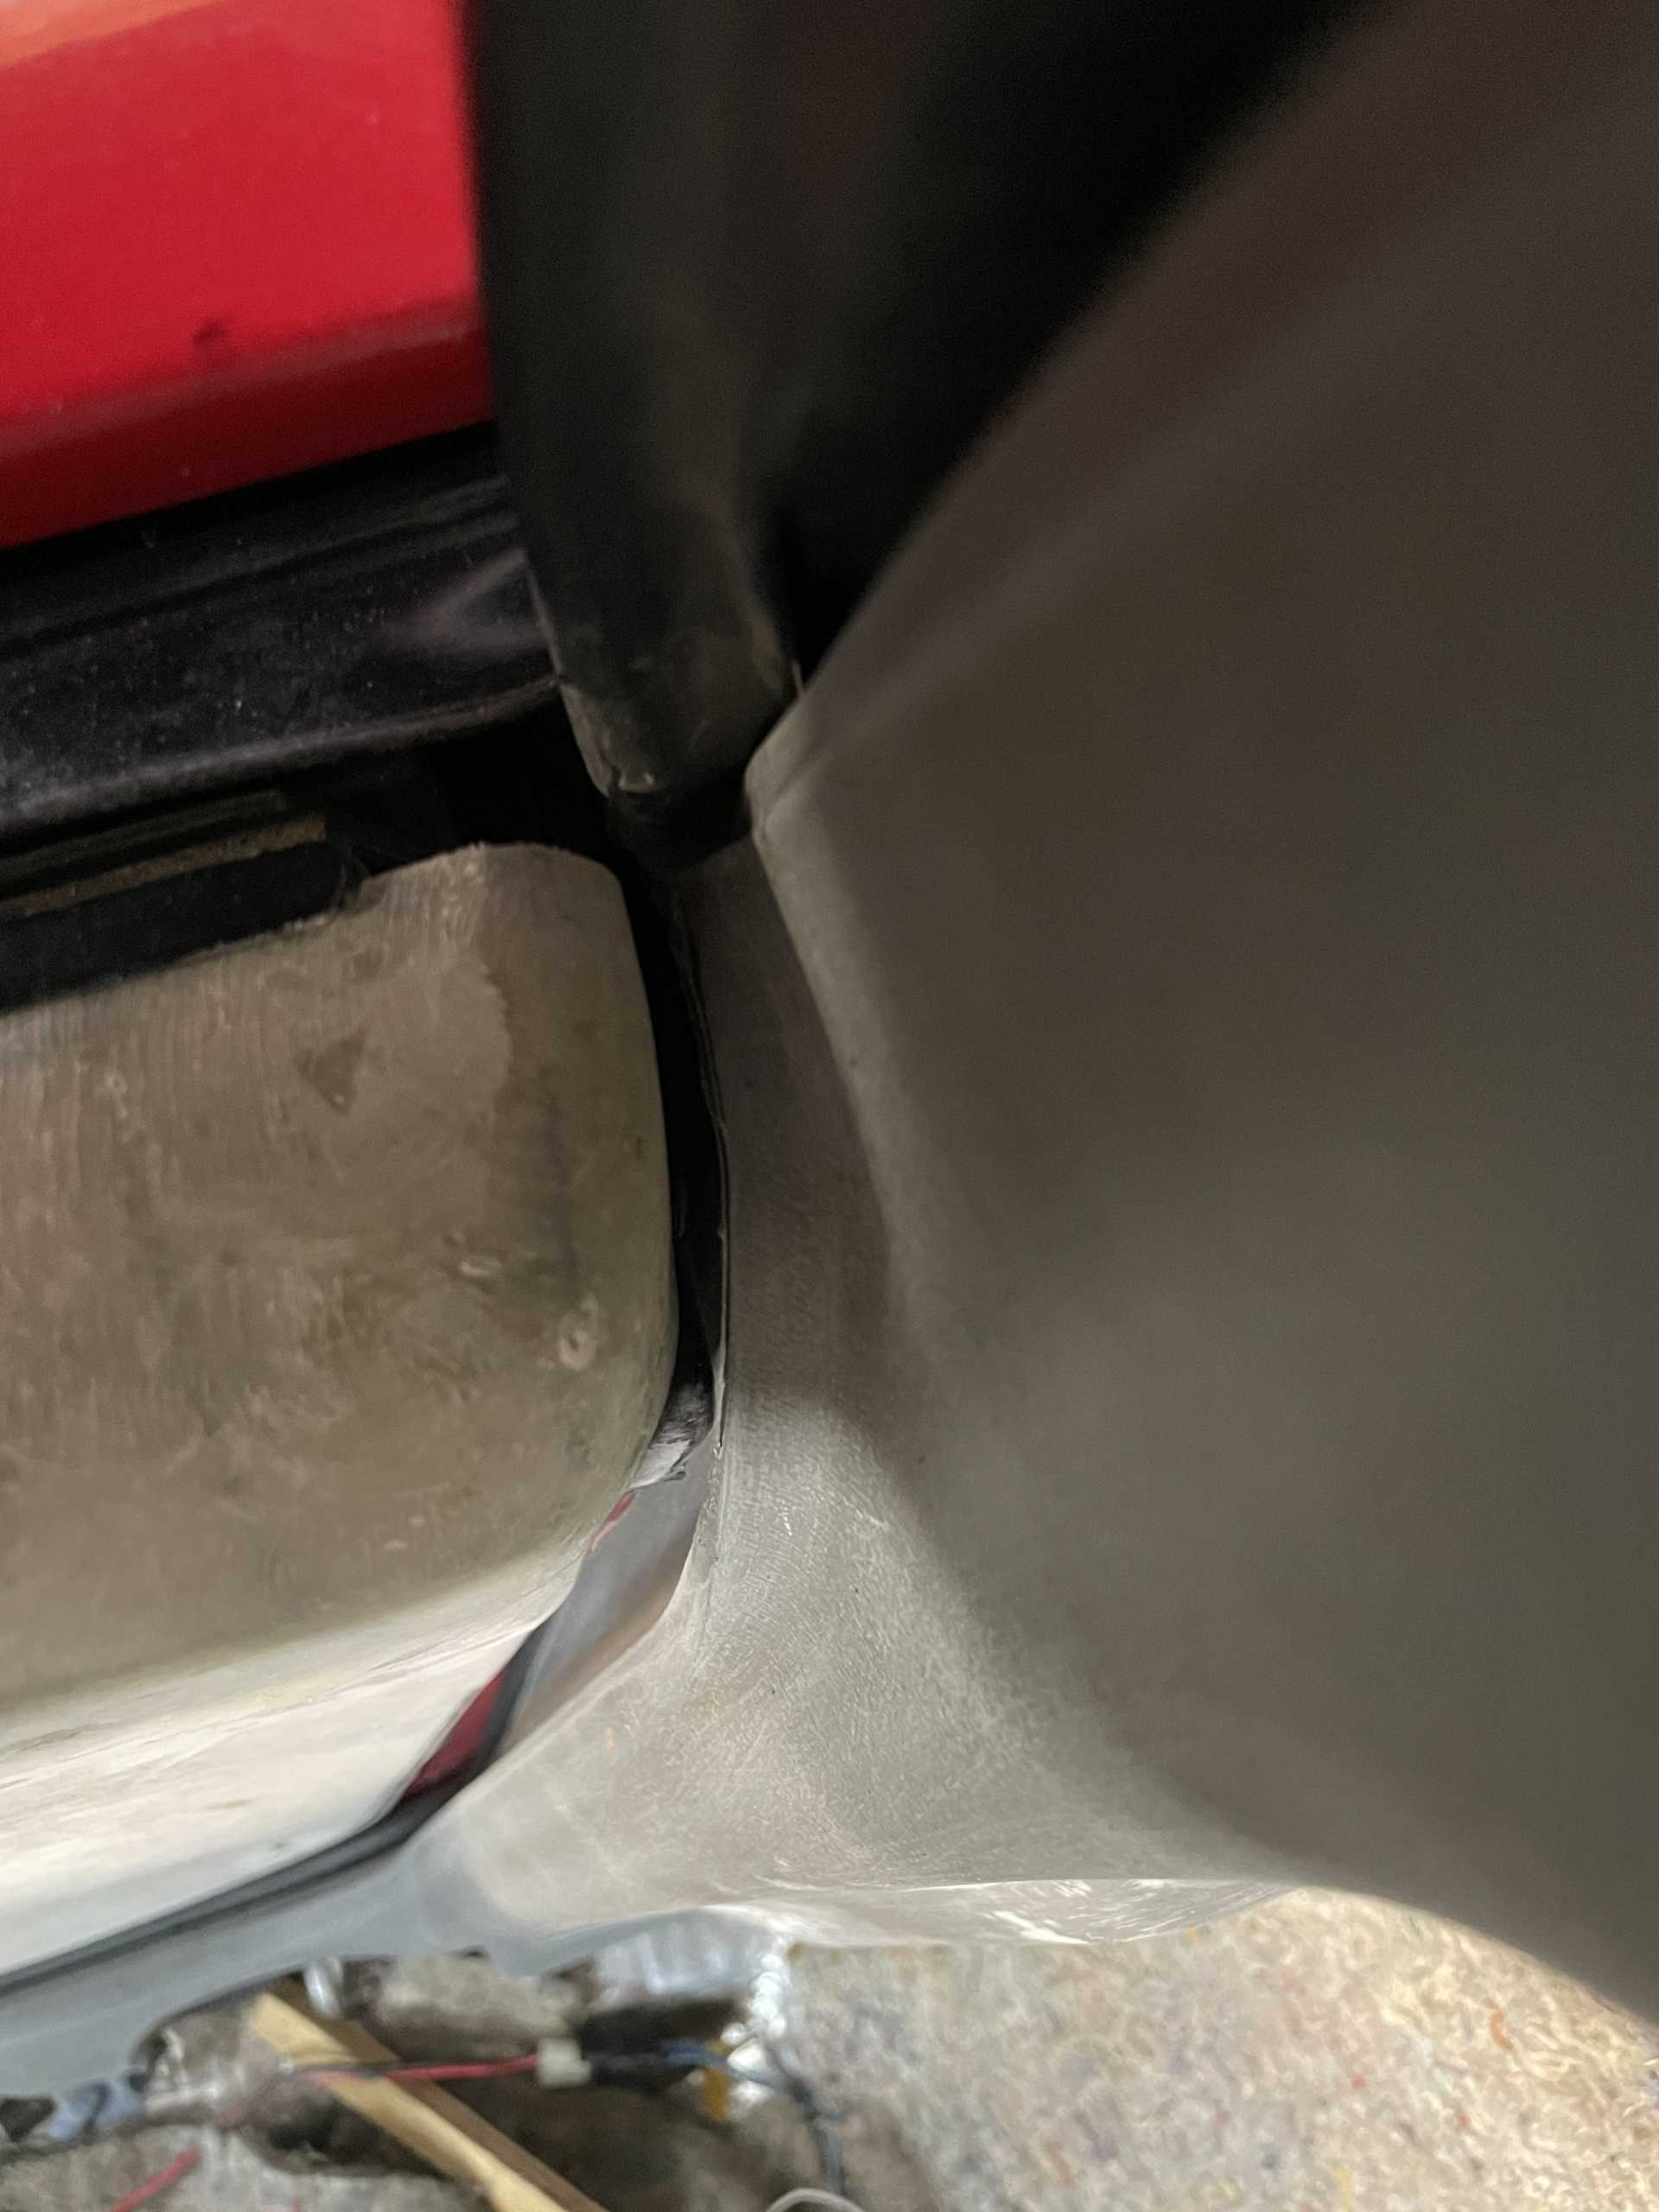
So we started by getting two more doors and cutting the tops off
We measured and determined they needed to be raised 1 3/8” up for both inner and outer window felts
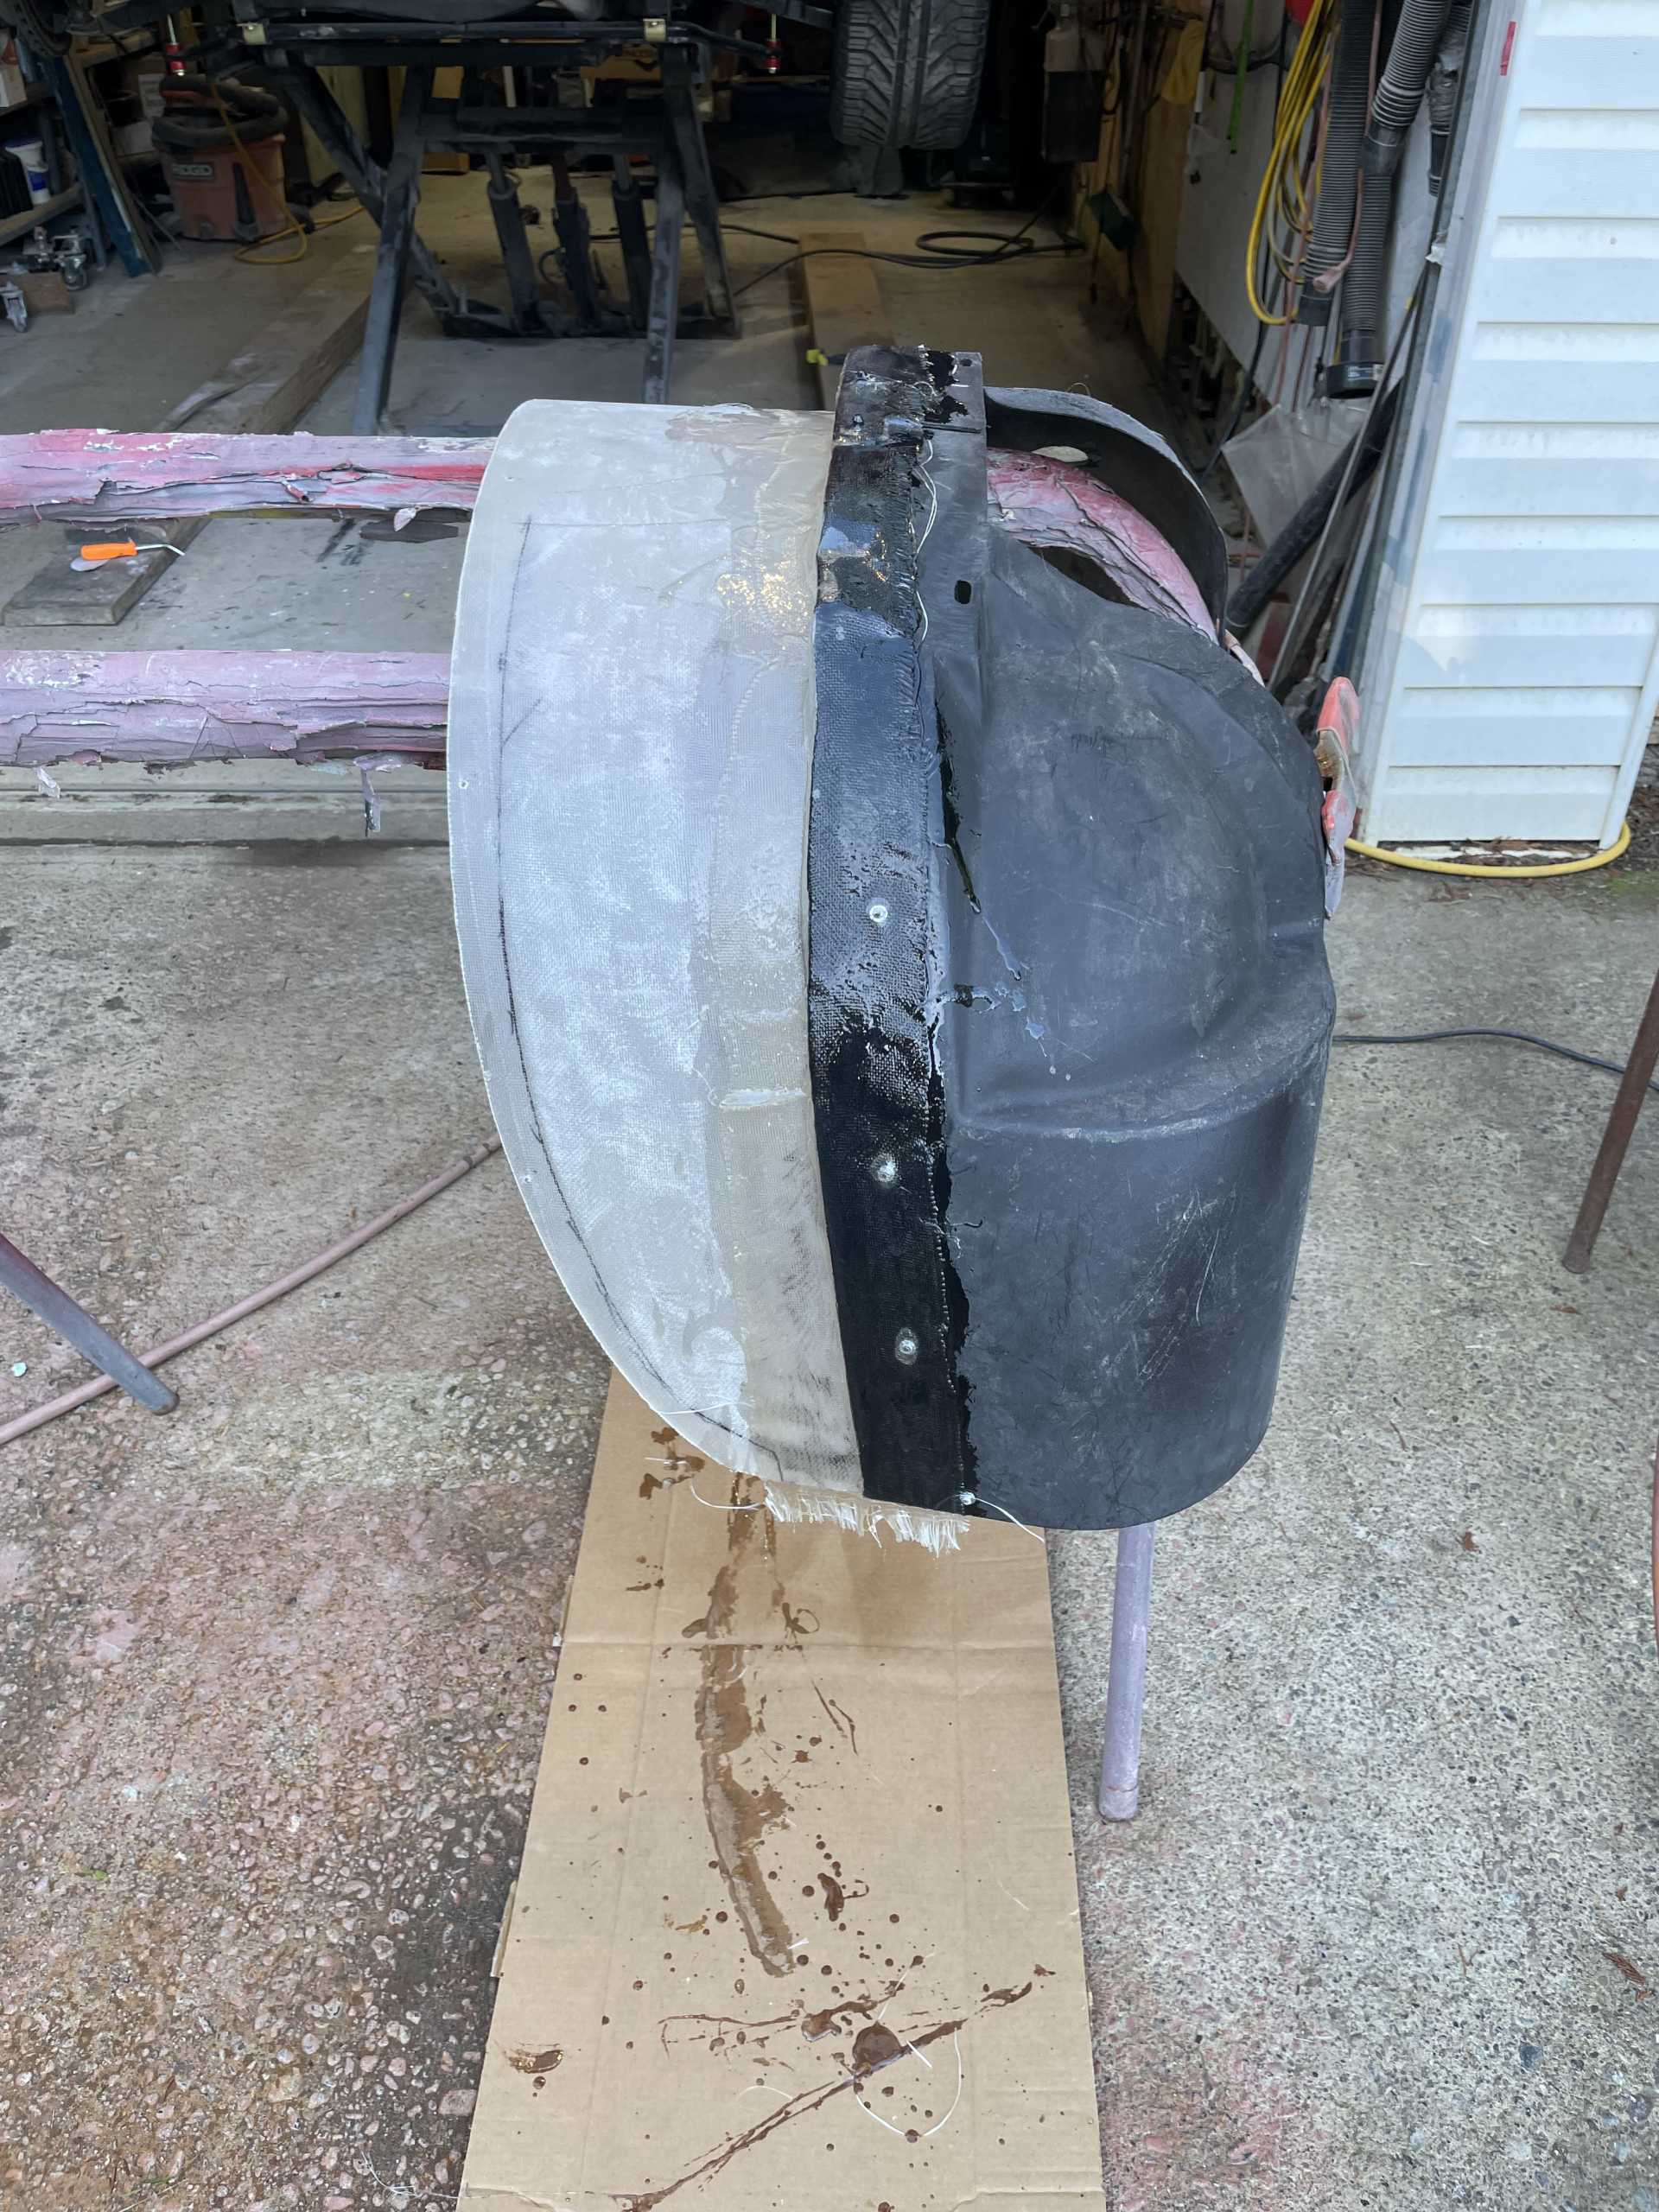
We tac welded everything in place and test fit the felts and window to ensure proper movement and fit .
Then removed the window for probably the 10th time in the process. And finish welding everything
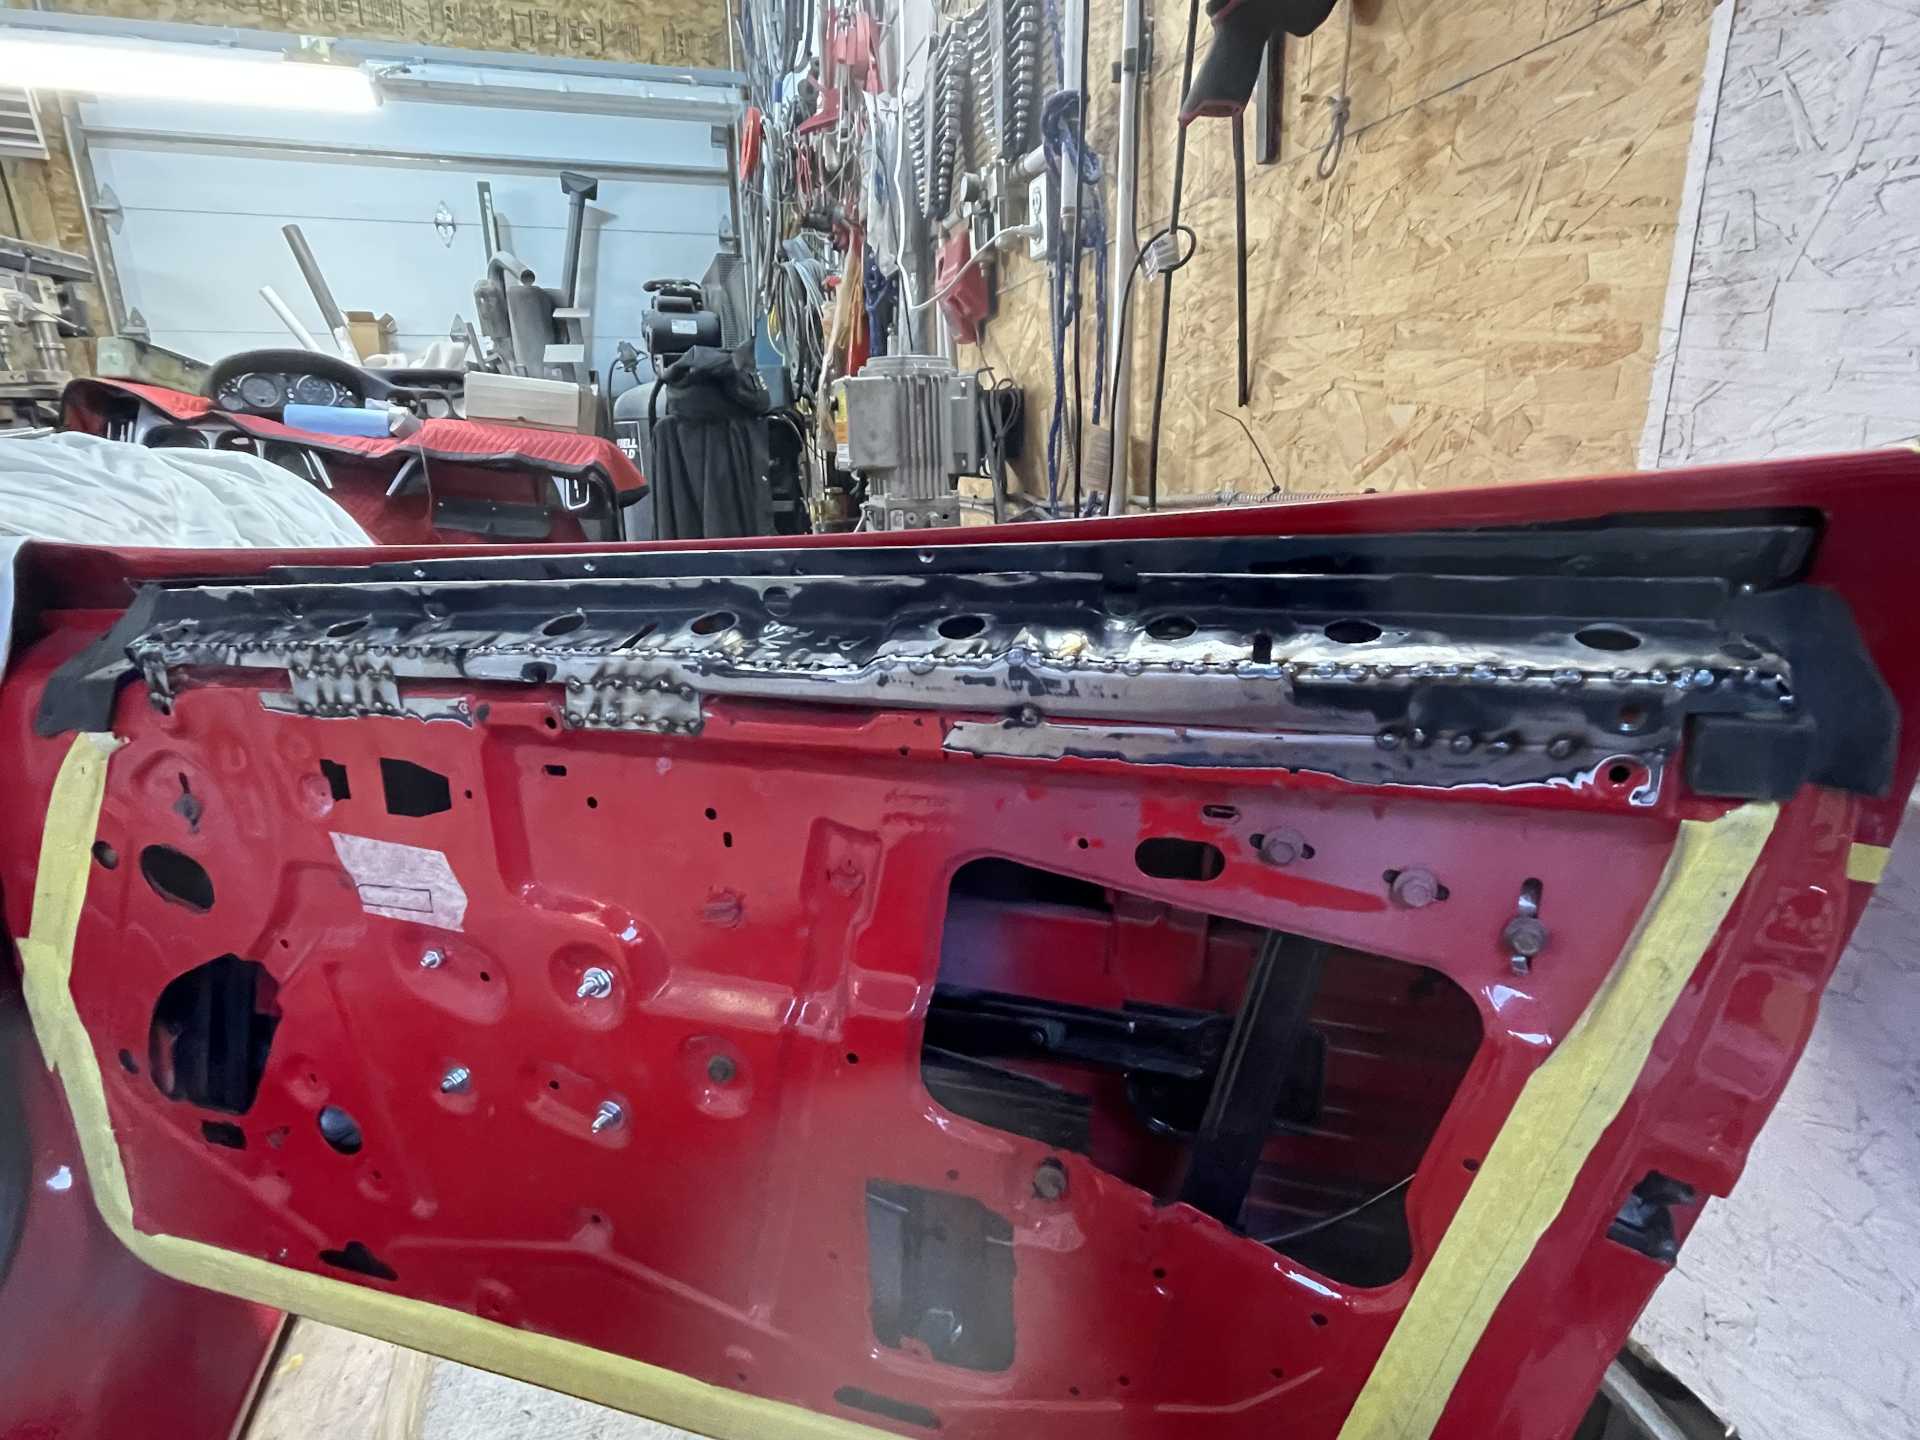
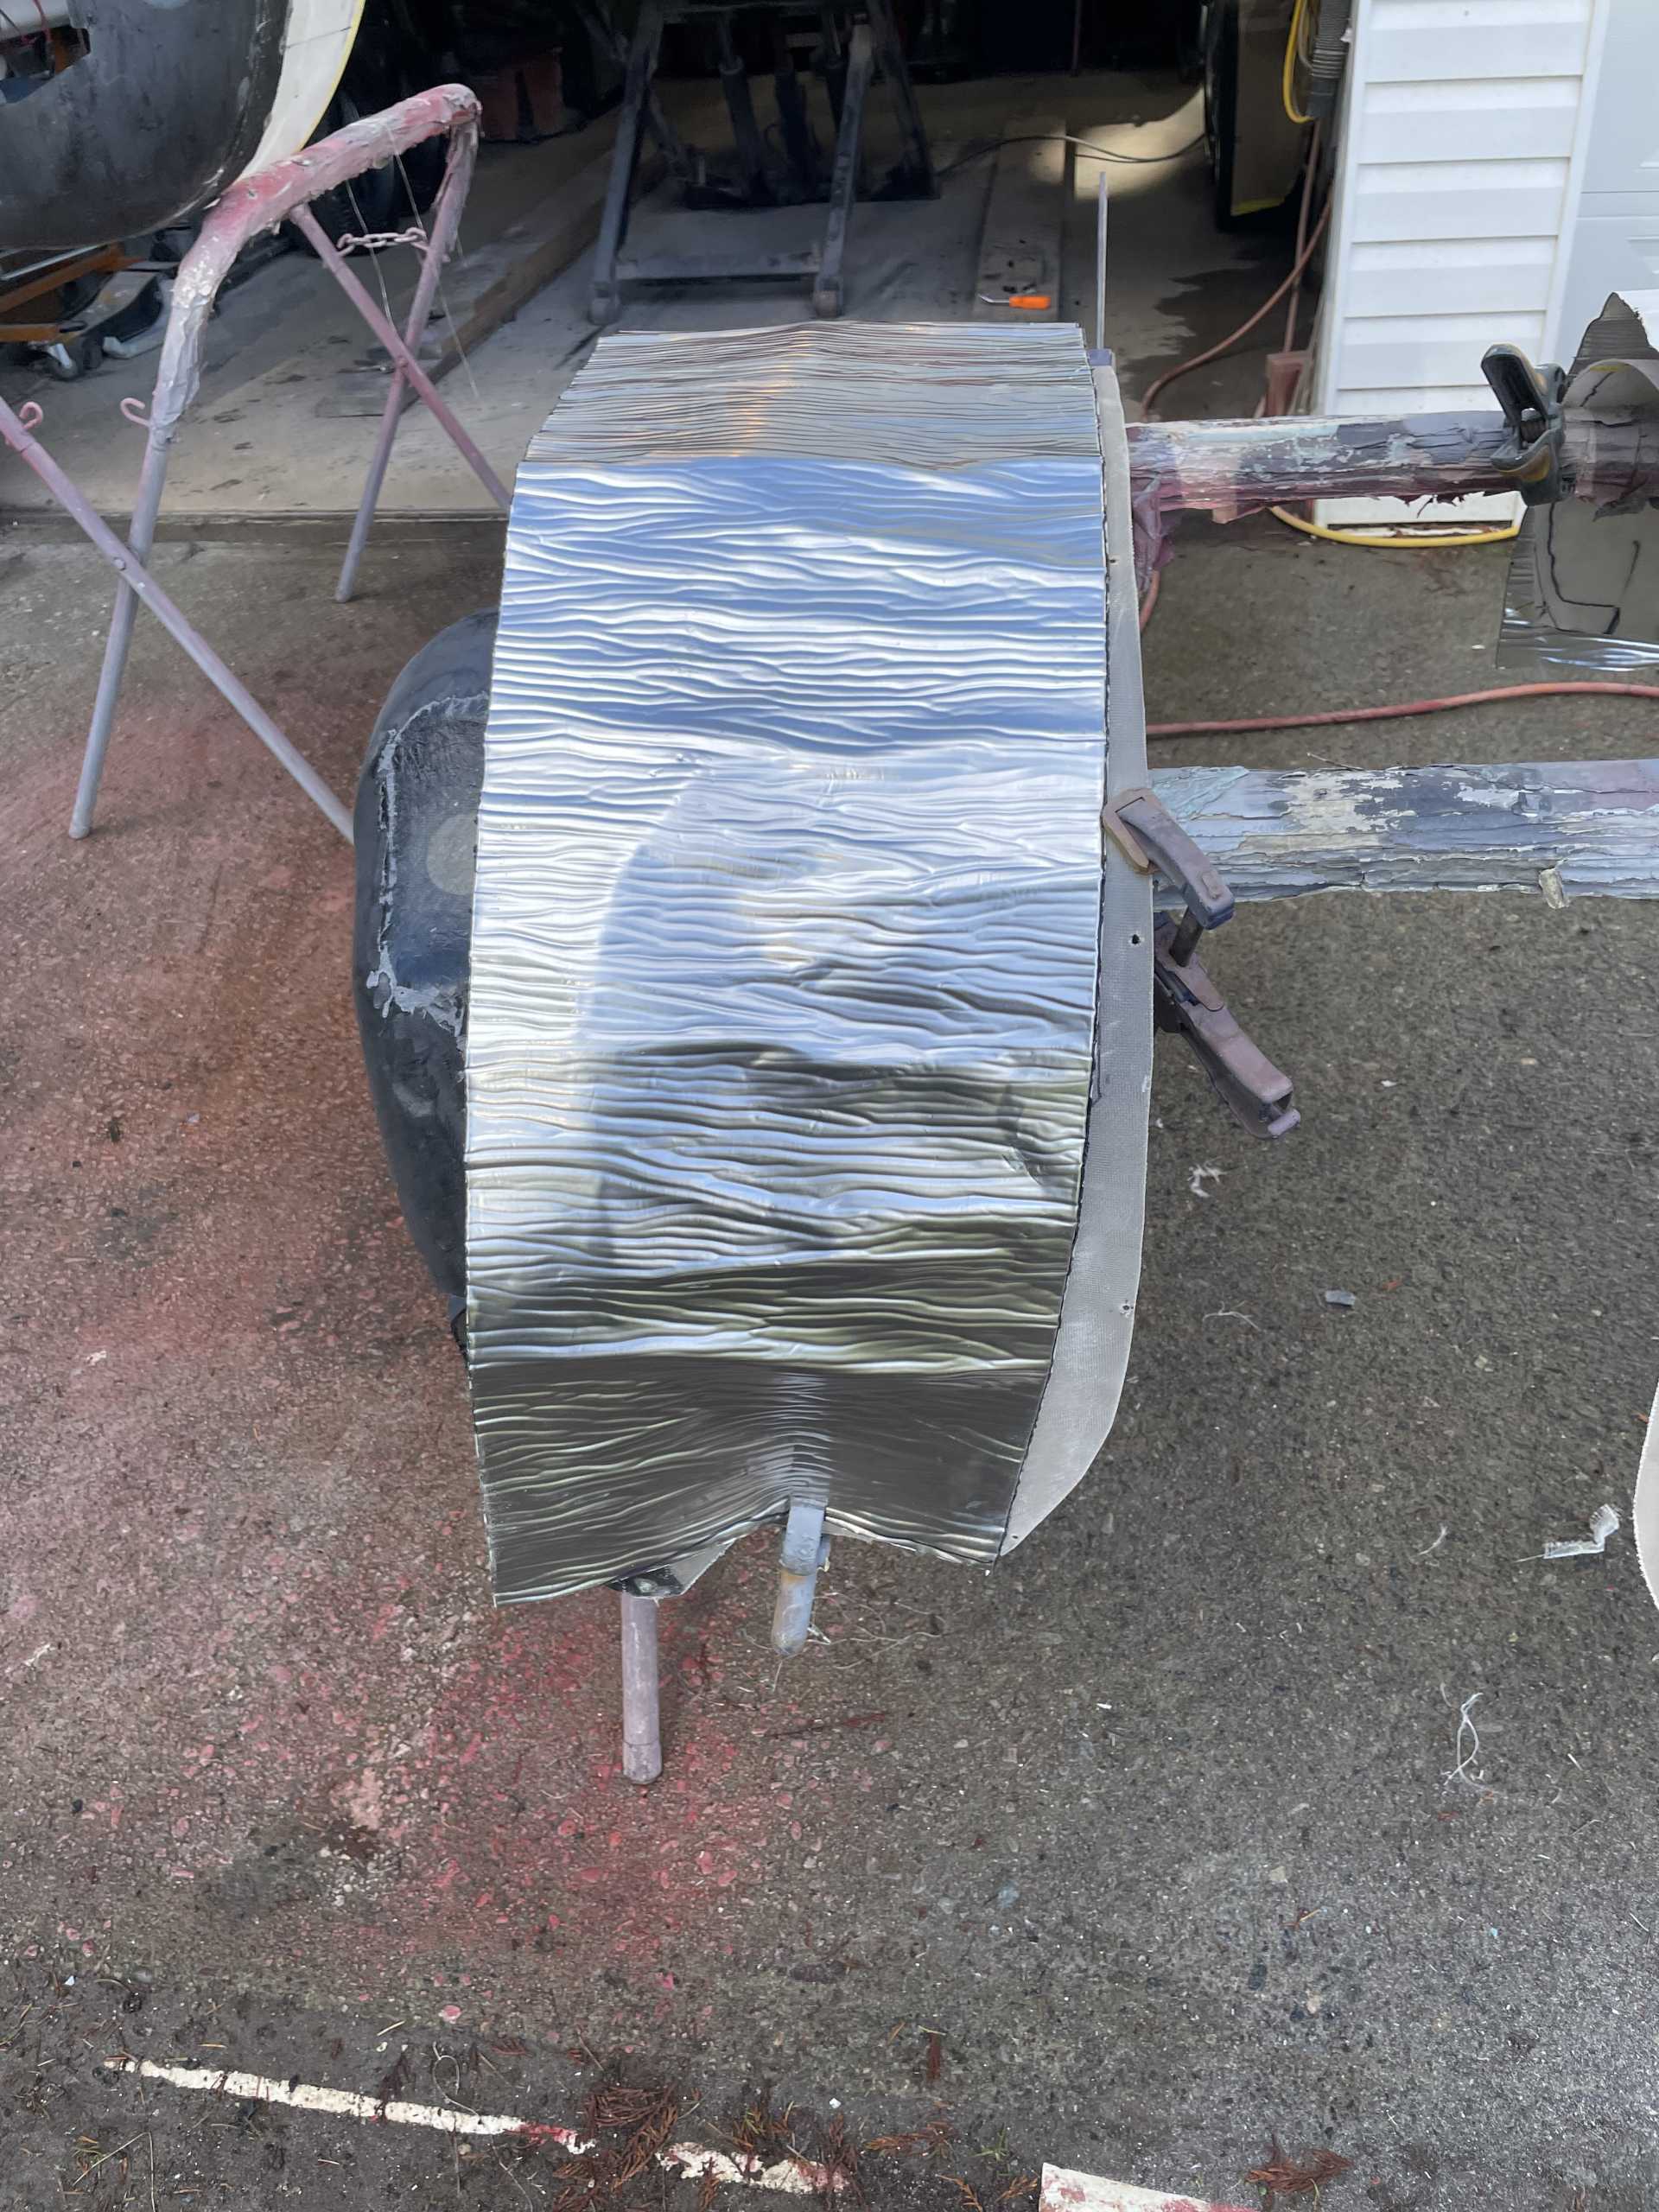
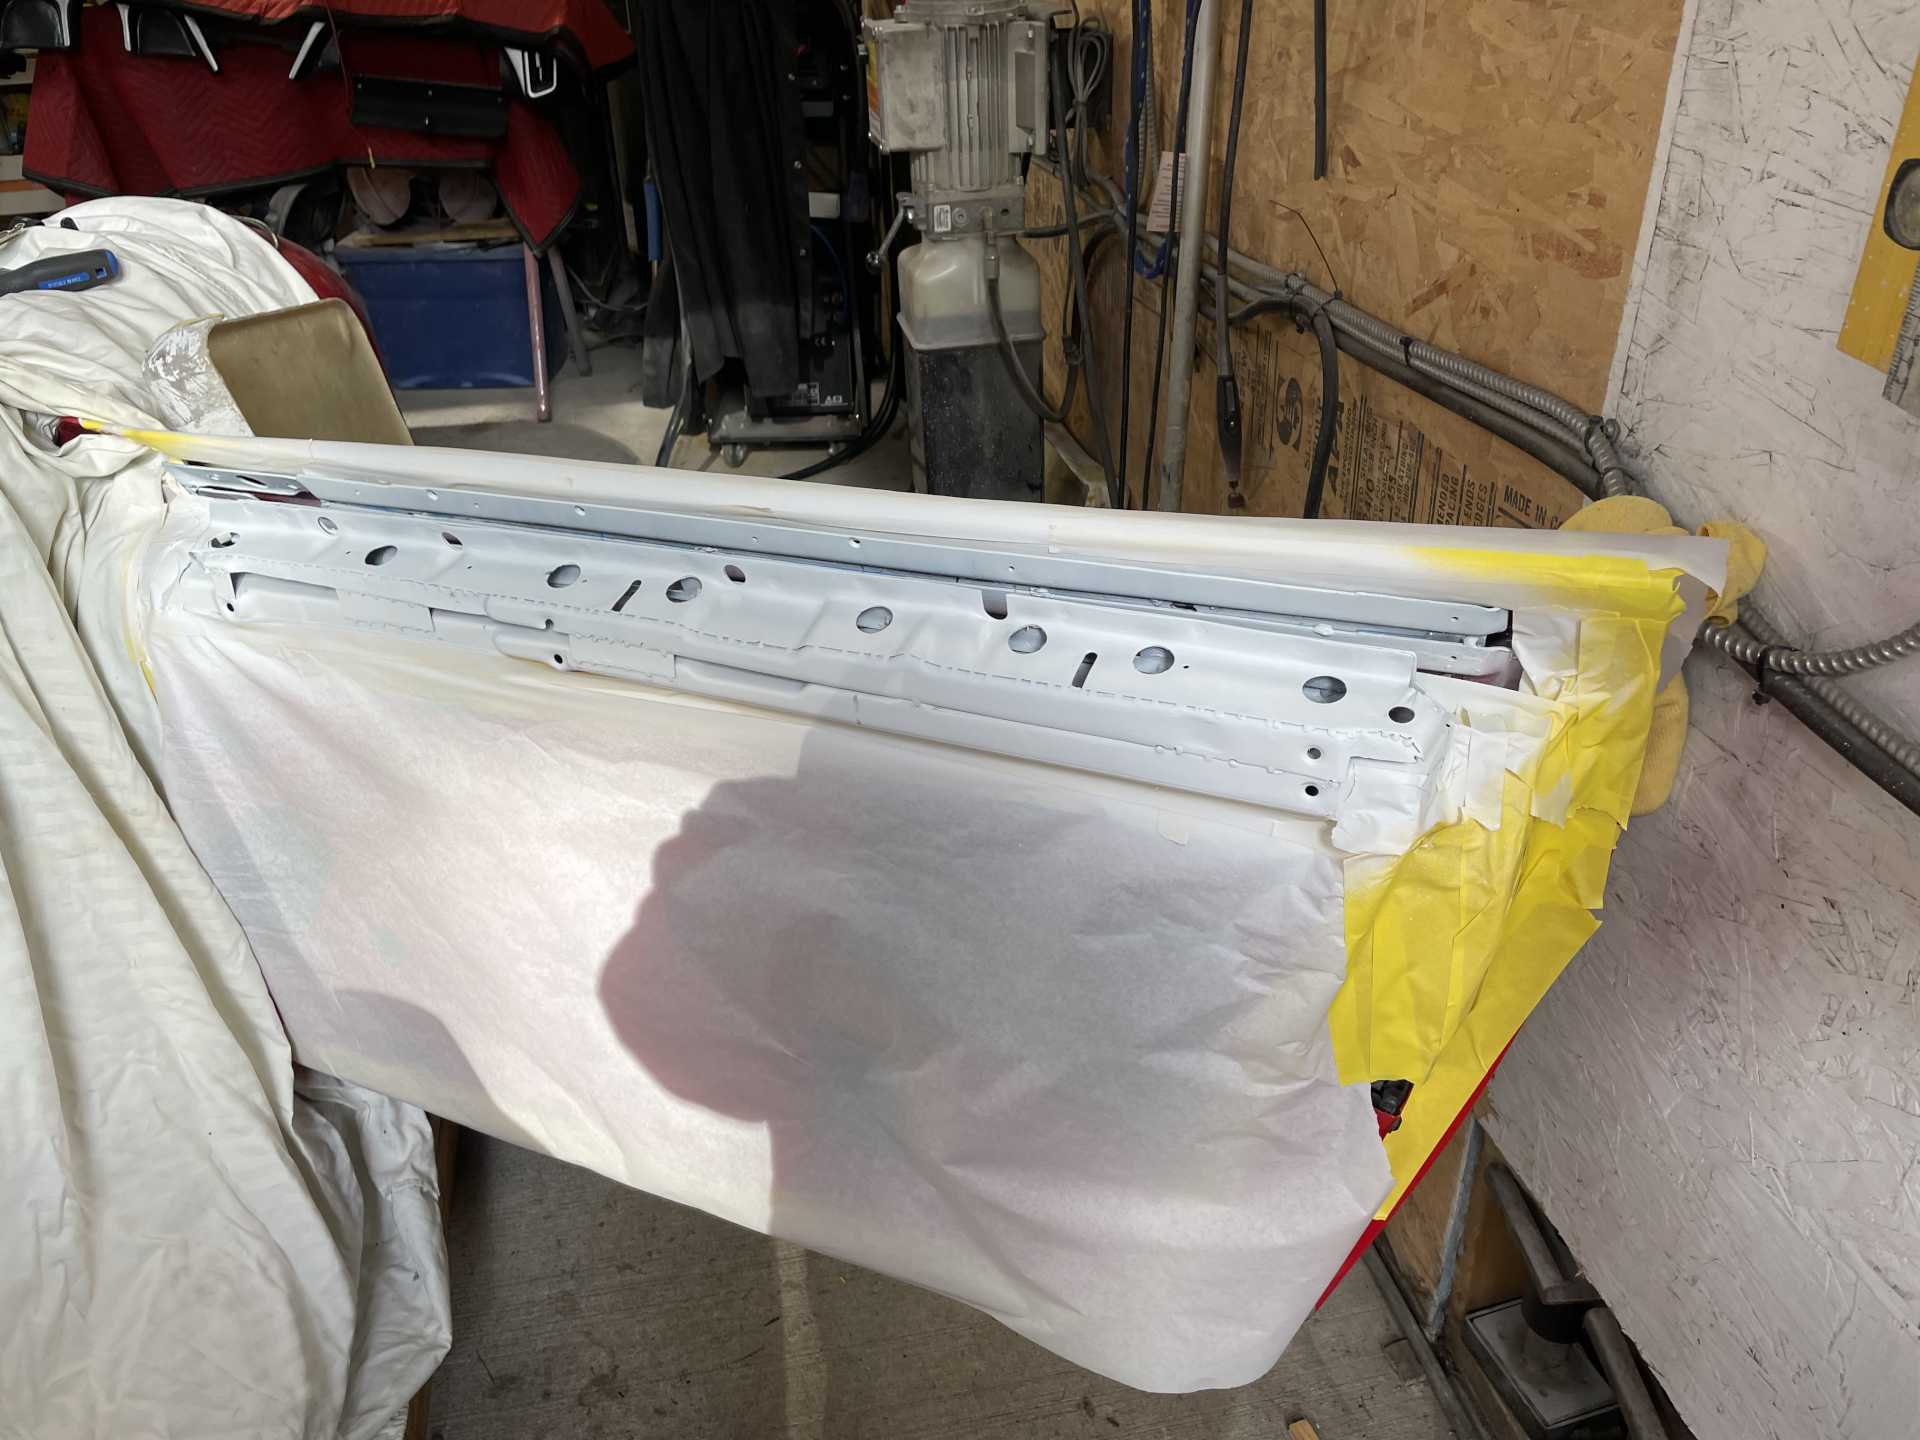
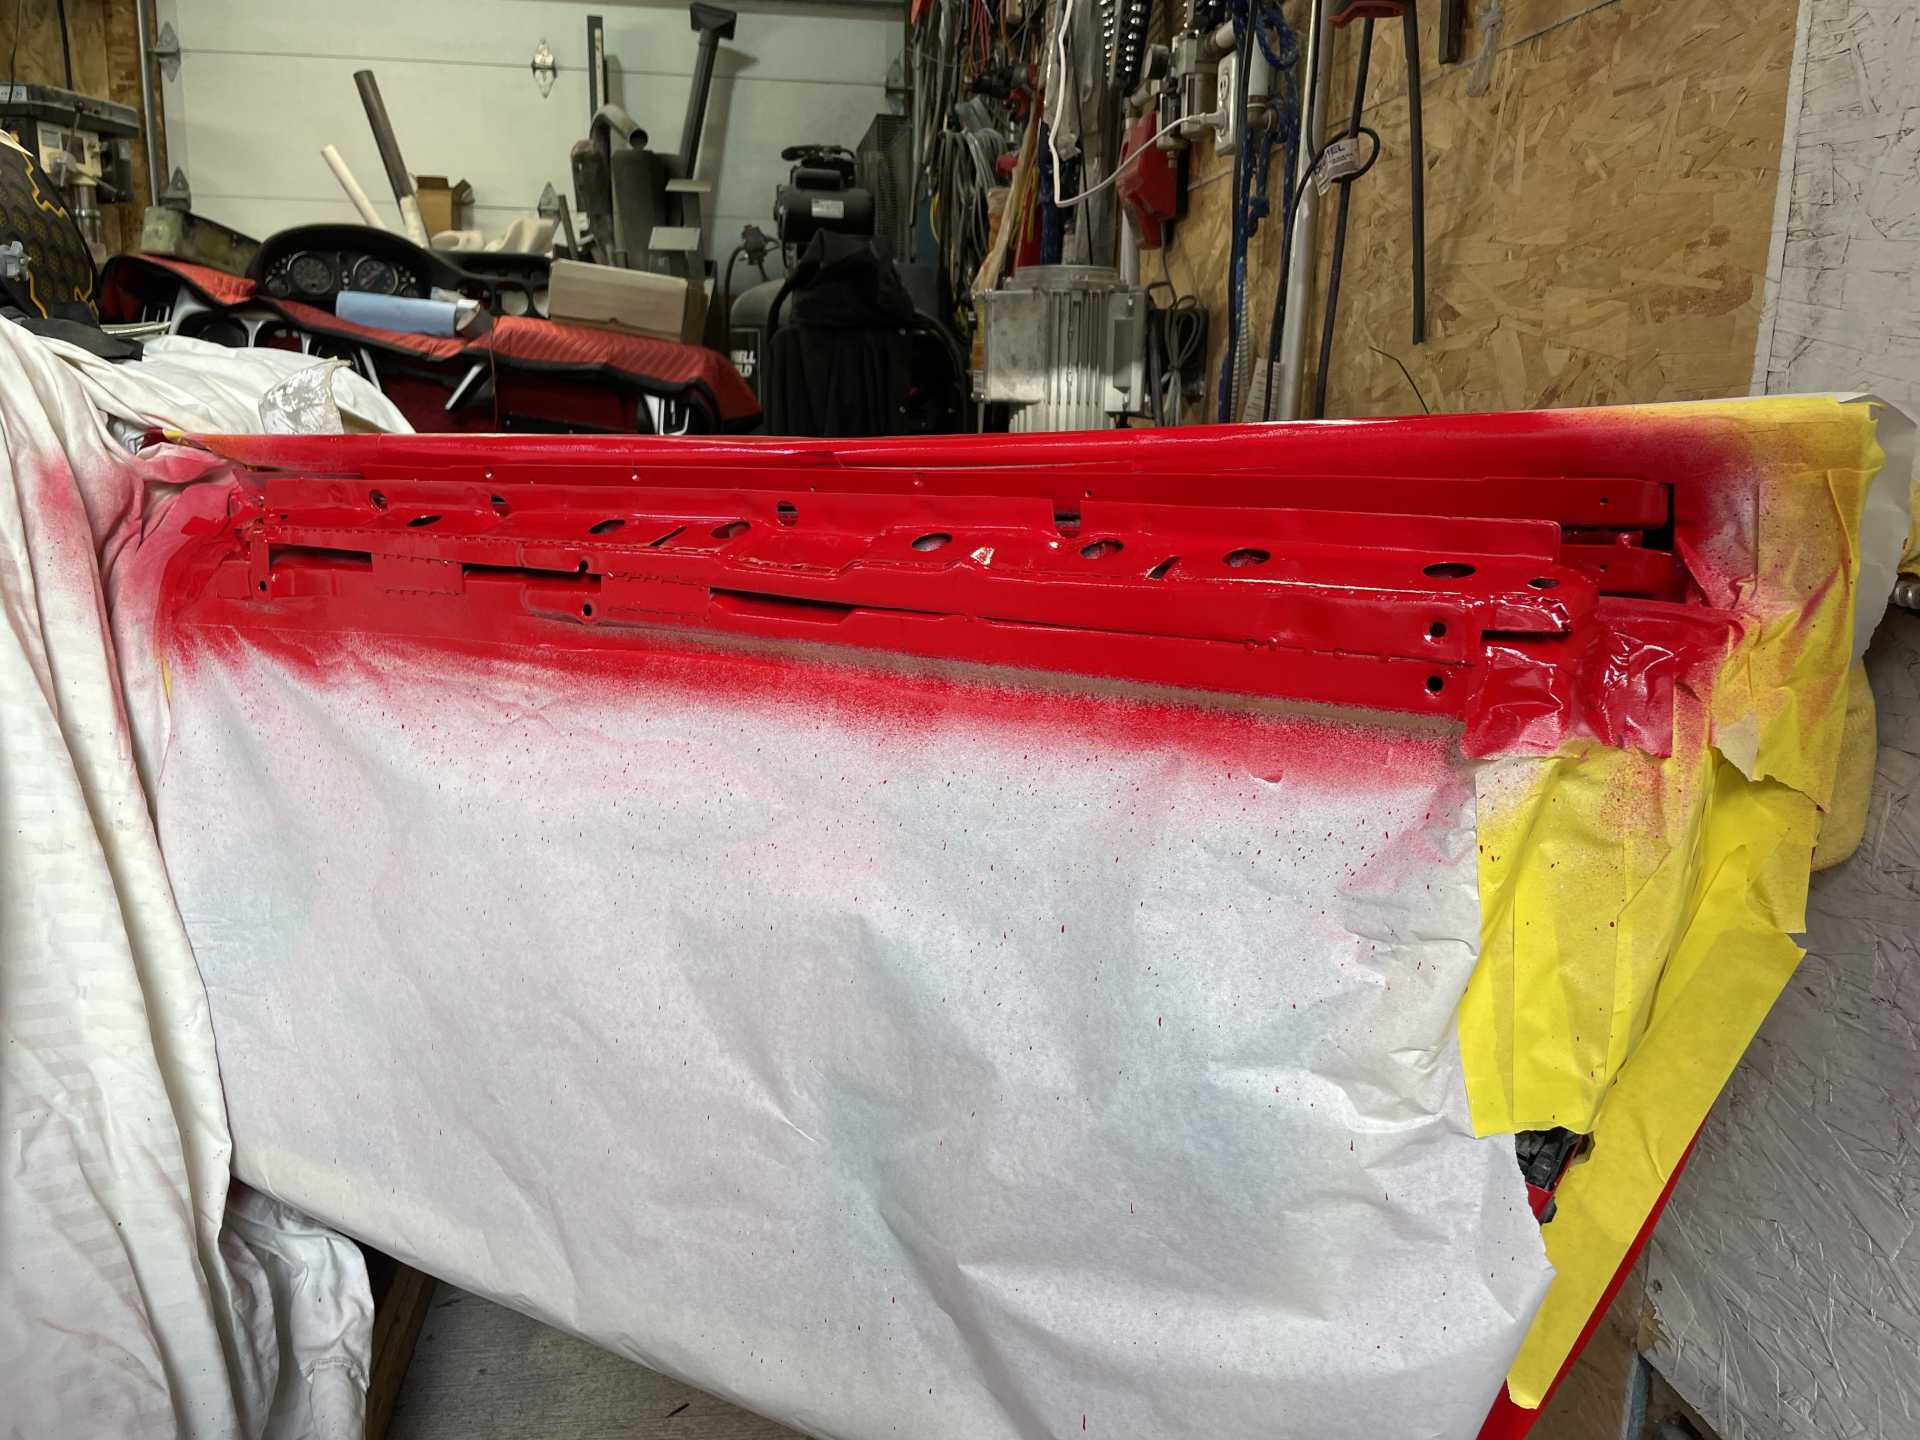
Then cleaned up the tack welds and prepared for Color painting
I have to strip out the doors one last time to clean all the grinding dust and crap before putting the doors together for hopefully the last time.
Thanks for looking
Wayne
|
|
|
|
dobie1
|
MAR 03, 08:47 PM
|
|
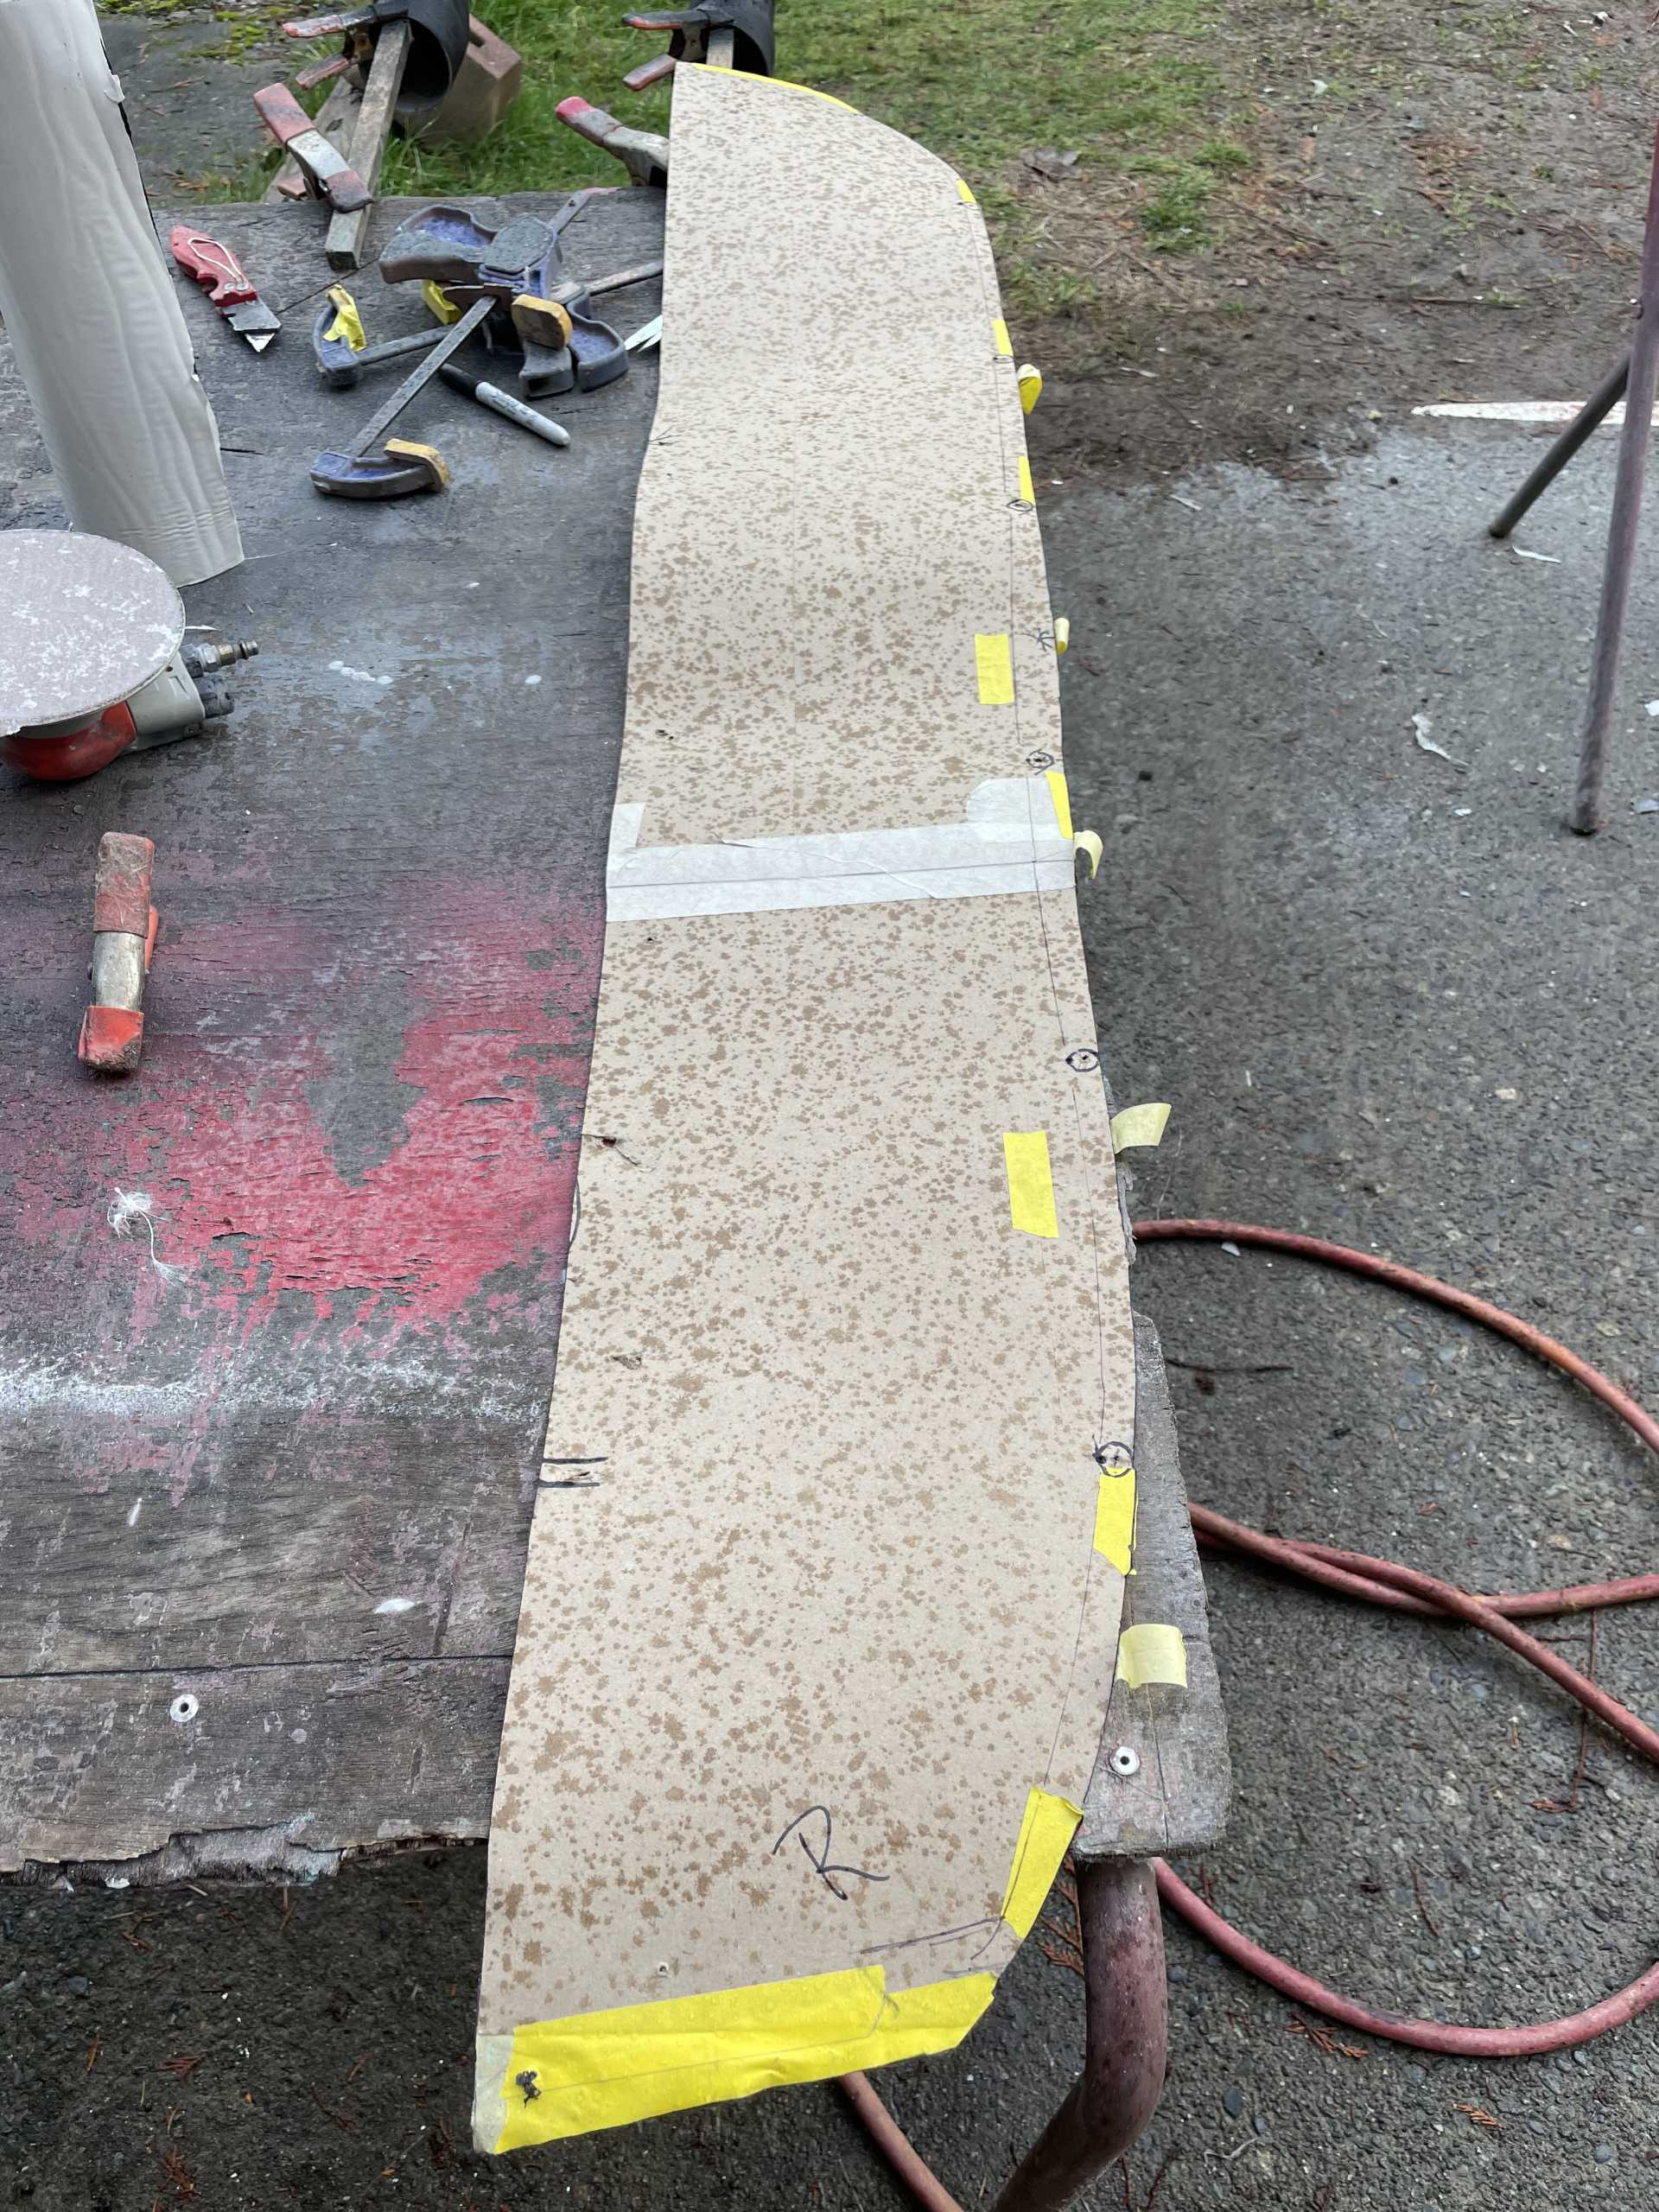
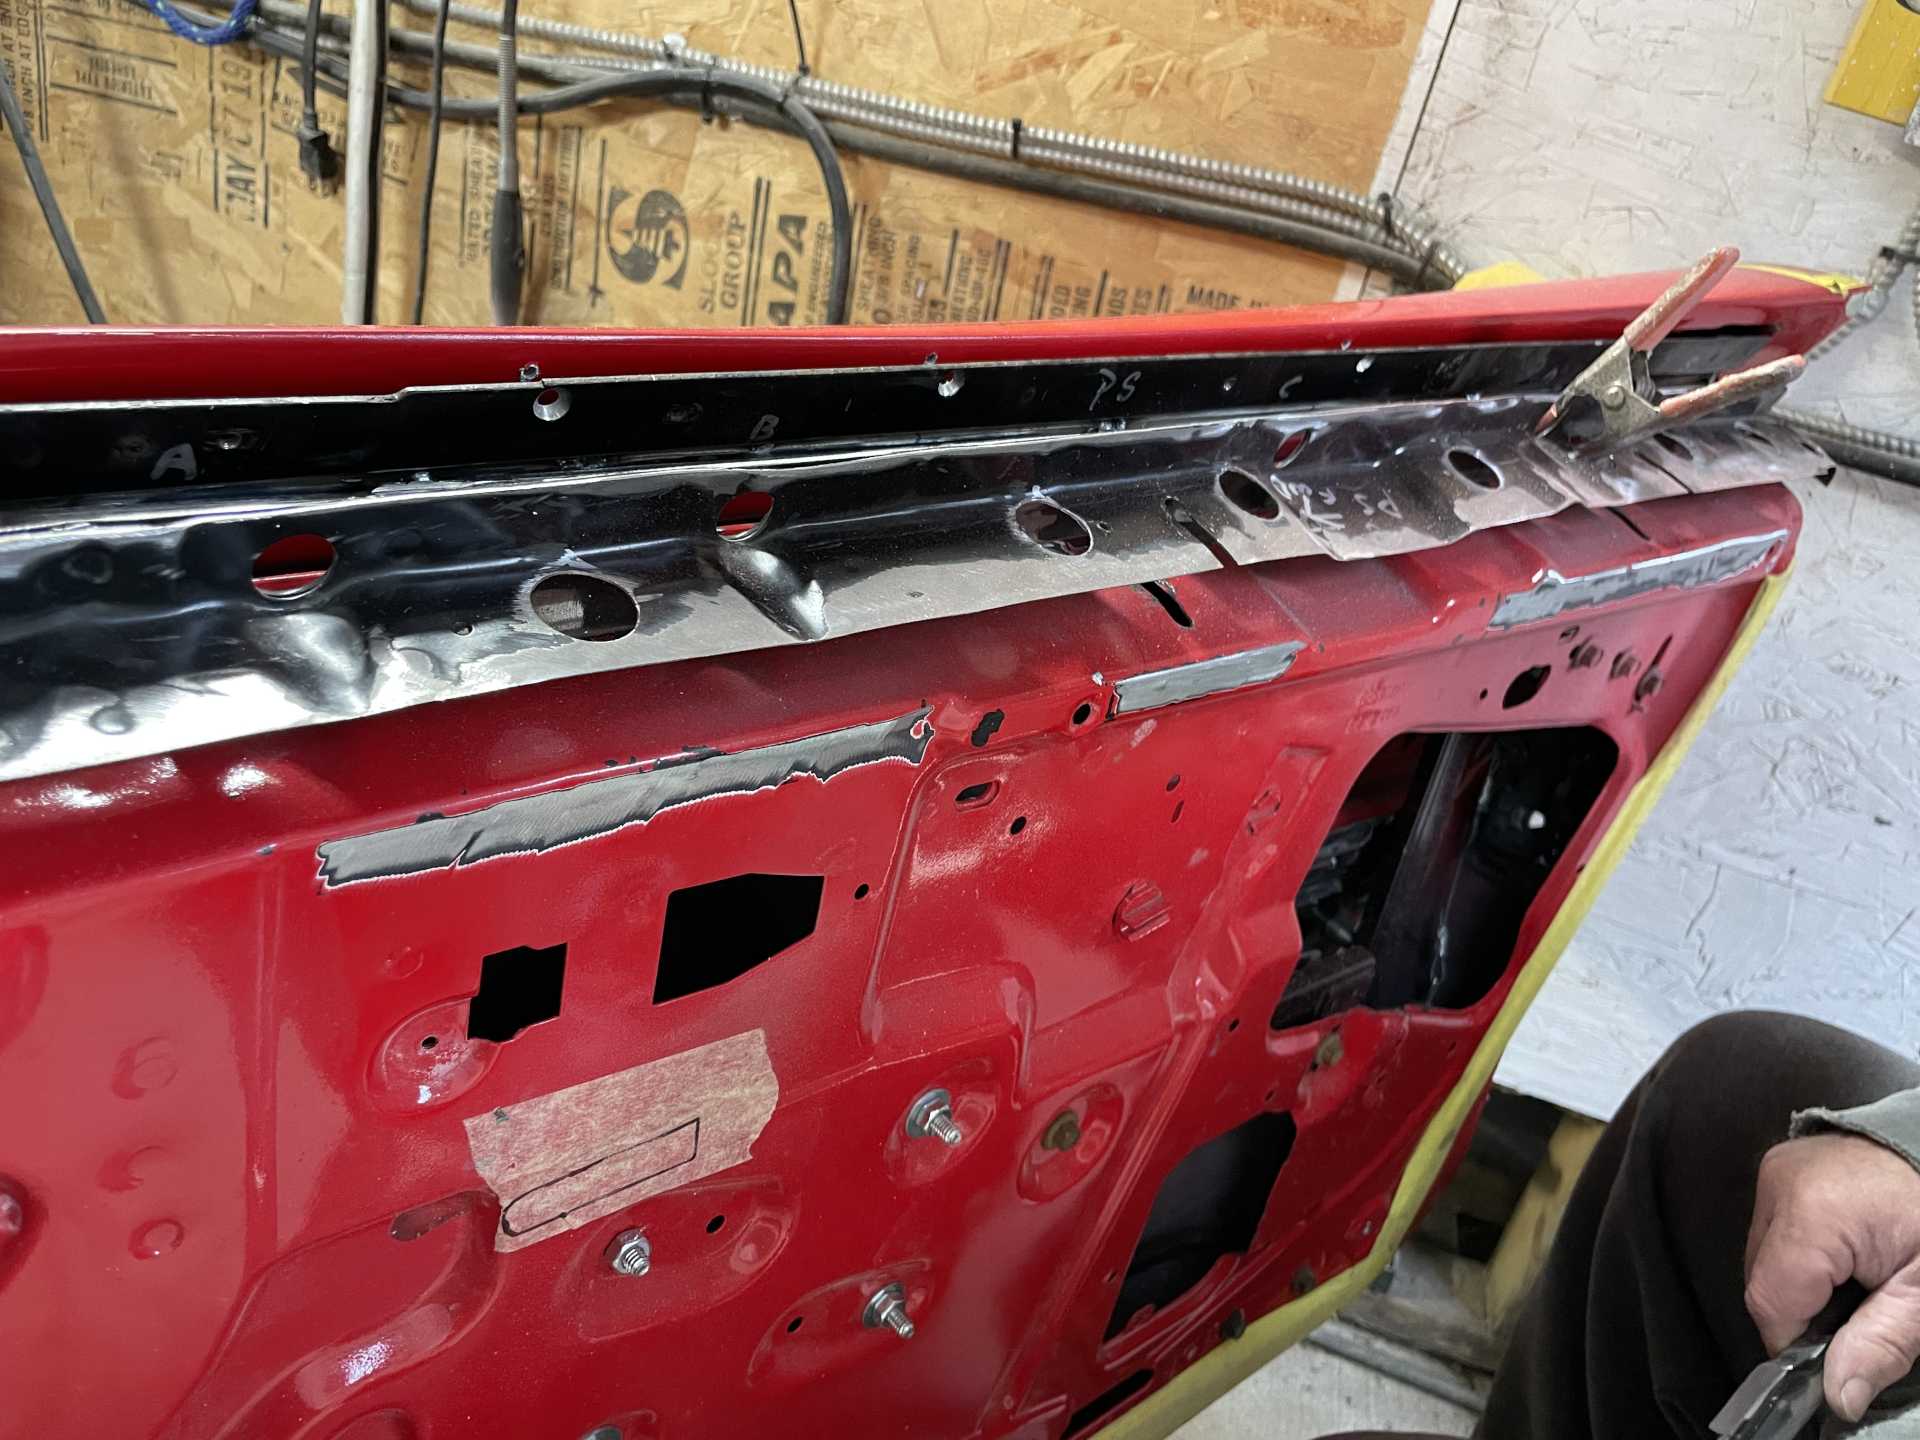
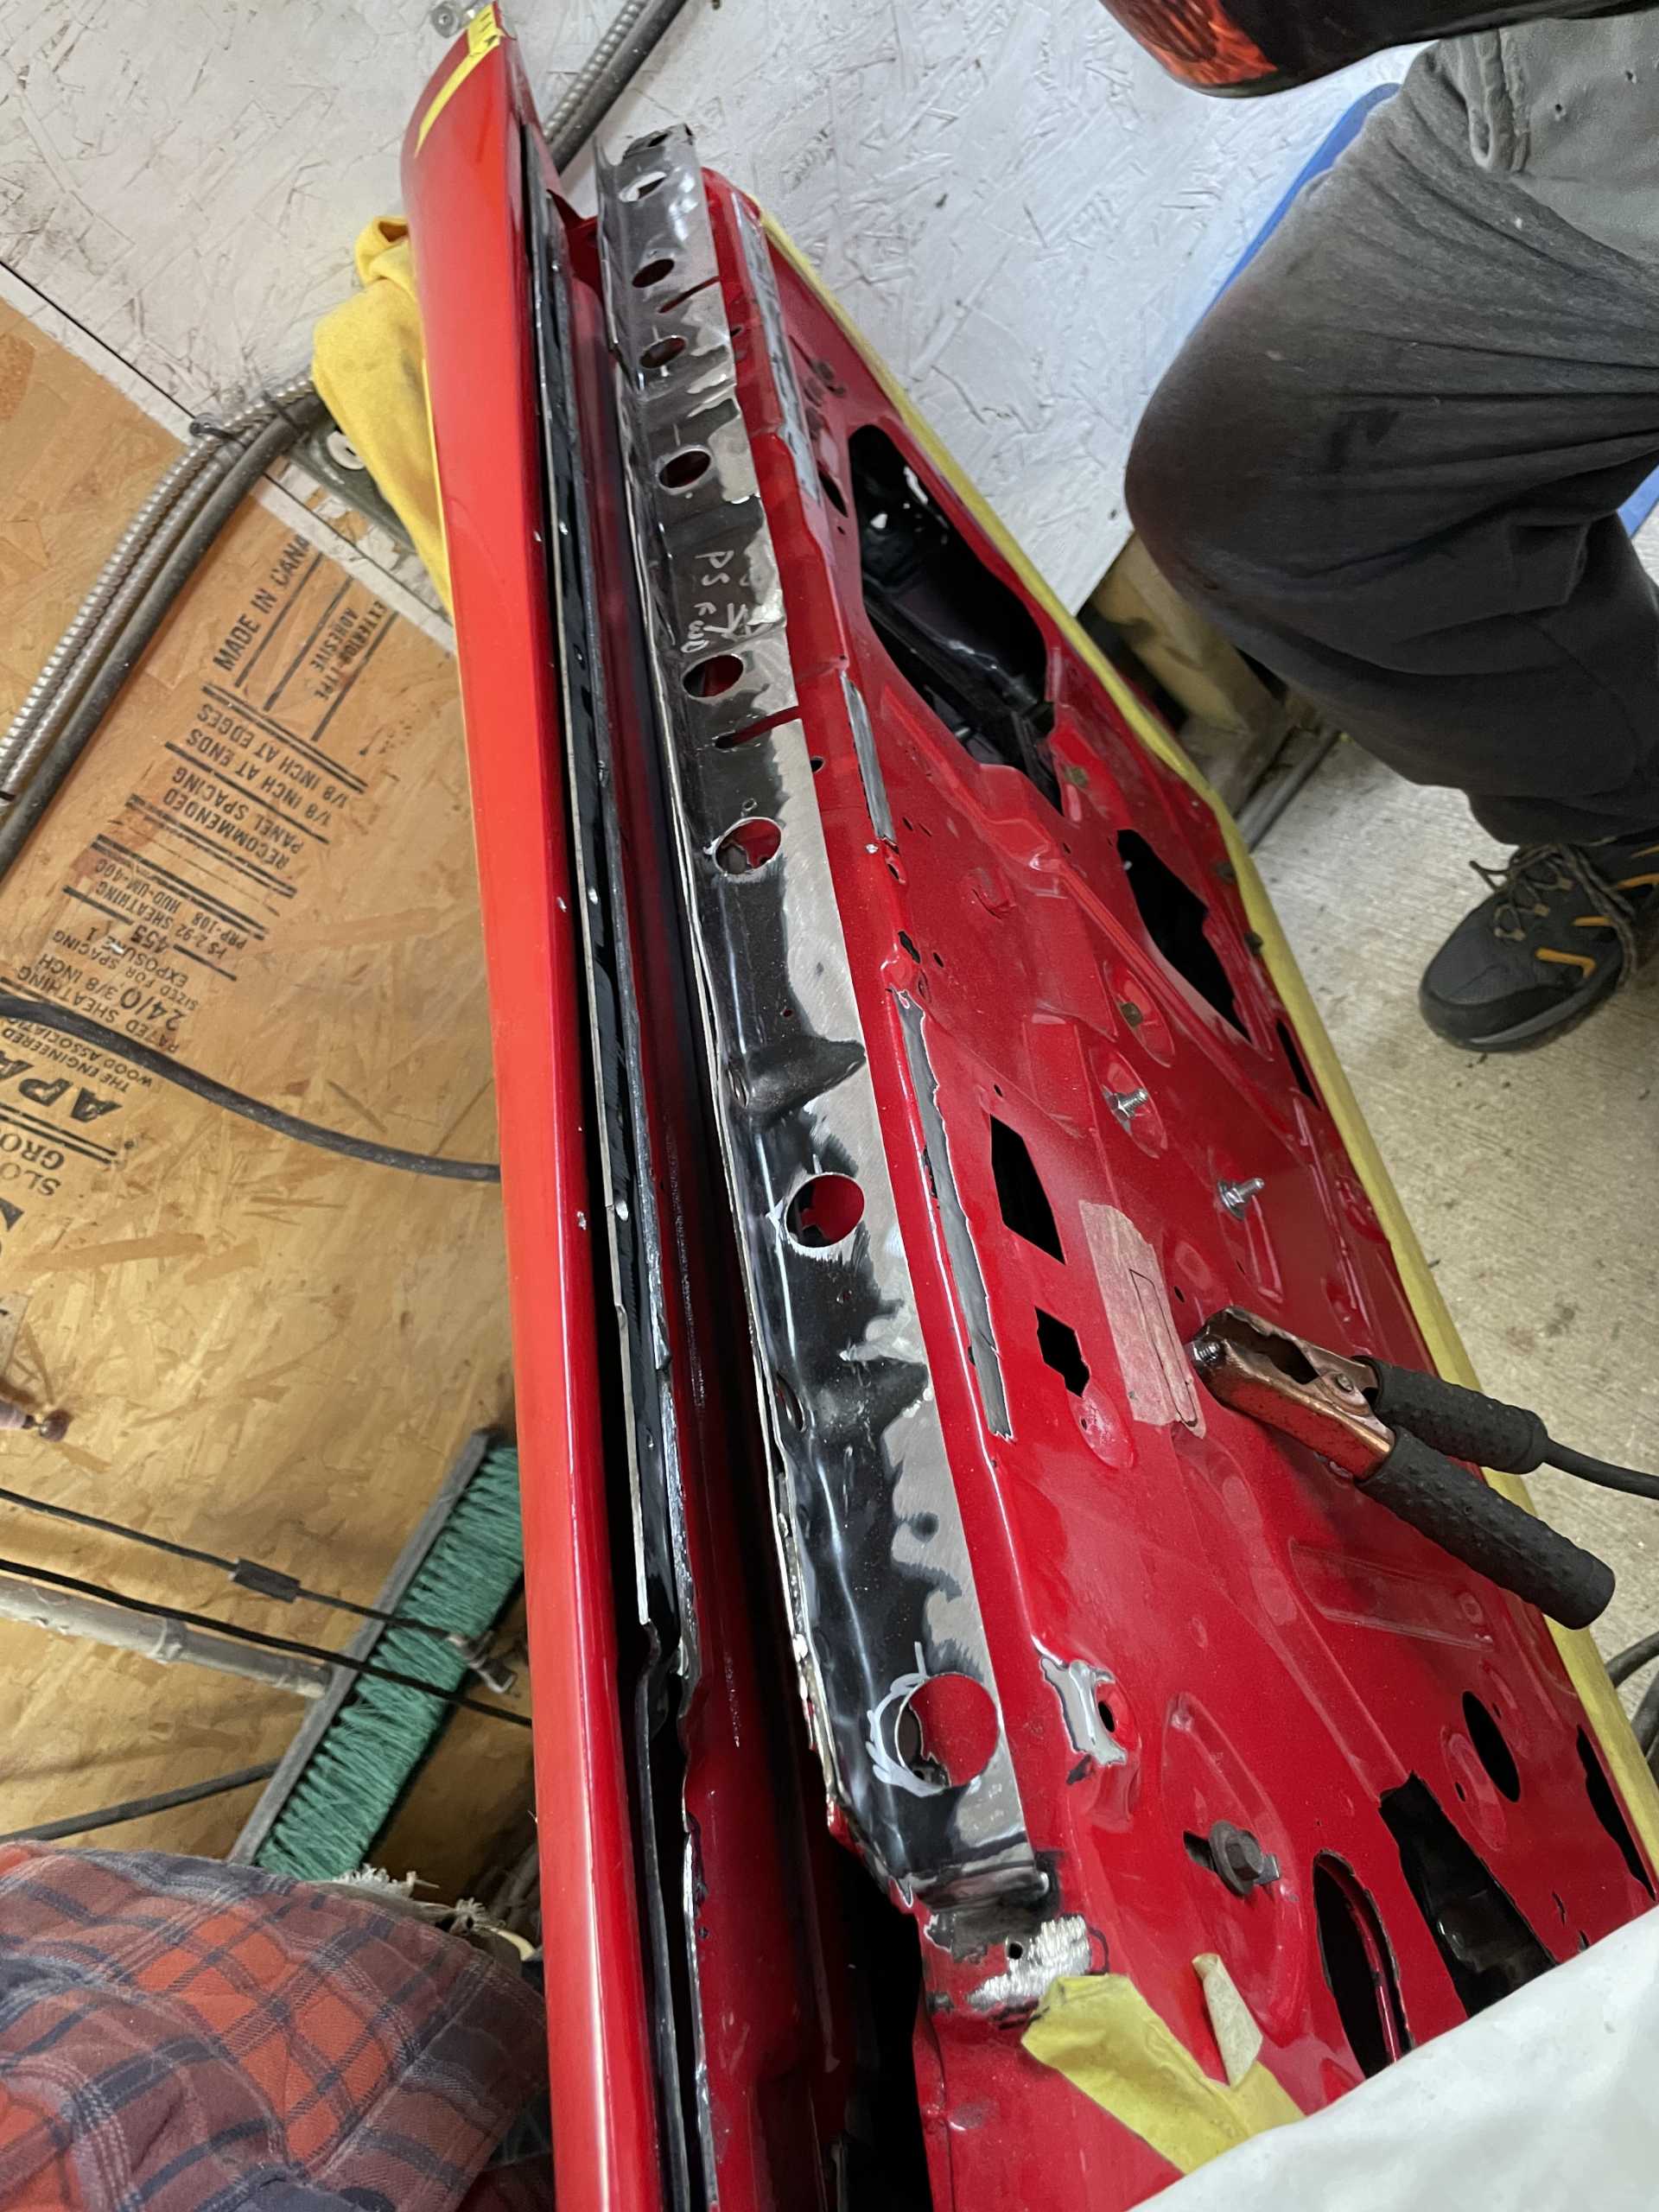
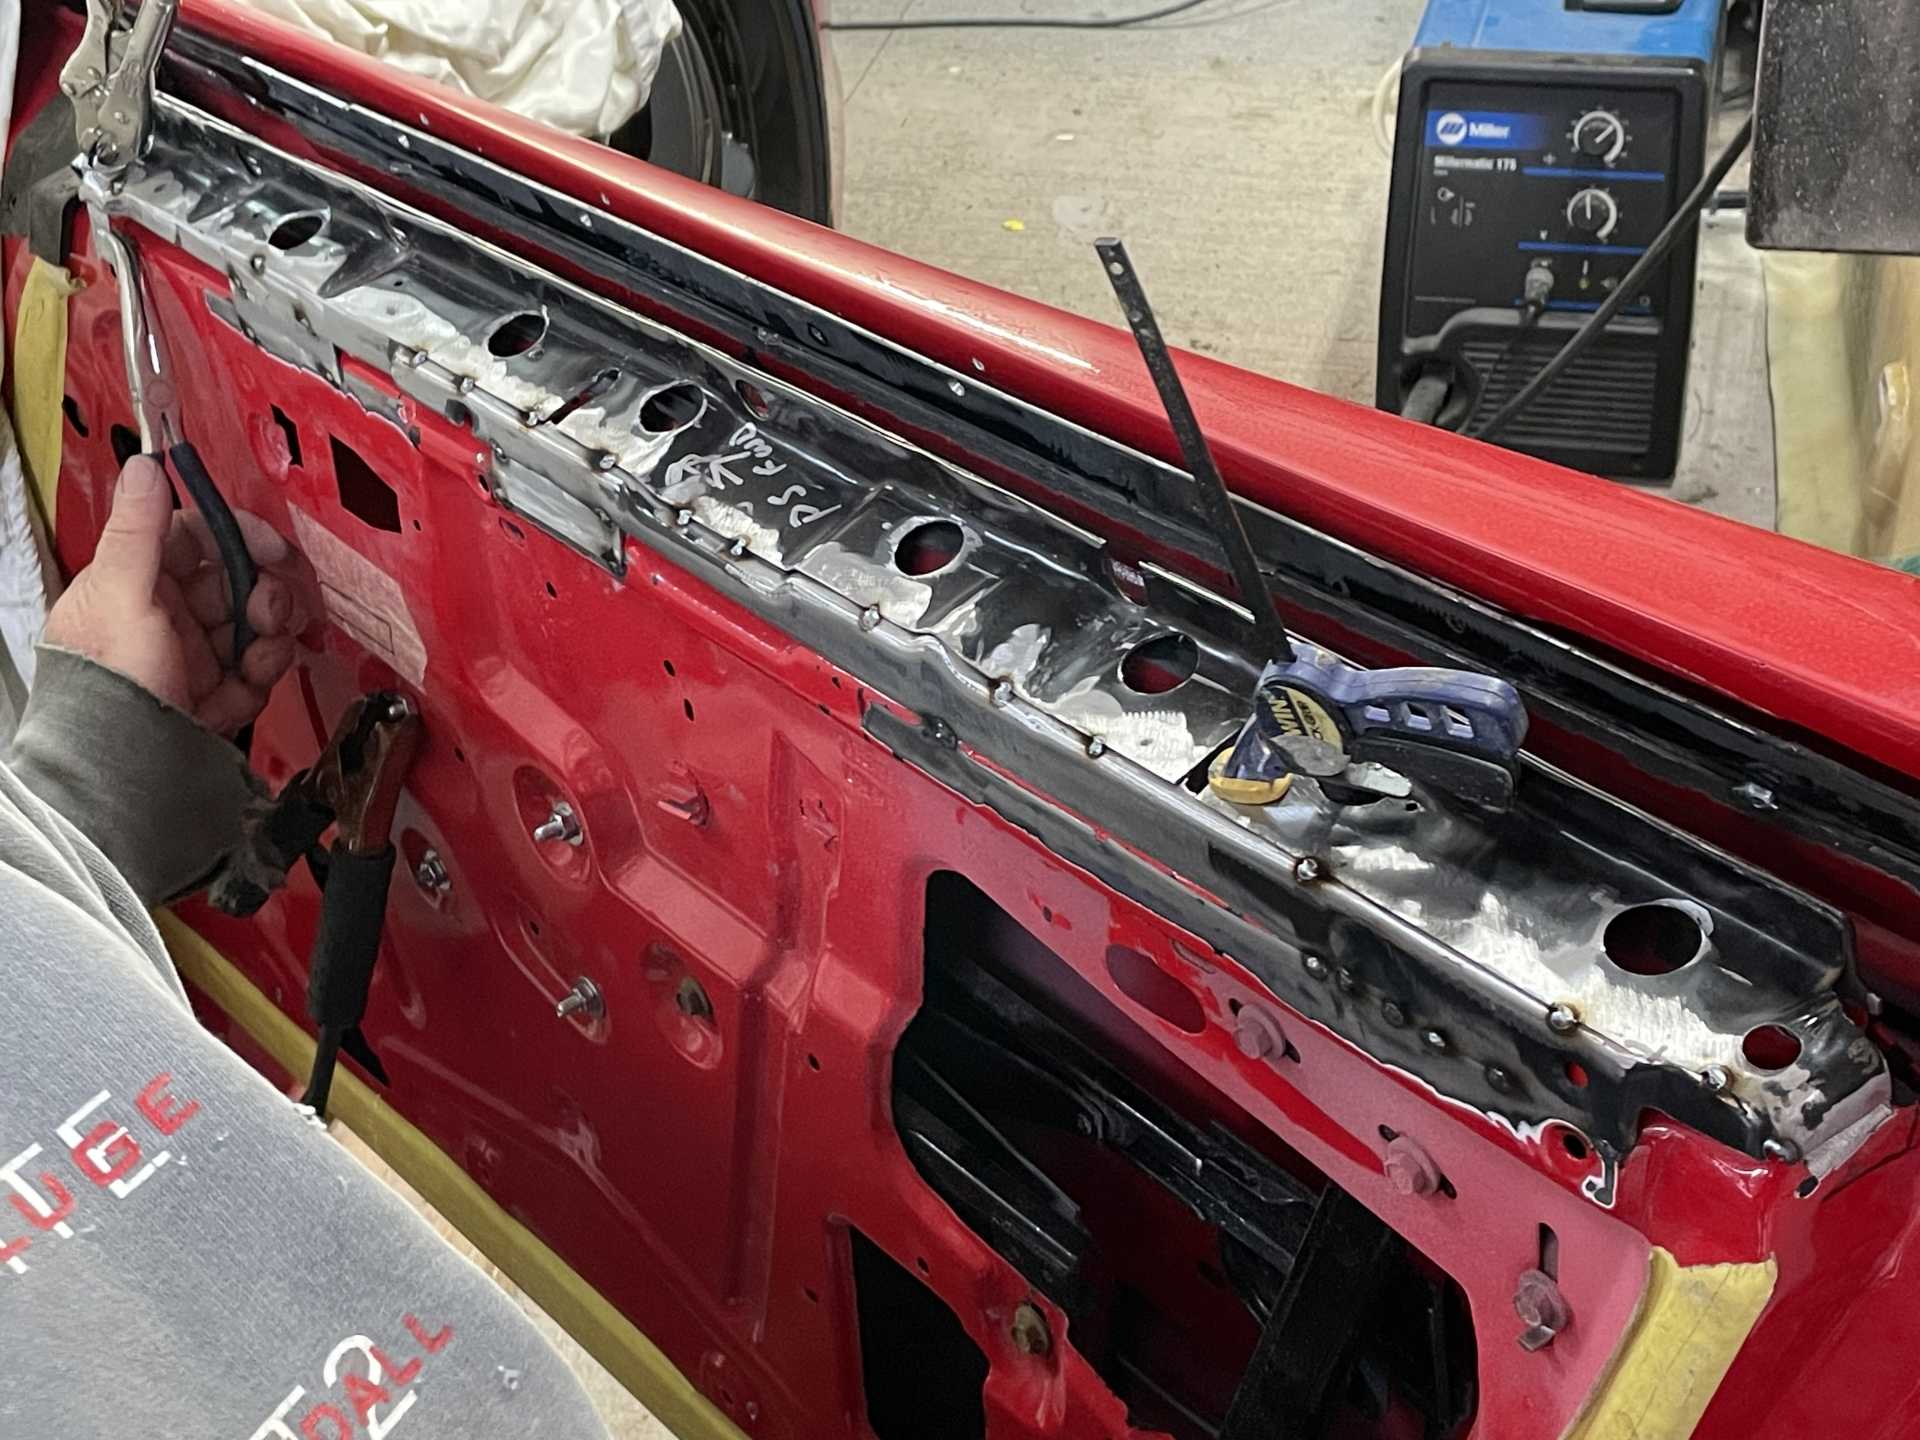
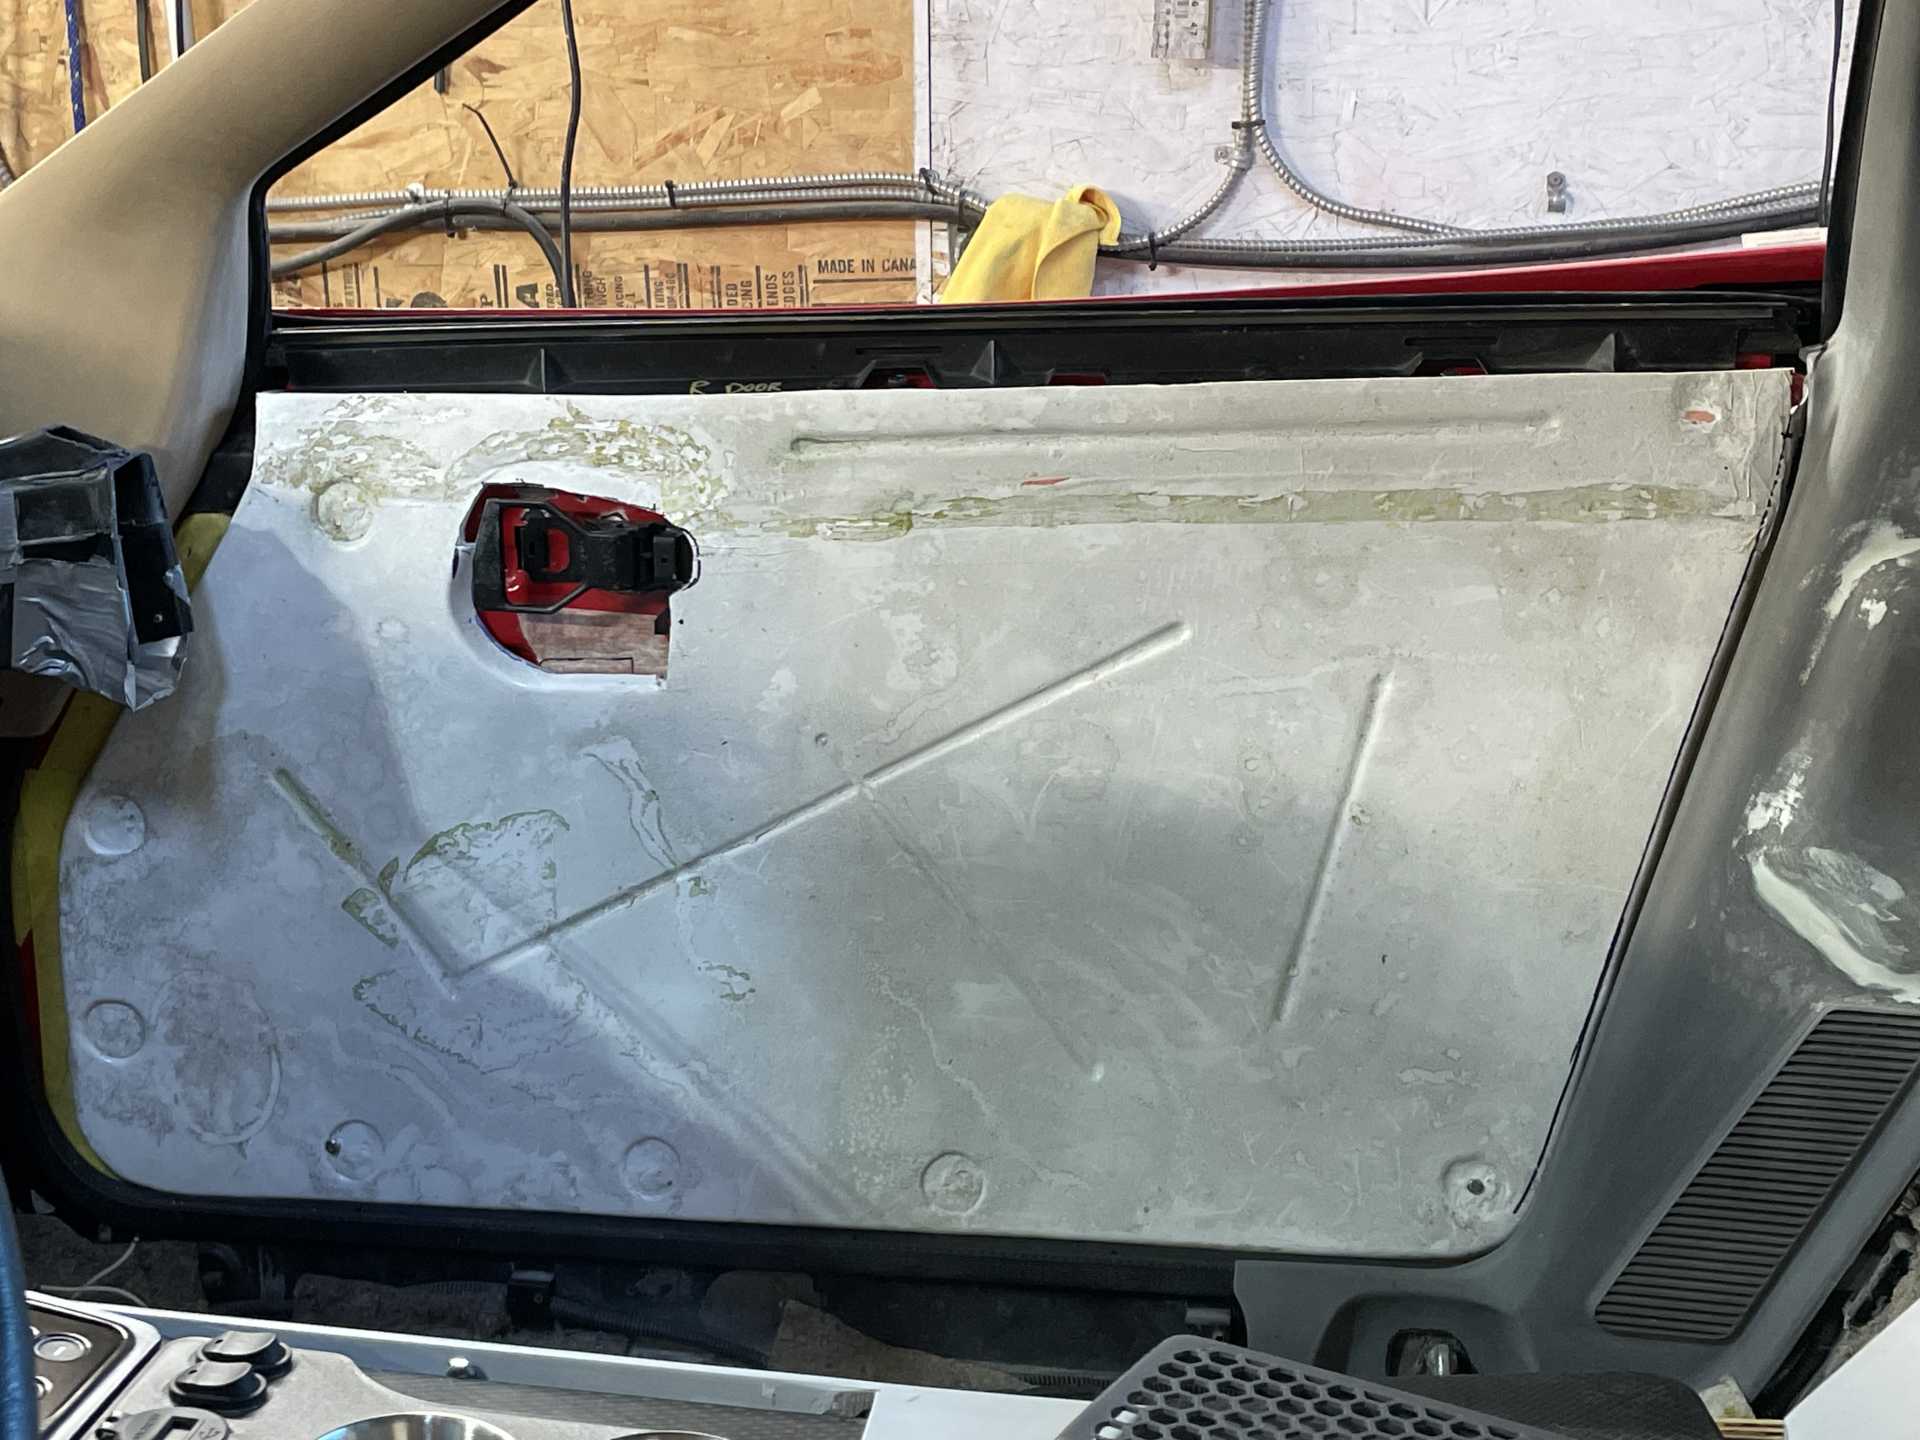
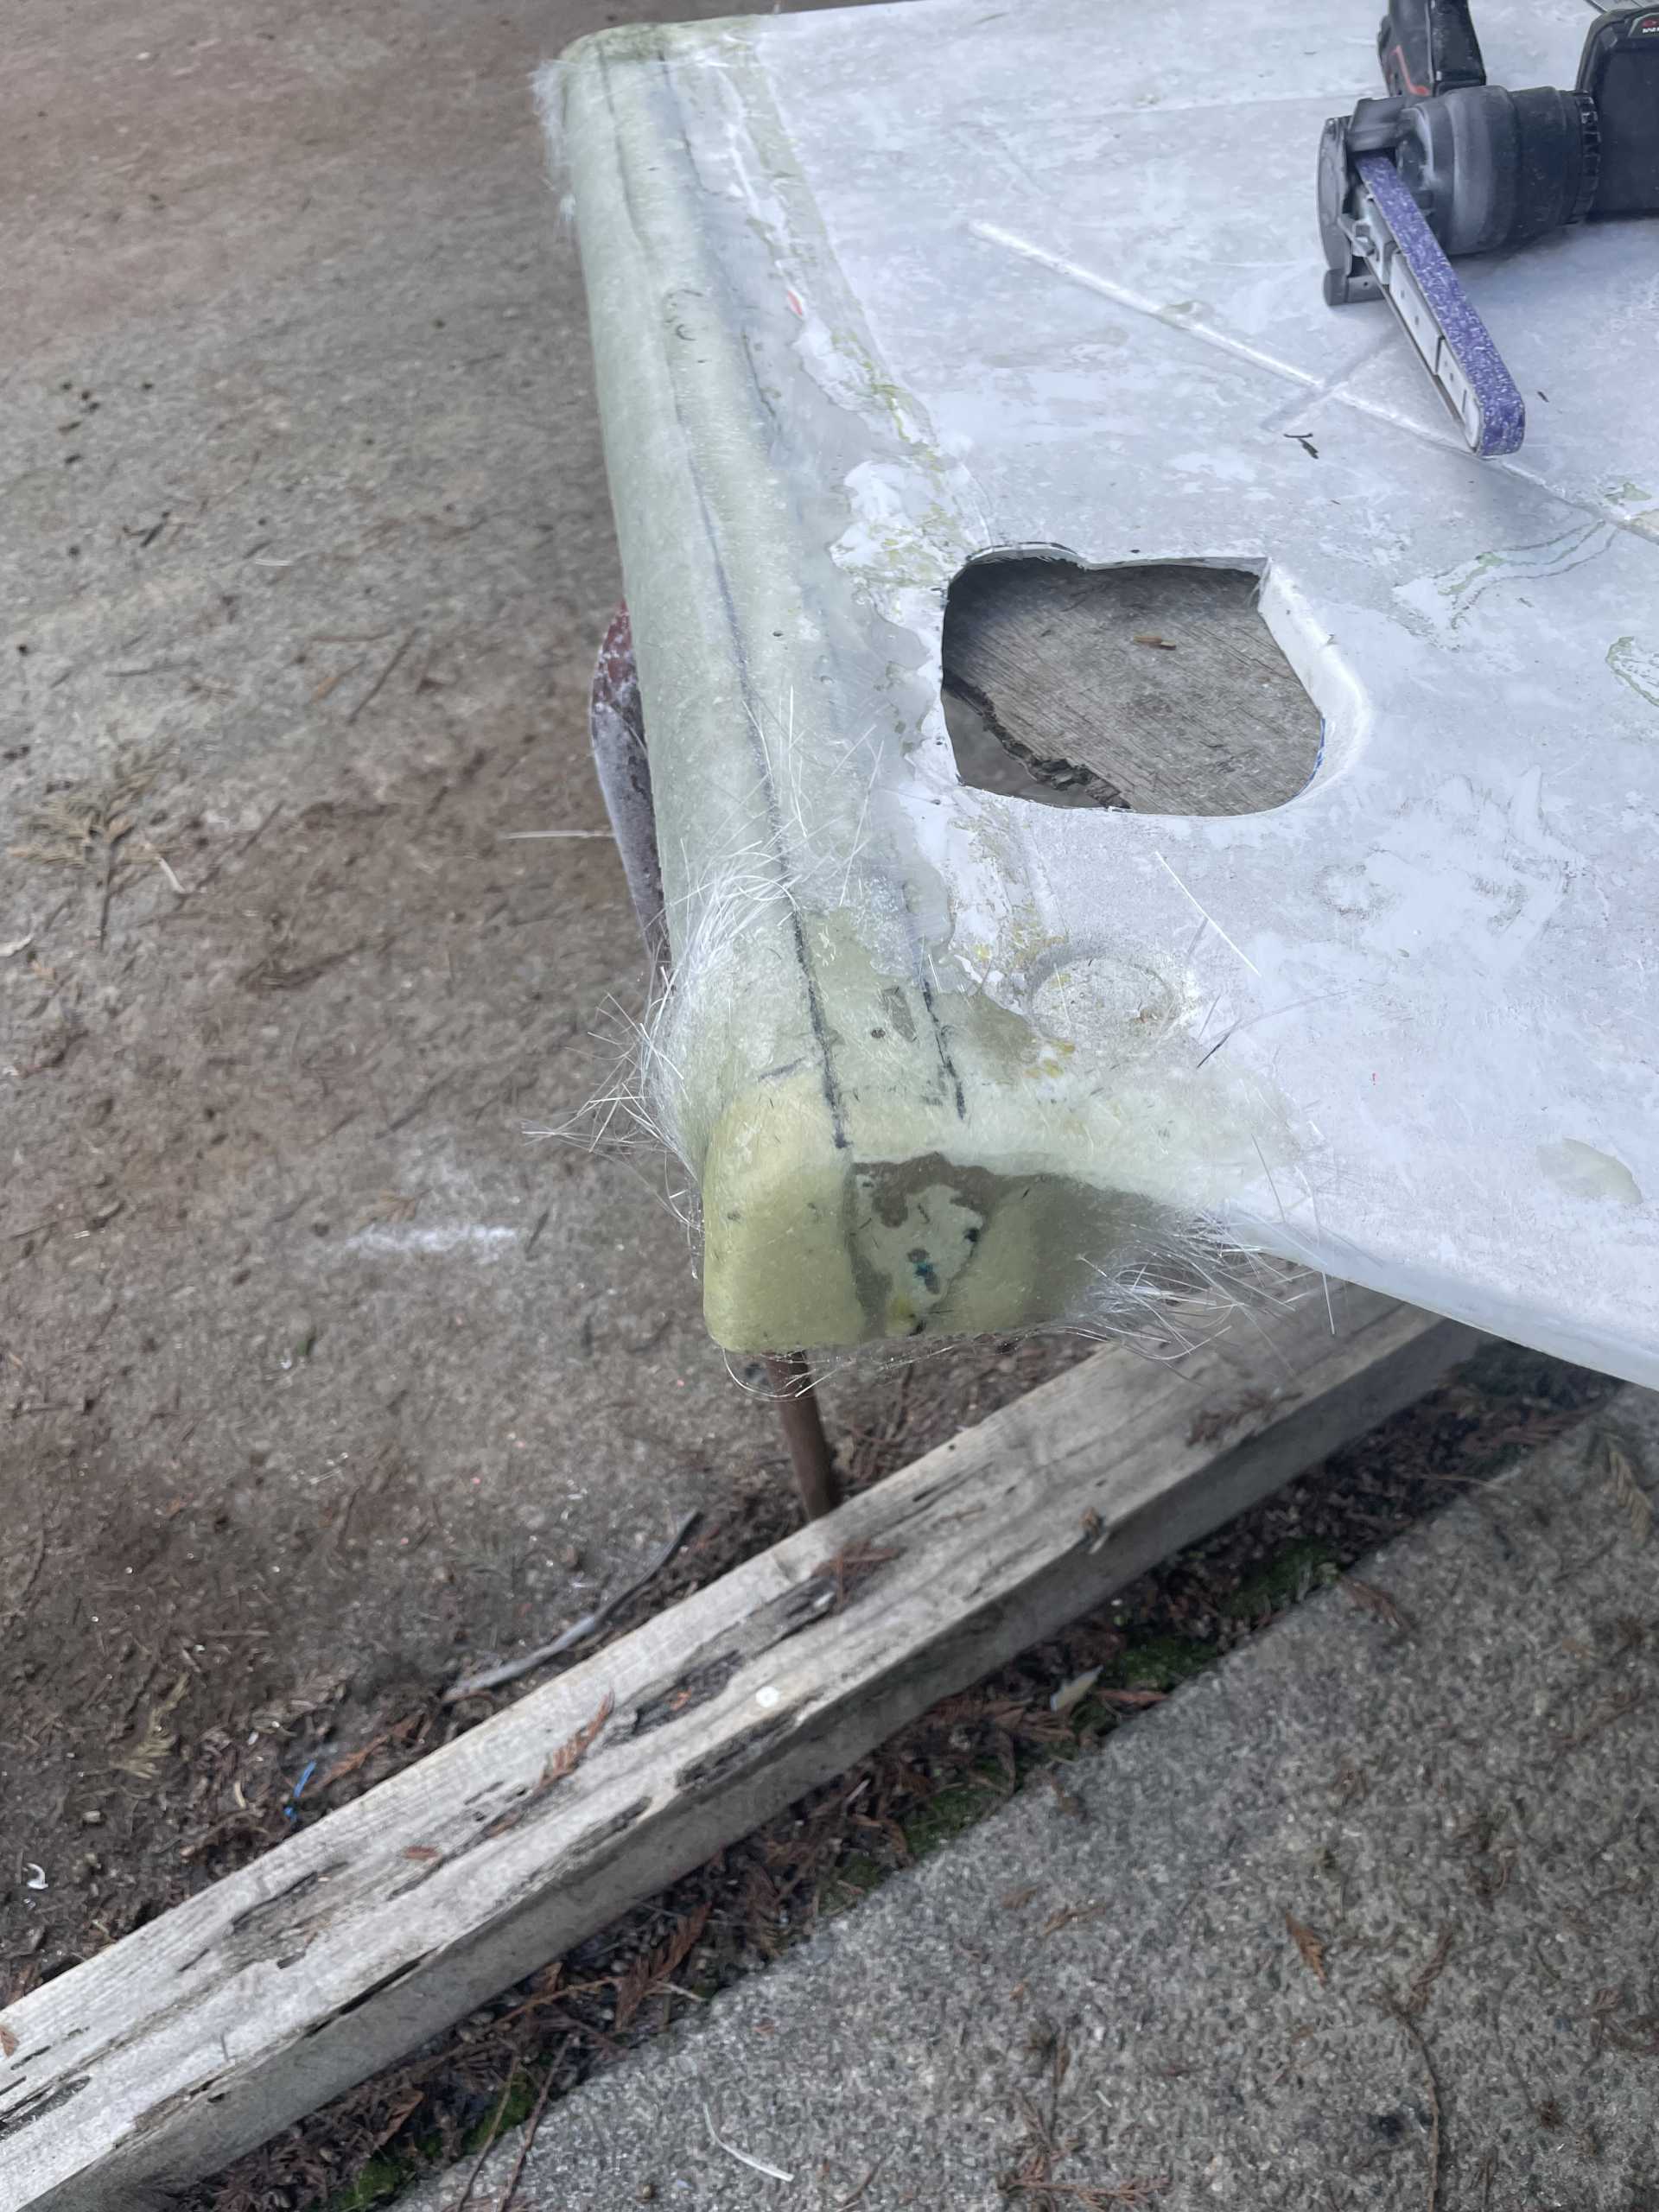
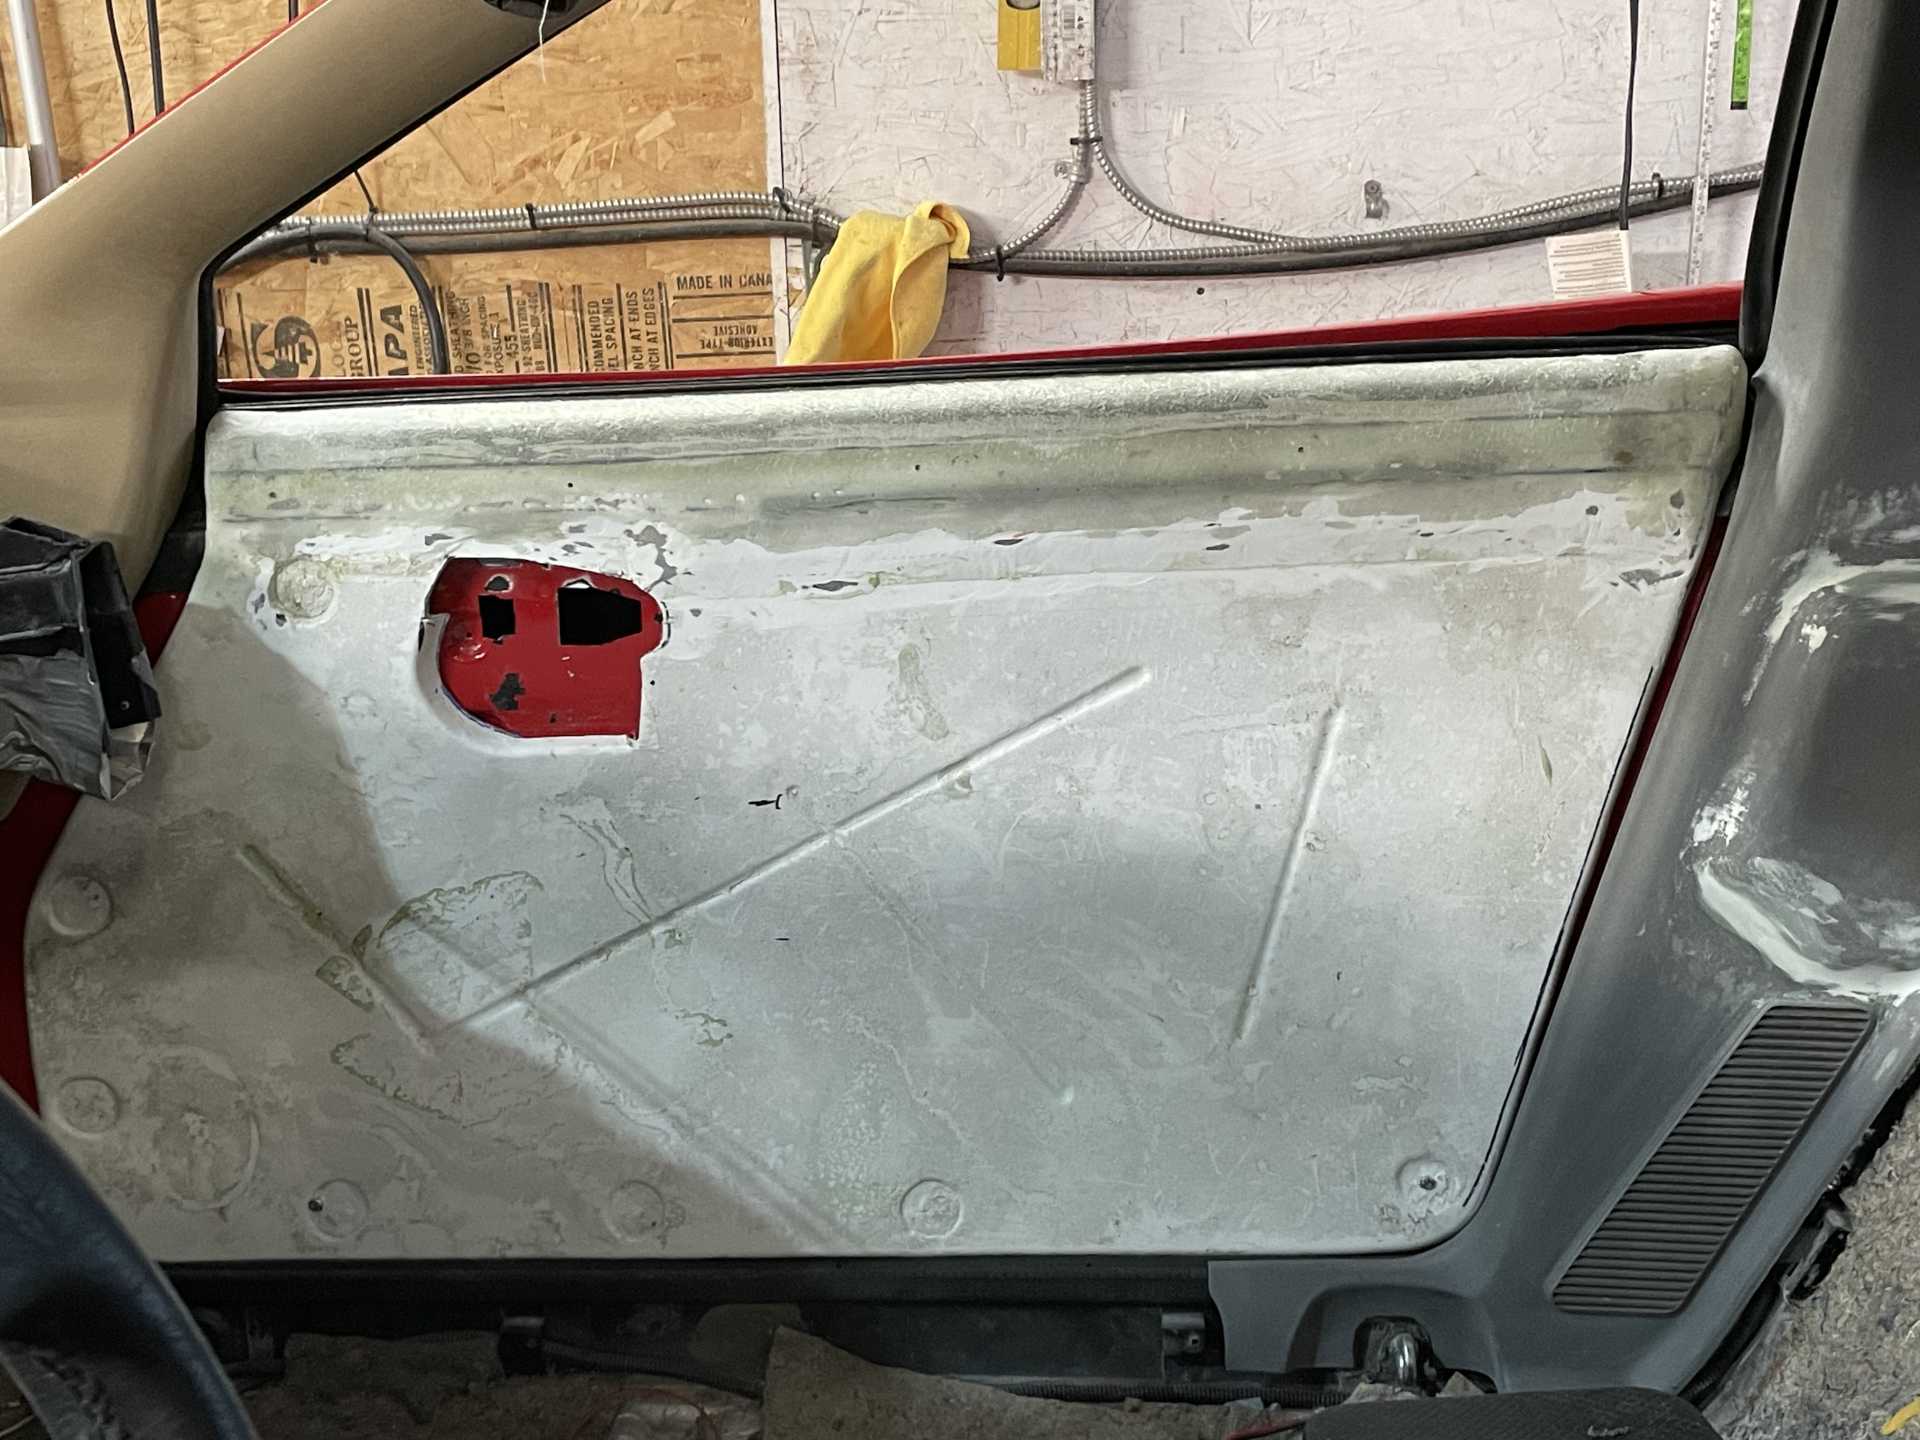
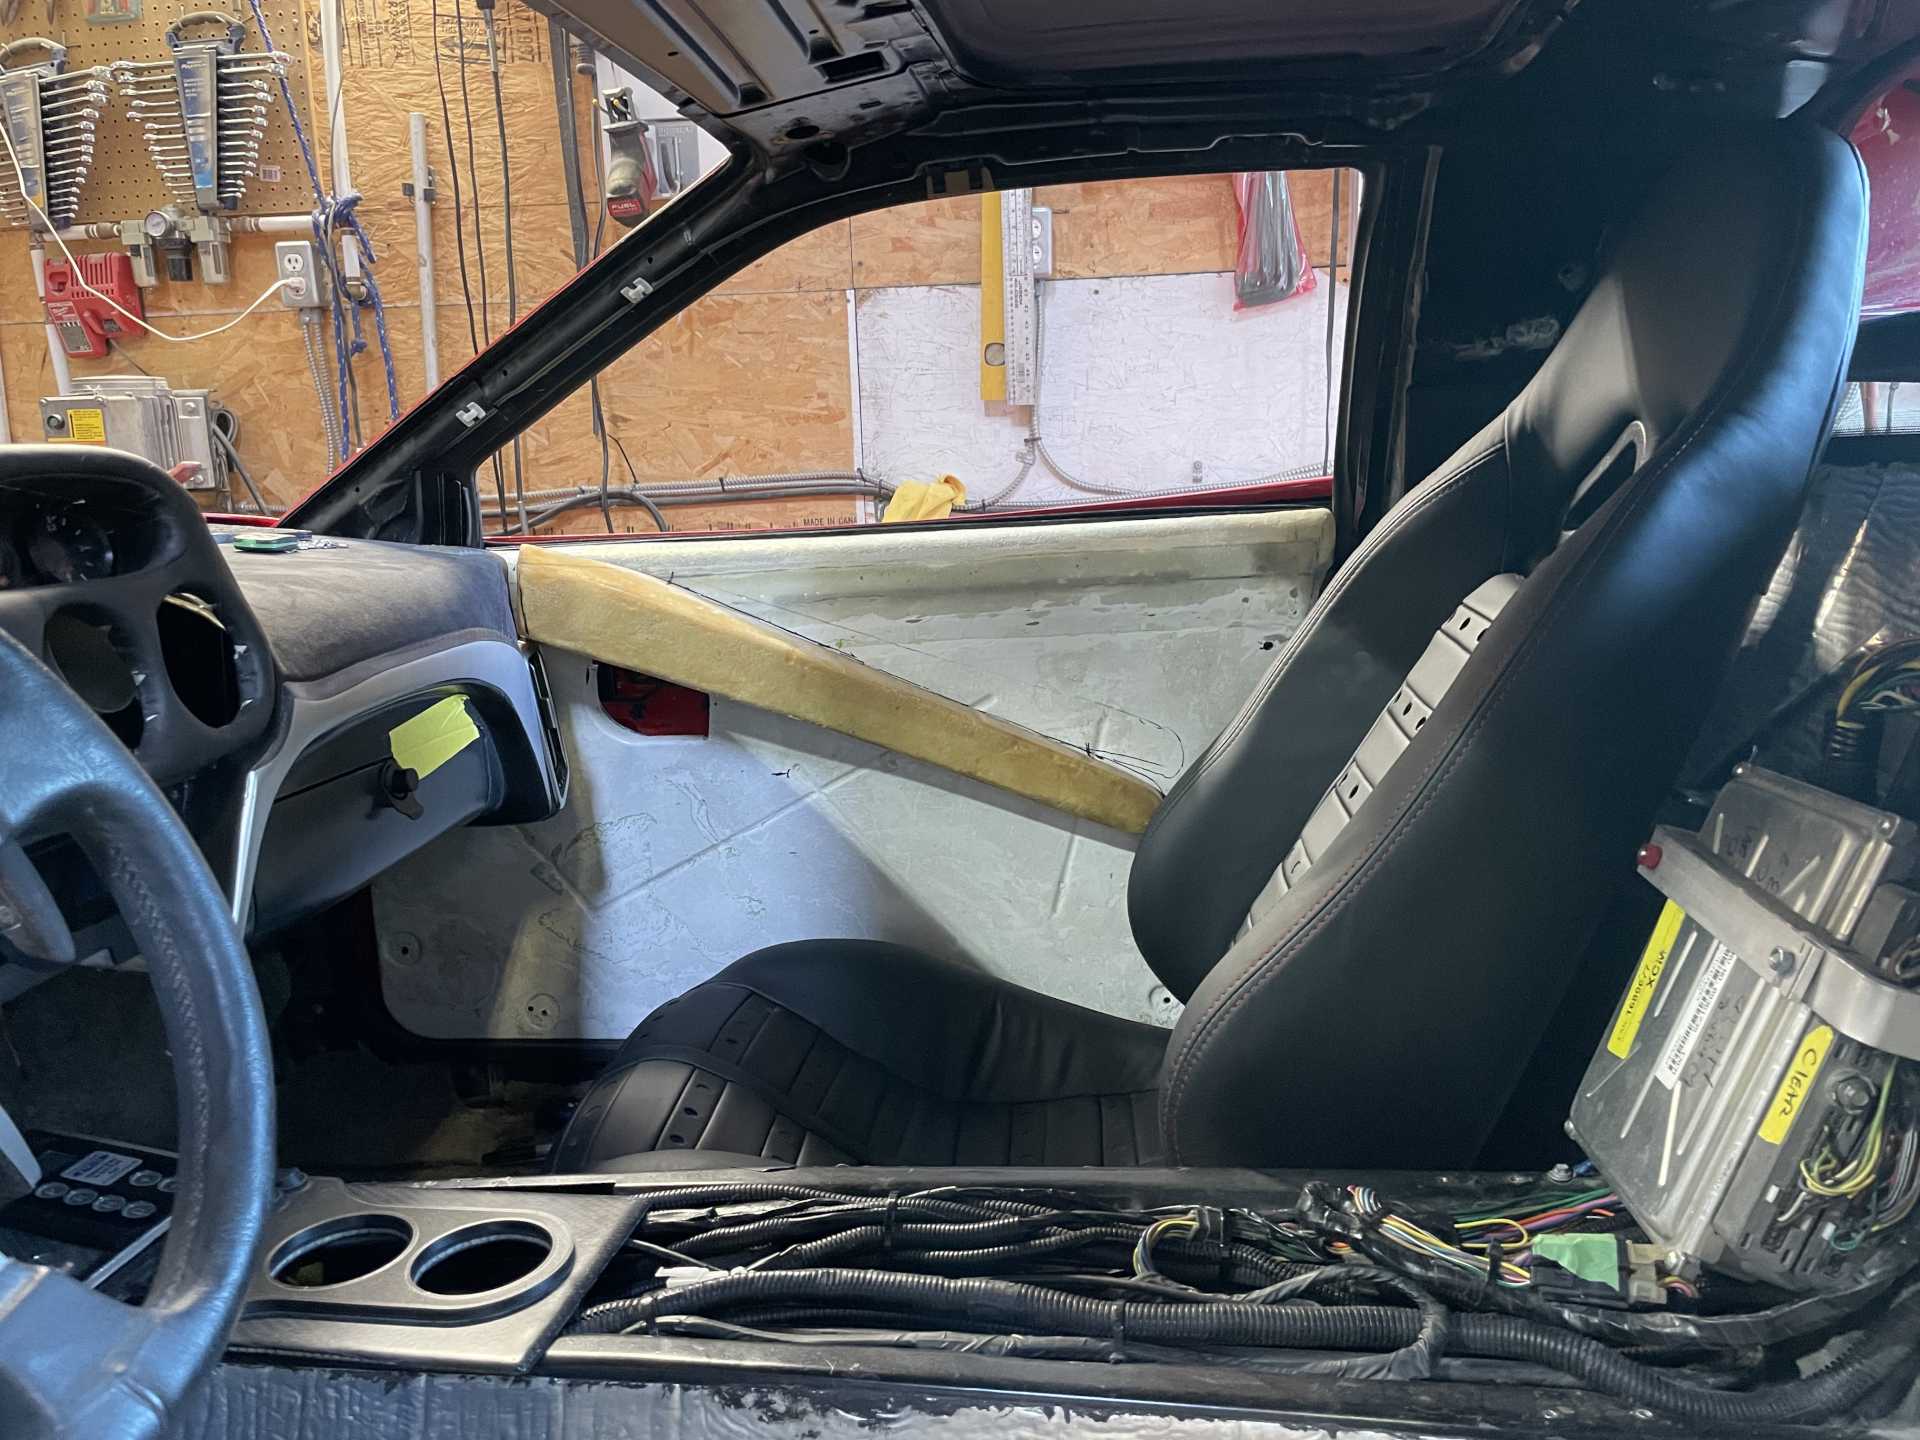
So with the window door seals and whiskers raised to a a proper height it was now time to finish and get the door cards modified to fit so they can be upholstered.
The top of the door card although it was raised earlier in the build no longer was going to work, it required the top to be cut off and a new one made .
I determined the height I needed parallel to the dew strips
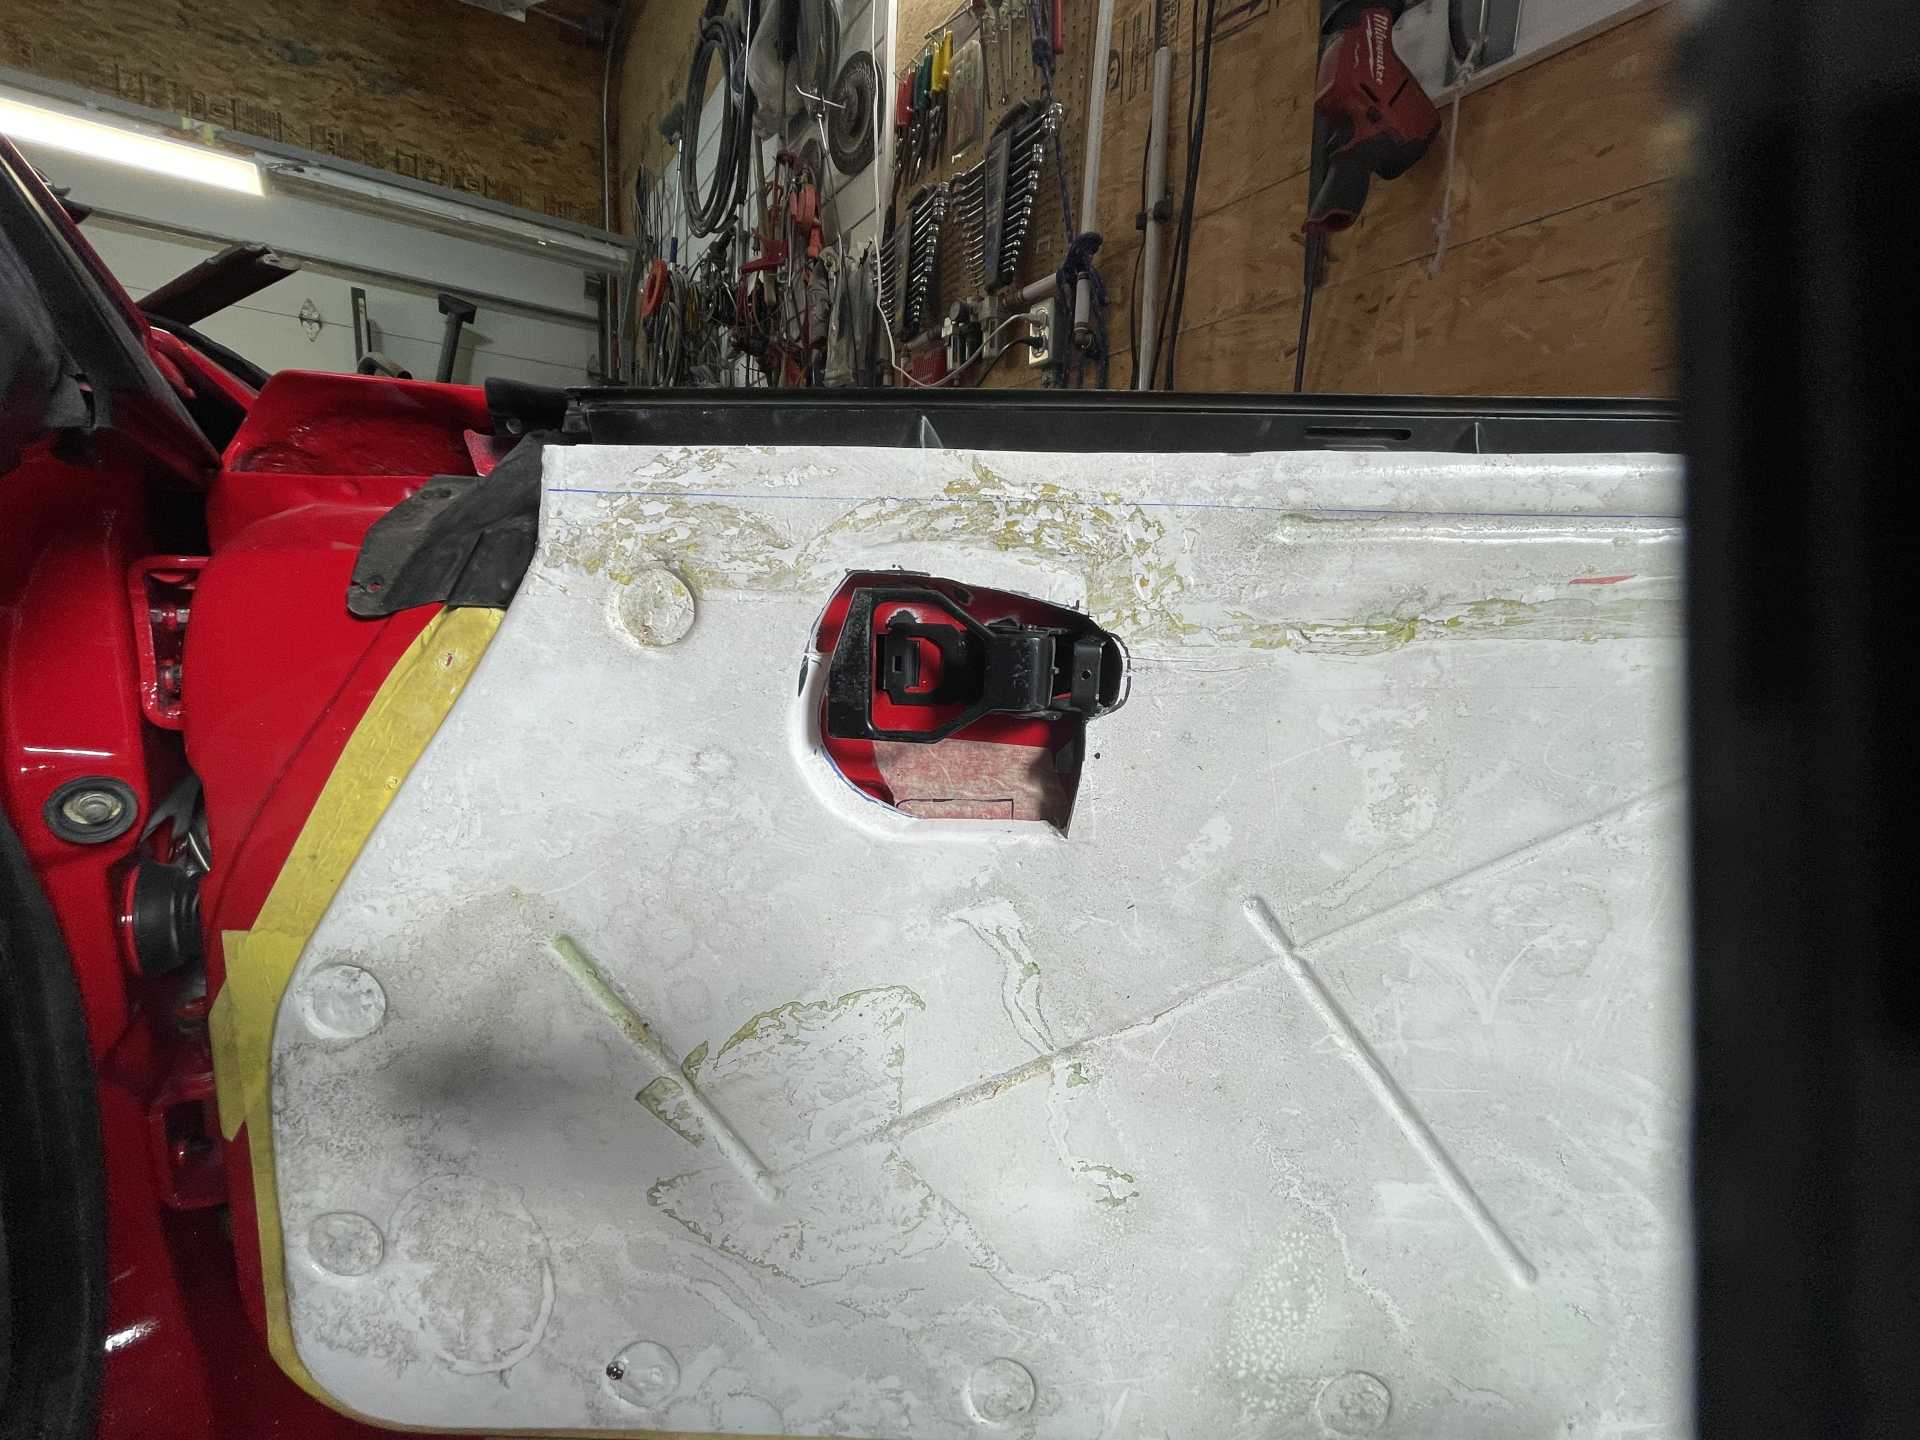
Then cut that piece off
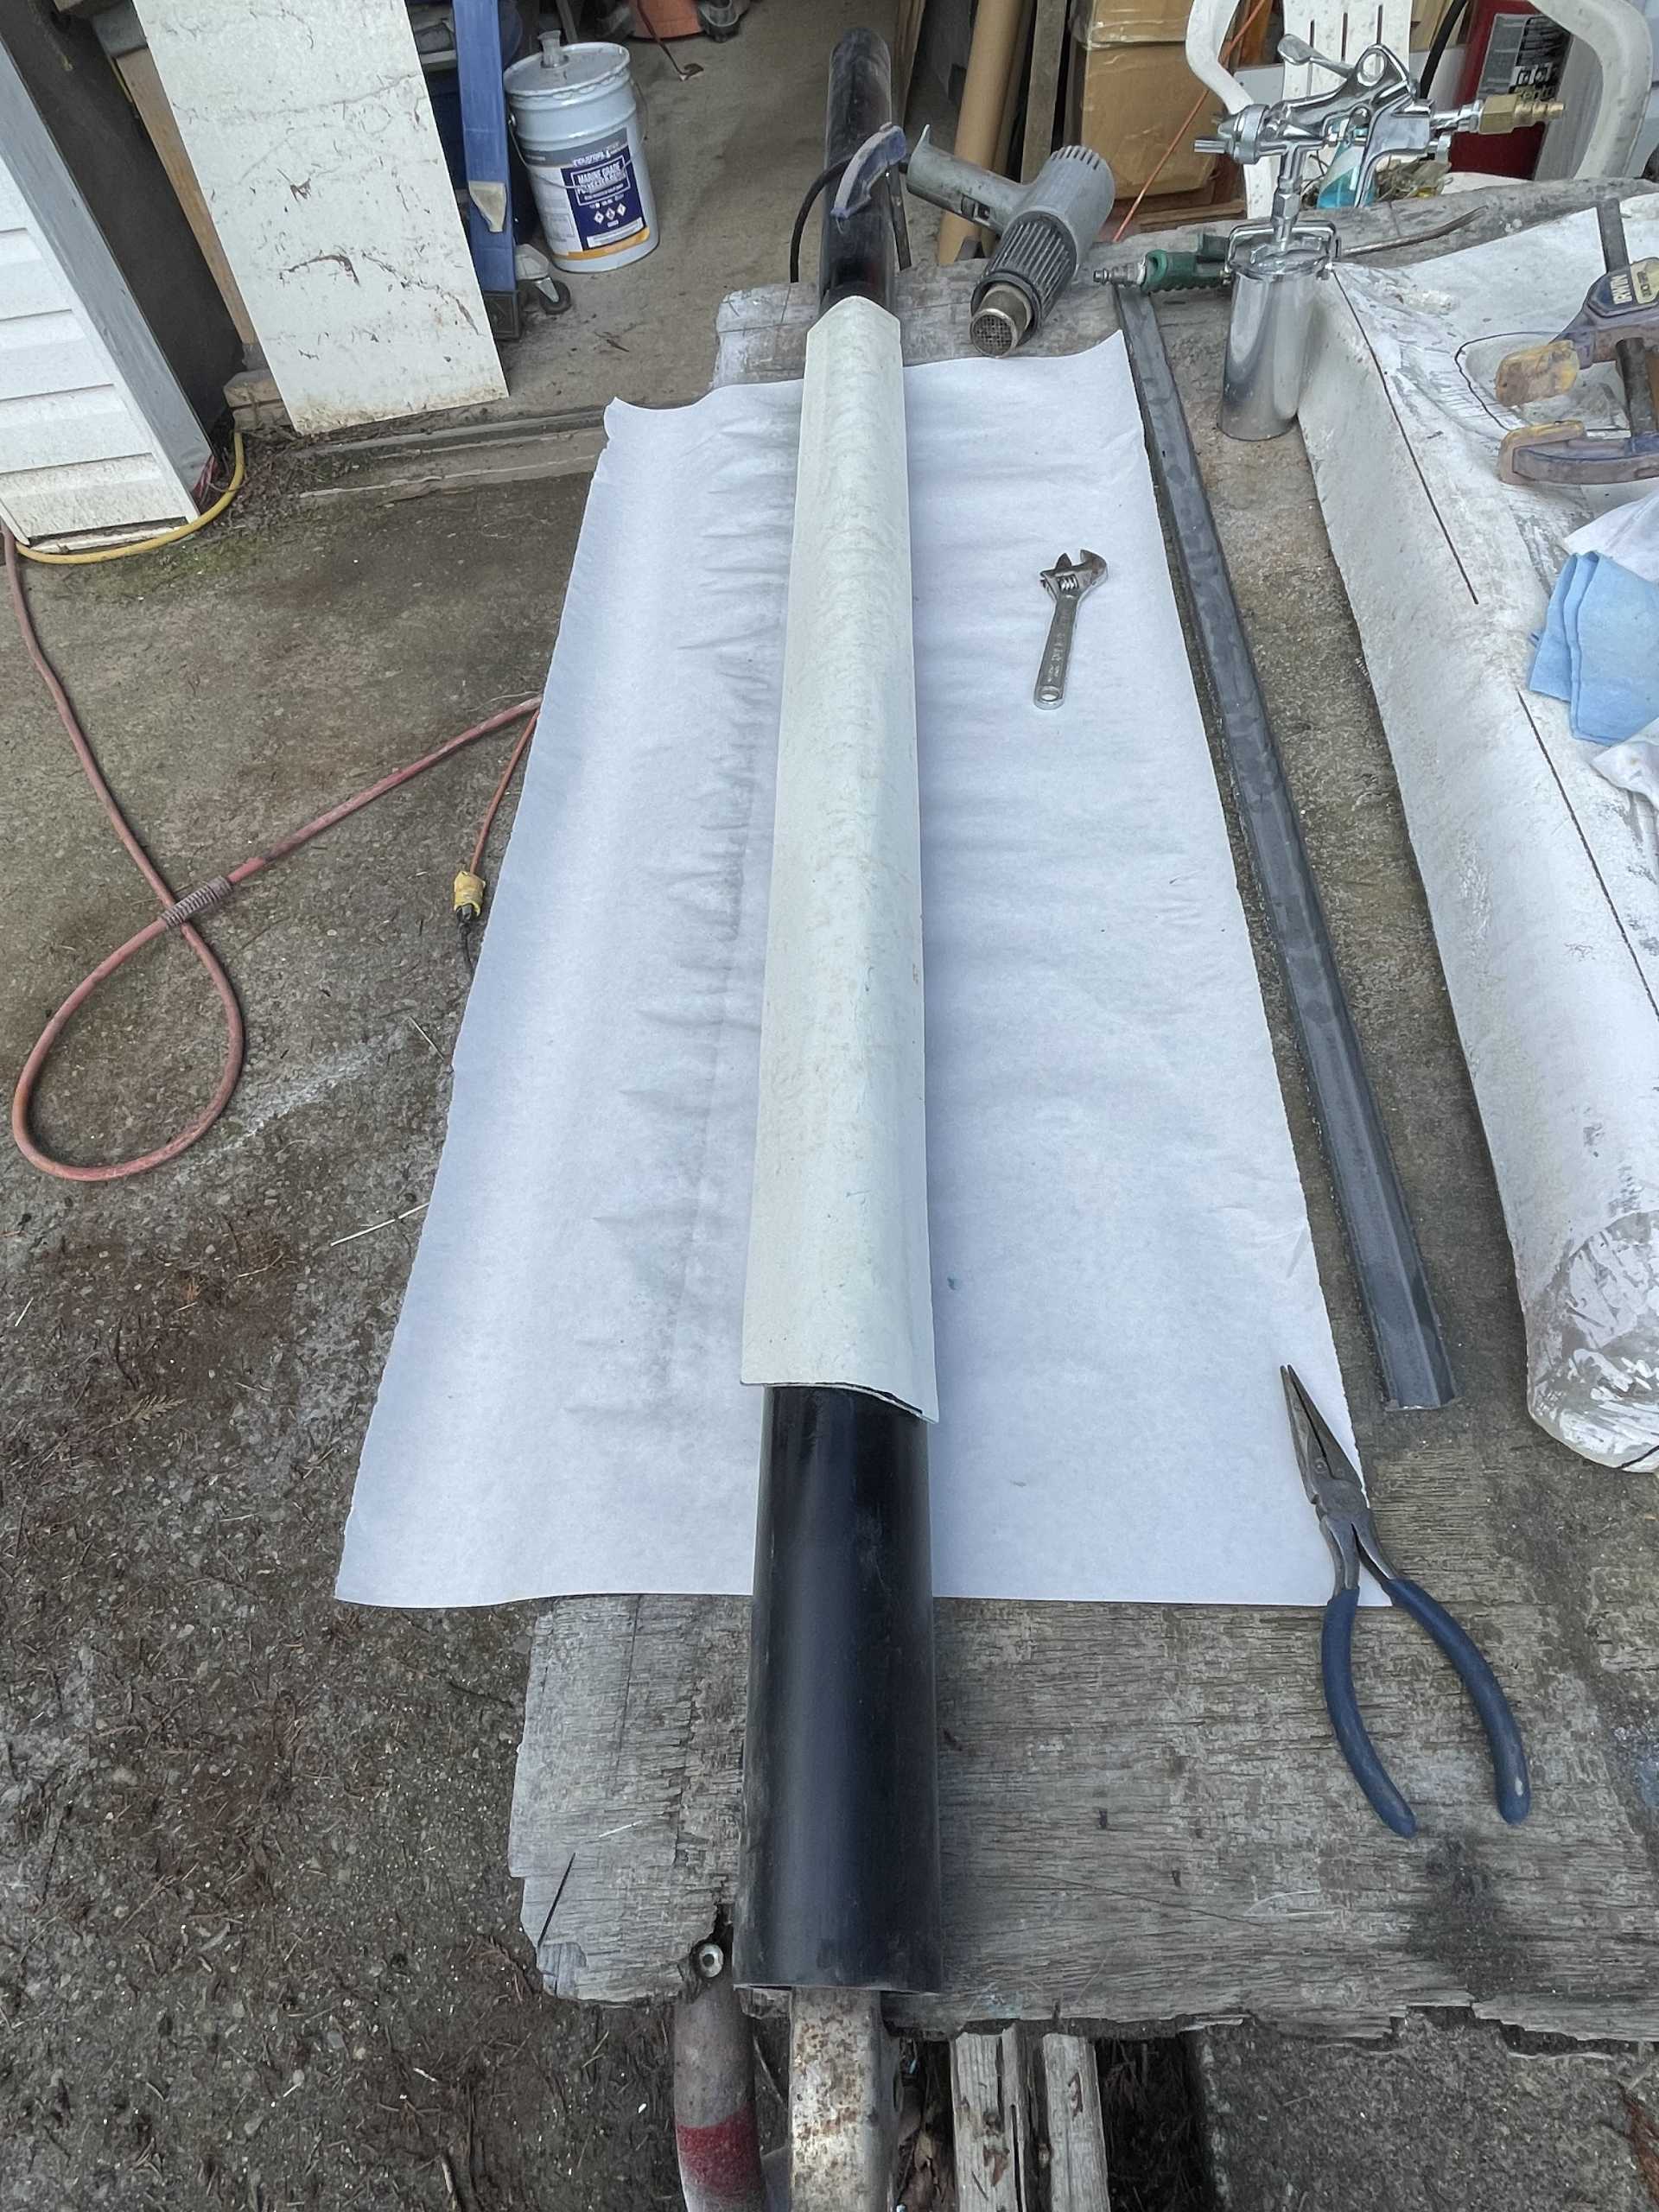
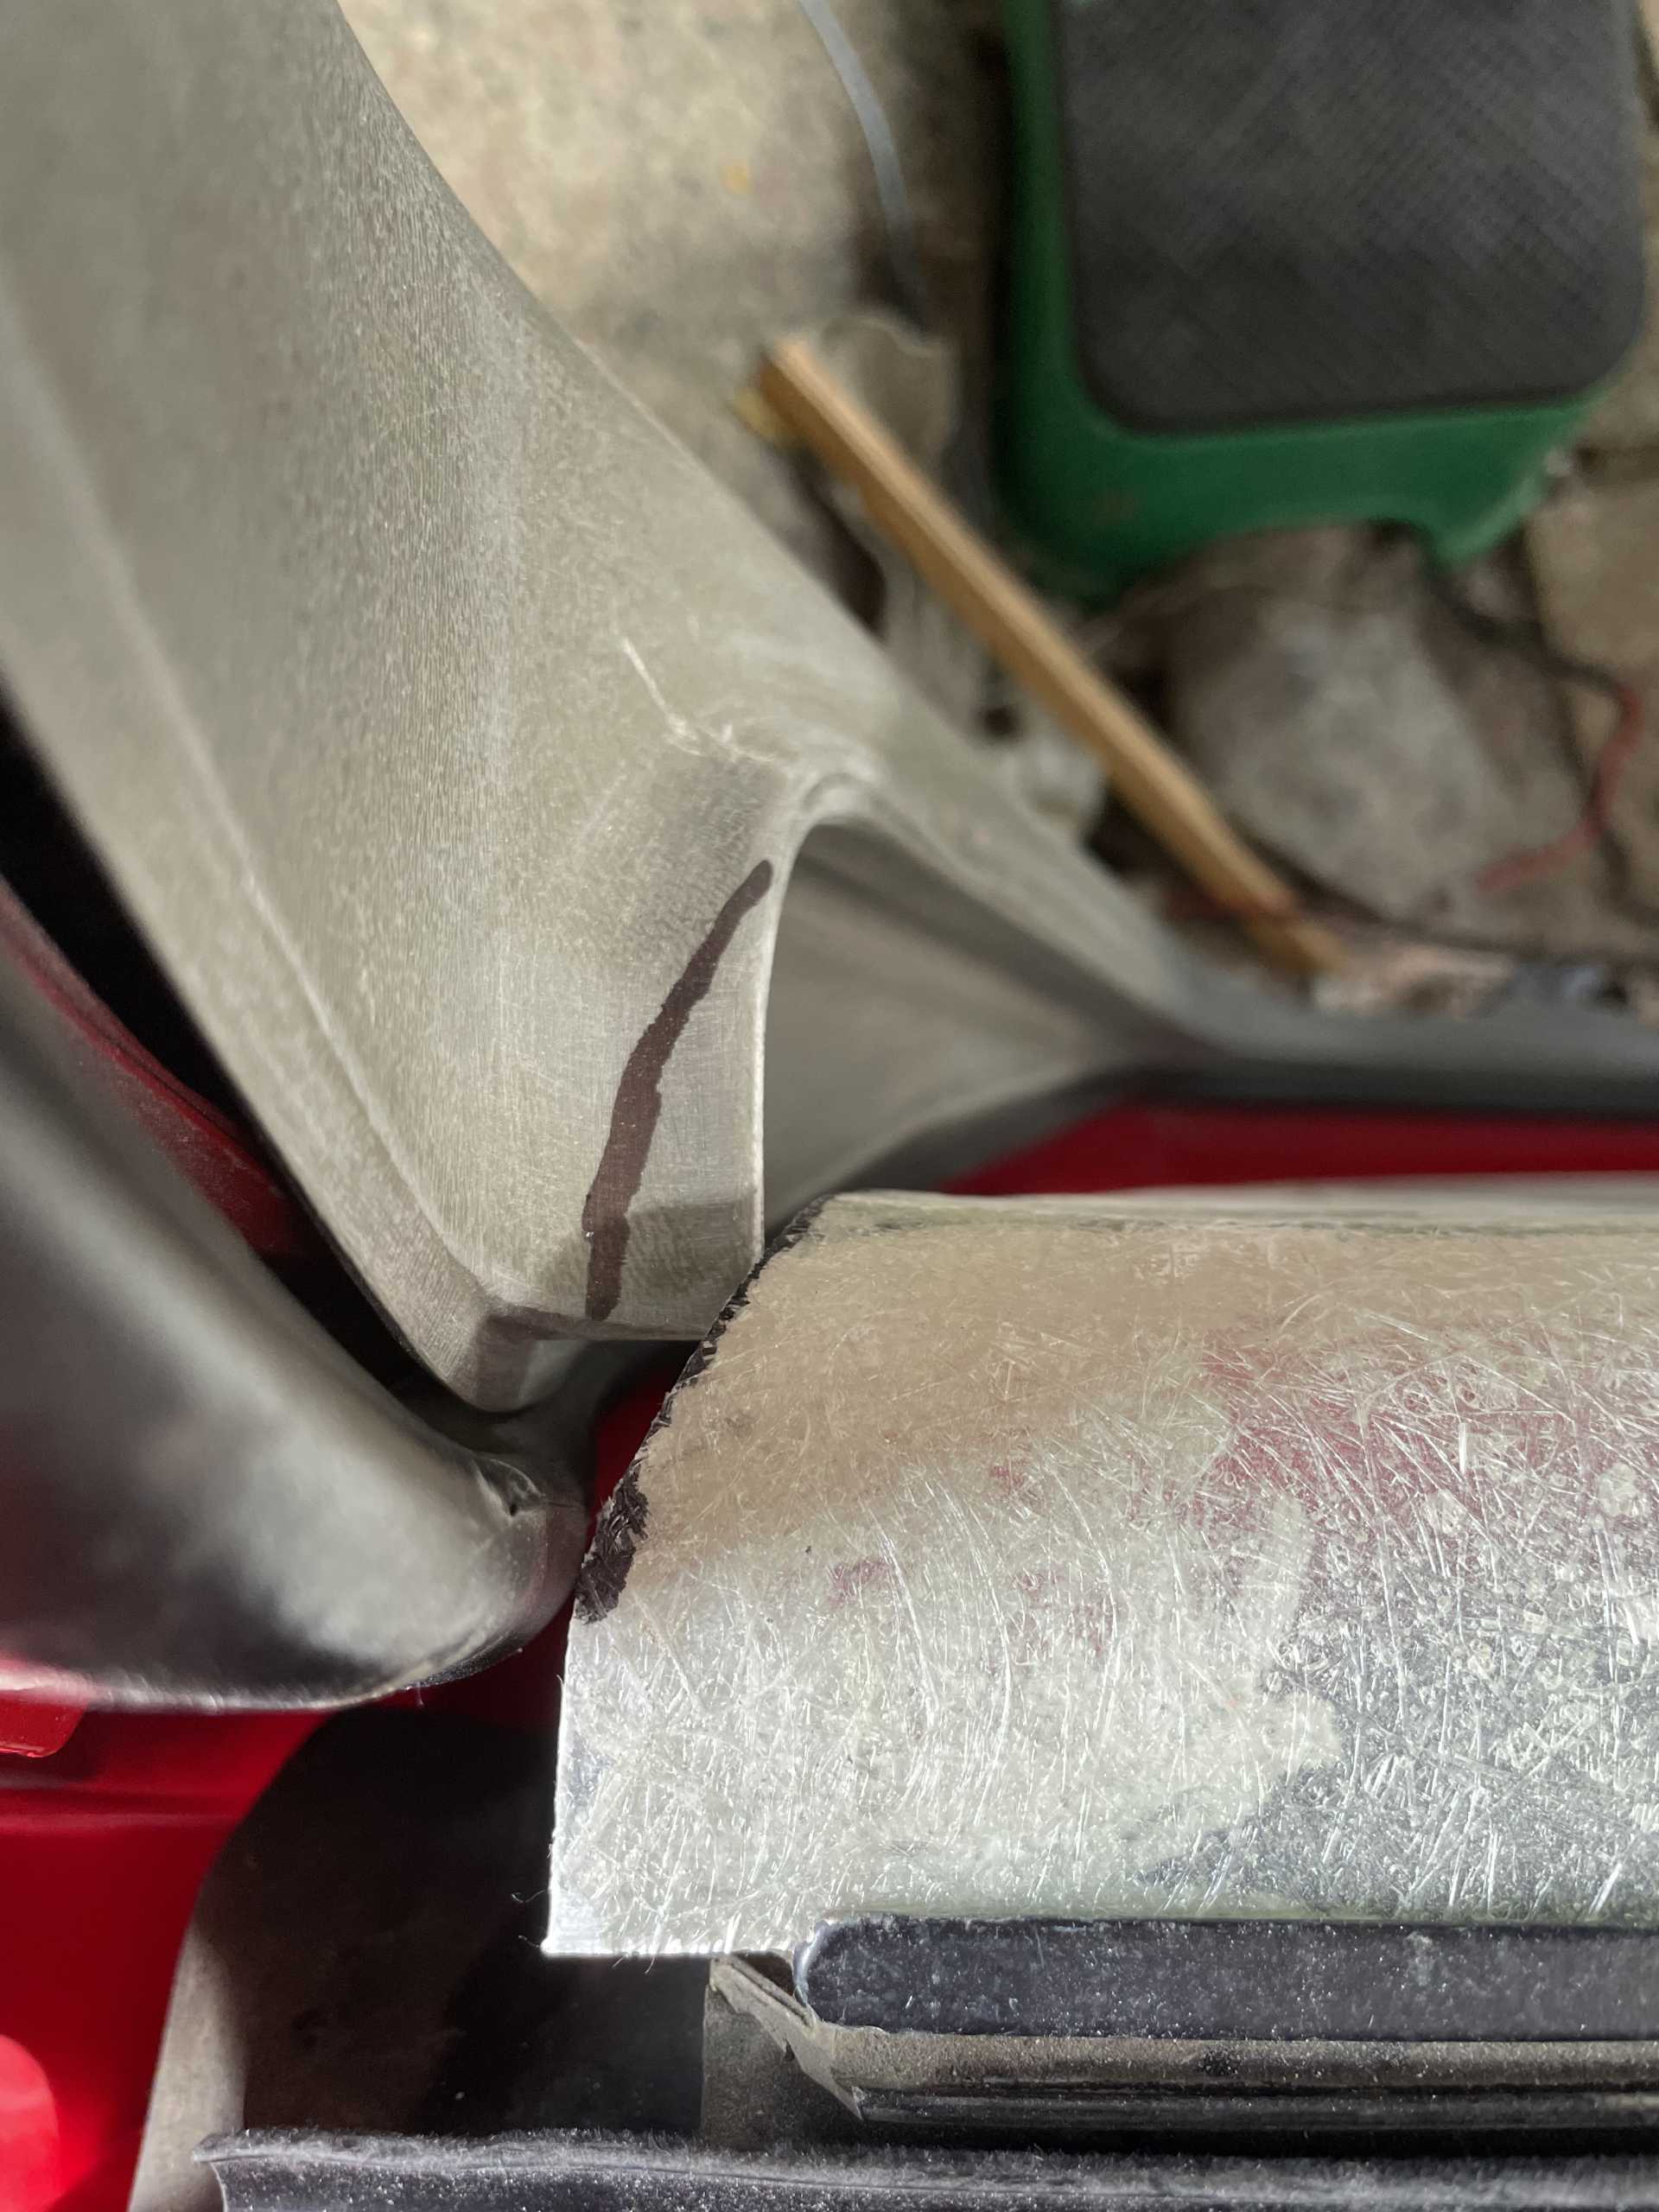
I then determined the curvature I needed and proceeded to make a buck. I found a piece of scrap plexiglass using a heat gun formed it over a piece of PVC pipe with the curvature I wanted
Then layed up a couple layer of glass then once it got to a leather stat not fully cured installed it onto the door card, and onto the door. By doing it this way ensures that the part will fit exactly.
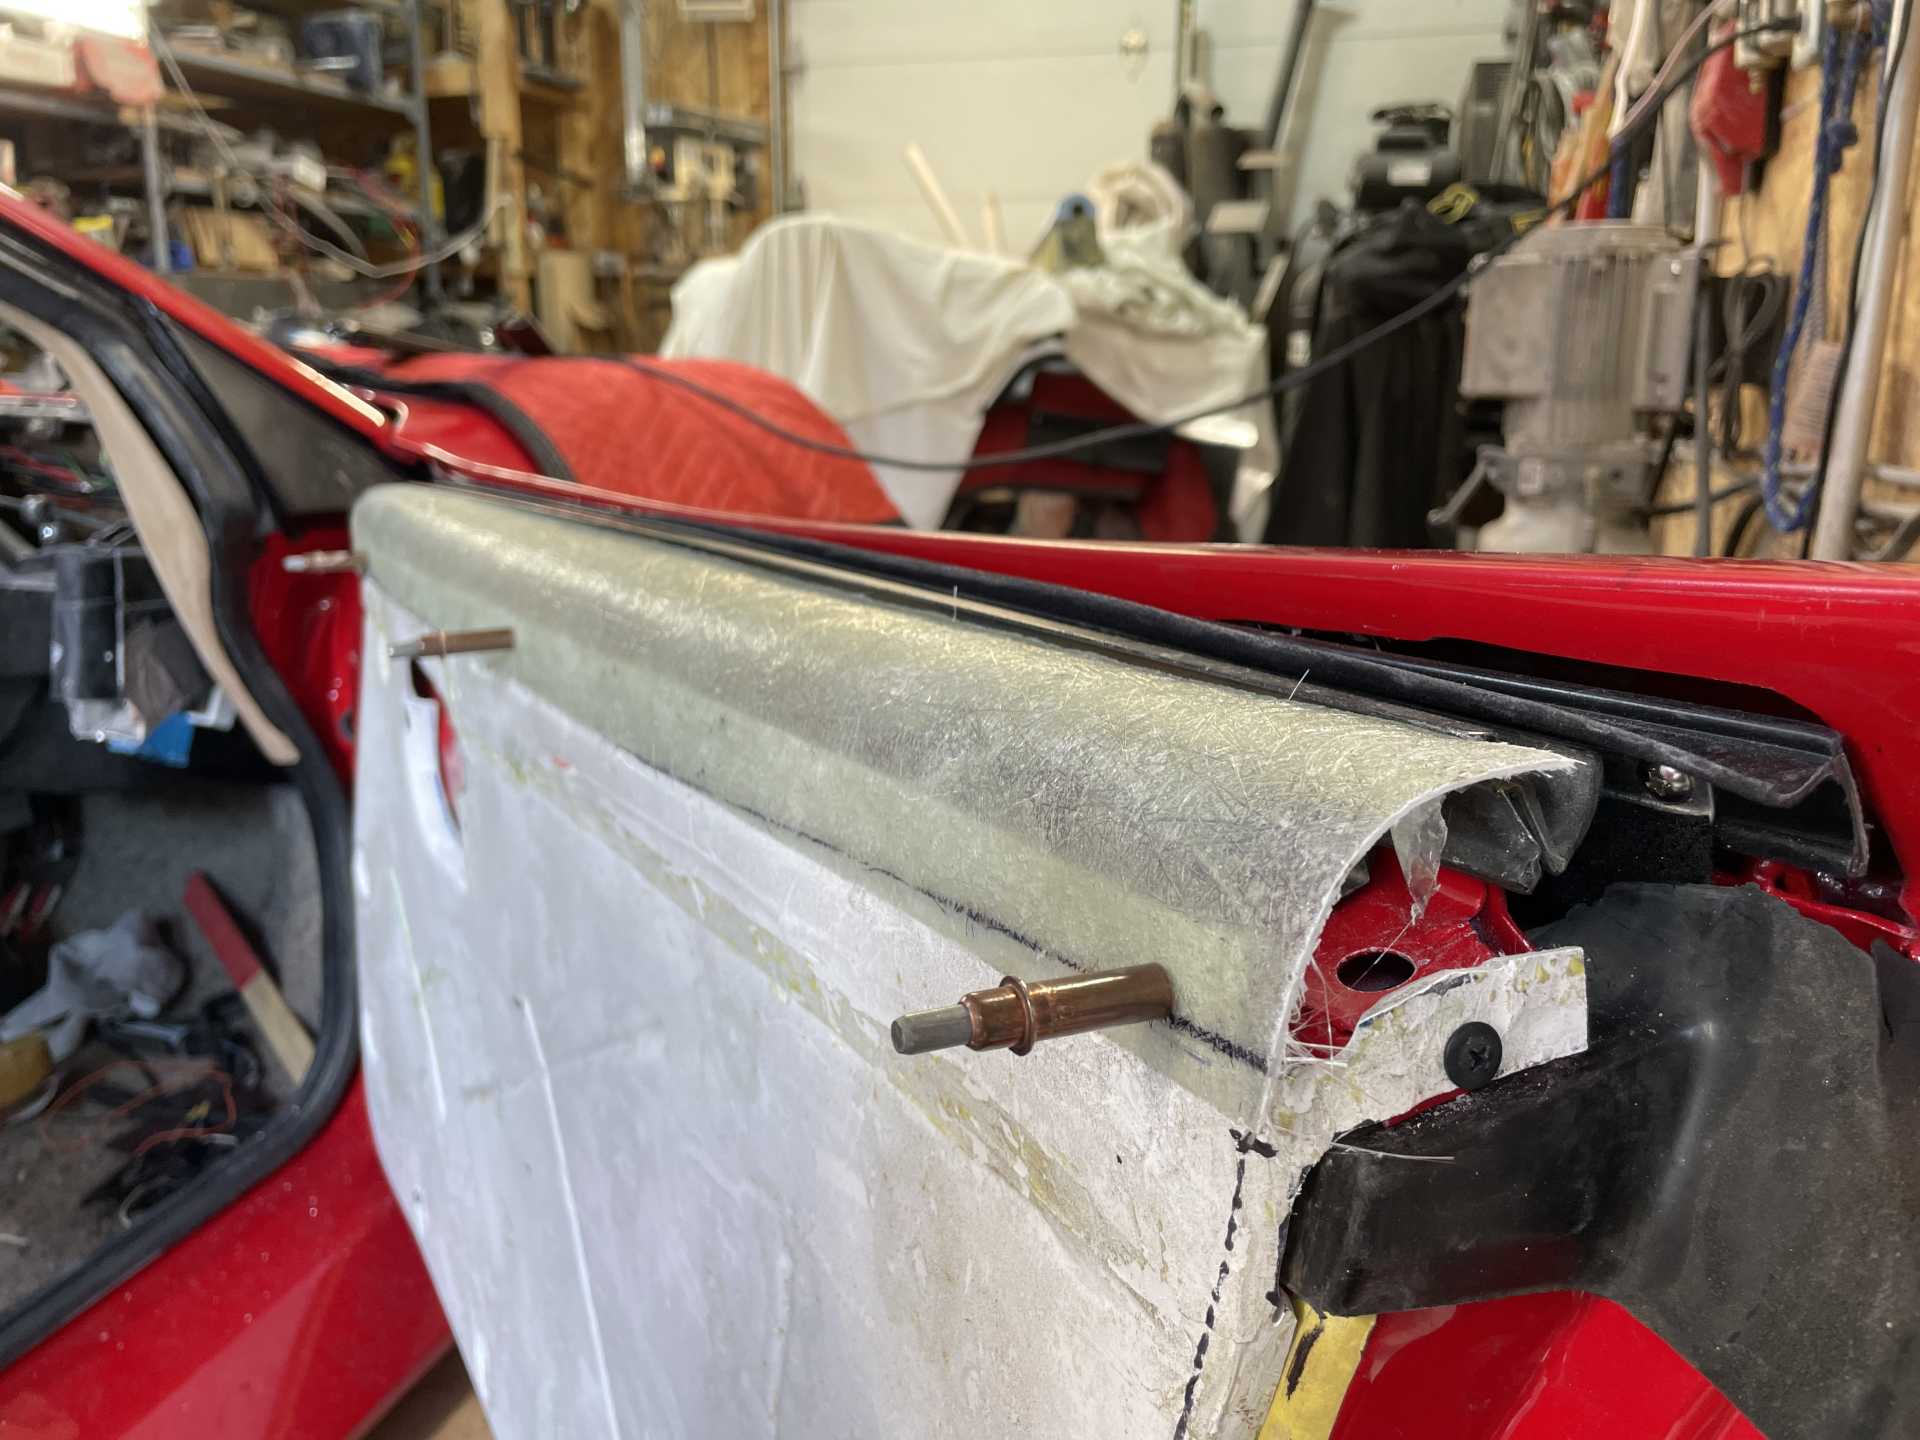
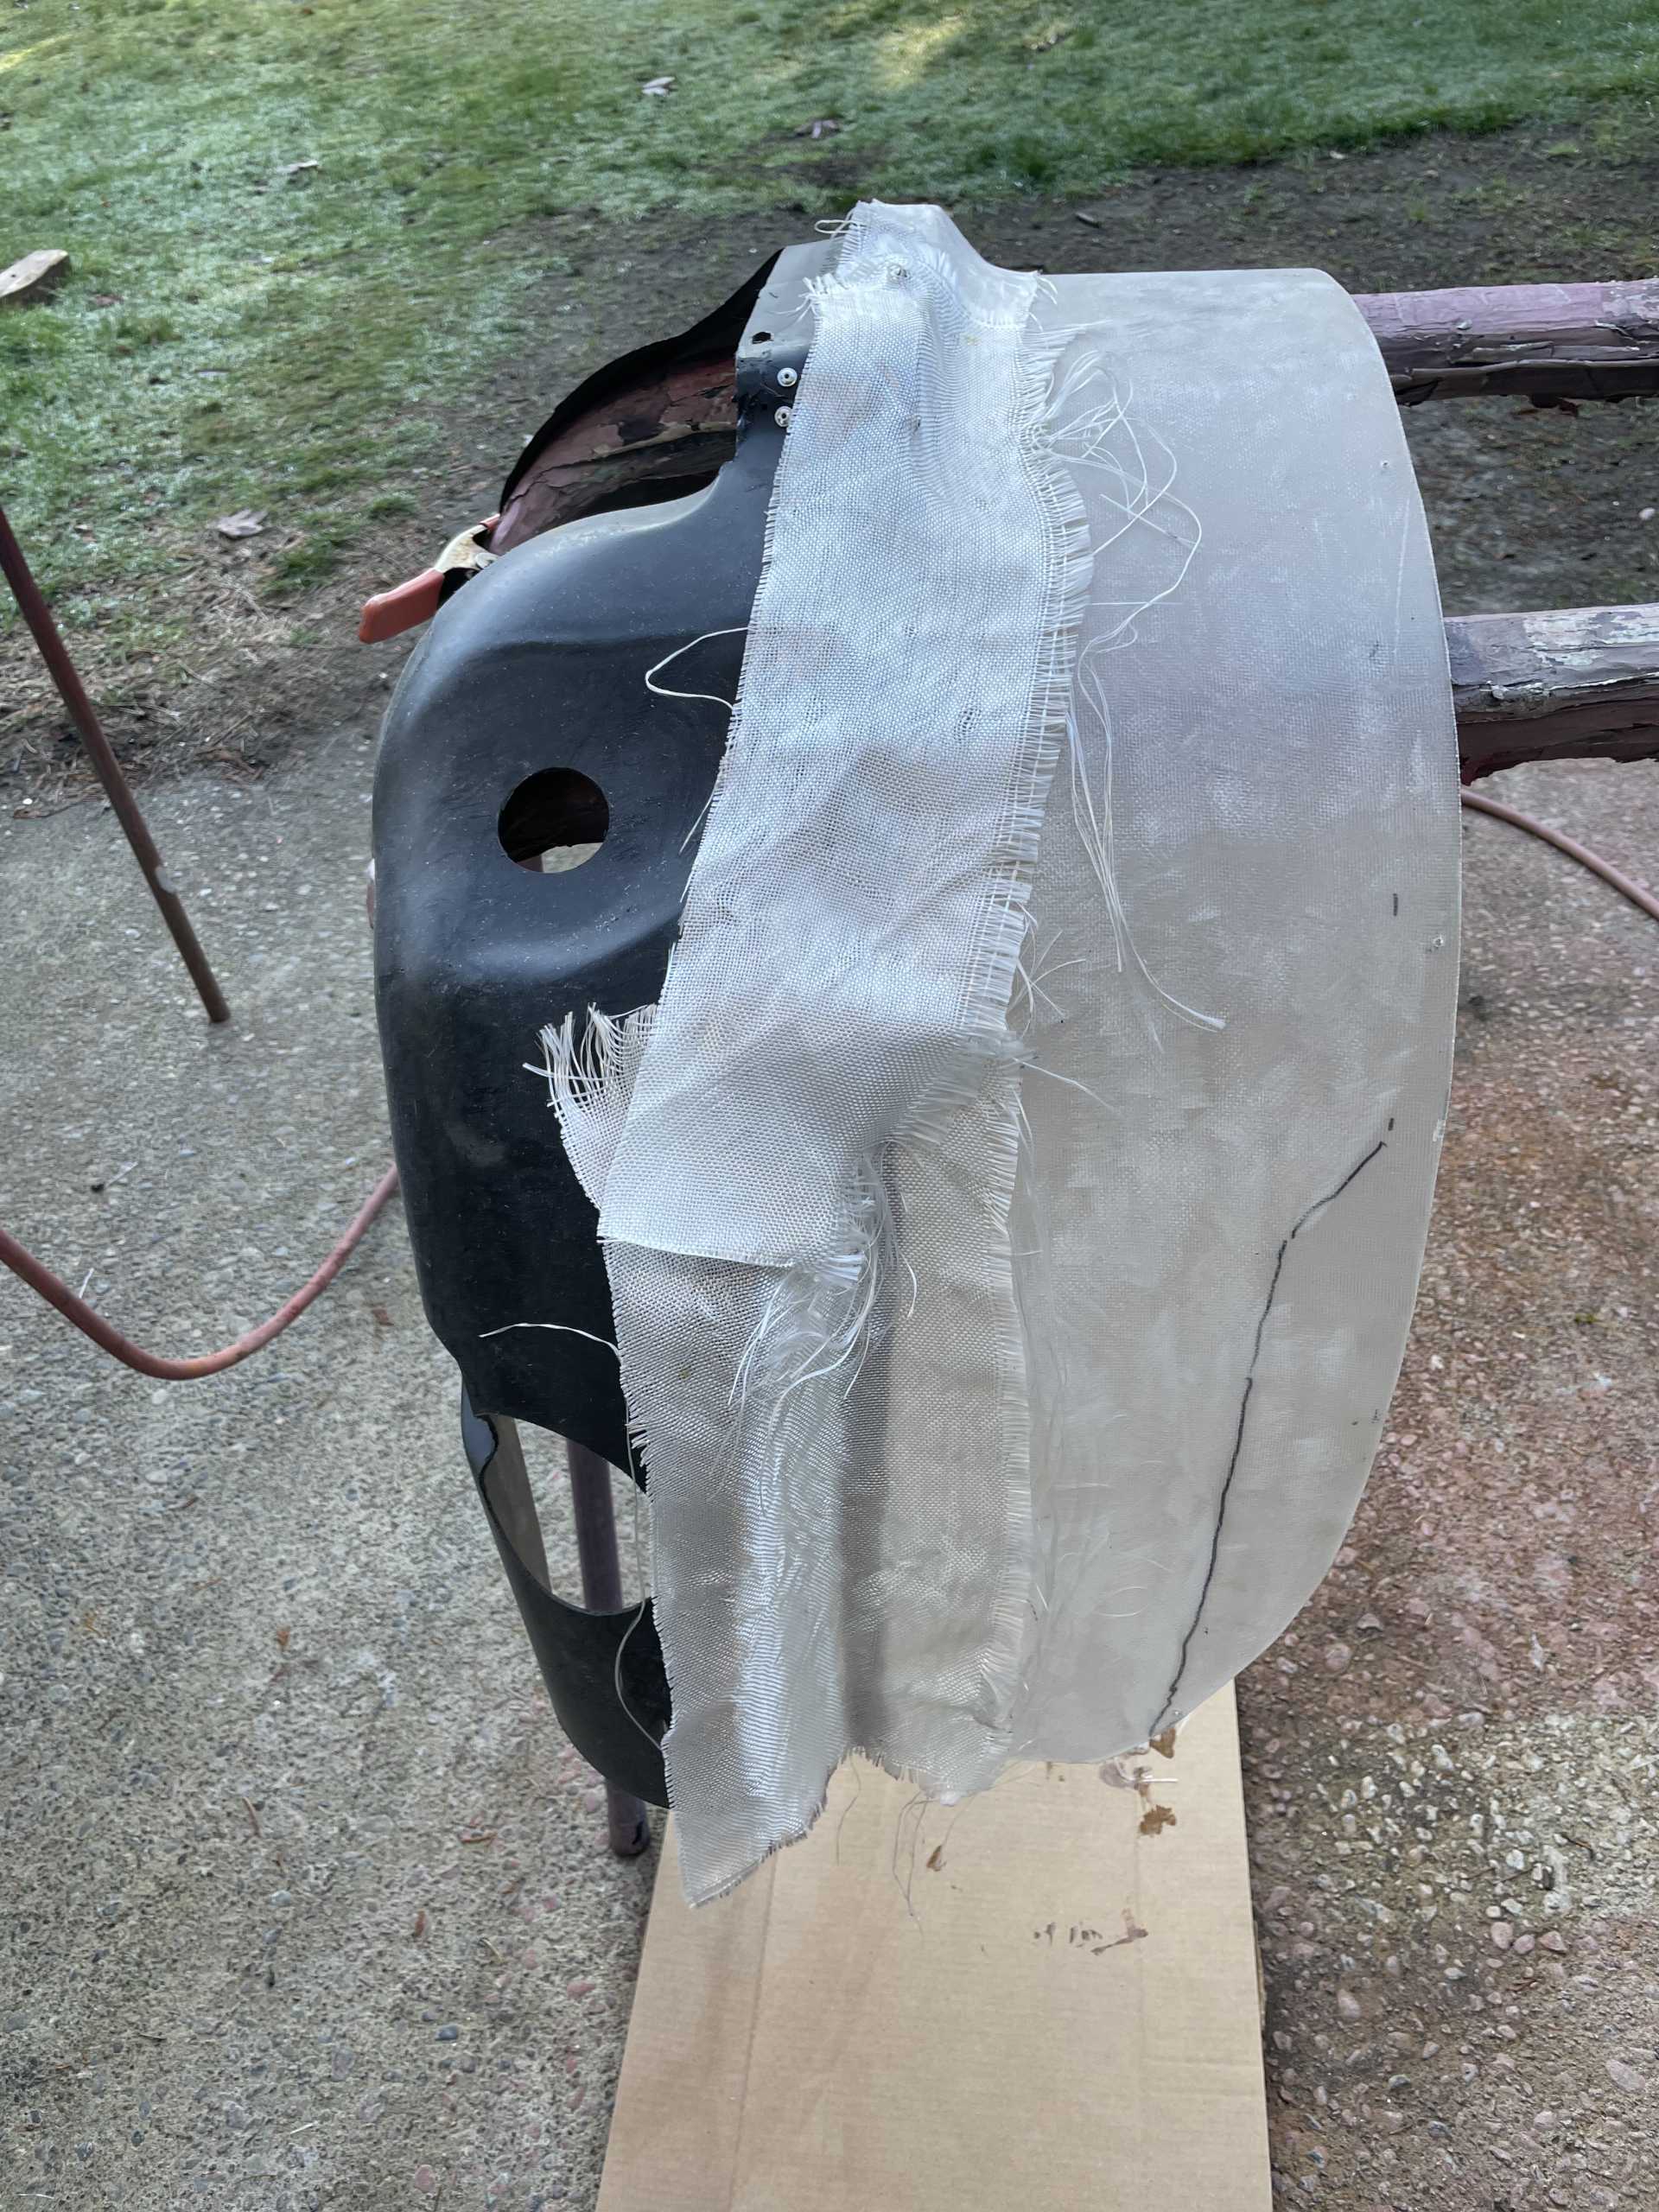
Once it was fully cured next day the next step was to make the end caps. I used some of my foam and filled in the ends sanded to the shape I needed and glassed over the foam and let cure.
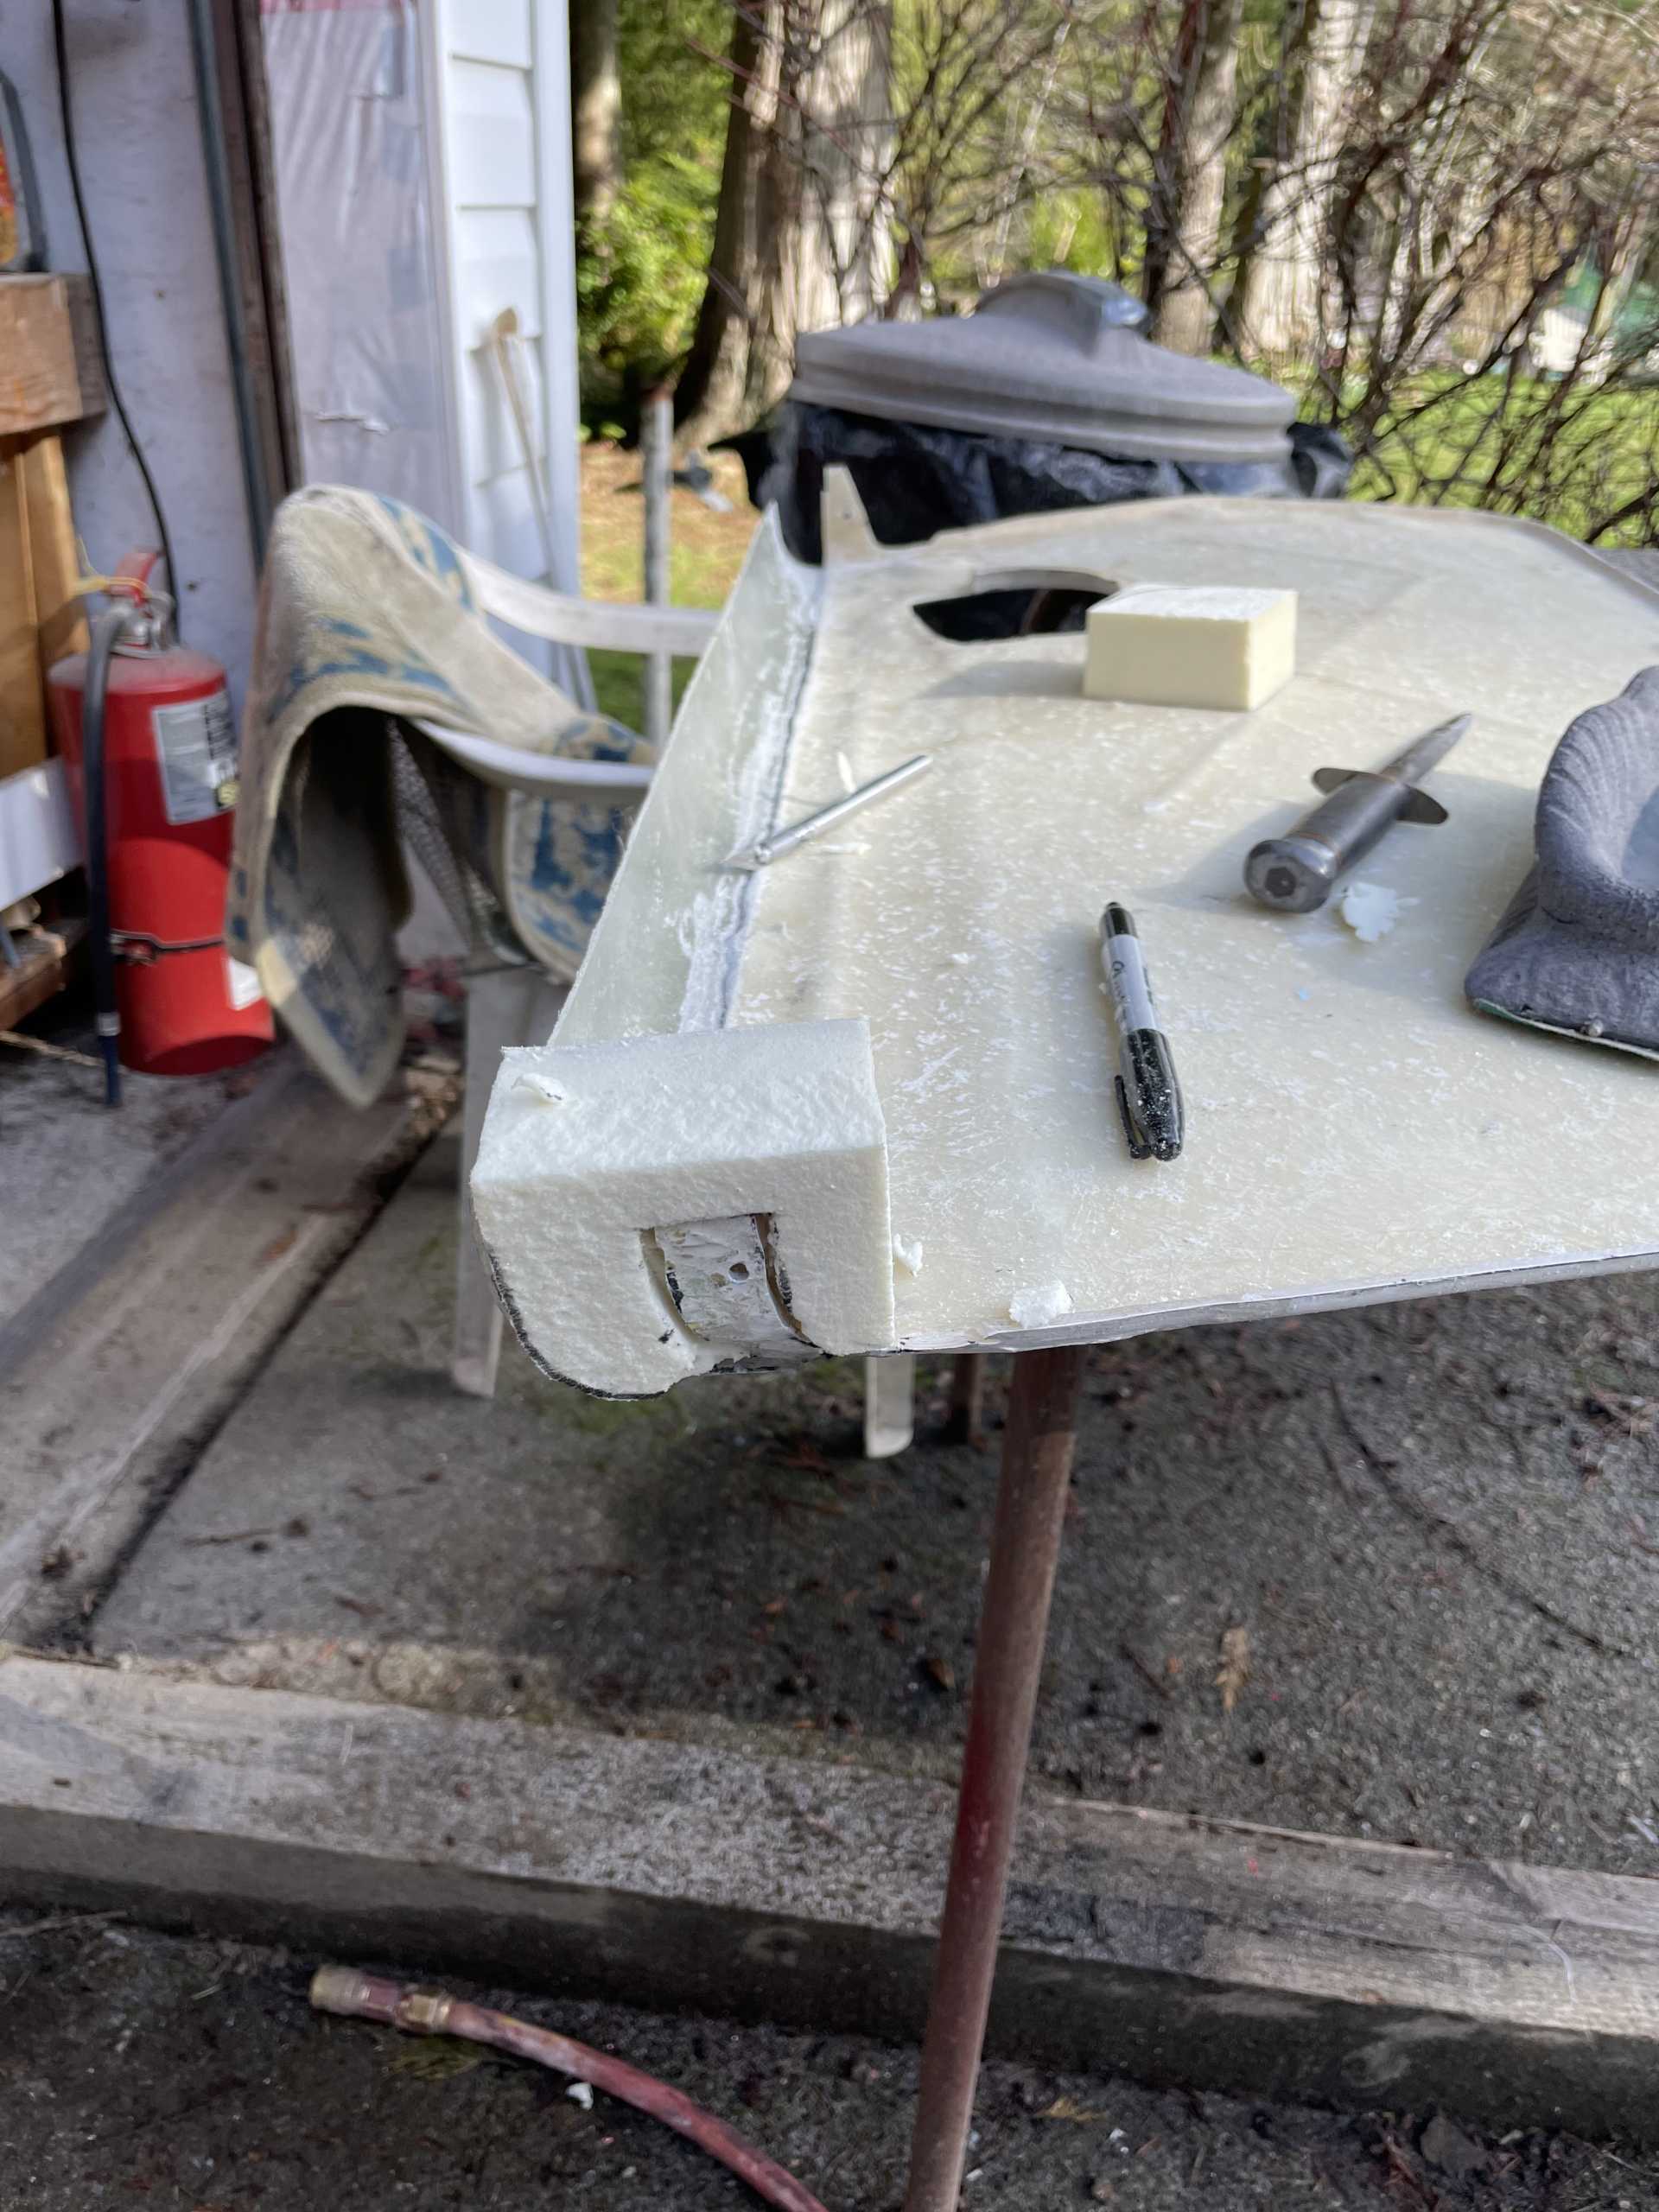
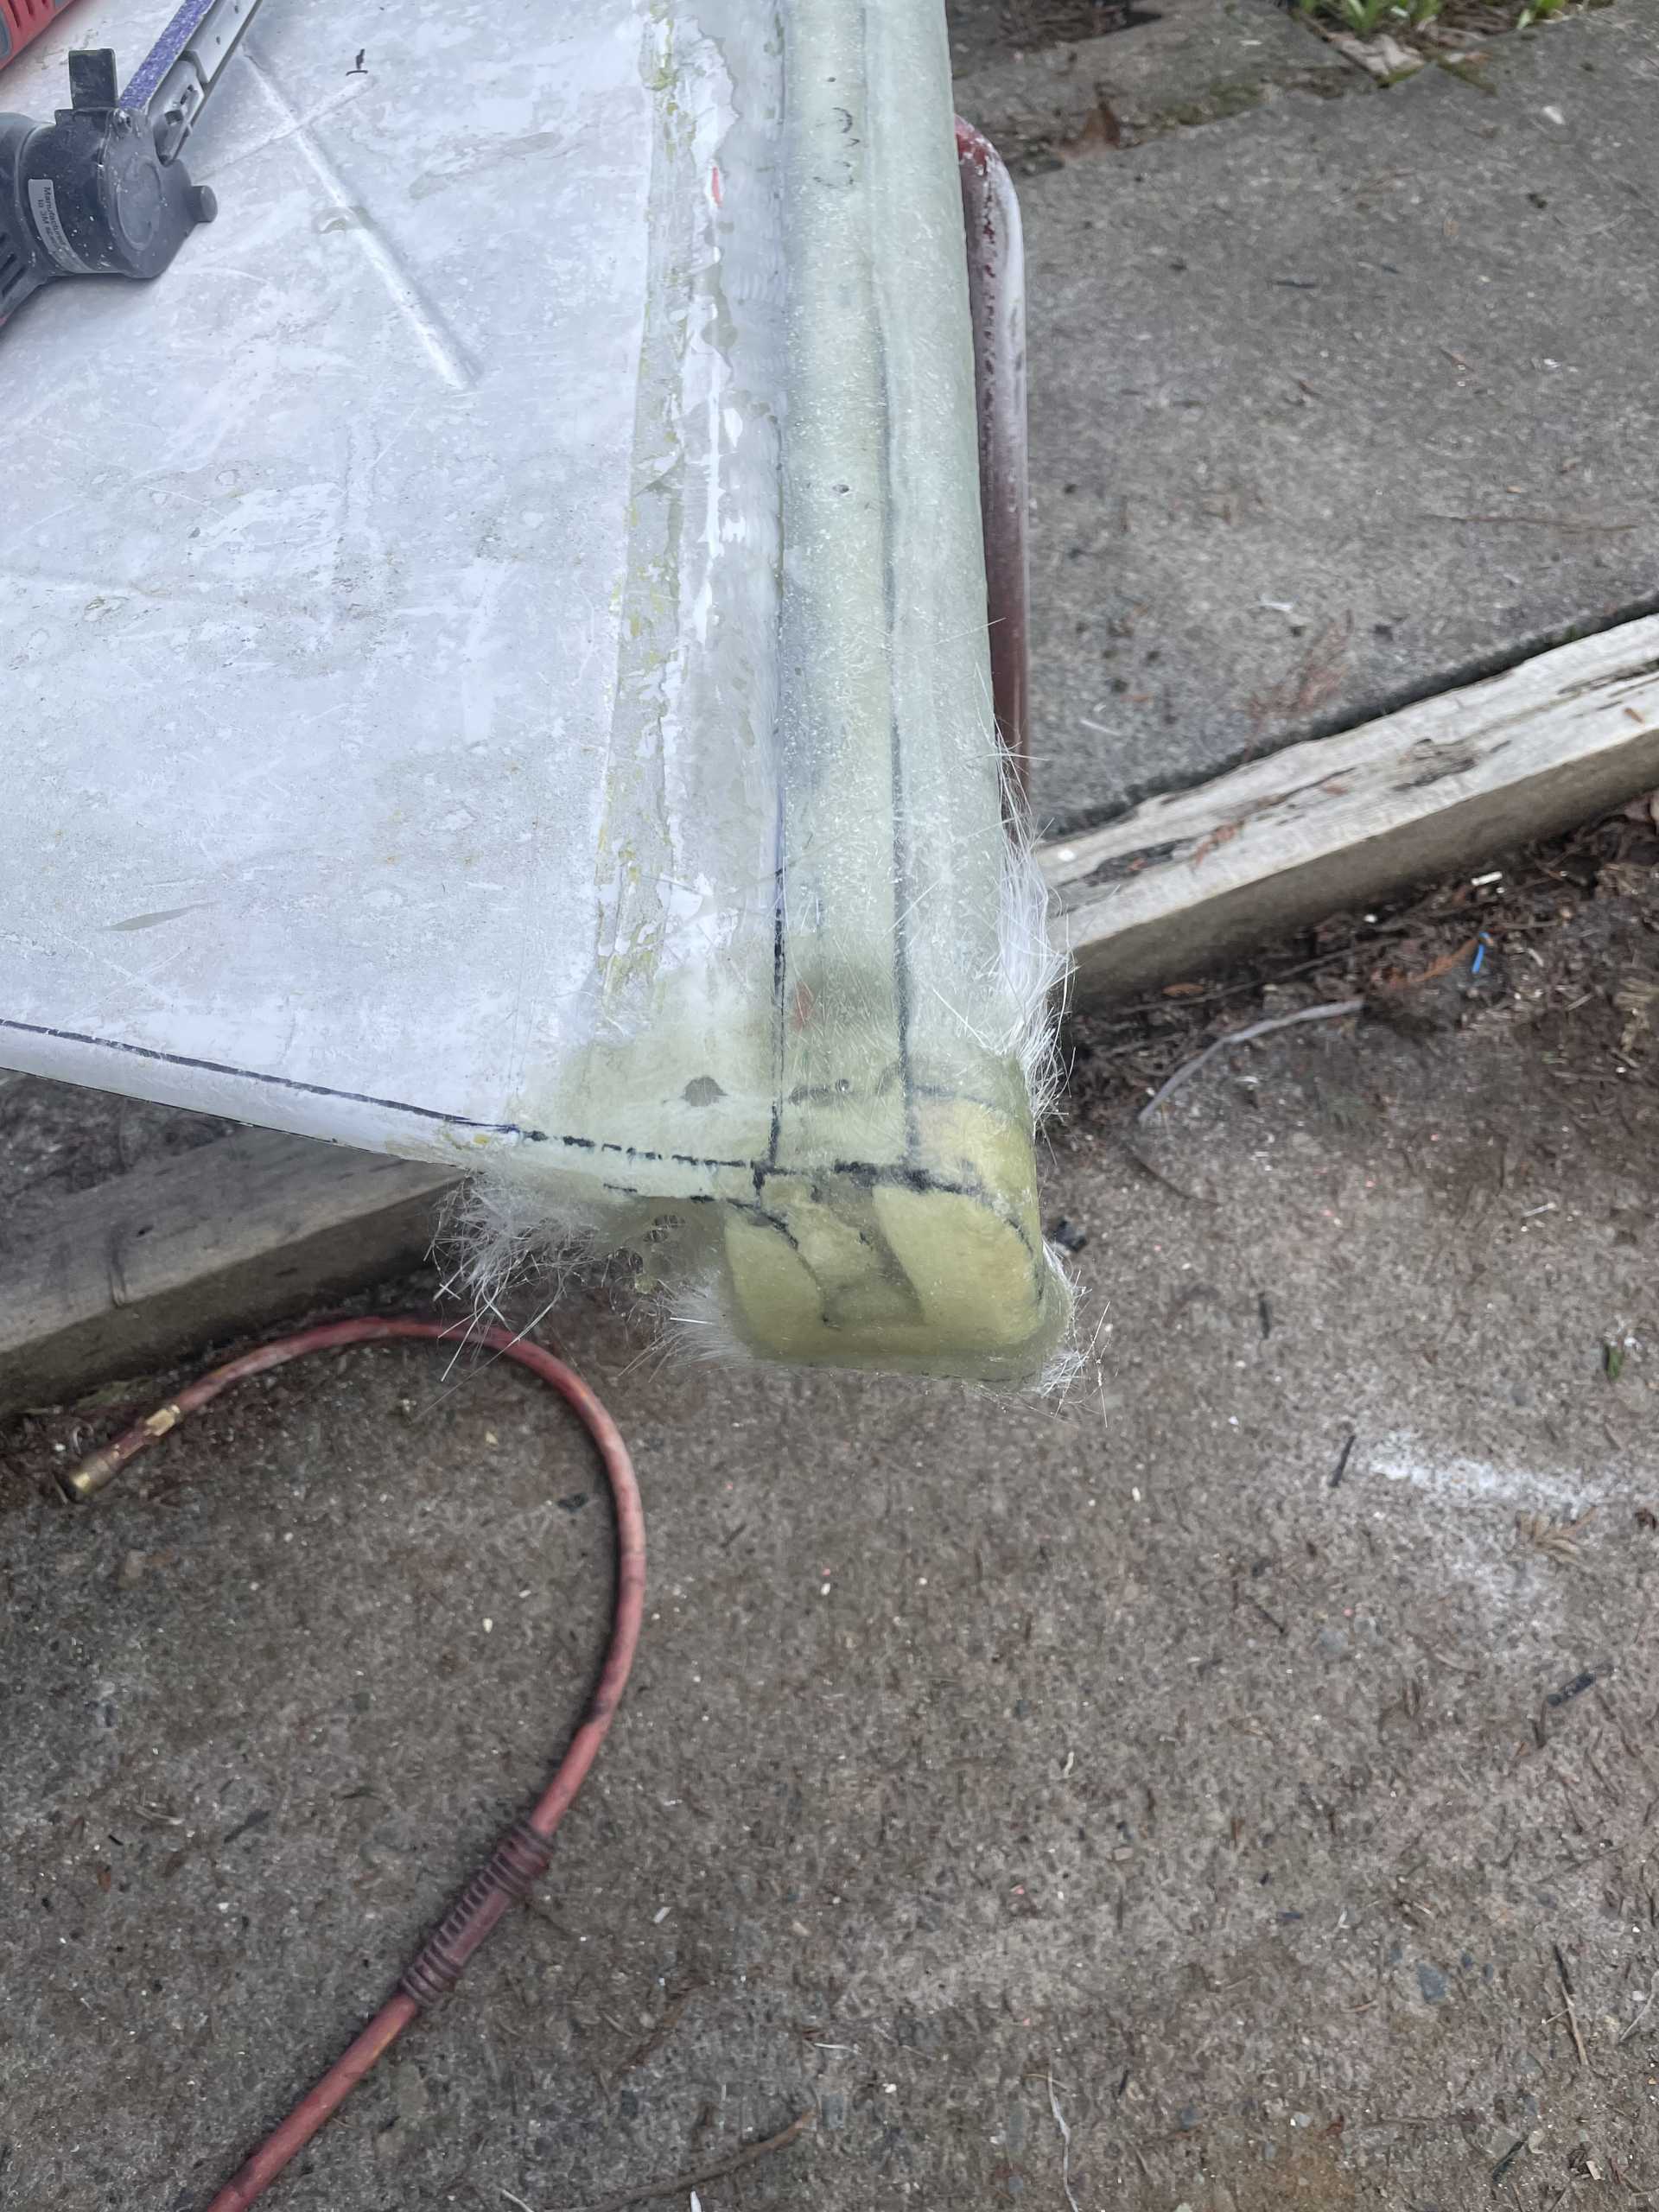
I then cleaned them up and fit them to the door
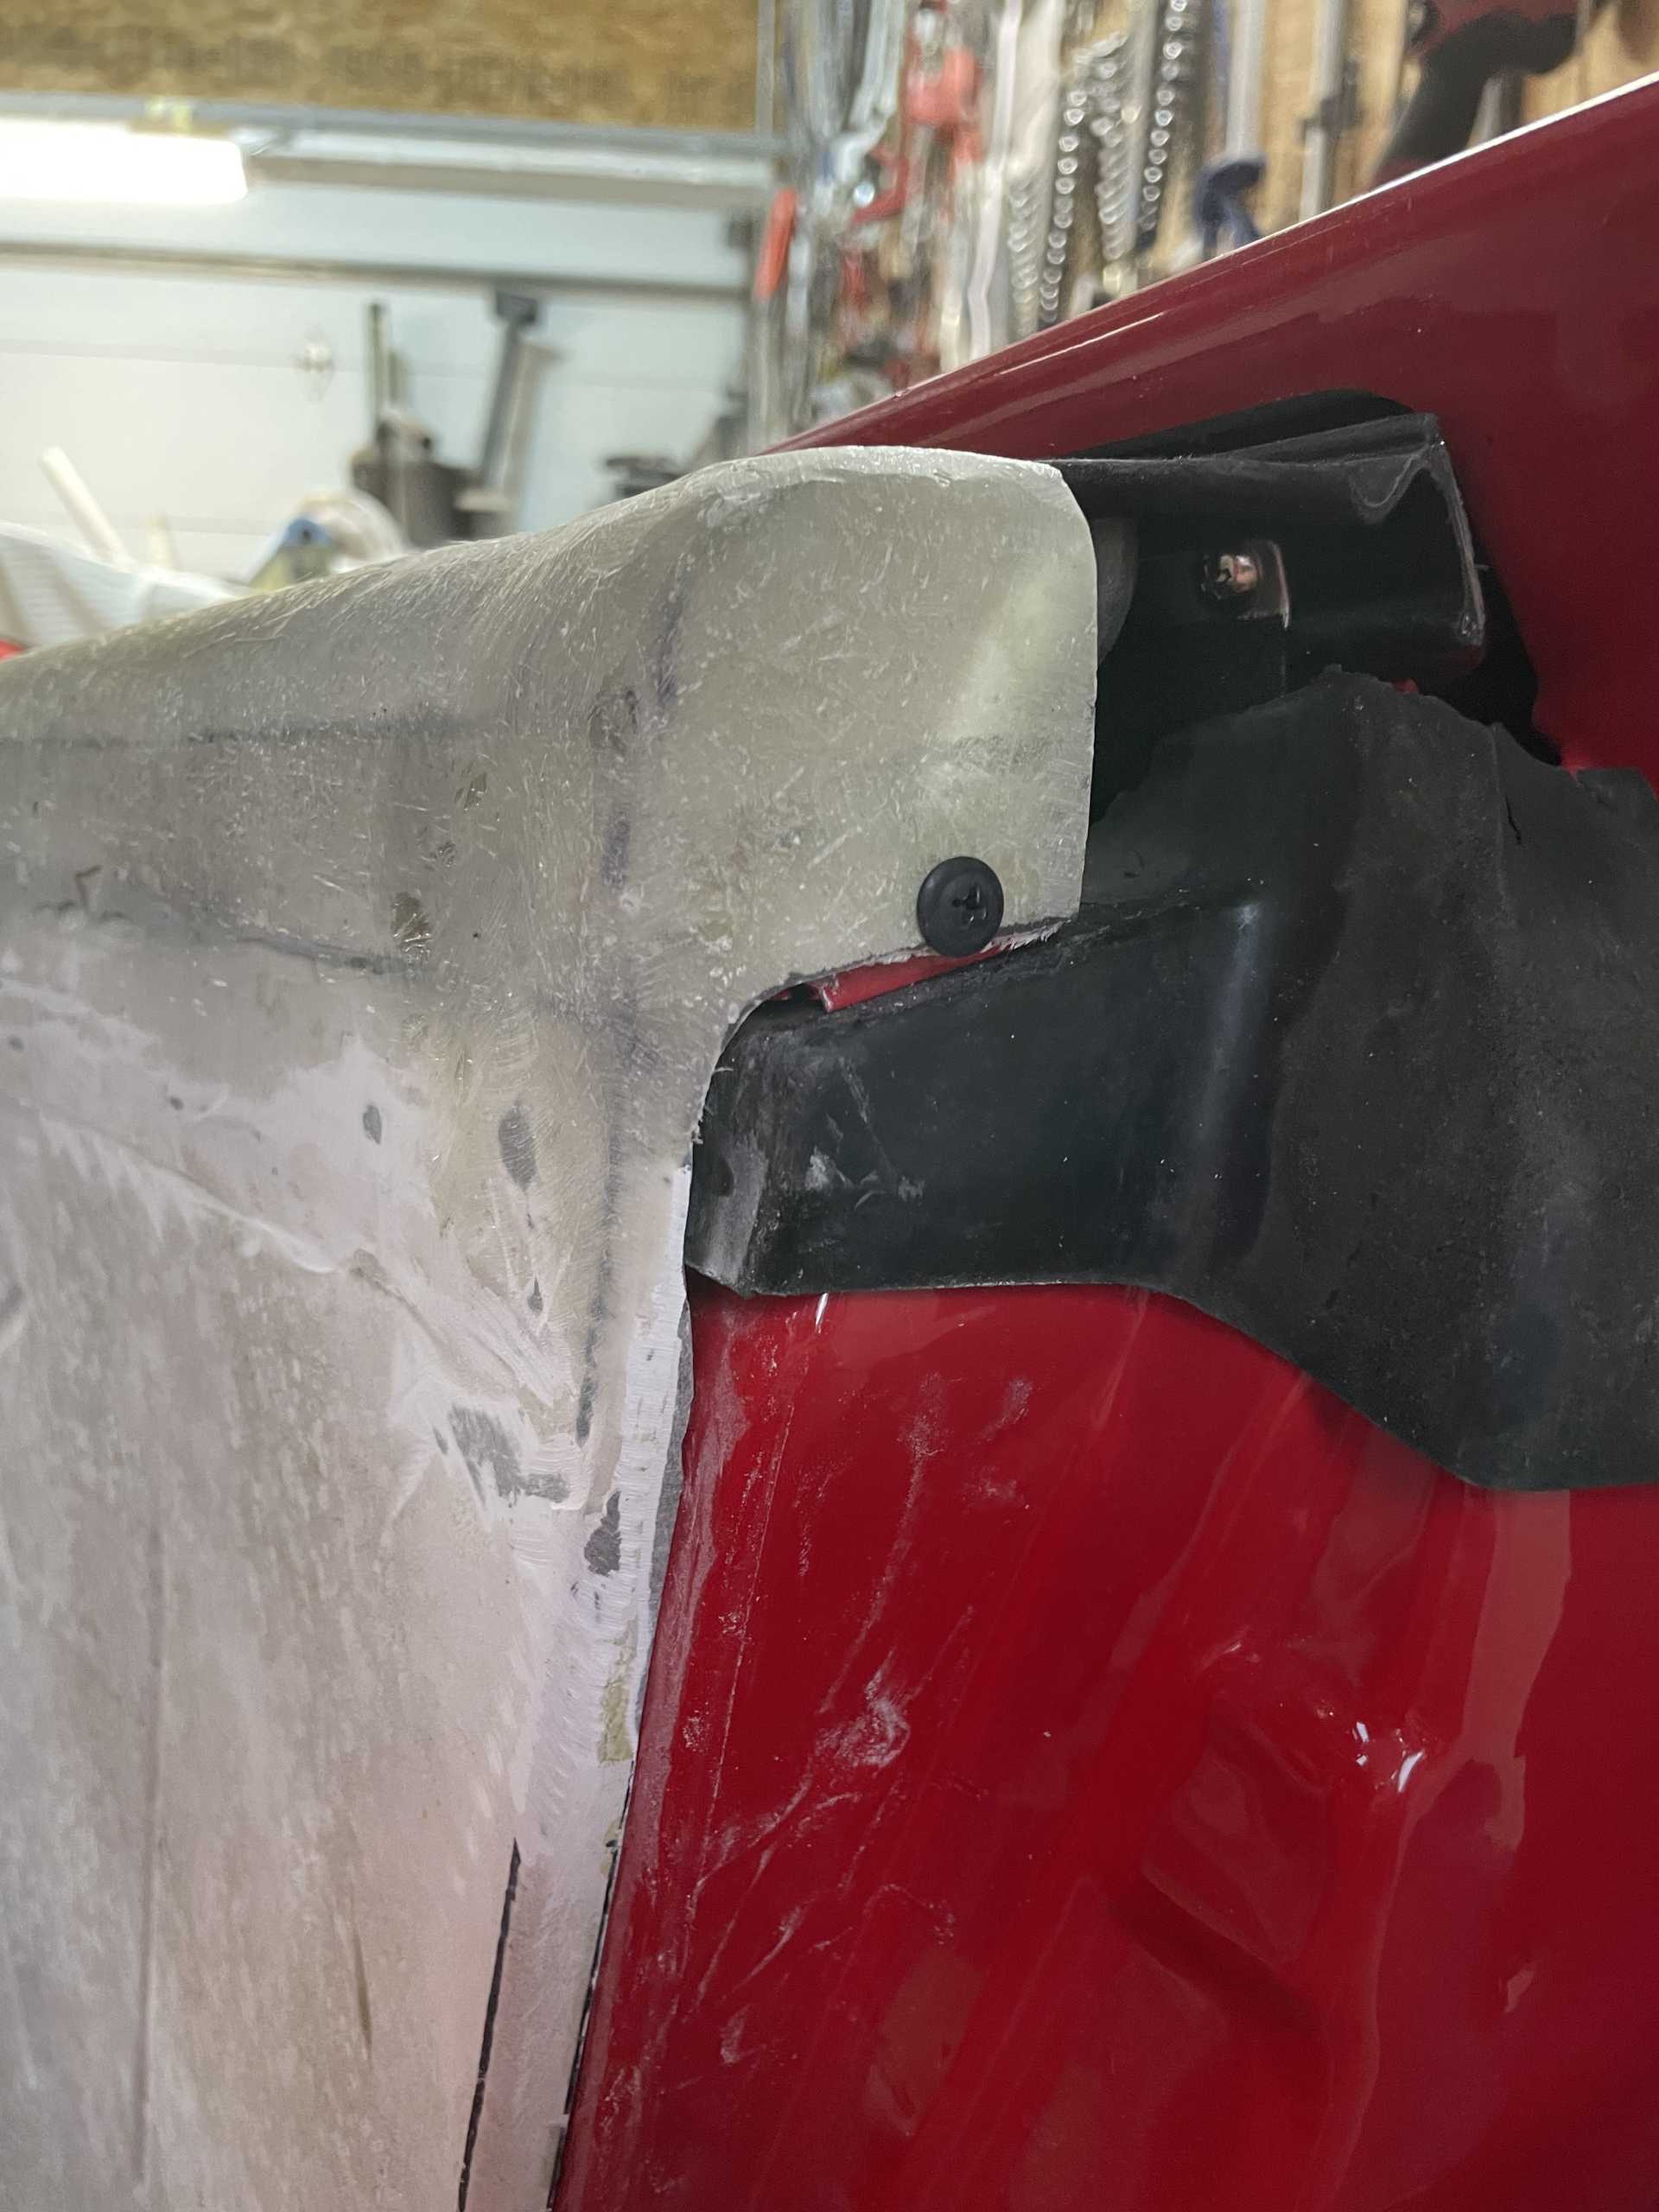
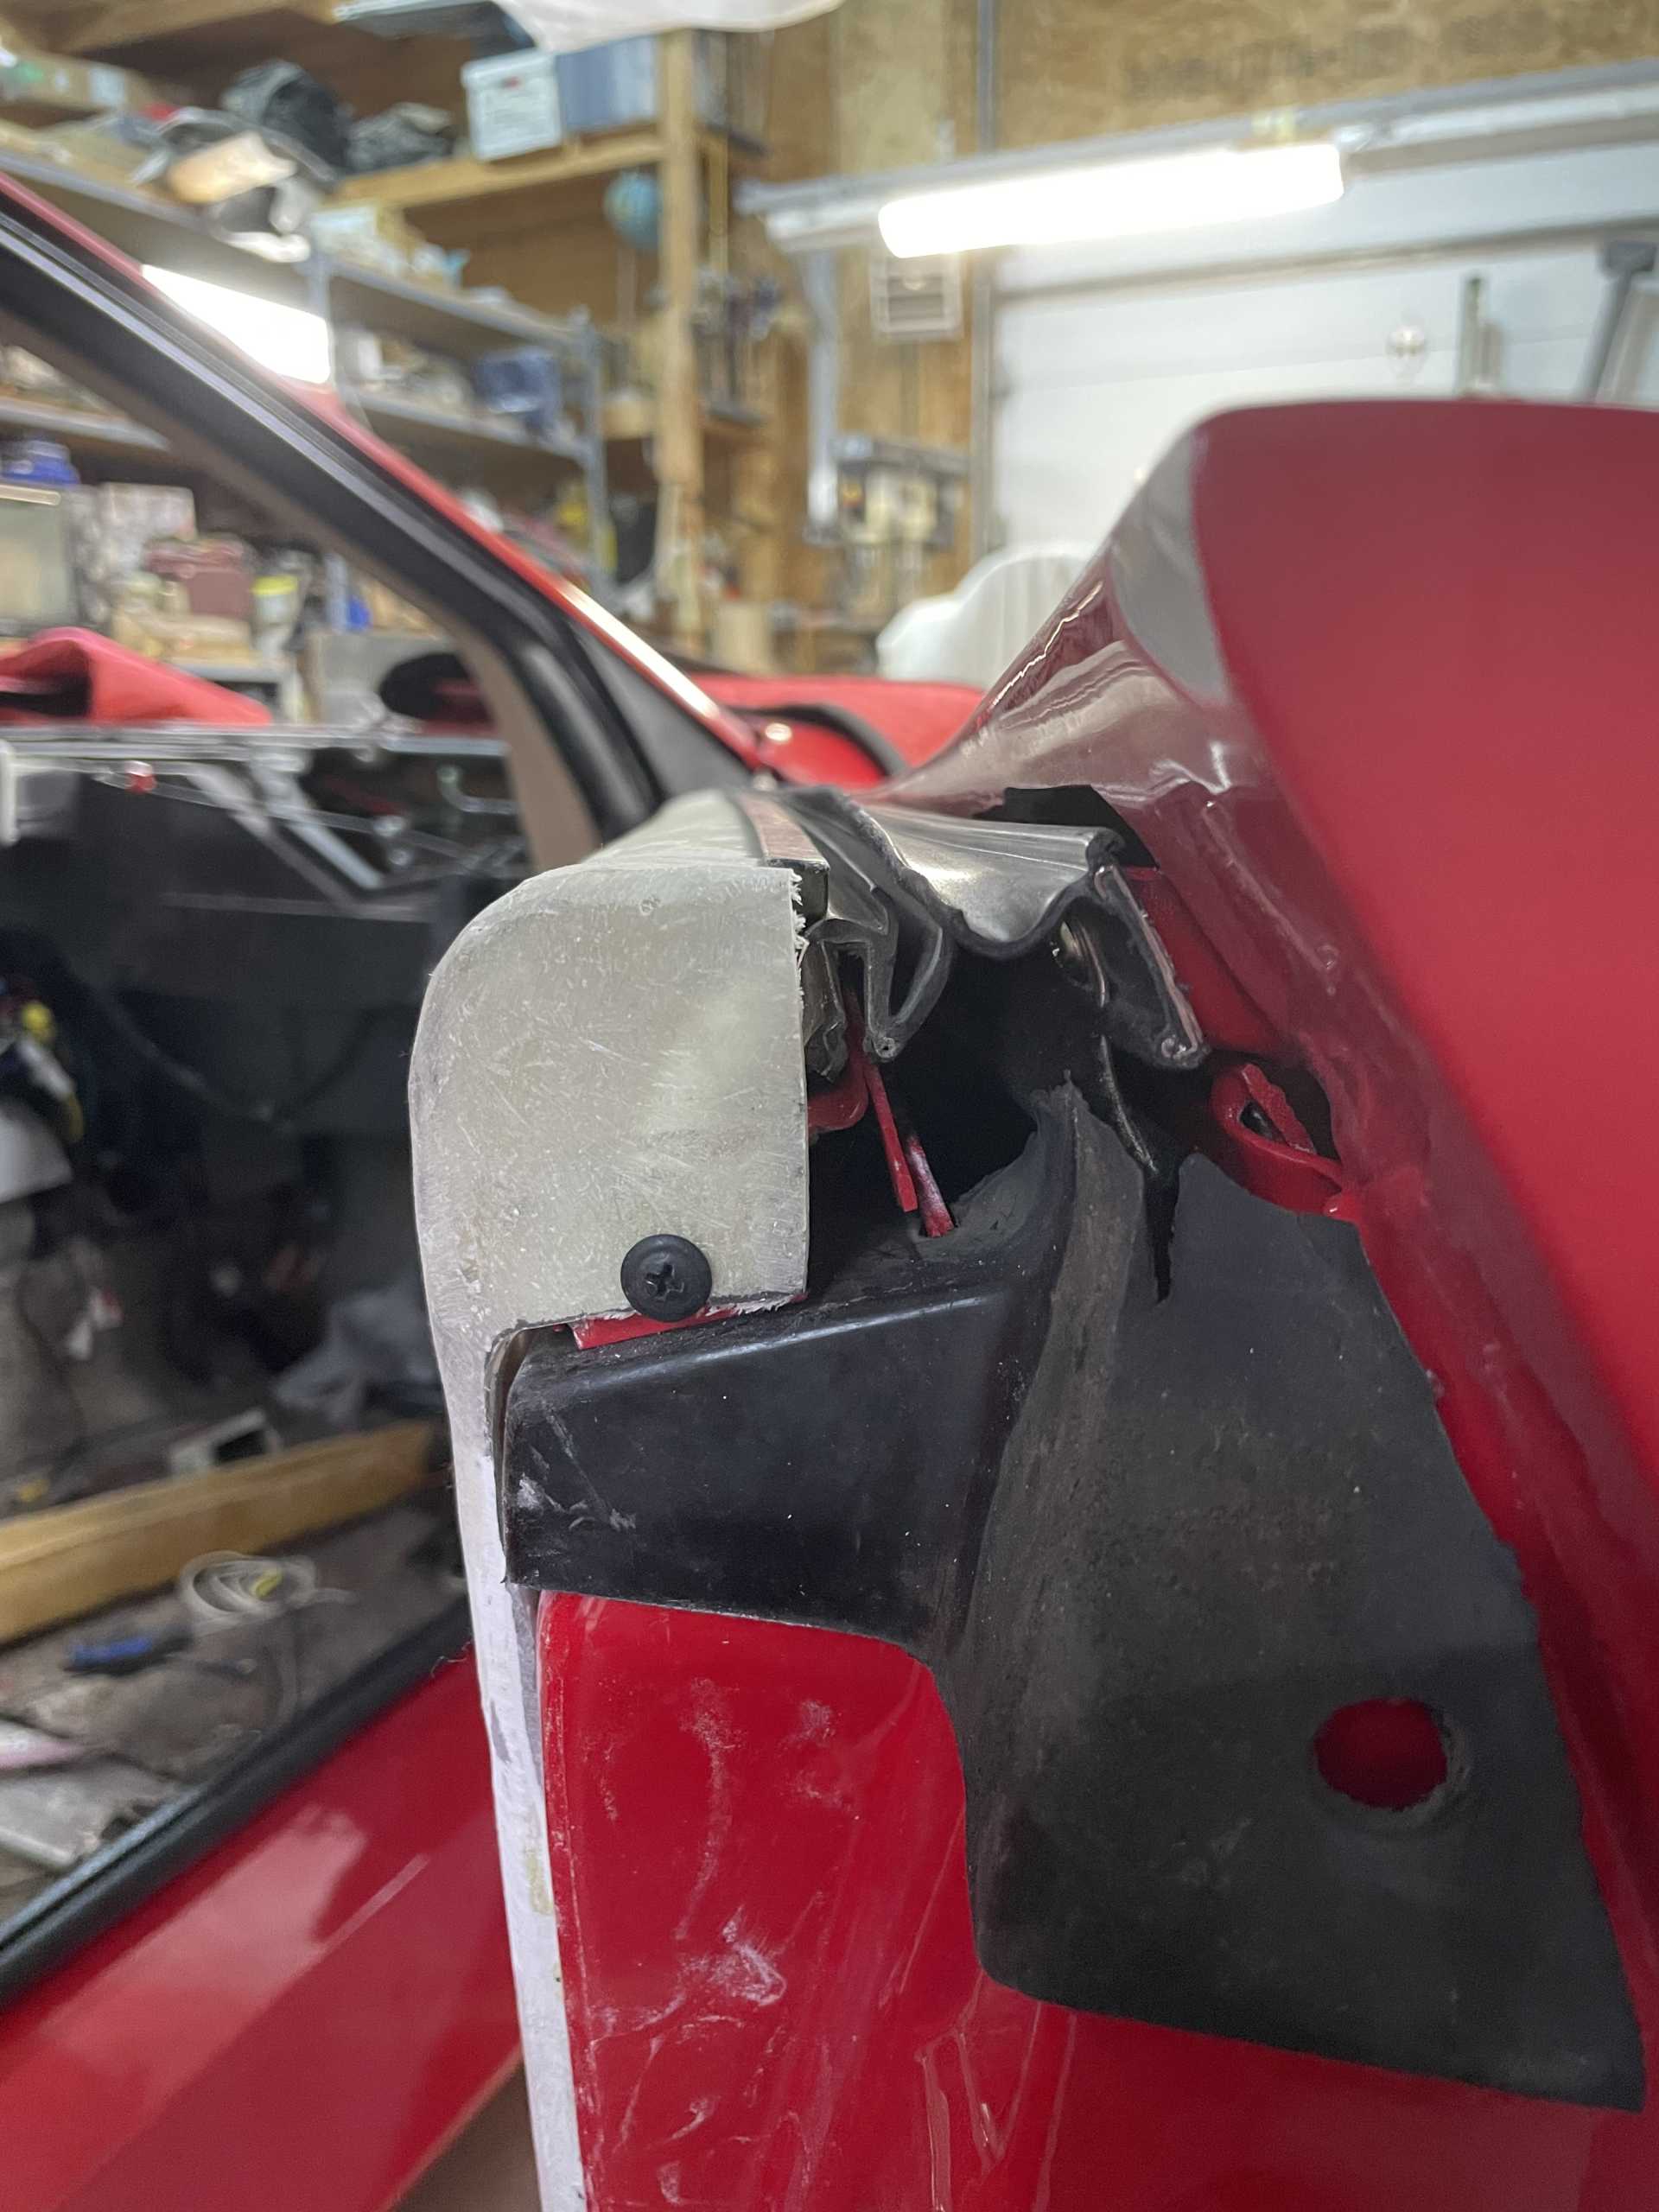
Then it was time to modify the “B” pillar to fit the door card
So the next step will be to install the dash so I can determine where the armrest will be attached …….
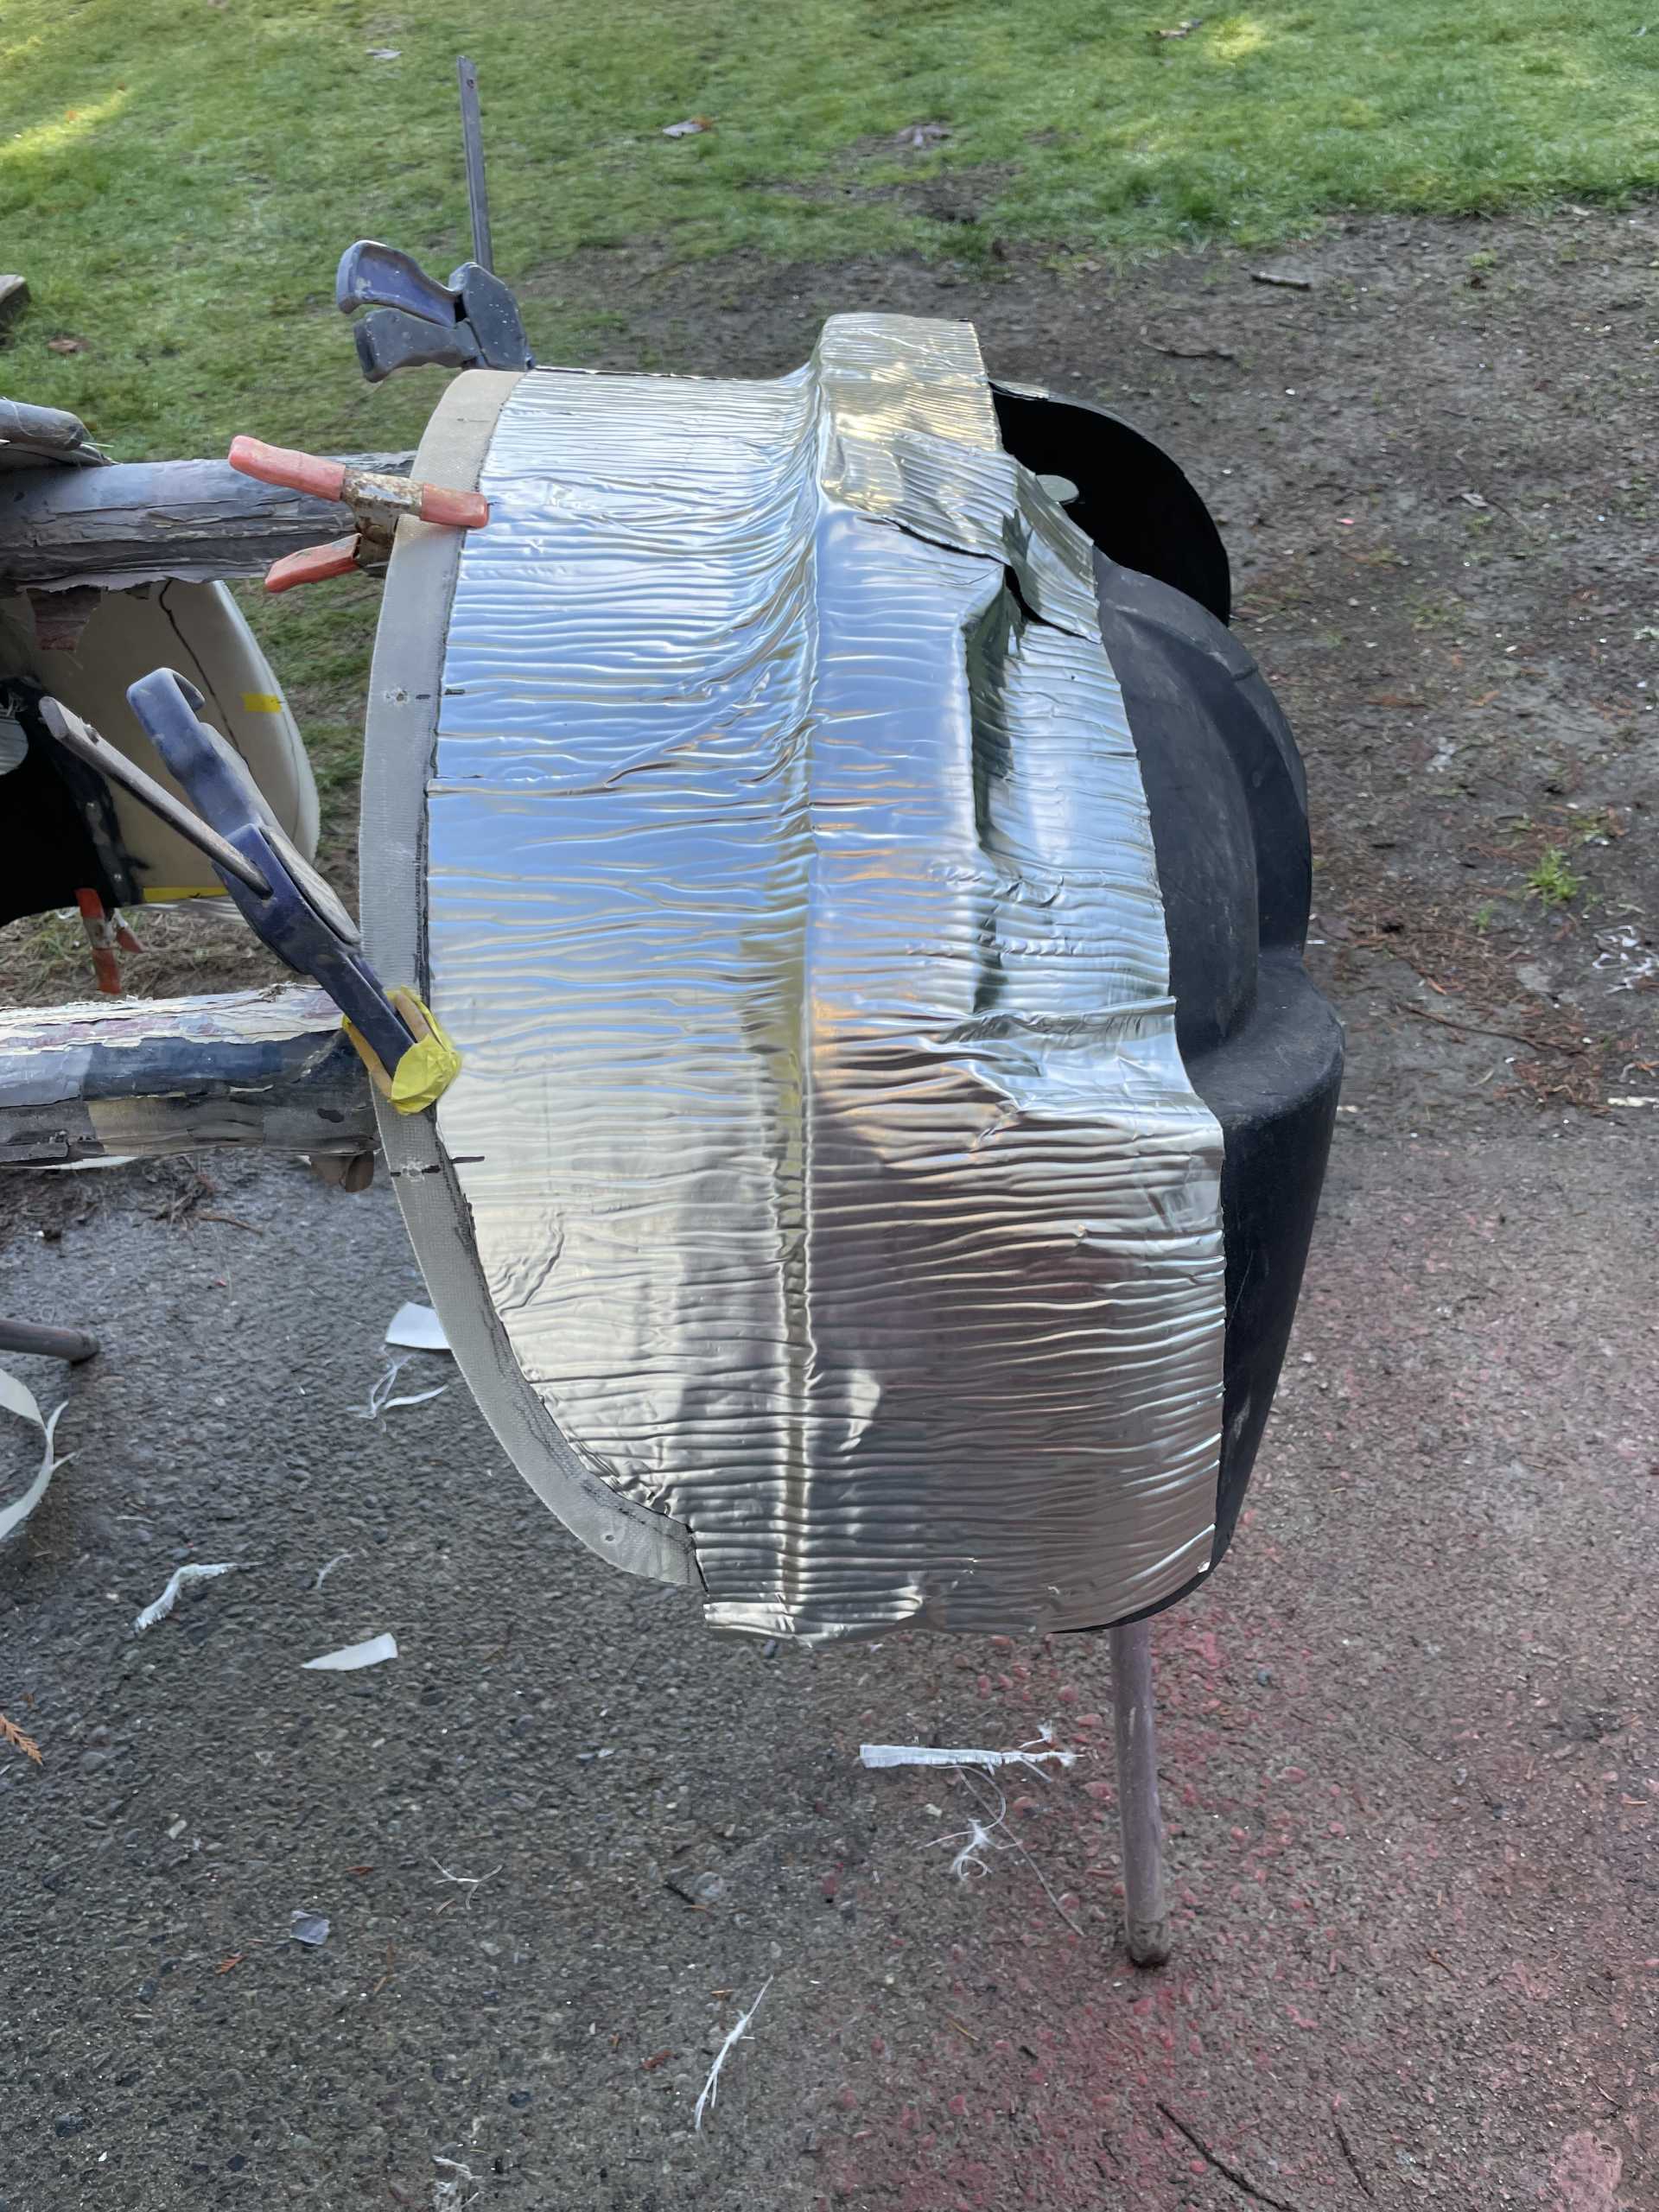
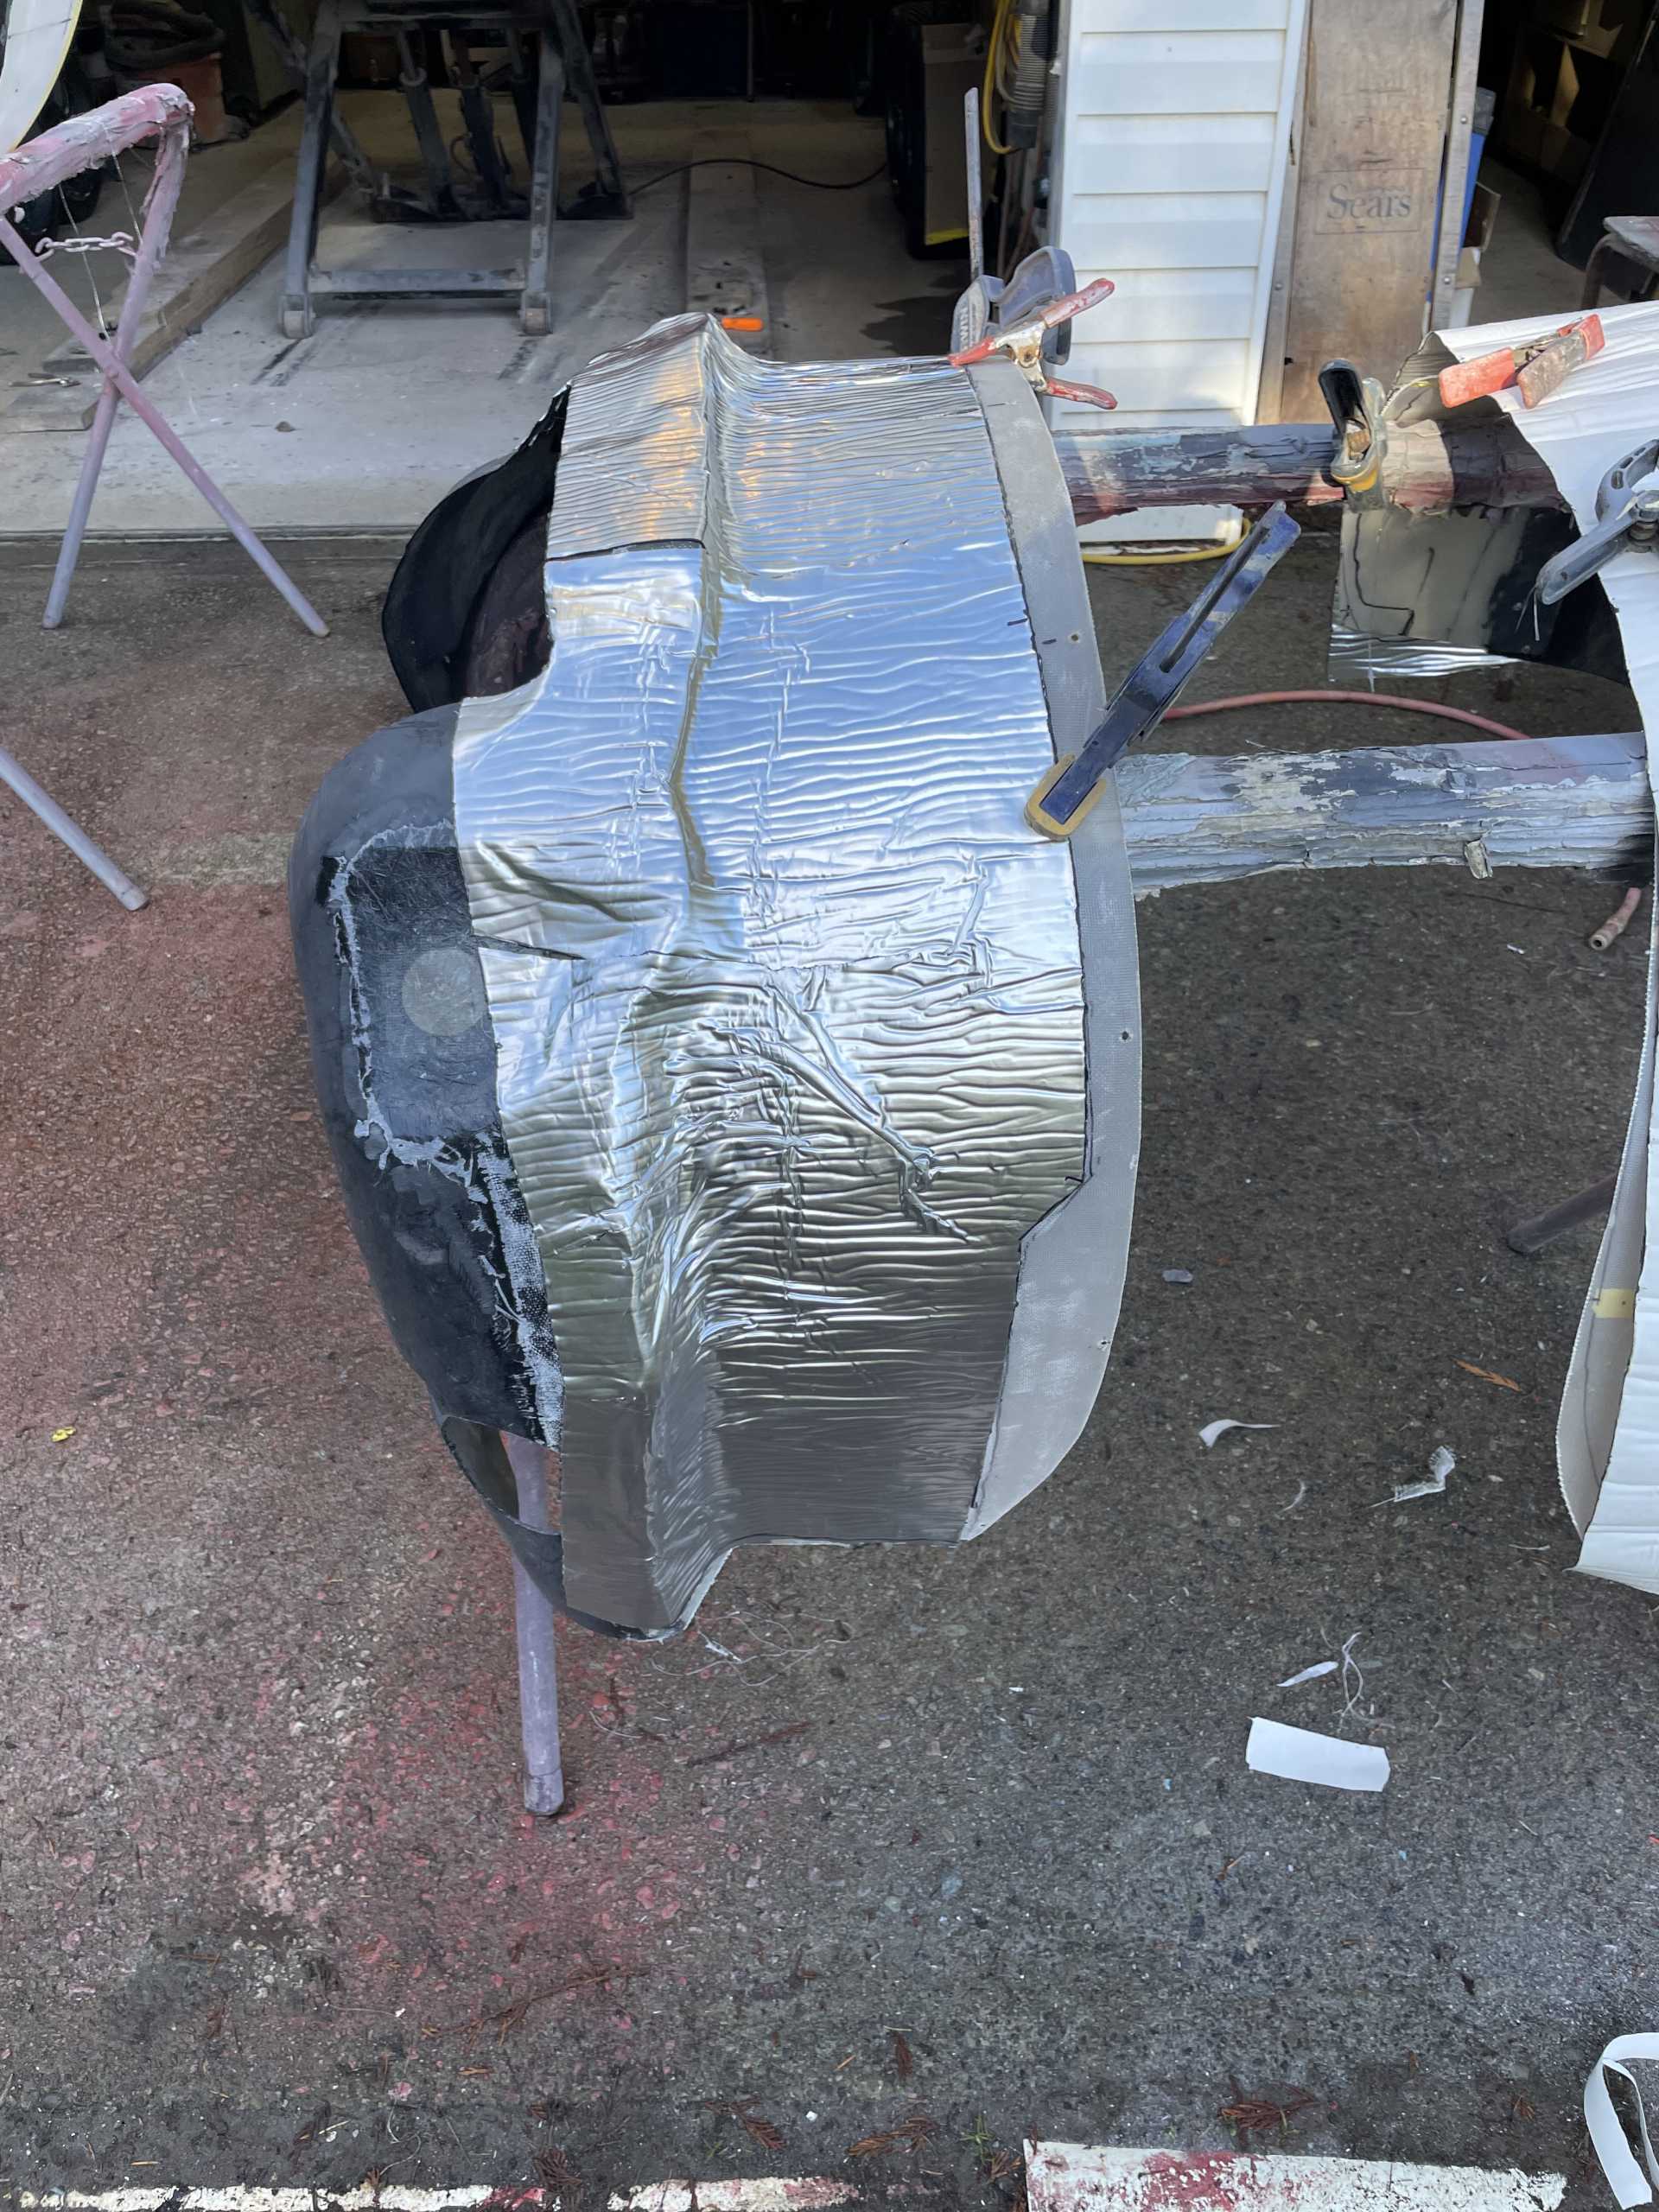
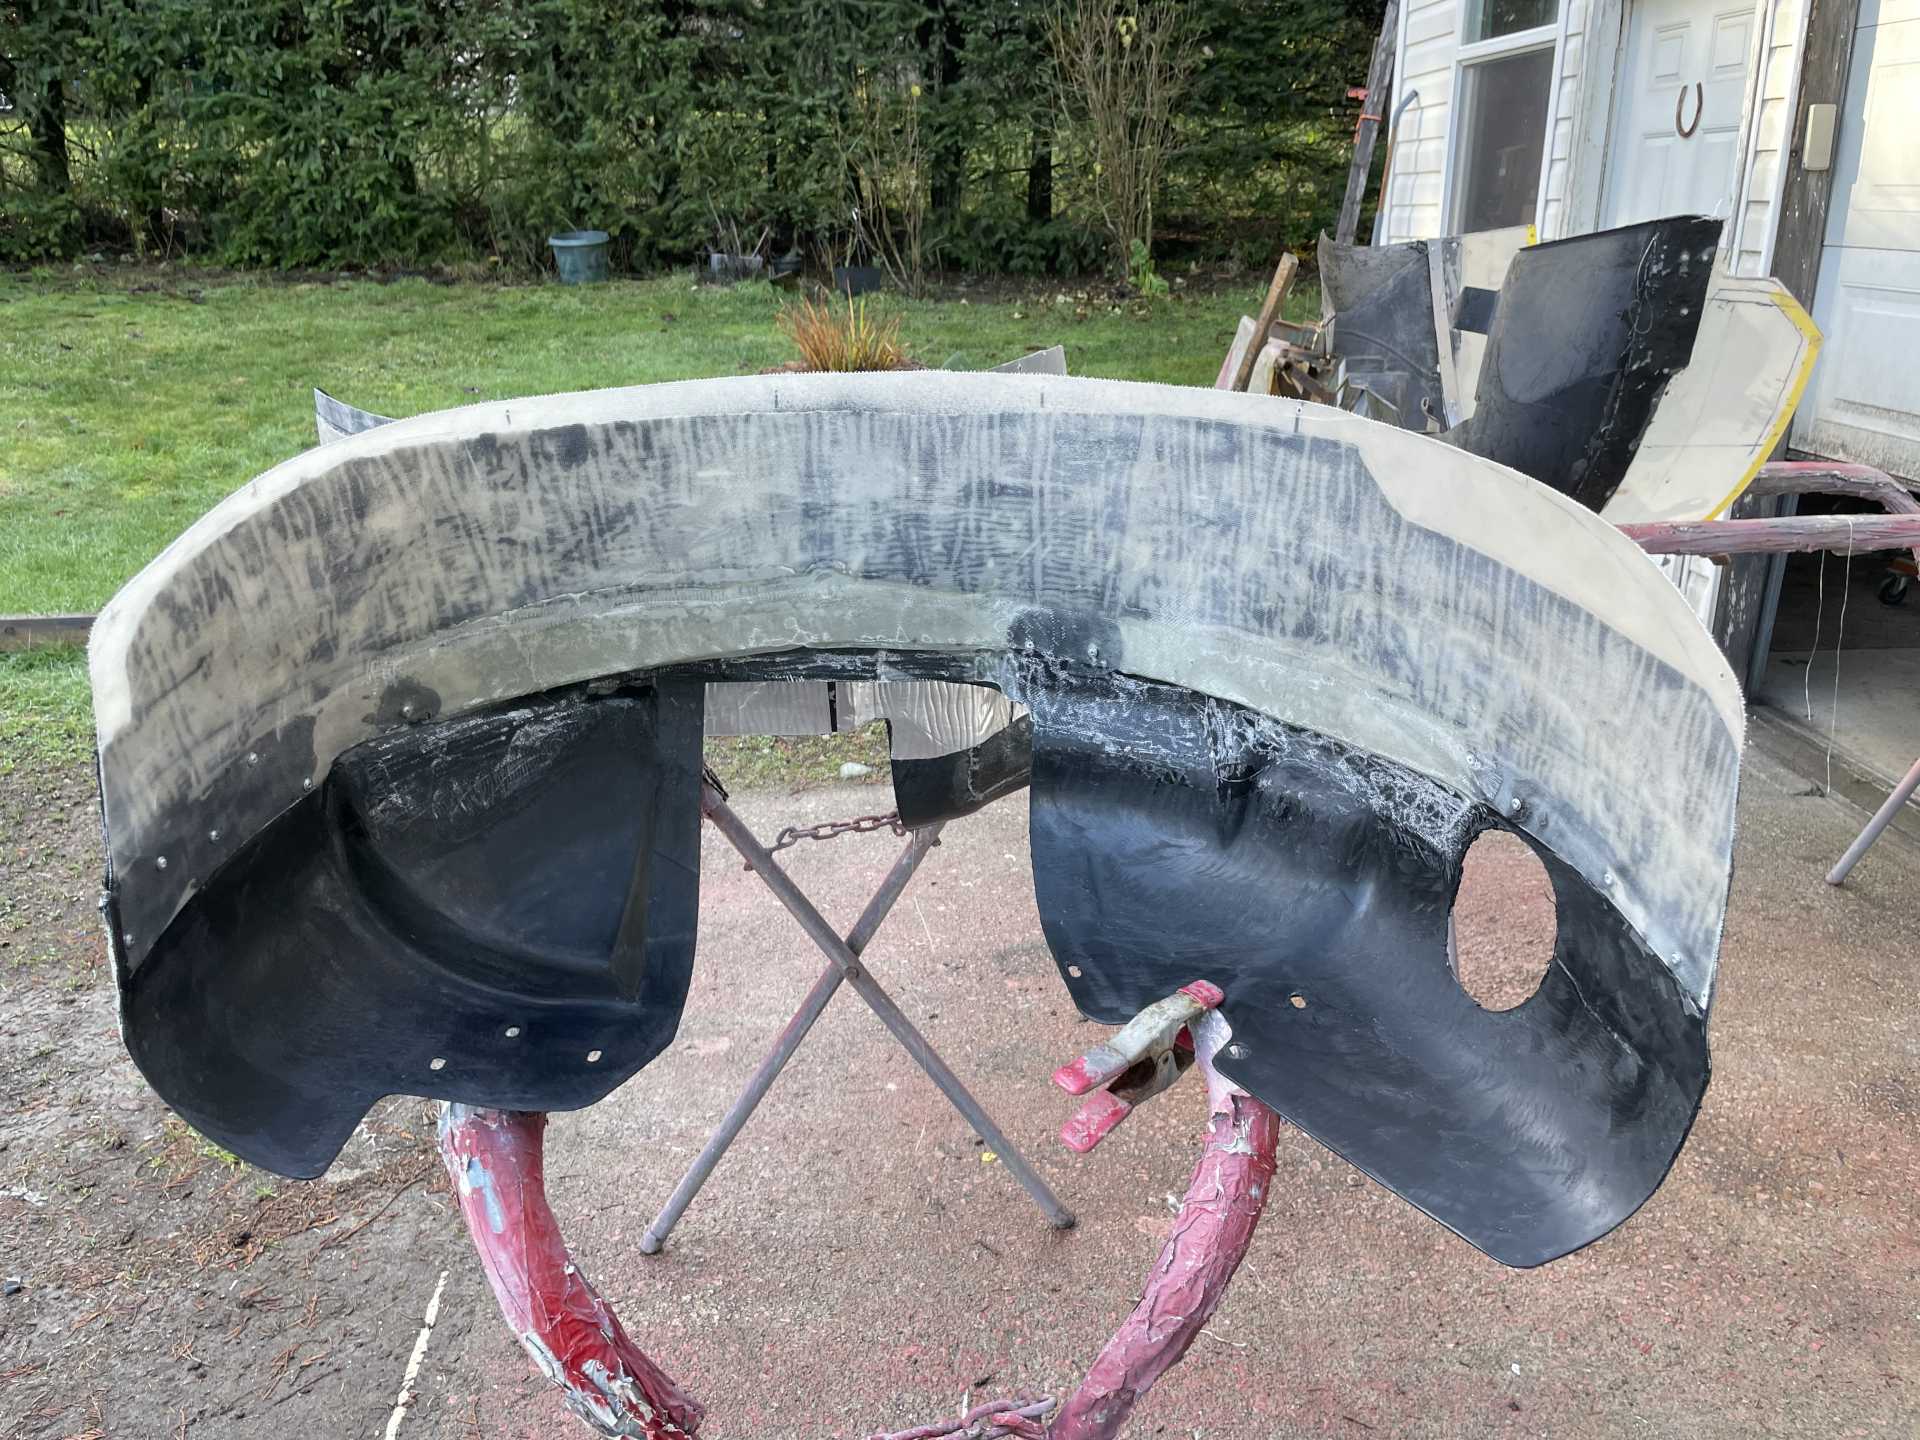
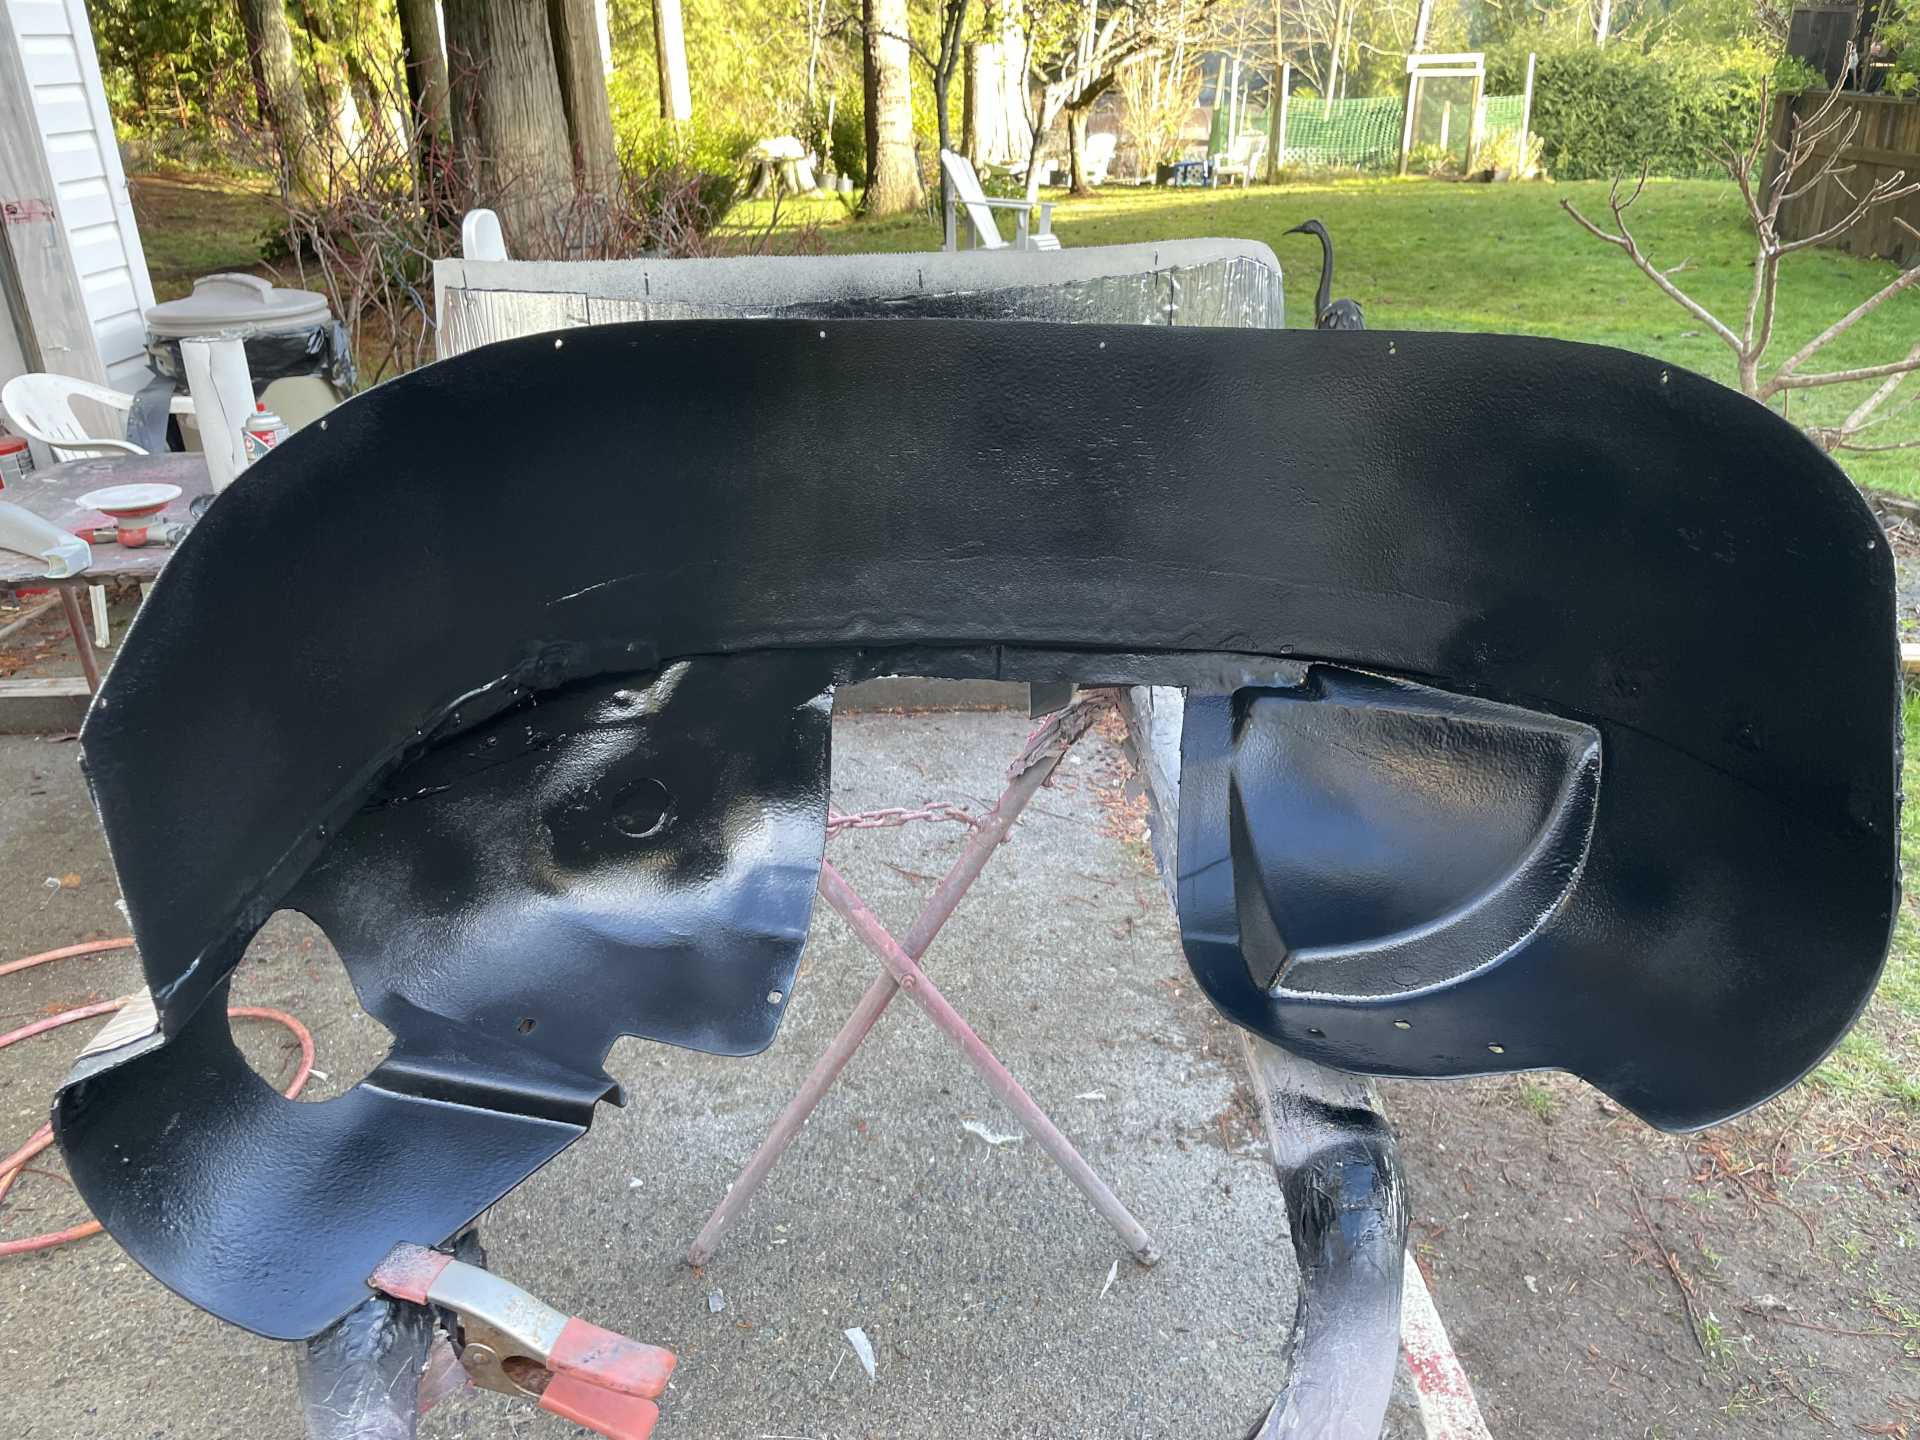
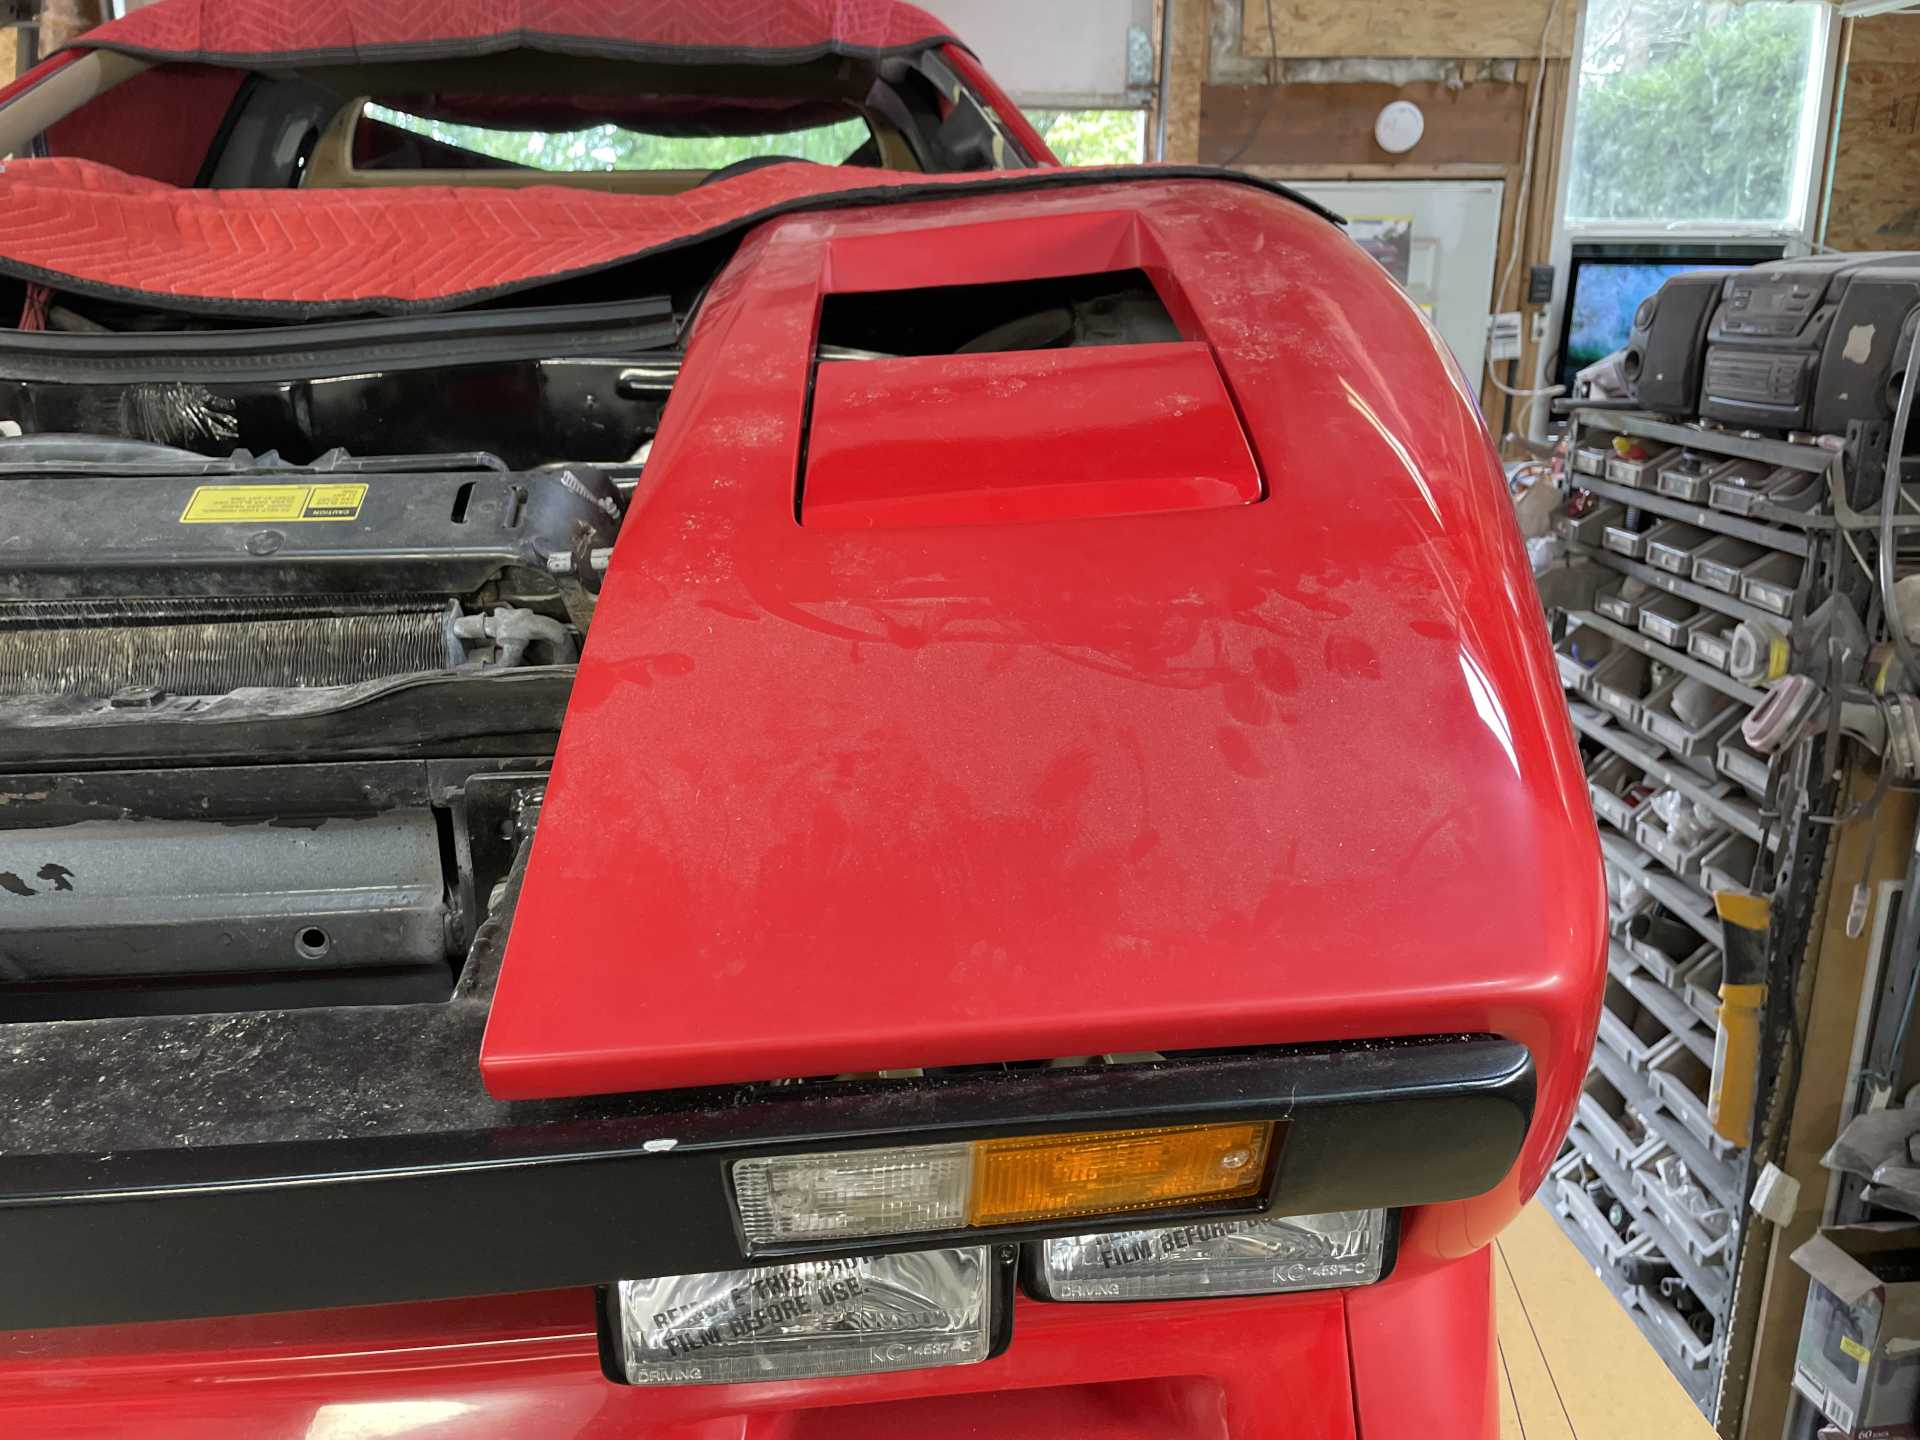
I also got the headlight buckets installed for a final check
That’s it today more to come😁
Wayne
|
|
|
|
dobie1
|
MAR 06, 10:24 PM
|
|
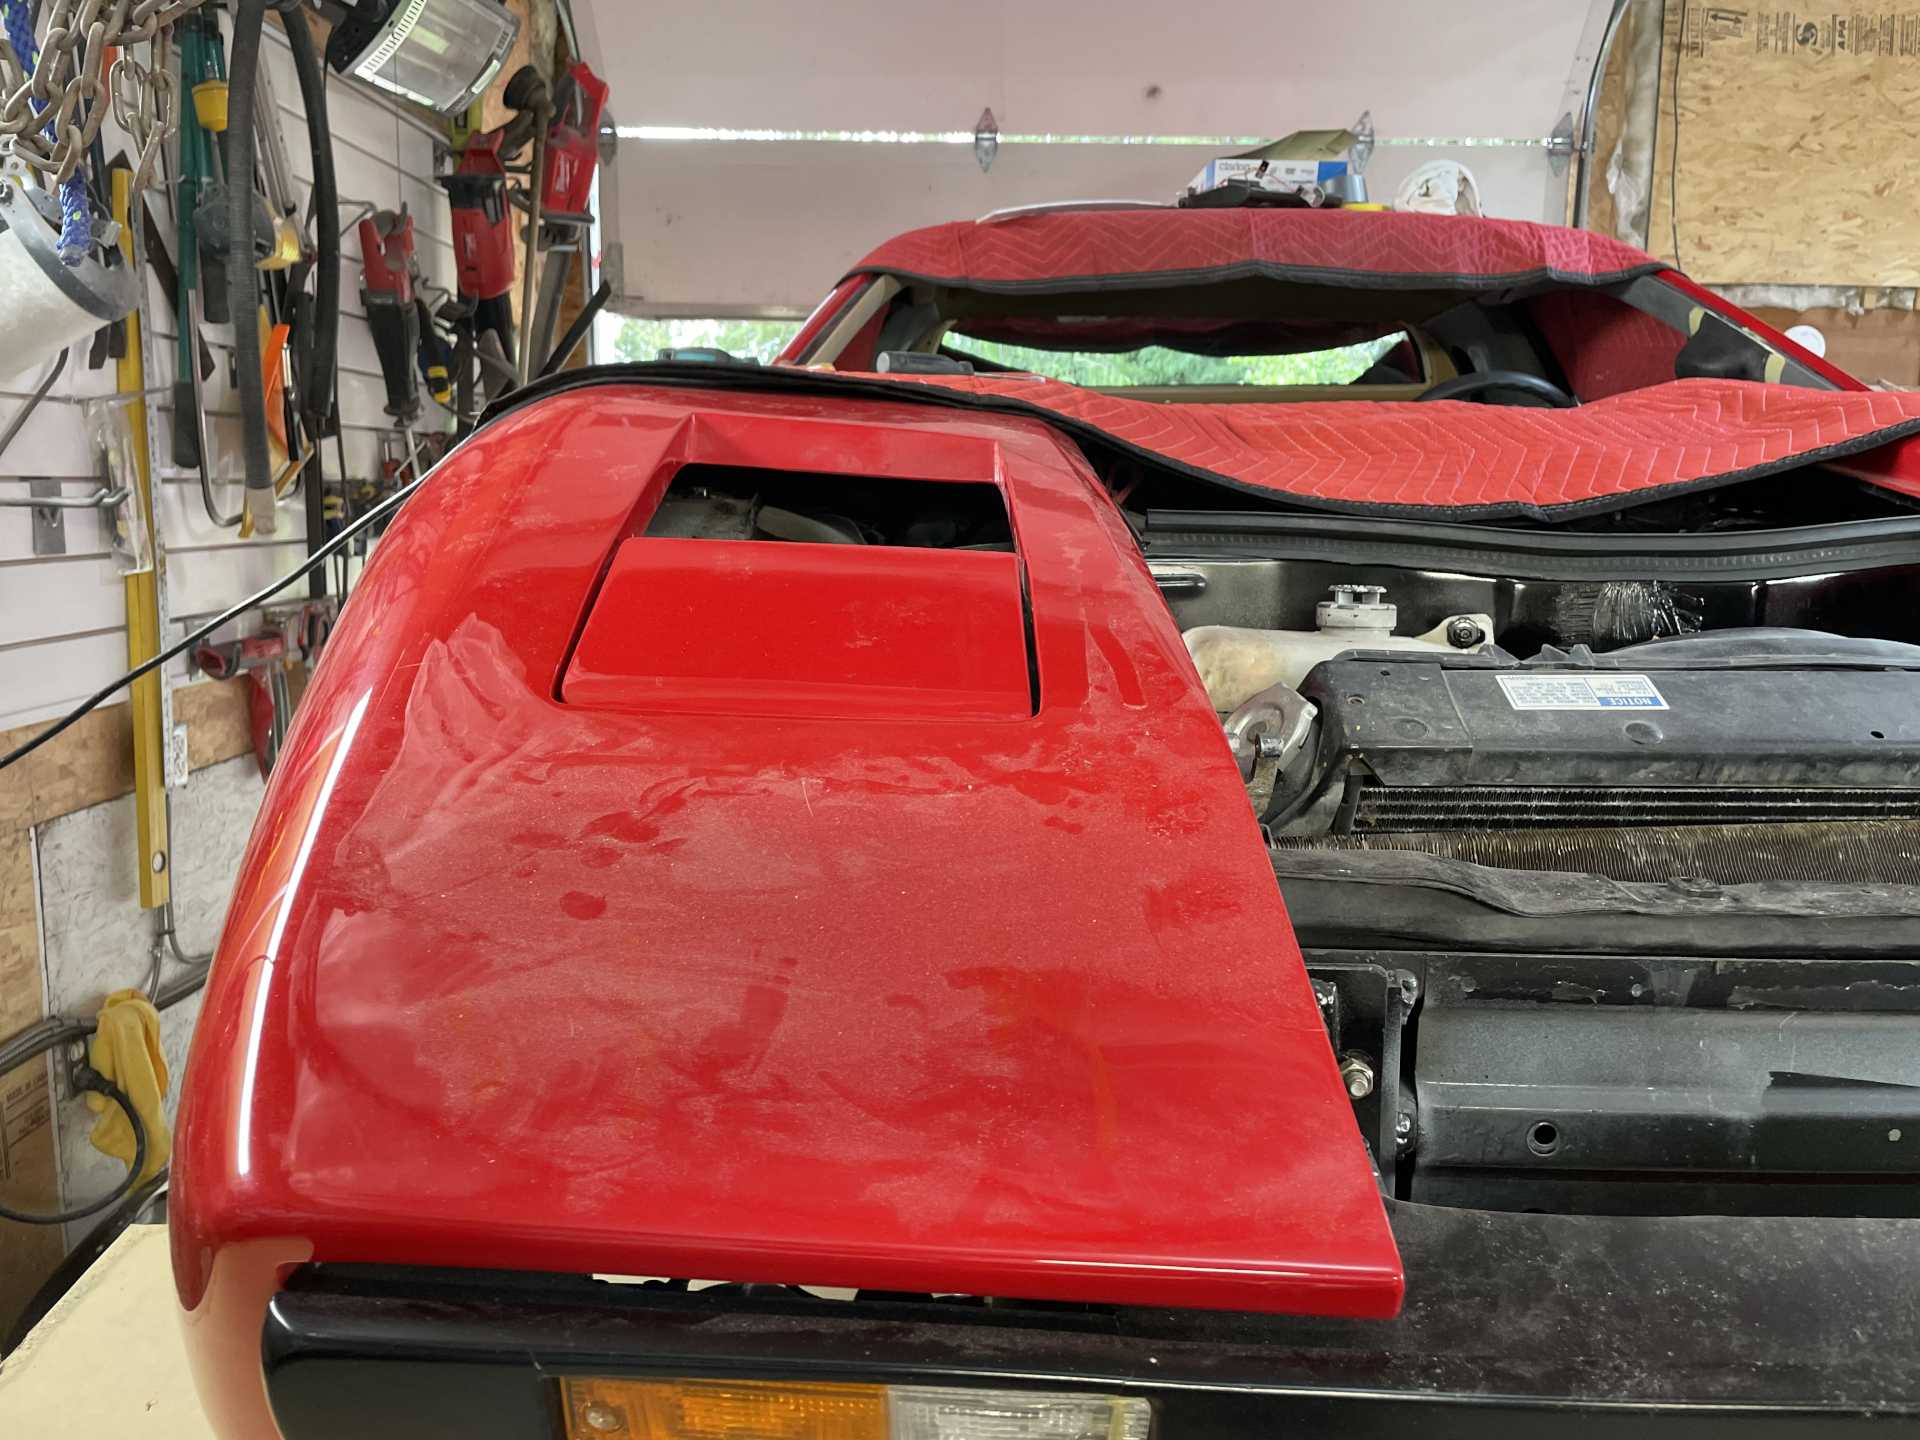
Here’s a few pics I think look really cool , giving me motivation
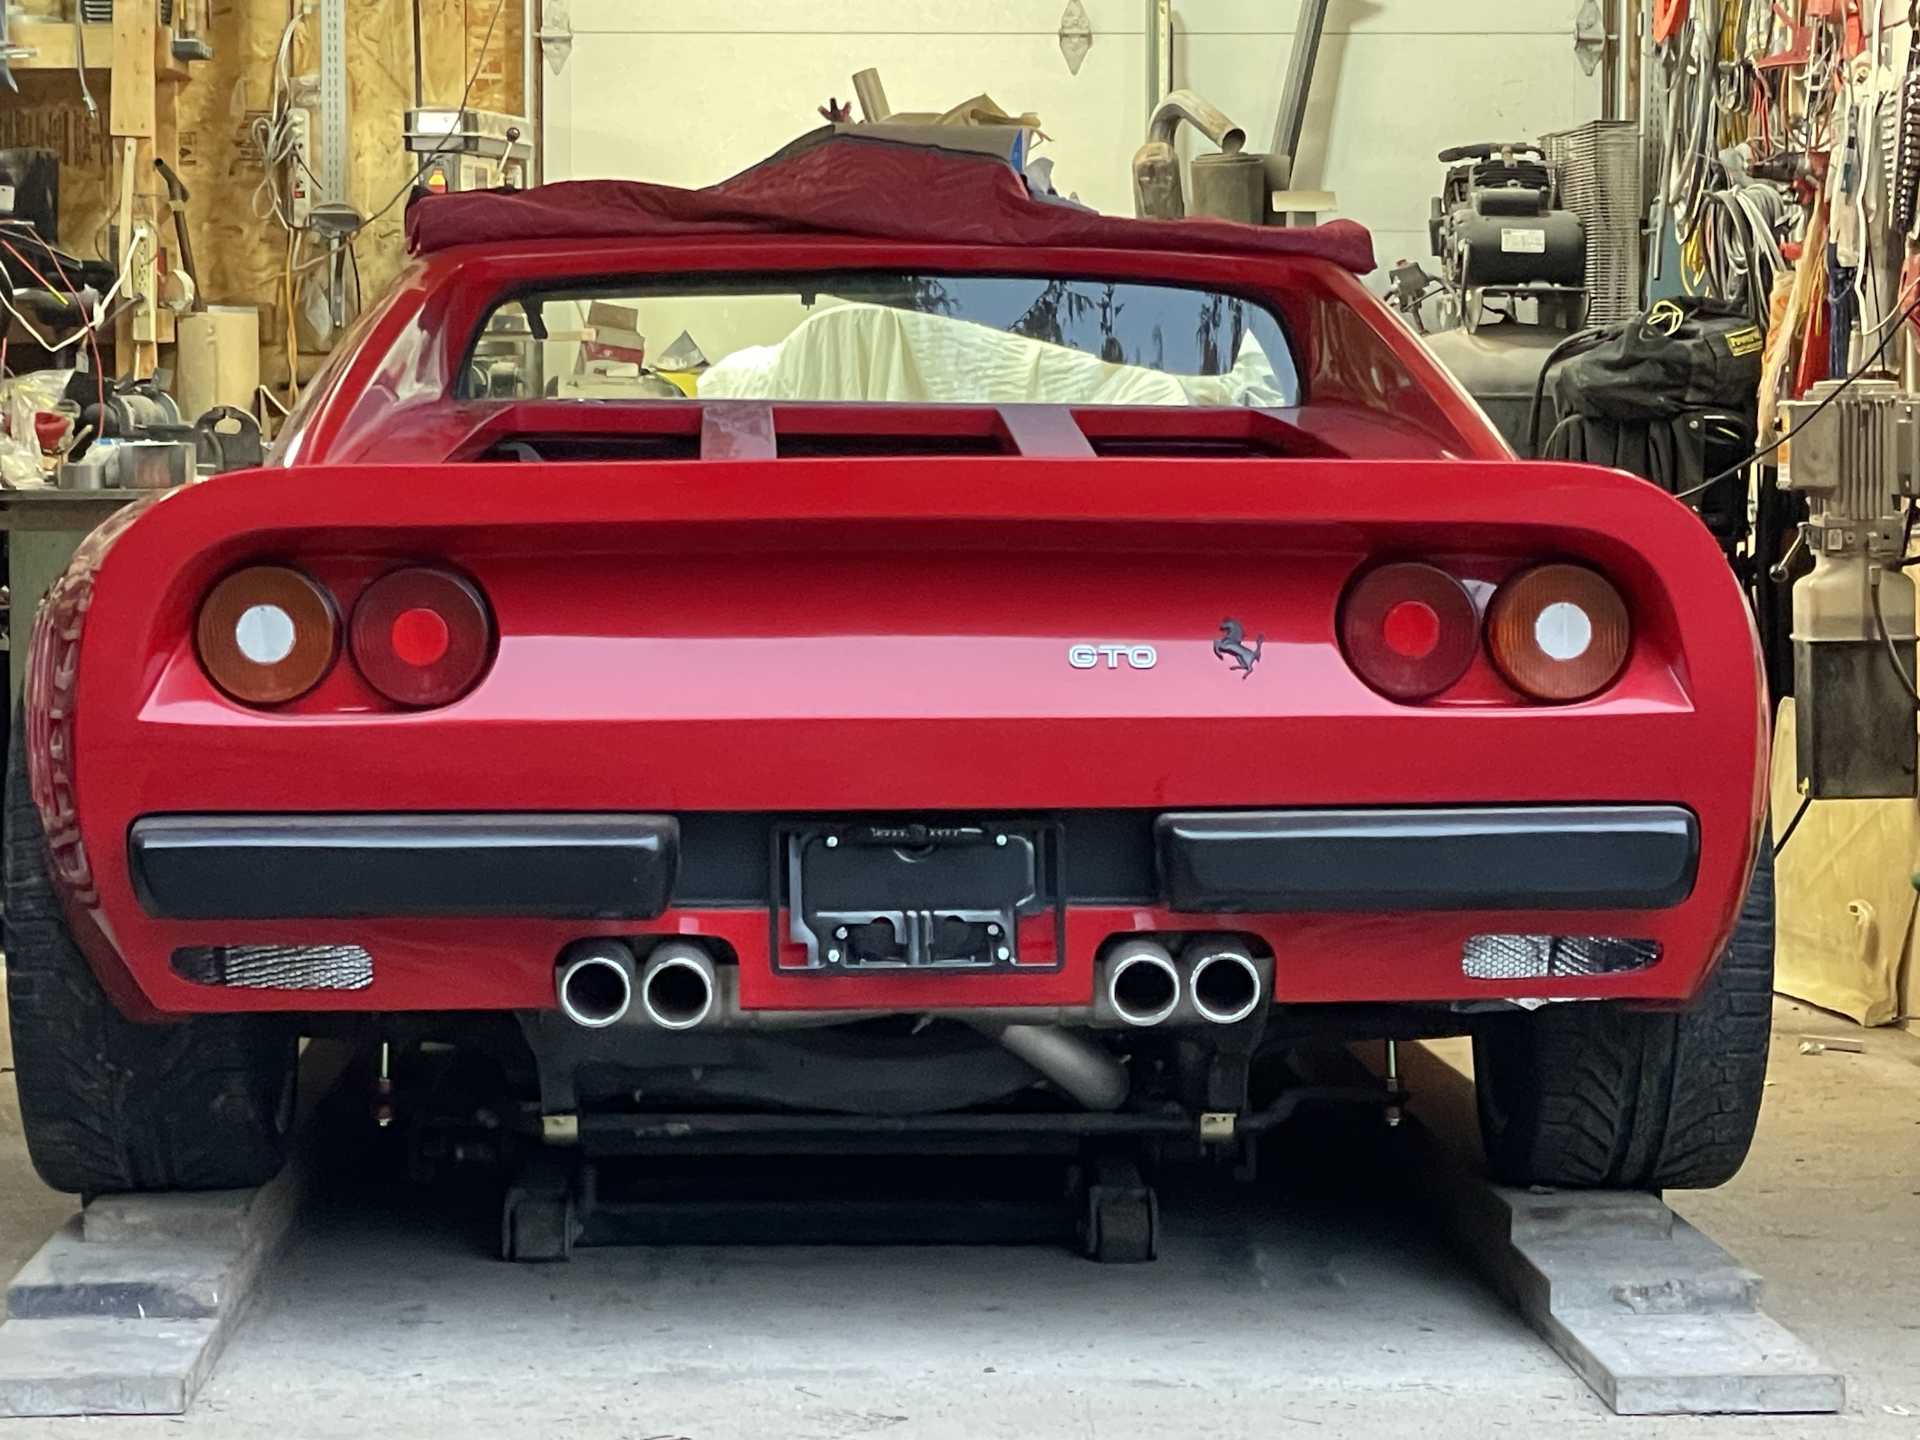
😁
|
|
|
|
zkhennings
|
MAR 08, 01:55 PM
|
|
Awesome work, it inspires me how you just keep making progress, working on it whenever you can. I get stuck in the trap of wanting to do nothing but make massive progress on the car and neglecting it if I am busy, even though I could fit in a few hours here or there.
Looking really nice!
|
|
|
|
Fieromaineac
|
MAR 28, 07:53 PM
|
|
Wayne, this is beyond belief! Trust you know I’m stealing all your great ideas for my Aldino convertible project. Right now I’m tired of removing four layers of old paint from the body panels. Looking to getting the car to the body paint shop later this spring. Wife is really tired of the seats stored in the bedroom!
Dana
|
|
|
|
dobie1
|
MAR 30, 09:59 AM
|
|
Thanks guys I really appreciate the positive support and comments.😁
So I got my first seat back for upholstery and have to say it is worth the wait🥰
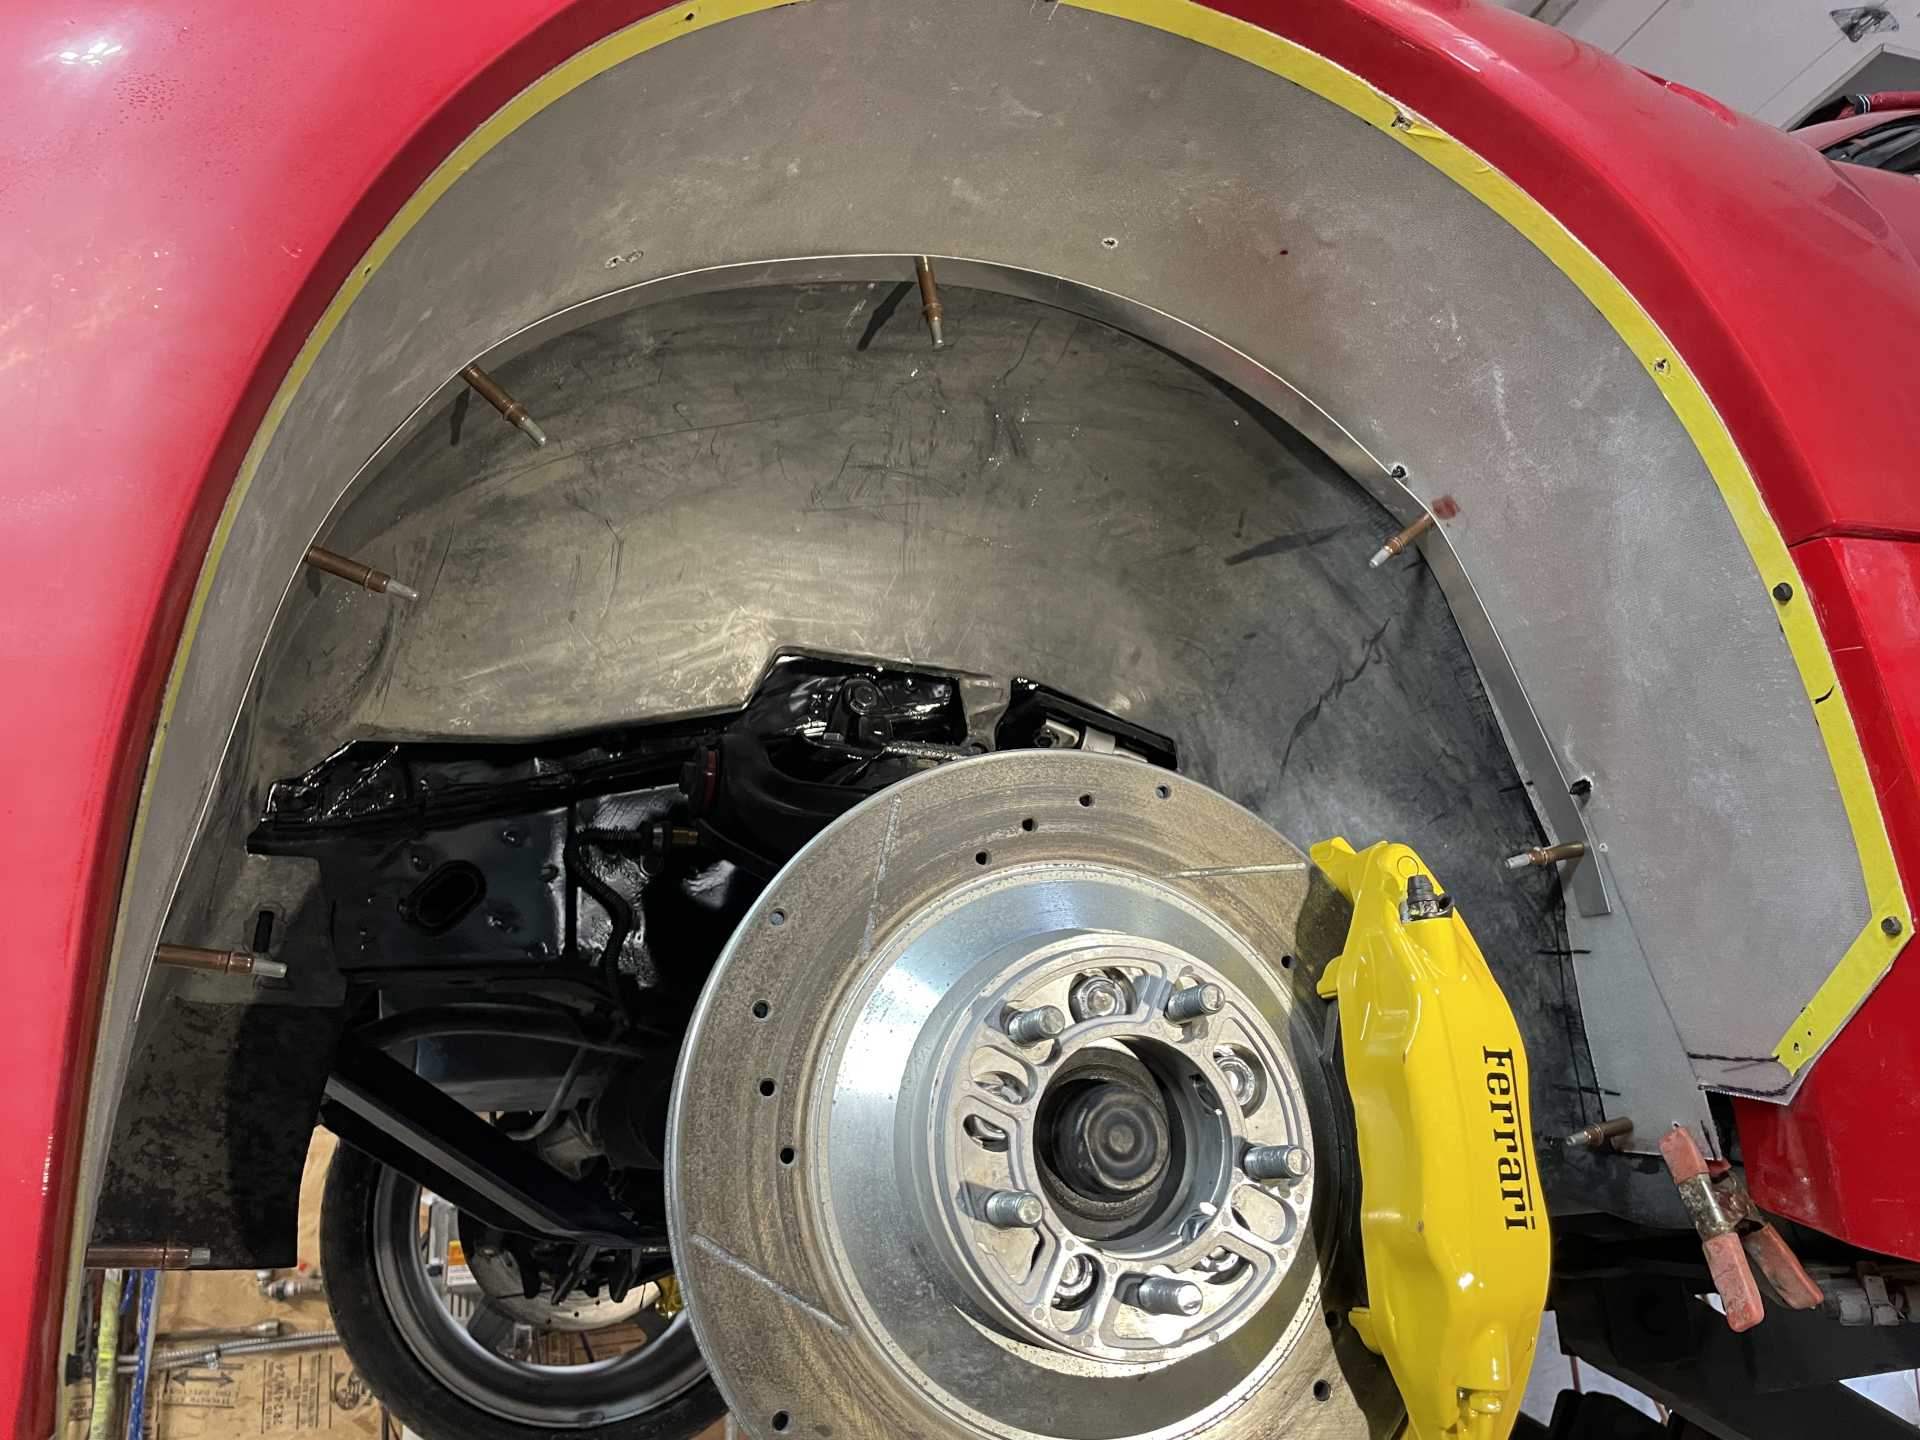
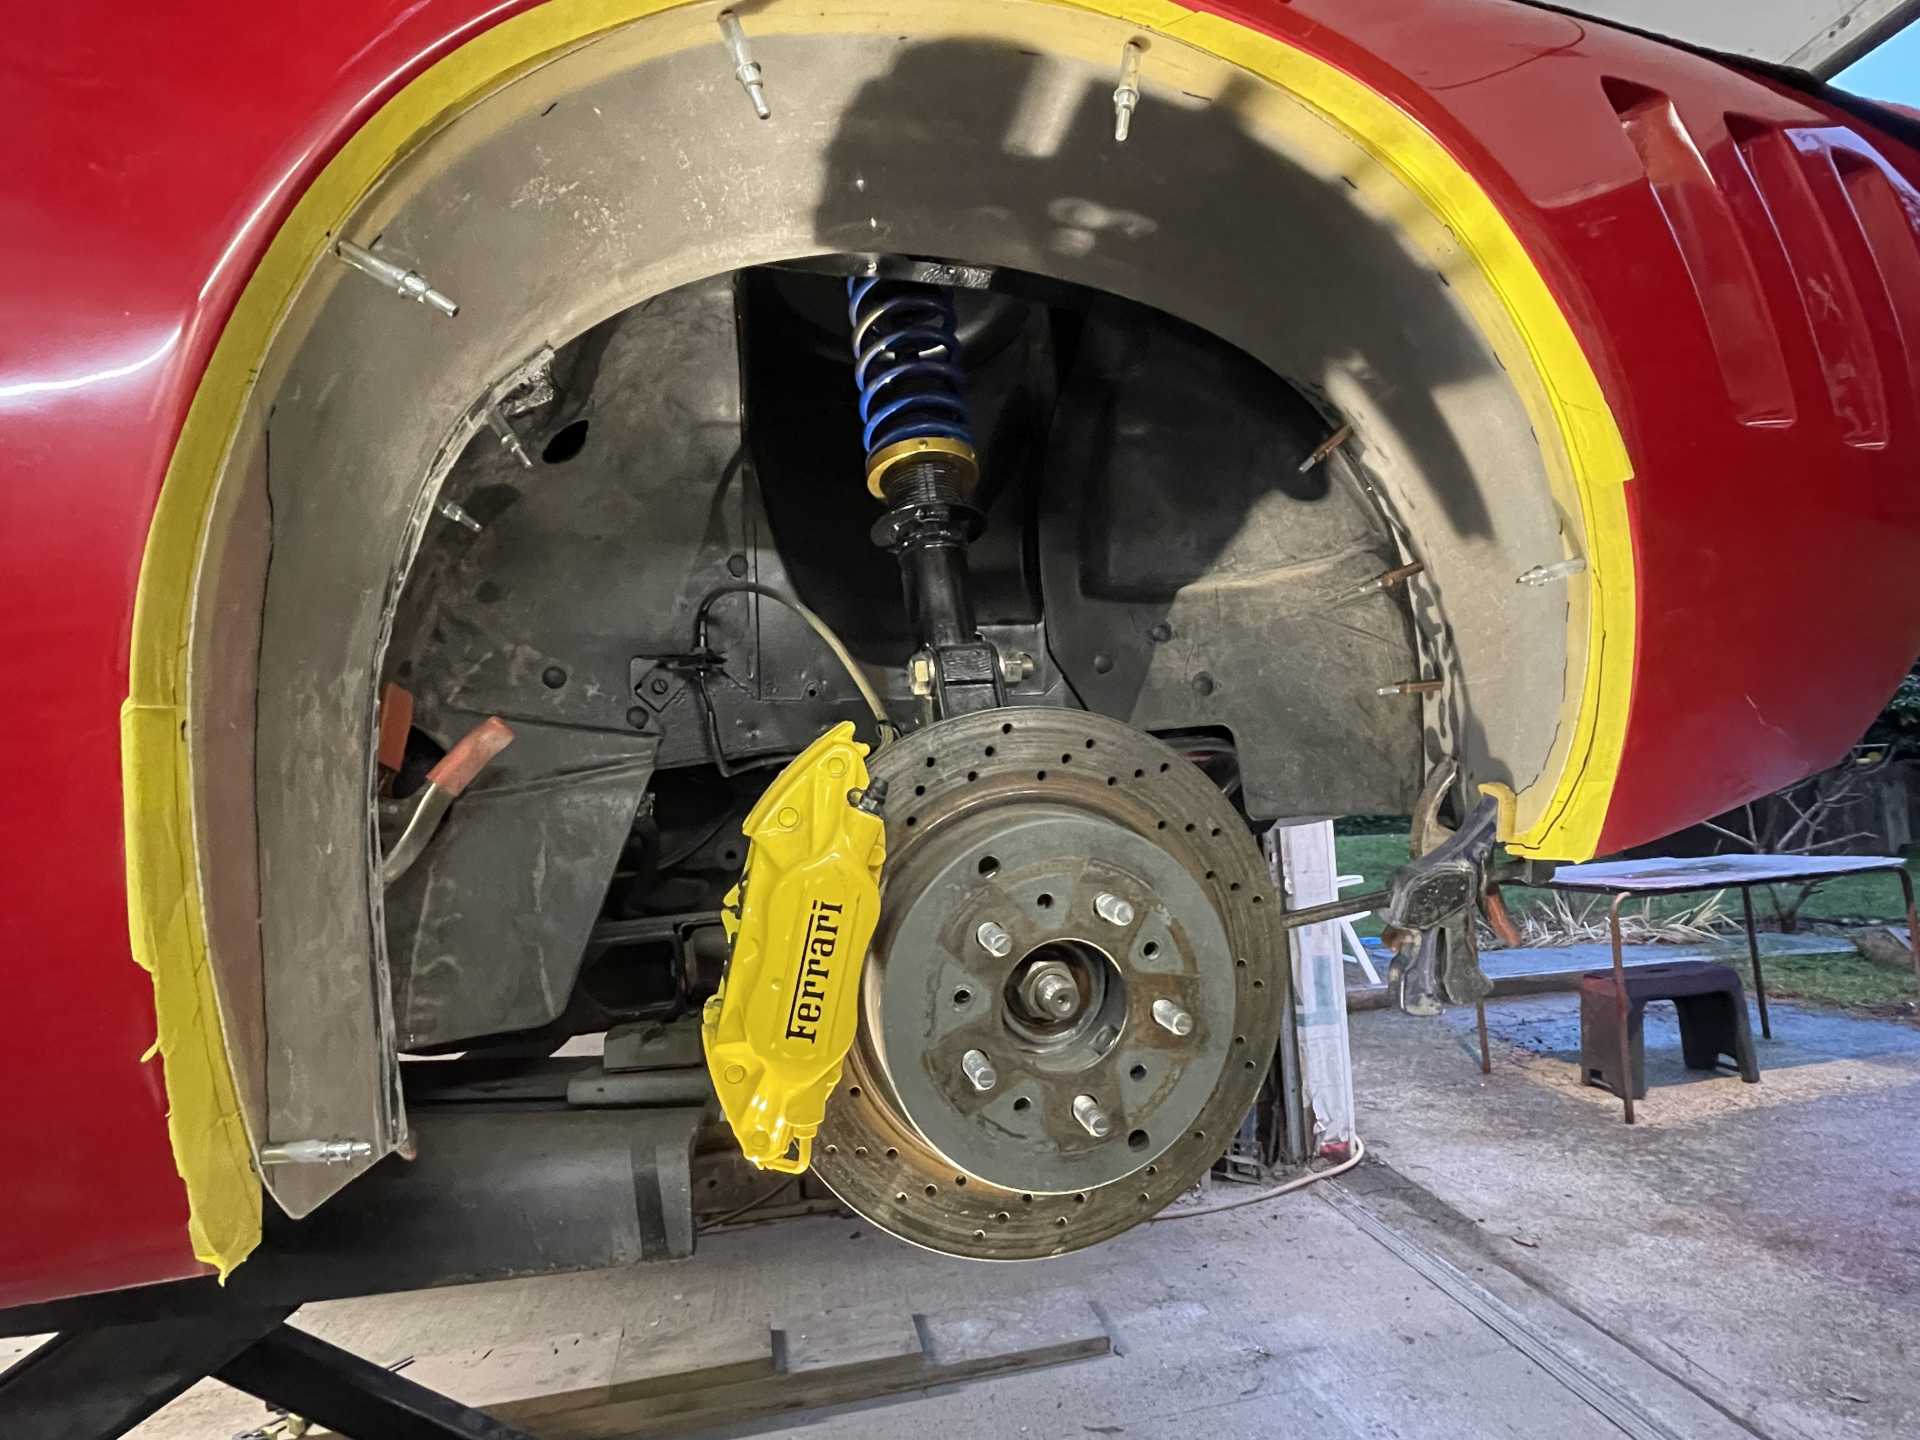
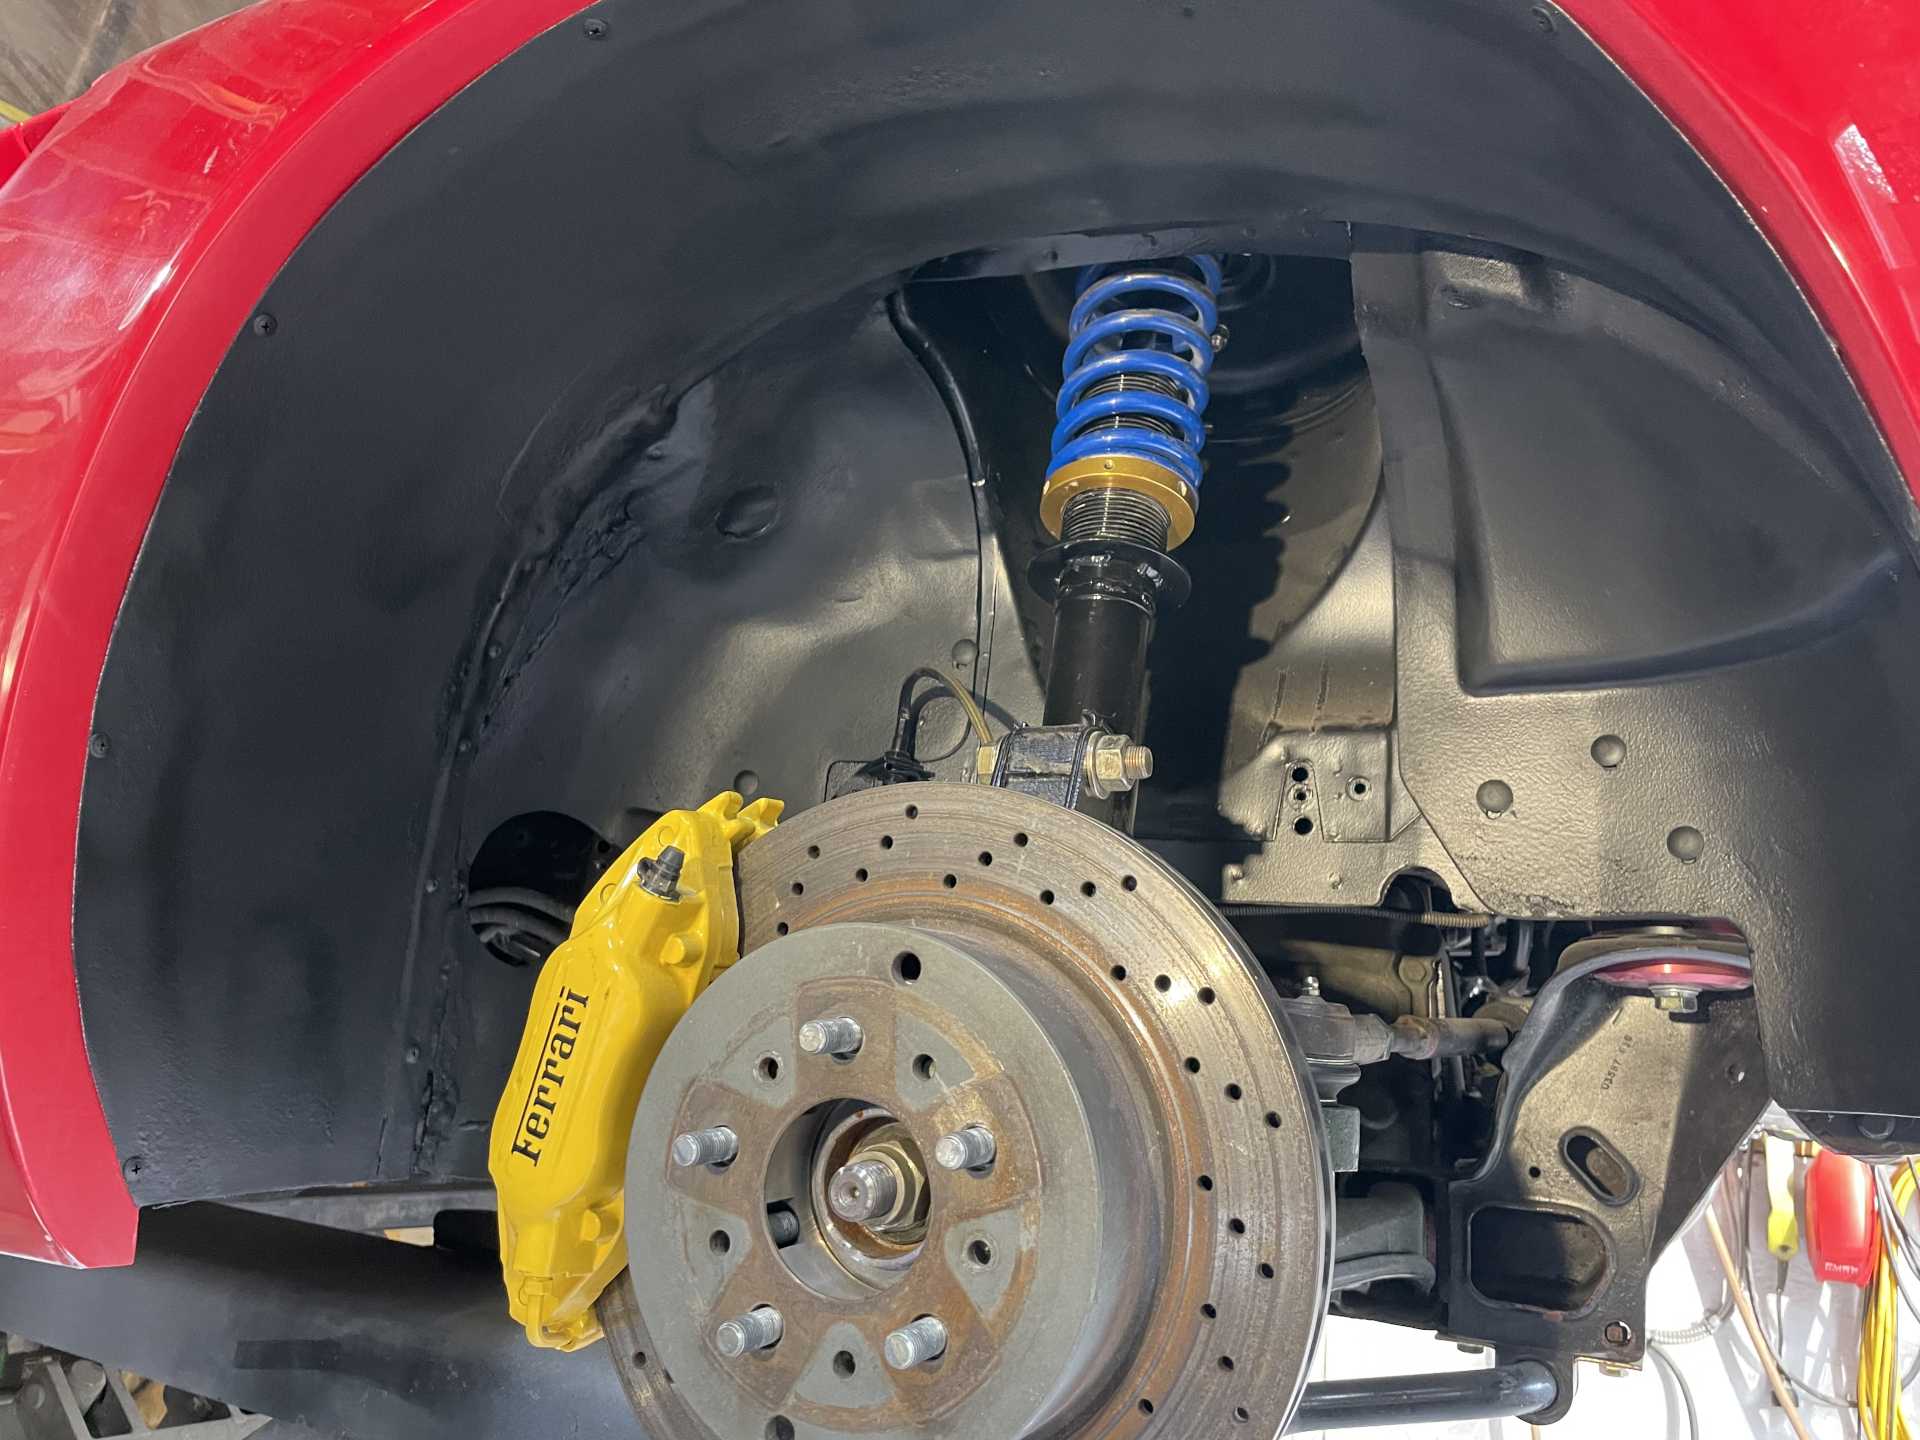
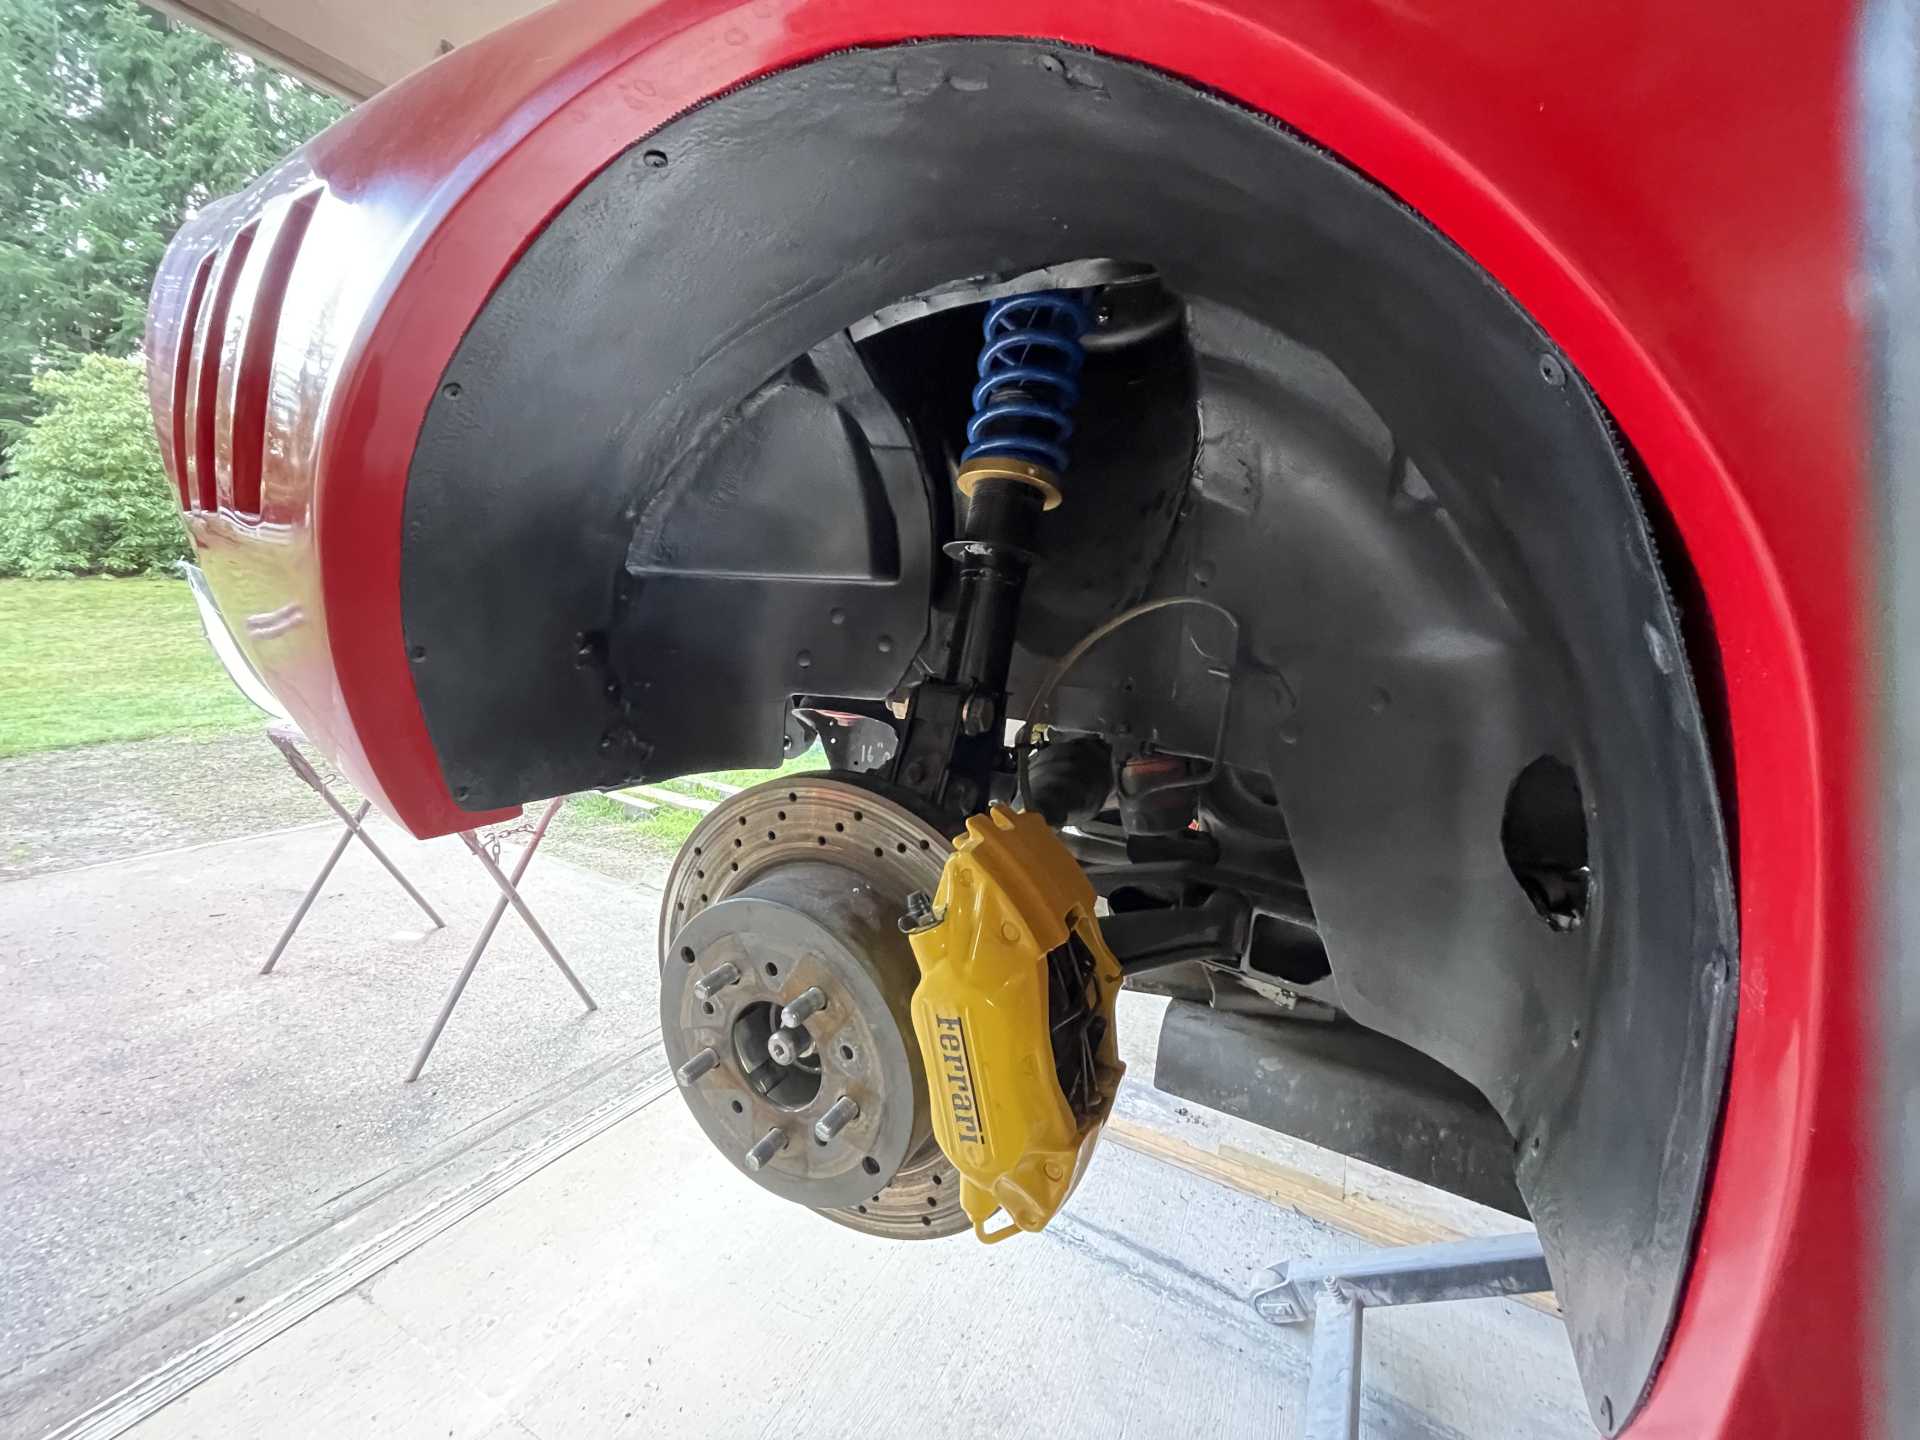
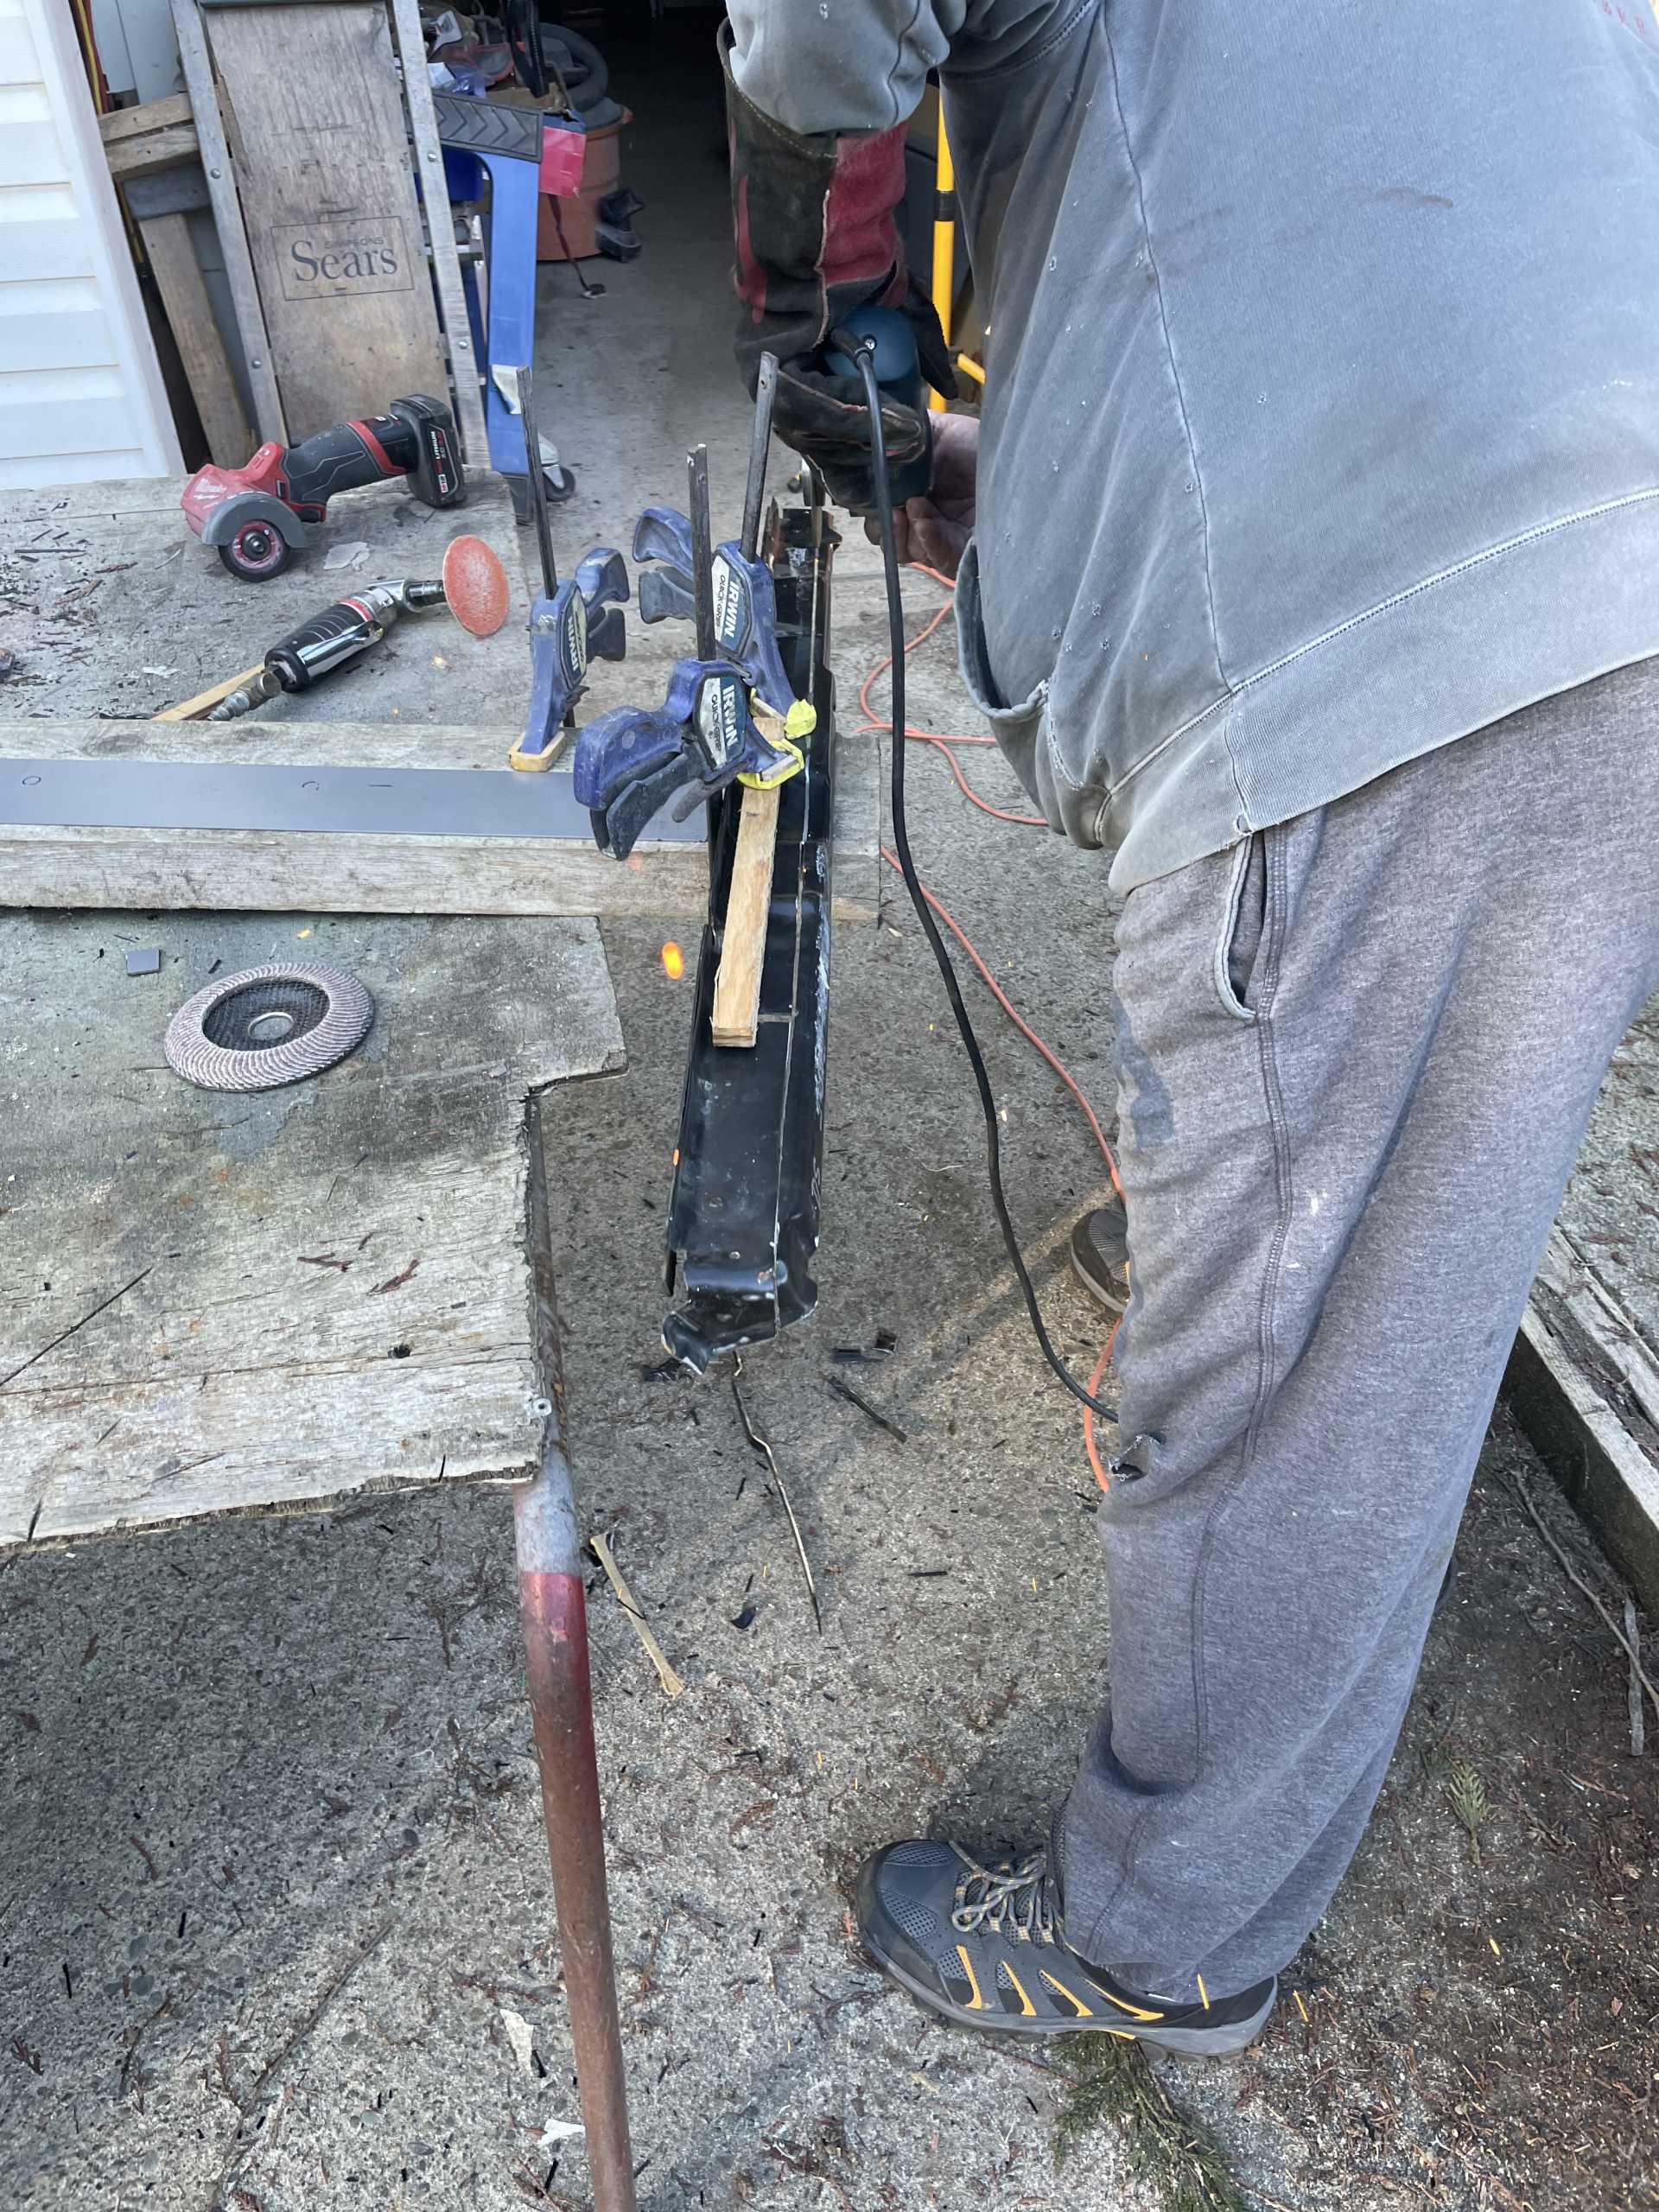
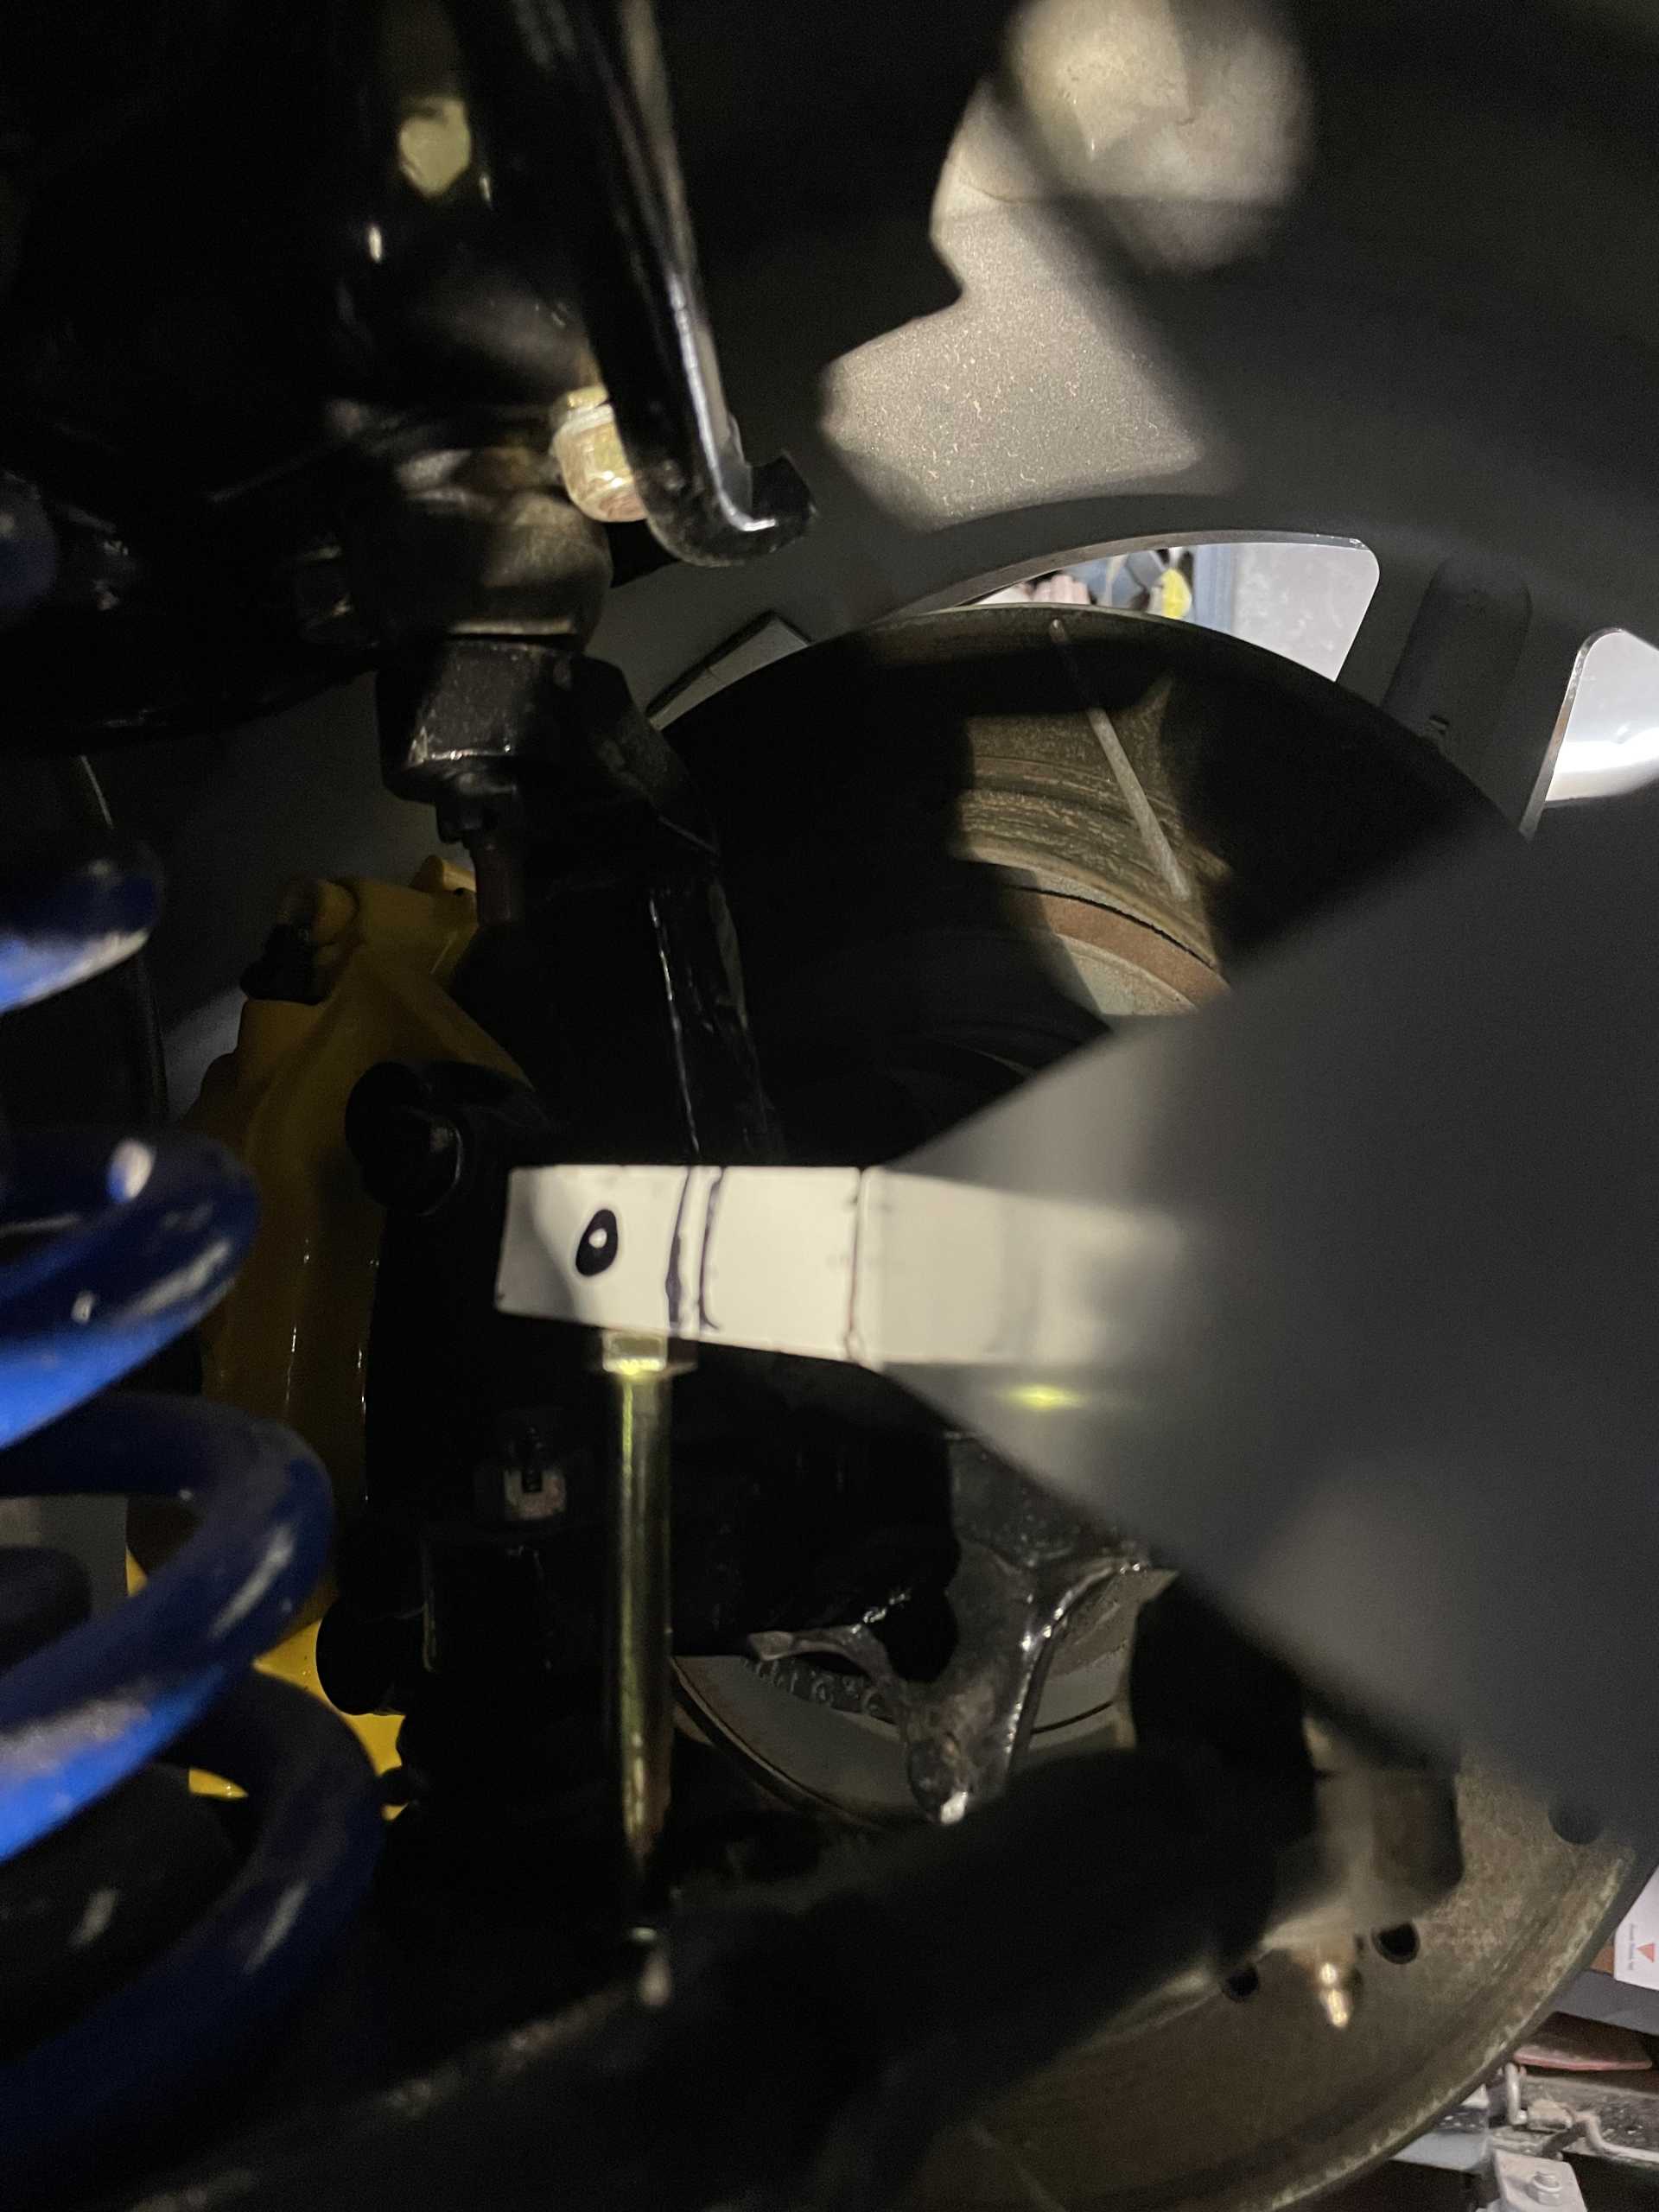
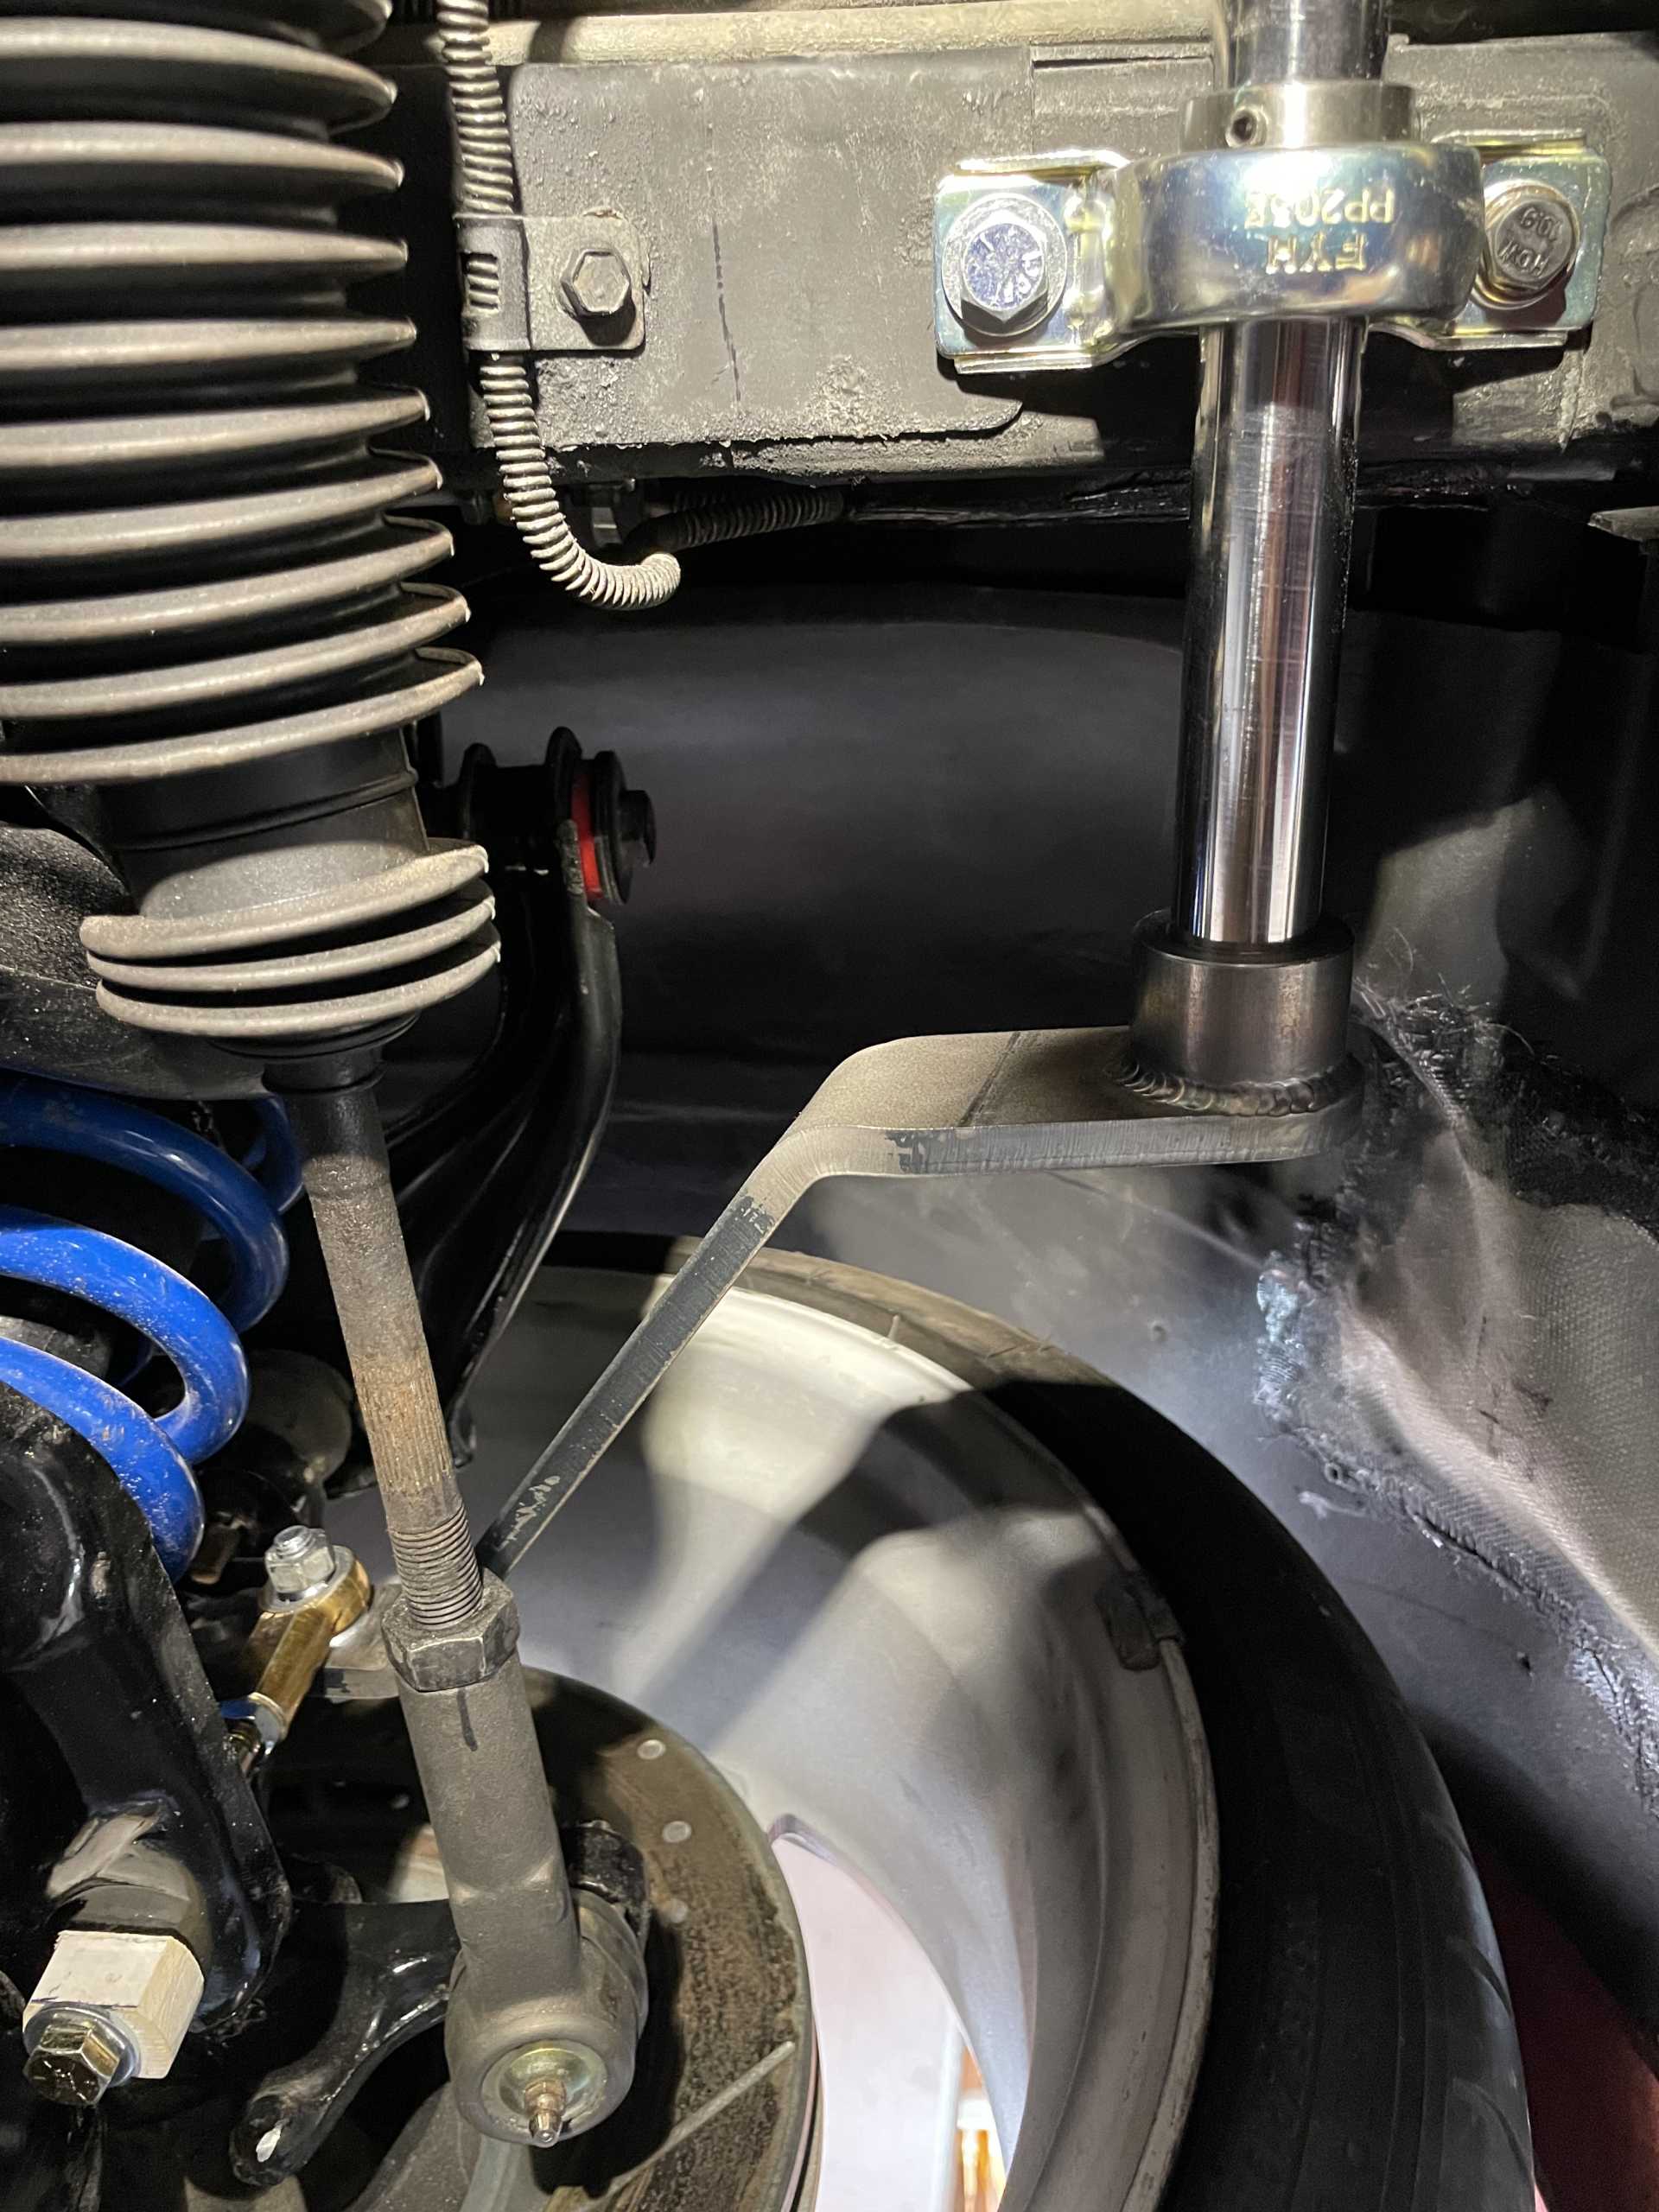
I also got my custom front sway bar fabricated up for my car. It had been a bit of a problem finding one that would fit the widened front end. The kit came with straight arms that needed to be bent to work in my application. So after making a template I had them bent , the metal brake was incredible 120 ton of pressure does short work of 3/8” steel 😁.
This is where the linkage between the arm and control arm link.
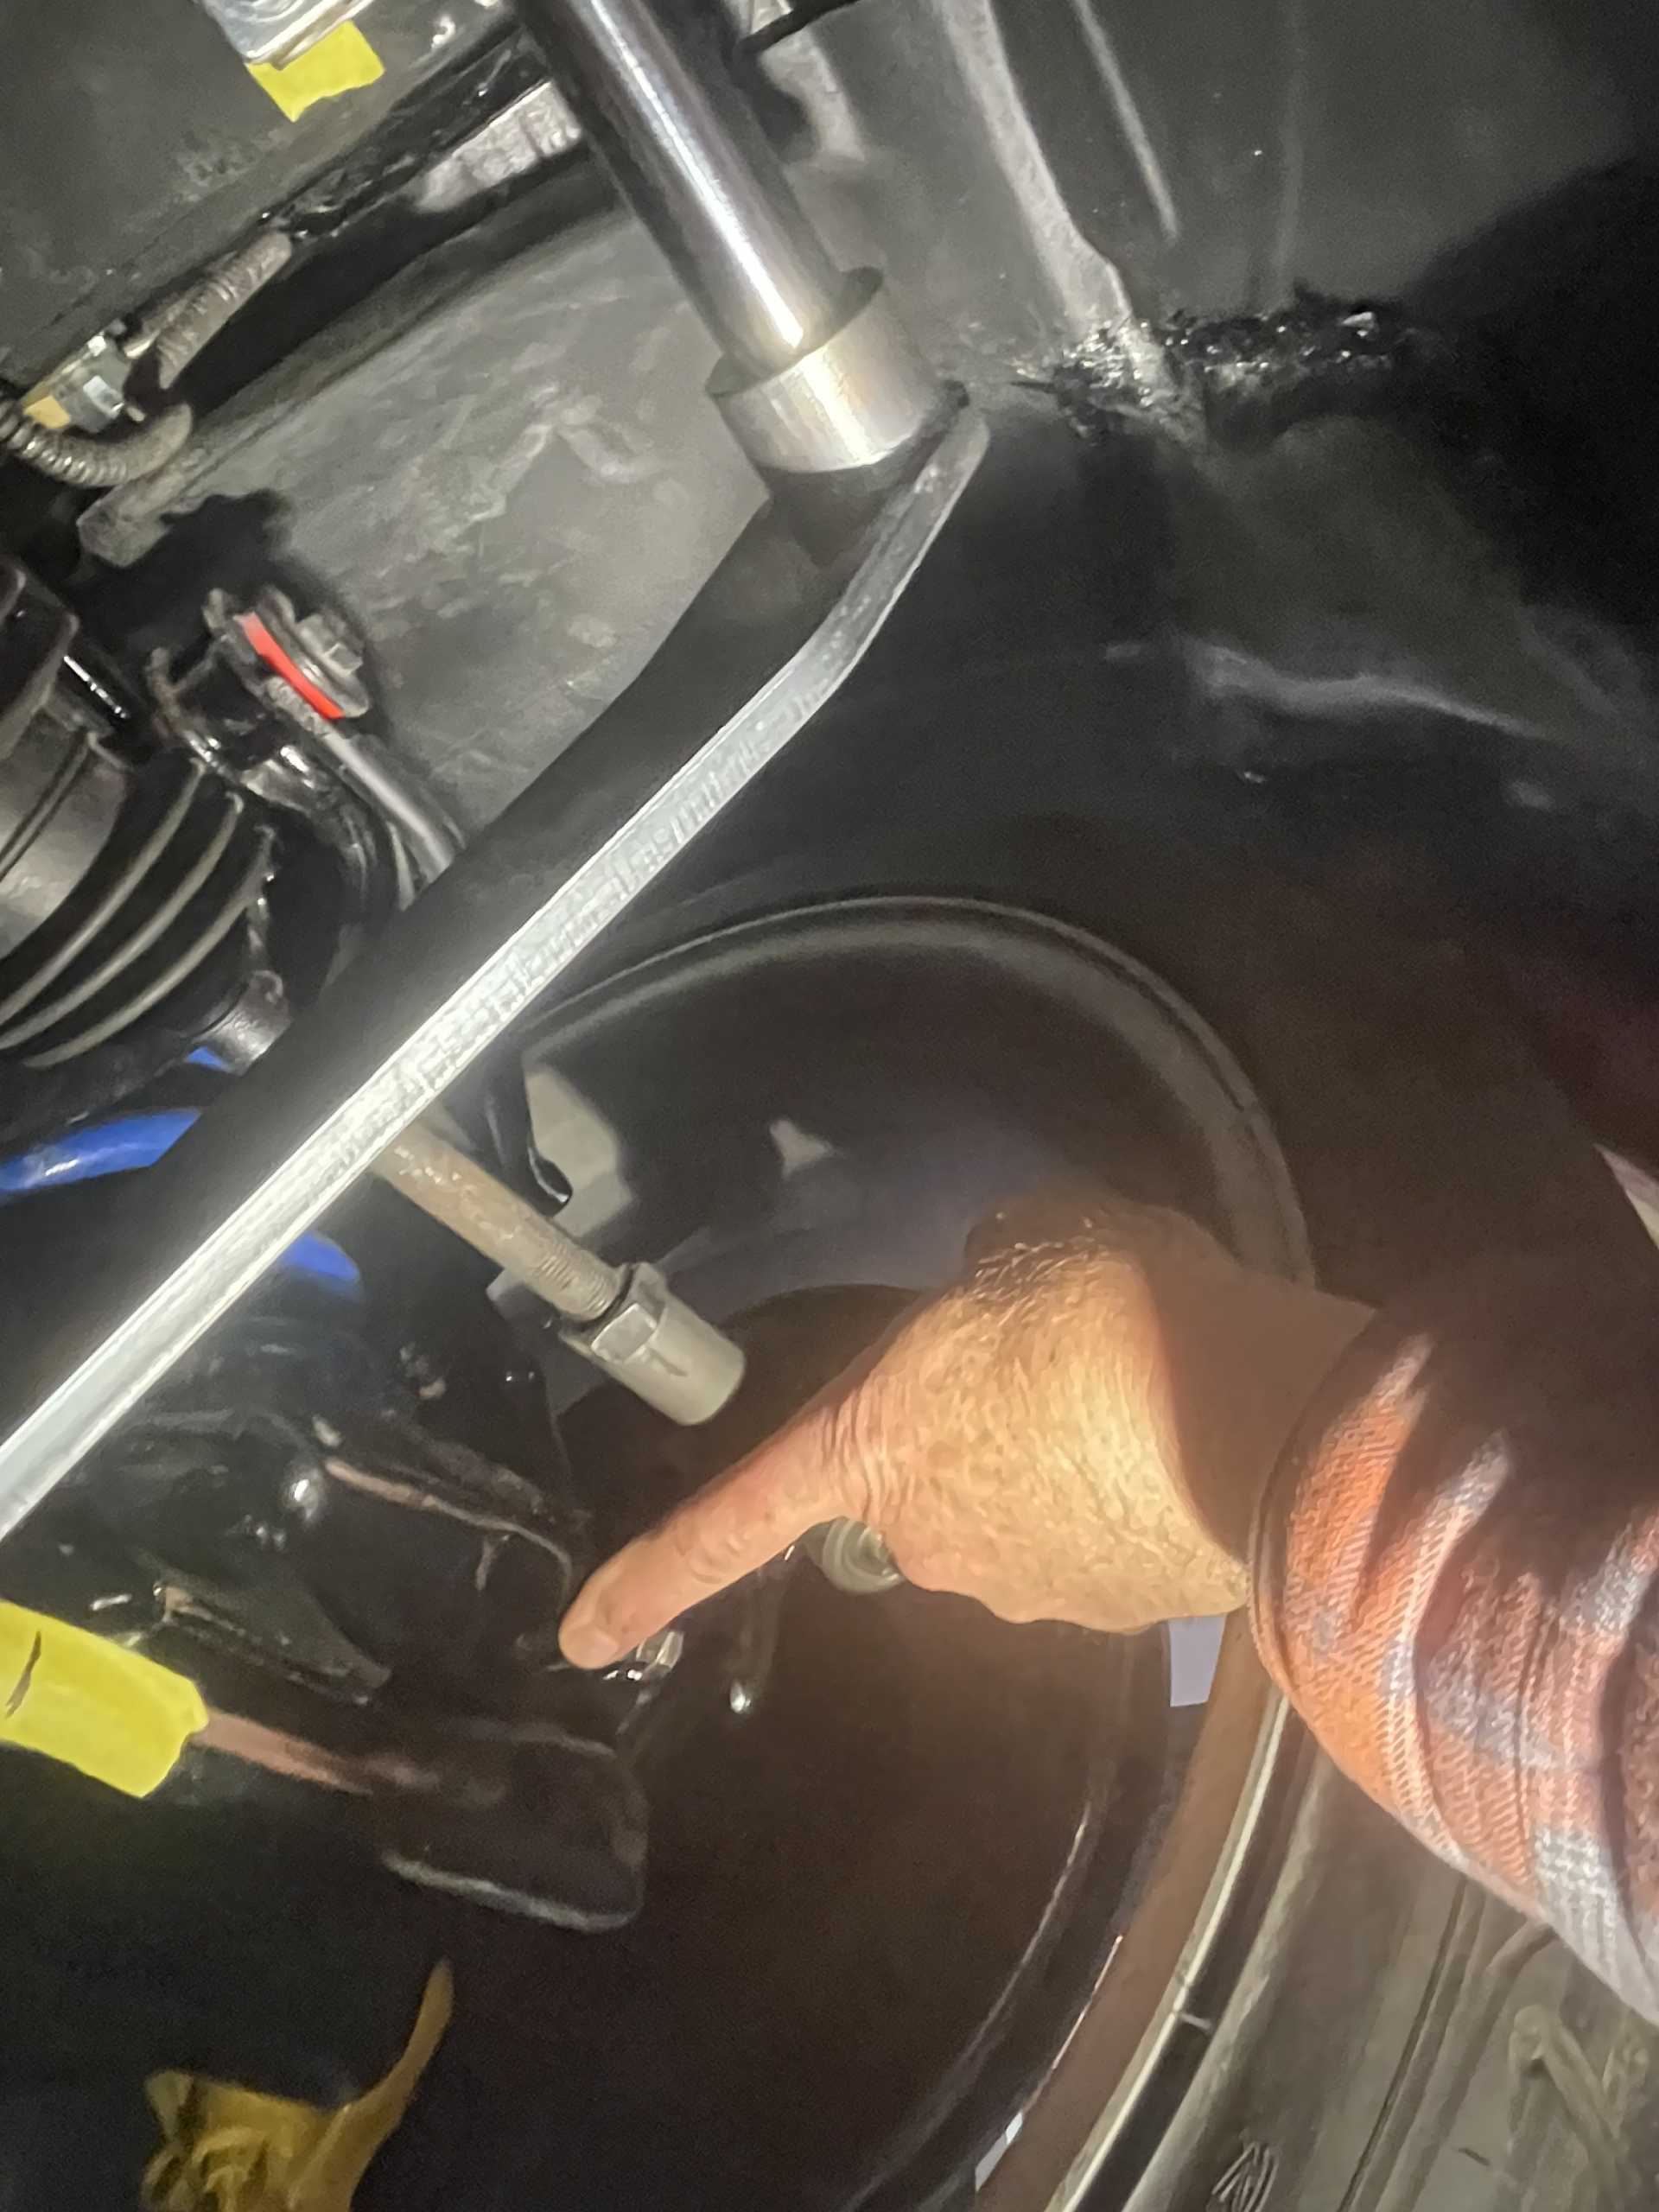
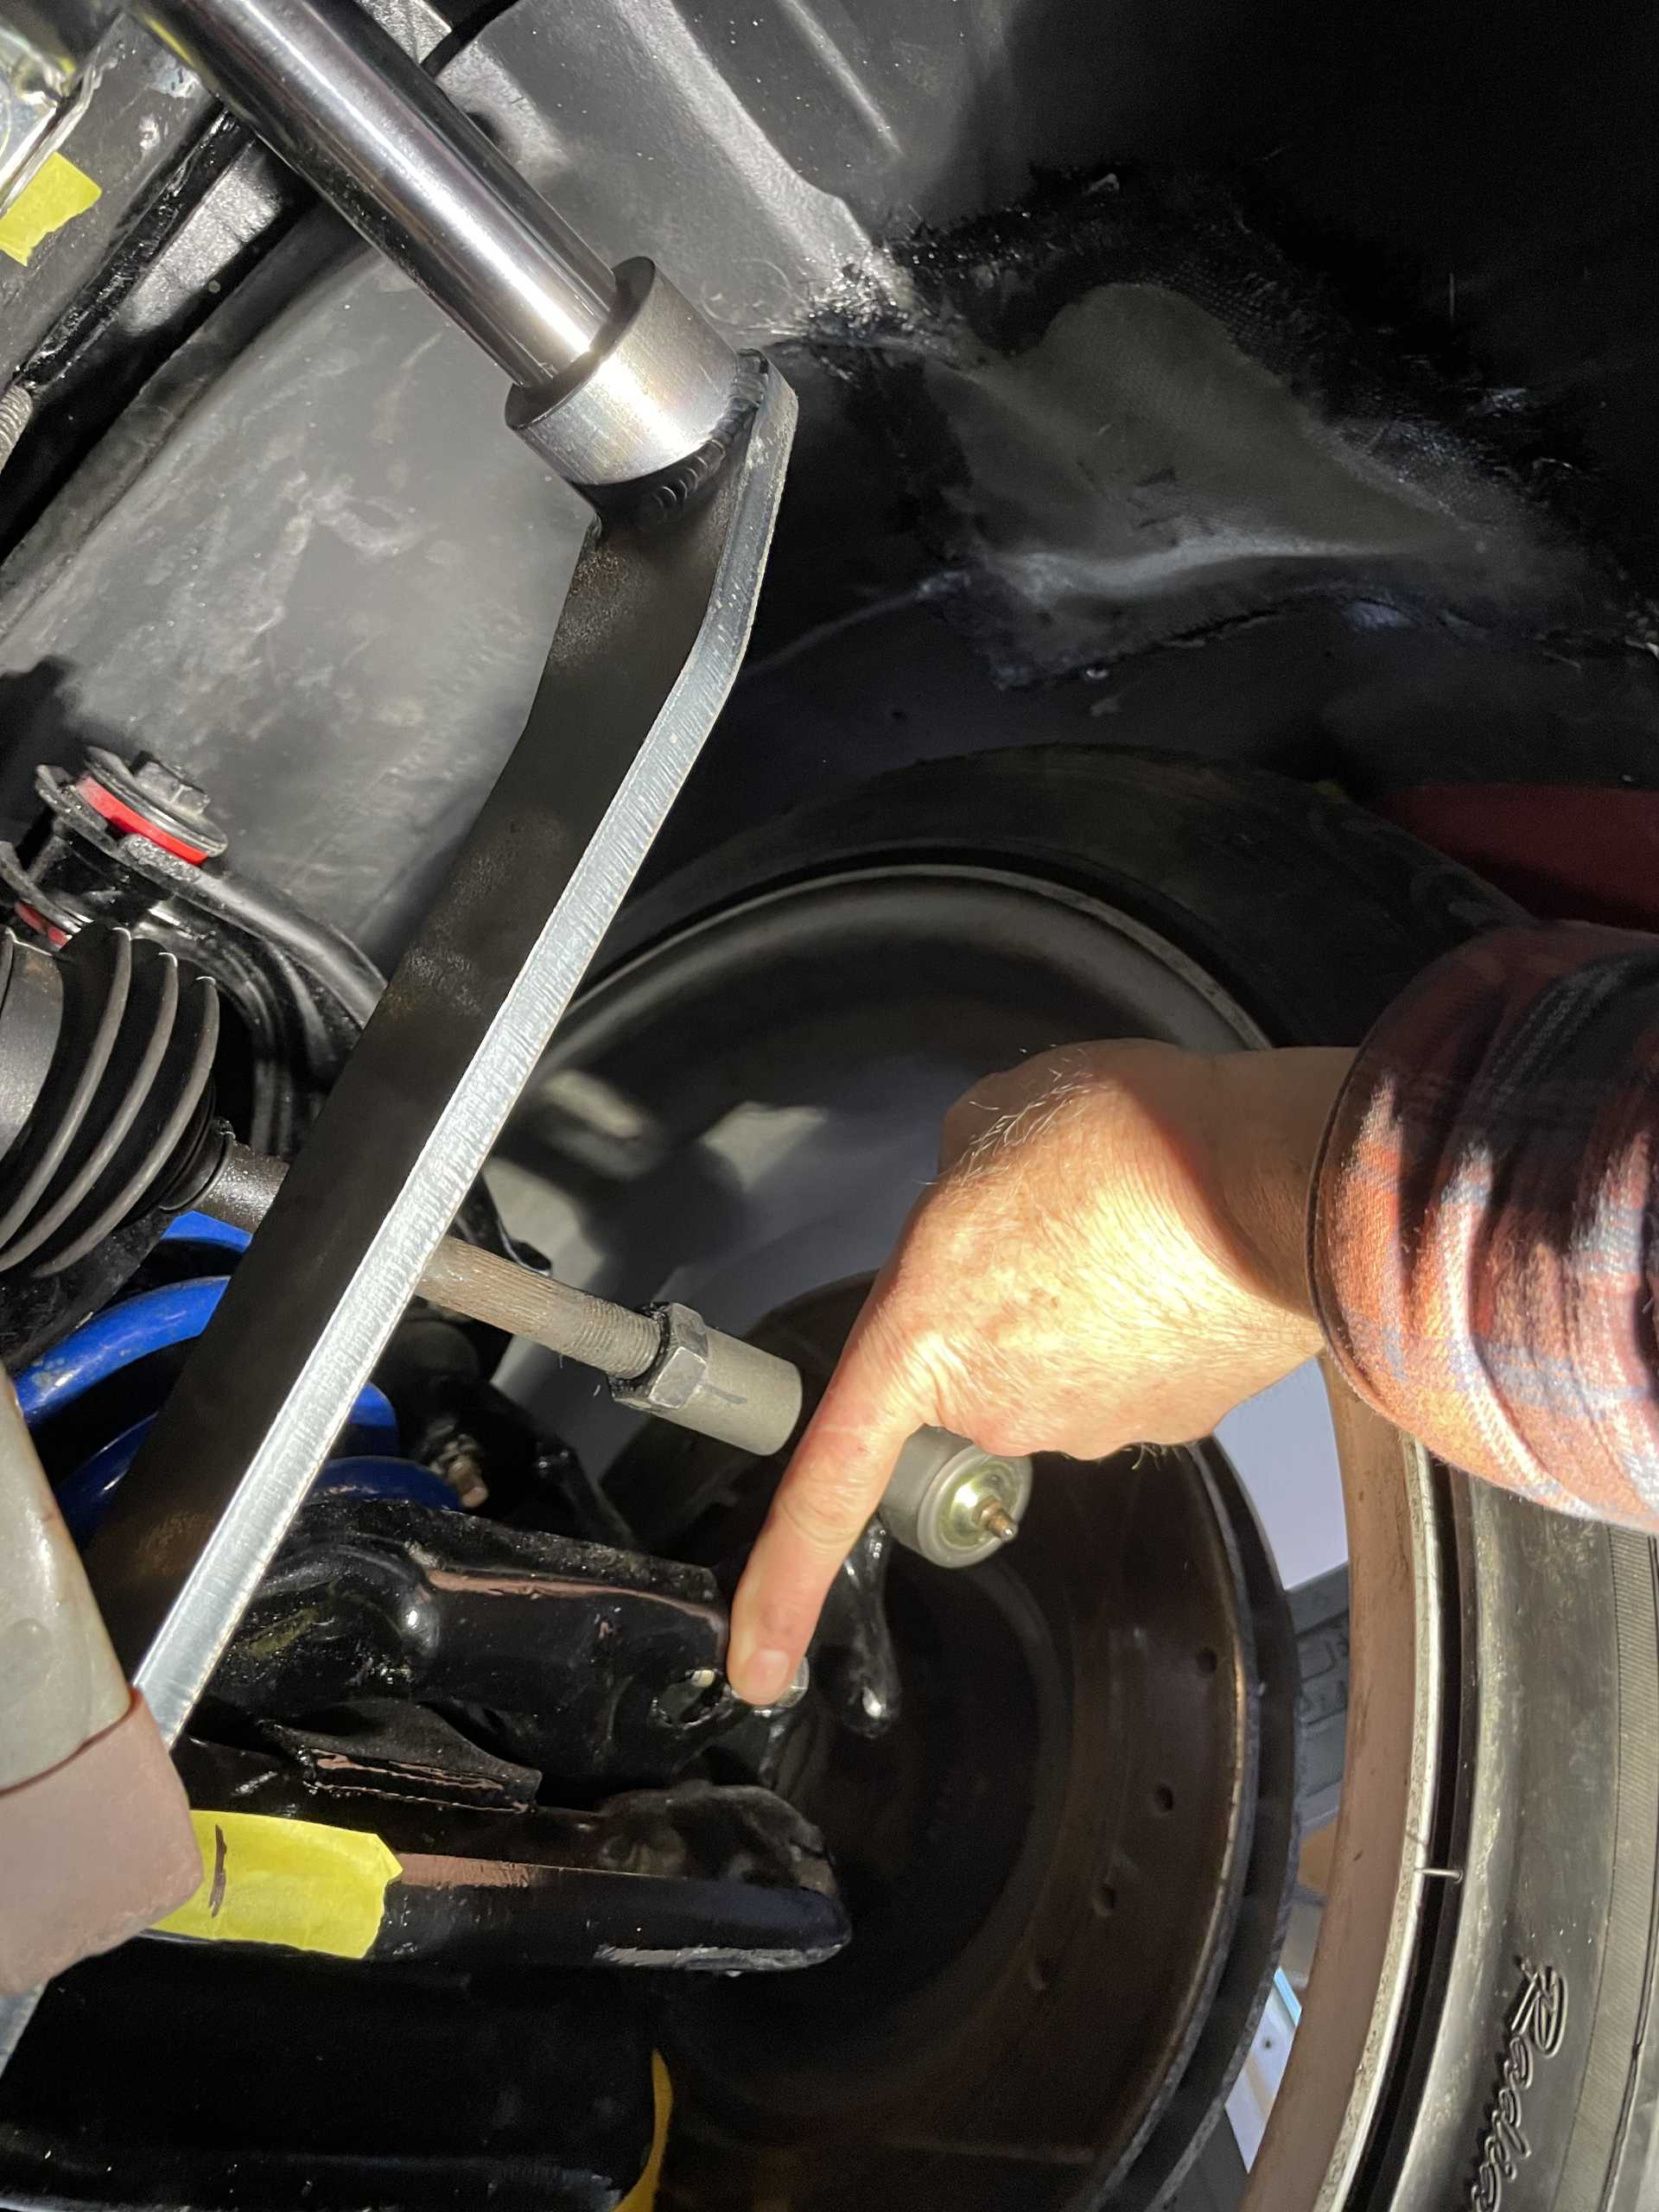
Finding the max length of the 1” polished steel bar mounted so the tire doesn’t hit.
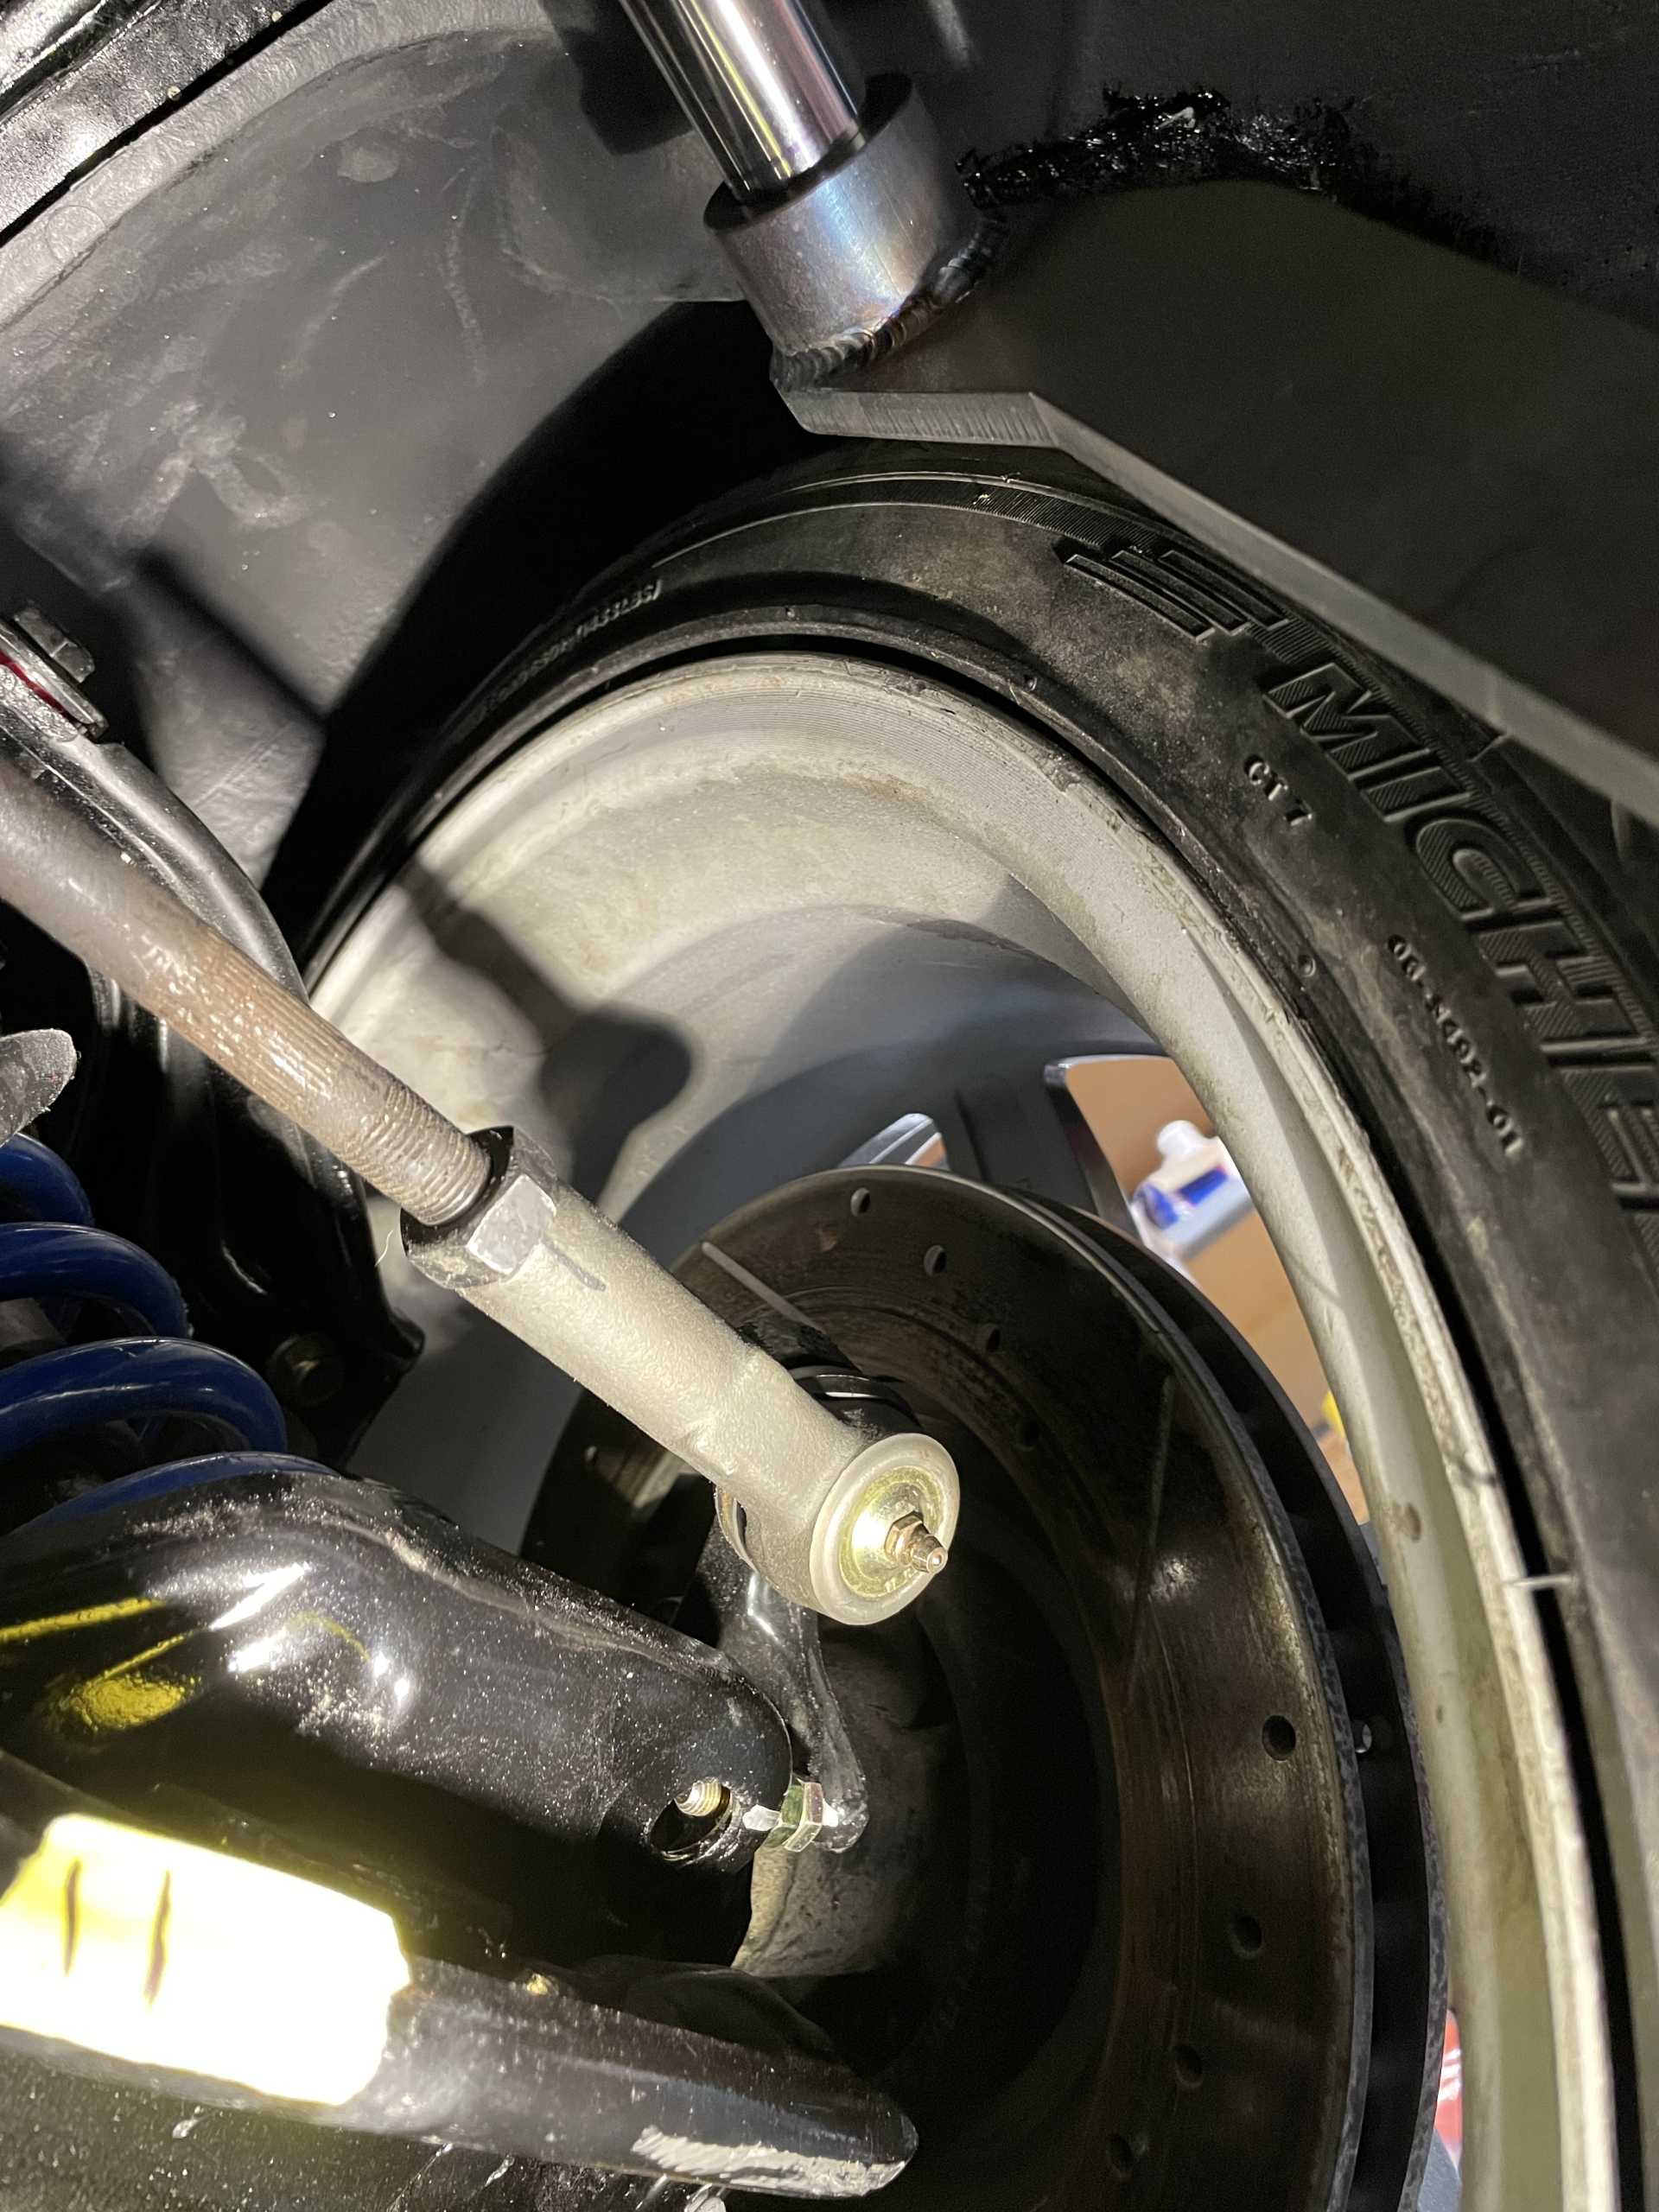
Then bending the template to fit
The end result!!
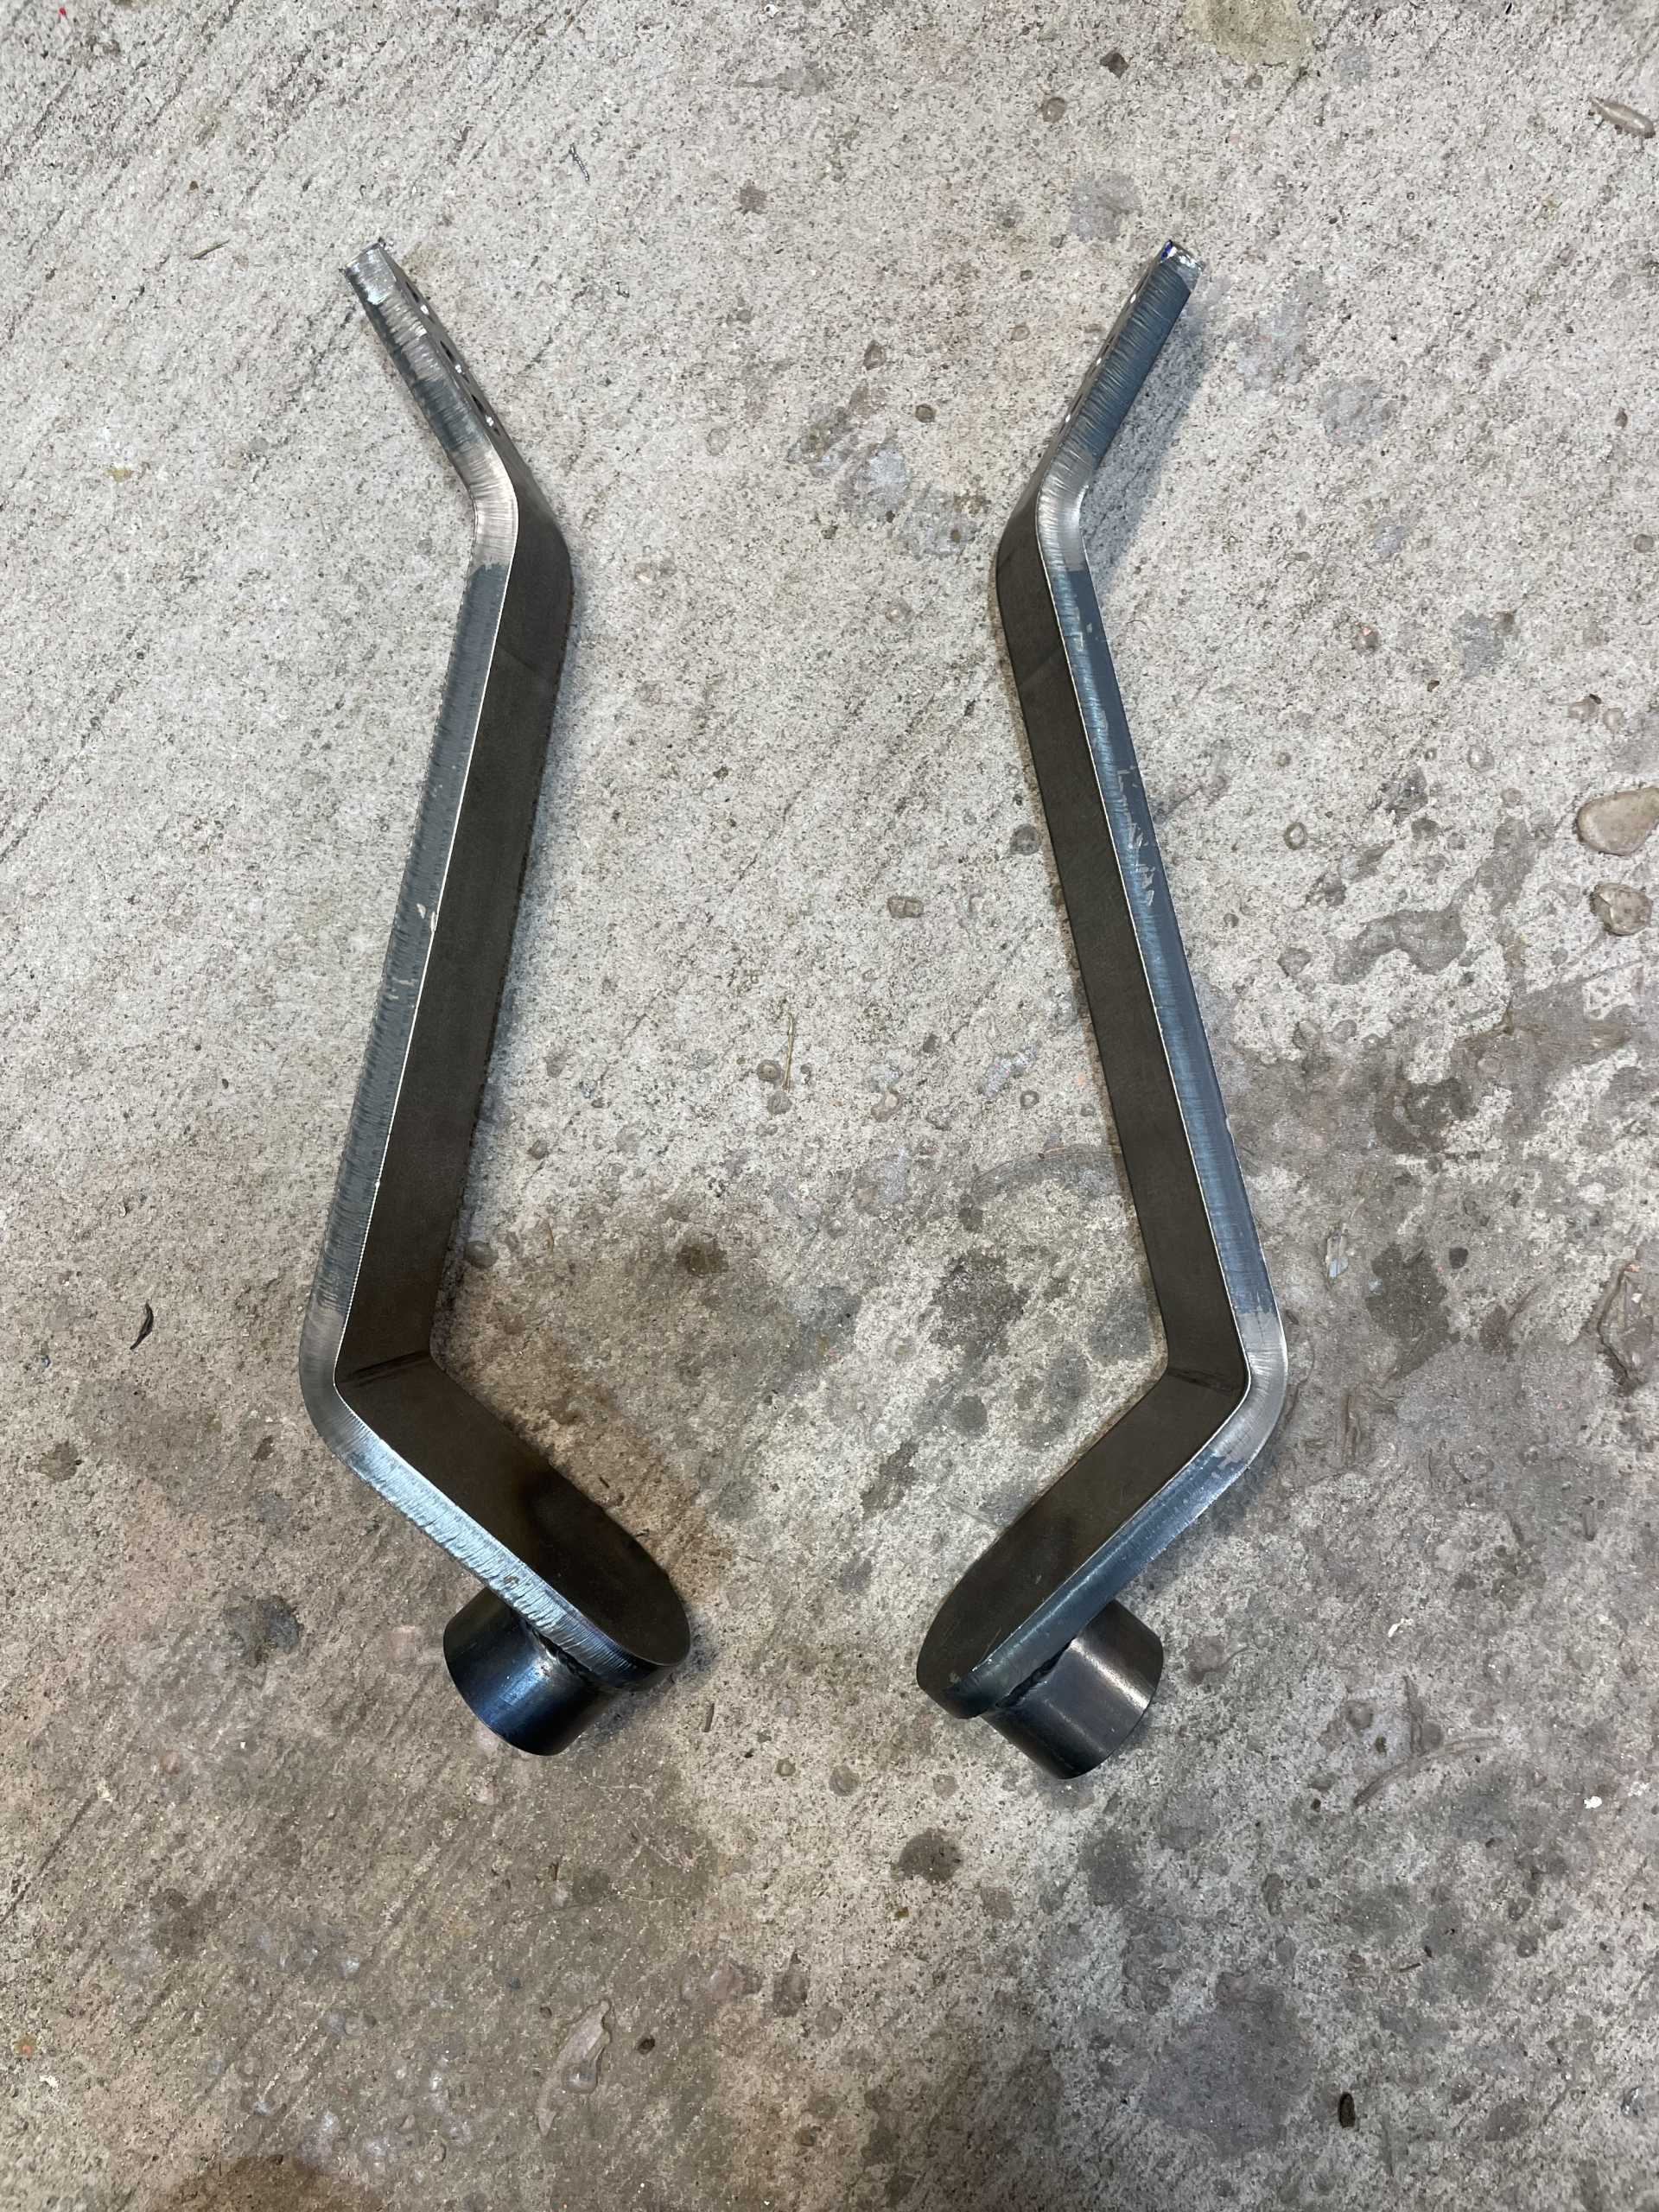
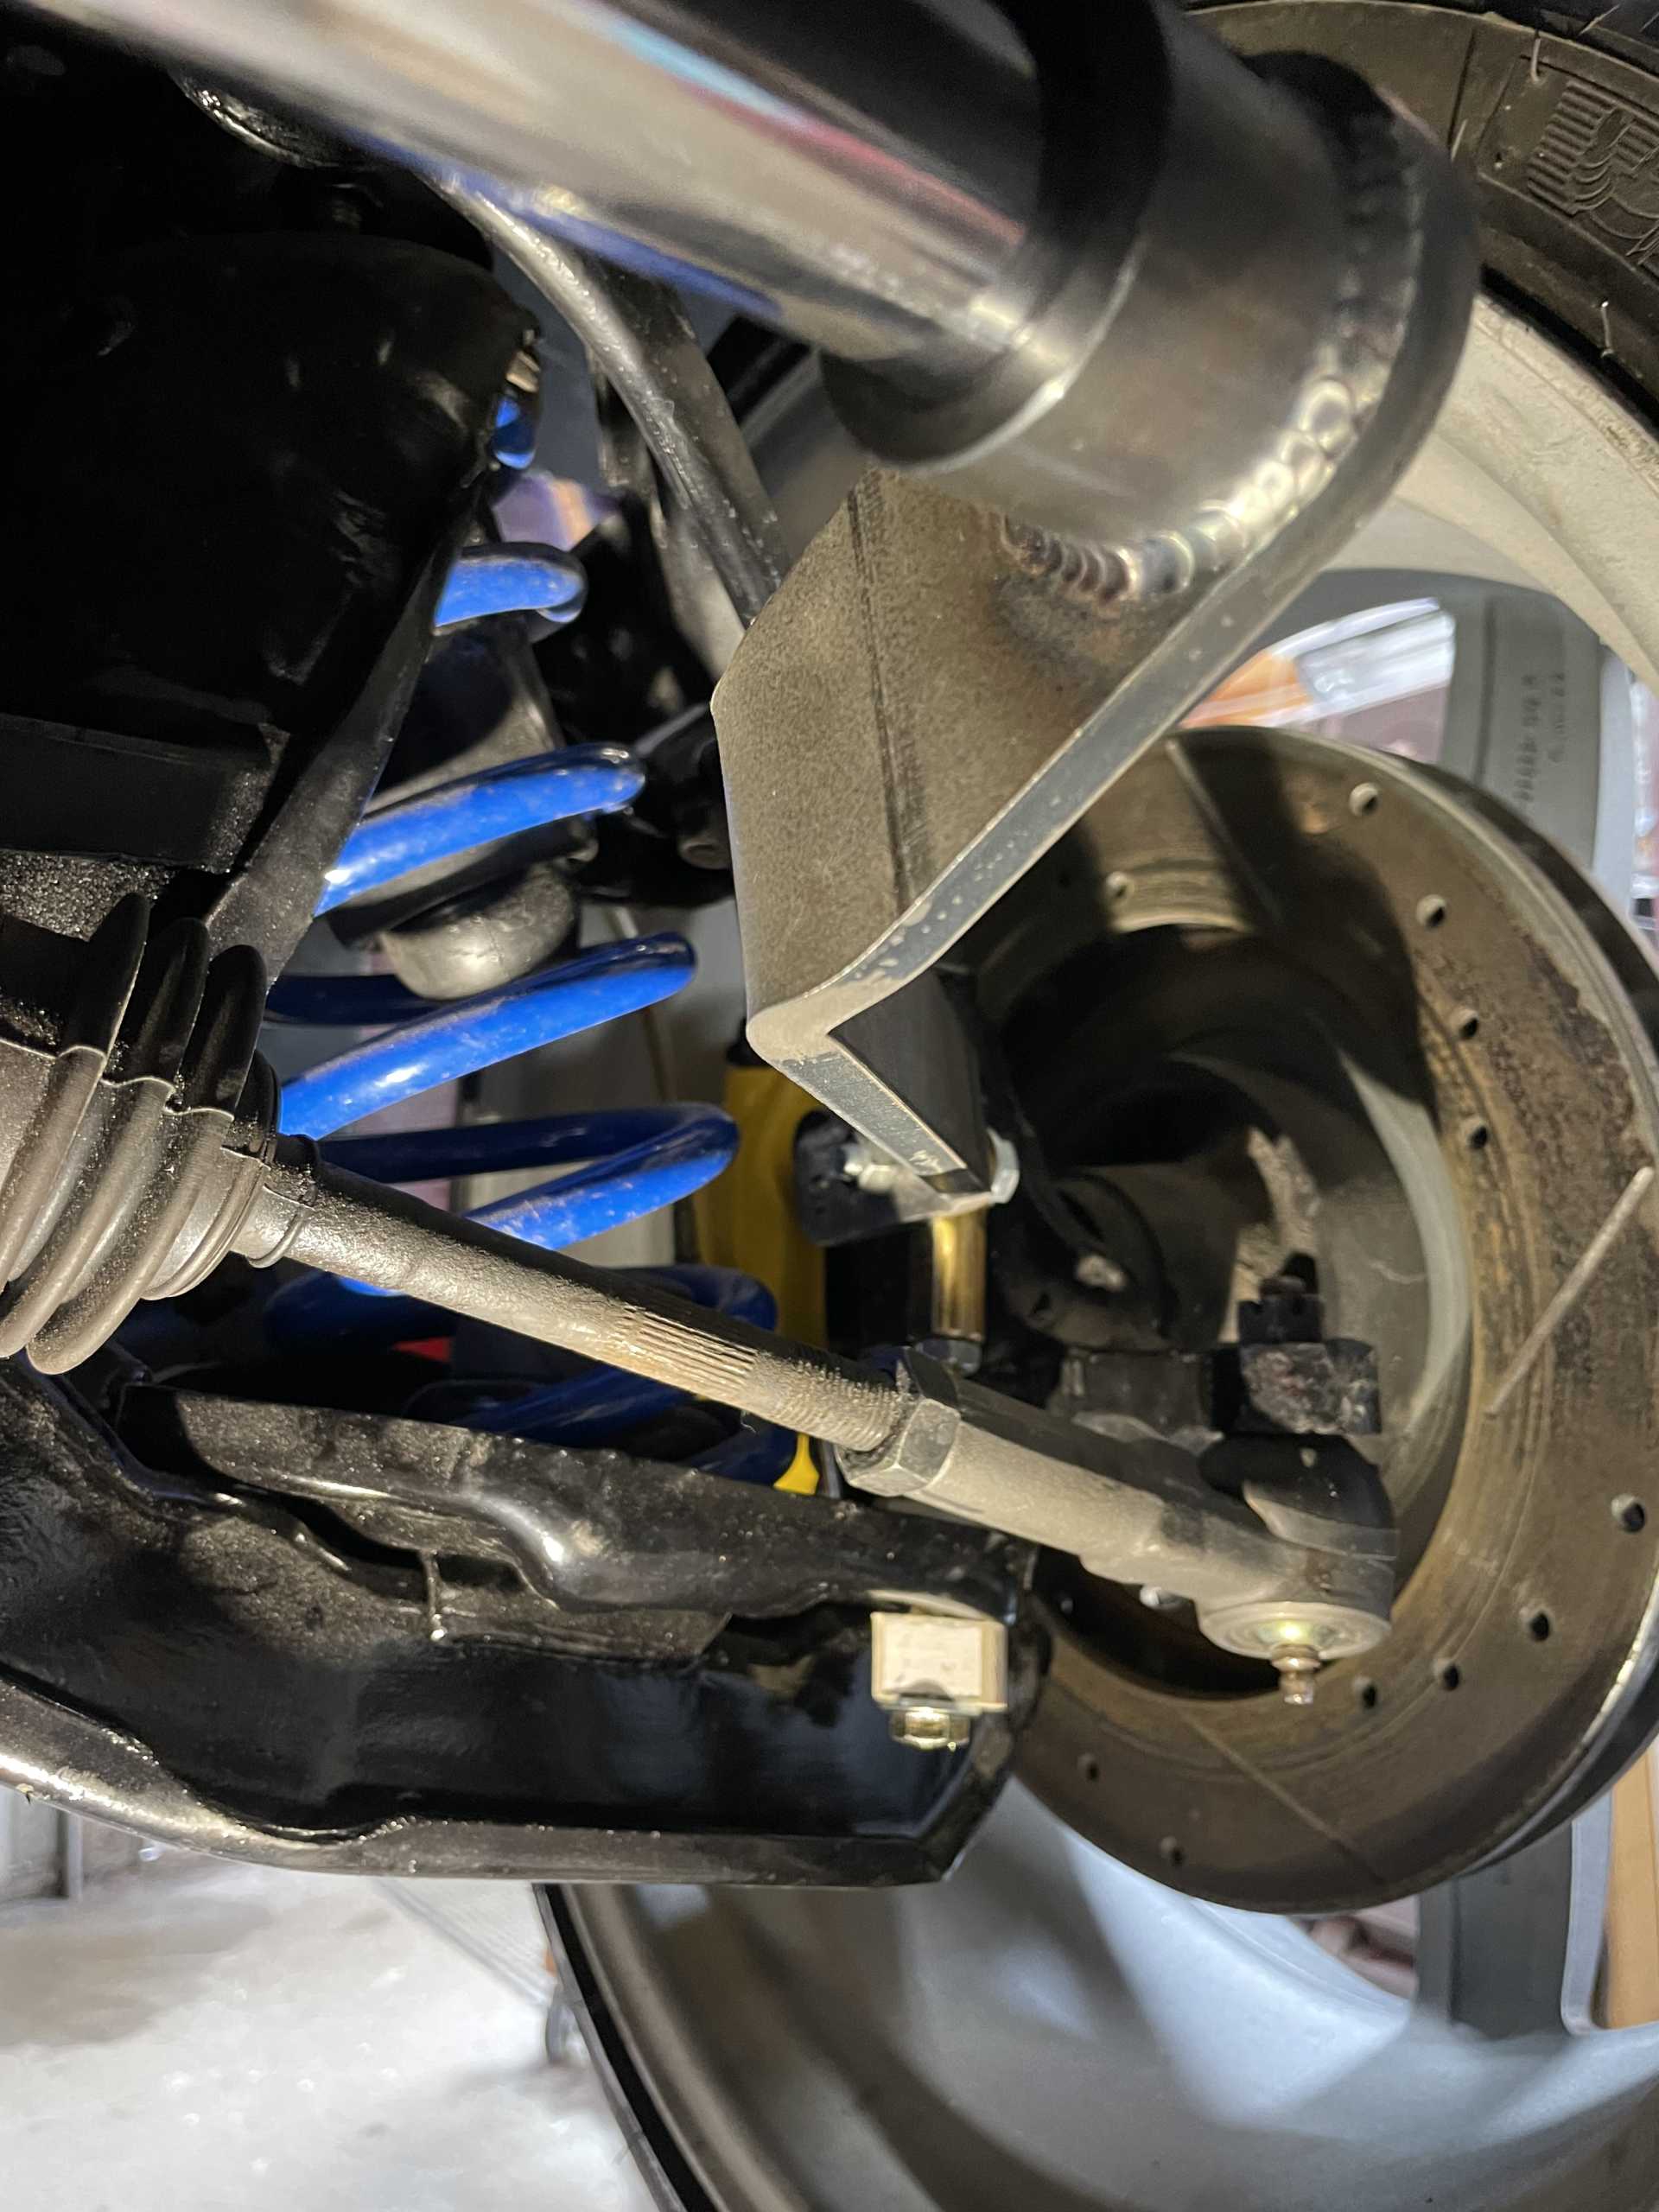
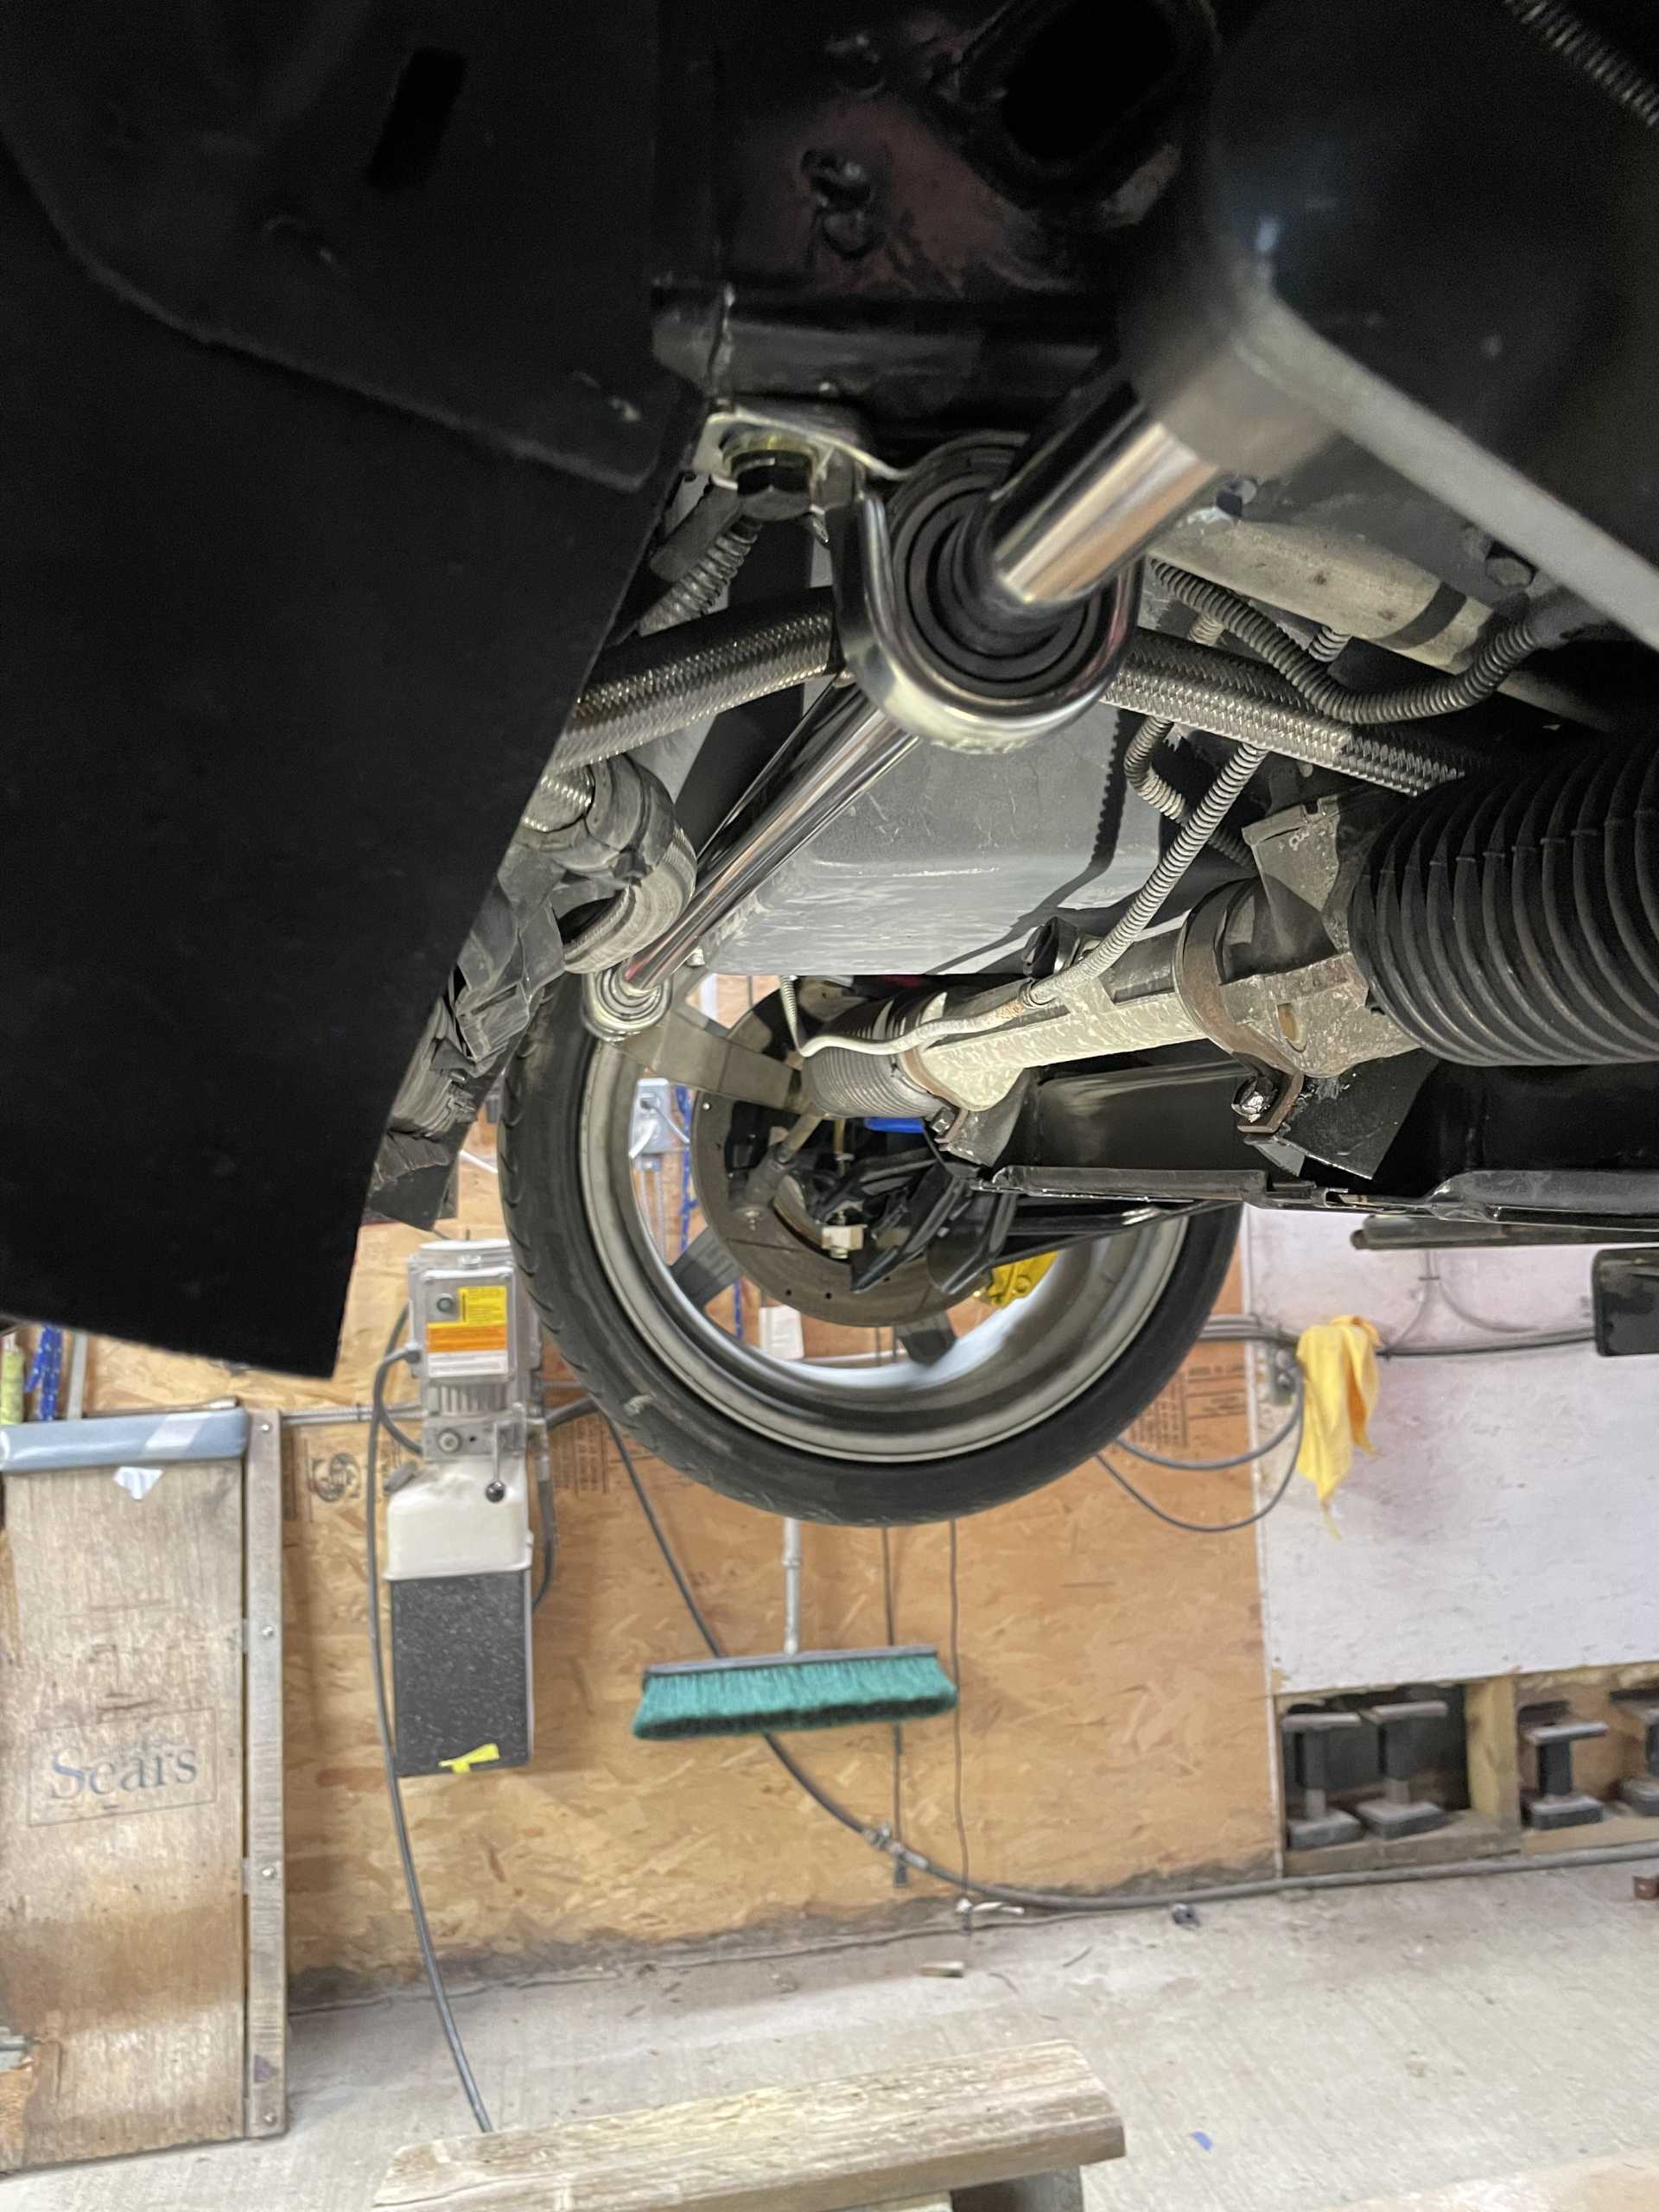
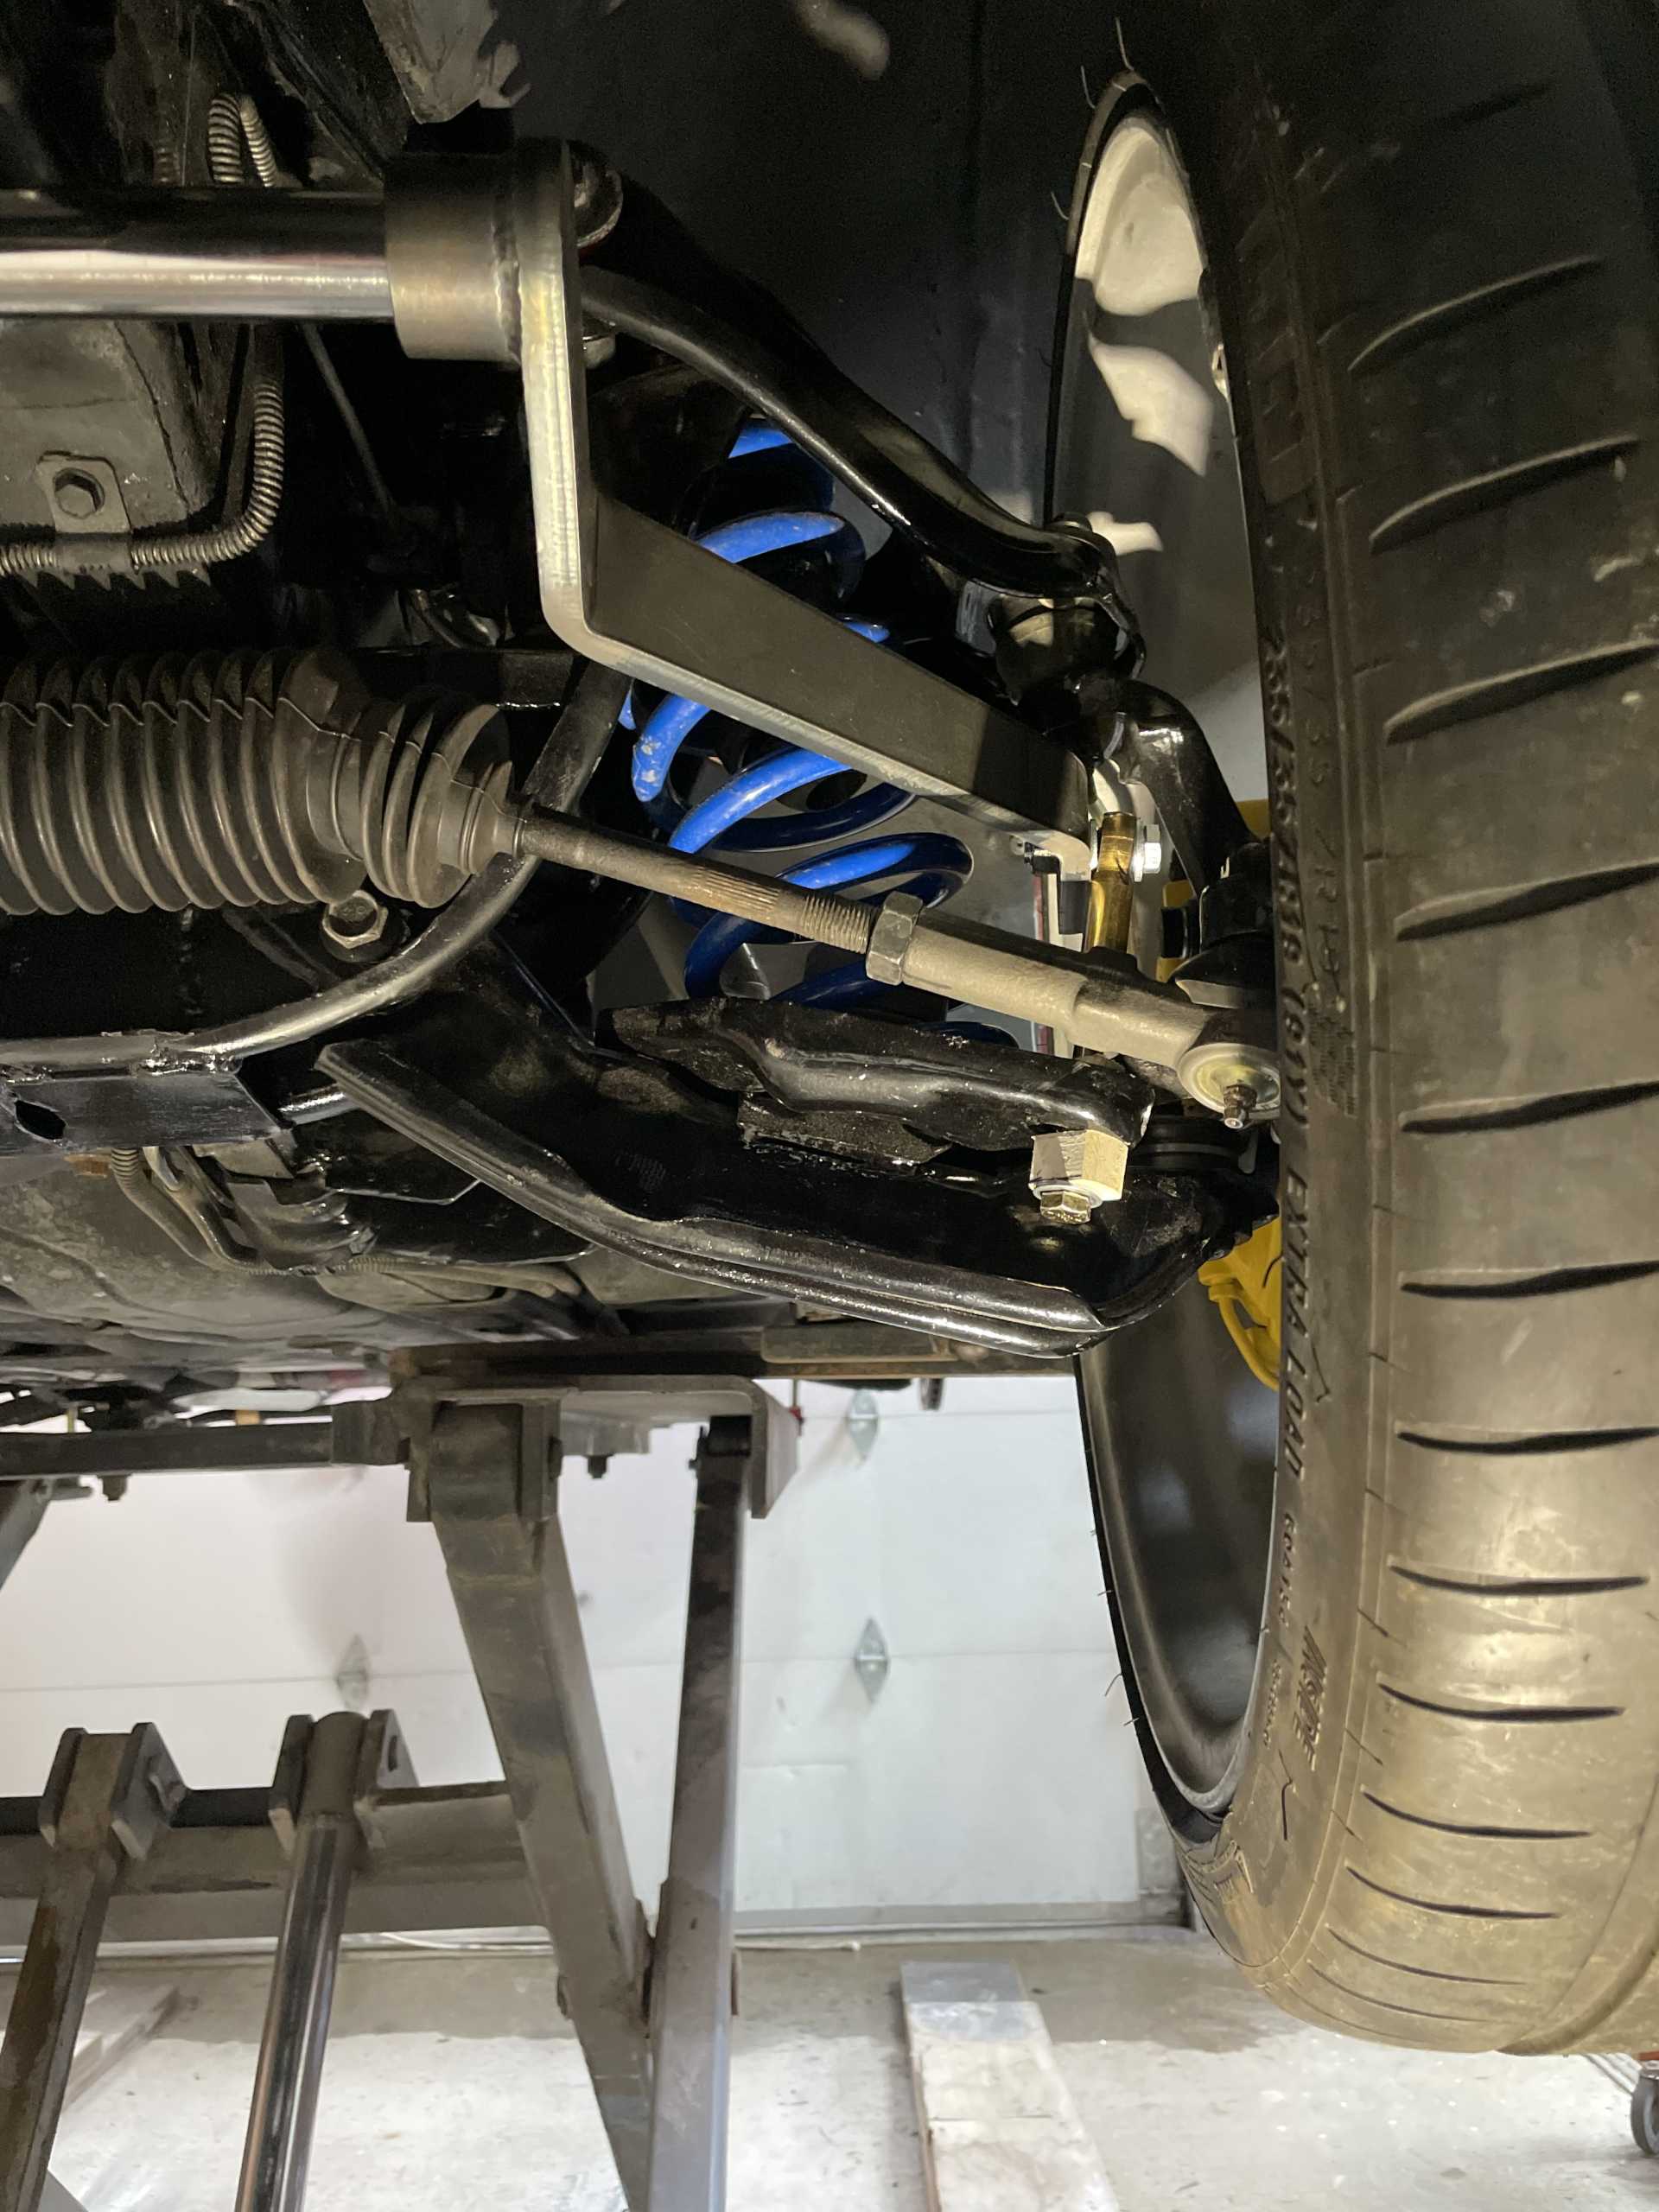
I’ll remove them now and powder coat them before final installation and pinning.
That’s it for now
Wayne
|
|
|