|
| SINISTER GT: The Official Build Thread (Page 1/31) |

|
ITALGT
|
SEP 02, 11:20 AM
|
|
______________________________________________________________________________________________

______________________________________________________________________________________________
Page 1: Introduction, interior work begins, tail light lens restoration, powder coating wheels
Page 2: Interior transformation continues, 2007 Daytona car show
Page 3: Custom air intake, wiper cowl reconditioned, accident rebuild
Page 4: Interior transformation continues, 2008 Daytona car show, blown transmission 
Page 5: Project gets new home, cradle dolly built, engine and cradle is dropped
Page 6: Weight reduction begins, 180 degree header installation begins
Page 7: 180 degree header installation continues, rear strut tower brace is fabricated, TPI intake is ditched
[This message has been edited by ITALGT (edited 04-28-2016).]
|
|

|
ITALGT
|
SEP 02, 11:22 AM
|
|
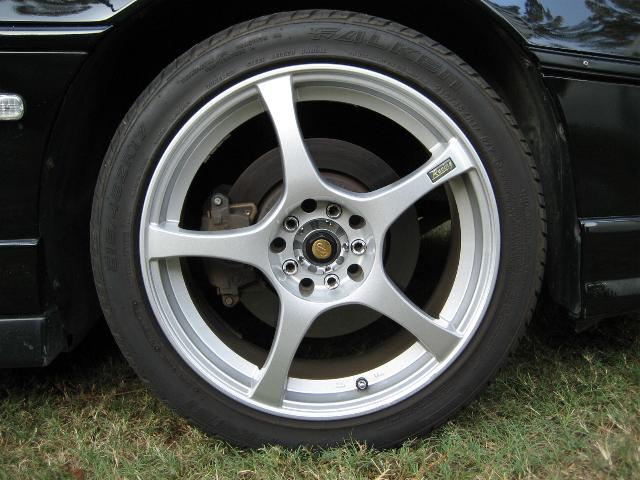
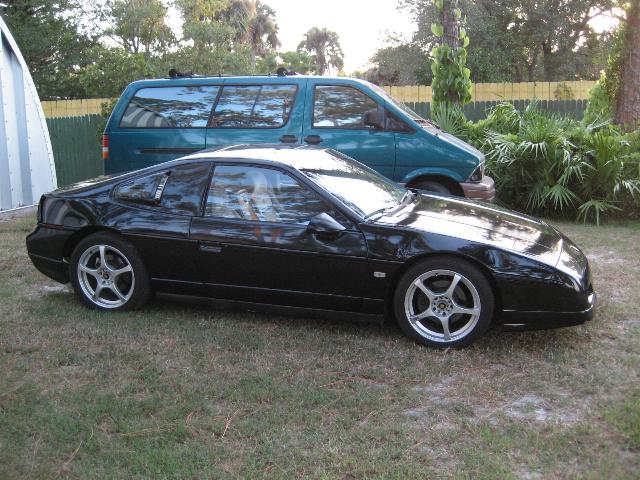
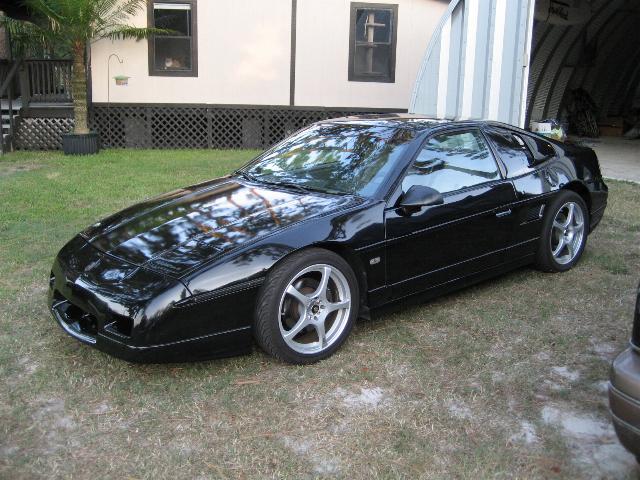
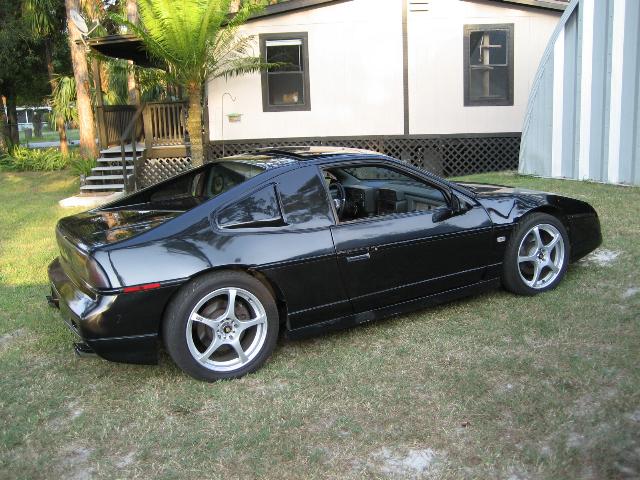
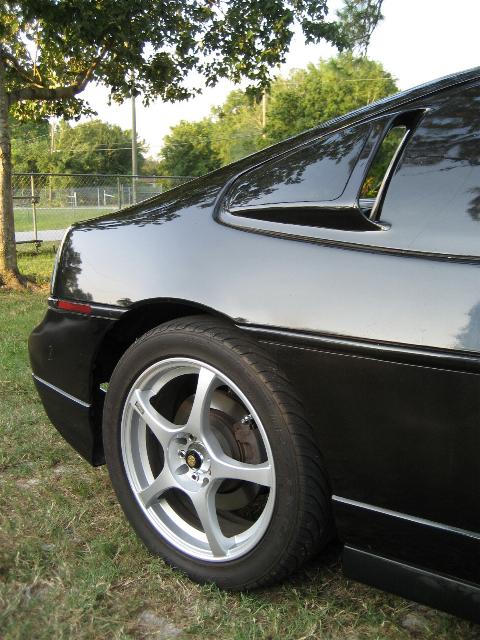
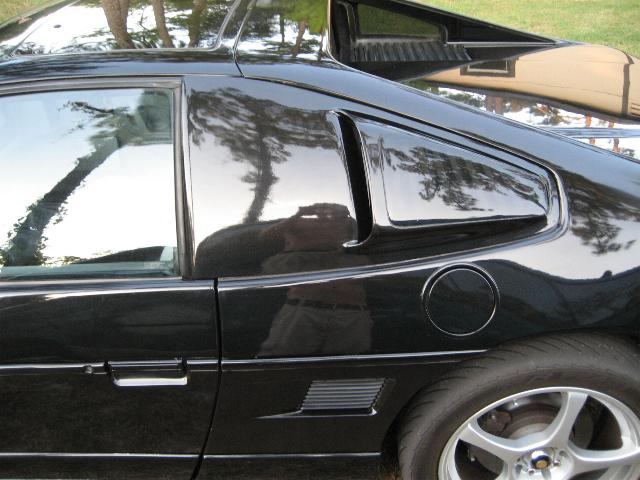
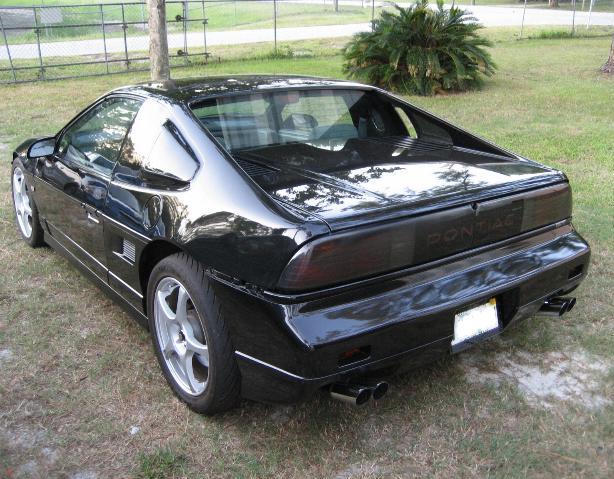
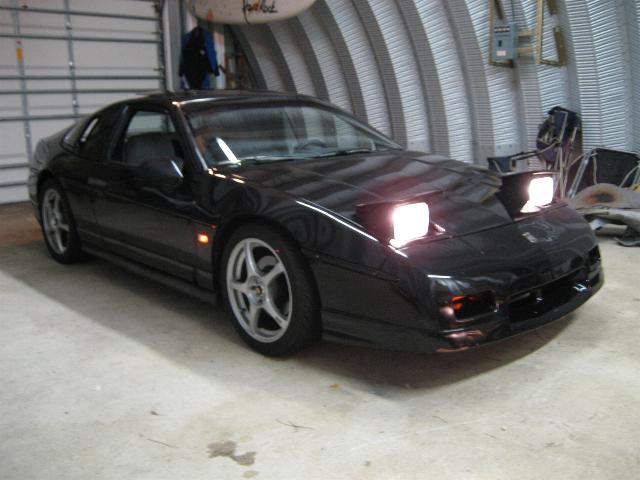
Underneath this black V8 Fiero GT's skin is actually a base 2.5L coupe that was found collecting dust in a grassy field somewhere near Norman, Oklahoma. The previous owner, located in Ohio, got his hands on the car and began to build his own SBC V8 Fiero GT. He started by combining '87 GT body panels to the base coupe's rust-free frame. The suspension was completely rebuilt with polyurethane bushings and was lowered using standard Eibach lowering springs. The brakes were upgraded using Archie's 11.25" brake rotor conversion. The wheels and tires were also upgraded to 17x7.5" Enkei RS5's with 215/45R-17's tires on the front and 235/45R-17's on the rear. The battery was moved to the front using Archie's relocation kit, and several Rodney Dickman accessories were also added throughout the car.
Here are a few pictures of the car before I purchased it:


In January of 2003, the Fiero got it's first V8 transplant; a mostly stock mid-80's Chevy 305 TPI V8, put in by Archie himself. Later, the 305 was swapped out with a rebuilt 350 V8 with a four-bolt main block, rebuilt rotating assembly, cast-iron Vortec "fast-burn" cylinder heads, Scoggin-Dickey lower intake, a mild CC "High Energy" 262H hydraulic flat-tappet cam, 24lb. Accel fuel injectors, and a custom-burned Street & Performance ECM chip. The throttle body and upper intake was left stock, with the exception of a small cone K&N air filter. A new exhaust system was made utilizing Sanderson shorty headers, stock cat converters and glasspack mufflers:

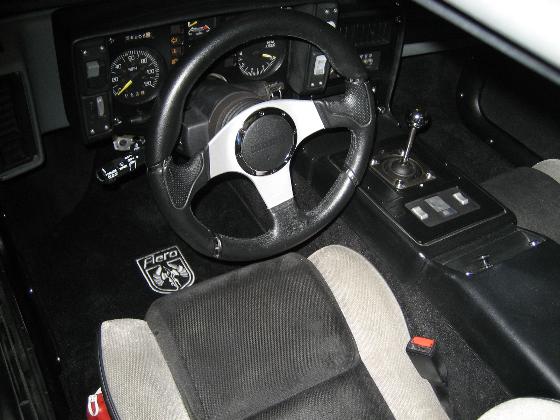
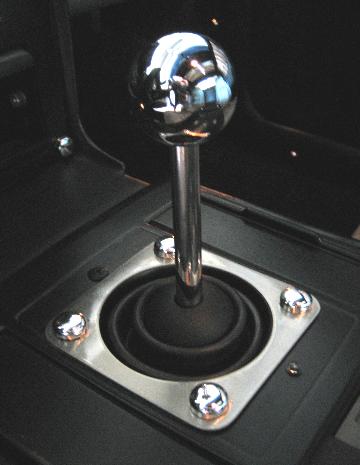
As for the interior, the stock steering wheel was tossed for a 350mm MOMO Millennium steering wheel. A MOMO Anatomic leather shifter knob was mounted on a Rodney Dickman short shifter made for aftermarket shift knobs. Sound deadener and new black carpet was also installed on the floorboards and firewall. Black vinyl was used to cover the headliner and firewall panels. A Viper alarm was also installed, along with a few stereo goodies. The rest of the interior was basically left disassembled/untouched when I finally got my hands on it:

In the early part of 2006, the previous owner lost interest in this project and offered it for sale here on the Pennock's mall. Apparently, the new-at the-time Nissan 350Z was more enticing to him than a properly done V8 Fiero needing only a little work to finish. When I arrived to buy the car, a new black 350Z was parked in his garage.
His loss. My gain. 
On May 7th, 2006... my 30th birthday... I grabbed a flight from sunny Florida all the way to Ohio to purchase the car... and then proceeded to drive it all the way back home. After two full days of driving, many miles traveled with a malfunctioning clutch slave-cylinder, I was back in Florida with my first SBC V8 Fiero. 
[This message has been edited by ITALGT (edited 11-08-2016).]
|
|
|
|
ITALGT
|
SEP 02, 11:23 AM
|
|
|
|
|
ITALGT
|
SEP 02, 11:24 AM
|
|
|
|
|
ITALGT
|
SEP 02, 11:25 AM
|
|
|
|
|
ITALGT
|
SEP 02, 11:26 AM
|
|
______________________________________ENGINE & EXHAUST_______________________________________
*Rebuilt 350 V8, four-bolt main block, stock bottom end, Tuned Port Injection
*Getrag 5-speed manual (upgrading to a late model Getrag)
*Vortec cast-iron heads, Scoggin-Dickey lower intake plenum
*Accel 24lb. high-flow injectors
*Competition Cams "High Energy" 262H hydraulic flat tappet cam
*AEM dry-flow air filter, custom "cold air" intake, Holley air-foil
*Proform 50,000 volt ignition coil, MSD 8.5mm plug wires, Accel hi-output ignition module
*Sanderson headers... cracked and busted, time for some 180's
*Street and Performance custom burned computer chip
*Mobil 1 Synthetic oil, Lucas oil stabilizer
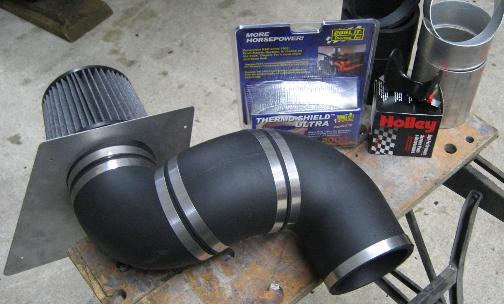
I made the "cold air" intake using 4" rubber hose, aluminum tubing, firewall mount plate, Holley air-foil and a AEM synthetic "dry flow" air filter:
The transmission that was originally used was an old Getrag 5-speed. It held together for me for a couple of years before it finally blew up at the drag strip in April of 2008. Here it is as it sits today, January 30th, 2013: 

Now that the engine cradle has been dropped for a transmission swap, I will begin adding a few goodies to wake up the 350 to extend the upper RPM range and increase overall performance with the low-geared Getrag 5-Speed. I will be ditching the stock TPI and SD Vortec base intake with a carburetor and appropriate cam. I will also be getting rid of the old mechanical water pump and install an electric one.
New Schoenfeld 180 headers... see page 6 for installation details:

Main strut tower brace in place with welds cleaned up:

More to come...
[This message has been edited by ITALGT (edited 05-26-2016).]
|
|
|
|
ITALGT
|
SEP 02, 11:28 AM
|
|
|
|
|
ITALGT
|
SEP 05, 12:27 AM
|
|
____________________________________THE BUILD BEGINS!____________________________________
The actual build begins with the clutch master and slave cylinder being replaced as they failed before making it home from Ohio. Because it's been discussed a thousand times here on Pennock's, I will skip all the boring removal/installation! It wasn't long after that the alternator stopped charging properly, and began making all sorts of nasty noise while the engine was running. I took out the old one and installed a rebuilt unit, which fixed the problem... no big deal. 
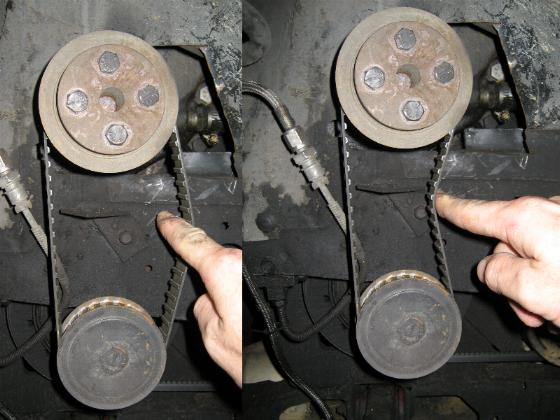
I had taken off the passenger side rear wheel while I was replacing the alternator, and noticed a problem with my water pump belt. I took the opportunity to snap a couple of pictures of the excessive play. Even though this belt is cogged, it was stretched enough to slip when it got wet (not a good thing). After a bit of searching, I found a new belt and installed it... very tight fit, but problem is solved. Note also all the oil and gunk all over the frame as well... I think it's the front seal on the engine. 
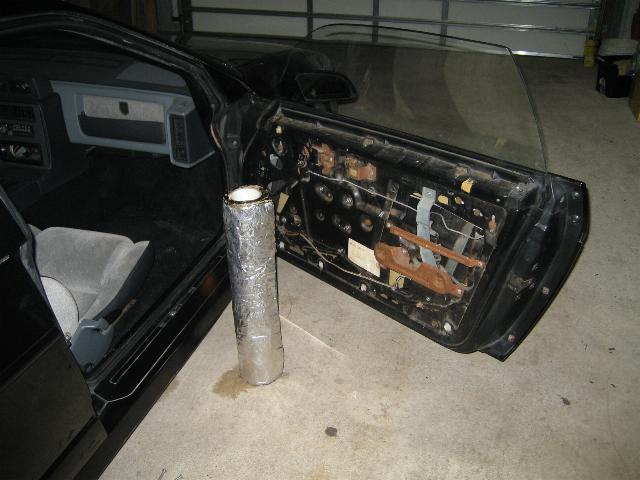
Next, it was time to start some interior work to achieve a black and gray fighter-jet theme. The first thing I needed to do was to redo the color of the interior panels using semi-gloss and flat black vinyl paint. Some parts had already been painted black, other parts were still the factory gray. The door panels were basically untouched originals. While the door panels were removed, I also took the time to put sound-deadener on the doors:
For the Fiero's interior panels, I started with the prep work by scrubbing them down good with a scotchbrite pad and alcohol. You can also buy a spray-on adhesion promoter to help the paint bond to the surface... I elected not to use it, as I've found that the paint sticks just fine with proper prep as I just described. Next up was masking the door panels. I choose to leave the map pocket attached as well as the door carpet to keep things simple. I used black Duplicolor flat-black interior paint... you can get this stuff at Walmart and most auto parts stores. This paint can be used on carpet, but it's best to re-coat/scrub it in good a few times to get it dark... it does lighten a bit after it's dried. Replacing the carpet is always the best option, but I'm not worried about it at this point.

Notice I painted the top of the door panel black to flow better visually with the rest of the interior. It also looks better when standing outside the car... nothin' but black!
Panels reinstalled:


Much better, eh? =)
Look for similar black and gray treatment on the rest of the interior.
[This message has been edited by ITALGT (edited 04-26-2015).]
|
|
|
|
GonsaiPK
|
SEP 05, 02:39 PM
|
|
|
Looks good! Say, are new seats in the works? Some black Mr. Mikes or Corbeaus would be rad.
|
|
|
|
ITALGT
|
SEP 05, 06:09 PM
|
|
| quote | Originally posted by GonsaiPK:
Looks good! Say, are new seats in the works? Some black Mr. Mikes or Corbeaus would be rad. |
|
New seats are definitely going to be needed! Driver's side is in ok shape, but the passenger side is torn up some. I will be replacing them both with aftermarket racing seats at some point in the future.[This message has been edited by ITALGT (edited 01-30-2013).]
|
|
|
|

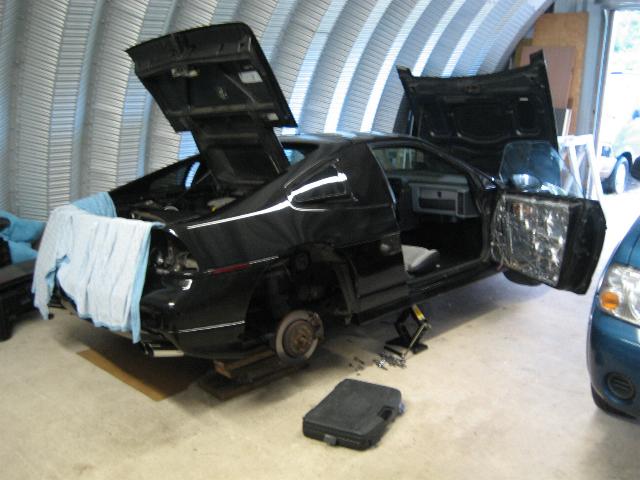
 In January of 2008, a wooden bridge covered in early morning Florida frost sent the car spinning uncontrollably into several sign posts (see page 3 of this build thread for the nitty-gritty details):