
 
     |
| Blooze Own: An F355 Six Speed N* Build Thread (Page 9/126) |

|
IXSLR8
|
MAY 11, 01:05 AM
|
|
Looks good. That's the way I did my block as well. And it sure does leave a shavings mess.
Your kit is an improved later version than mine. Mine didn't come with the fancy alignment jig. I found that predrilling the block holes with a 1/2 inch bit made things easier to drill with Norms bits. I also used ARP (VW) studs instead of GM's stretch bolts. I like norms kit because it holds great and you can use GM head bolts or aftermarket studs. I've taken the heads off twice and they held fine under each re-torque.
A new kit has also been developed by a fellow named Jake in Ontario, Canada. His kit is a one piece stud: http://www.northstarperformance.com/sgstuds.php He's on the Cadillacforums.com site and is not in favor of the inserts of course.
Both kits seem to work extremely well compared to GM's approved time serts. I think its good insurance to do Norm's inserts or Jake's studs to your block regardless if you have a head sealing issue or not.
You might want to consider using Cometic head gaskets (provided you have the 94-99 N*). They will not deteriorate like the GM graphite or Felpro gaskets under the shrinking and expansion of the heat cycles in the water jacket areas. I have them on my N* and they seal nicely. Expensive motor isn't it!
|
|
|
|
Bloozberry
|
MAY 11, 12:14 PM
|
|
Thanks for the comments mccanda, Isolde, Joe & Hugh.
Dave: the alignment jig was extra... it retails for $95 separately but if you buy it with the basic kit, the total comes to $395 for both so there's a savings to be had. I think it was worth the extra money to get the drill and taps lined up properly.
|
|
|
|
Bloozberry
|
MAY 12, 10:21 PM
|
|
At this point with all the machining, polishing and tweaking done, the engine was finally ready for a good wash... I was getting tired of all that burnt oil-varnish ruining my photos. I took the block to a different machine shop here that specializes in rebuilding cylinder heads, which I knew from experience could wash the block in a high-pressure hot water and detergent machine that wouldn’t ruin my polished exterior. The results were great and the block came out looking better than brand new. Over the course of the next few photos you’ll see the difference.
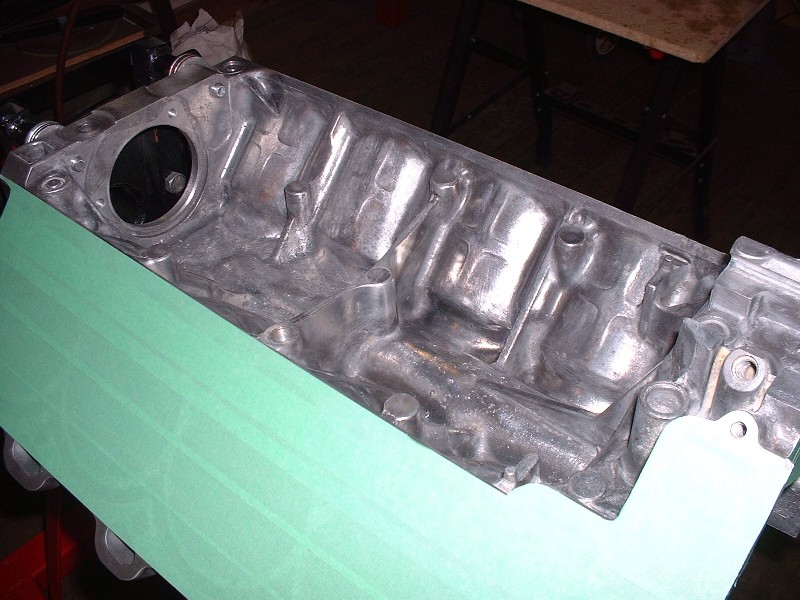
One thing I decided I wasn’t going to do was polish anything that wouldn’t be seen, like the intake valley (or the lifter valley if it were a pushrod engine). After the wash, the valley was super clean but still quite pitted so I wanted to protect it from future corrosion as much as possible. The dreaded white powder starts in the little pits and grows outward so the idea is to seal off the pits with paint to keep water and other contaminants out. Here's the bare valley:
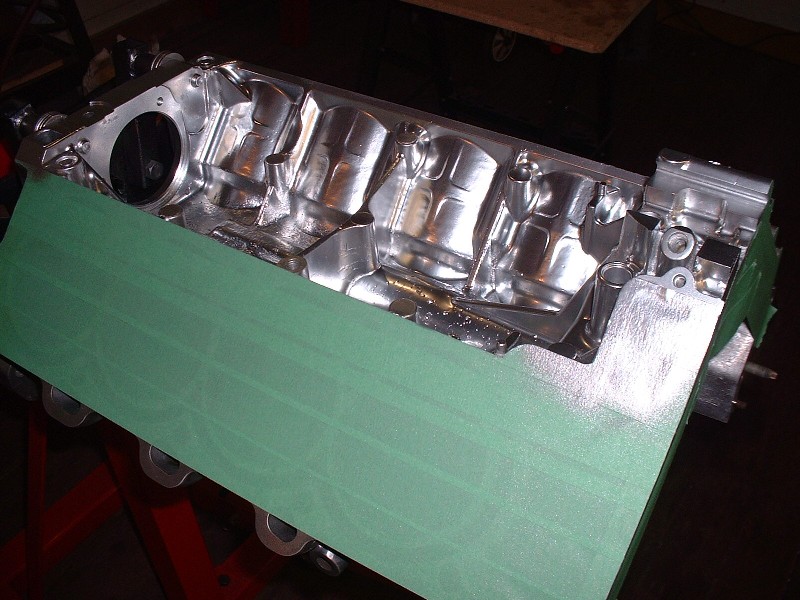
I masked off the cylinders and bought some Duplicolor Chrome paint… this stuff is amazing… looks great and dries fast. I think you’ll agree. It does smudge if oil contacts it once it's dry though, so if anyone reading this plans on spraying their entire engine with it, it will need to be clearcoated to keep the sheen.
With that little loose end tidied up, I could turn the engine over on the stand and start working on building up the lower end. The first thing was to measure the main bearing clearances so in-went the bearings. This is #3. You’ll notice it’s the thrust bearing with the side wings. I wear gloves when I handle bearings because finger grease is acidic enough to etch the finish on them if you’re not careful.

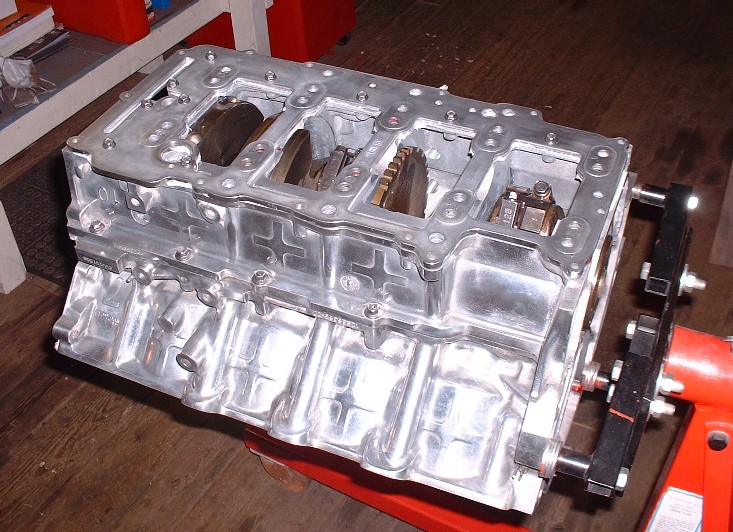
Here’s a pic of all the bearings in place (notice the clean innards?). Like any other engine, they go in the block dry. I lubed up the surfaces that contact the crank with a thin layer of motor oil before laying in the crank, but nothing thick like assembly lube at this point since I didn't want to throw off measuring the clearances.

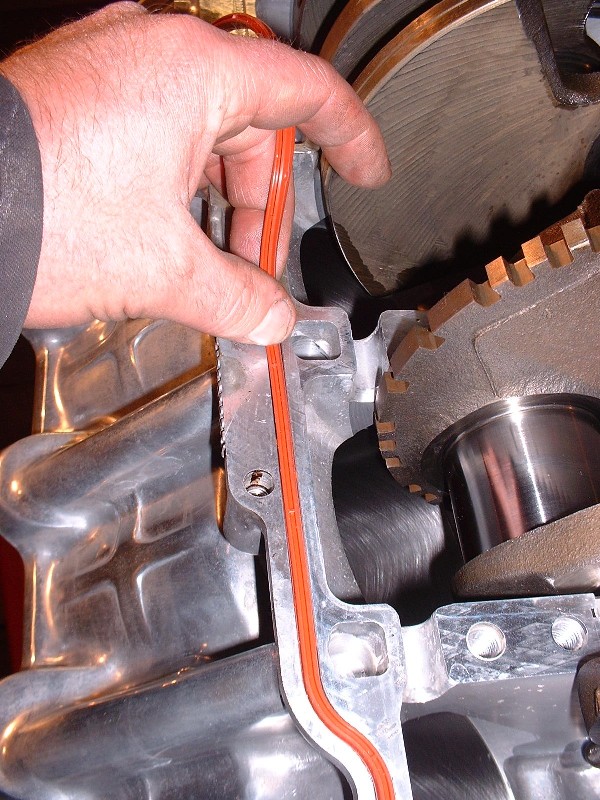
Next up was laying the OEM neoprene case-half seals and a piece of green Plastigauge on each of the main crank journals. The whole thing had to come apart again to read the Plastigauge, so no sealant was used on the case-half seals at this point. In retrospect I could have left the seals out at this point, but I figured they couldn’t do any harm. Later, I would discard these seals altogether and replace them with a new engine sealant that GM recommends instead.
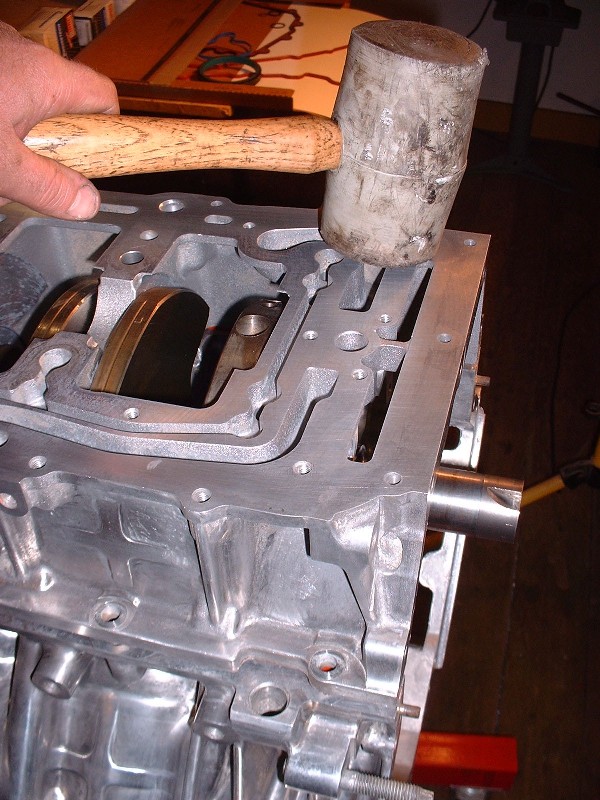
The lower bearing halves were installed in the lower case half, and the lower case half was then installed carefully onto the upper case half. There are four tight fitting guide pins that make installing the lower case half difficult without a rubber mallet.
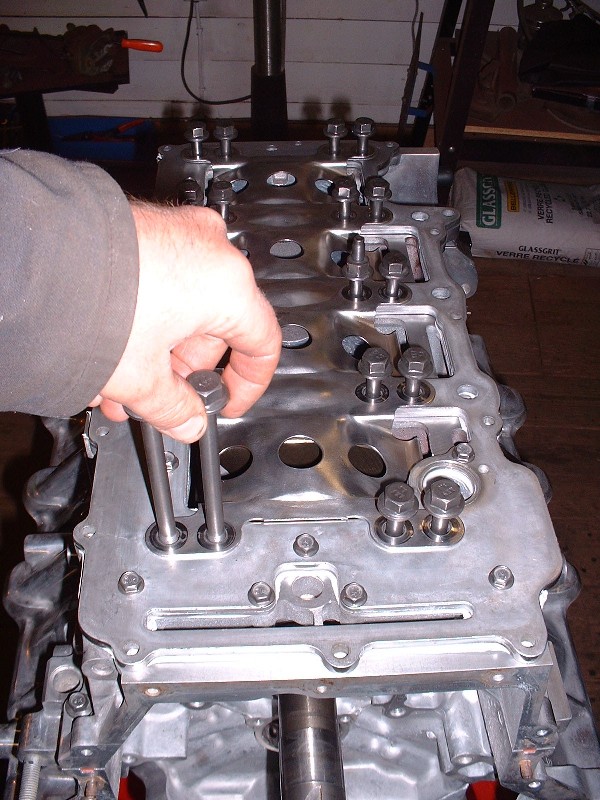
Because the main bearing cap bolts pass through the windage tray and the oil manifold, these parts must be assembled onto the lower case half as well before finally installing the bolts. Here’s the oil manifold sitting there awaiting the windage tray installation.
And here’s the windage tray in position and the main bolts (all 20 of them) being set in place. Unlike the connecting rod cap bolts, these are not TTY (Torque To Yield) and can be reused.
 [This message has been edited by Bloozberry (edited 05-12-2010).]
|
|
|
|
IXSLR8
|
MAY 12, 11:11 PM
|
|
|
Nice. I like that chrome paint! Nice to see shiney, shiney.
|
|
|
|
katatak
|
MAY 12, 11:45 PM
|
|
|
|
|
Will
|
MAY 13, 08:48 AM
|
|
| quote | Originally posted by Bloozberry:
After drilling out the factory threads, the next step was to tap the new holes for the inserts. Norm’s kit also included the tapping oil and the Locktite to secure the inserts in place.
|
|
Be sure you use an appropriate solvent to clean all the tapping oil out first.
I'd suggest "maximum strength retaining compound" (don't know the number right off) as opposed to regular red Loctite.
|
|
|
|
Will
|
MAY 13, 08:54 AM
|
|
| quote | Originally posted by IXSLR8:
Both kits seem to work extremely well compared to GM's approved time serts. I think its good insurance to do Norm's inserts or Jake's studs to your block regardless if you have a head sealing issue or not.
You might want to consider using Cometic head gaskets (provided you have the 94-99 N*). They will not deteriorate like the GM graphite or Felpro gaskets under the shrinking and expansion of the heat cycles in the water jacket areas. I have them on my N* and they seal nicely. Expensive motor isn't it! |
|
The Y2K engines use the same head gasket. I think it was used through '04 or '05.
Unless your had a problem with losing bolt tension or head gasket seal due to relaxation, creep or corrosion of the original threads in the block, or you are going to run 30 psi of boost, timeserts are quite sufficient.
The problems dealerships have with them are that the engines that need inserts are so badly neglected that they've deteriorated so much that they need bigger inserts than the timeserts.
IE, if you don't have a detectable porosity or corrosion problem already, you will almost certainly not need anything more than timeserts. Even at that, you only need timeserts for durability of the threads after multiple torque cycles.
|
|
|
|
Will
|
MAY 13, 09:03 AM
|
|
| quote | Originally posted by Bloozberry:
Finally, here’s what the insert looks like fully threaded in and locked in place. Pretty deep down in there eh?

Enjoying the slide show so far?
|
|
Deep set headbolt threads in the outer wall of an open-deck block keep the cylinder wall loaded in compression under all circumstances and help the cylinder keep a more consistent shape. This helps ring seal and therefore both power and economy. This was (I think) the first time GM used this configuration (although Honduh may have used it earlier in the B-series).
|
|
|
|
Will
|
MAY 13, 09:10 AM
|
|
| quote | Originally posted by Bloozberry:
And here’s the windage tray in position and the main bolts (all 20 of them) being set in place. Unlike the connecting rod cap bolts, these are not TTY (Torque To Yield) and can be reused.
|
|
The bottom end of the Northstar is extremely robust. I believe that Alan Johnson of CHRF uses stock main bolts in all of his engines at any power level (including 2000 HP Methanol burners).
BTW, I'd torque the main bolts first, THEN tighten the smaller bolts that help seal the oil manifold.[This message has been edited by Will (edited 05-13-2010).]
|
|
|
|
Bloozberry
|
MAY 13, 12:17 PM
|
|
Thanks for the feedback IXSLR8 and Katatak!
As for Will... thanks too for your comments... I was wondering how long it would take before you chimed in!  I'll address your comments one at a time: I'll address your comments one at a time:
a. The red Loctite I used was supplied by Norm in his kit, I too forget the number, but I have no reason to believe it he would include it in the kit if it wasn't strong enough... (keeps fingers crossed).
b. I know your comment was directed at IXSLR8, but the point I was making about Timeserts is that they are just too expensive. I don't think anybody questions their effectiveness on engines that meet the necessary minimum requirements, but for the cost of the the tool kit, it's no surprise there are equally good alternatives showing up at 40% -50% cheaper.
c. Interesting theory for the deep headbolt threads. I had just assumed that they were made deep to enable the use of longer steel bolts that would stretch more easily than shorter ones and come closer to matching the rate of expansion of the aluminium block and heads.
d. I'm not sure what difference it would make to torque the main bearing bolts first rather than the oil manifold bolts or vice-versa. The oil manifold bolts only retain the manifold to the lower case-half, whereas the main bolts secure the lower case-half to the upper case-half. Perhaps you meant that you'd torque the main bolts before the case-half perimeter bolts. That makes more sense to me, and is also the order which the manual calls for them to be done. In my picture, you can see one perimeter bolt, but I had only just tightened them finger tight.
|
|
|
|