 
     |
| ecotec swap (Page 85/98) |

|
wftb
|
NOV 30, 09:21 PM
|
|
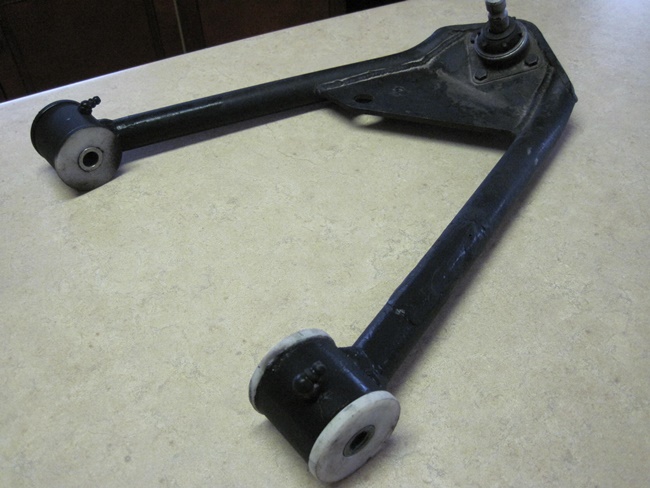
Since I was thinking that my front lower control arm poly were probably as soft as the uppers had gotten I started thinking about replacing those bushings. As far as I am concerned the front lower control arms are the worst designed piece of the 84 to 87 fiero suspension. The bushings not only do not line up, they are not even mounted at the same height on the car. This causes a lot of binding and a huge lack of freedom of movement. With the OEM rubber bushings the binding is not that big of an issue. Put on poly and the binding is a lot worse and it is easy for poly bushings to spin their centre metal tube causing the frame mounting holes to get sloppy and then things start moving around.
I noticed a thread by Mender about some rear control arm bushings called Lemforders. I don't know what the actual name of this type of joint is but it is basically a rod end without the threaded mounting stub but with a round housing that is pressed in to a control arm. They also are greased with rubber grease seals that will increase service life over rod ends. I figured these would solve all of the problems inherent to having poly on the front lower control arms.
I picked up a cheaper version of the bushing made by Febest MBAB-027Z on Amazon. They are only 12.00 compared to lemforders at 50.00 each. I cut and ground out some pipe to make holders for them. I made a makeshift jig to hold them in place while I welded them to the arms.
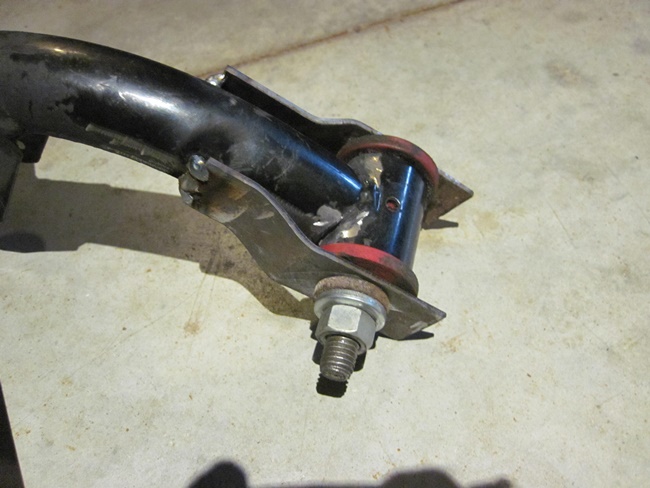
Prior to welding the jig on to the tube I cut almost all the old weld off as some of it would be covered by the jig. As I was taking the passenger side arm off I noticed that the rear mounting tabs had gotten pretty sloppy. Probably why I started noticing a slight right hand pull whenever I tapped the brakes just before putting the car away for the winter.
This is the completed passenger side lower control arm. I did not get the rear holder welded in so it would be centred in the frame tabs. Next time I will be a little fussier. The arm now moves up and down with no binding.
I used 9/16" grade 8 bolts to hold the rear of the arm in place because the holes were sloppy to the point of almost fitting that size. The Febest bushings have a 9/16 mounting hole. On the front mount I made a sleave for inside the bushing so I could use flanged 12 mm chassis bolts.[This message has been edited by wftb (edited 11-30-2017).]
|
|
|
|
wftb
|
NOV 30, 09:31 PM
|
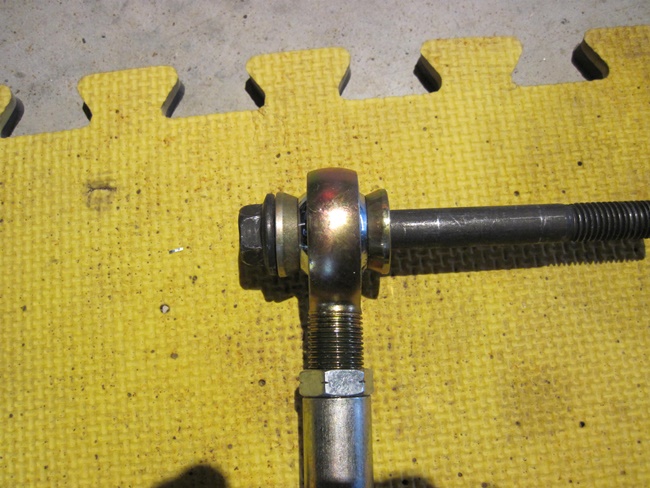
|
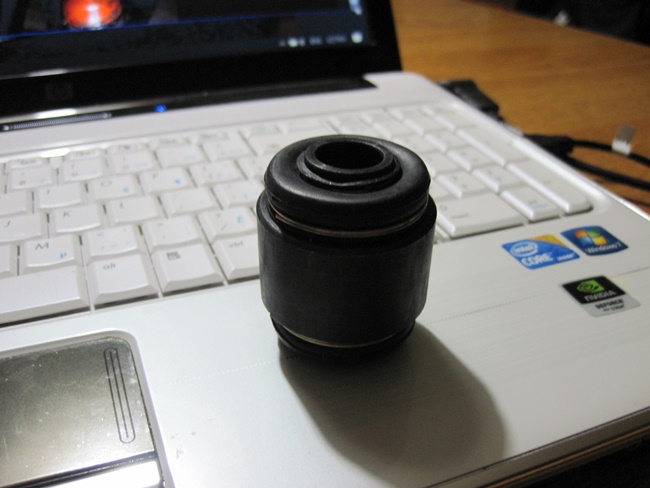
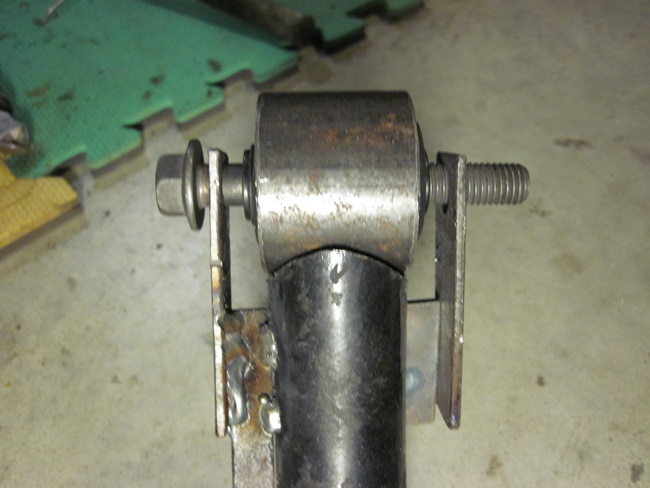
The Febest bushing:
|
|
|
|
Lunatic
|
DEC 01, 06:09 AM
|
|
Hey Steve.
Lemforder balljoints are used heavily in BMW vehicles. I replace them on a regular basis as they are a wearable item. The next time I pull one out, I can get you some dimensions if needed. Remember, I can get these at cost if needed.
|
|
|
|
wftb
|
DEC 01, 08:29 AM
|
|
|
Sounds good thanks Shayne. The Febest bushings come with a note saying they will only last 60,000 KM so as they wear out I will put the better quality Lemforders on. I just didn't feel like laying out that much cash at this time. Dimensions of any similar bushing you pull out would be appreciated. There seem to be about a hundred different years and models of Mercedes that use this type of bushing as well. [This message has been edited by wftb (edited 12-01-2017).]
|
|
|
|
wftb
|
DEC 06, 05:53 PM
|
|
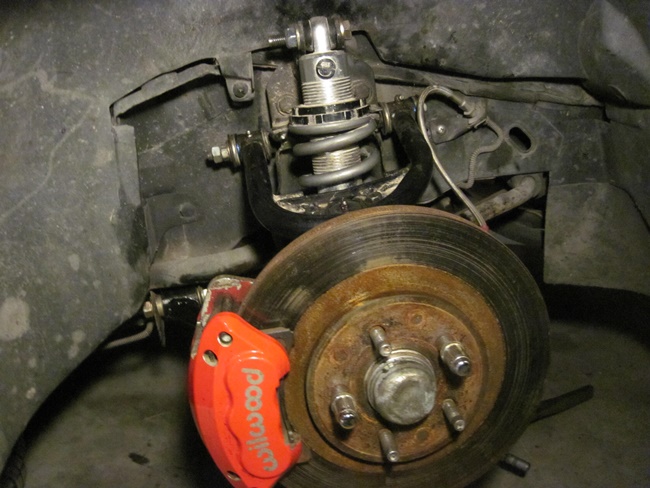
Passenger side is all reassembled. I tried adding a bit more castor by shimming the lower arm forward but that caused binding of the shock mount bushings. I could correct that with the rod end mounts I have but I put it back to stock. It isn't out by much so I will correct it on the upper arm after I get the drivers side done. I will need to set the camber but I can't do that without getting the car on the ground.
On the driver side I made a new jig that I think is a bit more accurate. Also I narrowed the holder to make it easier to get the spacers in. My original idea was to make them as wide as the febest bushing to protect the rubber from debris. I have decided the extra hour or so of swearing and chasing washers all over the garage is something I can do without. On the first replacement I will narrow down the passenger side to match. The passenger side bushings are already plug welded so taking them out now would ruin them.
Ready to weld tomorrow. Too dark in our garage at night to do a good job of it.[This message has been edited by wftb (edited 12-28-2017).]
|
|
|
|
wftb
|
DEC 12, 05:57 PM
|
|
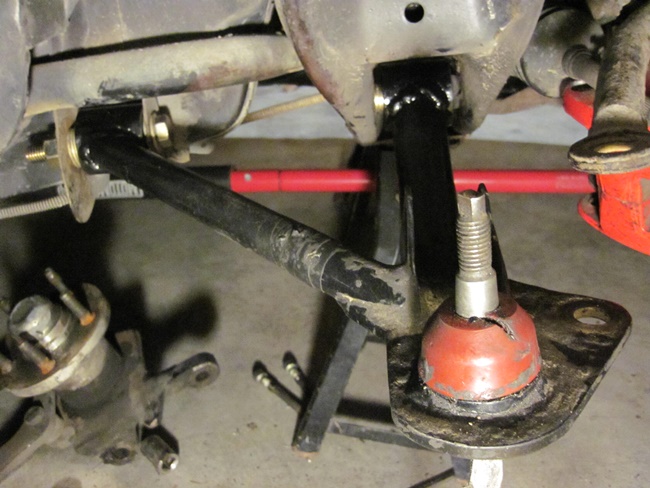
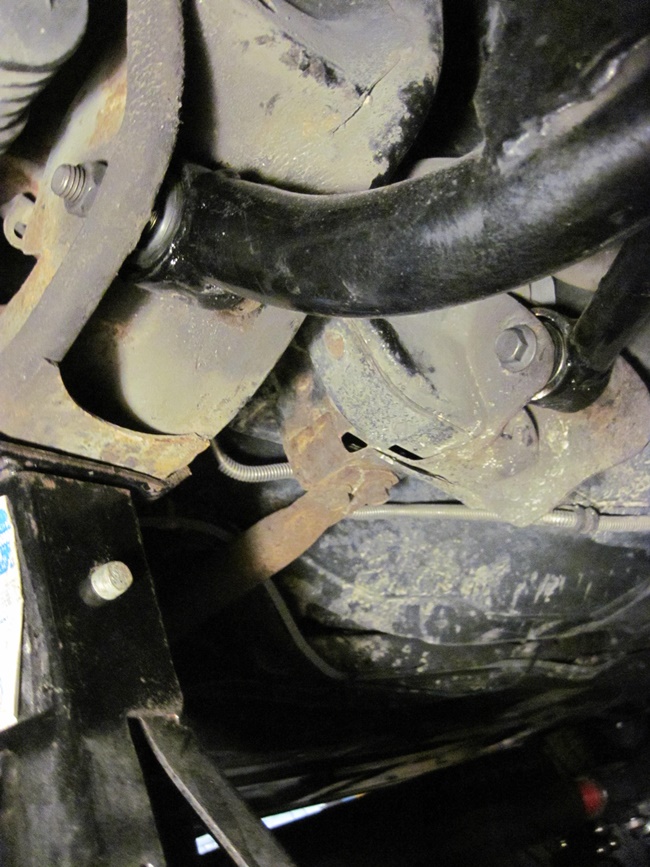
The drivers side front lower control is now welded up and installed. I put everything back together and put the wheels back on.
This pic shows the arm with the narrow bushing holders bolted in place.
The car is now sitting on dollies for the winter. Next up is new Del-A-Lum bushings for the rear lower control arms.[This message has been edited by wftb (edited 12-12-2017).]
|
|
|
|
wftb
|
DEC 22, 12:33 PM
|
|
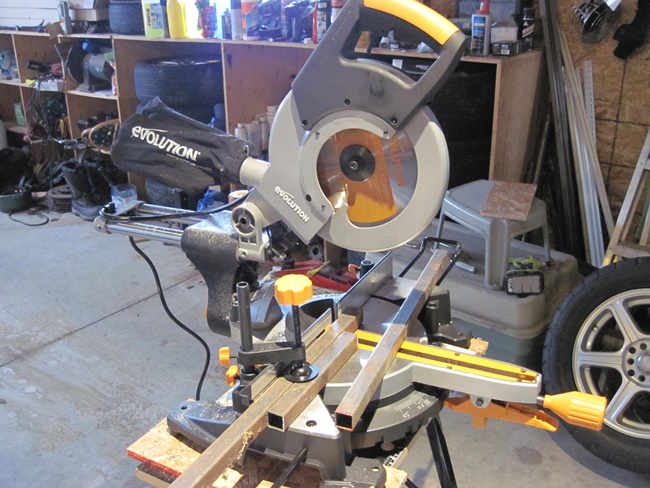
I picked up a new sliding compound mitre saw from Canadian Tire. They are on sale for 299.00 now. What made me buy it is that it will cut mild steel up to 1/4" thick. I was skeptical but it cuts really well. It uses a new (to me anyway) kind of carbide tipped blade made in Japan. I can now cut just about anything with just this saw and not send sparks flying all over the garage. The only thing I need now is a clamp to hold small pieces securely.
|
|
|
|
wftb
|
DEC 22, 04:18 PM
|
|
Made up a bracket to weld the new bushings on the control arm. New saw made short work of cutting the bits and pieces. Cut and welded up in about an hour.
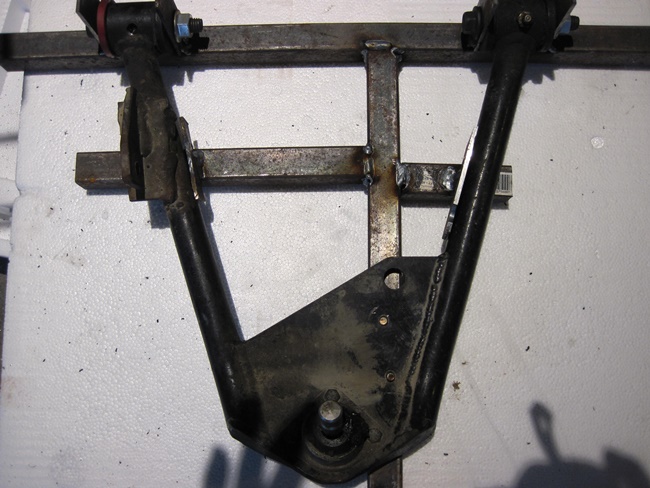
Going to cut off the old bushings and fit the new bushings to the arm tonight. The old bushings were shot, I could wiggle the end of the arm back and forth about 3/8" after the control rod and ball joint were disconnected.
|
|
|
|
wftb
|
DEC 24, 12:18 PM
|
|
Got one side welded up and I weighed it and it came out to 6.2 lbs. Got rid of the old control rod mount while I was at it. Ready to go back on:
|
|
|
|
wftb
|
DEC 28, 12:11 AM
|
|
Winter has hit full bore here in Bruce County. We are known as the land of horizontal snow but right now along with the snow we are getting really cold temps. We do get the odd dip down to -20C for a week or so but not till late January early February. For most of the winter we hover a few degrees off freezing give or take. All day it has been -15C and now it is -17. So working in our non heated garage has meant wearing my battery heated jacket and using a propane heater to keep my work area bearable. We can't drive anywhere so I try to stay busy on the car.
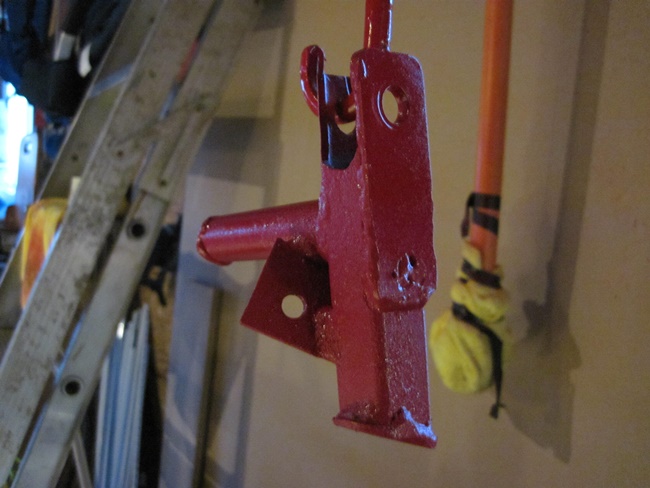
So I wanted to do some painting in the cold and I figured I could do it if I heated up the object in front of my propane heater. I have lots of red spray bombs warm in the basement so I heated up a bumpsteer bracket and sprayed it. The paint kind of boiled as it hit it. Guess 5 minutes was a little long to warm it up. Anyway it came out with a crinkle finish that looks OK to me:
I have everything in place again and spent most of the day adjusting camber and getting the upper arm angle to match the lower arm angle and getting the wheel base to match the other side. A lot of finnicky stuff that takes a lot of time. Some of my high tech tools:
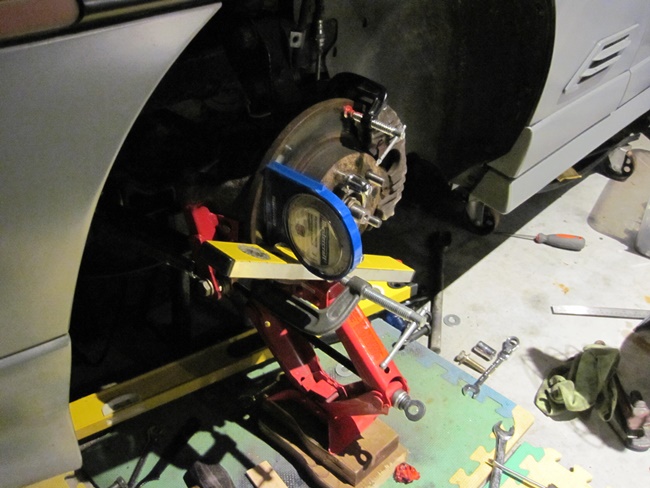
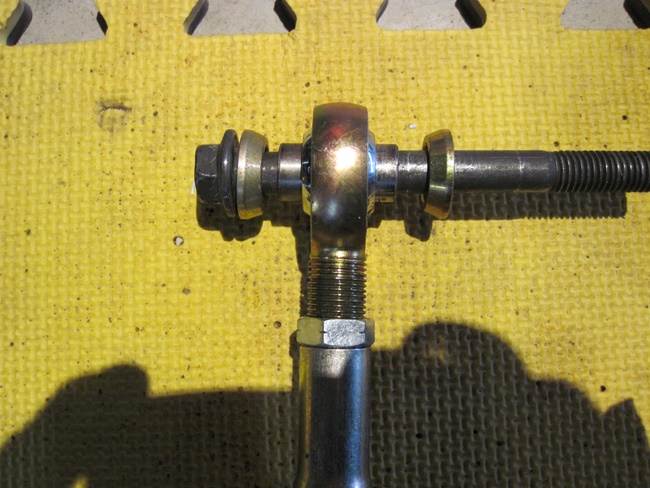
I can plot wheel movement on the ground with the laser and check camber gain with the dial protractor. Looks like I gain -2 degrees from ride height to projected full compression (about 2.5" of wheel travel) and nothing noticeable as far as bumpsteer. There is about 1/8" forward movement of the wheel from full droop to full compression. I do not think that will affect anything but the only way I think I can correct that is to cut off the upper arm mounts and reposition them. Not happening unless the next track day shows I need to. I will set ride height camber at -1 degrees. I am going to drop the ride height lower than last year, I think it has crept up a bit. I have fitted better rod ends as well as high deflection washers on the chassis side of the control rod. These have a 5/8" bore but 5/8" OD stainless tube makes a perfect spacer for fitting to the 12mm flanged chassis bolt:
|
|
|
