|
| Project Genisis Lo Budget 3800SC (Page 8/42) |

|
hercimer01
|
JUN 29, 08:39 PM
|
|
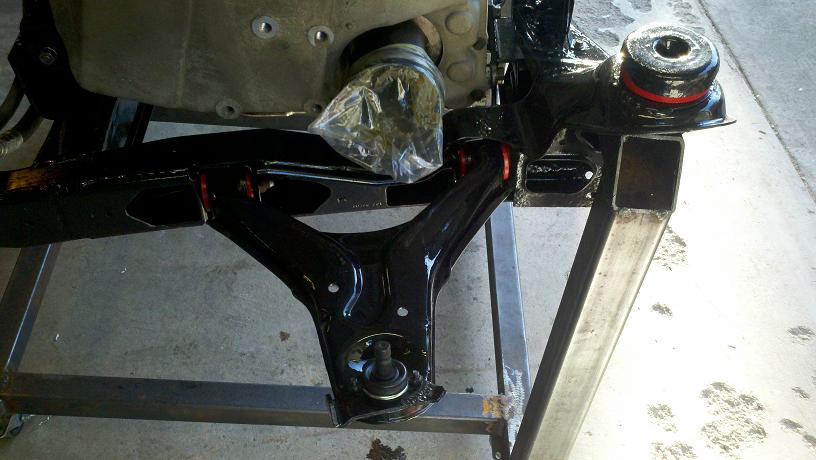
I FINALLY GOT MY LOWER CONTROL ARM BUSHINGS TODAY!!!!
|
|

|
hercimer01
|
JUL 02, 07:56 PM
|
|
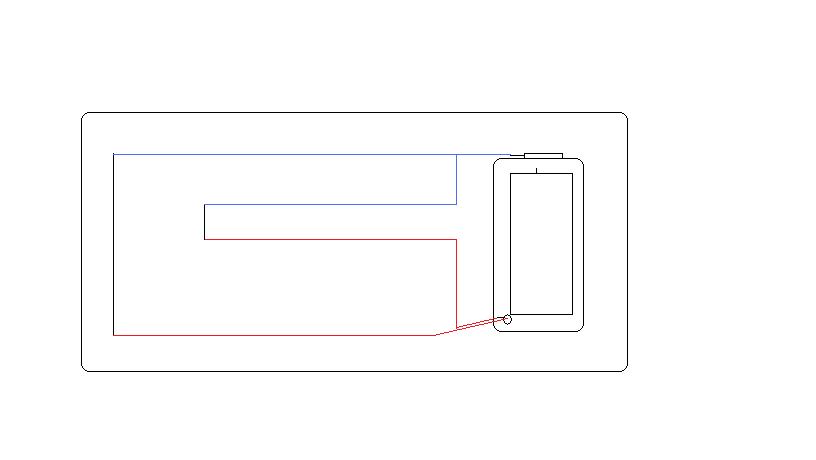
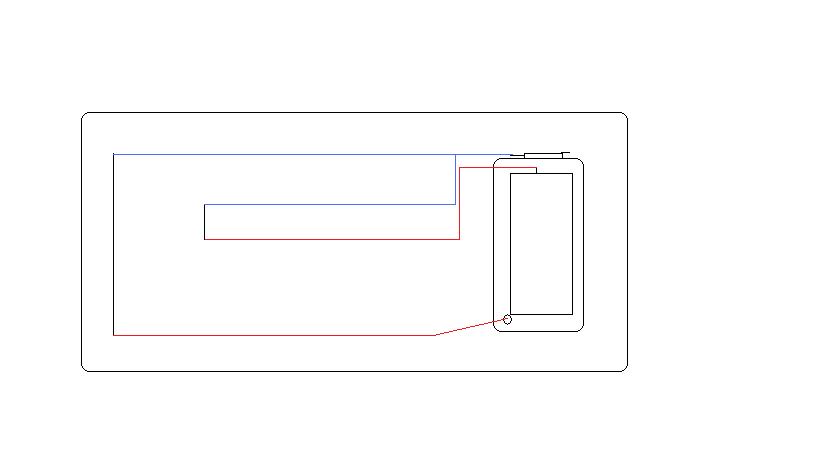
Ok. Ive researched the cooling system. Ive come up with two alternatives. #1 with a modified T-stat housing = more money. Or #2 3800 stock T-stat housing. I will probably go with the stock housing for now. Later, after i get her up and running and more money, Ill start modding. Here's some diagrams i came up with help from darkhorizons drawings and bmwgurus help.
#1 with modded housing
#2 w/o modded housing
|
|
|
|
JamesCurtis
|
JUL 02, 08:56 PM
|
|
| quote | | Thanks Guys. I think I will try to keep it in the same location, Trying to keep it "Lo Budget" here. |
|
Relocating the ECM is a simple matter of extending wires, unless you're worried about more expensive spark plug cables, it doesn't affect your budget much at all. If you do try to keep it in the stock location and rotate it 90*, I'd like to see how it turns out! Keep up the good work!
|
|
|
|
hercimer01
|
JUL 04, 07:29 PM
|
|
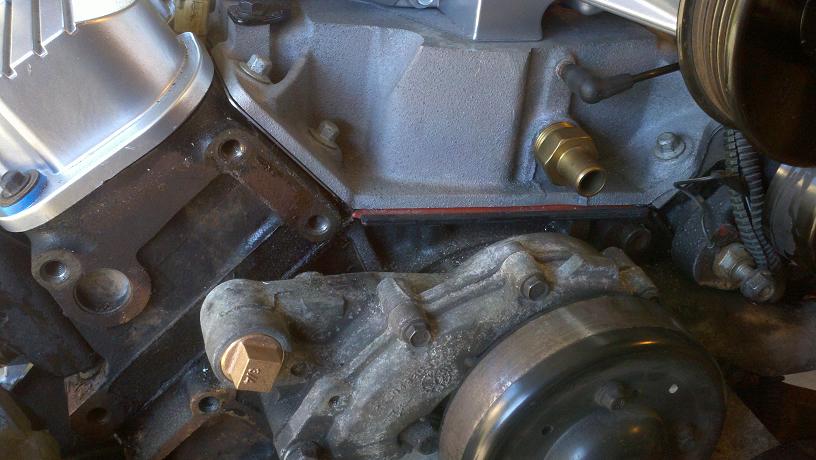
It looks like i was right after all. Here are the fittings, the plug was 5.50 and the hose fitting was from a friends junk box. I will have to add a filler tee at the 3800 stock thermostat cover and and tee somewhere on the passenger side for a return of the heater system.
 [This message has been edited by hercimer01 (edited 07-04-2011).]
|
|
|
|
darkhorizon
|
JUL 04, 10:03 PM
|
|
| quote | Originally posted by 1fatcat:
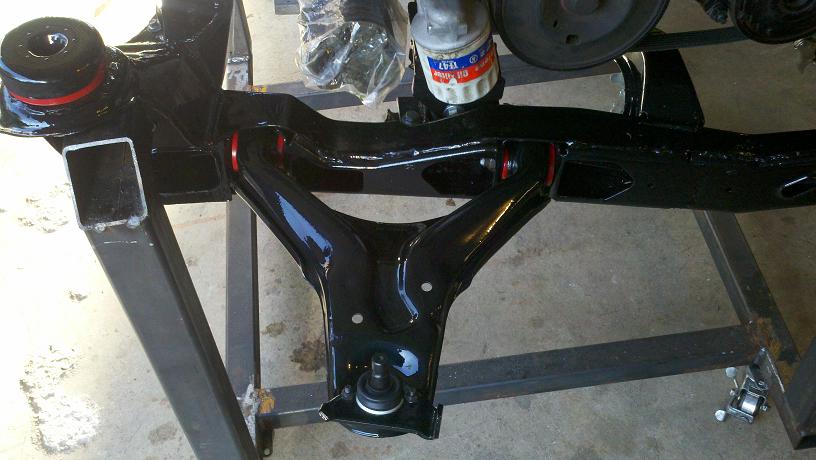
Those are the best pictures I've seen of 3800 mounts. Thanks! I never knew the front mount was only attached to the right side of the block. |
|
yea, and its crap. I would always suggest another style mount than that... at least something that offered some rotational resistance... that mount is doing nothing more than holding the motor off the ground...
|
|
|
|
hercimer01
|
JUL 05, 01:05 AM
|
|
| quote | Originally posted by darkhorizon:
yea, and its crap. I would always suggest another style mount than that... at least something that offered some rotational resistance... that mount is doing nothing more than holding the motor off the ground... |
|
Is that not what the dogbone is for? These are a far cry better than west coast fieros in the gauge thickness of the steel and bolt grades.
|
|
|
|
darkhorizon
|
JUL 05, 05:50 PM
|
|
| quote | Originally posted by hercimer01:
Is that not what the dogbone is for? These are a far cry better than west coast fieros in the gauge thickness of the steel and bolt grades. |
|
The BEST dogbones I see are complicated... and get in the way of quite a few things. It is very hard to get a hold of any type of steel when making a dogbone in the factory fiero location.... When making lower mounts you have many options to go to factory holes using very limited amounts of fabrication and material..
|
|
|
|
hercimer01
|
JUL 07, 03:29 AM
|
|
|
|
|
phonedawgz
|
JUL 07, 04:37 PM
|
|
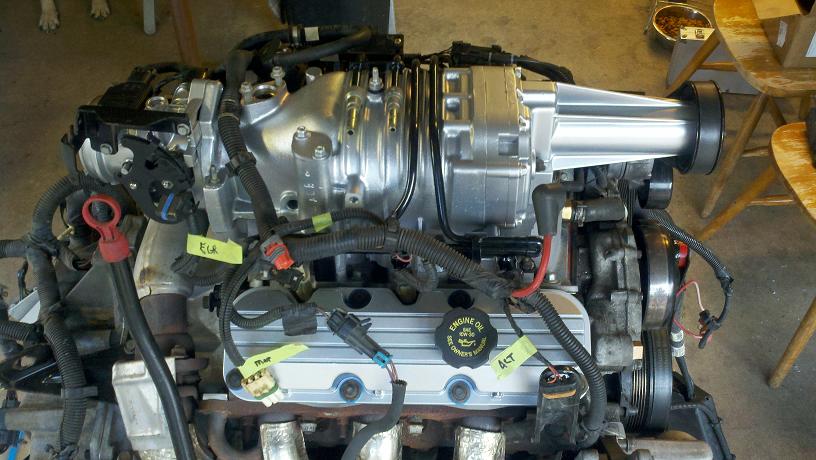
Move the MAP and EVAP purge solenoid to a location on the transmission.
No need to leave those warts on the top of the engine.
|
|
|
|
hercimer01
|
JUL 08, 08:02 AM
|
|
|
|