
 
     |
| Blooze Own: An F355 Six Speed N* Build Thread (Page 8/126) |

|
Bloozberry
|
MAY 07, 07:15 PM
|
|
| quote | Originally posted by mcaanda:
Blooze - sorry for the thread jack
|
|
| quote | Originally posted by joshua riedl:
... don't want to take up any more space here.
|
|
It's all good. I need this info as much as anyone else. At least if you post in here I won't have to go looking for it!
|
|
|
|
ptboy55
|
MAY 07, 07:47 PM
|
|
Great work Blooz...!!! Im following, your a patient perfectionist with an eye for detail, all the polishing looks fantastic..!! Good, clear pics with descriptions, really interesting..!!
Pete
|
|
|
|
1986 Fiero GT
|
MAY 07, 10:19 PM
|
|
| quote | Originally posted by mcaanda:
Please elaborate, as I know there are a few here that are seriously considering spending more that the cost of a super sized happy meal with this shop, myself included.
|
|
...and me. I still haven't bought anything from him yet, so we'll see.
Any more leads on another unlocked MEFI-4B, haha? There's nothing on eBay and everybody on forums wants like a grand. No thanks.
|
|
|
|
Bloozberry
|
MAY 09, 06:05 PM
|
|
While I was waiting on new head bolt inserts, I decided to run the block out to my favorite machine shop for cylinder honing and to have it checked out generally for squareness and trueness. This place doesn’t look like much from the outside, but it’s a whole different story on the inside. The place is called A&J Armstrong Machine Ltd and the line up of trailers hauling Pro Street, NASCAR, Top Fuelers… you name it, parked outside on any given day is amazing. He gets business from across the US and Canada daily. To walk in and see the tens of millions of dollars worth of CAD, CAM, & CNC machines whirling turning and doing their thing is out of this world.
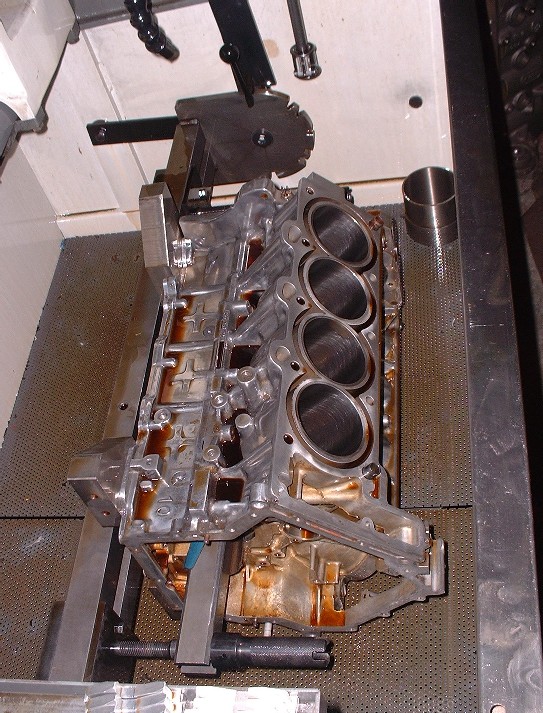
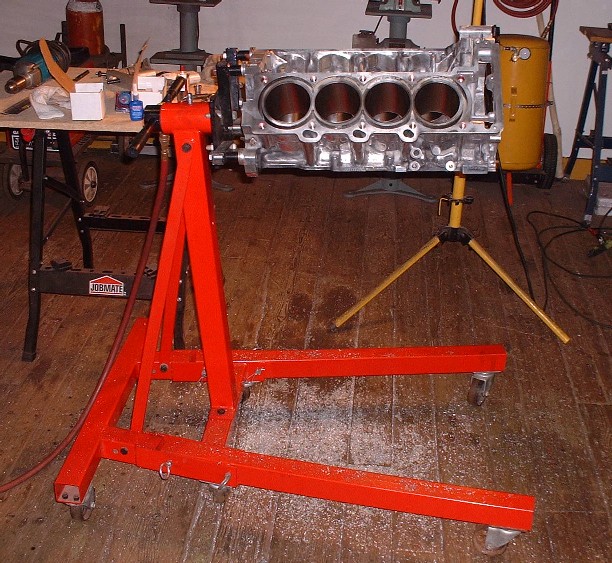
Anyways, with all the talk here on PFF about how important it is to find a machine shop that can do a proper bore and hone on a Northstar, I knew he’d be able to satisfy my need. He measured the cylinders up and found that to bring them back into round he’d need to over-bore by 0.25 mm (or 0.010”). In this case though, it isn’t really bored, but rather just subjected to an extensive hone job. I had told him of the especially hard cylinder liners and that only aluminum oxide stones were going to cut the biscuit. Well, forget the silicon carbide stones… forget the aluminum oxide stones… he dug out the 280 grit diamond hones for my engine. His machine is fully automated too, continuously measuring, honing, and truing at the same time by cyclically varying the stone pressures to render the cylinder round, while the operator just stands by and watches. Here’s the block sitting in the bed of the honing machine after doing one bank.
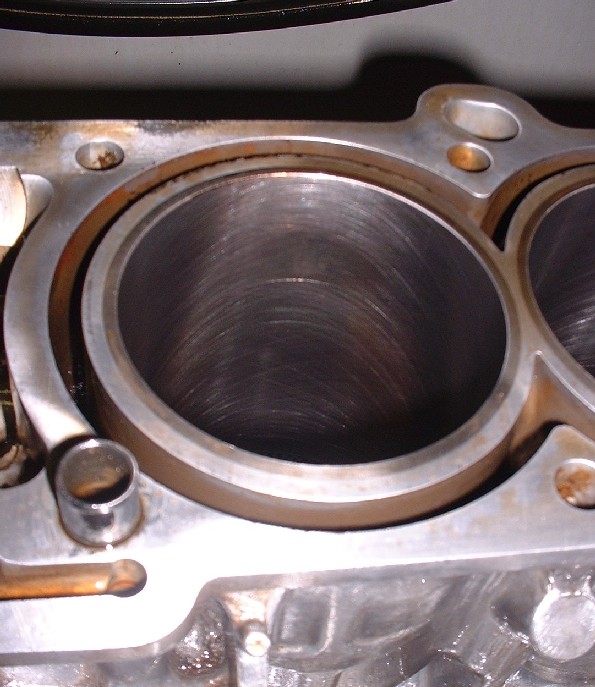
And here’s what a typical cylinder looked like up-close after it was done (albeit a little out of focus).
At this point, I opted not to get the block chemically cleaned yet since the machine shop couldn’t guarantee that all my hard work polishing the block wouldn’t be tarnished or slightly etched for that matter. But that was OK since I had a back-up plan… and besides, I still needed to do more dirty work… the long dreaded head bolt inserts!
For head bolt inserts I was trying to save whatever money I could by dropping in on the local dealership and sweet-talking them and showing them pictures of my project before springing the question of potentially “borrowing” their Timesert tool kit. (In case anyone wasn’t aware, the Caddy Timesert kit is made by Kent Moore (p/n J-42385-500) and retails for $770!!!) In exchange, I would buy the actual inserts from the dealership at $7 each X 20 inserts for a total of $140 they wouldn’t otherwise make off me that day. I had one foot out of the Service Dept door with the kit under my arm and on my way to the parts counter when the service manager stopped me in my tracks. Dough! So close. He said they couldn’t lend me the kit at all, fearing it would set a “dangerous precedent”, but he would see about getting me a cut-rate if I let the shop do the work for me. Uh-huh. The “great deal” turned out to be a half-hour labour per hole X 20 holes X $70 an hour, plus $140 of inserts, plus taxes… at, you guessed it, just shy of $1000, IF all went well. Just then, the Kent Moore kit suddenly sounded like a steal.
According to another PFF’er here who’s a Caddy technician (AJxtcman) about 50% of the blocks get junked during Timeserting because of porosity. The factory procedure calls for initially drilling and tapping for a fine thread insert, but then if too much porosity is found, a larger insert with more aggressive threads can be substituted after re-drilling and re-tapping. But even then, there’s a distinct possibility that the larger insert won’t solve the porosity issue in the vicinity of the head bolt.
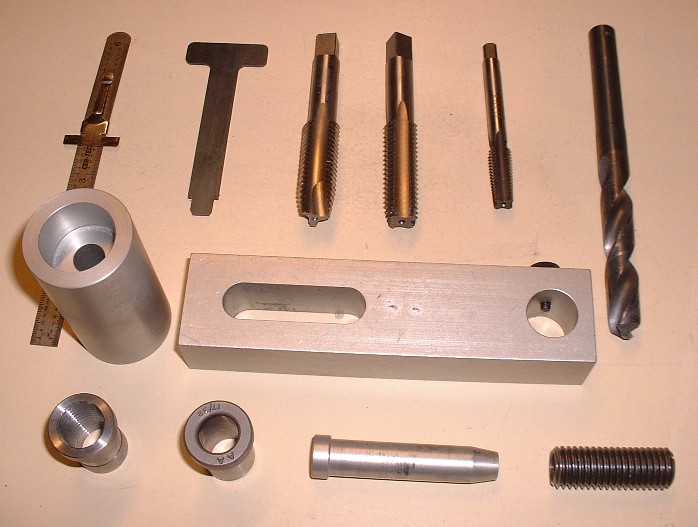
Anyways, it was about at that time I PM’d several PFF’ers who had done Timeserts themselves seeking anyone who would lend or sell me their tool kit. While nobody stepped up (and I don’t blame them, but I had to try), IXSLR8 (Dave, a PFF’er) put me on to Norm Huhn (www.huhnsolutions.com) who’s developed his own insert kit that’s marketed as being superior to the Timesert kit. His inserts have an even larger diameter and coarser thread than the over-sized Timesert kit, giving his inserts greater load spreading capacity and holding strength. The best thing? His entire kit, including 21 solid inserts and the optional bore-alignment jig, was only $500 delivered to my door after taxes. Here’s what the kit looks like (I know, I know... $500... doesn't look like it goes very far... but this is a Northstar! Everything is more expensive.)
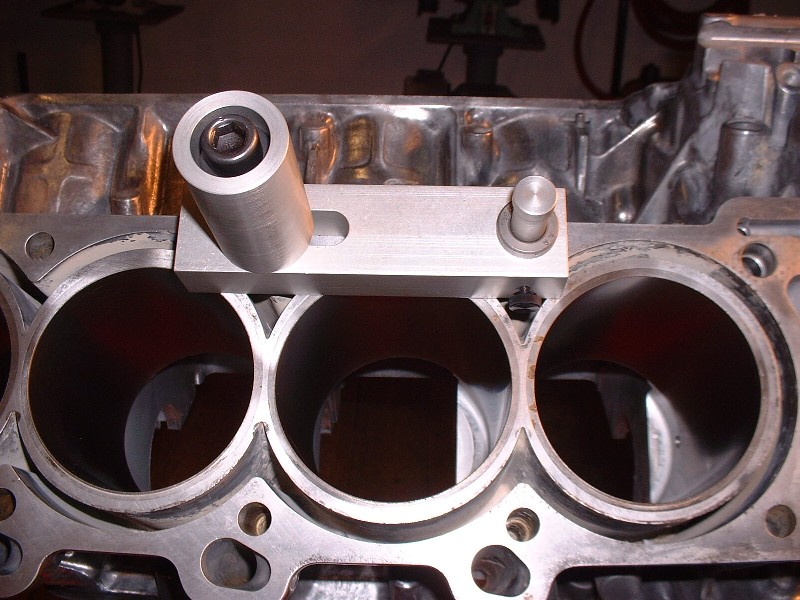
The jig is bolted to one head bolt hole using an old head bolt, and is swivelled around to drill and tap any of the adjacent holes. There are separate collars and a guide pin that slides through the jig to accurately locate the jig before drilling and tapping since both tools have different diameters.
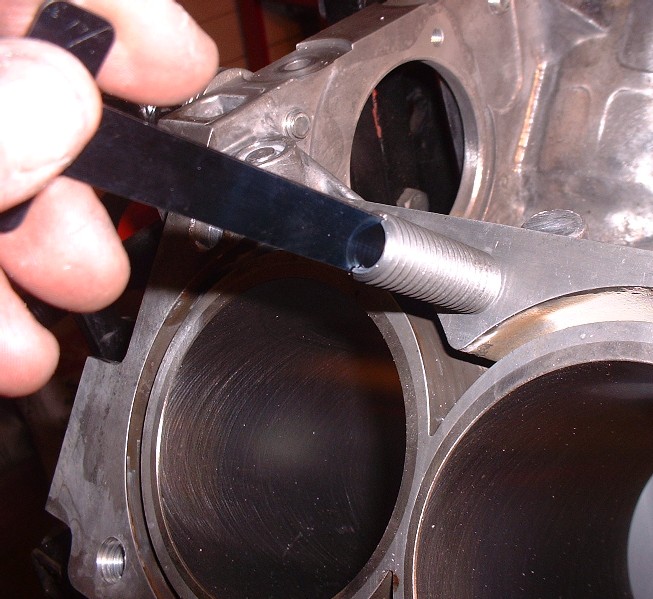
The instructions say that because of the depth of the holes, the soft nature of the aluminium, and the aggressive pitch of the drill bit, you have to drill without using a lot of pressure and you have to pull the bit out and clean the flutes three to four times before hitting the bottom of each hole. If you don’t, the shavings accumulate and gall-up the hole and can cause you problems when tapping. I found this to be good advice. The other thing to be aware of is that it takes a drill with a 1/2" chuck, not the run-of-the-mill 3/8" chuck.
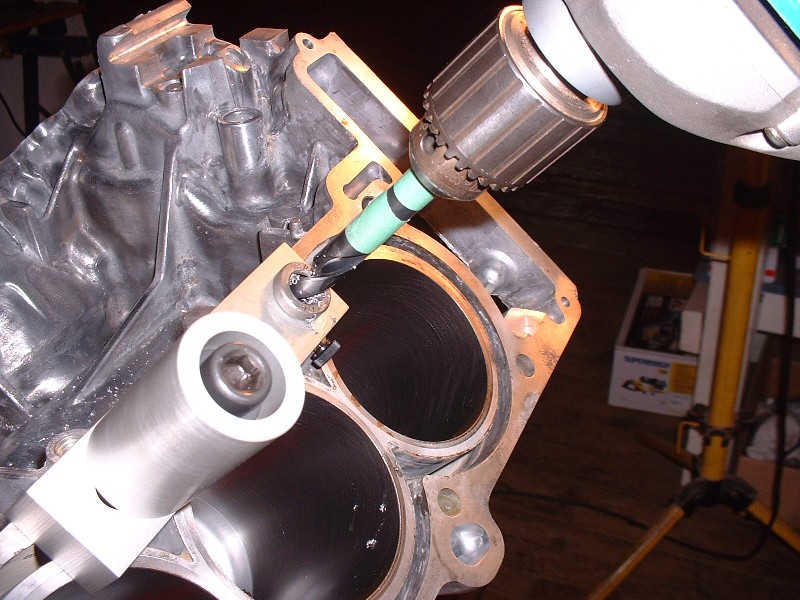
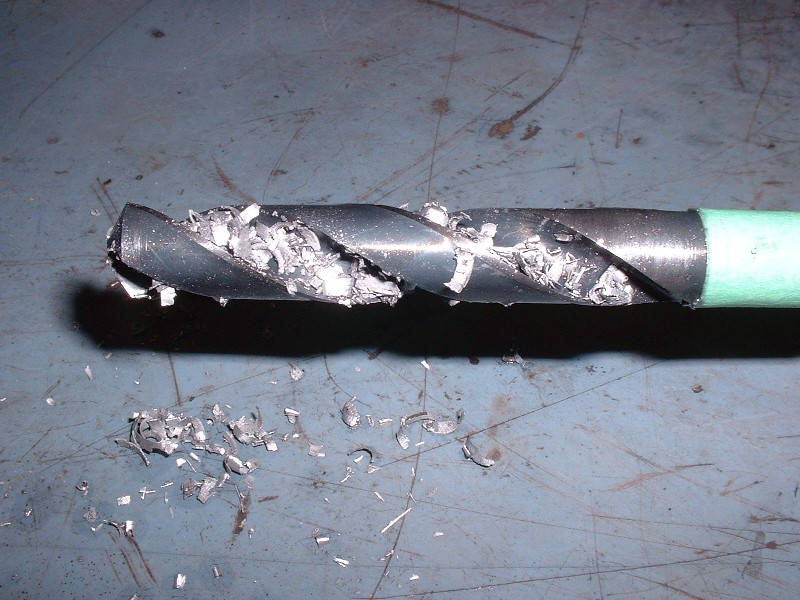
Here’s the nature of the shavings that came out… the bit really bites into the block and I found that if I placed any more than a light pressure on the bit, it would bite hard into the block and twist the drill right out of my hands. Notice the tip of the bit… Norm even thought about removing the cutting edge from the tip to prevent you from going any further down into the block than the original hole. As an added precaution, I stuck a piece of masking tape on the bit to mark the maximum depth of the hole.
|
|
|
|
Bloozberry
|
MAY 10, 07:55 PM
|
|
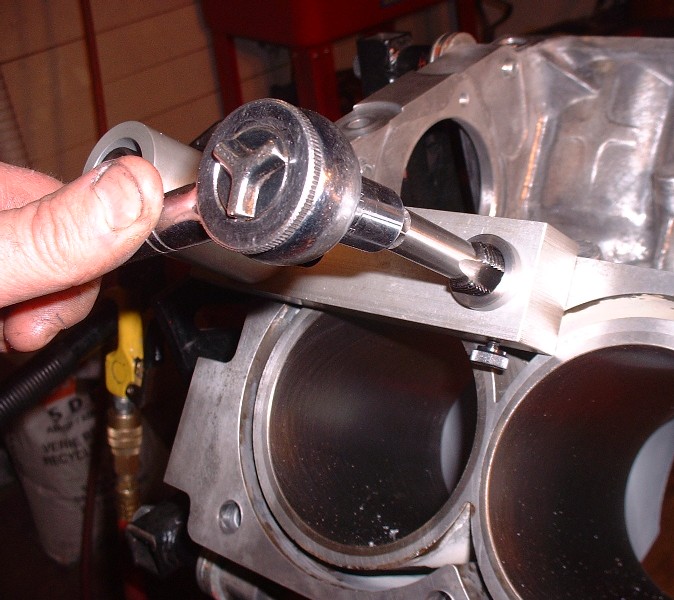
After drilling out the factory threads, the next step was to tap the new holes for the inserts. Norm’s kit also included the tapping oil and the Locktite to secure the inserts in place.
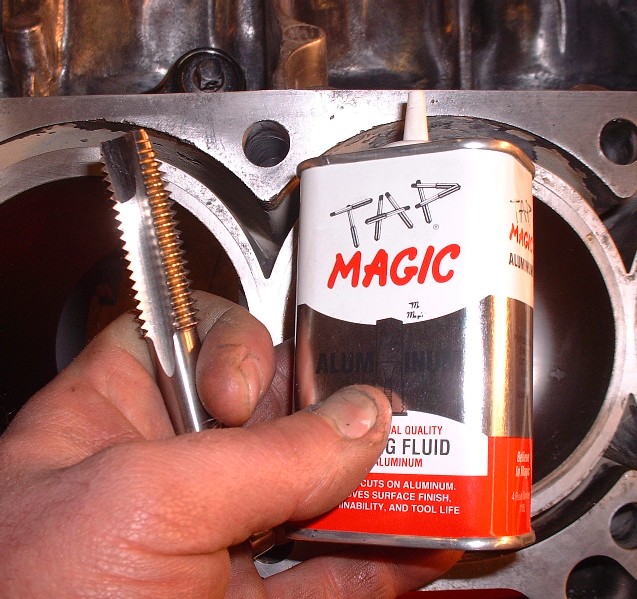
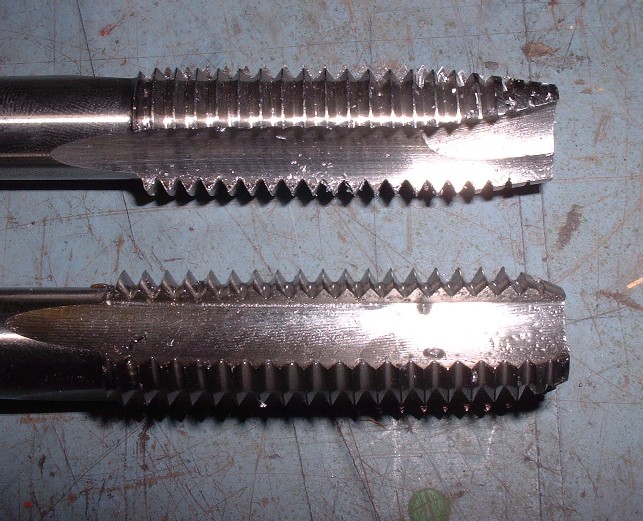
Here are the two taps he provided with his kit. Notice that the top one is more tapered at the end than the other. This is the tap that’s run through first. It’s tapered to make each cutting thread take a progressively larger bite out of the material you’re tapping instead of trying to do it all at once. The bottom tap is called just that… a bottom tap. It’s used to finish up the last few threads in the bottom of the hole that the tapered tap can’t do.
To start the tap squarely in the hole, it’s necessary to use the alignment jig again with a different collar inserted in it to accommodate the larger diameter of the tap. Tapping the holes is much like drilling the holes except that you have to back out the tap more often and blow out the chips to prevent them from galling your newly cut threads. I found that with the engine on the stand, it was easier to rotate the engine upside-down and then blow the chips out with compressed air than trying to blow them out with the engine right side up.
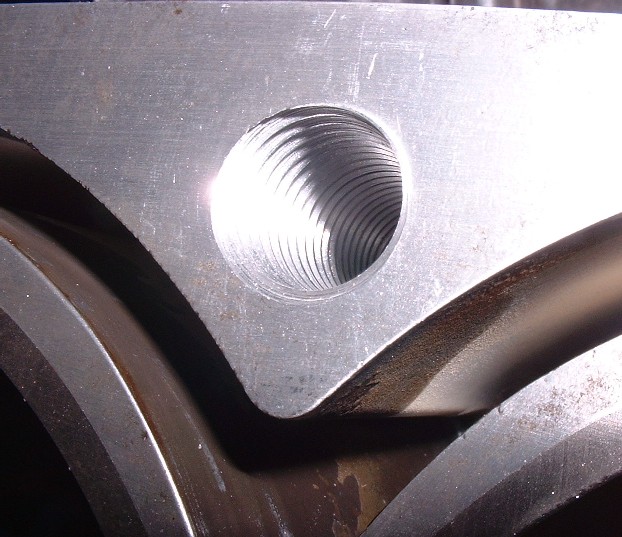
Once you’re done tapping each hole, you have to inspect the new threads to be sure that you didn’t come across any porosity that would lead you to reconsider using the block or getting a new one. Porosity will show up as several threads with chunks missing here and there. Luckily, all my holes tapped well.
It’s a pain-staking process to do all 20 holes and you can’t be in a rush. There’s a learning curve that goes with it too. In reviewing my build notes, I see that it took me 4.5 hours to set up the alignment jig and drill and tap the first 10 holes. With experience behind me, I was able to do the other cylinder bank in 2.5 hours, and from there, it took a final half hour to apply Locktite and screw all those inserts in. If you weren’t counting, that’s 7.5 hours in total! Here’s the pile of chips left on the floor after I was done all the drilling and tapping.
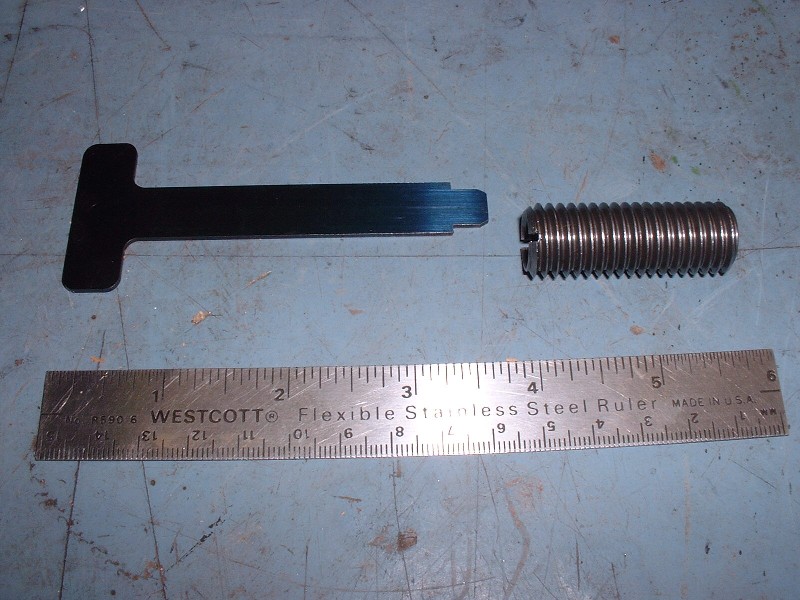
Here’s a close-up of Norm’s new threaded inserts. They’re gigantic compared to a Helicoil, and they’re solid too… not a wound spring-like insert. Also, unlike the Timesert inserts which expand as you’re threading them in and cinch themselves to the block mechanically, Norm’s inserts are held in place only with Locktite… presumably making them easier to remove if ever the need arose. The T-handle is the tool to thread them into the new holes.
Before you actually apply the Locktite, you have to thread all the inserts into the block and make a final measurement to be sure they seat at a specified depth. Then remove them all a final time (or re-tap any hole that wasn’t quite deep enough… it happened on one hole for me) and re-install with the thread locker.
Finally, here’s what the insert looks like fully threaded in and locked in place. Pretty deep down in there eh?

Enjoying the slide show so far?
|
|

|
mcaanda
|
MAY 10, 08:18 PM
|
|
| quote | Originally posted by Bloozberry:
Enjoying the slide show so far? |
|
Oh yea -  ------------------
Is this where I insert something witty? 
|
|
|
|
Isolde
|
MAY 10, 08:24 PM
|
|
| quote | Originally posted by Bloozberry:
Luckily, my wife has owned her own automotive upholstery business since '93. The interior is the only thing that I don't need to worry about! |
|
that's a helpful tidbit. Nothing like that around here, so I'll have to order out anyway.
|
|
|
|
olejoedad
|
MAY 10, 08:40 PM
|
|
Great writeup Blooze!
It's in My Favorites!
Joe
|
|
|
|
Hudini
|
MAY 10, 09:03 PM
|
|
Good stuff. I'm watching it as well.
Hugh
|
|
|
|
dratts
|
MAY 10, 10:12 PM
|
|
|
From what I have read I was leaning towards this kit too. I've heard that some cadillac dealers prefer this kit to time serts too.
|
|
|
|