
 
     |
| Trinten's SBC/F23 build - The work has begun! (Page 71/76) |

|
Trinten
|
NOV 10, 11:23 PM
|
|
Thanks!
I don't recall enough of what Mike did when we first started troubleshooting the shuddering. Engine RPM under load was something he explored. When he was finished he was positive the issue was from the TCC lockup and too low of RPM, versus just low RPM and other factors. This is where I wish he had the time to jump on and add technical supplemental commentary to my layman documentation.
Mike is eager to take it to the 1/8 mile track near his house. I made it clear that we weren't doing that until we had the coolant temp under control. The track has test and tunes (almost?) every Thursday evening. I don't know when they'll close the track for the season. Their website is basic, and if you want more info, it directs you to their facebook page, which is setup to where it can't be viewed without being logged into facebook. I'm sorry, Facebook should not be a businesses replacement for a good website.
Their website only shows the rest of their November schedule right now. That also could imply that it closes at the end of November? We'll see.
|
|
|
|
zkhennings
|
NOV 11, 01:27 PM
|
|
| quote | Originally posted by Trinten:
No, no EGT setup. Mike is logging A/F ratio during our test drives. When I'm out there next, I'll be putting the temp probe near the manifolds to see how hot they get.
This is what we'll put over the manifold on the front side, try to cut down on how much heat could be reaching the fuel pump: https://www.summitracing.com/parts/dei-050519
It was originally intended to go around the downpipe, but it's thicker than I anticipated and I don't think it'll fit between the downpipe and trunk wall. If it does fit, I'll just have to get another one. 
|
|
This is what I bought for my WRX from Harold G. Schaevitz Industries:
Product(s)
1 x PMD1XT Gauge - Blue - 12 VDC SKU: PMD1XT-BL-012-0 $66.50
1 x EGT-MP Probe - 90 degree - 6 ft - Clamp 2" SKU: EGT-MP-072-0000-SS-N+CLMP-2.0 $59.75
Has a very small rectangular digital gauge that gives you a temp readout and you can set an upper warning limit. It is clamp style so you just drill a hole into your hottest exhaust runner and clamp the probe in. You can log it via serial output. It is a high speed probe so it reacts very quickly. Designed for turbocharged engines. For less than $130 it is not a bad idea! The have weld in bung style as well. You can also just log the sensor and go gauge-less all together just for tuning only if you don't feel like monitoring it all the time.
I am just concerned with how high your temps were from just a chill cruise, it screams too little timing to me. If high EGTs go unchecked you can melt exhaust valves and damage turbos and O2 sensors!
Also congrats on getting the trans issues figured out, some in-car video would be cool!
|
|
|
|
Trinten
|
NOV 12, 12:53 AM
|
|
Thank you for the parts/prices! I will check that out.
I will need to take some videos from inside the car, usually I have a laptop to manage. This weekend (assuming I didn't overlook anything when ordering the rest of the new hose components and fittings for the coolant manifold upgrade), I'll try to get some video from inside the car.
This past weekend Mike had me stand on the side of an uninterrupted segment of road to record him doing a brake torque launch, but I'm apparently a terrible camera person, and as the car went by me, I did not appropriately increase my pivoting speed, so it quickly zipped out of frame. 
At the very least I'll get some new pics to post of the old manifold, the new one, and the new heat shielding (if we get that far).
|
|
|
|
Trinten
|
DEC 02, 06:50 PM
|
|
Updates! (also, if these pictures upload in super-size, I'll edit and fix it later on)
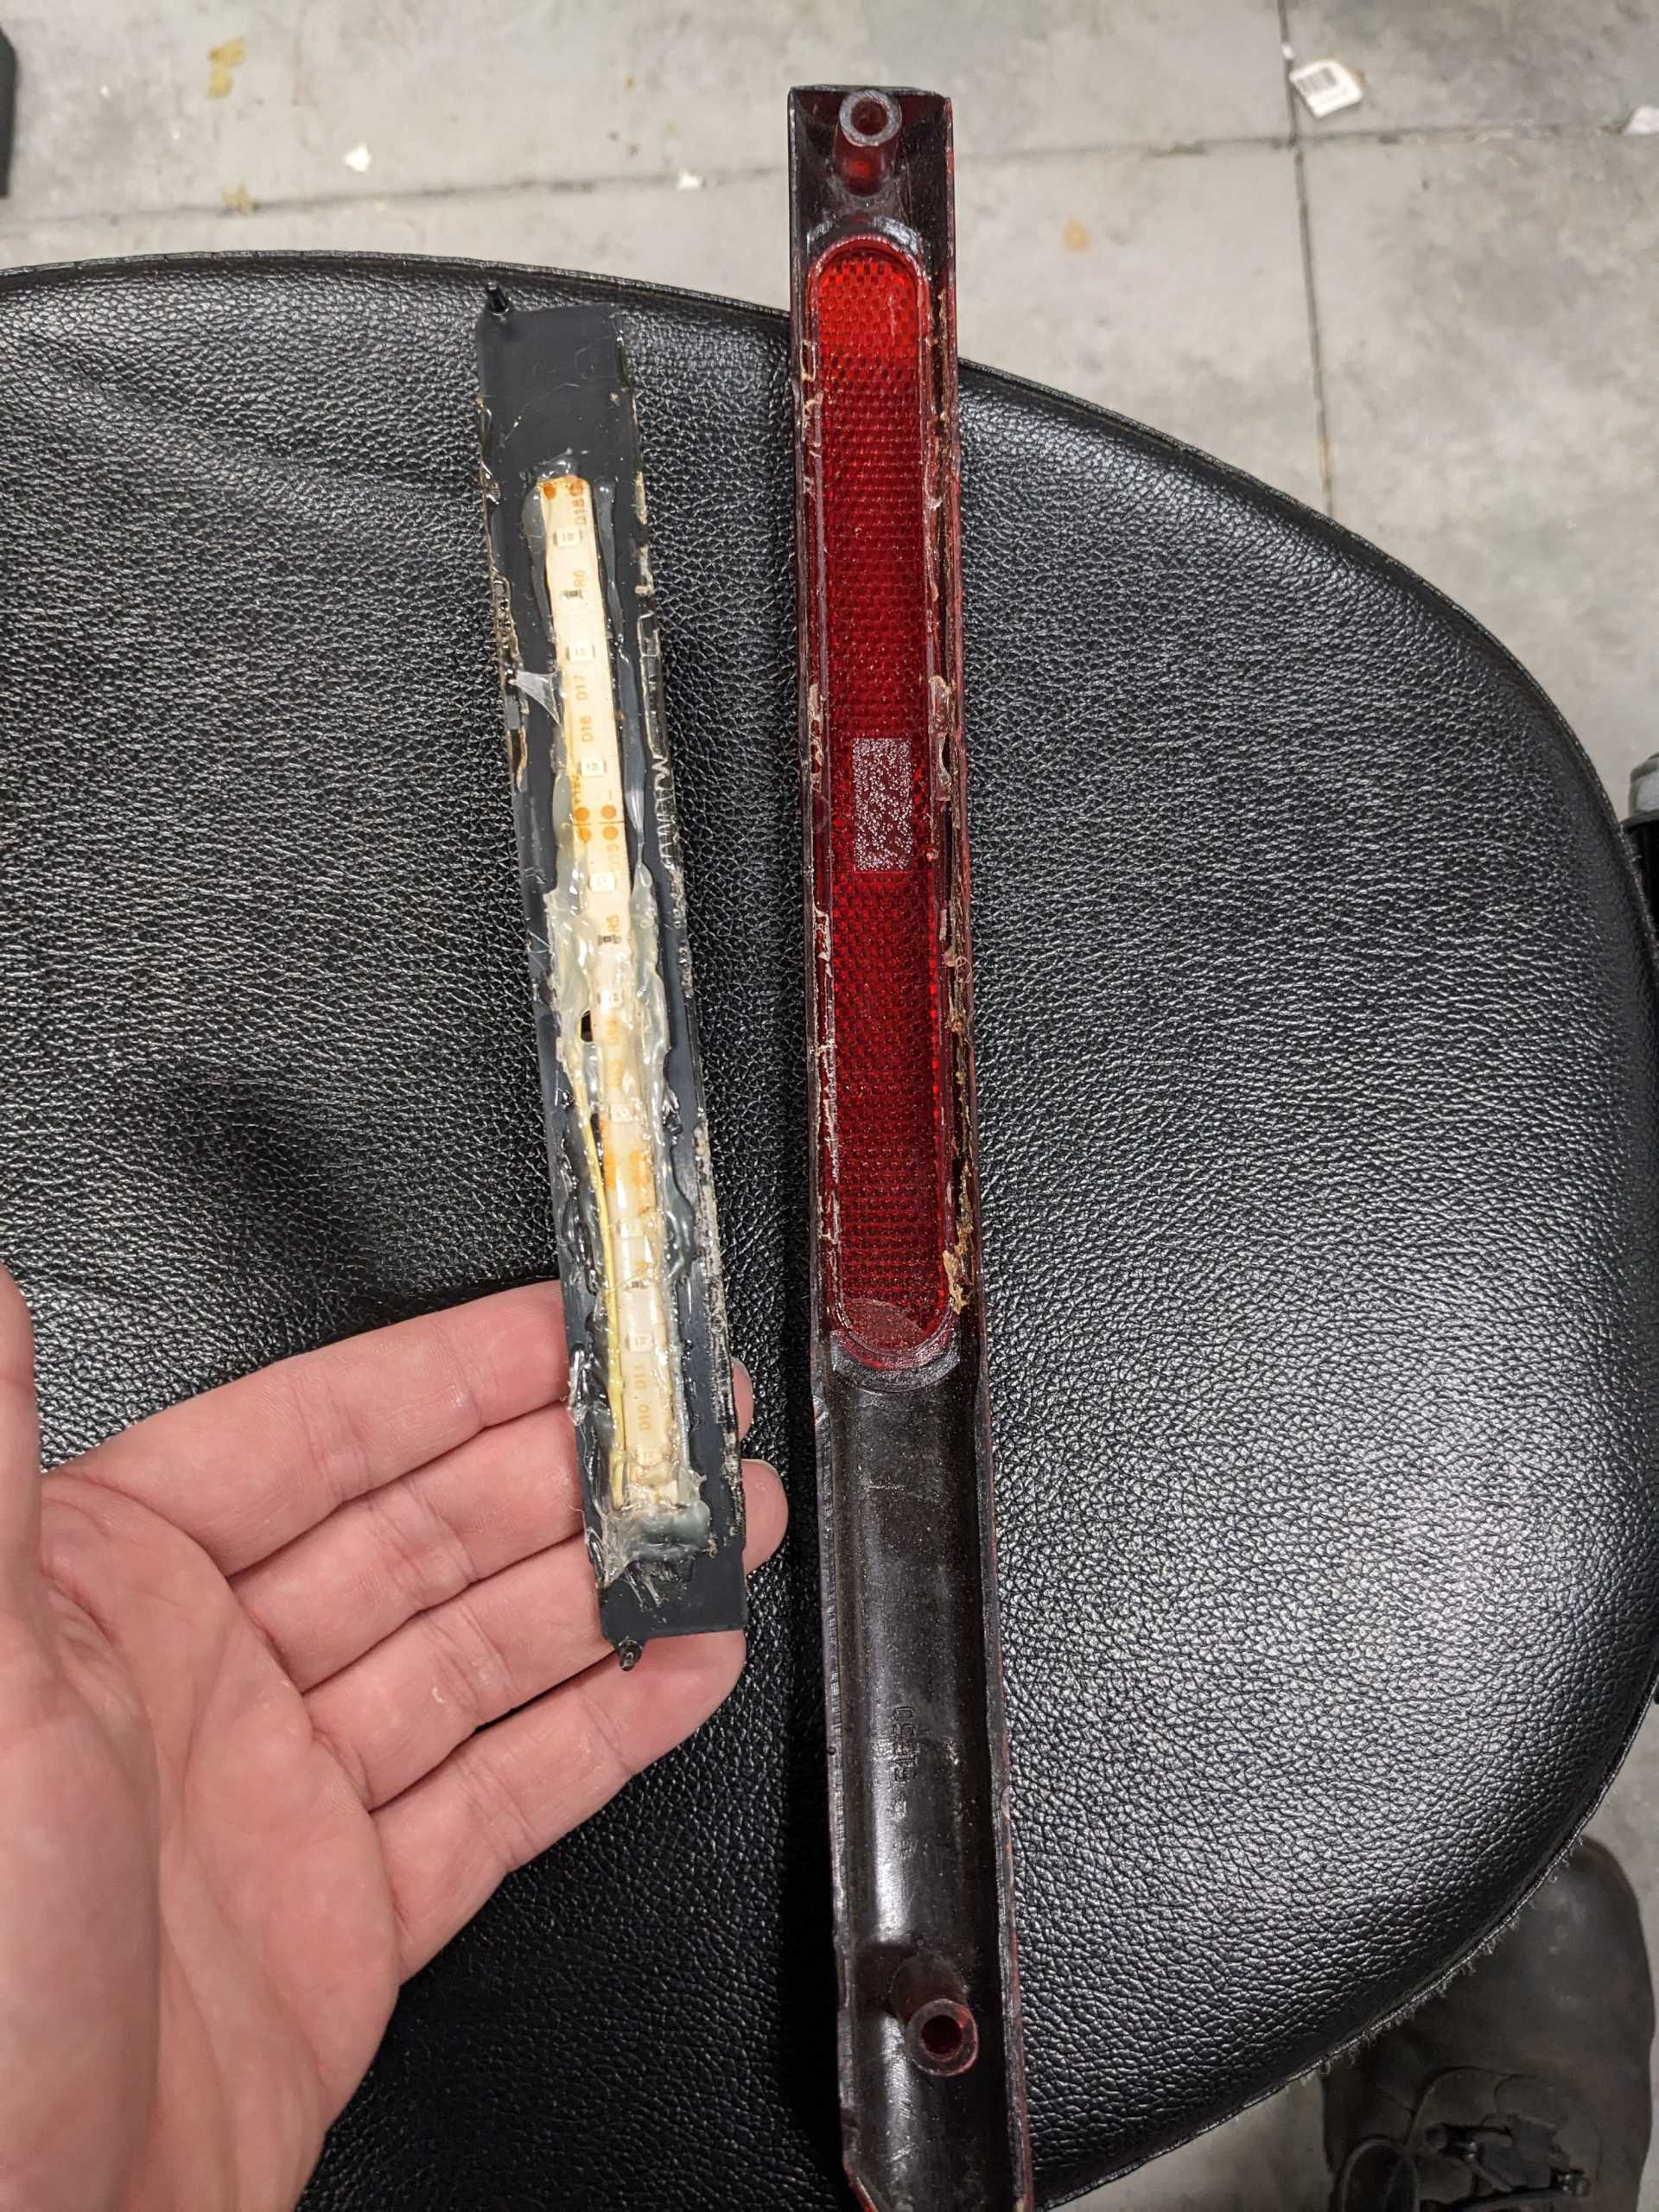
1. I need to find better options to seal Danyel's LED marker light(s). When securing one to the car, it popped apart. It looks like he might have used superglue for the plastic, and hot glue to hold the LED strip in place. Fiero Store has a sale this week, I might buy some new sets of marker light housings to play with.
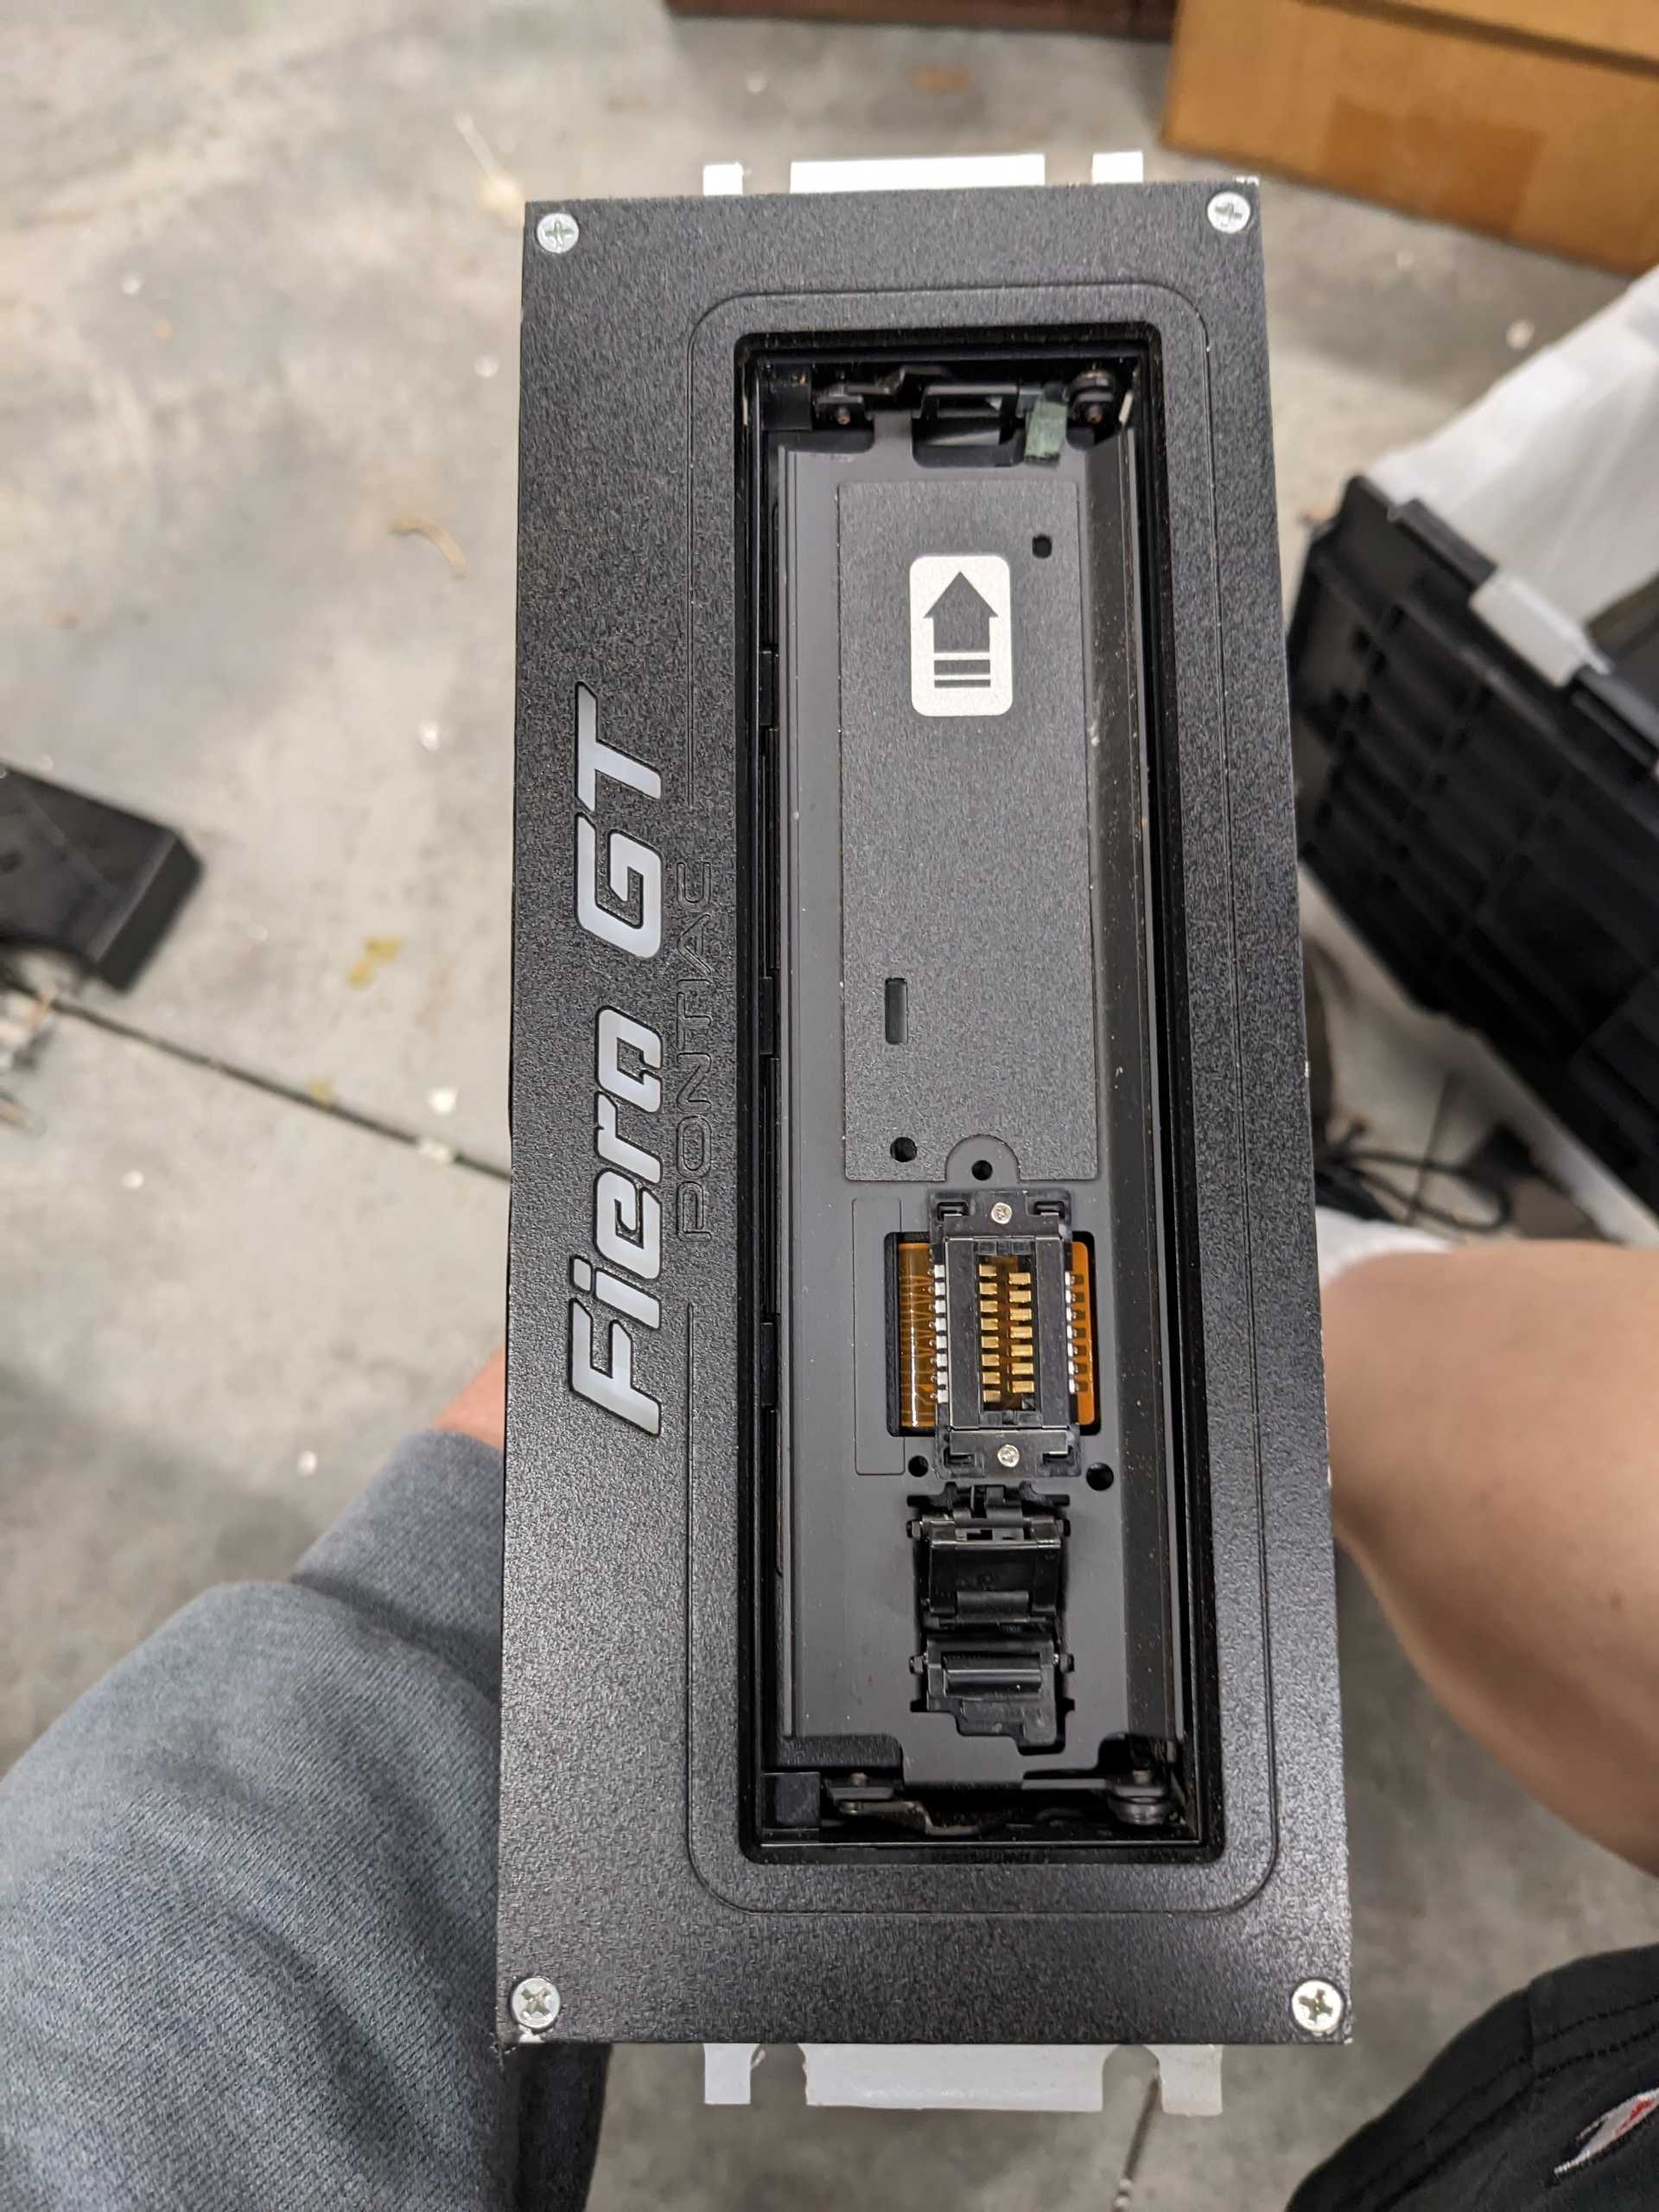
2. I found my old lighted Fiero GT HUMOUNT bezel for my single din radio (also still installed). Sadly it looks like Mark / HUMOUNT closed up shop sometime in late 2015 or early 2016?
I was going to order one for Mike, he wants to put in a basic single din head unit that has bluetooth so he can stream music from his phone. Oh well, in the meantime, when I get to having some semblance of a dash in there, I'll use this again. I might put in a newer HU, so I can stream from my phone too, or play things off a USB drive or something.
3. I finished putting M6x1.0 helicoils in both of my side mirrors. The driver side was loose, and it was the stud wiggling, so I figured I might as well. I had originally wanted to try to use a bolt. The idea was to slide the bolt out through the door, hold the mirror up near the threads, get the threads started, then 'walk it on'. Unfortunately this had a compound flaw. The first was getting a bolt the right length, as much engagement with the mirror as possible but no slack. Once the ideal bolt length was found, I did not have the space to turn the bolts enough by hand to get them started. Using a socket was out of the question, as the depth of socket and angle meant an auto-fail, and I didn't want to mess around with putting a 'backstop' in the socket.
Unfortunately over the last two trips, I lost all the hardware I had ordered from McMaster (the bolts in question came from Ace). I had ordered studs and a variety of fasteners to see what I liked best, including some heavy duty thumbscrews. While the cost itself is minimal, it's just a mild annoyance.
Mike is taking December off for himself and his own stuff, so I won't be back out there till sometime in January. He did tell me to have the additional AN hose fittings he needs for the cooling system to be sent to him, in case he wants to mess with that for a change of pace, so I did that.
Also, it seems the auto-shifter surround (with gear indicator) I have from one of Mike's Fieros is in pretty rough shape. The main bezel isn't broken, but I do need to replace an ashtray door and spring, however the gear indicator has 'sheared' off the black out paint... and it fell off the bezel. So I need to see if I can fix that or get another good assembly. There were a few on ebay, but one was all painted up and looked a little rough, and one that was in okay shape was going for around 300?? So I'll make due with this for now.
|
|
|
|
Trinten
|
FEB 06, 11:03 PM
|
|
It's a been a while!
In November, Mike let me know he was taking a little time off to work on his own stuff, and cleaning up/organizing his garage. Then the weather was a little too cold for us to be messing around with draining coolant and such, so we didn't work on it again till this past weekend.
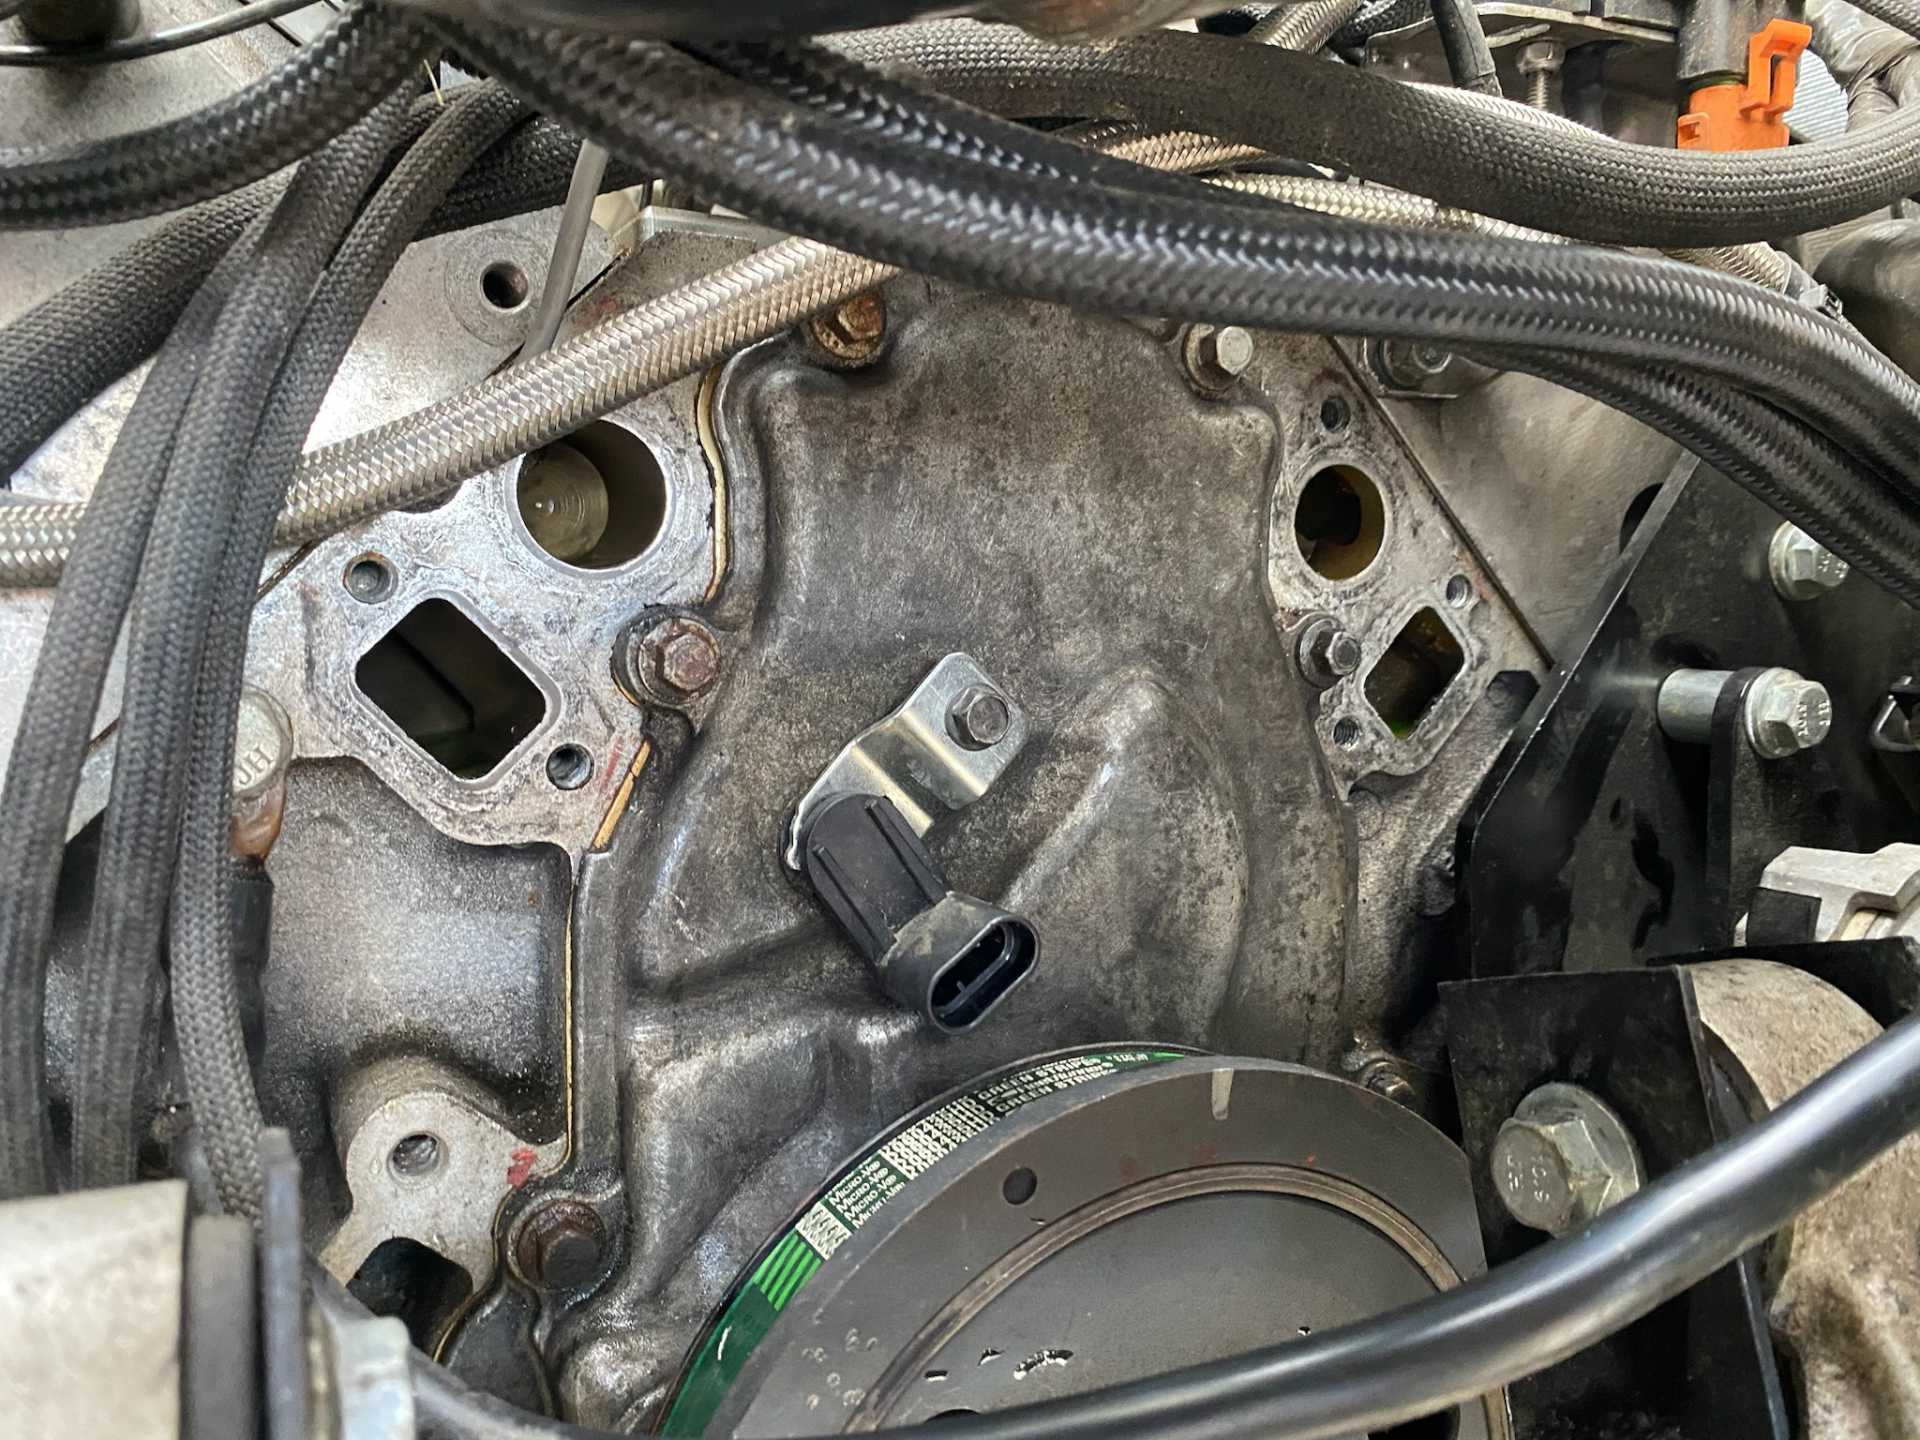
Unfortunately... we discovered the new water manifold we bought would not clear the cam sensor mounting point, and would have been practically on top of the sensor connector.
In the meantime, Mike made the new adapters to step up to the -16 fittings coming off of the coolant tubes, and we made AN hoses. He also bored out a ridge that was inside the -16 fittings (before we put them on the manifold, of course).
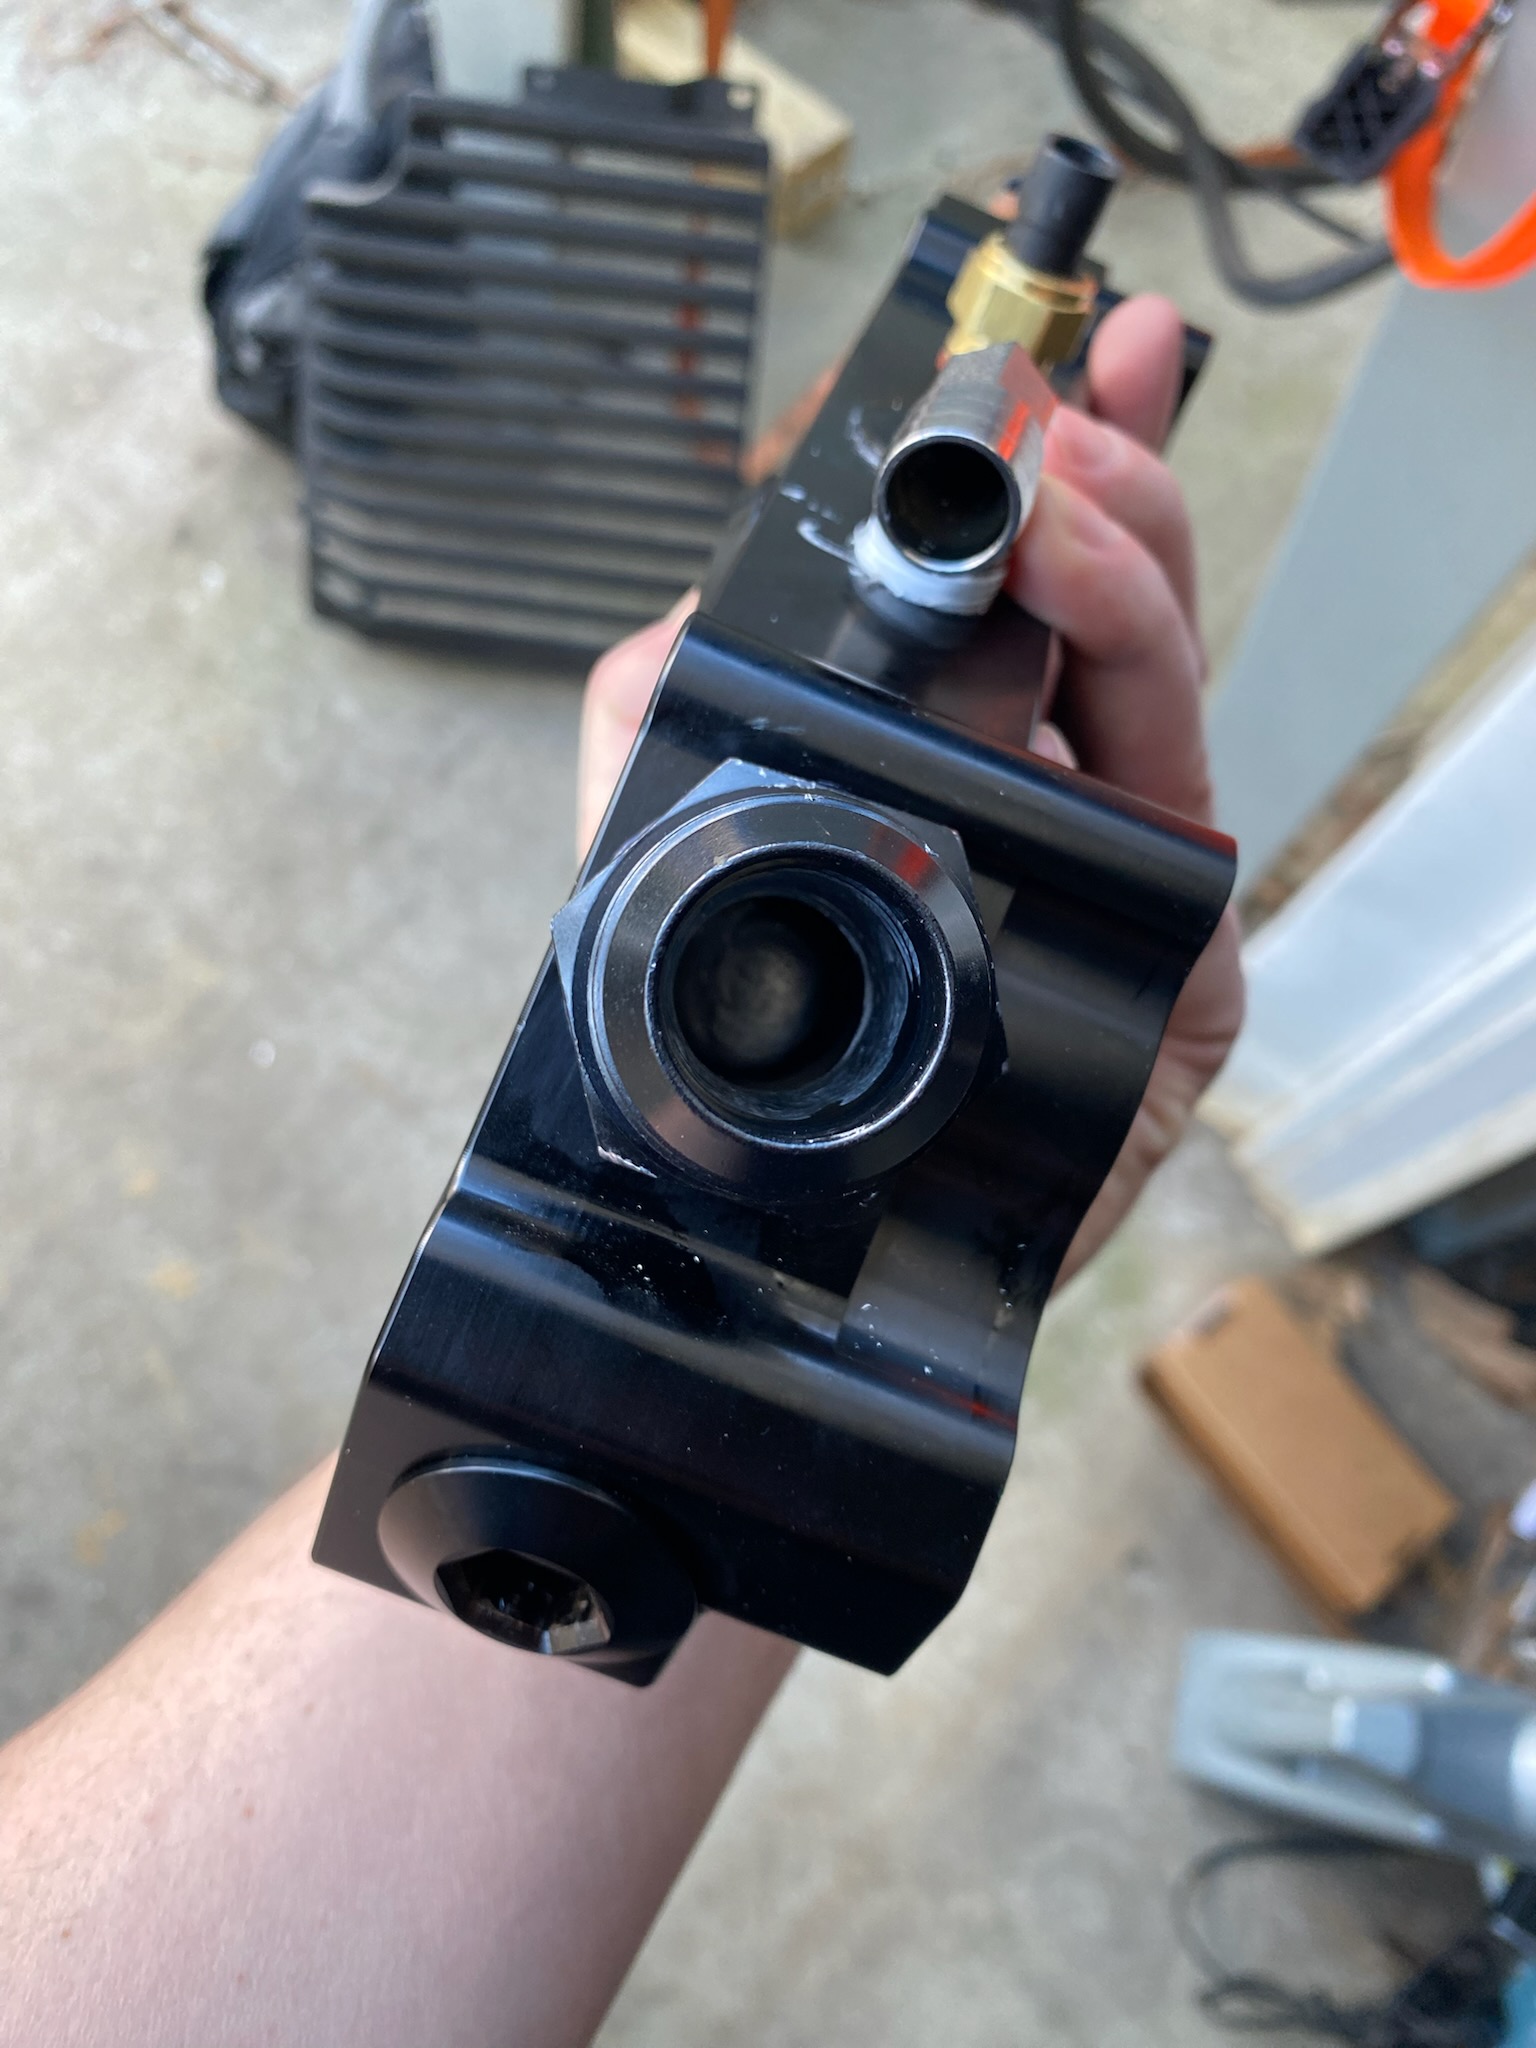
Here's some other pics of the new manifold:
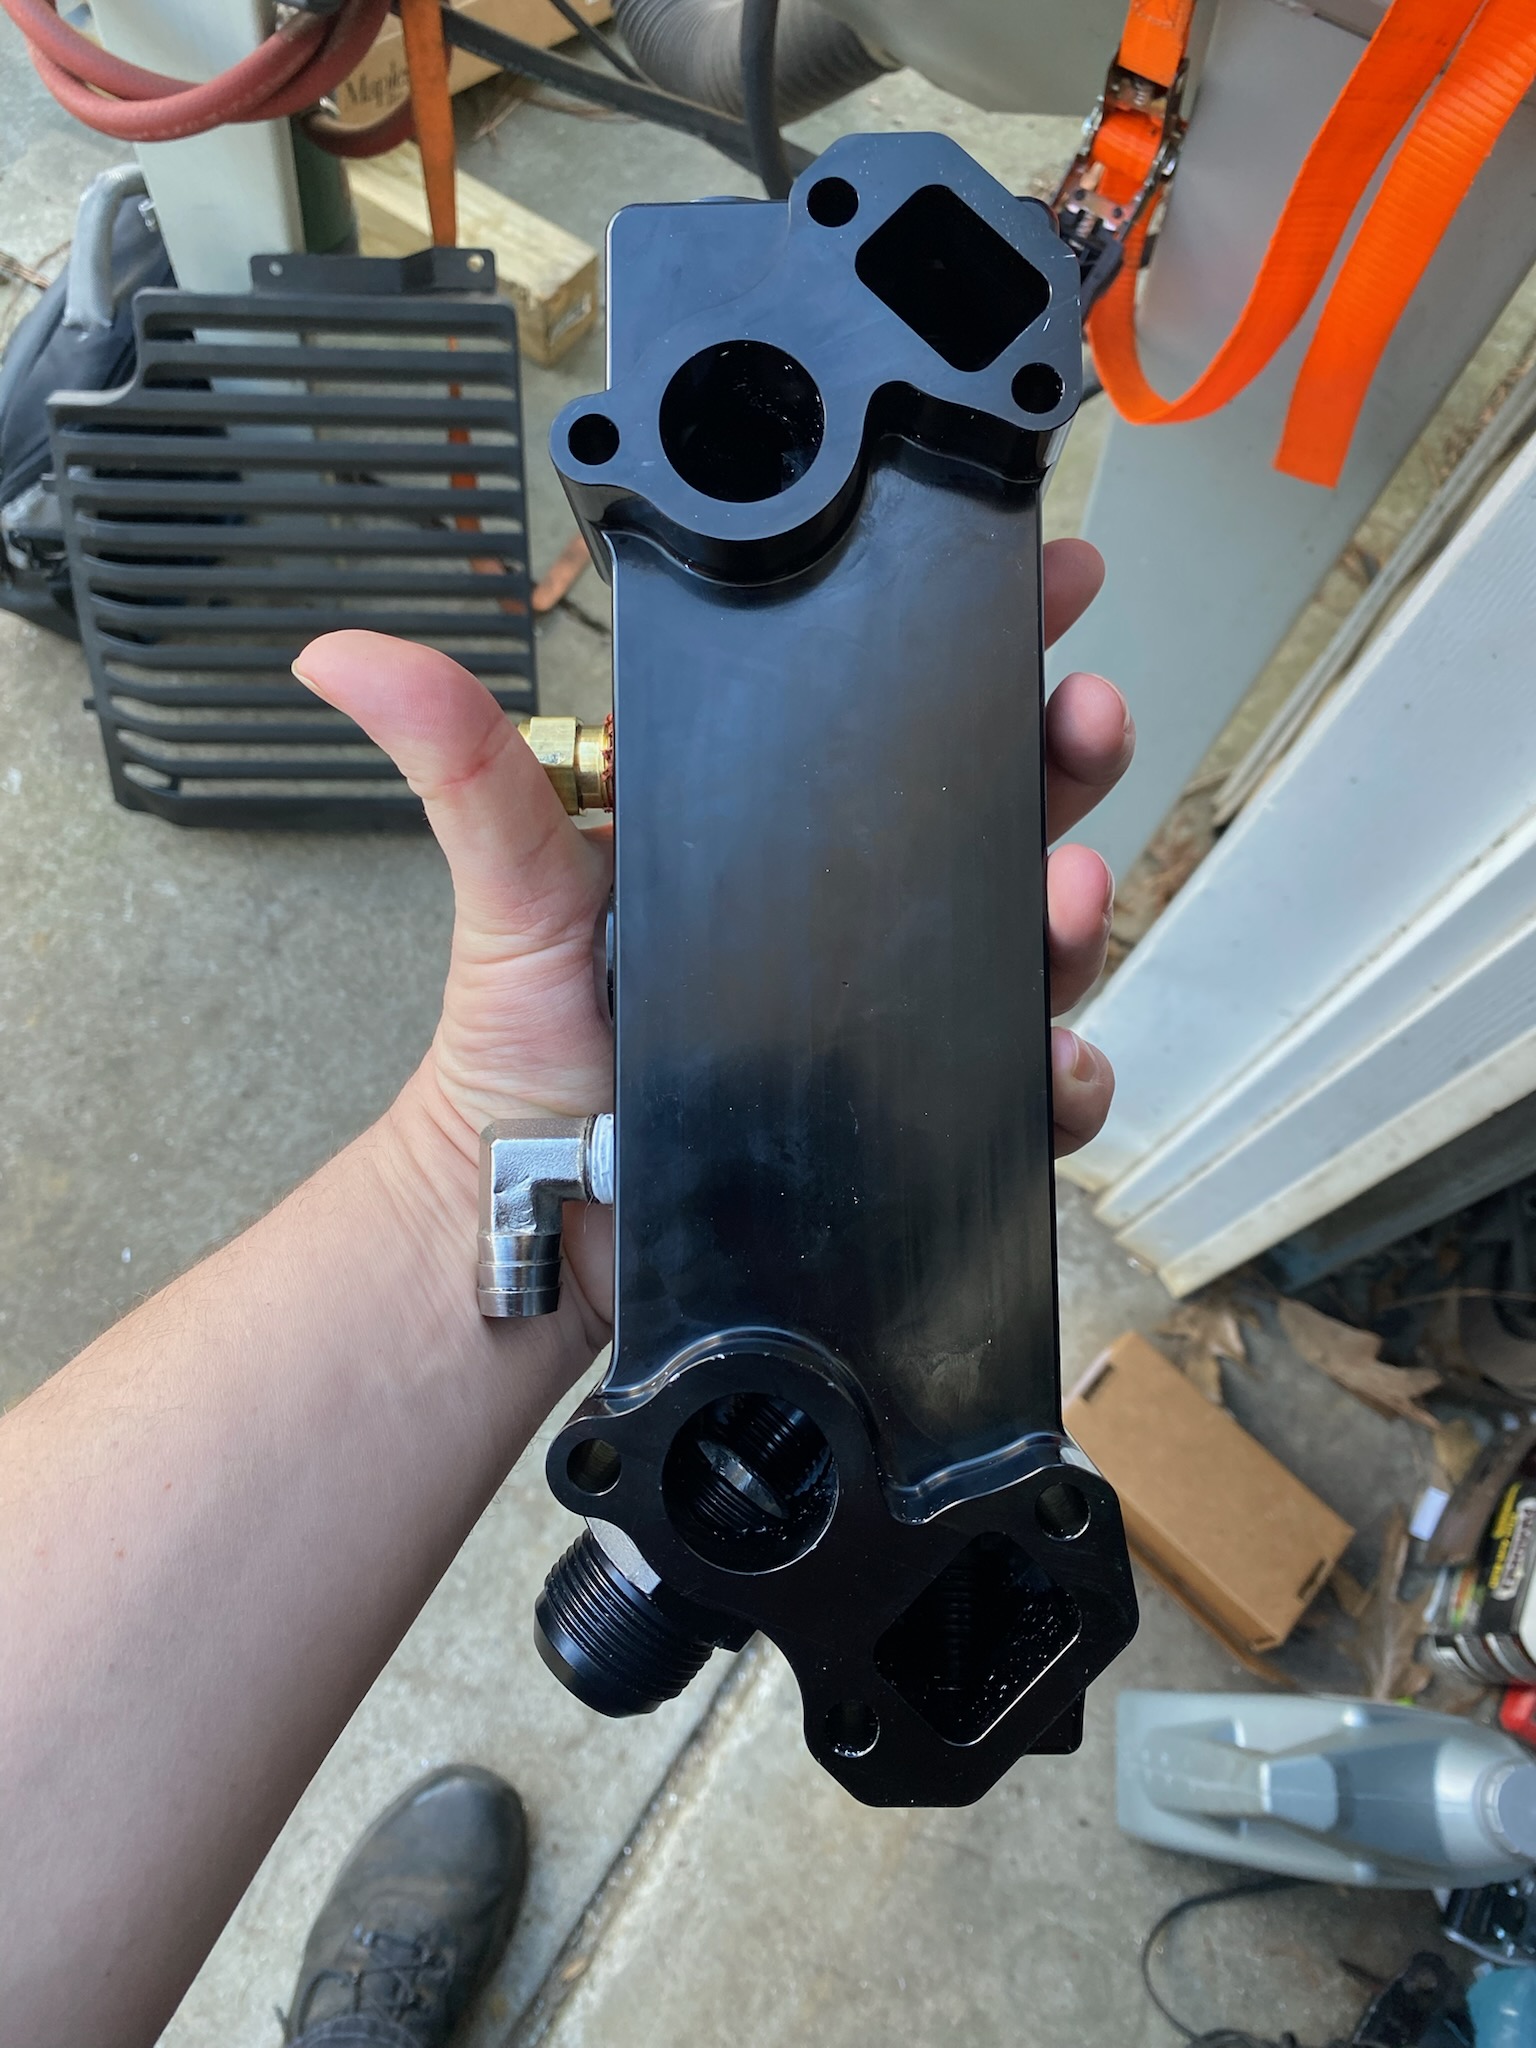
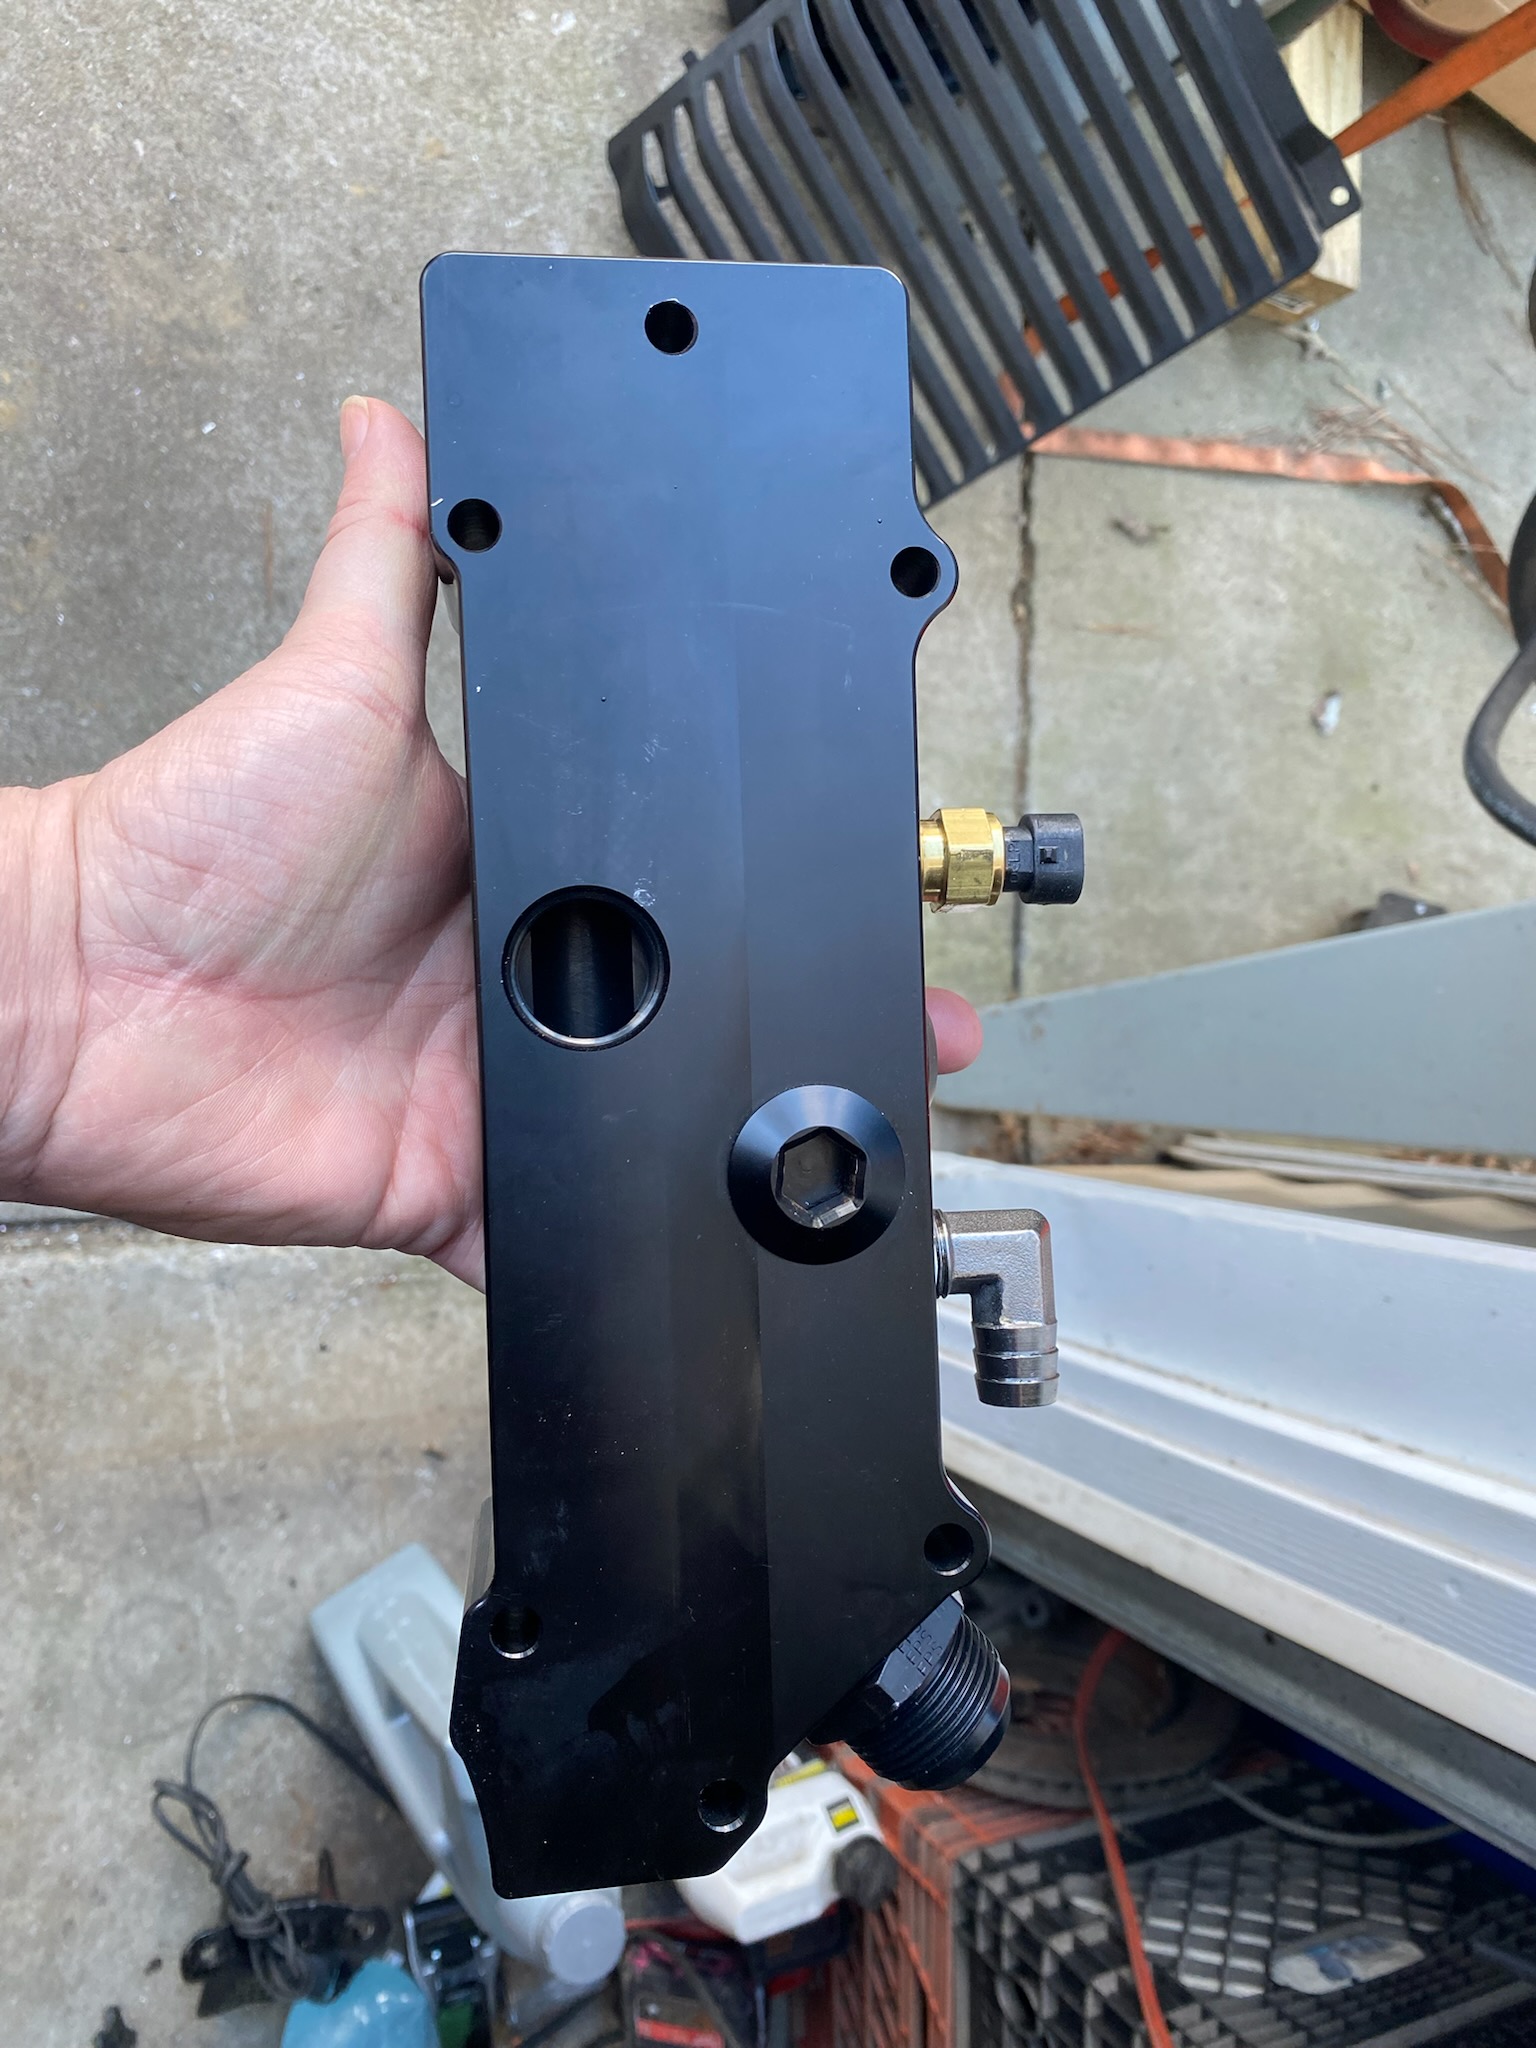
Much bigger ports and better transitions than the old manifold I bought:

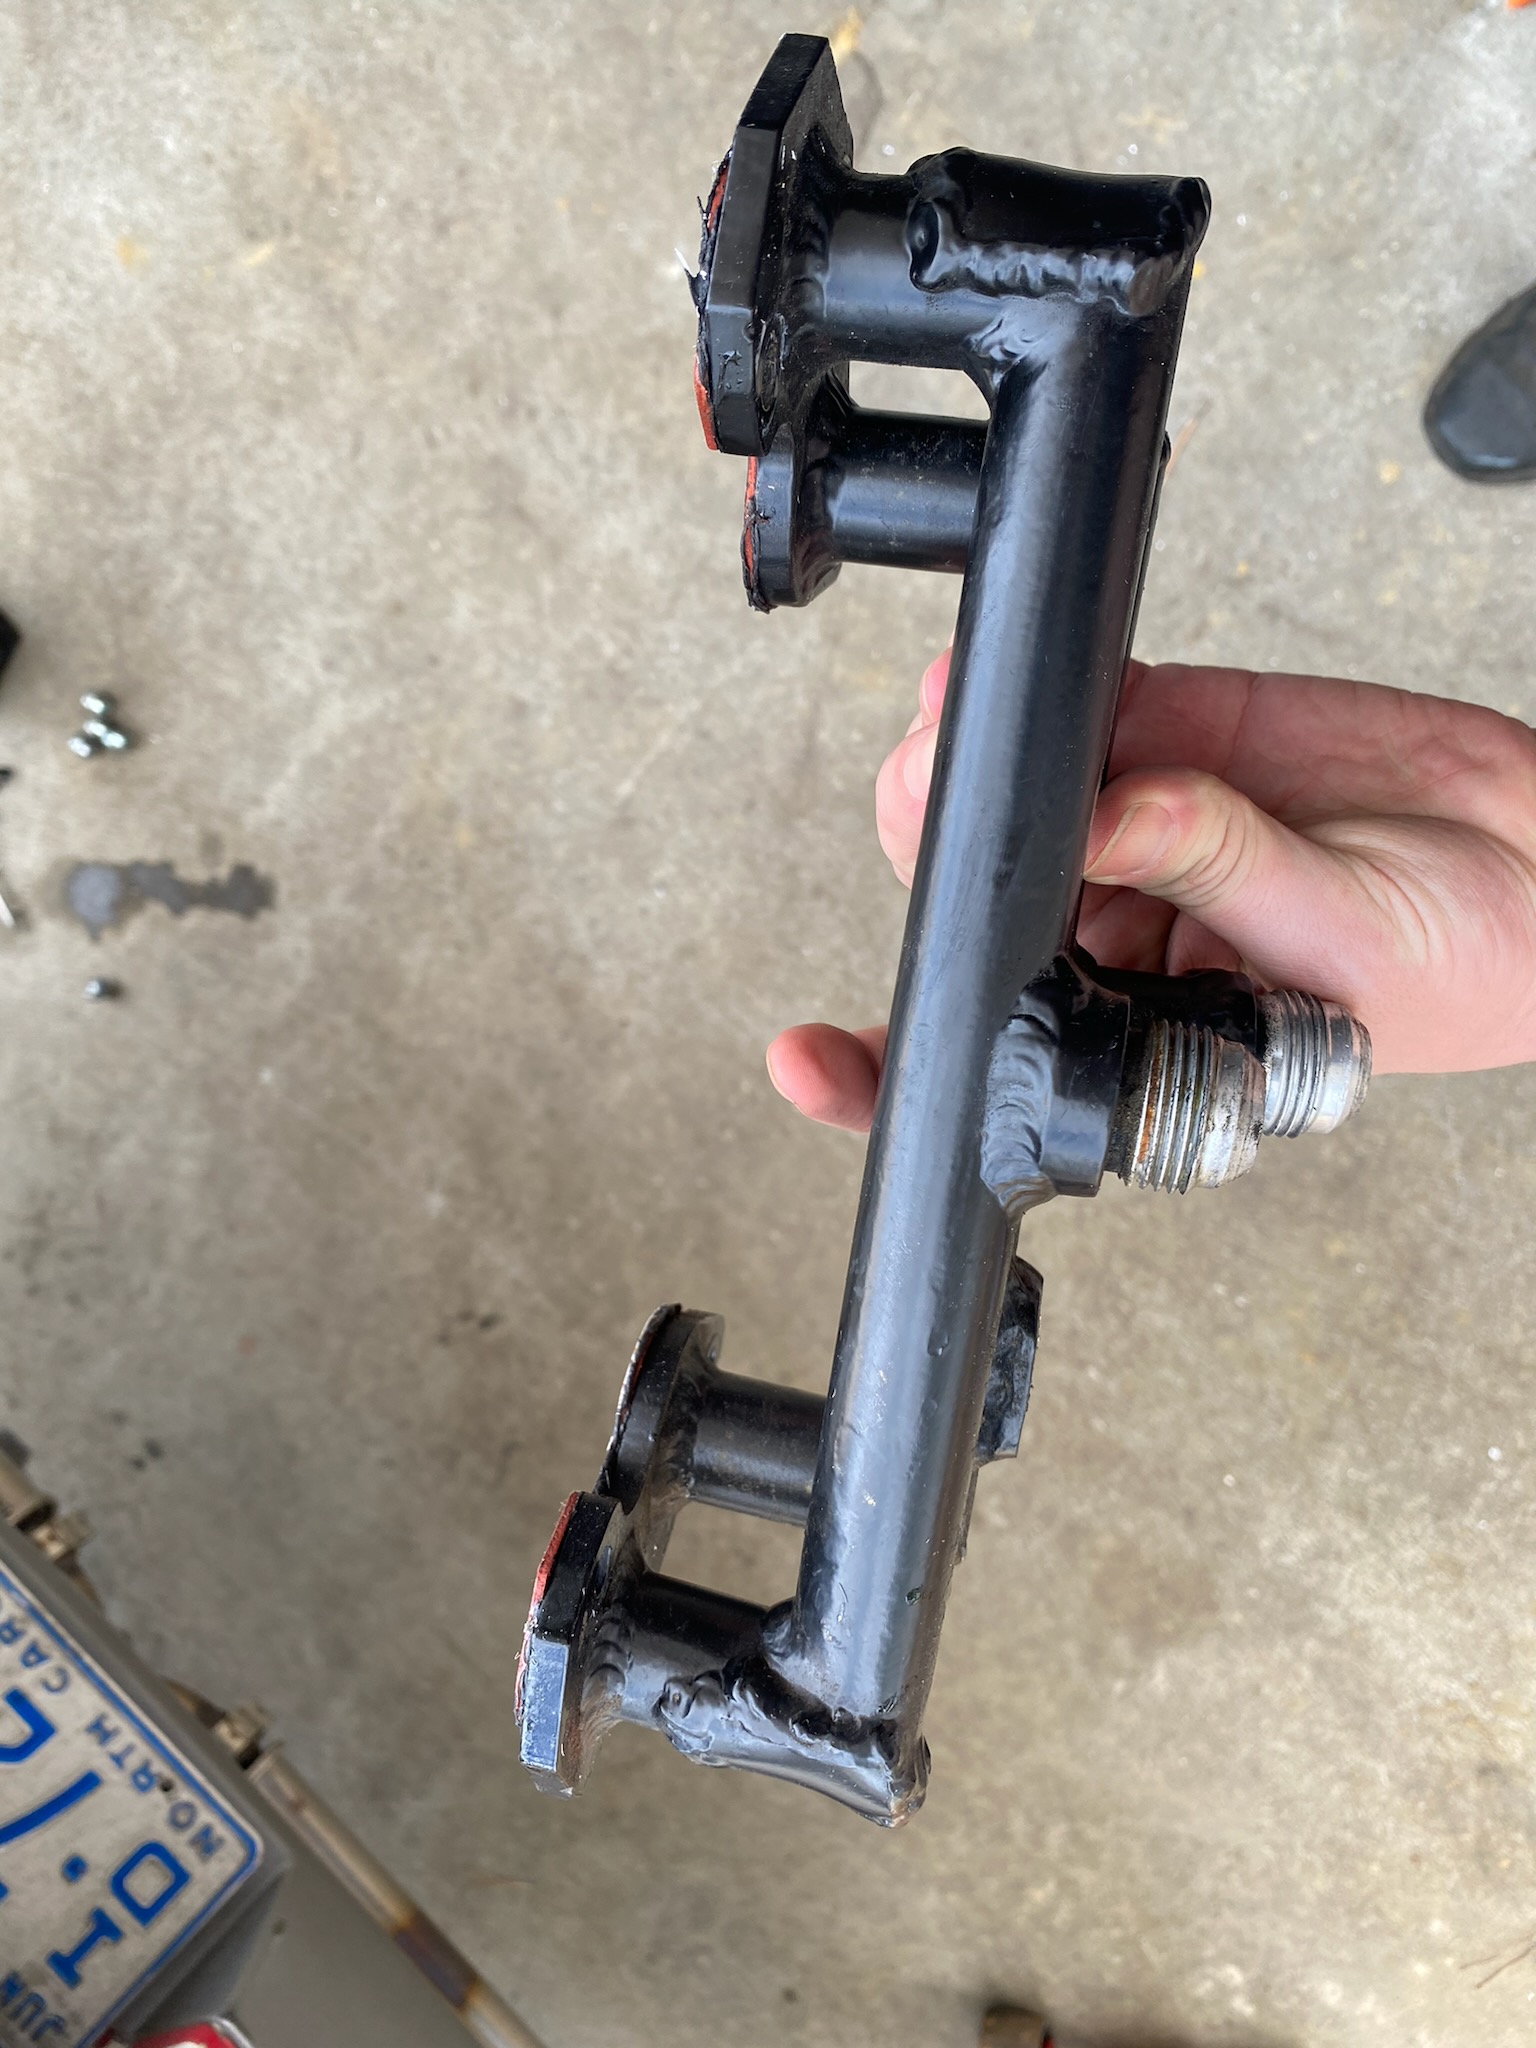
So Mike took some measurements, and I ordered a set of water manifold stand-offs to move it out a little. We'll see if we run into any new hiccups.
I also finished putting my side mirrors back on. As I mentioned a few posts ago, the original soft metal for the studs stripped out. So I put in M6 helicoils. I bought a variety of lengths of threaded rod to see what was going to work best. 35mm long seemed to be best. I also bought a variety of fasteners, including heavy duty butterfly nuts, and bolts.
The bolts didn't work strictly because of angling and trying to get the threading started. Which is what FieroGuru predicted, but hey, sometimes I gotta learn the hard way. lol
The butterfly nuts worked great. The angle on the 'wings' cleared the angled parts of the metal, and I was able to get them on by resting the butterfly on my index finger, reaching in and gently pressing it on, and a slight motion of my index finger and pushing with my pinky finger get it started. Then it was easy to reach in and push the wings to tighten it down.
I did put a little blue loctite on the studs going into the mirrors, just in case.
We're eager to get it back on the road for longer drives to see how the new manifold holds up. Even with the cooler temps, if we're running it on the highway (versus all of the 55 and under driving we've been doing) that might put enough load on the engine to see how it holds up.
Mike is eager to take it to the track and see how much the transmission will take. I told him I'd rather not do that until we get the other transmission from the shop. Yes, the same shop that's had it almost a year. lol
And there's still dyno tuning to do! This weekend I won't be able to head out to Mike's, I don't know if he'll work on it. Normally I try to be there when he works on it. I don't know if he'll finish it up without me or not. He's always got other things to work on. I'll reach out on Sunday and find out.
|
|
|
|
Trinten
|
FEB 11, 10:43 PM
|
|
Mike did decide to work on the car without me this past weekend (I won't complain).
The new water pump standoffs apparently worked great, Mike reported there were no leaks, and he took the car on a 22 mile highway trip to see how it held up. The whole highway trip, the temp didn't go above 190. This is interesting, as we do not have a thermostat in place, and this Davies Craig pump is not setup with any of the fancy controls, so it's running full speed the whole time.
Once he was off the highway and sat at a redlight at the end of the exit, the temp crept up to 209, but lowered back down quickly. Of course the temp was in the 70s, I think. So I'm a little concerned of how it'll be when the summer rolls in, or when I go to use the A/C!
I suspect I'm going to be spending the next few months earmarking some money for a custom Champion radiator.
The other issue Mike worked on was the slow weep we had from the oil feed line, weeping at the AN fitting on the turbo. I did some research and found people that had nylon braided AN hose sometimes had this issue, the temperature apparently melts the nylon braid inside the AN hose end, and that gives space for oil to weep out. Solution appears to be to switch to stainless braided hose, and put a heat sleeve on the line and as much of the fitting as possible to limit how much ambient heat it can absorb. So all of that stuff is ordered.
We still need to build the weatherproof secondary fuse box for the trunk space.
Also, the Fiero Factory seems to have come through for me. They found a shifter surround assembly that was in good shape. I also got a few extra sets of the D-Plates that flank the trunk under the GT clip to keep water out of there.
|
|
|
|
Trinten
|
FEB 17, 10:16 PM
|
|
We put about 70 highway miles on the car this past weekend. It was pretty cold out, around 42 degrees. With that, the coolant temp never got above 152. On the highway after drove a bit, it was sitting in the mid 130s. So if we assume a 1-to-1 increase of temp with outside temp, that means we can expect 90 degree temps to pull the coolant temps up to around 200. And as mentioned before, that's before the extra heat soak of the A/C running.
We have discovered the manifold is (Still) a choke point. At one point, before the coolant system built up some pressure, the upper radiator hose had collapsed, indicating that the draw of the pump was outpacing what the water manifold could let through. Mike is going to replace it with an aluminum tube, butting it right up to the radiator port and hard coolant tube, using a small slice of radiator hose as a coupler, but no gap (or not enough of one) for it to collapse.
We spent the highway miles doing some tuning, trying to get rid of the 'chugging' that we would get at RPMs under 2000 (1800-1950) when cruising at highway speeds. This engine likes to run rich. We would bump up the fuel ratio a tiny bit, and the engine would smooth out more and more.
Mike did a light pull, from 60mph he pushed the throttle to 33% and held it there. That part of the VE table was spot on, every vibration in the engine smoothed out where it felt like it was just gliding. It was wild. It also had an A-F Ratio floating between 11.5 and 12.25 during this pull. It seems when the ratio is higher than 13.25, and RPM is under 2000, we get the shuddering/chugging.
So we have a fair amount of time where we need to chase down all of those uncomfortable chugging points and adjust the ratio. Mike said this is just the price of having a performance/race cam, so he isn't sure if we can get it all out, but to explain how bad it is at it's worst... it's enough to make one think something was mechanically wrong, or rattle the car apart (the instrument cluster literally shakes).
We also are playing with the front suspension. The toe on it makes the steering a little twitchy, and much more likely to try to follow any dips in the road. He also suggested I get a Corvette front bump-steer kit. Some Corvette guys say it's not needed, but in reading up, one Vette performance shop explained just how time consuming dialing out bump steer issues can be (without a kit), it's not just tossing it on a laser machine and rolling the wheels.
Also, I had fun doing a donut on some private property (a warehouse area that is closed on weekends), and did a few hard pulls. It was crazy. Even after the wheels were heated up, the front end didn't come up, but Mike said that it looked like the body came up high enough for the wheels to reach the bottom of the suspension, given how the wheels angled.
Sadly, Mike's phone is an iPhone, and he hates them. So I need to walk him through getting Apple's google drive app installed so he can upload it for me. Or he has to copy it to his computer and toss it on a flash drive.
I still want to get the speedometer gauge and coolant gauge hooked up, right now we're relying on the laptop, or the FAST dash panel.
I think I need to give up trying to repurpose the Turbo Sunbird cluster, and start talking with Dakota Digital about their custom cluster builds to get what I want.
When the weather gets warm enough to do some welding (if needed), we're going to try to install one of the Mini Cooper seats I picked up and see how well it works.
Oh, and apparently my brake pedal switch is broke. My brake lights stopped worker. Fuse is good. So assuming it's that switch.
|
|
|
|
fieroguru
|
FEB 18, 09:10 PM
|
|
| quote | Originally posted by Trinten:
We spent the highway miles doing some tuning, trying to get rid of the 'chugging' that we would get at RPMs under 2000 (1800-1950) when cruising at highway speeds. This engine likes to run rich. We would bump up the fuel ratio a tiny bit, and the engine would smooth out more and more.
Mike did a light pull, from 60mph he pushed the throttle to 33% and held it there. That part of the VE table was spot on, every vibration in the engine smoothed out where it felt like it was just gliding. It was wild. It also had an A-F Ratio floating between 11.5 and 12.25 during this pull. It seems when the ratio is higher than 13.25, and RPM is under 2000, we get the shuddering/chugging.
So we have a fair amount of time where we need to chase down all of those uncomfortable chugging points and adjust the ratio. Mike said this is just the price of having a performance/race cam, so he isn't sure if we can get it all out, but to explain how bad it is at it's worst... it's enough to make one think something was mechanically wrong, or rattle the car apart (the instrument cluster literally shakes).
|
|
Vince, If you are still running the CompCams 232/234 duration @ .050" and .595/.598 lift with LSA of 112, that is a big cam for a 5.7 and larger LS, and too big for the LS4.
It is rated for 2400 rpm to 7200 rpm for a 5.7 and listed as race only... so trying to get it to run smoothly below 2000 rpm on a 5.3 is going to be challenging, if not impossible. The excessive overlap of the camshaft and intake manifold reversion are the primary caused of the issues.
A few things that could make it better.
1. Excessive Valve Overlap: If your ecm allows, adjust the start of injection to be after the exhaust valve closes below 3000 rpm (above this it doesn't really matter). This will keep unburnt fuel from coming into and going right out the exhaust valve and not being used for combustion. With the cam valve overlap pulling fuel out, the A/F ratio will be leaner and it will take more fuel to have good combustion. By only spraying fuel after the exhaust valve is closed, all fuel is used for combustion. This will help idle quality, fuel economy, and power in the lower rpm range.
2. Intake Manifold Reversion: At low cruise rpms, the intake manifold vacuum can exceed the scavenging effect of the exhaust. So as soon as the intake valve opens (while the exhaust valve is open) the exhaust gas is pulled up the intake runner vs into the exhaust manifold. This reduces the available oxygen in the intake charge and hurts combustion. About the only thing that can help is reducing manifold vacuum - On manual cars, upshifting a gear to drop rpm and open the throttle blade, and reduce manifold vacuum helps. Not much of an option for autos.
3. Adjust timing at these cruise rpm and map values to be in the 40 to 45 degree range.
I learned these lessons with my old 224/231 .564/.575 LSA 113 which was too big for a 5.3.
This was why I went with 219/223 | .617"/.595" | LSA114+3 with the turbo upgrade and very happy with it.
With a turbo 5.3, you don't need a huge cam to make LOTS of power to 7000 and beyond
|
|
|
|
Trinten
|
FEB 19, 12:46 AM
|
|
Thank you, as always, for sharing your knowledge and experience
Yes, Mike did tell me this was a race cam, and he said similar things, that it was likely never going to be smooth everywhere. I said I was okay with that, just not okay with it being so bad that the instrument cluster 'dances'. lol
He did mention adjusting more things in the ECU than just the VE tables, but since I don't know enough about tuning, I didn't want to assume I was going to remember what he said properly - and I didn't want to put words in his mouth. I'll send him what you suggested and see if that's the same thing he's talking about. He did talk about making adjustments to better deal with the overlap, and that it would be the drive tune versus the track tune. So I *think* you guys are on the same page.
I also discovered today that the changes that Apple made a few months ago, Mike was able to send me the video he took without it being compressed to garbage, so I need to get that on the google drive and link it.
|
|
|
|
Trinten
|
MAR 02, 09:54 PM
|
|
*cough* "The driver" *cough* in this video is not very good at doing donuts, probably bad throttle control. Said driver was really good at getting his last Fiero to kick out a 180 without the front tires moving very much, which is a fun way to turn around in a parking lot.
https://drive.google.com/fi.../view?usp=drive_link
Okay, so the weekend before last we've been trying to smooth out that last little rough spot in the 70-80mph zone, when the car is "trembling" with the torque converter locked up. I did share with Mike the info that FieroGuru posted and he said we could certainly try those suggestions too.
So we picked a loop that gave us about 75 miles or so on mostly highway driving with long stretches of flat road. This time I drove while he tuned. He tried messing with just the timing first in our last trouble area, advancing it all the way up to 45 at one point, and pulling it way back. It made very little difference. So he set that back to it's starting point (I don't recall what it was) and he played with the fuel next. He tried leaning it out, then adding fuel. Also very little difference. So then it was time to start adjusting both values.
We tried FieroGuru's suggestion first, it got much worst. My vision was literally close to doubling. I don't recall what order he did the next things in, but basically he started trying different combinations, to different degrees of retarded timing and more fuel and advanced timing with more fuel. He would sometimes have me ease off the gas and slow down a little, then go back up to our trouble speed of 70+.
In the end, running the car in that part of the tune with greatly reduced timing and very rich improved the driveability. It's still not perfect, but now it doesn't get bad till about 72. So if I stay under 70, it stayed pretty smooth, except when going up a little incline, which puts the engine load into that same spot that it was hitting at 70+ on flat surfaces.
Here's the painful part of this, before we started this trip, the FAST computer had estimated my MPH at 15.5. For just this circuit, about half of it with this low-timing-high-fuel setting... MPG was down to 8.7! LOL
Mike was like "are you sure you want to leave it here?" and I was like "we can mess with it later, as long as I know what the worst case is for fuel consumption, I can plan accordingly. And I'll just need to buy a second Jerry Can to keep fuel in. He also said we can try to play with the tune to get the transmission to unlock the torque converter at those speeds, or leave it unlocked until it gets up to, say, 75... but damn. That's a lot of extra heat getting generated, and we're already struggling with heat management.
He half-jokingly suggested I buy the Fiero towing kit, so we can put on one of those "cooler holders" on the back of the car and strap jerry cans to that. He still wants to drive my car on RFTH, and said that if he needed to, he'd rig up a pump and hoses to the cans, so he can refill the tank on the fly. I'm pretty sure he was kidding about that part... pretty sure.
Though since most of RFTH won't be in the "lousy spot" of the power curve, the MPG should be much closer to the 15.5. And Mike will dial that in further next. This was just the start of the tuning. At the end he wants to have two tunes, one for regular driving, and one for the track. This one is still "in between" and moving towards the street/everyday one.
This past weekend I went to the junkyard, there is a Fiero that landed there a few weeks ago. The Passenger side seat in it is in great shape, no tears or anything I saw in the fabric, which is rare. Unfortunately the passenger side door is jammed shut, and they had the car up on extra-tall junkyard 'stands', so I couldn't get to the few parts I wanted because I couldn't get enough leverage to break the fasteners loose. Mike said he'd go with me next weekend and bring his battery powered sawzall. I don't like doing that, I don't like damaging parts other people might be able to use. Since this is to get the tube that houses the A/C Orifice tube, and we need to get the accumulator out of the way, and that is easy (and inexpensive) to get new, I won't feel bad about it this time.
Is there a market for good seats? Should I bother to pull it? I have a set of tan leather 84 seats that are in good shape that I've tried to sell locally without success.
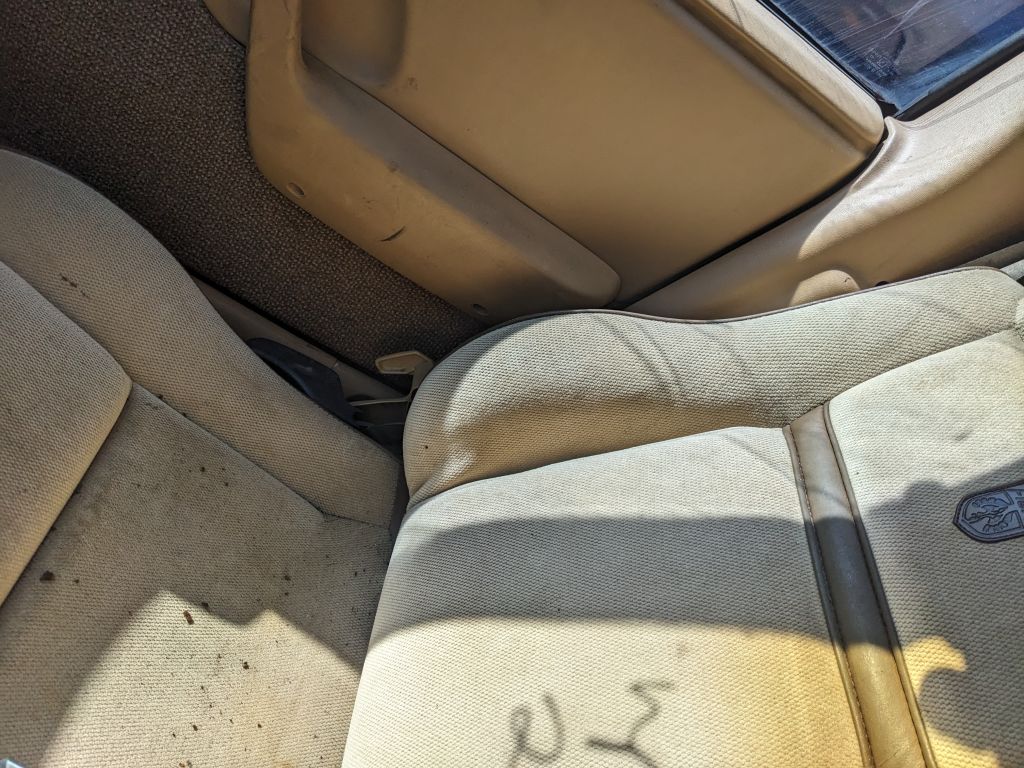
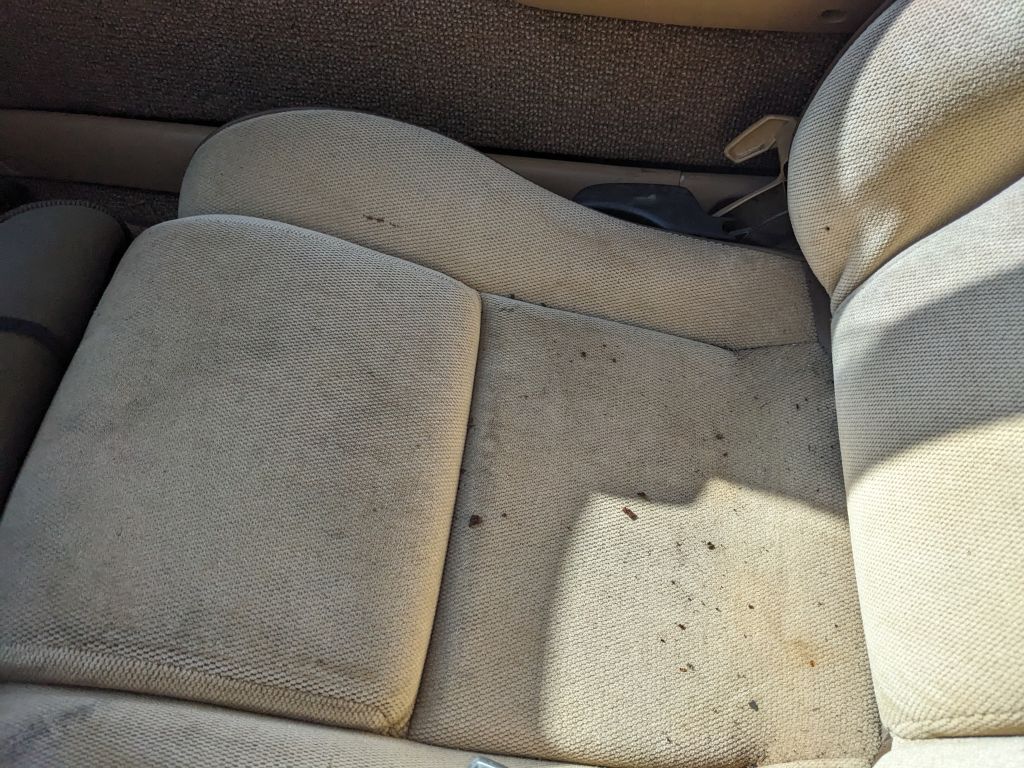
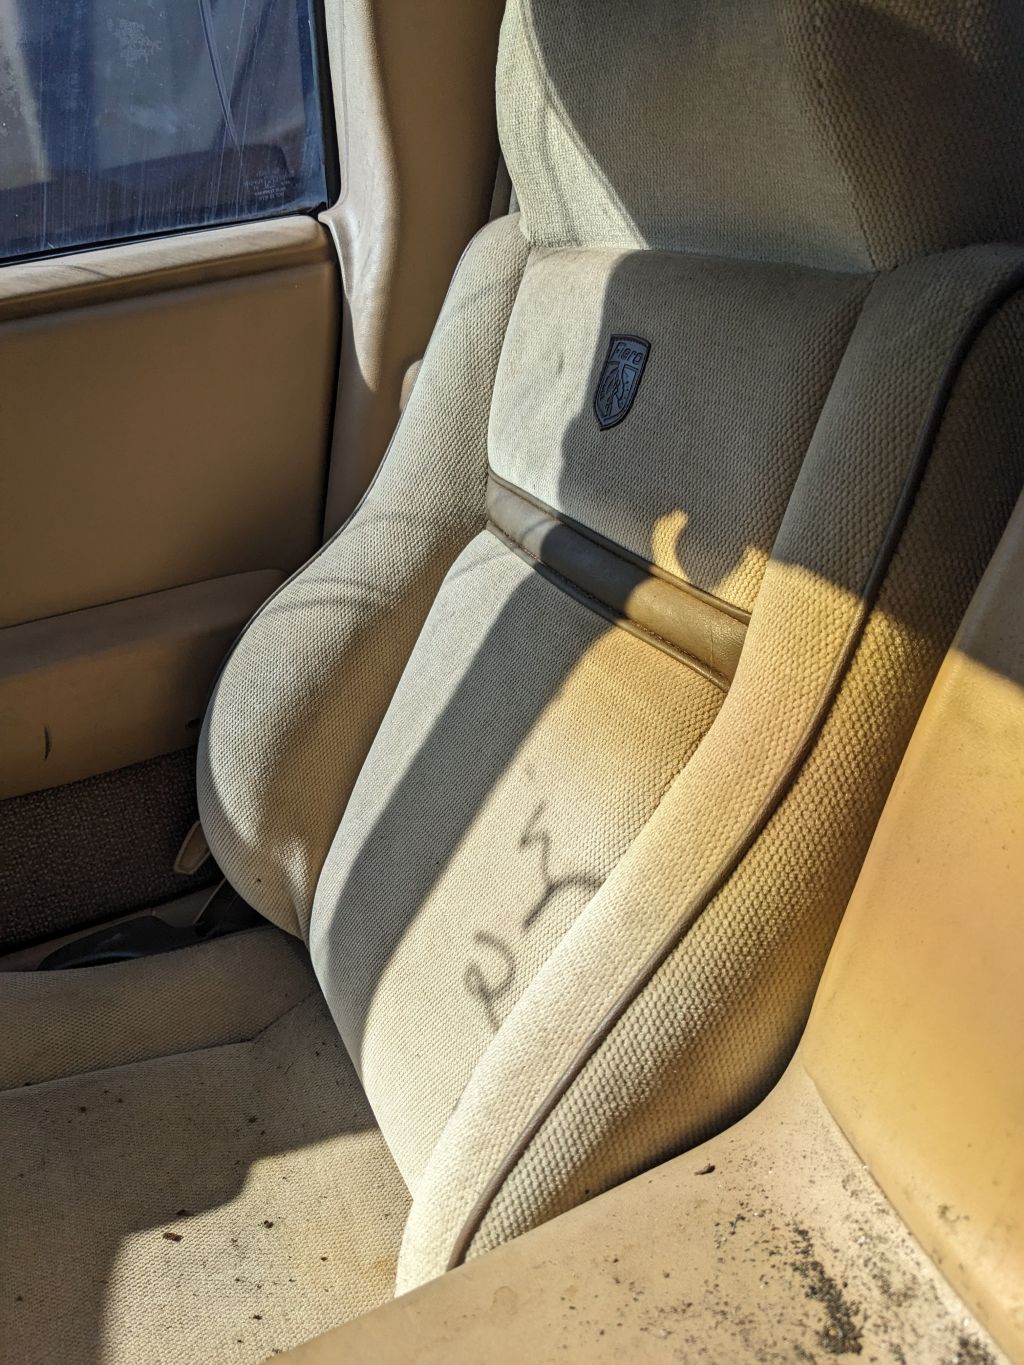
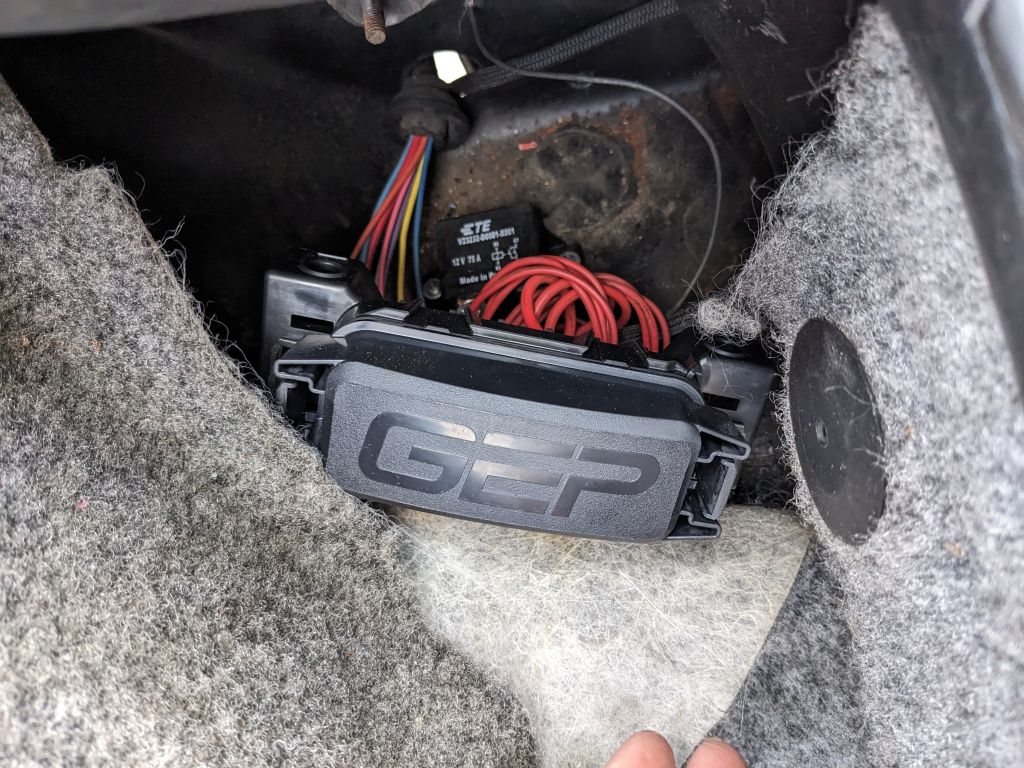
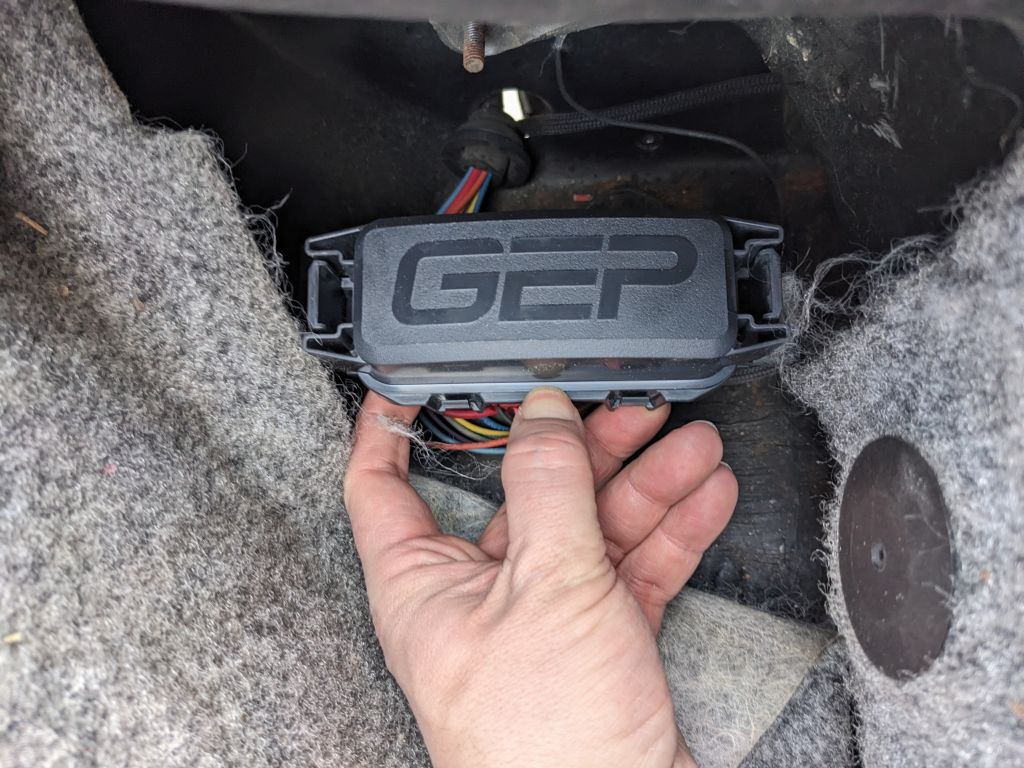
Anyhow, this weekend I replaced the power mirror controls (the 'Right' didn't work), and we replaced the auxiliary fuse box in the trunk (which was getting exposed to water and corroding fuses because of the cracked D-plates) with the GEP weatherproof one! When it's done, it'll be mounted facing up, just behind the carpet where the alternator trunk fan motor was, so it'll be easy to access if I need to change fuses. The unused spots are closed up with plugs.
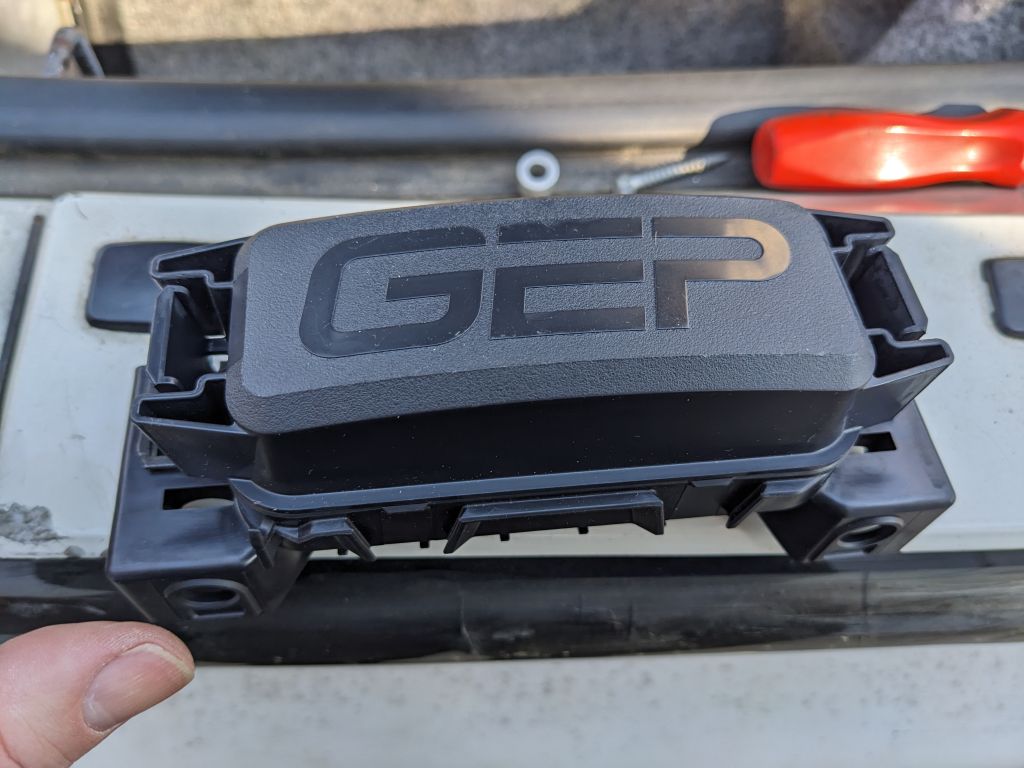
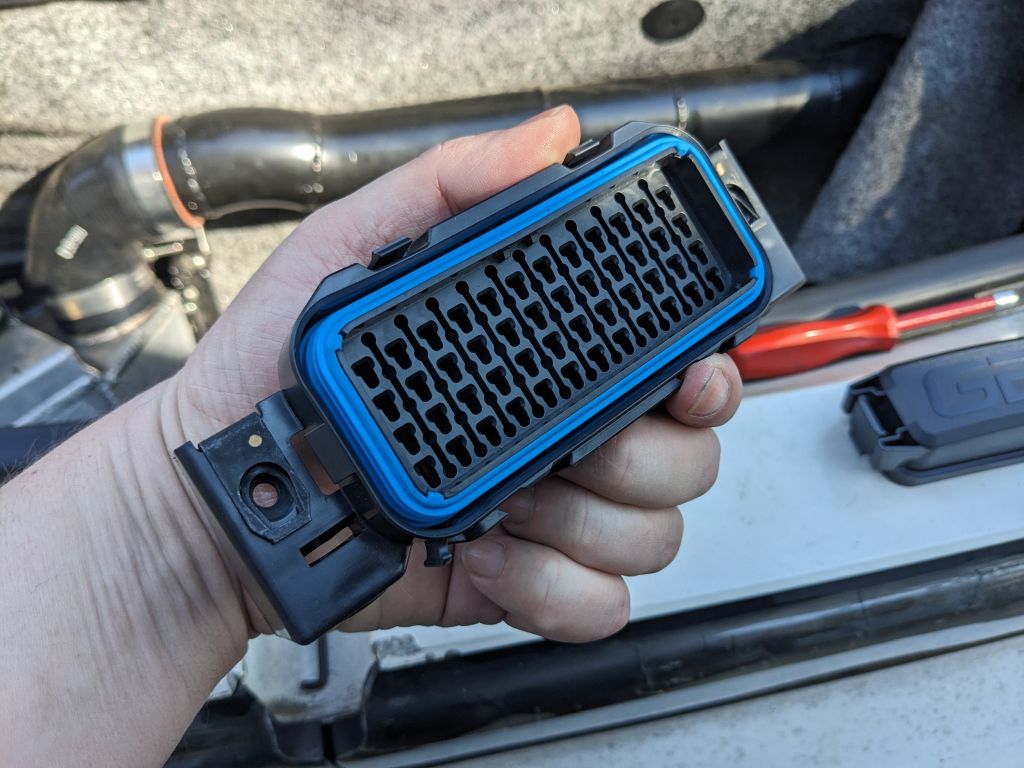

The relay Mike had me get to go along with this is one he used when he was doing motorpool work for the police. He said these 75amp relays could take a beating and he never had one of the TE/Tyco ones fail on him. So that's what we got. We now have plenty of fuse space in the back, and the intercooler pump is wired in with the rest of the key-on stuff. And all the wires running to the relay are on their own eyelets, so if the Amps in the back is too much for that relay, I can pick up a second one. I need to do some math.
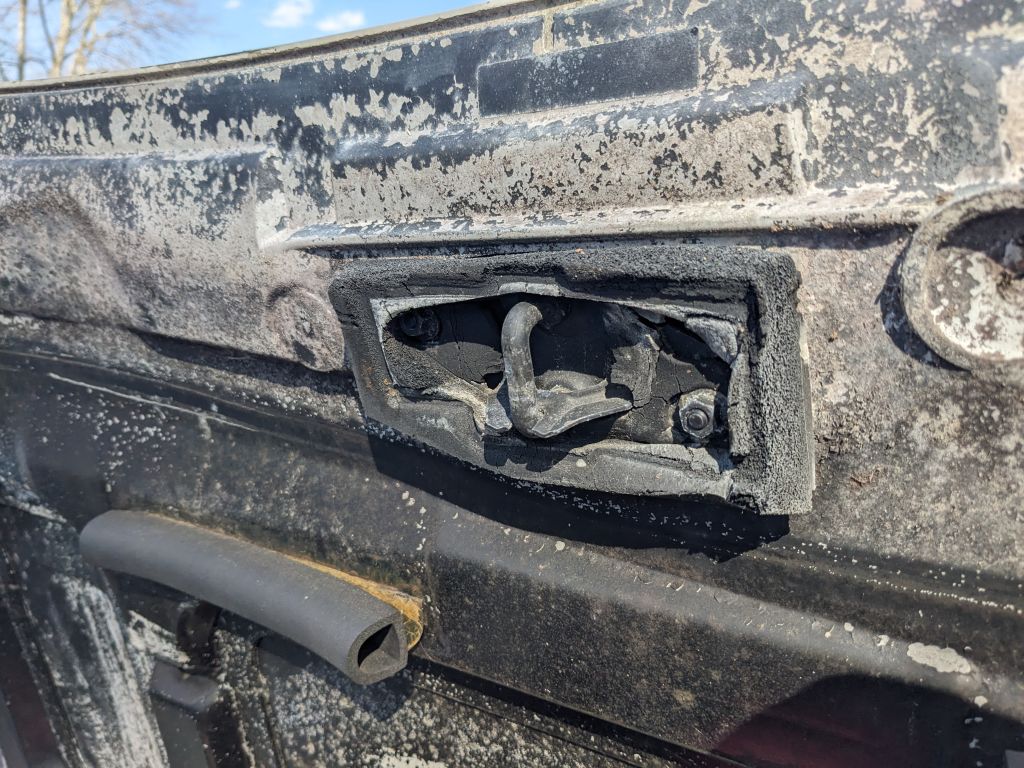
Last, does anyone know of a good source to get replacements for the deteriorating material around the hood latch??
 [This message has been edited by Trinten (edited 03-02-2025).]
|
|
|
|