 
     |
| Aurora 4.0l / Izuzu 5 speed swap into 88 coupe (Page 71/102) |

|
88GTS
|
MAY 15, 11:16 AM
|
|
|
Hey Charlie, can you please post pictures of the cut without the vent installed. Also, with the version 2 vent, do you also have to cut the sheet metal in front of the spare?
|
|
|
|
cptsnoopy
|
MAY 15, 05:33 PM
|
|
| quote | Originally posted by 88GTS:
Hey Charlie, can you please post pictures of the cut without the vent installed. Also, with the version 2 vent, do you also have to cut the sheet metal in front of the spare? |
|
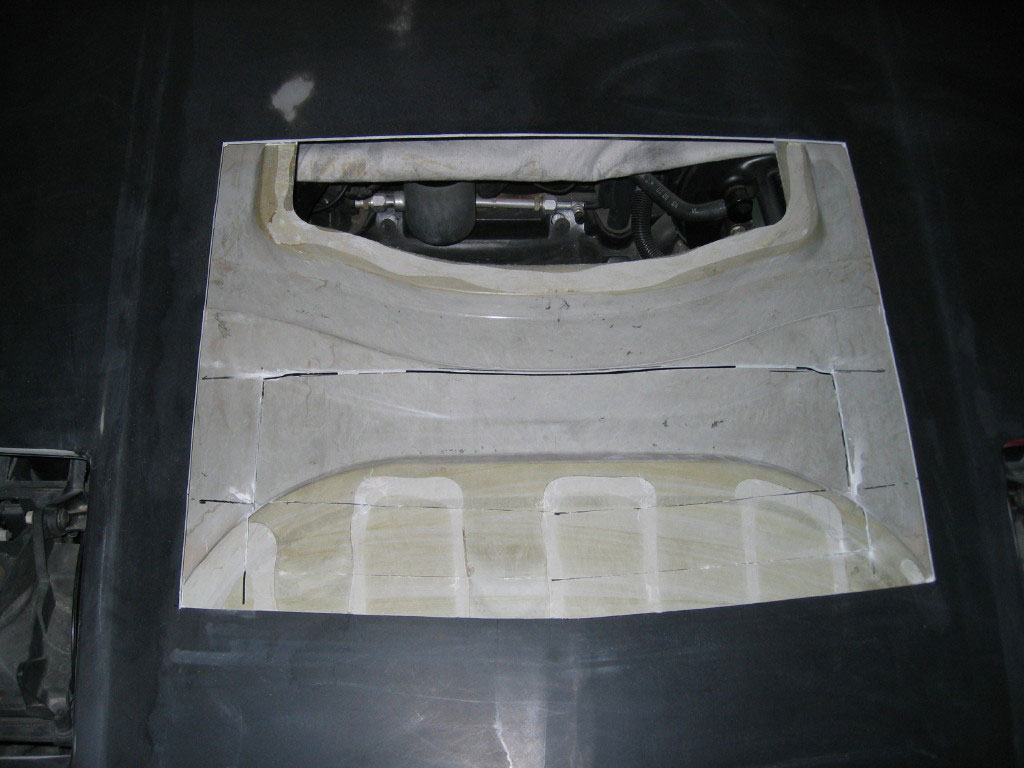
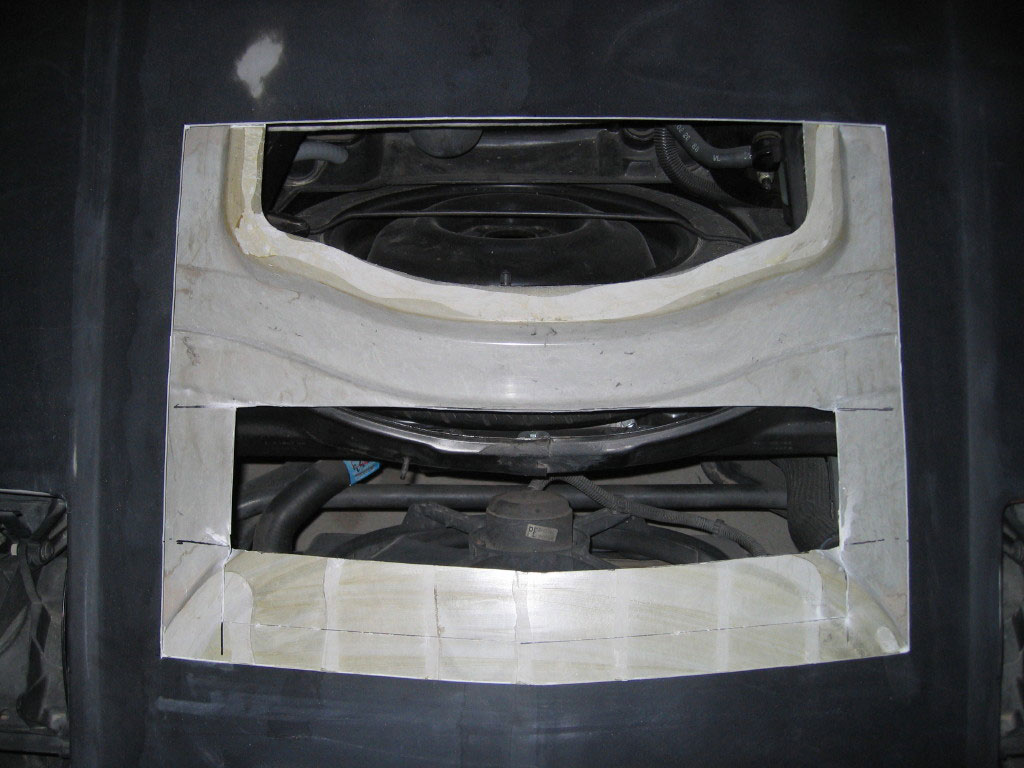
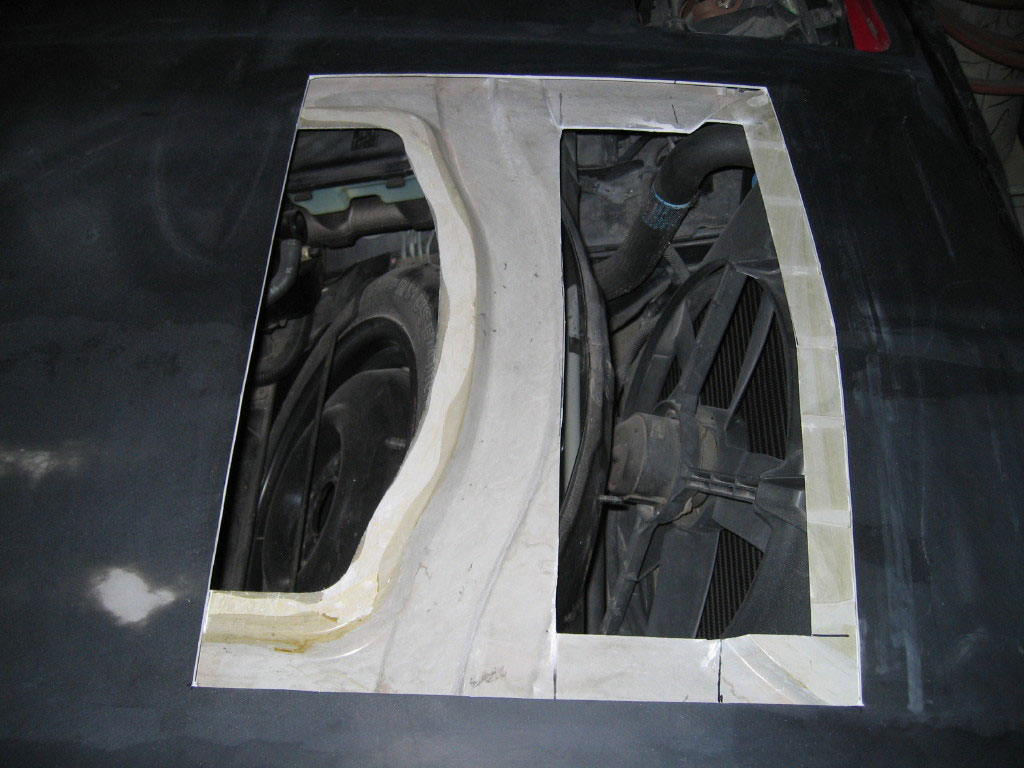
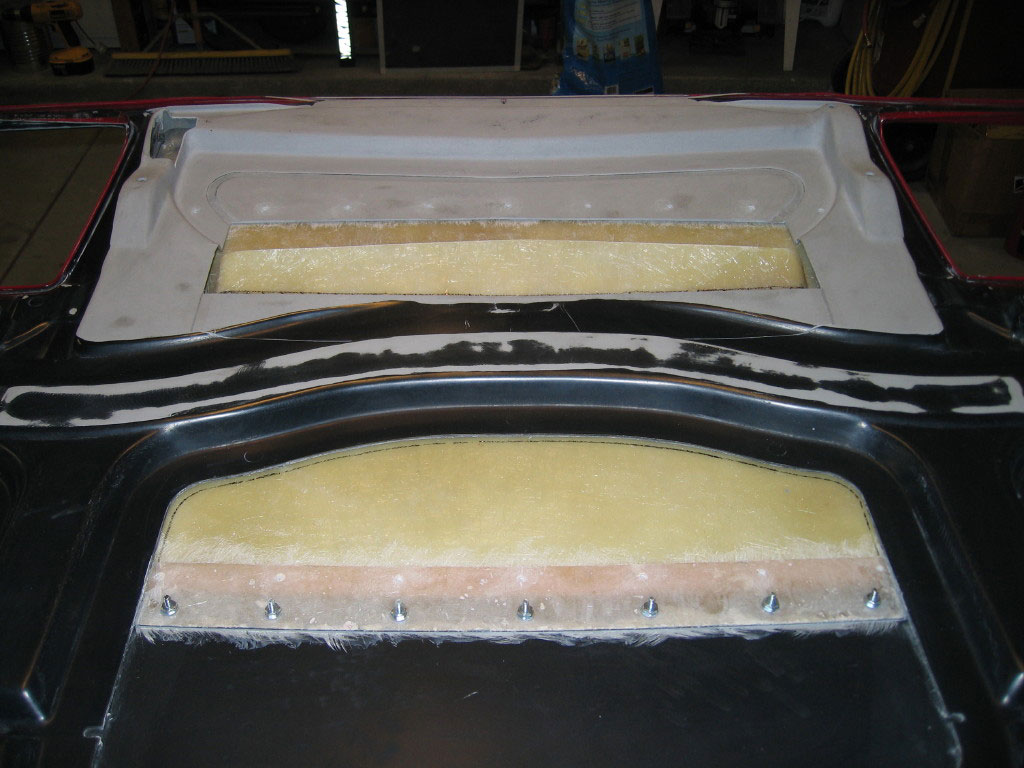
I put the pieces that I cut out back in for the first of these photos. I wanted to show how it looked before I screwed up...  The first cut took out the part of the lower skin that would seal the spare tire area by mistake. I should have spent more time figuring out which part of the skin could be left in place. It would be a close fit but I think the vent would have fit with that part of the lower skin intact. The second cut was to remove more of the lower skin because it was visible through the vent from the top. If I had to do it over again I would make sure that I left all of the lower skin that touches the seal when the hood is closed. The first cut took out the part of the lower skin that would seal the spare tire area by mistake. I should have spent more time figuring out which part of the skin could be left in place. It would be a close fit but I think the vent would have fit with that part of the lower skin intact. The second cut was to remove more of the lower skin because it was visible through the vent from the top. If I had to do it over again I would make sure that I left all of the lower skin that touches the seal when the hood is closed.
The version 2 vent does not need any sheet metal cut out. It also allows for putting the sun-roof glass in it's stock location over the spare tire.
Charlie


|
|
|
|
88GTS
|
MAY 15, 07:20 PM
|
|
Thanks Charlie!
Is the version 2 vent hole also 2.5" x 16"? Paul only list the dimensions of the original one on his site.
|
|
|
|
cptsnoopy
|
MAY 15, 07:36 PM
|
|
| quote | Originally posted by 88GTS:
Thanks Charlie!
Is the version 2 vent hole also 2.5" x 16"? Paul only list the dimensions of the original one on his site. |
|
Your welcome. The hole in this vent is ~ 2.5" X 18.5"
Charlie
|
|
|
|
cptsnoopy
|
MAY 18, 03:41 AM
|
|
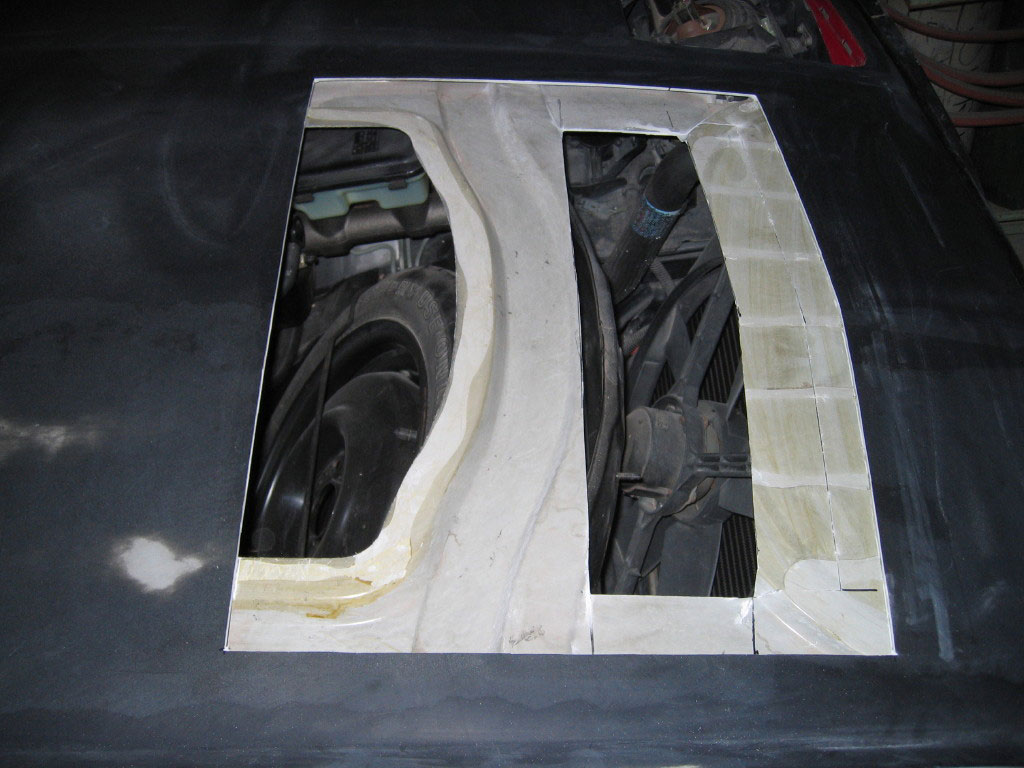
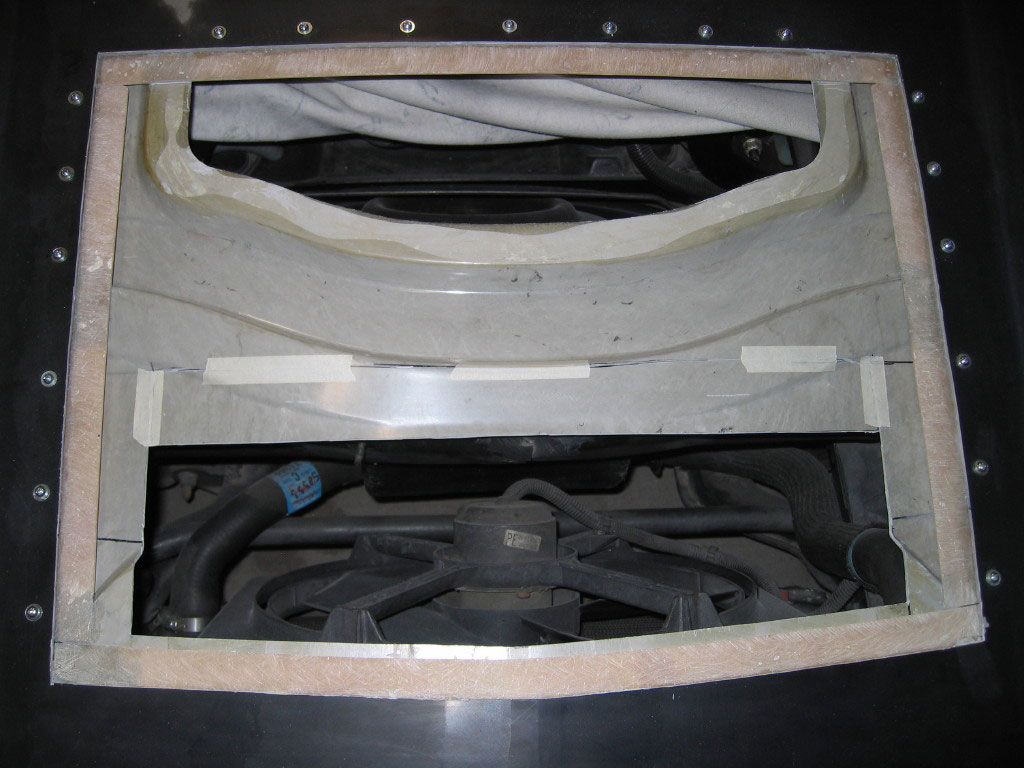
Taped in place is the piece that I should not have cut out. The vent fits fine over this and allows the bottom skin of the hood to contact the weather seal as it normally would. I will be bonding this piece back on.. 
Charlie
|
|
|
|
cptsnoopy
|
MAY 19, 01:24 AM
|
|
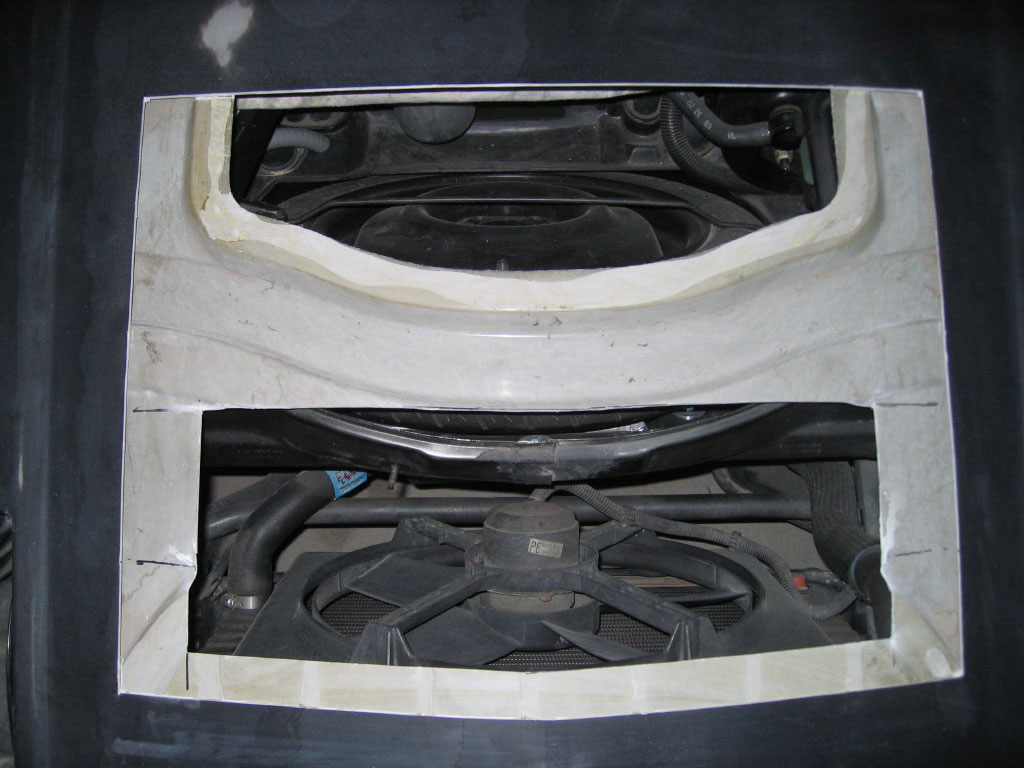
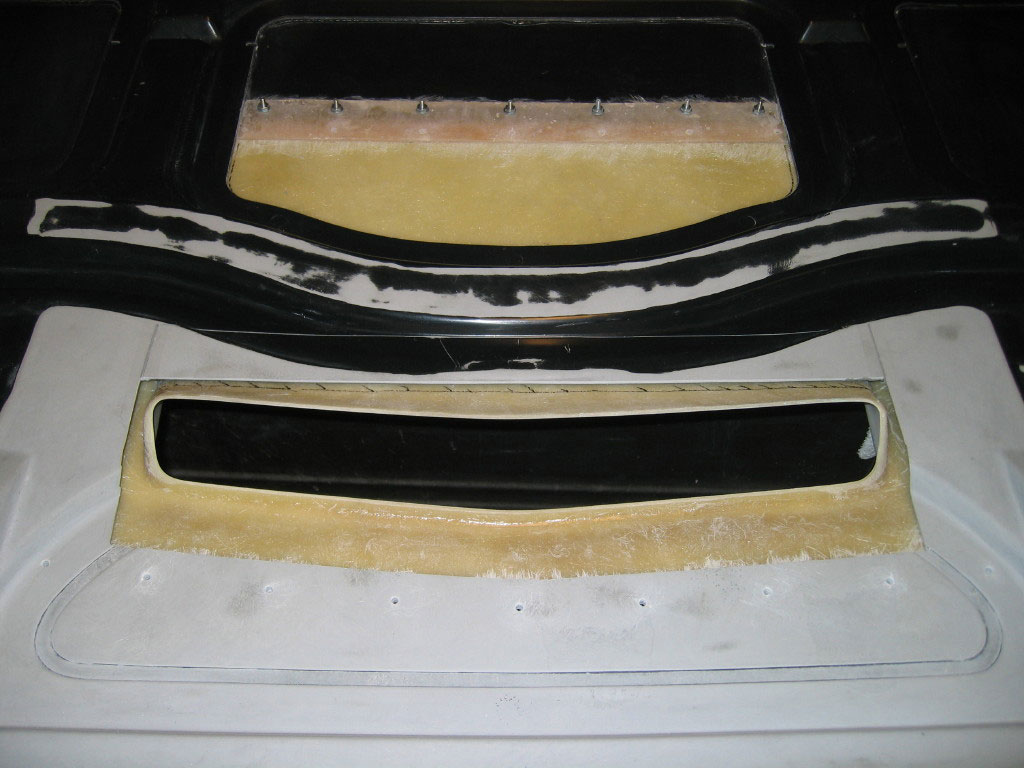
Pictures of the underside after bonding the lower skin piece back on. I am certainly doing this the hard way. (Paul would have had 10 of these done, filled, blocked and ready for paint in the time I am doing this one... ) I have a number of screws that you cannot get nuts on by hand when bonding down the vent. So I took the time to glue nuts and washers in place so I wont have to drill access holes or cut away any more lower skin.
When I get some time I will diagram dimensions of the hole I cut out. Others may decide to do it differently.
Charlie
|
|
|
|
cptsnoopy
|
MAY 20, 02:18 AM
|
|
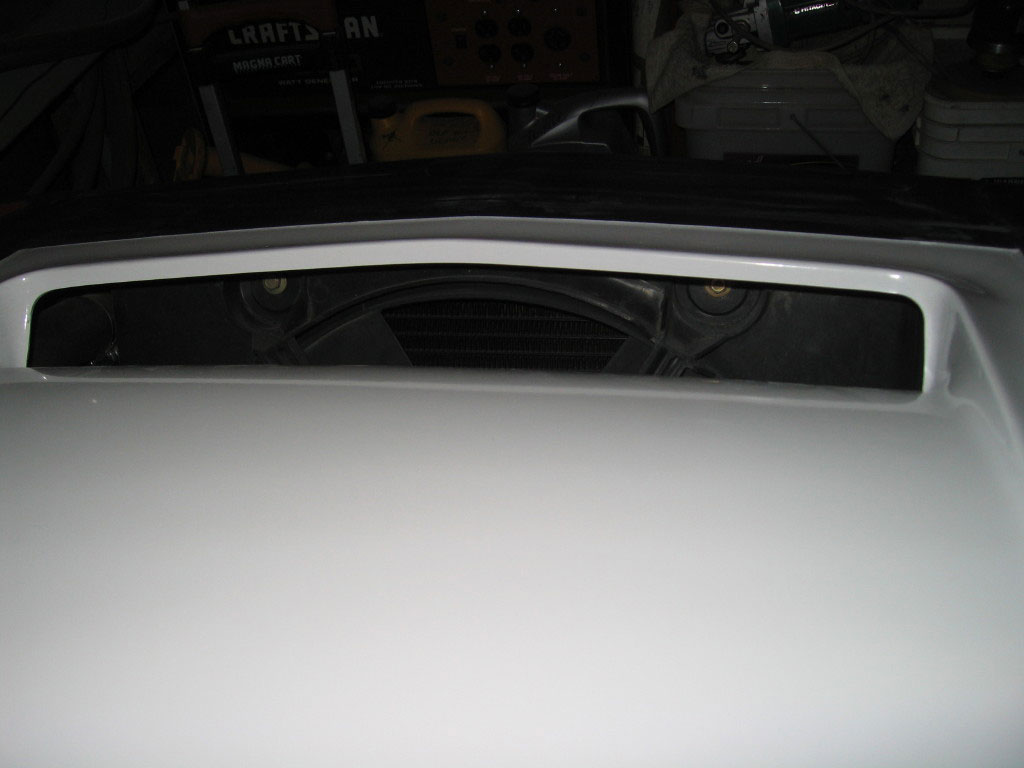
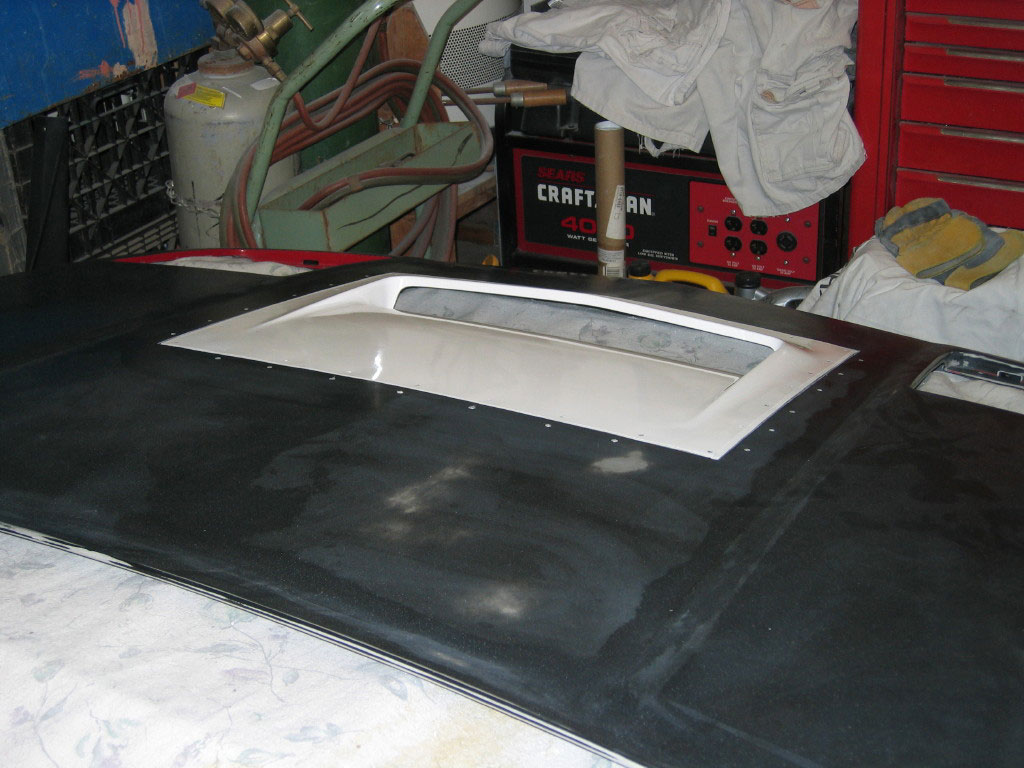
Angel Vent-v2 is bonded in. Notice the small amount of lower skin material that needs to be cut out. This works great if you don't mind taking the time to glue a bunch of nuts to the backside of the bonding strips before bonding the vent in place. It does look great though, just what I was after.
Charlie

|
|
|
|
qwikgta
|
MAY 21, 11:55 PM
|
|
looks good, I am looking at purchasing this scoop too. I dont understand the screws? Is the top portion of the skin removed, leaving the bottom portion of the hood intact? If so, doesn't the scoop just rest on top of the lower skin? if so, don't you just bond the scoop to the lower panel? I have read the instruction, but they also don't make sense. The pictures show the lower hood intact, so I don't understand the screws.
thanks
rob
|
|
|
|
RCR
|
MAY 22, 07:03 AM
|
|
@ Rob: The screws are there to hold it in position while the adhesive dries. Once set, the screws come out and the holes are filled.
@ Charlie: Looking good.
Bob
|
|
|
|
qwikgta
|
MAY 22, 01:24 PM
|
|
| quote | Originally posted by cptsnoopy:
|
|
OK, I get that they will do a great job in securing the scoop as the adhesive drys. I had assumed that when you place the scoop in the hole, it fits flush and all you need to do is put some weight on top of it so that is does not move. I noticed from this pic it looks like a fiberglass strip was added all around the lower panel. I get why you need the stip on the back portion, because when the upper portion is removed, there is no lower there to attach the scoop and it could flex in that area causing a lot of extra glass work, but what is the rest of the fiberglass all around the lower panel? Or is it just that im looking at it wrong. Again, thanks for all the anwers to this, I want to make sure I ask all the questions before I buy the scoop.
//
It looks like you have to move/relocate the overflow bottle. If so, what are your plans, and/or what did you do. Any others also move their bottles?
Rob[This message has been edited by qwikgta (edited 05-22-2011).]
|
|
|
