|
| Chrysler 3.5 HO V6 swap (Page 7/33) |

|
carbon
|
NOV 26, 08:16 AM
|
|
Awesome work man! Can't wait to see this in person... I had no idea you were this crazy when I met you last summer. 
|
|
|
|
seajai
|
NOV 27, 08:49 AM
|
|
| quote | Originally posted by carbon:
Awesome work man! Can't wait to see this in person... I had no idea you were this crazy when I met you last summer. |
|
LOL......Crazy..... I was just thinking that the other day when I was standing the garage staring at the car and going over the list of things I still need to do. I sometimes have a tendency to jump in with both feet and worry about the depth of the water once I'm in it.
|
|
|
|
engine man
|
NOV 27, 10:39 AM
|
|
|
It's only crazy if you can't pull it off but it is genius when you do make it work and i say it is gona be genius
|
|
|
|
gtxbullet
|
NOV 27, 04:55 PM
|
|
looking good!!!
at first it sounded weird, but then seeing the engine and trans...it actually looks like a pretty decent swap to do.
keep the pictures coming.
you have another follower!
|
|
|
|
chetw77cruiser
|
NOV 27, 07:30 PM
|
|
I read earlier that you are looking at the megasquirt for engine control but were not sure about COP (coil-on-plug) compatibility. If I remember correctly, the Chrysler COP has an igniter built in that is controlled by a TTL signal. If so, the Megasquirt3 and MS3X add-on boards will control sequential injection as well as ignition. Add in a megasquirt GPIO board or microsquirt with appropriate Megashift code, you have a complete system that will control your engine and trans combo. Communication between the two is by can bus, so only a few wires to string between the two. If you need any help or more information, let me know.
Keep tuning my friends.
|
|
|
|
seajai
|
DEC 01, 10:40 PM
|
|
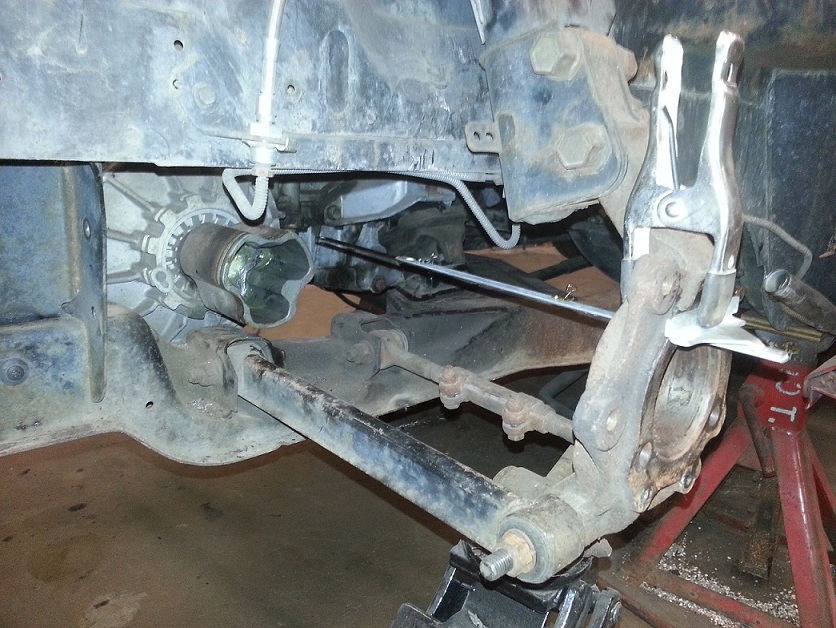
It was a busy week at work so the garage was silent all week, but got a little more accomplished today. I wanted to know for sure what my offset was going to be on my axles, so I re-installed the suspension and used a jack to compress it to ride height. I used a T-square clamped to the knuckle to extend the axle center line back to the transmission, the offset comes in at 2.5". I figured out the approximate pivot points of the axle shaft in the joint and measured the length for the axle. The right side comes in at 13" long, figure that into the 2.5" offset and you get an 11 deg C/V joint angle. The left side axle is 18" long which gives a 7.5 deg C/V angle. I'm thinking the 11 deg angle on the rt side is going to be ok, the front C/V joints on my 1 ton Chevy pickup run at about an 8 deg angle, and they have 216,000 miles on them.
I also wanted to know the weight of the 2.8 eng/trans as well as the 3.5 eng/trans. I was able to borrow a hanging scale from a neighbor who works for a crane outfit. Both engines weigh in at just a little bit over 550 pounds. So even though the Chrysler engine is larger than the 2.8, the all aluminum construction evens things out.
Got the engine back out of the car now and started working on alternator and A/C mounting. I'll have some pics of that soon.[This message has been edited by seajai (edited 09-28-2023).]
|
|

|
Fierofreak00
|
DEC 04, 07:18 AM
|
|
|
|
|
seajai
|
DEC 04, 09:12 AM
|
|
|
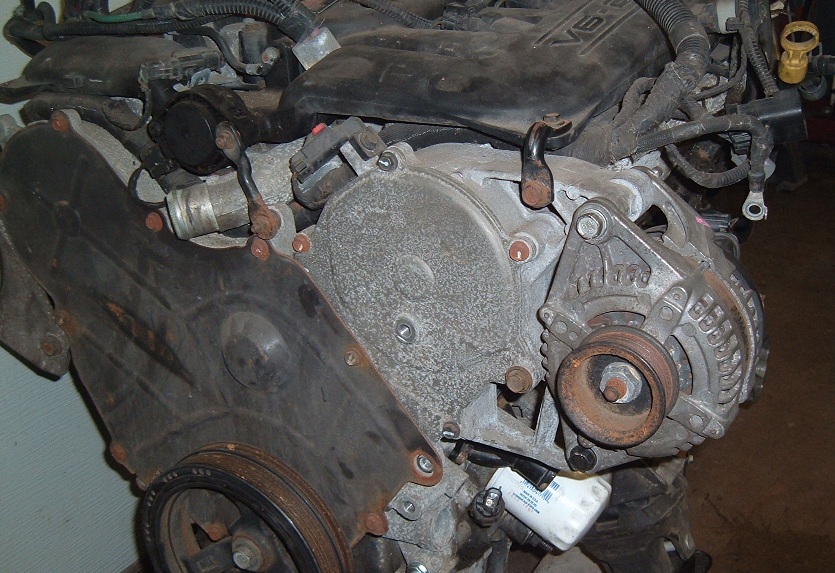
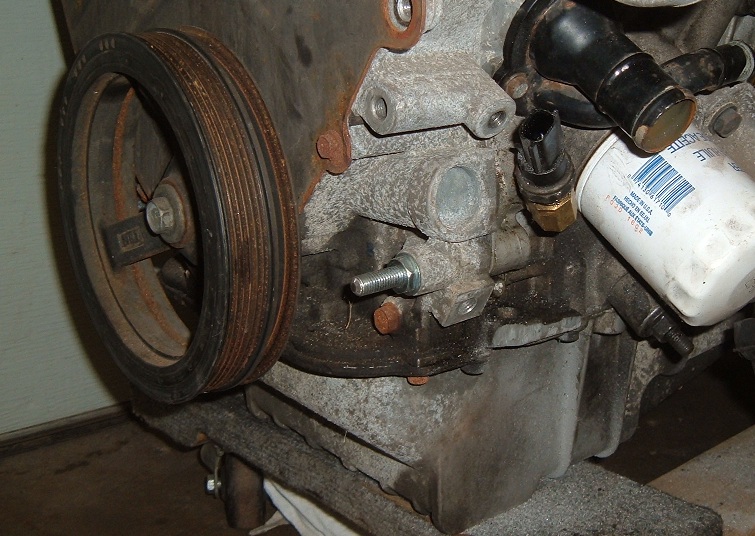
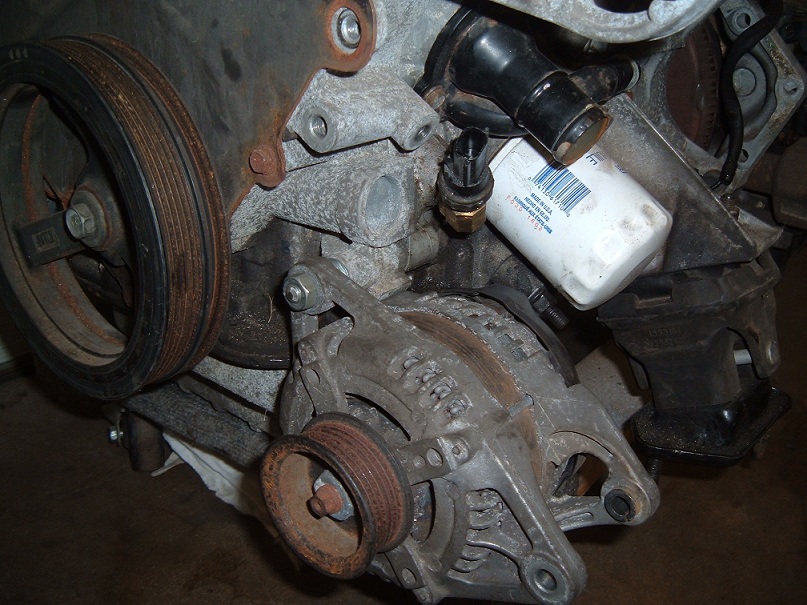
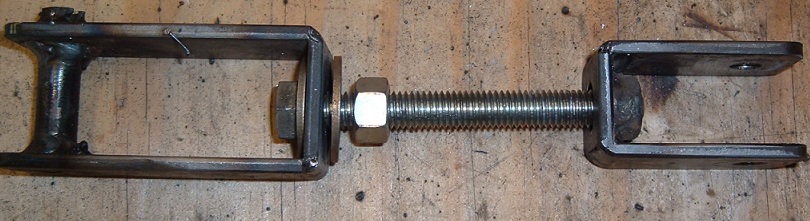
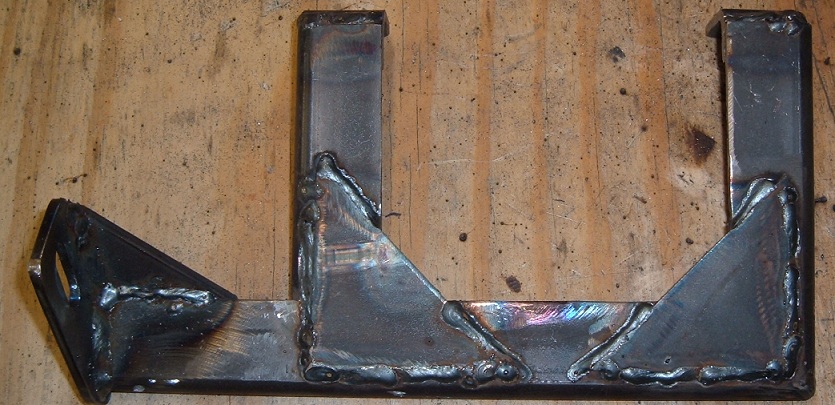
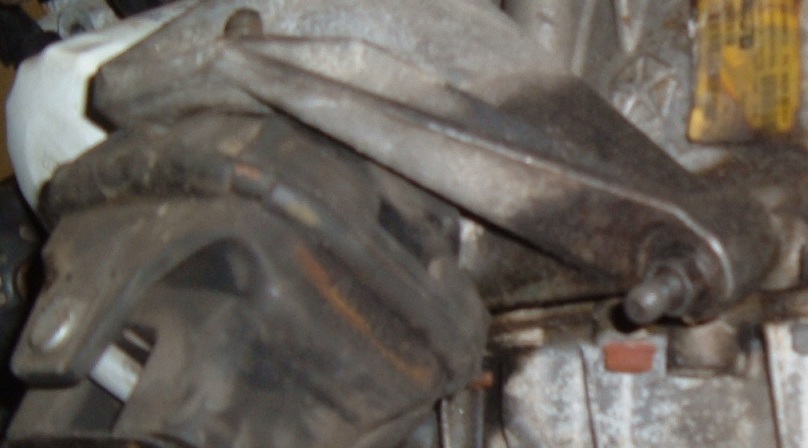
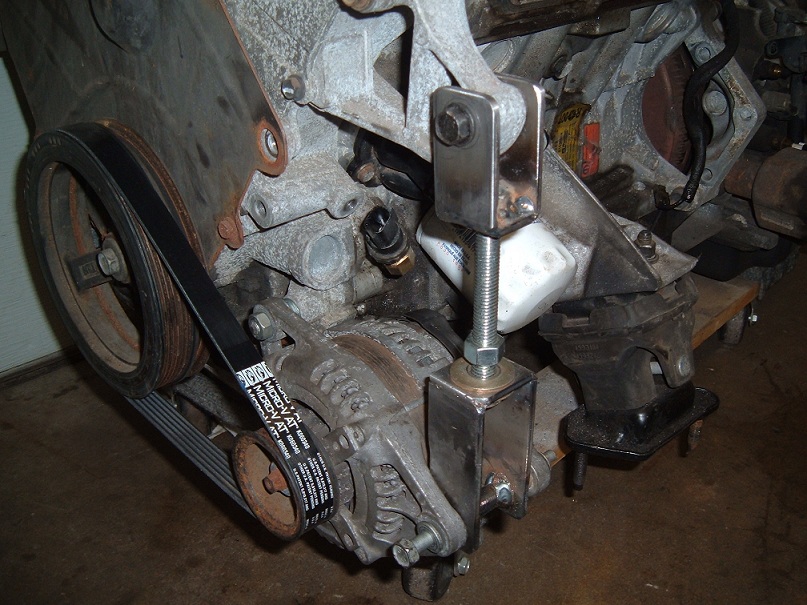
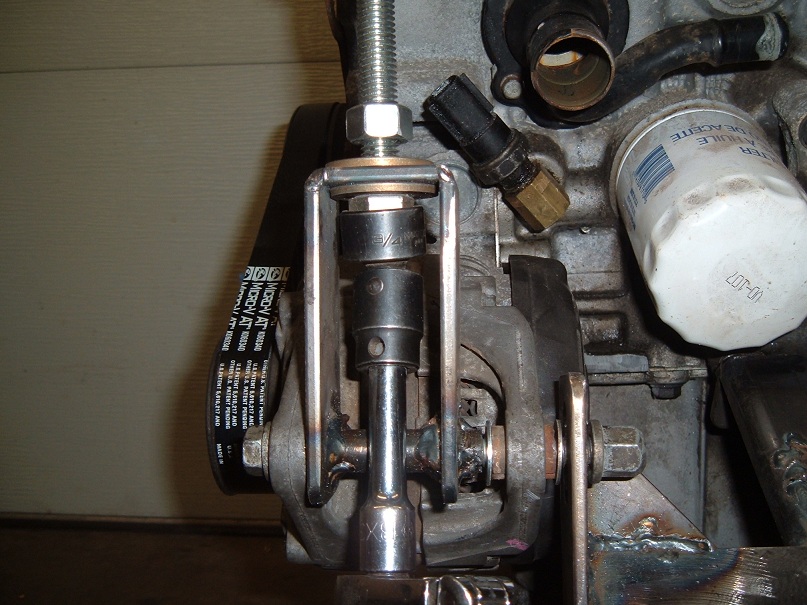
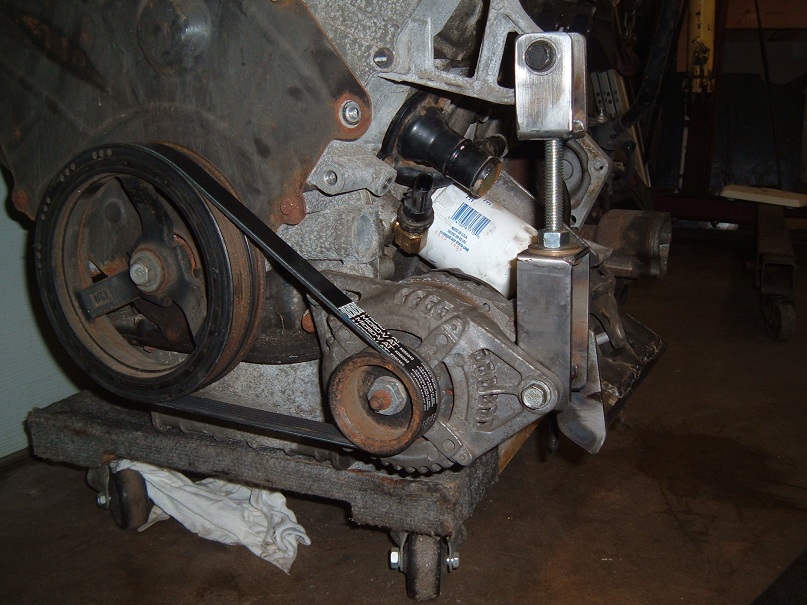
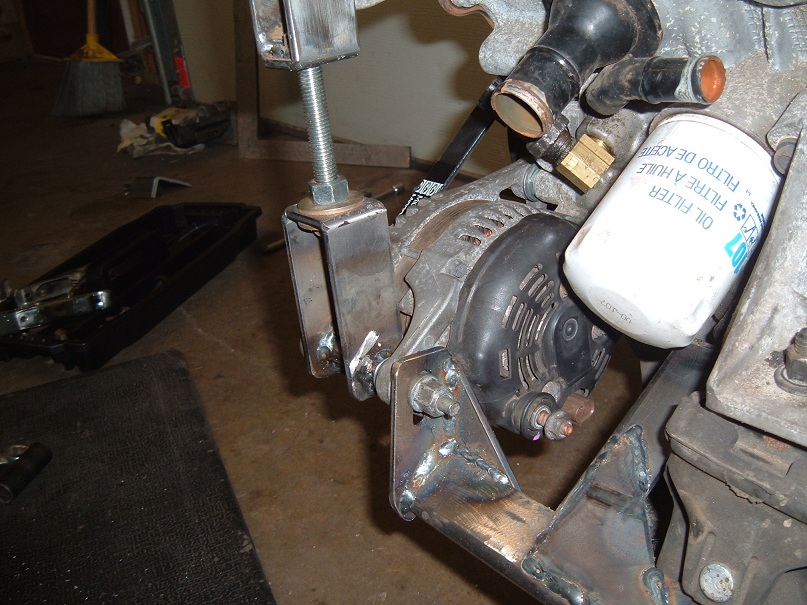
Still working on mounting the alternator down low and in on the block. I was able to use an existing hole on the timing cover for the pivot point, and I'm half way through fabrication on a bracket for the other side. Hopefully have some pics soon.
|
|
|
|
seajai
|
DEC 08, 07:26 PM
|
|
|
|
|
BV MotorSports
|
DEC 08, 08:45 PM
|
|
Now someone needs to do a Subaru H6 swap! 
|
|
|