
 
     |
| Trinten's SBC/F23 build - The work has begun! (Page 69/76) |

|
Trinten
|
APR 01, 11:49 AM
|
|
Another productive weekend of tuning the engine and the transmission. The transmission tune has been a little challenging because of the torque converter and camshaft (for different reasons). Mike says because it's a little 'loose', that we need higher RPM to keep some of the chugging down (it would shift into third, then we'd feel this odd shake that Mike thought was the TCC locking up in error, it wasn't). Changing the shift points has alleviated most of those issues. Downside is 4th gear won't come on till about 65 (for now), and the TCC won't kick in till about 70. If we still get shuddering with the TCC, he'll just leave it turned off for now, until we can send in the torque converter to get it adjusted. This also means my MPG is going to suuuuuuuuck.
Engine tuning for driveability is pretty much done. We gradually raised the RPM cutoff, and upped the boost a tiny bit (capped at 7psi right now). Startups are still an issue, but we noticed something odd when we were tuning for that. When starting it, I had to give it a little gas (RPM up to around 1800) for it to stay running. The FAST was reading 0-1% for the TPS! That's not right...
Here's where it gets stranger, after about 30 seconds I slowly let up off the pedal... as I do, the TPS reading creeps up! No pedal, FAST things the TPS is at 2-3%. When driving it, TPS seems to read correctly!! So this is what I think right now.

I know we replaced the IAC. I thought we had replaced the TPS as well once already because the original one wasn't sending a signal to FAST at all. So next weekend we're going to ohm out the TPS wires. If they're all good, I'll buy a FAST TPS to see if that solves that oddity.
We also did some testing and tuning with the brake proportioning valve. After that was done, Mike did a brake launches in a deserted parking lot. He was surprised when the rear tires broke loose and did a burnout, given we have those z06 wheels and Nitto 555 tires on there, and all the weight sitting over the axles. So he's curious to see how tough it'll be to get it to hook and launch well at the track as we turn the boost up. I might have to get a set of slicks sooner than expected. He tried explaining to me that most of your 1/4 mile or 1/8 mile time is made in the first 60'. If you don't do well in that space, it's hard to make up for it.
I also have a few videos I need to get off my phone so I can post them. This isn't the montage that Mike was working on, that isn't done yet. Just stuff I recorded while in the passenger seat.
|
|
|
|
Trinten
|
APR 07, 12:09 AM
|
|
Another productive weekend!
The new FAST TPS went on, we did the TPS learn sequence, and immediately saw some improvements with cold and warm starts. Hot starts are still a little twitchy, but it's much closer now.
We noticed a behavior Mike called "trailer hitching" at certain RPMs when keeping an even speed. We then did more transmission tuning, and it's running much smoother now. We reconnected the wire for the torque converter lockup, and didn't feel the shuddering we had before, but we didn't get on the highway much today. We also turned up the boost a little more, we're around 8psi now.
Mike is fairly happy with the brakes. He took the car out to an empty spot and tested heavy braking to see how the car would behave - he was worried about the rear end swinging around. He did have to do a little corrective steering, and said he wanted to look into options to increase the braking for the rear. So I'm going to look into brake caliper upgrades the Corvette guys run. Given that I have the S10 brake booster upgrade already, I hope those two things will work out well. And we have the adjustable proportioning valve if the new rear calipers are too much.
We have work to do up front to push more air through the radiator. I have a tendency to think farther ahead and get caught up in my own concerns, so I had bounced my ideas off FieroGuru who pointed out some ideas. When I brought them up with Mike, turns out he hadn't overlooked it, just had it a little further down his list since the engine was staying at stable temps right now. I was thinking ahead to what would happen once we have the air-to-water running and A/C. For under the car Mike wants to setup a hinged plate with rubber sides, so if I bottom out on anything, it won't be as likely to get ripped off the car or permanently smashed upwards. The rubber sides will let it 'flap' on the hinge and settle back into it's proper spot.
We also noticed the intake has some resonance, very similar to what my last intake was doing (the whoooshing sound goes away when Mike put his hand on it with a little pressure, same behavior that FieroGuru chased down on my SBC and solved with a clever internal mechanism). So I might see about attaching some kind of bushing to the underside of the decklid so it puts a little pressure on it.
|
|
|
|
Will
|
APR 22, 03:39 PM
|
|
| quote | Originally posted by Trinten:
-Replace the orifice tube and pull vacuum on the AC system to make sure it holds.
|
|
Use a variable orifice valve instead of a fixed orifice tube. That will give better AC performance at low engine speeds and low vehicle speeds.
|
|
|
|
Trinten
|
APR 22, 09:26 PM
|
|
Thanks Will.
I remember reading about them before and being a little surprised at the price difference. I am about 80% sure that's what I bought. At least once. I say that because I've found like, 4 orifice tubes as I've cleaned up and organized things in my garage. I need to check the part numbers.
This weekend we didn't get much done on my car thanks to the weather, Mike having an A/C issue for his house, and he was installing a motor into one of his other Grand National projects that needs to be done and ready to go within the next few weeks.
He did finish what he calls the "hater pipe". The single outlet tube at the replaces the mufflers at the v-band. It's to remove exhaust restrictions for the track. You can definitely hear more of the cam-chop when that is on.
I'm glad I have a few of the headlight control modules. I think mine died. Or the janky headlight switch in the beat-up instrument cluster we stuck in there for now died. CowsPatoot is going to be out there way in June before Carlisle, I asked if he would help with some of the stock Fiero stuff, since he knows a bunch of this stuff by heart. So I'll be asking him to help with stock internal wiring (like the headlight situation, the "power trunk release / emergency brake" safety feature (the donor was a manual), and working with Mike to get a few more gauges working (like the speedometer) before Carlisle if possible.
|
|
|
|
Trinten
|
MAY 28, 12:46 AM
|
|
Cold start up tune is getting closer! Sometimes it won't quite stay running on the first attempt, but will on the second.
Some more cold tuning is still required, if you put it into gear right after it starts up, the load is enough to make the engine stumble and die. Which is frustrating.
Still tuning shift points. We thought we had it all ironed out, then the TCC started doing silly stuff again. So we need to see what we missed.
Good news on the headlights, the module isn't dead. When that motor is winding up, it moves fast enough that it "tightens" itself at the top. This past weekend we were doing some testing with it, and when the light didn't go down, I went to turn the adjustment knob, it was pretty stiff. Once it was loosened, it ran down on it's own. If anyone has thoughts on that, please let me know.
Also still dealing with the start-up-single-swish-phantom-wipe. Chug was out visiting and figured it was the turn signal assembly, but I told him we replaced it and using the turn signals never triggers the phantom wipe, only once during start up.
We got the horn working - sort of. The new relay was put in, fuse under the dash replaced, put the spring and pin under the horn button (I'm apparently missing some plastic piece? If anyone has an extra one to sell or a part number, please let me know. We got it to work, but it's a band-aid). When we hit the horn, the relay buzzes, then one of the horns buzz, there's a delay of up to a few seconds, then the horns sound off. Voltage at the horn relay when the key was off was only around 10.5v. Reading at the battery had us at 12.1v. New Relay on the way. Again if anyone has any thoughts, please let me know.
Mike is working on routing the hose for the intercooler and placing the motor. This upcoming weekend we need to make sure the wheel well covers won't interfere with where he wants to put it. We're repurposing an old electric water pump that was on my last Fiero, so I'm sure there are smaller options out there if we need something different. He also bought a different heat exchanger for me in trade for the one I originally purchased a few years ago, we just don't have the 'stacking space' for it. This one is shorter. It might still be a challenge. We're looking at creative options. Hey, if Bugatti can cram like, 16 radiators into the Veyron, we'll figure this out.
I reminded Mike that I wanted to get all the A/C hoses done and connected so we can make sure there are no vacuum leaks before we fill the intercooler system, just so we're not draining it later and potentially having to move the car around to get it to a dry patch of workspace.
Also! I found my directions that came with Danyel's 3rd Brake Light LED. I'll scan them if anyone needs a copy. I didn't see the instructions for installing it on his sale thread. To install it not only requires breaking/disassembly of a stock bulb then soldering wires (both are no issues), the panel mounts in the housing using hot glue... that part I was a little disappointed in. So I might sell it and buy one of the LED options from SuperbrightLEDs.com (where I had gotten the LED bulbs for my last Fiero's brakelights and they were awesome. There is a side-by-side picture someplace. Speaking of which, I need to find those.)
Anyone want to give any feedback on long term use of Danyel's LED main brakelight kit? I have that too, also not installed. I really liked the look of it, but not sure if it also is hotglued into place. Also wanted to see if anyone has had any issues with individual LED burnout or anything. I really don't want to install them with my restored originals or with either of my Keith Goodyear sets and then have it start to have issues after a year or two - requiring unsealing the assembly, and removing the (possible) glue along with the LEDs).
My only major concern with driving it to PA right now is getting the airdam done in time. All materials we should need have been bought. It won't stop me from getting up there, but might require additional stops while I give the electric pump and fan time to cool things down. When the outside temps were cooler, we were pushing around 210-215 degrees after being on the highway for just about an hour. Not great stuff.
OH! Last question. Can anyone educate me on how to adjust the sunroof lever? On my last Fiero, when you pushed it into the 'up' position, it stayed there and required clear intentional effort to bring it back down. This one, we hit a bump and it flops down.
Thanks guys!
|
|
|
|
Will
|
MAY 30, 12:58 PM
|
|
| quote | Originally posted by Trinten:
Good news on the headlights, the module isn't dead. When that motor is winding up, it moves fast enough that it "tightens" itself at the top. This past weekend we were doing some testing with it, and when the light didn't go down, I went to turn the adjustment knob, it was pretty stiff. Once it was loosened, it ran down on it's own. If anyone has thoughts on that, please let me know.
|
|
The Storm Trooper left headlight does that on the "down" end of travel. It hits the stop hard enough that, if it's been sitting for a while, I need to manually crack the knob loose before it will drive itself the rest of the way up.
|
|
|
|
Trinten
|
MAY 30, 02:36 PM
|
|
|
I was told there was some sort of internal limit switch on the 2nd gen motors that could be set to tell the relay when they were at the end of their travel. When I installed rodney's motor upgrade/rebuild parts, I don't recall seeing any such mechanisms. Is this possible? I thought that was only with the first gen motor/setup?
|
|
|
|
Trinten
|
JUN 02, 08:27 PM
|
|
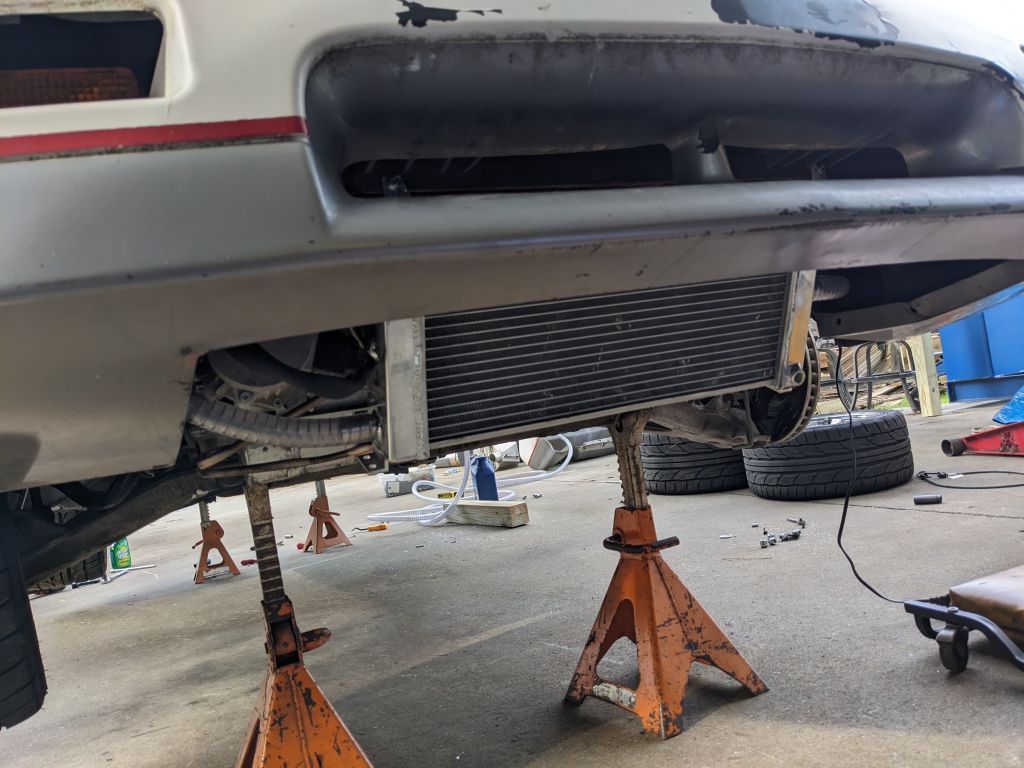
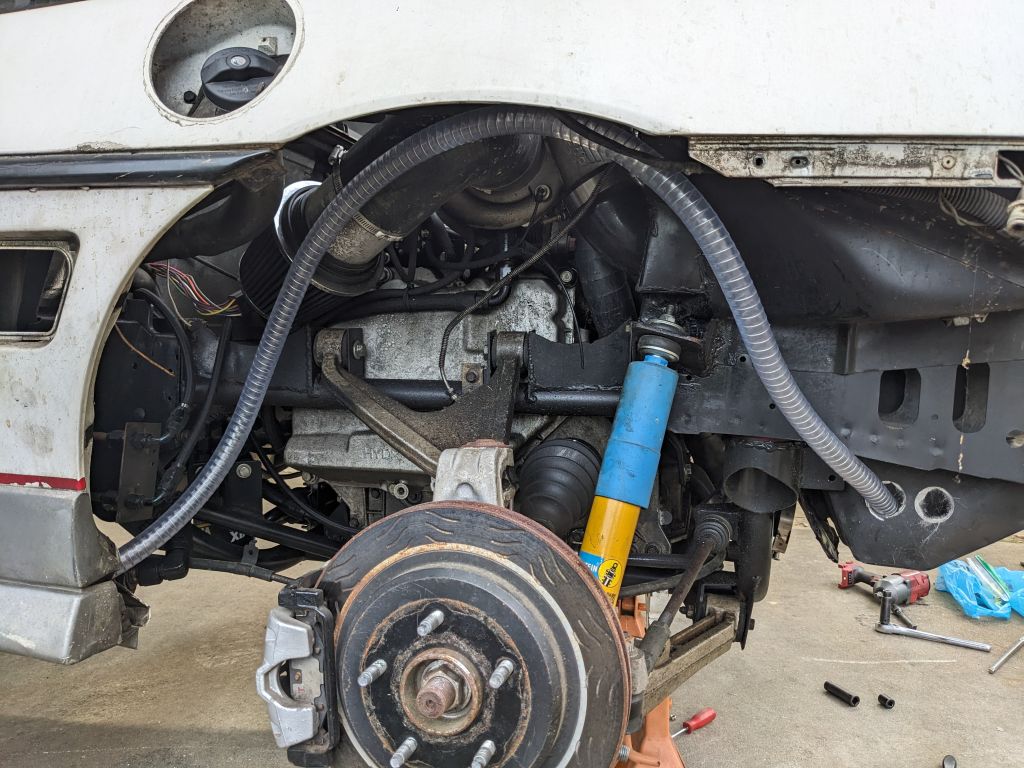
This weekend we worked on mounting the heat exchanger (Mike called it an "after cooler"). It required reworking some mounts up front, and moving the transmission cooler, so we need to remake some of the lines going to the transmission cooler. Even though it looks low in this picture, it's not lower than the radiator, and the front cradle is still the lowest point up front. It does mean I need to watch for sharp transitions when going down a hill, though. There's one gas station here I'll need to be careful with! lol
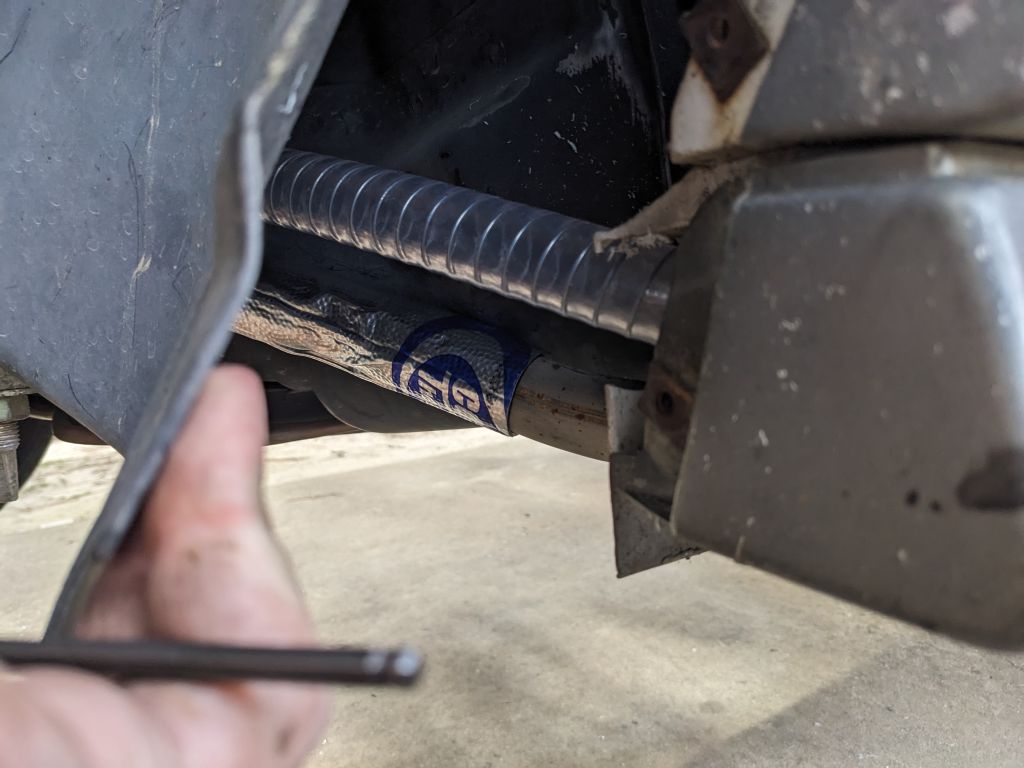
We're running the intercooler hose behind the rocker panels on both sides. Some pictures to help illustrate the rest:
As it comes out of the rocker up front, it's following the heater tube for a little bit before routing a different path.
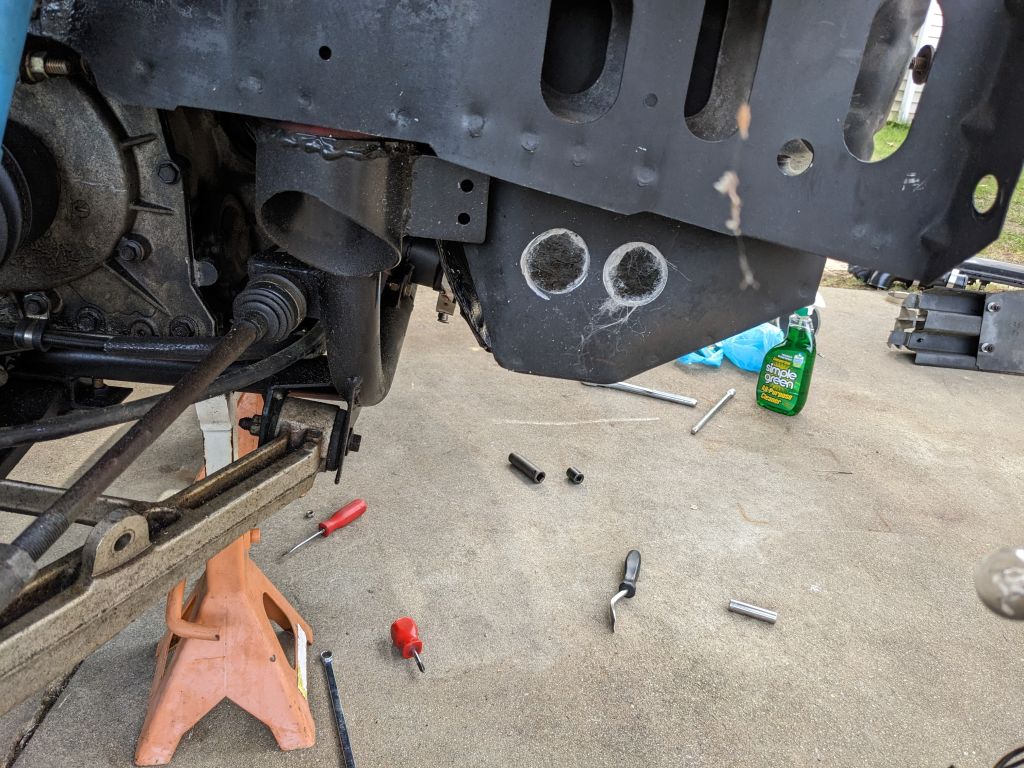
Is then runs down under the rocker panel. We took off the rivets and it fits in there nicely. There is a metal lip in there that is easy to cover up. We cut a hole in the plastic near the front and it will be closed up with a snug rubber grommet and a little RTV if needed.
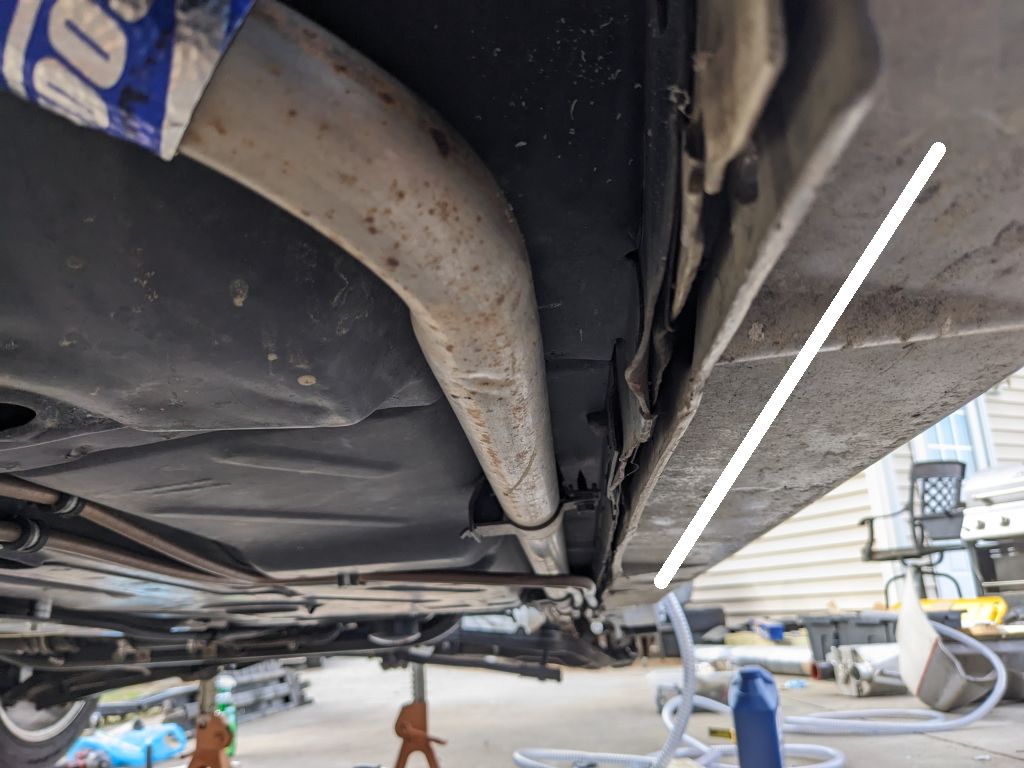
It then comes out of the rocker in the back, and will go up over the wheel well cover. Same as in the front, the hole we cut in the rocker will be sealed up with a grommet and if needed, a touch of RTV.
The intercooler cage holds the intercooler about 5 inches off the floor of the trunk. So we put holes in the side of the trunk where the hose will run in and out, and again grommets will be used.
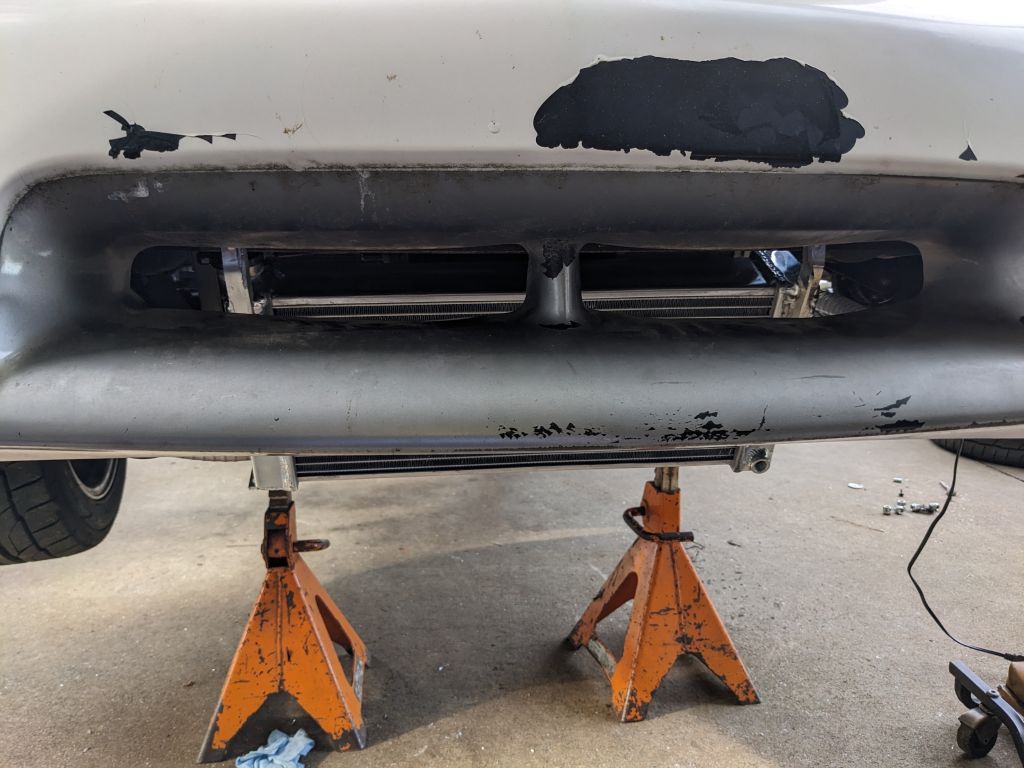
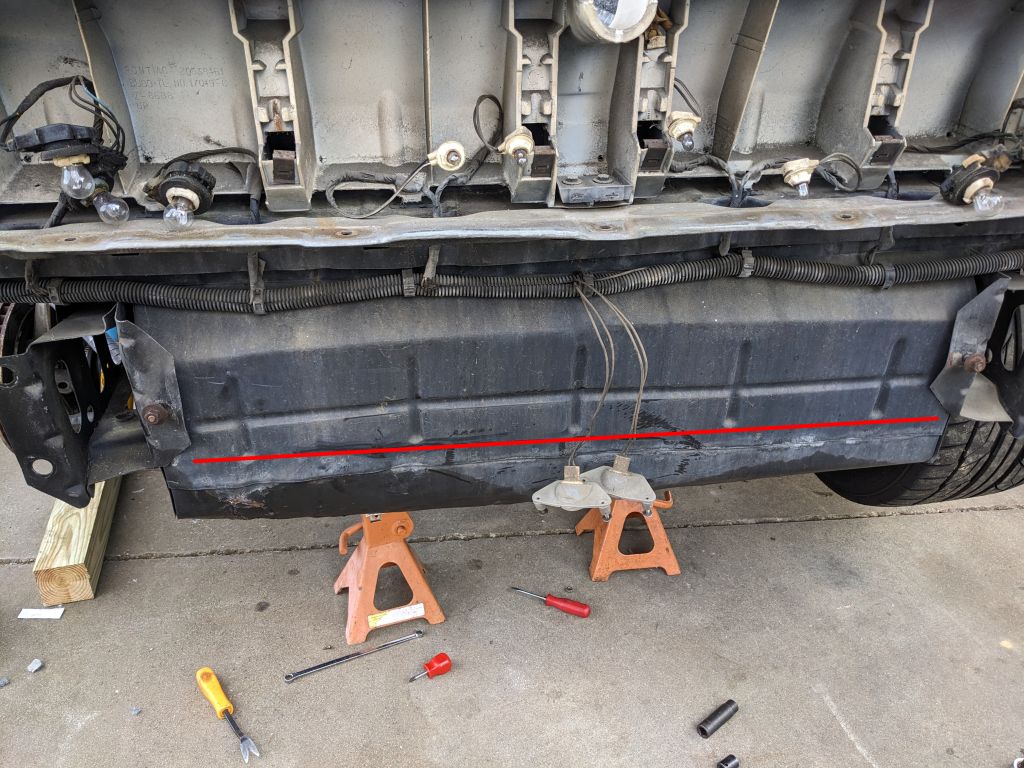
When it comes back out, it'll circle around behind the bumper, it'll follow the "tunnel" on the bumper, where that red line is, then over the wheel well cover again, and through that rocker panel pocket, etc etc.
After we finish getting this setup, we're going to move onto the air dam!
And cold start is getting closer. Not *quite* there, but getting closer. Warm start is kind of pain still. Hot start is great.[This message has been edited by Trinten (edited 06-02-2024).]
|
|
|
|
Trinten
|
JUN 08, 11:45 PM
|
|
Intercooler is all setup. With the routing of the hose and the various heights of things, bleeding the air out of it all was a little tough. Overall it took us way longer to get that done today than we thought it would. So we have not been able to start on the air dam yet. I also replaced the orifice tube before we put the reservoir back in.
We took it for a drive, and on the highway it gets dangerously warm, and this is just cruising around without A/C. We are also still having an issue with the trapdoor in the fuel tank sticking. At around 3/4 of a tank, the pump started making it's "I'm out of gas" sound. So we pulled off the road before it died (with only a few seconds to spare, thankfully we weren't on the highway).
We managed to coast to an orientation where the nose was higher, to let gas push back against the trapdoor. After a few minutes the car would start, but die within seconds, so it wasn't pushing the door open. I went across the street and bought a 5 gallon gas can, filled it up to about 4.5, and walked back over and started filling it up. This filled the tank up completely (with maybe a few pints of fuel still in the can). The extra weight of the gas coming in (it goes into the center section, behind the trapdoor), knocked it open, as the car started up without any issues right after that and we got back to Mike's.
I don't know if he'll have time to drop the tank and try to figure out a solution for the trapdoor. For the next tank revision I suggested to use a non-moving "sieve" as the trap door. The viscosity of the fuel slapping up against a bunch of tiny holes will likely slow it down enough and keep some fuel at the back until forces change and gas is being driven to the back of the tank again. Mike didn't comment on this idea, so I don't know if it's a good idea or not. I also suggested trimming up my 'lower wedge' (the ~1" that comes off the bottom of the tank on an inward angle, making it more of a trapezoid shape when looking at it from the back), and making that go from the 'wedge' to an upward angle towards the nose to help push gas back. It'd reduce the capacity by maybe a quarter of a gallon. Again no comment from him on the idea. That usually means he's at least considering it.
I did discover I ordered the wrong bushings today to put around the hoses going into/out of the trunk. We worked up a temp solution, but It's not great, so I need to order the right stuff.
Will the car still go to Carlisle? I'm not as optimistic right now. If we finish the air dam, we still have the trapdoor getting stuck. Granted I have a 5 gallon metal "jerry can" that I was going to put in the trunk anyway, but I've got a fear of being on a stretch where there isn't a gas station for longer than I can make it if the tank acts up, even with the emergency fuel.
I am going to price out a car hauler. I can drive it around locally once it's up there, so it'll get to the show under it's own power.
To end on a positive note, Mike got the cold start dialed in. Today each time we needed to start it when it was cold, it fired right up on it's own. Still need to work on the 'warm start', that's still a little twitchy.[This message has been edited by Trinten (edited 06-08-2024).]
|
|
|
|
Trinten
|
JUN 13, 08:49 AM
|
|
Mike spent a few days after work mocking up and testing out an air dam. The throat started below the bumper 'nostrils' to be able to grab more air, and then went back, boxing everything up. He took it for a drive and we have mixed results.
Cruising on the highway is now stable (though the ambient temps were still only in the low 80s). However when coming off the highway, if needing to come to an immediate stop, the heat soak from not moving caused the temps to climb up to 240. Once he was moving, they'd drop back down.
Currently the main fan and the water pump are set to run at 100% all the time. This is because I've had a tough time getting the controller for the BMW pump to accept the custom program I was trying to put in (BMWs ramp up their pump speed as needed. I wasn't happy with any of the preset options. For example some had the pump only running at 5% until a certain temperature was reached. Well, the heat sensor is in the front, engine is in the back... I wanted the pump to start at 20% flow, then ramp up to 100% by the time the coolant hit 180 degrees). The company's tech support was really responsive in trying to help me figure out why it wasn't setting correctly. Since I want to get a second one, they said they would pre-program the setting for me.
I digress. Mike and I talked about next steps. The headlight flaps are currently still off, so hot air has an easier time escaping. After Carlisle we'll likely cut a window in the hood in the radiator area. I'm also going to talk to him about moving the secondary transmission cooler. There are units out there that come with their own fans, we just need to find a place to package it (and run another key-on circuit). The where is going to be the toughest part. We're out of room in most of the obvious places. The ones that have some room left are in or right next to the engine compartment, which is a boiler room. Maybe under the front bump on the passenger side? Basically opposite of the headlight control module. It'd mean cutting some breathers into the bumper, but eventually I'm getting a bunch of new body work done, so I'm not concerned about that.
Last option is to pull the current radiator and ship it to one of those places that do custom radiators, with explanations of what can and can't be changed (for example, some 'depth' can be added, if they make it a little shorter, but all plumbing points have to stay in their current spot). See if they can come up with something that has a better cooling capacity. I will also ask Mike about cutting a few pass-through holes in the metal shroud holding the fans on the back of the radiator. That way at highway speeds, the air will have more channels to push through.
I did call AFCO and asked them if they had a better fan/shroud solution for that radiator (it all came together) they said they didn't. The guy I talked to asked for some details and I think at first he thought I was kidding when I told him what we had done. I told him I wasn't the only one jamming LS4s and turbochargers into Fieros. It was a fun conversation.
We also haven't had time to figure out how to mount and power my "exhaust fan" for the engine compartment. I have a Spal fan that will fit on the underside of the vent. Mike needs to modify the vent (likely welding on some nuts) so we can mount the fan to it... and of course, get some Key-on power to it. I figure something that's actively pulling air up/out of the engine compartment is going to help.
If anyone has any other cooling ideas, please let me know!
|
|
|
|