
 
     |
| The Miura project begins (Page 66/84) |

|
kevin
|
JUN 06, 07:33 PM
|
|
Archie, you are a true legend! 
Cordially,
Kevin
|
|
|
|
RCR
|
JUN 07, 09:05 PM
|
|
Amazing build, Archie (and crew). It's been a pleasure following it.
You do realize you will have to change the title of the thread to "The Muira project - start to finish".
Bob
|
|

|
Sofa King
|
JUN 08, 05:11 PM
|
|
|
The interior? WOW... I just slipped on my drool...
|
|
|
|
whodeanie
|
JUN 08, 09:39 PM
|
|
this car is even better in person. we got to Archies thursday am and got to help out a little on this car.
my hat is off to all of you, Archie, Rob and Chris
it was great to see all of you again. I look forward to my next visit.
D.
|
|
|
|
Archie
|
JUN 14, 09:24 PM
|
|
We're back to working on the odds & ends we got to do.
The biggest thing is the door locks.
The ones we ordered on EBay (the expensive ones) did come in. As anyone who's built a car like this can tell you, many times using original parts is not as easy as some would think.
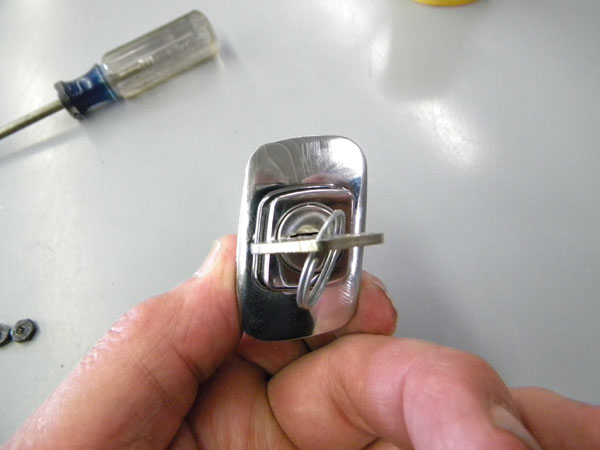
Here's what we've got so far......
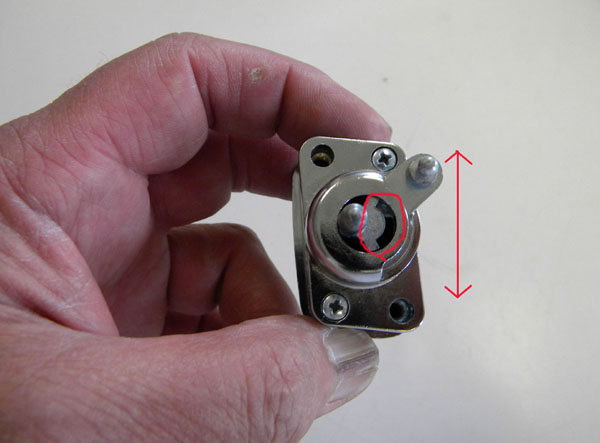
On the new locks, we were hoping that pushing in the button was going to move the lever on the side of the lock up & down.
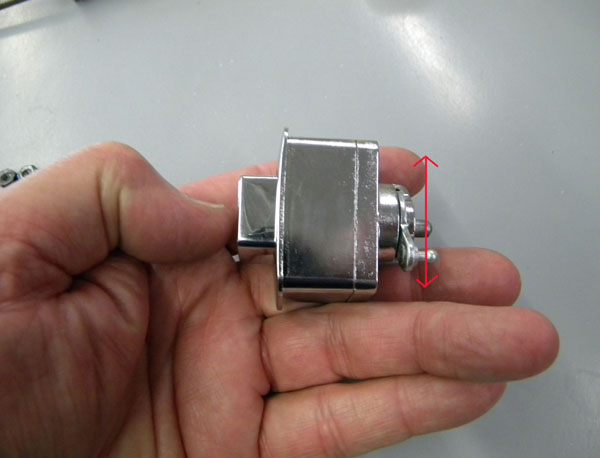
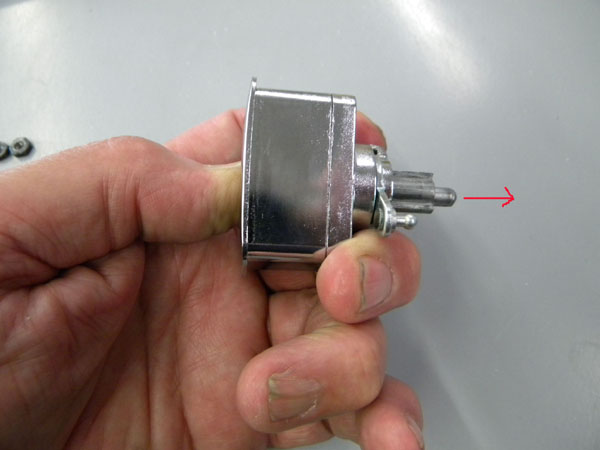
But, instead, pushing in the button extends the rod out the back of the lock.
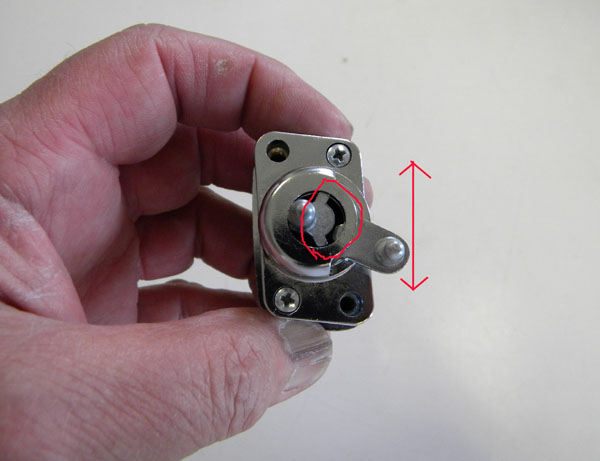
We were also hoping that the lock it'self was internally locking. In other words we were hoping that when the key was straight up & down (unlocked) the button would push in & it does that. BUT, it pushes in no matter what position the key is turned. We were hoping that when the key was turned horizontal that it would lock the button so it wouldn't push in...... NOT the case.
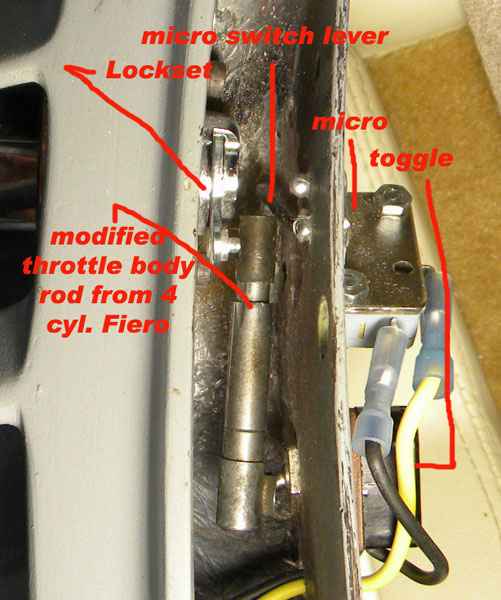
As it turns out, on the real carturning the key moves the lever on the side of the button assembly. The action moves a tie rod that connects to another device ..... see part numbers 4126483 & 4180040 on the top of this page http://www.miuraworkshop.com/tavdoordetails.html_ (http://www.miuraworkshop.com/tavdoordetails.html) The actual locking takes place in that device & locks a lever sticking up from it. This lever extends up behind the buttons we have & prevents the button from being pushed in when this device (4180040) is locked.
As you may recall, doors on cars back in the '50's & '60's did not lock from the inside. This means that even if you had it locked from the inside, it would still unlock & open when you pulled the inside door release lever. This function is accomplished on these buttons, when you turn the key to lock the lever in the 4180040 device & you remove the key. In these pics you can see that the lever is free to move up & down without the lock cylinder (key) being turned. You see that once you've locked the door with the key, the actual locking is in the 4180040 device. So if you have the locks engaged then the action of opening the door from the
inside turns the key slot vertical (if it's not already there).
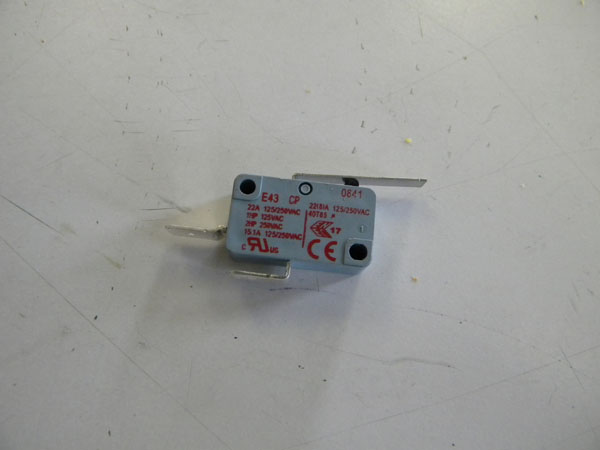
This is what we are thinking now.....We are going to have to convert these button assemblies to electronic use with the pushing in action of the button activating a micro switch to pop the door open & as a locking device, we are planning to use a toggle switch that will be activated on & off by the lever on the side of the button. The toggle switch will turn on & off the power to the micro switch.
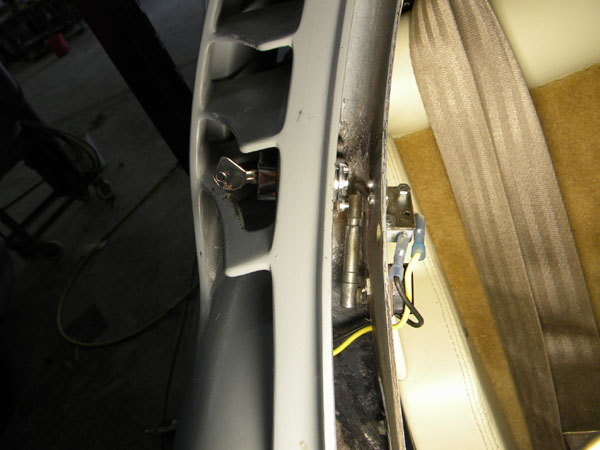
These pics of the fitting of the button as of the EOD Friday. We have to keep the lock assy. as far back in the door as we can so that it clears the back edge of the window as it goes up & down.

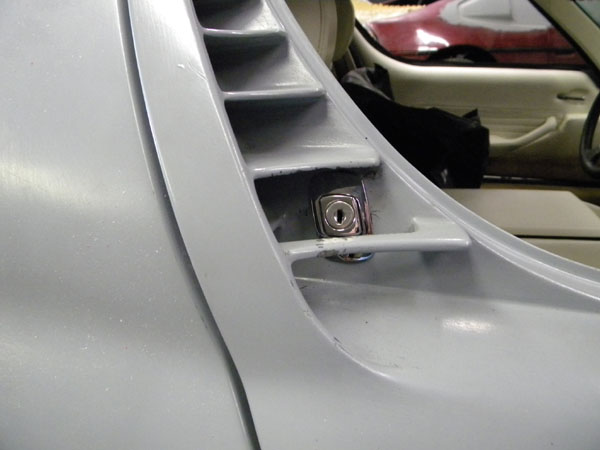
This one is looking down into the window channel with the window & dew wipes removed.
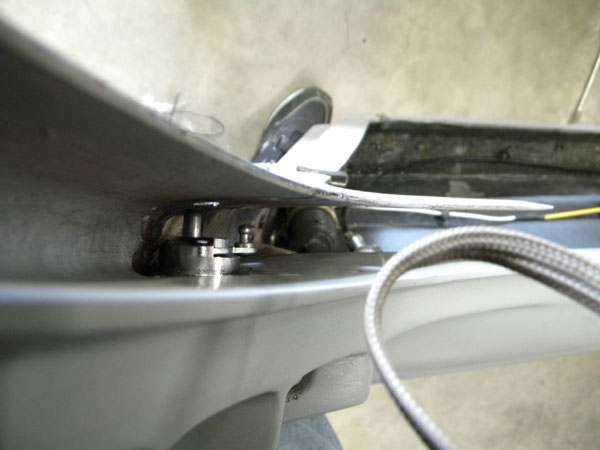
These buttons will have to activate a micro switch to open the door electronically. And we will have to connect the locking lever on the side to a toggle switch to turn off & on the power to the micro switch. Today, we figured out how exactly we were going to do that.
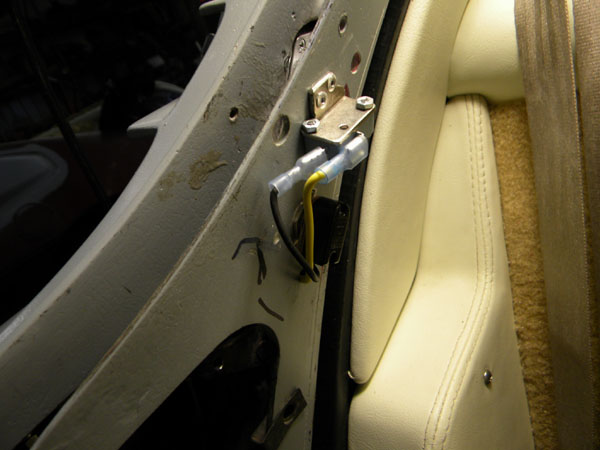
The micro switch (top) & the toggle switch (bottom) mounted to the inside of the door. The door panel will fit over these.
The micro switch looks like this & the lever is routed inside the window channel to reach the tip that extends out from the button.
Looking inside the window channel, hopefully you can see the workings......
Archie
------------------

need someone to make me a new sig.
|
|
|
|
Archie
|
JUN 19, 11:40 AM
|
|
|
|
|
madcurl
|
JUN 19, 12:14 PM
|
|
| quote | Originally posted by Archie:
update....
1st to take care of old business....
Someone pointed out that I hadn't posted any pics of the gages installed in the car. So I took these...
.JPG)
.JPG)
Archie
|
|
Gotta love those gauges and dash. What are the various functions for the lights--like the one between the speed and tech cluster and the ones below the center gauges?
|
|
|
|
Archie
|
JUN 19, 07:44 PM
|
|
| quote | Originally posted by madcurl:
Gotta love those gauges and dash. What are the various functions for the lights--like the one between the speed and tech cluster and the ones below the center gauges? |
|
Between the speed and tach is the turn signal indicater. Back in the olden days many cars had only one indicater. We had to wire in 2 relays to isolate the 2 Fiero indicater signals to use only one indicater.
Under the six pack of gages, we have from Left to Right...
Green - Parking lights on indicater
Blue - Bright light indicater
Amber - Check Engine Light
Red - Handbrake indicater light
Red - Engine overheat light.
Archie
|
|

|
pavo_roddy
|
JUN 19, 08:53 PM
|
|
HI all 
What is the Lizard Skin for, on the body panels? A true great treat, that u share these build threads with us Archie!------------------
Me, I sell engines, the cars are for free, I need something to crate the engines in....
Enzo Ferrari....
Aerodynamics are for people who can't build engines....
Enzo Ferrari...
Today they are called garage's, yesterday, they were stable's! Eric Jacobsen....
|
|
|
|
Archie
|
JUN 19, 11:12 PM
|
|
| quote | Originally posted by pavo_roddy:
HI all
What is the Lizard Skin for, on the body panels? A true great treat, that u share these build threads with us Archie!
|
|
Thanks
The Lizardskin is a thick spray on sound deadener. http://www.lizardskin.com/pages/sound_control.php
Archie
|
|
|
|
.JPG)
.JPG)
.JPG)
.JPG)
_1.JPG)
.JPG)
.JPG)
.JPG)
_1.JPG)
.JPG)
.JPG)