|
| My 88 Formula Interior Redesign (Page 63/87) |

|
Sofa King
|
APR 24, 08:11 PM
|
|
|

|
grkboy707
|
APR 25, 12:02 AM
|
|
| quote | Originally posted by Sofa King:
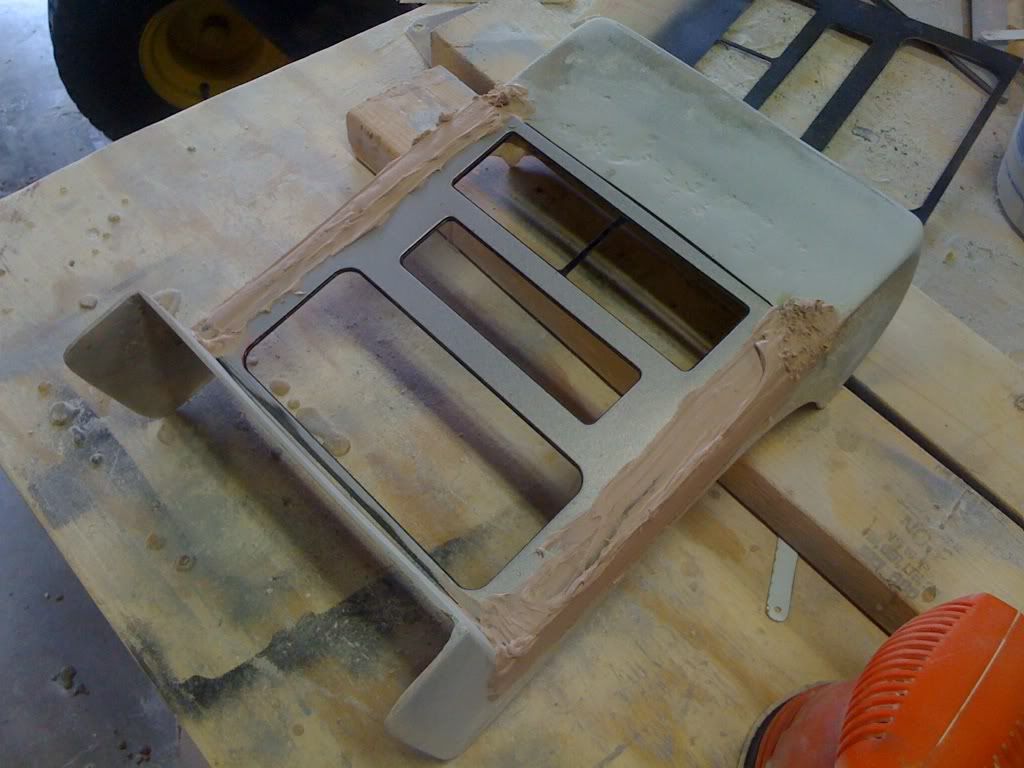
Both trim plates had 4 bolt holes. I had to move the holes on the lower trim plate for asthetic reasons and to account for the lip over the vents. Speaking of which, I've decided to put the lip over the vents - which means I can't place the Pontiac logo. But I'll fiddle with the design a little more before I go final
|
|
But your not putting the trim plates on, are you? I though you were just gonna screw the gauges into the console.
|
|

|
Sofa King
|
APR 25, 07:33 AM
|
|
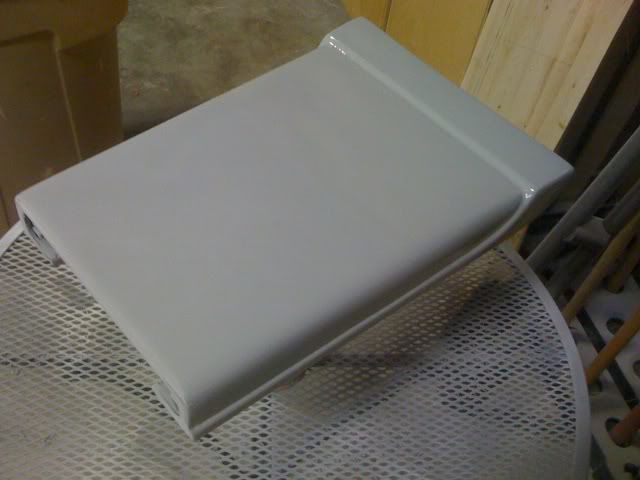
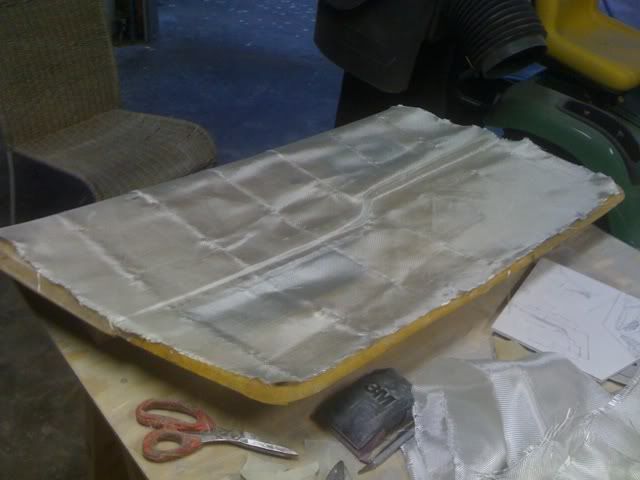
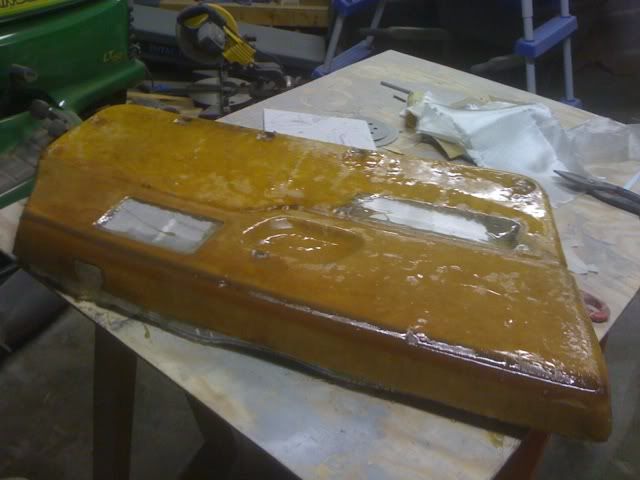
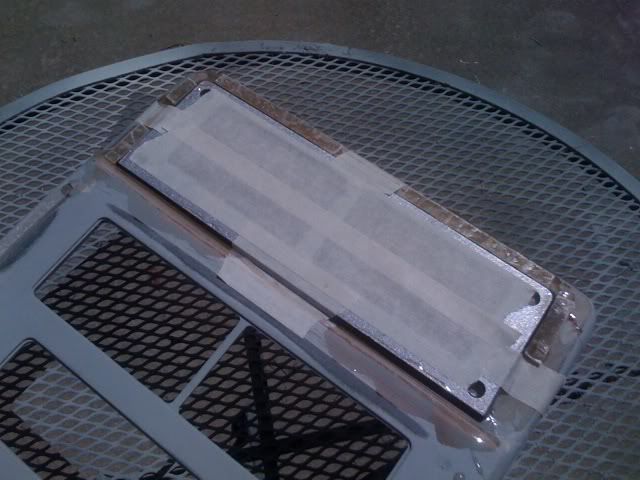
The original trim plates have already been integrated into the new radio cover. To carry over from the original console design I went ahead and drilled the holes for the hex screws. They will not actually mount into anything. I'm going to cut the heads off, create backer plates that will be mounted behind the holes and then carefully resin the screw heads into place. Which means that whenever I have someone work on the car I have to remove the radio cover so they don't break the screw heads.
As you can see by these images the trim plates are resined and adhered to the radio cover I created
Does that make sense?[This message has been edited by Sofa King (edited 04-25-2010).]
|
|
|
|
grkboy707
|
APR 25, 08:34 AM
|
|
|
Okay. Got it. I knew you integrated the plates in, but I thought you would have filled in the holes. Have you thought about doing so?
|
|
|
|
Sofa King
|
APR 26, 09:58 AM
|
|
|
I was going to leave the holes filled but I'll give this design a chance. If it doesn't work, I can always fill the holes back up. Thanks god for resin & filler... and sanding... and sanding...
|
|
|
|
Galliero
|
APR 26, 05:10 PM
|
|
|
Quick maybe obvious question: But once you lay your glass and it cures do you sand it first, then prime before you apply bondo or do you apply bondo, sand smooth then prime?
|
|
|
|
grkboy707
|
APR 26, 08:00 PM
|
|
| quote | Originally posted by Sofa King:
Thanks god for resin & filler... and sanding... and sanding... |
|
...and filler... And sanding...and more sanding...and filler...and sanding....more sanding...and then maybe a layer of resin....and more sanding 
|
|
|
|
Sofa King
|
APR 27, 07:48 AM
|
|
| quote | Originally posted by Galliero:
Quick maybe obvious question: But once you lay your glass and it cures do you sand it first, then prime before you apply bondo or do you apply bondo, sand smooth then prime? |
|
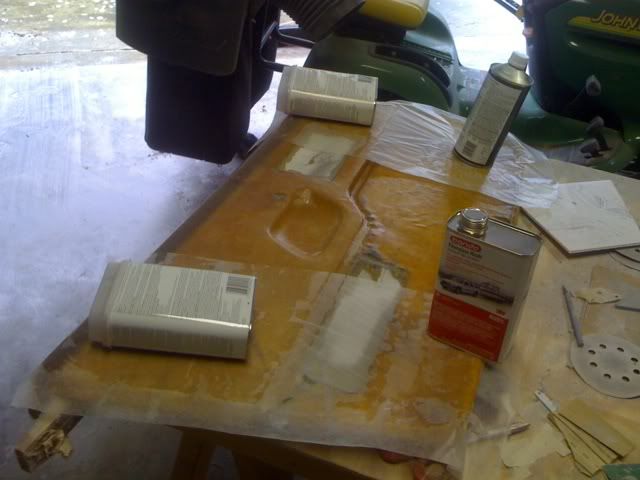
That's a great question: I haven't been glassing for very long (if anybody else want to jump in please do so) but depending on the type glassing you're doing heavy sanding isn't always necessary. For example. If you're creating panels that will be covered with material (vinyl or leather, etc) then light sanding would probably be necessary especially around the edges and joints that have been sealed with resin and filler. But since it's going to covered, then heavy sanding isn't necessary at all because the padding and / or material will cover any slight flaws in the glass. However, if you lay glass over an object / body panel and spread resin and then the glass then you would probably have to do a light sanding to take down any high marks - this can be done by hand or by machine and the type of sand paper you're comfortable with.
If you're going to paint the surface then YES - you have to SAND SAND SAND and it doesn't matter whether you laid glass over an object or created individual panels. Sanding preps the surface to accept the filler and the primer. Obvious holes are usually filled first before a shot of primer goes on. When the primer is sprayed, that's when you really see how many little air bubbles made it to the surface - that's when the body filler comes in. I can't tell you how many times I've sanded an object only to find out that the fiberglass dust filled in countless holes - that's when you get a little frustrated (ask Katatak). You lay your filler, sand it smooth using various grits of paper (and it HAS to be smooth), shoot another coat of primer and do the process all over again until the all holes are filled and you have nice smooth surface. There is just no getting around the sanding at all - unless you really know what you're doing and/or you're working with gel coats and stuff like that - that's beyond me. So far, every piece of glass I've worked on has required extensive sanding and filling, priming, sanding, filling, priming, sanding, filling, etc etc etc... until the surface is exactly the way I need it to be.
I hope this helps? It was a little convoluted... sorry
|
|

|
Sofa King
|
APR 27, 07:56 AM
|
|
OK GUYS...
This is bad... really bad...
I temporarily installed the radio cover back into the car to get a feel for fit and finish... And I'm not feeling it... I don't like it. Not sure what happened and I really don't know what to do at this point. Granted I still have to fix the gaps between the radio, a/c, and the cover, paint the actual console itself and then adhere the lip over the vent... but I'm just not excited about this piece anymore. Not sure what to do or what direction to go... I really like the look of the 89 console and I think that's where I got in trouble... My focus shifted.
I don't know. I'm just not feeling it with the piece. Something is missing!
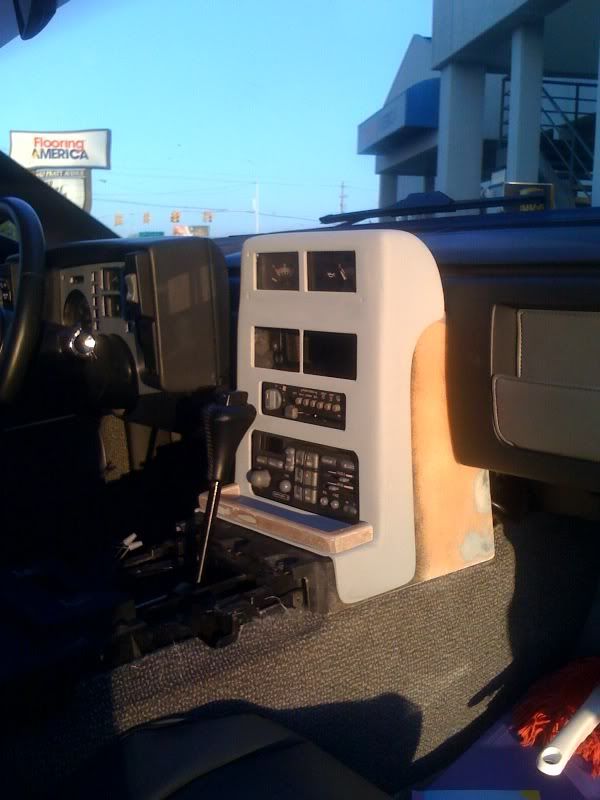
UGH!!!!!!!!!!!!!!!!!!!!!!!
|
|
|
|
TXGOOD
|
APR 27, 11:34 AM
|
|
I don`t know if you guys are actually using full "bondo" but you ought to try glazing putty for the small imperfections.
It goes on a lot smoother and is easier to sand.
I use this. It`s a good all around putty even for your SMC.
Mike
http://www.evercoat.com/productDetail.aspx?pID=29[This message has been edited by TXGOOD (edited 04-27-2010).]
|
|
|